David G.
-
Posts
11,326 -
Joined
-
Last visited
Content Type
Profiles
Forums
Events
Gallery
Everything posted by David G.
-
I usually use some thinned Tamiya flat white as a kind of drybrush wash. After that dries, I brush on three or four coats of Tamiya clear gloss. I use the same technique for reversing lights. I know that technically headlights aren't "white" but I think that's the way most people see them and I feel that this method creates an acceptable illusion. Regards, David G.

-
Sweet Vette! Lots of good detail on this one. David G.
-
Great color, details and assembly, a good solid build. Looking at those old Macks one can see why they chose the Bulldog as their mascot. David G.
-
Thank you Gilles. David G.
-

1958 Chevy Proton- A Fictional Nuclear Powered Car (Photos Restored)
David G. replied to David G.'s topic in Model Cars
Thank you David. You're welcome Patrick. I'm glad you appreciate the effort. David G. -
The Grape Crate - a (mostly) scratchbuilt Model A Woody
David G. replied to OldNYJim's topic in WIP: Model Cars
This thing's gonna be wicked cool when it's done. David G. -
Nailed it on the color! The interior looks great. David G.
-
Excellent looking paint! A great color for that body style. David G.
-
Dang, that is sweet! David G.
-
Nice work on the radiator and wheels. David G.
-
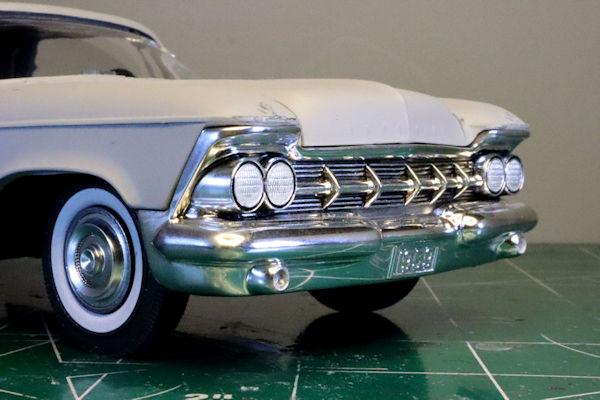
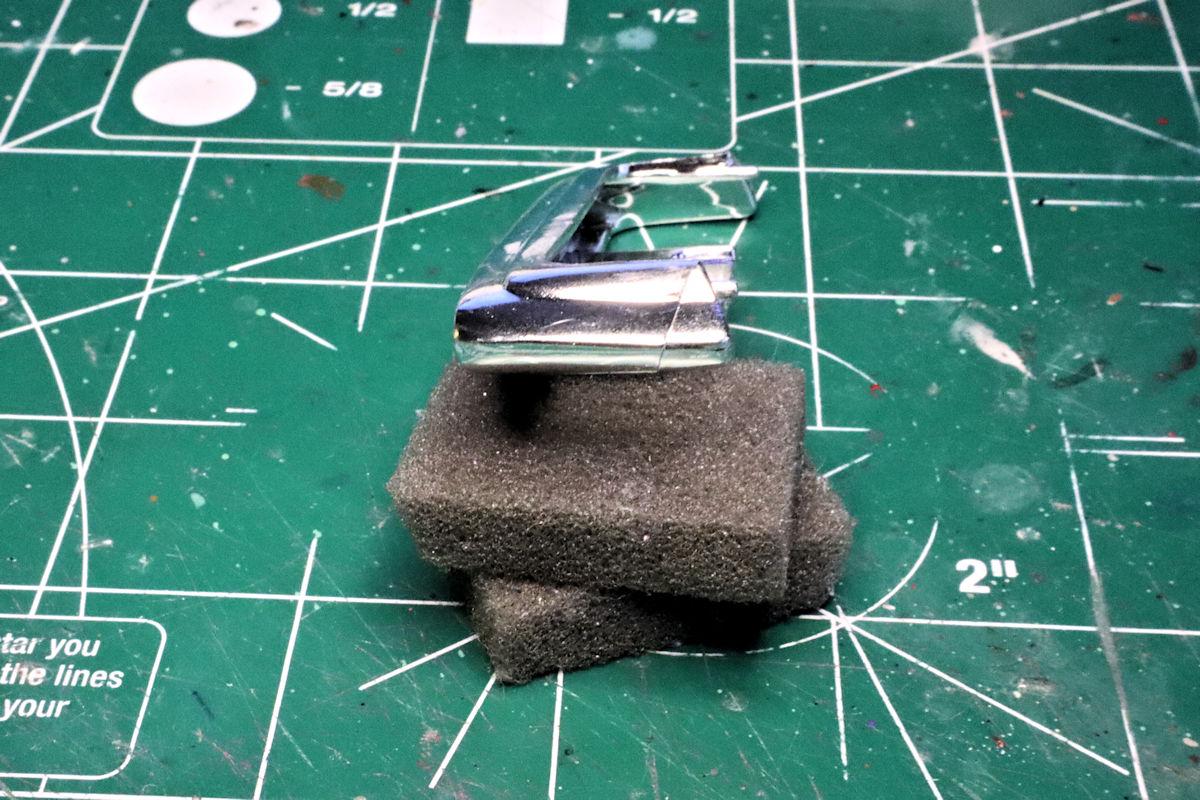
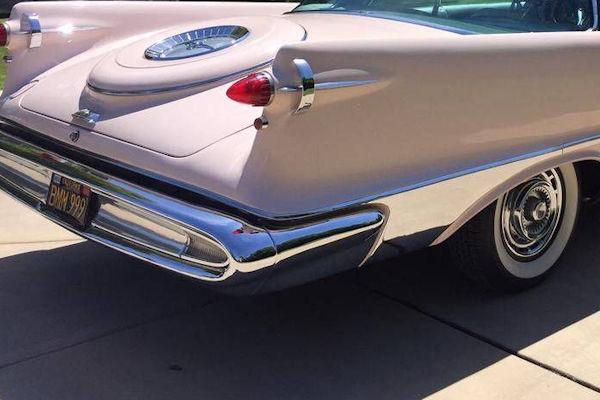
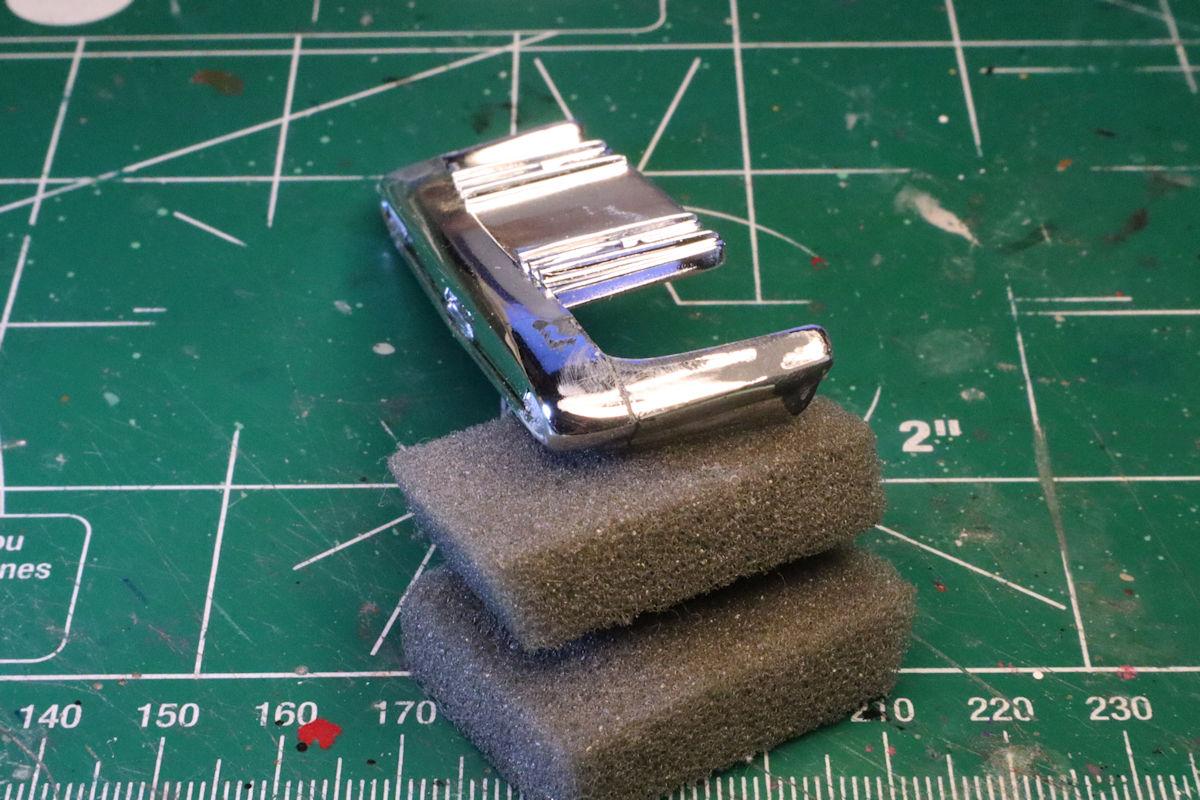
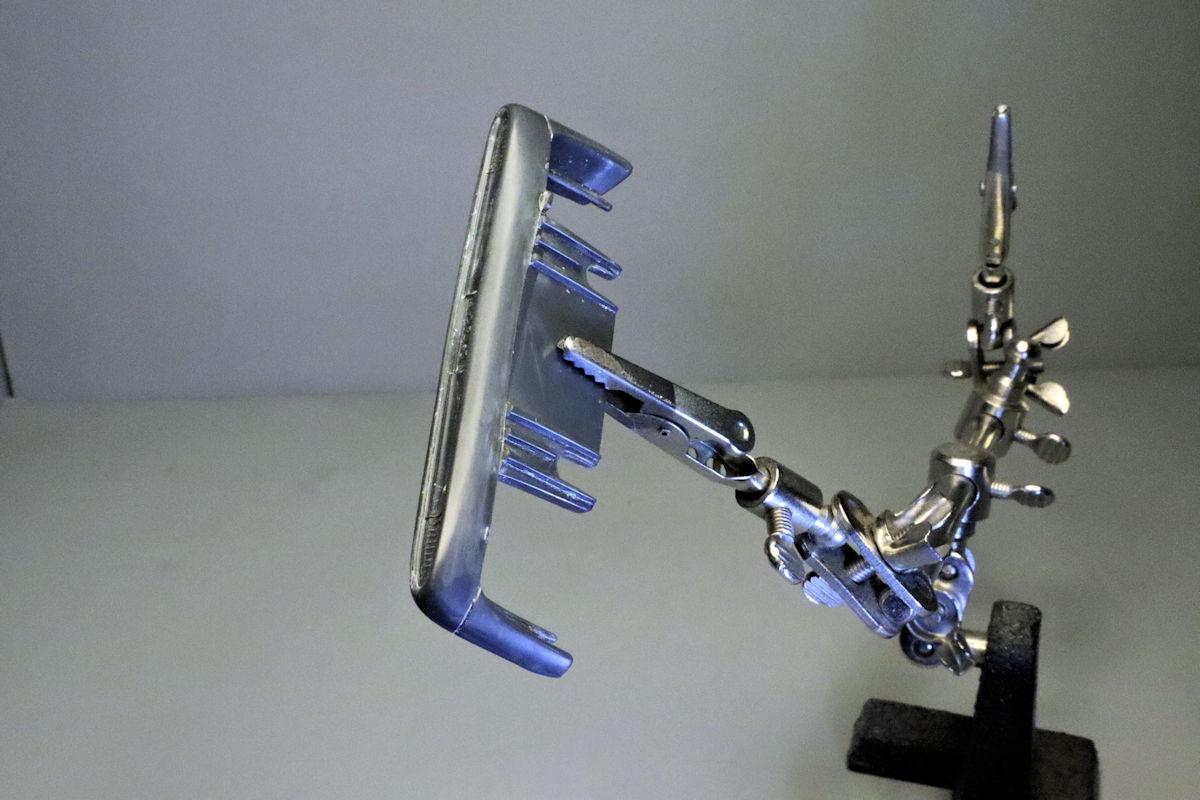
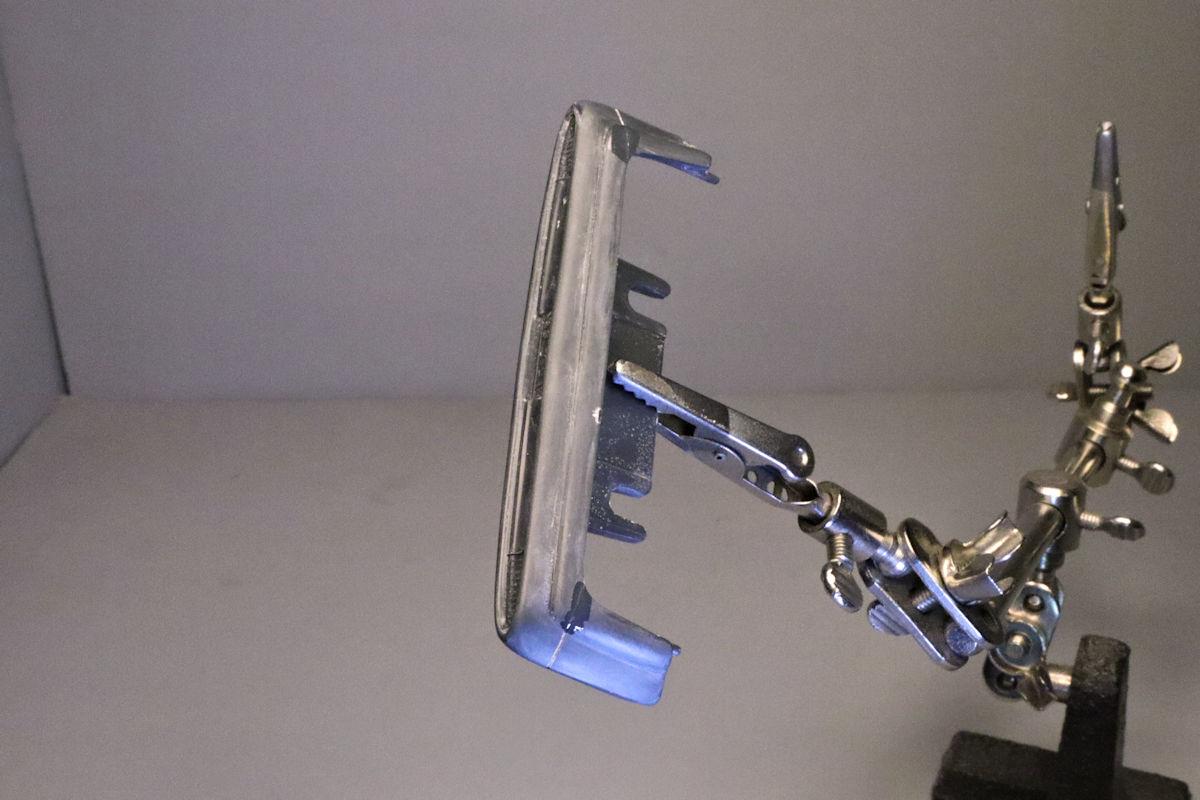
Hello Everybody! Since I more or less finished the front bumper/grille piece, I figured that I would use the momentum to keep going with the rear bumper. Not surprisingly, the rear bumper has the same issue with parting seams. One other thing I learned in my research is that the bumpers on this care are actually a three piece assembly with a noticeable joint between the rear main bumper and the two side pieces. Why go through the trouble of cleaning up the bumper and not finish the job? I decided to add these features as well. At this point I'd realized that I had caused so much damage to the chrome finish of the bumper that my only option was to strip it off completely. It was the only was to get a finish smooth enough for a good "re-chroming". At first I assumed that the entire part represented the bumper and scribed my lines accordingly. But based on part diagrams in online shop manuals, I came to believe that the lower portion of the model part was most likely a roll pan and shouldn't include the bumper seam. So I back-filled this with CA and plan to smooth it over and ultimately paint it the same color as the body. As I say: "Model builders, we're problem solvers who create our own problems to solve! " Right now I'm waiting on an order of Molotow paint to arrive so I can decide on how to re-chrome this part. I'll have three options, Molotow, Spaz Stix or good ol' Alclad II. Thanks for taking the time to look and as always, please feel free to comment. David G.
-
1958 Chevy Proton- A Fictional Nuclear Powered Car (Photos Restored)
David G. replied to David G.'s topic in Model Cars
Ah, a fellow Fallout fan! I love raiding that Corvega plant. It's almost like a game of its own. I usually clear out Jalbert Brothers Disposal first and use that as a forward base. Thank you for the kind comment Dennis. I think that this is the first GIF comment I've received. "1.21 Gigawatts?!?" If I remember correctly, at the time I was thinking of how much horsepower it would take to move a 1956 Chevy Nomad with two fifty-gallon tanks of water and a lead shielded reactor added. According to my research a 1956 Chevy Nomad wagon, on which this car is based, weighed a little more that 3,000 lbs. To that we add 100 gallons of distilled water (8lbs. per gallon for 400lbs.) and associated storage tanks and plumbing which I estimated at an additional 100lbs. For the powerplant itself, I just swapped out the weight of a Chevy 283 engine and automatic transmission at an estimated 750lbs. Together and that adds up to an additional 1,250lbs. more than the stock '56 Nomad or about 4,300lbs. My 1971 Delta 88 weighed just a little less than that and got along just fine with about 300 horsepower at about 445 lb-ft of torque. I figured all that in horsepower because I live in the USA. To convert to gigawatts, we should first convert the horsepower rating to kilowatts. Horsepower is not really a set standard but more of a range in which 1hp is roughly equal to .75kW. This works out to about 225kW. That's works out to a disappointing 0.000225 GW. I think Doc Brown has me beat. Thanks for your comment Patrick, I got a chuckle out of it. David G. -
A long, difficult journey with the paint but well worth it in the end. The engine, chassis and dash look great! David G.
-
A much more tidy job than mine was. Looking good Eyman! David G.
-
The paint looks perfect! I don't thing the real cars were that shiny back in the day. David G.
-
Great looking detail under the hood. It's a shame about the fit issues, I hope you can work them into a satisfactory conclusion. David G.
-
Looks to be a very interesting project. David G.
-
That color looks right for the era, great choice. David G.
-
Absolutely Gorgeous! David G.
-
A beautiful pair of Challengers! It's a shame about the degradation of time but they still look great. David G.
-
Everything looks great so far Bob, but it's a bummer about the windshield frames. There are few things more frustrating. At least most of the model can be built before the windshield needs to be mounted. If the frame or body were that warped then you'd really be hung out to dry. I had problems with a short-shot trim piece with a Revell kit in 2010 and they were great to work with. I know that that's ancient history now and many things have changed but hopefully their corporate culture is still intact. Best of luck with this. David G.
-
Thanks Michael. David G
-
1958 Chevy Proton- A Fictional Nuclear Powered Car (Photos Restored)
David G. replied to David G.'s topic in Model Cars
Hello Everybody! As some of you may know, I've been going back over my old threads and updating old photos and replacing broken photo links. To say that there is a lot of work involved in such a project is a bit of an understatement. To get things just the way I want them, there are some threads that I will go back to and redress more than once. This is one of those threads and hopefully it's done now. Thank you for your patience and I hope you enjoy. David G. -
Hello Everybody! As some of you may know, I've been going back over my old threads and updating old photos and replacing broken photo links. To say that there is a lot of work involved in such a project is a bit of an understatement. To get things just the way I want them, there are some threads that I will go back to and redress more than once. This is one of those threads and hopefully it's done now. Thank you for your patience and I hope you enjoy. David G
-
The Grape Crate - a (mostly) scratchbuilt Model A Woody
David G. replied to OldNYJim's topic in WIP: Model Cars
I've been a funeral director for over twenty years so I guess my eye is trained to see certain shapes. On a similar line of thought, I don't know if you realized it but York happens to be the name of a casket company based out of York, PA. Sooo... a happy coincidence? Nice work with the styrene, it's fun to watch this come together. Thanks for taking the time to share it with us. David G.