David G.
-
Posts
11,326 -
Joined
-
Last visited
Content Type
Profiles
Forums
Events
Gallery
Everything posted by David G.
-
Thanks Karl, mine too. David G.
-
Beautiful rendition! I have one of these I've been working on for a couple of years now. I should get it out and fiish it up. David G.
-
It just keeps getting better! David G.
-
Great color choice, nice detailing. A good solid looking build. David G.
-
Fabulous work on these! David G.
-
Beautiful paintwork, good solid looking build! David G.
-
 You're welcome Greg. I'm glad you like the bus too, thanks. David G.
 -
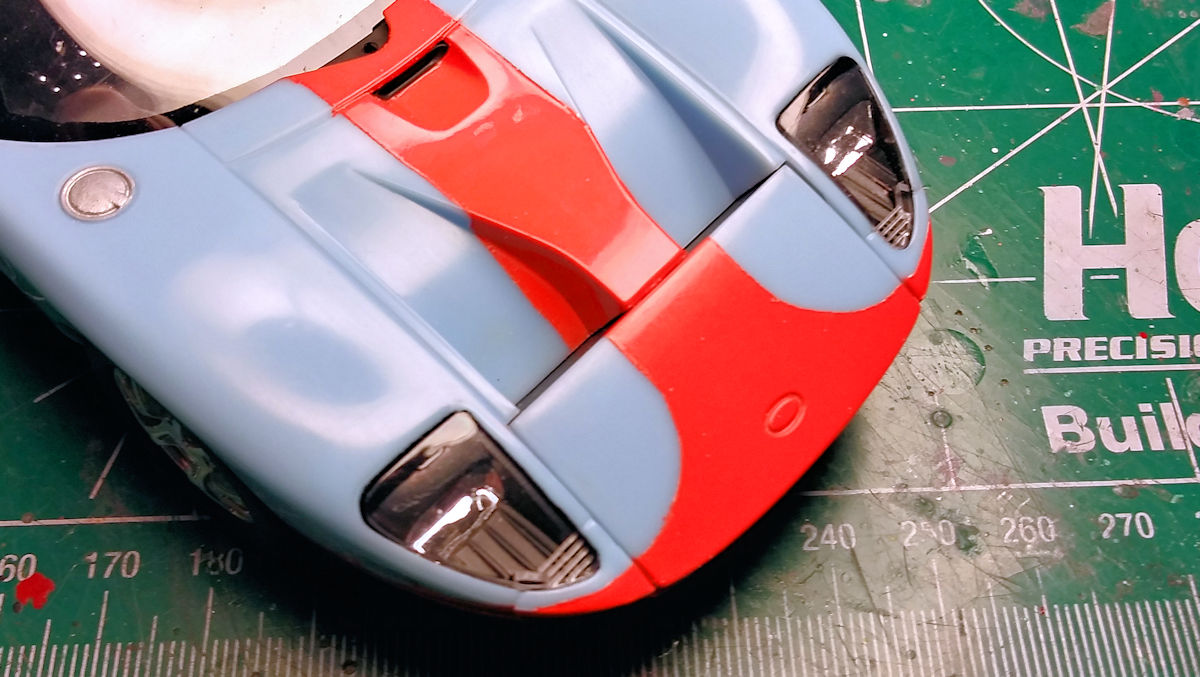
Hullo Everyone! I got a bit more done today. I found a way to take care of those ugly locator tabs on the headlight lenses. I painted a black stripe along the top of the lens. There's supposed to be a border all the way around the entire lens, like this. But I'm not going to get that fancy. One of the things that model building has taught me is when good enough is good enough. If I try to do any more than what I have, I stand a fair chance of mucking it up. This is good enough. I also got almost all of the detail painting done. A bit of it can be seen with the gas cap but that's all I'm showing of it until I get some more photos taken. As always, thanks for taking the time to look and please feel free to comment. David G

-
Excellent weathering! David G.
-
55 Chevy Bel Air Hardtop: WIP (Photos Restored)
David G. replied to David G.'s topic in WIP: Model Cars
Well, here we are again! This should be the last time I have to rescue this topic from the PhotoBucket Monster. I've gone in and reedited the old photos to hopefully make them a bit more eye friendly and uploaded them to the topic once again. Regards, David G. -
Revell VW Bus (Photos Restored)
David G. replied to David G.'s topic in Model Trucks: Pickups, Vans, SUVs, Light Commercial
Well, here we are again! This should be the last time I have to rescue this topic from the PhotoBucket Monster. I've gone in and reedited the old photos to hopefully make them a bit more eye friendly and uploaded them to the topic once again. Regards, David G. -
Well, here we are again! This should be the last time I have to rescue this topic from the PhotoBucket Monster. I've gone in and reedited the old photos to hopefully make them a bit more eye friendly and uploaded them to the topic once again. Regards, David G.
-
Excellent detail work, especially the custom engine. Your weathering is spot-on. I built the convertible version a couple of years ago so I know exactly what you're saying about the front fender wells. They're the one thing that took up most of the time on that build. I painted mine almost the same shade of blue as you did yours. David G.
-
Sweet little roadster! David G.
-
New commissioned works
David G. replied to GLMFAA1's topic in Model Trucks: Pickups, Vans, SUVs, Light Commercial
Nice trucks. Are the stripes are lettering decals or painted? Also I'm guessing that the "Y" is for Youngstown? David G. -
Cool! David G.
-
Very Cool! That's one I don't have yet. David G.
-
Nicely Done! Great detail work on the engine. I have an older version, the race crew, I think? I built it as a grocery getter all painted up in gold. I even made a bag of groceries for the back. David G.
-
Great color choice. David G.
-
Beautiful paintwork and excellent detailing. David G.
-
Nice work on the engine and good call on the wheels, they look great too. David G.
-
Experimenting With Leather
David G. replied to Straightliner59's topic in Tips, Tricks, and Tutorials
Interesting idea. I'm curious to see how it lays down in application. David G. -
Absolutely gorgeous! The chassis you used looks like the one from Monogram's '59 Cadillac. David G.
-
Thank you Chaz. Funny that you should mention painting the border around the headlight lenses. I did just that along the top edges to hide those location tabs that I mentioned in the previous post. It turned out pretty good but I think I may stop there. I hand painted it and it was enough of a challenge that I'm worried that If I try to do more I may muck it up. Thanks Carl, it is beginning to feel that way. I'm kind of getting that urge for the final push if you know what I mean. David G.
-
*1960 Chevy Fleetside Pickup*
David G. replied to Zippi's topic in WIP: Model Trucks: Pickups, Vans, SUVs, Light Commercial
Nice color, I think the wheels will work too with a little black wash and some detailing. David G.