Brutalform
-
Posts
2,830 -
Joined
-
Last visited
Content Type
Profiles
Forums
Events
Gallery
Everything posted by Brutalform
-
 You did a fantastic job on this build. Looks just like the trucks we used to see traveling the interstates years ago.
 -
When the project dies. Or does it?
Brutalform replied to Jantrix's topic in Model Building Questions and Answers
I can relate to what you are saying. I’m not really saddened that a project is over, but disappointed because I always seem to realize I could have done something differently to the project after it’s completed. Lately I’ve been writing my plans of my projects in a note book, and try not to stray from the plan. Seems to help when it’s all planned out on paper, for me anyway. -
AMT/Italeri reefer trailer
Brutalform replied to KJ790's topic in Model Trucks: Big Rigs and Heavy Equipment
Had a hard time being convinced that it was actually a model. Looks VERY realistic. The weathering you preformed is fantastic. I especially like the “soot” marks from the exhaust in the trailer top. Nice job. -
When the project dies. Or does it?
Brutalform replied to Jantrix's topic in Model Building Questions and Answers
I get too many ideas going on in my head, like I’ll get really interested in building several cars. I’ll take the 62 Bel Air S/S cars. I’ll build the Dyno Don car, then Stricklers, and when it comes time to build the Proffitt car, it will wait for about a year until I get around to it, in order to have all three completed. Same goes for Max Wedge cars. Build two, then loose interest (temporarily) in building the rest I had initially planned. Then I’ll pop open a kit, for no apparent reason, and get it done from start to finish, even though there are ten others started. Maybe it could be called a slump buster? Now I’m all involved in a semi wrecker, that will be finished up before any of the started kits I have waiting. A few of my old big car Fords have been sitting for over a year now, Go figure. I really never sell off started builds. Usually I look in my stash, and I have to ask myself why I’m holding on to cars I know I will never build? They are the ones I normally will sell off. Building, collecting or hoarding models may not be as bad as suffering from alcoholism, or some other form of addiction, but sometimes I do wonder? -
Possibly a plastic drinking straw, cut to fit, painted silver, with some “stop light” red paint.
-
63 Galaxie w_Starliner Chassis - Who tried it?
Brutalform replied to MeatMan's topic in Model Building Questions and Answers
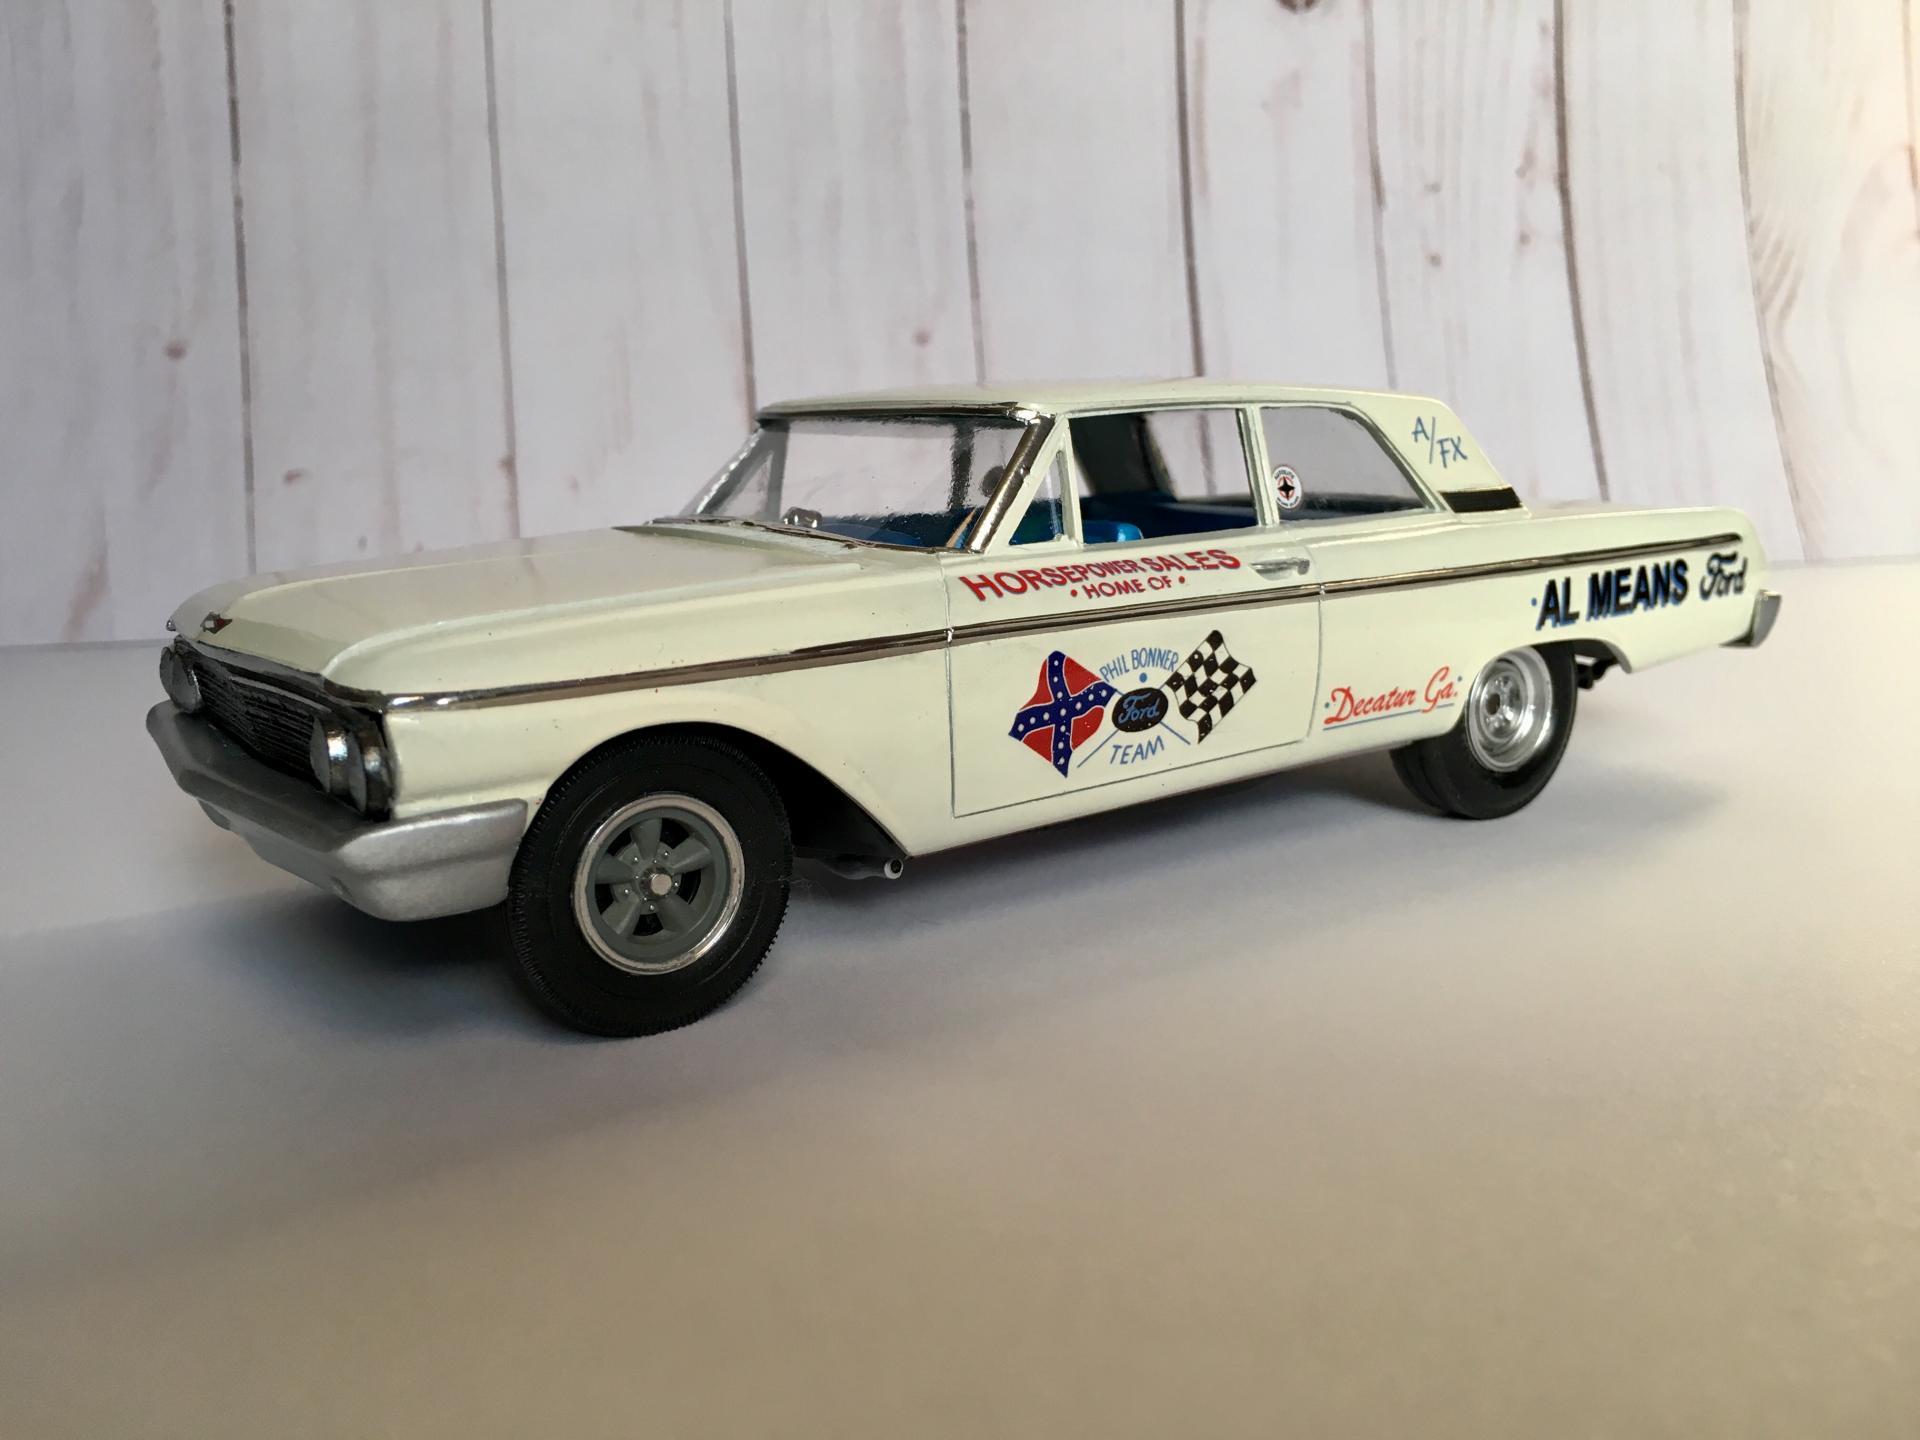
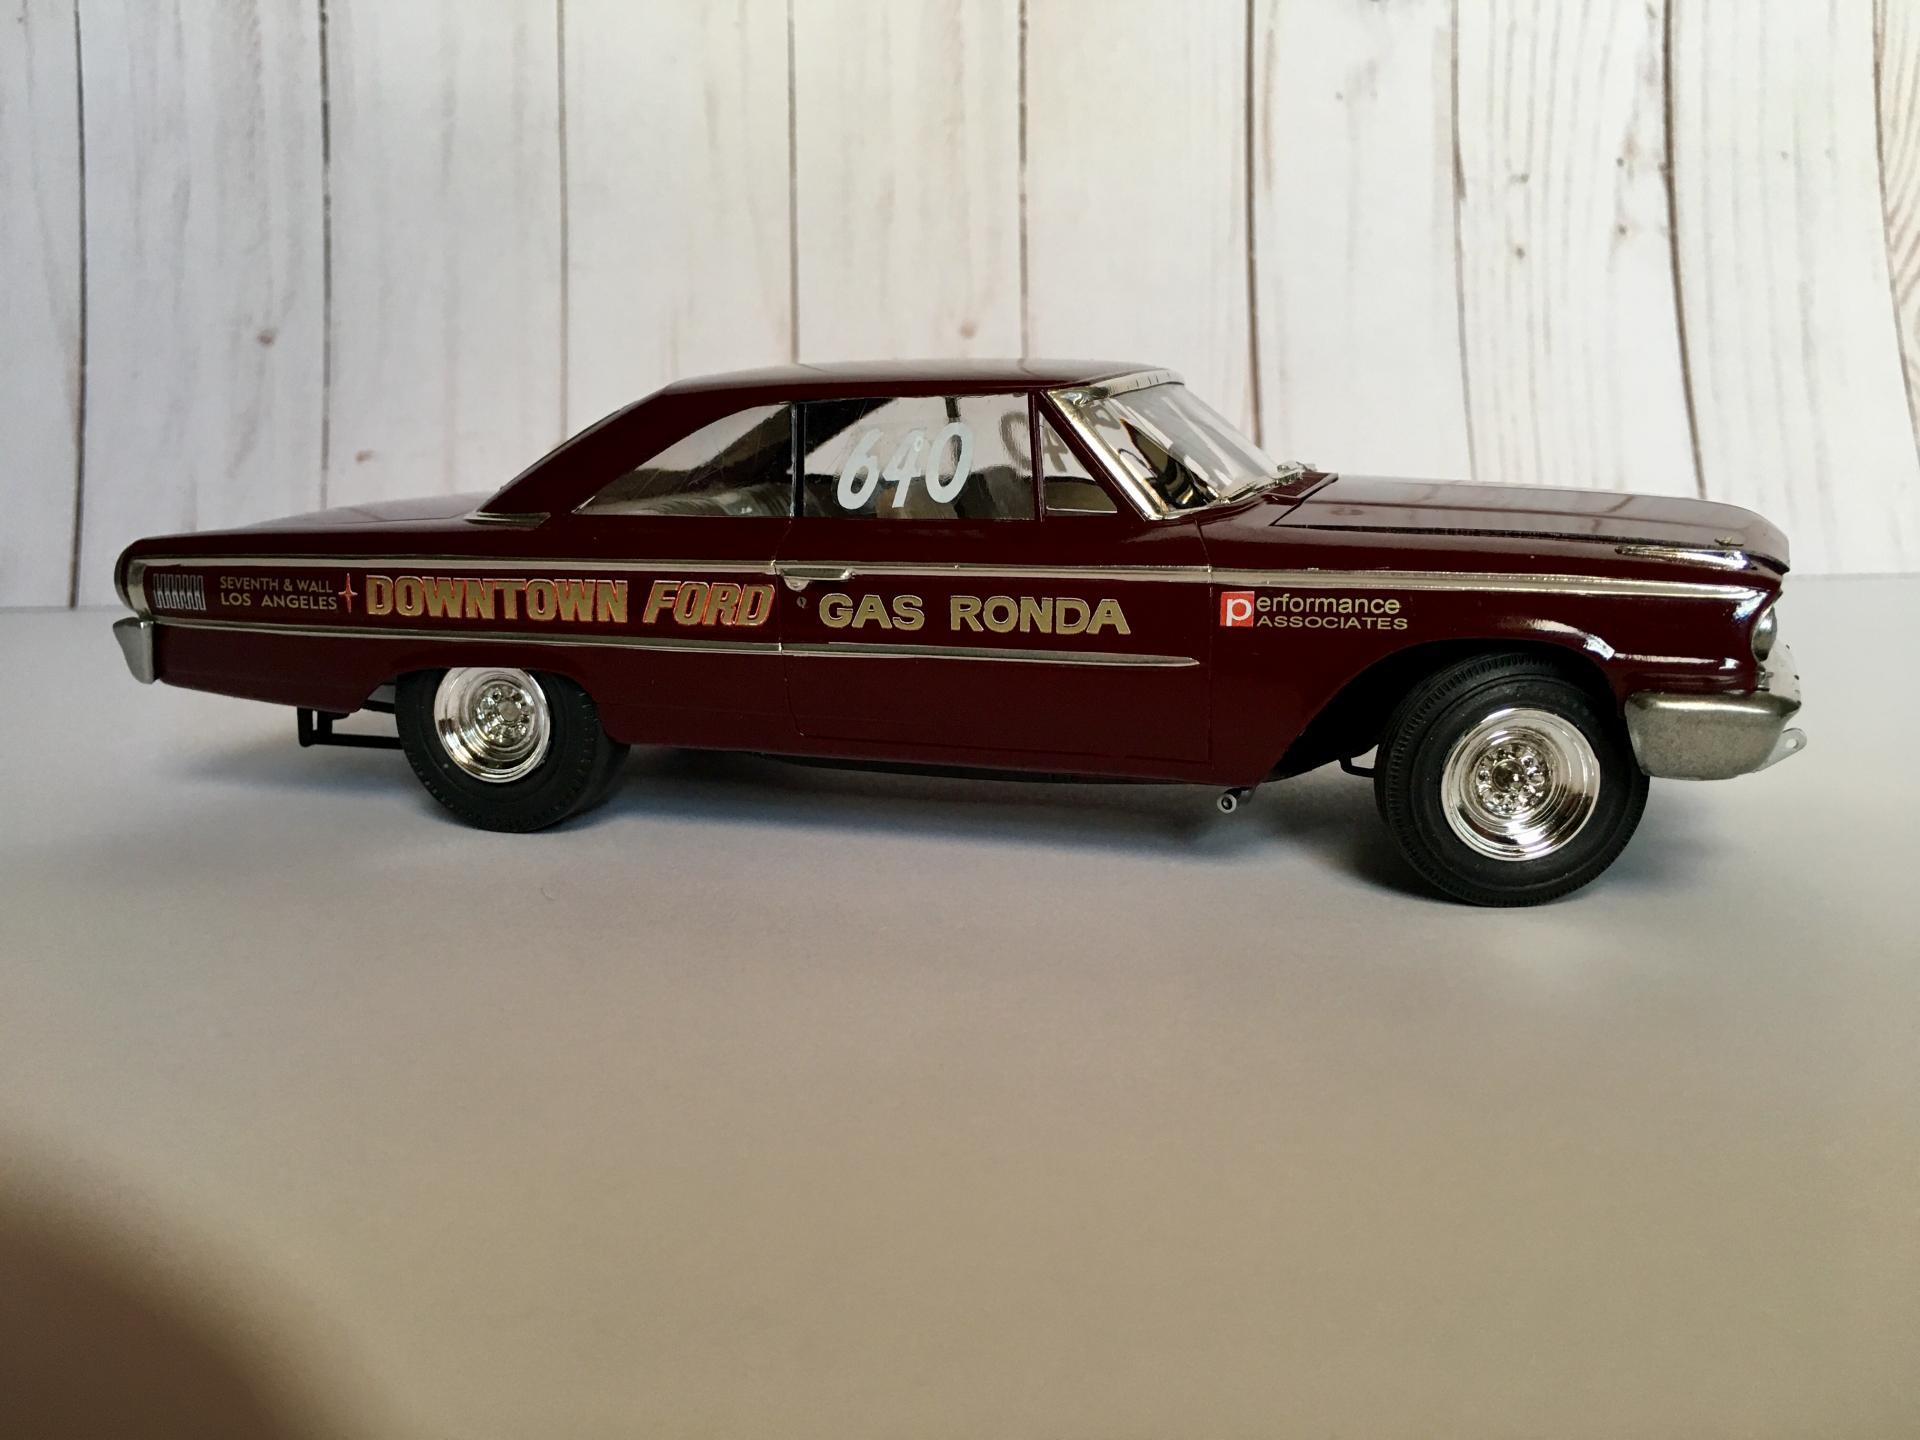
And a completed Gas Ronda 63 using the 60 chassis, with everything installed. Also some minor trimming on the radiator support may be in order to fit the chassis in other big car bodies. Some work was done on the Ronda cars radiator support.
-
63 Galaxie w_Starliner Chassis - Who tried it?
Brutalform replied to MeatMan's topic in Model Building Questions and Answers
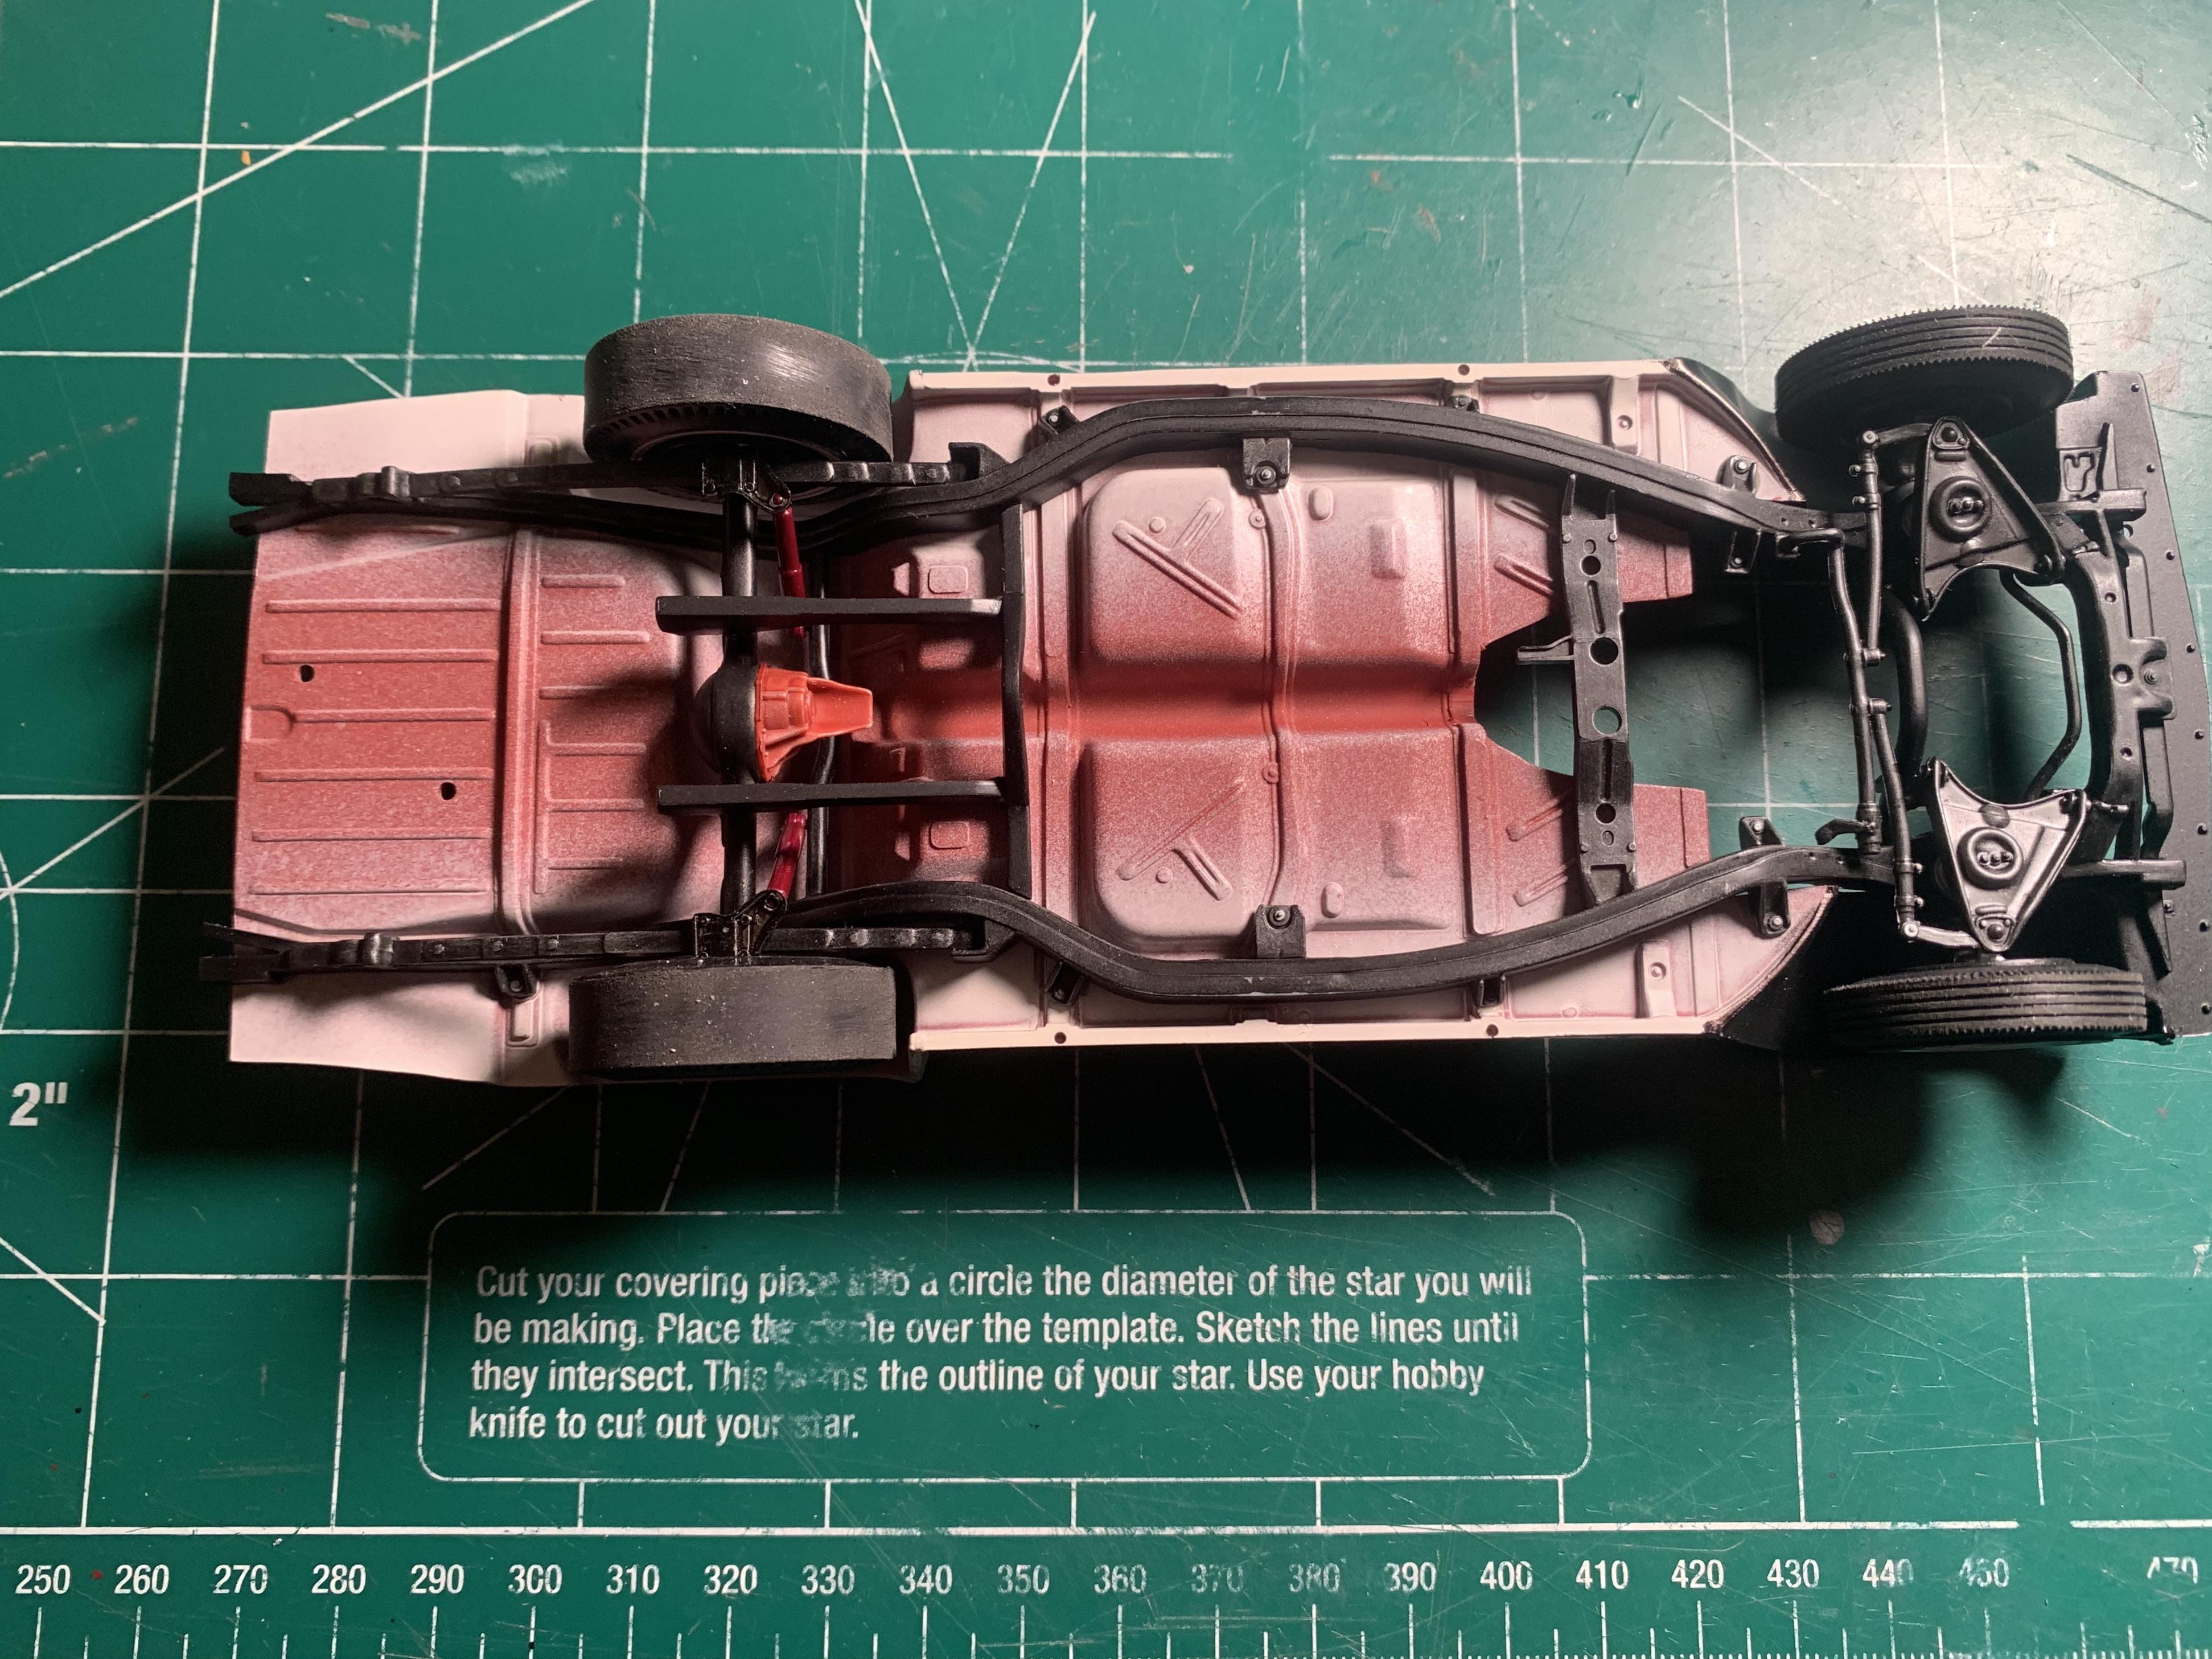
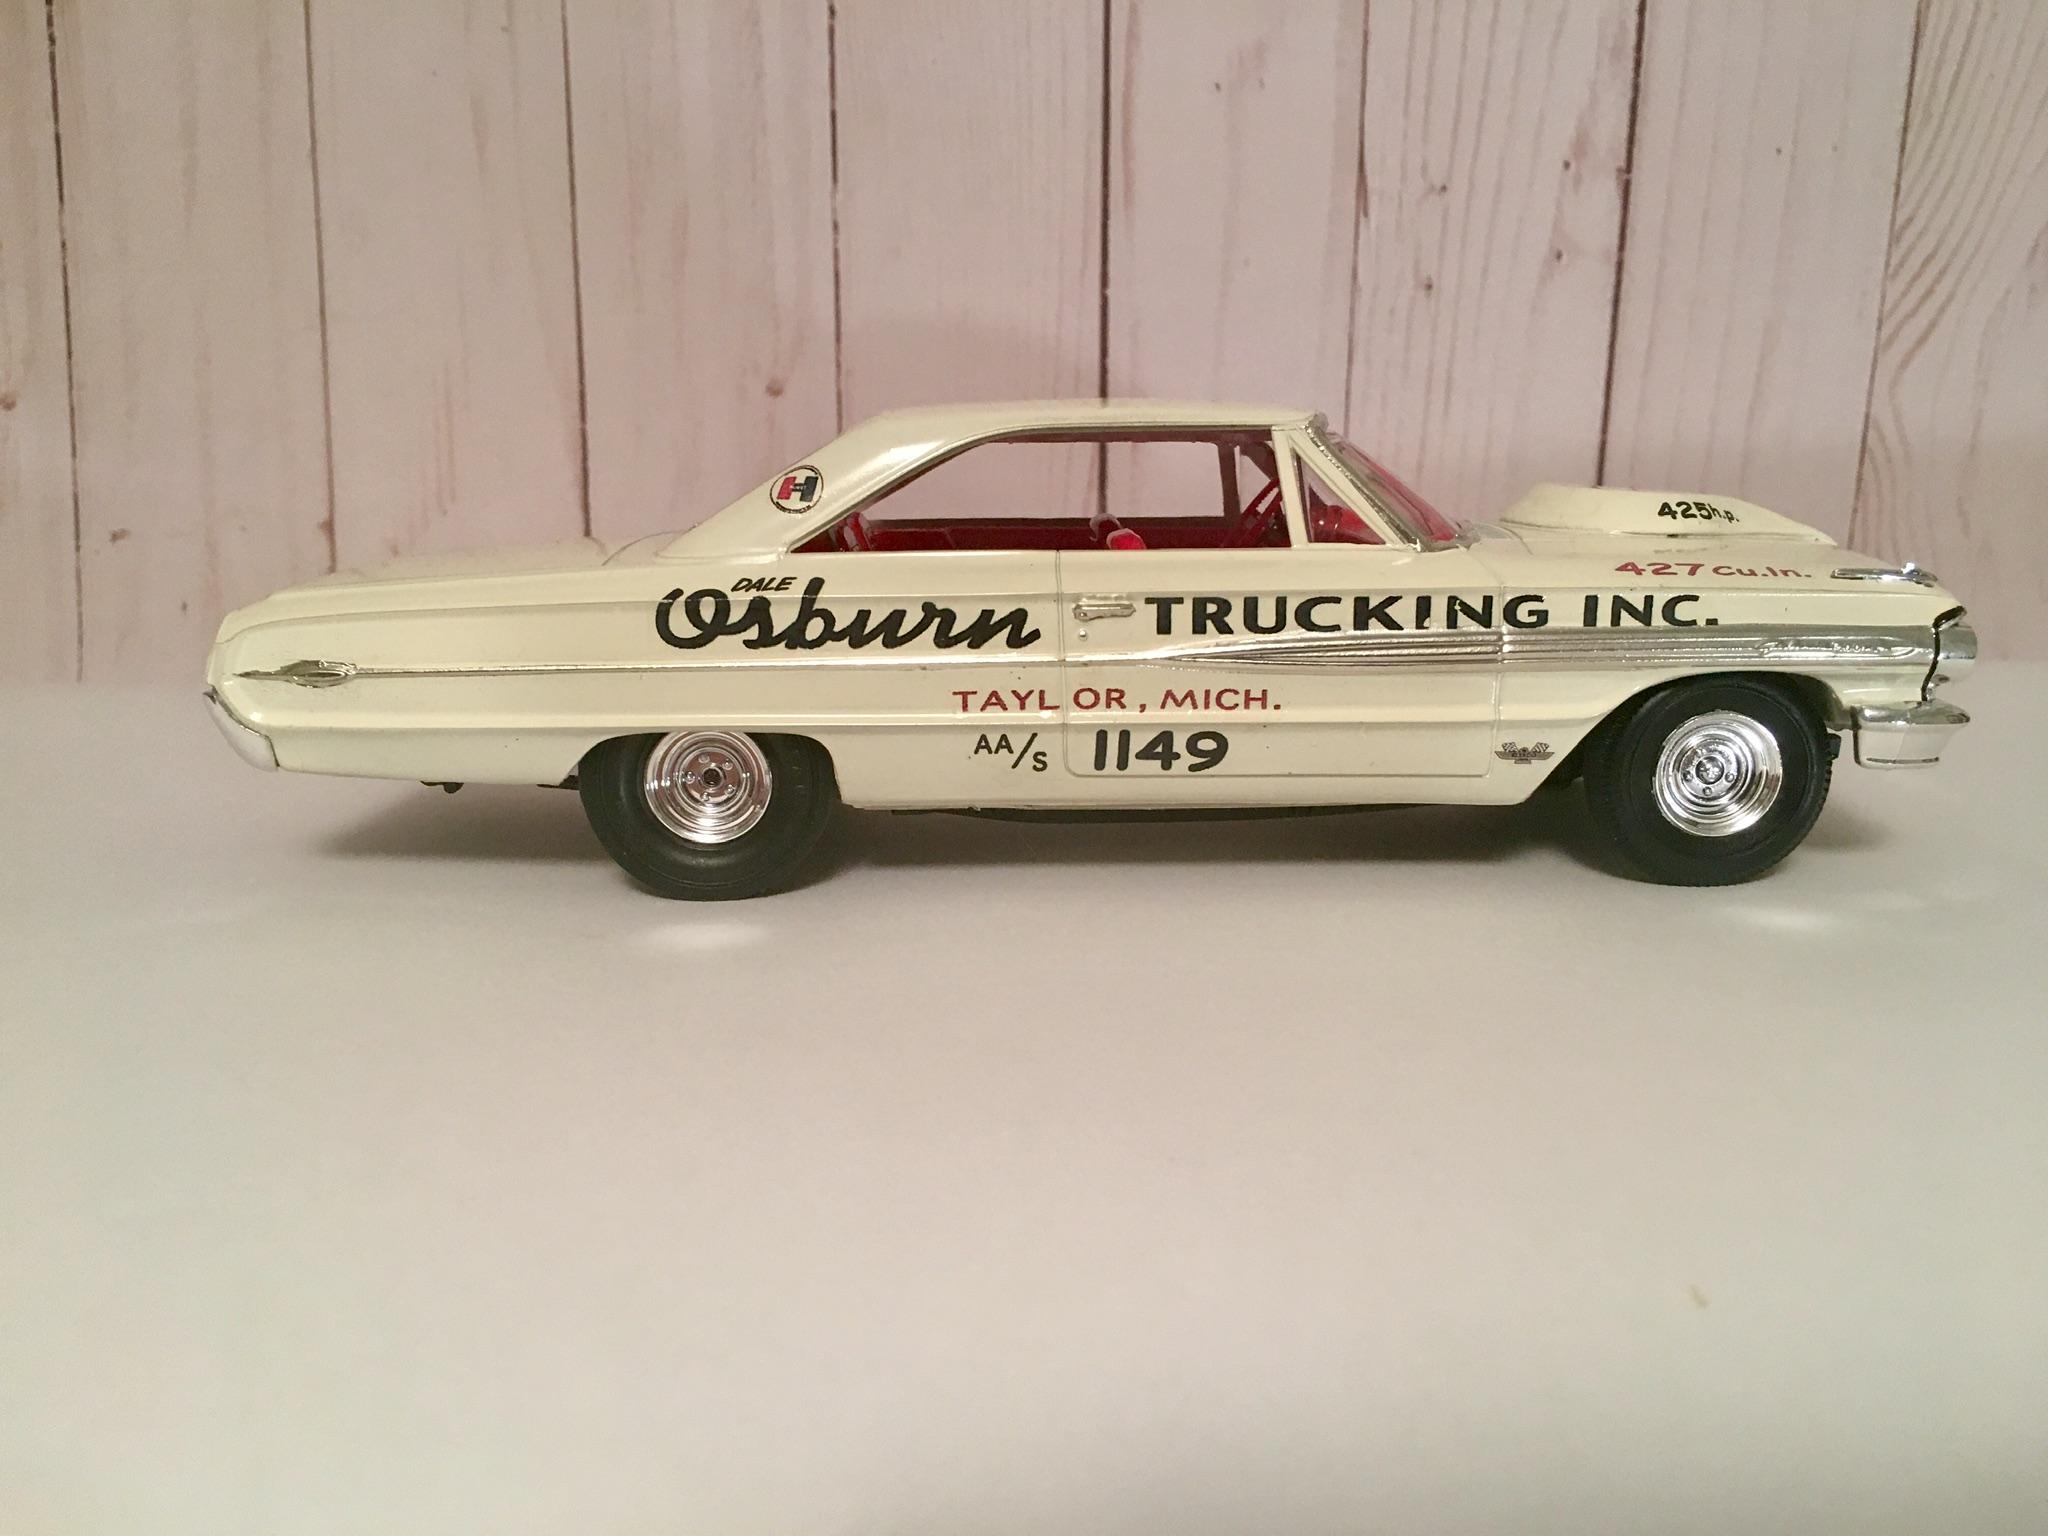
Here is a pic of a current project 63 box top Mel Burns S/S car chassis. It shows the rear where it needed to be cut to fit the slightly shorter 63 body. I’ve never encountered a problem with the width though.
-
63 Galaxie w_Starliner Chassis - Who tried it?
Brutalform replied to MeatMan's topic in Model Building Questions and Answers
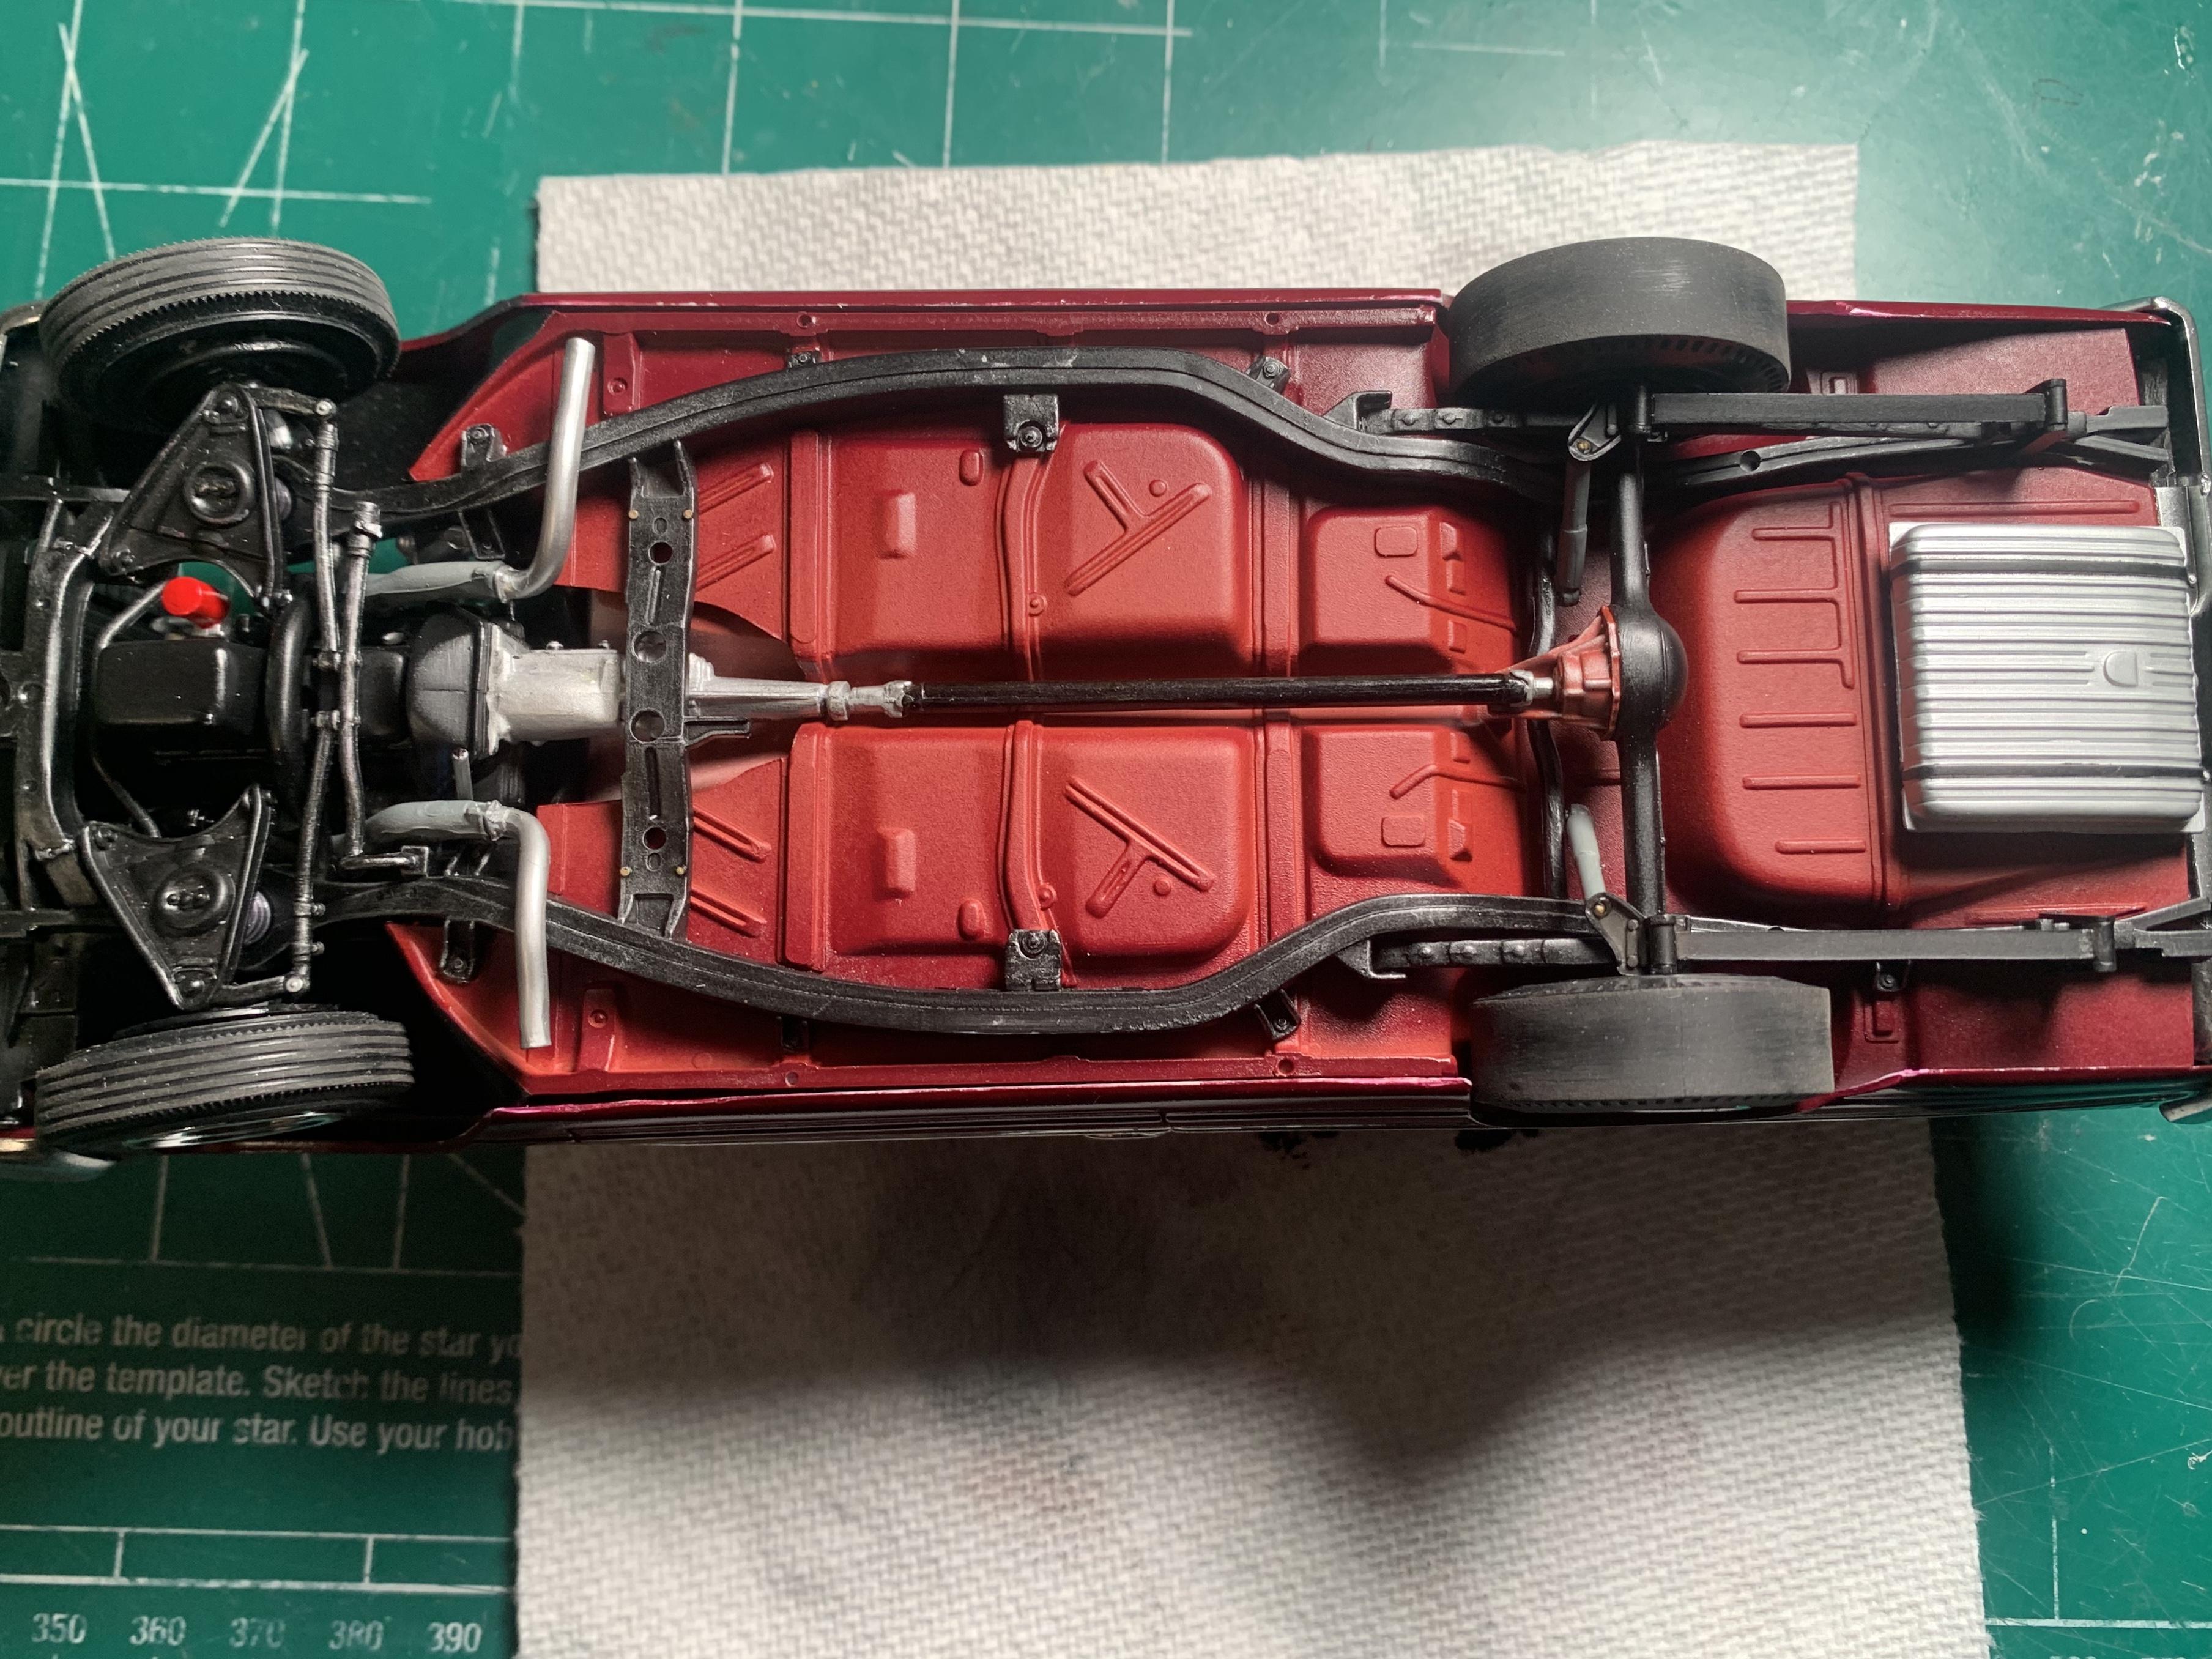
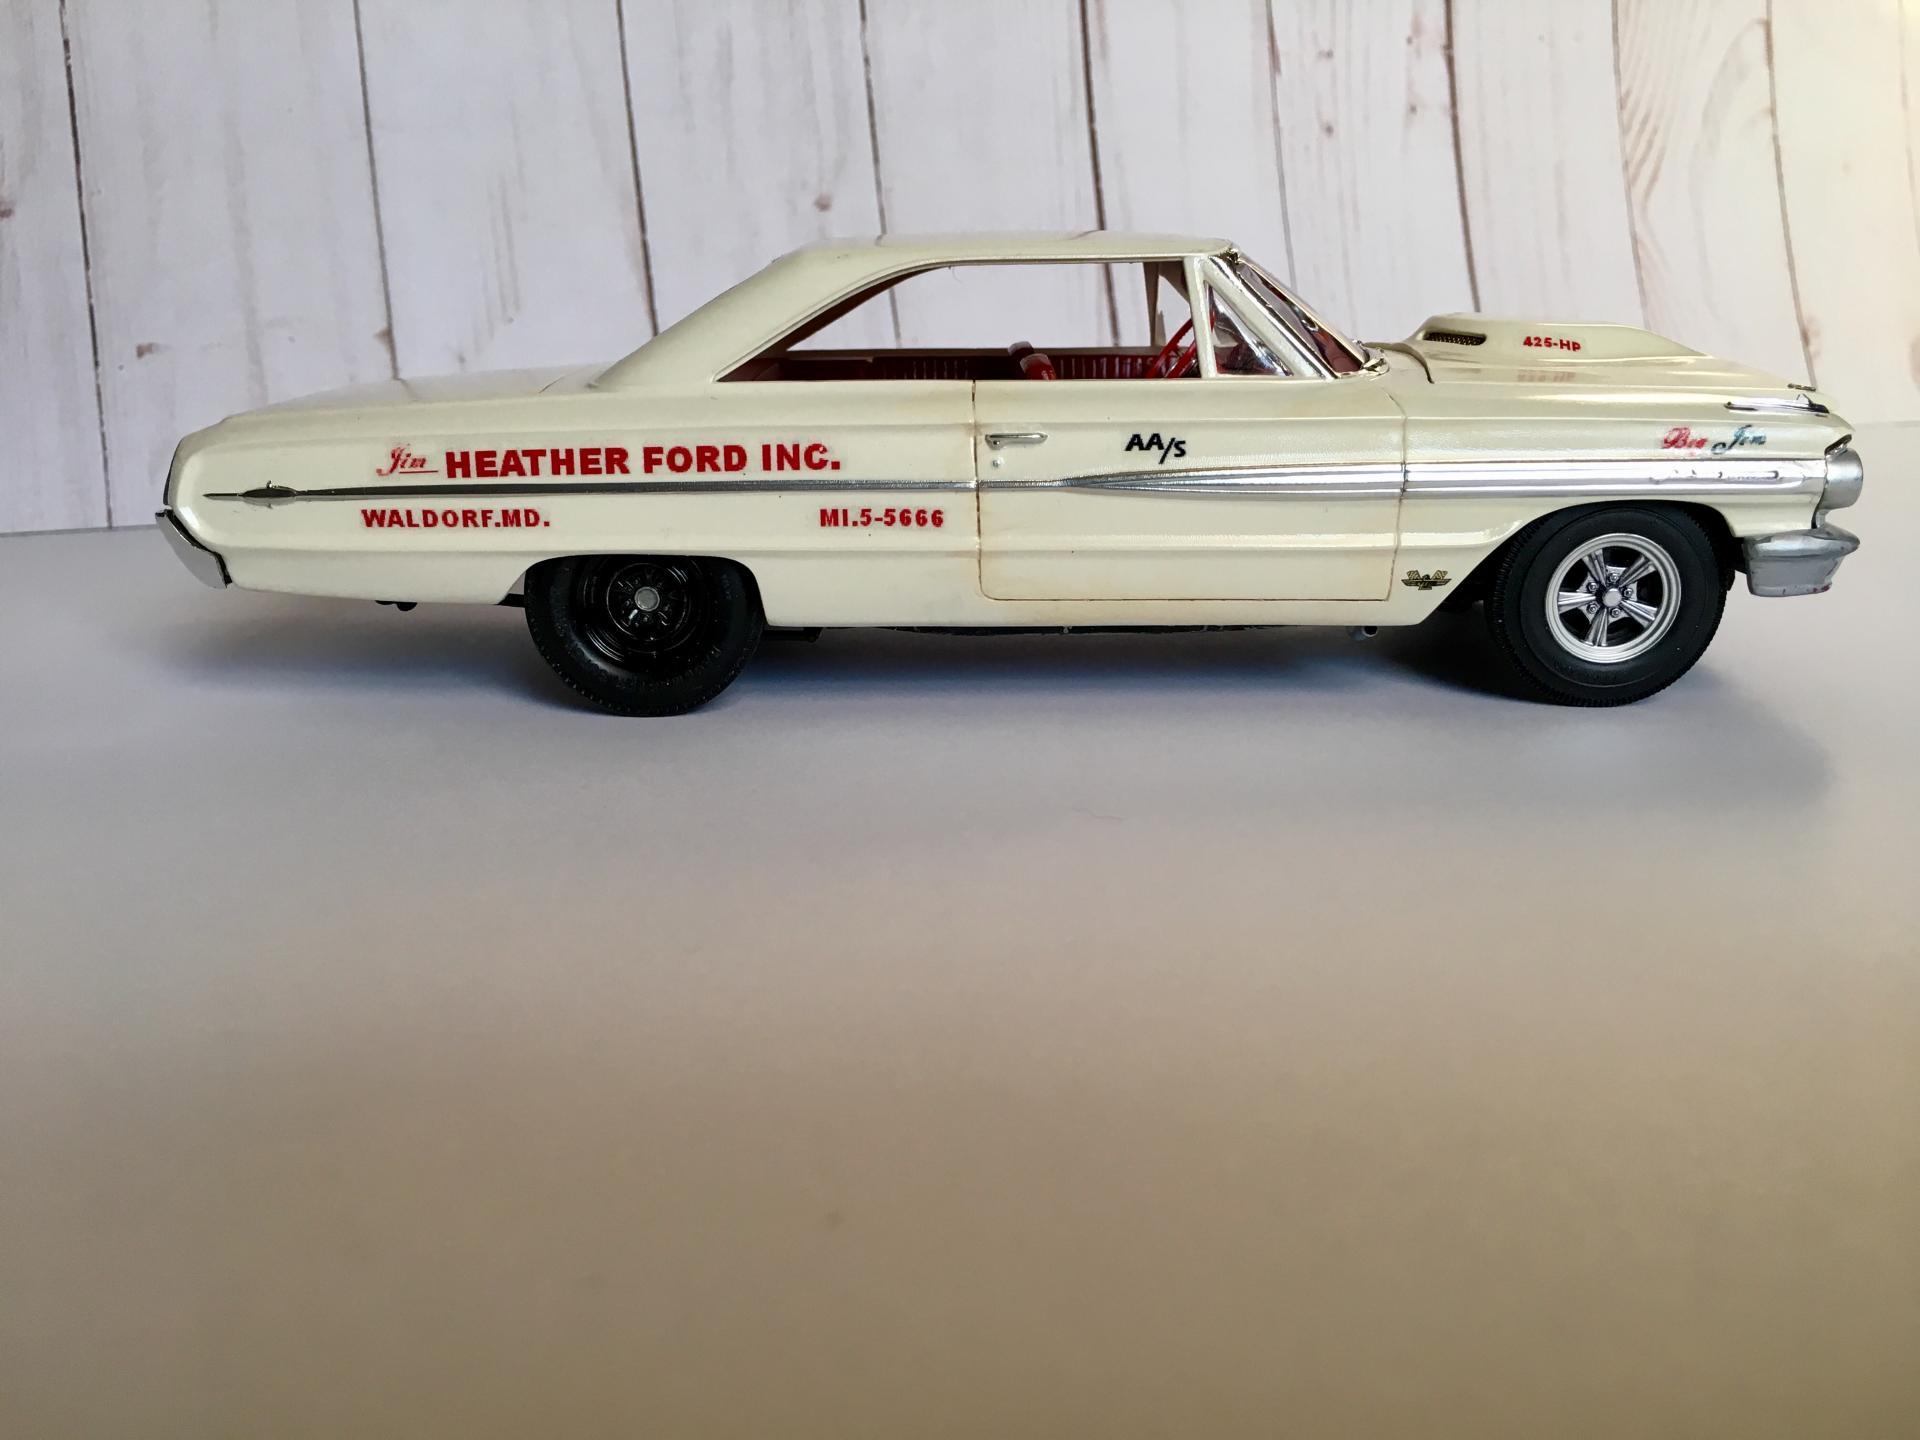
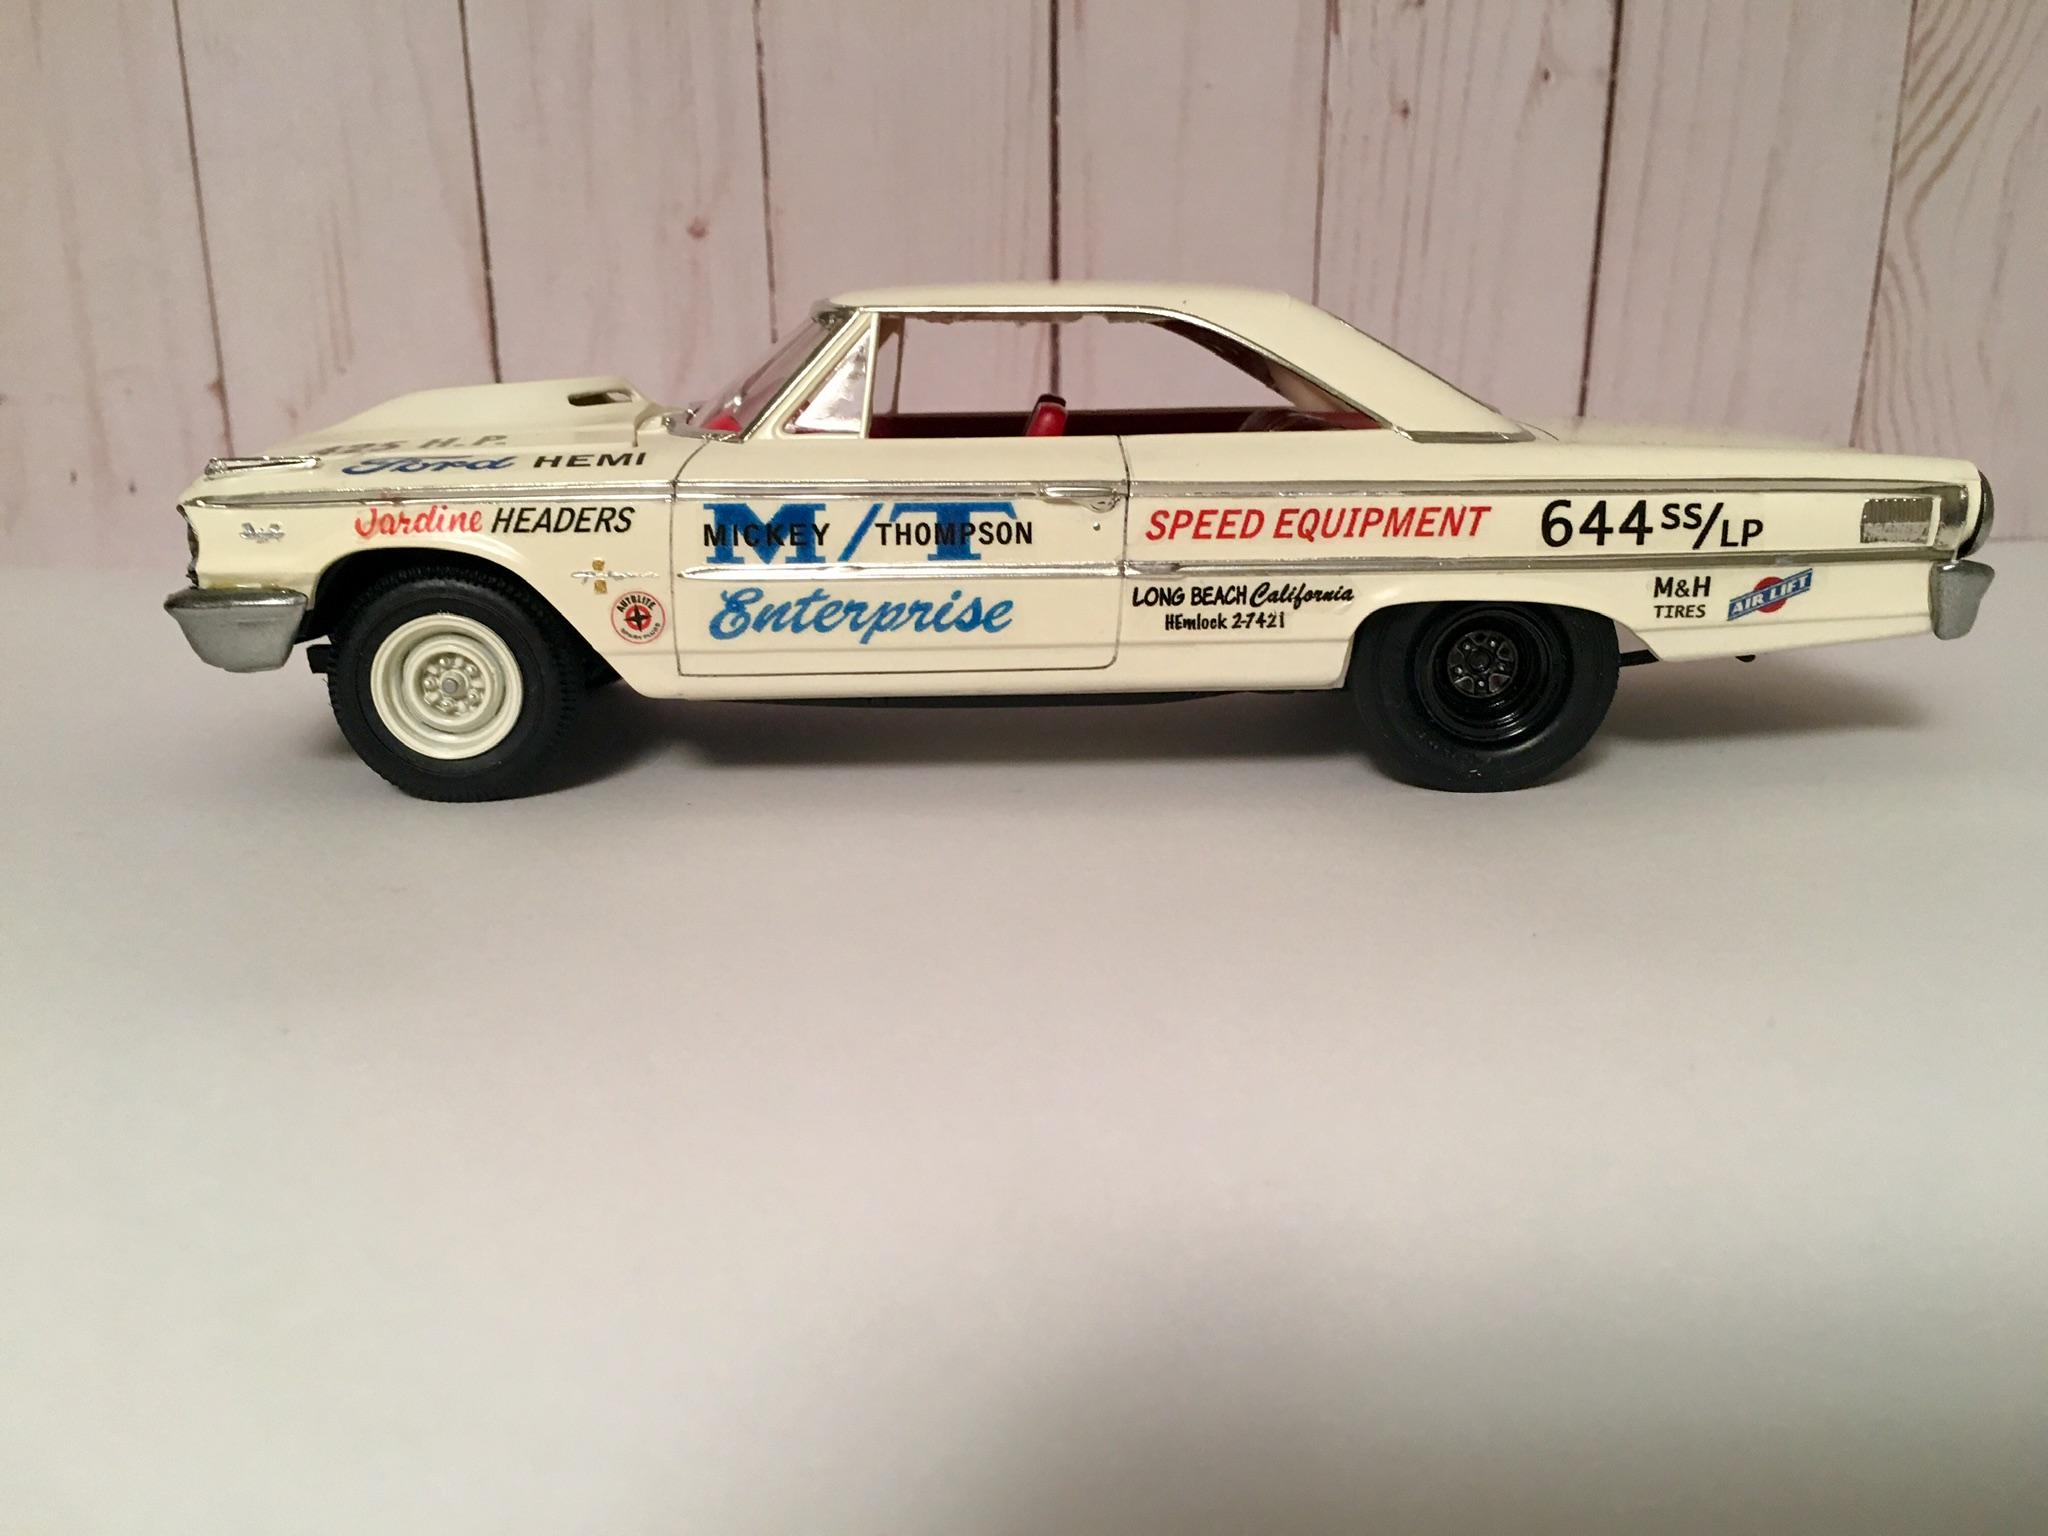
I’ve used the Starliner chassis and floor under a quite of few 62, 63, and 64 Galaxies. Even though they are not a perfect fit, there is only minimal trimming, and modifications to make it fit. Usually removing a bit of the ends of the rear frame rails, and some trimming of the floor pan in the rear also, using a razor saw. I literally have a dozen or so, of unused Starliner bodies, and glass and chrome, left over from all the kits I robbed the suspensions from. Here are a few pics of some of my builds using the Starliner chassis. They all have the Starliner under them. I’ll get some under carriage pics up in a bit.
-
Brockway 361 Wrecker
Brutalform replied to Warren D's topic in WIP: Model Trucks: Big Rigs and Heavy Equipment
Beautiful work going on here. Don’t see many of these trucks anymore. -
How do I get anything done???
Brutalform replied to tbill's topic in General Automotive Talk (Trucks and Cars)
My bench never gets too untidy. I usually give it a good dusting off, and put all the stuff back after every build.
-
Beautiful work so far.
-
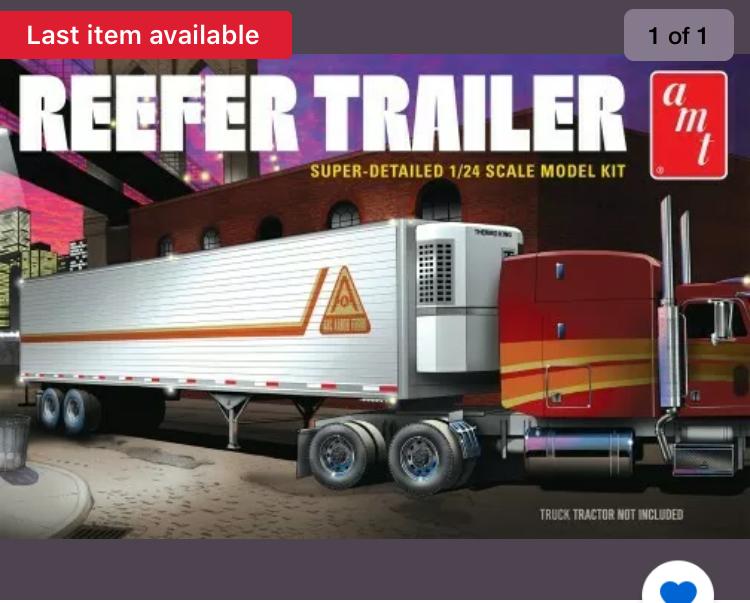
I had this sealed kit a while back, but it was the blue and white Gulf box art, but I sold it, so I never even got to see what was inside.So I can’t compare this one to the older one. I started this one yesterday, and I do like the rubber tires, as compared to the vinyl tires that’s usually included in the truck kits I’ve seen. The rings fit flush to the rims better using these, more flexible tires, than the previous tires, as they were a bit stiffer. I don’t like the fact that the call out numbers on the instructions are non existent on the sprues. Can be a bit difficult for a builder who doesn’t normally do trucks. It is a royal pain. The instructions are pretty vague in some areas also. There is no cable for the boom included in the kit. I have the frame completed, and almost ready for paint. It’s a tiny bit crooked, but it’s as straight as it’s going to get. Hopefully it will be fine during assembly. I also removed material on each side of the deck, rear tail light area, and the front wall of the box, to allow the rear tires to look more correct, instead of having them way under the box. If you don’t mind having no numbers on the sprues, a ton of flash, and the rear tires tucked way under the body, then this kit isn’t too bad. I suppose it’s the same old model just re issued in a new box.
-
AMT Rebox of the Italeri 378 Long Hauler
Brutalform replied to Casey429's topic in Truck Kit News & Reviews
After viewing Hpiguys (Chris)video, I knew this was going to be my next model purchase. I for one have never built a cab that is molded in all separate parts either. My main concern was to have a trailer in 1:24 scale to compliment the tractor... so this bad boy, along with the tractor are scheduled to arrive today. Keep the videos coming. I really enjoy the reviews.
-
Very nice build. Looks like it was just built. I was never a big fan of those style wheels, but they look perfect on this build. I still wish that Boyd paints were still available. Nice color choice.
-
Doner kit for resin 62 Ford kit ?
Brutalform replied to cobraman's topic in Model Building Questions and Answers
60 all the way. I have more 60 Starliner bodies lying around more than any other parts. I always use the chassis and other things for any 61,62,63,or 64 big Ford. -
Movin’ On Kenworth Resto
Brutalform replied to Plashdaddy's topic in Model Trucks: Big Rigs and Heavy Equipment
Looks fantastic. That thing was a real glue bomb. You did a real nice job saving it. Id definitely get the decals! -
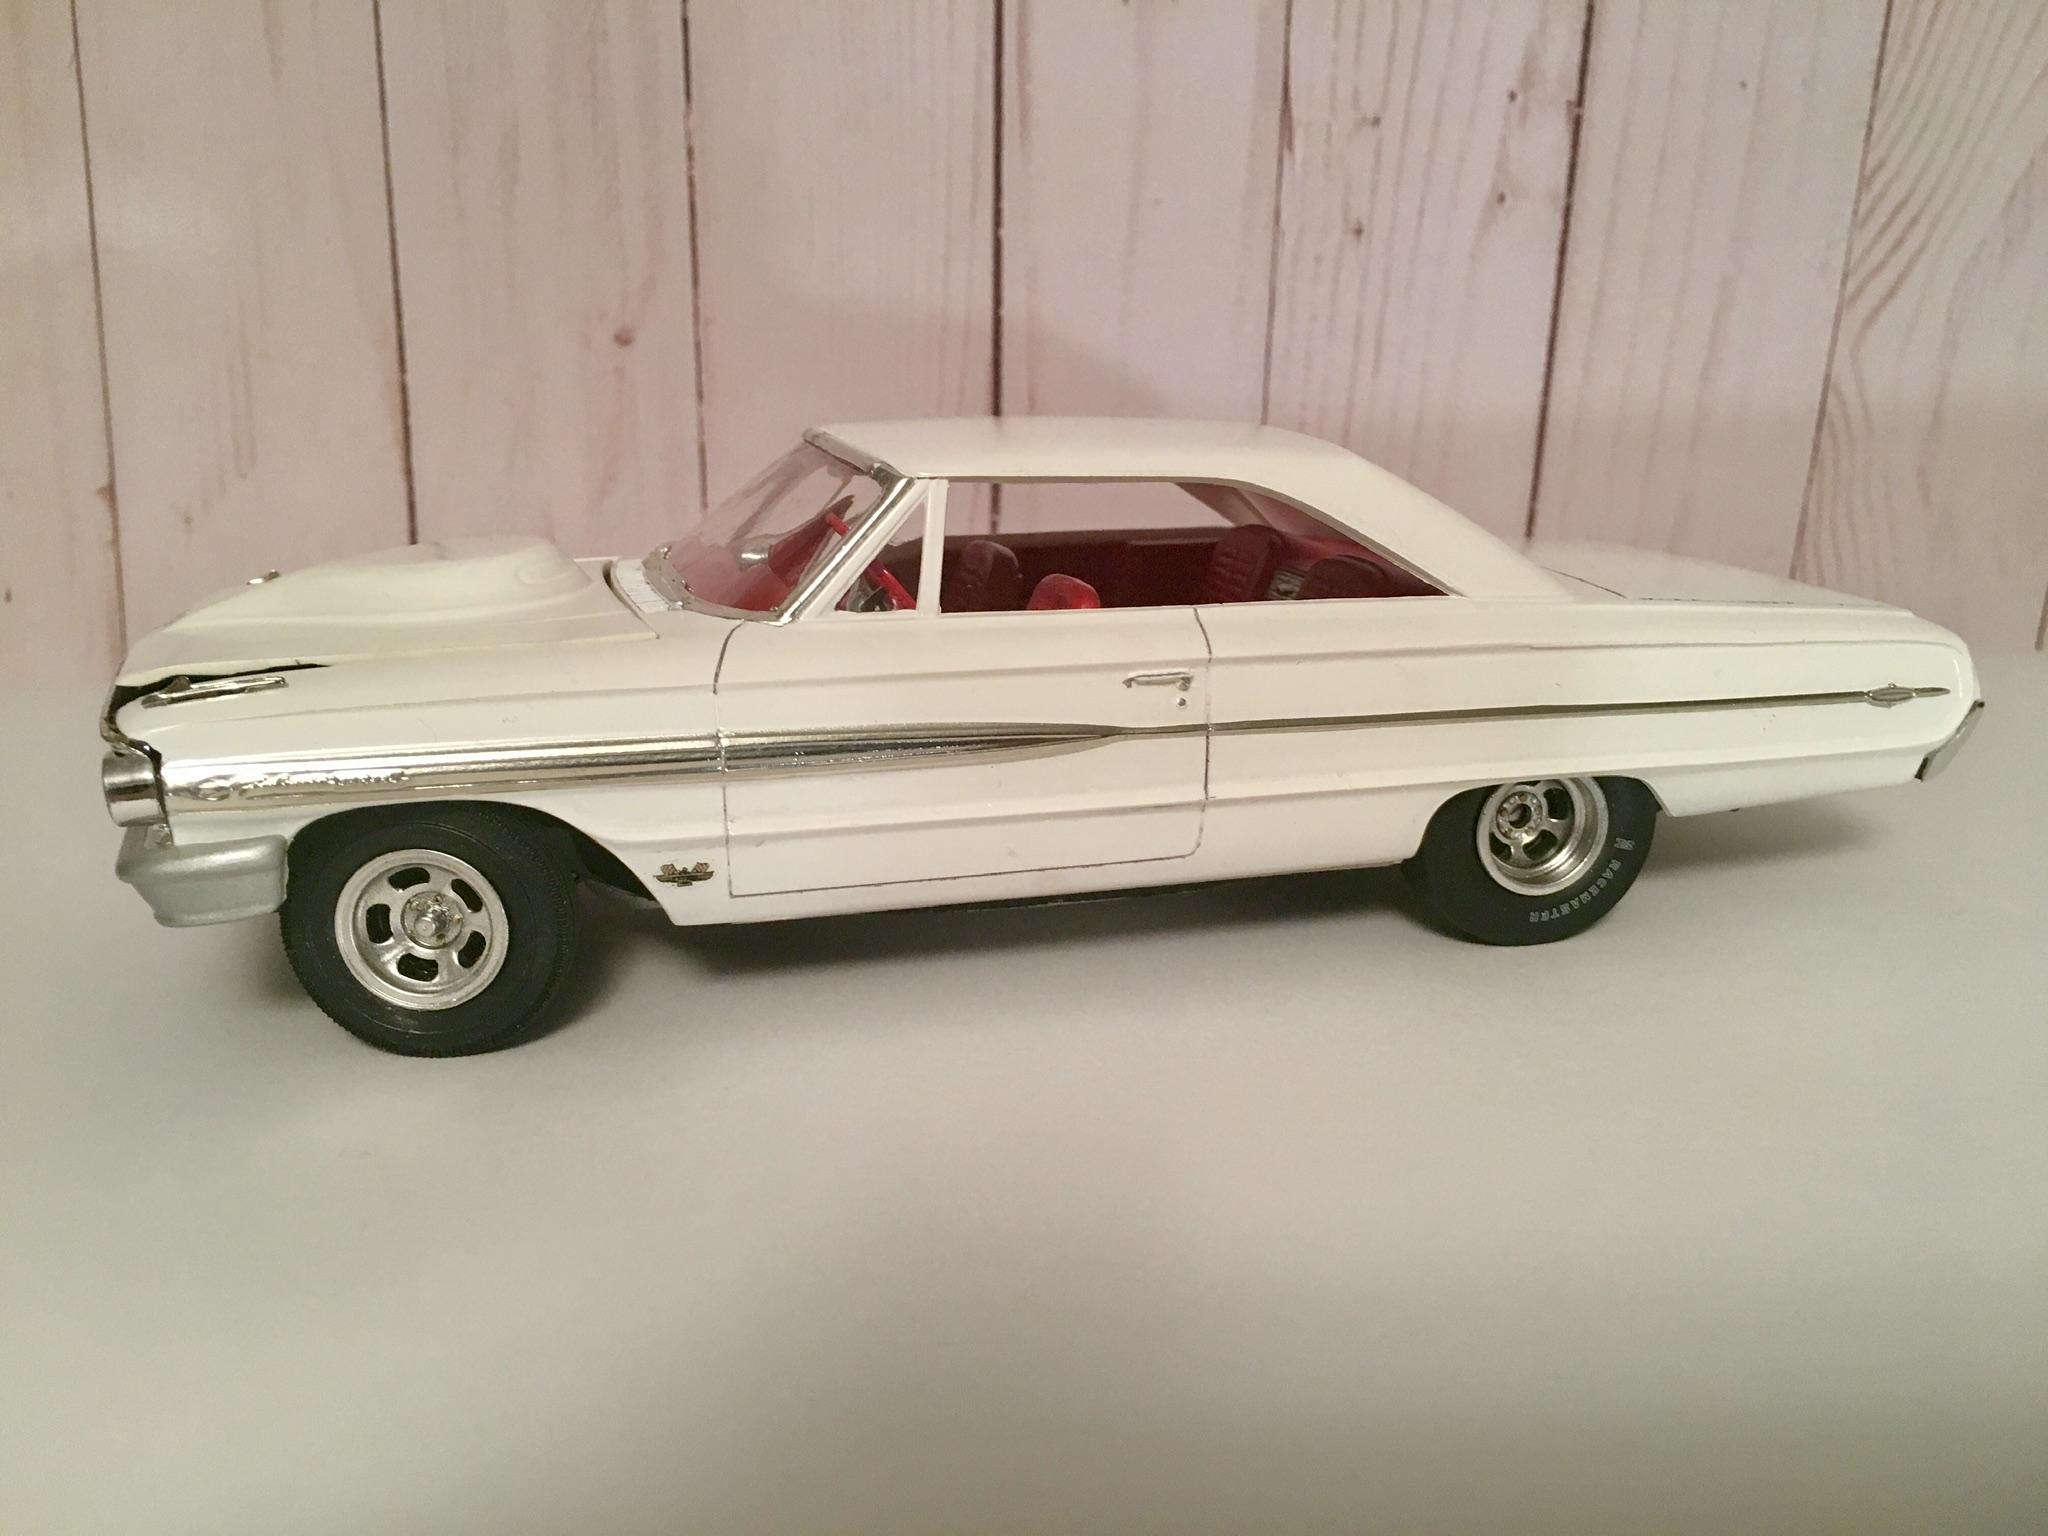
How did you get the paint nice and shiny? I have this same car, and the paint looks rather dull. Yours is looking real nice, and I’m waiting to see it all assembled.
-
Moebius/Model king 65' Plymouth AWB box art
Brutalform replied to Mr mopar's topic in Car Kit News & Reviews
This I like! -
Wow, Roger, this car looks absolutely beautiful. The detail is top notch. I like the fender mounted solenoid, and tachometer you added. . Perfect color choice of that era.
-
Very cool pair of Mopars there. I really like the Hemi racer. Not knocking the blue one, but I really like those “as delivered” vehicles. Mopar really had their stuff together when it came to racing. You did a very nice job on both of these builds.
-
AMT 67 Chevelle PS wheels
Brutalform replied to Oldschool4x4's topic in Model Building Questions and Answers
I often wondered why that kit came with a four spike Centerline style wheel. They still look pretty good, except for the one less spoke. Are you looking for a correct wheel in this style? One of the Revell 69 Nova SS kits has decent looking Centerline Convo Pros that you would just need to modify the rears to be a pro street rim. -
If anyone would like to supply me with five or so, can you please PM me?
-
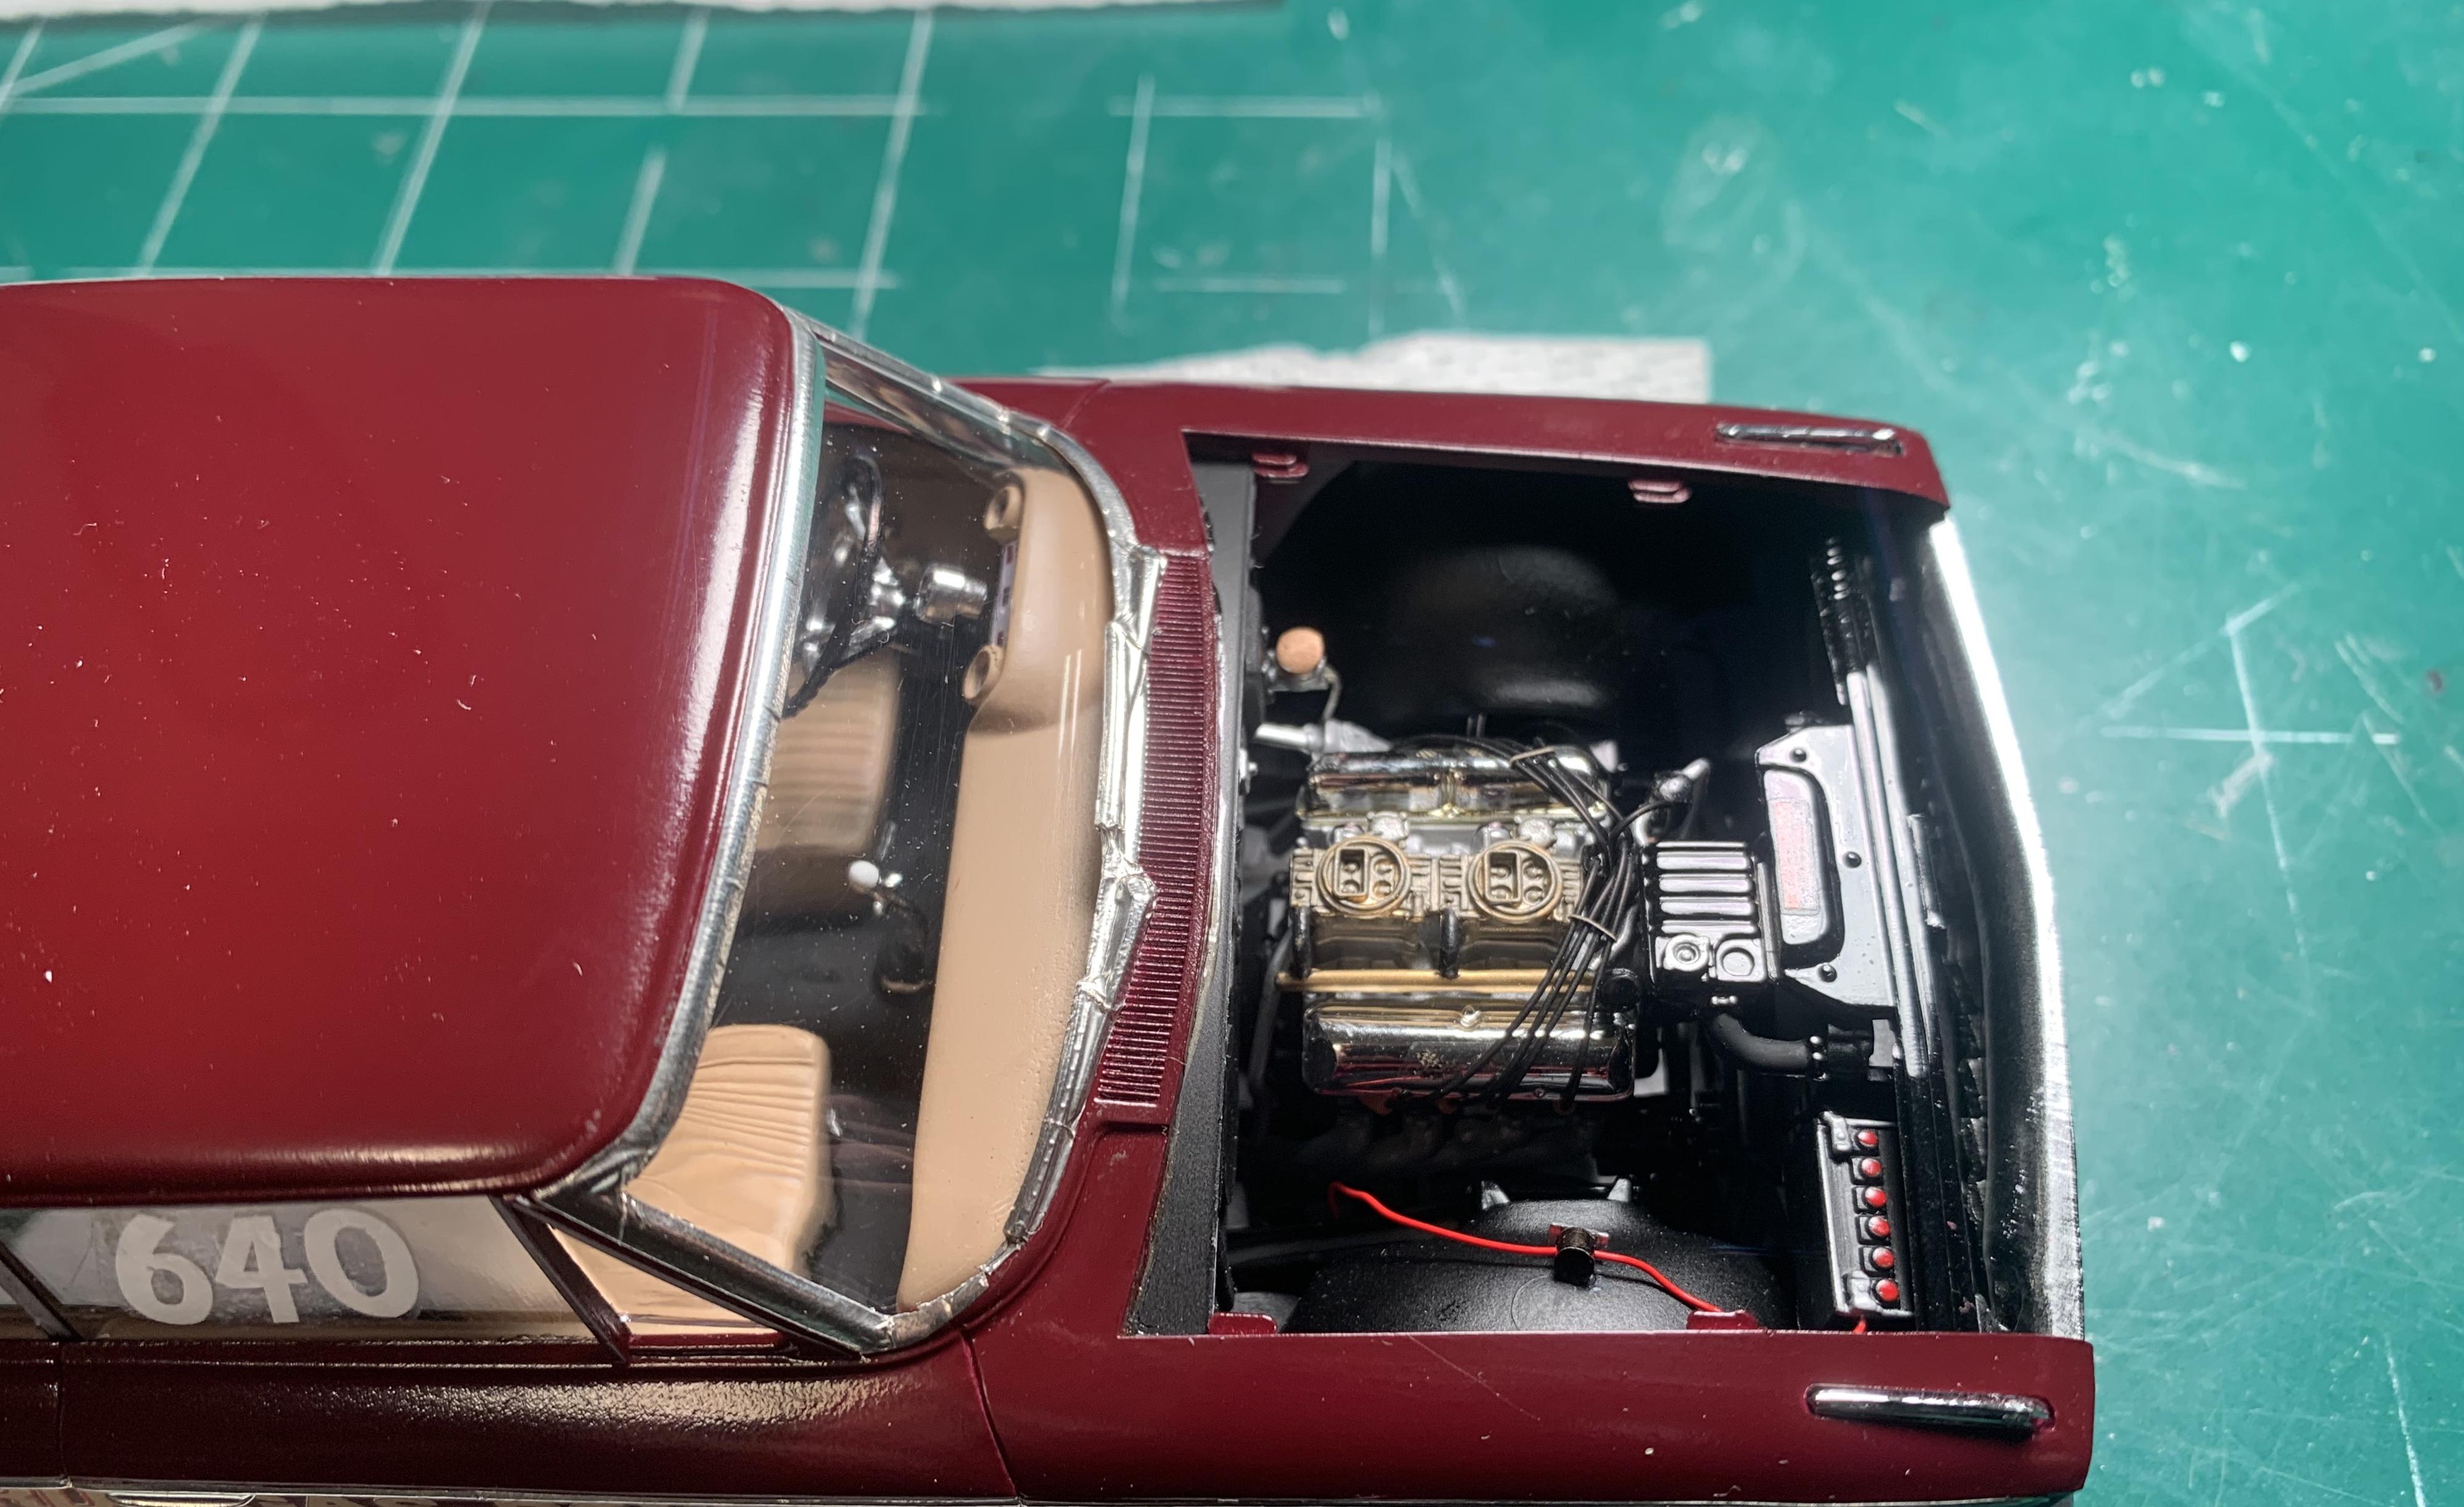
Looking great so far Misha! This is a very interesting subject for me, as I have several of these types of builds going on right now. I’ve completed a 63 Fury, but still have a 62 Fury, and a resin 62 Savoy, a 62 Dart, and a 63 resin Dodge. I’ve acquired a few sets of fender well headers for my cars. There is a lot less work making the Lindberg chassis fit the 62 Fury, as compared to the other cars I mentioned. Missing Link has a really nice casting of the Max Wedge cross intake, that could replace the odd looking supplied intake from the Lindberg kit. Using this with some Fireball carbs, you can’t beat this set up. I can’t wait to see more updates of your build.
-
Does anyone know if someone is casting Mopar alternators? I have a few builds where I need at least five, correct looking alternators.
-
Coming together nice. The interior and its details looks fantastic. Looking forward to more.