Codi
-
Posts
2,675 -
Joined
-
Last visited
Content Type
Profiles
Forums
Events
Gallery
Everything posted by Codi
-
FANTASTIC Bruce..........I just love those shots of the car outdoors. The beauty of all your detailing and of course paint, are presented in all their glory. Wish that one was mine!! Cheers, Tim
-
Good to hear your surgery was successful and you're feeling better Dave. I can only echo what others have stated and thank you as well for all of your efforts. Everything you describe is very time consuming and takes true dedication to keep after it. Cheers, Tim
-
Hi Art, I just wasn't happy with the finish. The humidity gave it an eggshell finish one time, then it "blushed" (the finish was flat even with the semi-gloss clear on it) so that didn't suit either. The steps I got good results with were actually pretty straightforward. After removing the old paint with lacquer thinner, I used my dremel and steel wool pads to get in the crevices etc. to get an as "new" ready to paint surface. Washed it thoroughly with dawn and blew it dry with my airbrush. Sprayed the etching primer as they instructed, multiple light coats with 10 minutes between each. Waited 45 minutes and sprayed the black in multiple light coats as well (3 coats primer and 3 of color) also 10 minutes between coats. Waited an hour and then sprayed it with 2 light coats/passes of the tamiya semi-gloss. It gave me the proper gloss finish I was seeking over the flat black color. Waited 10 minutes between each clear coat. That was it. All out of the cans. One of other issues I wanted to share was on my first attempt, the finish pealed off (again, the humidity, was about 65%) whereas now it's ON.....and I can describe it as actually hard. The self etching primer was key in that regard as it made the difference in how it stuck to the brass. My first attempt the primer was tamiyas standard fine white for plastic and metal. That didn't work. For ME, the keys were reasonable temp, low humidity and multiple light coats.........no medium or "wet" coats applied. The finish is thin as lacquer is, but again, tough. If you have any plastic bits on your brass chassis, I would practice on something first to ensure the self etching primer doesn't do bad things to those bits and pieces. Mine, being all brass, that was not an issue. Hope this helps in some way. Cheers, Tim
-
Hi John, the dehydrator is something I've used for several years now. I bought 2 so that I could make mine taller for the types of things I paint. Just had to do a bit of crude hacking to remove the shelves inside and sealed the 2 halves together with sticky plumbers silver tape. So far as using it, I never set it above 95 degrees........I prefer to let it cure the paint for 2 to 8 hours depending on what type of paint I'm using. Then let it cure another day or so in the cabinet before handling. Again, dependent upon the type of paint. Interestingly I contacted Alclad with some questions and he cautioned me NOT to use the dehydrator when spraying their enamels. The formula they use and dehydrators don't place nice together. I suppose it has something to do with the speed that the enamel is curing and what their formula is. Just thought I'd share. Lacquers dry quickly as you know anyhow so an hour in the dehydrator is just "insurance" before handling. There is a great link on the forum with all kinds of great info and experiences that others have shared that you'll find helpful too. Pete, nice to hear from you as always.Thanks too! Dave, I can only surmise that the humidity is a very key factor when spraying their lacquers. They even say on the cans that it shouldn't exceed 65% but at anything in the low 40's you should get great results about every time. I was also surprised at how well it went down right from the rattle can. Since you live nearby you know the horrible paint weather we've endured since Spring. I'm just glad it's done and turned out smooth & at how hard the finish is as well. That's a real plus. Gilles, thank you sir as well. It's always nice to see others from around the world visiting the forum to share their work or to post comments. I really look forward to seeing pics from model shows in Europe and Asia whenever they get posted just to see what others are interested in building and the quality of their work. btw, started on the hardline's as noted and spent 5 hours alone just to get em' going. this is going to take a while. Cheers!
-
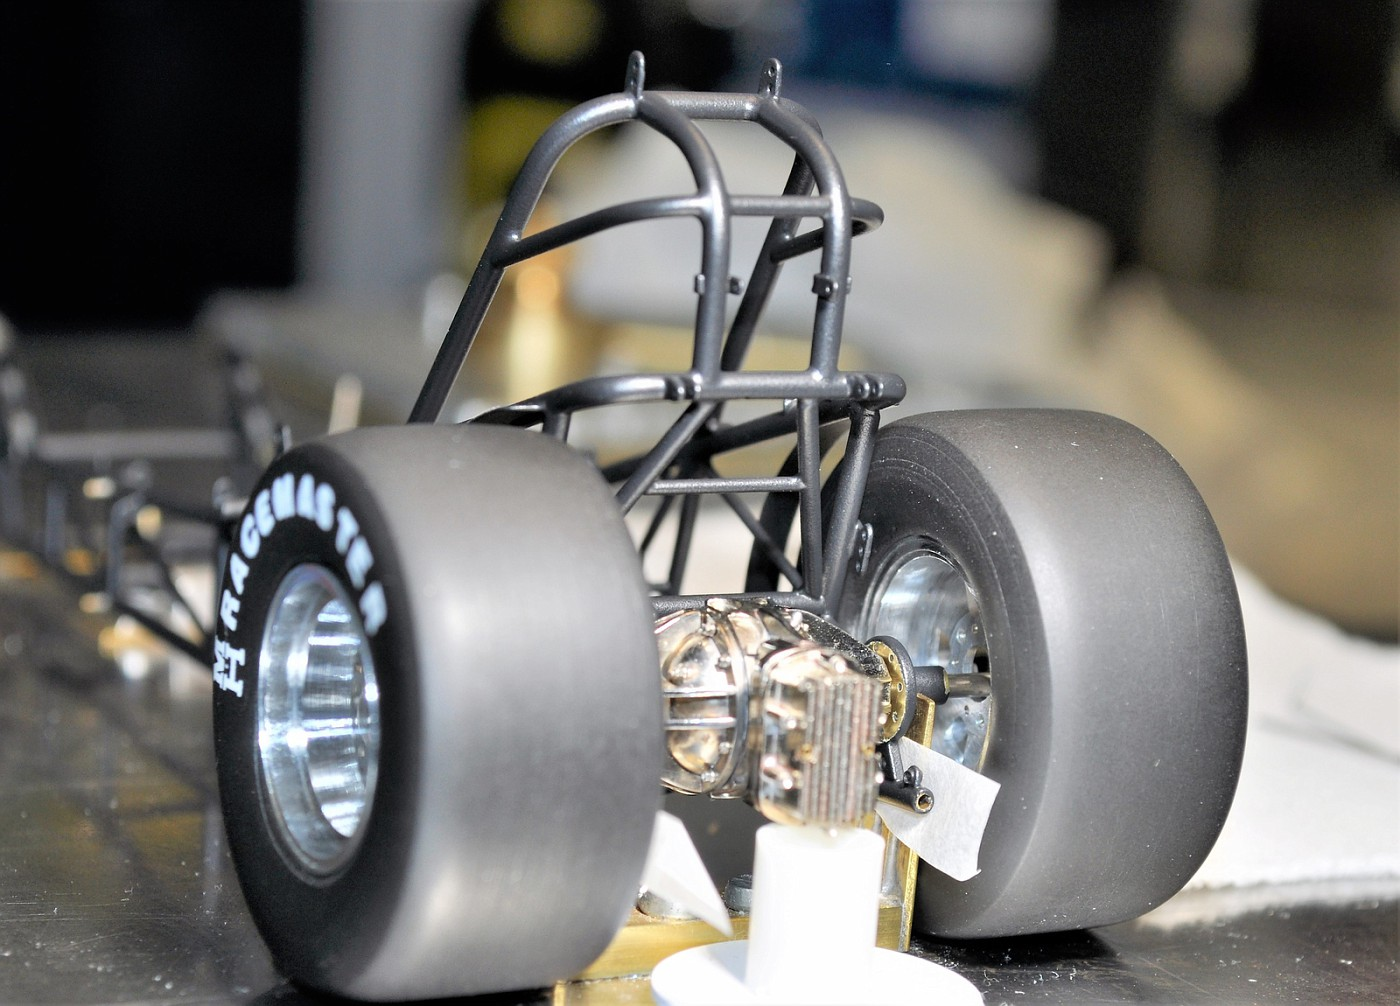
Thank you! Dave, the tire lettering are decals. I followed some tips that Clay K. shared and was happy with the results. Cheers!
-
Bruce, just wow. You've really got me wondering what madness I'm doing in 1/25th. My old eyes are making it harder and these 1/12th cars seem like such fun. Beautiful car by any measure. You've gotta be one proud papa having that one on your shelf. Congratulations.
-

1/12 Tamiya 312T
Codi replied to nickfzr61's topic in WIP: Other Racing: Road Racing, Land Speed Racers
You guys in Big Boyz are just on a roll. Great job Nicholas. I'm envious. cheers, tim -
1:12 Tamiya WR1
Codi replied to Belugawrx's topic in WIP: Other Racing: Road Racing, Land Speed Racers
UGH! I feel for ya' on that one man. I too would just walk away while I ponder what to do next. Your commitment to the car and what you want from it are to be commended. I know you'll get it the way you want ultimately. Keep at it man! I'll be sure to follow along. Tim -
That is so slick. Nicely done sir.
-
1/16 Scale Army Vega Funny Car - Finished 10/14/2018
Codi replied to Mooneyzs's topic in WIP: Drag Racing Models
now THAT is way too cool. Love the pics of the 2 cars in the same shot. Natural light shows EVERYTHING...........looks even more fantastic if that was even possible. Kudos guys! -
Thank you one and all as that part was just kicking my butt. I peeled off tape etc. from the chassis and took a couple pics with some shiny bits on it just to get some satisfaction from all the grief it put me through. Should be really sharp once all assembled. I'm going to tackle all the crower and manifold hard lines next so I can then begin final detailing & assembly. Cheers!

-
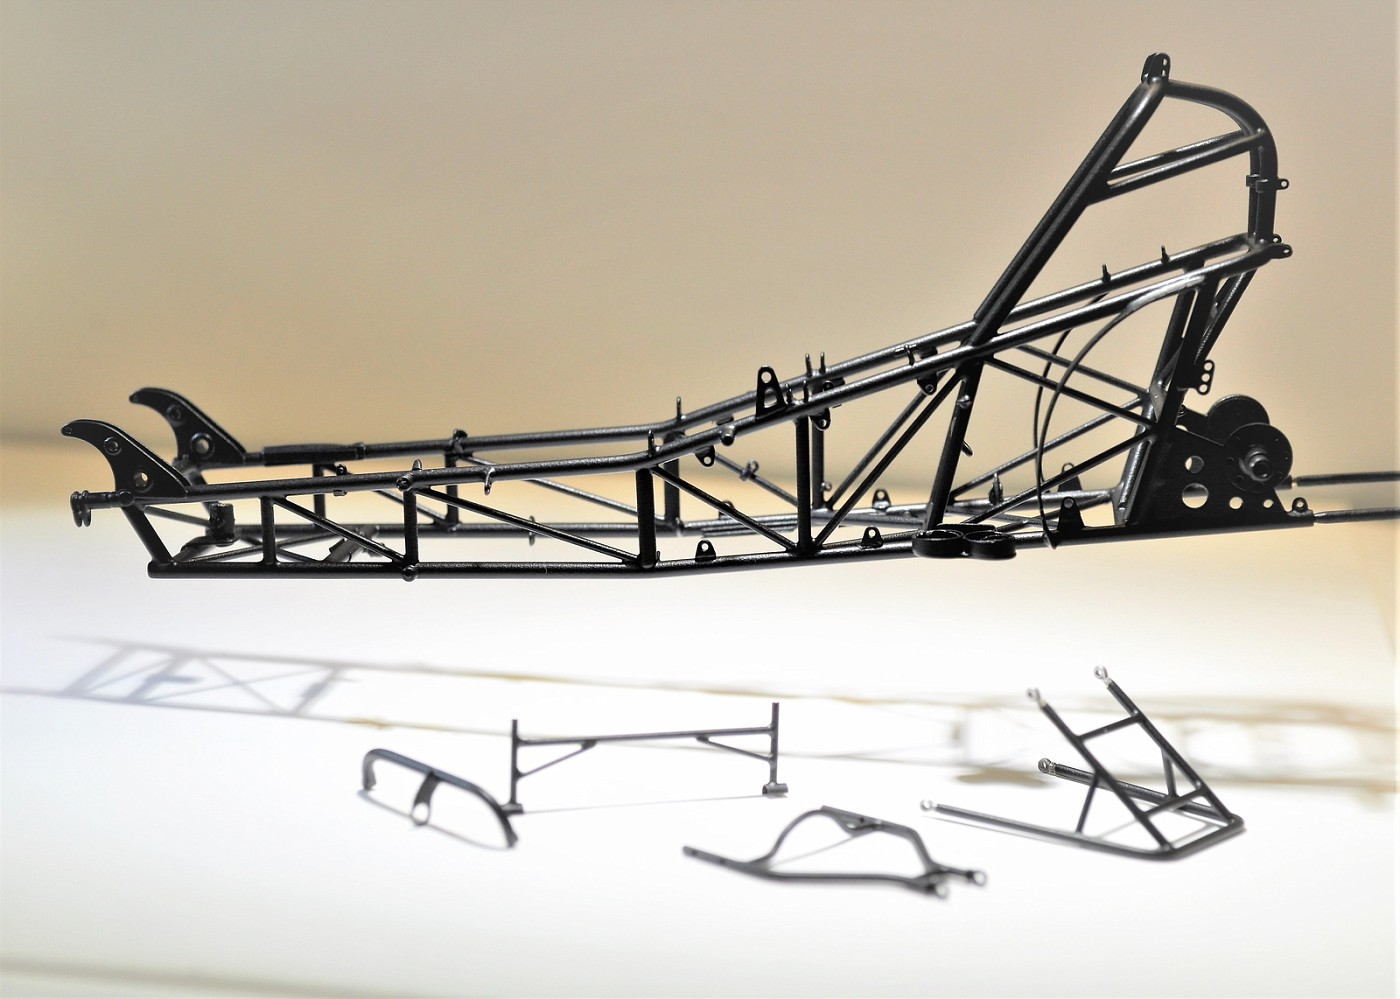
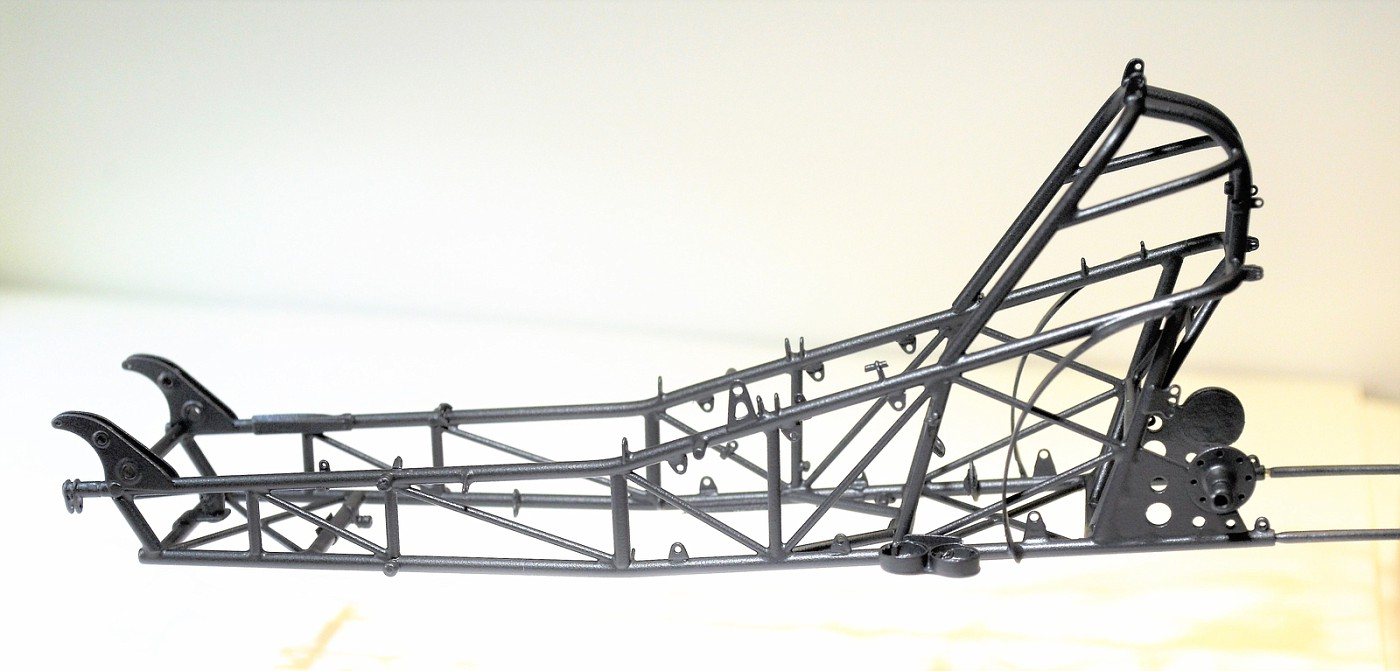
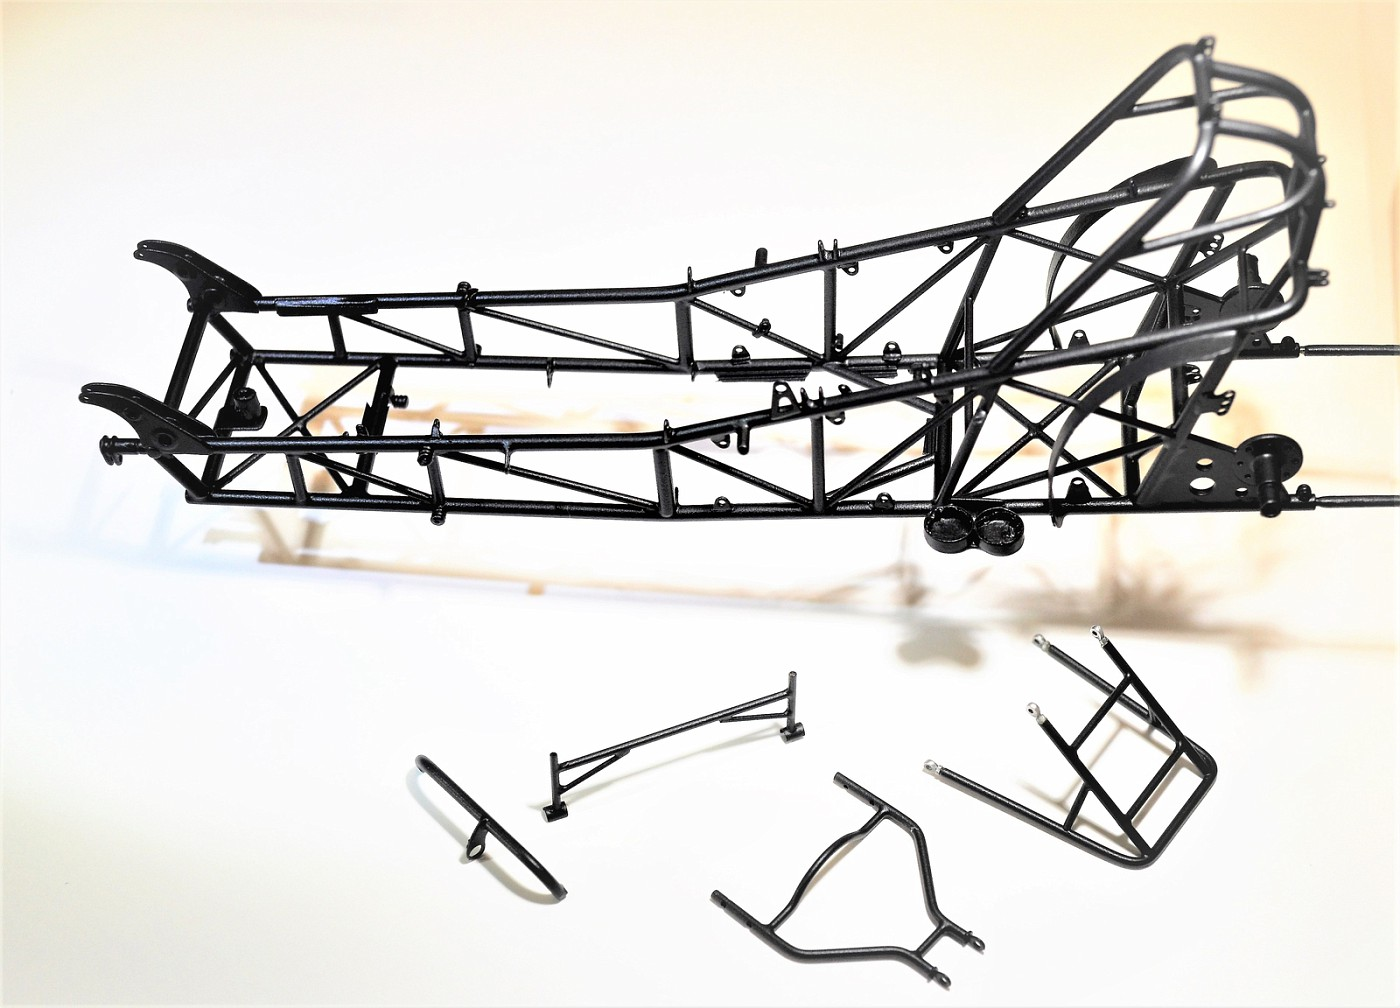
Finally. After stripping the chassis 3 times I got it done. Paint is duplicolor etching primer, duplicolor universal matt black and tamiya ts79 semi-gloss clear. Stuff is tough too. I attempted several times to apply this by decanting it and using my air brush. Bad results but I think it was down to the humidity. Last attempt I sprayed it straight from the rattle cans, 70 degree temp and 39% humidity. The humidity seems to be the critical number. I won't bother spraying it again unless the heats at 70 or more and the humidity is 50% or less. cheers, tim This pic is the most accurate for the true color btw.
-
Gotta agree with Chris, brass is the way to go. His method was excellent as well. I took a slightly different path but they turned out satisfactorily for me. Good luck. Tim
-
Dann, you're appealing to all of my scratch-building hot buttons. That's a great tip you shared and love the way you tackled it. Keep it up sir. cheers
-
1:12 Tamiya WR1
Codi replied to Belugawrx's topic in WIP: Other Racing: Road Racing, Land Speed Racers
I. JUST. LOVE. THIS. THREAD. Fantastic Bruce and that link you provided is just amazing to ogle at. Cheers sir! -
Hi Erroll, The chassis was cleaned with my dremel brush, then steel wool, 000 grit I believe and also in the nooks and crannies with an asbestos brush. Cleaned it thoroughly with soft scrub and then dawn dish liquid.......rinsed thoroughly with clean cold water and blown off immediately with my airbrush. I'm confident the surface had nothing to do with it. Bare brass like this requires an etching type primer. I just checked my experiment from yesterday and it was perfect. Didn't cheap or peel off whatsoever. Seems tough as nails. I'm cleaning up the chassis one last time, I've decanted the duplicolor etching primer to spray through my airbrush (Art Anderson provided some great insights on a blog that I found on-line) that should permit me to airbrush it (like I said, I don't care for the duplicolor spray can nozzles) so I can control it the best way possible. We'll see........the "experiment" went well so I'm very encouraged I'm onto the right product for the task at hand. Cheers!!!
-
Hey Dave, no, no it doesn't. I've stripped the chassis twice of the tamiya so I read a bit on this forum about the experiences of those using duplicolor. I sprayed their self etching primer and matt black so far which I'll test for durability in the morn. Lays down nice on the brass I even though I don't like their nozzles. Sprayed it right from the can too. If it passes the durability test I'm going to spray it with the tamiya semi-gloss lacquer for final finish. We'll see but this too has been a learning curve. I would be disappointed at this point if it wasn't. I think. cheers
-
As a scratch builder that does a lot of research on every build and that seeks out those that are truly in the know.......go to Jerry Bickels website and buy their new book on chassis construction. Covers pro-stock and pro-mod. It's under their "Info Center" link btw. It's not cheap, $79.95 but you'll find it helpful if you're looking to build your own from scratch. Another great 1:1 builder that Dave (comp1839) put me onto that has a LOT of on line videos/tutorials on real pro mod chassis construction is the Tim McAmis website. Both are very informative and up to date. You should find them to be most helpful. Good luck
-
Hi Mike, you should see it in gunmetal. So far so good today I'll get the clear on it and then share pics. I think you'll like how it turns out. Dave, oh you always tread that fine line don't ya'? Always did appreciate you're sense of humor. I'll give you a call in the coming week to catch up with you too btw! Pete, thank you sir. My intent is to have a build book so there will be "before and after" pics showing the brass chassis. What I think you'll find interesting is the difference between a plastic funny car chassis that I experimented with for color choice. You can really appreciate the detail of the brass chassis when they're side by side. As you know I did the brass for 2 primary reasons. The weight of all the metal machined components etc. hanging off and on it dictated a strong chassis was necessary and I wanted to get close to the true scale & appearance for 1/25th. In a couple days when I take some pics, I'll share the side by side of the two. Art, I painted the chassis with decanted Tamiya fine white primer for plastic and metal. The gunmetal color is Alclad's and the clear will be decanted Tamiya semi-gloss clear. Hope that helps. Cheers all!
-
Stuka....
Codi replied to Southern Fried's topic in WIP: All The Rest: Motorcycles, Aviation, Military, Sci-Fi, Figures
Saw you posts and thought it was January of 42' on the Russian front. Great weathering job as others mentioned, but a fantastic overall build in total. cheers -
John, I had to laugh at myself when I read your post my first thought was John would have had it painted 5 different shades of pearl, metal flake, pinstripes, flames, fogged and who knows what else. You're at one end of the paint spectrum but somebody has to be at the other. I think I know which end we both stand. Thanks again for your insights and suggestions you've given me. Chris, thanks man. I know you can appreciate where my mental state is on this build right now and this seemingly minor step was a big one for me. What you can't see is the 26 different places wherein I had to mask it off, it will be obvious when I it completely painted. Tolerances are so tight on 1/25th that the thickness of the paint (although thin) will impede assembly. Sooo...... Lou S & Bruce, thanks fellas. White on brass was a big change in appearance & it will be quite different when I spray it gunmetal. I can see it in my head with certain bits and pieces on it already. Cheers!!!
-
Side by side by side Dragster builds...Kemp-Teresi-Sobak
Codi replied to ClayK's topic in WIP: Drag Racing Models
Nice too John. Roger's comment about the black and white pics really add a cool element to them. Very creative. cheers, tim -
What a pair Tulio. Love them both and I'm sure they look great together on your shelf. Cheers, Tim
-
You just have to admire that kind of talent. Truly impressive Dann and I keep going back to stare at the detail you captured. WOW! tim
-
Chad Hiltz : "Green Goblin" on the Workbench 3/6/18
Codi replied to John Teresi's topic in WIP: Model Cars
I learned along time ago that when it comes to your builds John, no matter how off the beaten path the subject might be, if anyone can make it look fantastic, it's you. I wasn't sure about this one when you began the thread but I knew better than to question it. Of course, you're simply killing it. Your attention to detail continues to set new standards. This last post really is fantastic and I'm a true fan of what you've done with it. Just superb John. cheers, tim