DPNM
-
Posts
1,163 -
Joined
-
Last visited
Content Type
Profiles
Forums
Events
Gallery
Everything posted by DPNM
-
Thank you for the kind words Rob. MAYBE don't close this out yet. I must like abuse as I may start to try to correct a few of the flaws so, I might not be finished with this yet. I'll see what, or if, I can accomplish any more and update you when I know that I will take it no further.
-
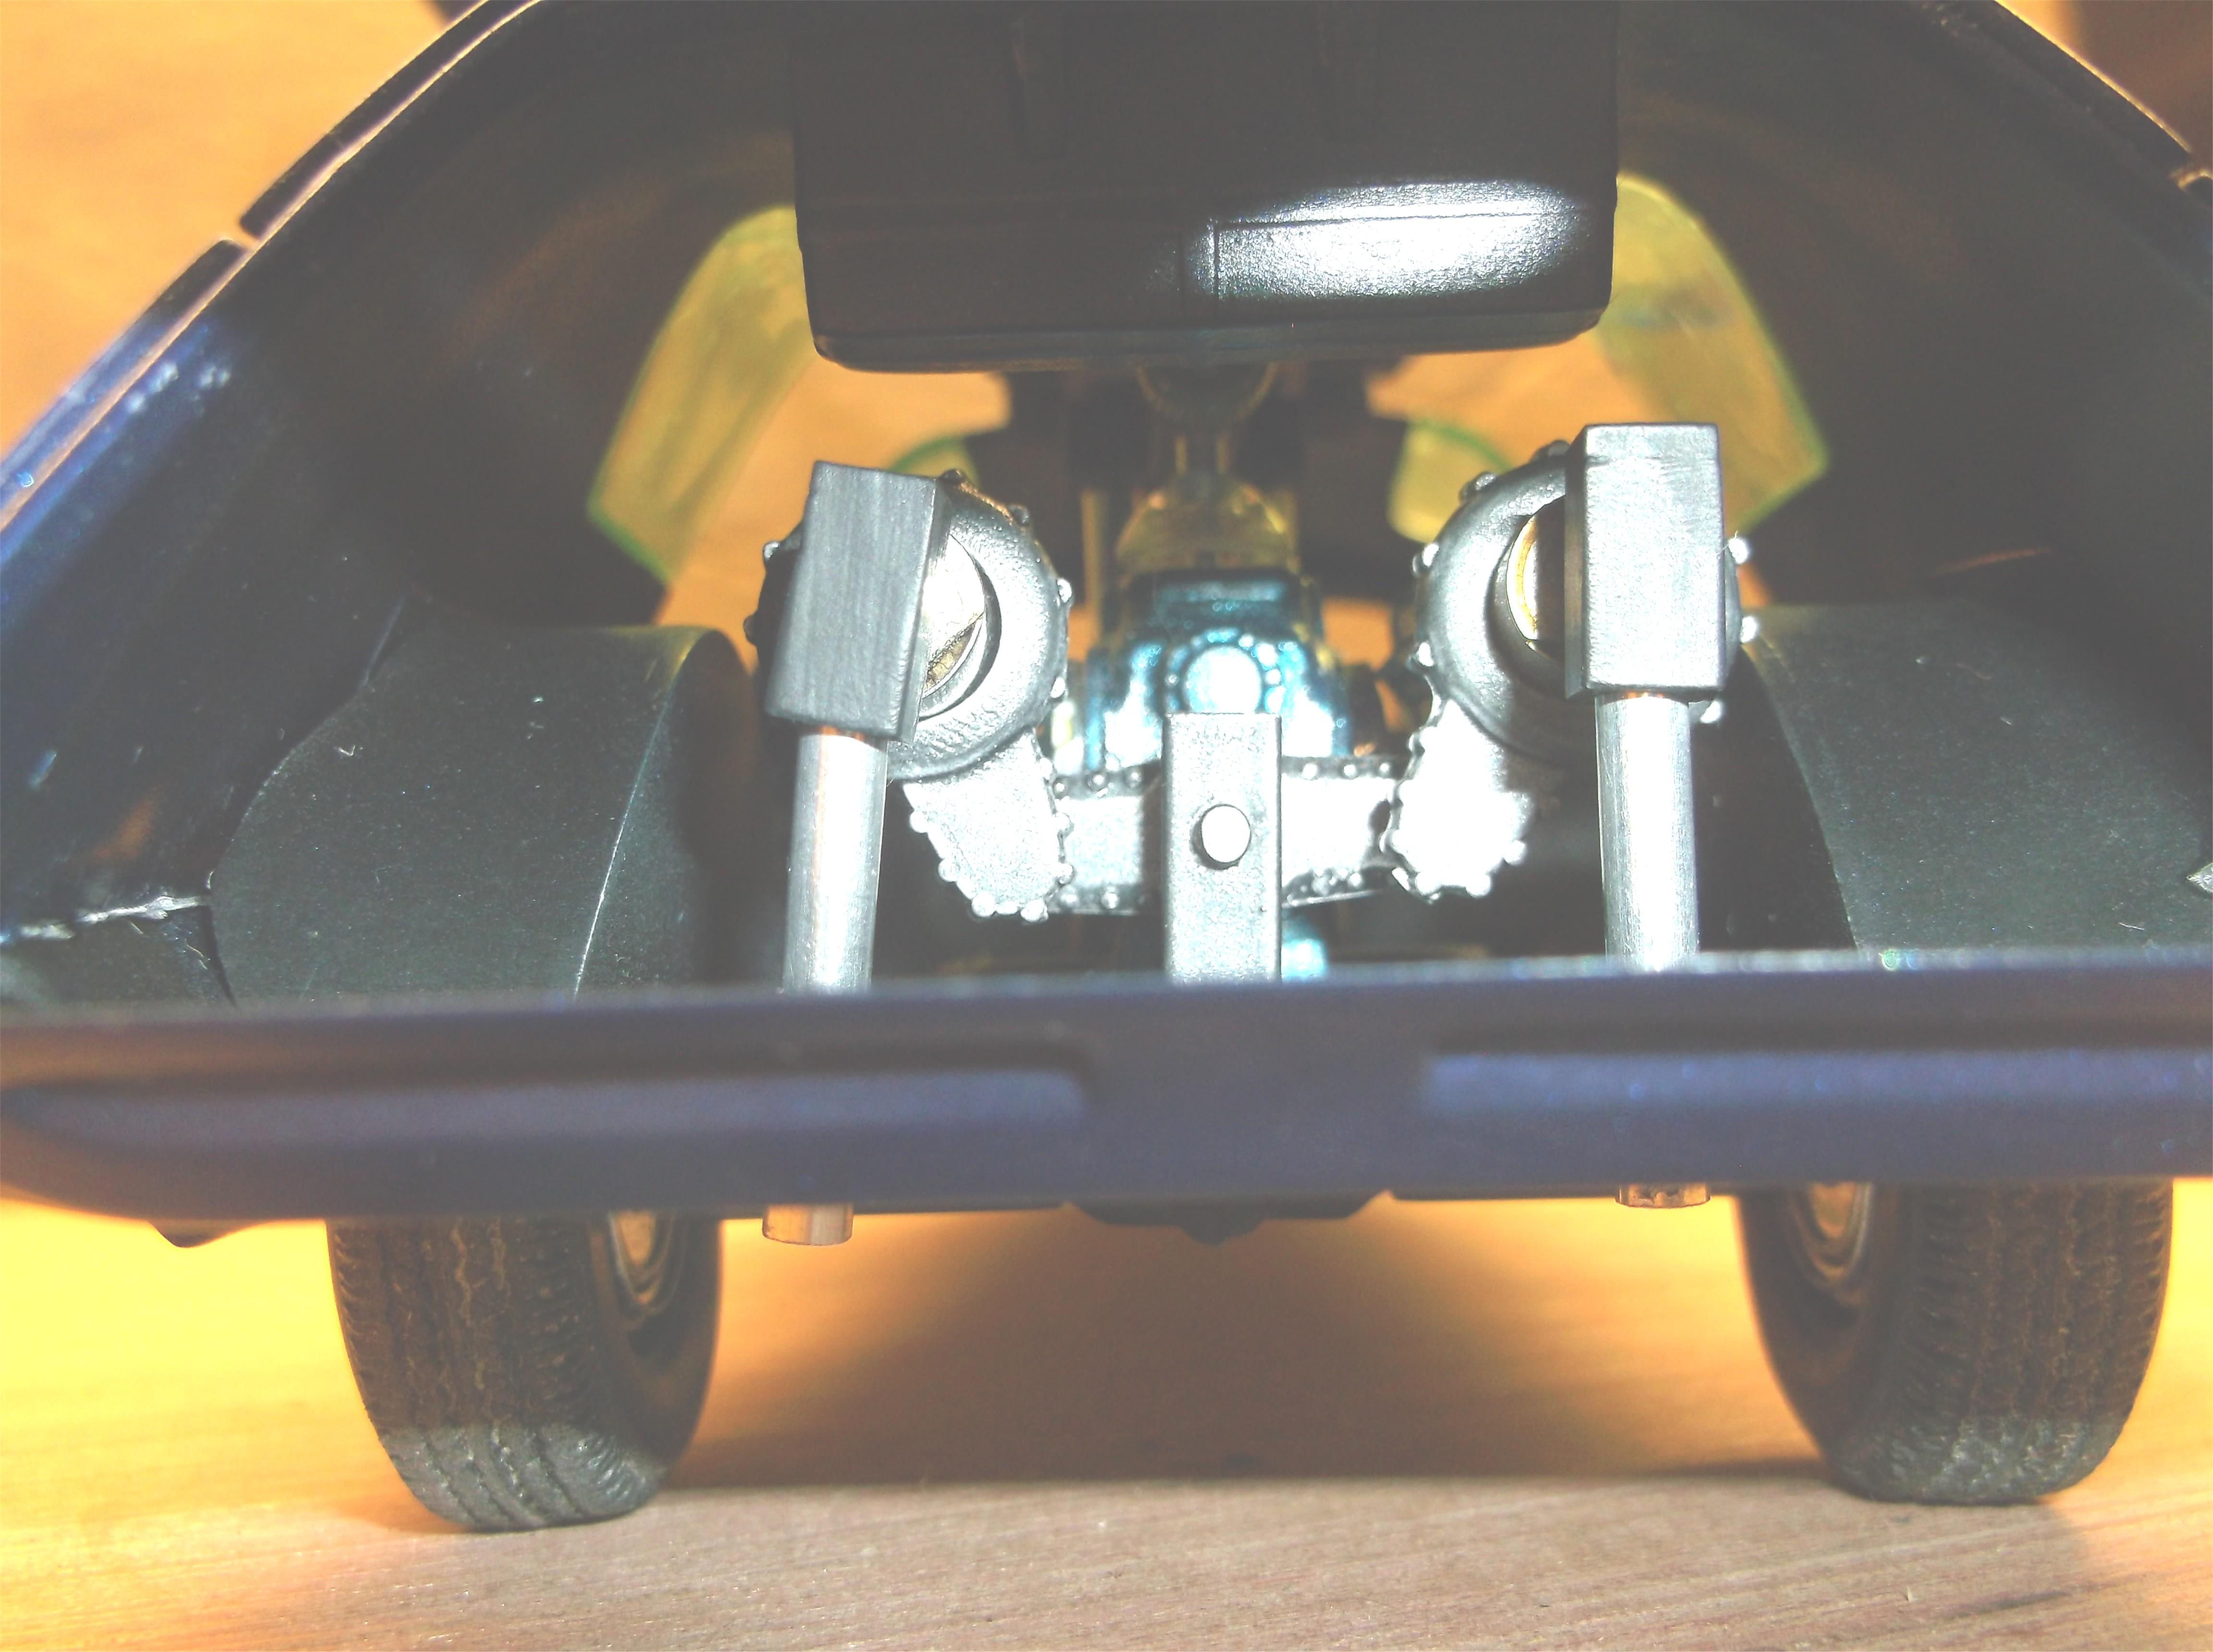
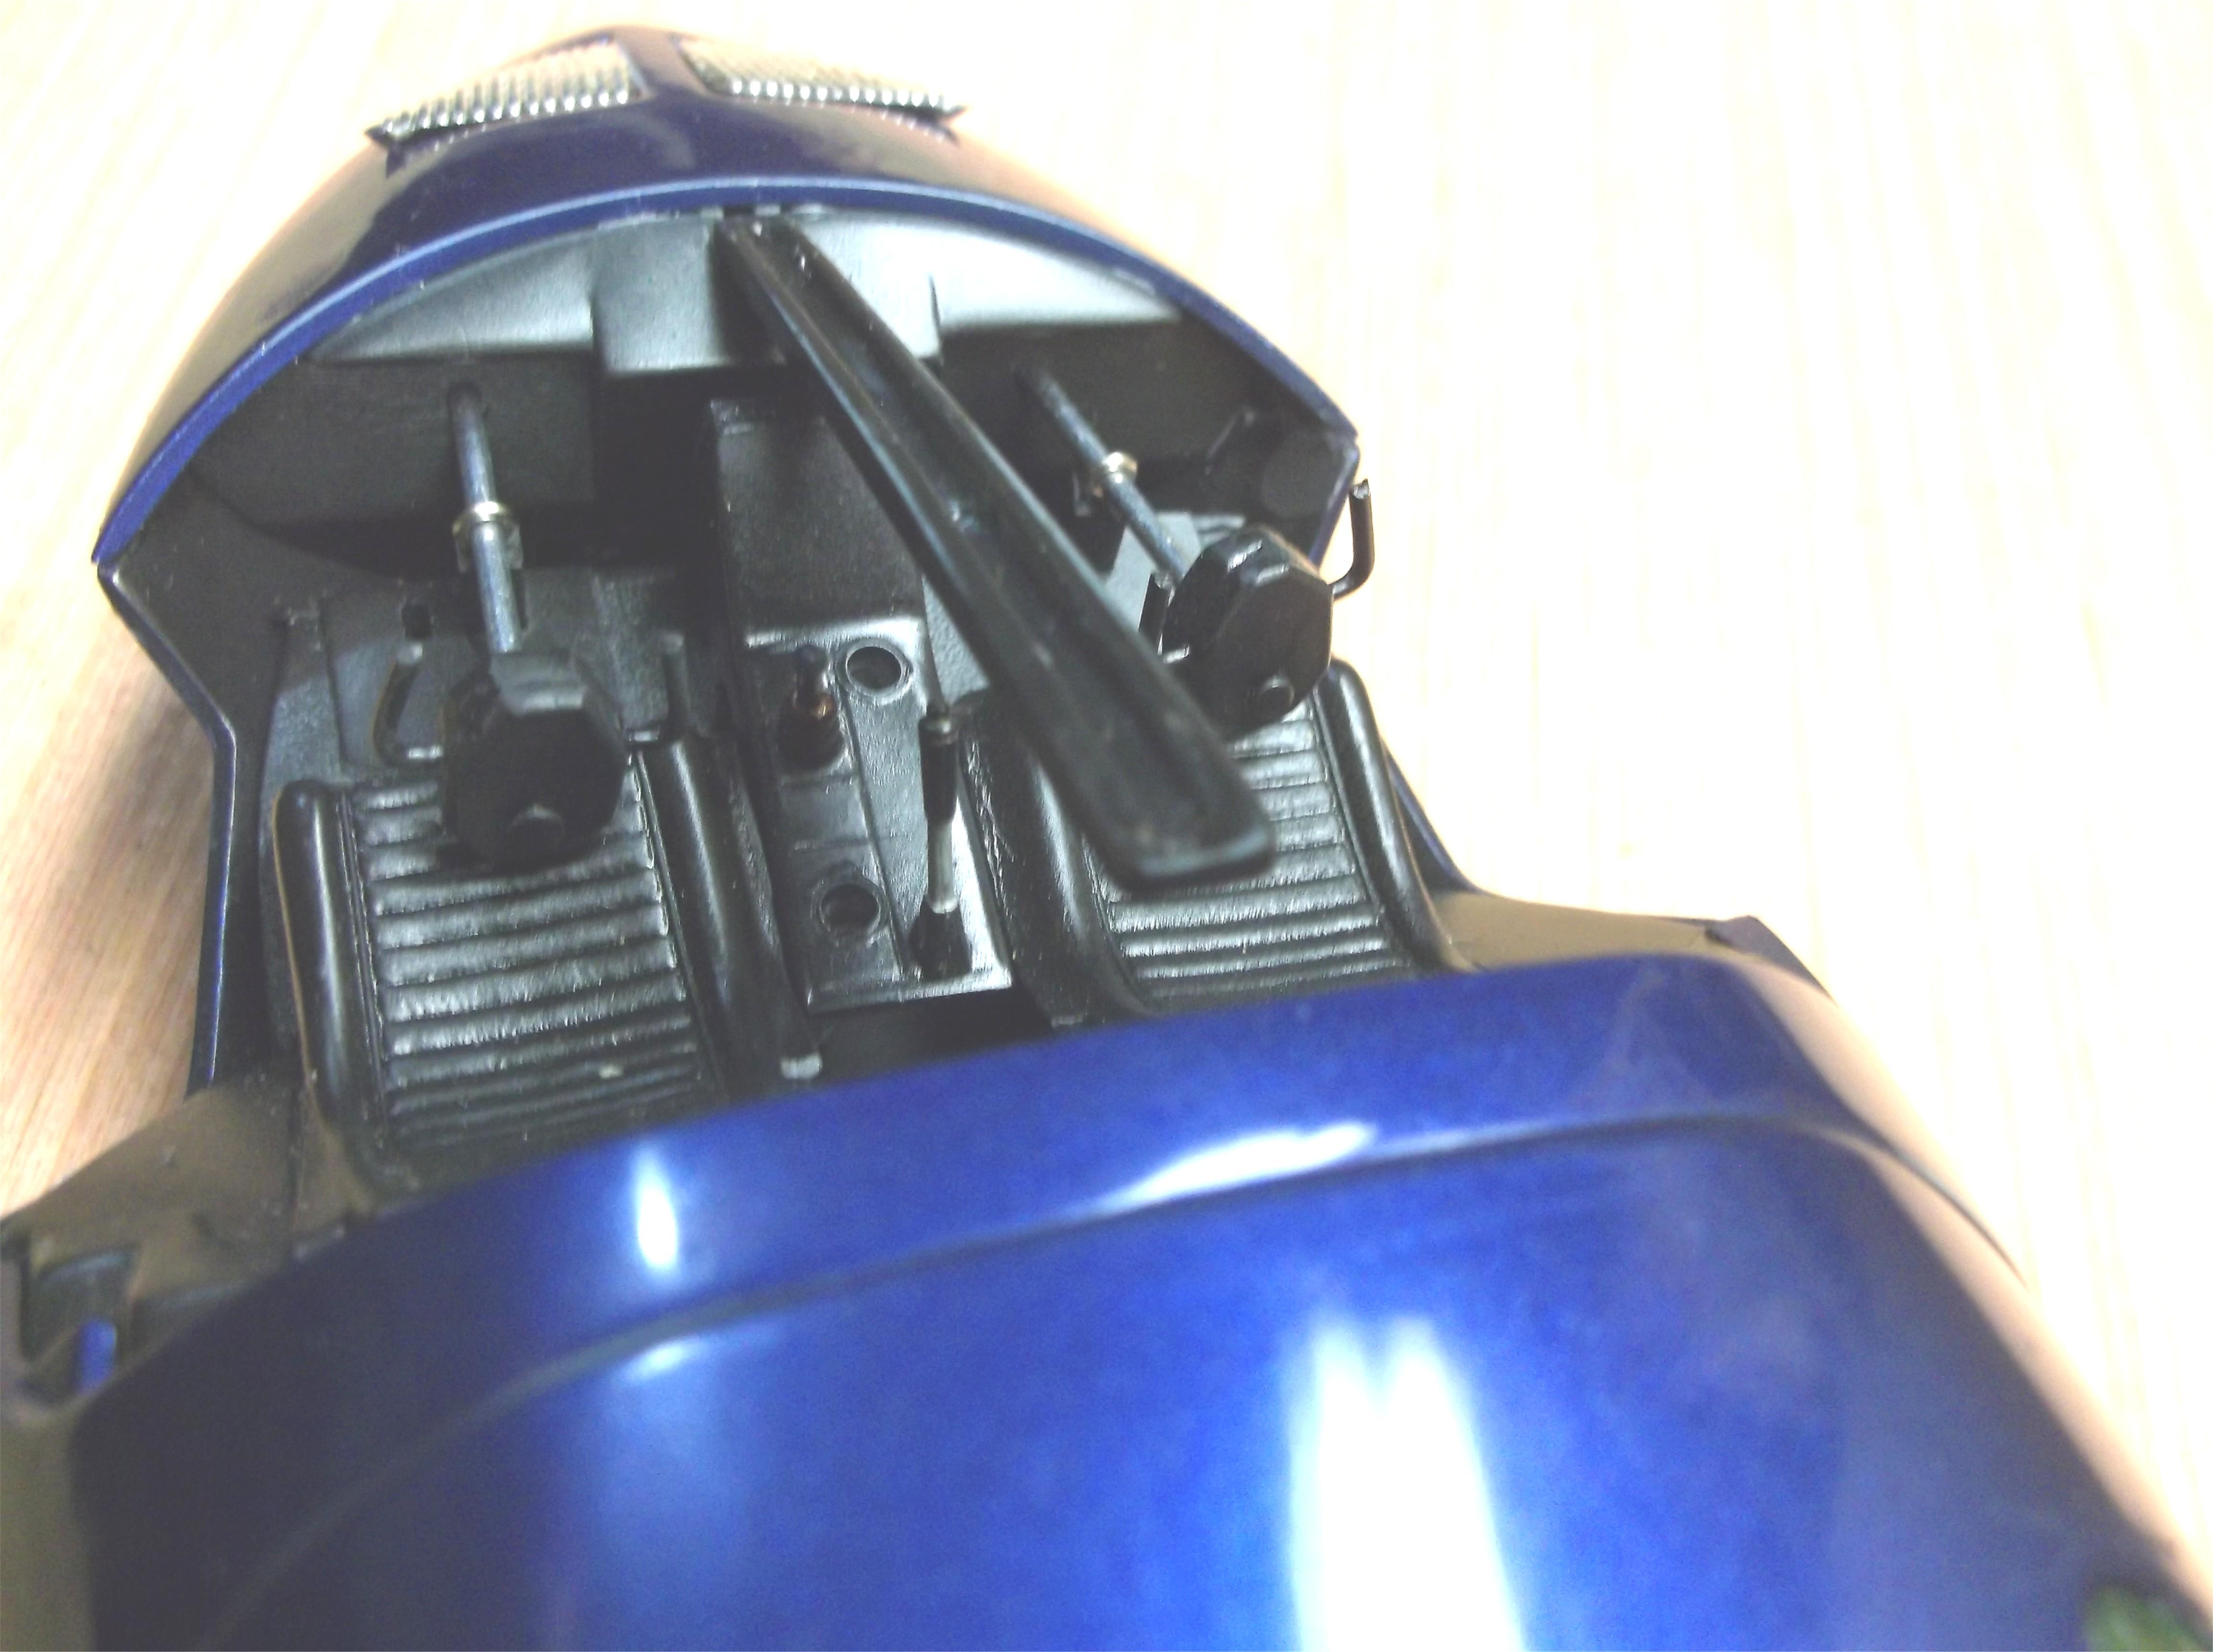
When I said I planned to build this it was mentioned to include a pass through from the driver compartment to the rear section so it would seem more van like. I did that. I also just took a pic to show the front axle. It does move up and down on the spring so it is functional. Added a pic of the printed paper copy of the decals I planned on printing on decal paper, the sanding pad and wax.

-
More pics
-
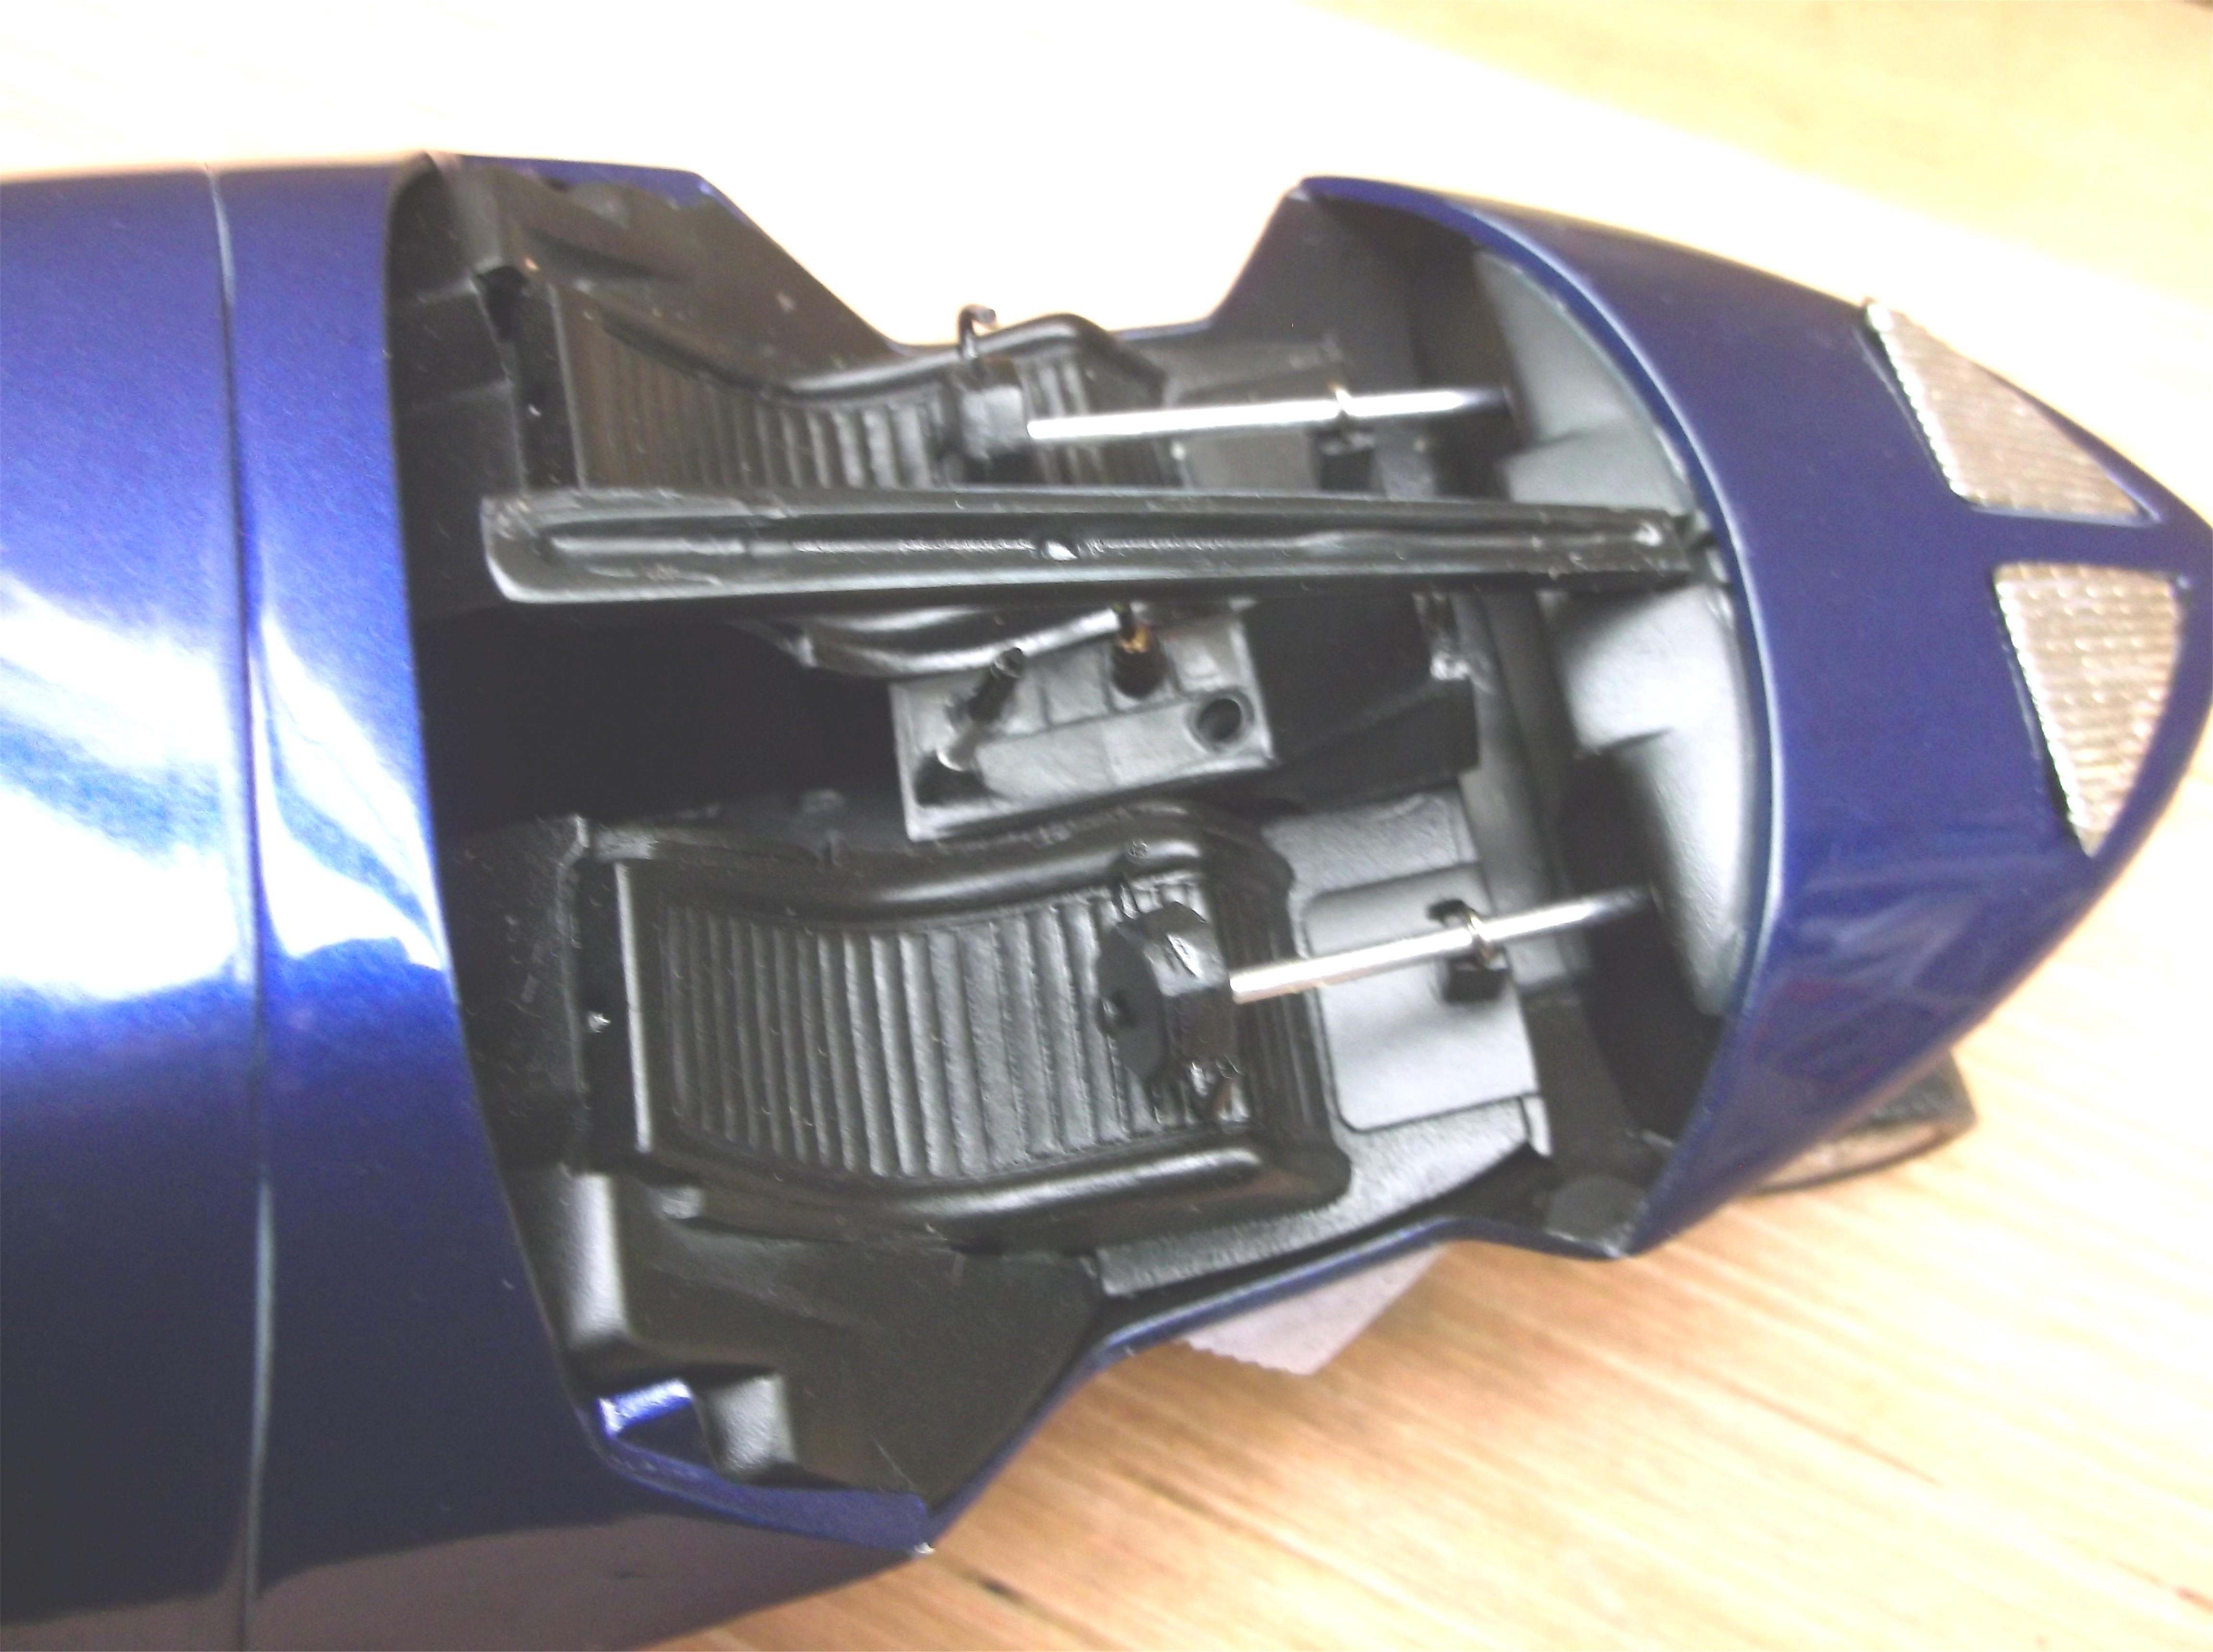
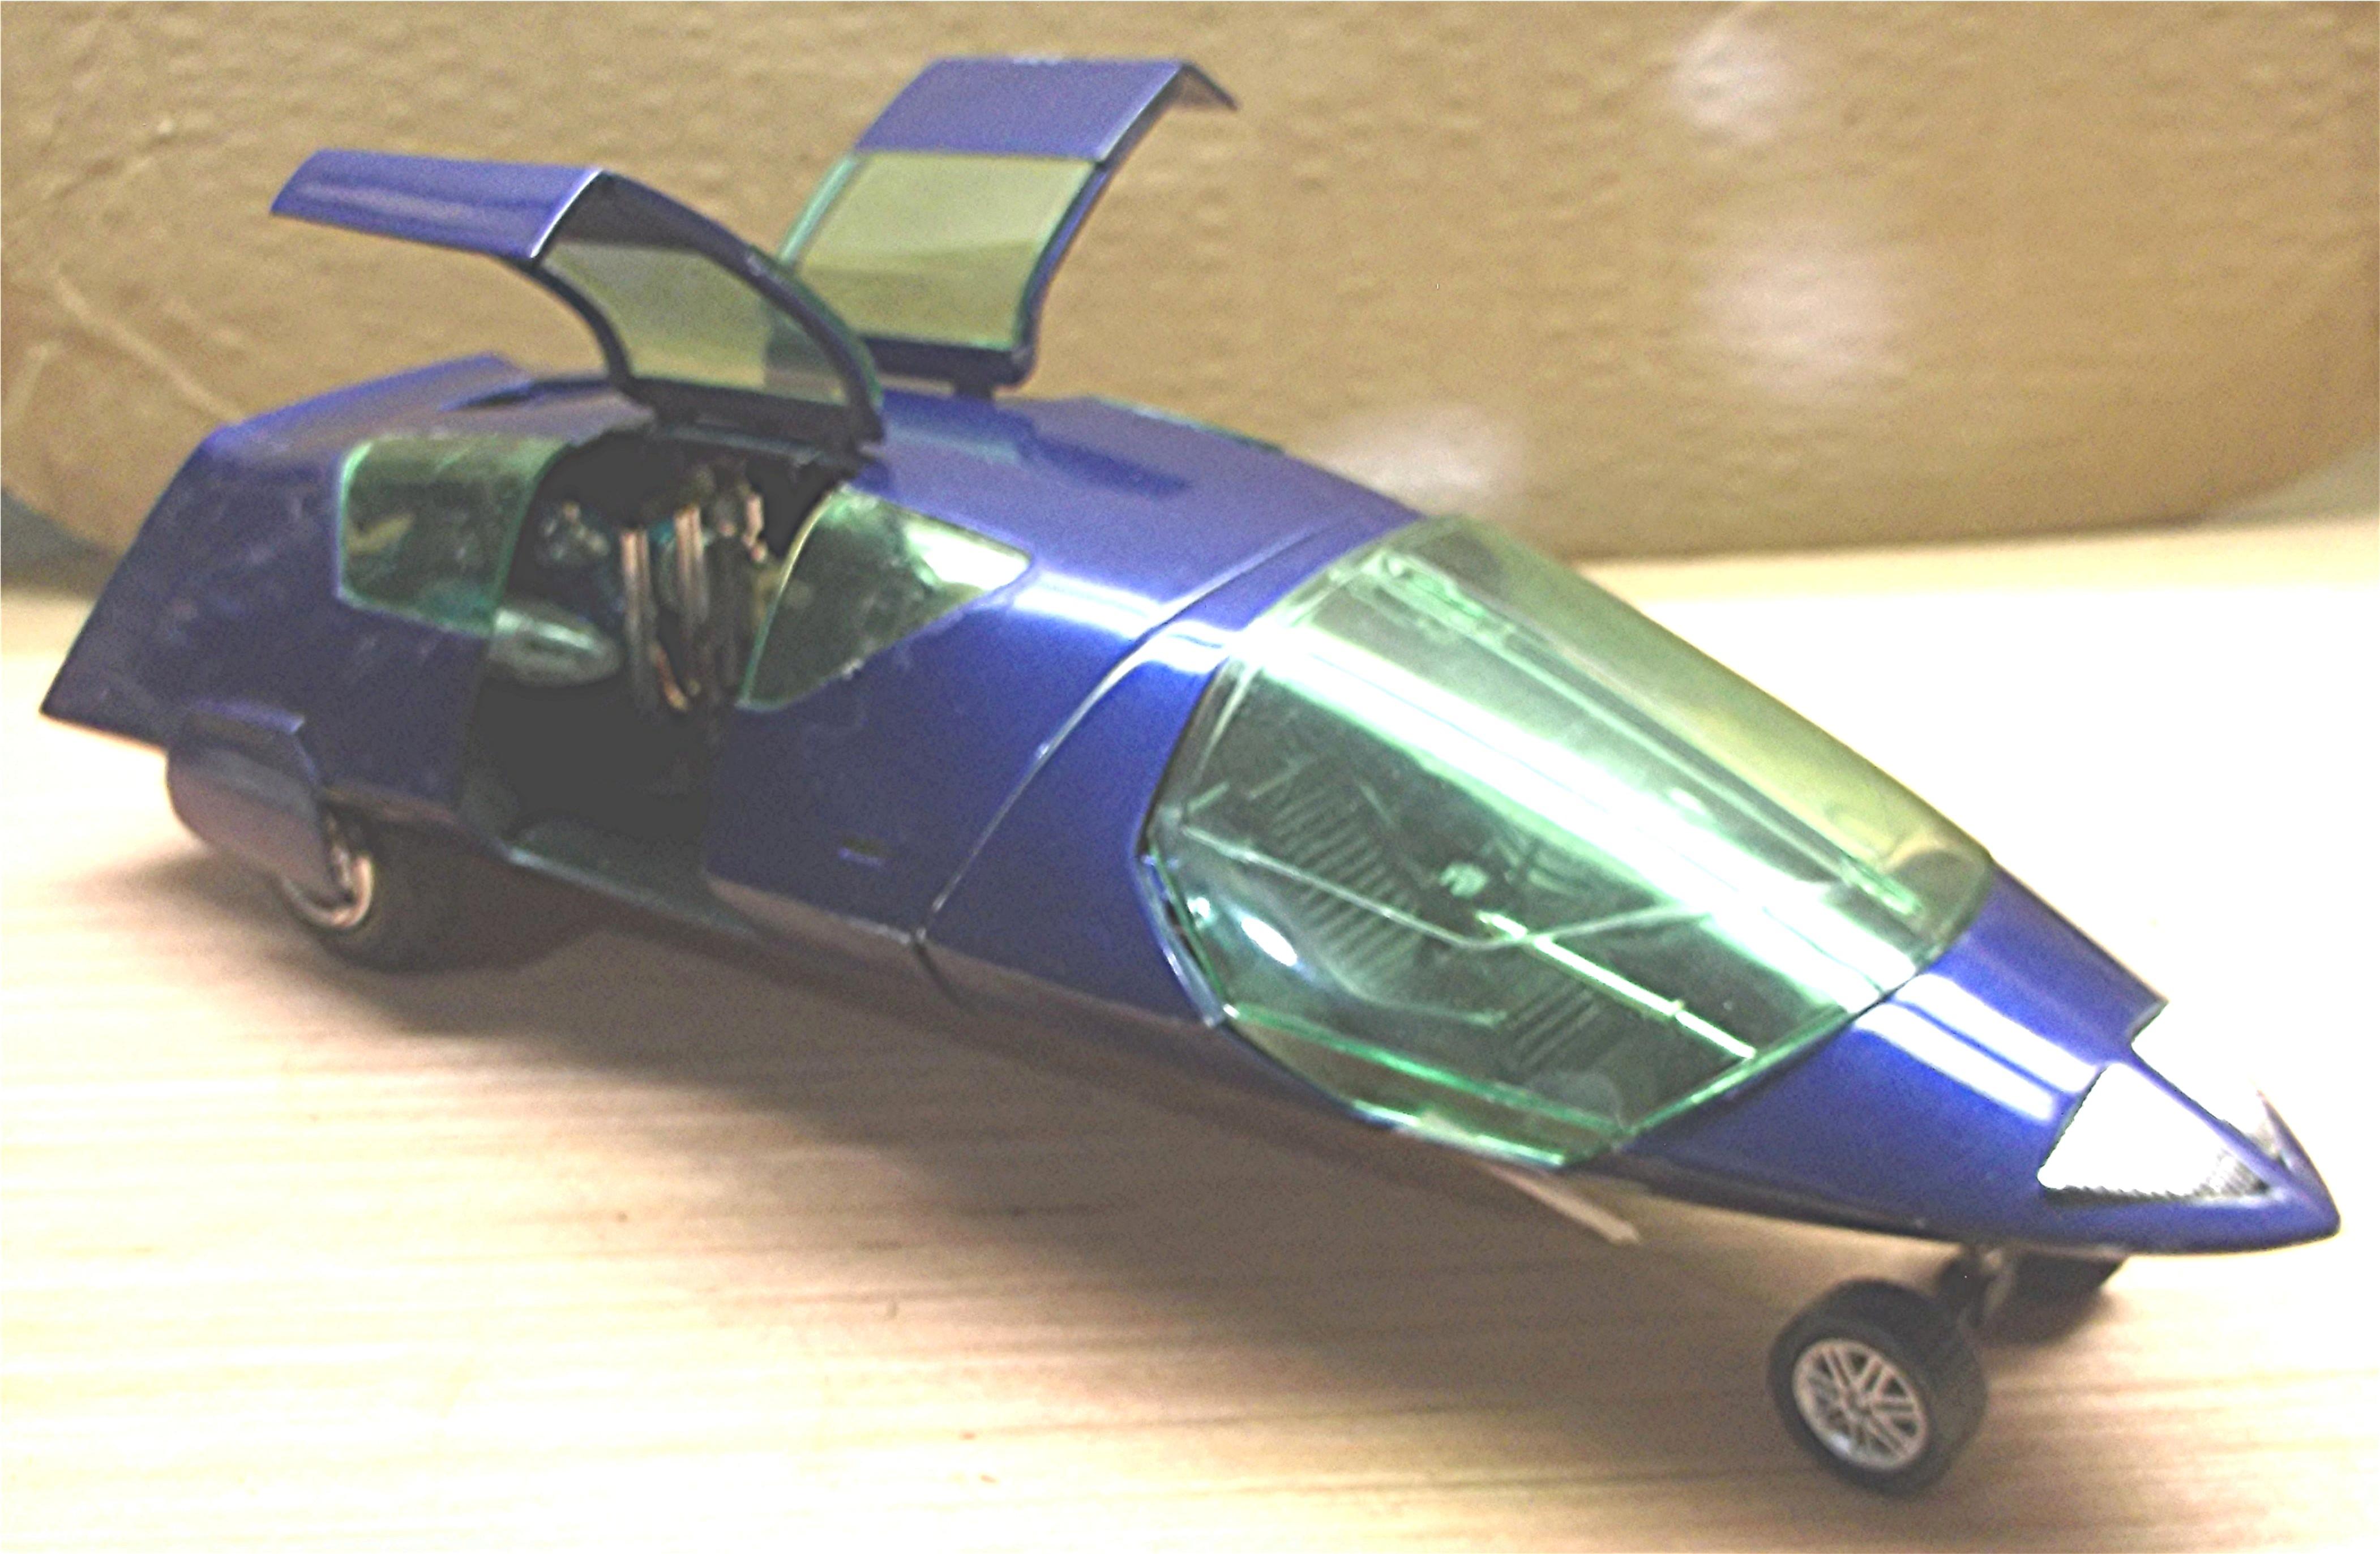
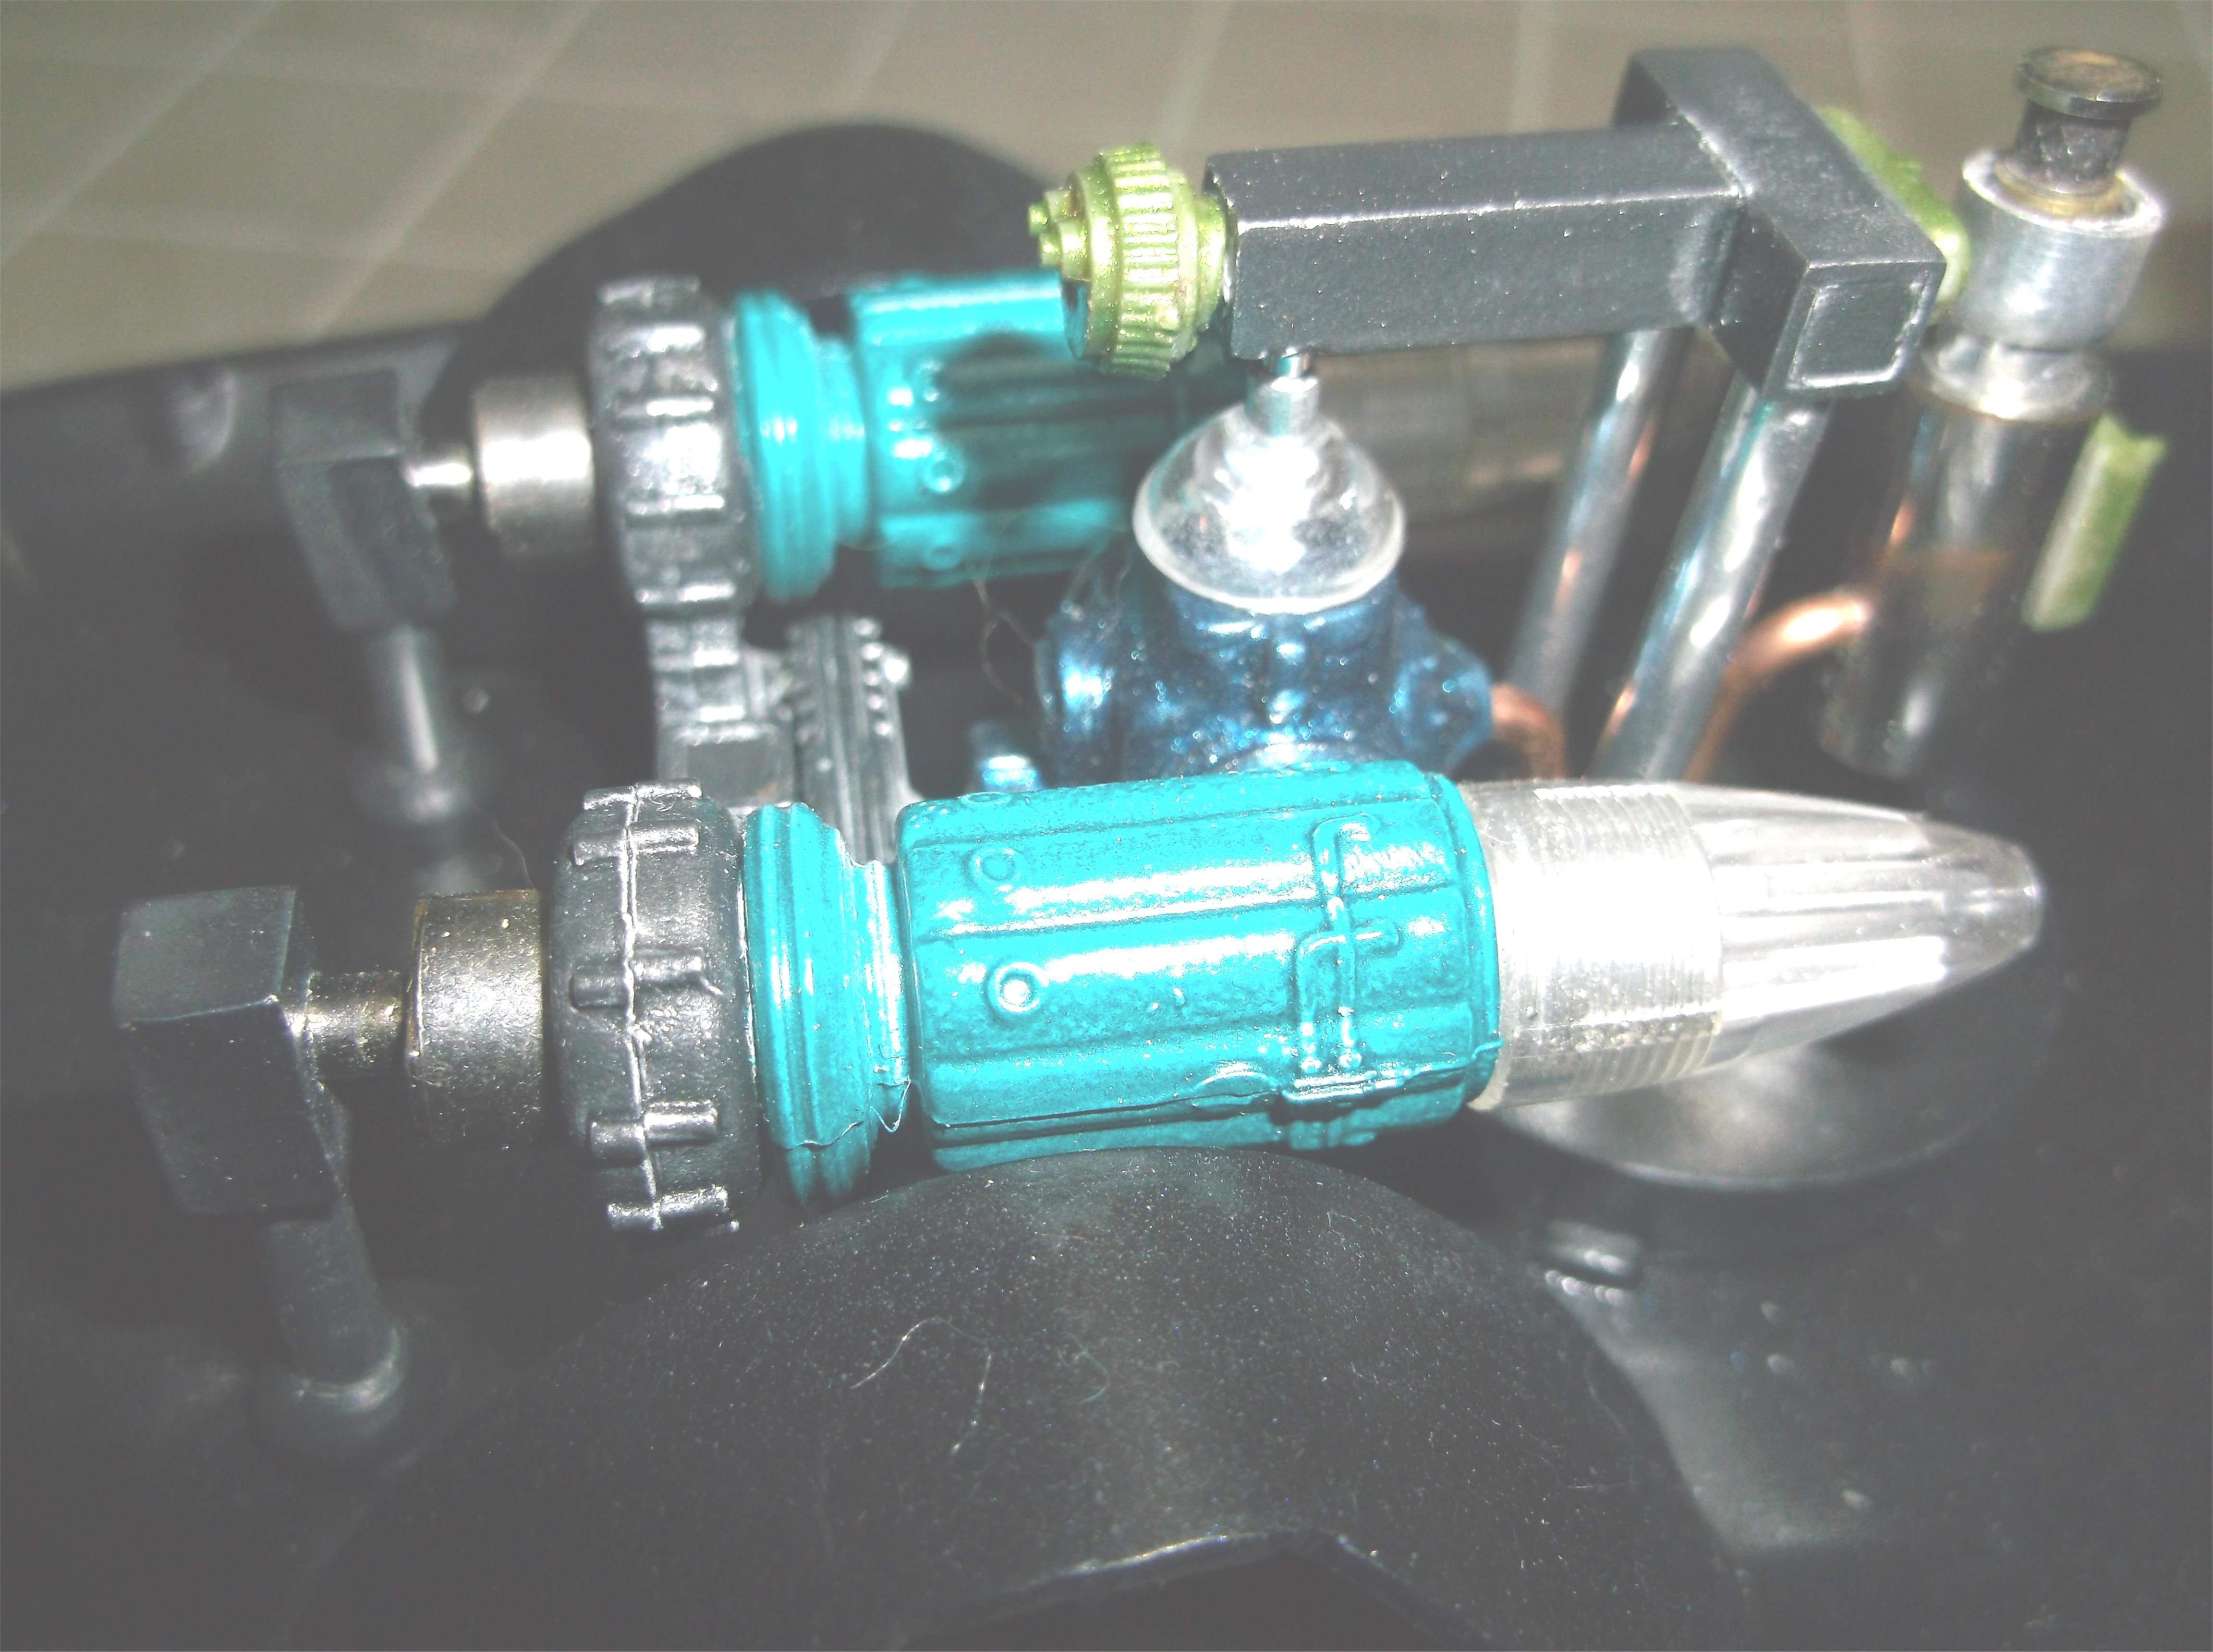
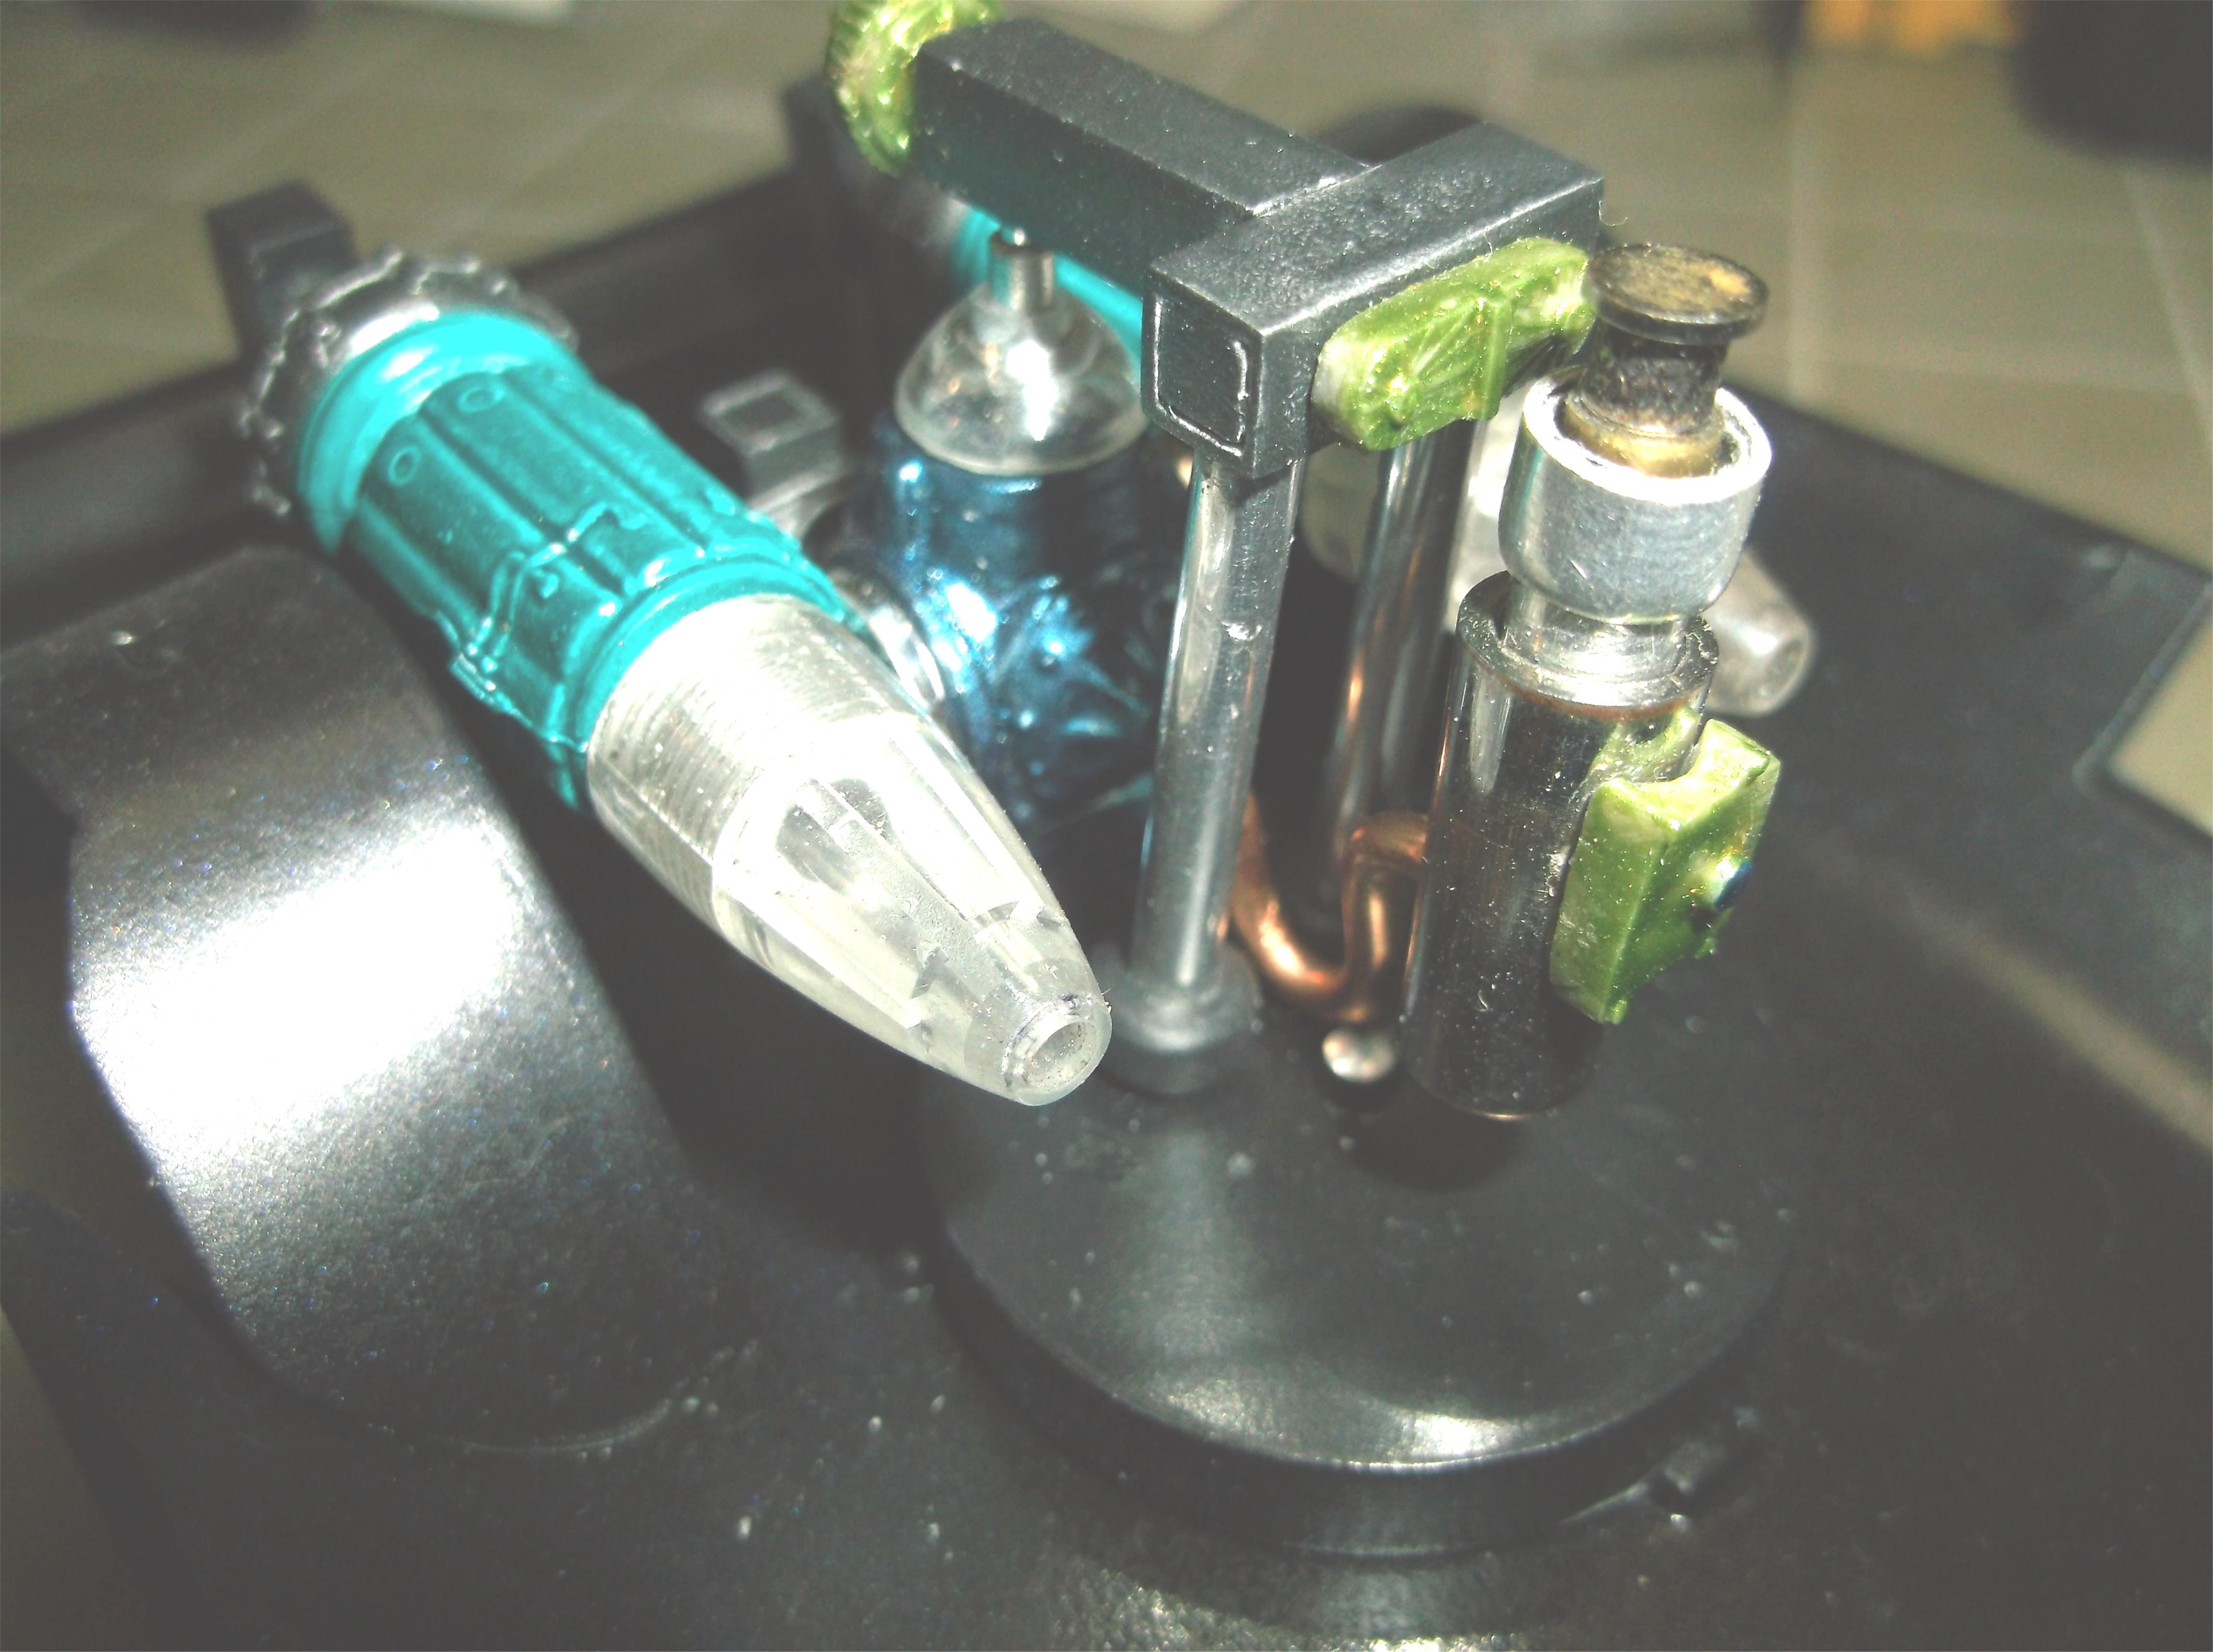
Moon Trash 3 or, “I tried to make a sow’s ear into a silk purse but I did finish the sow’s ear”. I joined this build fairly soon after it started. I had one so I thought I would build the AMTronic. First mistake. This kit I would not wish on anyone. It, IMO, is just plain horrible. Ill fitting parts, gaps, gaps and more gaps and more aggravation than I can explain. I am calling this done. I had many plans when I started it, some posted earlier in this thread. It didn’t work out that way. I just got to the point of being over with it. If you look up the original Cannonball Baker Sea to Shining Sea Memorial Trophy Dash you will see the van used in the initial run was called Moon Trash ll. That is the genesis of my name for it. The first run was not a race. It included Brock Yates, his son, Brock Yates, Jr.; Steve Smith; and friend Jim Williams. Highlights of the build, if you call it that. I did do the engines similar to my original plan. I modified the two rear ones to look a bit more cool and aggressive, at least to my eye. I moved the front engine to the rear and connected it to the two rears. My theme on the engines was to make them look like garbage cans. The air intake I designed to look like an Insinkerator. This is one part of this build I am happy with. I modified the interior, using two of the rear seats instead of the kit front seats. I designed this so either front seat occupant could drive at any given time. I made the steering wheels to look airplane related. The front wheel assembly was also aircraft inspired. I made my own inner rear wheel wells. I had to cut a hole in the bottom to get the rear pumpkin to mount the axle below the underside to get a higher ride height to off-set the height added to the front. It would have been like a nose high Gasser other-wise. I also have to give a special THANK YOU to Casey. He supplied me, on his dime, with the rear tires I used to help achieve said rear ride height. Thank you Casey! I am not going to add any more details. I’m not going to put the decals I planned to make on either. This model will be put in a box and placed on the bottom of a dark closet. I had planned to do a lot of scratch-building and custom touches. That went out the window, so to speak. I had planned on a really cool idea for paint but decided to forgo using it, as to me, this build did not deserve it. I then found a nice finger nail polish but decided against that too. I ended up spraying it with DupliColor Sonic (name kinda added to the theme) Blue Pearl from the rattle can. One thing I do differently than most, I would guess, is the way I polish my finished paint. After curing I sand with a (Carborundum brand) 800-1000 grit sanding pad. I then polish with fairly dry Mothers California Gold Carnauba Cleaner Wax. It takes a good long while to do it this way and this one was somewhere around half the time I normally would spend. There is no clear coat on the body. Yes, I know that there are numerous flaws. I must have glued the upper hood incorrectly as the windshield does not sit right. I used white glue to attach the glass (which still needs cleaned off) and I can't get the lower drivers side glass to hold using white glue. Another flaw is I had to super glue the body half's after I painted it. I did get some super glue on the body. There was no way I could figure out how to paint the interior after the body was glued together. My seam filling is horrible. I used 3M Glazing and spot putty and Tamiya white putty. I sanded with a flat block. The seams have not been filled and finished so as not to be noticeable. I can only guess that they kept shrinking. I may have found a better putty alternative so I will try it on the next project that I need to do body work on. All the paint in the interior is DupliColor black primer from the rattle can with a satin finish clear coat, also from the rattle can, in case you were wondering. Sorry, I do not mean to sound so jaded. This kit was simply frustrating. Lesson learned.
-

What’s everyone using for clear?
DPNM replied to mariojr's topic in Model Building Questions and Answers
I typically spray DupliColor paint (rattle can or airbrushed) or fingernail polish. I use DupliColor clear on both. -
Possible eBay listing value help needed
DPNM replied to DPNM's topic in Model Building Questions and Answers
Thanks Tom, Good advice. -
Possible eBay listing value help needed
DPNM replied to DPNM's topic in Model Building Questions and Answers
Sorry Steve, I have them listed on eBay now and I had edited my original post this morning to remove the item descriptions and the picture. I didn't want to run afoul of the no selling clause, even by slight reference. -
Possible eBay listing value help needed
DPNM replied to DPNM's topic in Model Building Questions and Answers
Thank you for the help Dave. I did that and where I had thought it should be priced at is pretty much where they had sold for. At least I was in the right ballpark. -
I've run into a bit of a financial difficulty and am considering selling off a model lot. I plan to list it on feeBay but I'm not sure what it's value should be. I don't want to be posted here as one of those crazy sellers who wants gold prices for brass. Any help to determine a fair price would be appreciated.
-
It may just be my computer but I don't see a pic.
-
I have a couple other things that take my time and money besides the little I do scale modelling. I have a few basic woodworking tools. Full size table saw, small drill press, band saw, two scroll saws, compound miter saw, router table and a few routers. There are a few other tools I'd like but... I also collect airbrushes. I've been selling some off but still have about 25 of various brands. I was buying them just to have but I have since decided to only keep and collect uncommon, unusual, unique and vintage airbrushes. The rest will hopefully be going to new homes. I had come across a quantity of walnut wood. I've started making boxes for the airbrushes I have that aren't in a box. It's a great way to combine these two hobbies. I also have plans to someday getting the OSSA in my signature back to running condition. It seems that every time I have the cash to restart it's rebuild something else comes up. I am sure a lot here can commiserate with that.
-
Maybe it's just me but your question seems rather vague. Are the bottles plastic or glass? Do your bottles have the airbrush siphon tube or a lid that seals? Are the bottles you are trying to clean empty and you want to use them for a different color? If the bottles are glass you should be able to clean them with lacquer thinner (or enamel reducer). I do not have any plastic bottles so I can offer no confirmed advice. Sealed lids can use the same thinners for cleaning. It may be hard to get it all out of the nooks and crannies of the lid, and the gasket if it has one, so I would recommend trying to put the same similar color in the bottle once cleaned. IE, new blue paint in a bottle that had had blue in it at one time, new red in an old red bottle, etc. I hope this helps.
-
Car looks good in this pic. I'm fairly certain you recently picked up a Paasche H. As with any airbrush the three most important things are practice, practice, practice. It will take you a bit of time to figure things out. The right thinning percentage, distance from the subject, best air pressure, nozzle adjustment, etc. Once you become more familiar your paint work should keep getting better.
-
Being 1/6th scale they should be fairly large. Just a thought, and I don't know if it would help, but you may want to look at (4) thin, aluminum pulleys. Like something found in an old VCR perhaps. Radio Shack, Grainger, ? You could then hopefully find O-rings to use as tires.
-
Duplicolor Perfect Match Spray Paint Chart
DPNM replied to Jordan White's topic in Tips, Tricks, and Tutorials
Jordan, THANK YOU for posting this. As a DupliColor guy this is invaluable. Kudos to you for taking the time, which I would think was considerable, to do this. Much appreciated! I scrolled down at about two at a time. It did take a little while to load, but well worth it. This is the first post on here that I put on as following. -
Finest-flake silver metallic paint??
DPNM replied to Ace-Garageguy's topic in Model Building Questions and Answers
The next time you are heading to an auto parts store that carries it, you may want to peruse the DupliColor paint aisle. They have a variety of silver shades. There may be one (or more) that could work for you. -
Nicely done! Your friend should like it. My top car to own and drive. A 242 would be nice but I'm keeping an eye out for a 245. Easier to find them here.
-
I agree with you Greg. To me, the front end is the only good looking part to this car. Incorporating the '67 scoop would have added nicely to the look. I have my own idea how I would have done it.
-
Couple different views for those that may not have seen it.
-
I had to work the next morning so I turned the TV off just before the show started. I'm pretty certain I'm glad I missed it. This car doesn't represent what I would have hoped the '83 would/should have looked like. There is too much that looks "off" to my eye. I'd list some but quite a few have been mentioned here already. Ugh. Suffice to say I'm not a big fan of this generation Corvette. It might well have been a step forward in a more current (at the time) design but the only thing this generation means to me is you can own a Corvette dirt cheap. I understand some people like this generation. That's all well and good. To each their own. And this is very true:
-
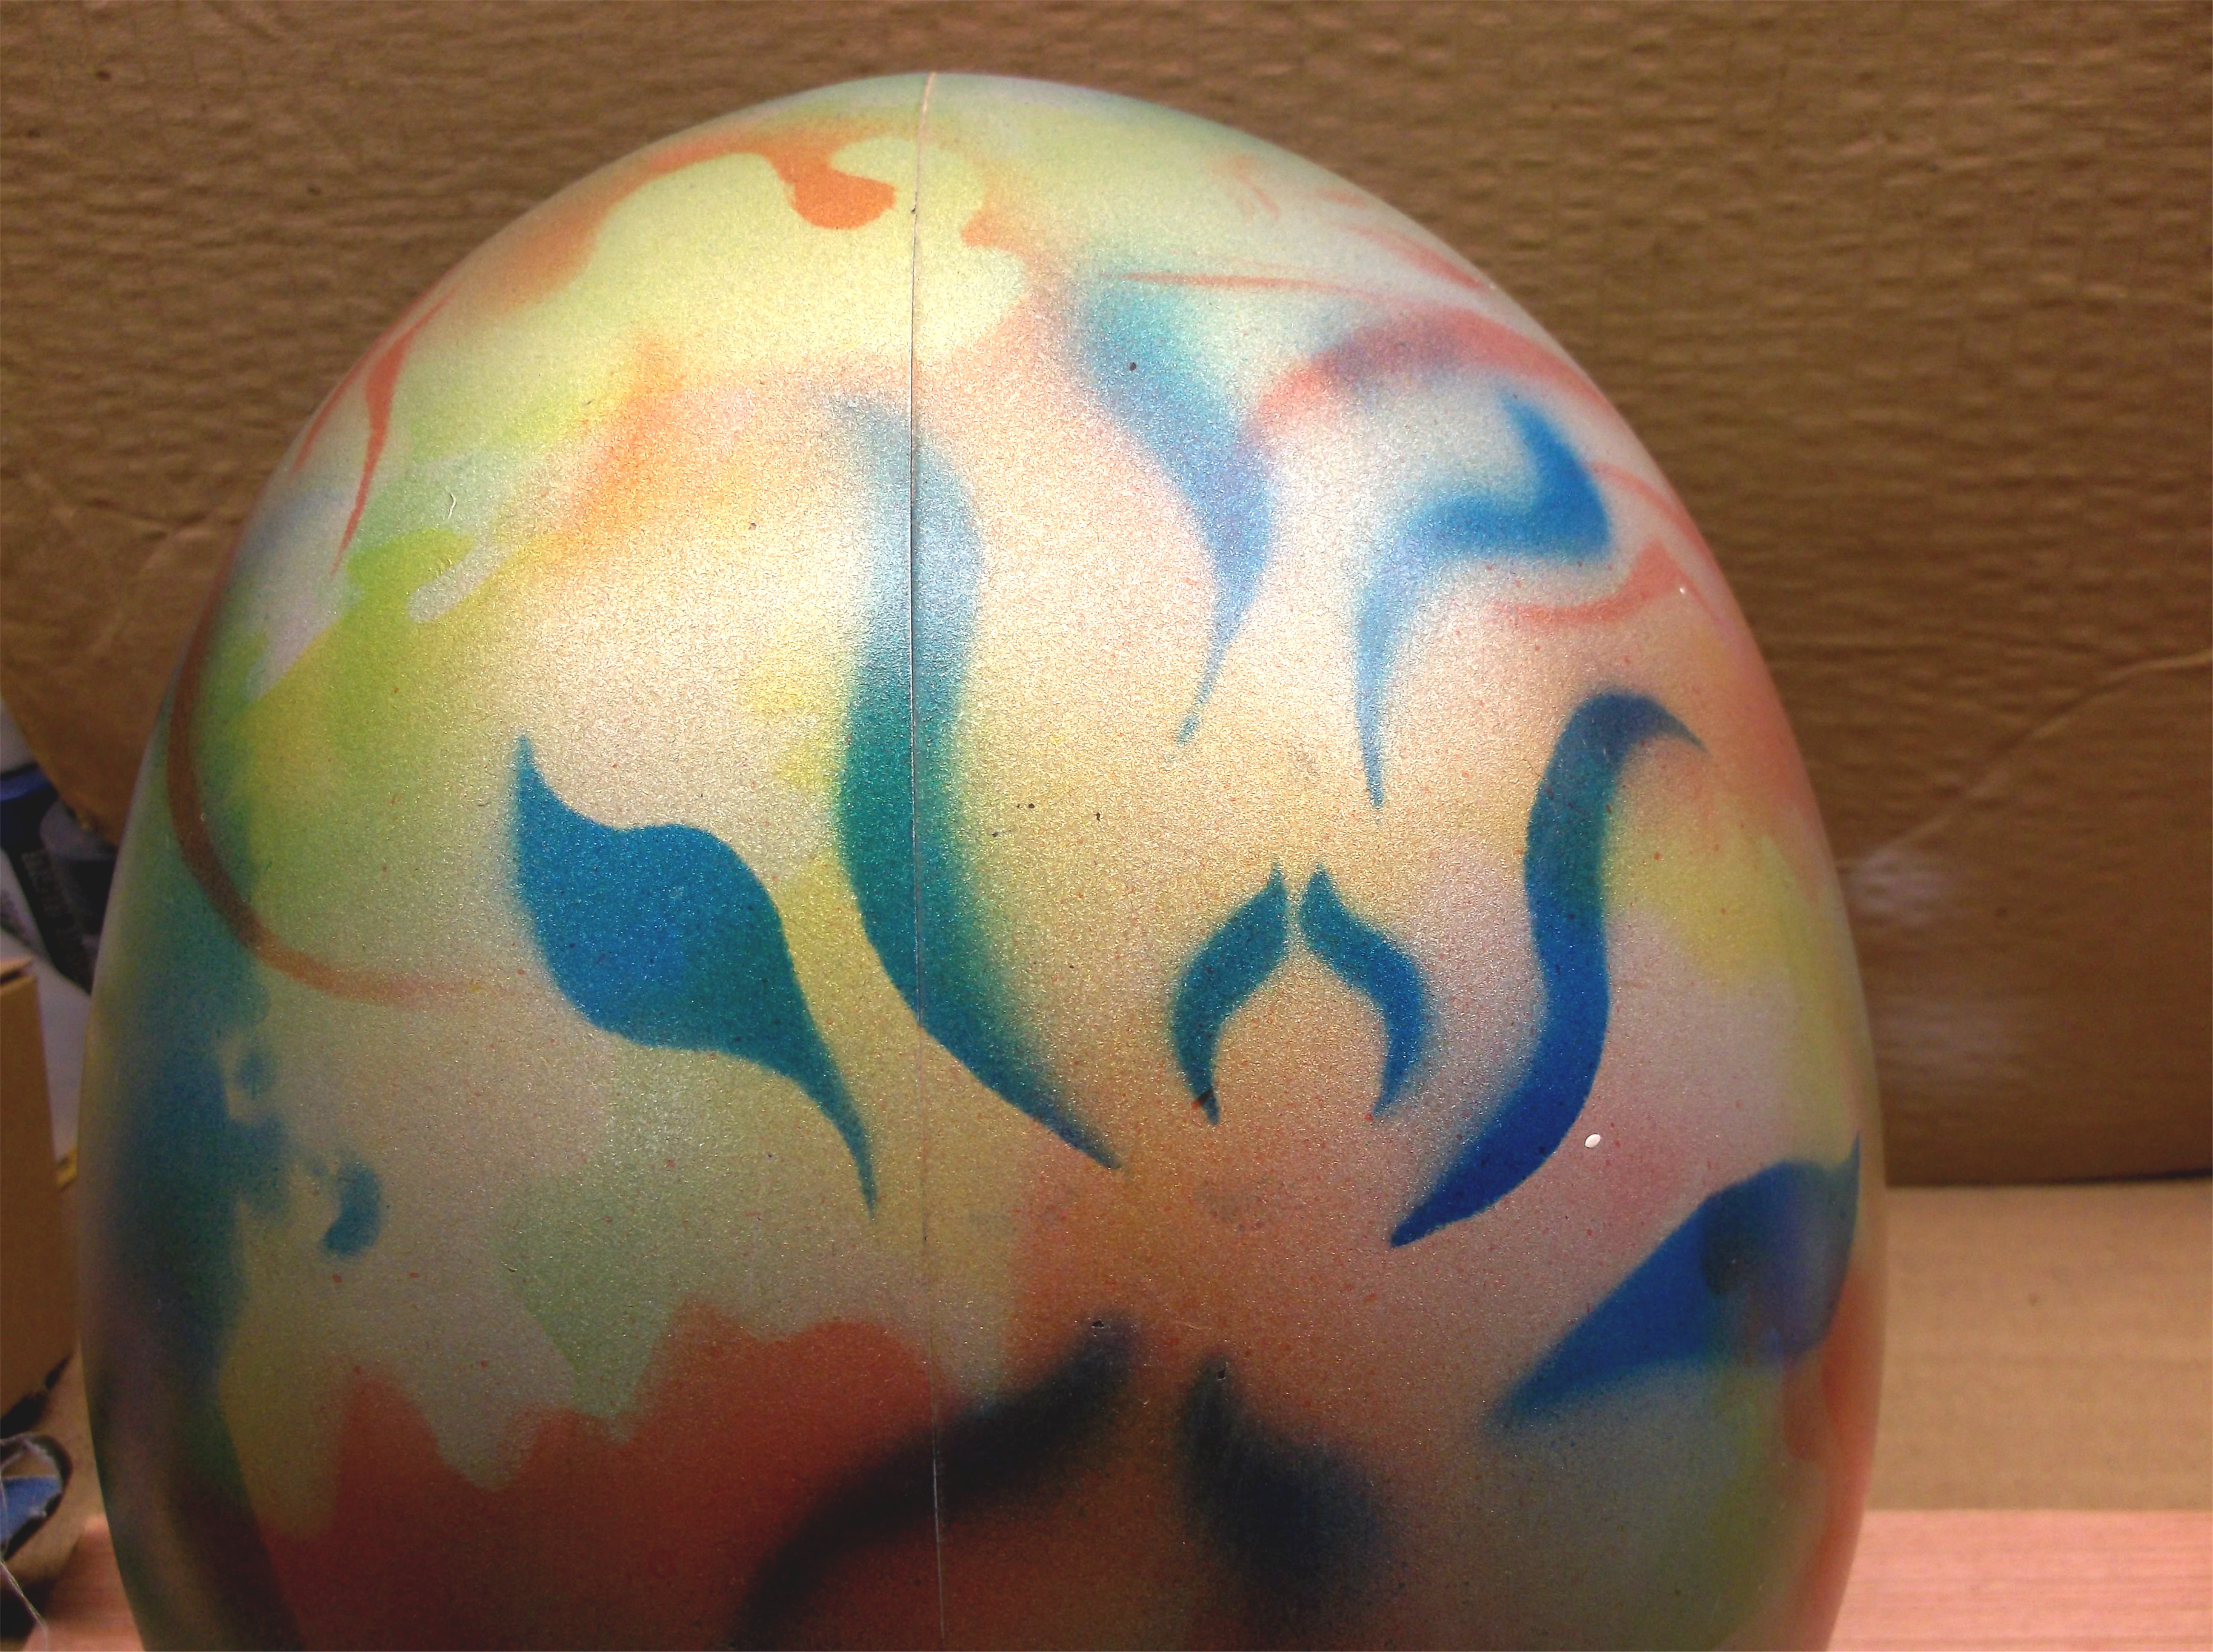
I was visiting with an ex girl friend yesterday and she said her sister had found an old helmet she thought was mine. My current avatar is the motorcycle that inspired me to learn how to airbrush. This has to be one of the first pieces I had done. It dates to around 1976. I still have a fondness for the old school '70s paint look. I really didn't put much color on this helmet. Probably afraid I'd mess it up so "quit while you're ahead". I signed it, too bad I didn't have the foresight to date it. I don't recall which airbrush I used to do this with. My first AB was a Badger 250. It is more of a paint sprayer than it is an AB. The next AB I bought was a Binks Wren B. I had used it for over 40 years. The "nose" was pretty much beat up. It is not replaceable like the Paasche H is. I gave it to a niece a couple years ago who had expressed an interest in learning how to AB. Last week I had swapped my brother a newer/nicer Binks Wren B kit for my old one so that has returned too. My niece was not using it but my brother has gotten a few airplane model kits so I figured he could use it. He isn't a modeller per se. He likes airplanes. Additionally, in the box with the helmet was the back rest pad for the sissybar of my avatar bike. The bike was a '73 Super Glide and it met it's demise in the back end of a Lincoln Continental (not my fault BTW). Such nice surprises!
-
Although on the wrong side I have to go with this: I will add a nod for the B-17 Flying Fortress too. There is a Bipe I like, need to find a pic. I'm not a big plane guy and I don't know the name of the Bipe. Kinda makes it a lot harder to search for a pic. I do know it when I see it though.
-
1992
-
Being you have one jar I would suggest that you find one of the metal color cups for it. Just my opinion but I would think the jar would only really be needed when spraying a large quantity of paint, as in painting a 1/24 car body. If you get the smaller cup you can use it to spray things like the engine, rear axle, etc. Once you paint what you need you can pour the unused material that is still in the cup back into it's container, if you are using paint from a bottle. Cleaning the color cup is fairly easy and will make for faster color changes. I do not store my paint in a closed siphon tube jar with a stopper. I don't spray often enough to have it sit that long. I know others here do and you will probably hear from them too. If you are using paint not from a bottle I'd suggest getting a few empty jars with regular lids to store the left-over paint in.
-
What the others have said. At 20 psi there isn't much oomph behind it to blow the clog out.