Peter Lombardo
-
Posts
2,393 -
Joined
-
Last visited
Content Type
Profiles
Forums
Events
Gallery
Everything posted by Peter Lombardo
-
 Really, really well done...... I love the cab details. Just add a few more vehicles and it is ready to arrive at the dealership.
 -
Nice, that is one crazy car/truck. I bet in real life you would have a difficult time keeping the "light" rear end going straight with all that power up front. Very cool design and pretty unique
-
Very well done on a kit that is difficult and of such an important car in racing history. Great job.
-
I missed this car when it first got posted, wow, it looks really nice, smooth and uncluttered and the color suits it very well. Love the wheels on it too. Nicely done..
-
Looks great, man that car is such a beast. It must be a real struggle to drive one of those today. Anyway, this looks really well done.
-
1962 Pontiac Catalina Custom Coupe
Peter Lombardo replied to Peter Lombardo's topic in WIP: Model Cars
Great, Thanks guys. -
Pretty slick, great conversion. I guess, 1962 was really Pre-Uber" days. very nice.
-
1962 Pontiac Catalina Custom Coupe
Peter Lombardo replied to Peter Lombardo's topic in WIP: Model Cars
See if you can see these.
-
1962 Pontiac Catalina Custom Coupe
Peter Lombardo replied to Peter Lombardo's topic in WIP: Model Cars
Guys, really sorry about the picture issues, I will look into it and get it sorted out. -
Beautiful build, just so perfectly finished. Love the color and the stance. Usually I am not a big fan of old "stock" builds, but this is just so well done.. Very nice.
-
1962 Pontiac Catalina Custom Coupe
Peter Lombardo replied to Peter Lombardo's topic in WIP: Model Cars
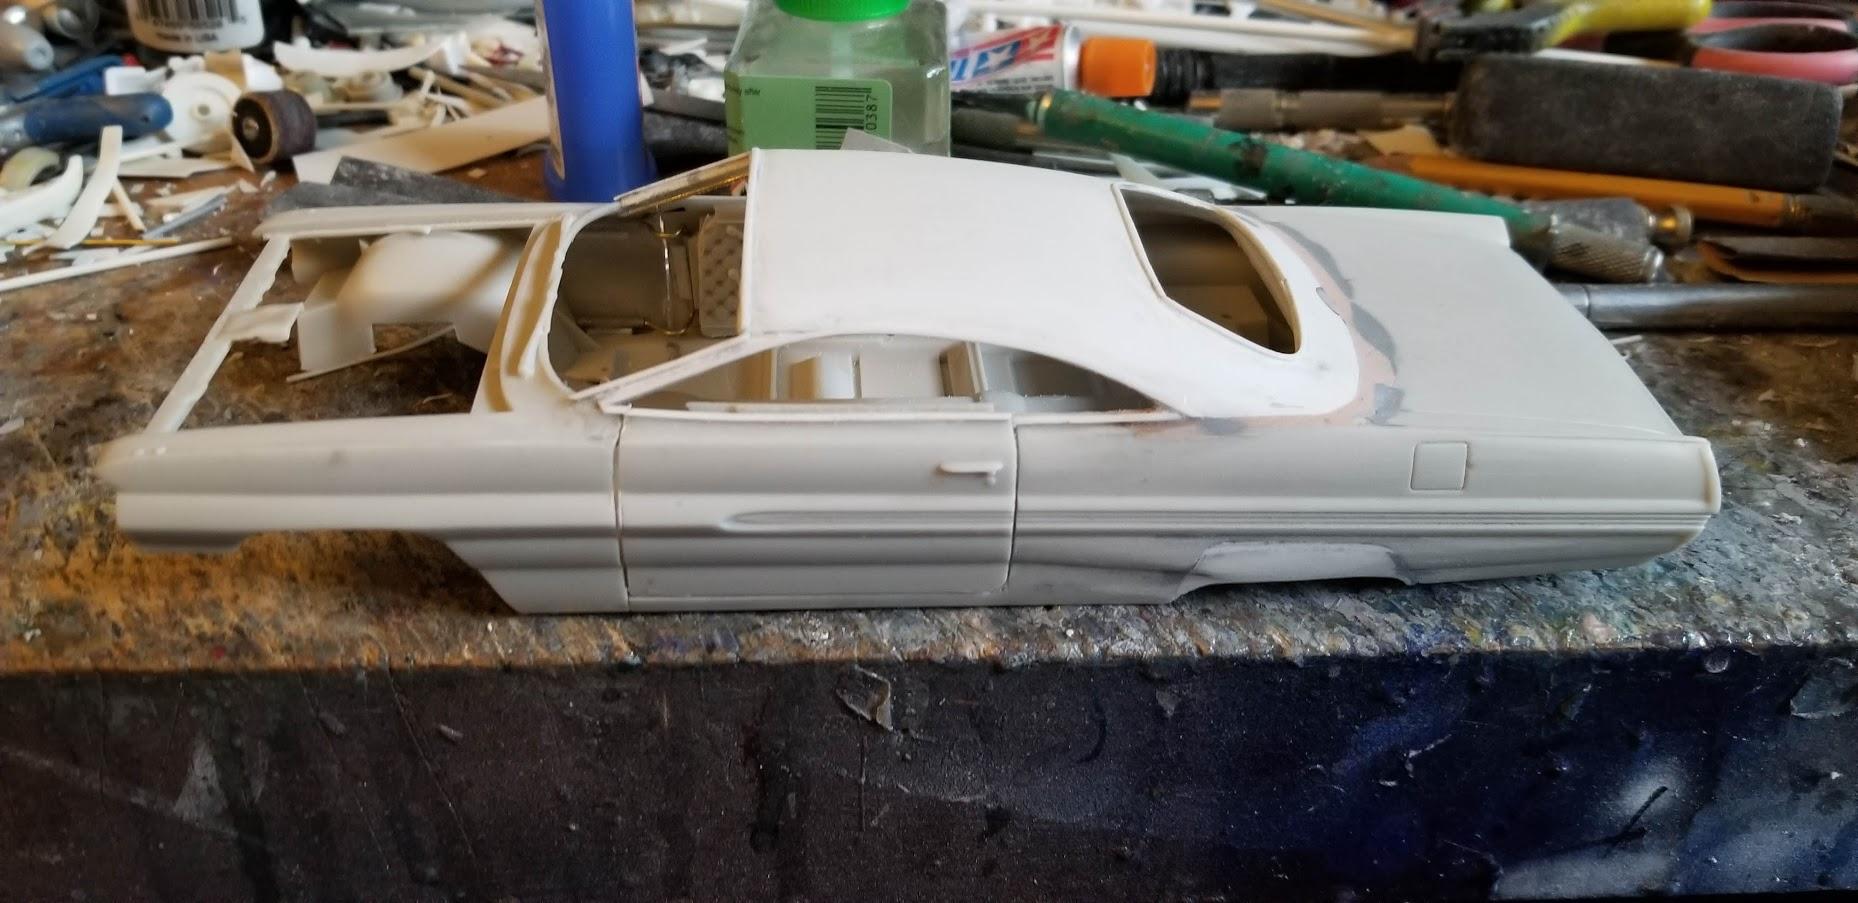
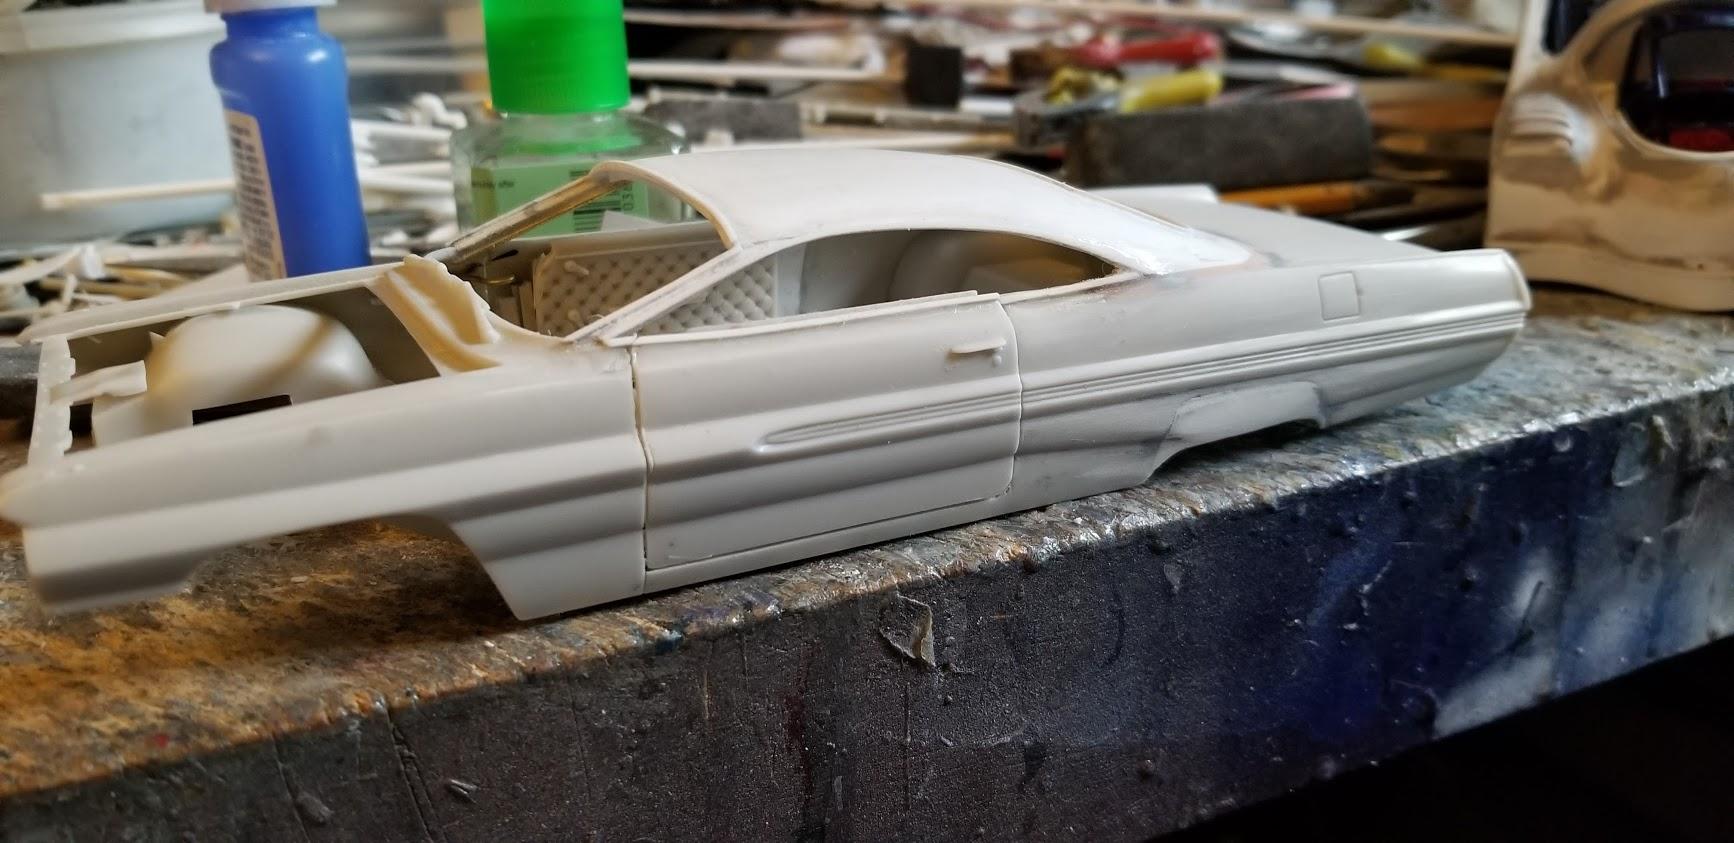
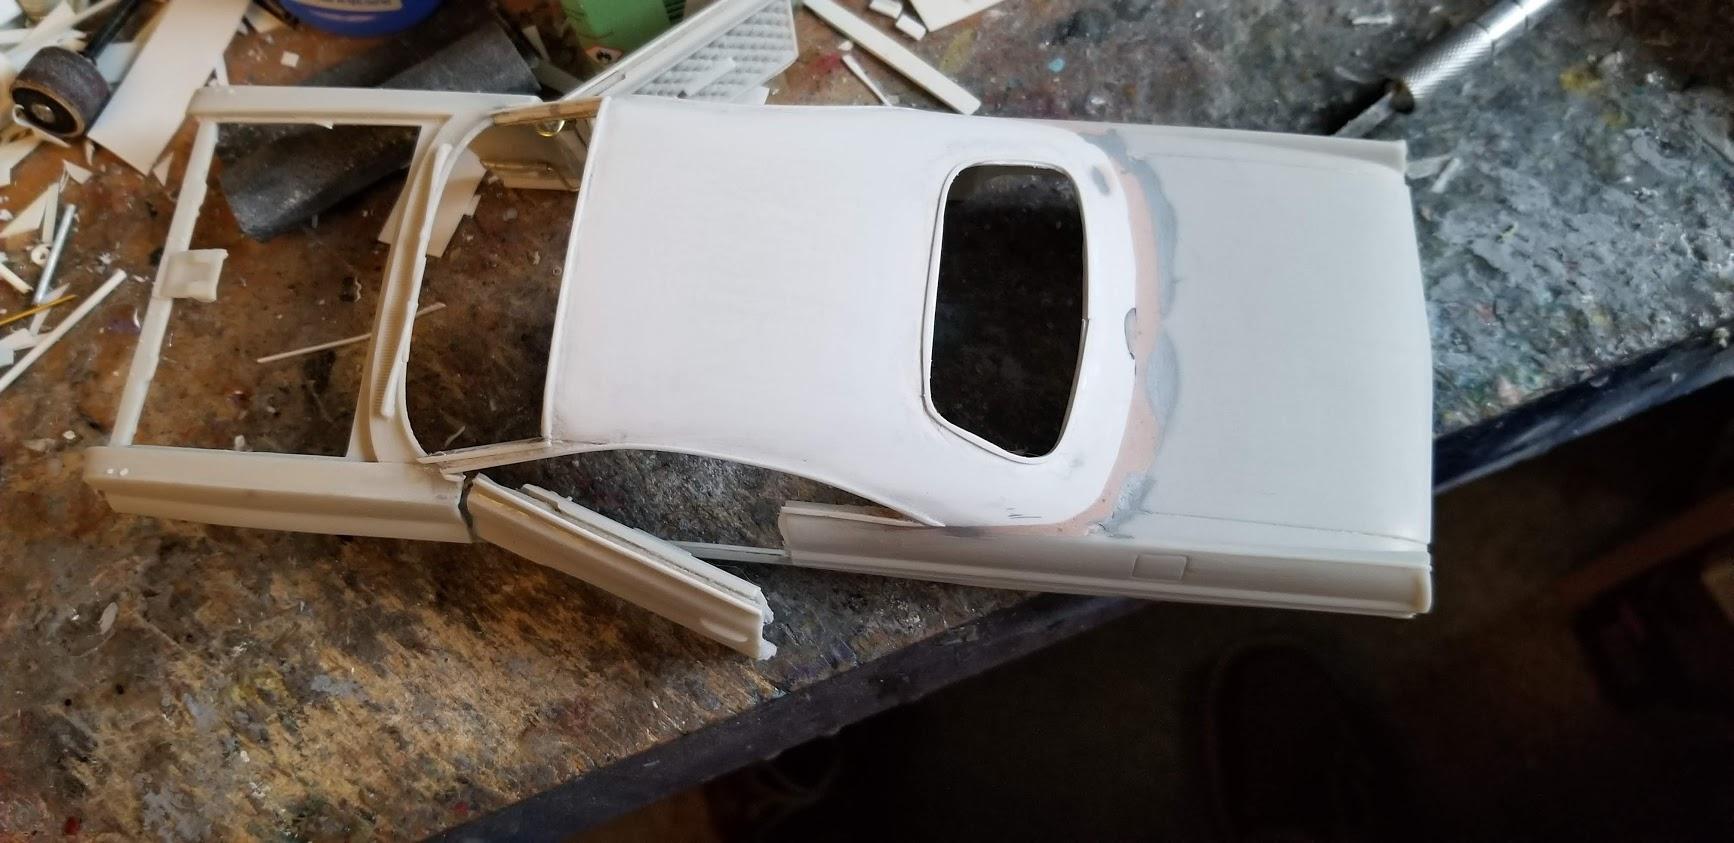
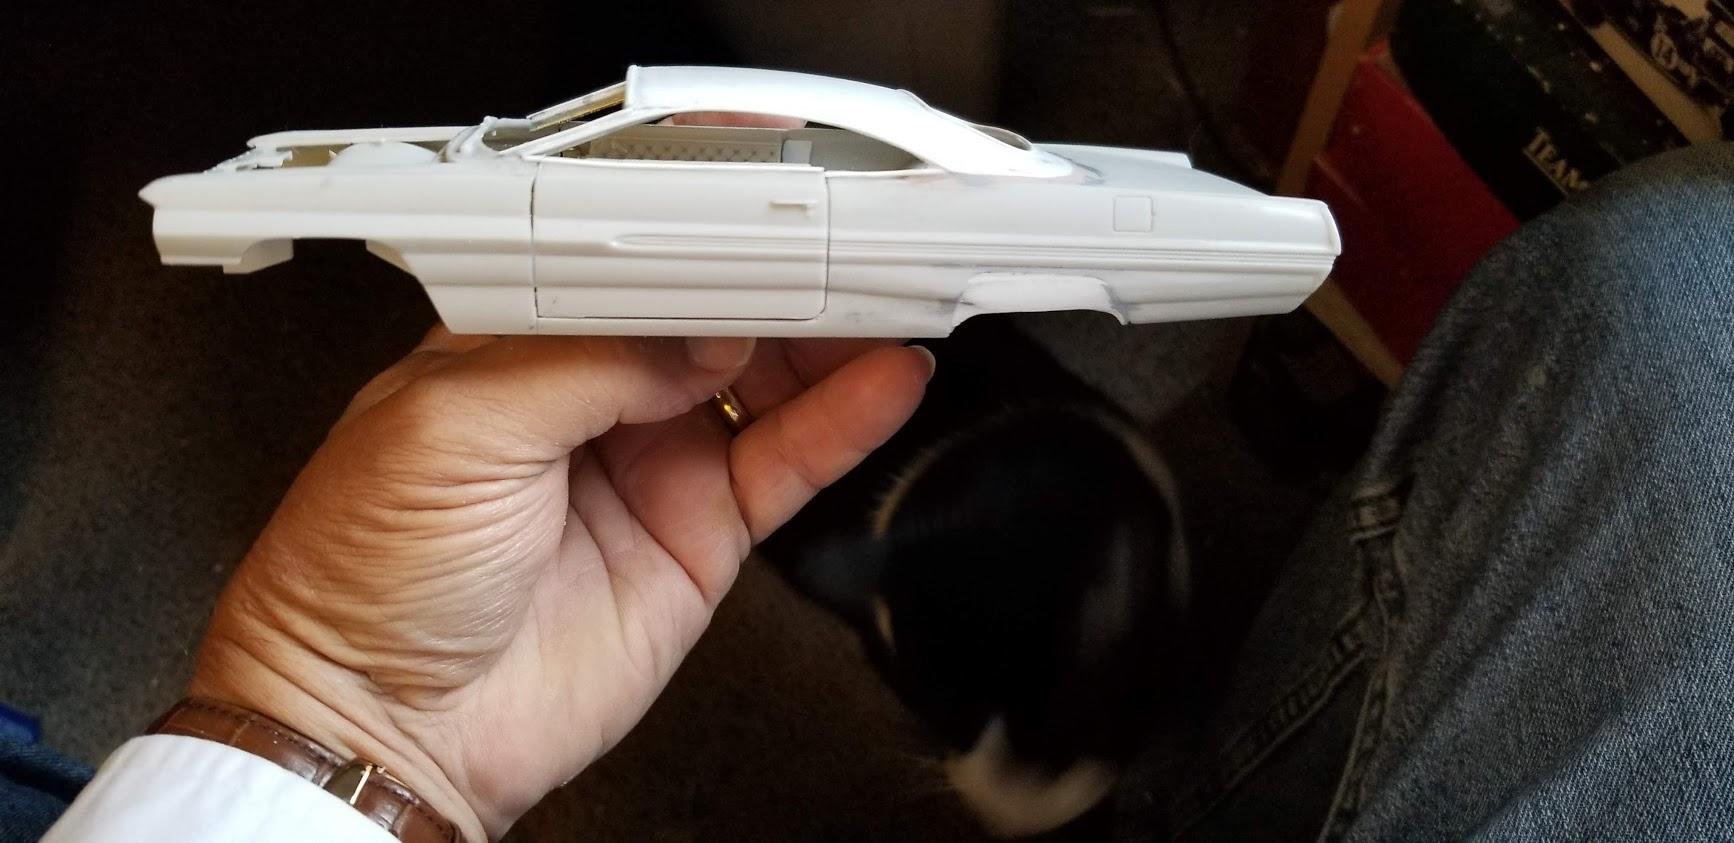
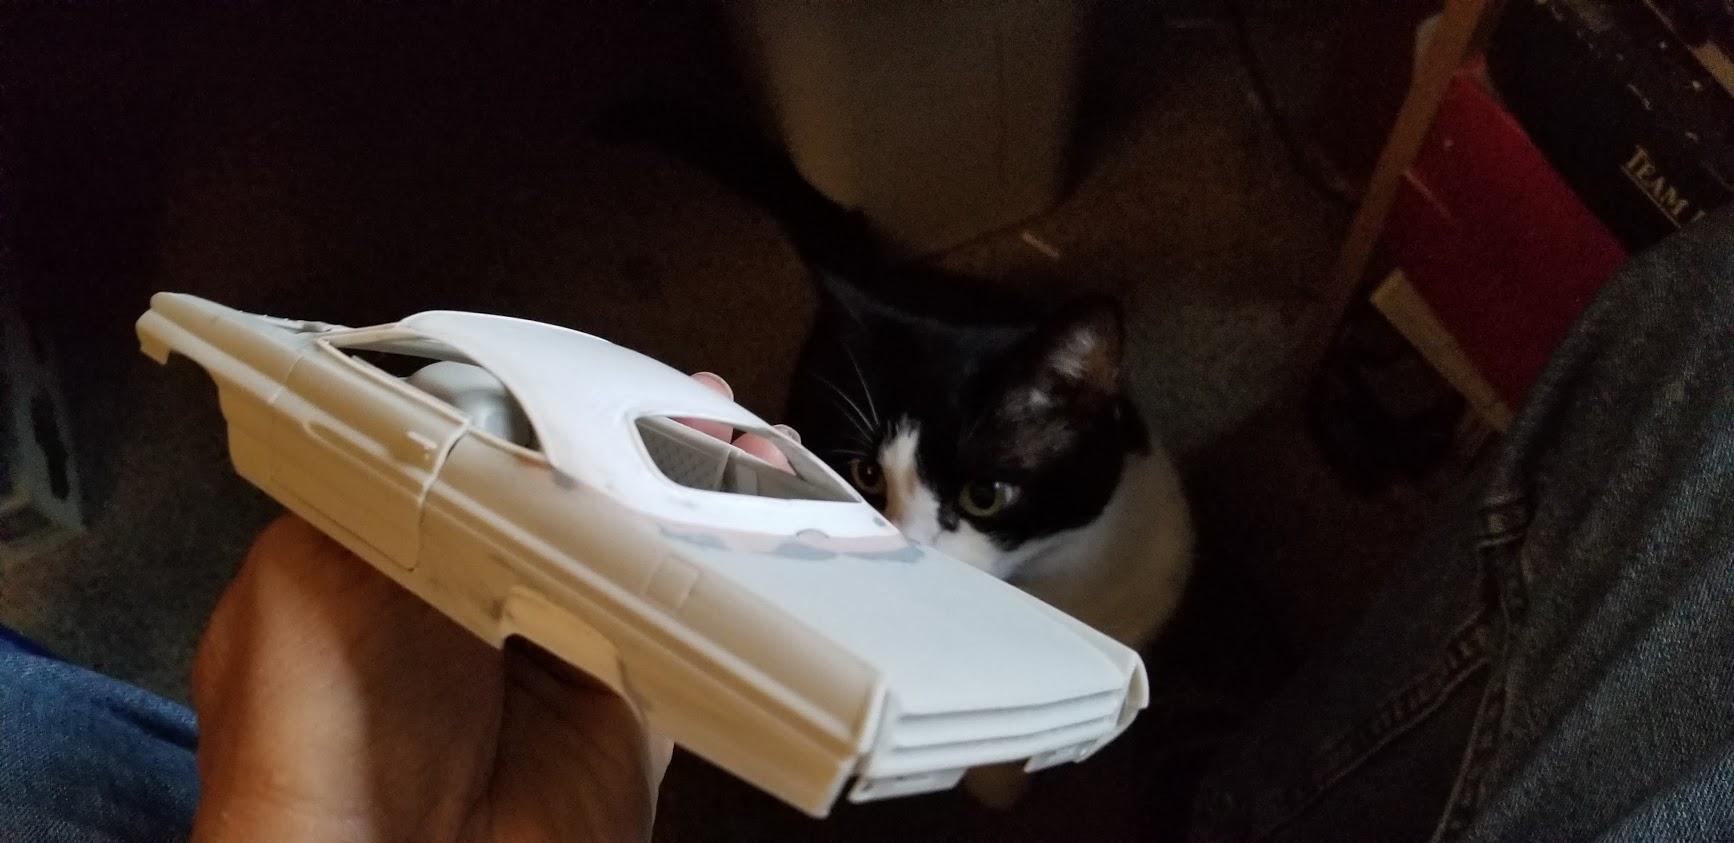
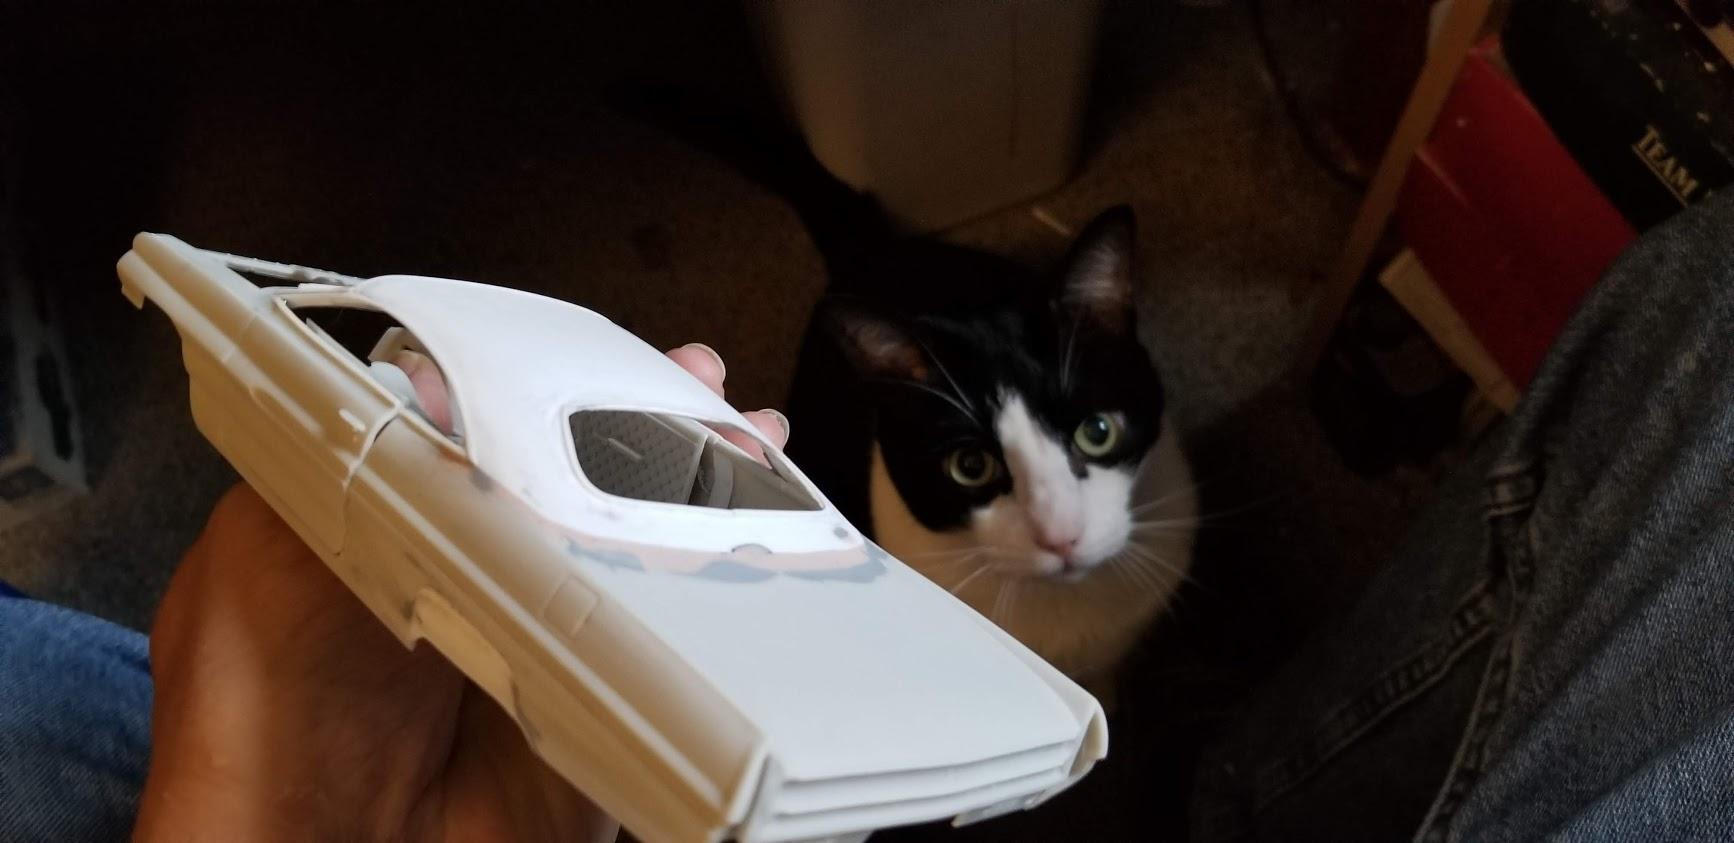
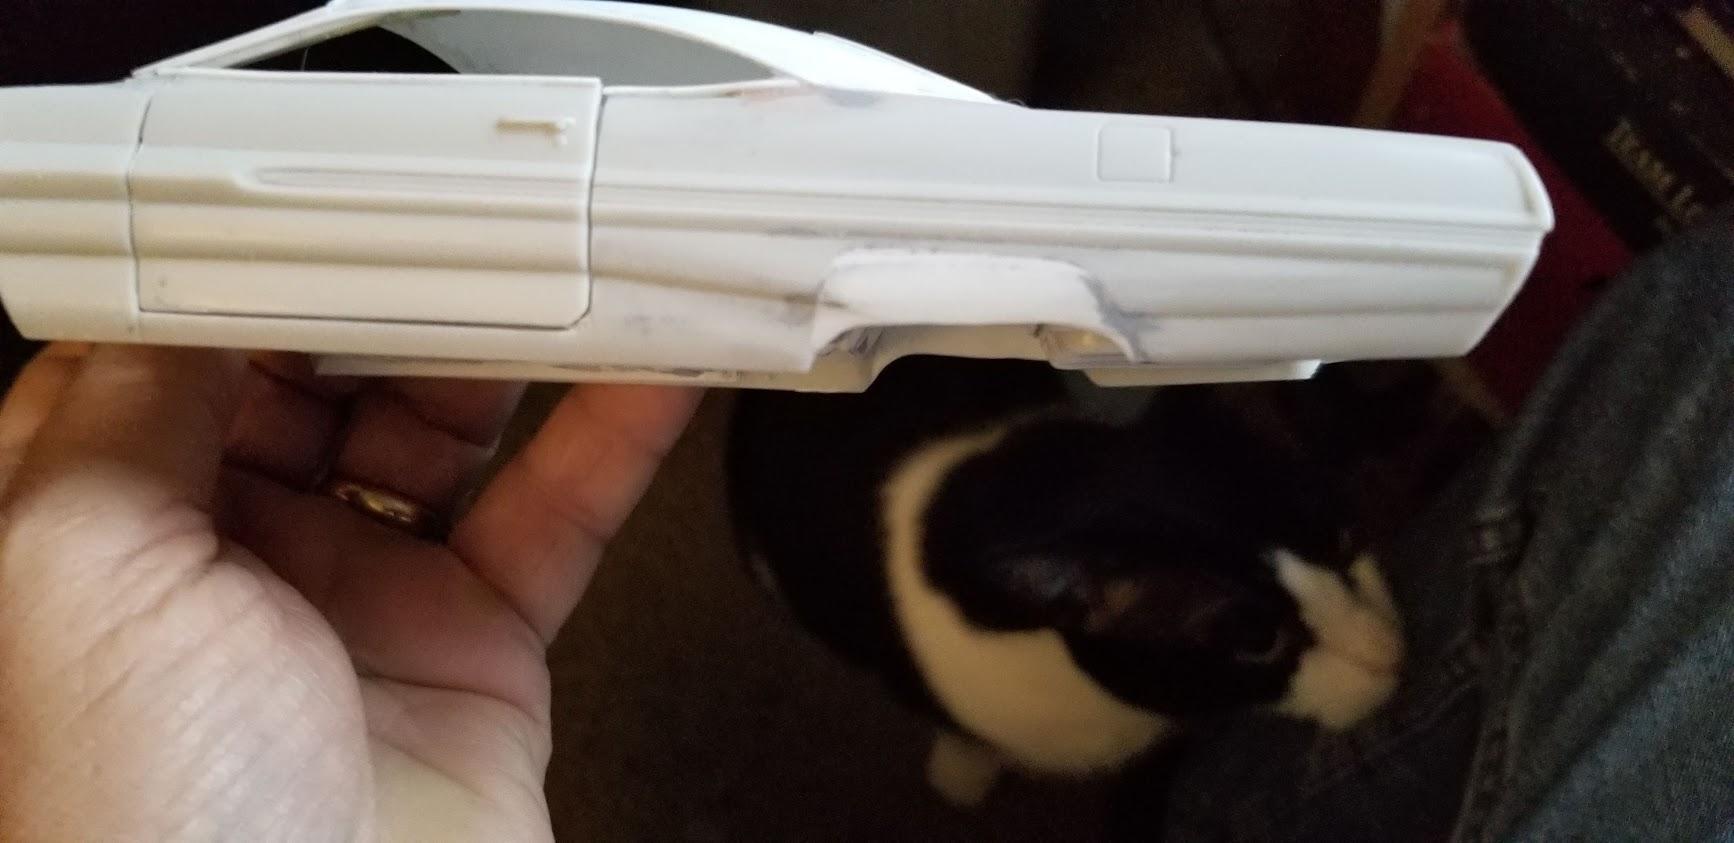
Three shots with the door openOh yeah, above you can see where I filled the two holes for the fender trim I am deleting. -
I am waiting for some ordered parts for Salt Shaker and the custom decals I am making for the Riviera, and then the motivation to finish the decals on my Ford GT, so why not start another project? This is the AMT Pontiac Catalina. I purchased this many years ago and it has been on the storage rack just staring at me for years so the other day I picked up the box, opened it and figured, why not? So, first thing I did, which seems to be the first thing I always do with these cars is I started opening the doors. But since I planned on removing and replacing the top, I only did the doors up to about 90% since I needed the strength of the doors to hold the body together once the top is removed. Removing to the top was a snap. 4 quick cuts with the electric rotary saw and the top was gone. The only tricky part was rebuilding new "A" pillars because the curved ones would not look correct since the new roof is significantly lower than the original. I glued and puttied the new roof in place and sanded the joints smooth. Then I opened the rear window and finished the side window area. When I finished opening the doors and built hinges for them I moved on to the inside door panels. Once the hinges were secured, I cut out the inside door panels from the kit supplied interior "sides" and glued them in place. I then added plastic strips around all of the windows to represent the chrome molding which will be BMF after the car is painted. Next, I will use bondo to make the door jams and finish them. I decided to add rear wheel opening skirts. These were cut out in two layers because of the body contours and then glued and puttied in place. I am planning a light pale yellow "pearlish" flat paint and maybe some painted on white scallops to accent it. of course, the colors are always subject to change as I may see another car that inspires me to go a different color direction, but as of now, the light pale yellow is looking good in my minds eye. . This door actually fits perfectly, it is just not closed properly here. Obviously, the doors and trim still need a little work to clean them up and align the doors exactly, but all is pretty close to finished on them.P.S., that is Max who came into my workroom to annoy me to give him, and his buddy, Dexter some treats,I dechromed the front and rear bumpers as they will be molded to the body and obviously paint body color. I am planing a slightly modified air-cleaner for the engines 2 carb's and a very lowered stance. Not sure if the door handles remain or get shaved yet. Thinking of using the custom wheels from the 1965 Riviera since I have them just laying around on the workbench since I have different wheels for Riv, when I get to finish that car.
-
Really nice, love the color combination. I remember these cars from back then, they were real monsters with tons of power and torque. looks great.
-
Pretty nice, you can't go wrong with any Cobra build..... this is very well done. I like it, one of these days I may try and find one for my collection of Cobras. Well done.
-
Very nice, there is nothing like a Red Ferrari. Very well done.
-
Looks great, the yellow is just perfect, not too bright, just right. Well done.
-
All things considered, it looks great, nice job. The yellow is really bright., Love seeing the MG's as I own a "A" and a "B". Very cool I am thinking about finding a TD or a FT, preferred between the two., again, nice job.
-
Very nice, understated and cleanly done. You gotta' love these Tamiya kits.
-
Super clean and well done.
-
You just gotta' love Cobra's........ I would sure love to see a new version of the 289 first generation car.... the AMT kit has so many shortcomings.... and I can't justify the cost of the Model Hero or Studio 27 varieties. Great job, looks terrific.
-
Very well done, not what we are used to seeing here so it is a welcome change of pace...... great work.
-
Panel Painted '58 Thunderbird Traditional Custom
Peter Lombardo replied to Greg Pugh's topic in Model Cars
Looks great, the '58 Bird is perfect for this style paint scheme. I even did one, so yeah, it really looks good on this car. Nice work. -
Very nice, great paint and the wire wheels look really "right" on this car. well done.
-
Usually, I have a pretty good idea of what I want my next build to look like. It is a rare occasion when I find a build changing every time I sit down at the workbench. Well, this is one of those builds. From the very beginning, I have been wandering down a dark hallway. The original design of the body was done 10 or so years ago, and I never knew exactly what I would do with it. It is kind of a mix of futuristic meets Group C race car. Then a few months ago while cleaning up all of the junk I have accumulated in my work room, I stumbled on the clay master and got to thinking about it. The idea hit me to make a Bonneville Salt Flat racer out of it since I have been thinking of doing the same with an extra body I have of an early version of the Timbs special. Well, I you see where I have gone with this so far, but now I have a new obstetrical to clear, and once again the body engine cover is proving to be a stumbling block to clear. The engine with its tall fuel injection unit required I raise the height of the cover..... okay, done. Then I began work on the frame and roll bar configuration and ran into more height issues. Once again the engine cover required a new round of surgeries and enlargements. Please pardon the few "hairs" on the chassis, they have been eradicated since the photo. Not only will I need to clear the roll bar and fuel injection, I will need to clear the radiators which this car would need to cool down this massive engine. In desperation to come up with a solution, I looked to one of the Art Deco bodies I designed many years ago thinking the soft rounded shapes of the fenders could form the basis of the air vents so I cut the body up and grafted on sections of the rear fenders to the cowling. Since taking these pictures, I have added a section from the front fender to the leading edge to bring the scoop closer to the front of the body. It is currently covered in putty and will get sanded smooth once fully dry. Like I said, this car is being built by the seat of my pants with "field" changes happening daily. My only concern is that with such a mish-mush of changes and components, I am struggling to keep any kind of uniformity in the finished car.
-
Great looking, really well done. Love the color and the custom touches...... terrific.