stitchdup
-
Posts
7,124 -
Joined
-
Last visited
Content Type
Profiles
Forums
Events
Gallery
Everything posted by stitchdup
-
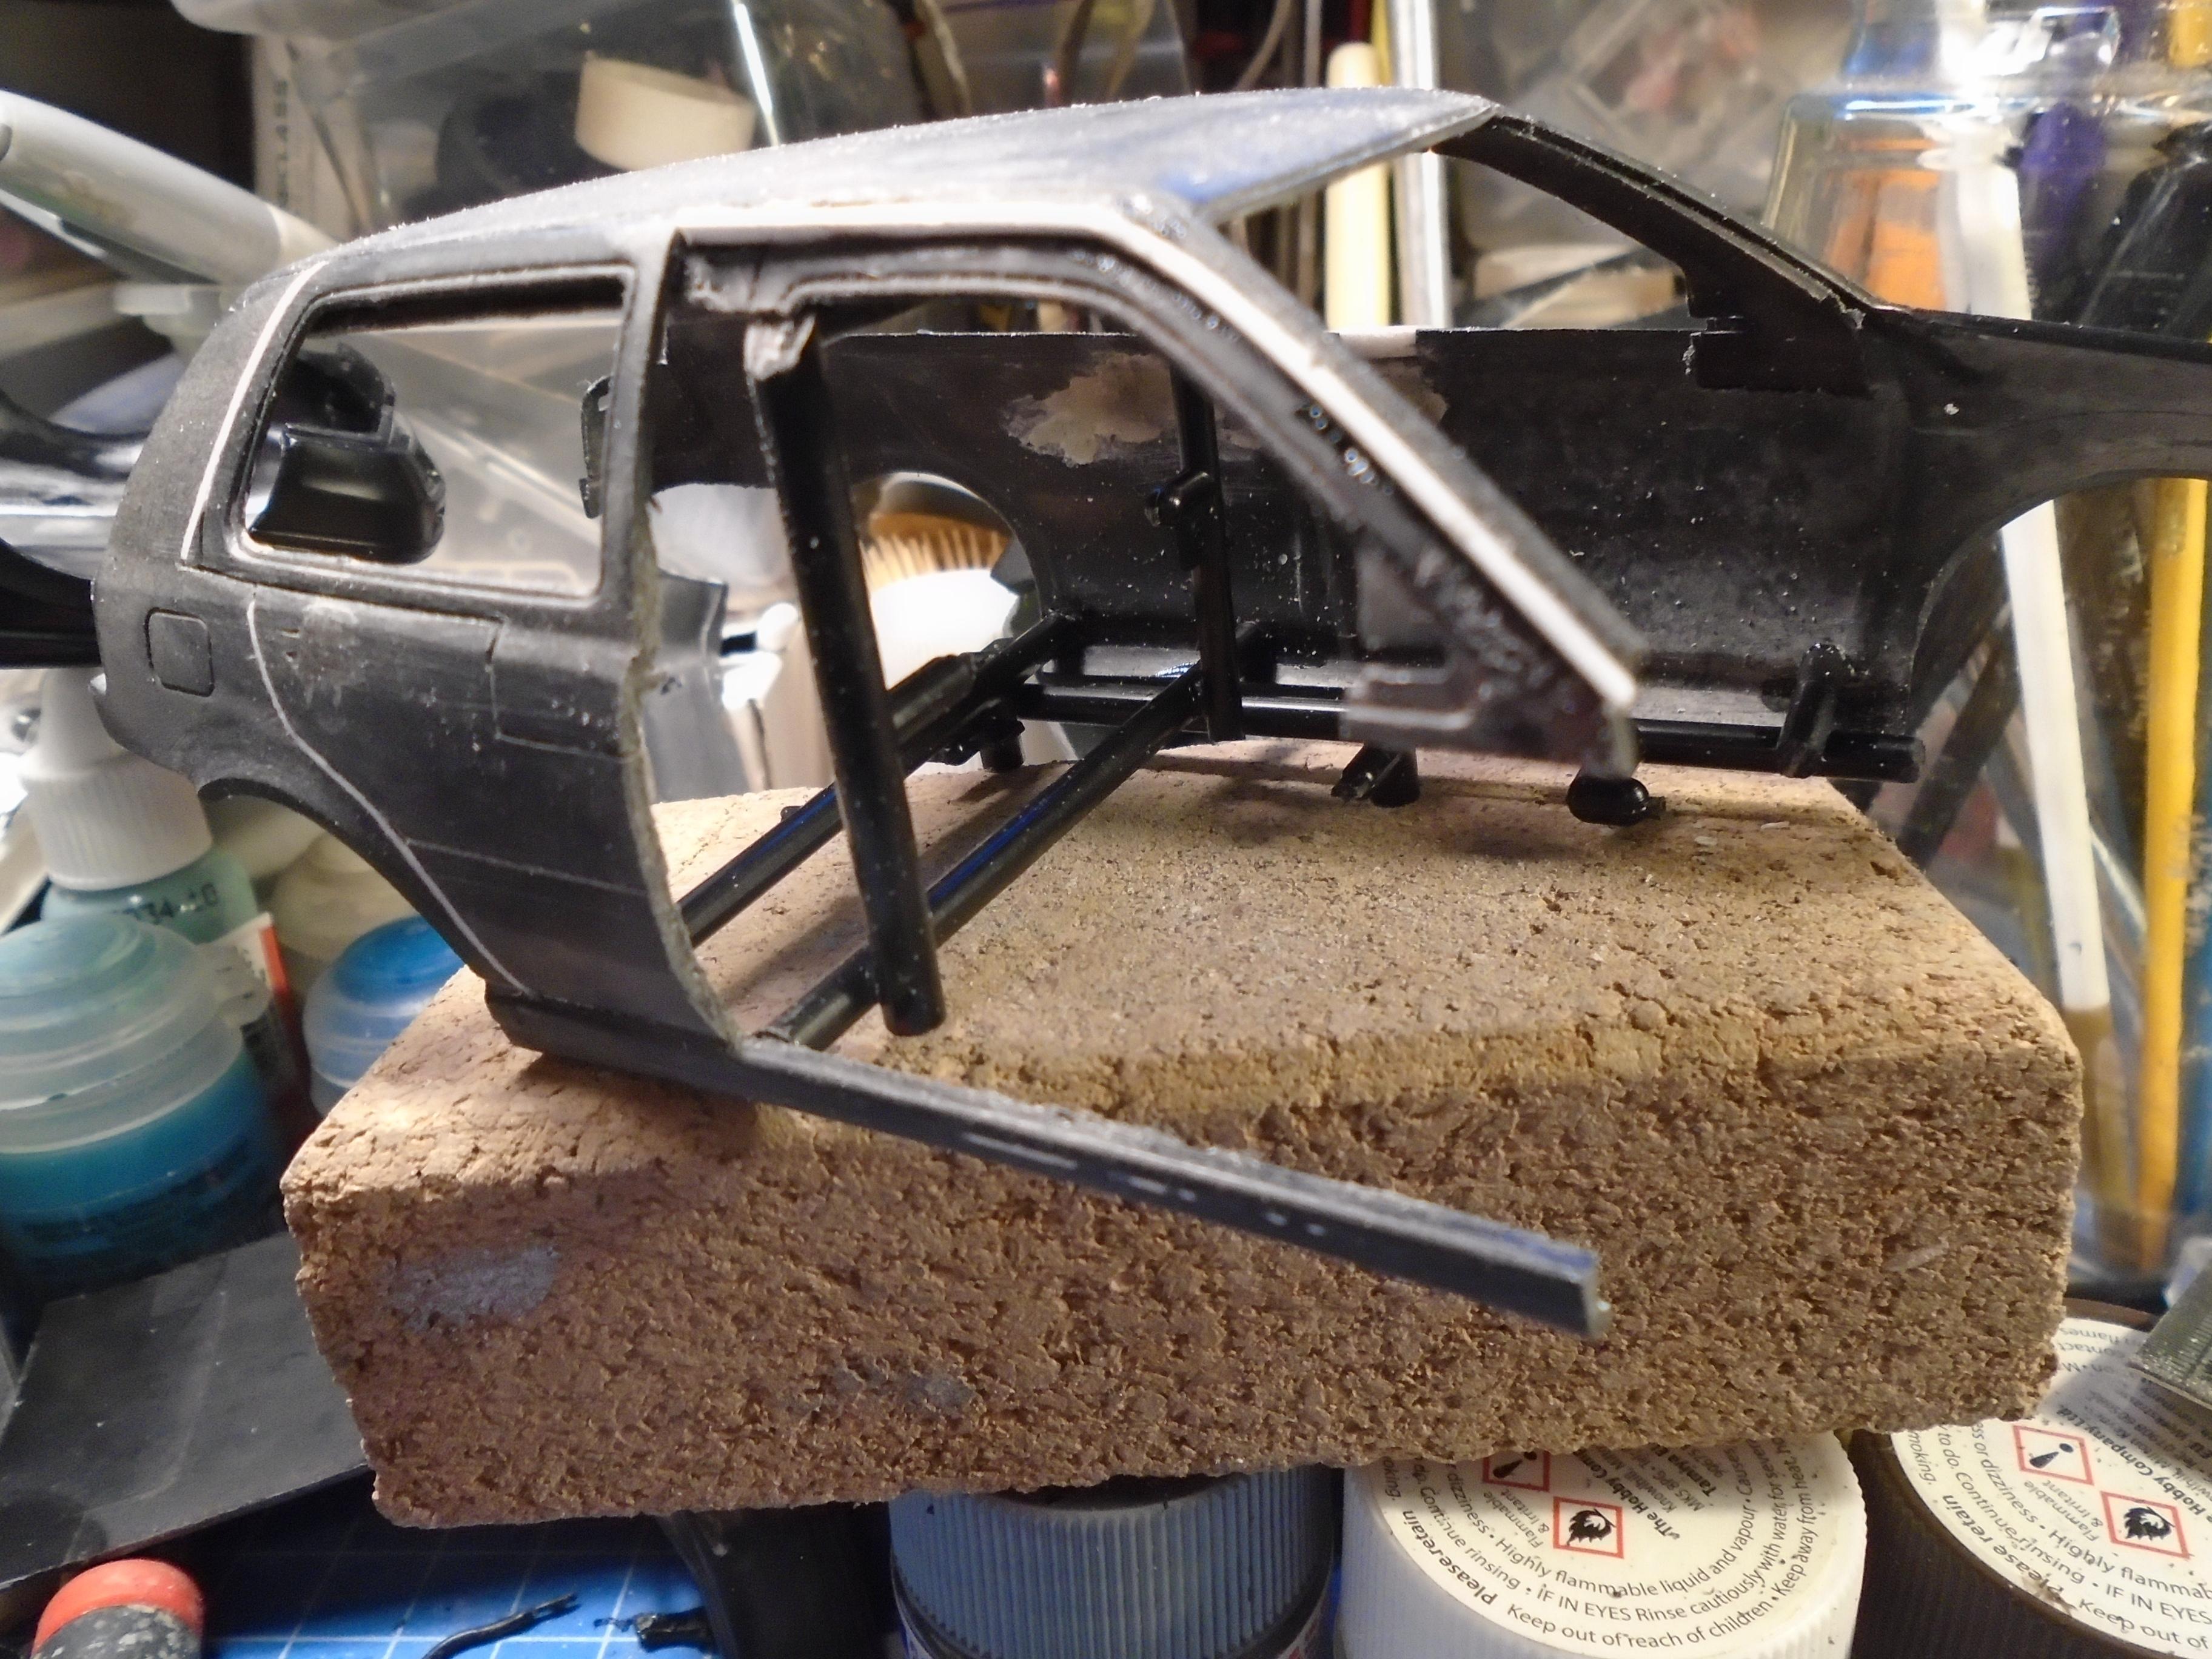
a little more done. next is building up the door inners

-
are superchargers possibly more popular in the usa because of the auto boxes? a turbo can be made to drive with litle lag, but its the boost kick that makes thenm fun in the same way as the honda vtecs. it just feels a bit more special and even on the slow reno 5 and fiat uno turbos it still had that kick
-
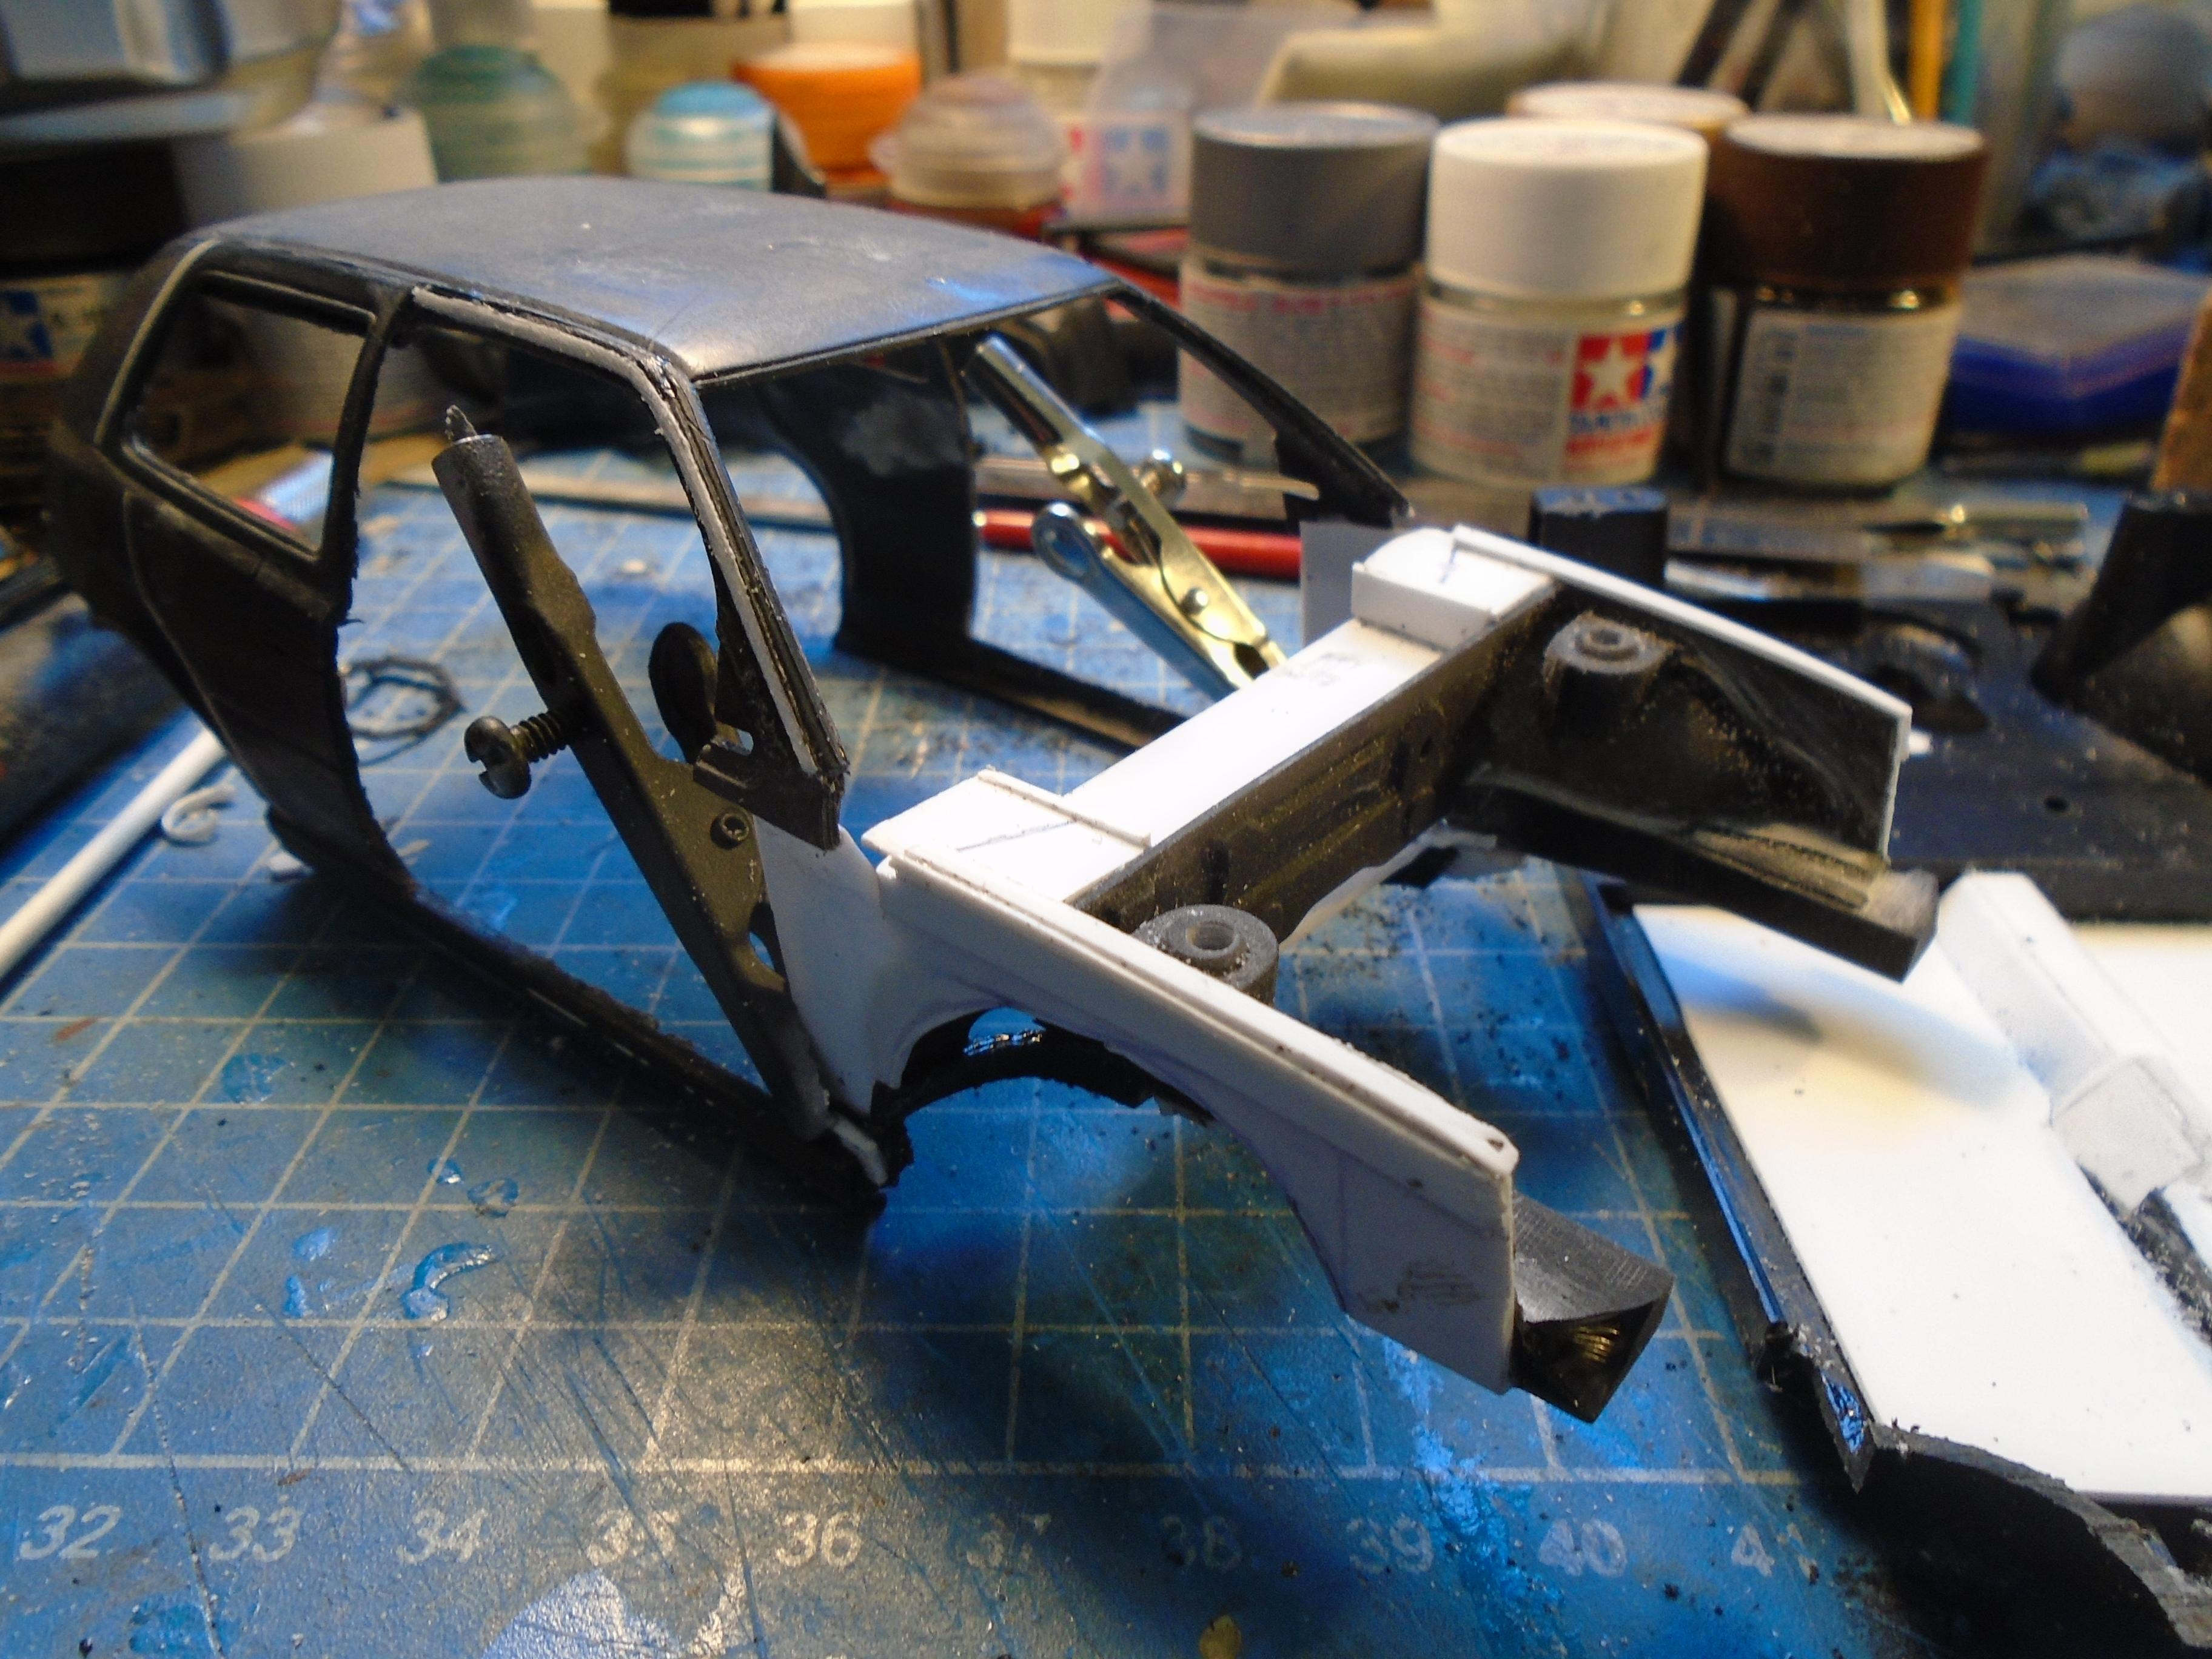
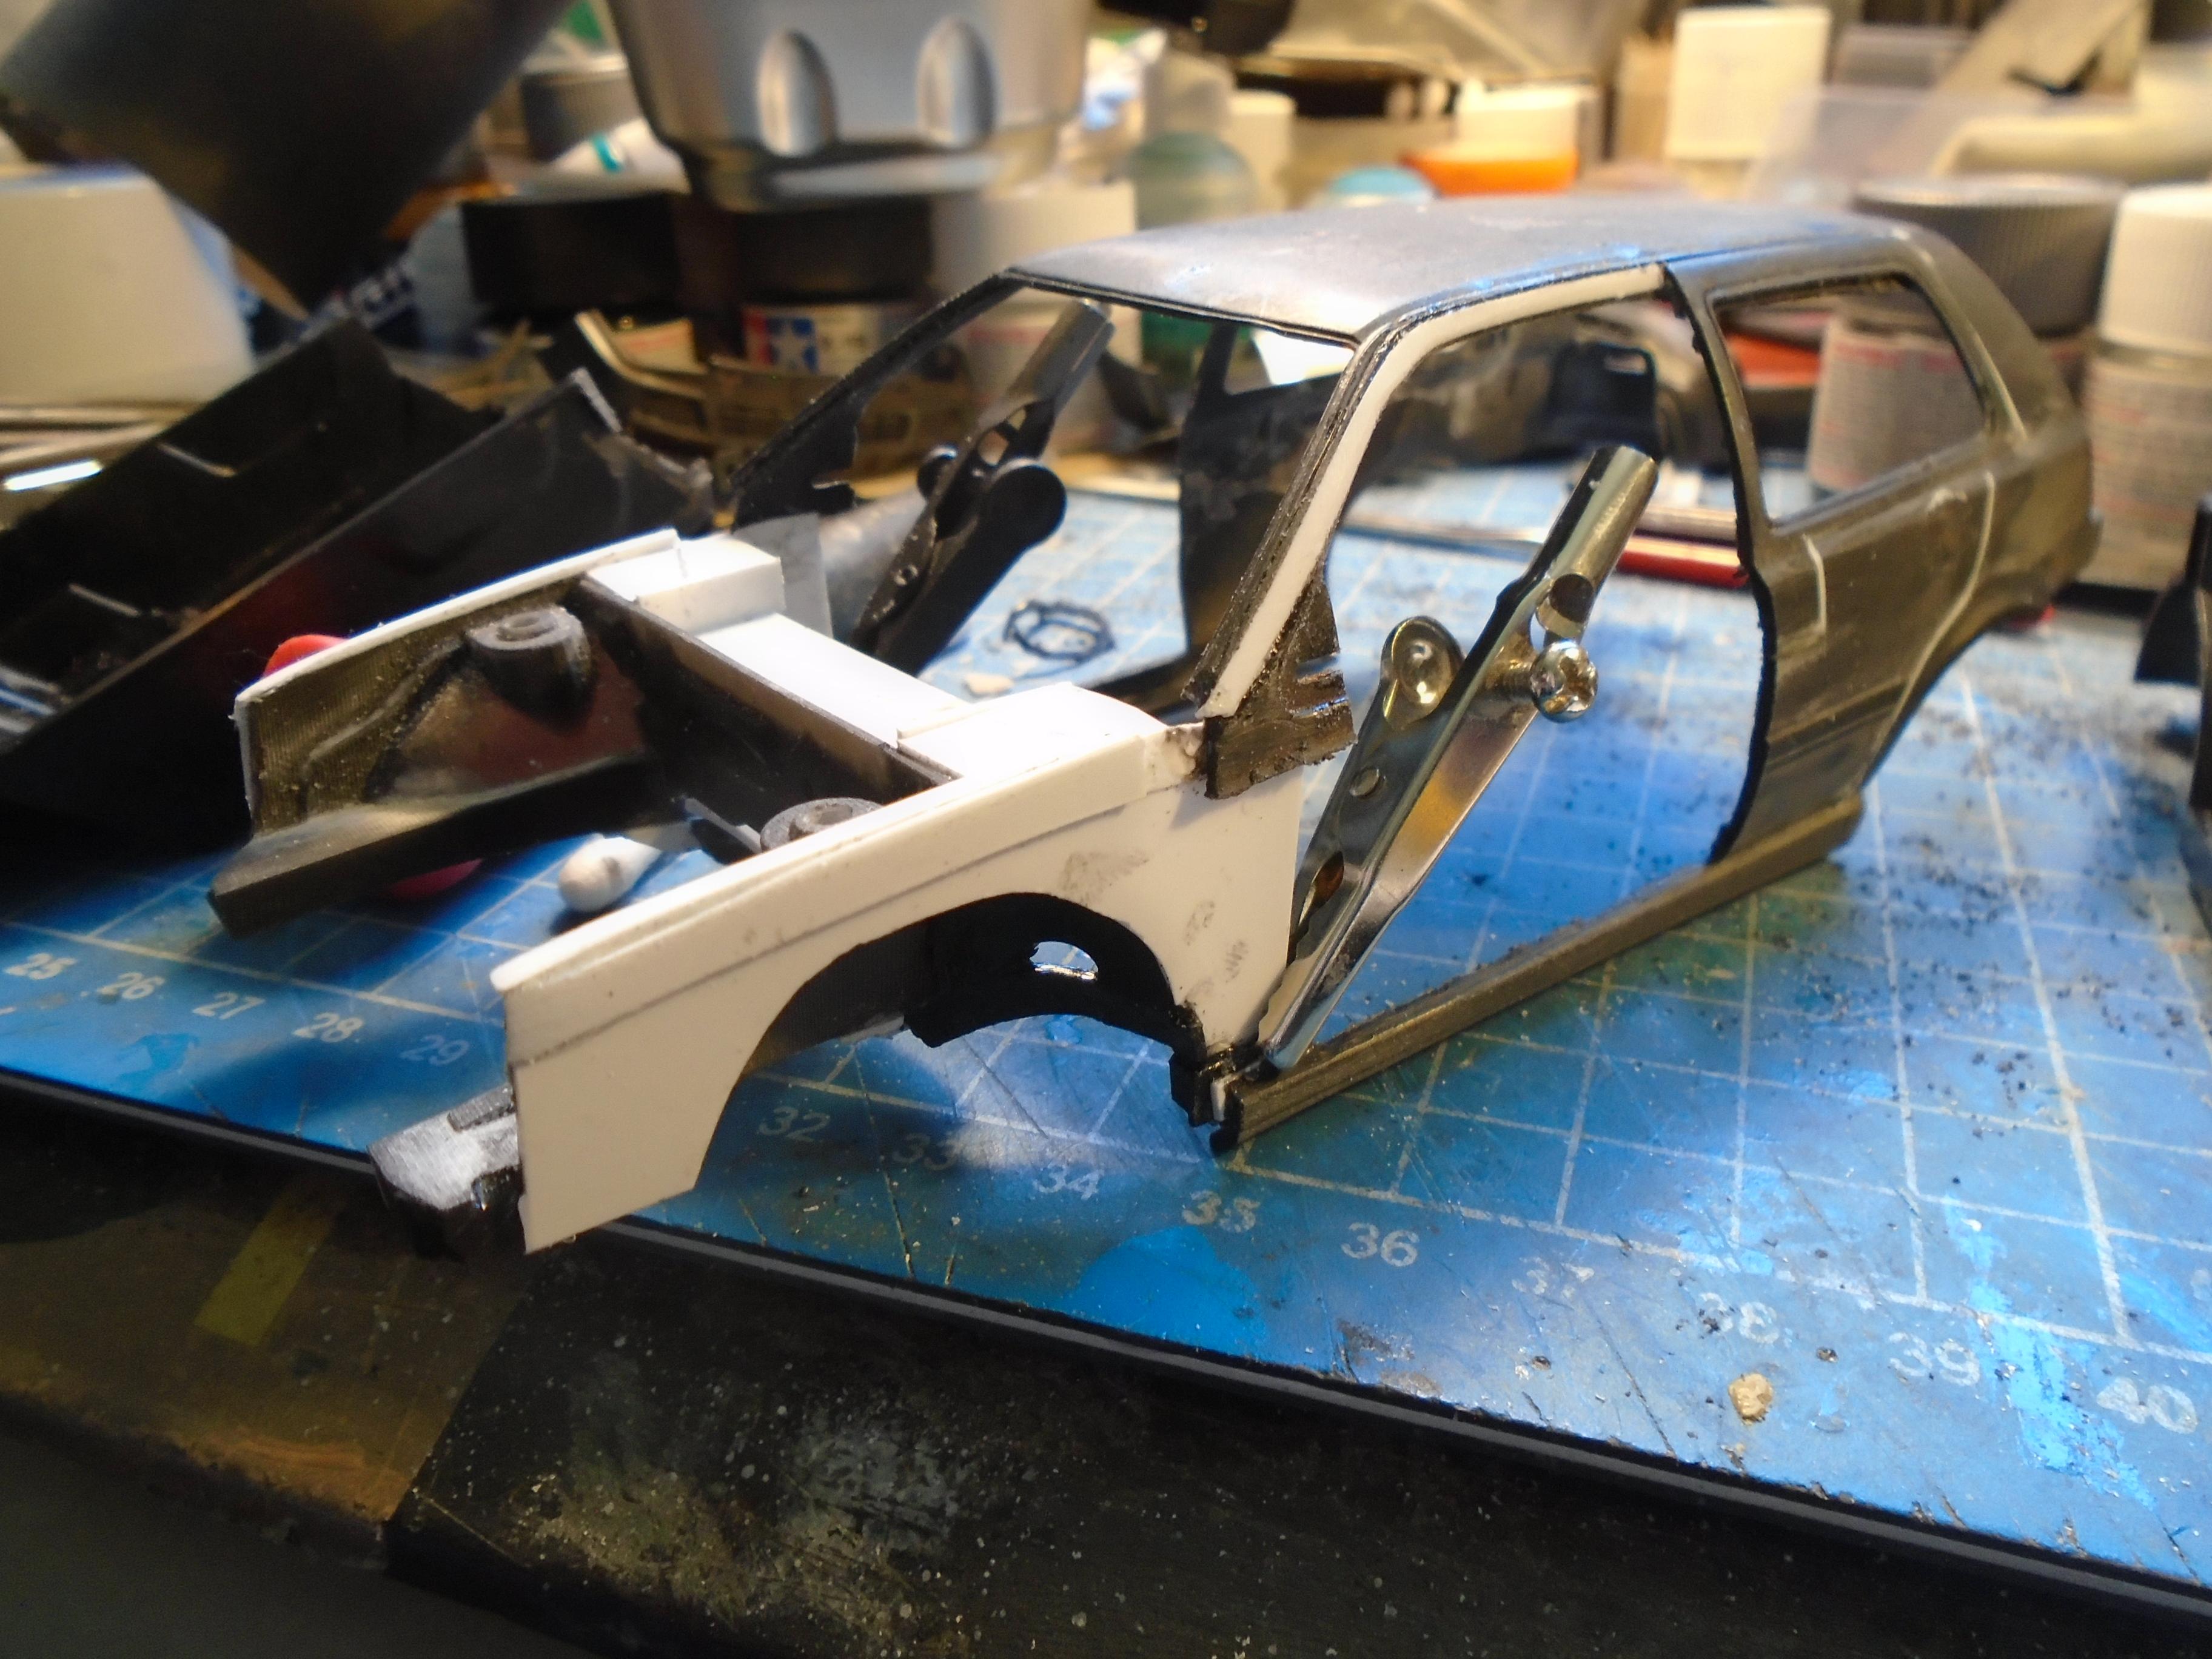
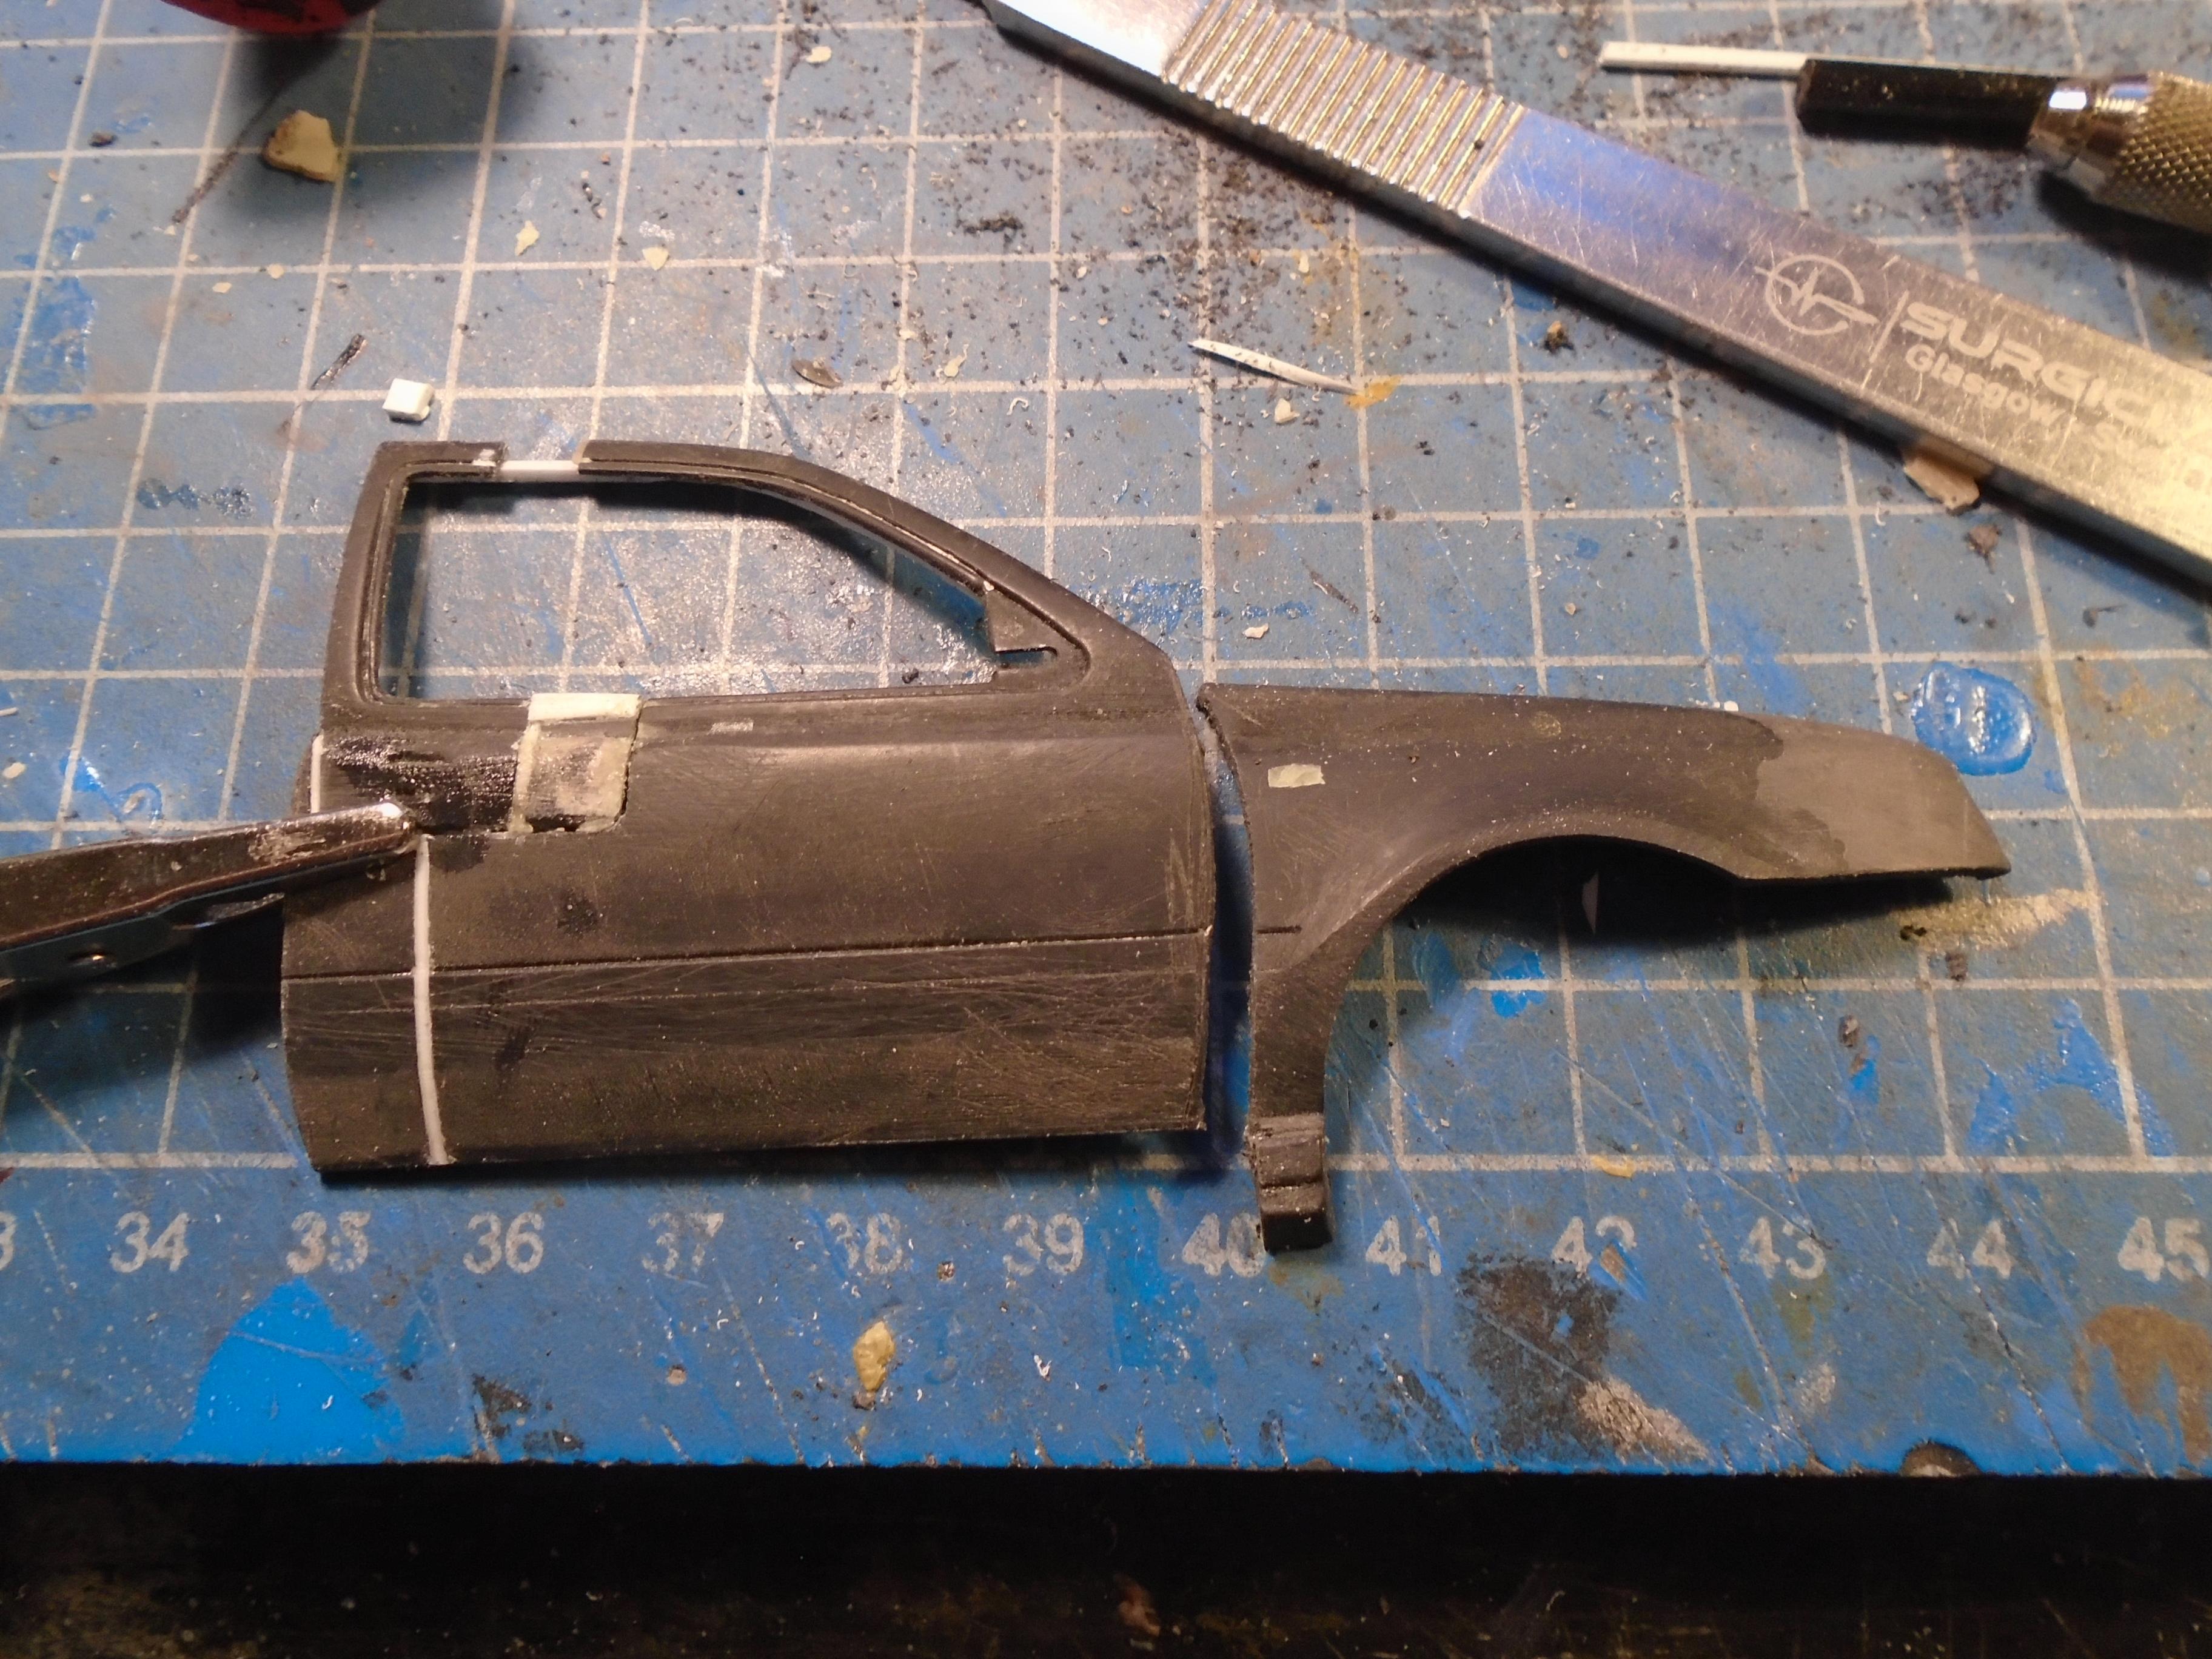
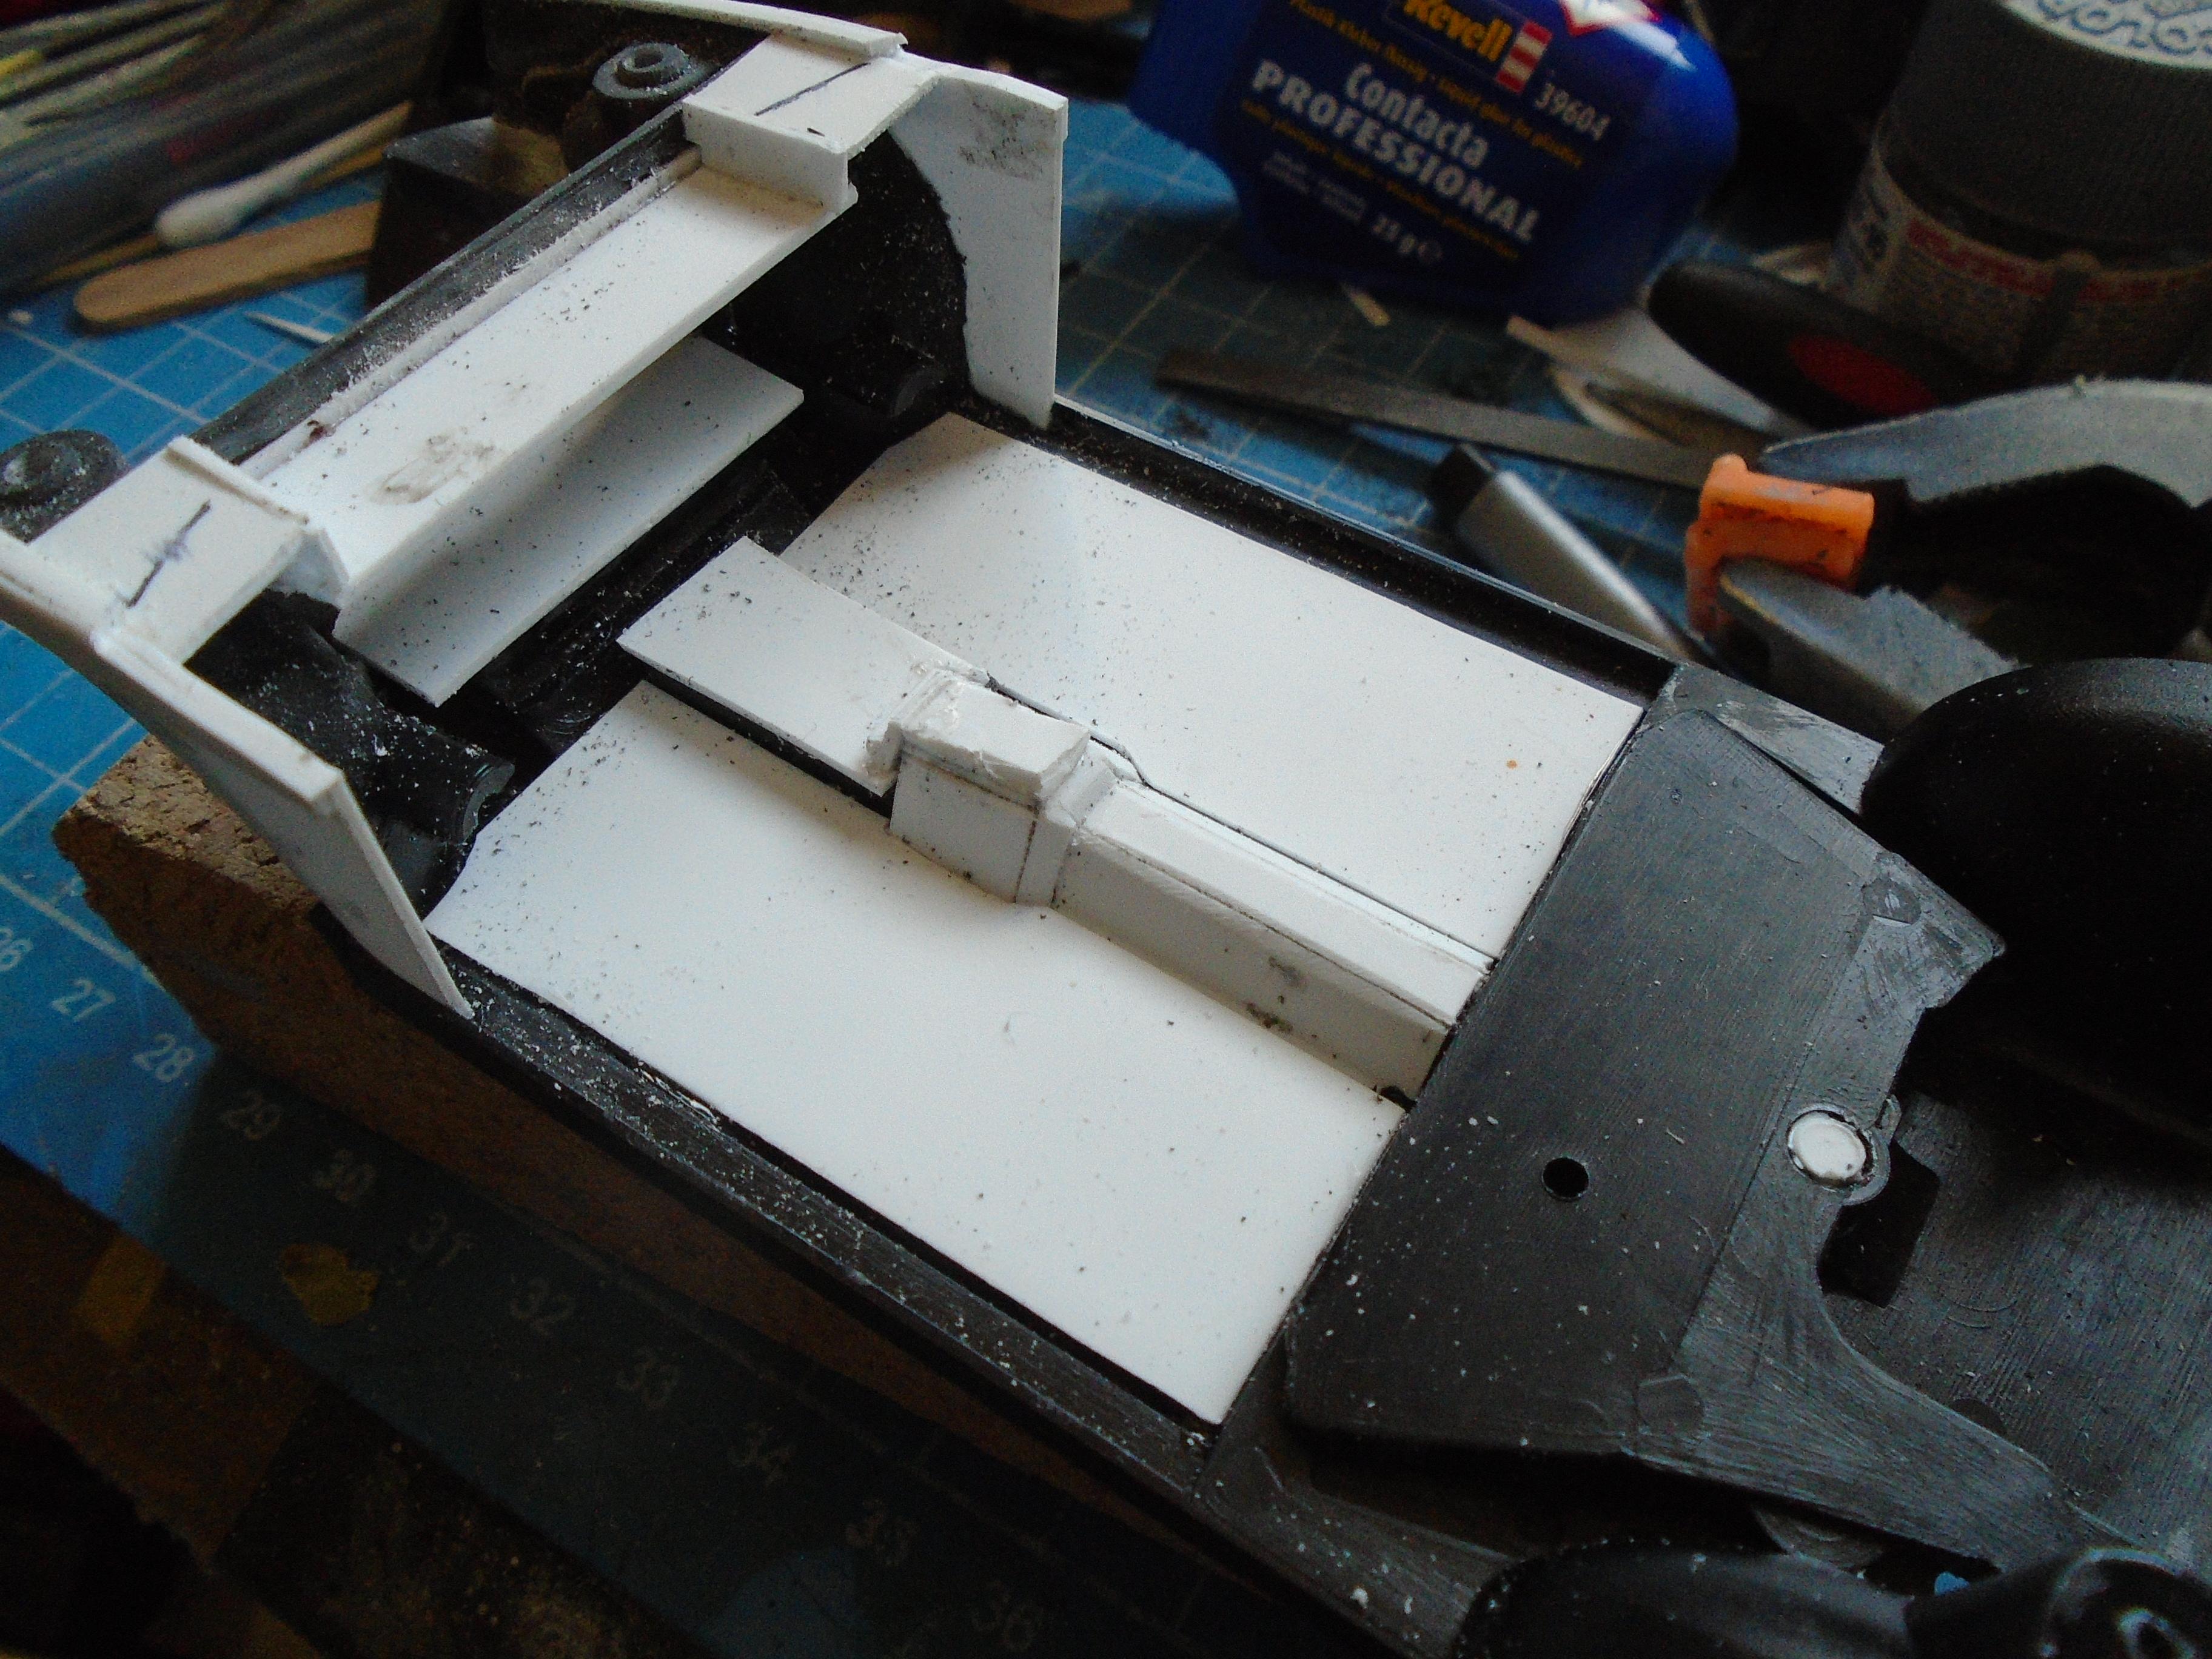
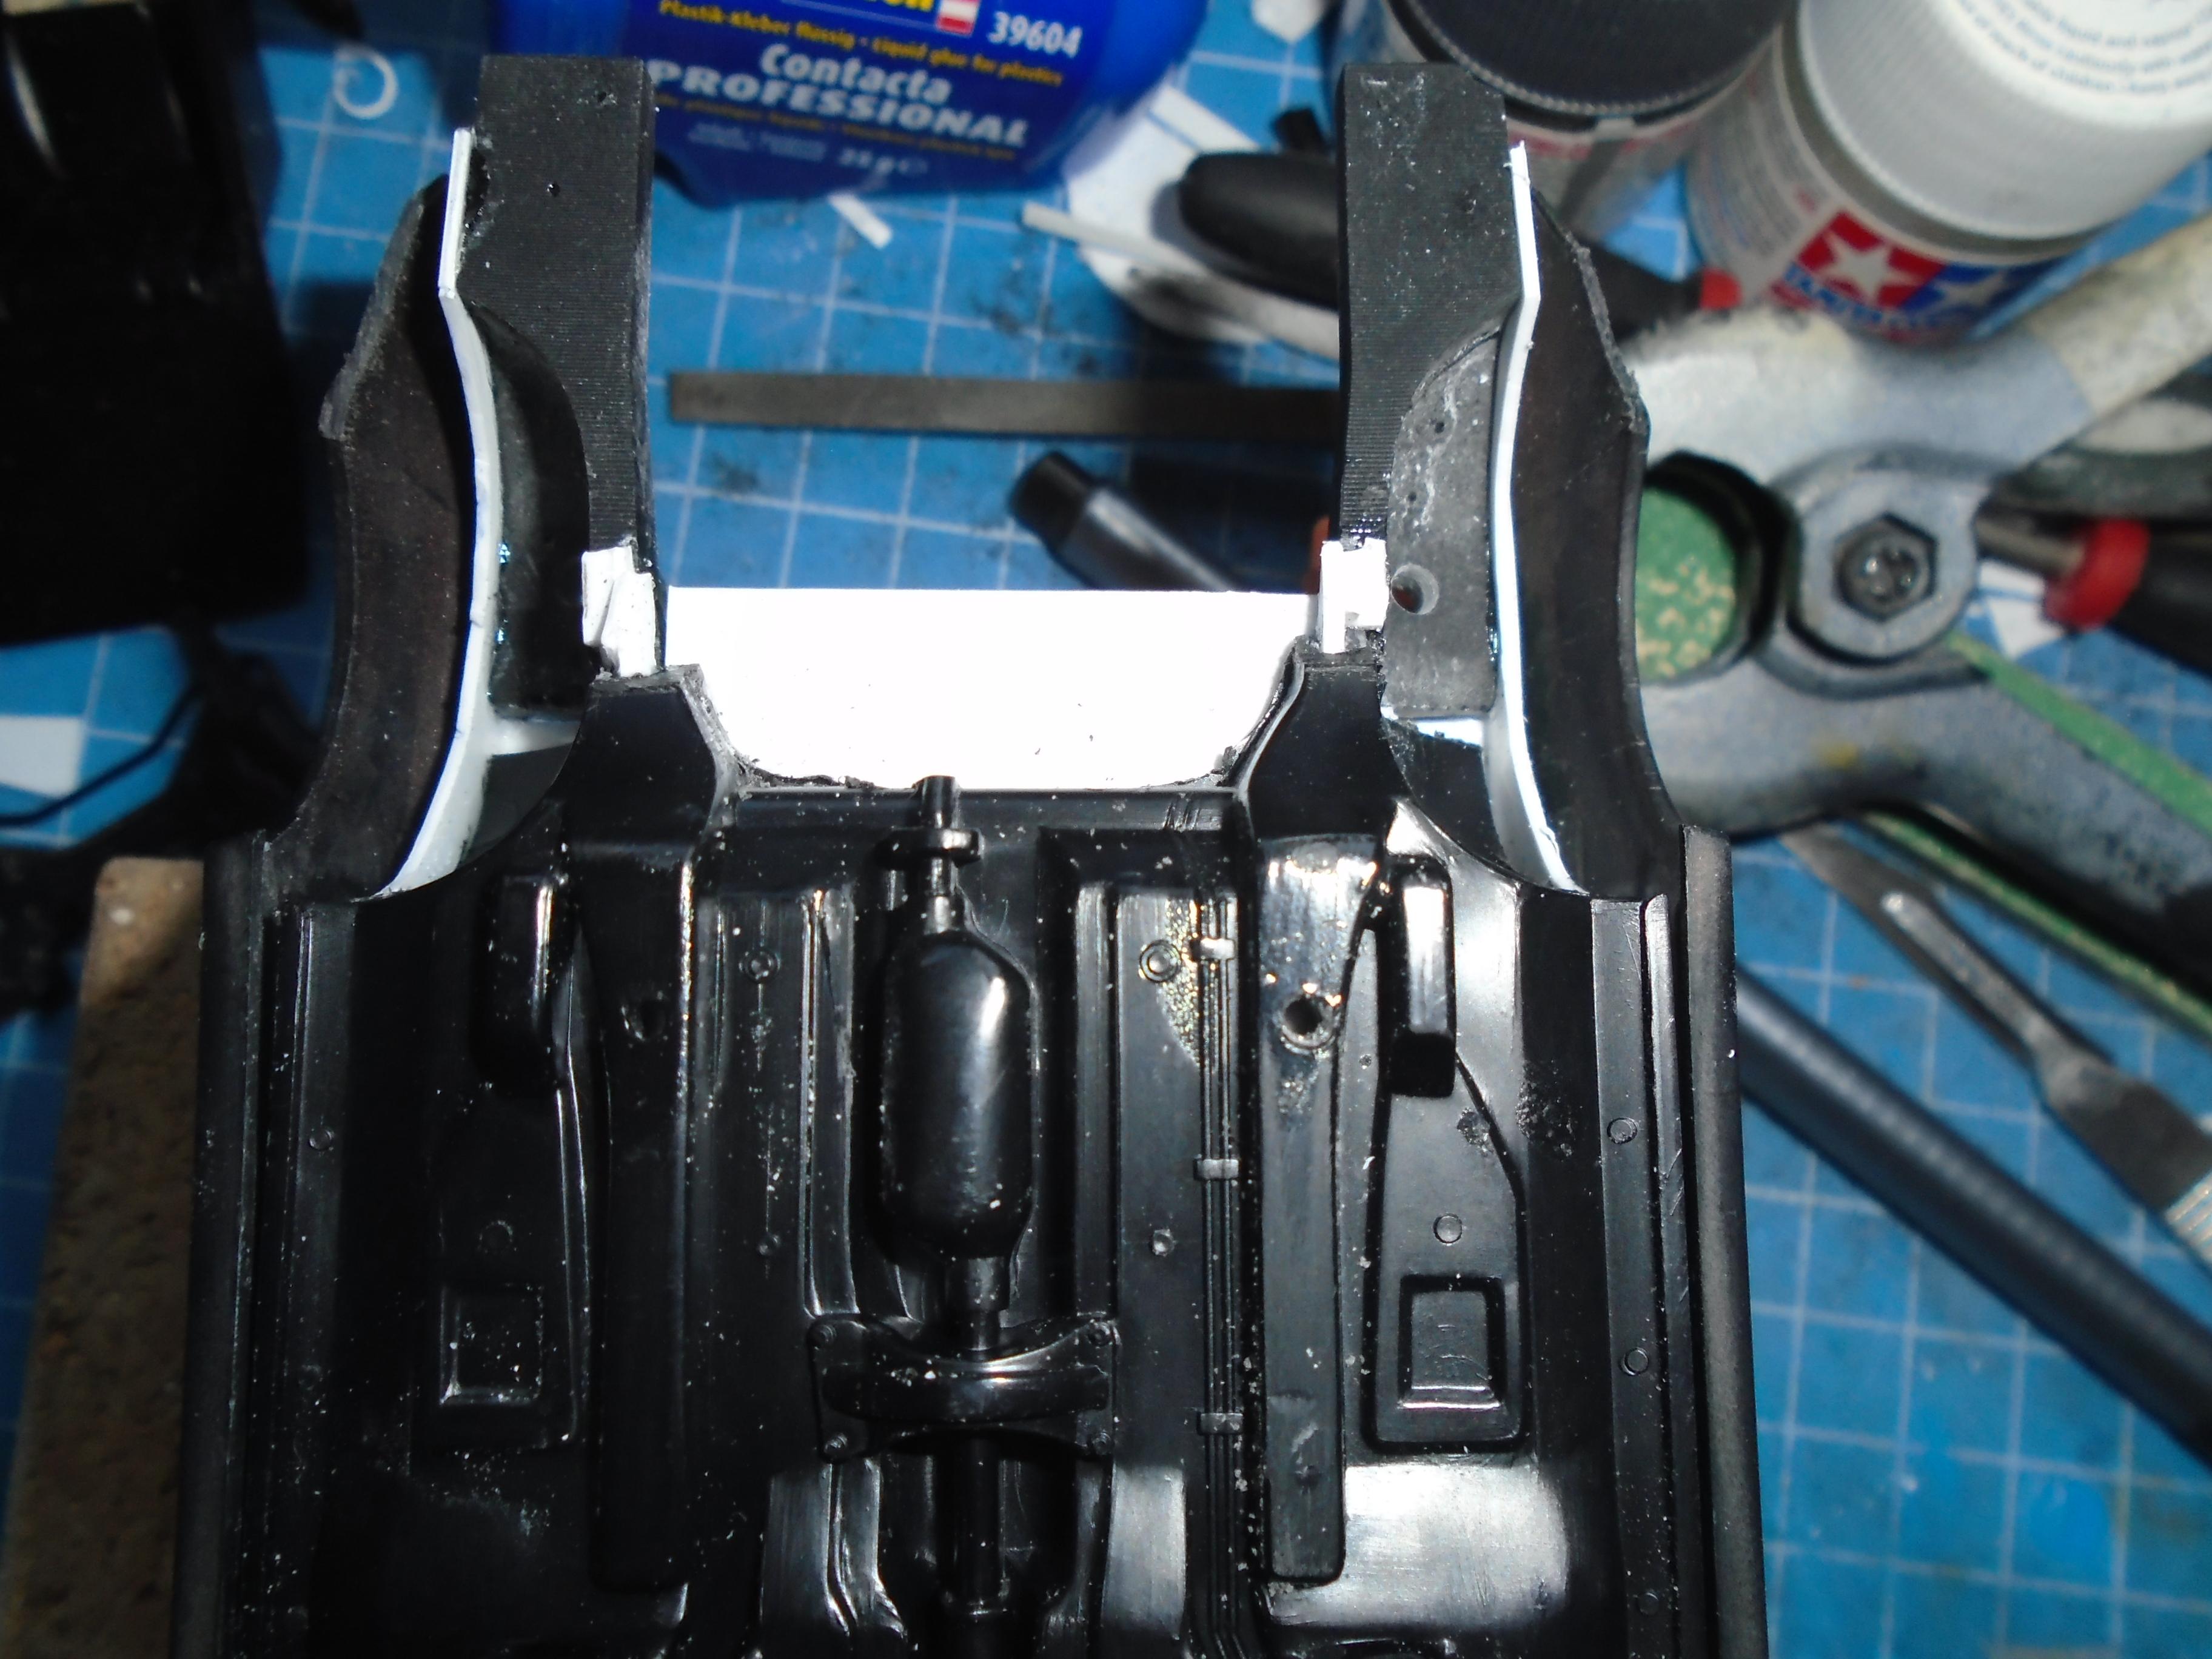
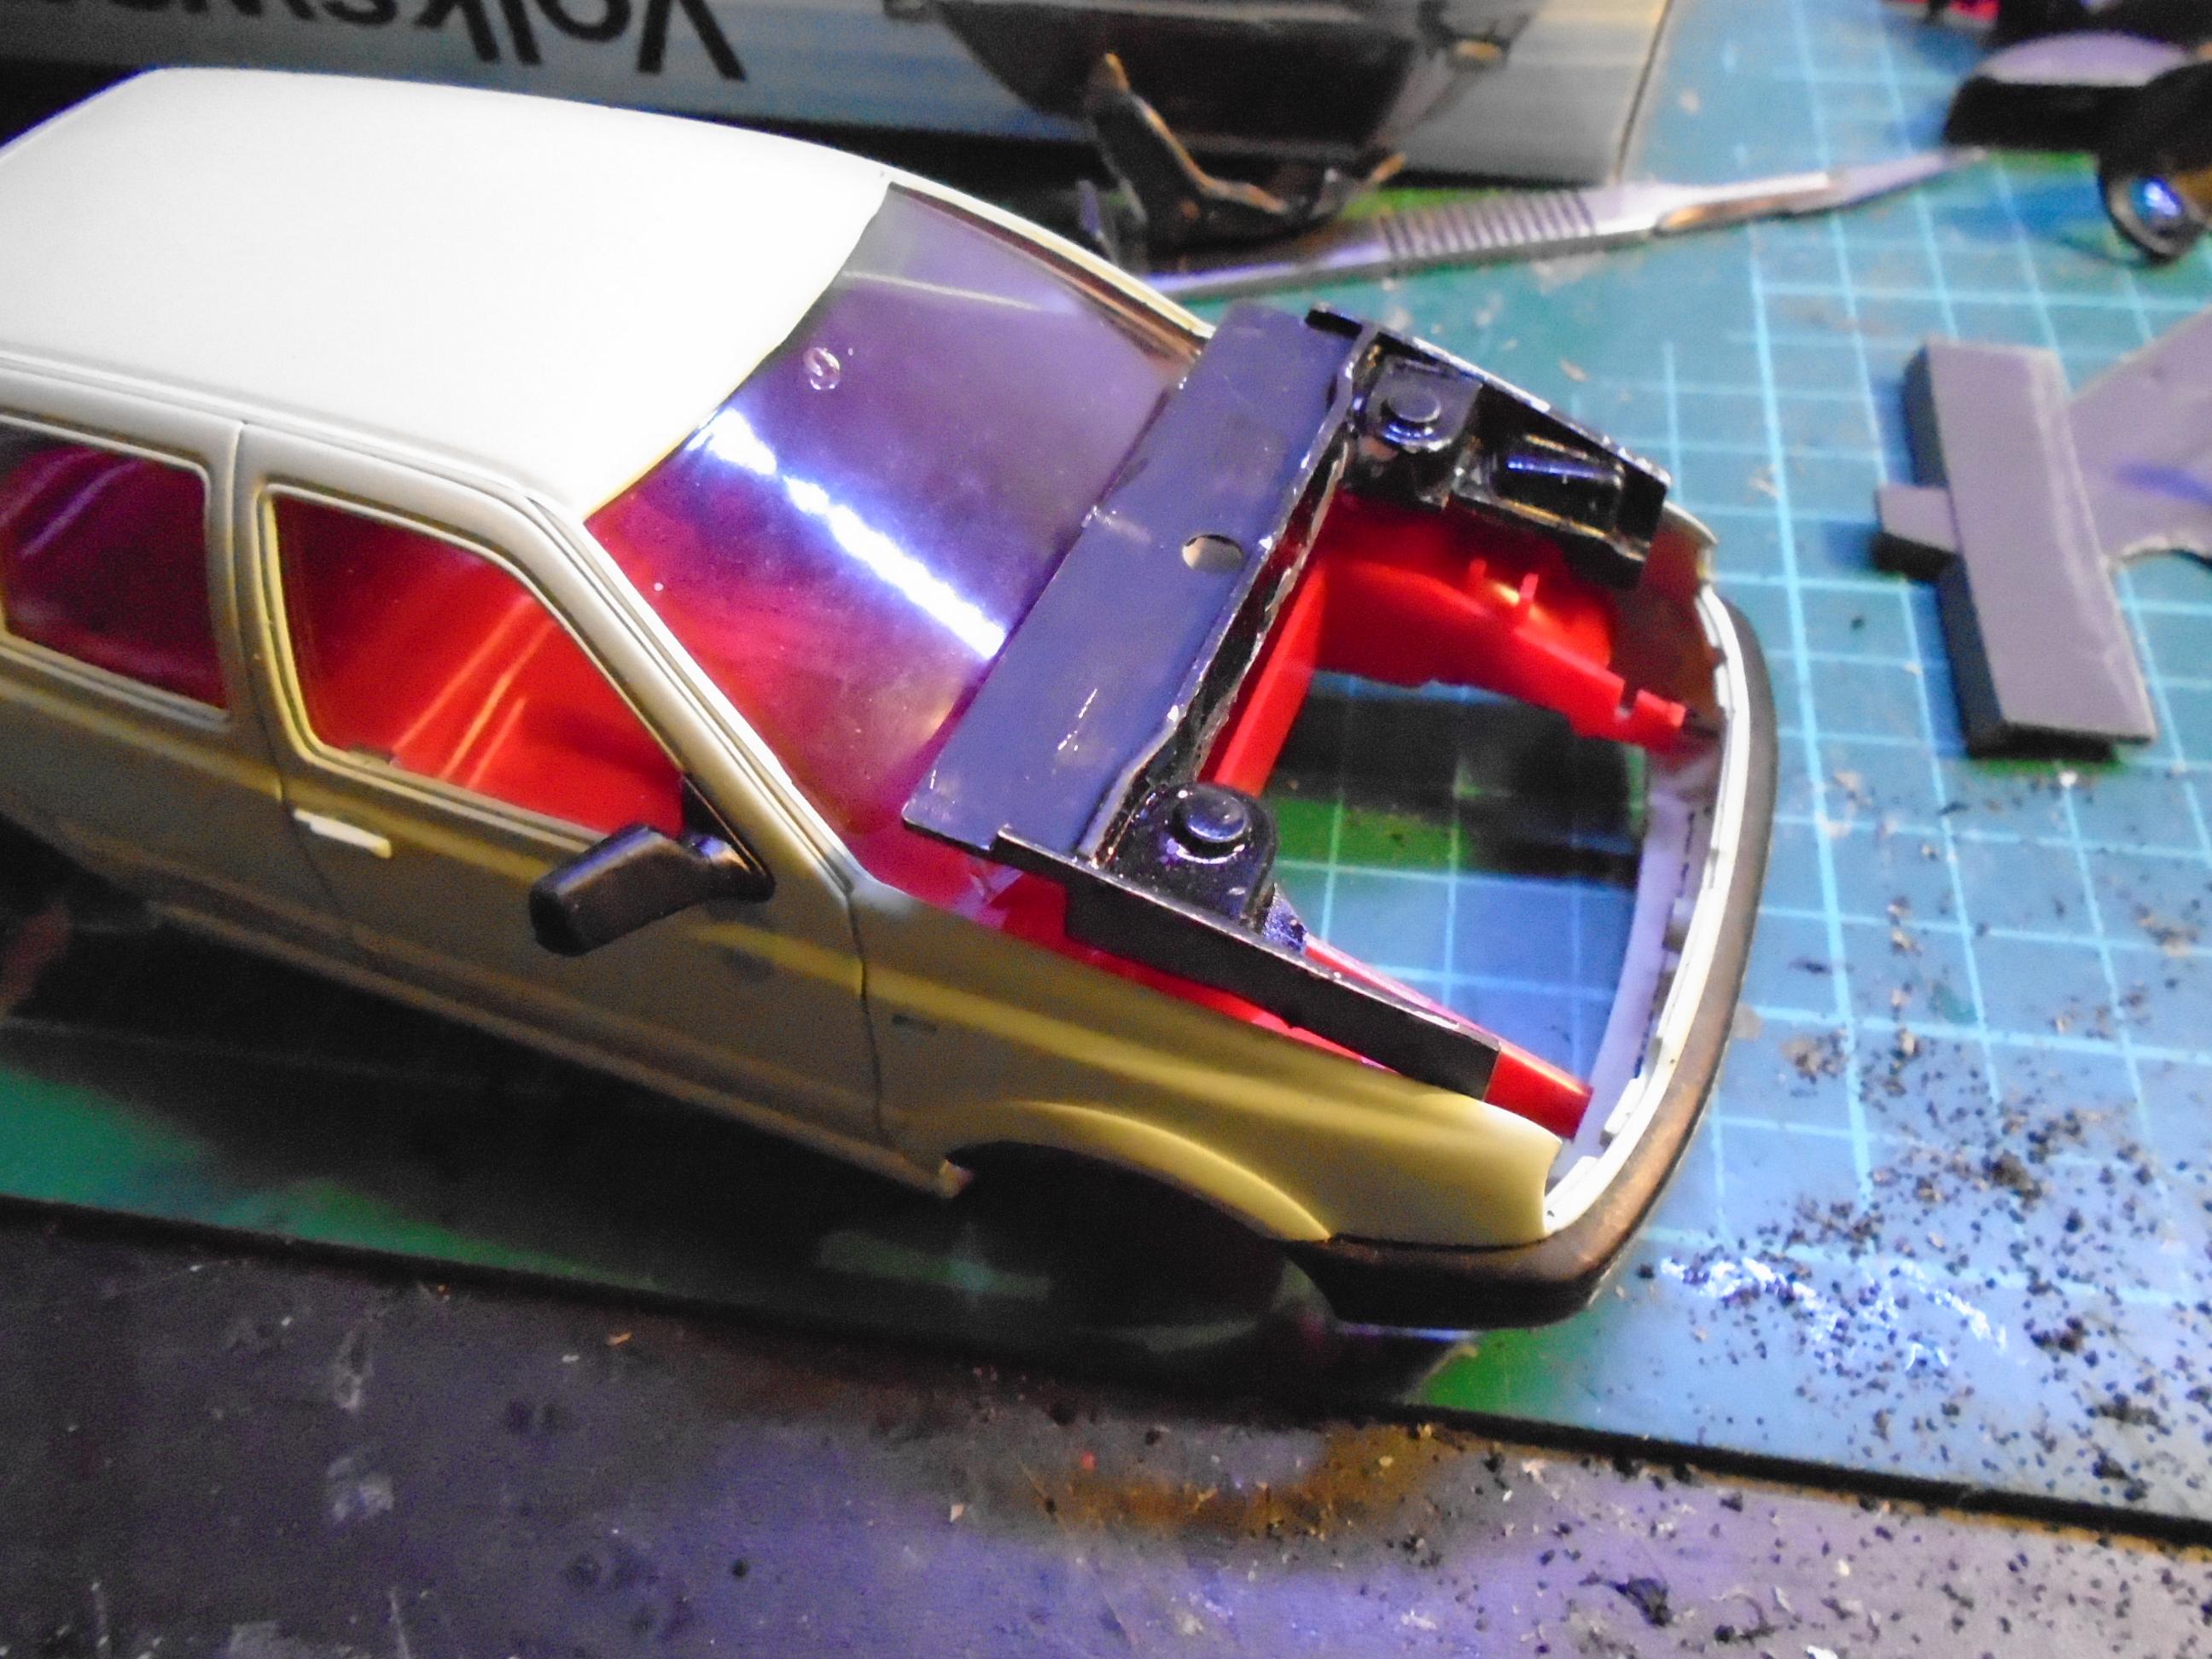
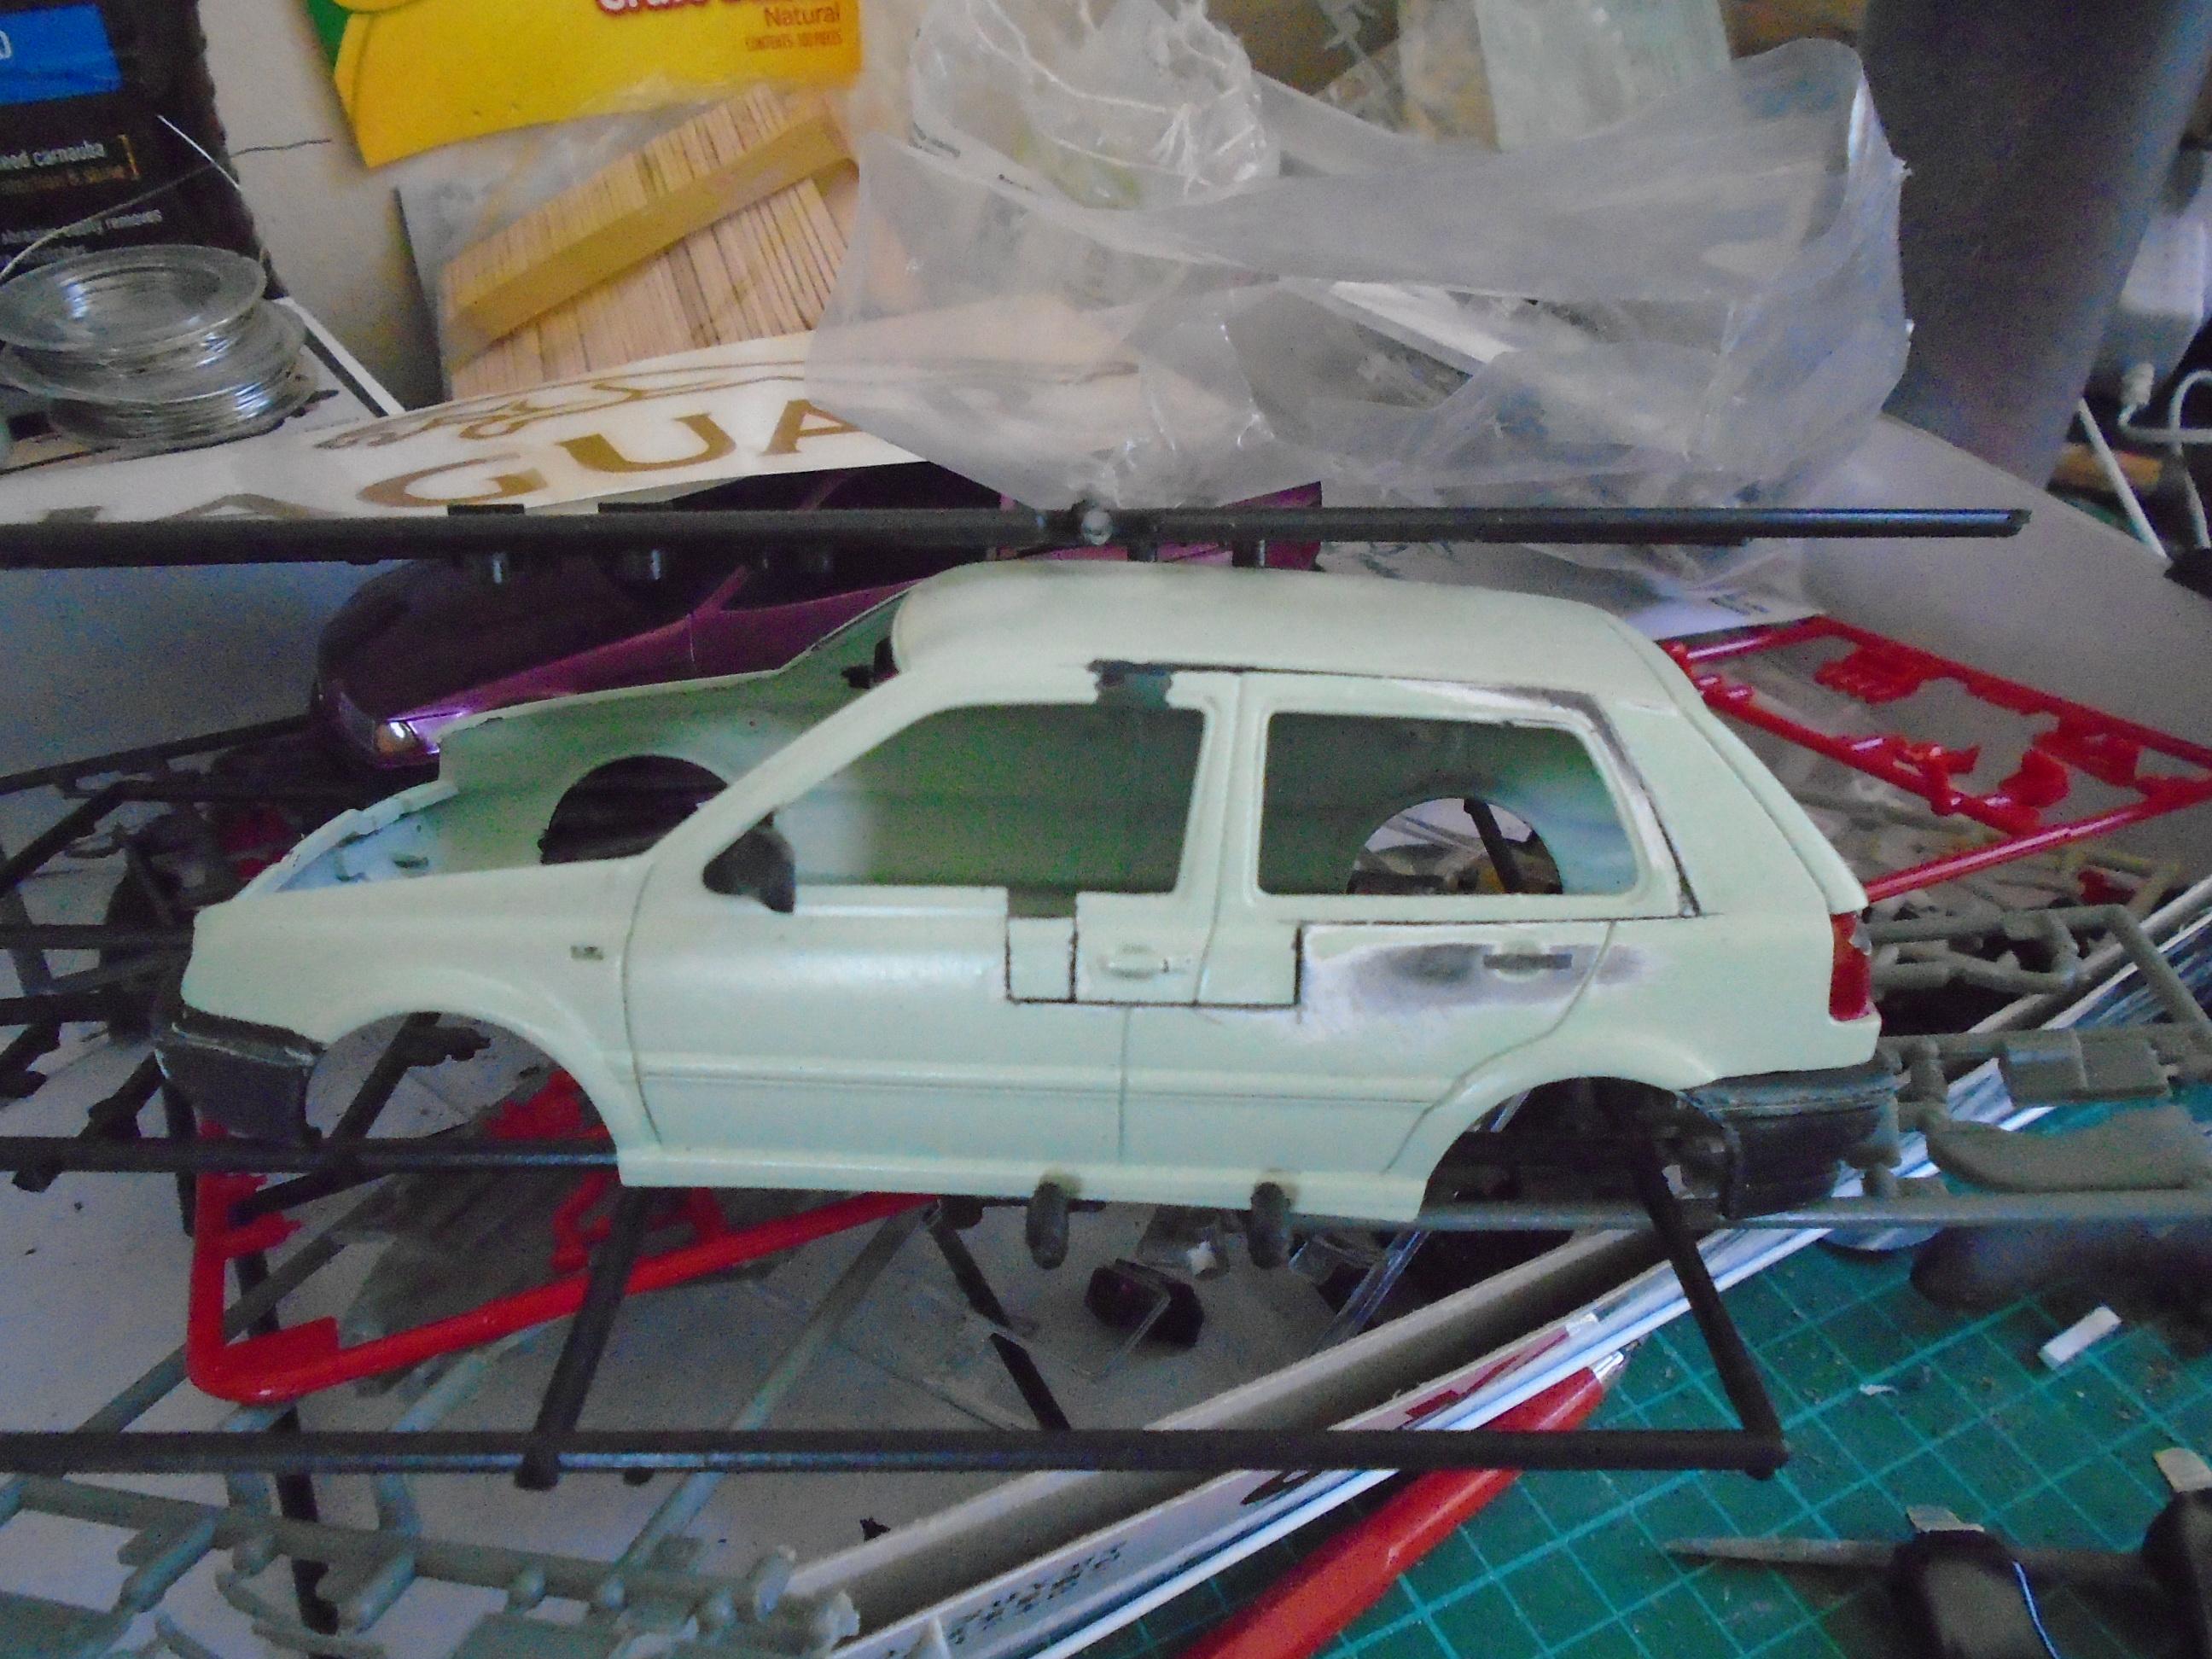
I went for it. I've cut up an extra body tp rob the roof corners to reinforce the window edges and added strips to the inner door edge. this will all get filed back. because i want to hinge the doors i've also removed the front wings and will be removing the engine bay from the chassis and fitting to the body. this should get me pretty close to a bare golf shell minus the floor. i took my time to do this side and i dont expect the other side to be any faster due to the screen edges
-
problem solving makes things fun
-
know less than the next guy to reduce the risk of mandatory overtime
-
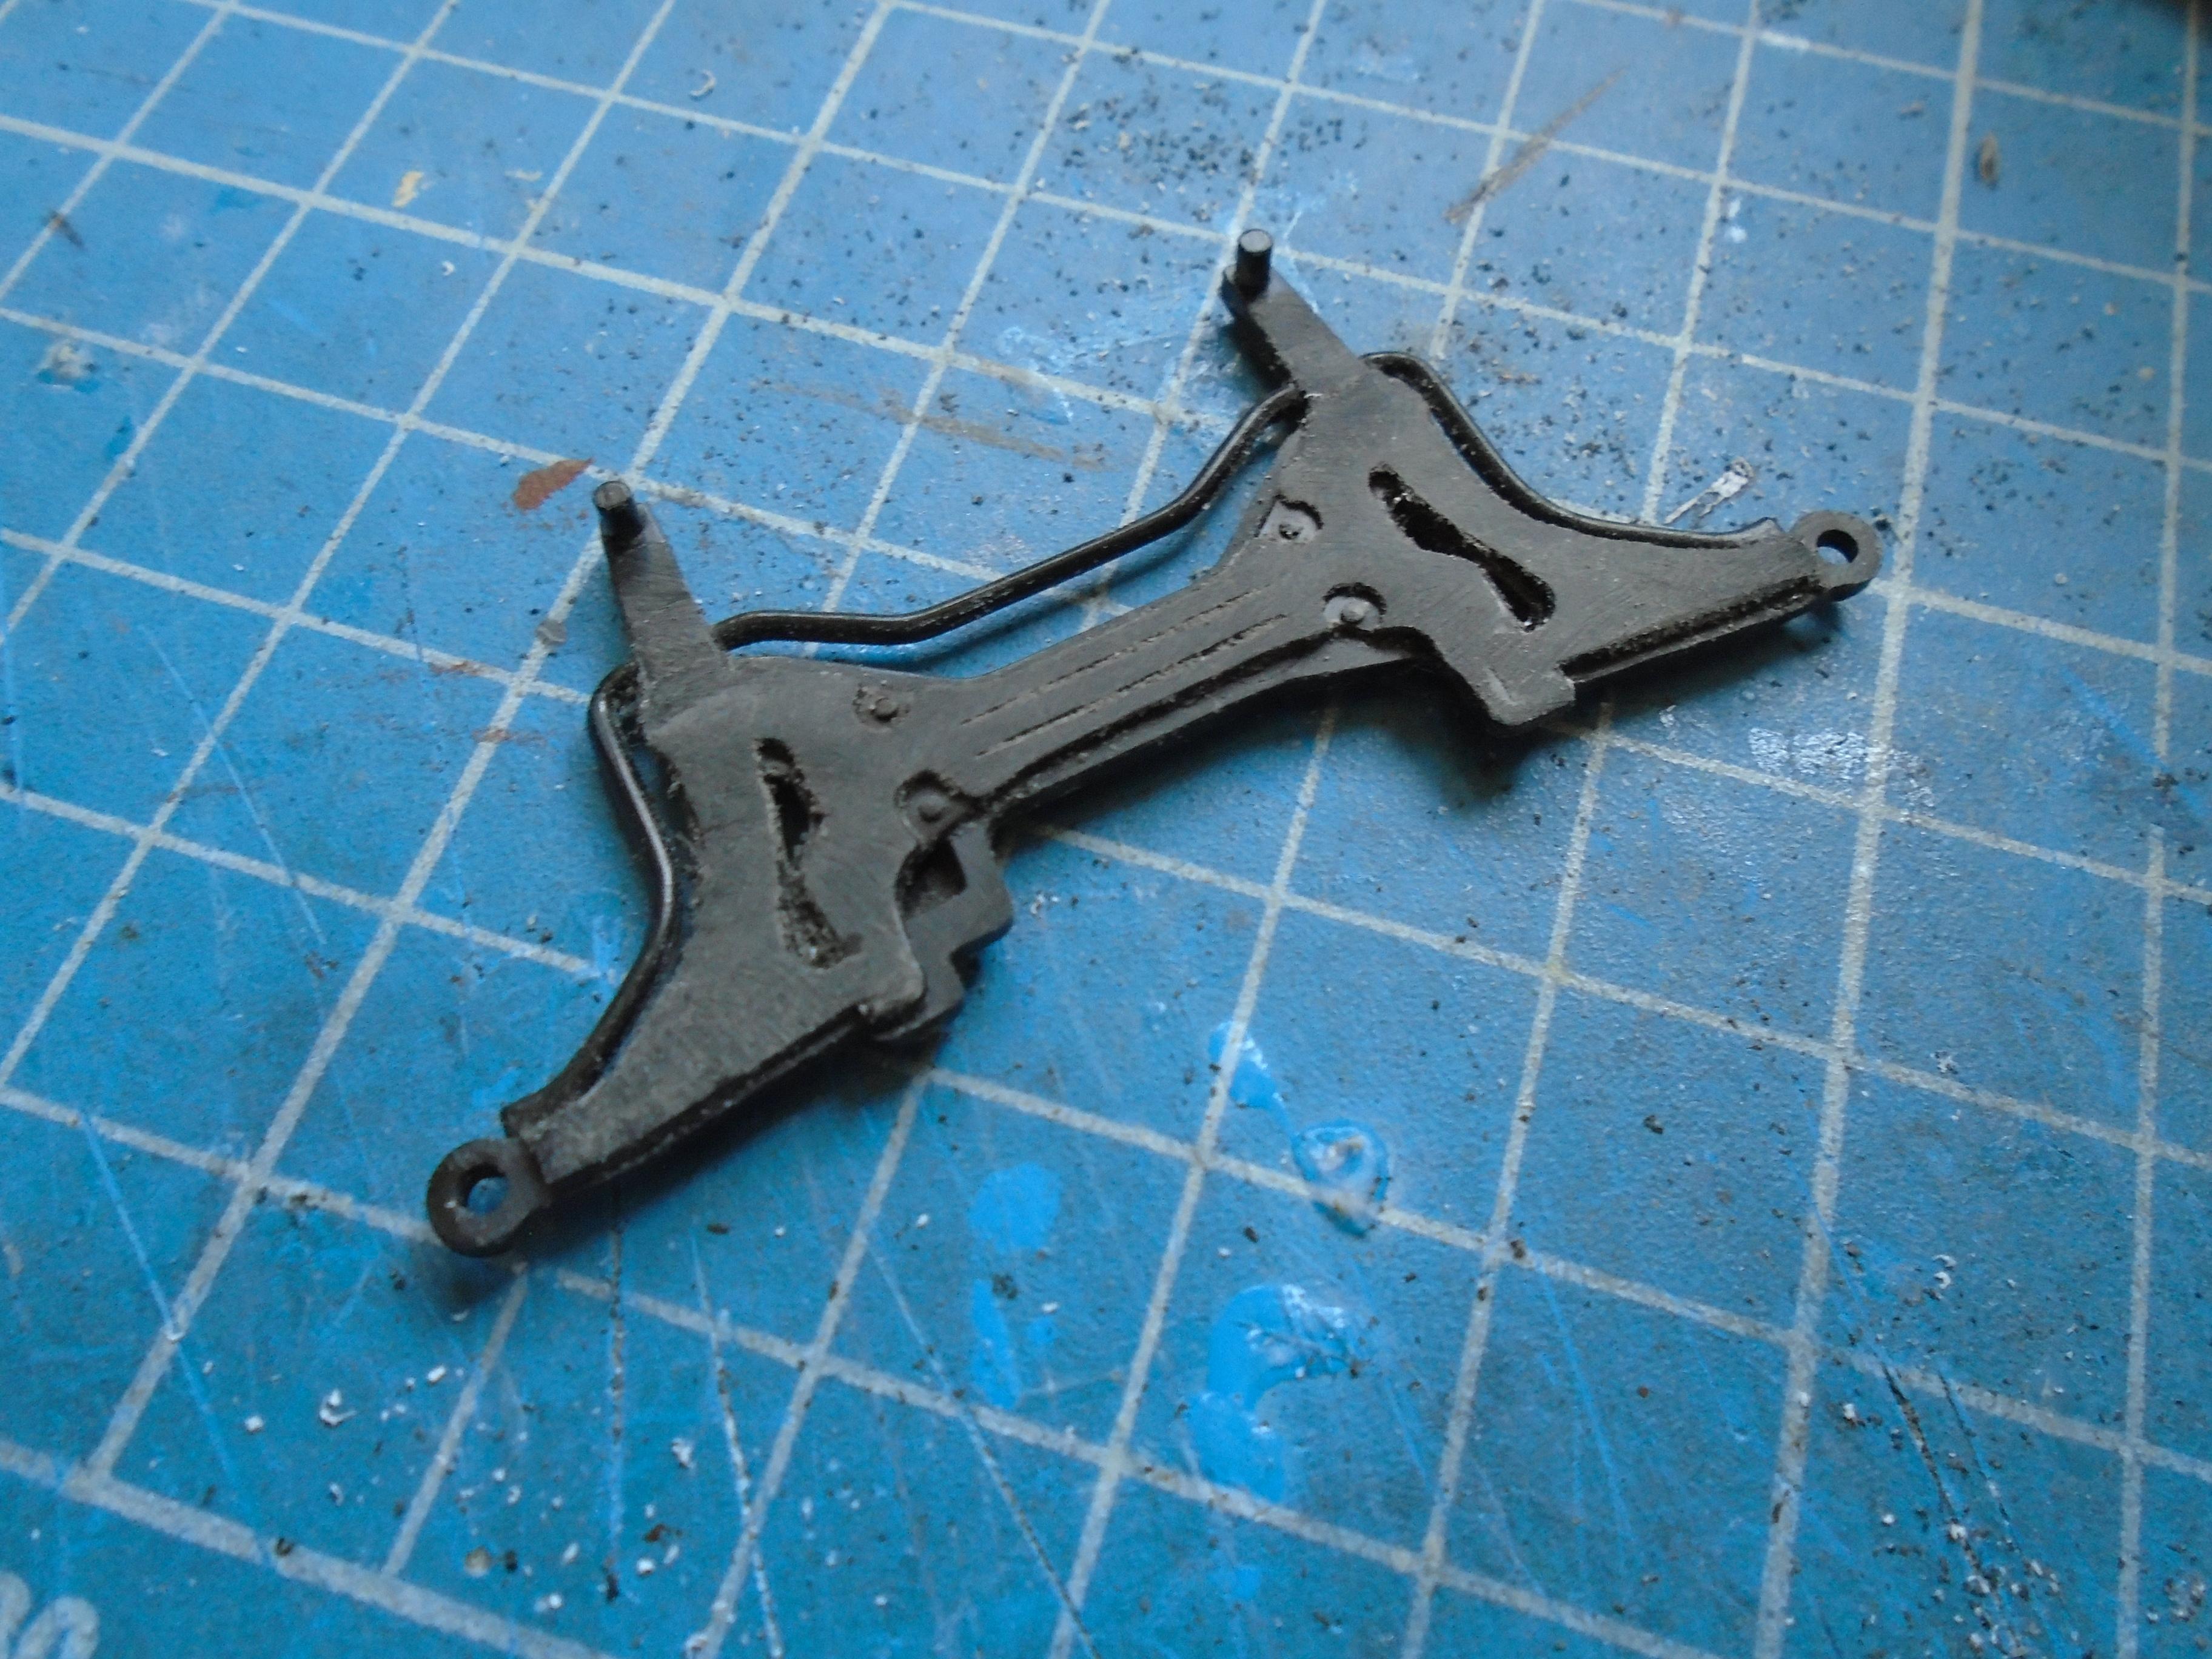
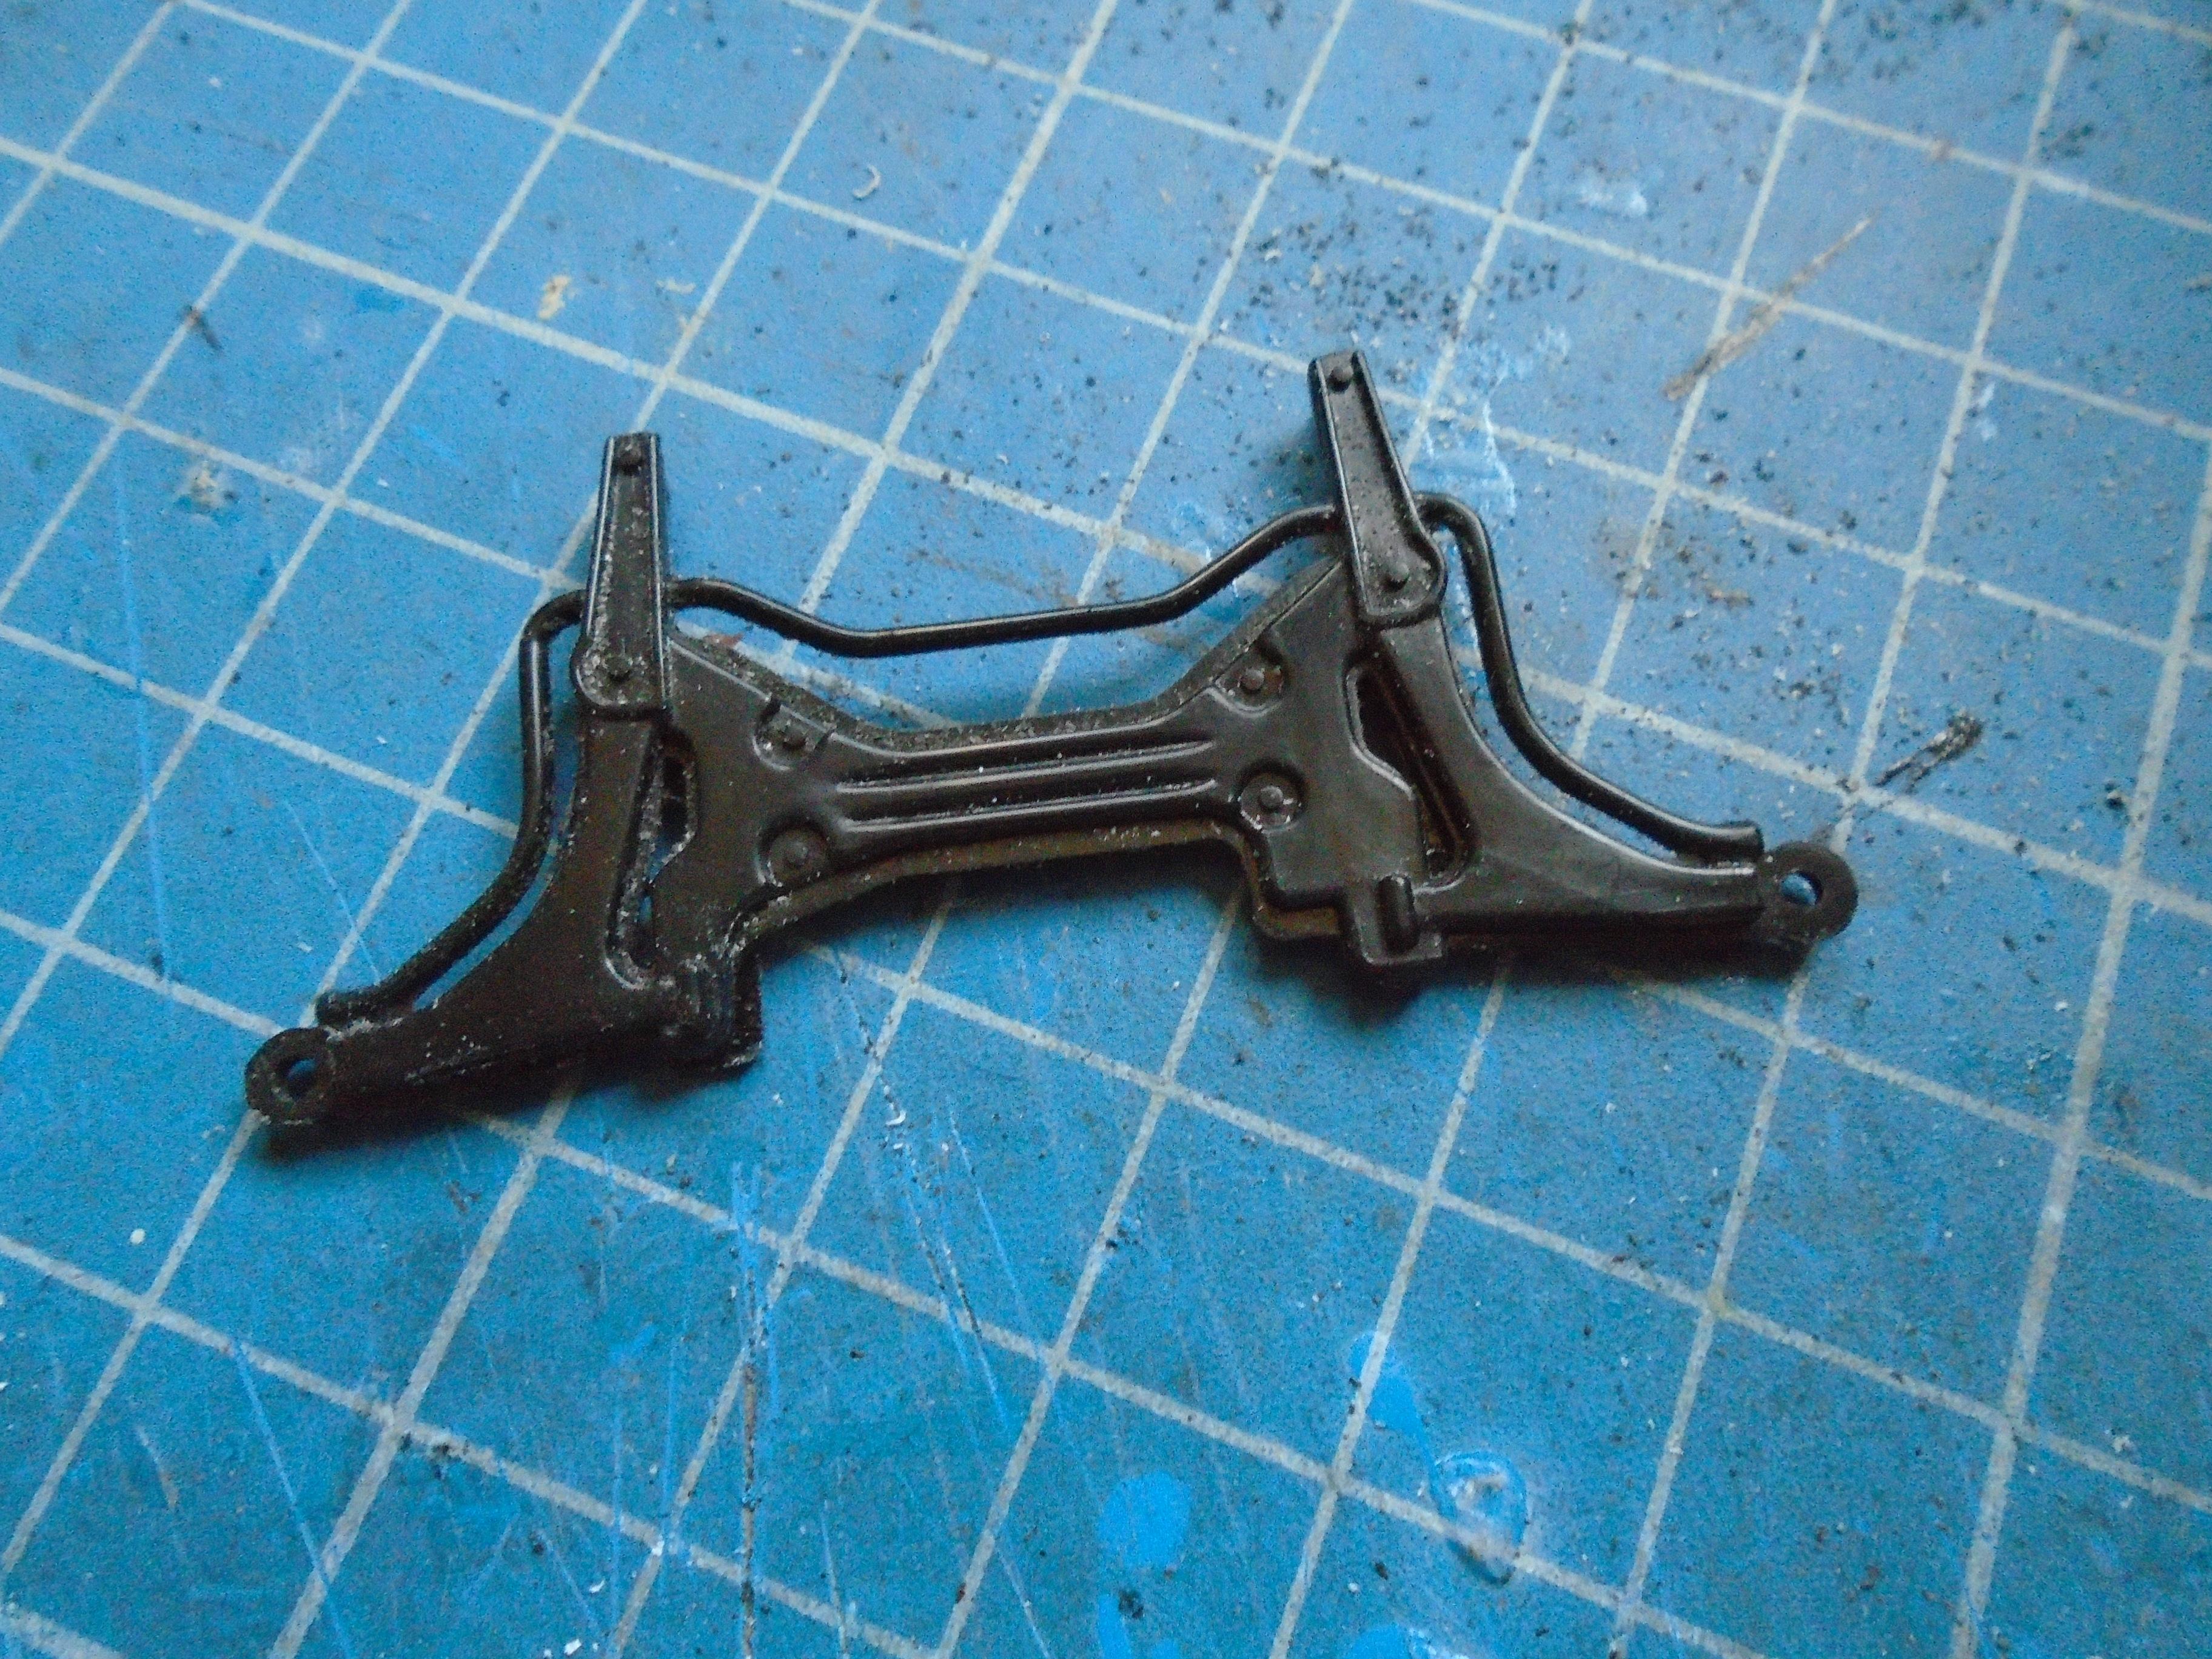
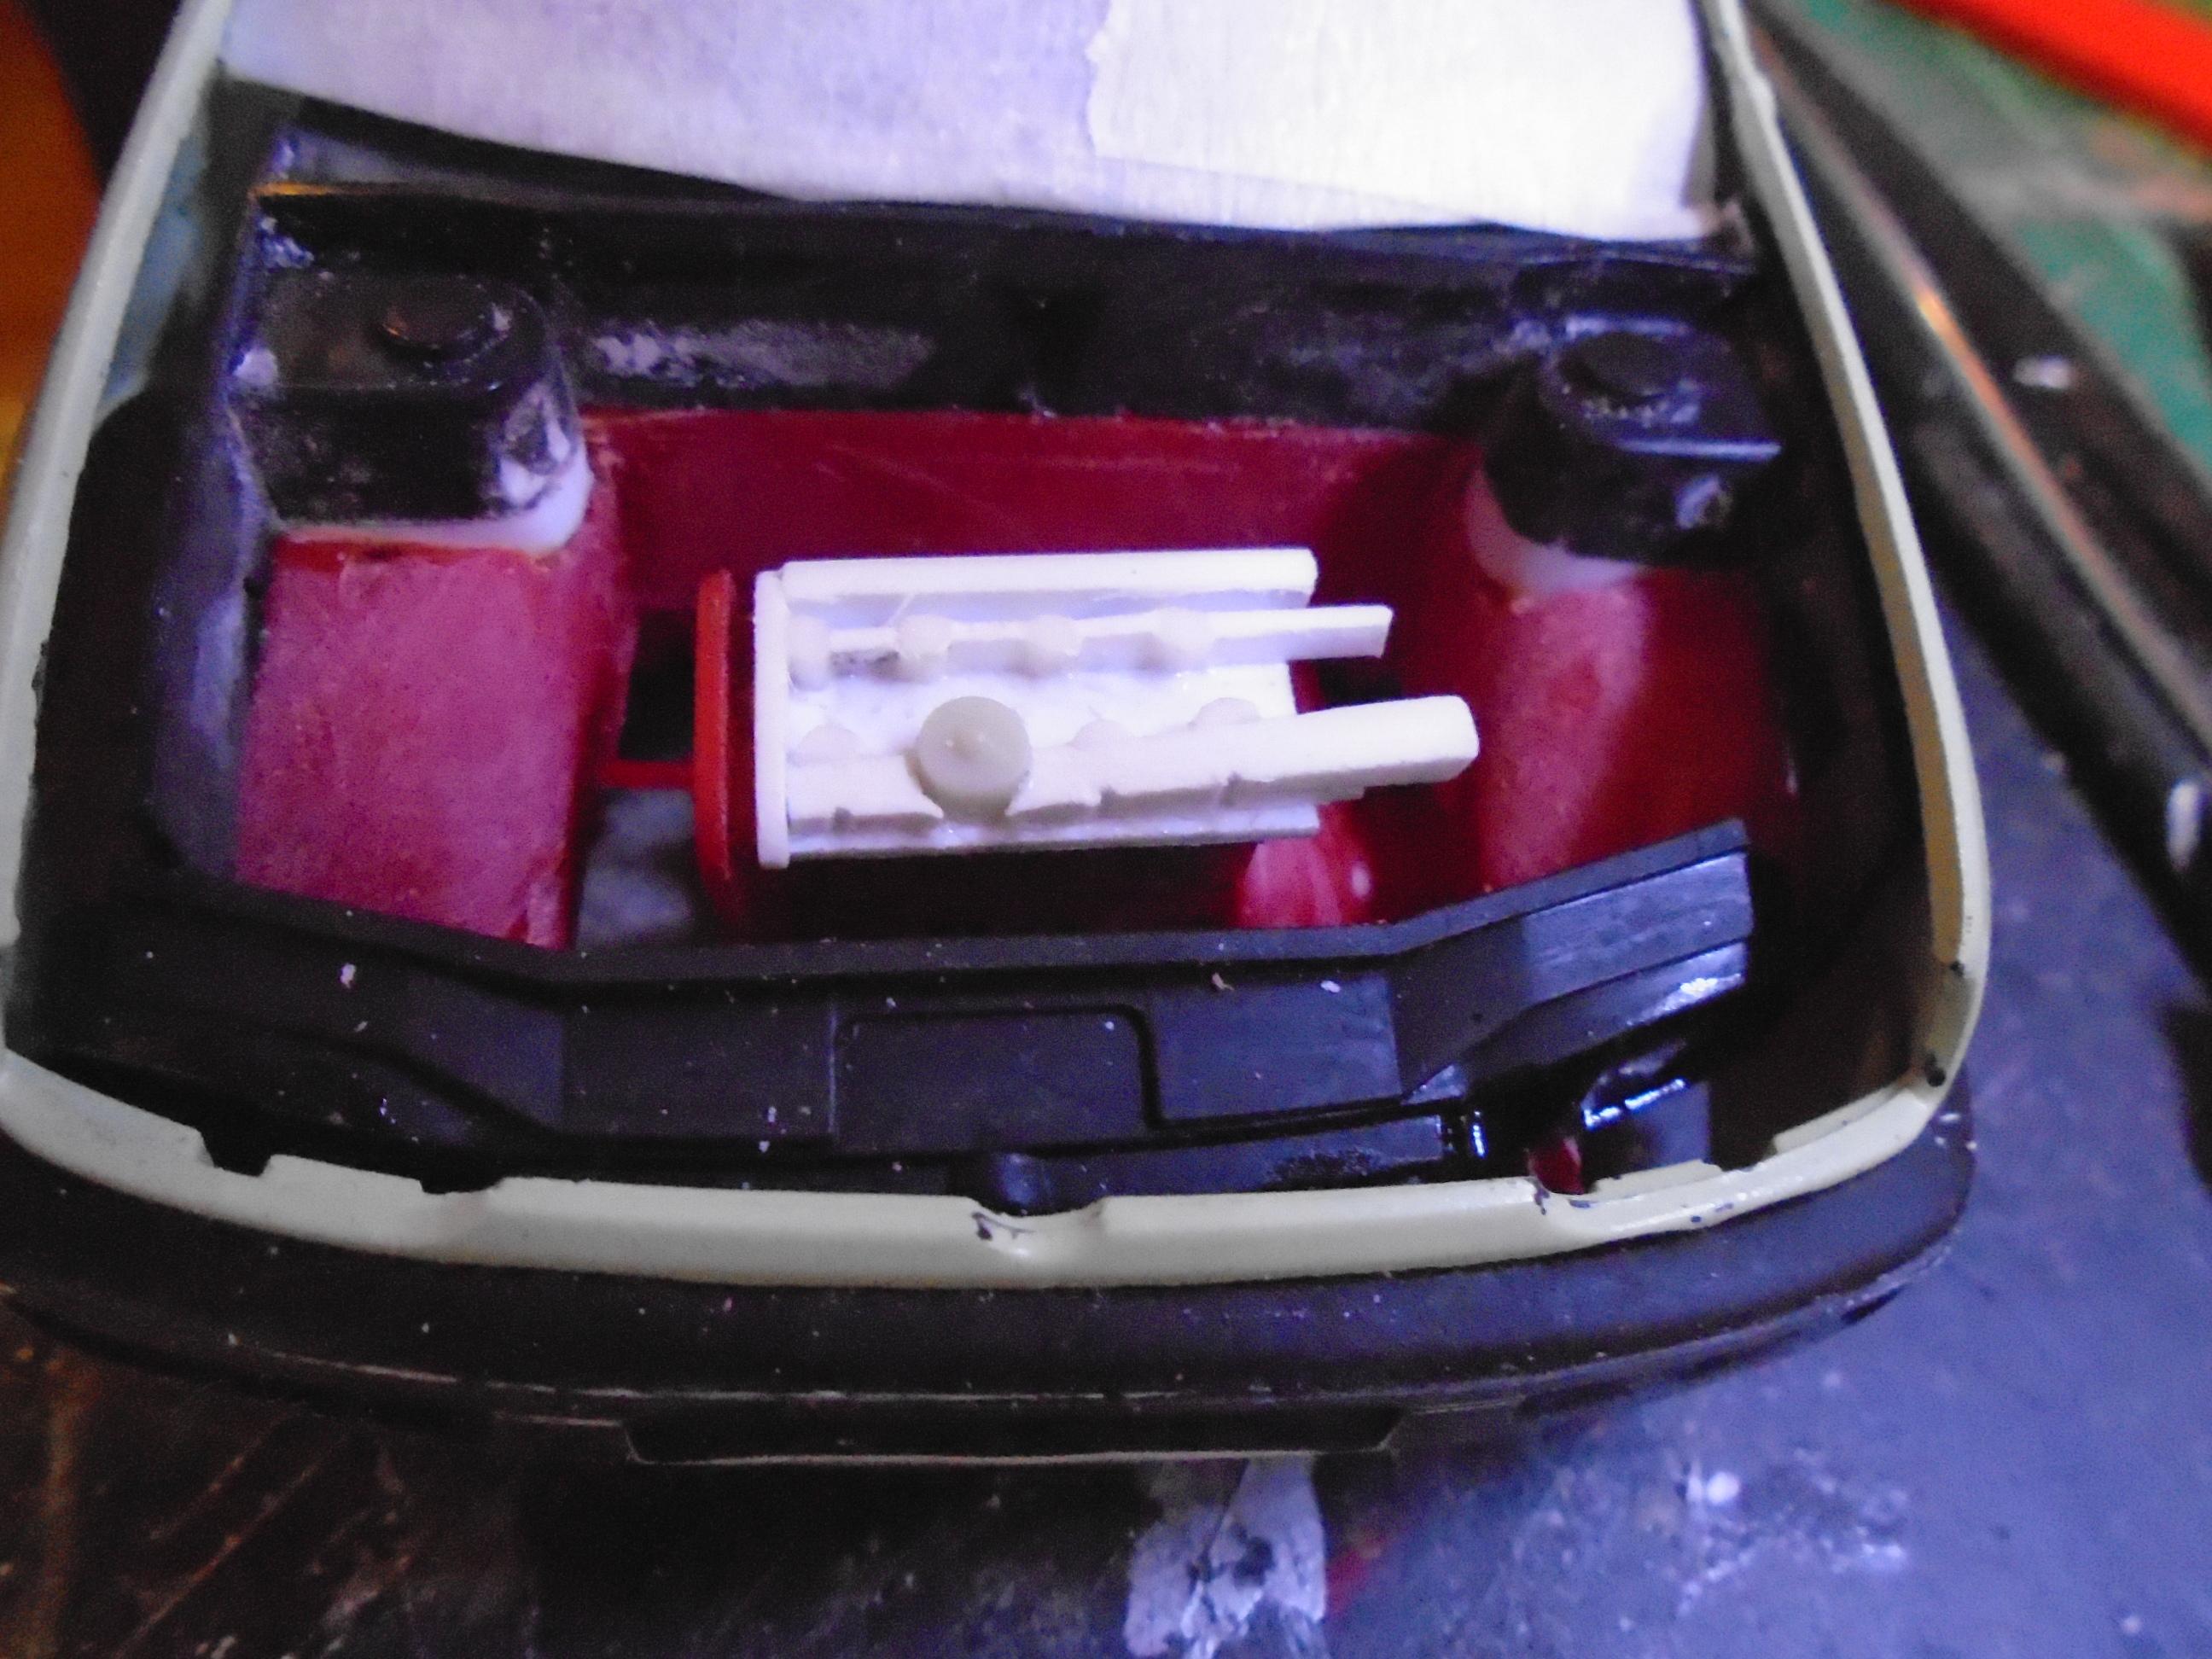
done some more on the floorpan/chassis. first i've removed the kit interior floor as it served its purpose. next i built up the tranny tunnel to look a little more like it should, though since i didn't want to remove whats already there i've angled the sides towards the back as its mostly hidden anyway. next up i trimmed the outsides of the engine bay a little and added some flat sides and the upper body reinforcing. this will add more strength to the join between the 3d printed bay and gives me excess material to file down for fit. as you can see its getting closer but this is just a mock up body to check alignment. I've left them long at the back as it gives me the correct start for the inner door panels and i'm sorely tempted to pen the doors, but that needs a lot more thought as the door is also the window edge. i might have a plan but it needs refining some. and to finish up i've started modding the suspension cross member to look more right on the top. i removed the bottom from another crossmember then filed both to fit together
-

Converting a truck to a tow truck
stitchdup replied to Lionel's topic in Model Building Questions and Answers
theres a member here called mchook thats threads might help you. they've scratched a few old wreckers that look great -
I dont think the tee means anything. chris harris collects old tamiya rc cars and featured them in one of his books. alpha model will be the first to do a f80
-
there was one out last year in another box. it is the enthusiast kit but the box is a manga or similar version. same kit with all the parts but has a normal curbside price. if your unsure what kit it is the japanese stores usually have the instructions pictured
-
it depends on the situation. for everyday i'd pick a supercharger but for going fast turbo. also my reason for a supercharger is most of my cars have been fwd and a turbo has the major drawback of torque steer when the boost kicks in. if you think its bad on a tuned rwd you want to try it when its also the steering wheels. theres a reason reno 5 and fwd escort turbos are hard to find and it wasn't a lack of supply, lol
-
I'm in scotland so i cant really help. do you have any local tabletop warhammer type gamers? they are the other group that uses mostly resin printers and many of them do printing too being a generally younger age group. it could be worth asking them
-
Converting a truck to a tow truck
stitchdup replied to Lionel's topic in Model Building Questions and Answers
do you have access to a 3d printer? there ar a few beds and winches available on cults -
I'm pretty sure i recognise that park. Did there used to be a skateboard ramp where the basketball pitch is?
-
I dont think the phaeton would work as a bugatti. its just not fancy enough for the bugatti name and sits below the audi a8 in terms of spec. Its a good car but even as a vw fan it always seemed like it was trying to be an audi and like you say, the vw name just isn't going to feature in many ceo car parks. a few folk i know in the vw scene think it was more of a production test for the engines as they got put in a lot of the vw group suvs when the phaeton went away. vw would probably use the audi a7/porsche panamera for a bugatti base. the platform is probably the most versatile for engine variety and has all the latest kit so offers more option for body and trim packages and its already used under the bentleys so we know it can handle a heavier body
-
Yellow Fever Competition Coupe, Keeler's Kustoms
stitchdup replied to stavanzer's topic in Car Kit News & Reviews
if you have an amt 36 theres another option hiding in the toyoda body but its a lot more bodywork. Its on my to do list but i dont mind sharing it cos its a long list, lol
-
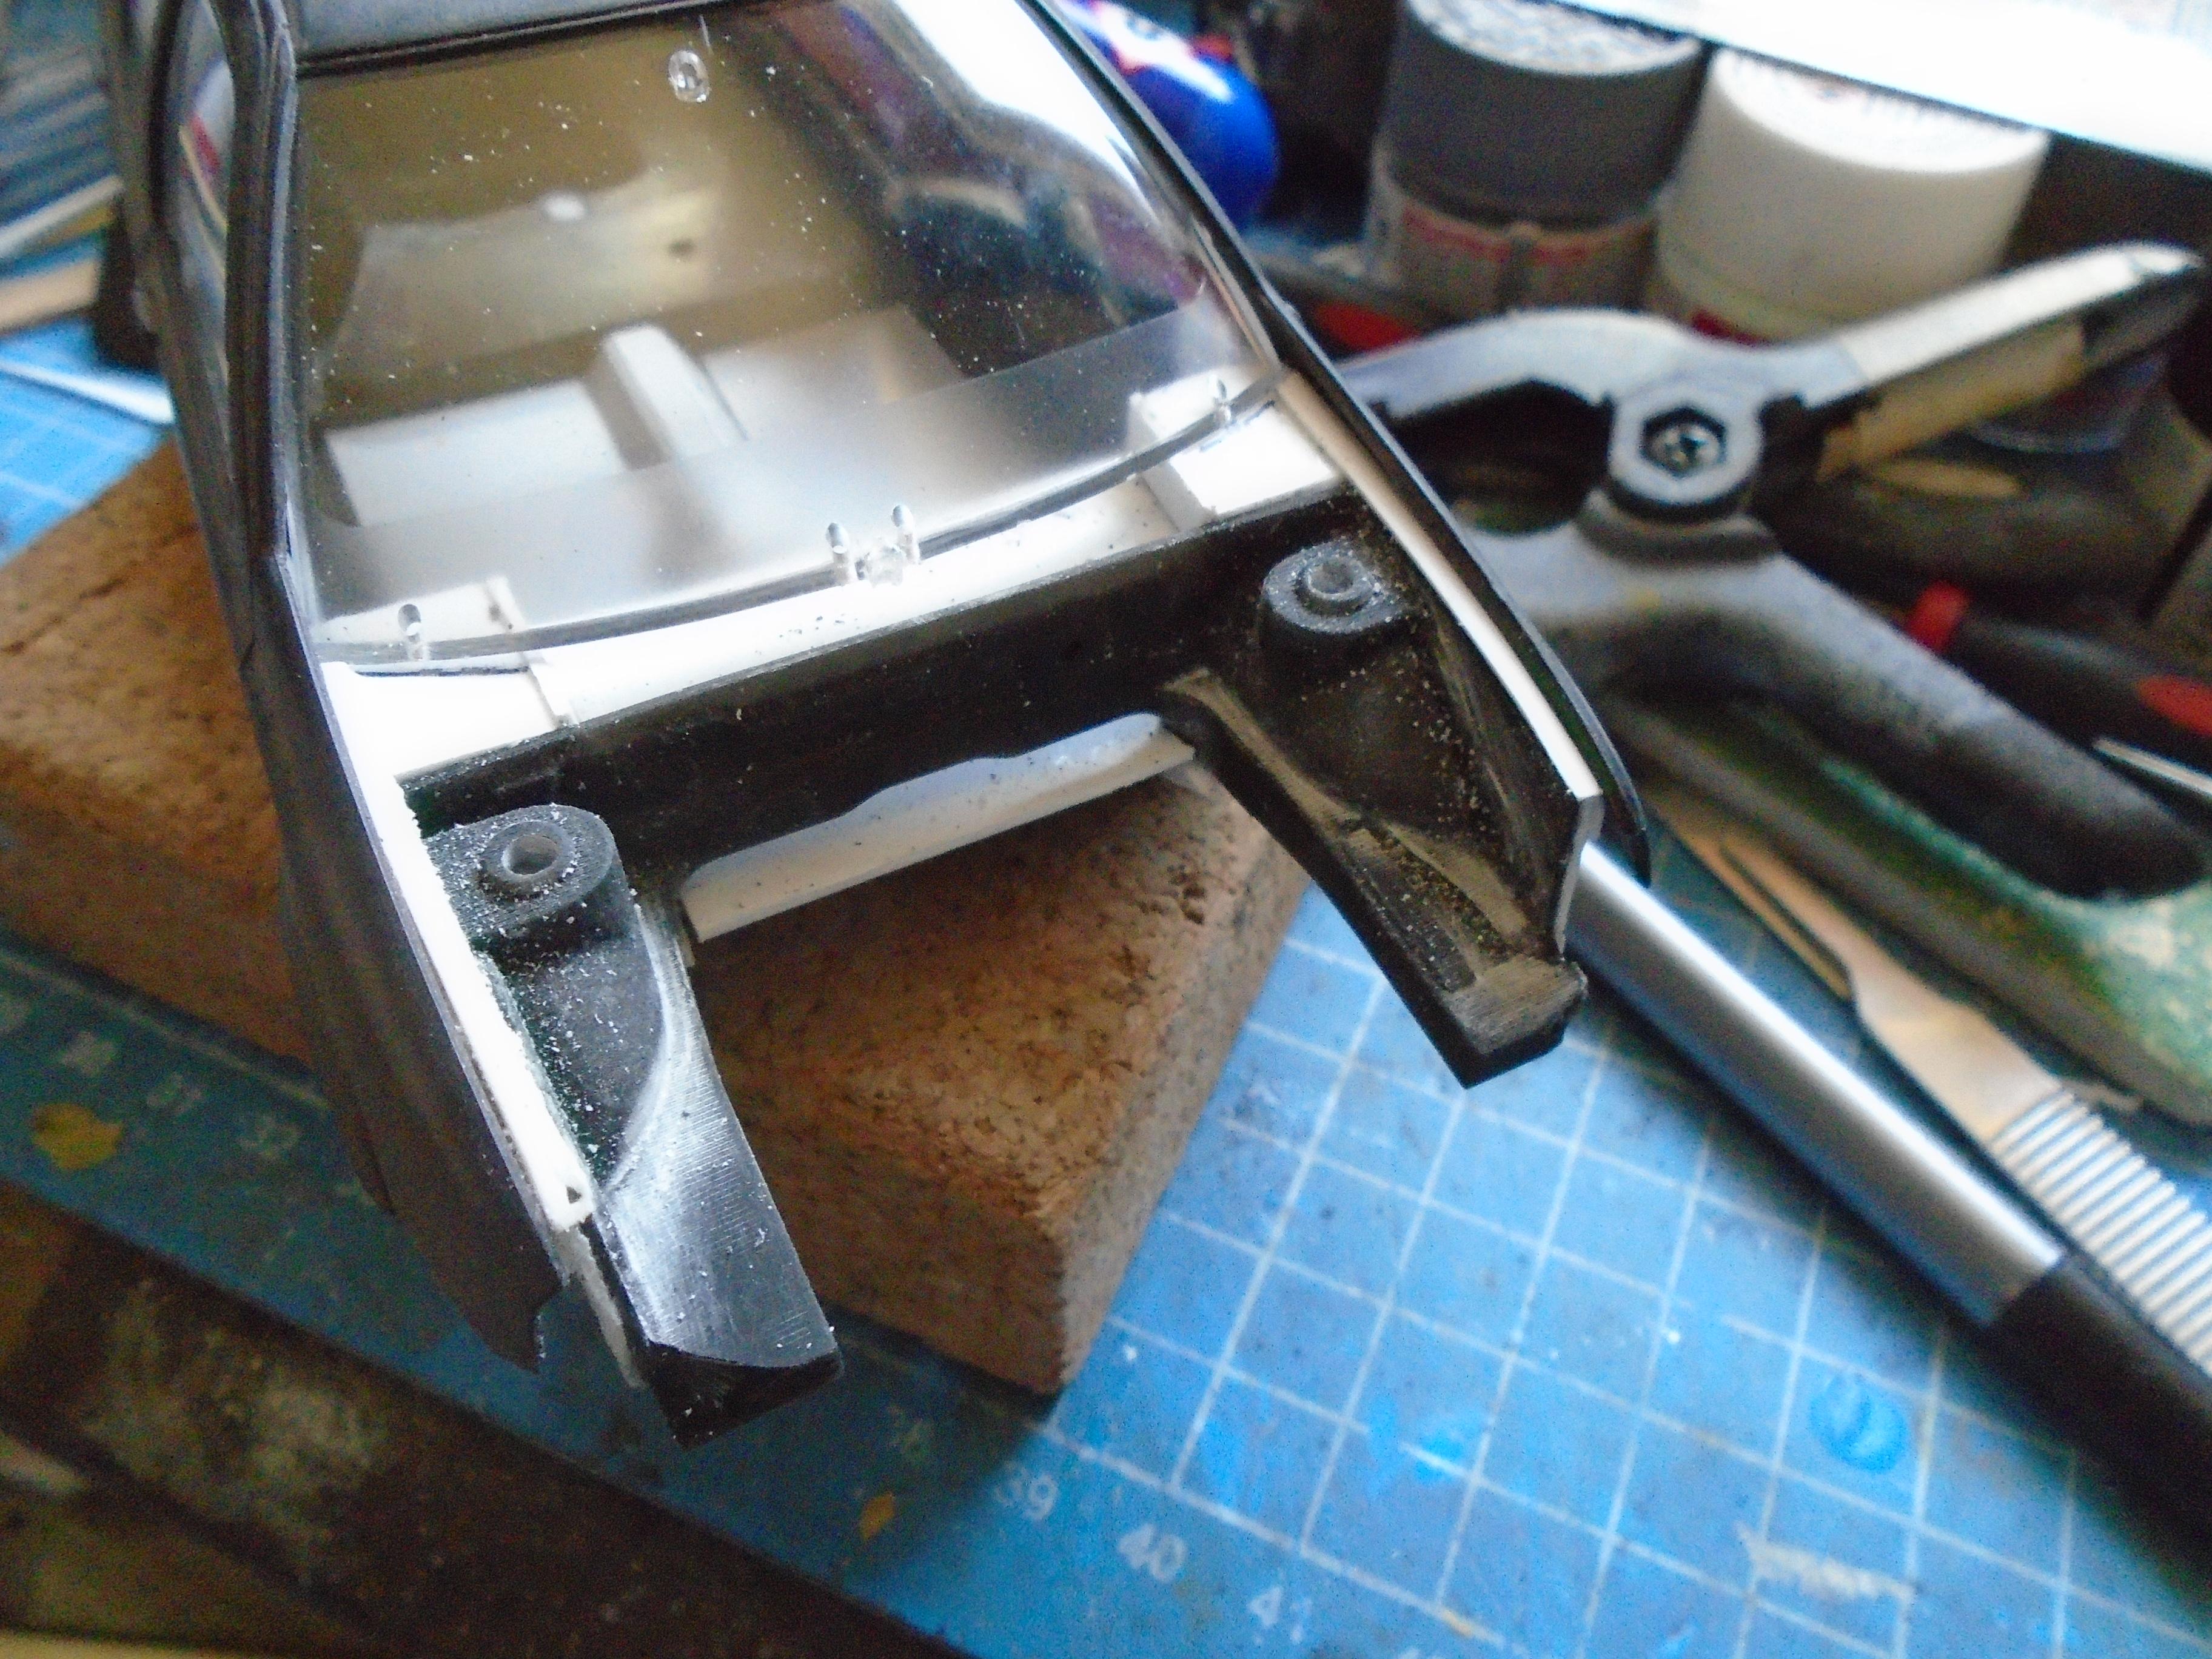
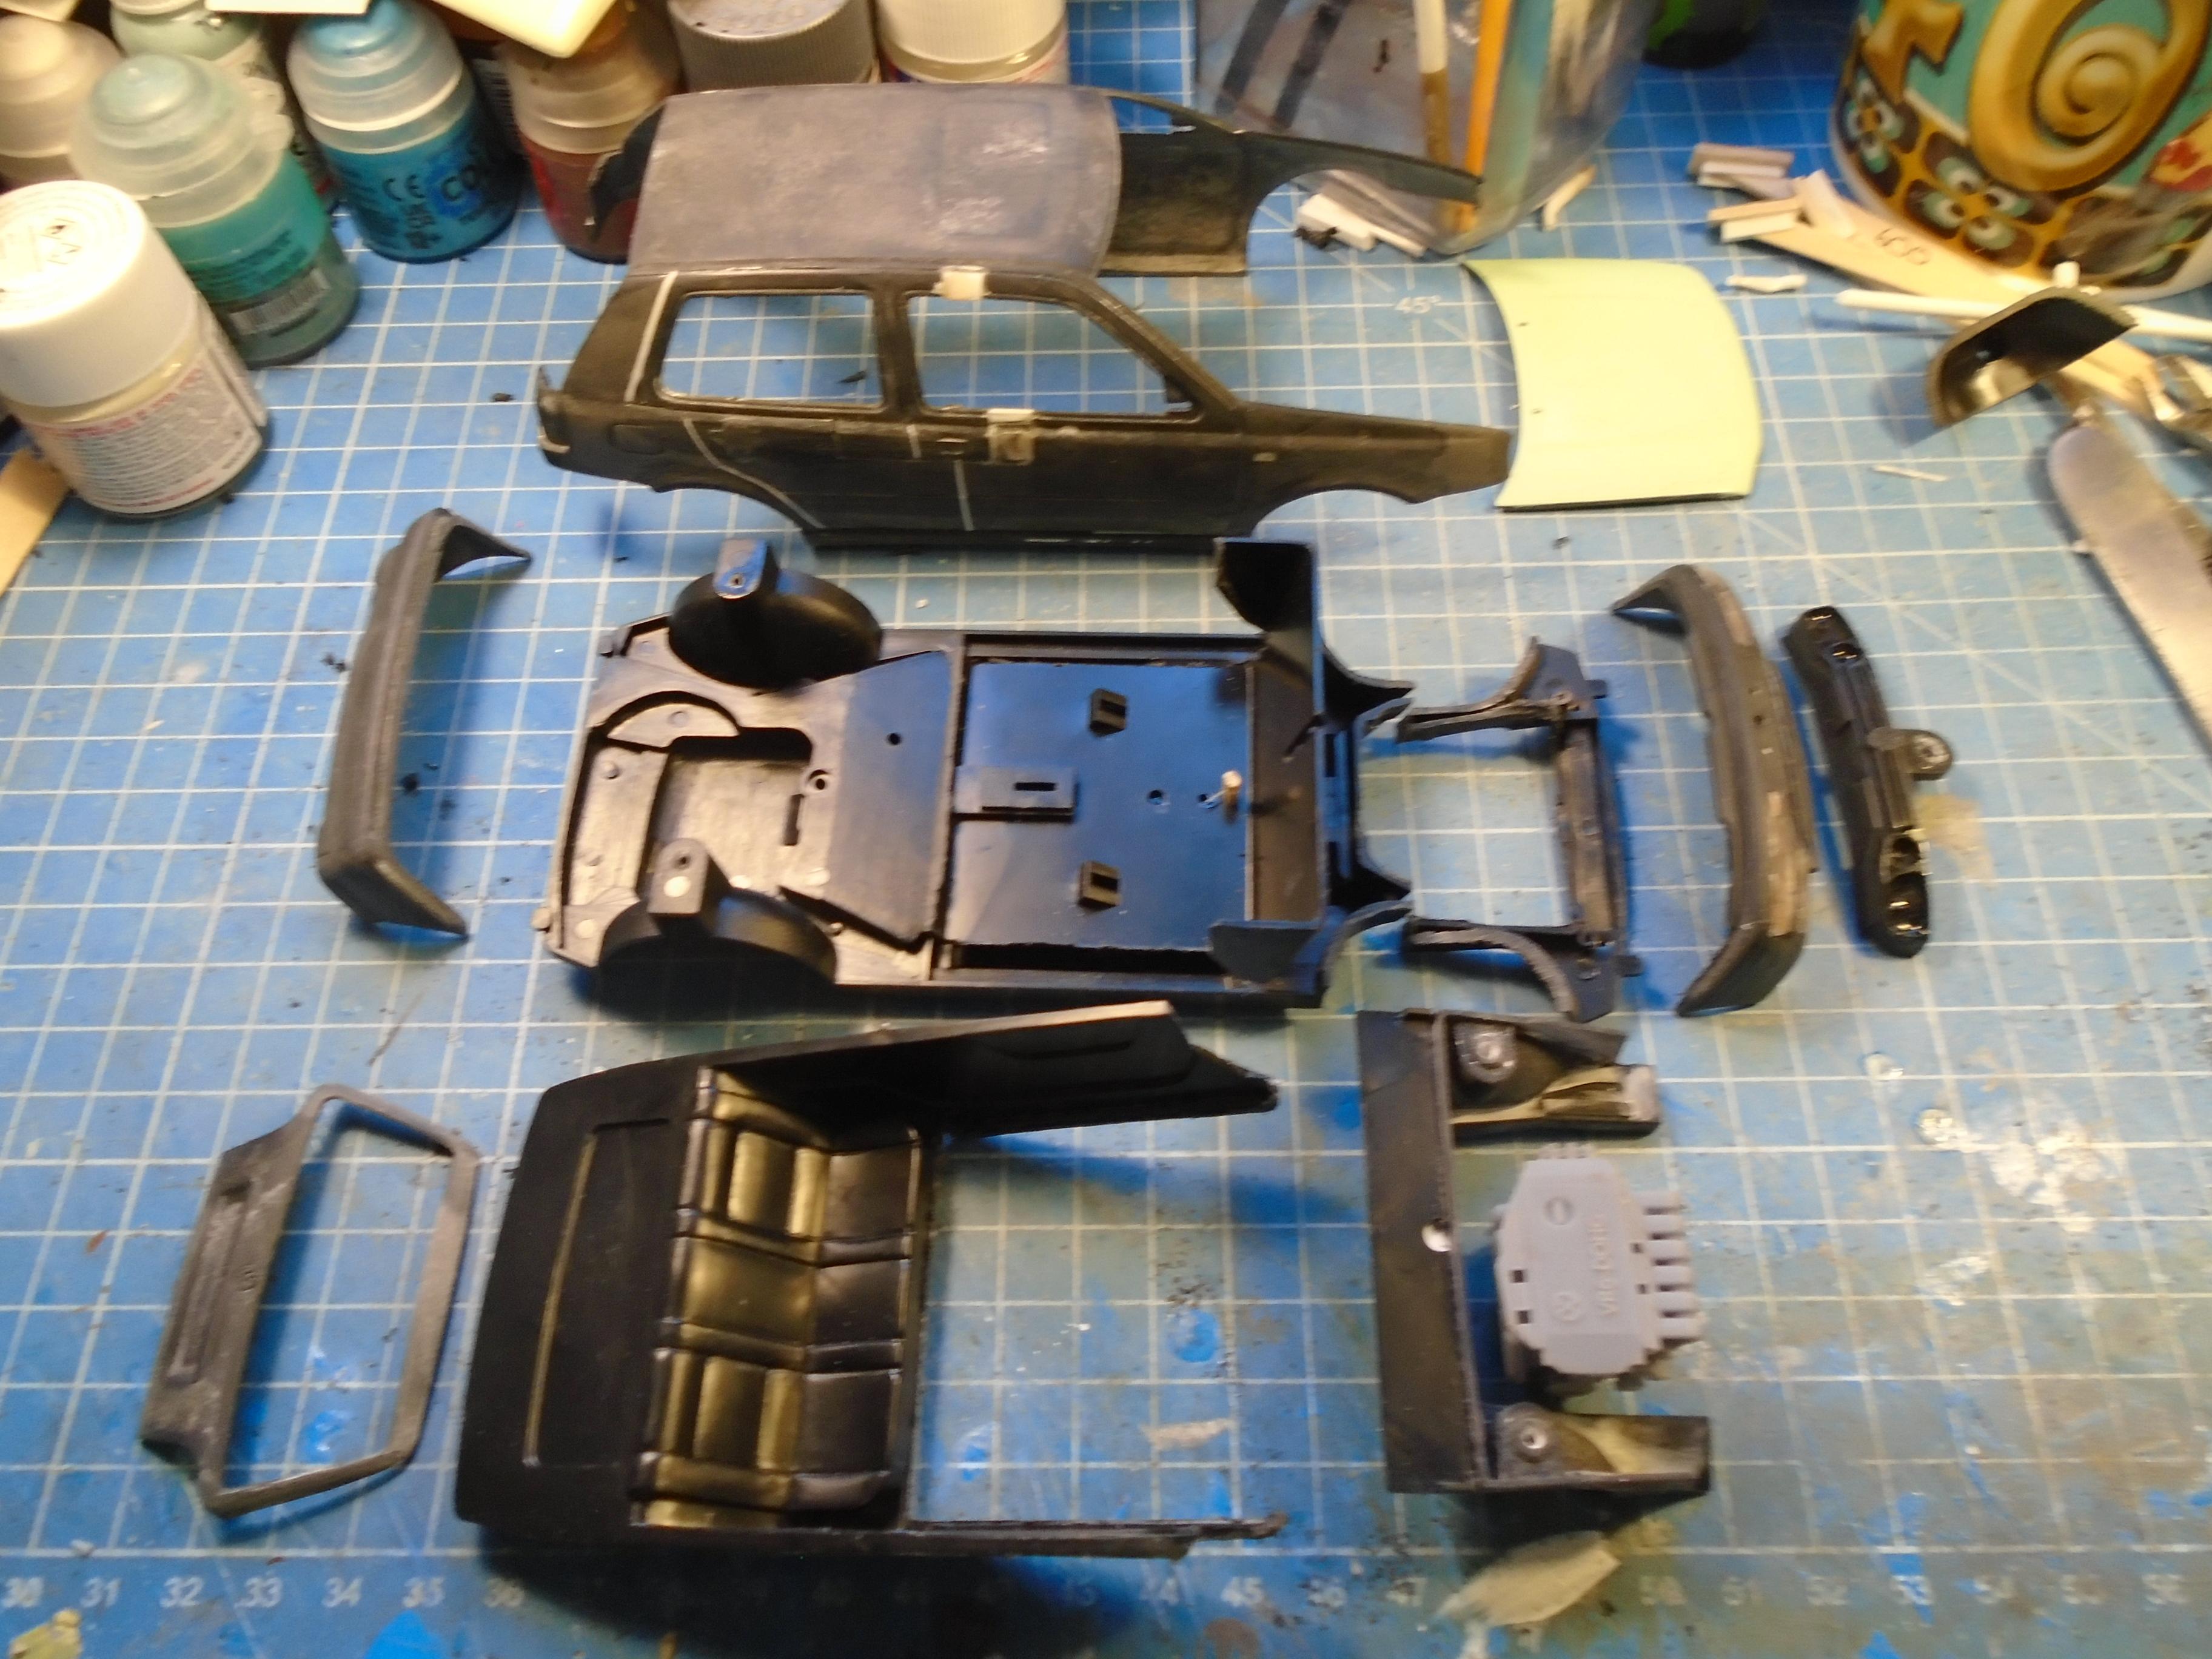
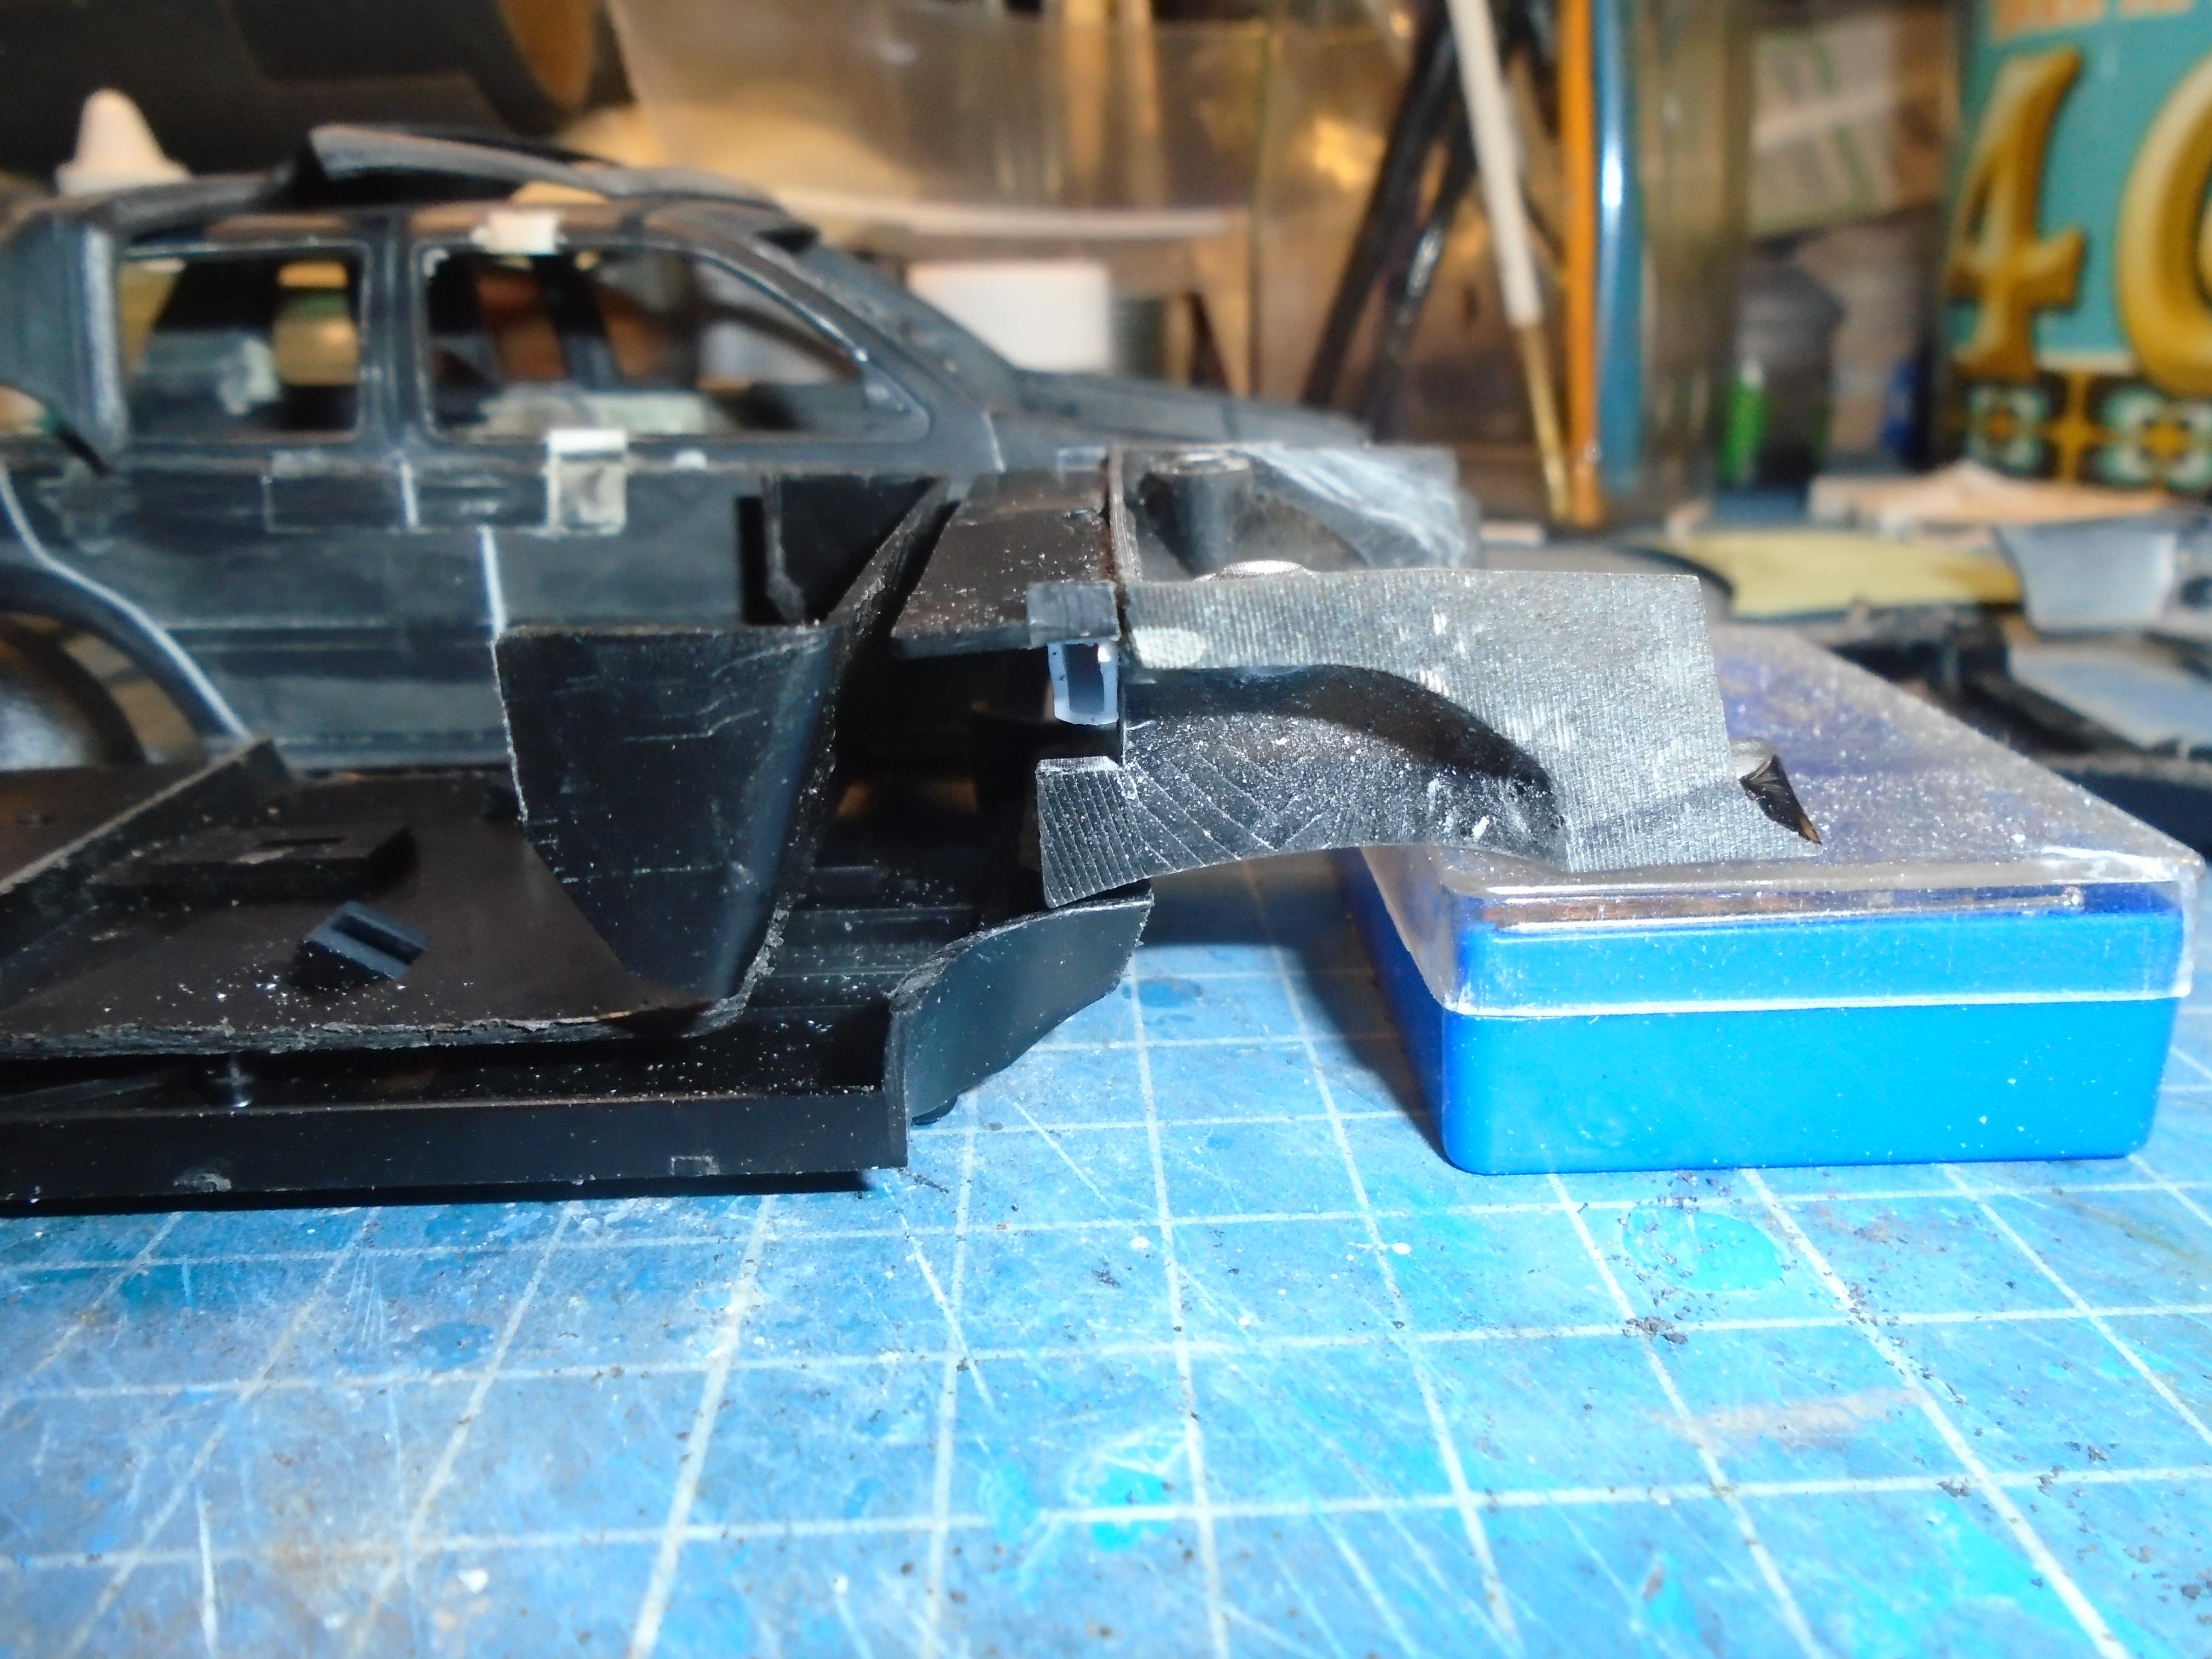
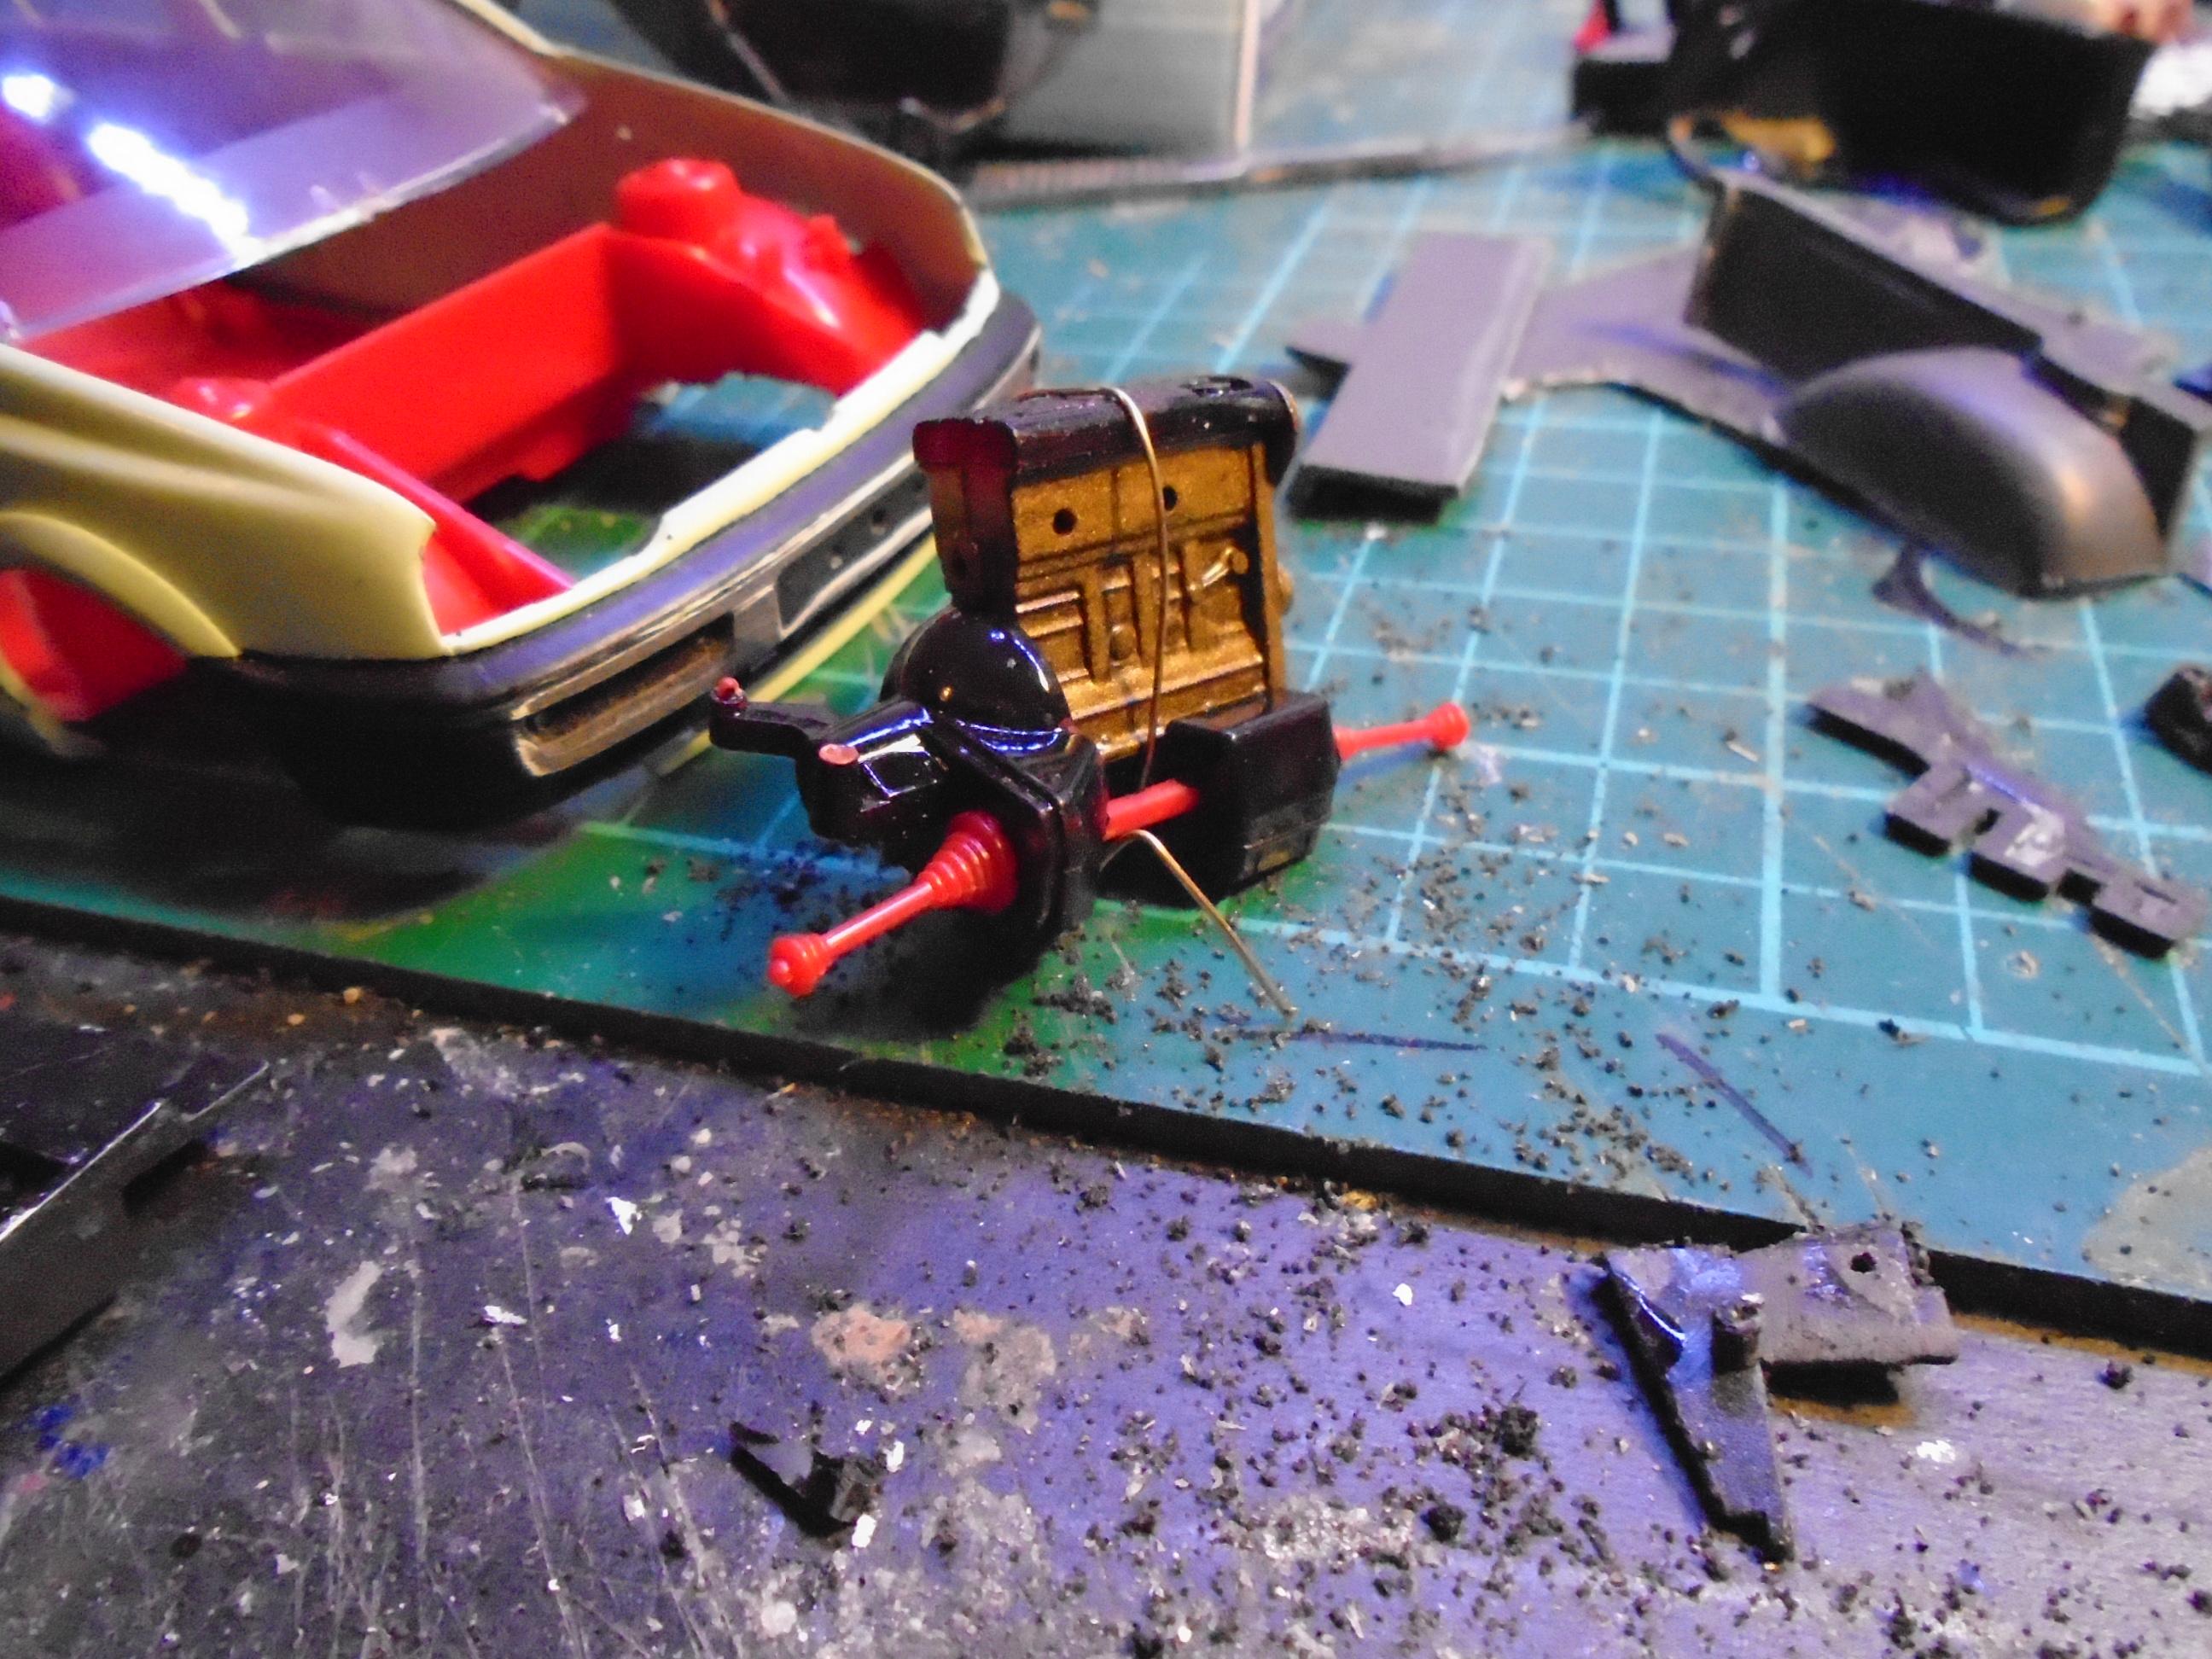
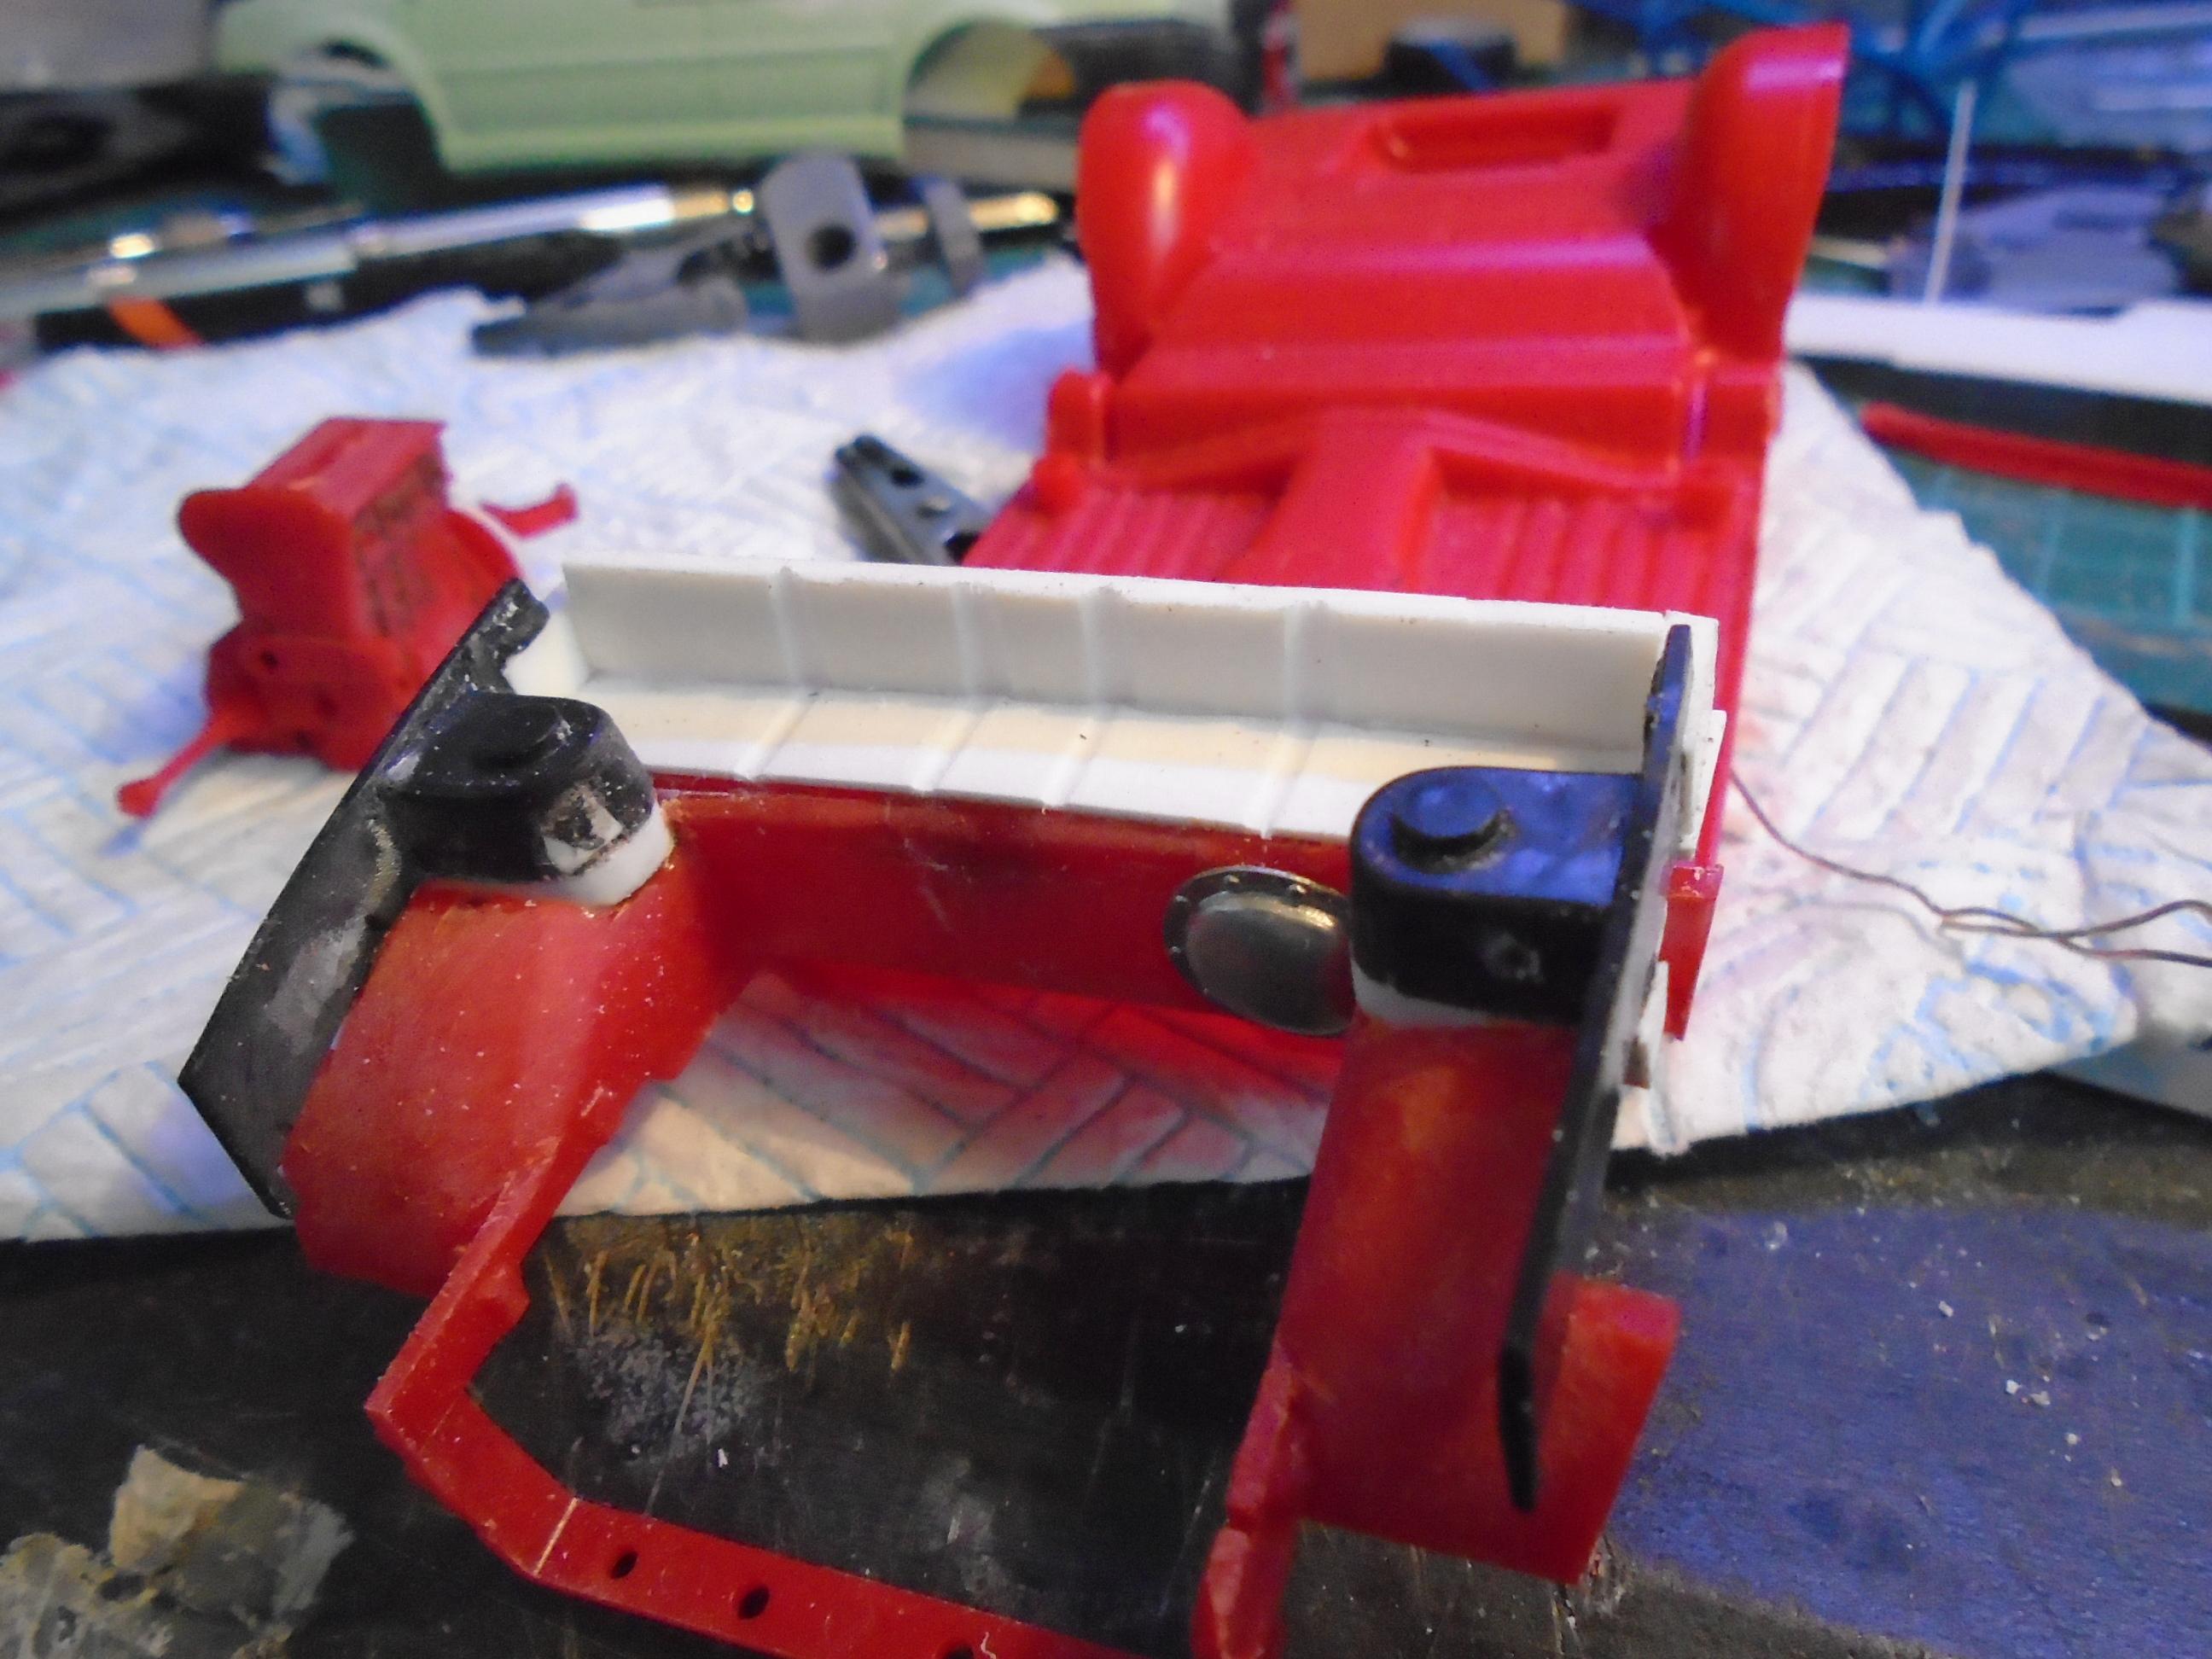
So with the fresh chassis, a little bit of thought and a saw, I've now emoved the front from the chassis and swapped some parts from the fujimi engine plate to the printed bay i've ended up with something much closer to an actual mk3 front end. Its no glued yet but the basics are there and some scratching will fill the gaps. I'll be trimming the the front legs later. and i spent a couple of hours removing the last of the gti trim which was tedious and boring but i strangely enjoyed it. I removed the floor from the interior to help with lining things up at the front, and sincethe saw was out the bumpers and boot lid came off too. and the engine i'll be using. you might see the vr6 while i'm building it but its just for mock ups as its all sorts of wrong theres a lot more to come with this one.
-
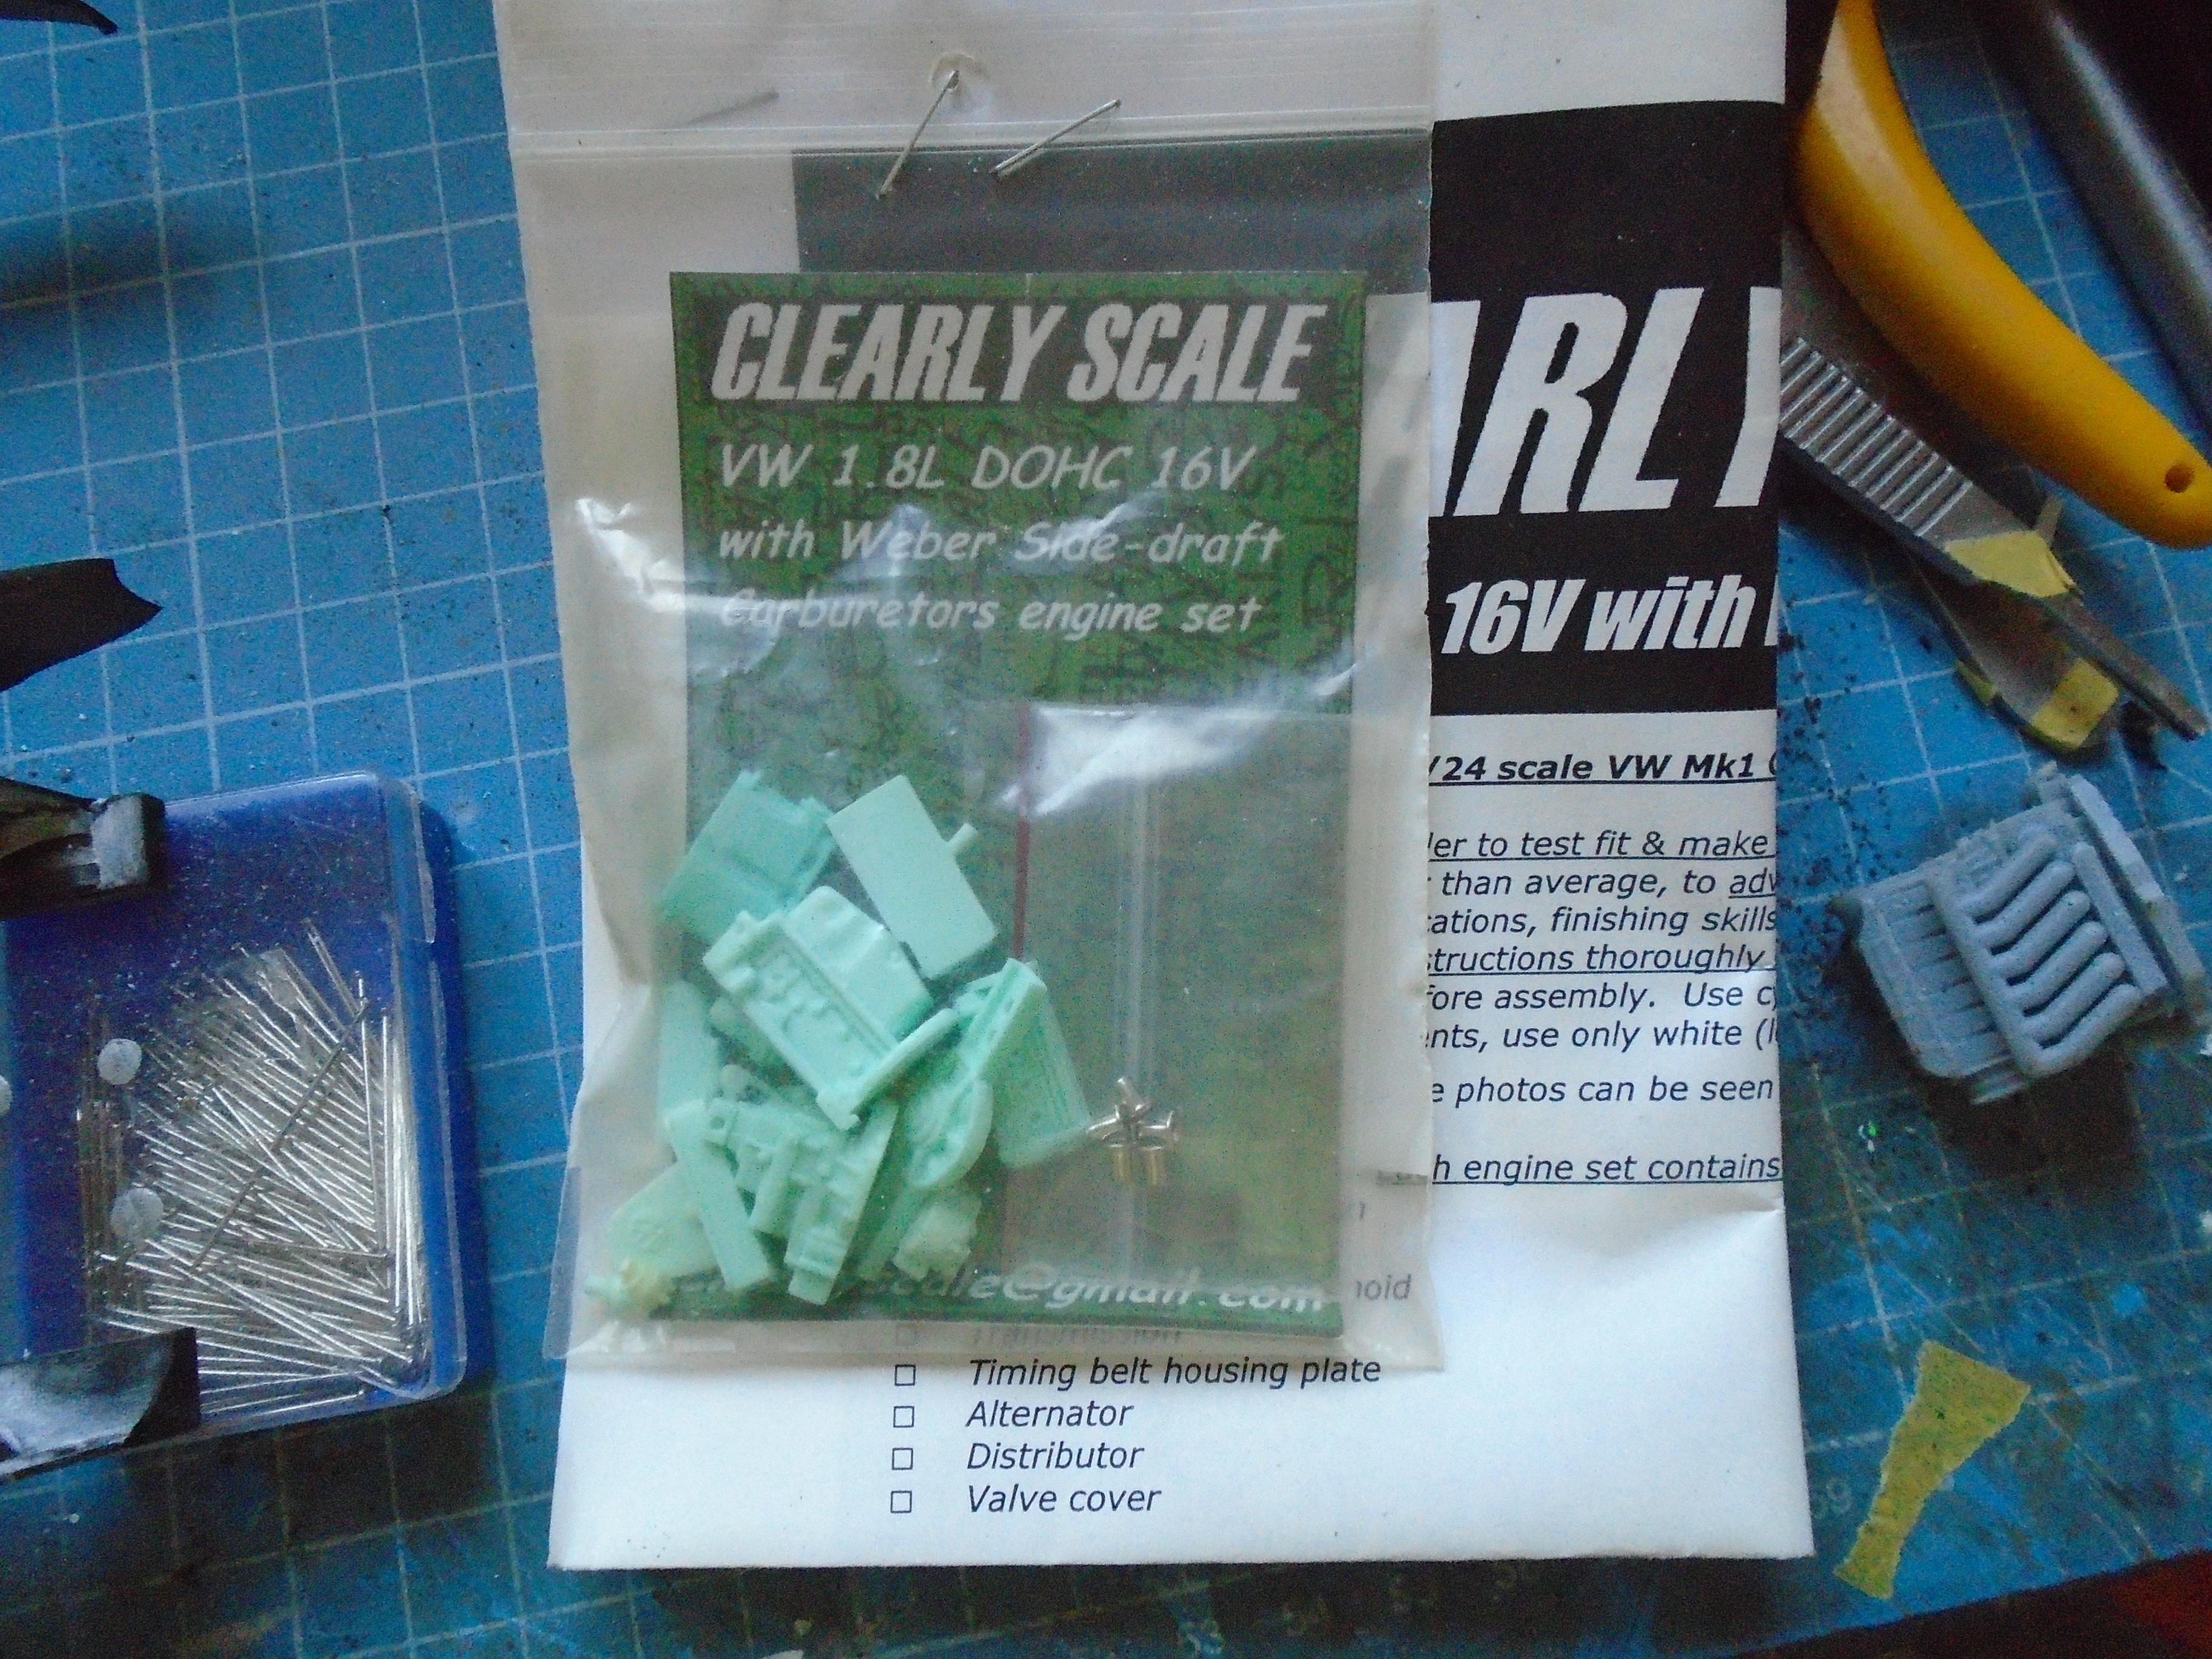
This was originally started back in 2019 before the new ferry arrived at my previous job. It has had work done sporadically but never really moved that far along but now with various parts from the aftermarket and 3d printing i can actually build my old golf. When i started this i didn't have anything but the body as i'd used it under a uscp wagon so i made do with an alfa coupe chassis and bmw compact interior but all that is getting put in the parts box and i'm using a second hand started kit as a donor for the chassis and interior. I'm sticking with the original body as i dont fancy doing all the changes again at this time but since i have another 5 fresh kits who knows what the future will bring. Unfortunately i dont have any pics of my old car but i know where it currently sits and it wrecked from not being used. I did look to buy it back but all my good parts are gone and the carbs are more corrosion than metal at this point. So my aim is to build it as i would if i still had it which isn't too far from what it was, just nicer finishes as i viewed it as a project but never really had an end goal ten. This time i do, abf16v, 6 speed box, boxster brakes, bags, base model body trim and interior and a shaved engine bay. Hers a recap of what had been done. I was converting the alfa engine to look like 1.8t but i messsed it up and got details mixed between it and a tfsi but i now have a correct clearly scale engine. and all i've kept
-
do you mean rubber black? if so its flat and looks like rubber
-
its also available as bondic brand. slightly different but basicly the same thing
-
Revell (Monogram) 1/24th scale, 1985 Pontiac Fiero
stitchdup replied to Luc Janssens's topic in Car Kit News & Reviews
revell are just trying to sell more of the expensive spray chrome. -
Do you also have 1:1 project cars?
stitchdup replied to ctruss53's topic in General Automotive Talk (Trucks and Cars)
If dodge had got a neon into fast and the furious i reckon it could have been more popular. there were some good builds based on them back in the max power days and if the dealers had spares in europe it would have sold better. all the basics for a vtec beating hot hatch are in the rt versions, they just need a little more refining and a decent air filter. for an american car there were a few in my area but none were rt's, just granny shopping cars -
I added an alternator to the tailshaft of my skyline body swap, then pronptly forgot to take a pic and glued the flat floor on, lol
-
What is your favorite sports car?
stitchdup replied to WillyBilly's topic in General Automotive Talk (Trucks and Cars)
most of these aren't sports cars, these are gt cars, not really sports cars. a sports car doesn't need to be fast, just feel like its fast which means brakes and handling, so i'll go for a bottom of the barrel lotus elise mk1 and embarass most of these on a twisty road, and then overtake again while your filling with gas, and with the toyota corolla enginr it should not need any maintenance lol
-
if i'm bidding on ebay for an opened kit i always assume a major component is missing and bid accordingly. That way if it is, its less of an issue. I've had more issues with amazon than ebay but i've also found johan kits on amazon for 20 bucks so i guess its swings and roundabouts. if your looking at new buy it now kits you can probably find them cheaper elsewhere but for older kits i still like ebay. I'm one of those folk that puts in my bid at the start cos i dont have the patience to watch them count down.
-
it never siezes could describe the 3 cylinder valencia engine my mates ford fiesta that rarely had oil or water inside but was driven the length of the country weekly