89AKurt
-
Posts
8,429 -
Joined
-
Last visited
Content Type
Profiles
Forums
Events
Gallery
Everything posted by 89AKurt
-
Thank you, will have that bookmarked. Got the wire looms installed. Last step was weathering like it just finished the race. DONE!

-
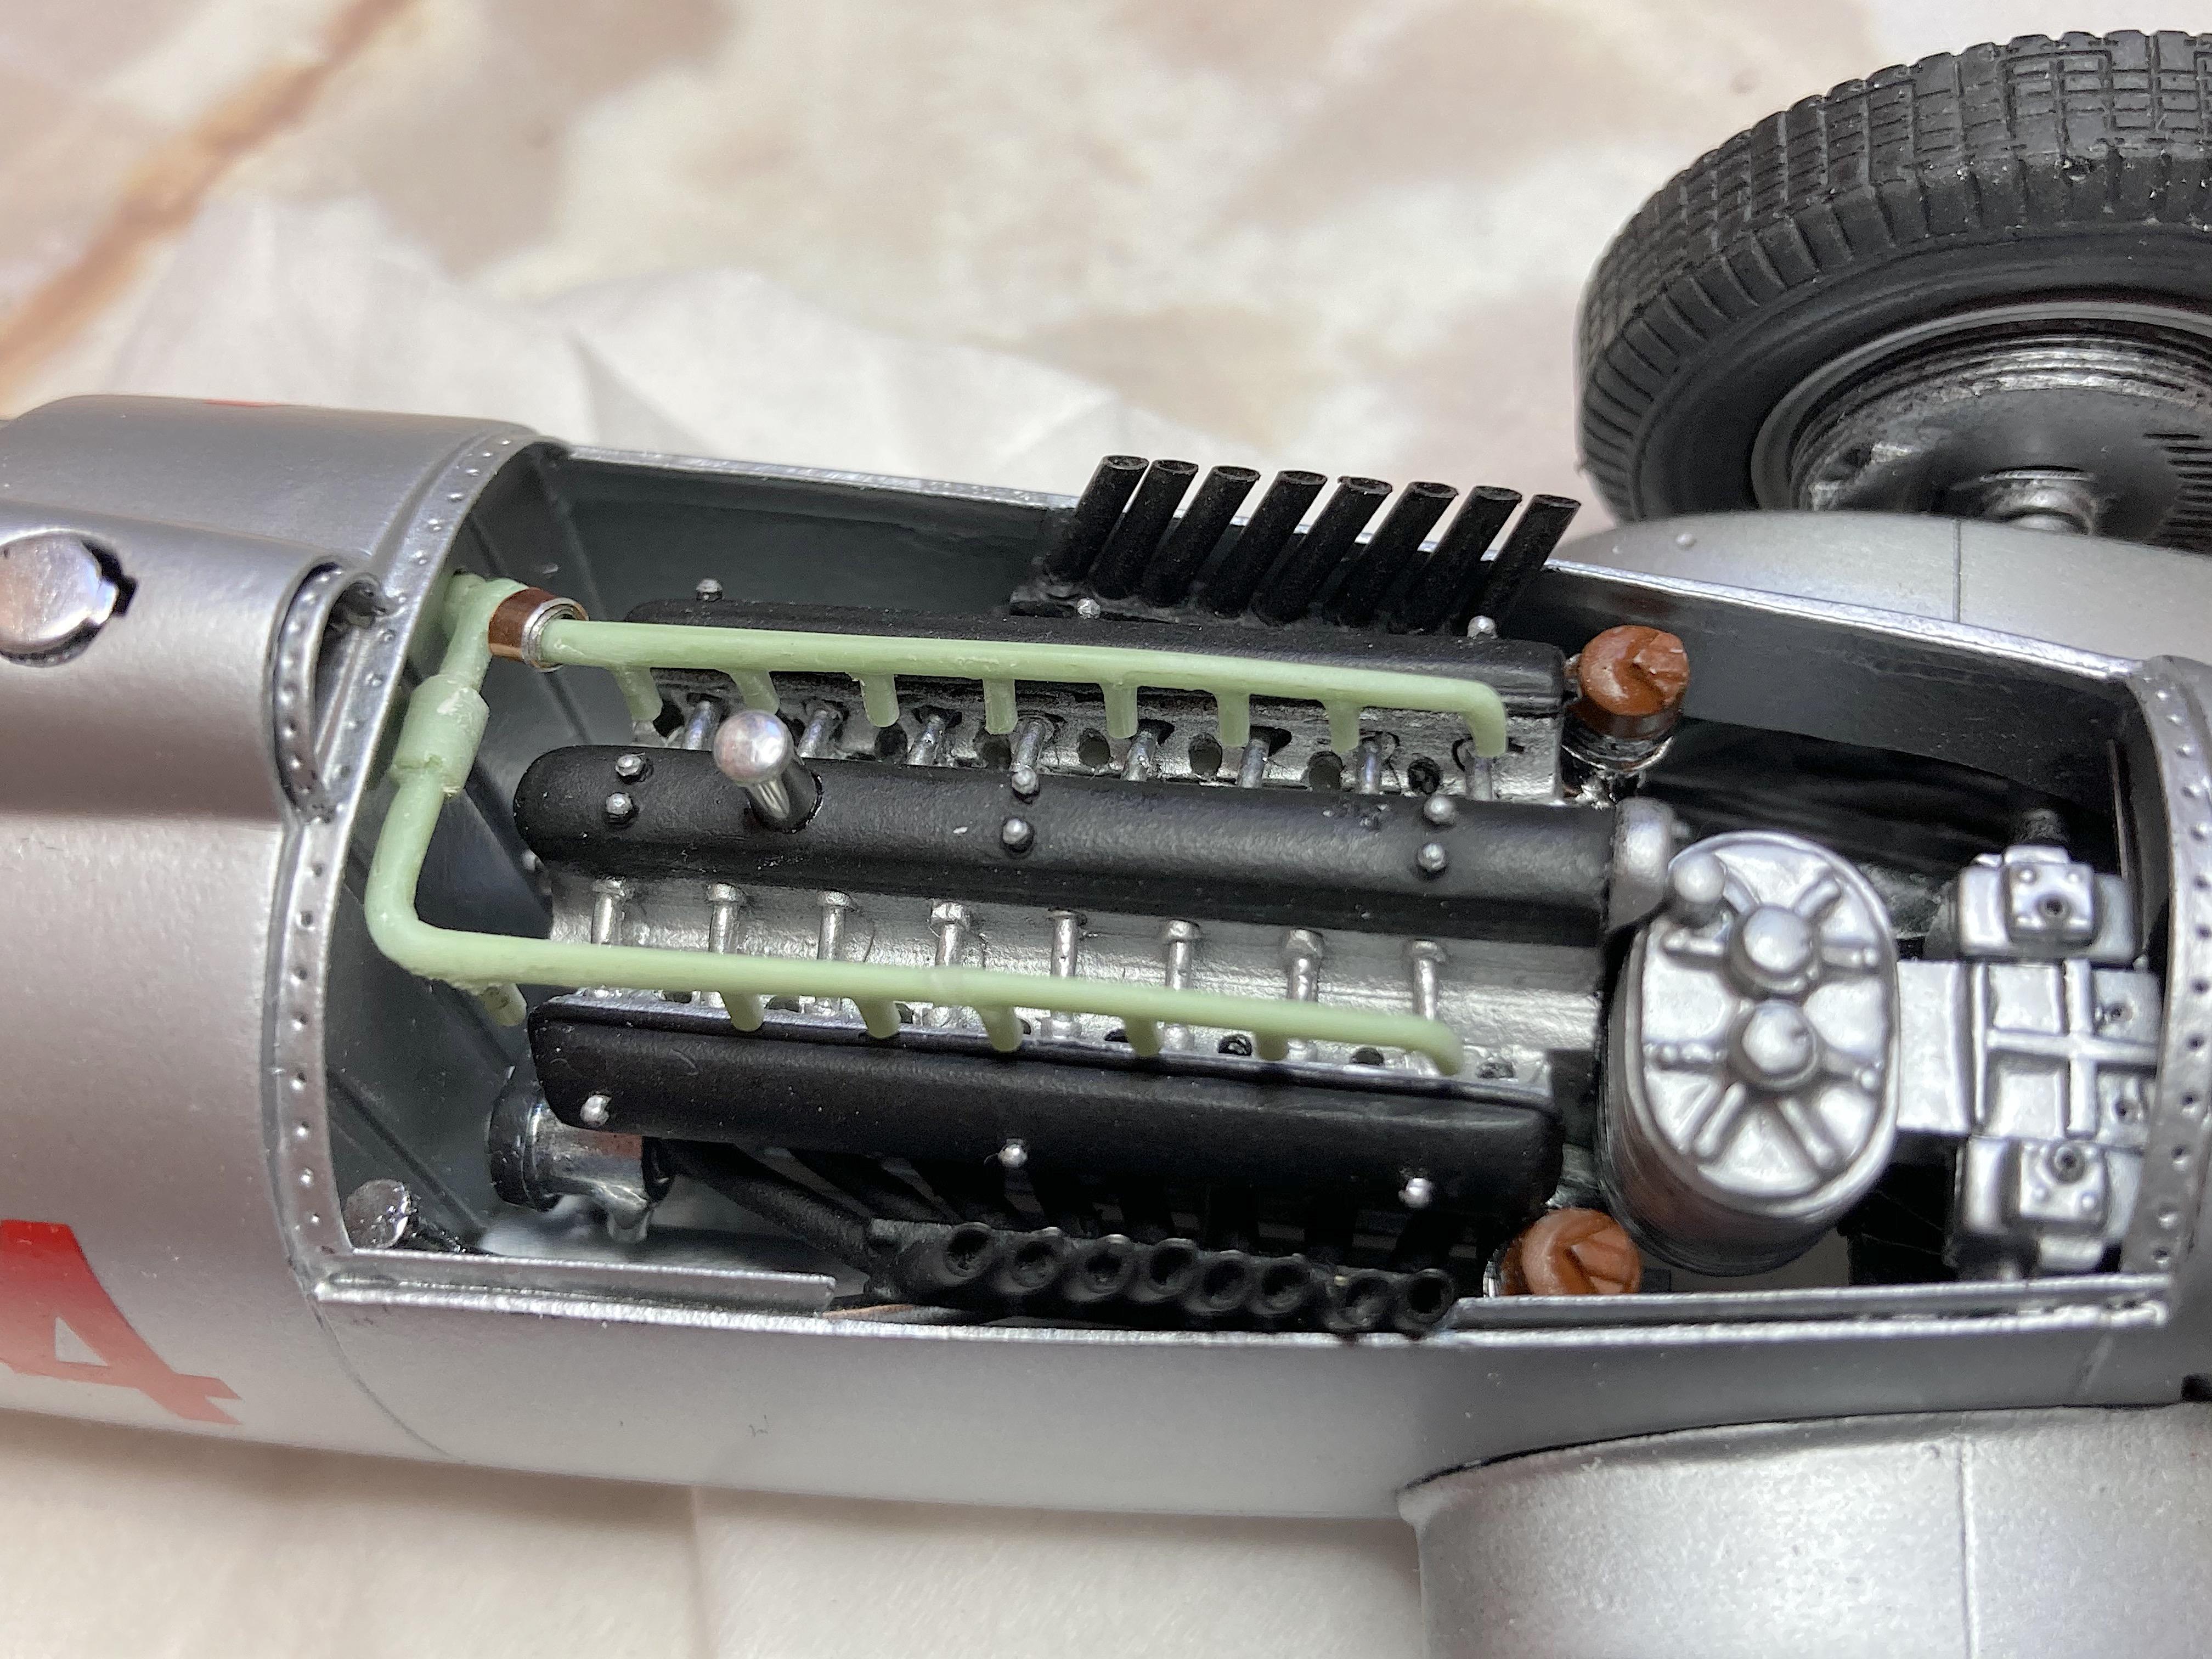
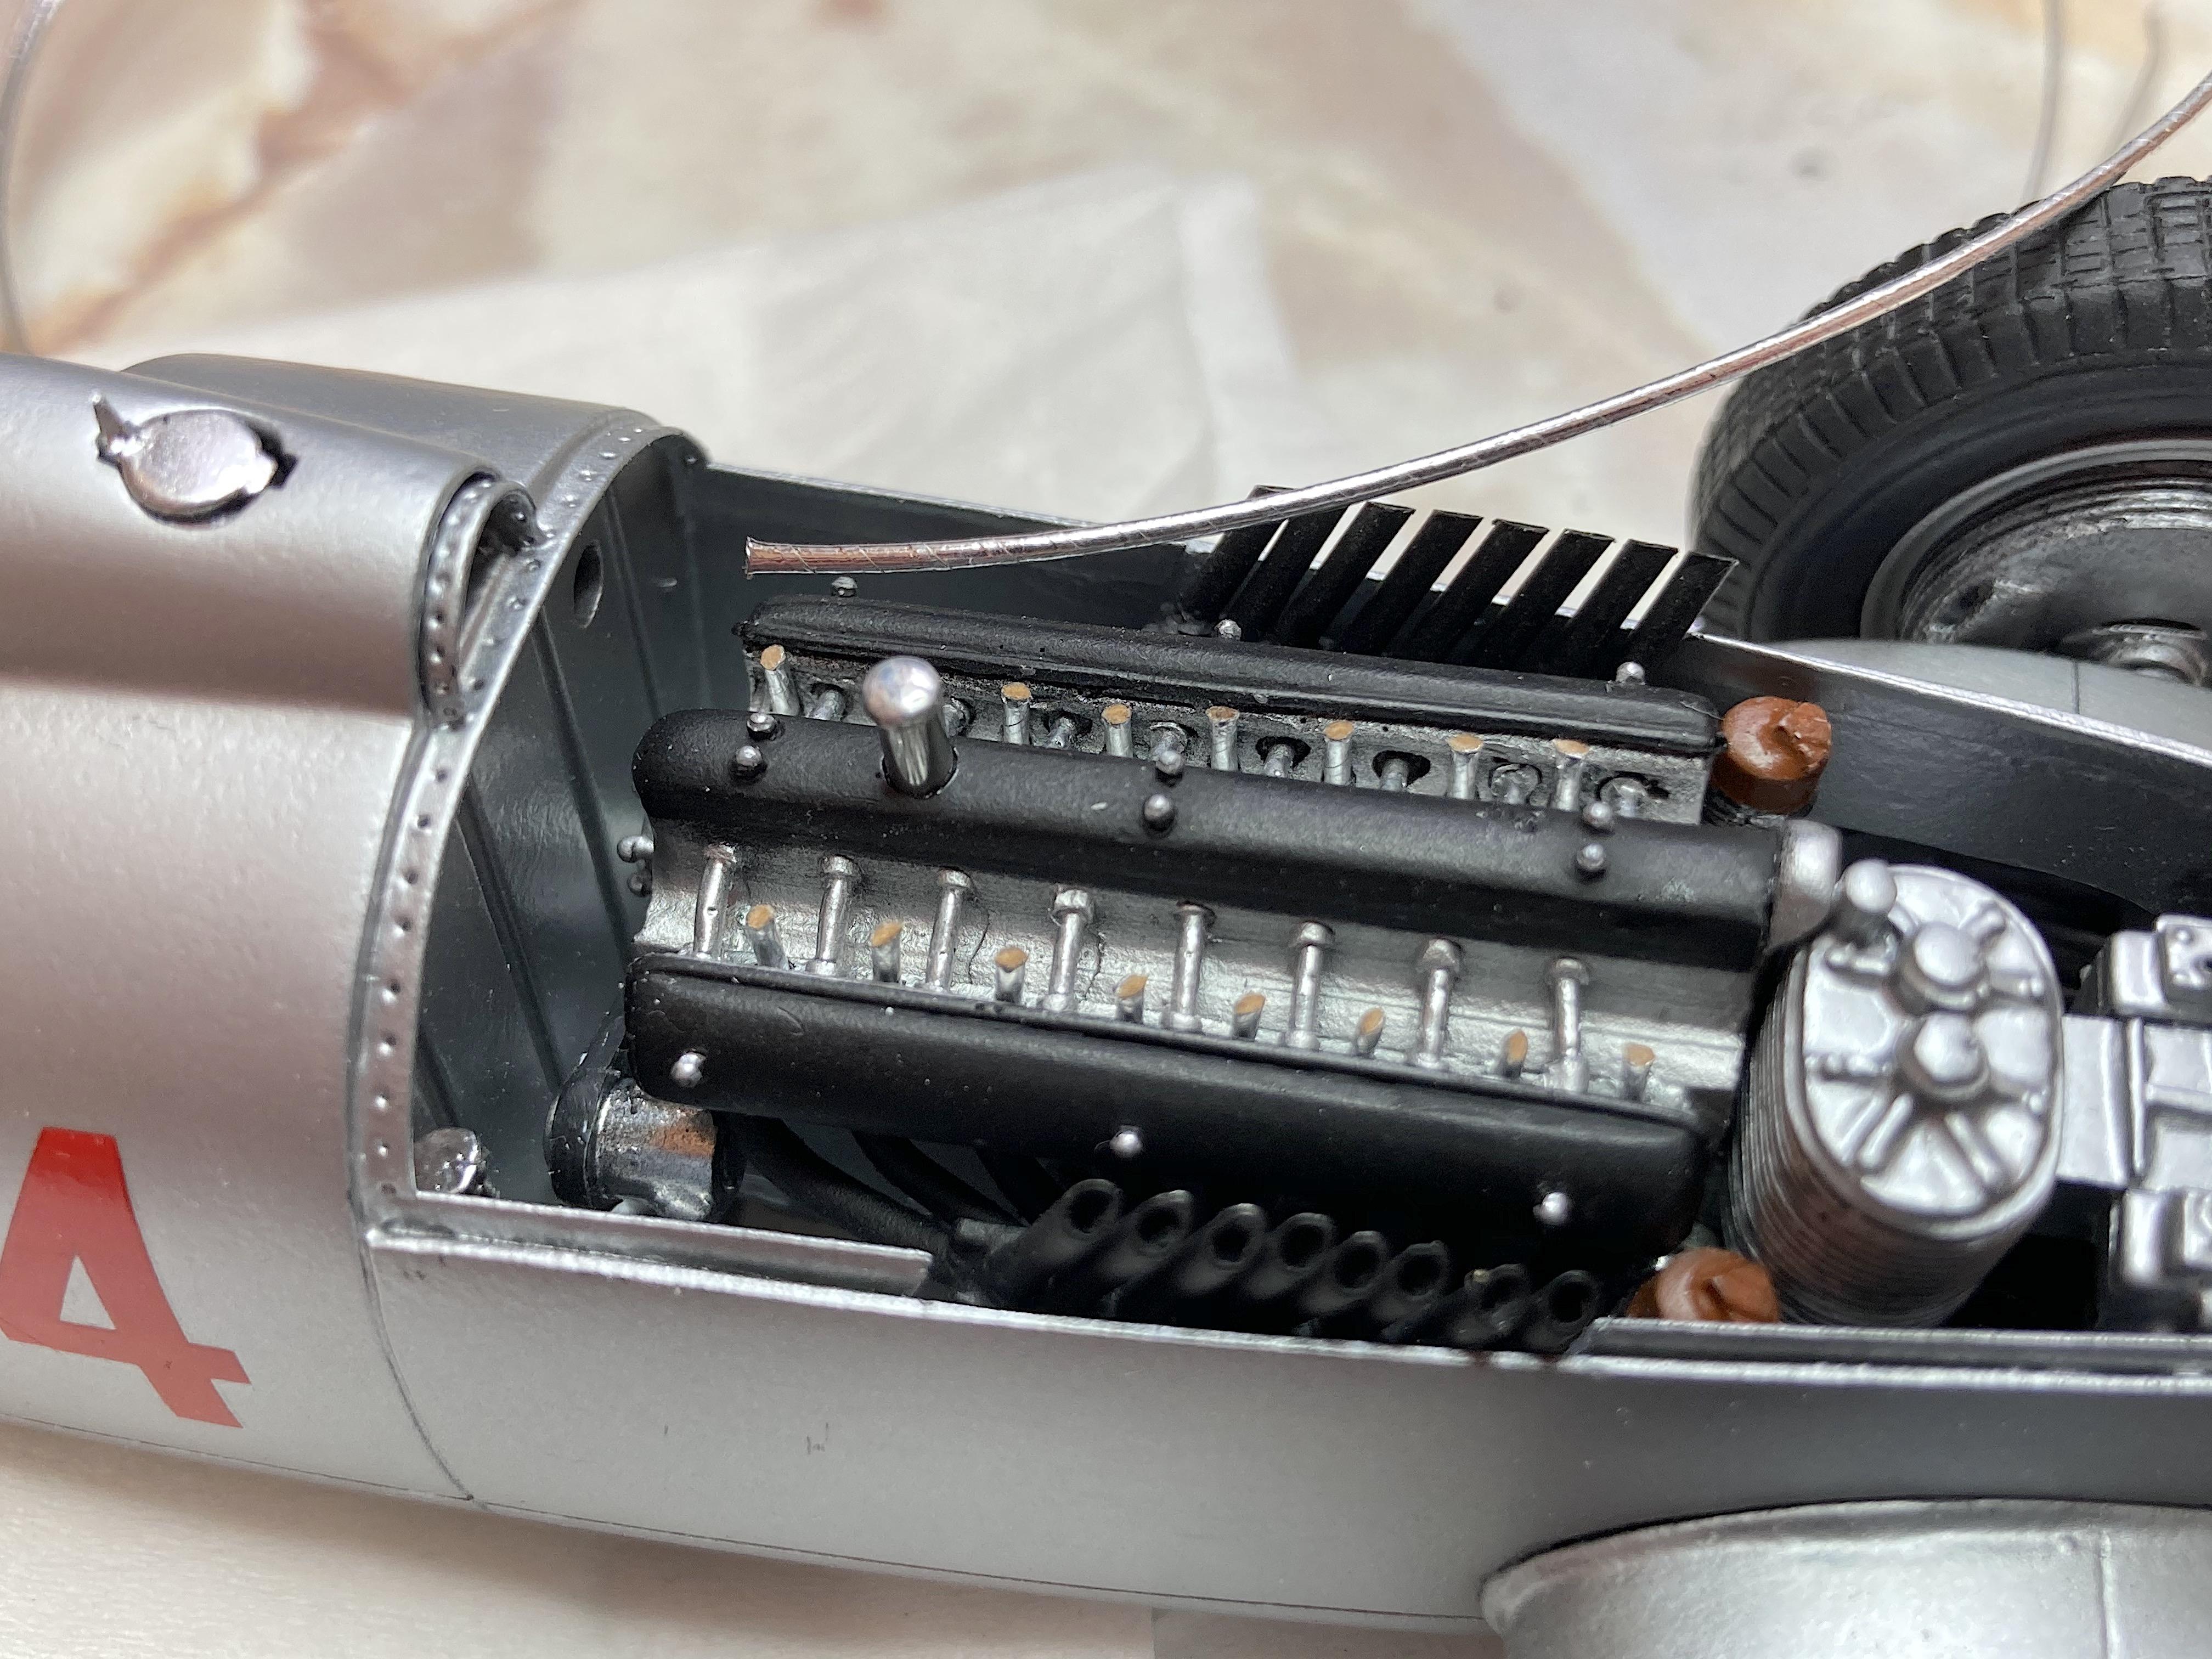
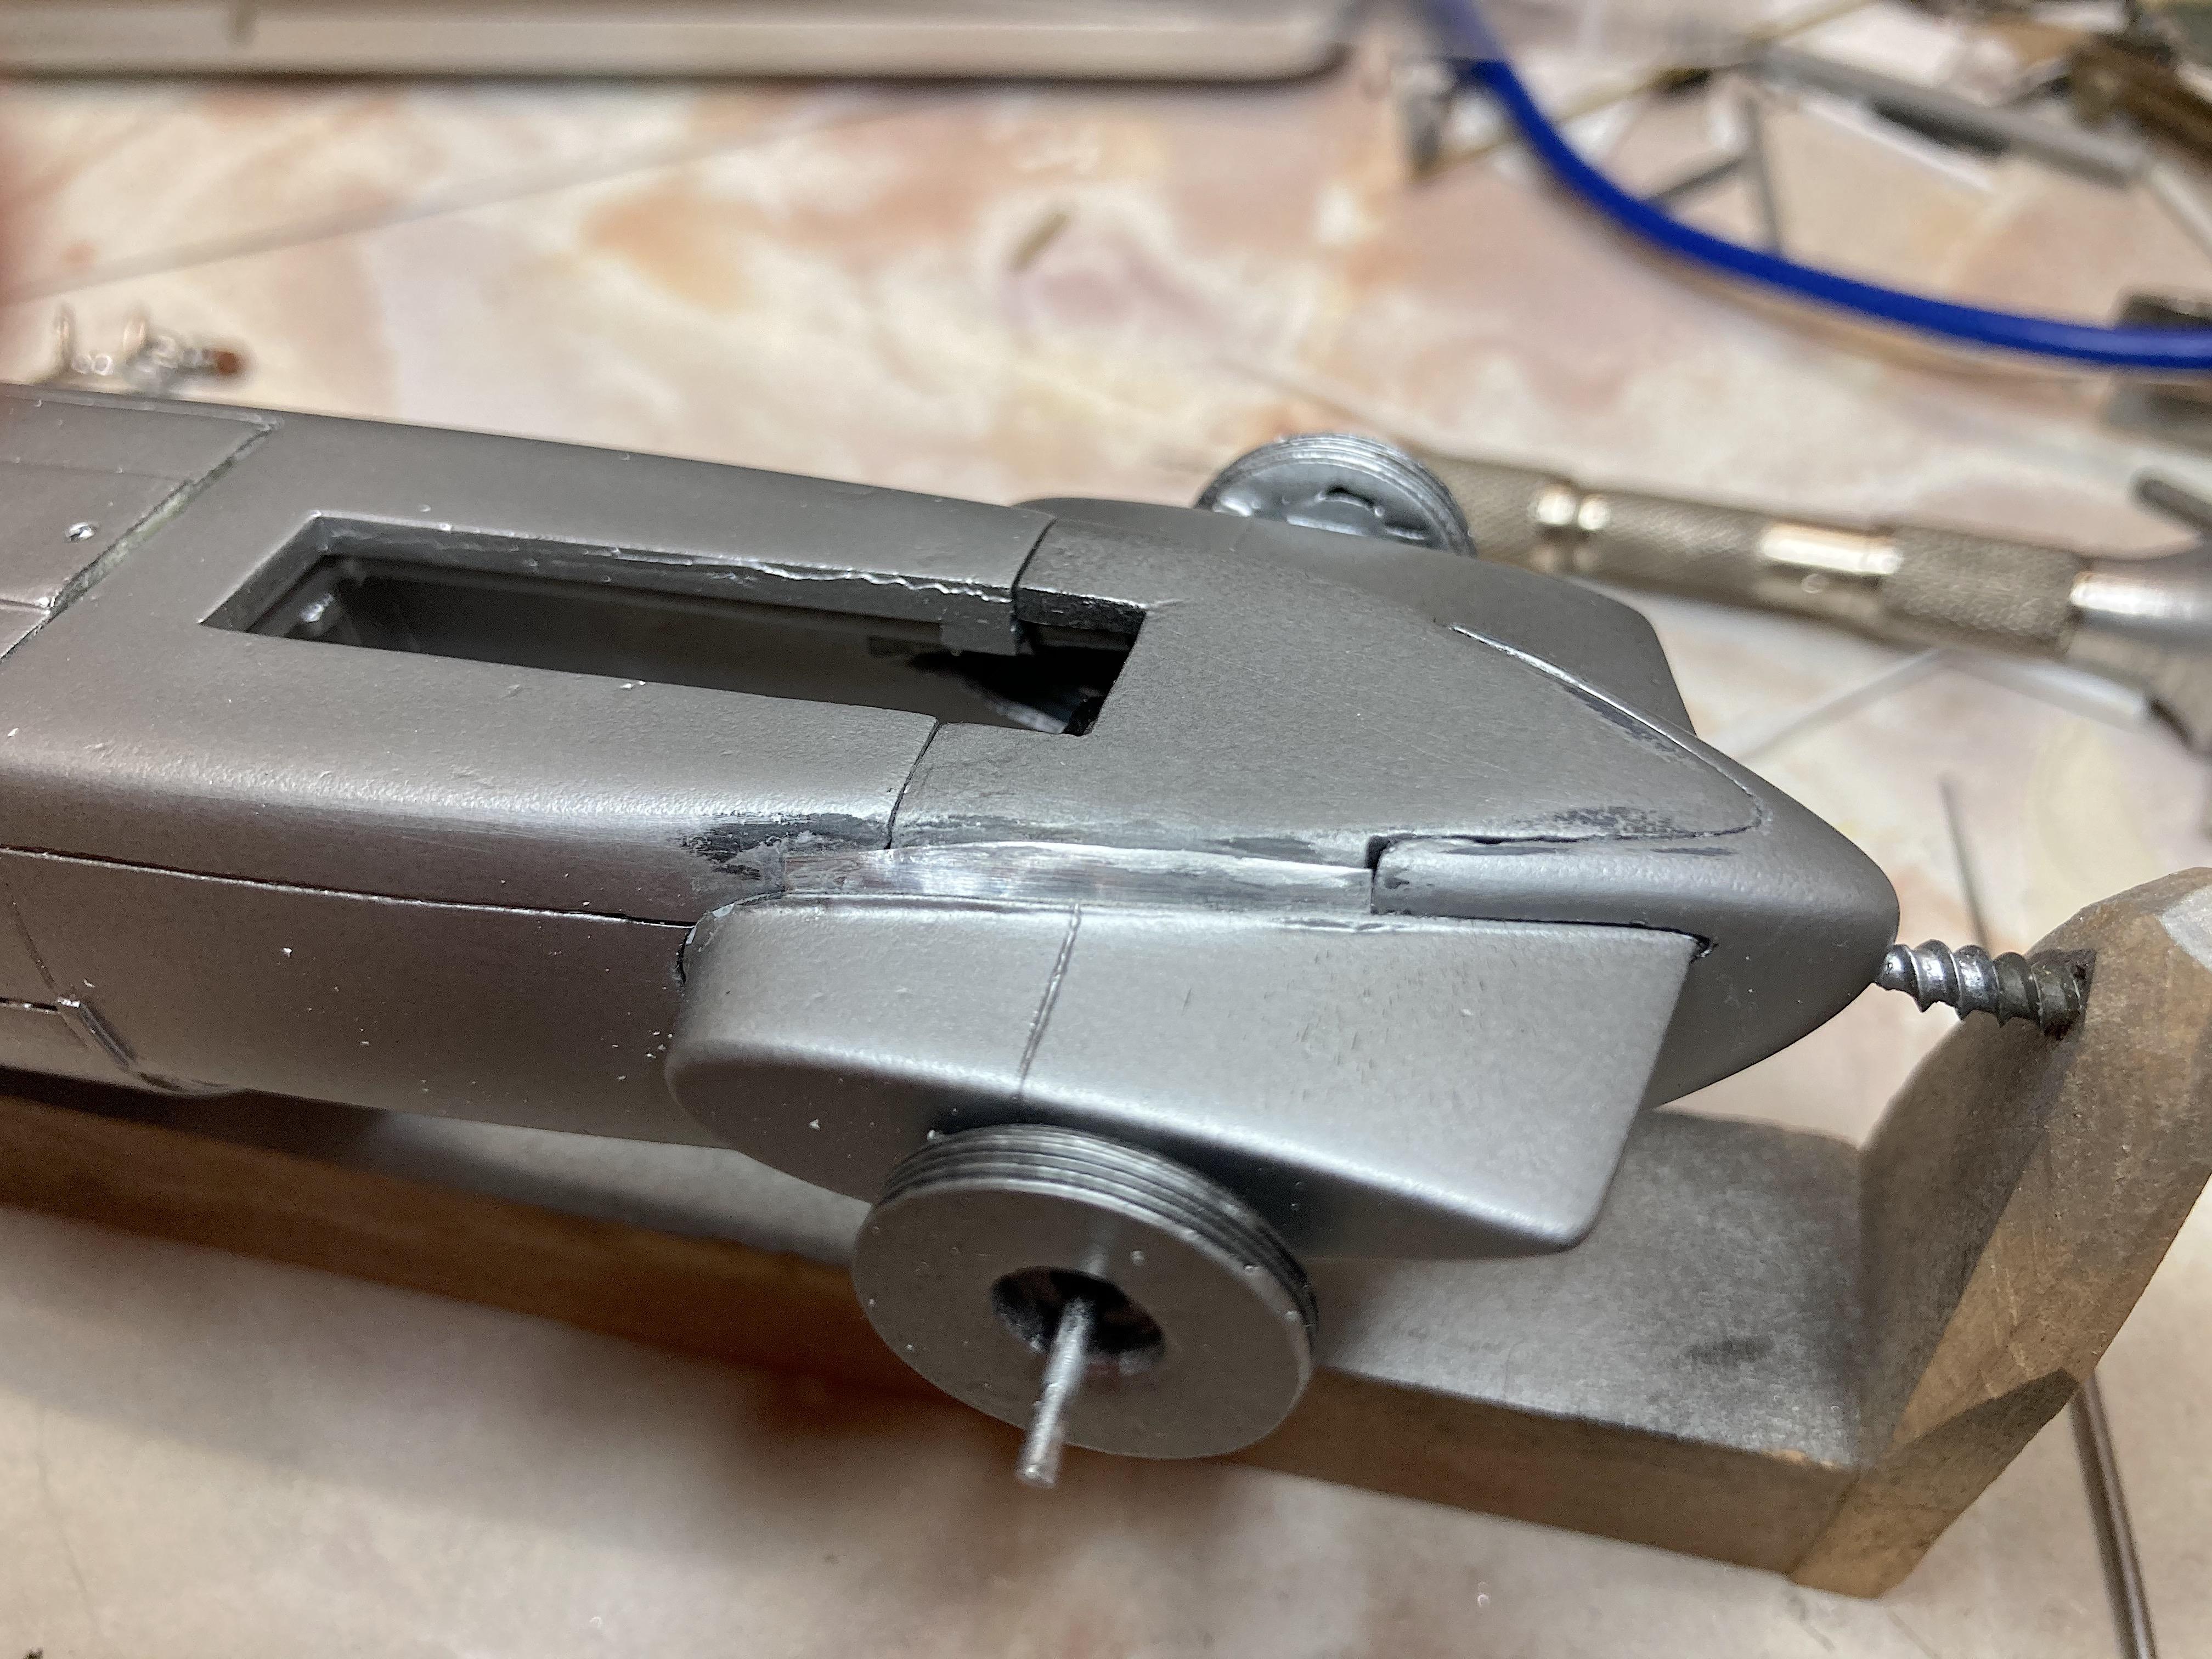
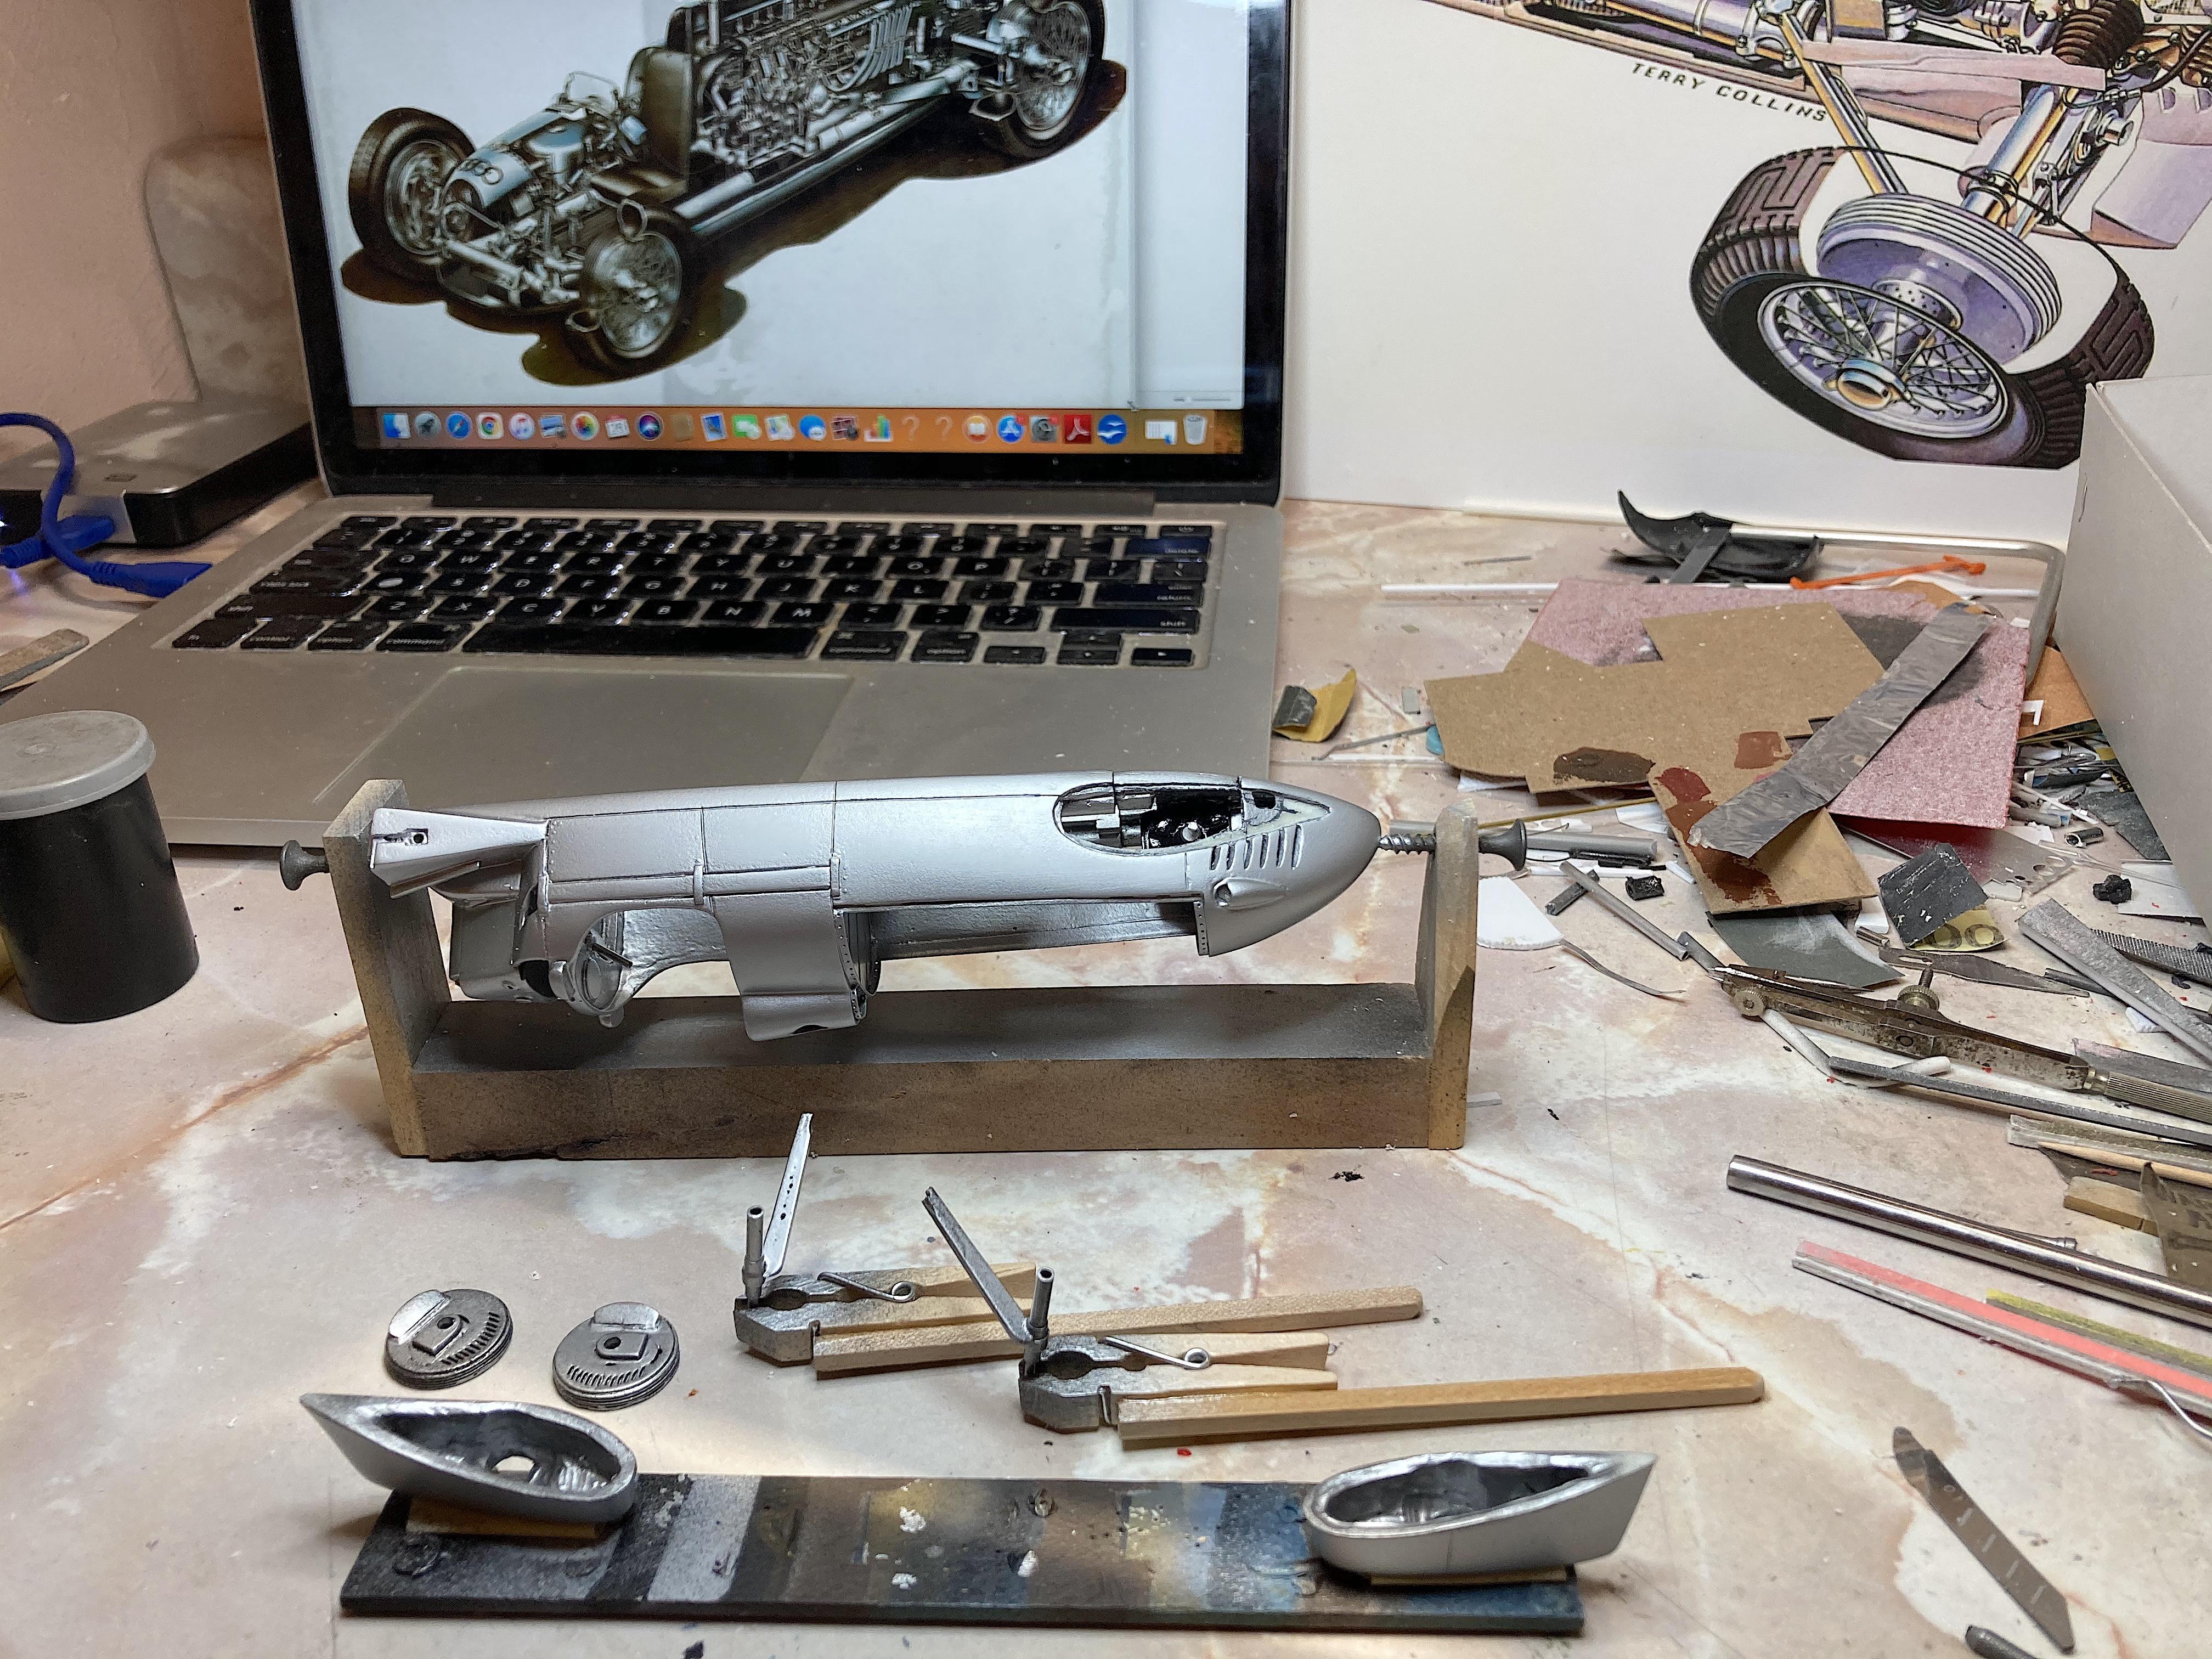
Much appreciated! I'm done hating on it. Made the starter shaft. I got the hypodermic tubing years ago at an IPMS show, need to hunt more down. Also made an aluminum washer. Four parts. I had scavenged aluminum wire from a TV antenna, first thing I made with it. Think it's the oil filler cap. Used the portable lathe (cordless drill), shaped with sanding sticks, steel wool, , file, and polished. The dreaded coolant header. I'm amazed he could resin cast such a delicate part, wonder if the color is a stronger resin. I had broken off one of the tributary pipes when test fitting, then broke one of the runs. I didn't see how to get all 16 pipes in holes, so changed procedure. I had this decoration "wire", got some time ago from a craft store, think the core is like cardboard and wrapped with chrome mylar (total guess). Cut short pieces and glued into the engine, cut off the pipes on the header. Used Tamiya tubing (from the 1/12 race car kits) at the end, the real car has a hose there. Had to cut to narrow, that was one reason it was a pain. Airbrushed that gloss black, then Alclad polished aluminum. Glued into the bulkhead with Tacky glue, glued the hose ends, then applied superglue at each pipe, expecting the glue to bridge the gaps. Worked SO MUCH BETTER this way! Next was adding the fuel lines, two sizes of solder wire, more of the hypodermic tube, some other wire that is braided that I used for the first time. Added a fuel pump that was an ejection pin from a chromed part. Polished aluminum plate used for a clamp mount. There are two parts left! One was not cast complete, the other has a slight void, besides they are not the correct tapered tube used for the spark plug loom. Stretched sprue, being careful not to pull out too fast (like a glass blower) got close to the taper. Some sanding got it refined with the flare at the end. Sprayed aluminum. Used Detail Master wire. No way am I doing each lead to ghost spark plugs. I made dinner, now I'm off to finish tonight.
-

Testors (Gunze Sangyo) Lamborghini Spelling Bee Special (Silhouette)
89AKurt replied to 89AKurt's topic in WIP: Model Cars
Tamiya putty also disolved. Oh well. Yea, I've been collecting plastic spoons, need more. ? -
Is Testors airbrush thinner JUNK?
89AKurt replied to 89AKurt's topic in Model Building Questions and Answers
Thanks for your input! Oh man, thanks for letting me know about the Dupont. I've noticed every new part for my '68 pickup causes cancer and birth defects in CA. ? Hey no worries. Appreciate your input too. I haven't searched, there must be a paint topic on this forum. -
of bare bones
-
Love this! Very well done. The paper used for the seat belts, is that craft paper that's red? There is a great selection of colors and textures, I may consider this.
-
Mercedes Outlaws & Hot Rods
89AKurt replied to 89AKurt's topic in General Automotive Talk (Trucks and Cars)
I was hoping everyone would! That's the idea of this topic. Looks awesome, you have a Under Glass of that? Huh, sure would be a project! -
I knew going in that it wasn't going to be a Tamiya kit, trying not to bag on it. I should dump in the AMT Kits Suck topic. ? I shall preserver! Thanks! Just in case anyone wants to build this, hope it helps. I should do Snap-Tite kits from now on. ? Thanks.
-
Cool looking car, why did Chevrolet take so long to go mid engine? I'm sure those "Lambo" doors were fun to hinge. Looks good!
-
Is Testors airbrush thinner JUNK?
89AKurt replied to 89AKurt's topic in Model Building Questions and Answers
Only used it for the gloss black paint, never with Splash or others. Been using the Hobby Lobby 40% coupon to stock up, that was something I didn't have. I hated chemistry class in High School. -
Made good progress today. Spent hours on the engine, one of the valve covers was glued on crooked by Pinto, so that threw off the right exhaust. I boogered it on with gobs of superglue, but it's sort of hidden by flat black. Glued in the engine with Tacky glue, so it could be adjusted. No pictures, not that happy about it. Got the front parts on. Had glued the suspension arms on, but they were too long, the instructions showed them long, so had to cut apart and correct. The radiator and nose went on well. Got the decals on. Used the weaker Microsol around the edges. Where they go over seams, used the hotter Solvaset, had to be careful because that melts these decals. Used guitar strings, N28 .711 mm and DY40 1.015 mm, plus a black wire for the radiator hose. No it's not finished, have some more details on the engine to do, and the starter shaft at the tail. The wheels are superglued on, but the spinners are attached with Tacky glue. I was blown away that all four wheels sit on the bench! Fabricated the windshield, used Bare Metal Foil.
-
Is Testors airbrush thinner JUNK?
89AKurt replied to 89AKurt's topic in Model Building Questions and Answers
In my first comment picture, the bottle has ⚠️(similar), not for acrylic. I'm back to using the automotive thinner, works great. -
LOL That's a beautiful job, your first huh? I have worked several rallies in Arizona, they aren't as gung-ho as in Europe.
-
I'm in with this Tamiya Subaru Impreza (formerly WRC '98 Monte-Carlo). I had considered doing a street car anyway, even though I love rally cars. I have the Sti engine, and photo-etch detail parts to drive myself crazy with. I got gravel tires after taking this picture, so that will eliminate the slicks. It will be a shame to not use the light pod, but will keep the lower lights. Have a CB radio somewhere....... I love your choice! If I didn't have the Subie, would consider the Sport Quattro S1, but that needs to stay rally, and if I do a second that will be the '87 Pikes Peak hillclimb. Look forward to seeing what that kit is about.
-
I'm still stumped about a vinyl roof on a Tri-Cheby. ?
-
FYI: These make decent pets.
-
Not bagging on your choice for mirrors. ? Food packaging, especially high end holiday goodies, are a great source for material. Today I tried something found in a coffee can, the seal lid had this thing in the middle. It is two layers, a clear plastic and the mylar mirror film (assuming that's what it is). Been awhile since I got it, think Trader Joes coffee in the can.
-
The sadomasochist is coming out today. First up, finding out there are issues with the exhausts. Even if I didn't modify, they would still be a RPITA. Because I added the lip along the engine bay, that pushed them inward enough to not allow clearance with the hood. This is the other side when one fits. Then a double whammy, not long enough. I based the length on the original part. I wasn't really happy with the tubing used, picked the next size up that I was smart enough to get. Wasting some with much more than needed, can't grow these longer. Something I knew wasn't good enough in the beginning, thought I had fixed, but there was a HUGE gap at one of the spats. Glued on some of the thick aluminum foil, and tried to blend in. Was burnt out by the end of today, so did what I still know how to do, decals, and mirrors. The dash decal was one piece, instructions say nothing about cutting apart, which is required since the tachometer is raised. I contemplated making 4 tiny bezels for the other gauges, but since I'm hating this build, blew it off. The mirror is something I found in a coffee can lid.
-
? A moat.... you ain't from around here are ya?
-
Mercedes Outlaws & Hot Rods
89AKurt replied to 89AKurt's topic in General Automotive Talk (Trucks and Cars)
You ain't kidding! ? I kinda dig this 190SL, except the seats. -
Is Testors airbrush thinner JUNK?
89AKurt replied to 89AKurt's topic in Model Building Questions and Answers
A little update, it sucks for cleaning too, especially Alclad aluminum, it created goober chunks. It also does not light off like other thinner when I dump into the burn can. It's just no fun! -
found my stash
-
Nice state! Town being kept secret? ?
-
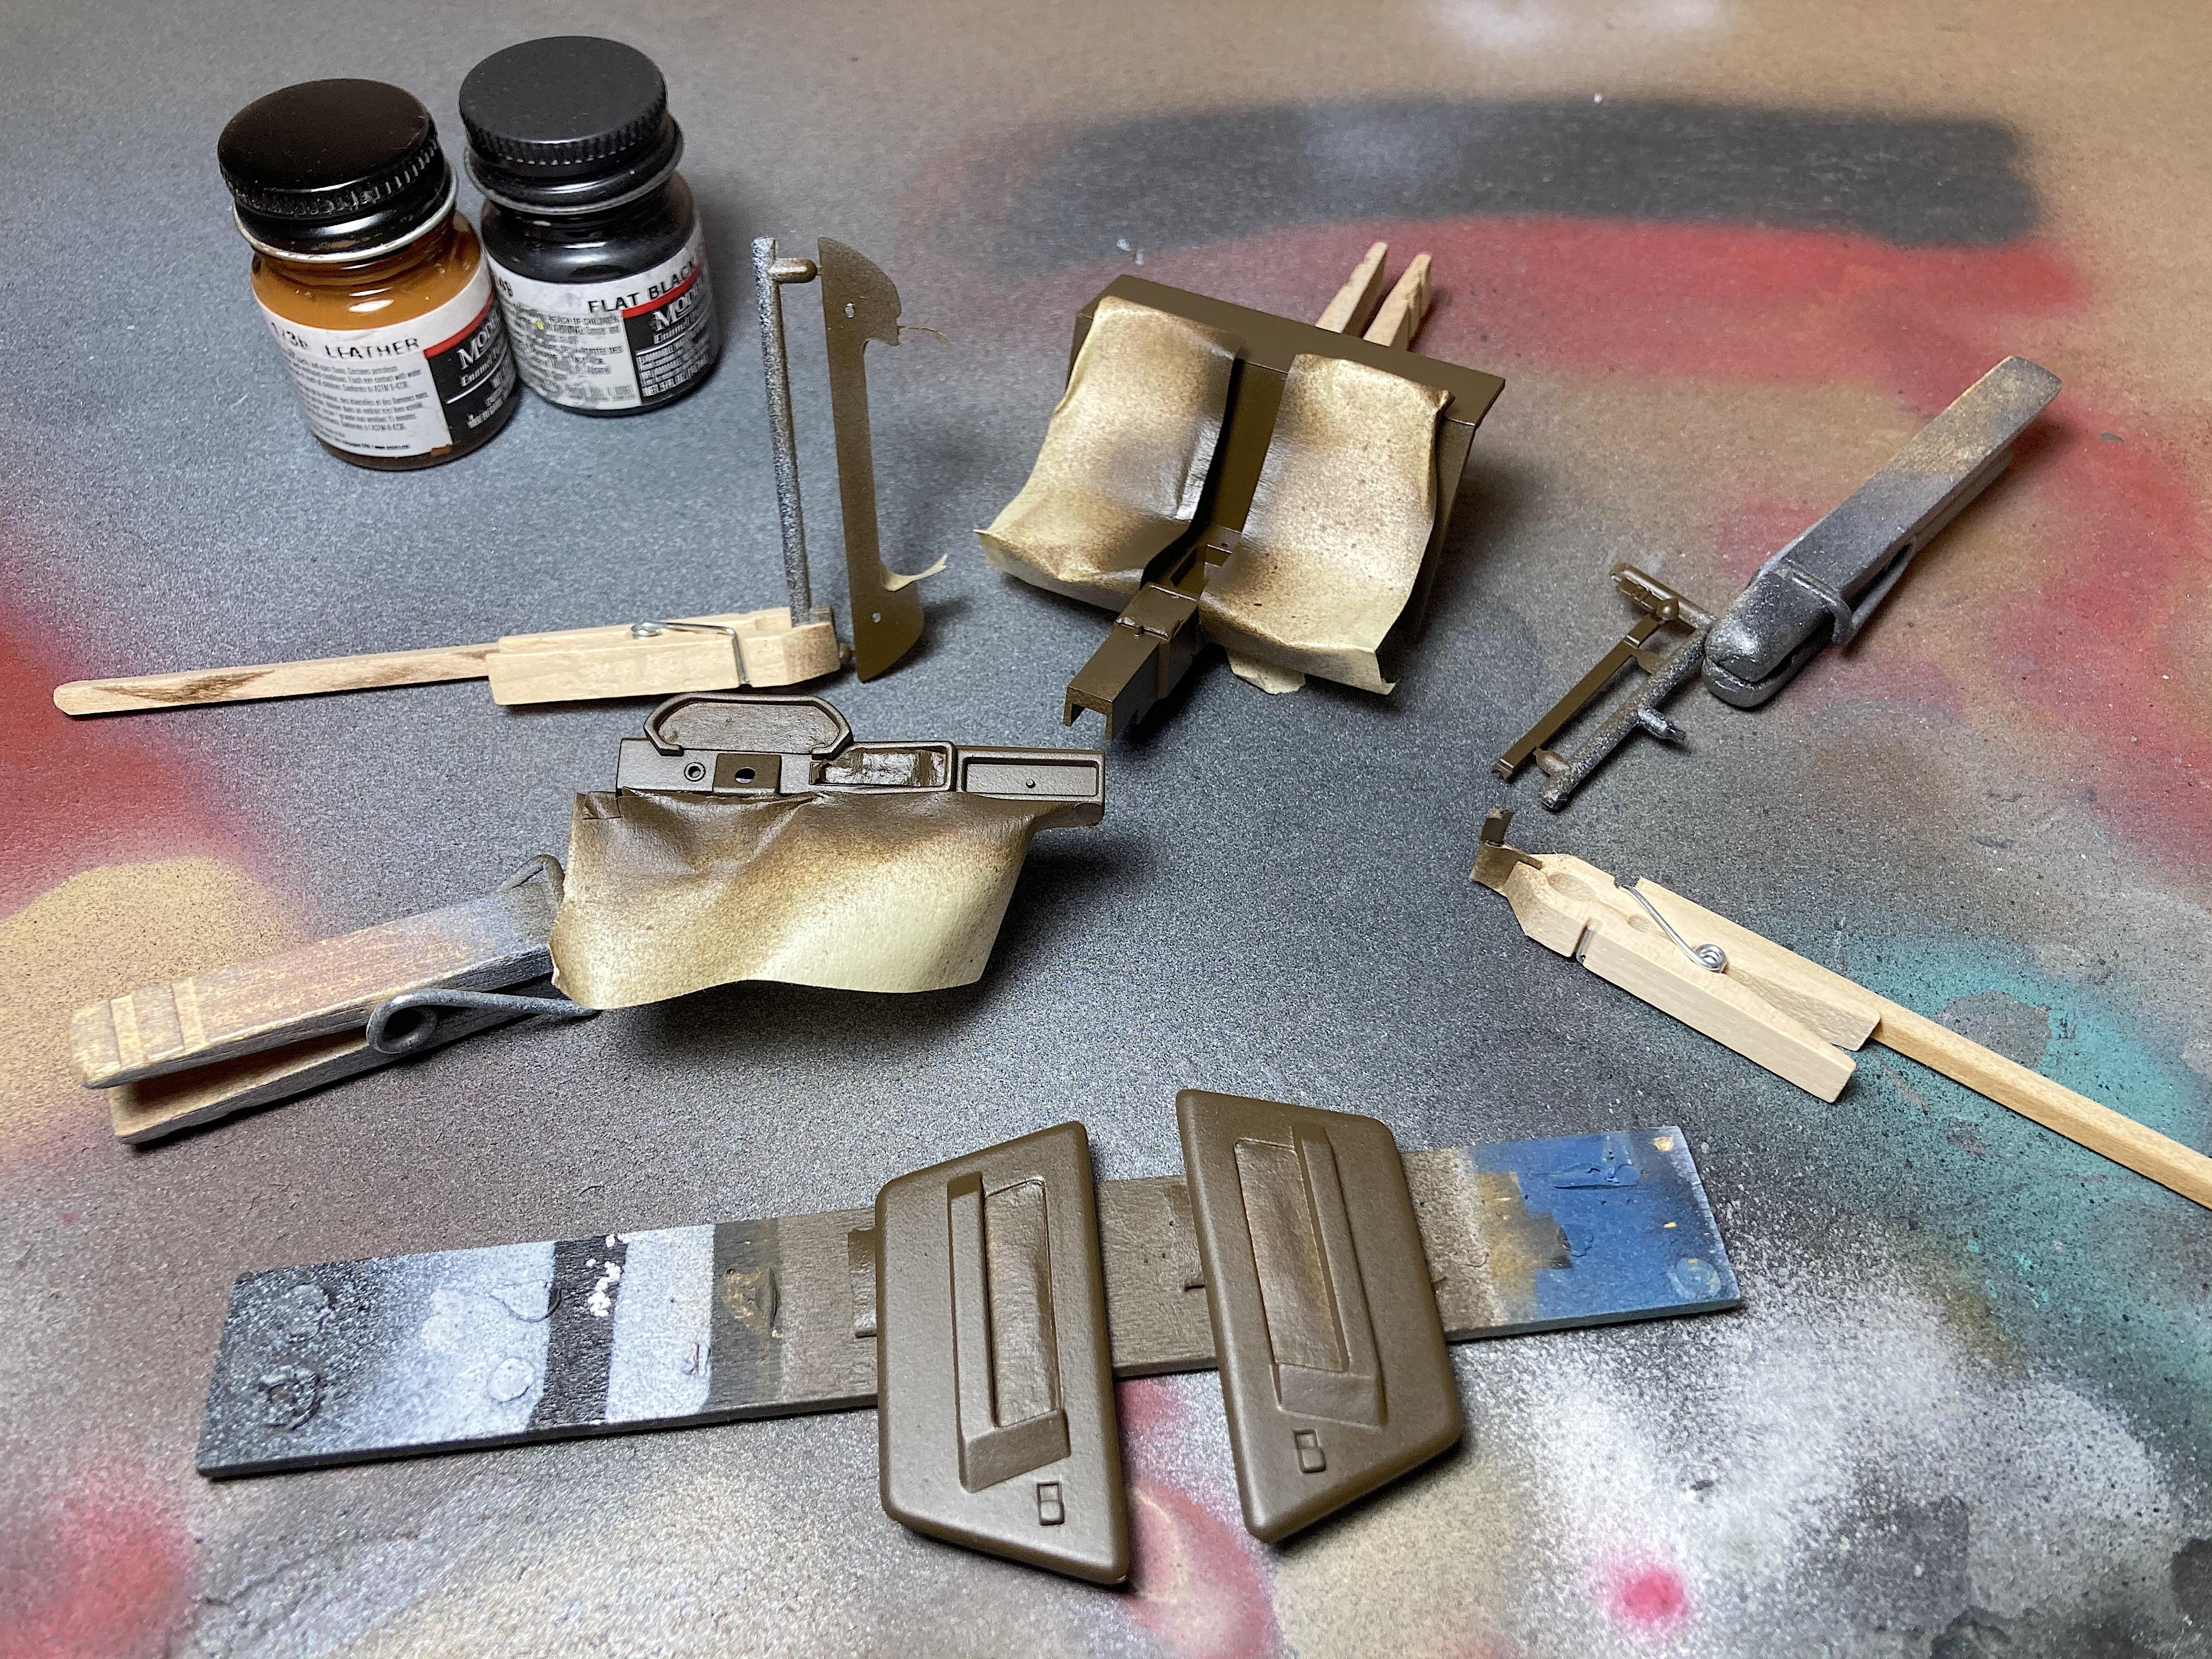
I got these little wood clothes pins at Hobby Lobby. Glued on sticks to make them longer, and removed the tips using a disk sander. I use full scale clothes pins to stabilize for painting. Reversed some, but haven't used yet.
-
Have not. Don't know what that car is, so much wrong with it, no radiator exhaust vents, no windscreen, mirrors, and looking at the suspension it looks painted grey. The video is the D, exhaust joins together through the suspension is the easiest clue, shape of the front and rear are not as pointy, fuel filler on the side, etc. But basically the same glorious sounding engine, still listened to it again. Now that I'm in the mood for fixing mistakes, tackled the rear axles. Cut short lengths of the aluminum rod for each end of the new aluminum tubing. Wrapped thick aluminum foil around the end, using the resin part for a guide. Cut off the trailing arm, glued to the axle. Thinned the inside of the spats to clear the axles. Needed to refine the fit of those spats to the body, then painted the inside aluminum. Also made a piece for the brake drum, sort of the shape seen on the cutaway drawing, that the axle fits better in. The Splash Paints silver is holding up really well with this extra handling.