89AKurt
-
Posts
8,426 -
Joined
-
Last visited
Content Type
Profiles
Forums
Events
Gallery
Everything posted by 89AKurt
-

What song(s) make you wish for an open road and no speed limit?
89AKurt replied to Jantrix's topic in The Off-Topic Lounge
This has and will always be my favorite. -
My '16 Honda Civic has them. On the Honda forum, someone made a meme, the #3 setting shown as ??. Have to admit, I like that feature.
-
Ferrari 330 GTC + 575 M Superamerica Resto-rod
89AKurt replied to 89AKurt's topic in WIP: Model Cars
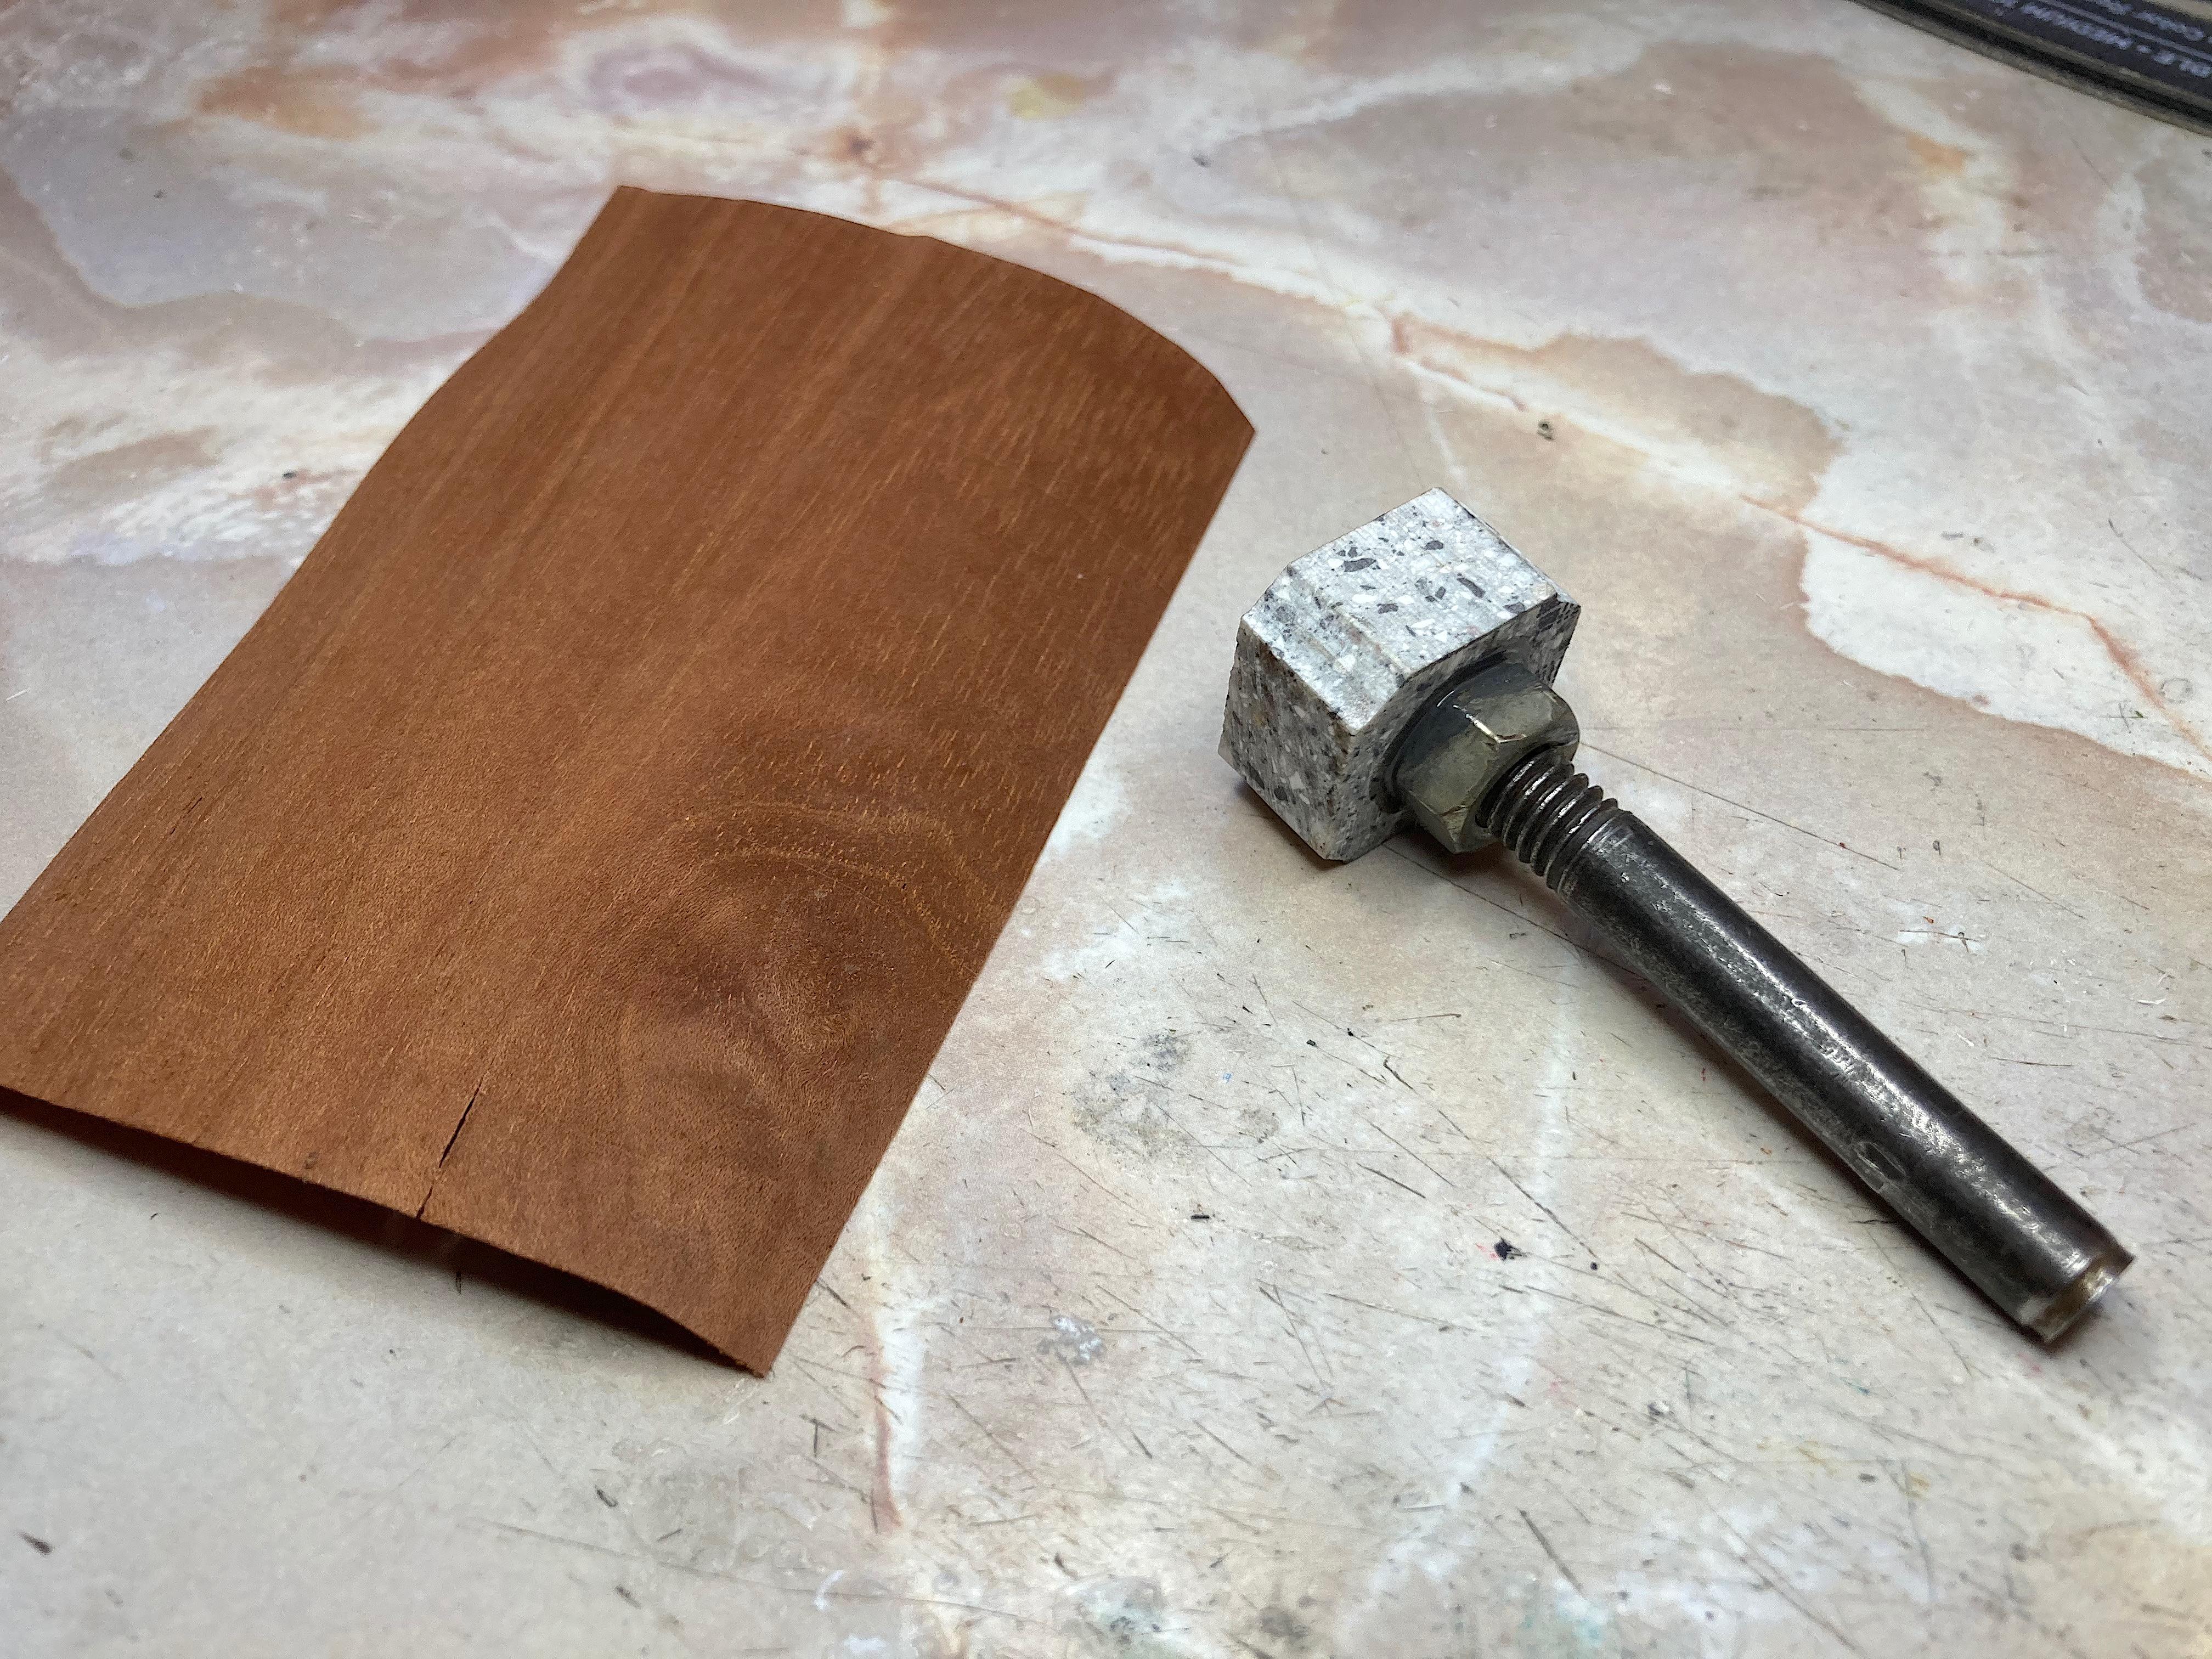
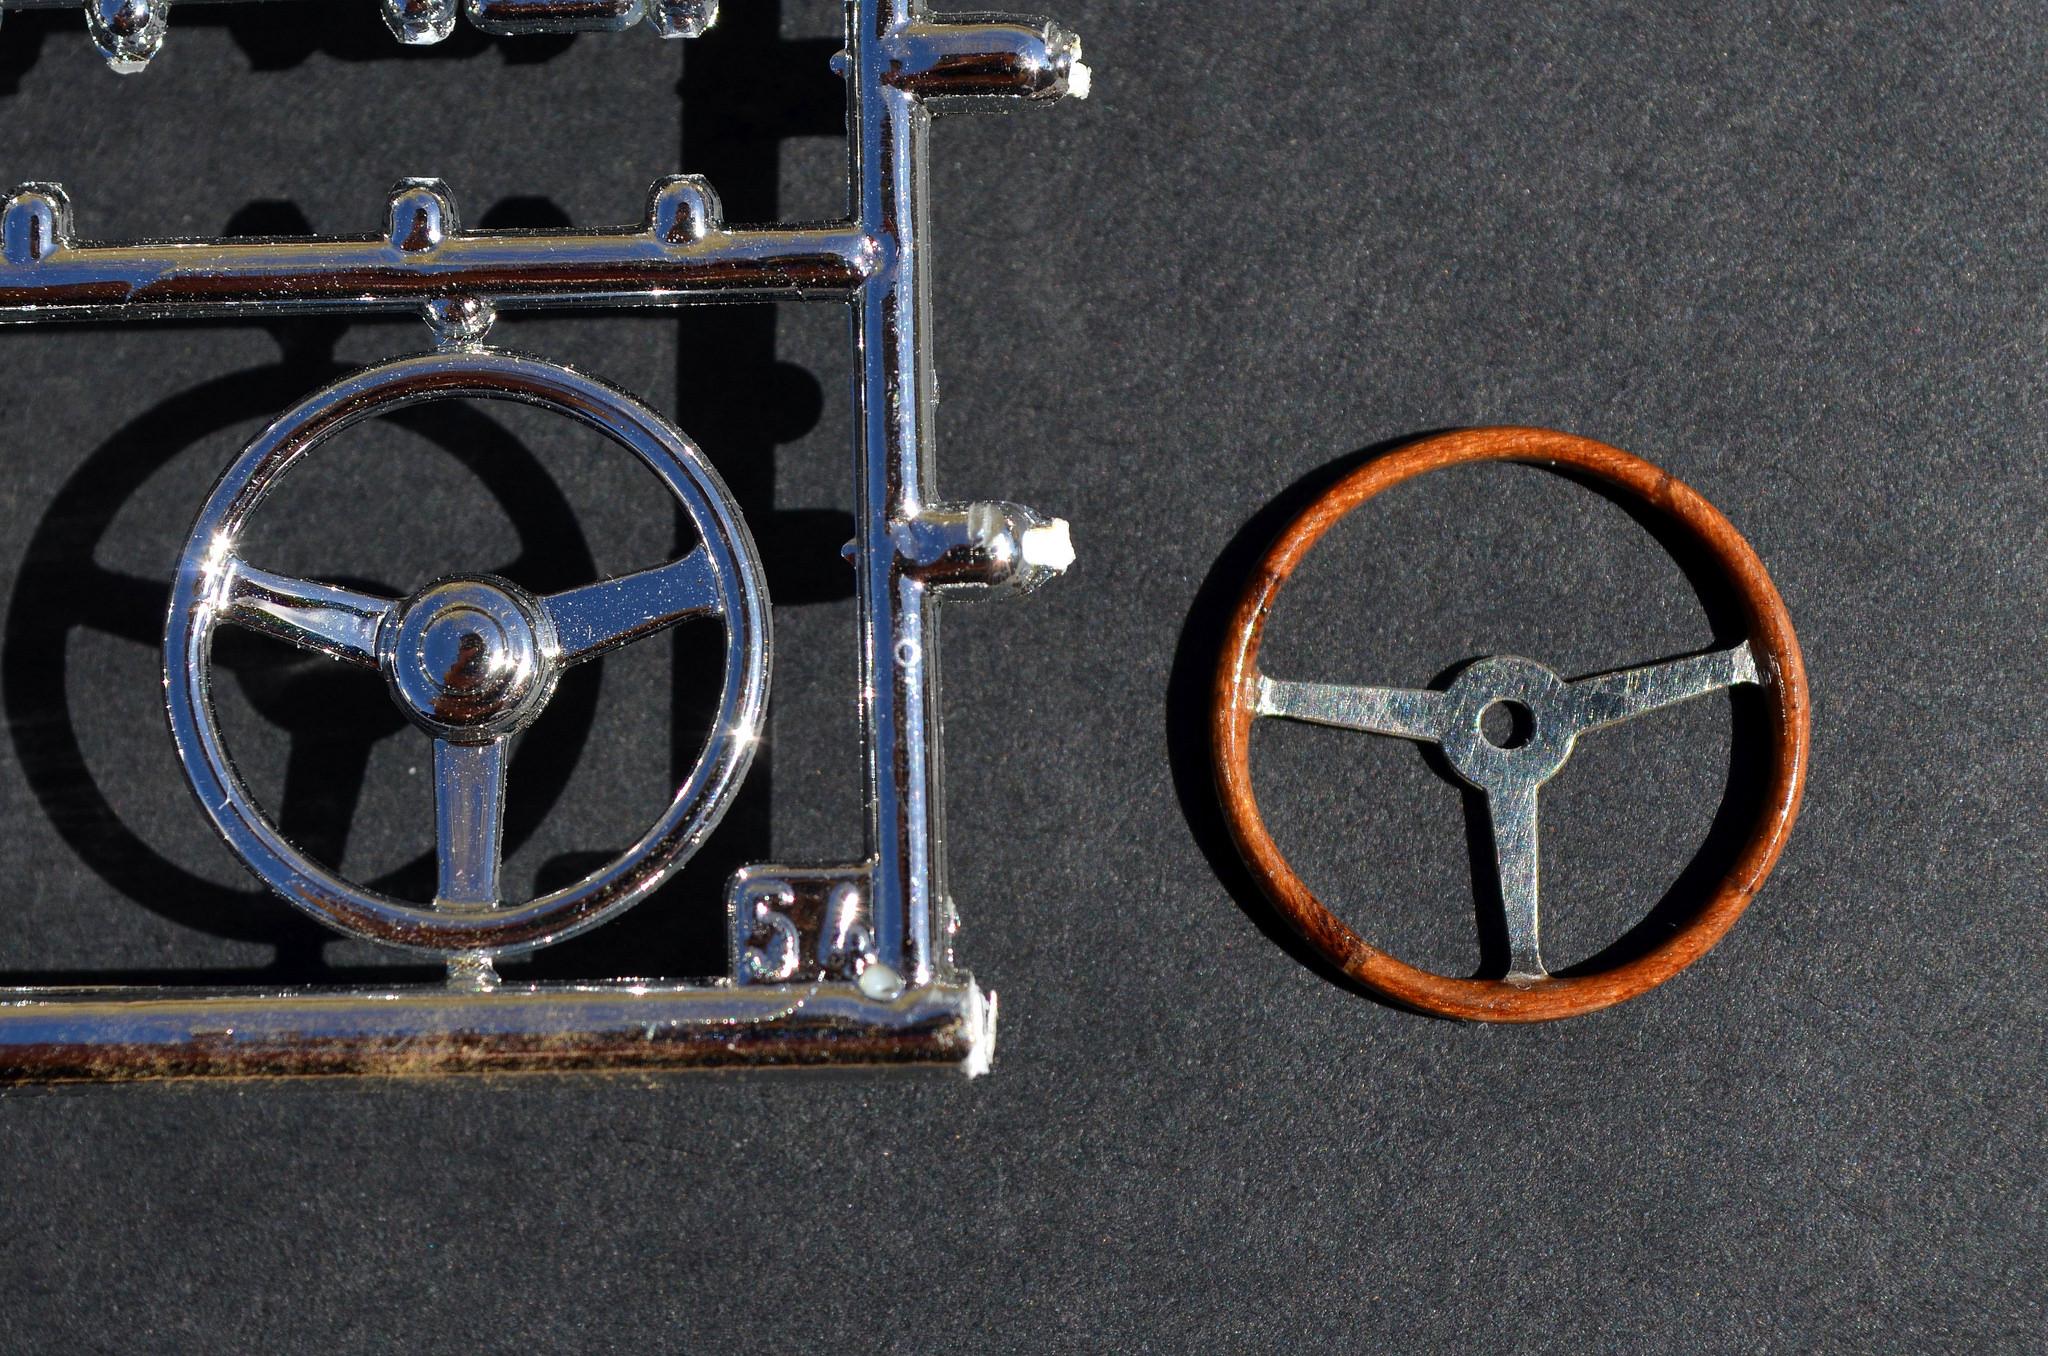
Steering wheel rim, thought I would skip ahead to something else that could be really annoying to fabricate. ? Using cigar mahogany, picked one that has less open grain, and has an area that ought to look great when done. Laminating 3 layers, crossing the grain 90º to each layer. Made a jig using Corian, tapped shallow threads for the bolt without a head, applied JB Weld when threaded in, and a nut for good measure. Used the drill press like a lathe, turned down using a chisel, to size measuring with the calipers. Using drafting sketch paper on each side of the laminated piece when it's clamped, to prevent getting glued to the Corian blocks. I have tried the first one, but did a major screw up, so not posting a picture. ? Yes I'm insane. ?
-
? I'm surprised, not that often. But I don't live in the Rust Belt either. My neighbor says to ask him first when I decide to.
-
Not just because I built that kit, but this is really cool! Nice job on it, but the windows are too clean. ~raz~ Love the barn setting too.
-
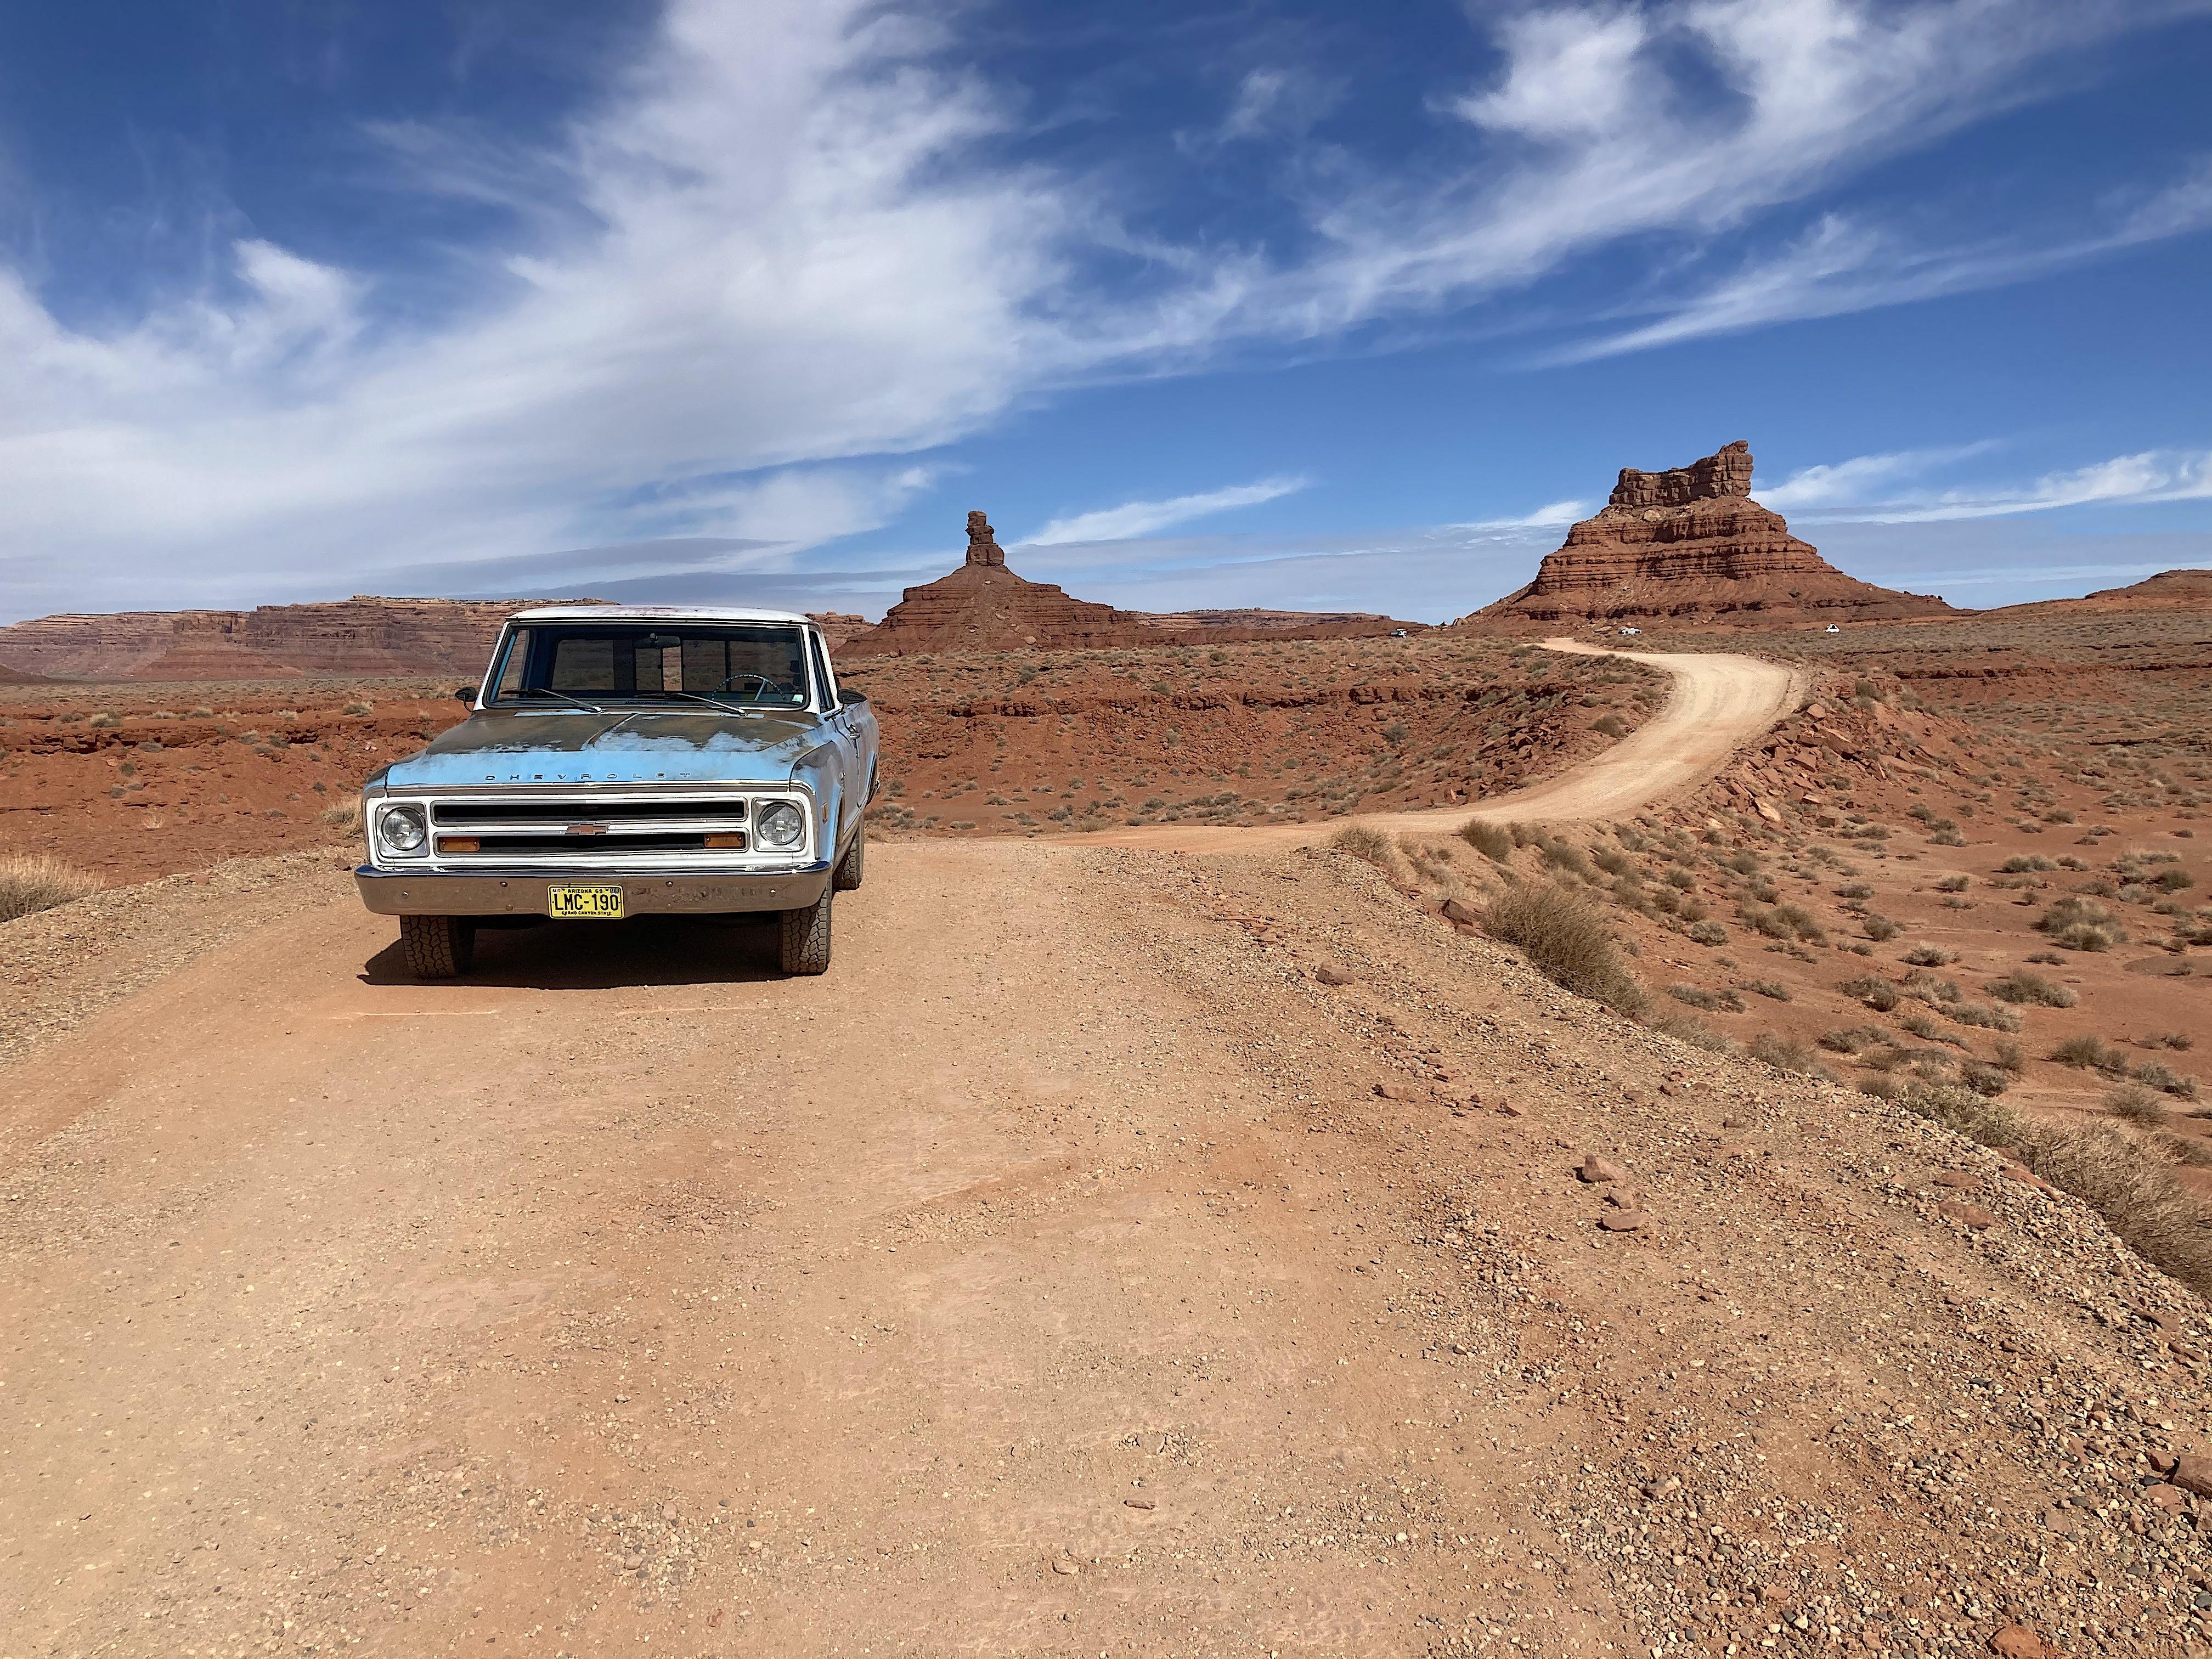
"Old truck ... from the 90s." ? Yes it's a beater, power windows as in grunting while winding them up, no power drum brakes, 4 on the floor is the anti-theft deterrence. No windshield washer, and the wiper switch needs to be replaced. I could get an EFI system, but that introduces a chip. People with money do more than restore these with the bells and whistles. You could buy a beautiful restoration at an auction for $80,000, still a little cheaper than a new pickup with a 4 way tailgate. I've made a few things from the scrap pile, like mounts for the free mirrors that came from a motorcycle. I just drive it around town, but did a camping trip several hundred miles away, last November. I have a totally different frame of mind driving this, than the 2016 Honda Civic that's a computer with wheels on it. The data center computer has a glitch, sometimes taking a rough turn it starts beeping at me, the stealer quoted something like $1,300 to replace it, but I've been living with it. Look at my rust bucket. ?
-
shipment heist reported
-
Ferrari 330 GTC + 575 M Superamerica Resto-rod
89AKurt replied to 89AKurt's topic in WIP: Model Cars
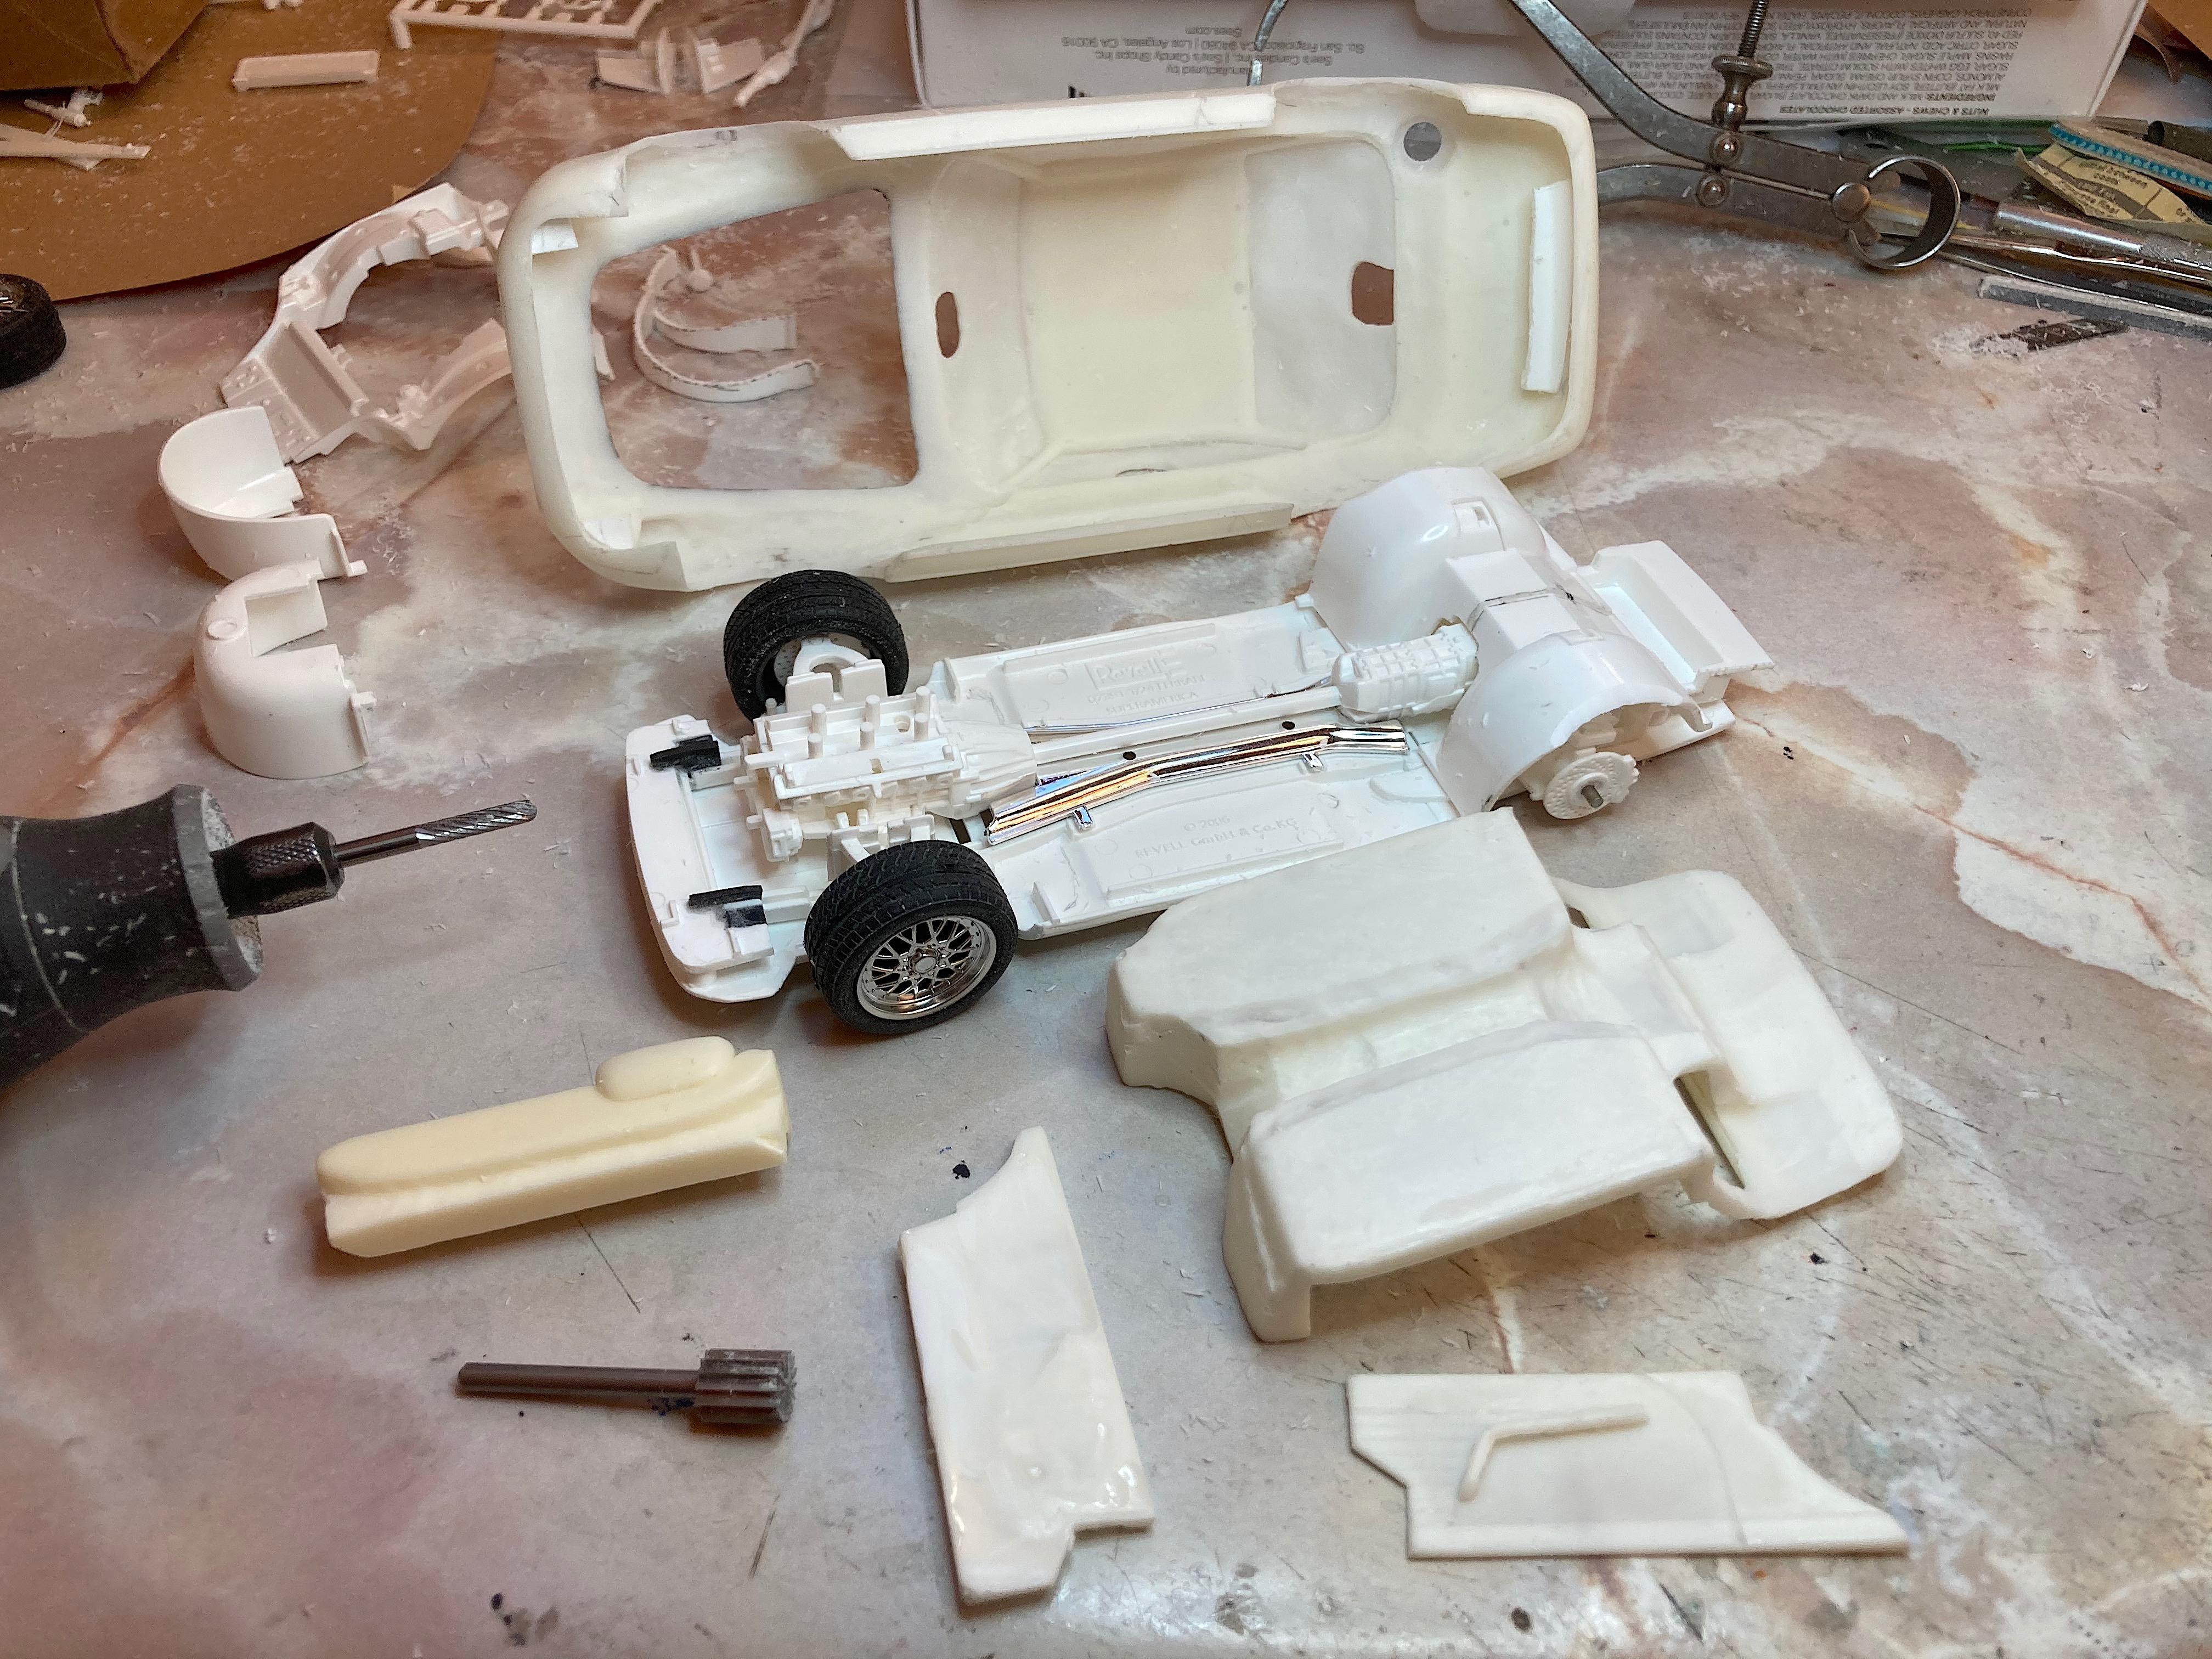
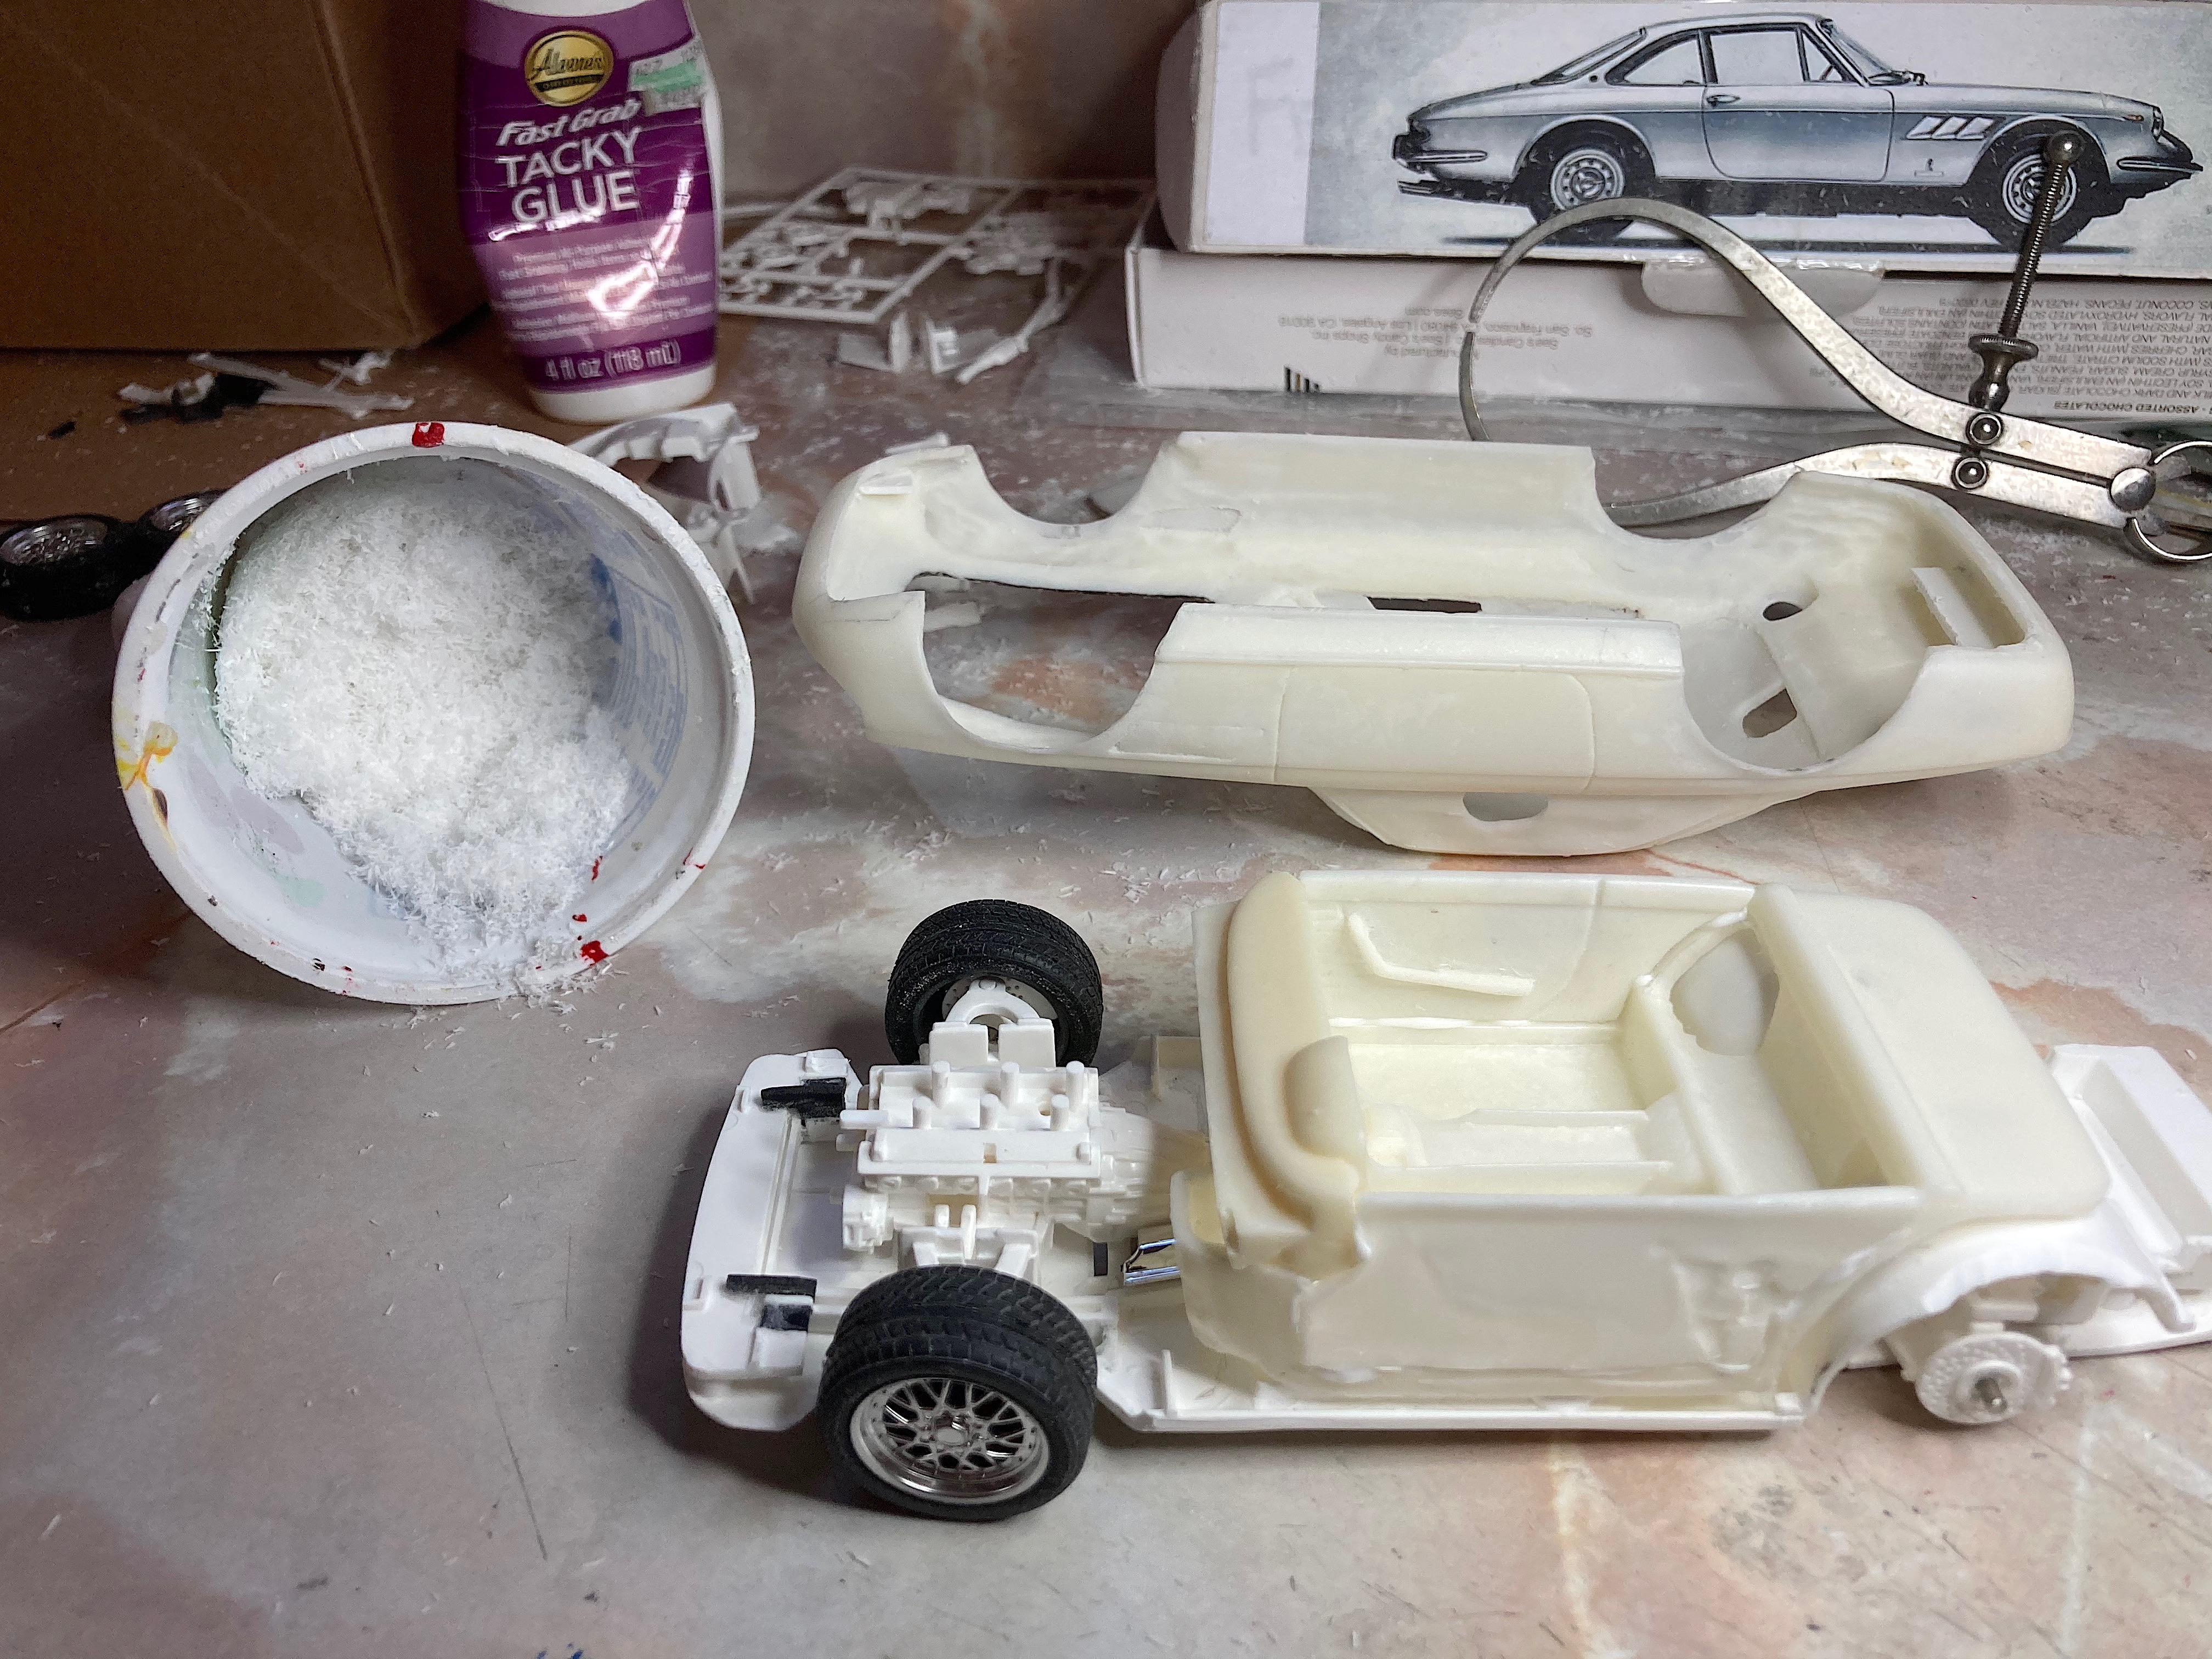
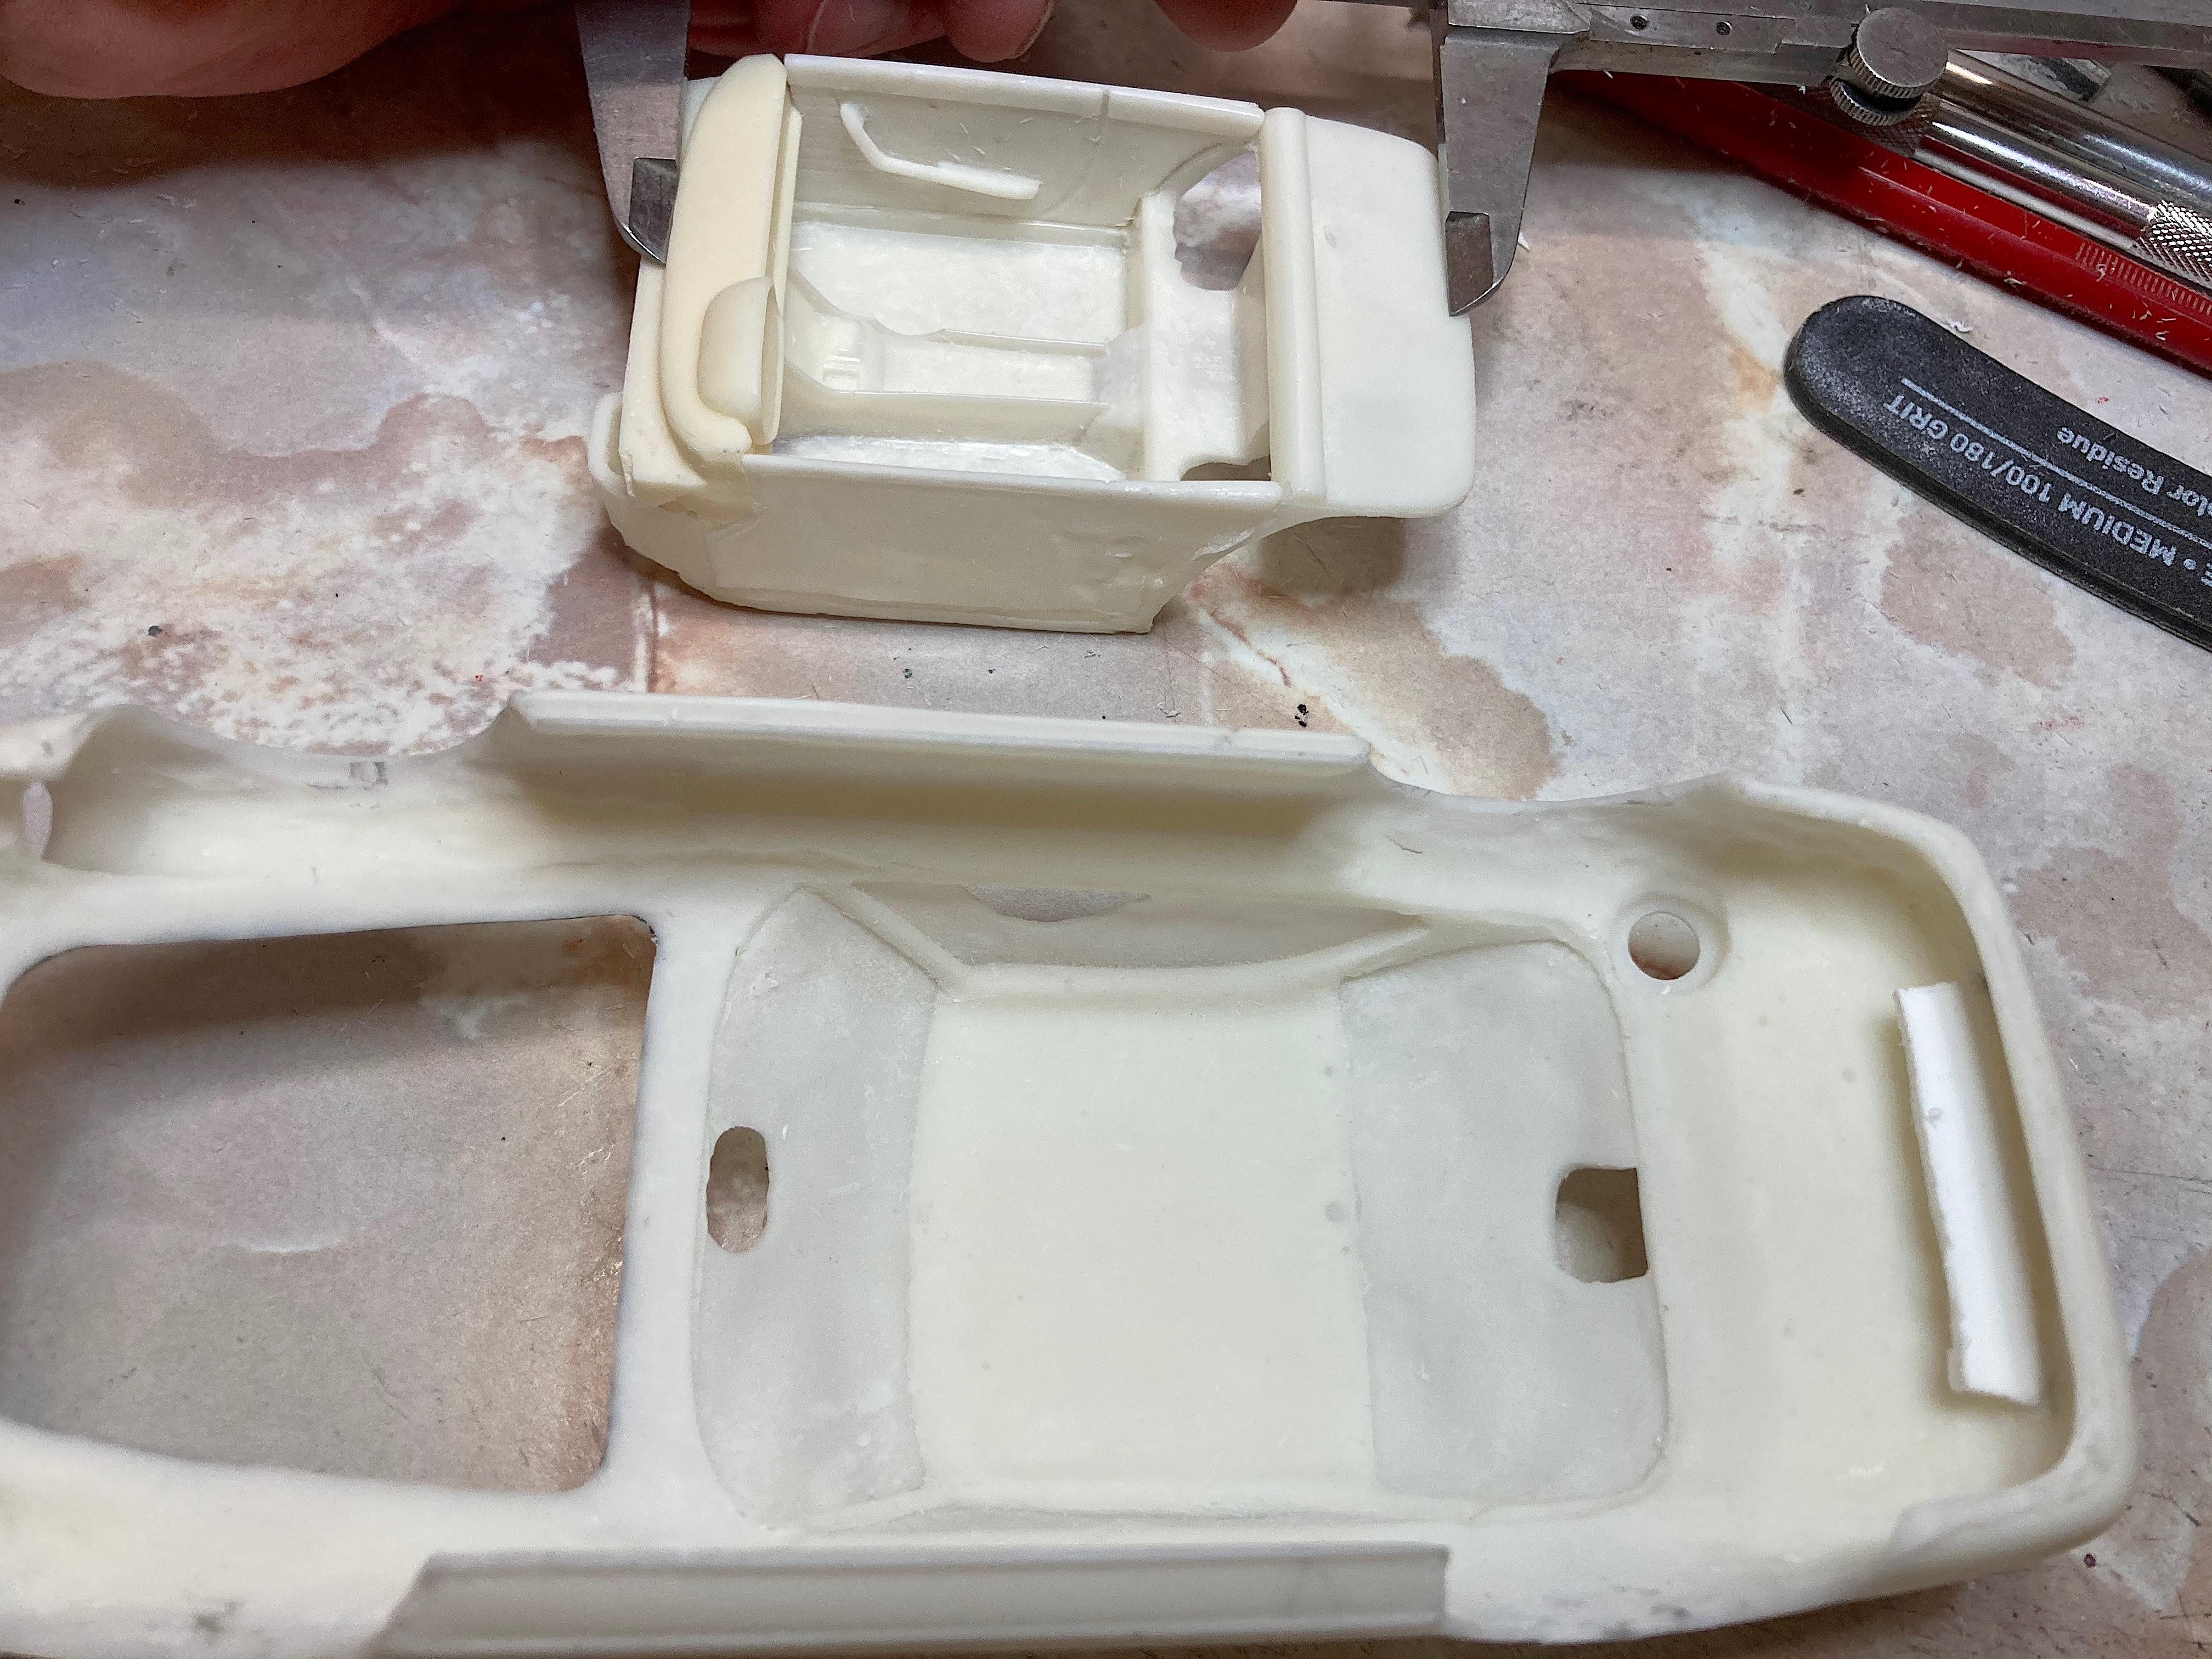
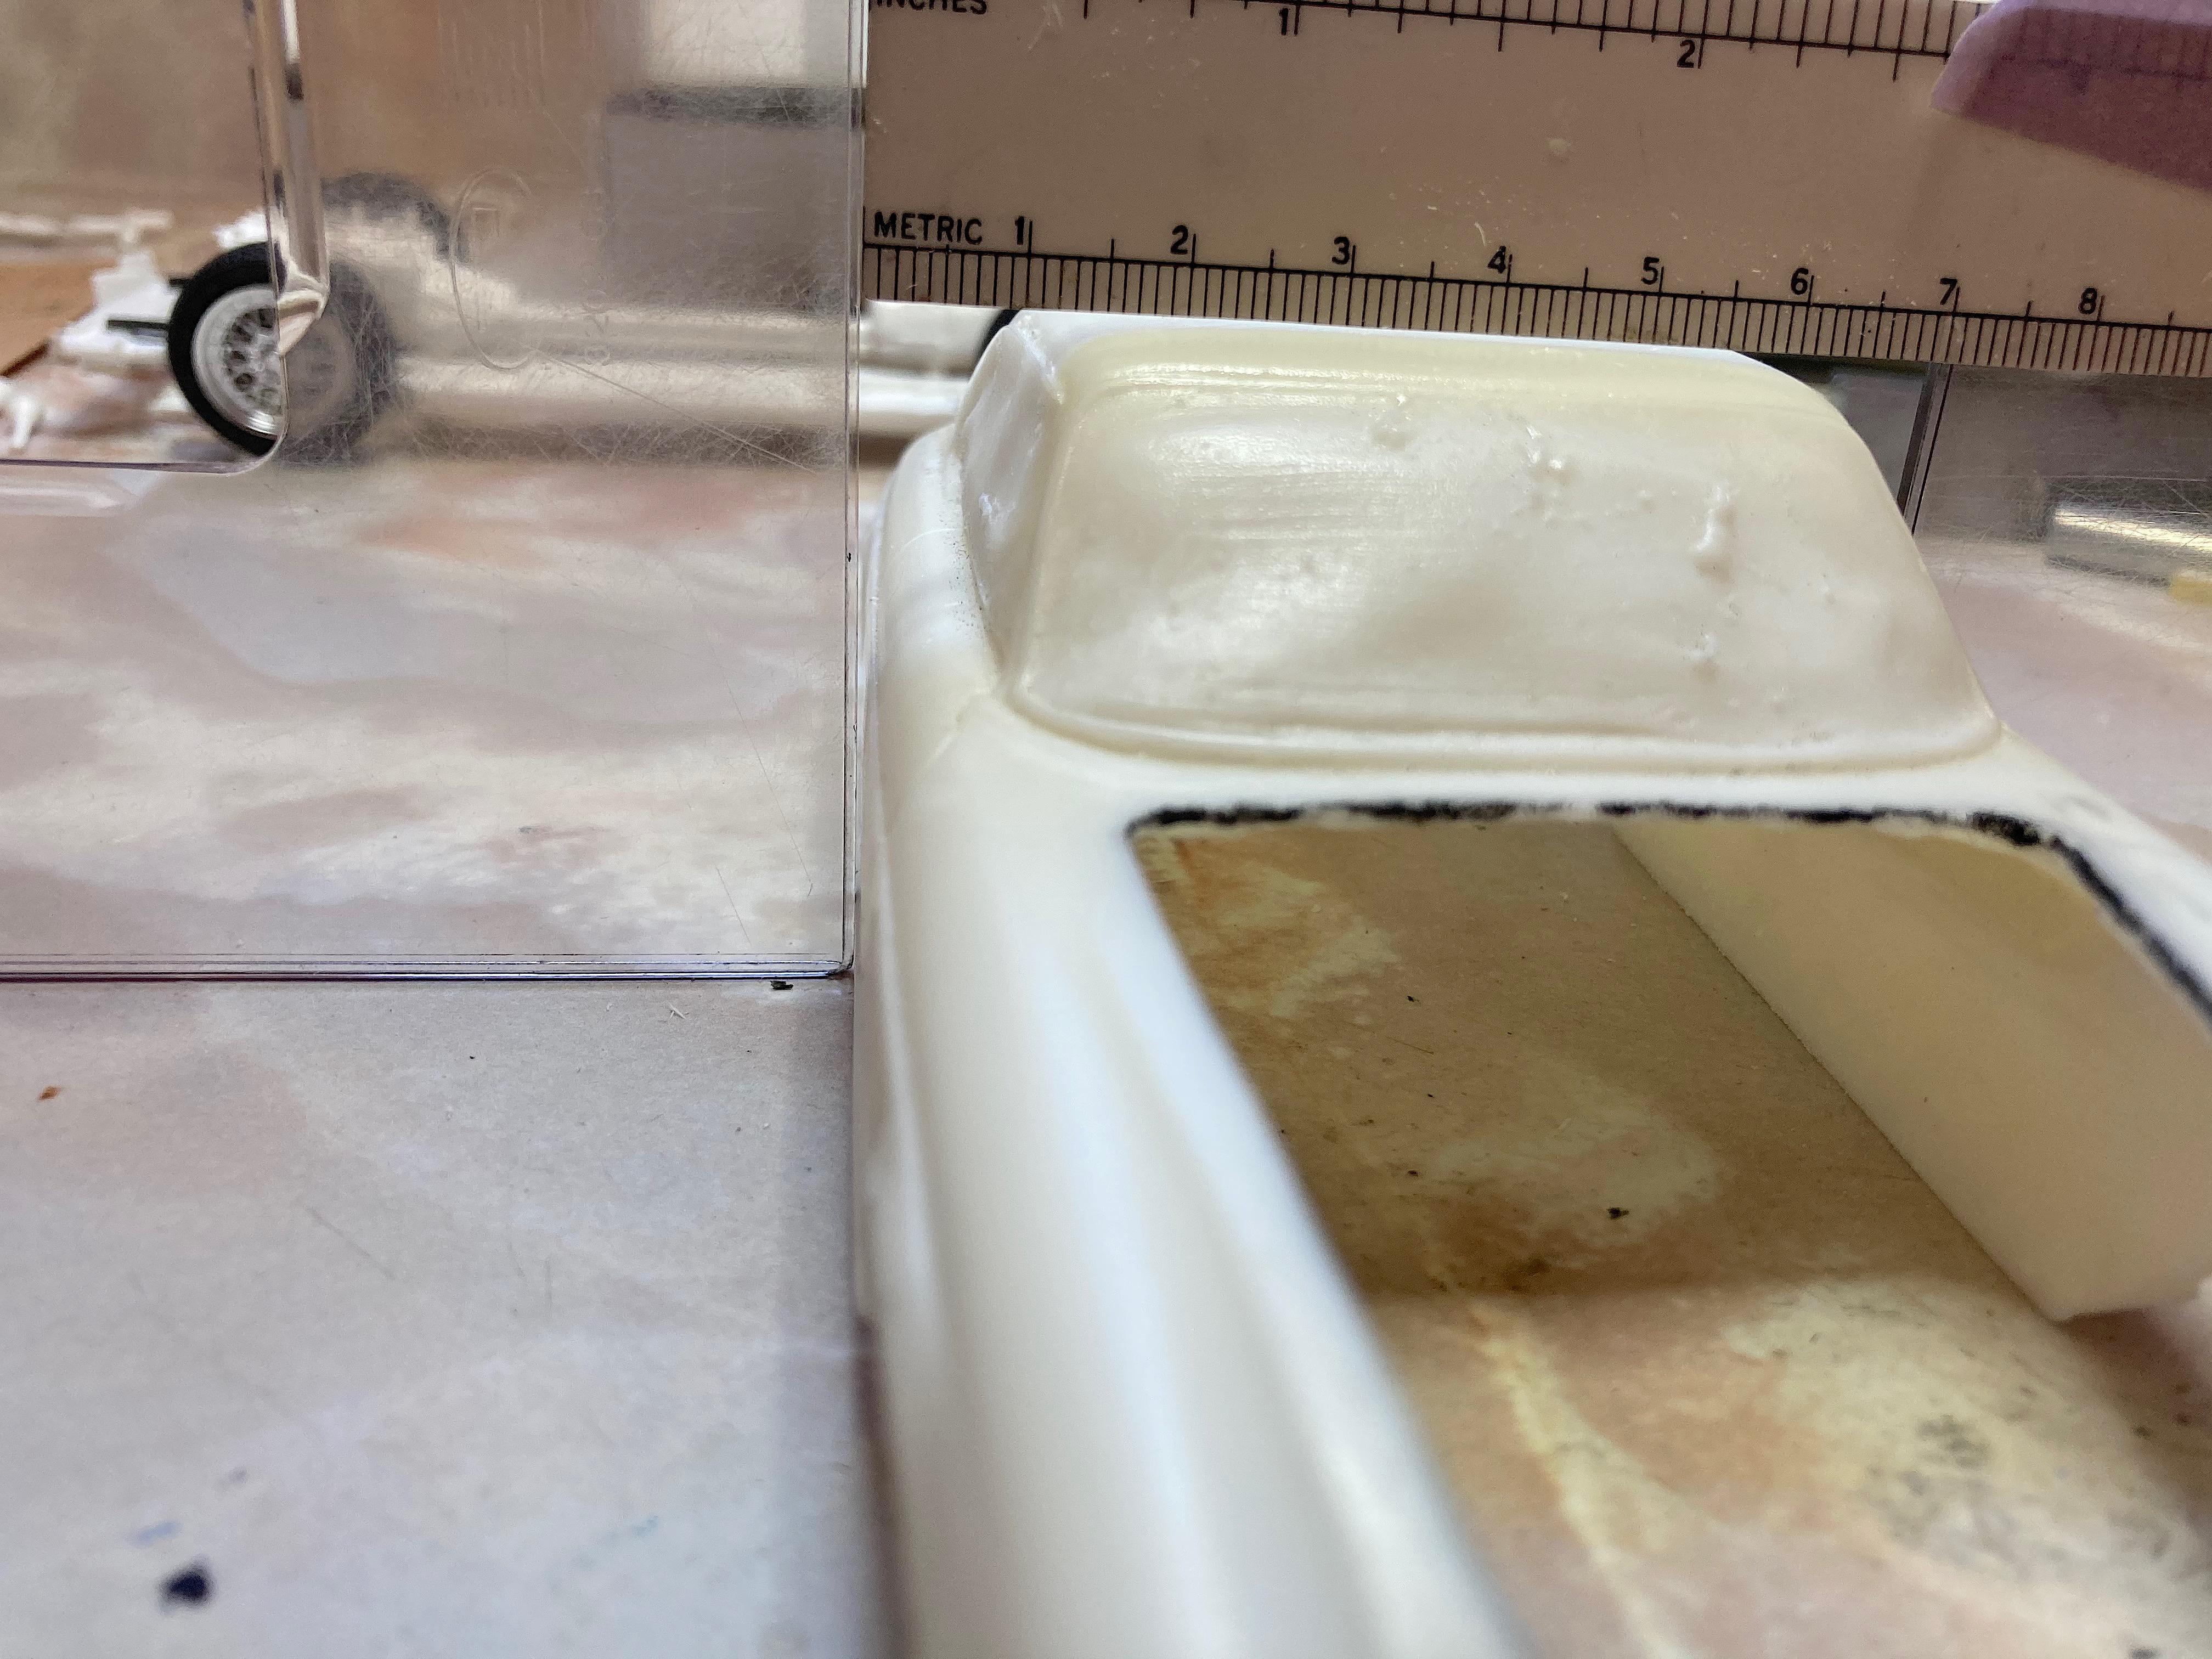
Bad enough when kit bashing, but the quality of this resin kit has something to be desired, increasing the amount of work. Started on the interior, which is only four pieces that sort of fit together. I worked on just the dash fitting below the windshield. Then mating the rear of the tub, with the Revell wheel wells. Then mating with the tunnel, and the transaxle fitting inside the tunnel. Tacky glued the interior together, then to the chassis. Cooked out tonight, weather has been beautiful, but snow is forecast. Tonight discovered it's not fitting. Looks like the interior stem to stern is about 4 MM longer than the greenhouse. I may just have to cut out the front and back window openings, and just be careful. Or perhaps I should work on getting the outside of the body "repaired" as in filling bubbles and scratches on the roof.
-
I would have to visit Snake if I posted my favorites. How about favorites that are safe for this forum (one could be an exception, but lighten up).
-
ignited the outhouse
-
Ferrari 330 GTC + 575 M Superamerica Resto-rod
89AKurt replied to 89AKurt's topic in WIP: Model Cars
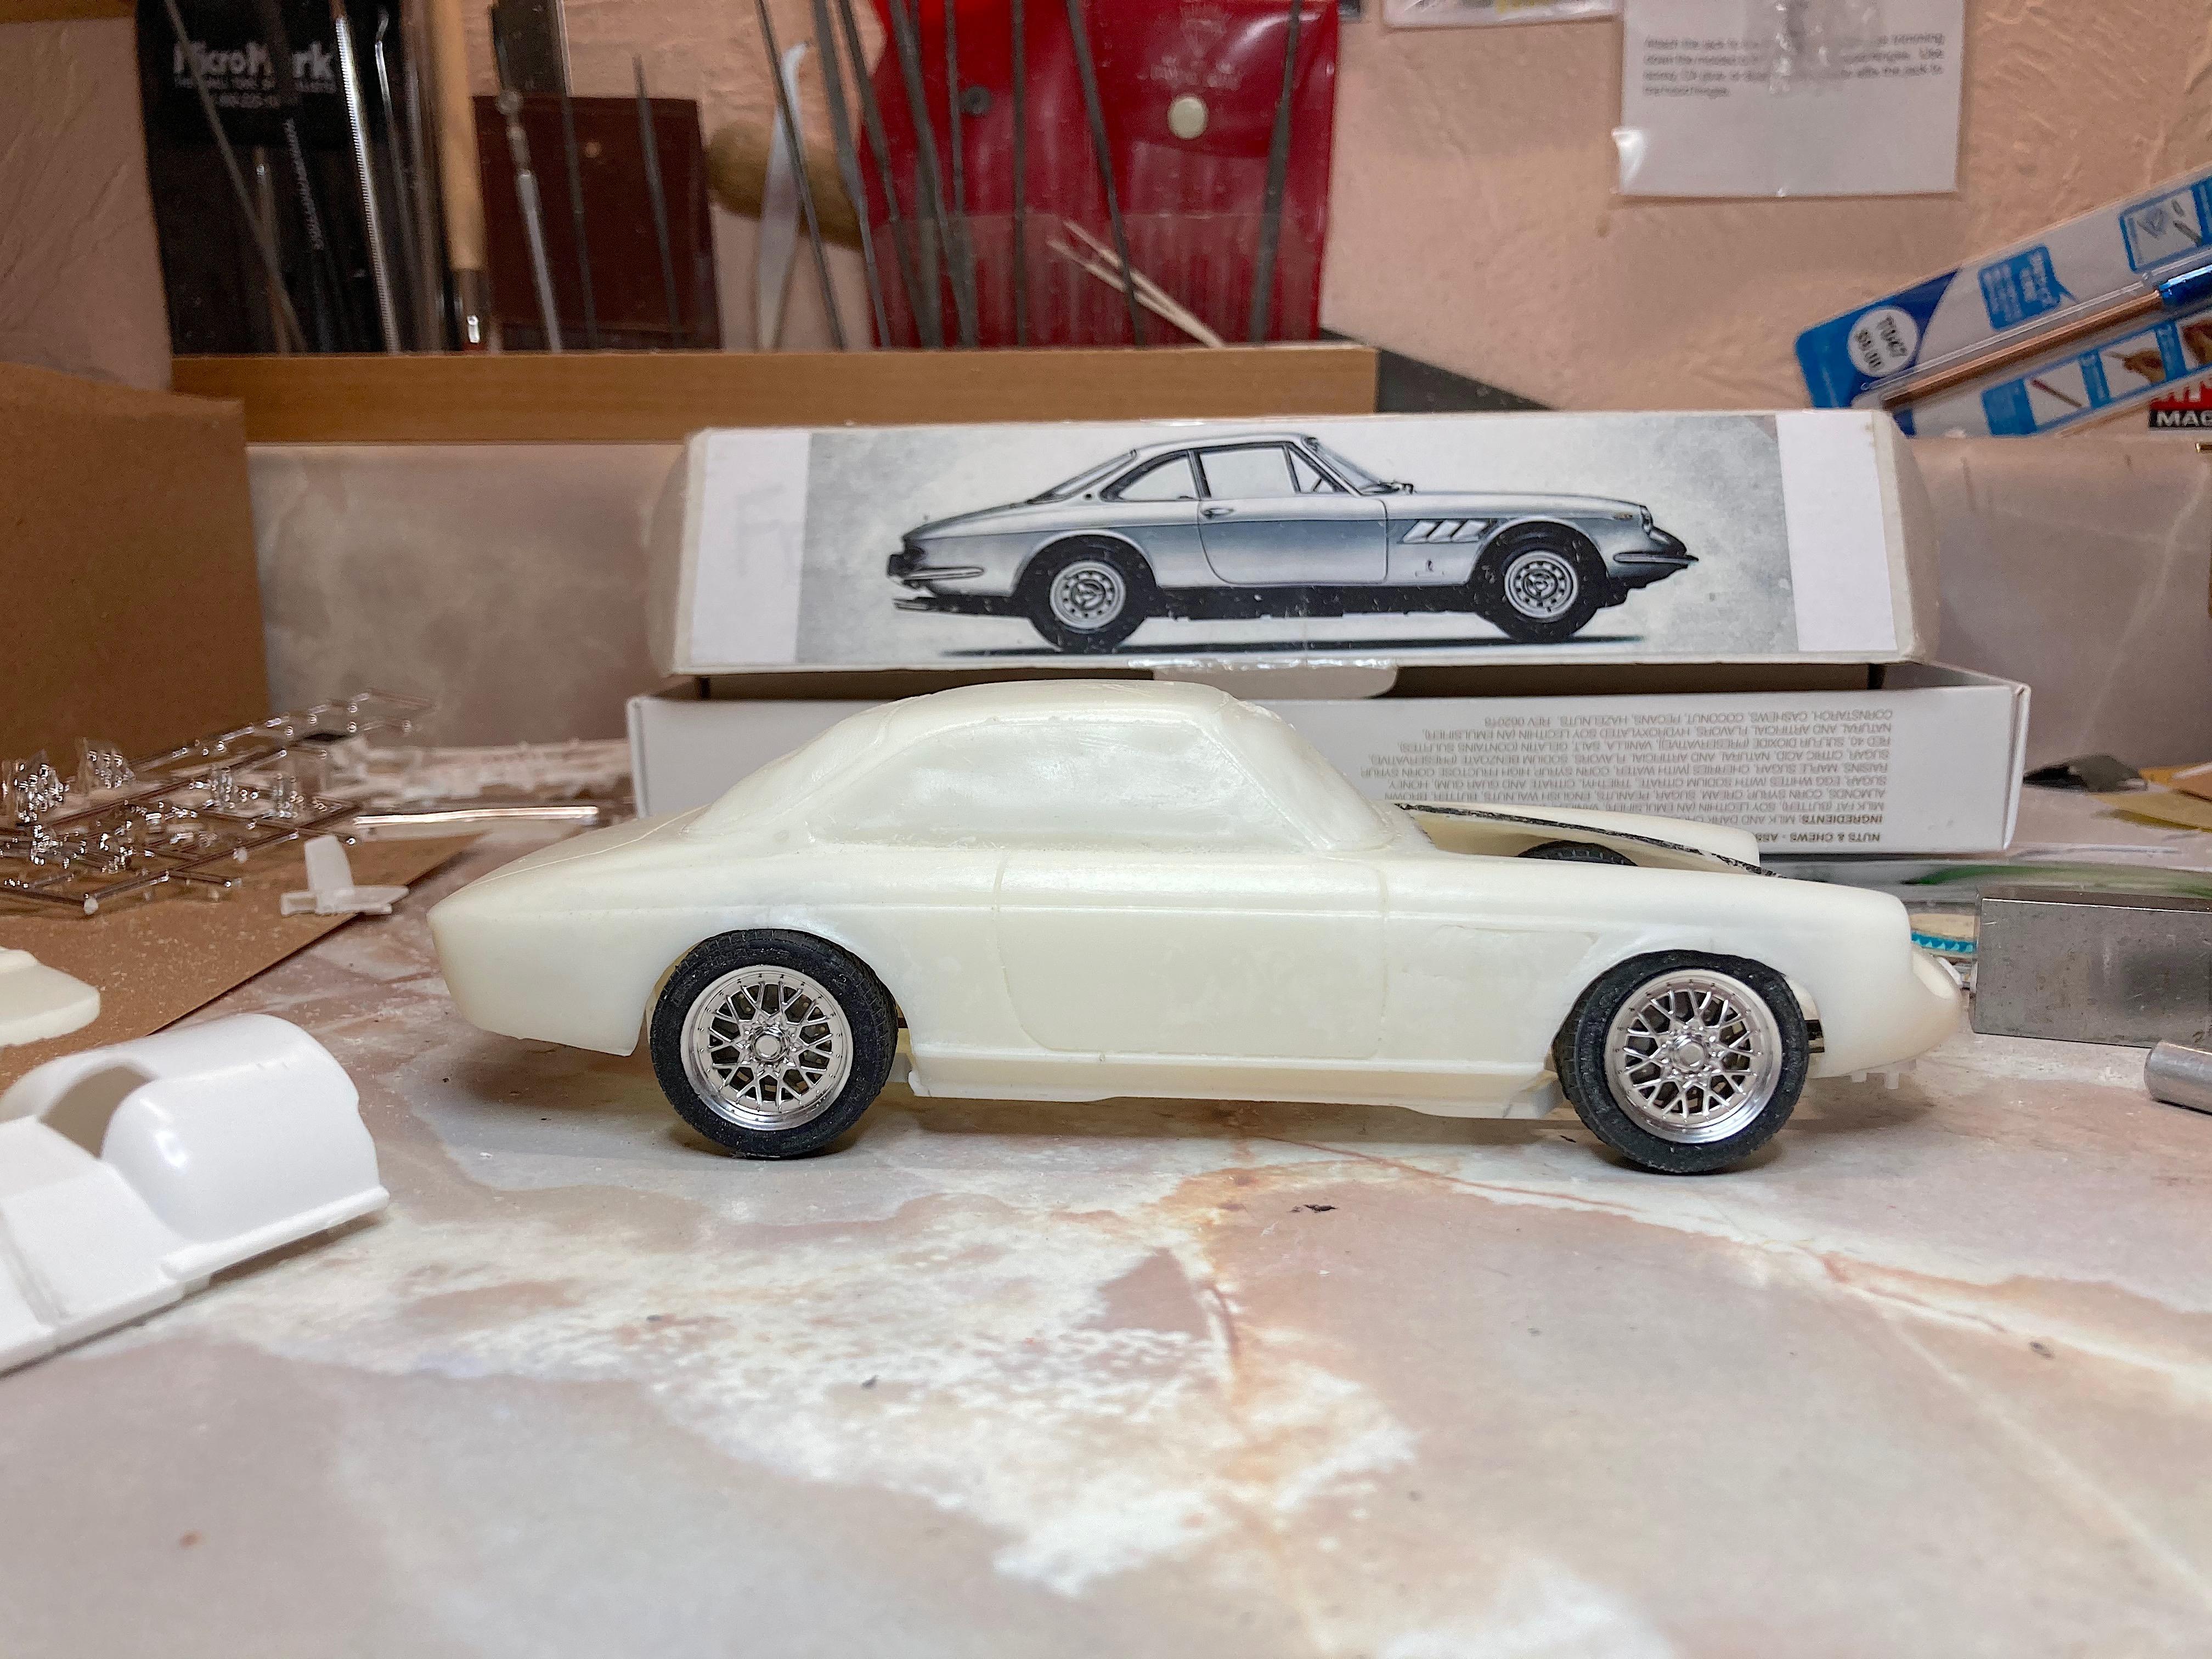
Another week zoomed by! I was not exactly looking forward to fixing the body. Drew a line between the top of the wheel arches, and attacked with the Dremel (loving the bit I got for this project). Used the caliper that my dad had, to feel the thickness, it was easy to see at each end, then when it wouldn't move, marked and ground some more. Used the light to see how even it was too. I ran hot water over that area until the resin softened, then bent it. Took a few tries to get it right, and it's just a tad narrower than the chassis so it will fit tight. Also flared the fender lips a bit. I had to shorten the chassis, marked parallel lines about 3 MM apart, cut between with the hot-wire, sanded to the lines but not into them. Glued tabs on one side first. With all the tweaking, broke the rear off. ? So I worked on cutting off the outside of the fender tubs, again with the hot-wire. I can't glue this on now, have to glue the transaxle in first. Much happier with the marriage, huge relief! Now we're cooking with gas! Next major step, fit the interior and wheel tubs together. I better keep the resin in the windows still, which will make it more difficult, but better than breaking a pillar.
-
I'm intrigued by the red crackle paint, since I build Ferraris.
-
drifting off shore
-
Mechanics recreate Renaissance paintings.
89AKurt replied to Richard Bartrop's topic in The Off-Topic Lounge
I'm ain't cultured enough to know what painting this replicates. -
Container Ship Adrift in Atlantic with...
89AKurt replied to TransAmMike's topic in The Off-Topic Lounge
Thanks for the link. I know Audi Etrons were in the manifest. -
You have more discipline then me! I got that and the MPC Deserter from Hobby Lobby at 40% off, just to look at the tires. ? Might put the chassis under the '57 Cameo. I can't think of one kit at the moment, have lost track of how many times for several, will think about it.
-
You one of them cat burglars? ? I moved this piano from the back of the room, to the front room to take pictures, so I can get rid of it. The cats never had an interest in it, but of course now it's an easy and sunny location. Fuzz Therapy.
-
used to bait
-
mixed with tofu
-
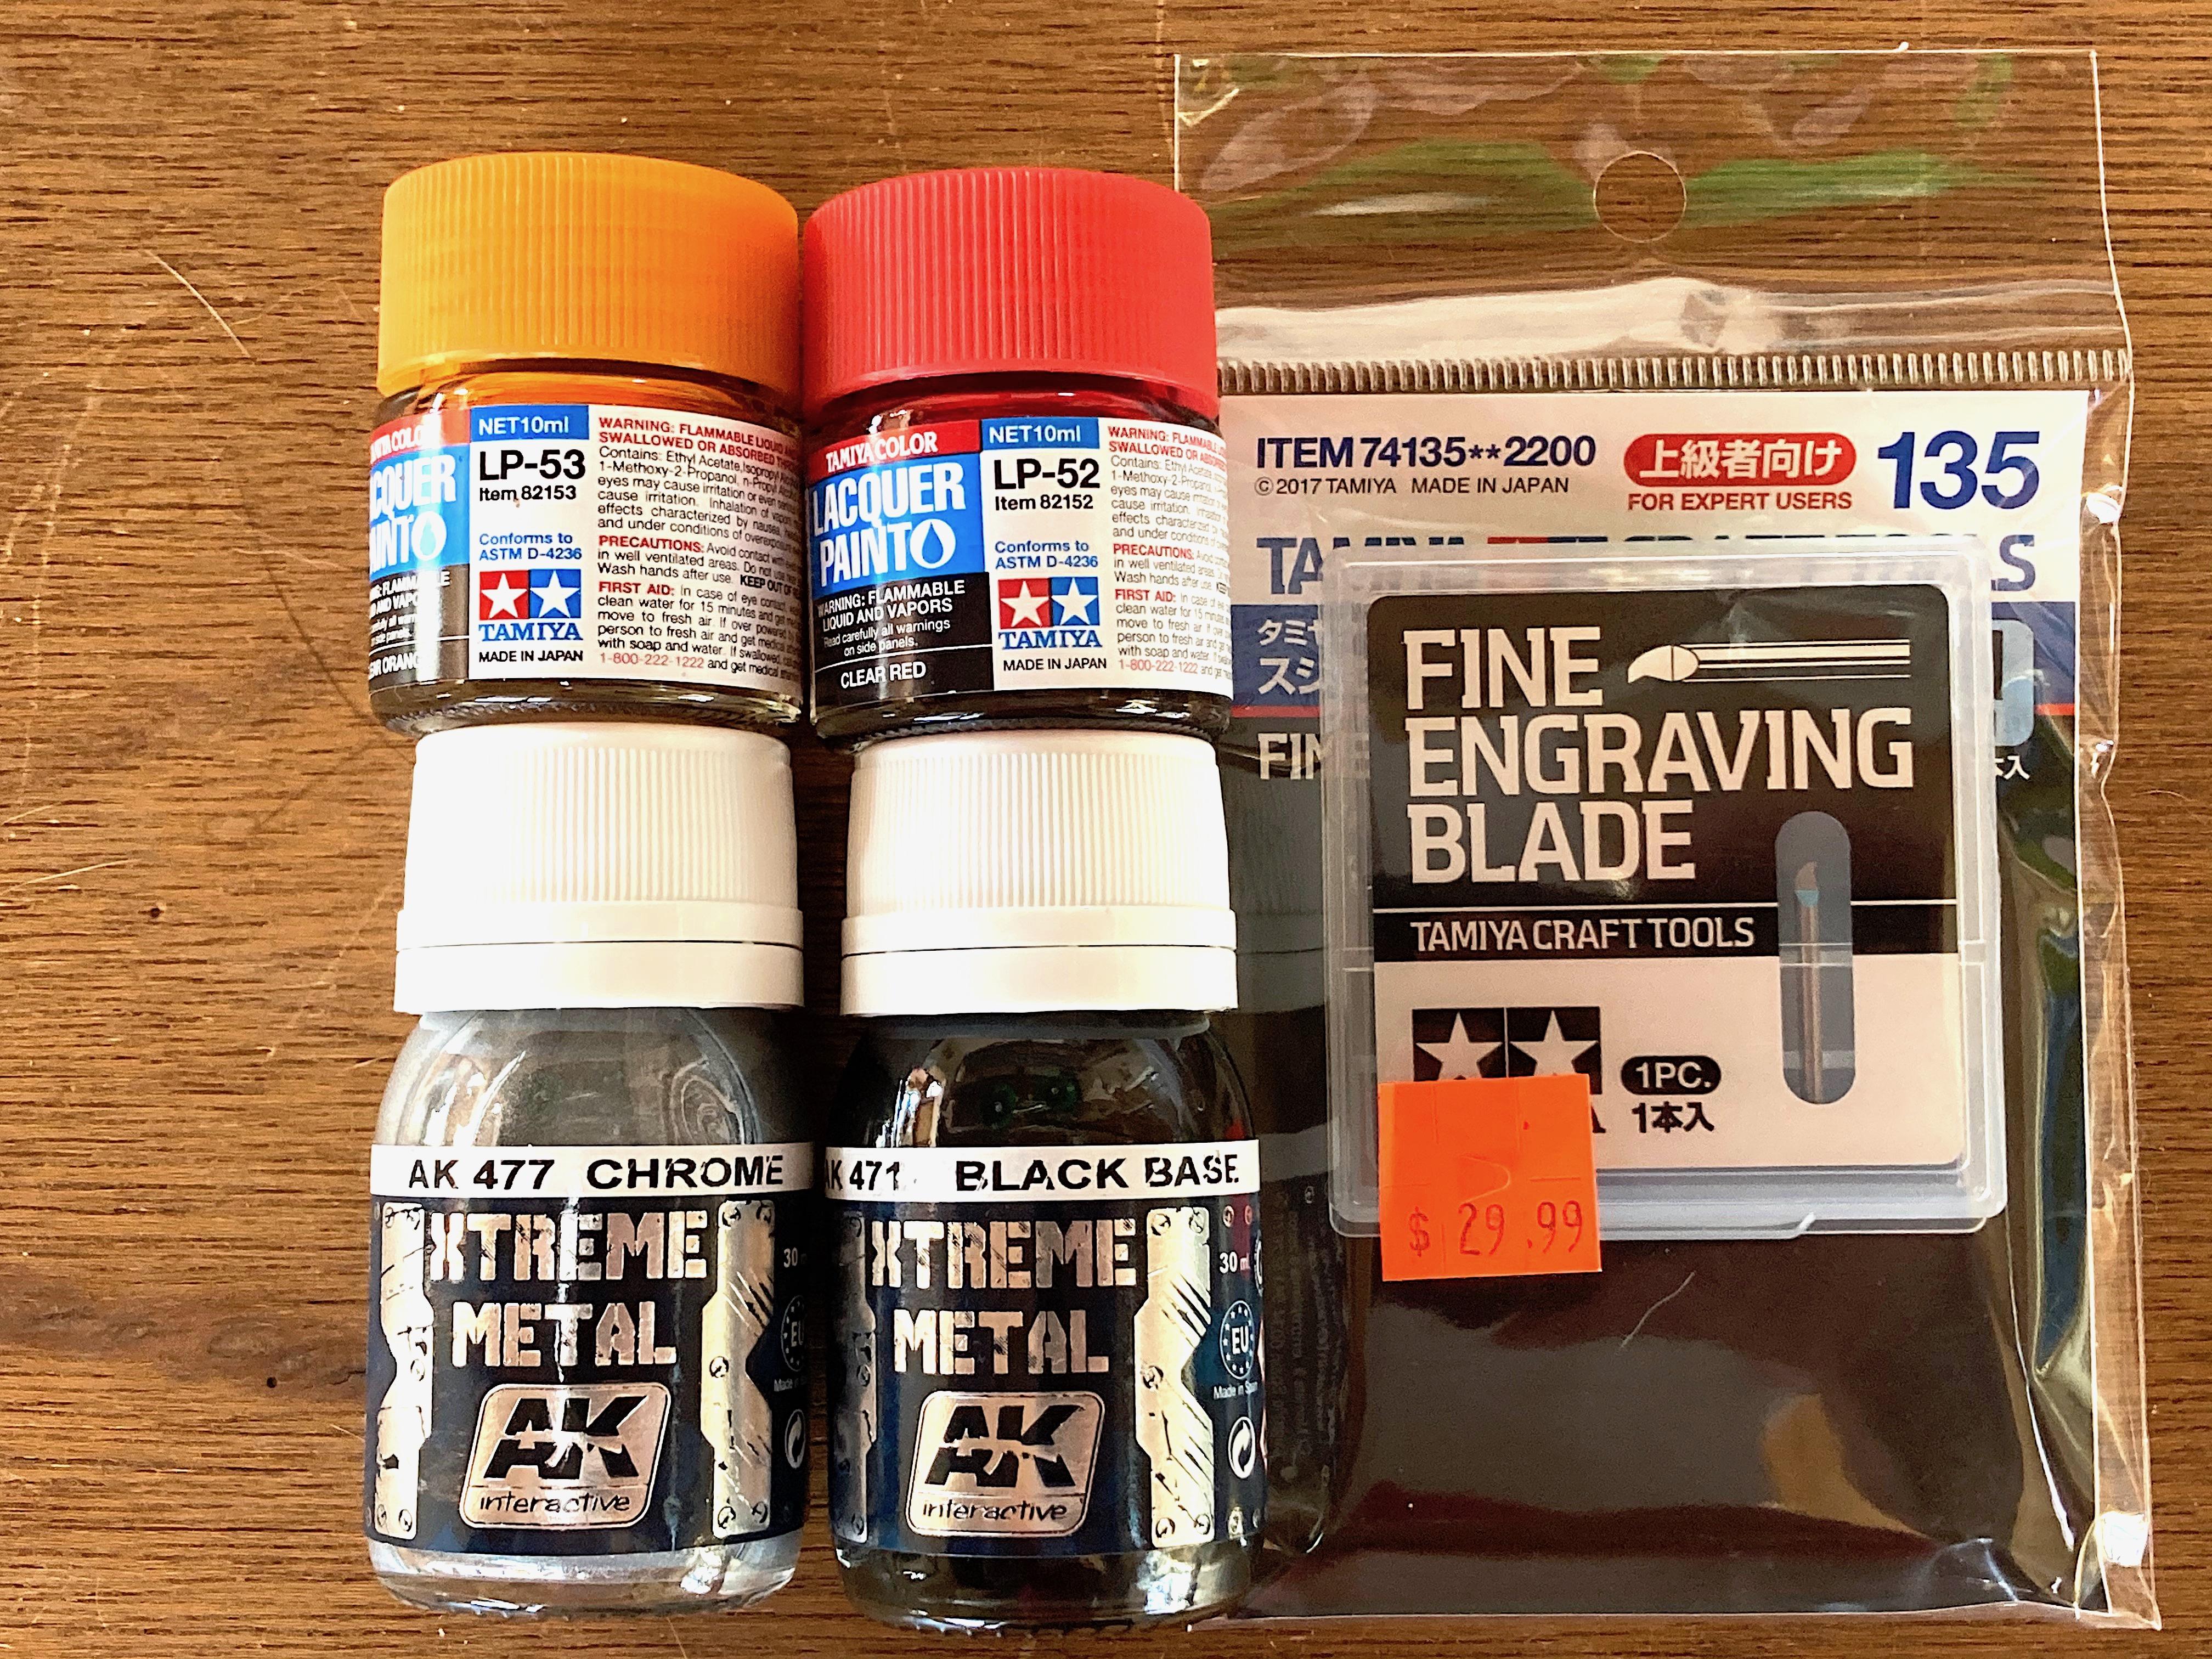
Been awhile since I've been in a real hobby shop (Hobby Lobby does not count), Andy's Hobbies in Glendale. Since my Model Master clear red and yellow went bad, needed to try something else. Also wanted to try another chrome paint. And *had to* get the thinnest Tamiya scriber blade. There were no car models I wanted, other than the Senna but resisting getting another modern exotic that needs lots of carbon-fiber decals.
- 39,146 replies
-
- 2
-

-
- johan
- glue bombs
- (and 1 more)
-
of ketchup packets
-
Ferrari 330 GTC + 575 M Superamerica Resto-rod
89AKurt replied to 89AKurt's topic in WIP: Model Cars
Appreciate the comment and help. The Campagnolos for the 246 would not be correct. I see the Renaissance wheels (Jeu de 4 roues Campagnolo 1/24 (Ferrari 275 GTB) avec pneus et papillons), the slots don't look right. I have a few sets of other brand p-e wheels, which do not have the nice tires that come in the Fujimi kits. I'm good with the steering wheel, just need to turn wood rims which I think is possible; I used the Replicas & Miniatures of MD steering wheel which had real wood parts. I understand why you wish I would build a "correct" model, that's never been my intention to begin with, everyone else can build concours correct builds. Thanks! So do I, nothing like having a make or break moment.
-
Ferrari 330 GTC + 575 M Superamerica Resto-rod
89AKurt replied to 89AKurt's topic in WIP: Model Cars
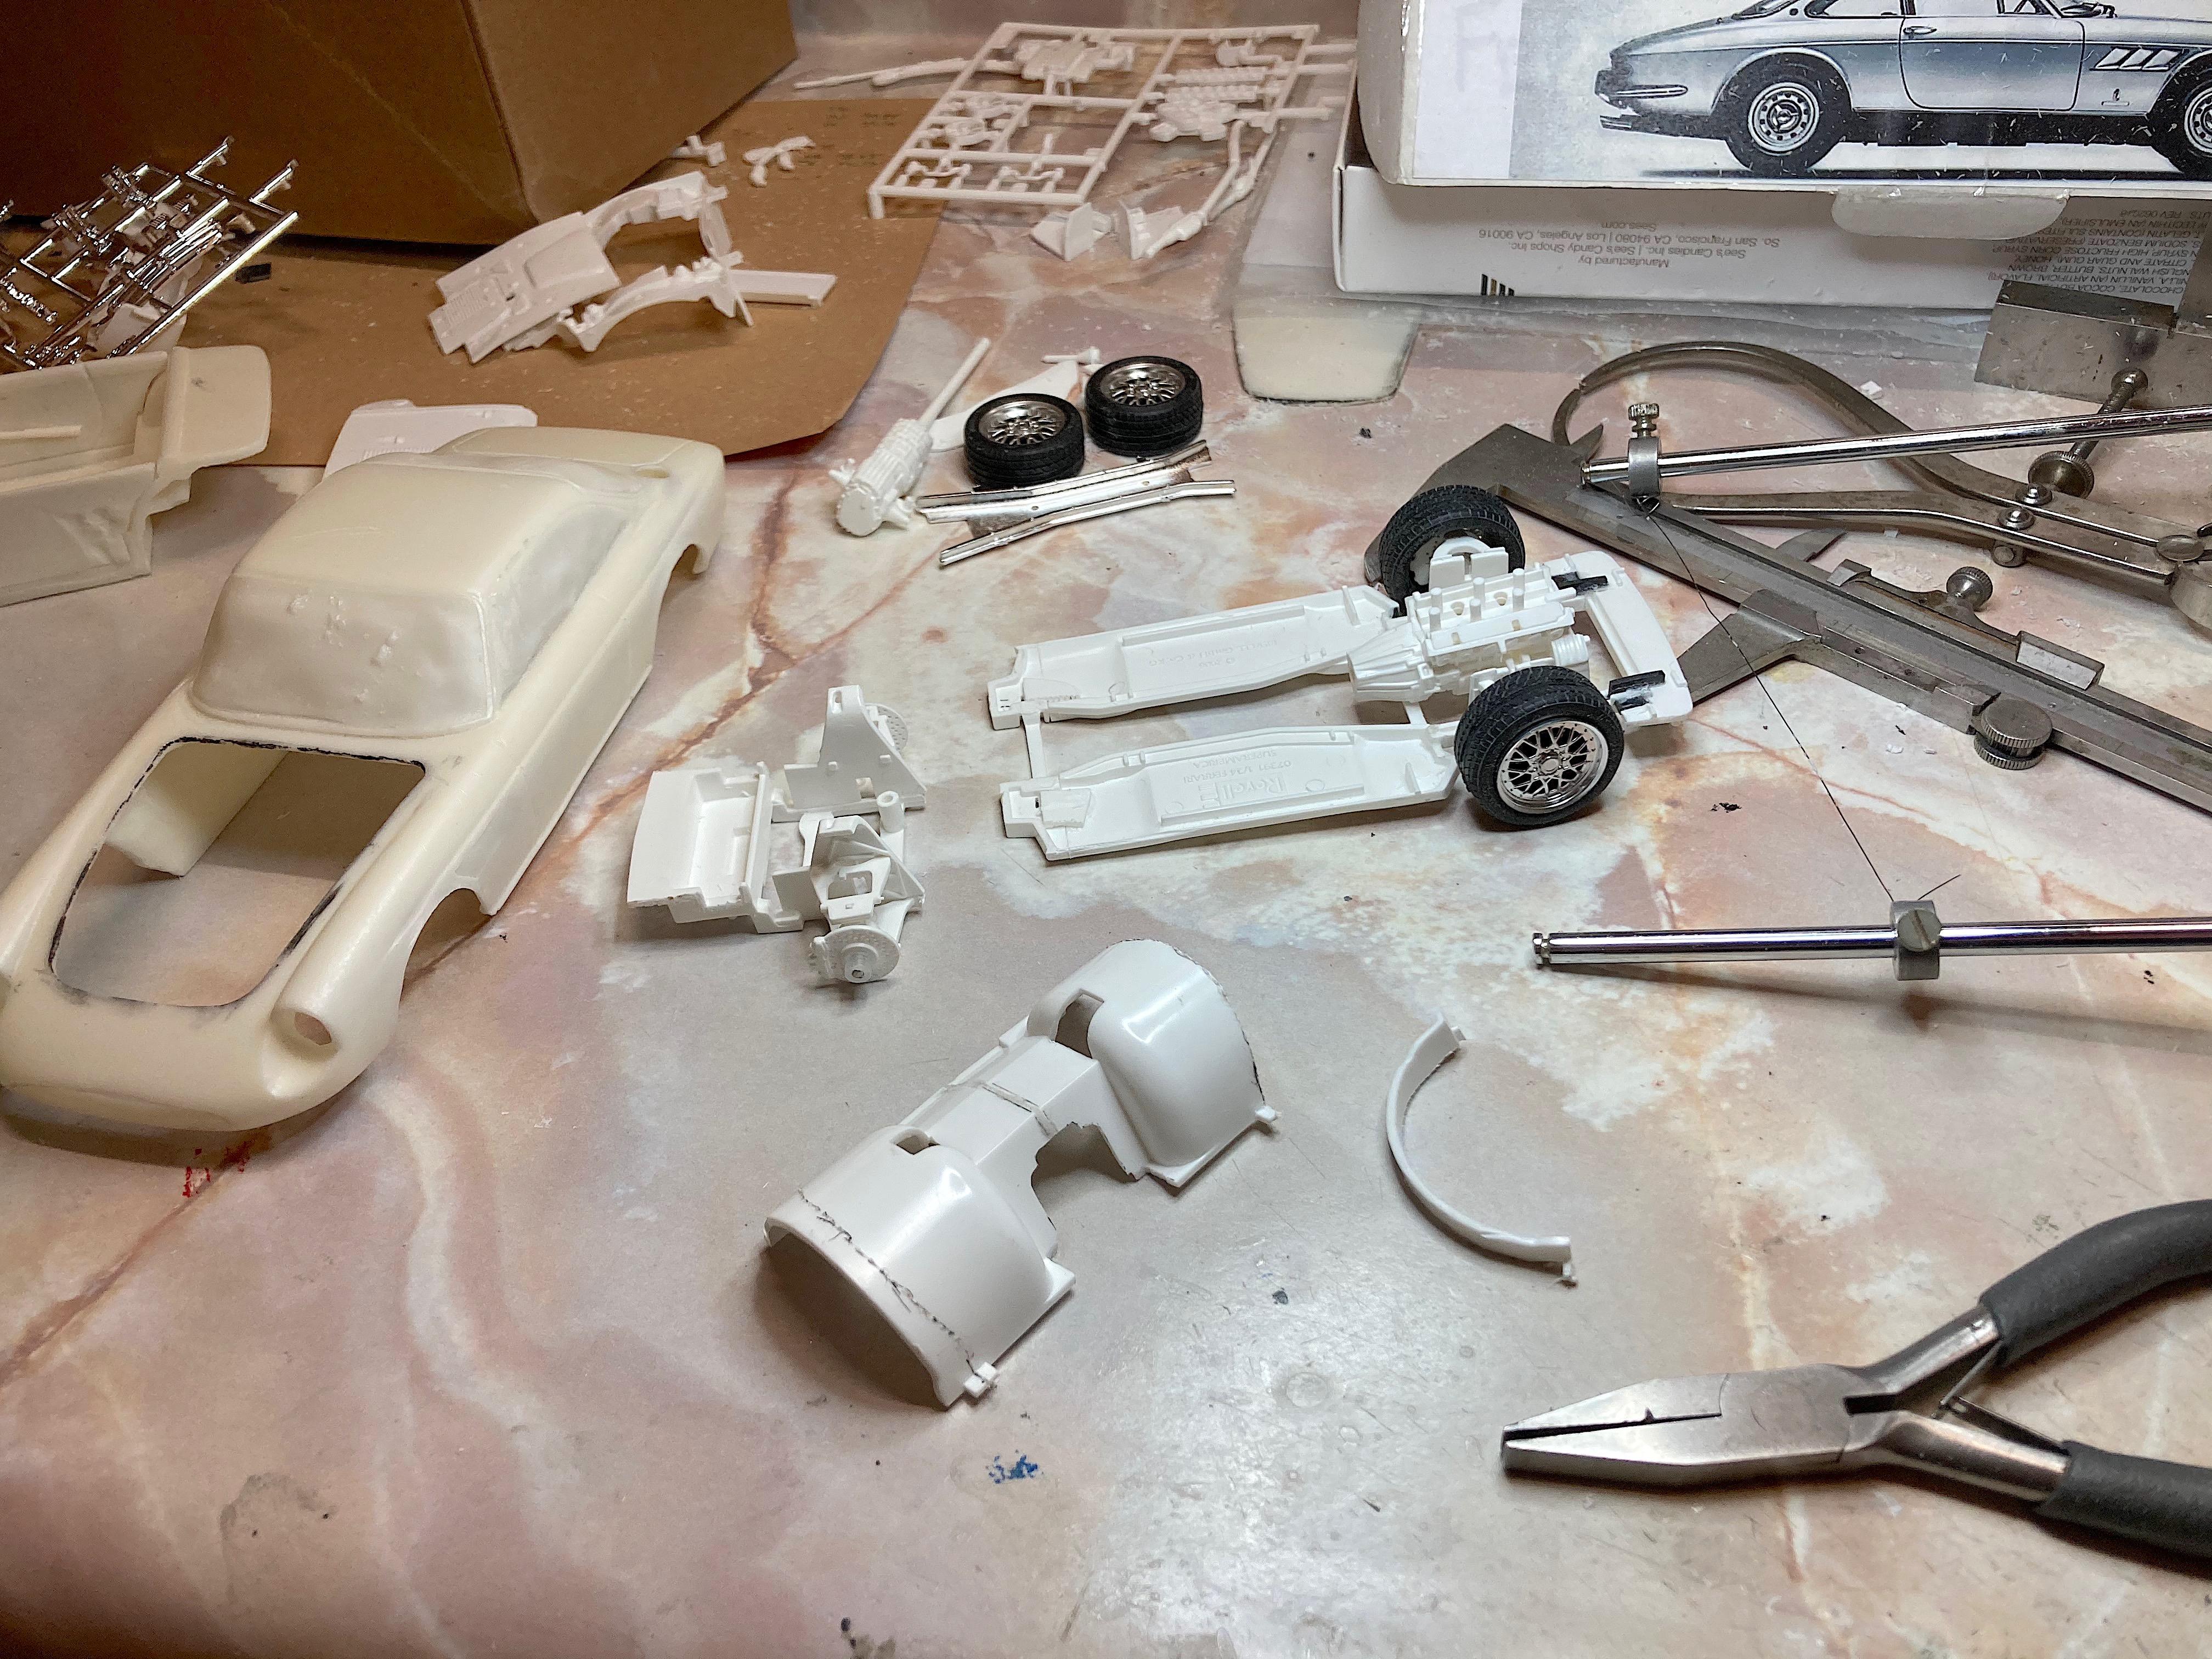
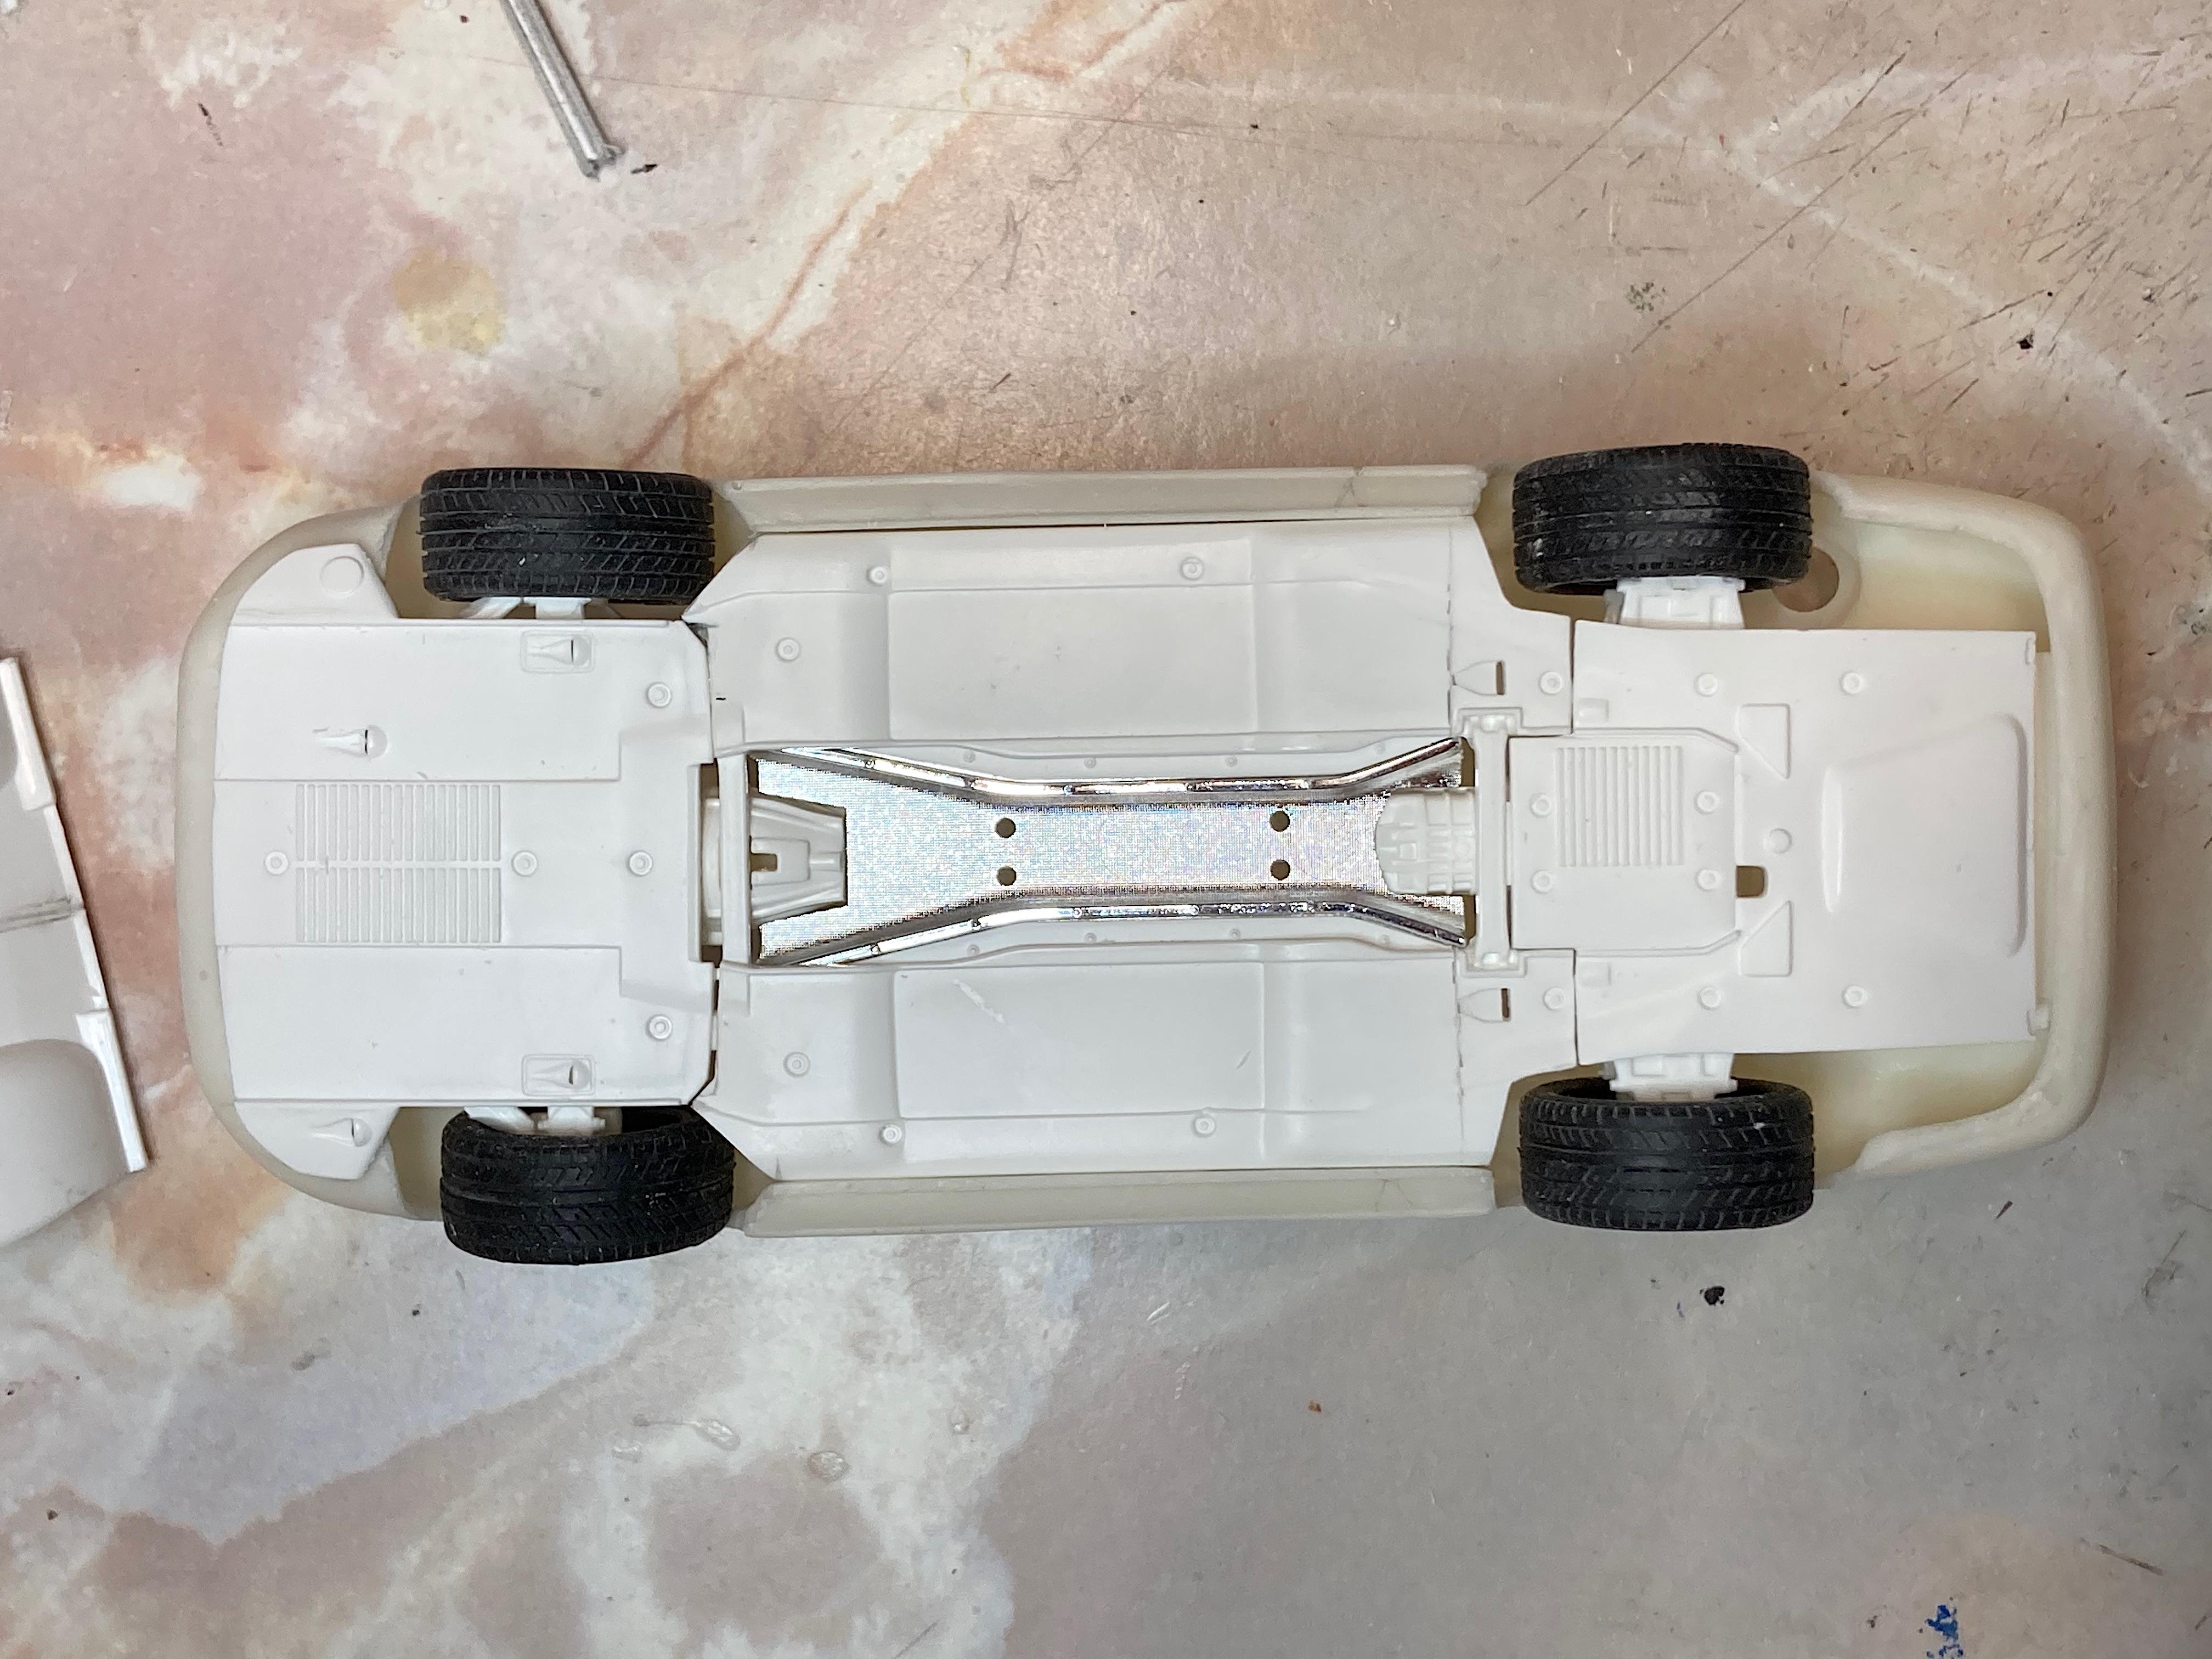
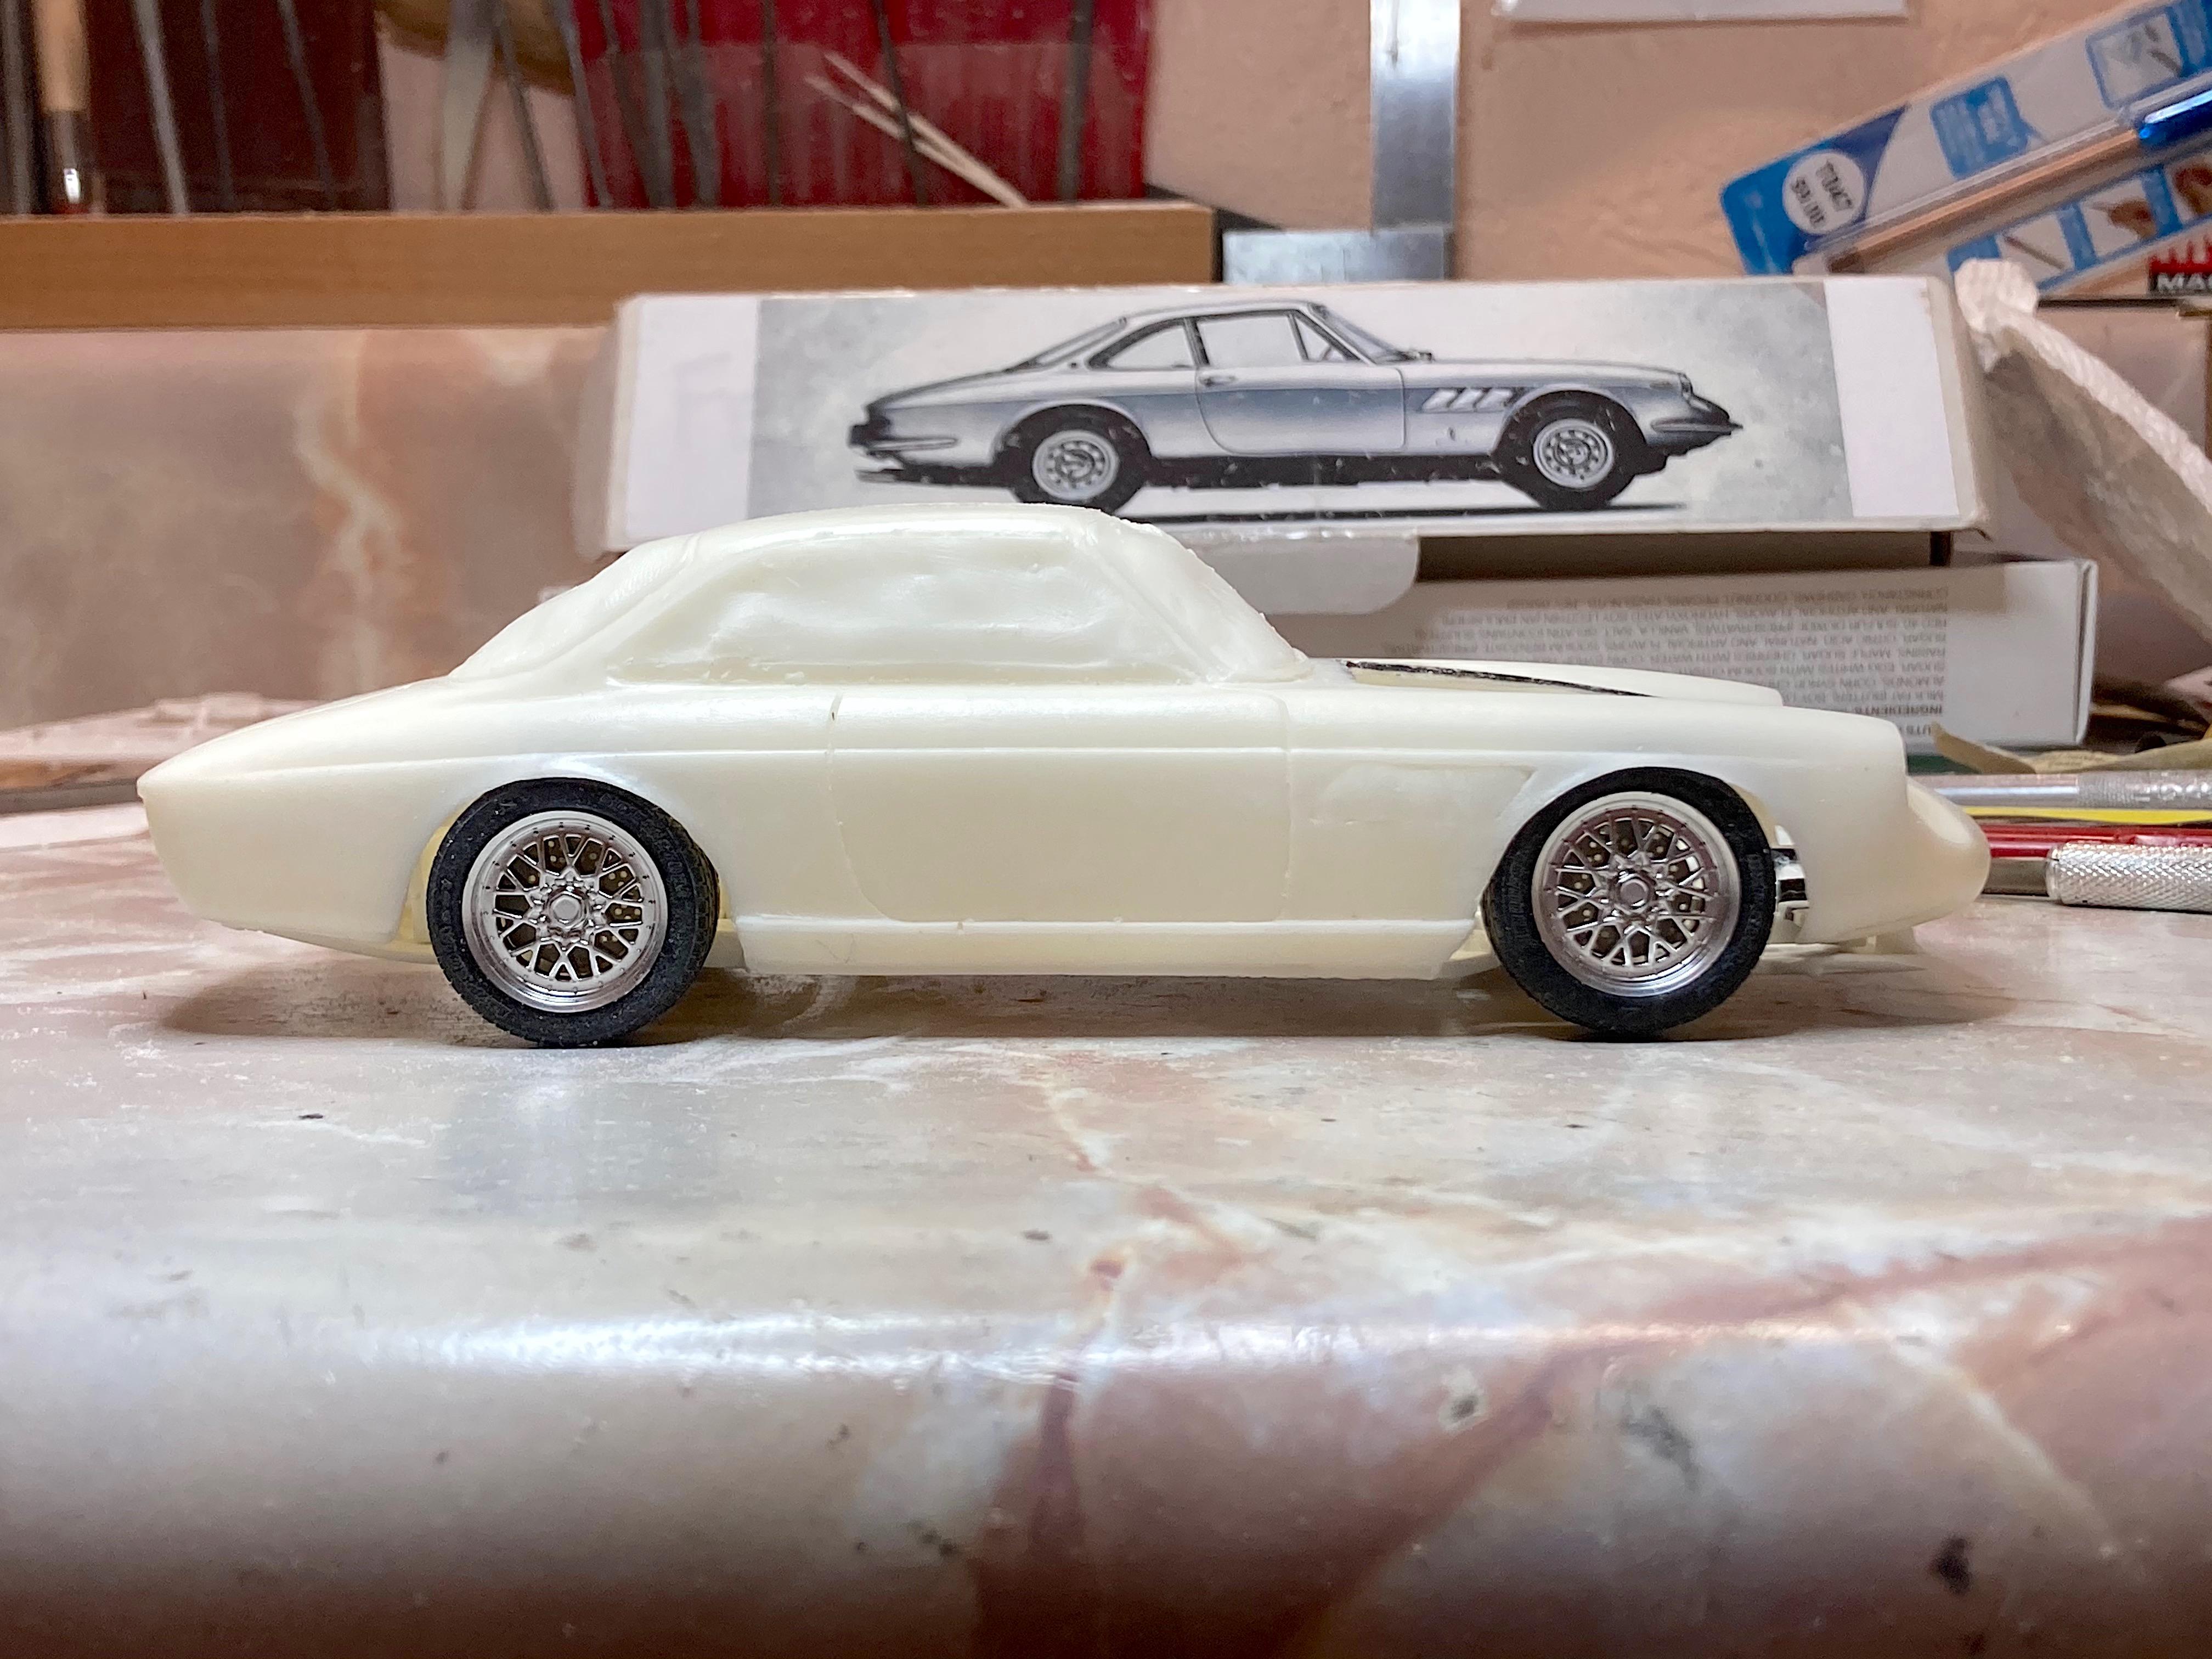
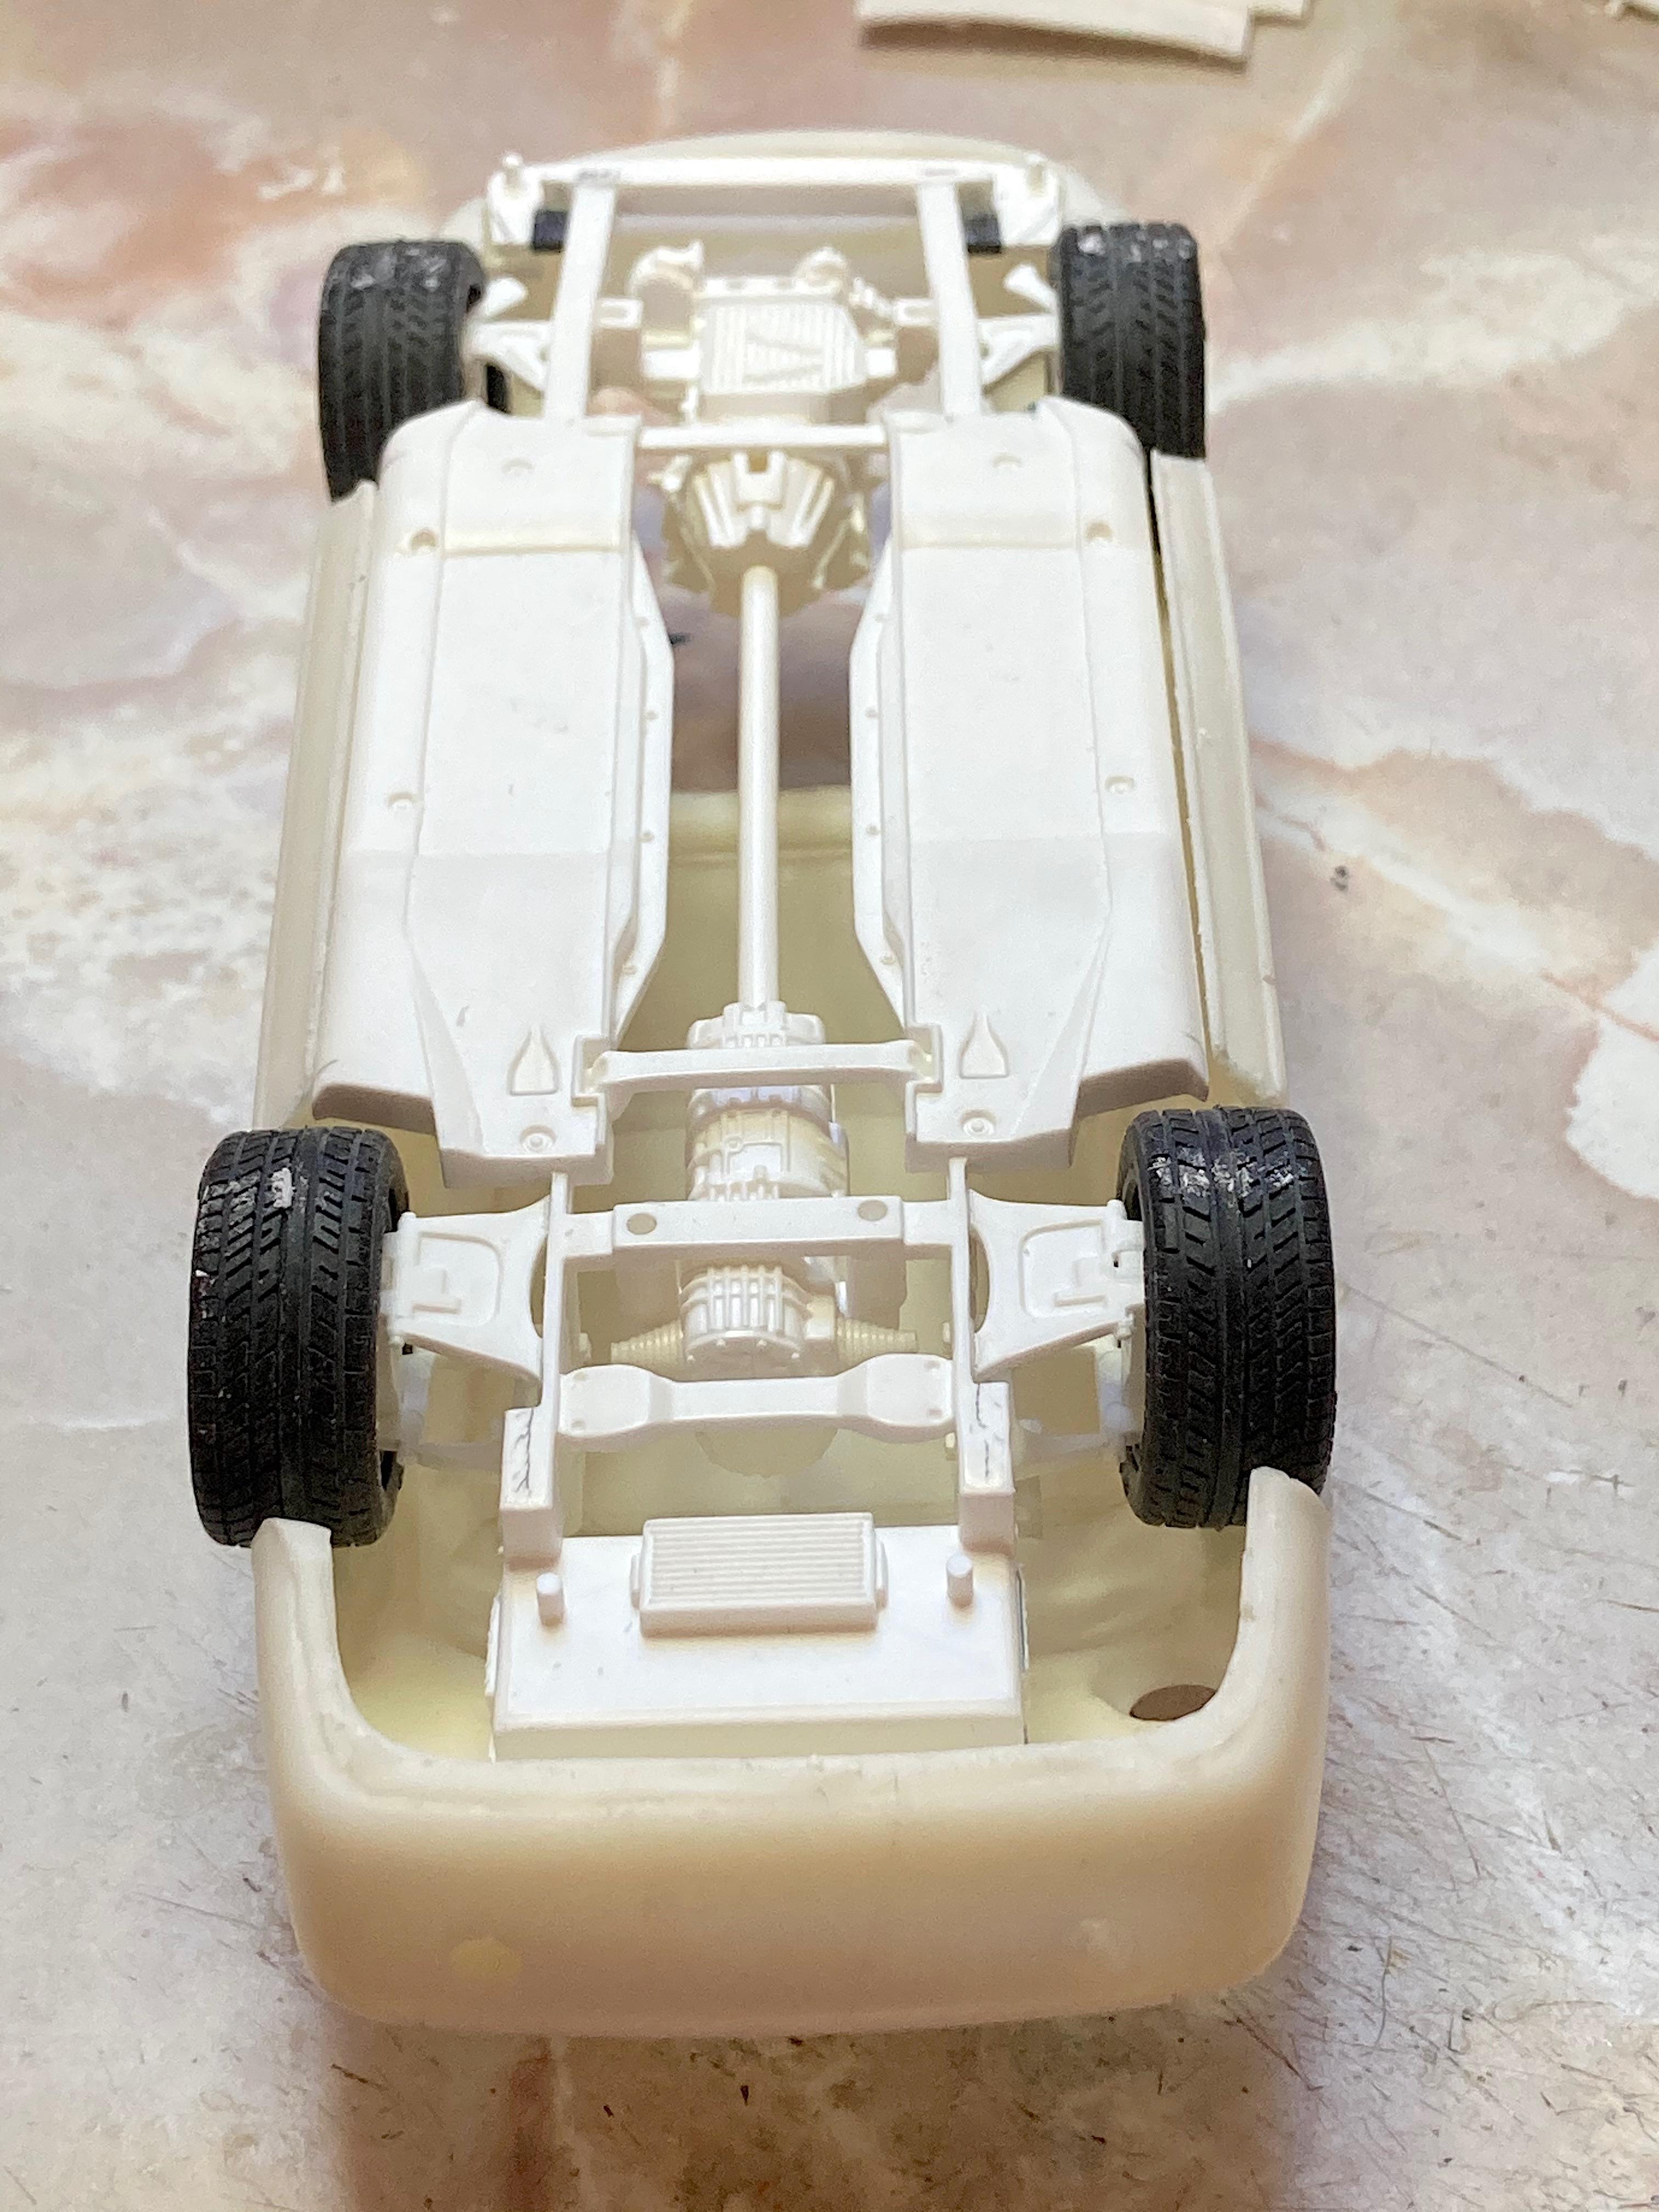
Now what?!?!? ? I knew going in, this wasn't going to be a cake walk (where did that old saying come from?). Notice how one side the back tire sticks way out, the other side tucks in perfect. It's not the chassis modifications. I could see with my eyes the sides had been warped, perhaps when the caster took it out, he didn't set it down and check the alignment, or got warped in packaging. The only way I could think of showing in pictures, was to set up the drafting triangles on each side. Right side, it's almost vertical, the bottom almost touches the triangle. Left side, the belt line touches, and the bottom is noticeably under. I've read about using hot water, I need to keep it away from the greenhouse, which is really delicate as it is. Debating whether to grind down the underside between the top of the wheel arches to thin out before trying the hot water. The resin is really thick. Need to meditate or medicate on this. Meanwhile, looked at the rally lights from the Cannonball Subaru. Have two slightly different lens choices, the amount of engraving lines. Since the bumpers will need to be painted Alclad chrome, these reflectors will get it too. The only issue is, no chrome ring around the headlight lenses. The other lenses that came with the resin kit have much to be desired, the round red are supposed to be reflectors, those will be Farmers Insurance stickers.
-
Includes mop sink.
-
Ferrari 330 GTC + 575 M Superamerica Resto-rod
89AKurt replied to 89AKurt's topic in WIP: Model Cars
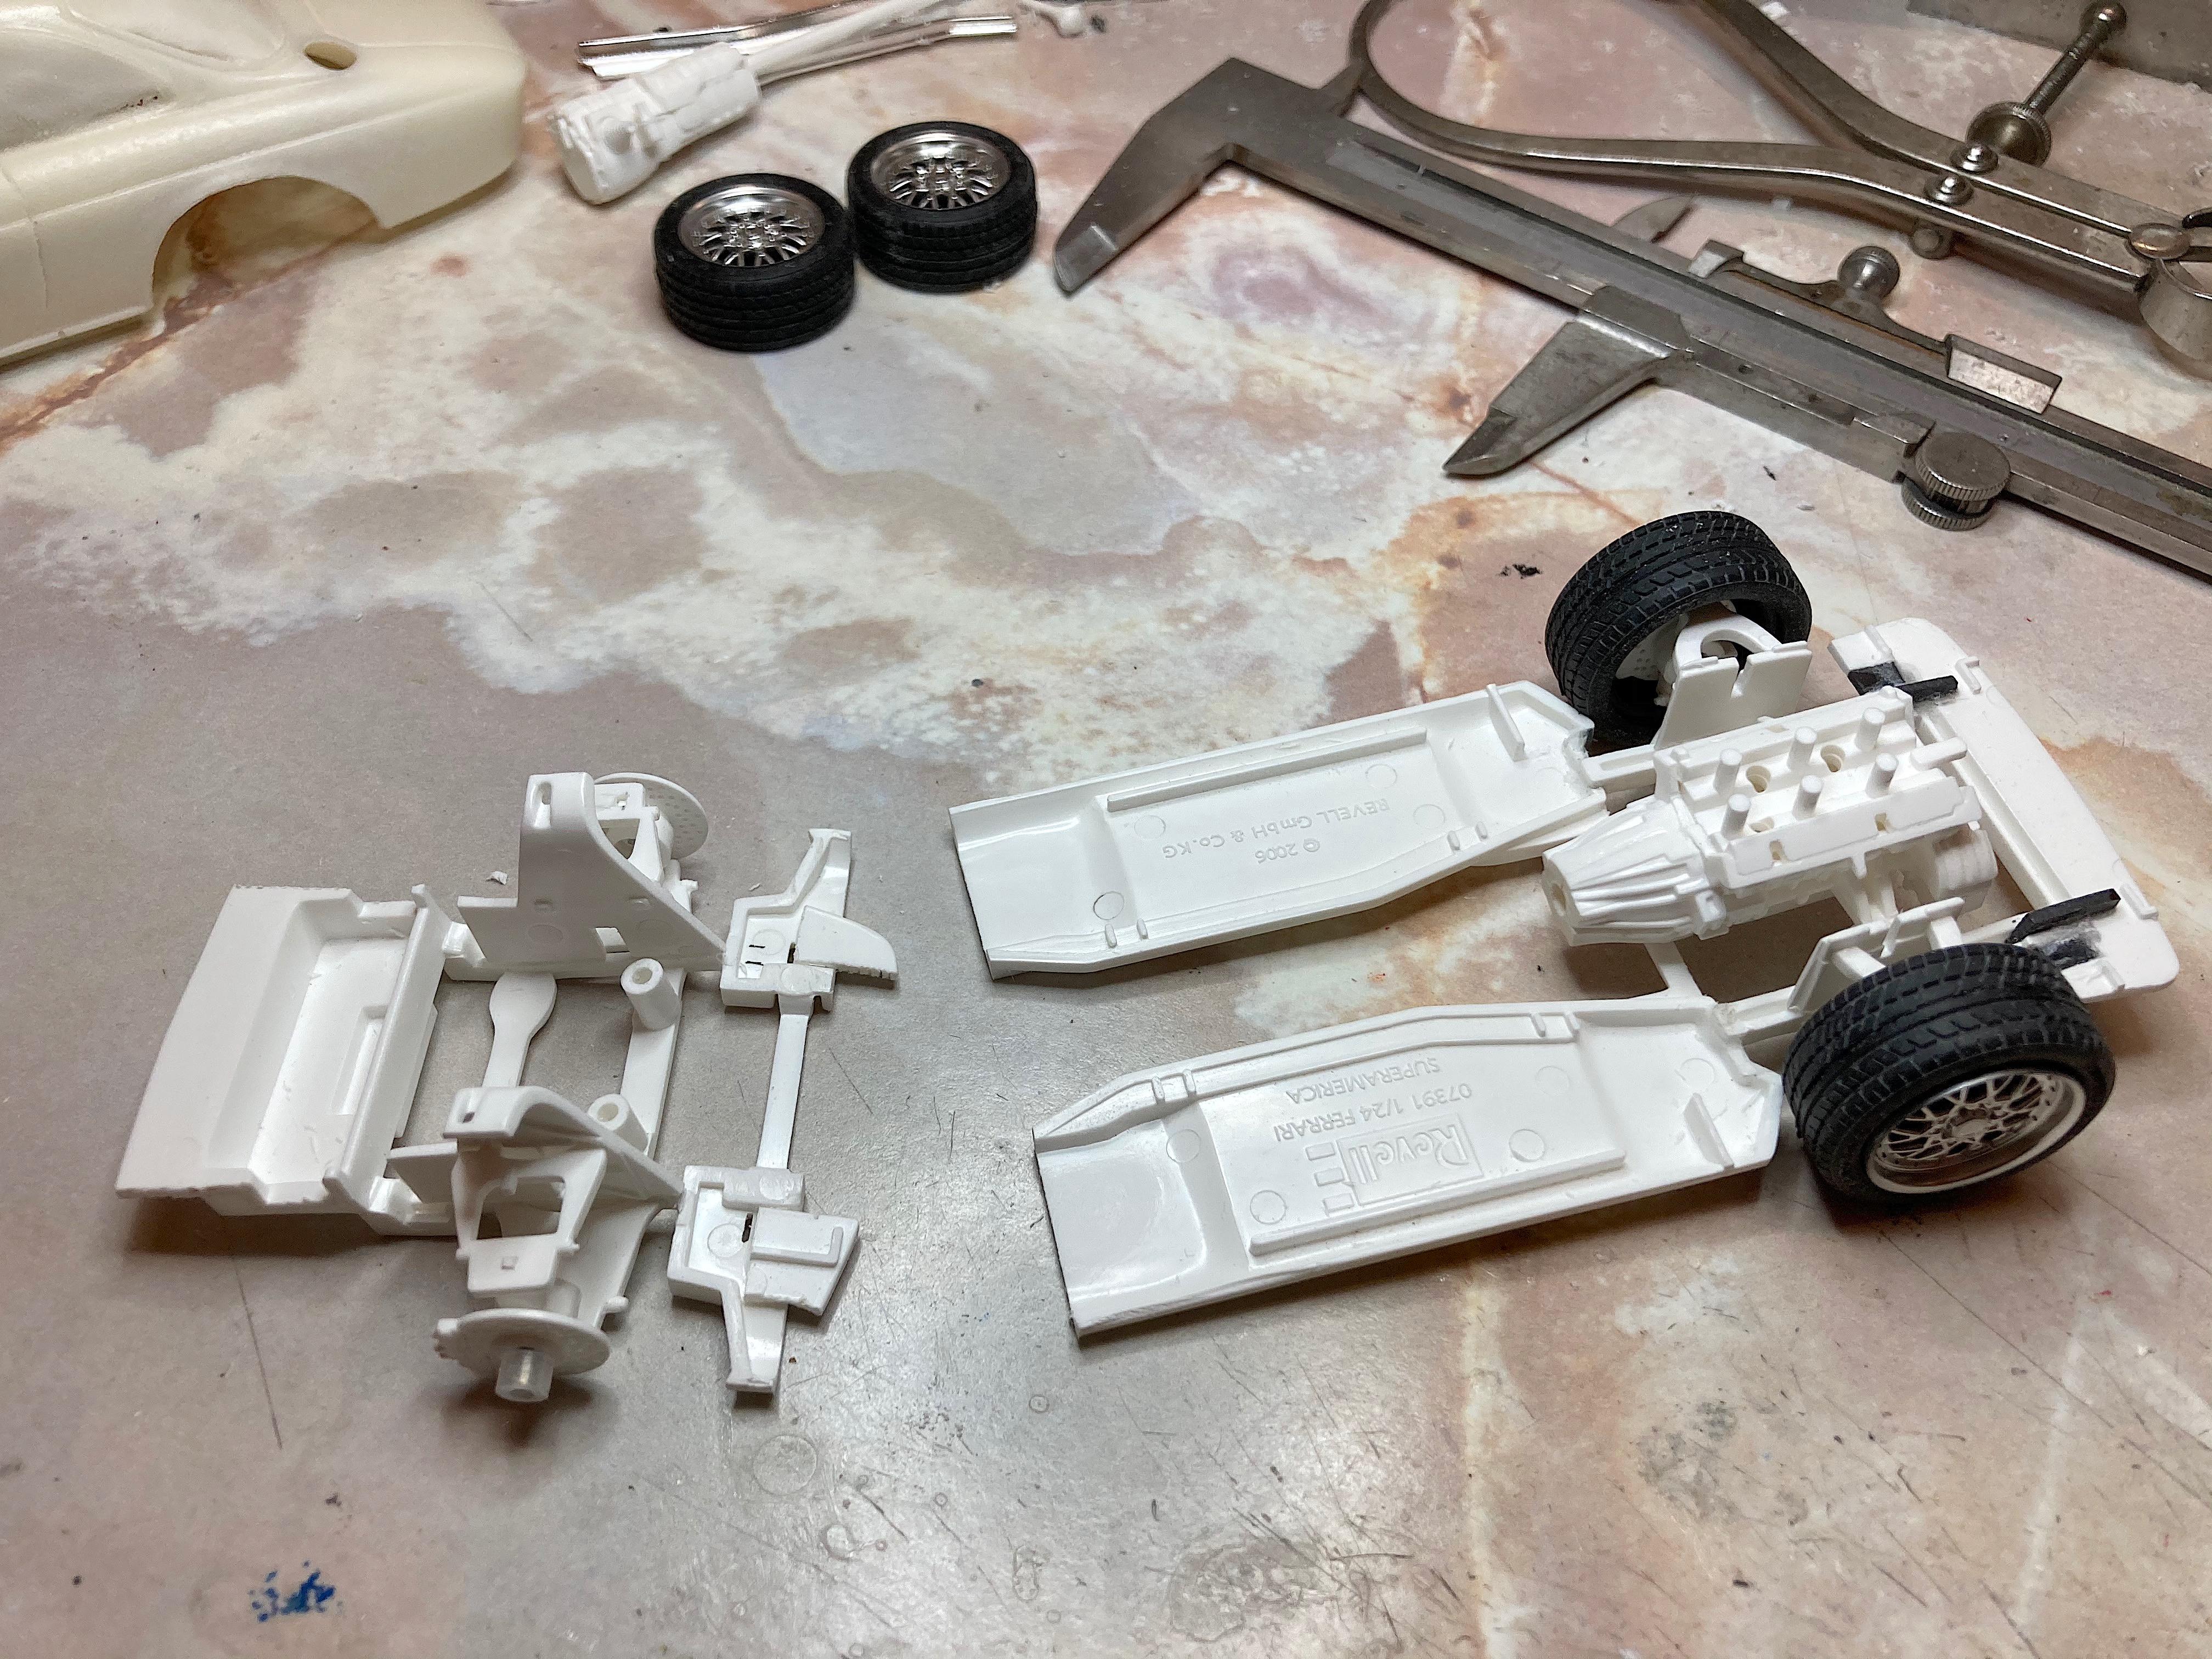
Started off tonight figuring out what was going on with the wheelbase looking wrong on the left side, when the right side is spot on. Using the square, it sure looked like Revell screwed up with locating the hub, they have square pins going different directions so we would keep the correct parts on the matching side, appears they put the holes on the wrong side of centerline. If anyone has built this kit, let me know. Fixed all that, not much to see. Used the Dremel to reduce the "axle" on the wheels, which was about 1MM, so the wheels are just about within the body. Started on the interior, cleaned out the armrest holes, sanded edges and got the parts to fit. Ground down some areas in the footwell, and inside the tunnel. There is going to be major surgery getting the Revell tub grafted with the interior. Temporarily glued the interior together. I'm hoping the interior will fit with the chassis pan, fingers crossed. It will be sweet if I can have it this low.