Dragonhawk1066
-
Posts
3,932 -
Joined
-
Last visited
Content Type
Profiles
Forums
Events
Gallery
Everything posted by Dragonhawk1066
-

AMT 1971 Plymouth Duster 340 in Go Mango Orange.
Dragonhawk1066 replied to Dragonhawk1066's topic in Model Cars
Thanks guys! -
Thanks guys!! Thanks Tom! I wet-sanded the color coat and then applied the decals and clear coated, but I did not sand or polish the clear. I did apply a coat of wax before final assembly.
-
Nicely done! You'd never know you started with that pile of a kit!
-
Cool little buggy!
-
Very nice! Looks pretty good in gold!
-
"Holy Grail" Models?
Dragonhawk1066 replied to Billy Kingsley's topic in General Automotive Talk (Trucks and Cars)
As things sit right now, this is my "Holy Grail" kit! I would take either, but the black one is the one I built, and pretty well glue-bombed, as a teen in the early 80's. These are going for $100+ on ebay, so it will probably stay a Grail kit for quite some time. Round 2, are you paying attention, this would probably make a killing if it were to be re-issued, LOL!!!
-
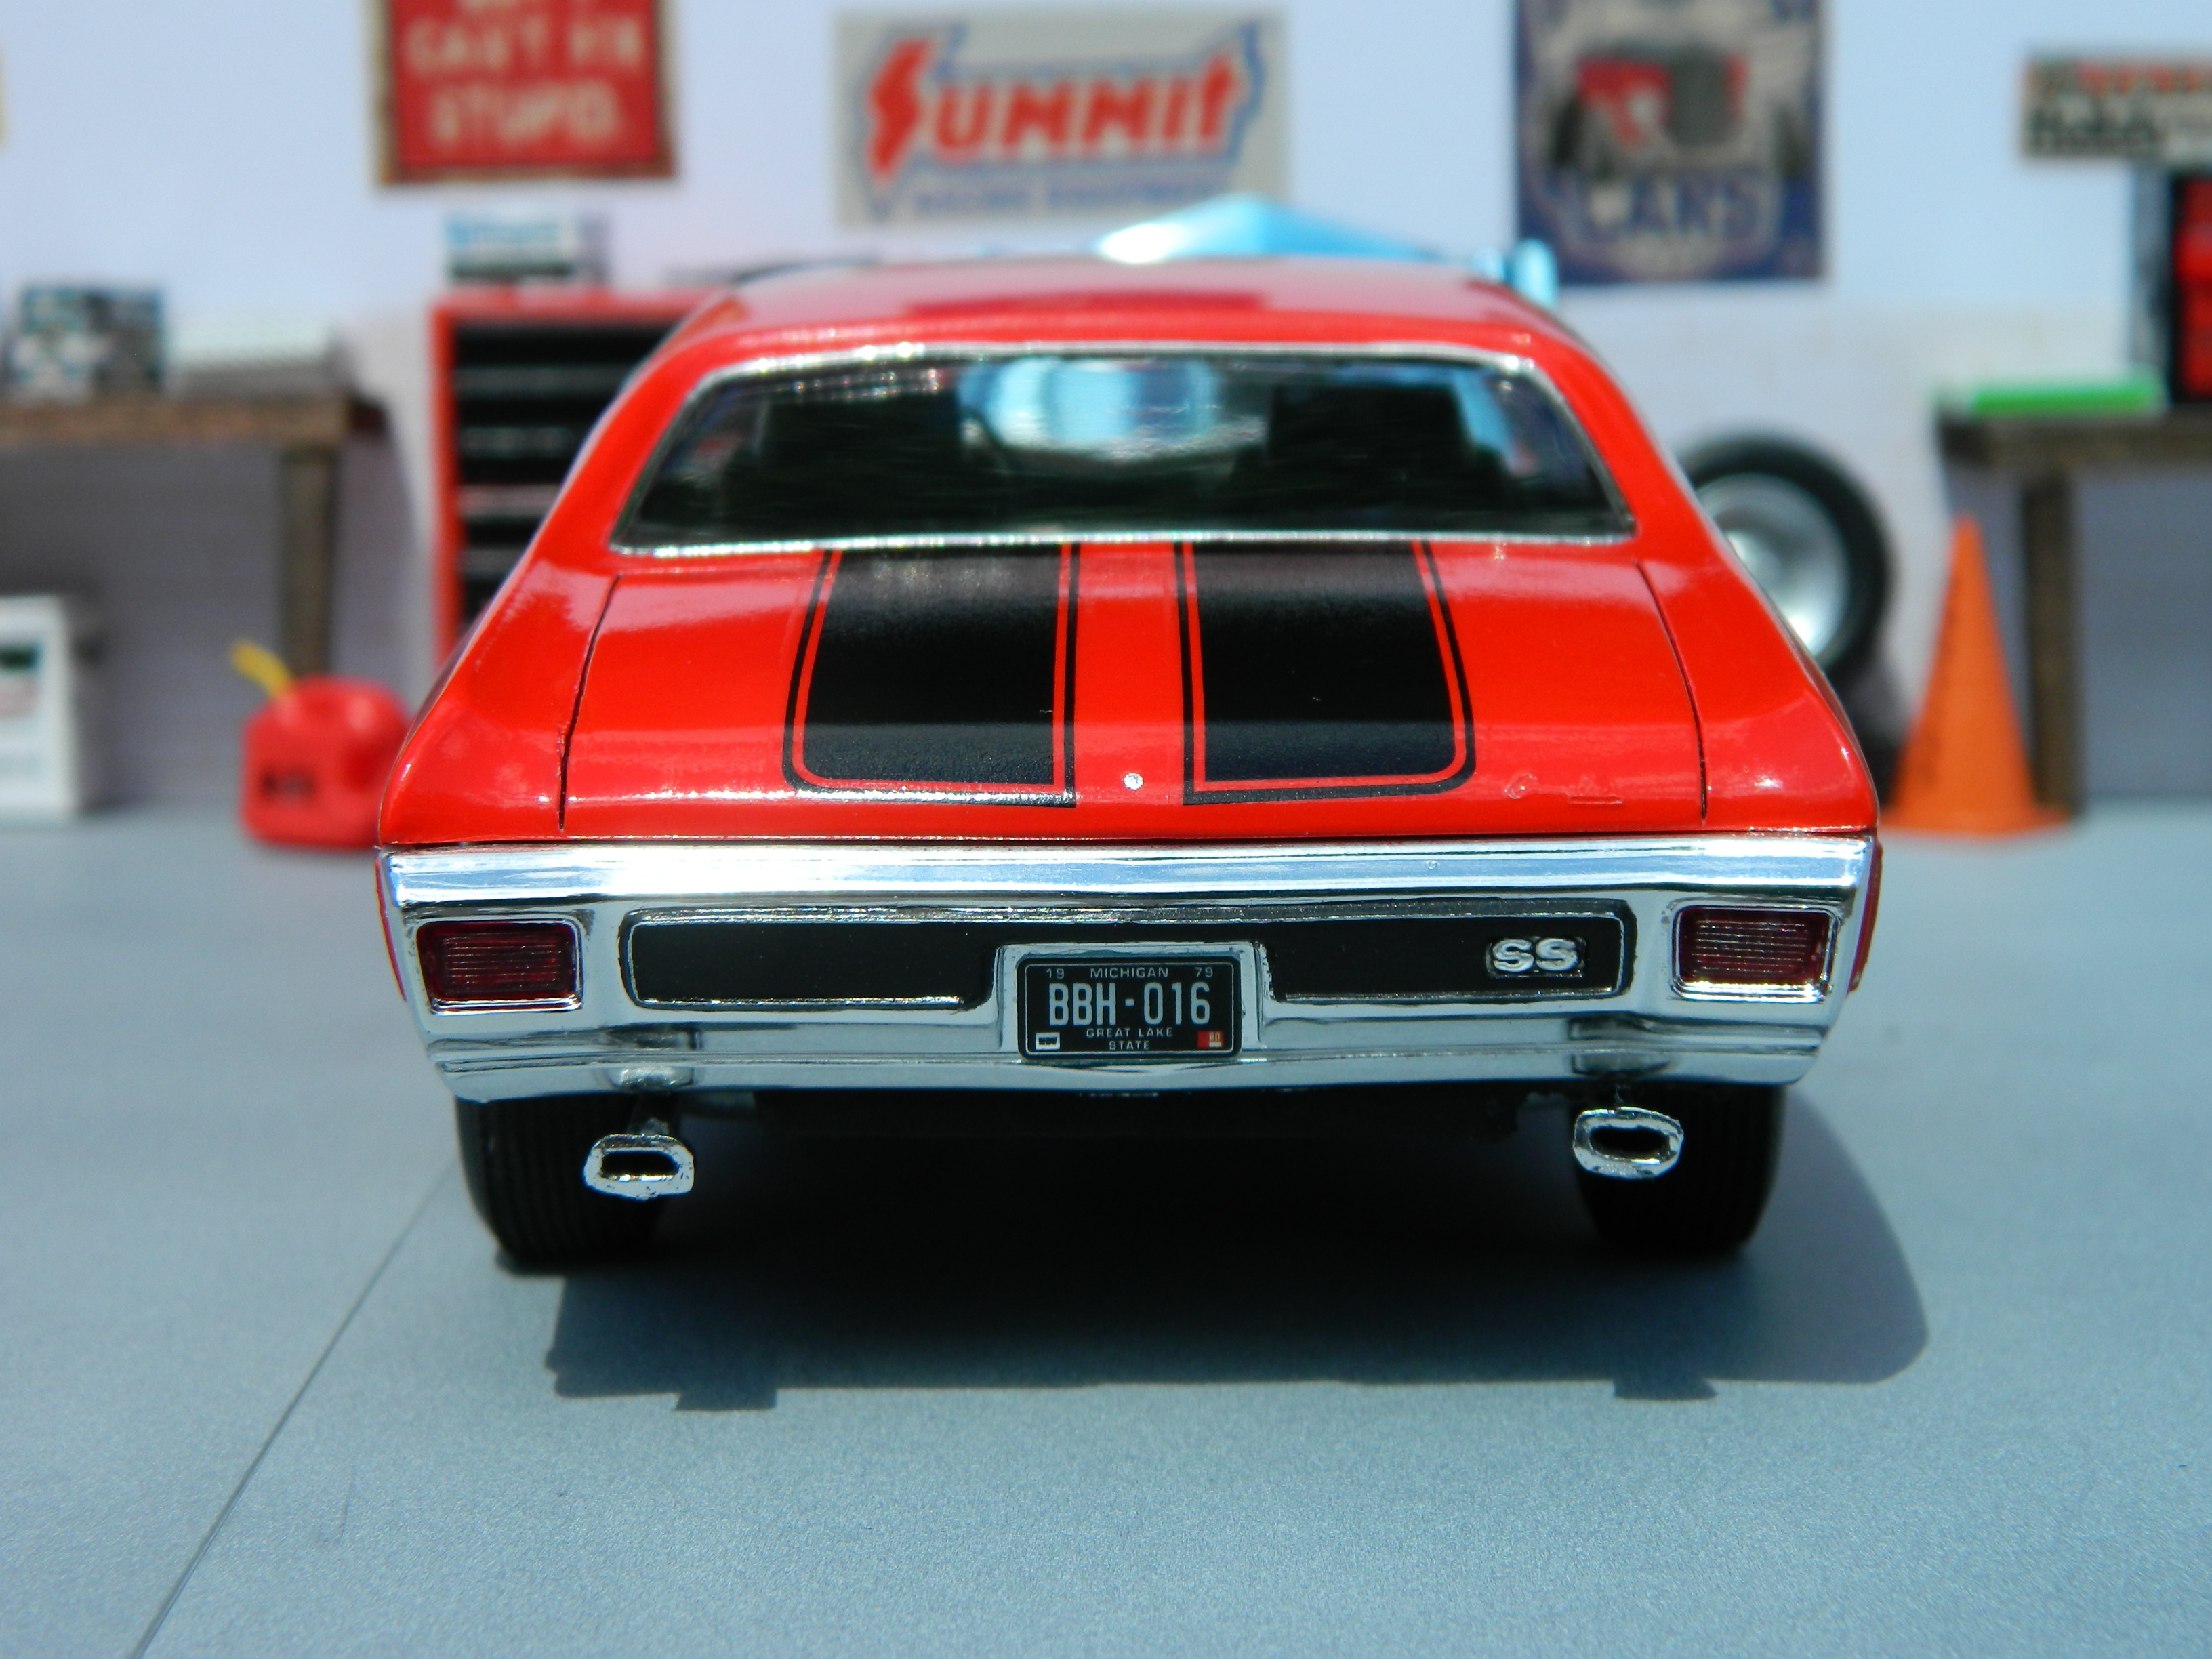
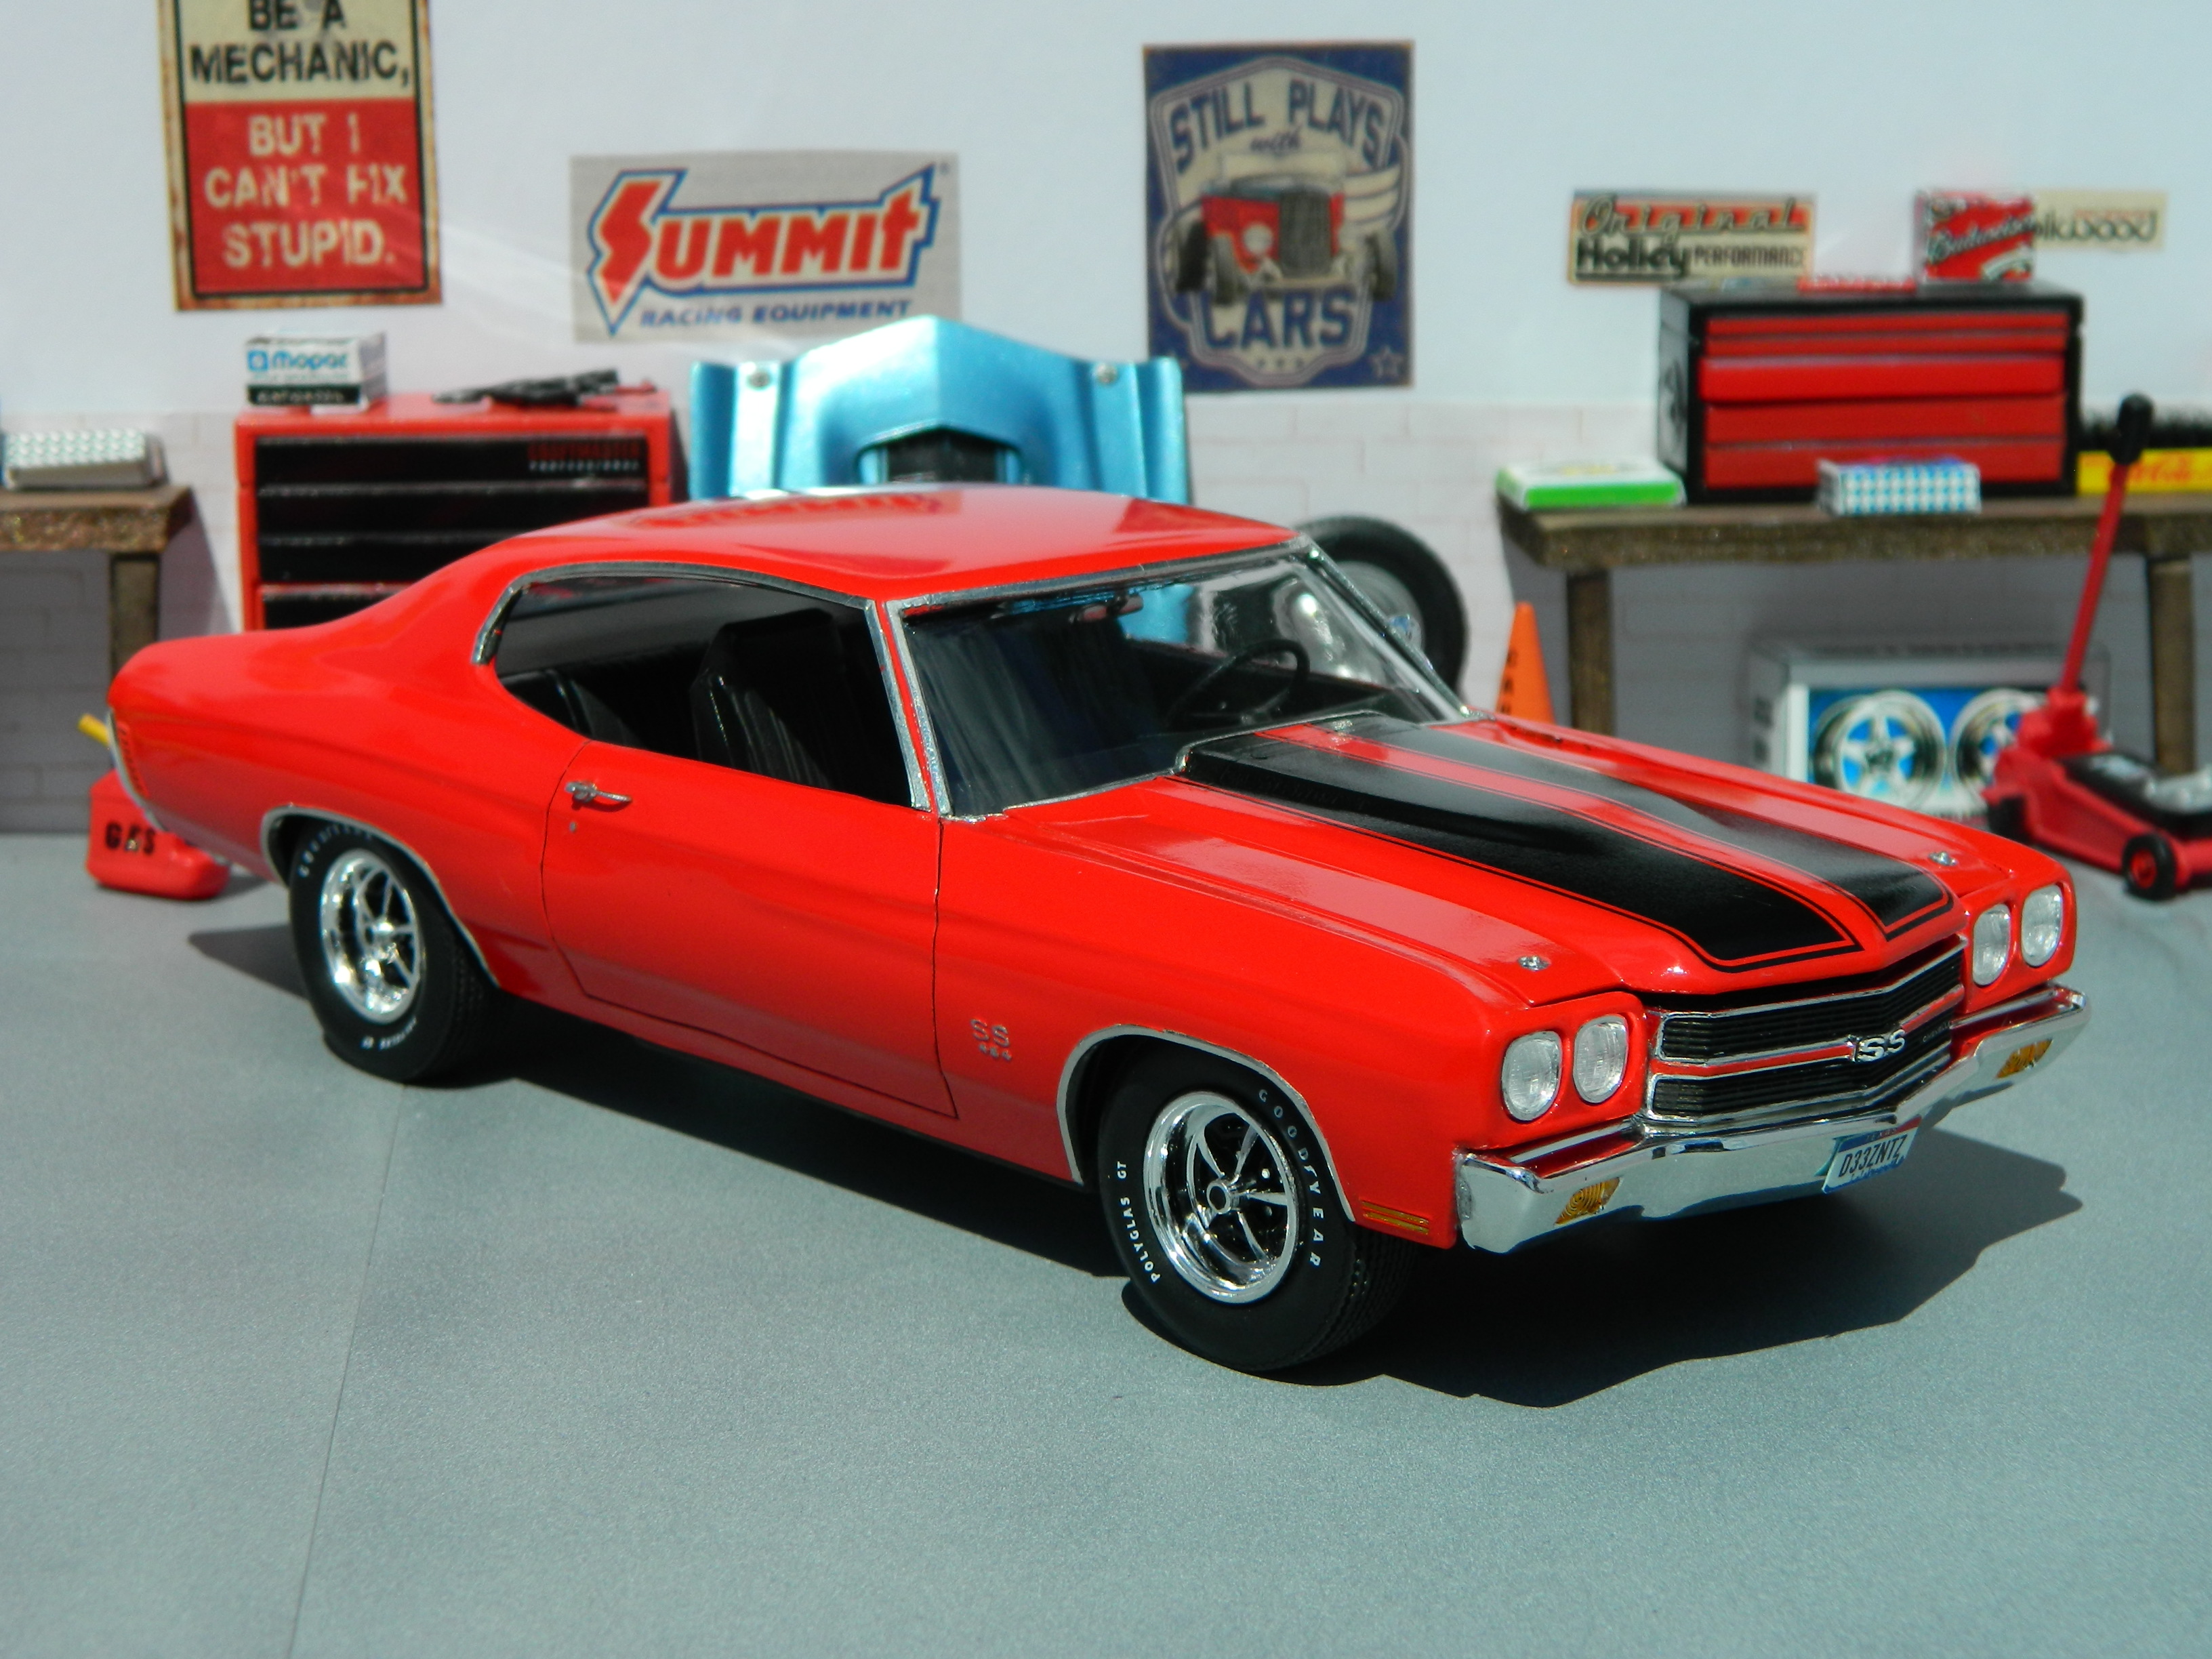
I finished the AMT 1970 Chevelle SS454 yesterday. I know, same old--same old, everybody does them in red, but to me the most iconic Muscle Car is a Red Chevelle SS454. So the color is Tamiya TS-49 Bright Red. I left the interior primer black and brushed satin clear over the dash, door panels, and parts of the seats. I added valve stems, ignition wires, heater hoses, and an Accel Supercoil from MAD for extra details. The trim is Bare Metal Foil and the door handles came from Fireball Modelworks and were painted with Molotow Chrome. The final fit was pretty finicky, but after 4 tries I finally got it to look right, although I'm not happy with the gap between the hood and grille. I also sanded down the door window trim on each side, as it was almost non-existent, and used some .010" x .030" styrene strip for the trim. It's a pretty basic but familiar AMT kit with low parts count, lacking details, and showing it's age, but it turned out pretty good and felt nicely nostalgic.
-
Very cool! Very nice weathering effects, I really need to try my hand at that someday!
-
AMT 1971 Plymouth Duster 340 in Go Mango Orange.
Dragonhawk1066 replied to Dragonhawk1066's topic in Model Cars
Thanks for the kind words everyone, much appreciated!! -
I like that color!
-
That's a sharp color for that car! Sometimes our subjects don't like to be very photogenic, lol.
-
That had definitely seen better days, lol. You cleaned it up nice!
-
Looking very sharp so far!
-
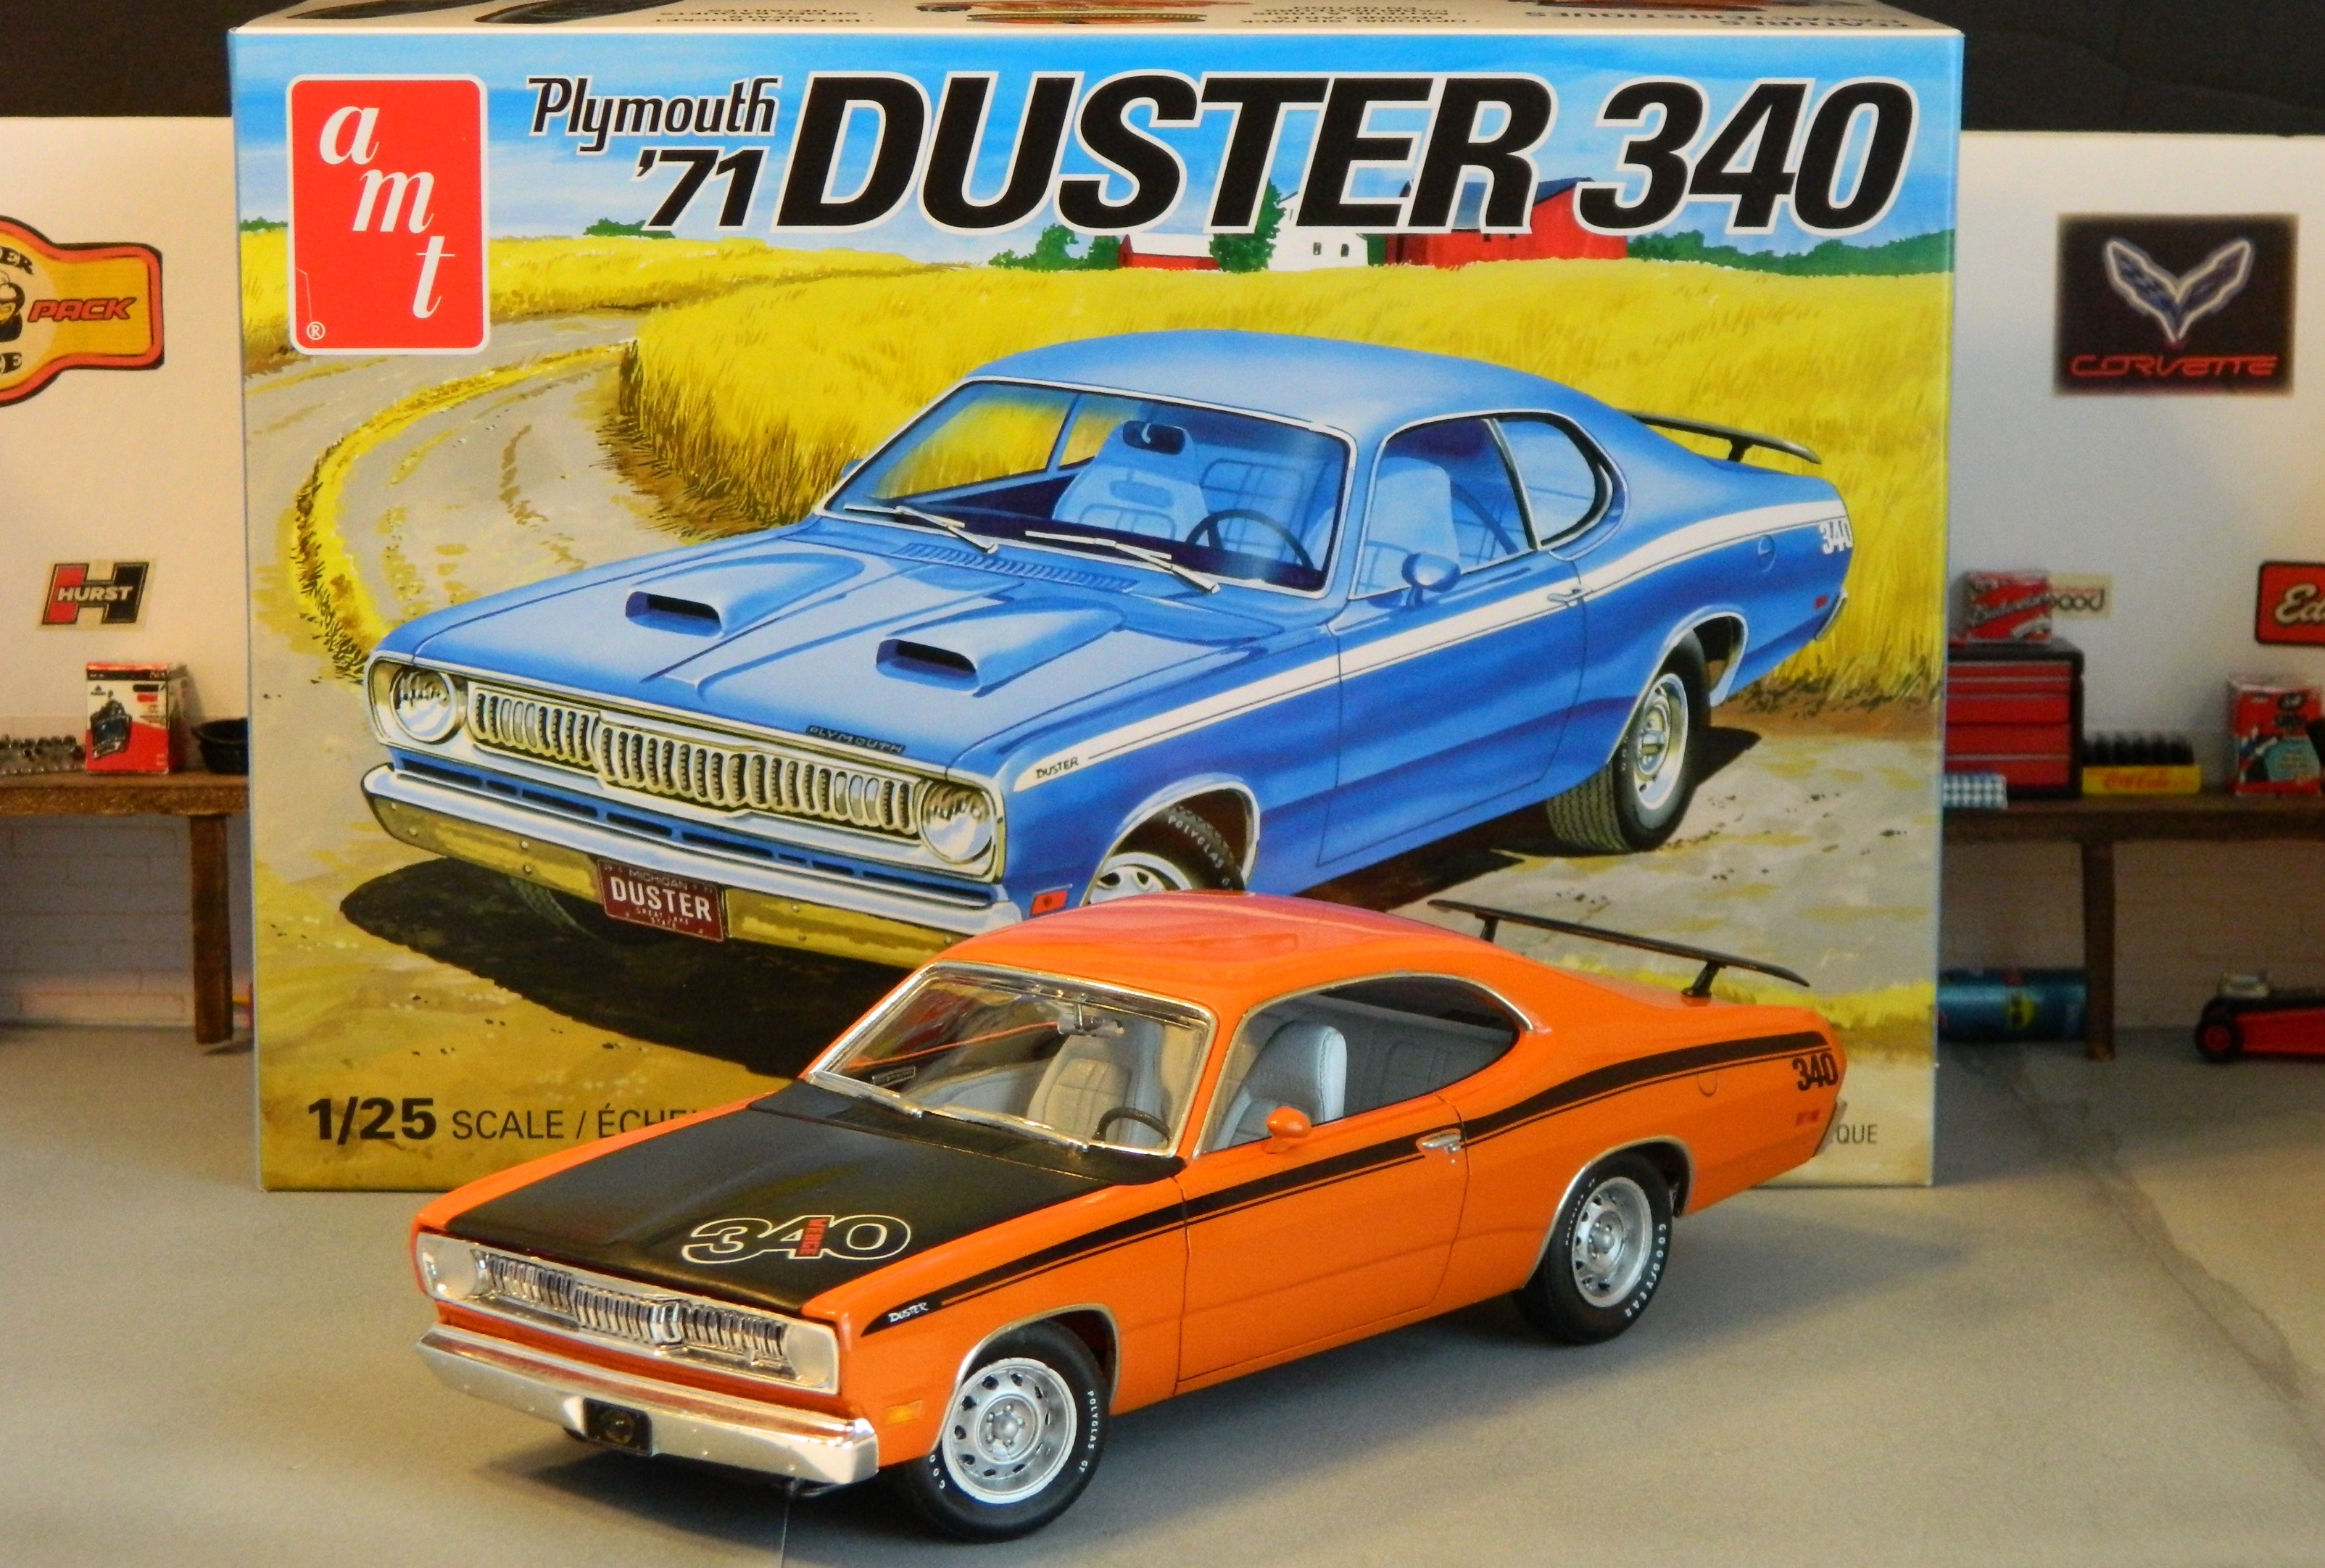
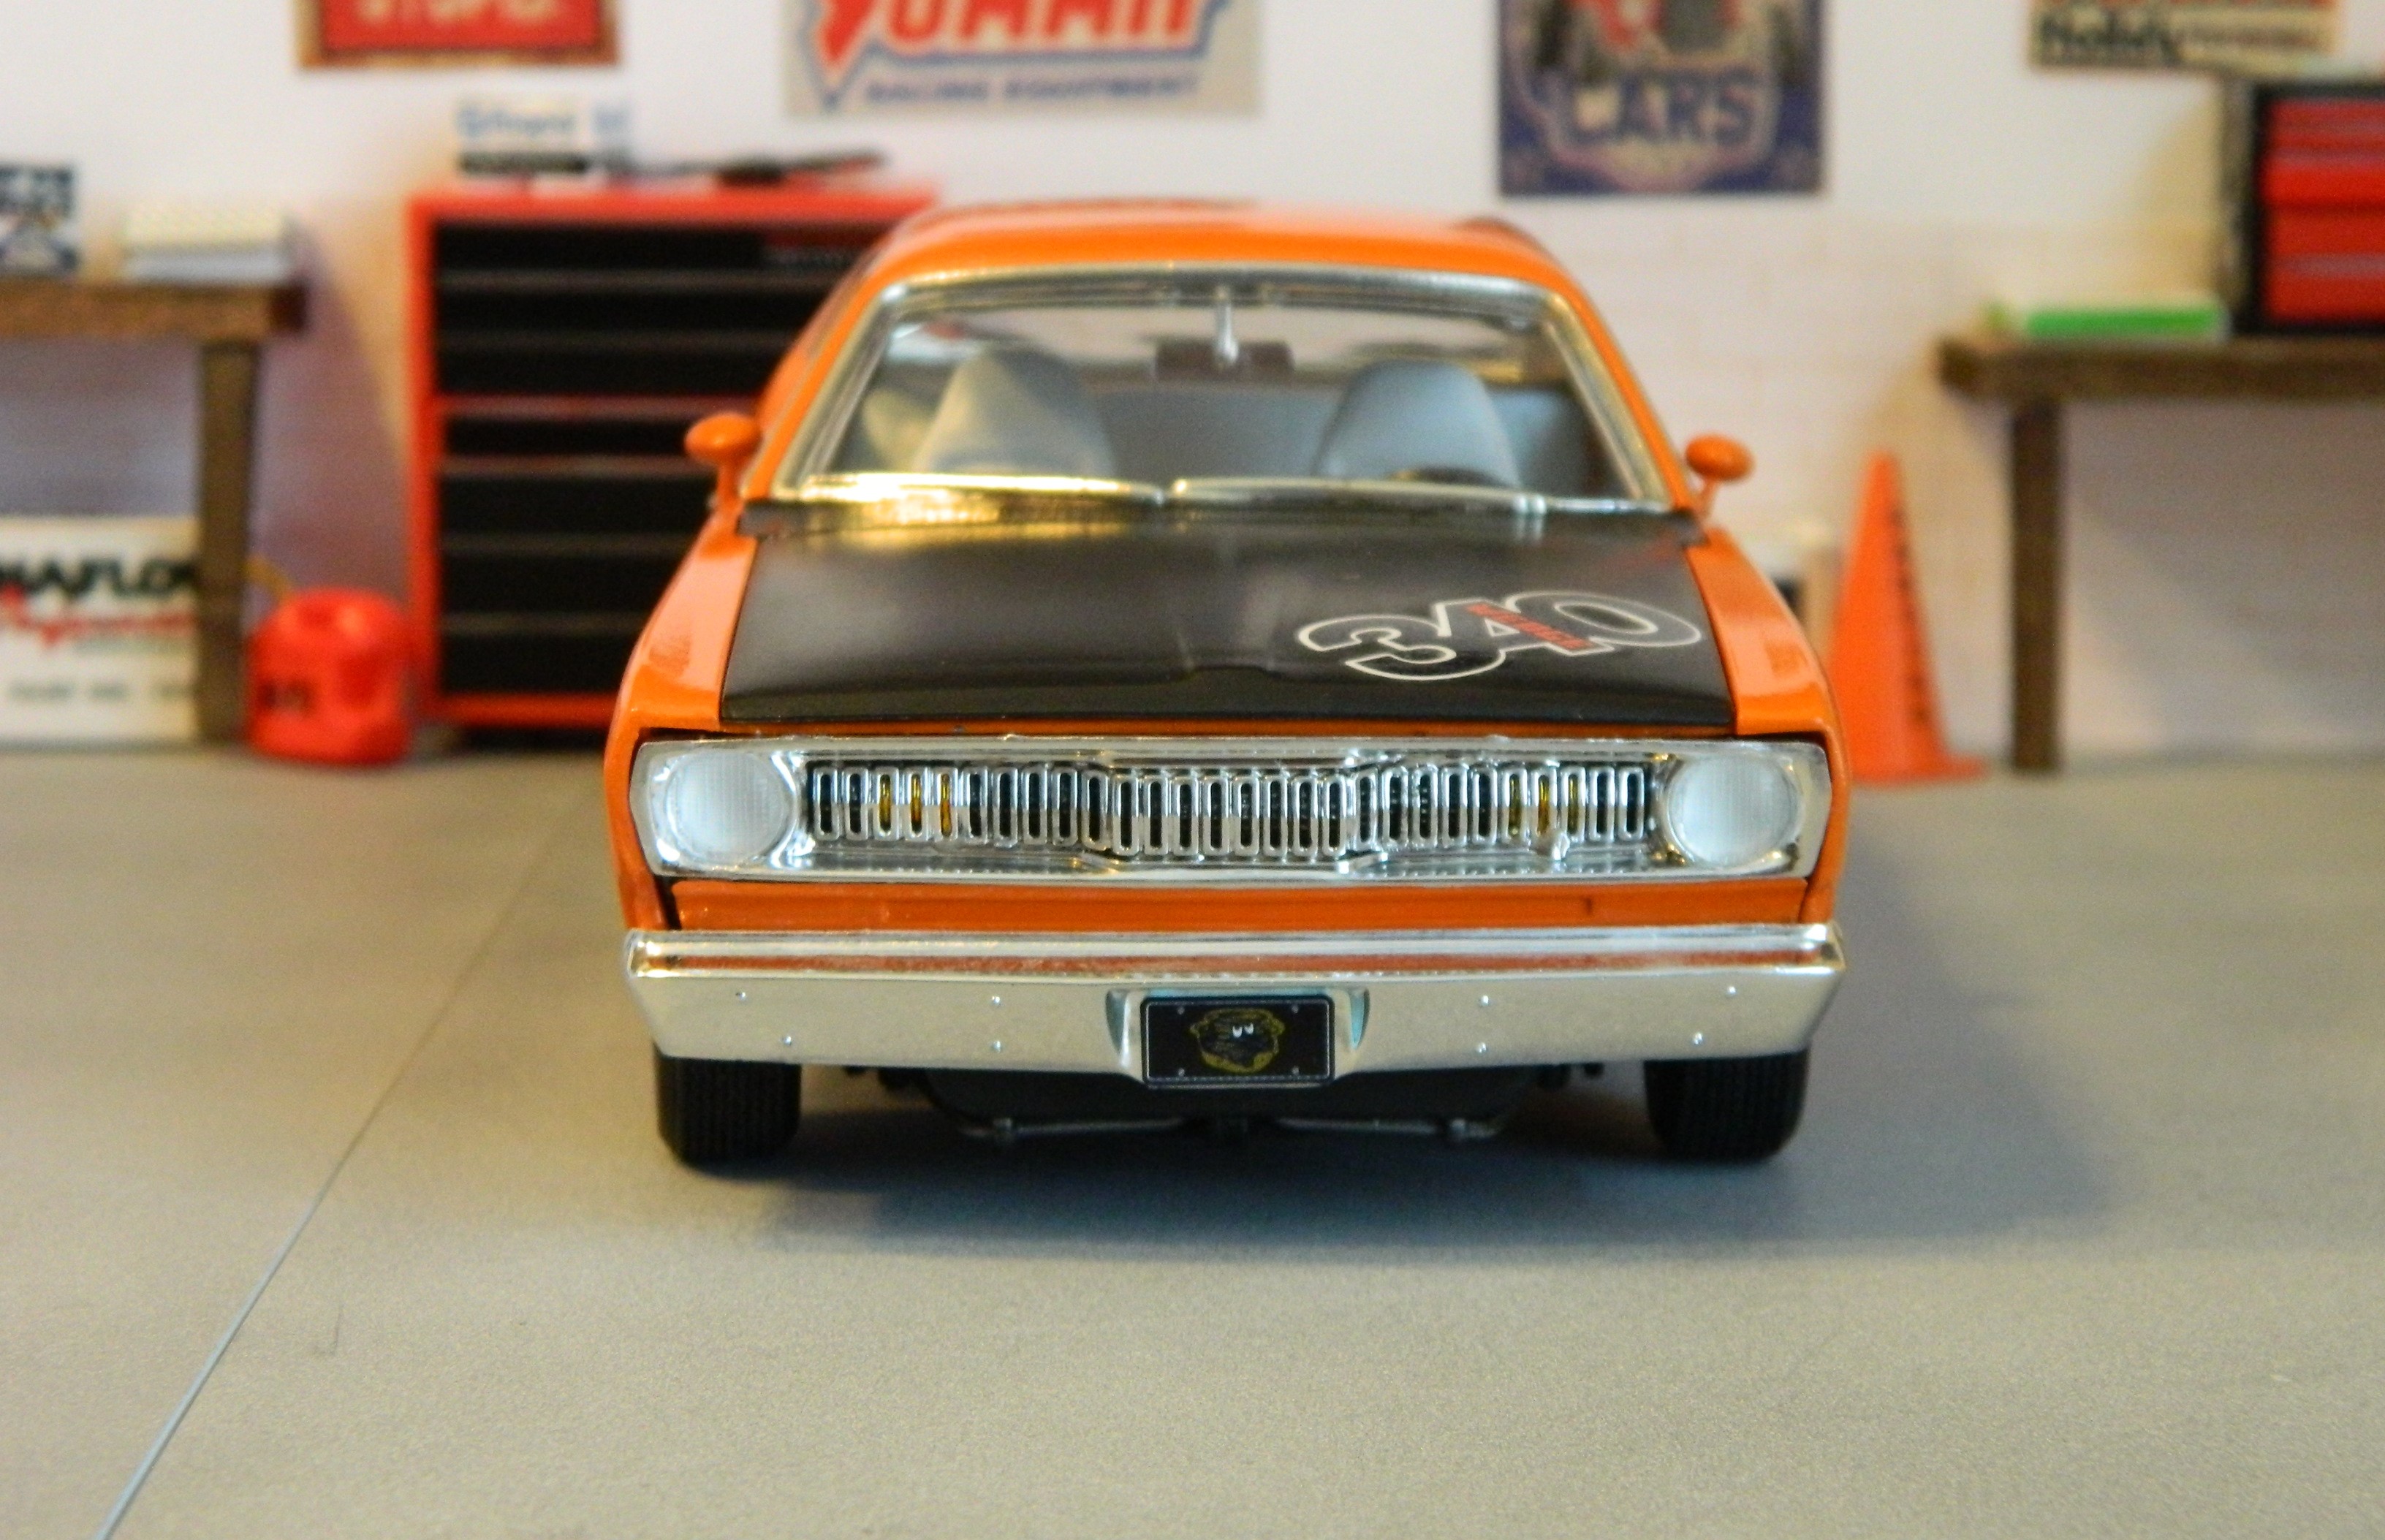
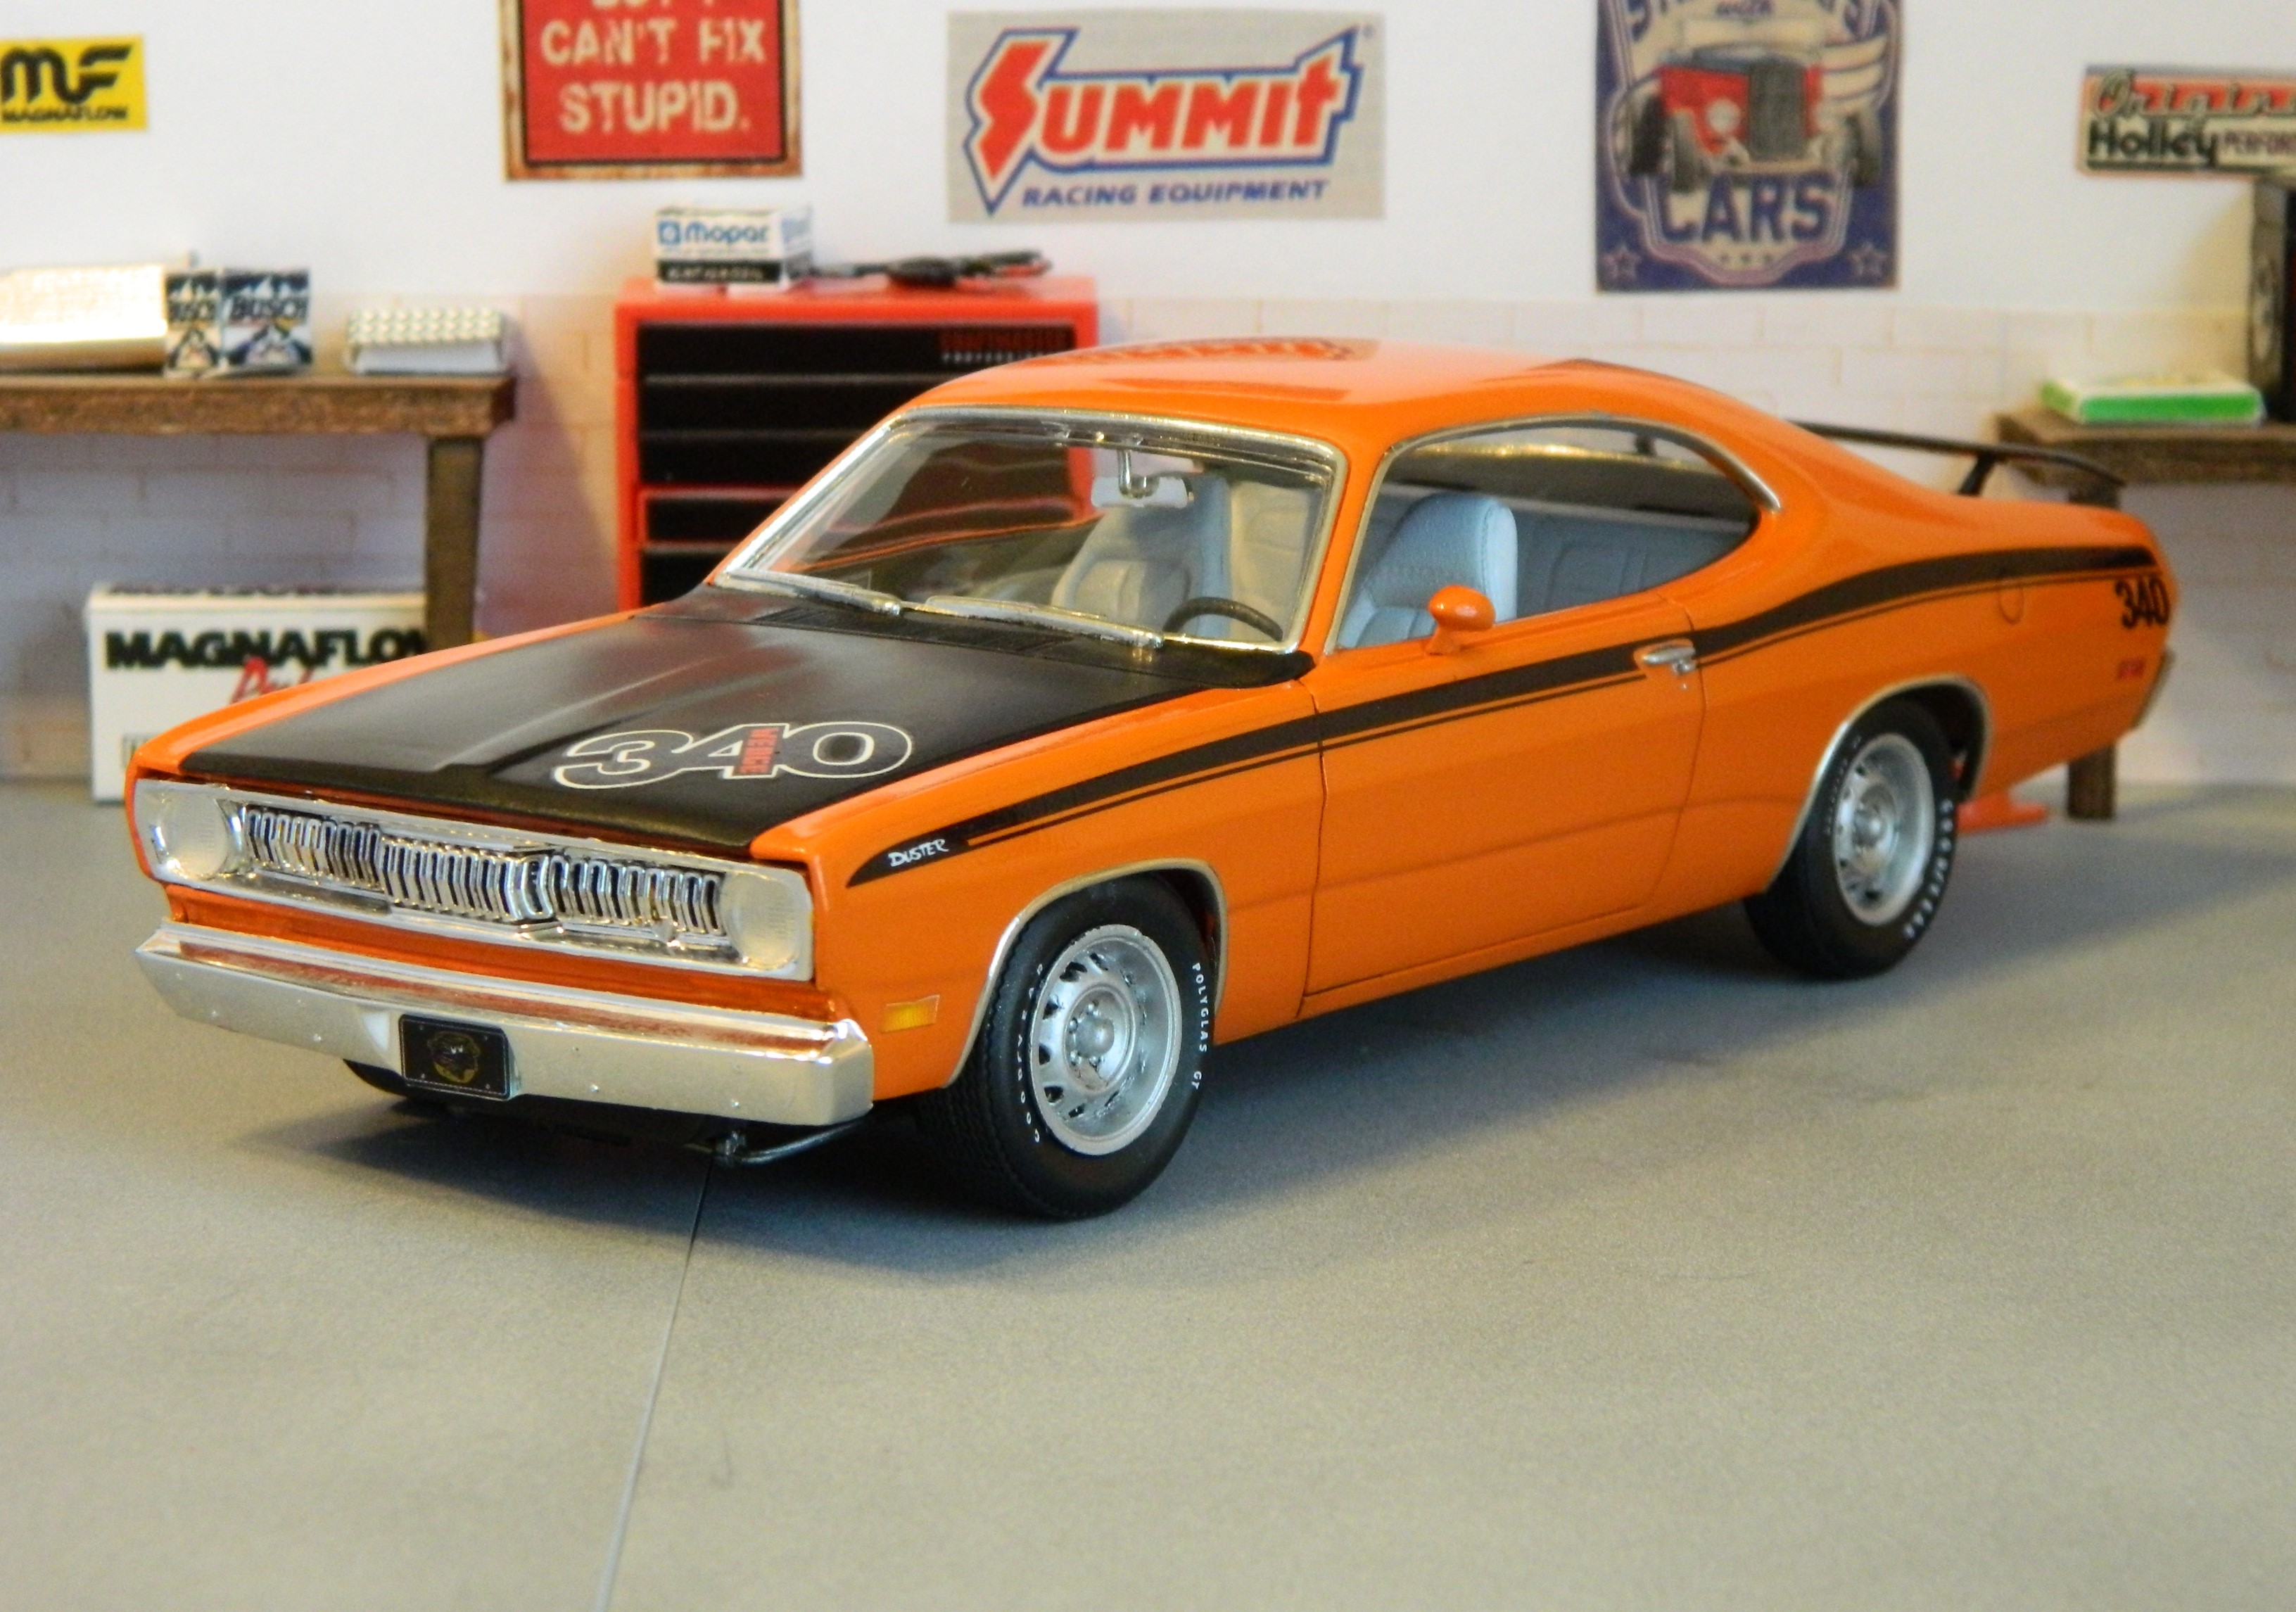
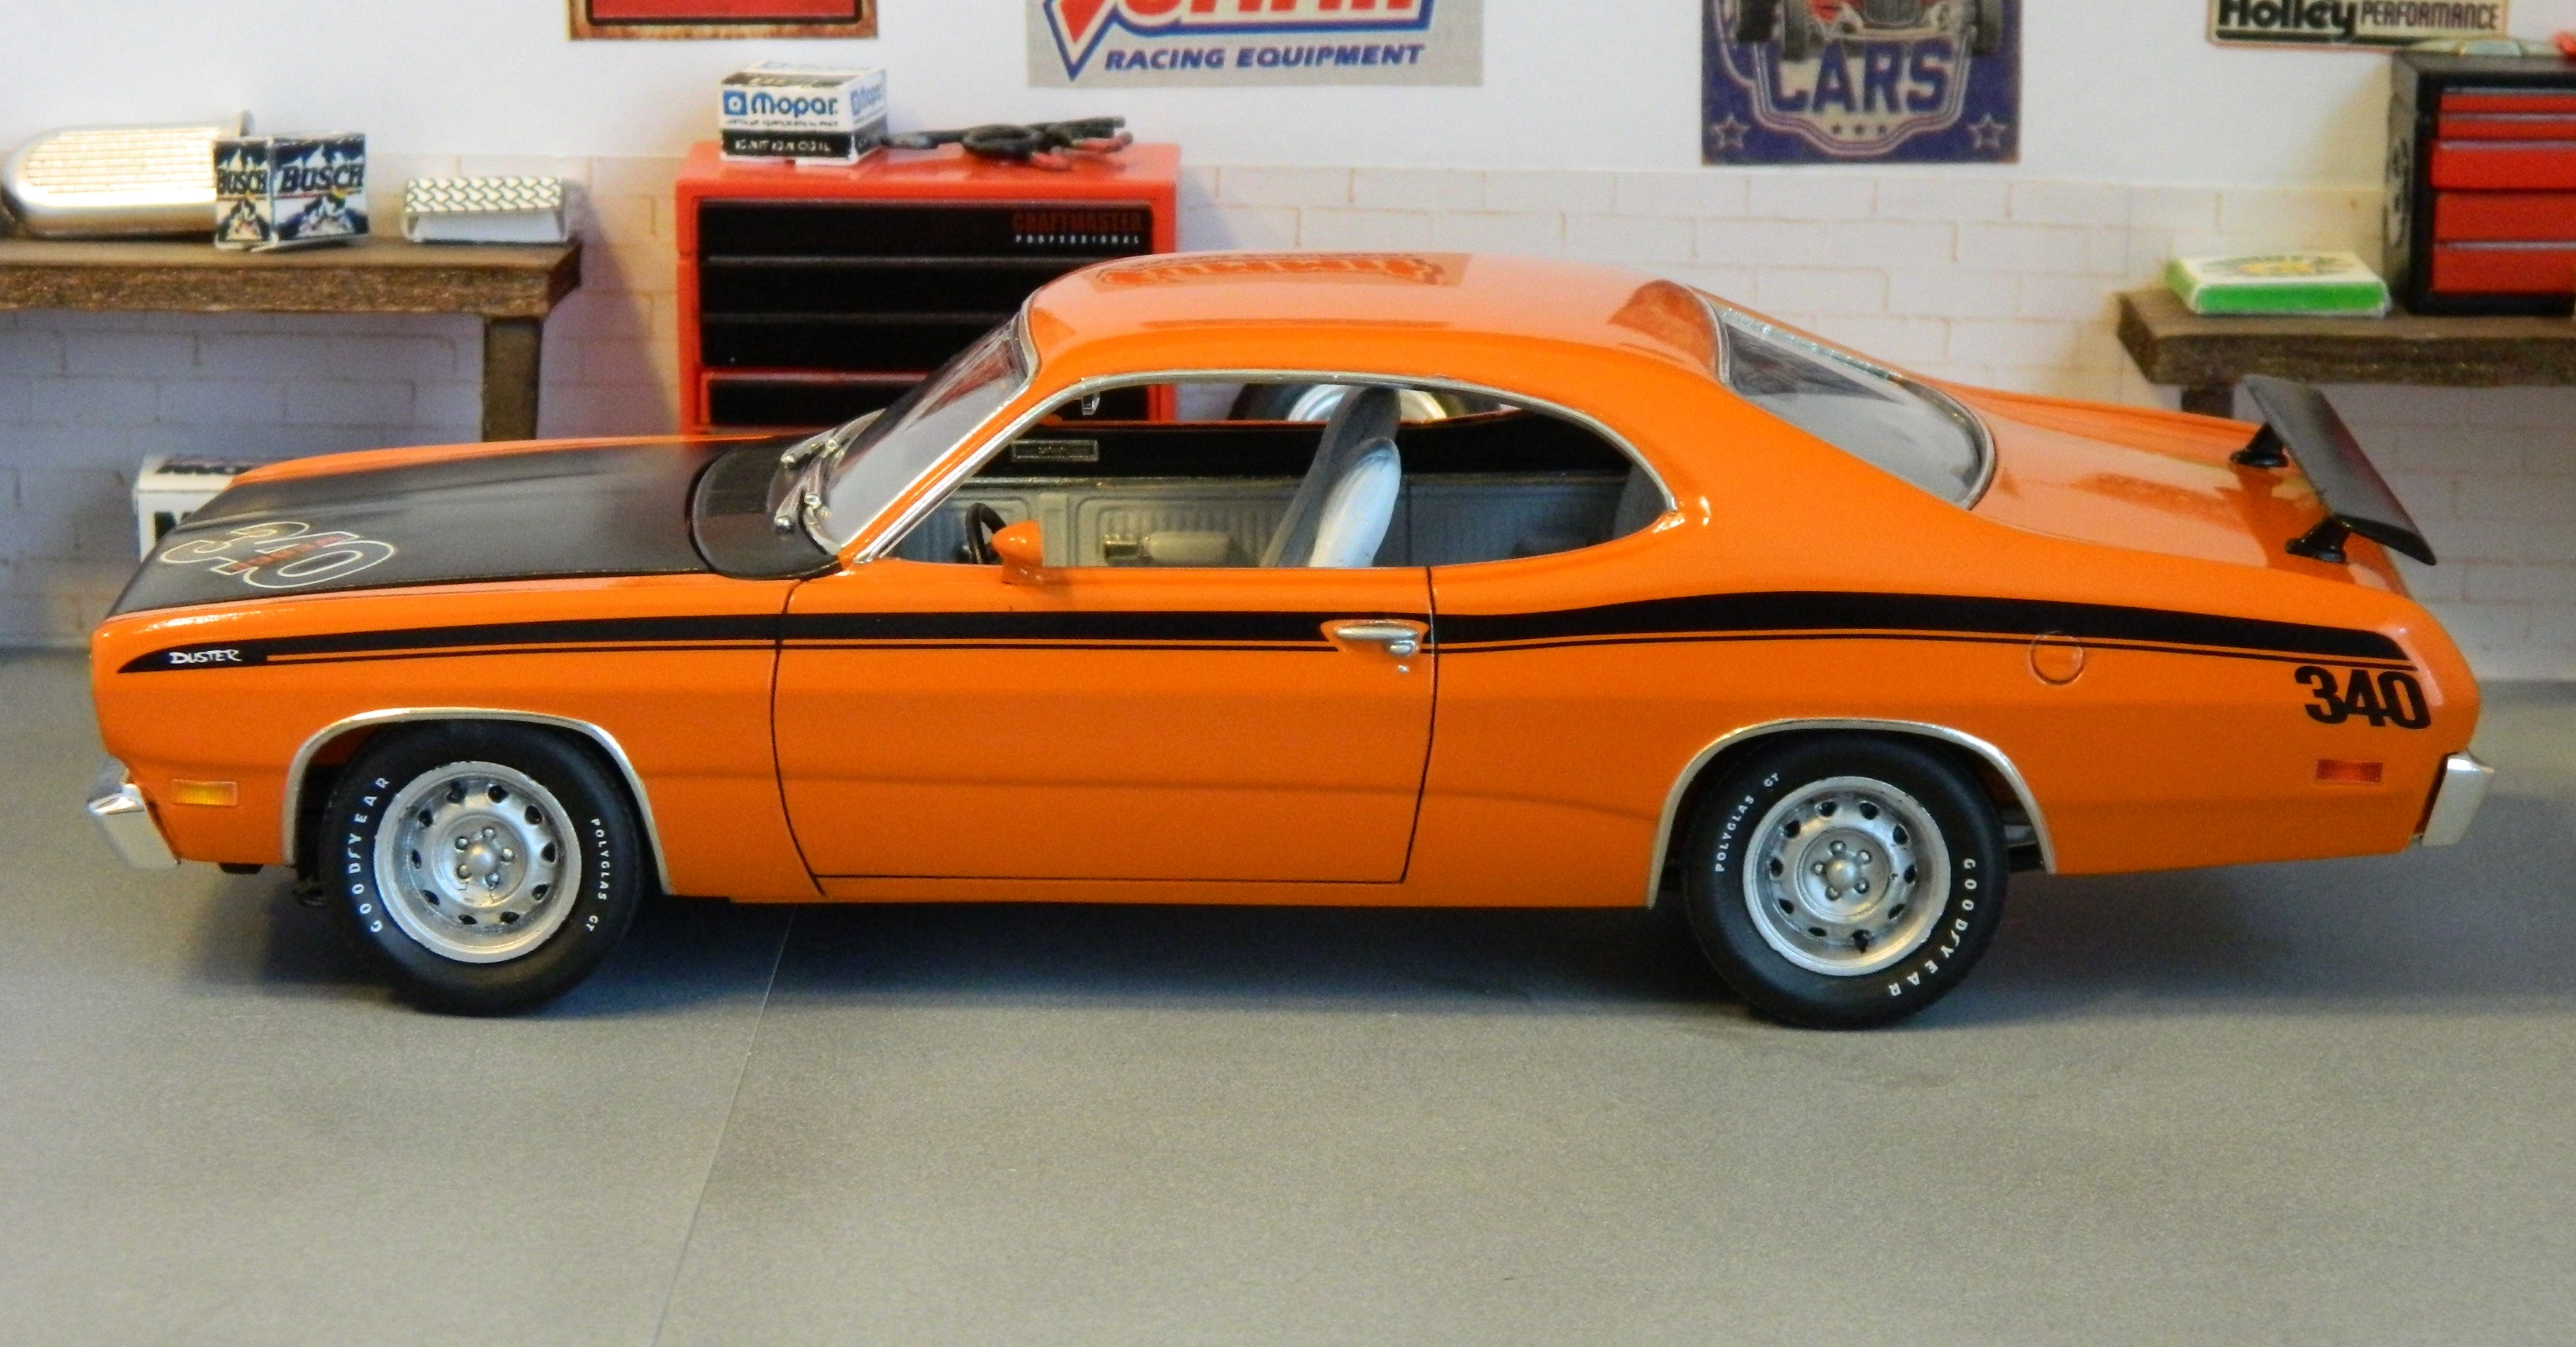
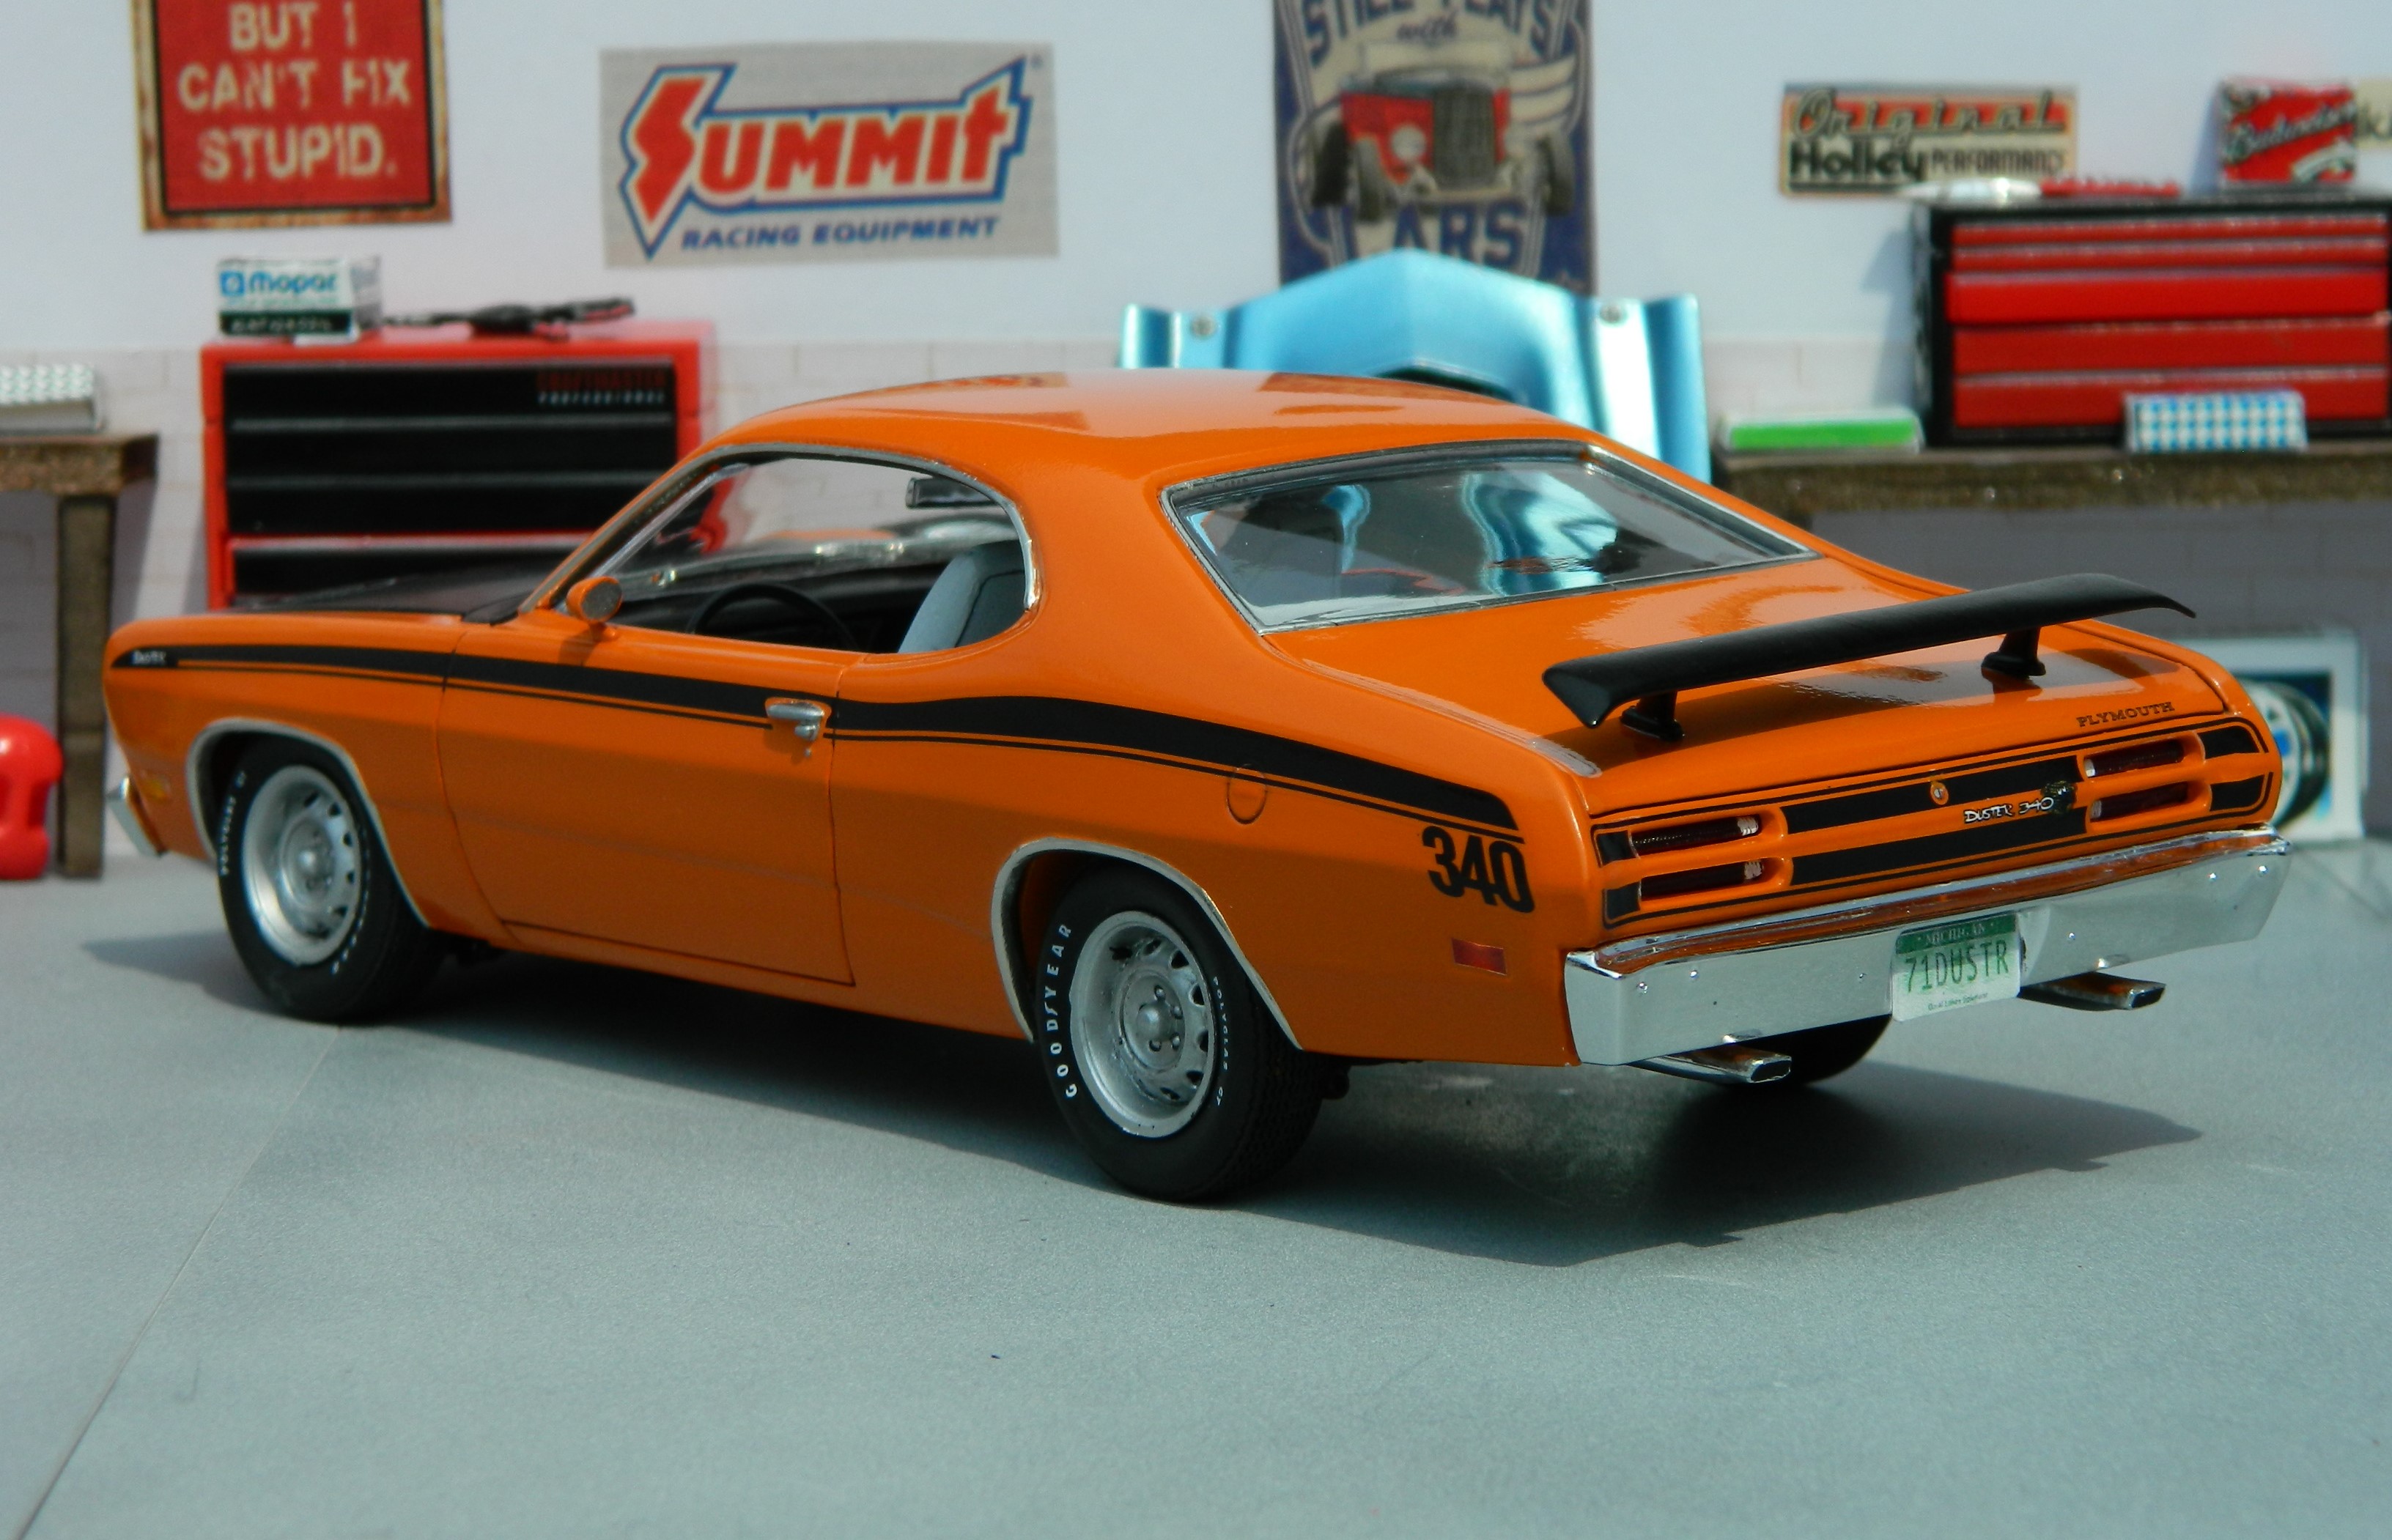
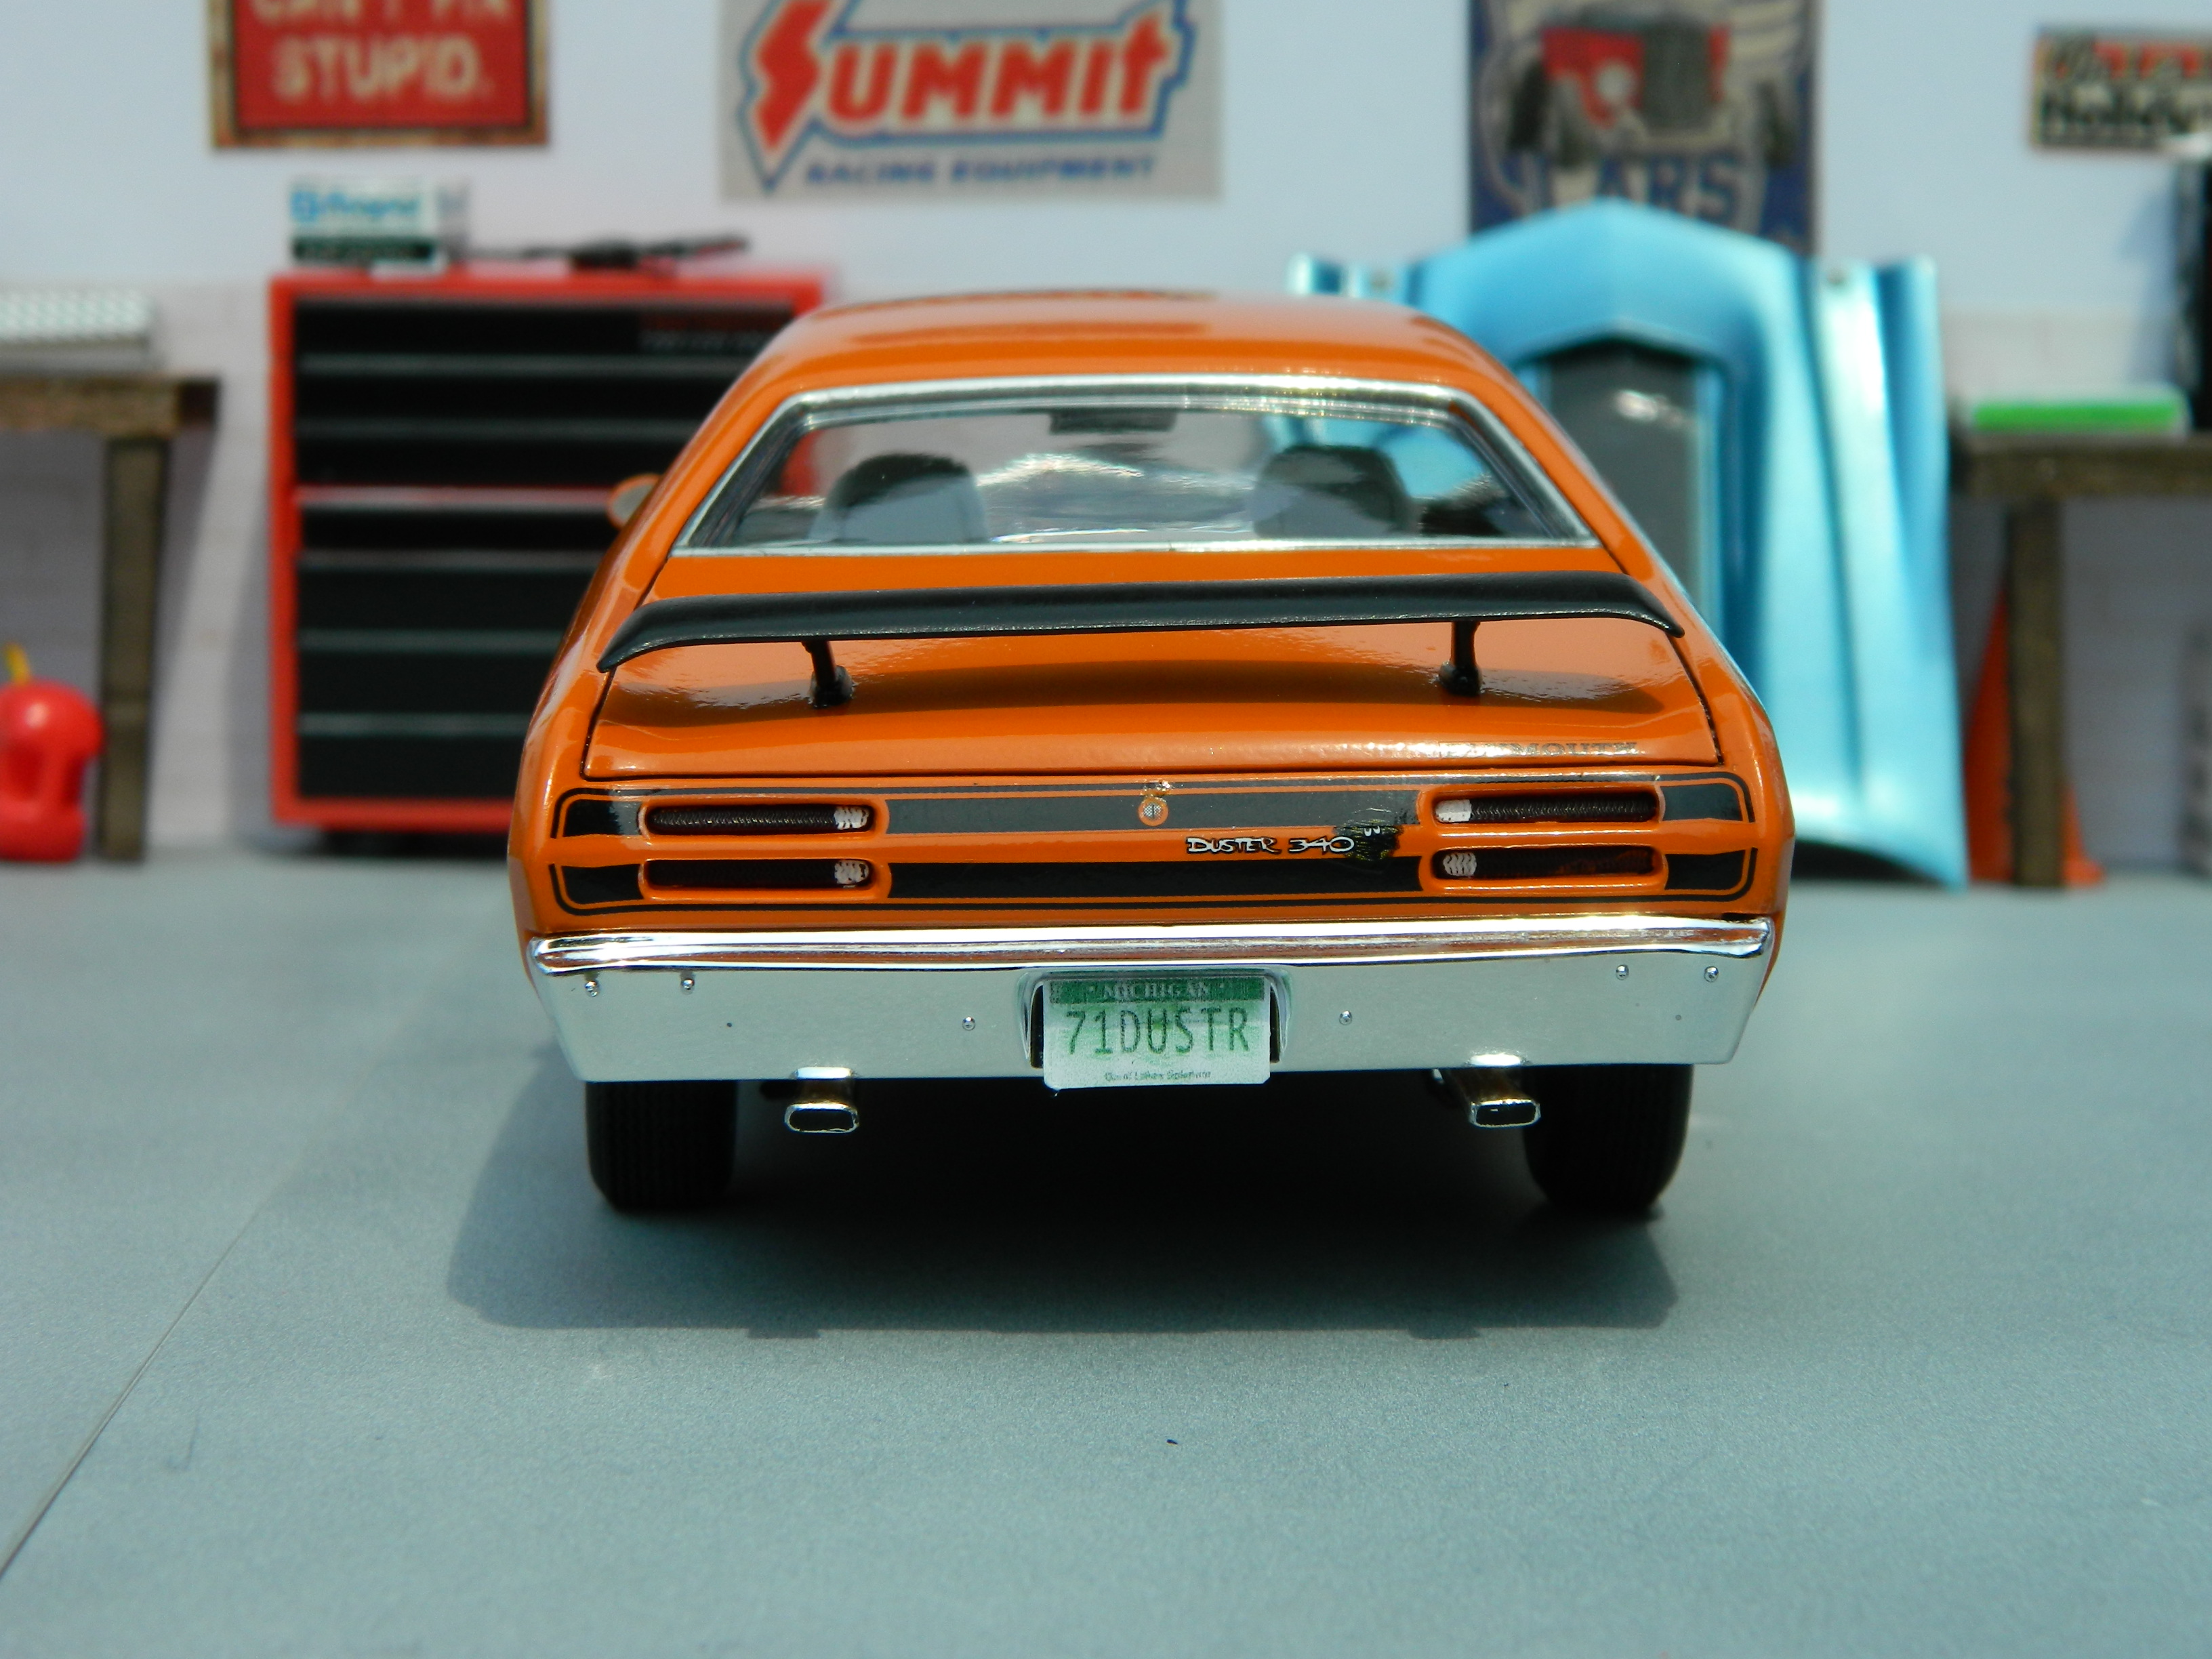
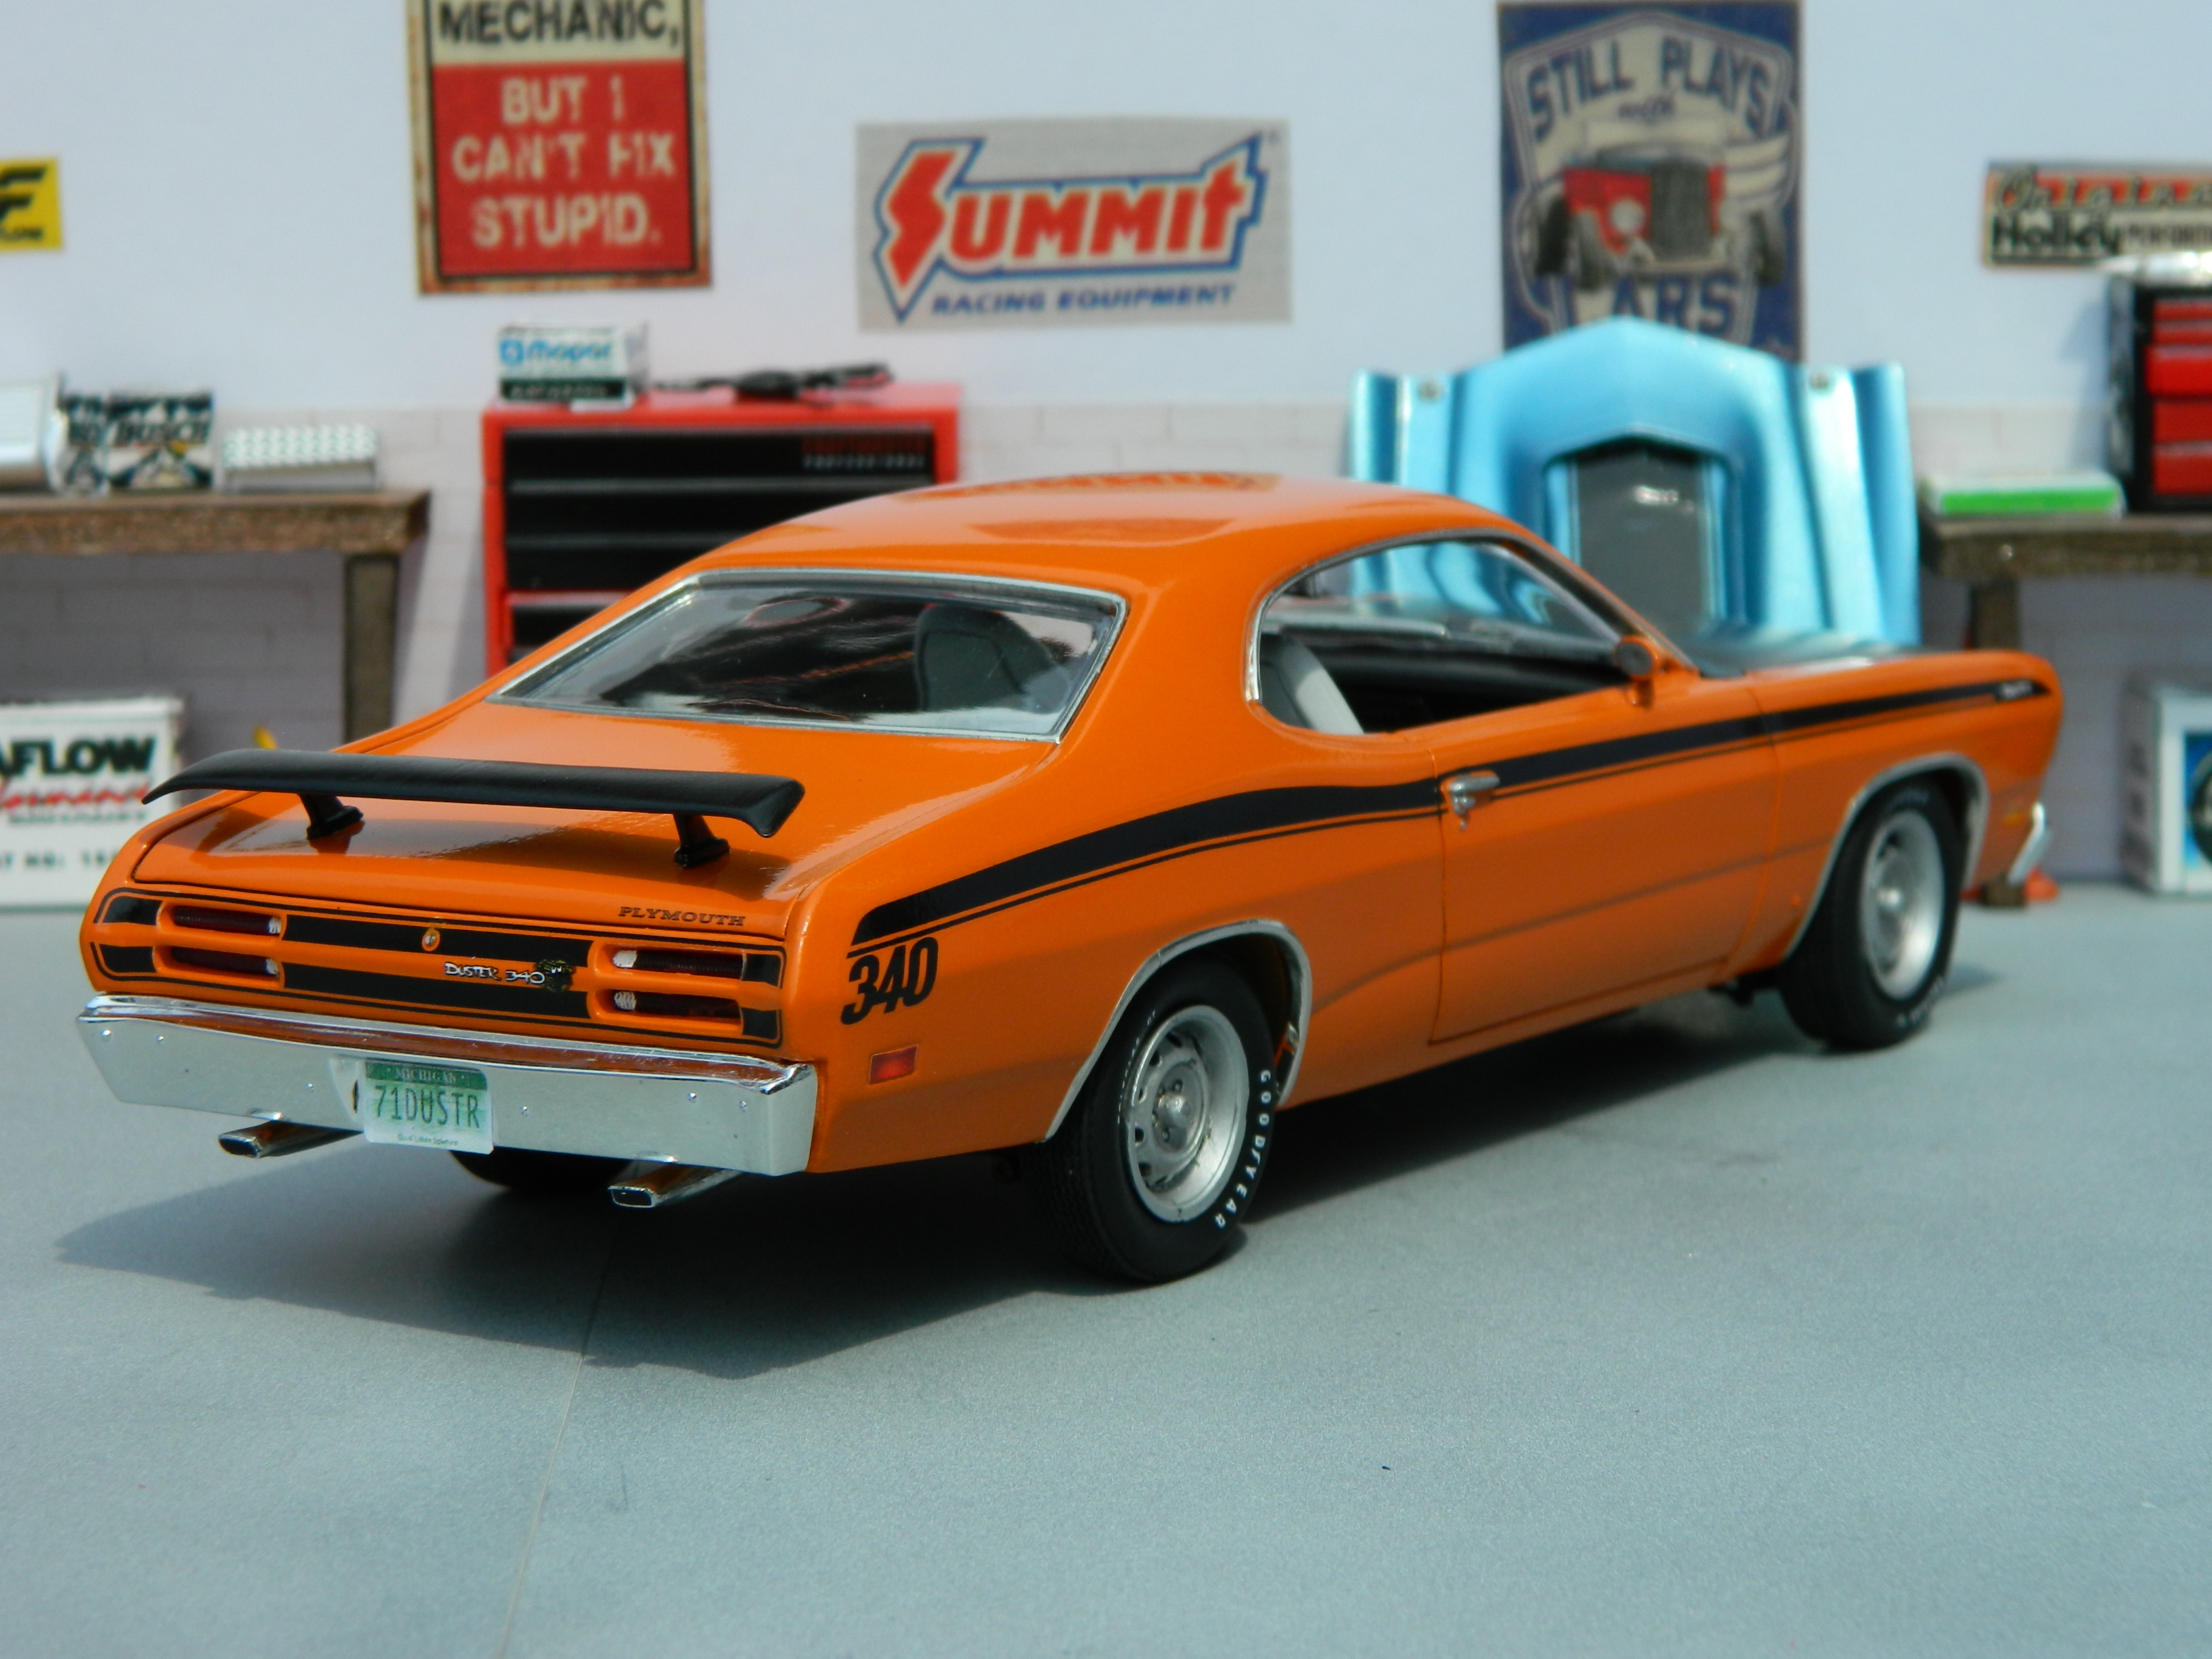
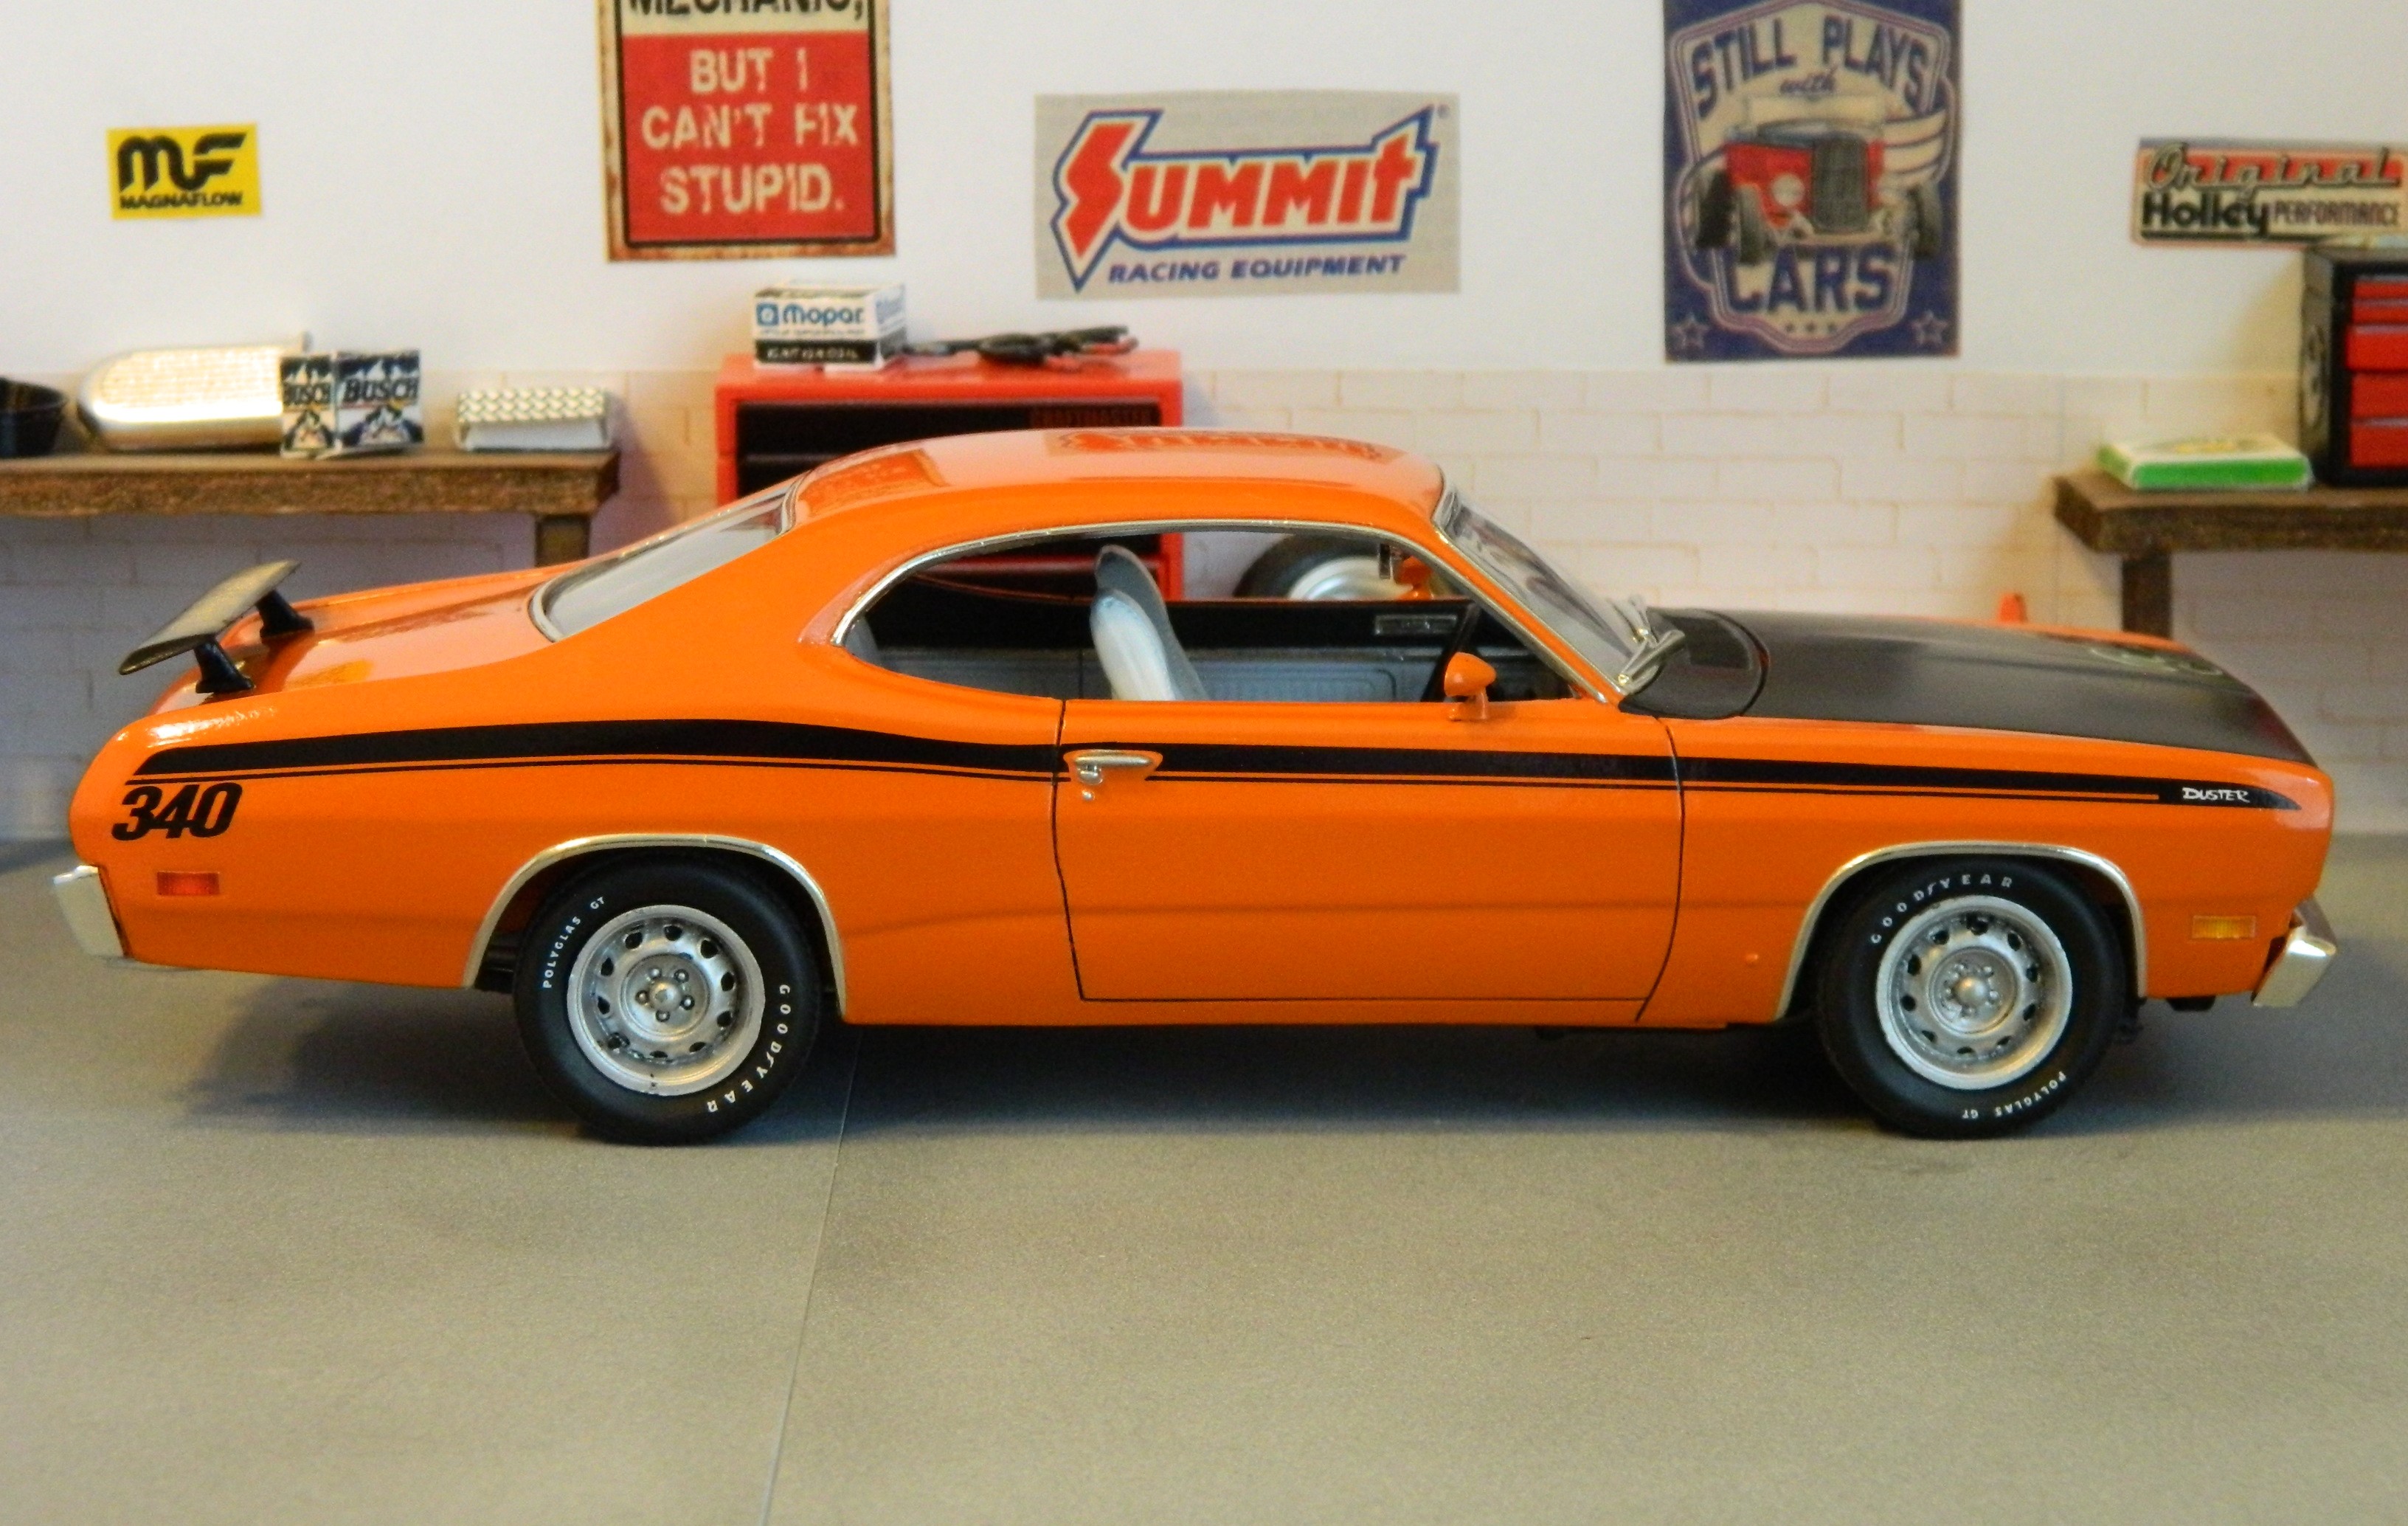
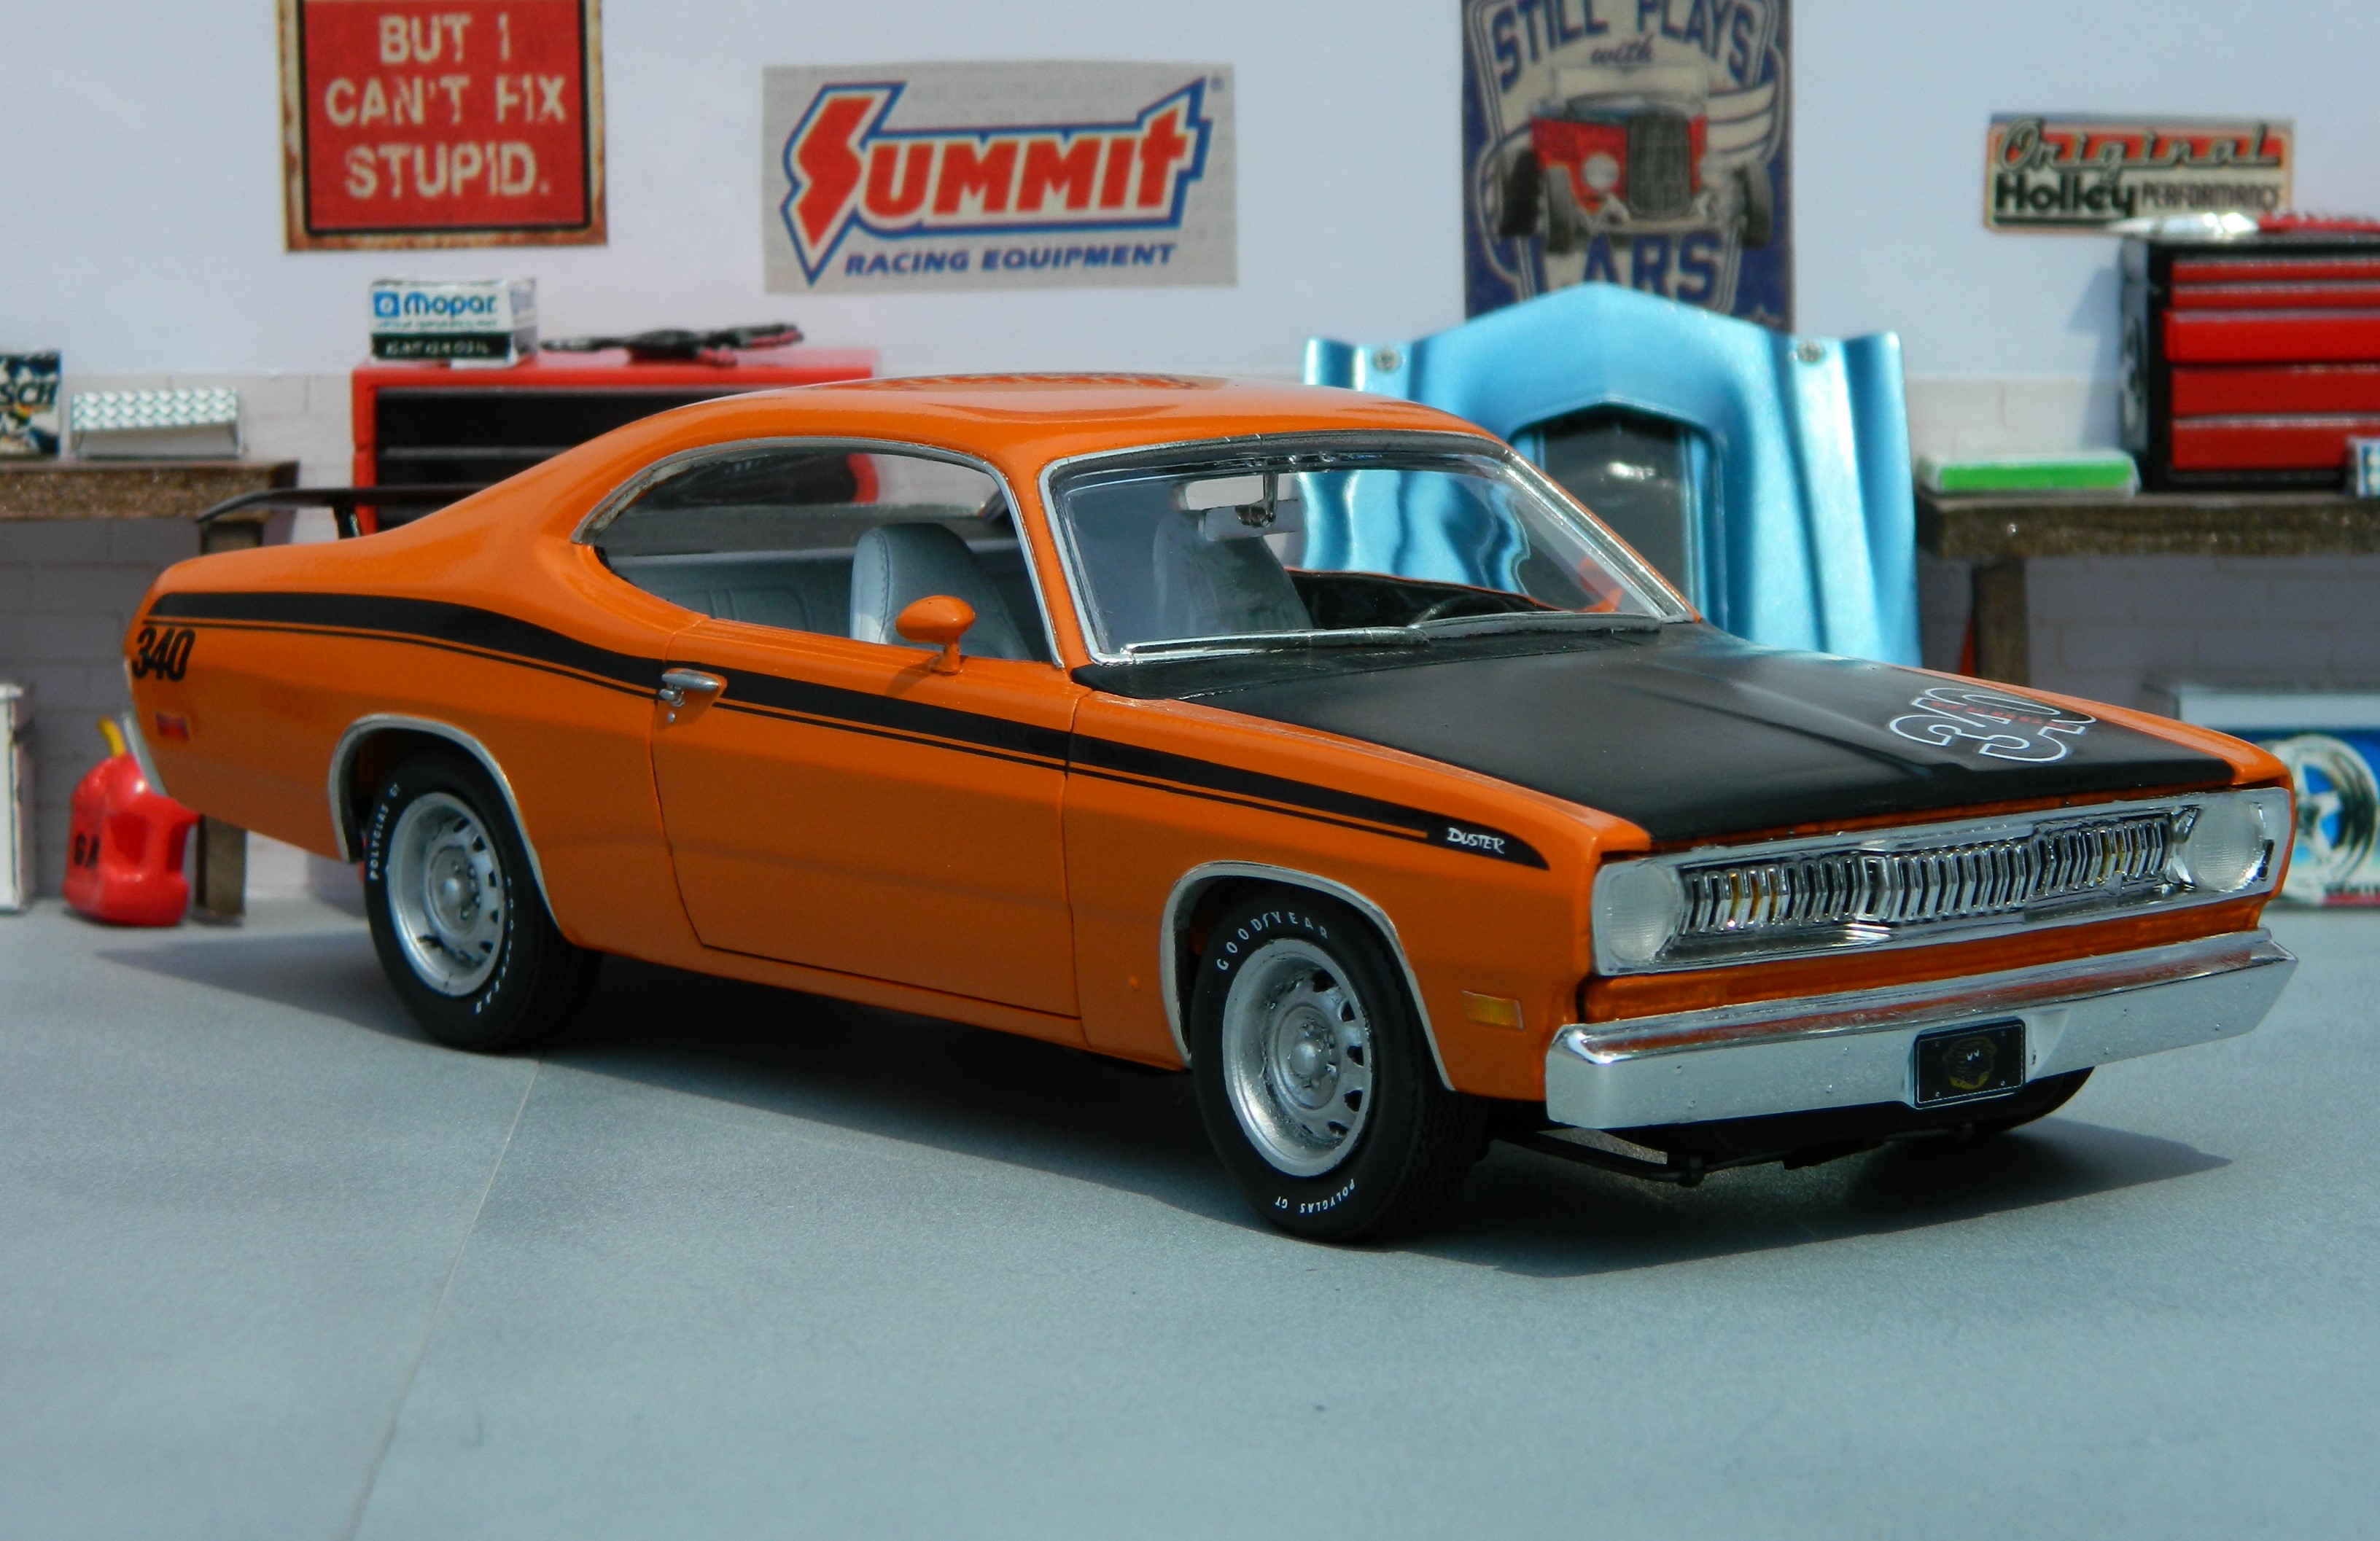
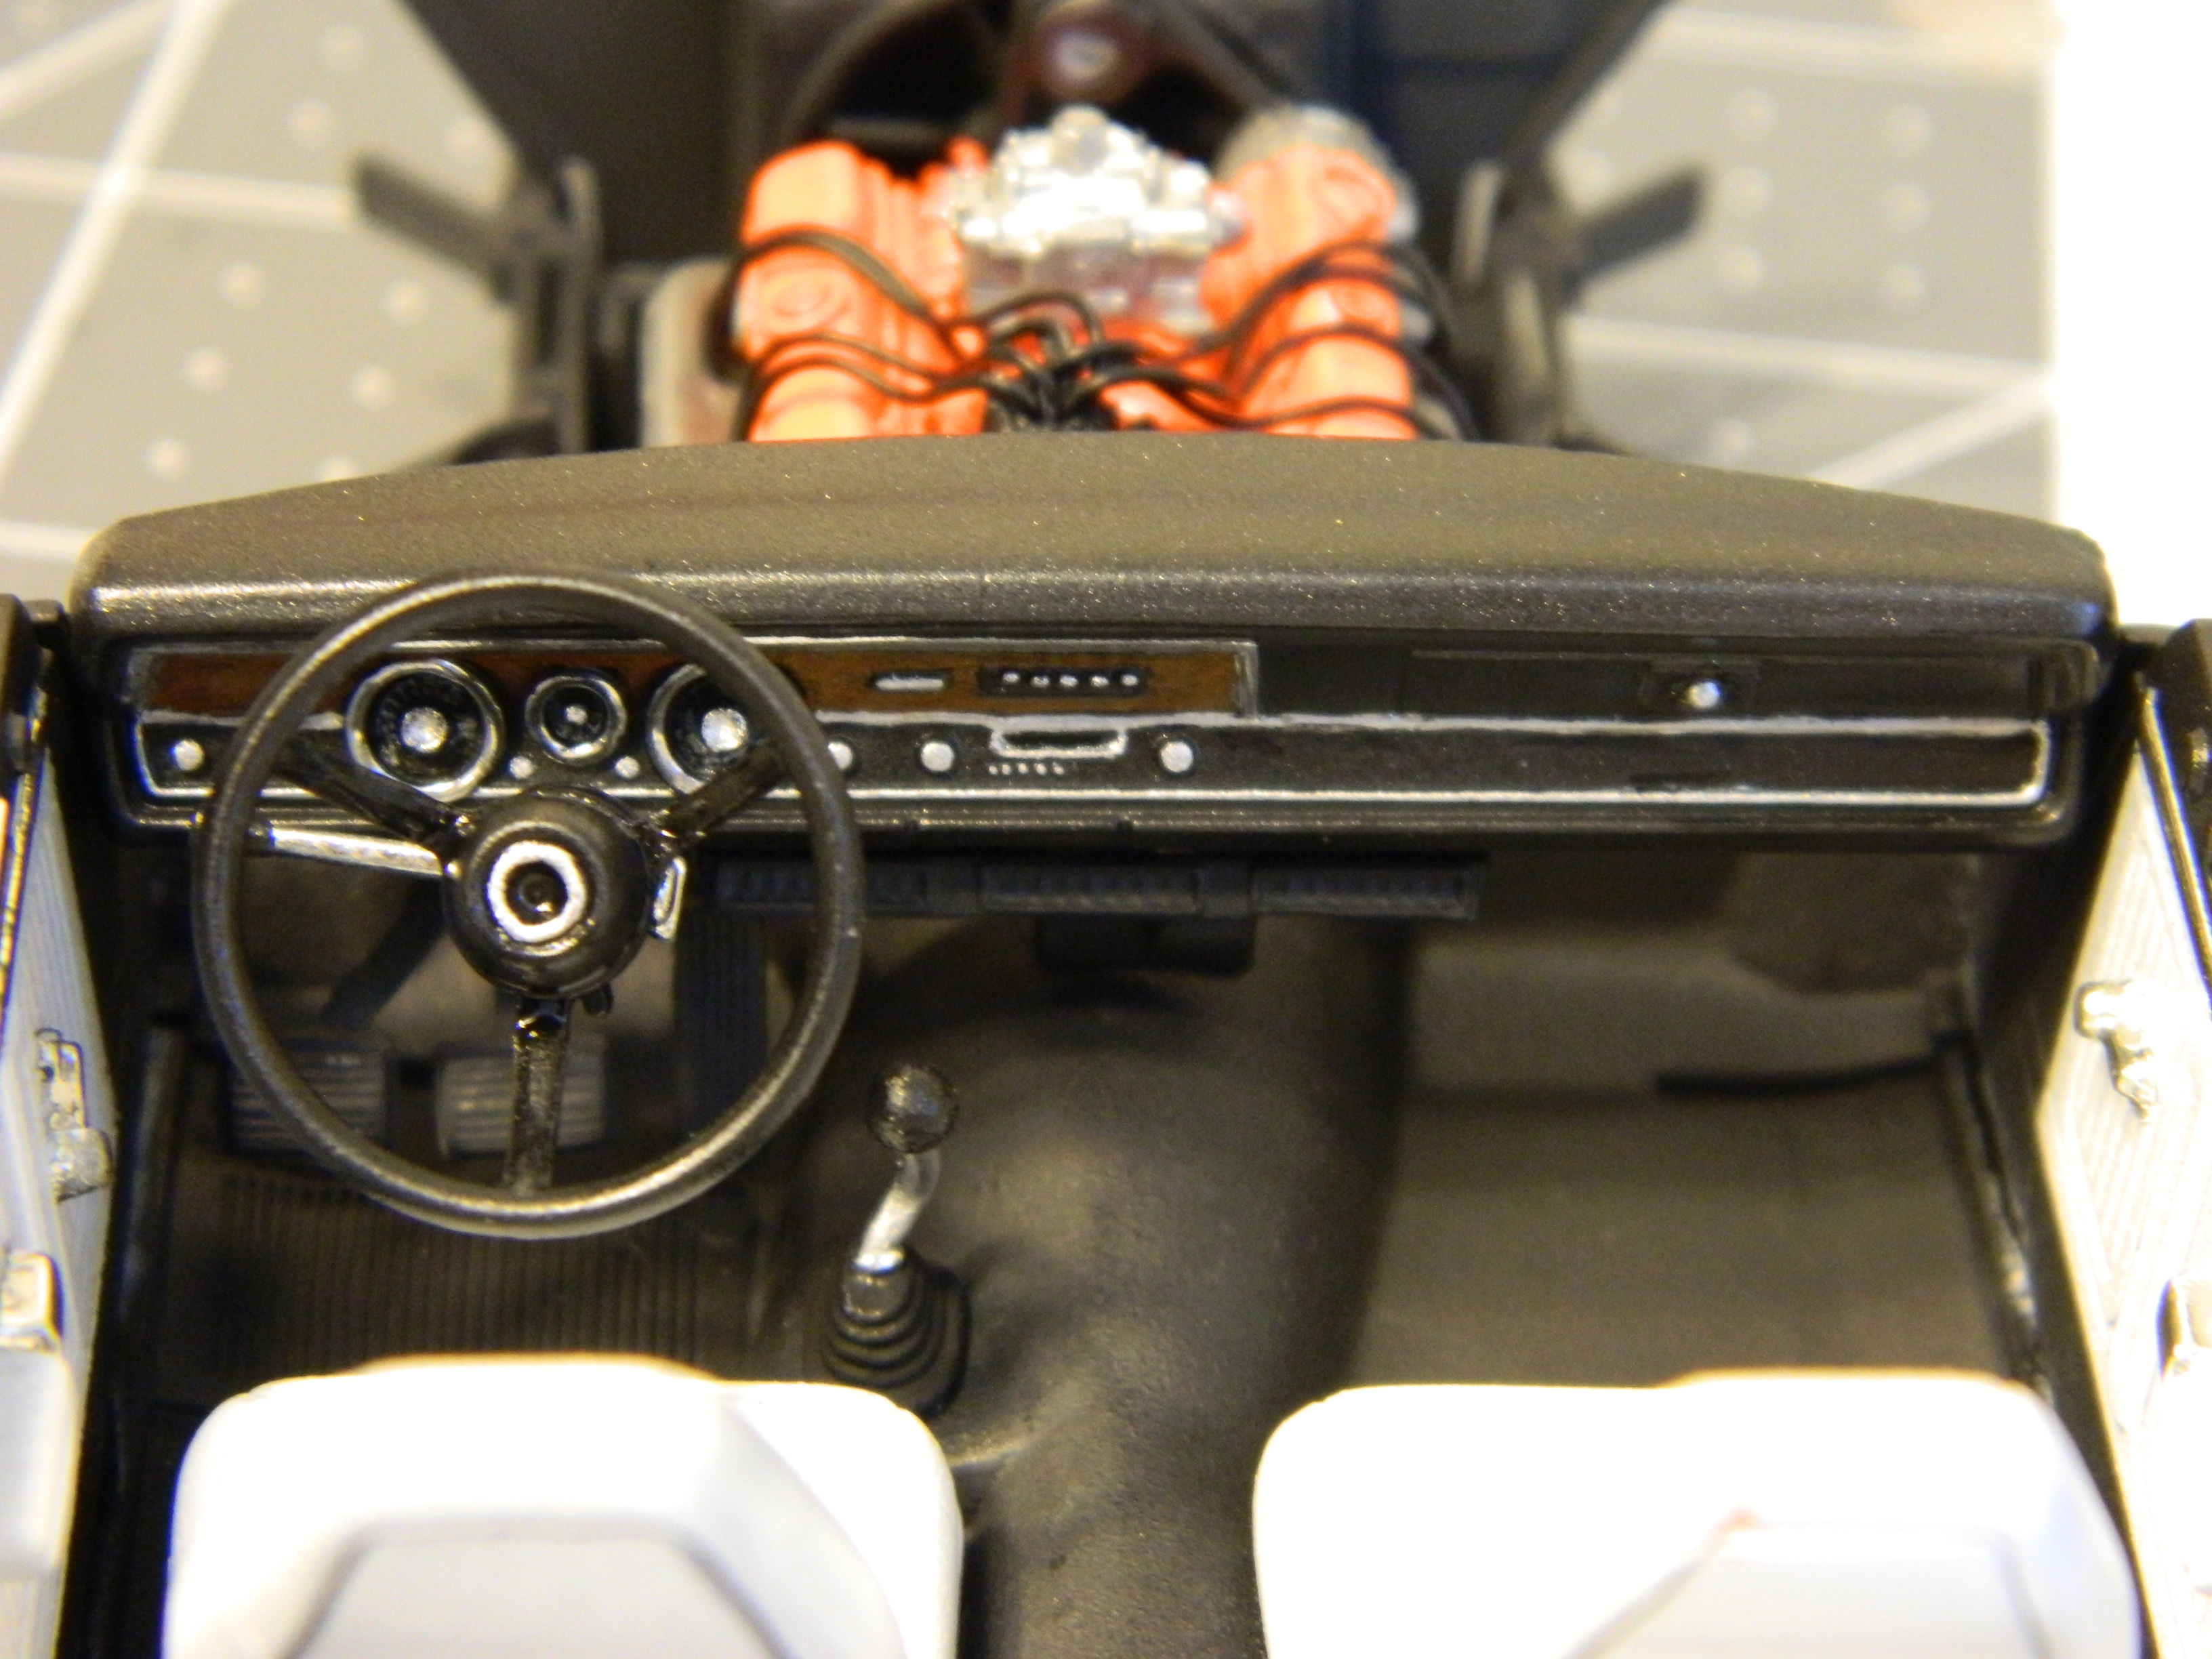
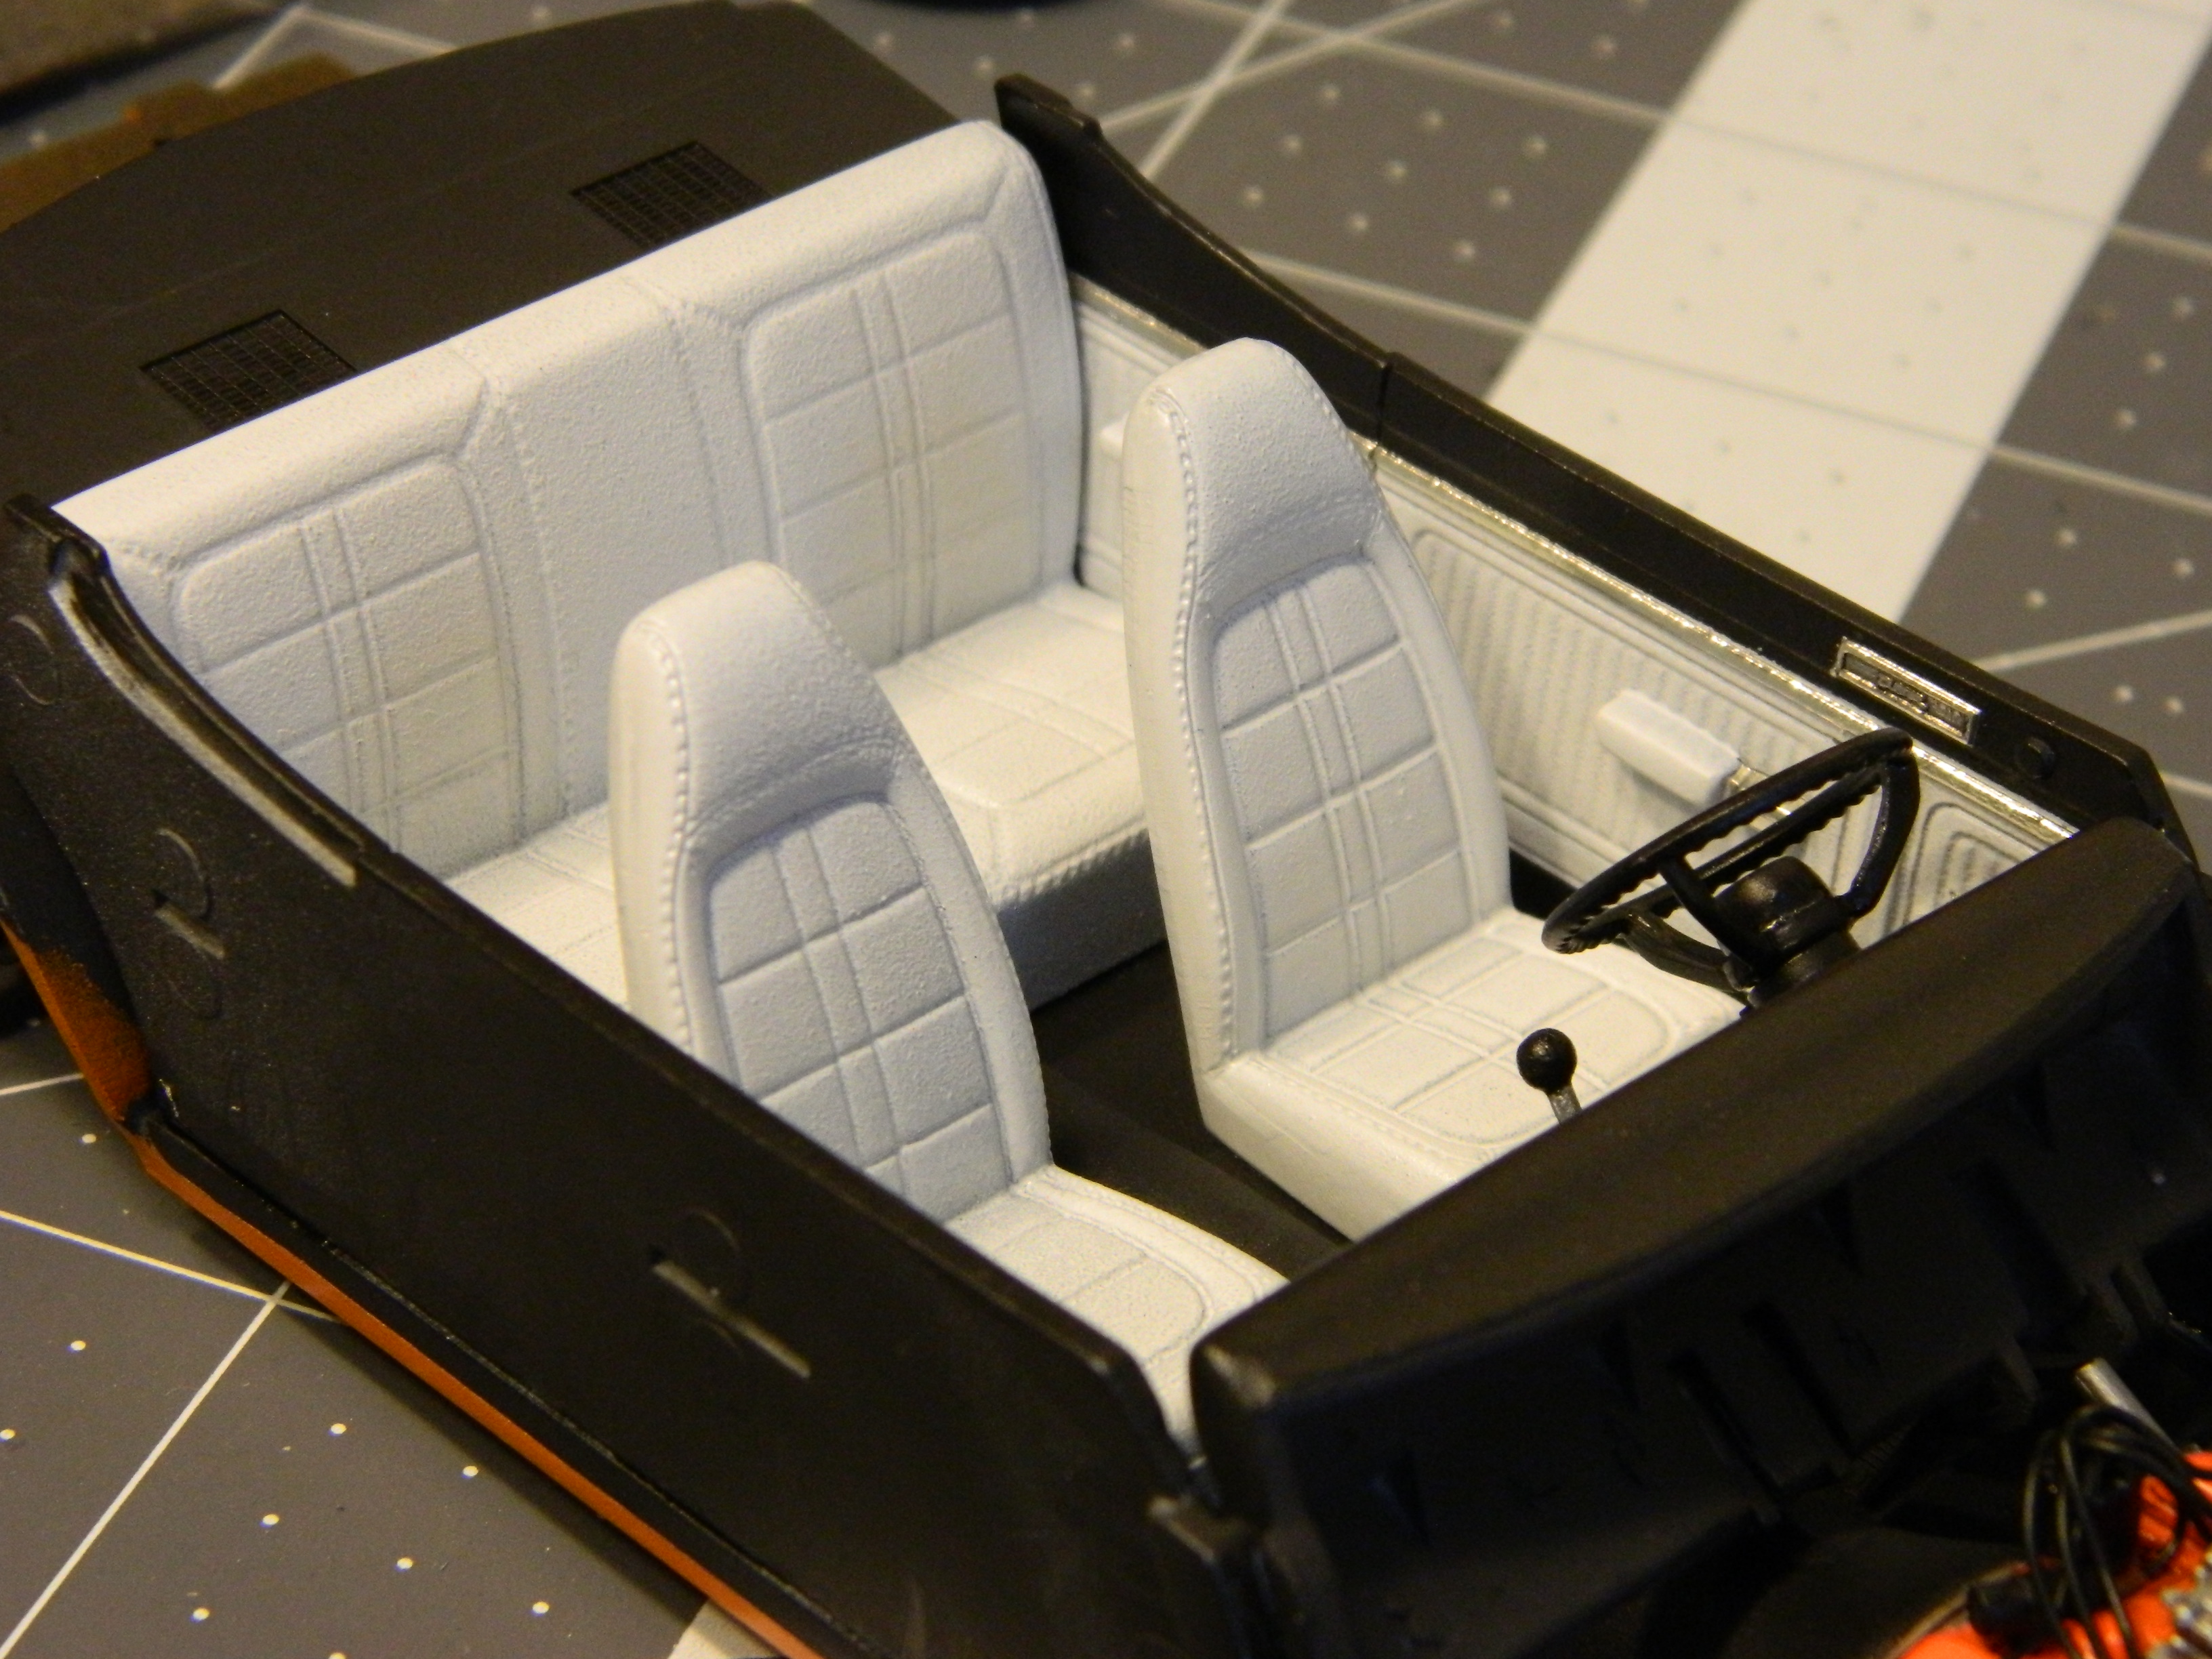
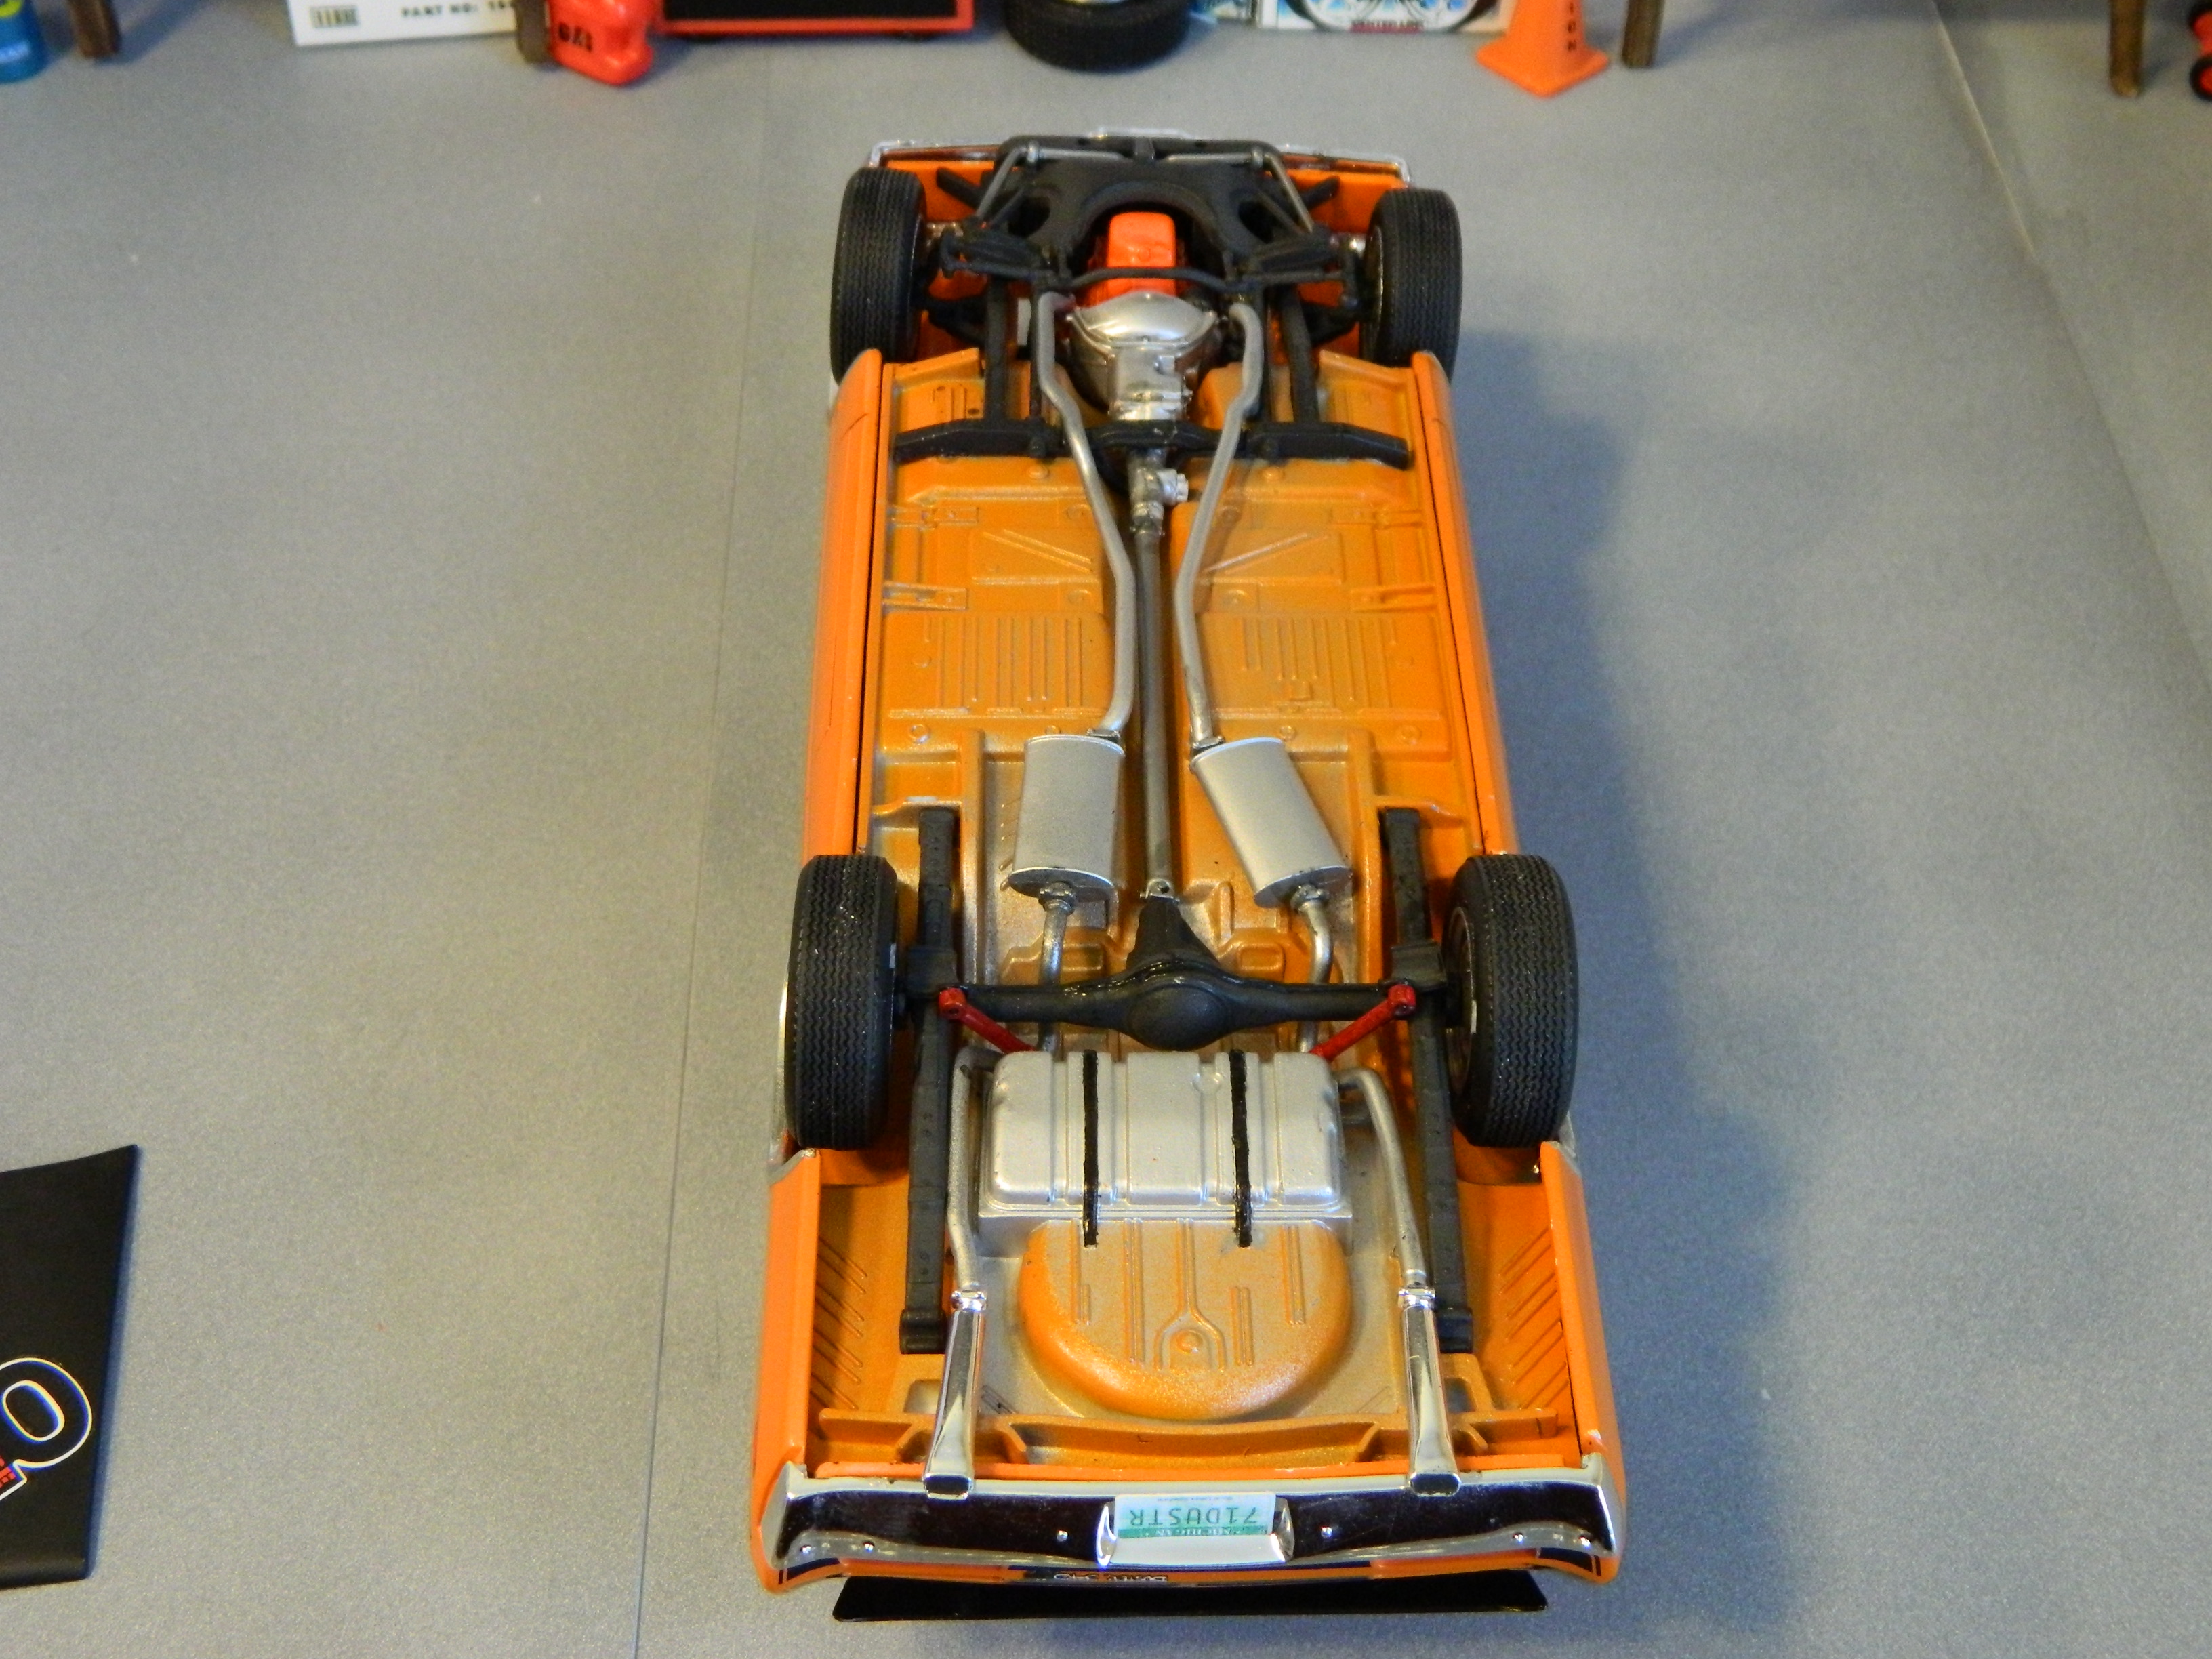
With special thanks to a fellow Forum member for sending me a missing part, I was finally able to finish the '71 Duster 340 yesterday. The paint is Model Master Go Mango Orange with MM clear, while the hood is just black primer with satin clear brushed on. The interior is just white primer with satin clear airbrushed on and the black floors and dash are also black primer with Pledge brushed on the dash. The gauges are decals and the dash trim is very carefully brushed on Molotow Chrome. I added ignition wires to the engine, and valve stems on the wheels, while the window trim is Bare Metal Foil. What a great kit overall, and a generally fun build. Thanks for looking!
-
Well done!
-
Looks great!
-
That looks awesome!
-
Daisy Duke's '71 Plymouth Satellite
Dragonhawk1066 replied to Andrew D the Jolly Roger's topic in Model Cars
Nice work! -
Very nice!
-
Looks great!
-
I love wagons. 1956 Plymouth Belvedere.
Dragonhawk1066 replied to carbuilder1950's topic in Model Cars
Very nice! -
That's pretty sharp! Nice work!
-
Messing around with my photo backdrop garage.
Dragonhawk1066 replied to Dragonhawk1066's topic in Dioramas
Thanks guys! Thanks Carl! LOL, they'll probably end up working on a '70 Chevelle SS454 next week. Thanks Bill! These are the Fujimi Mechanics set. There are so many figures to choose from anymore, I definitely plan on getting more. You've got some great ideas and techniques on yours that I'll have to try to steal for my current "Speed Shop" WIP. -
Looks good! Nice work on the details!
-
Well done! It certainly looks like what a Gremlin would look like today, lol.