NOBLNG
-
Posts
9,546 -
Joined
-
Last visited
Content Type
Profiles
Forums
Events
Gallery
Everything posted by NOBLNG
-
Did the early Victorias come with either a trunk or a rear door? Or is this strictly a custom job? I suspect the first pic is, but would like to verify it. Second pic is a later (34?) model.

-
Beautiful !?
-
Excellent work! These look like really nicely detailed kits.?
-
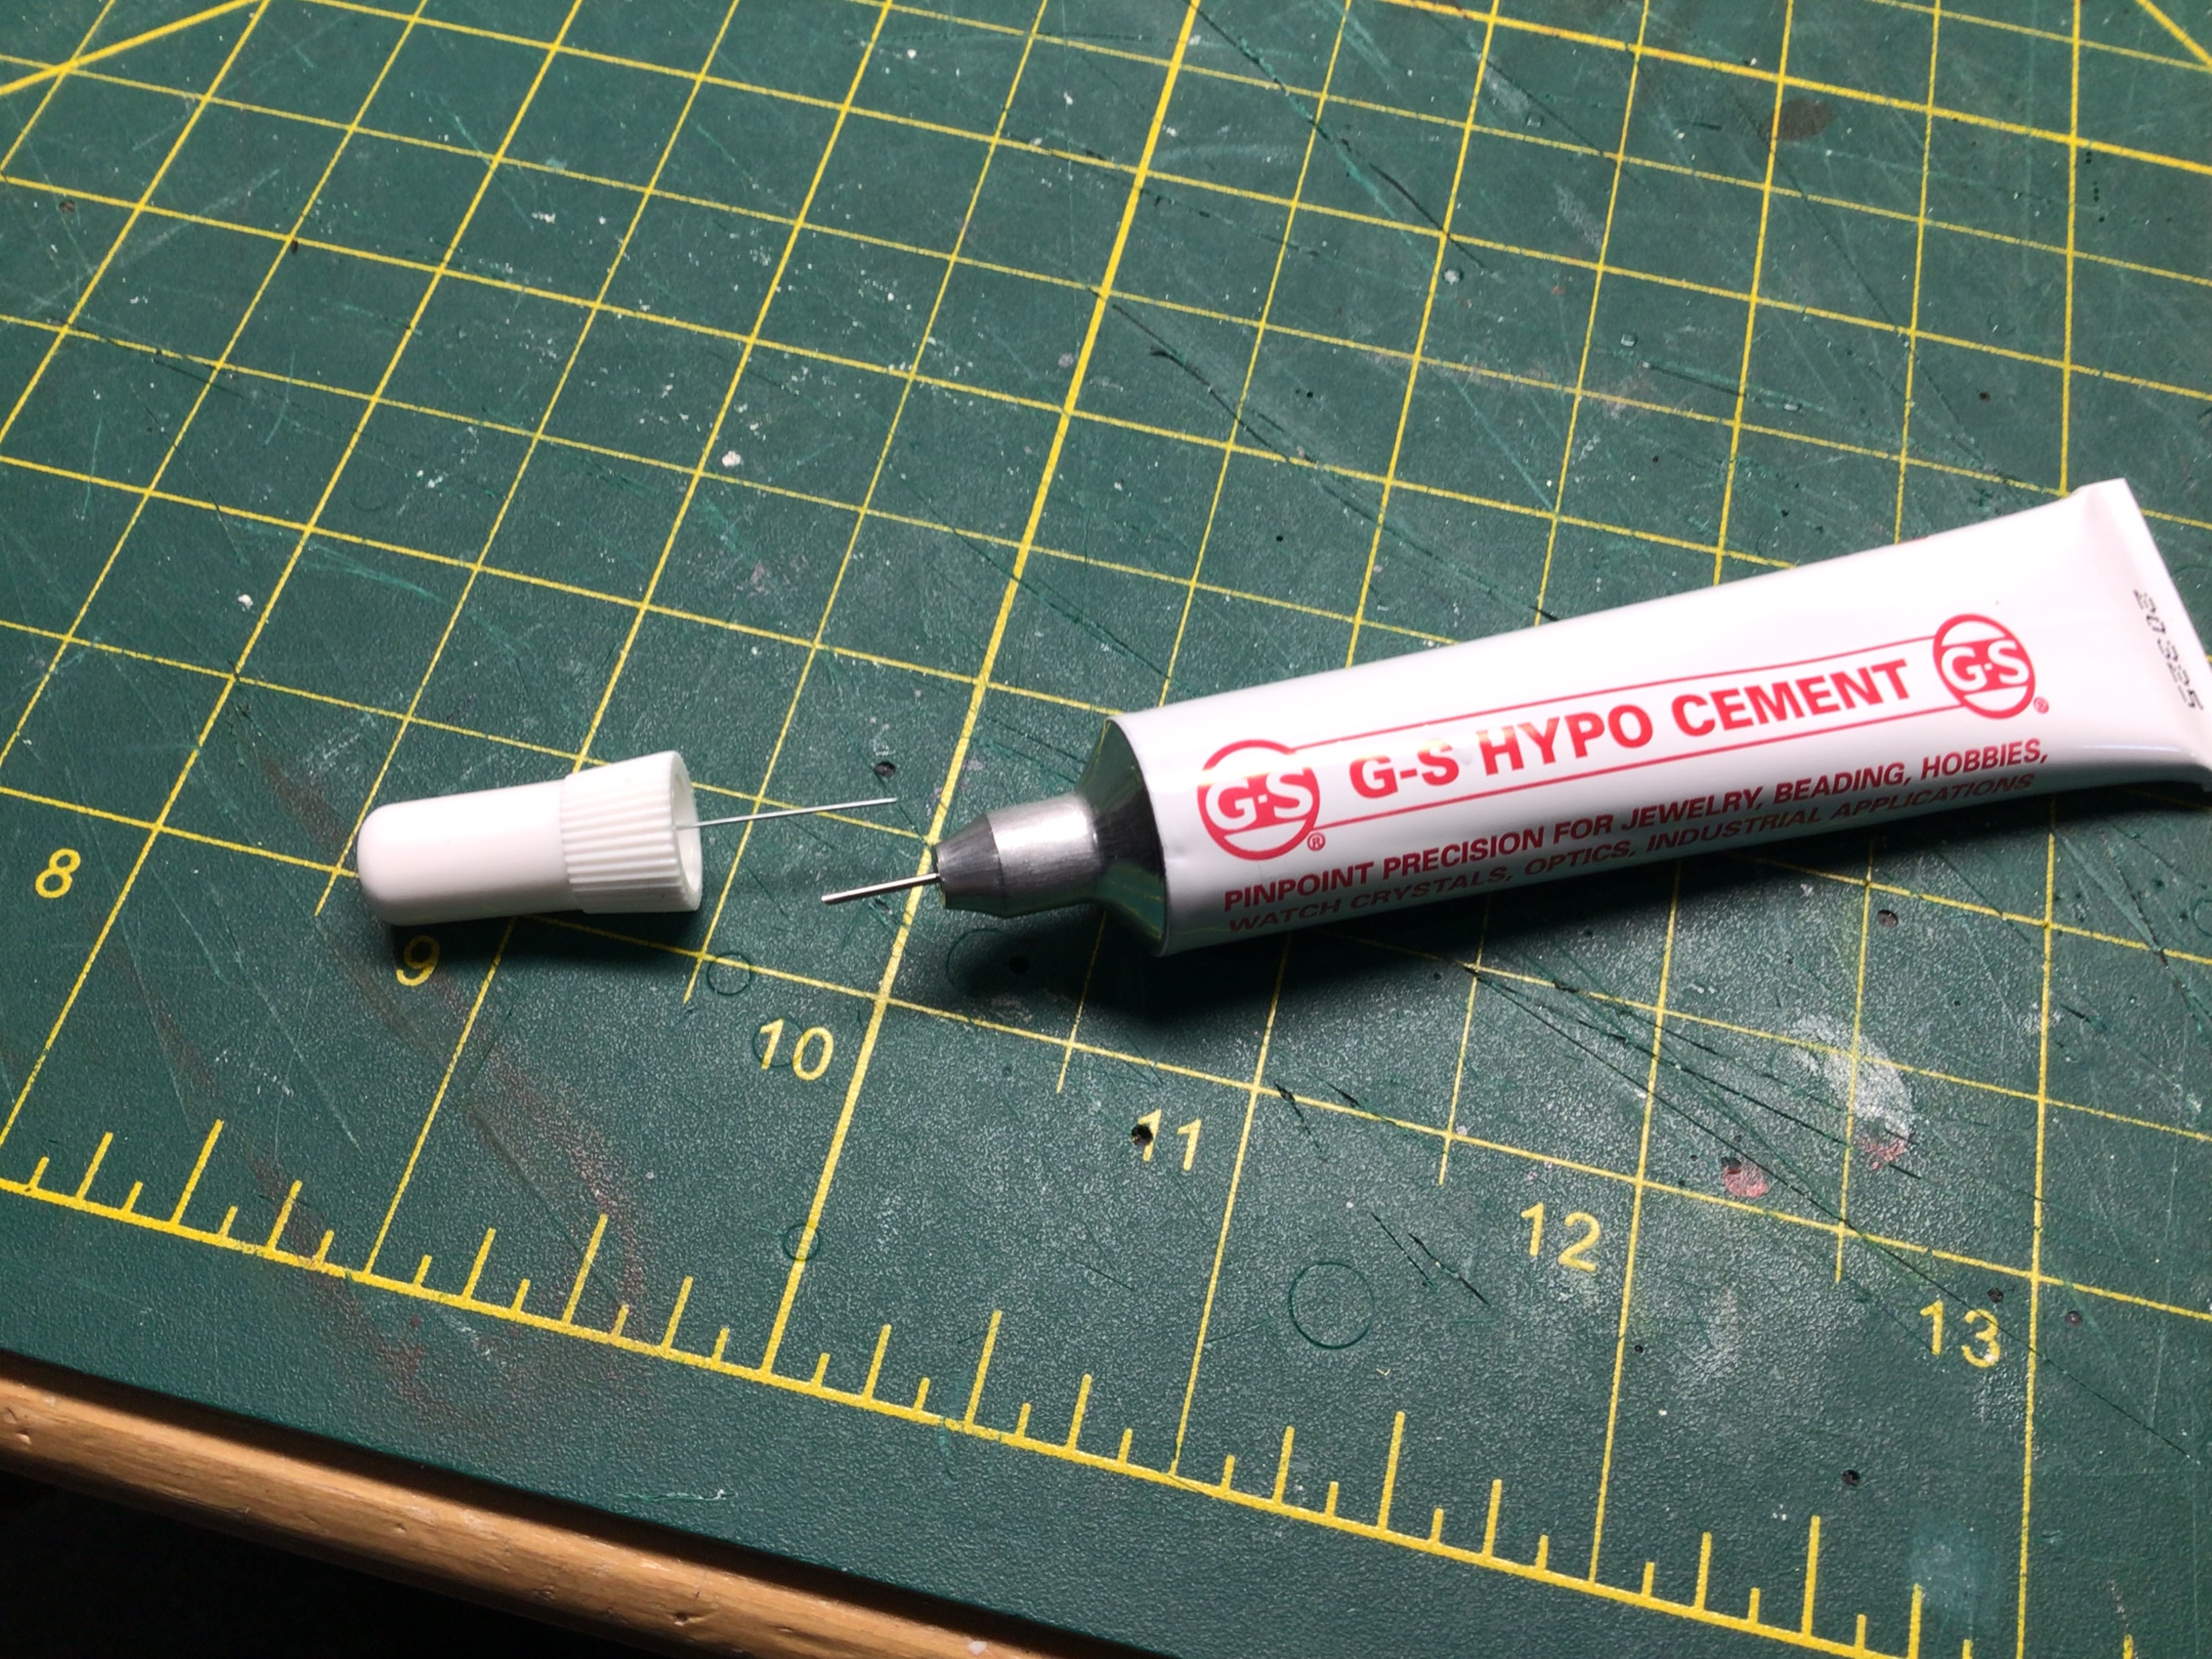
 Thanks. They are actually a photo copy of the kit decals (I screwed up the actual decals), and covered with This G-S Hypo Cement that someone on here recommended. Now hopefully I can get a decent paint job on the body to match the dash. I’ve had to strip it and start over.?
-
What did you screw-up today??
NOBLNG replied to TransAmMike's topic in General Automotive Talk (Trucks and Cars)
Thanks, but I don’t know.? I sure didn’t see them previously, yet they are clearly visible now. Same with the raised lip around the roof insert and texture that I sanded level I thought. Oh well… It’s in a jar of brake fluid now. ? once it is thoroughly stripped, I will re-assess the status. Edit: I guess the scratches were in the plastic. They must have been filled by primer. This paint I am attempting to use is a hot laquer designed for Polystyrene RC bodies. The heavy coat I put on must have softened the previous coats right down to and into the primer. Same with the roof insert…there is still just a little of the texture left. The brake fluid I used to strip it must have weakened the glue joints on my chop job too!?
-
Not saying you wanted it cheap or fast, but this reminds me of a sign I once saw. Any reputable shop should not offer option #3! ?
-
That would look real nice in a charcoal gray metallic! ?
-
Looks like you got the windshield frame straightened nicely. Be careful with the chrome on this one. I put tape on the radiator shell to protect it while handling and it peeled the chrome off. Looking good!?
-
What did you screw-up today??
NOBLNG replied to TransAmMike's topic in General Automotive Talk (Trucks and Cars)
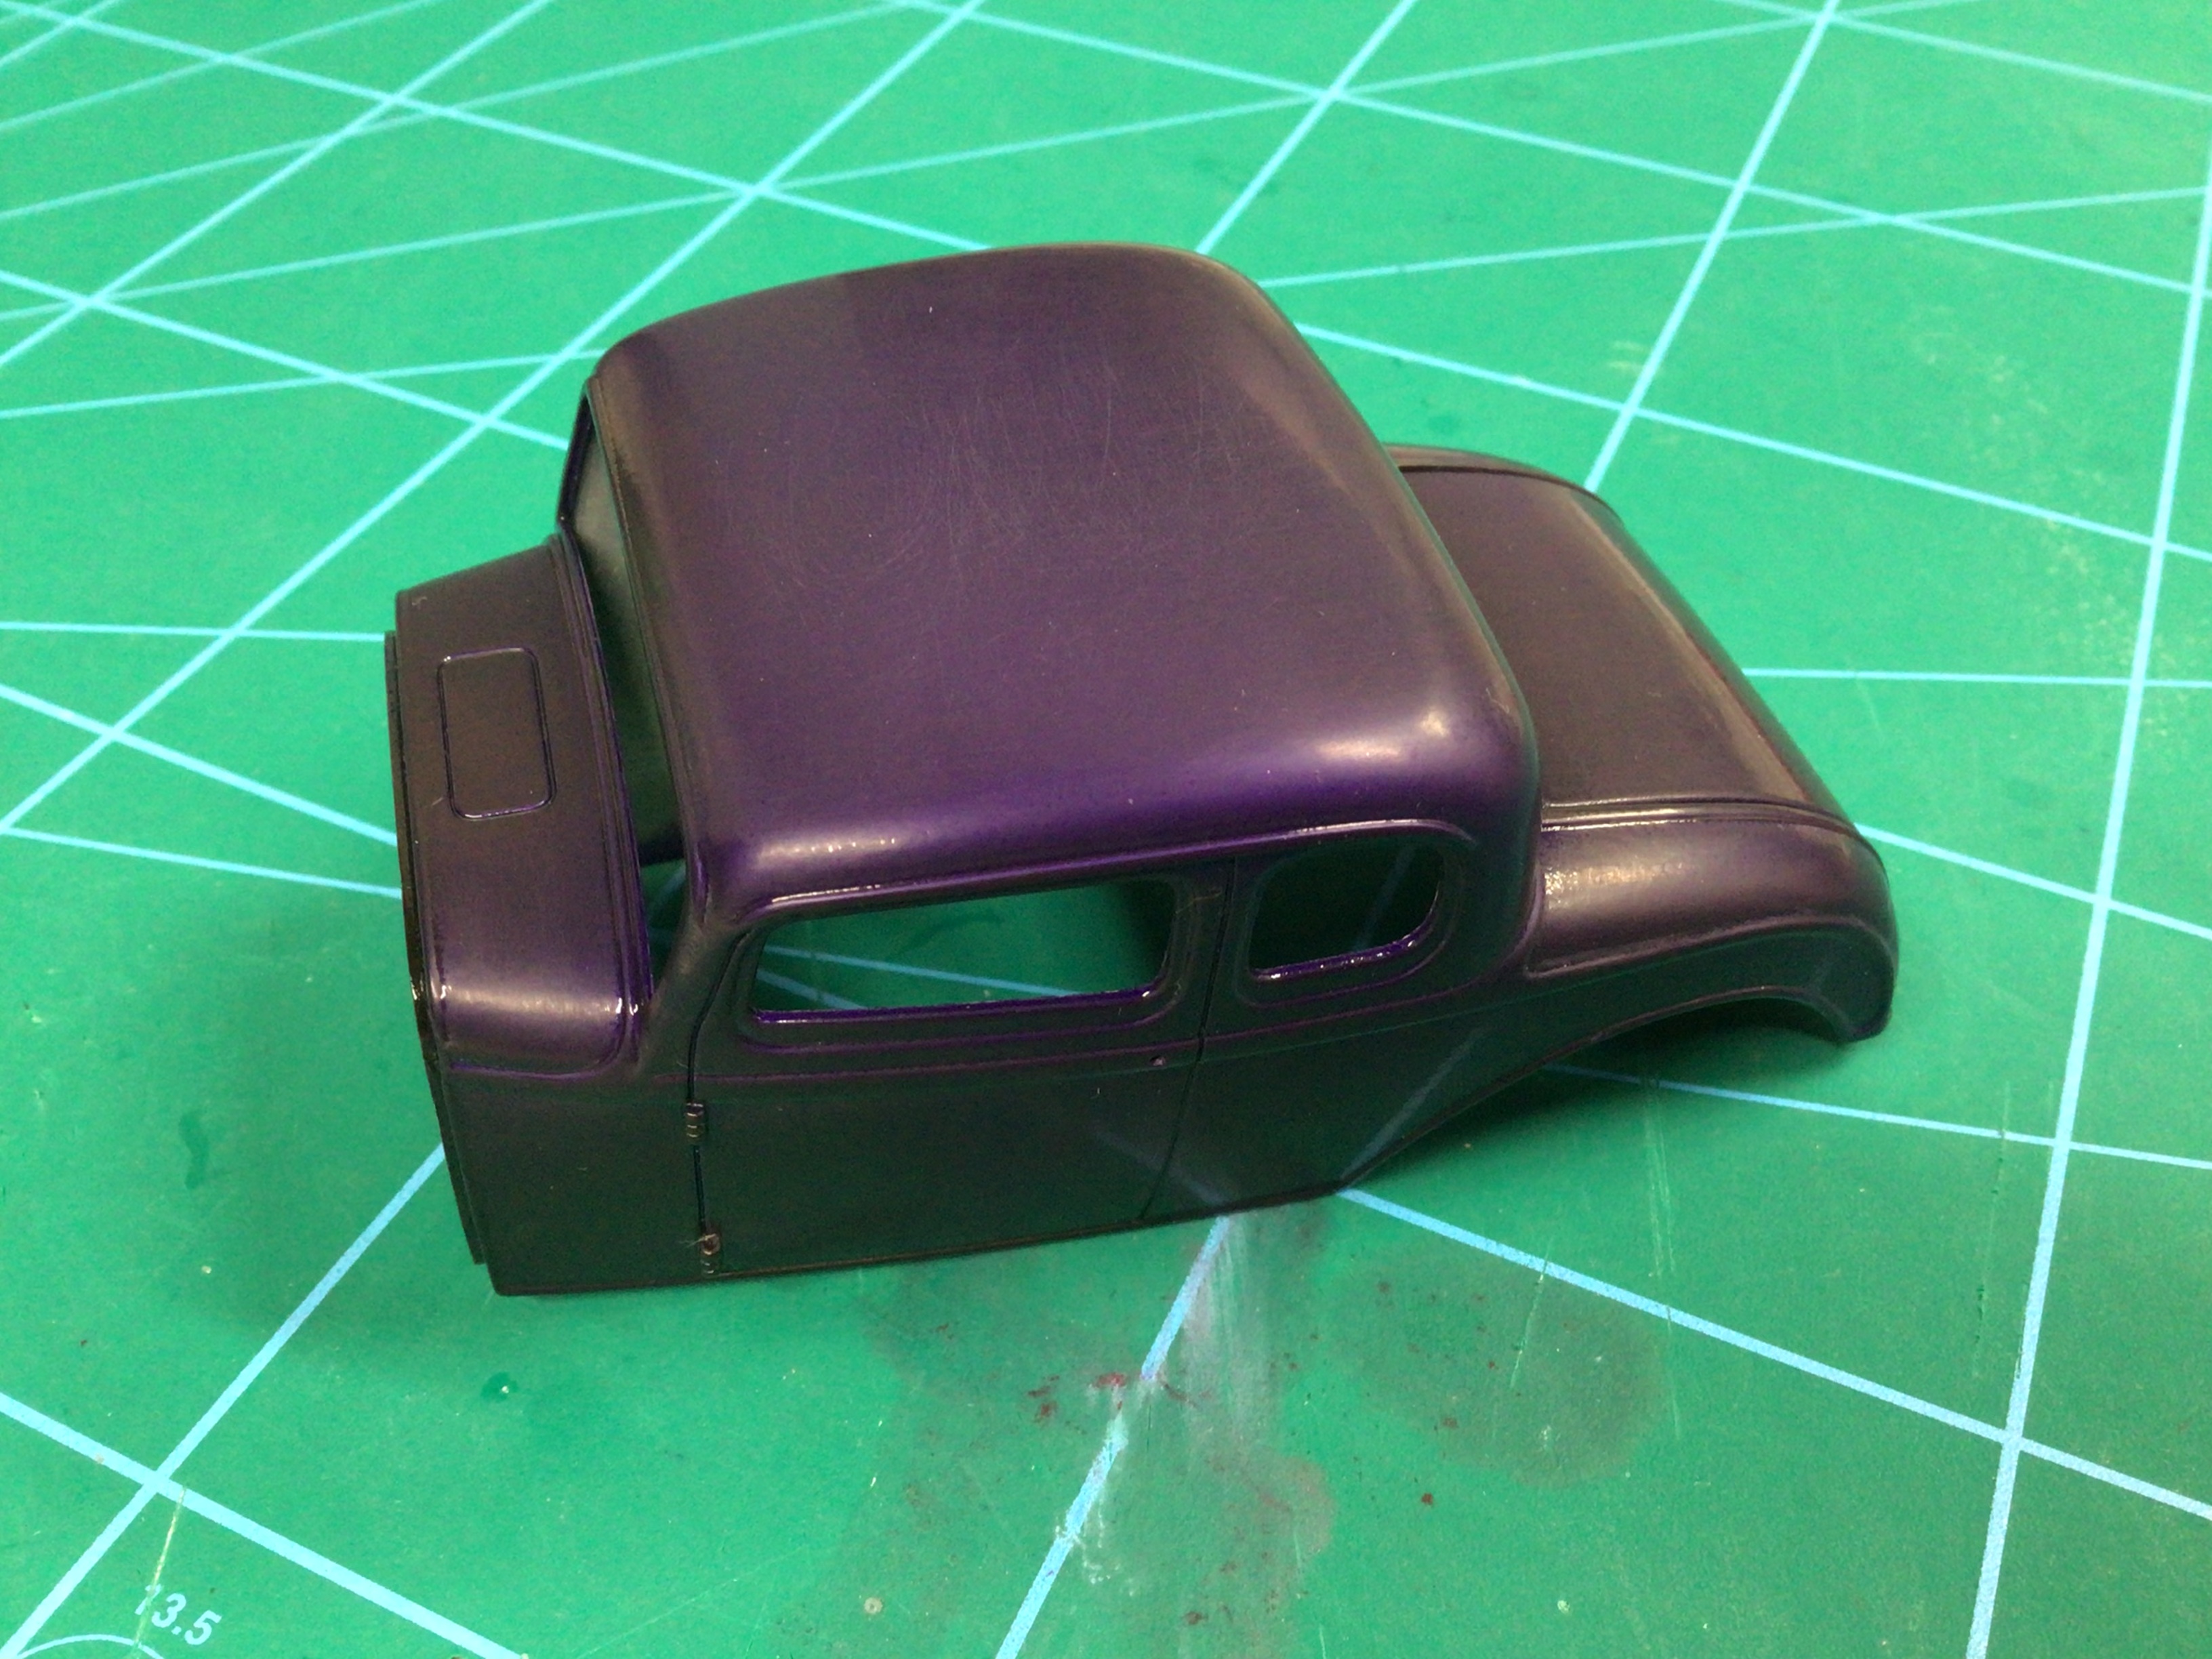
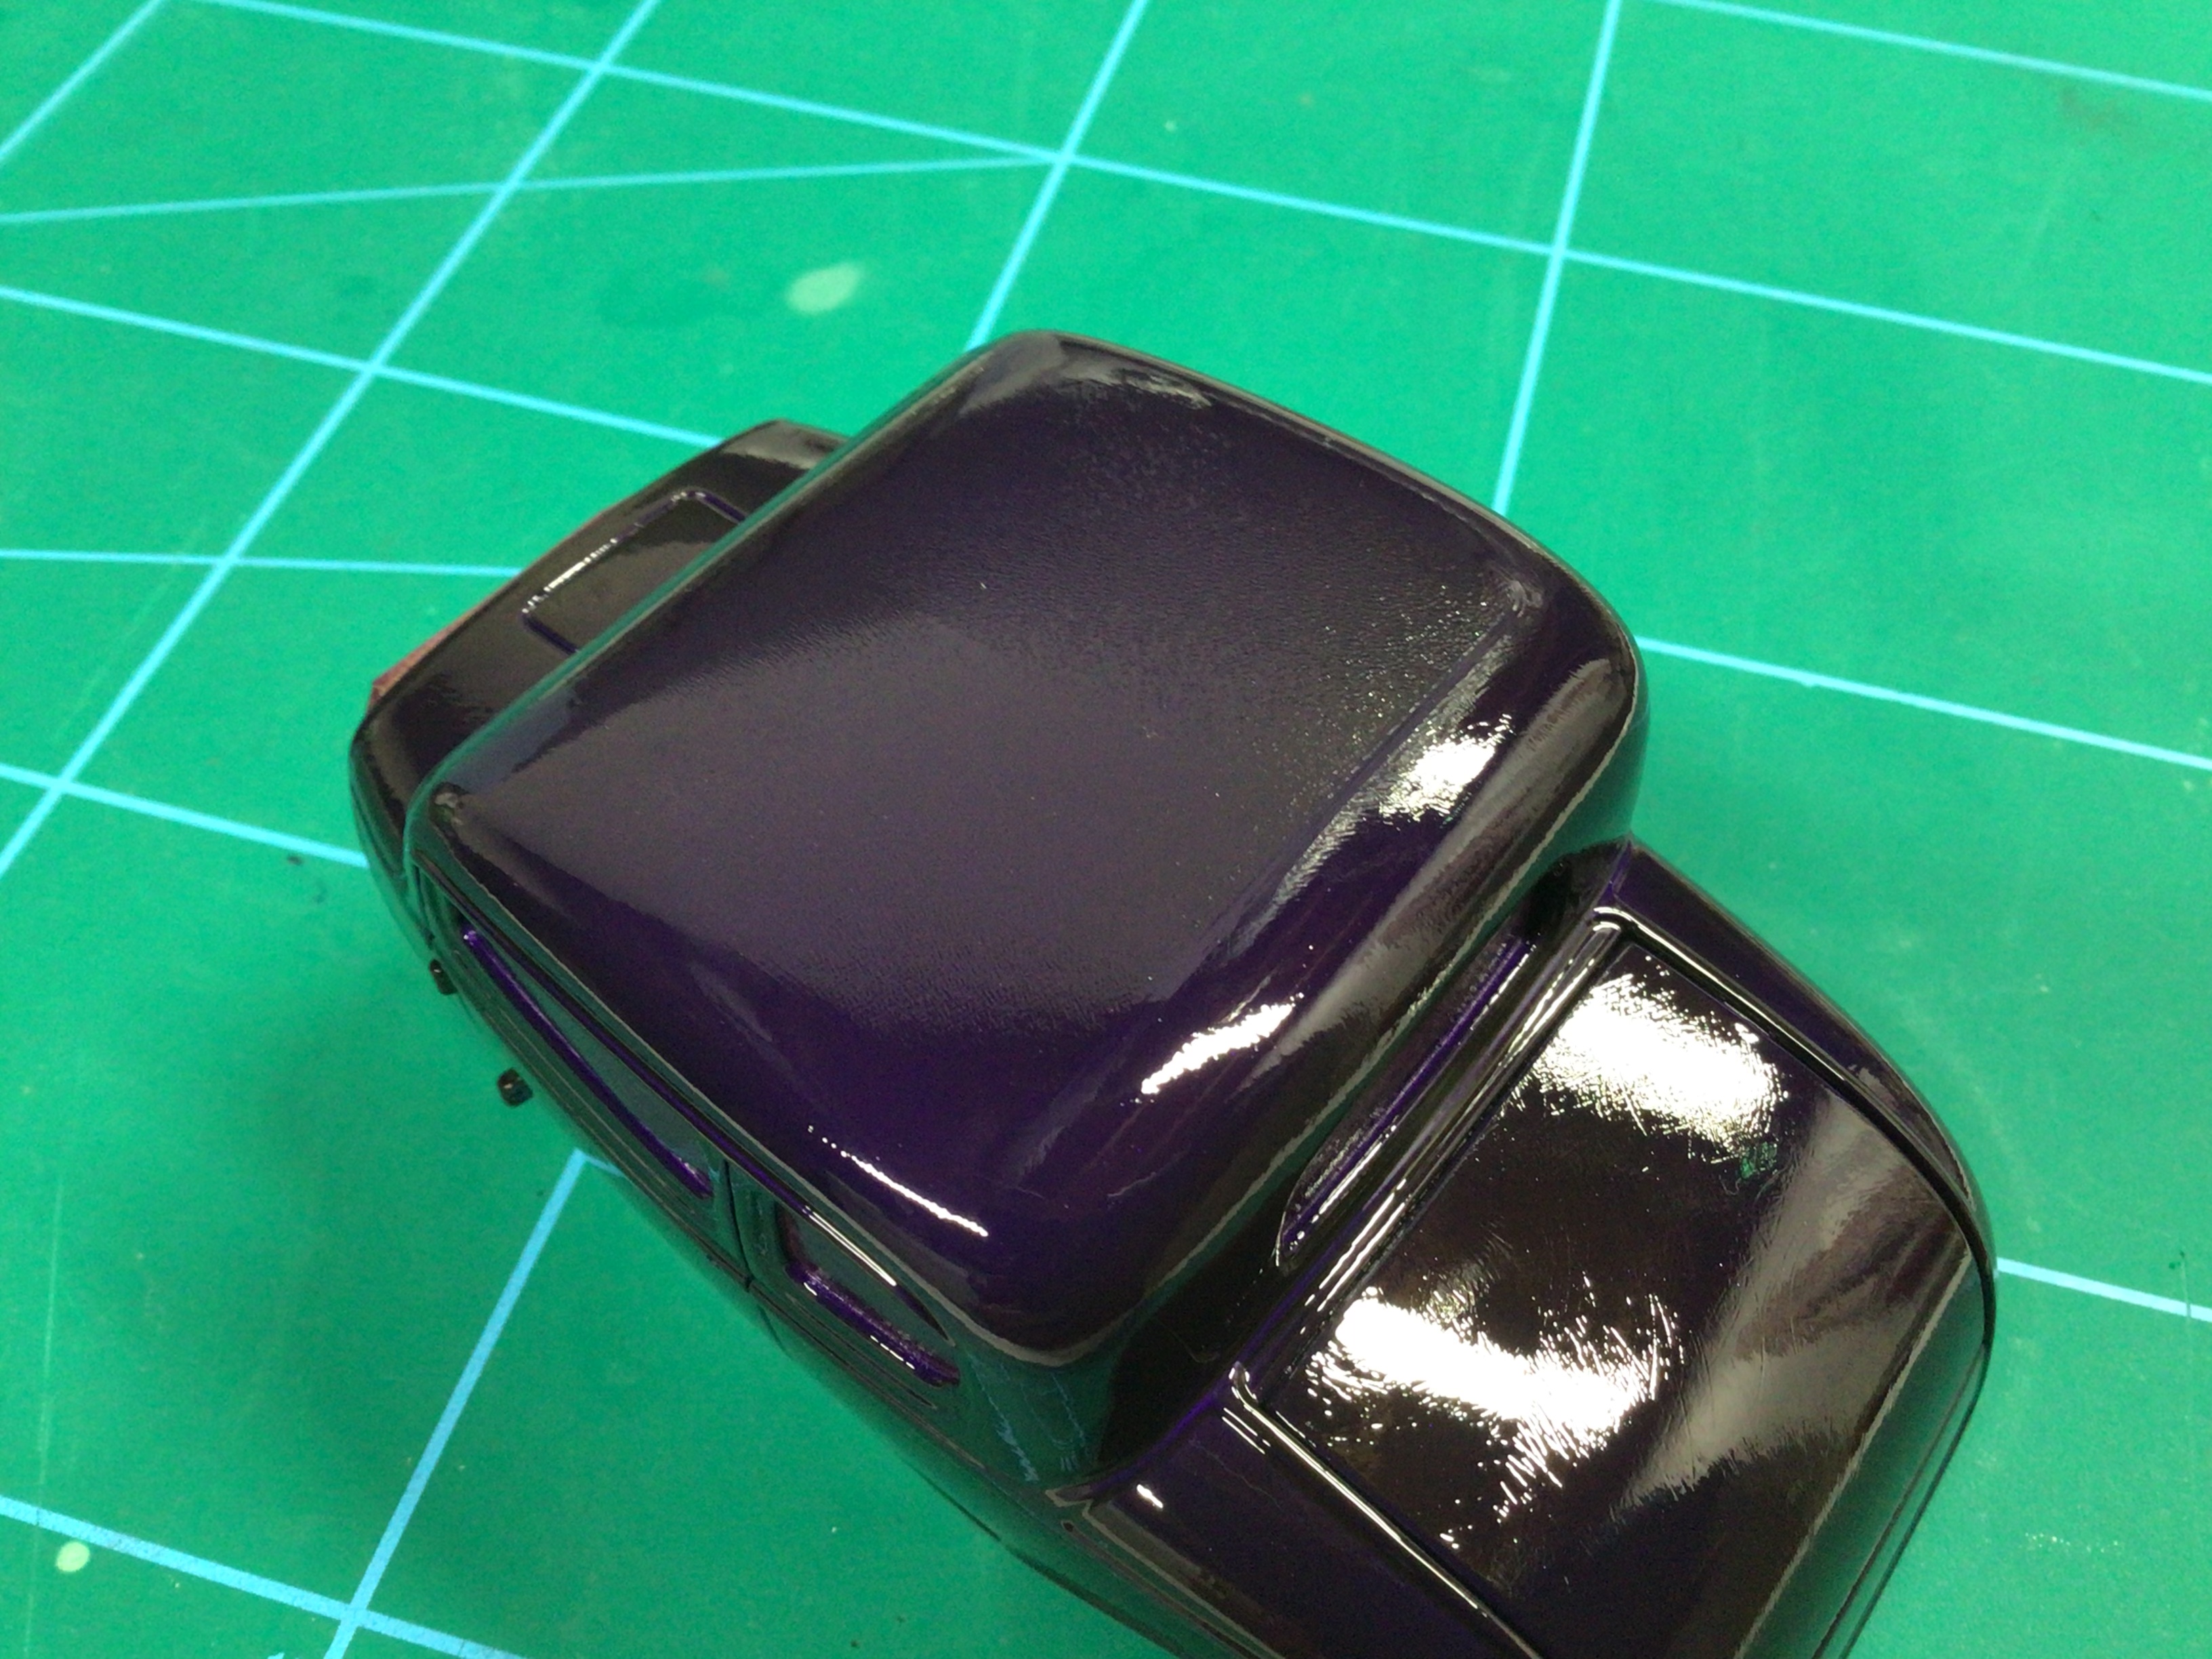
My paint job!? This is Pactra candy purple over a silver base. I know I put it on too heavy to get the real candy effect, and I was OK with that…I still like the color. It had a bit of an orange peel texture, so I wet sanded the entire thing smooth, and figured one more nice heavy coat that could “flow out” smoothly would do. Well, a bunch of scratches showed up on the trunk and the roof insert that I thought I had sanded smooth in the first place showed up all of a sudden.?? I guess it’s going into the pond now!?
-
How about an early ‘vette? Or anything with a fair bit of chrome to accent the paint.
-
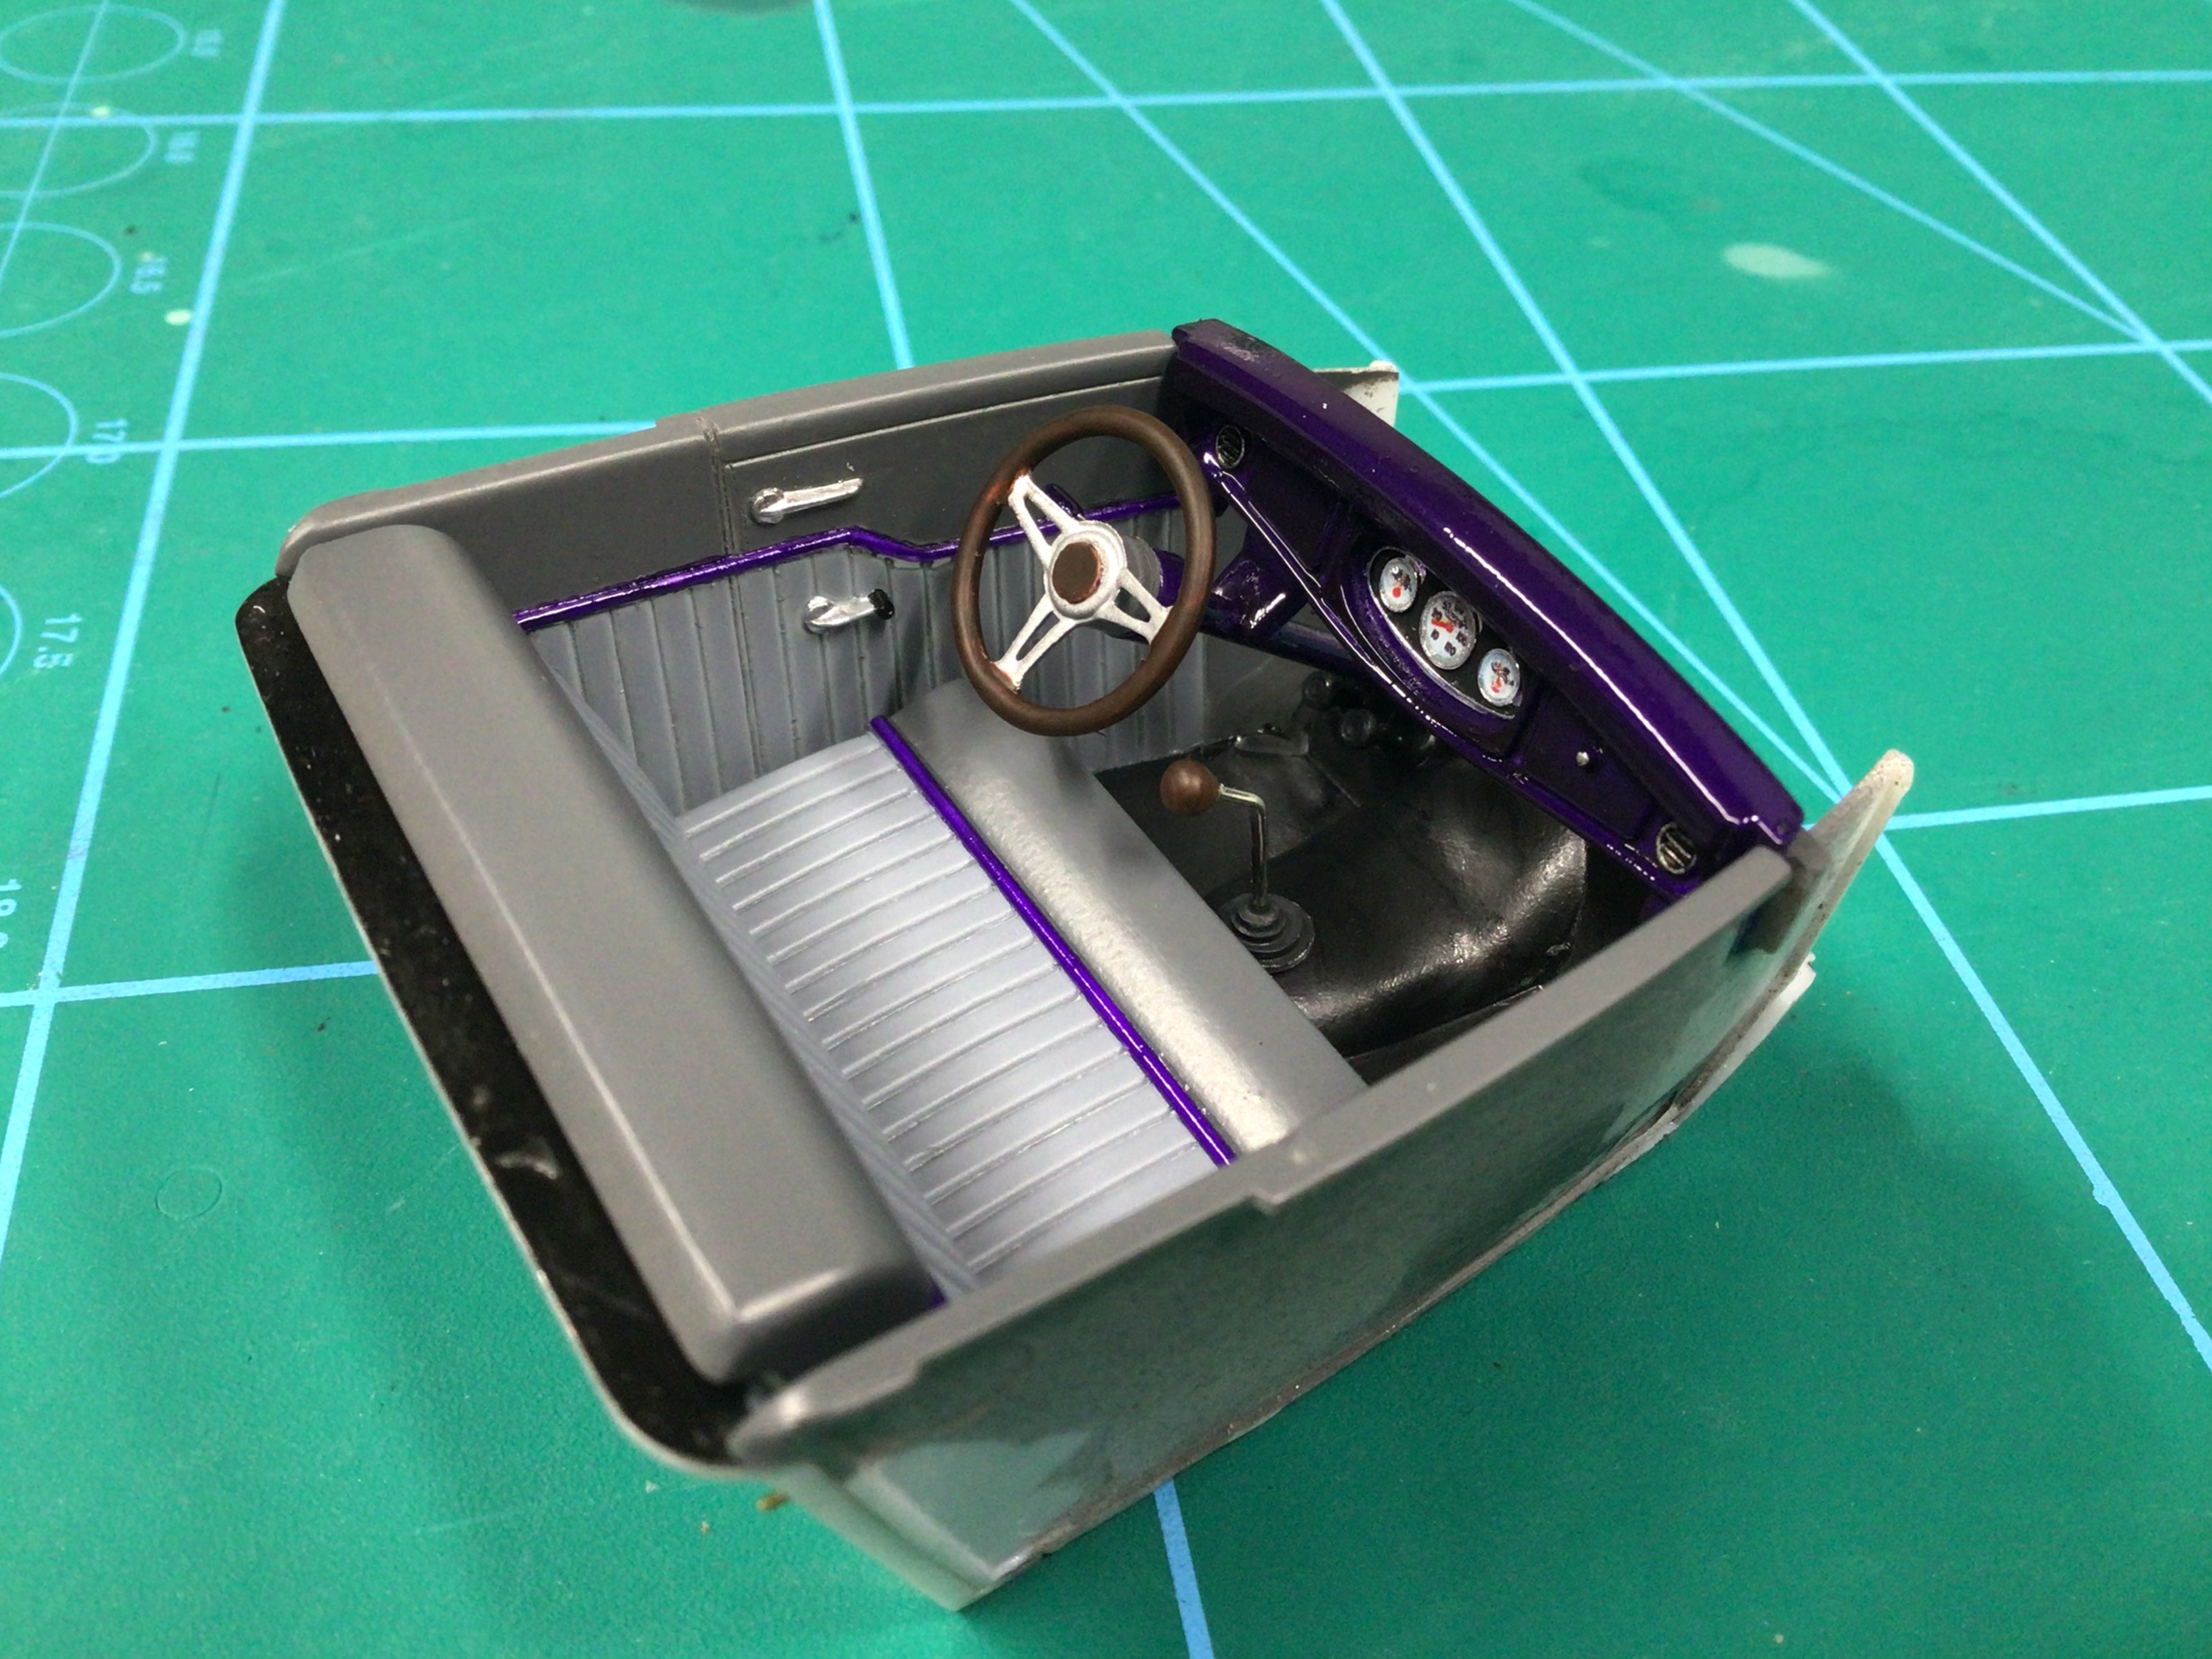
I finished the interior on my ‘32.
-
The paint looks beautiful Luke!?
-
The Neil Peart Collection, up for sale
NOBLNG replied to iamsuperdan's topic in General Automotive Talk (Trucks and Cars)
I’d love to have the Corvette or the Jag, but since I’m dreaming….the Corvette AND the Jag!? -
My Grand Cherokee
NOBLNG replied to heepey's topic in Model Trucks: Pickups, Vans, SUVs, Light Commercial
Nicely done! Those are great vehicles.? -
Nicely done! Wheels look great on it.?
-
They both look beautiful Helmut. That blue one has to be the smoothest brush job that I’ve ever seen!?
-
Beautifully done! And great photos too.?
-
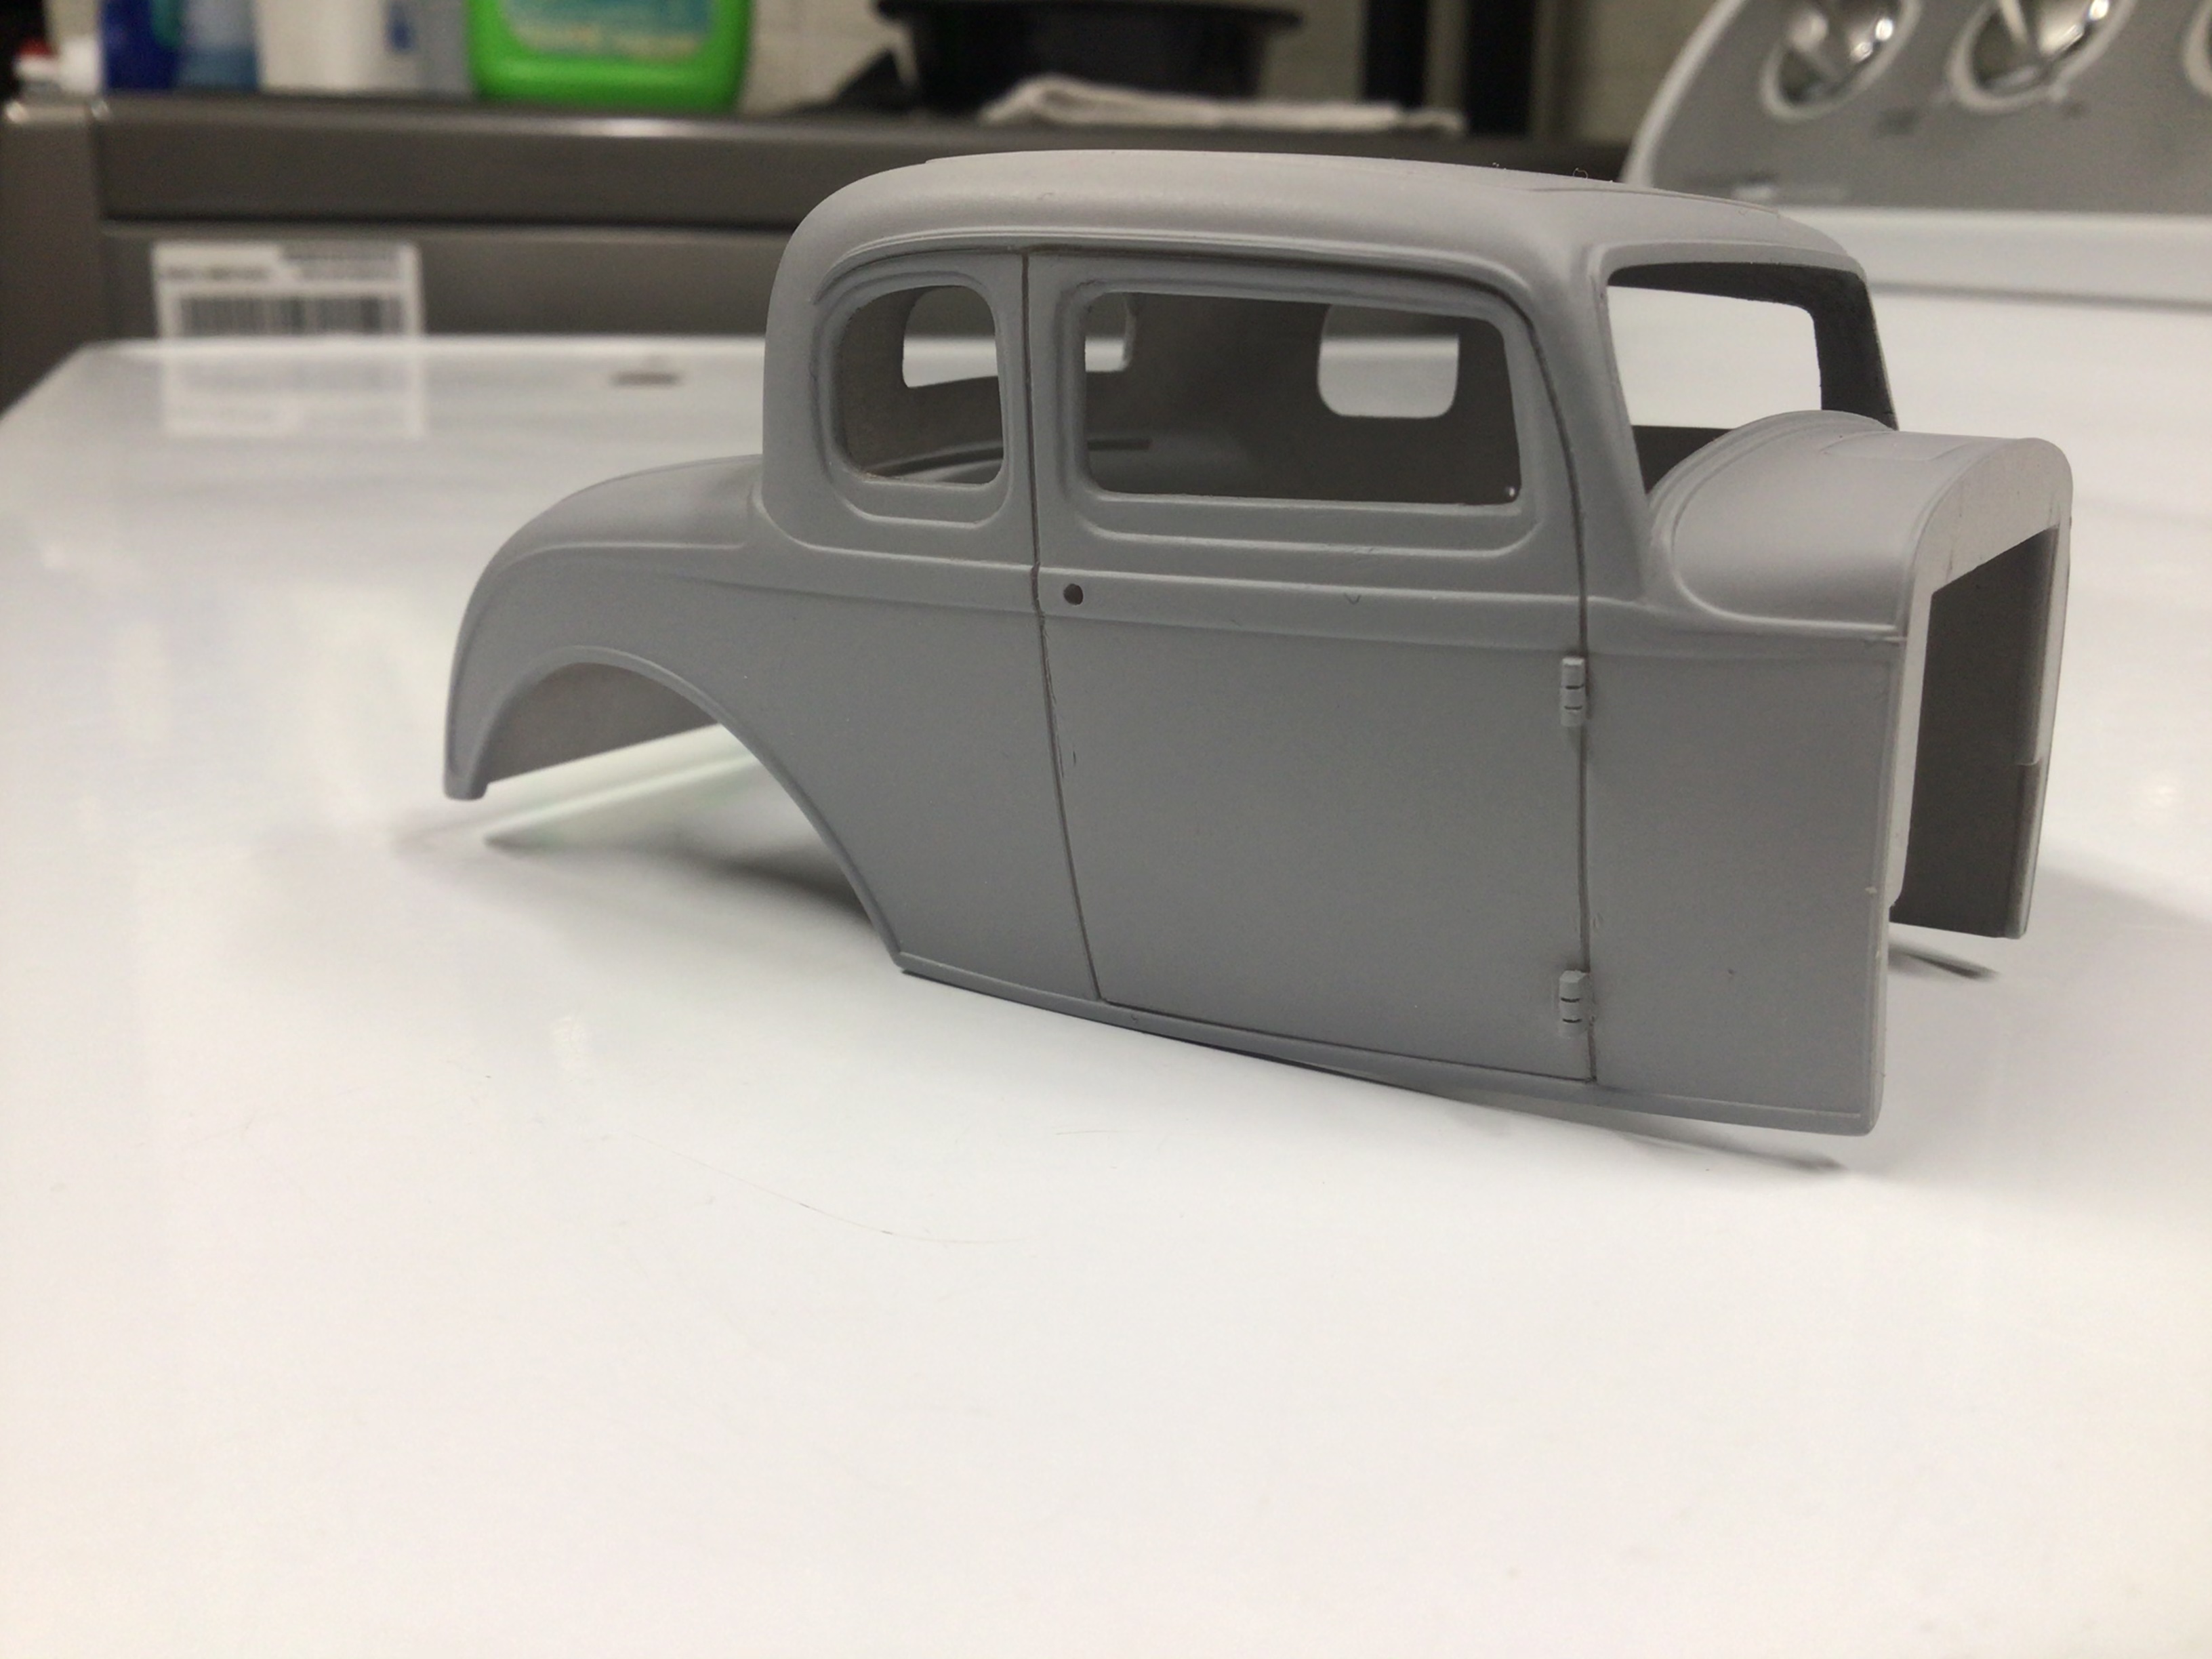
Nice job on the body work! And thanks for restoring the photos for us.?
-
It doesn’t look like you did. I think that would have destroyed the upper hinge? All your pillars seem to line up nicely! Nice sectioning job too! Any finished pics of it Mike?
-
Looks good! Way finer than the hacksaw would do. The width of the blade aids in making a straight cut.?
-
Looks like a nice clean chop to me! ? I too suffer from a lack of a concrete plan for most of my builds. Looking forward to seeing the developments.?
-
This sounds like a good rule of thumb. I think my chop was 3” or 3-1/2”. I’m not a big fan of the “hammered” look…I mostly want to get rid of the greenhouse look. Thx.
-
Excellent work all around. It looks much sleeker than original. Those pins for dash knobs is a terrific idea…consider it stolen!?
-
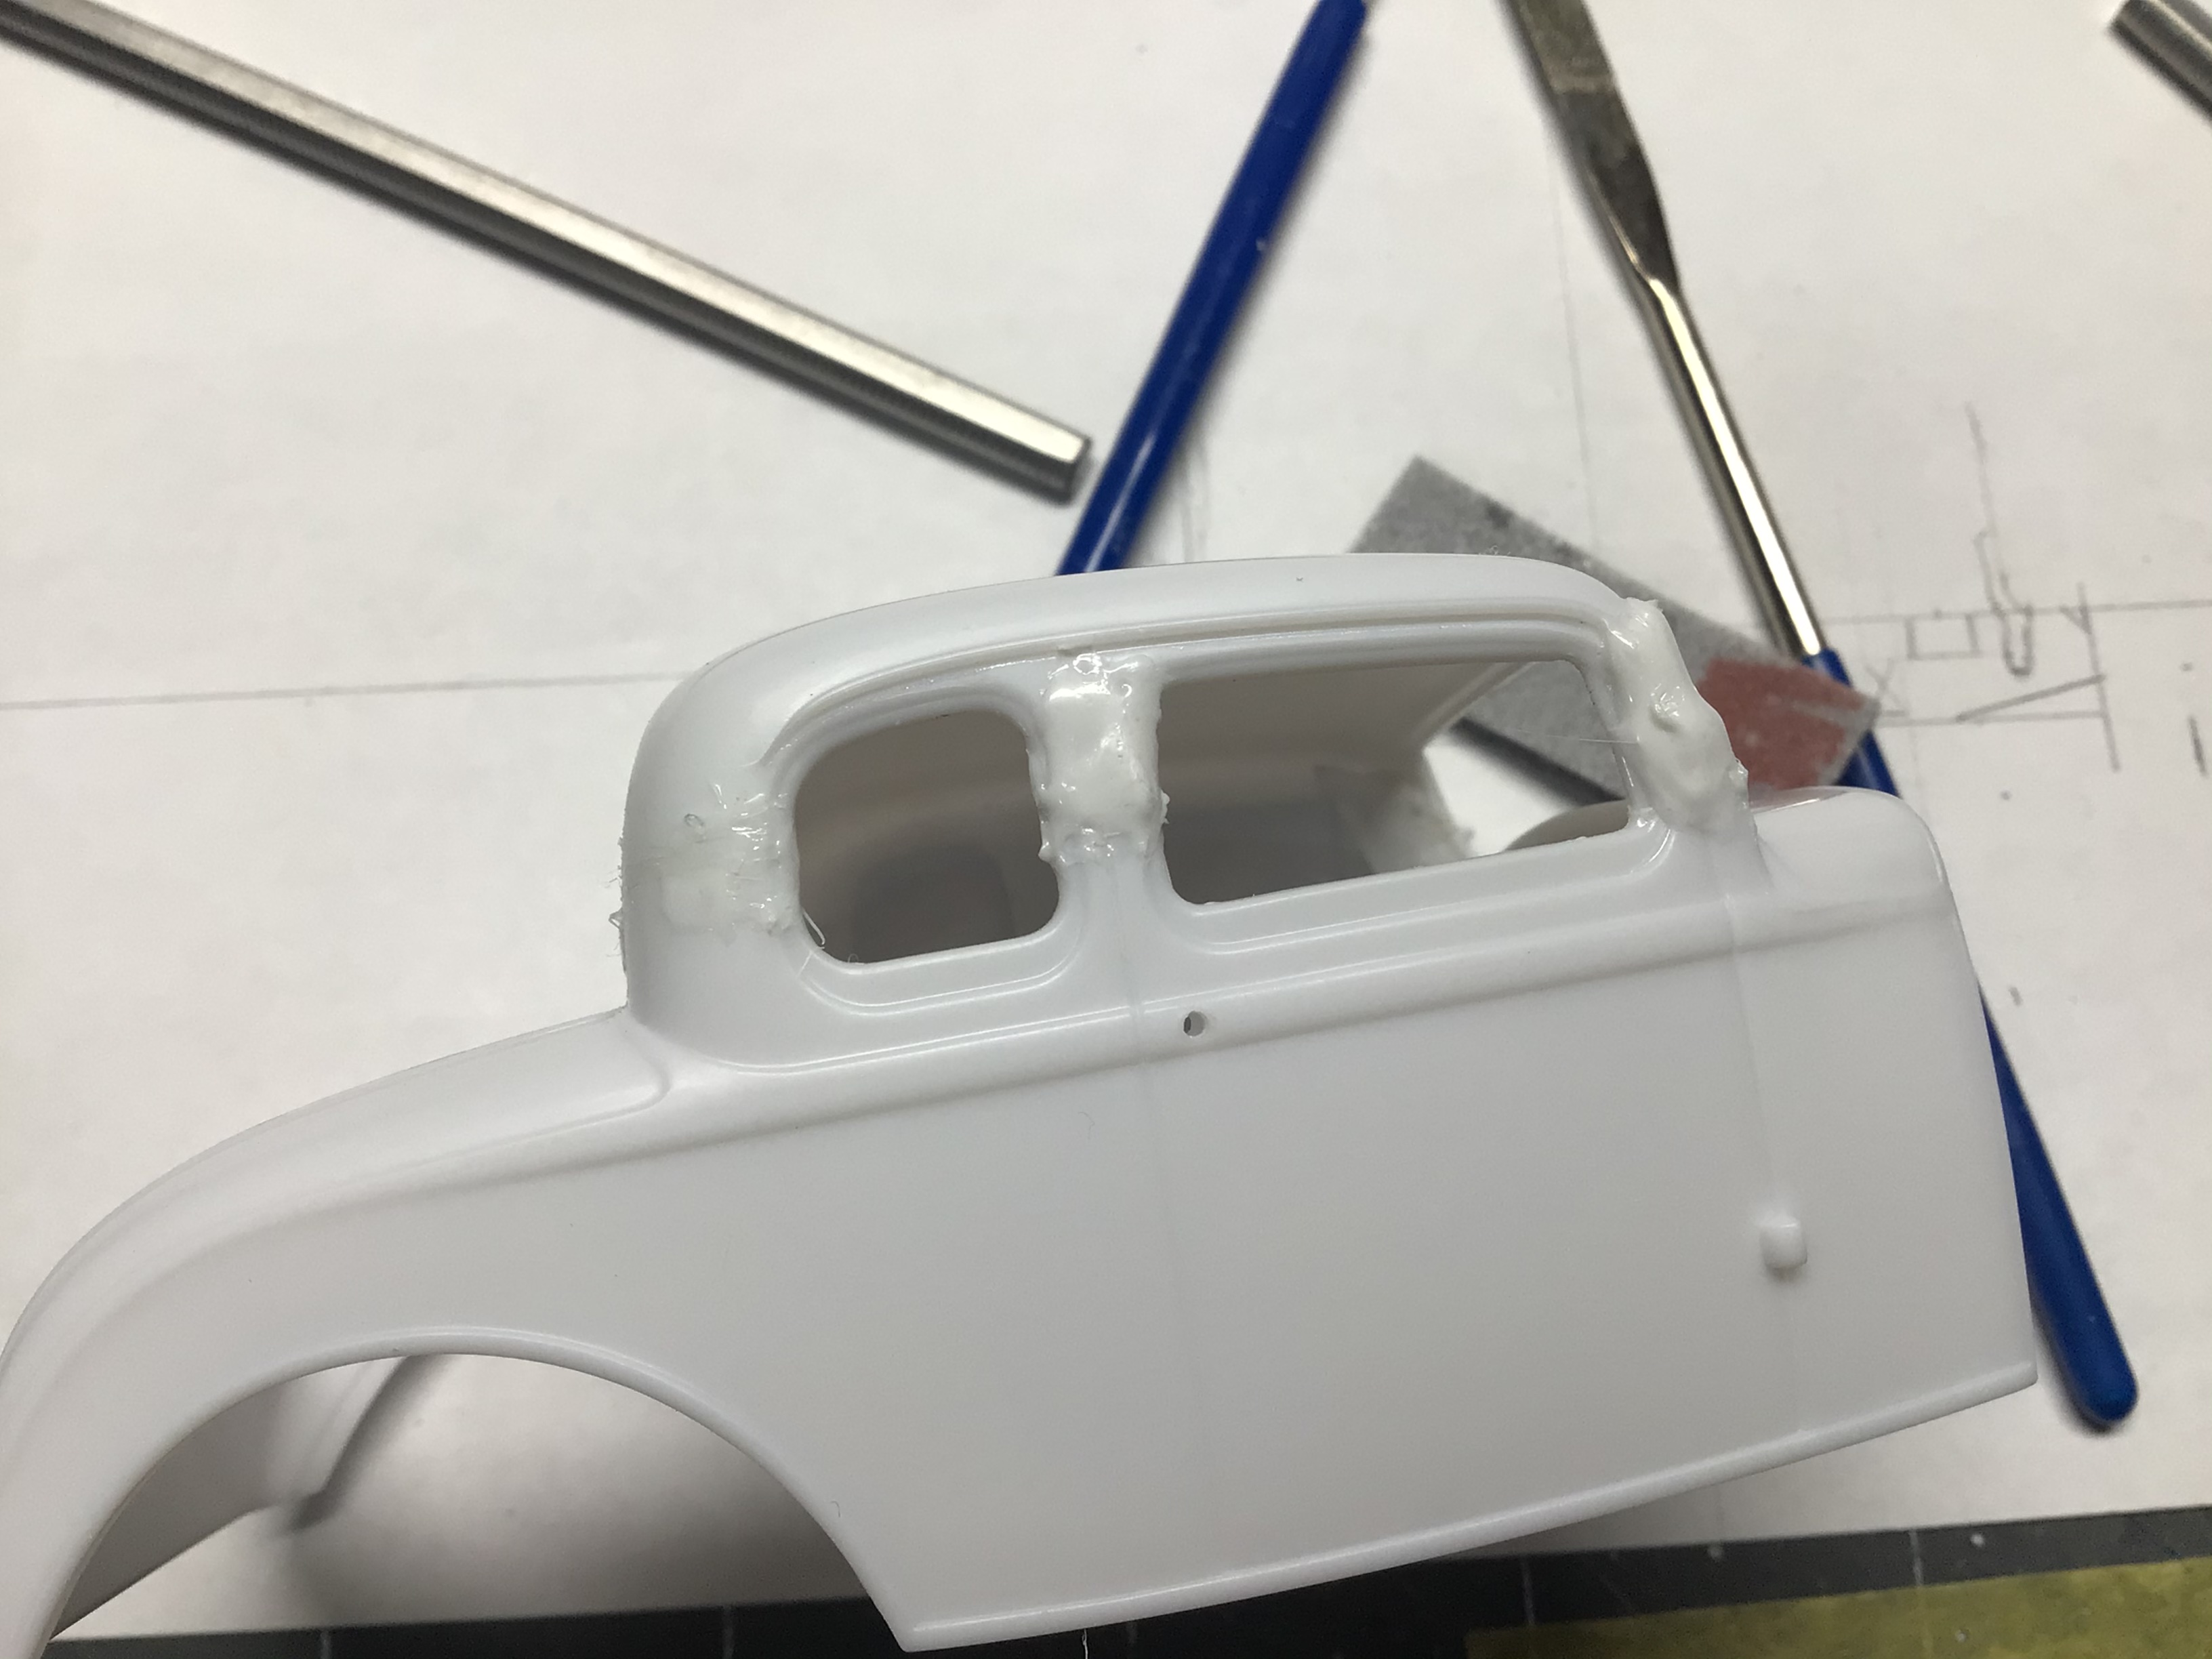
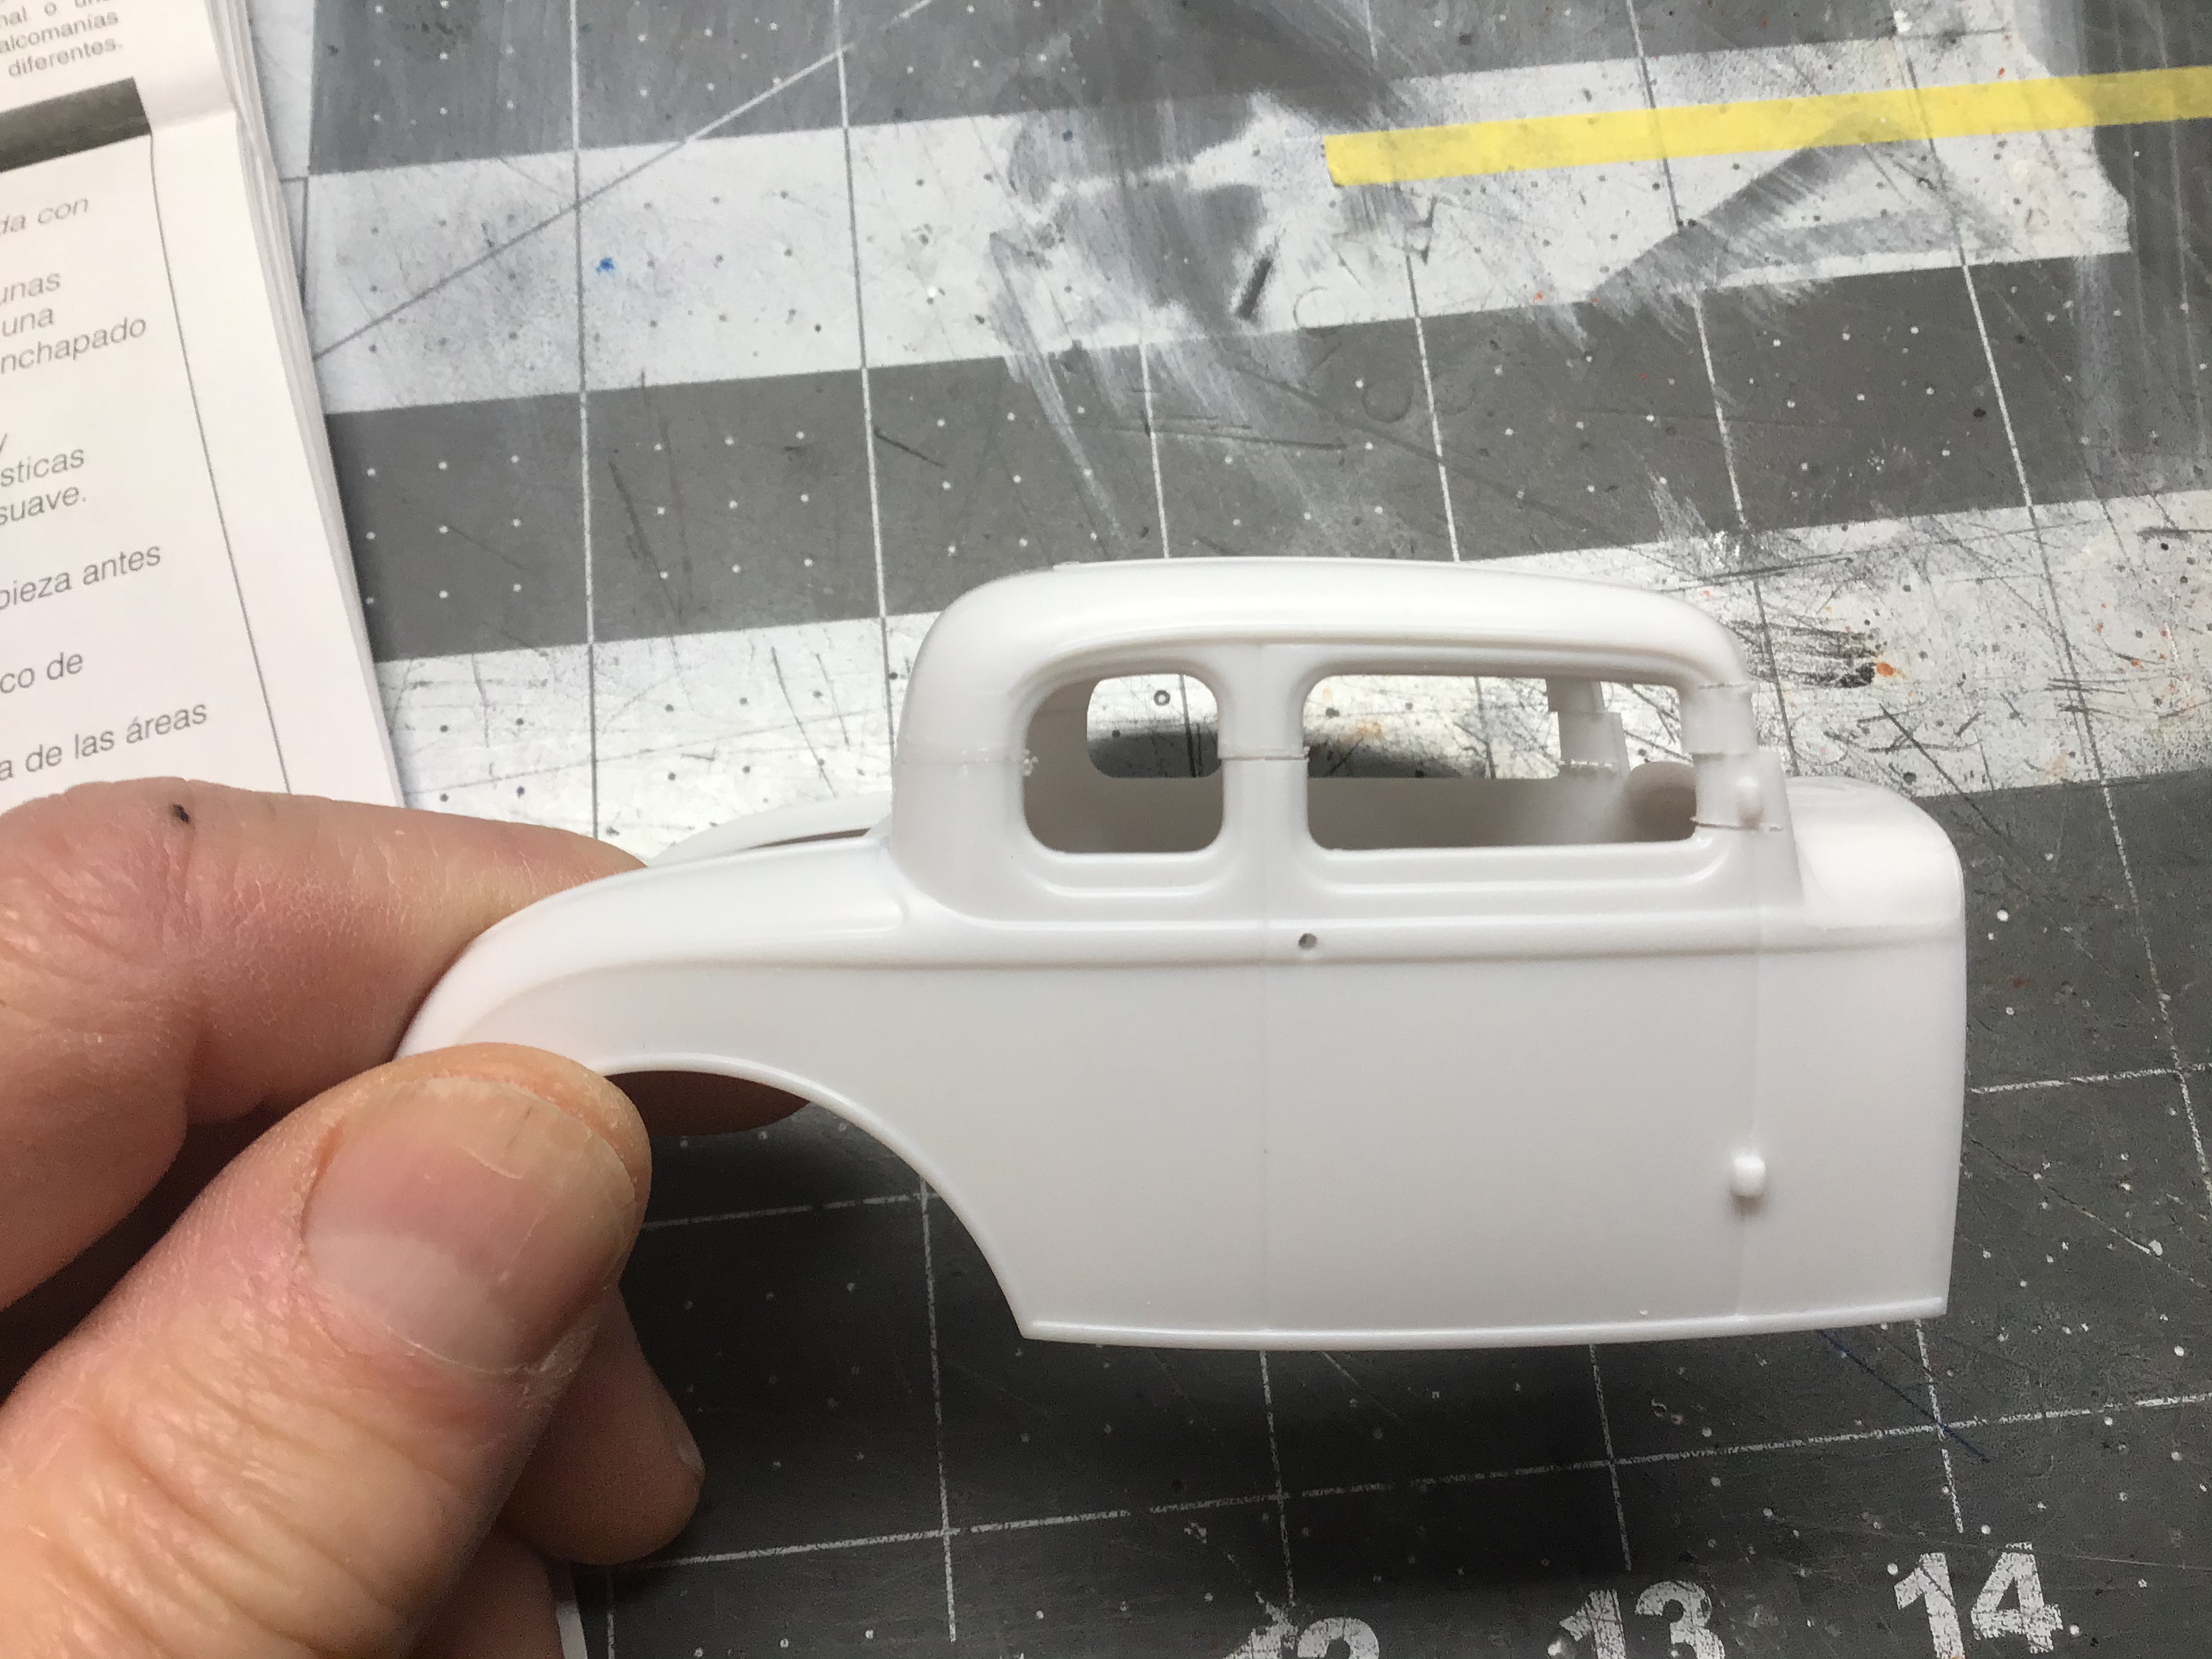
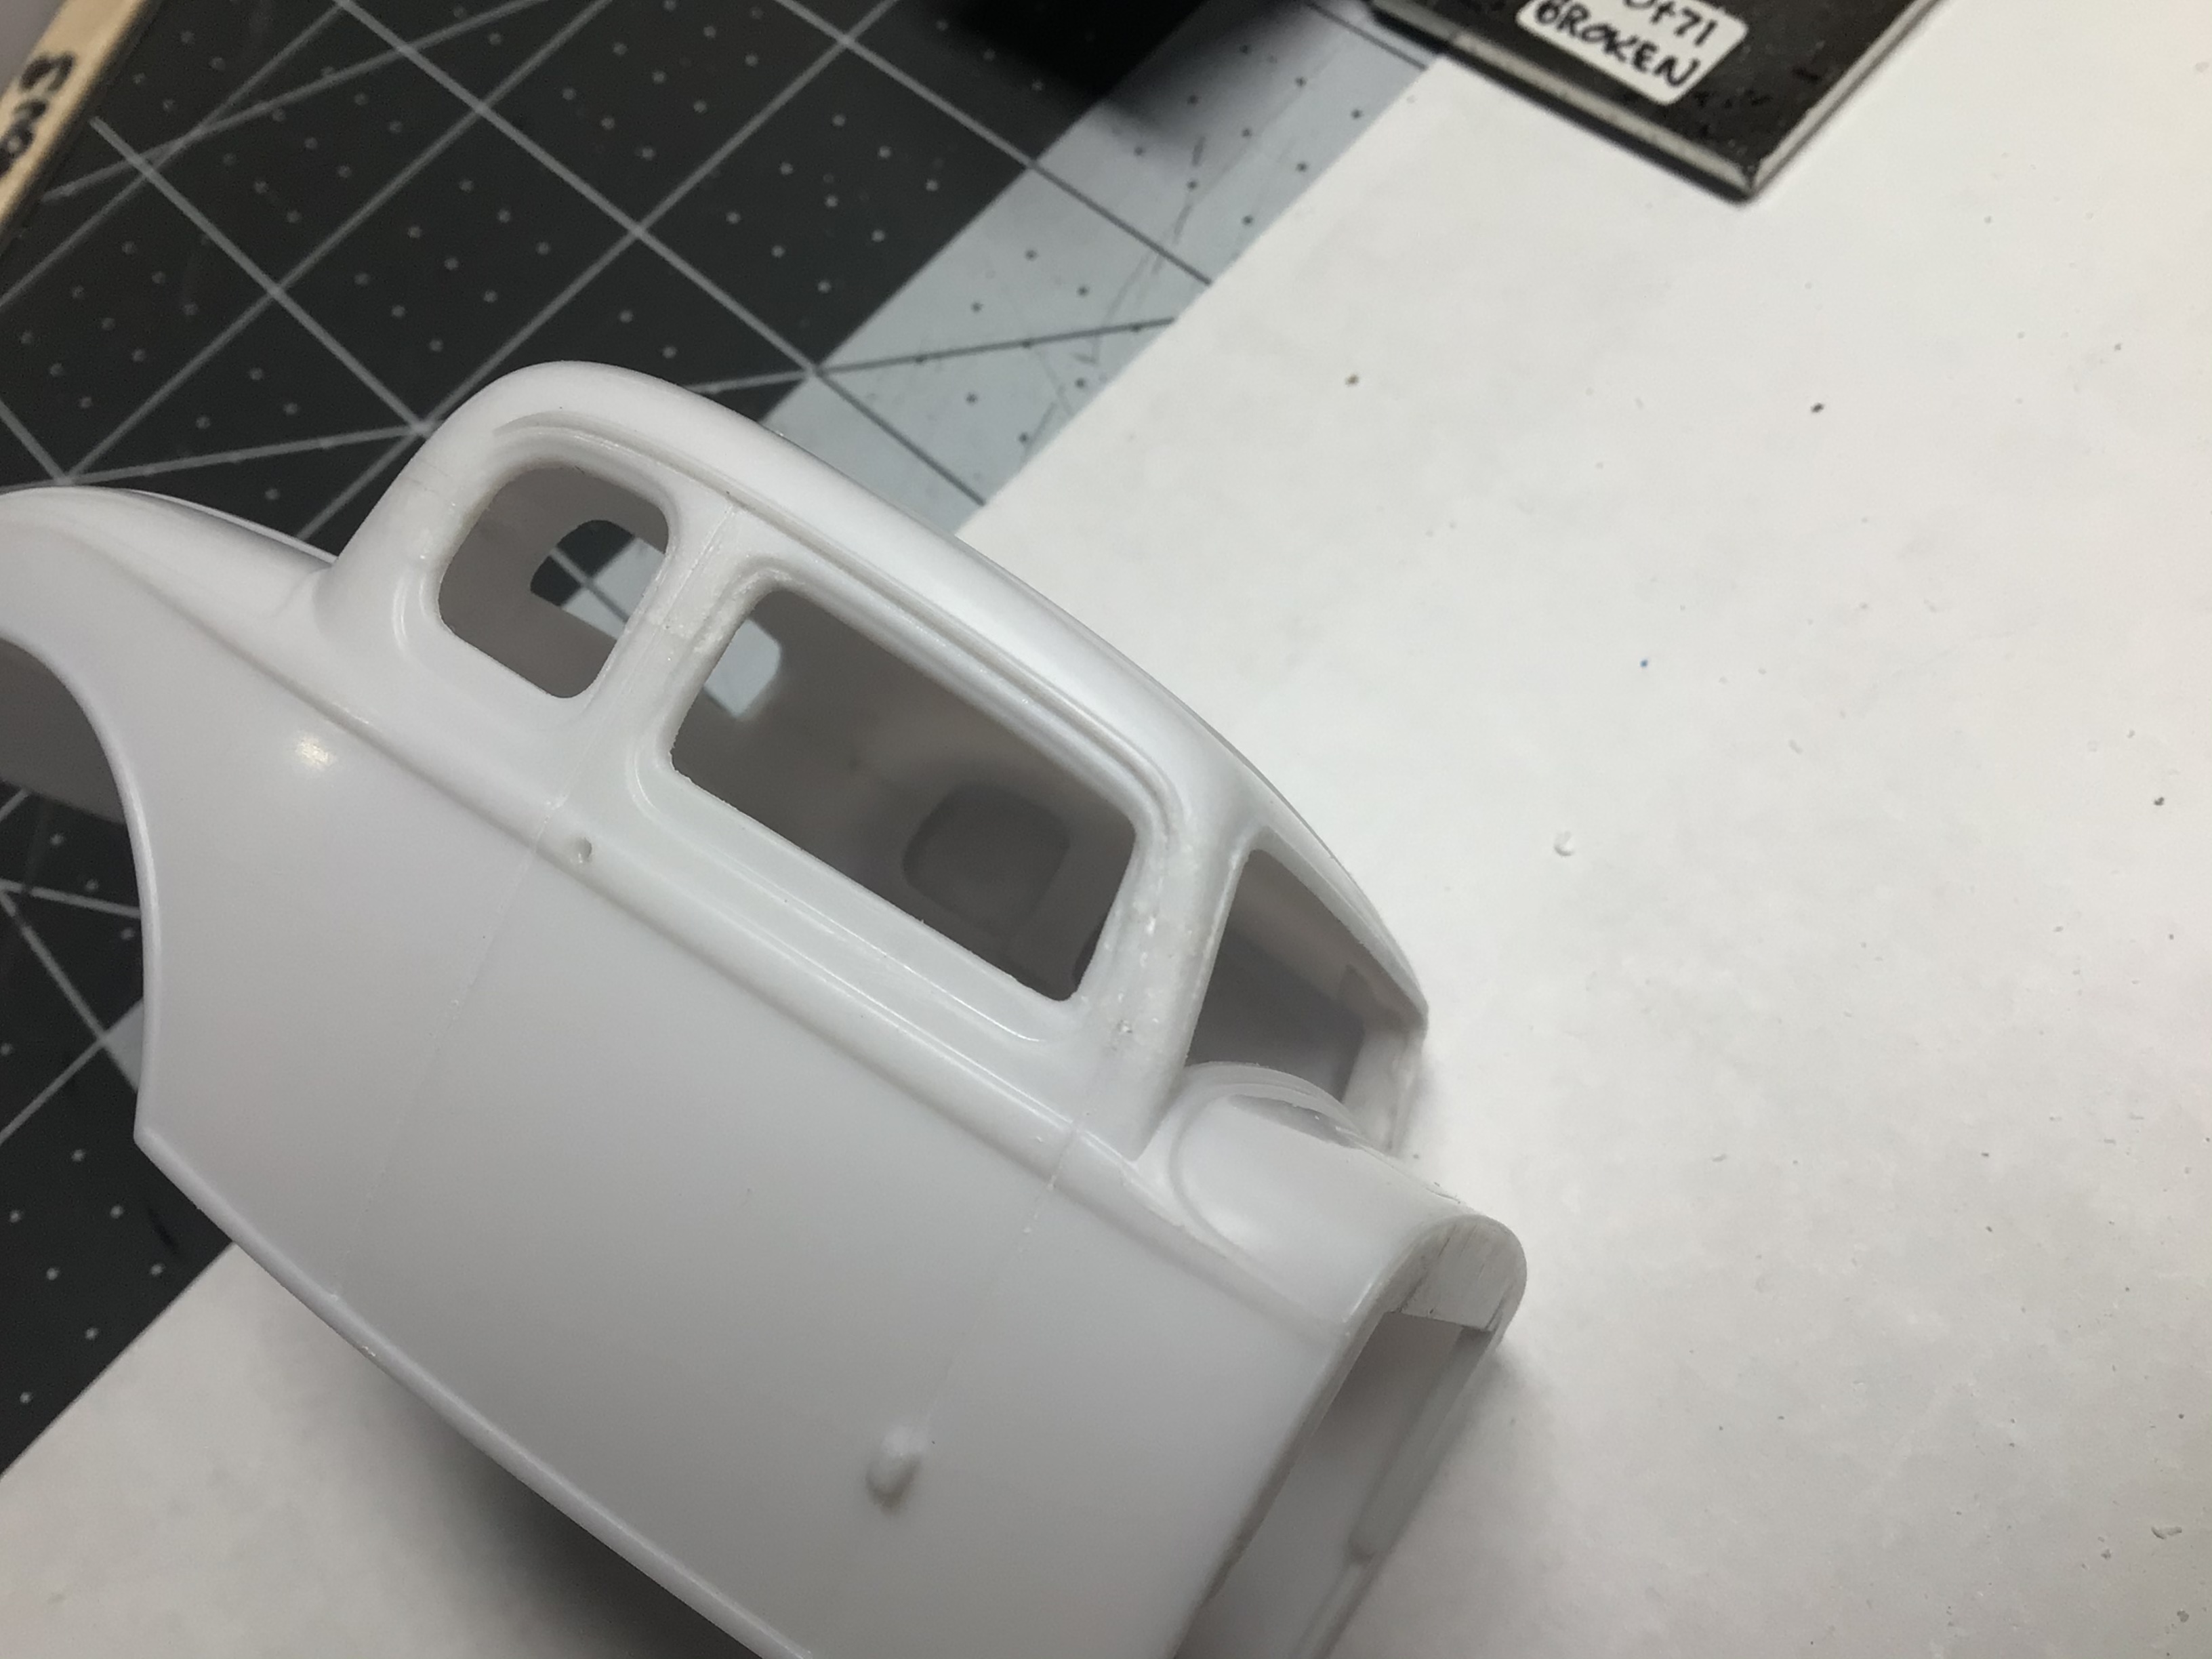
Thanks. This was my first ever chop and I aligned the rear section because I figured it would take a lot more filler to blend than the center post would. Next time I think I will cut just under the drip rail and move the top half of the B pillar back into alignment. Thanks, I am happy with the results, but I did slather on a bunch of sprue glue to blend and reshape the A pillar. My next chop will likely be the AMT ‘32 Vicky. I figure with careful cutting and filing the removed piece should fit back in snuggly with very little filler required.
-
When I chopped this ‘32 you can see how I tackled the A pillar. I have seen other chops with a section removed from the mid point as well. The problem I had was the huge mis-alignment that required leaning the top section foward and the lower section back to re-align them….which makes three cuts. I was not about to lengthen the roof! ? I figure on my next one, I will cut out the entire A pillar and then shorten and file the two ends to match the cut angles on the body and roof. Has anyone done it this way, or have a better idea yet?