NOBLNG
-
Posts
9,524 -
Joined
-
Last visited
Content Type
Profiles
Forums
Events
Gallery
Everything posted by NOBLNG
-
And if you’re not sure it’s ok for styrene, Do a test on some spare parts.
-
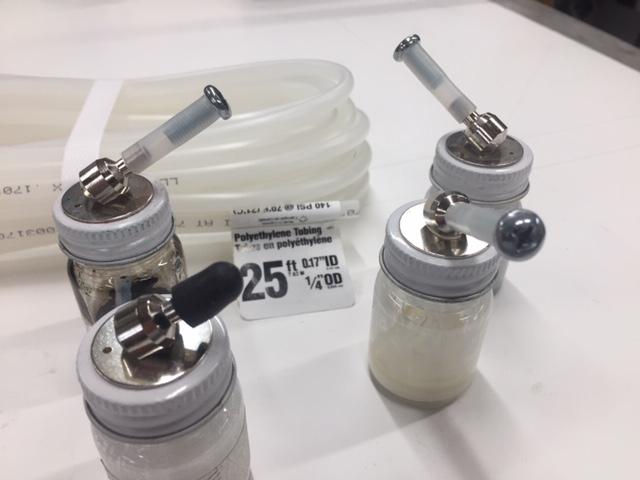
I made some caps for these Passche nozzles from .017” ID polyethylene tubing and a #12 machine screw. Incidentally, the Micheals bottles are a different thread than the Passche ones. However the smaller Passche bottles are the same treads as Model Master paints. FYI. And...I have enough tubing left over for a few more!?

-

Cleaning paint dust from models?
NOBLNG replied to PierreR89's topic in General Automotive Talk (Trucks and Cars)
Try a soft bristle toothbrush? To keep it from happening again, you could place a strip of TP on top of them while spraying. You should have plenty on hand by now, and you can always recycle it.? An ounce of prevention... -
As long as the playdoh doesn’t get eaten by the resin it should work. I did cast a couple headlight lens using Silly putty and bondic.
-
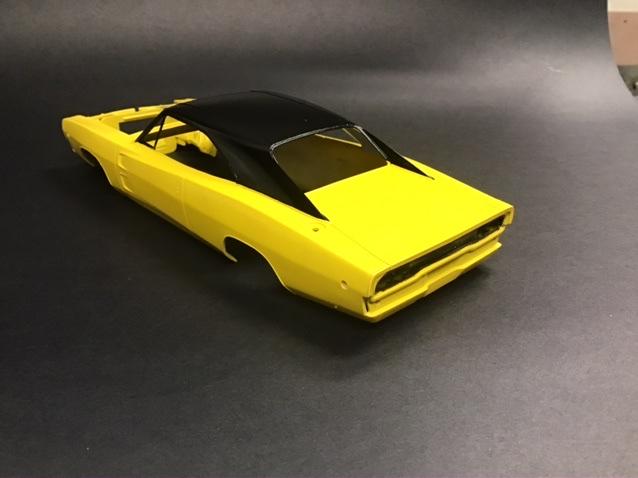
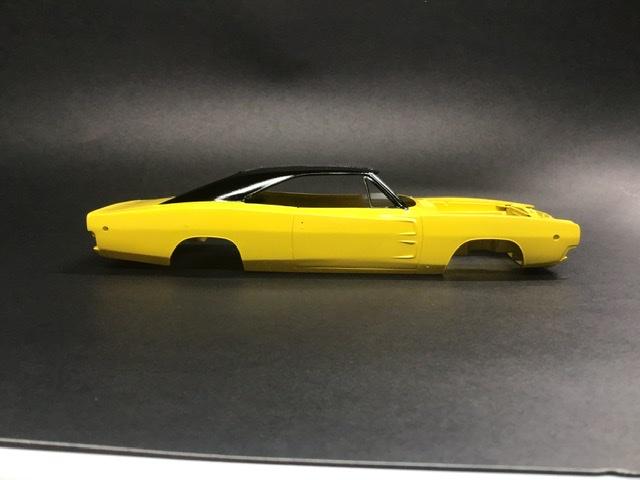
Got some paint on it.
-
Jay Leno and the Hemi Under Glass
NOBLNG replied to SCRWDRVR's topic in General Automotive Talk (Trucks and Cars)
Well Jay can scratch that one off his bucket list!? -
Sorry?. Yes, the chrome has to be scraped of for the glue to take hold. I like Tamiya paints. Laquers are more durable and dry quicker but the fumes are nasty! Priming is definitely required in my mind, especially on bodies. For glue, I mostly use Tamiya extra thin quick set for all close fitting joints. For slightly looser joints, good old Testors tube glue, but it dries real slow. Epoxy is another good choice for looser joints or joining dissimilar materials. A lot of guys like super glue, but I rarely use it. For starters, don’t try to achieve perfection, it will only discourage you.
-
Welcome. Yes, yes, yes, yes, and be patient! Someone will be along shortly to give you a better answer.?
-
She’s a beauty! Is that all Wicked Colors paint? What clear do you use over it?
-
That is a beautiful job!
-
Looking real nice! I love that red too.
-
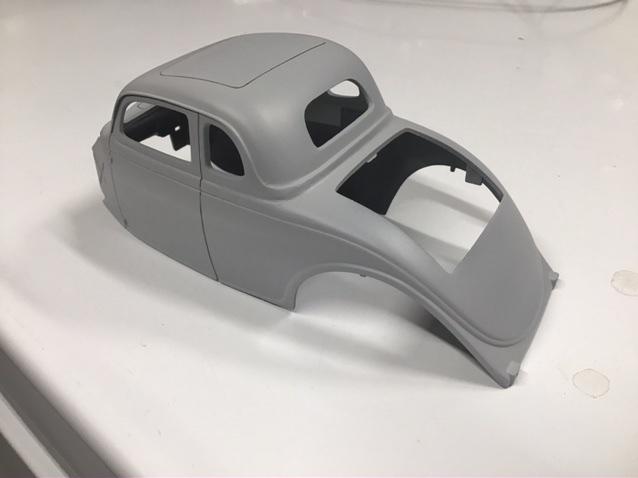
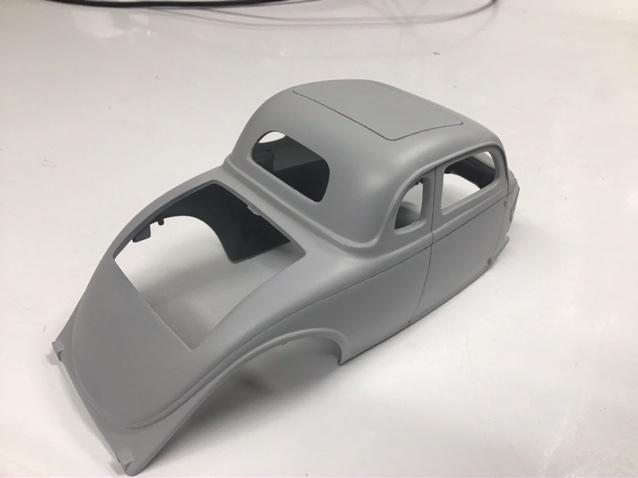
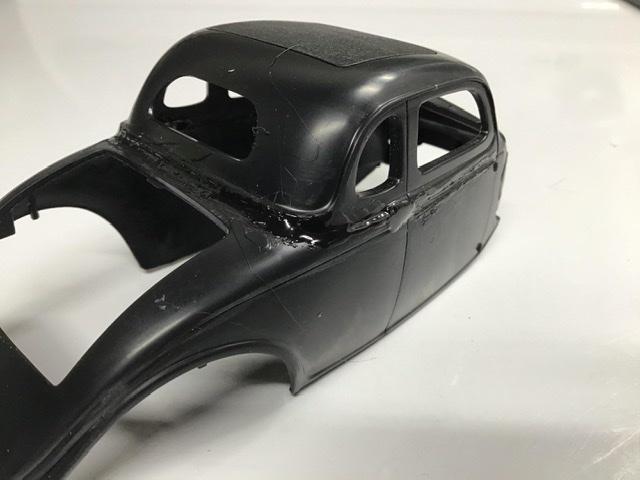
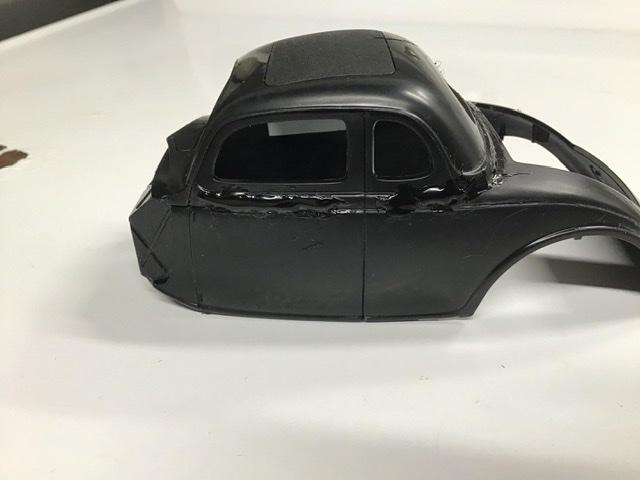
I primed the body for the Amt ‘36 ford. I hate black plastic! It’s very hard to see any flaws until a coat of primer goes on. I don’t know why they made the roof a separate part on this kit? That said, I think this body is shaping up nicely. The sprue glue I mixed up worked well.
-
I’ve never done a real wood one. Try typing this in google. “site:modelcarsmag.com wooden bed”
-
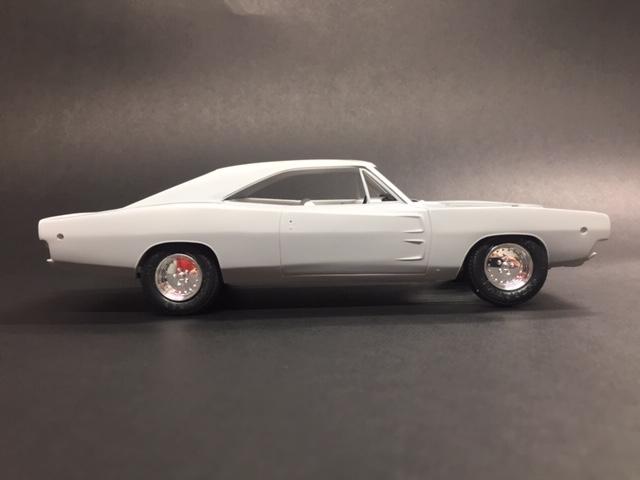
I found these centerlines and tires in my parts box. I don’t recall what they might be from, but I think they look OK. The kit tires always seem to look a bit small to me. I figured I better get the stance right before painting everything. I think I finally got it right in the third pic. Comments welcome.
-
Nice! I like that look!
-
Nice looking Camaro! Yes, putting the engine and subframe in last seems to be the trick for these cars.
-
Boy, that thought has crossed my mind a number of times over the years! Thankfully 99.9% of the time I take a break and re-think that scenario. ?
-
Does everyone have a portal to another dimension on or near their work bench, or is it just me? I pryed off a part with my hobby knife that I had incorrectly installed and when it “popped” off, I heard it hit the inside corner of my workspace then.....? I hope whoever is on the other side sends it back soon!?
-
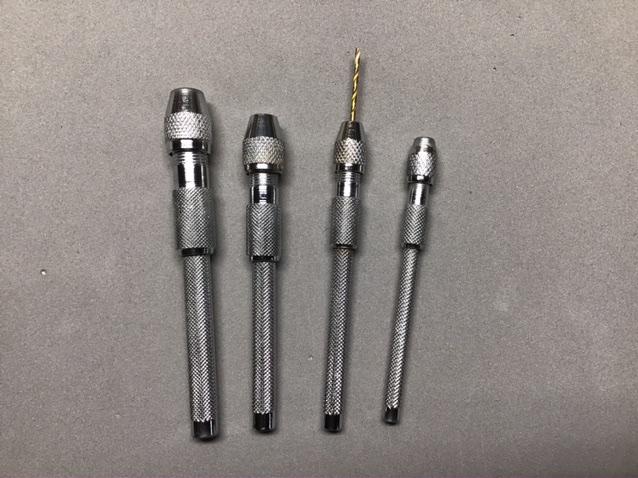
Those look really nice! I bought a cheap set of chinese(?) ones from my local hobby shop. Only one holds the bit straight and they are all poorly threaded and hard to tighten.
-
Interesting colour combo.
-
Cool!?
-
Looking good so far Tom! I separated the front subframe/engine section and glued it in place after the tub and floorpan were in place.
-
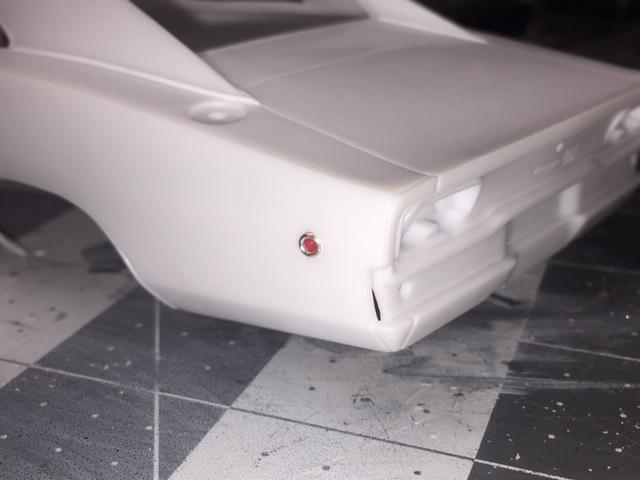
Thanks all. The lens fit quite loose actually but the bezel will cover it. And by all means, feel free to steal it...I’d be honoured! ? Maybe I should have put this in the tips and tricks section.
-
Thanks. Beats the heck out of the decals I think!
-
Get a model tow truck and start your own wrecking yard!?