NOBLNG
-
Posts
10,233 -
Joined
-
Last visited
Content Type
Profiles
Forums
Events
Gallery
Everything posted by NOBLNG
-
Watching this video
-
Batteries! I was rummaging through all my open boxes looking for a good donor battery. What’s with these things? These are all from 1/25th scale AMT kits. L-R...’69 Mach One, ‘55 Cameo p/u, and ‘56 T-Bird. The middle one is the best scale, but the detail is only so-so. I haven’t found anything better in the Revell kits...some are even moulded in place lumps! ?

-
I’m not a religious man, but you have my best wishes Carl!
-
I agree. It’s looking real nice.
-
I have recently started using the Bob Smith Industries variety also and really like it. I use mostly the medium thickness and have had great luck with it and kicker. The thin stuff usually winds up on my fingers.? I have some home-made glue loopers that I now have to dip into the bottle of thin stuff when I need to use it. The nozzle is hopelessly plugged solid with dried glue.
-

misinformation on the web.
NOBLNG replied to thomascoffey1959@gmail.com's topic in The Off-Topic Lounge
I am amazed at the wealth of information on this site. Correct answers to some pretty obscure questions can be found here. Alternately, I like to search out dedicated forums for a certain model of car for accurate info. Any bad info is usually corrected by the more knowledgeable members. I find that much more fruitful than just plugging my question into a search engine. -
The thin stuff sets real quick...too quick sometimes. So it seems best if possible to position the parts and then flow the glue into the joint. However, if the parts have a sloppy fit then medium or thick is needed and that seems to take forever to set up. That is when I like to use the kicker.
-
I have not had a lot of experience with CA, but since I’ve started working with resin, I’ve had to use it more often. So... 1)Does it stick to paint? I know any solvent type glue has to have the joints devoid of coatings in order to bond. 2)Does the “kicker” weaker the bond over just letting it dry naturally?
-
misinformation on the web.
NOBLNG replied to thomascoffey1959@gmail.com's topic in The Off-Topic Lounge
My number one rule for searching anything on the internet is...Do Not believe the first thing you see! Multiple searches are always required. And with photoshop type apps out there, seeing is no longer believing. -
Thanks for the link keyser! I didn’t know that existed. I will keep my eyes open.
-
This is my summer ride. I wish someone had made a kit of this NC (third generation) MX-5. The only ones I have seen are the NA’s and ND’s.
-
Make a blank out of sheet or rectangle evergreen and file it to shape. Alternately you could glue some half- round to some rectangle to get an oblong shape...add end plates if you like. Then drill the ends and add your tubing sleeve or exhaust pipes.
-
Wow Dann! That is quite the imagination you have. Thankfully you have the talents to bring it out of your head and onto the table so that the rest of us can see and enjoy it. Kudos!?
-
Looks real nice there John! Very clean.?
-
Revell 66 Suburban Ambulance
NOBLNG replied to BIGTRUCK's topic in WIP: Model Trucks: Pickups, Vans, SUVs, Light Commercial
Congrats on retirement!? Nice looking project too. -
I have used BMF and I have used Molotow to coat the bucket.
-
I got the MX-5 out today, took it to the carwash and asked the wife if she wanted to go for a ride (YES!). After a while I noticed the heel on my clutch foot was getting hung up....I figured maybe the sole of my shoe was peeling? After a while I reached down to see what I could determine. Well, likely at the carwash I must have stepped in somebody’s used chewing gum, and it was now smeared all over my heel and the floor mat....Yuck!?? Luckily I have Weather tech floor mats in there and not carpeted ones. A good scraping and some laquer thinner managed to clean it up fairly well.
-
He was likely trying to use it to hold those ears back.
-
Cut a chunk of the chrome sprue off and soak it. Then you will know if it does or doesn’t work.
-
That is starting to look really cool!
-
They sure had some different looking vehicles.
-
The Ugliest Corvette Ever?
NOBLNG replied to stavanzer's topic in General Automotive Talk (Trucks and Cars)
Just when you think you’ve seen it all...?. -
Nice! Can’t wait to see the finished product.?
-
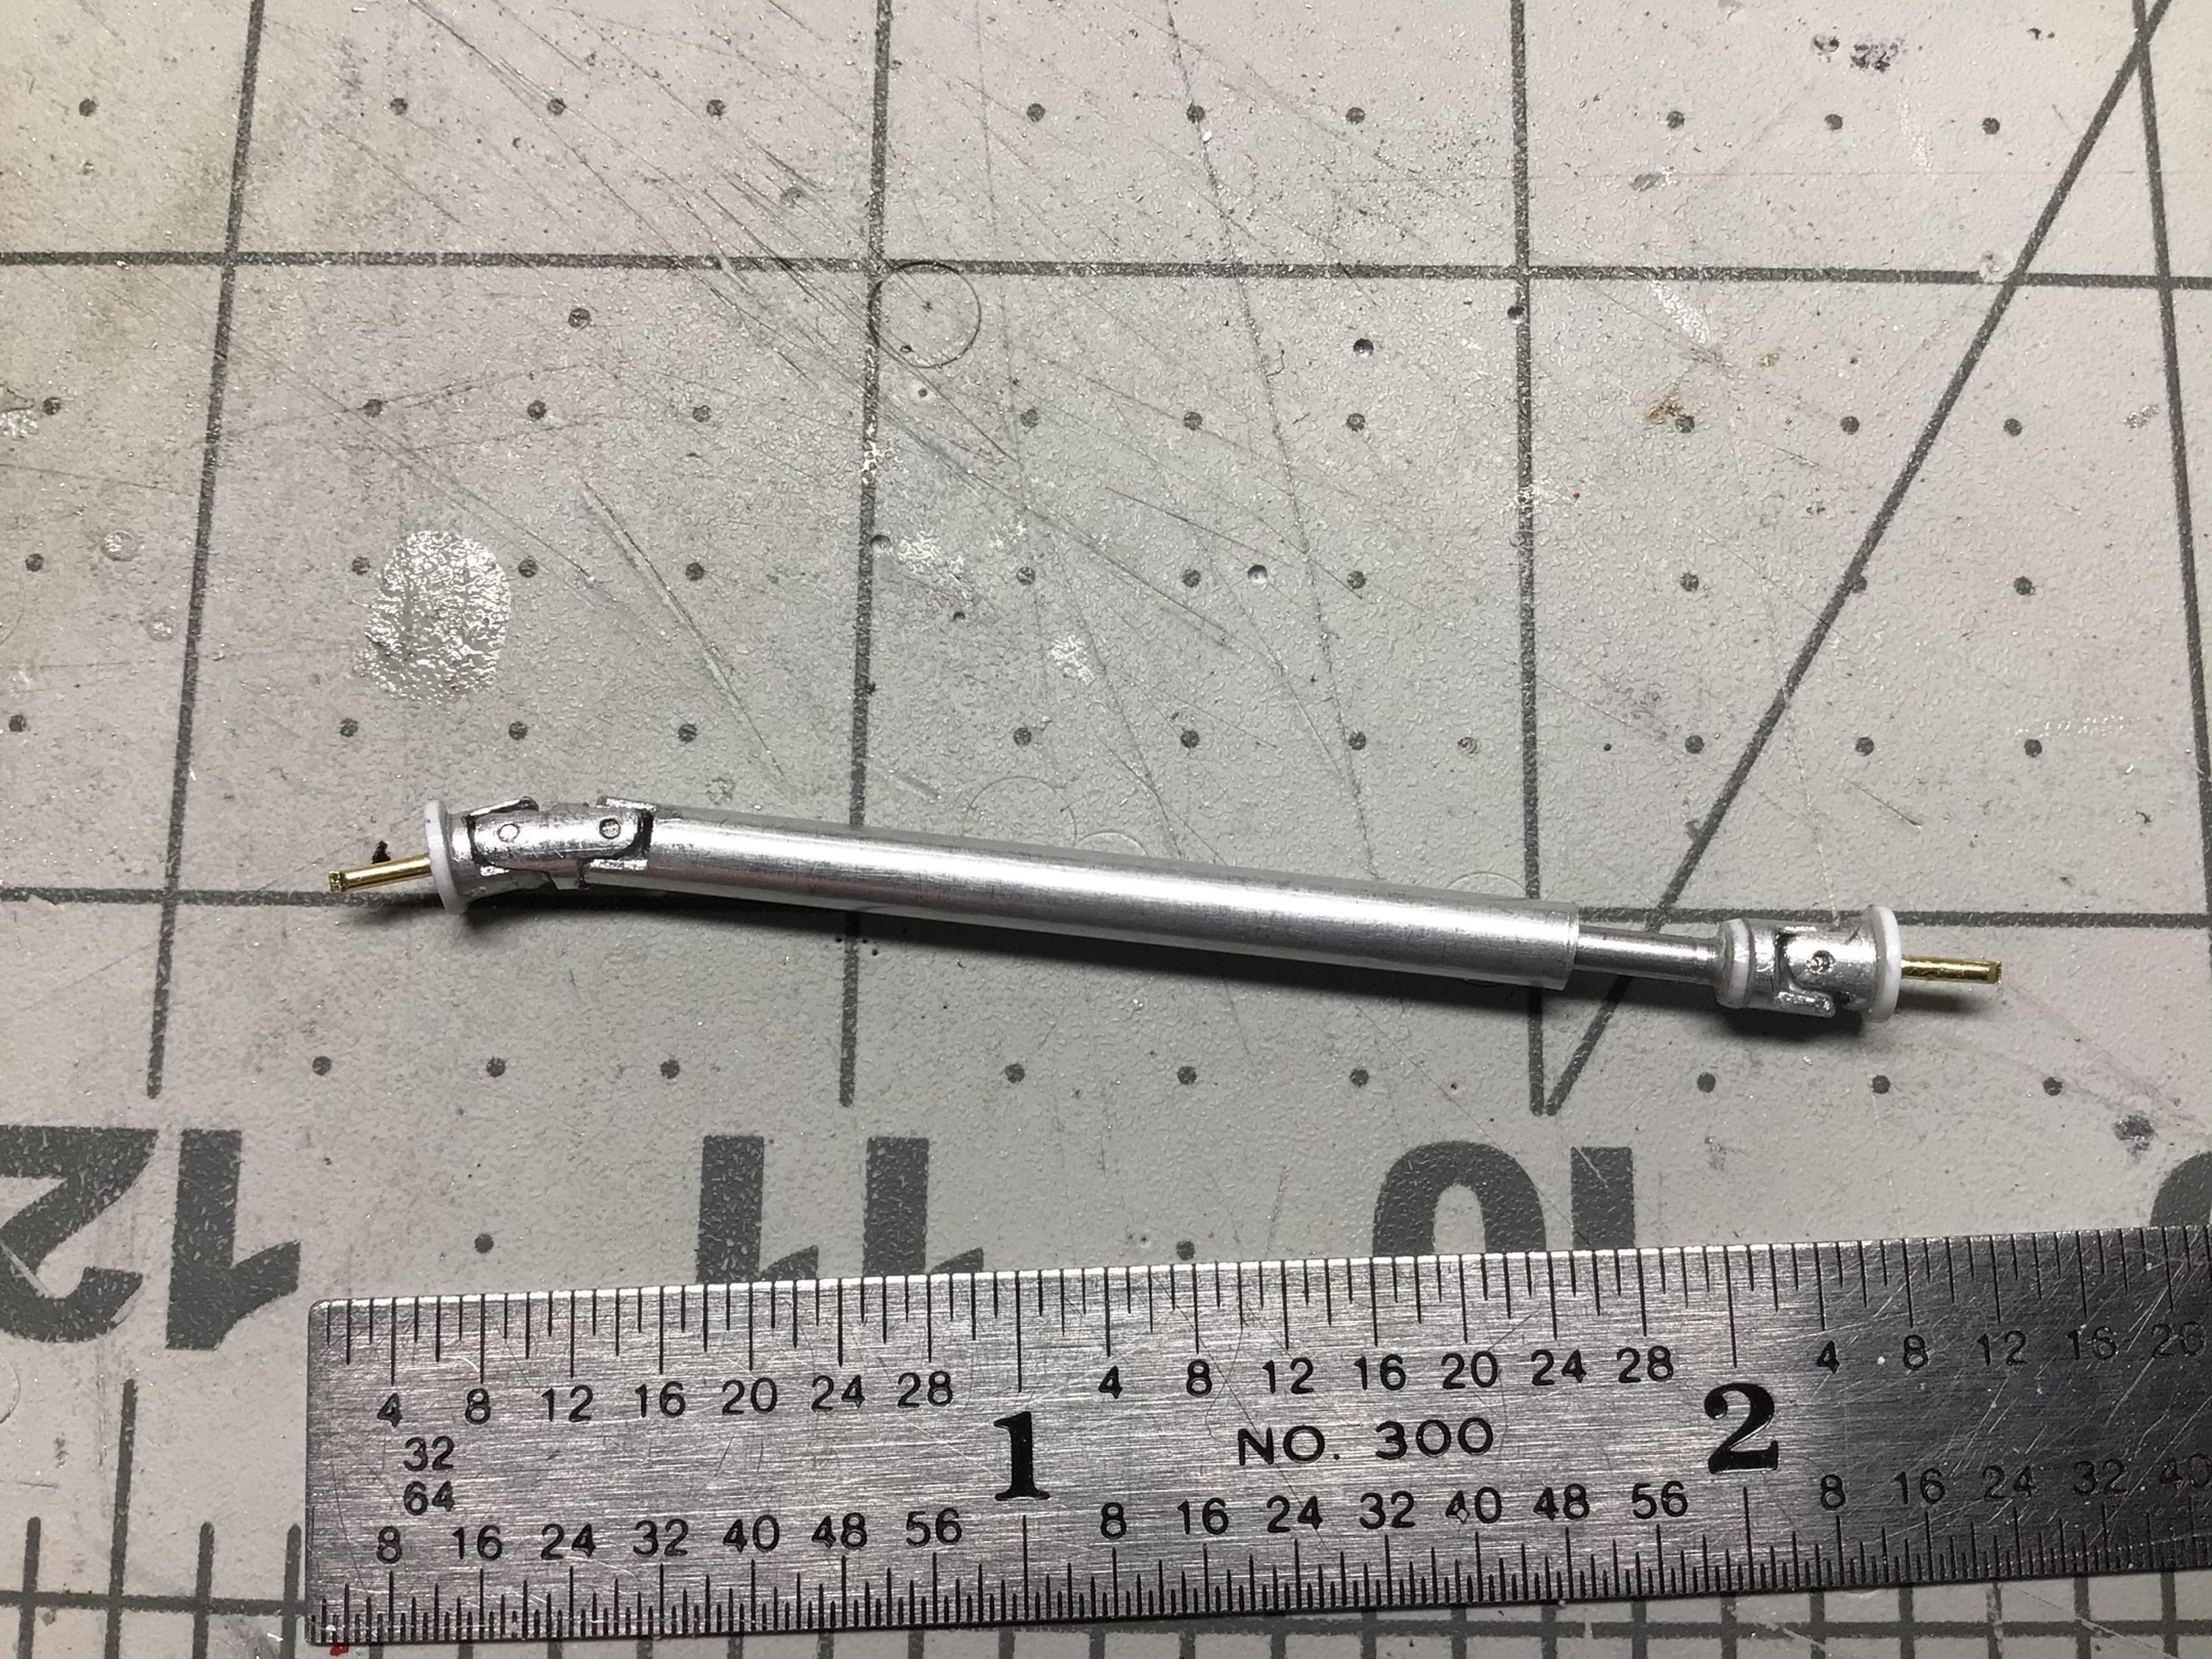
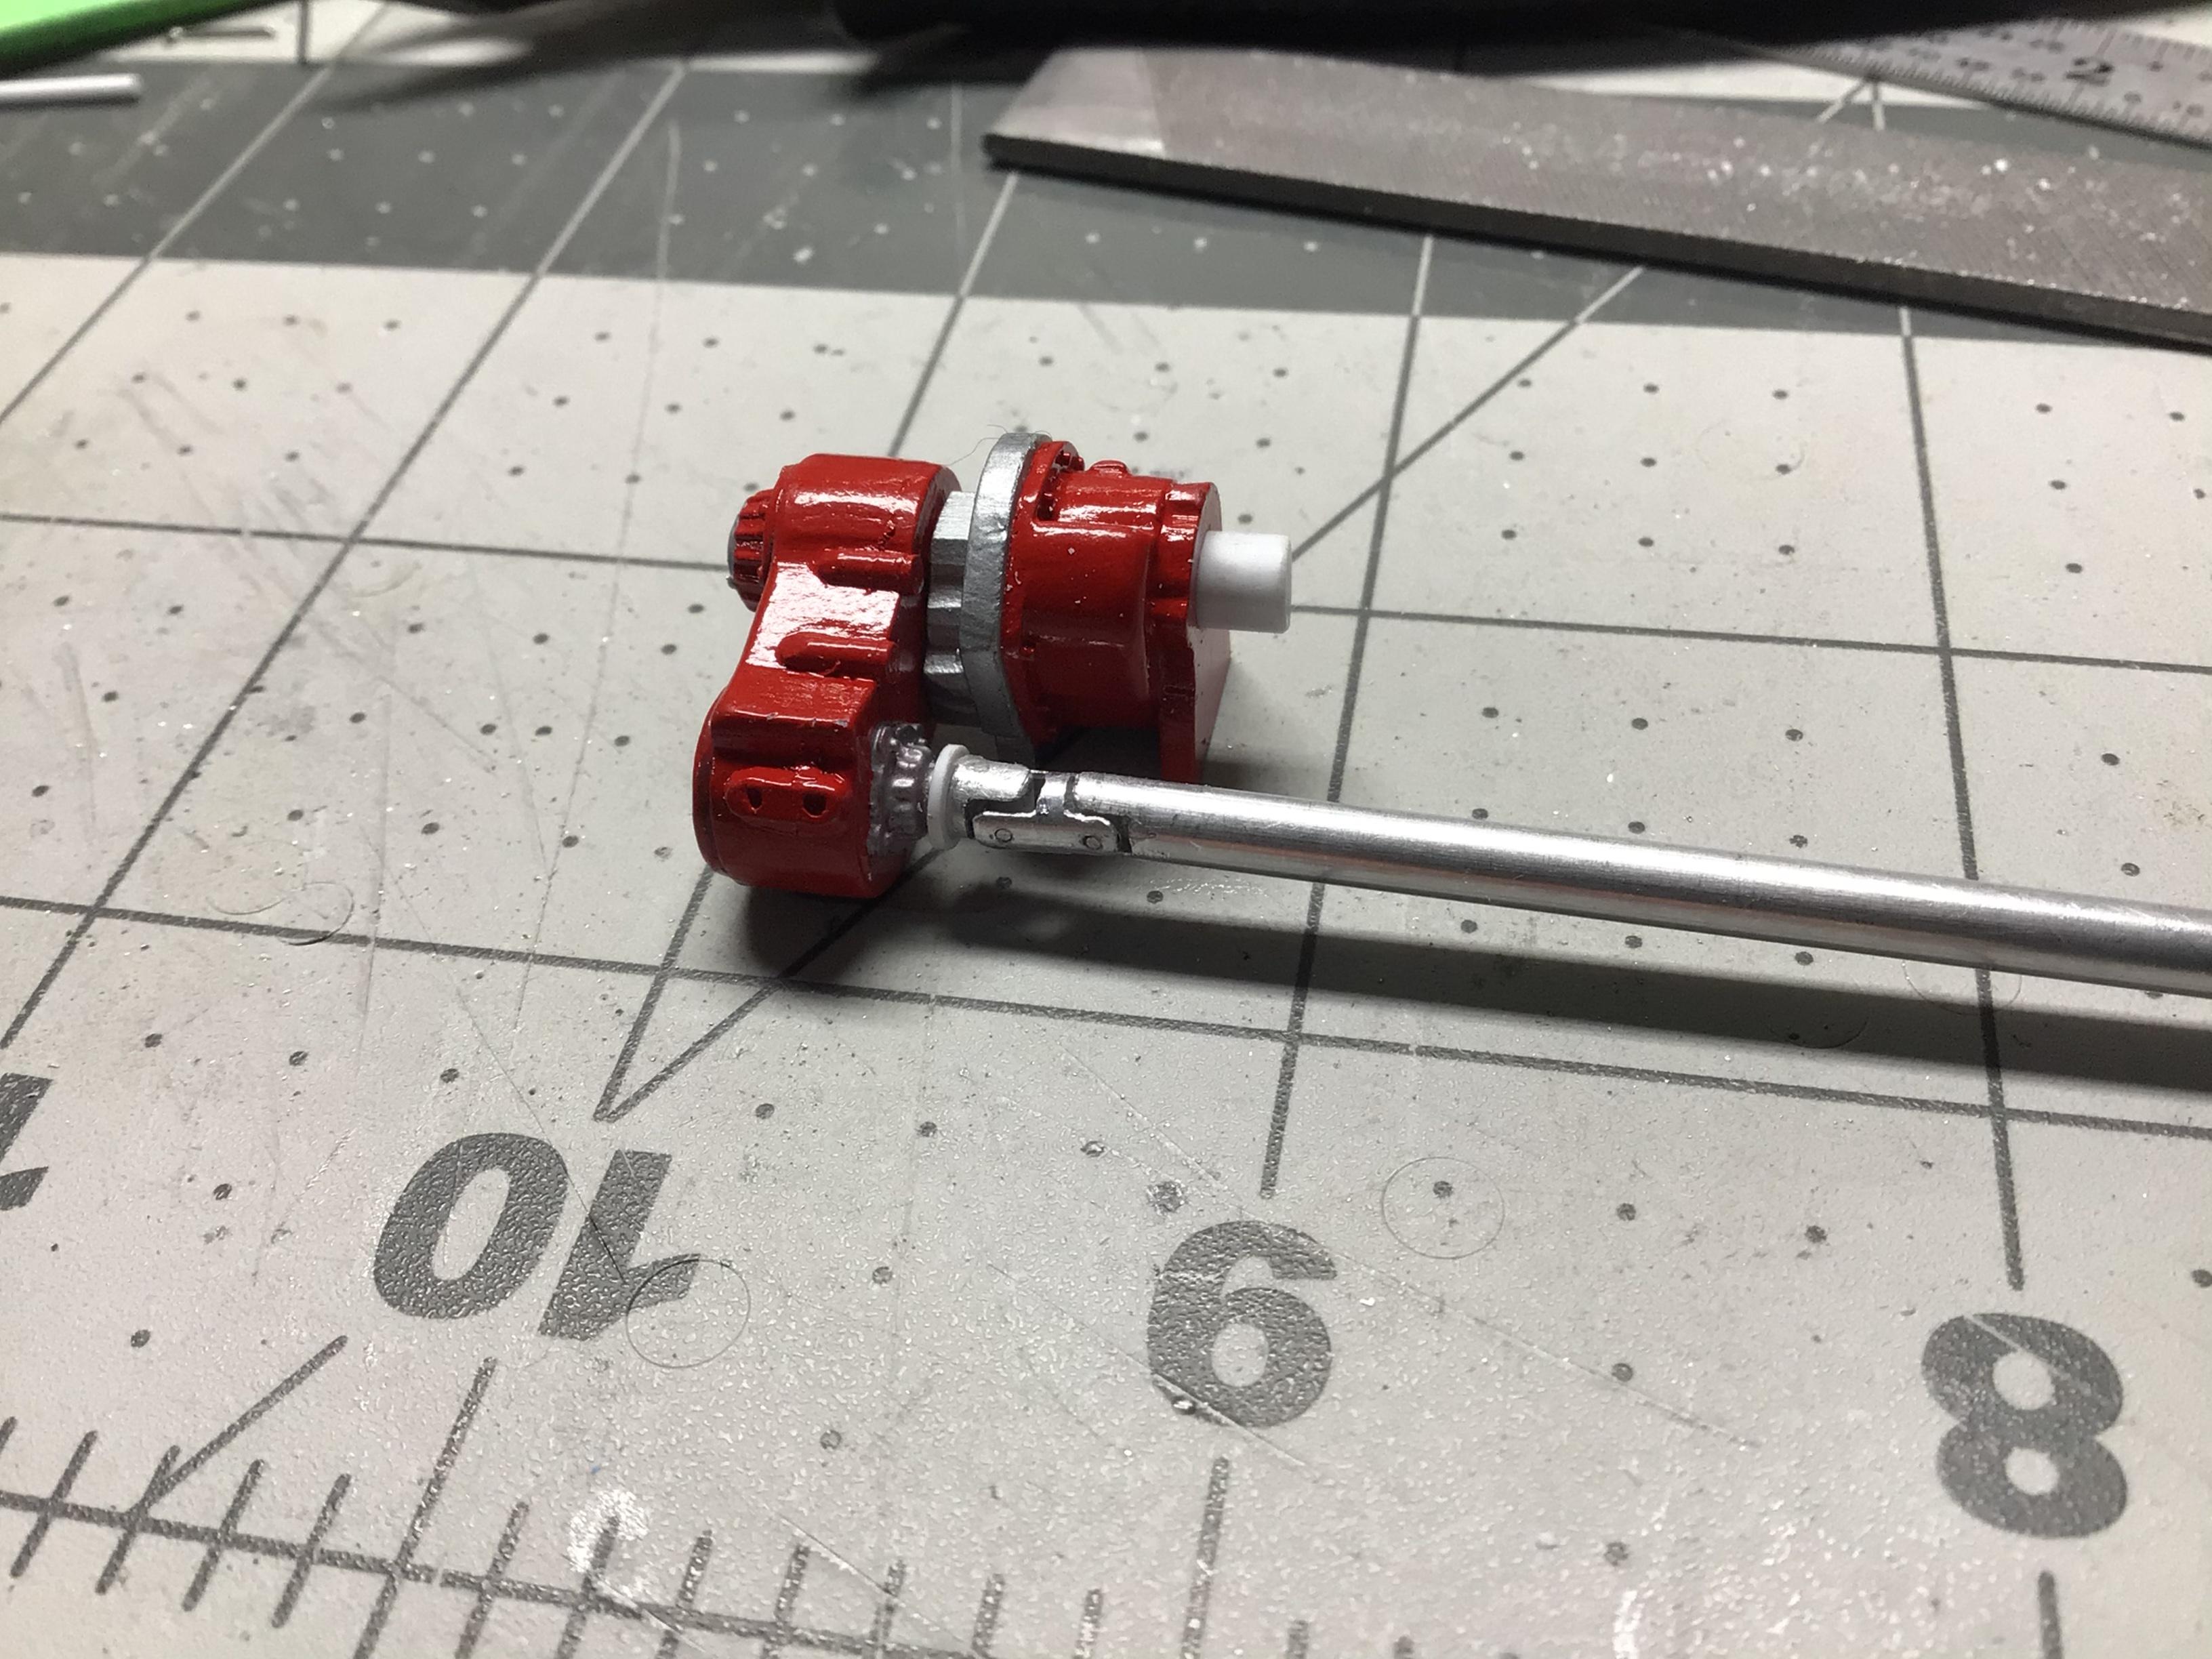
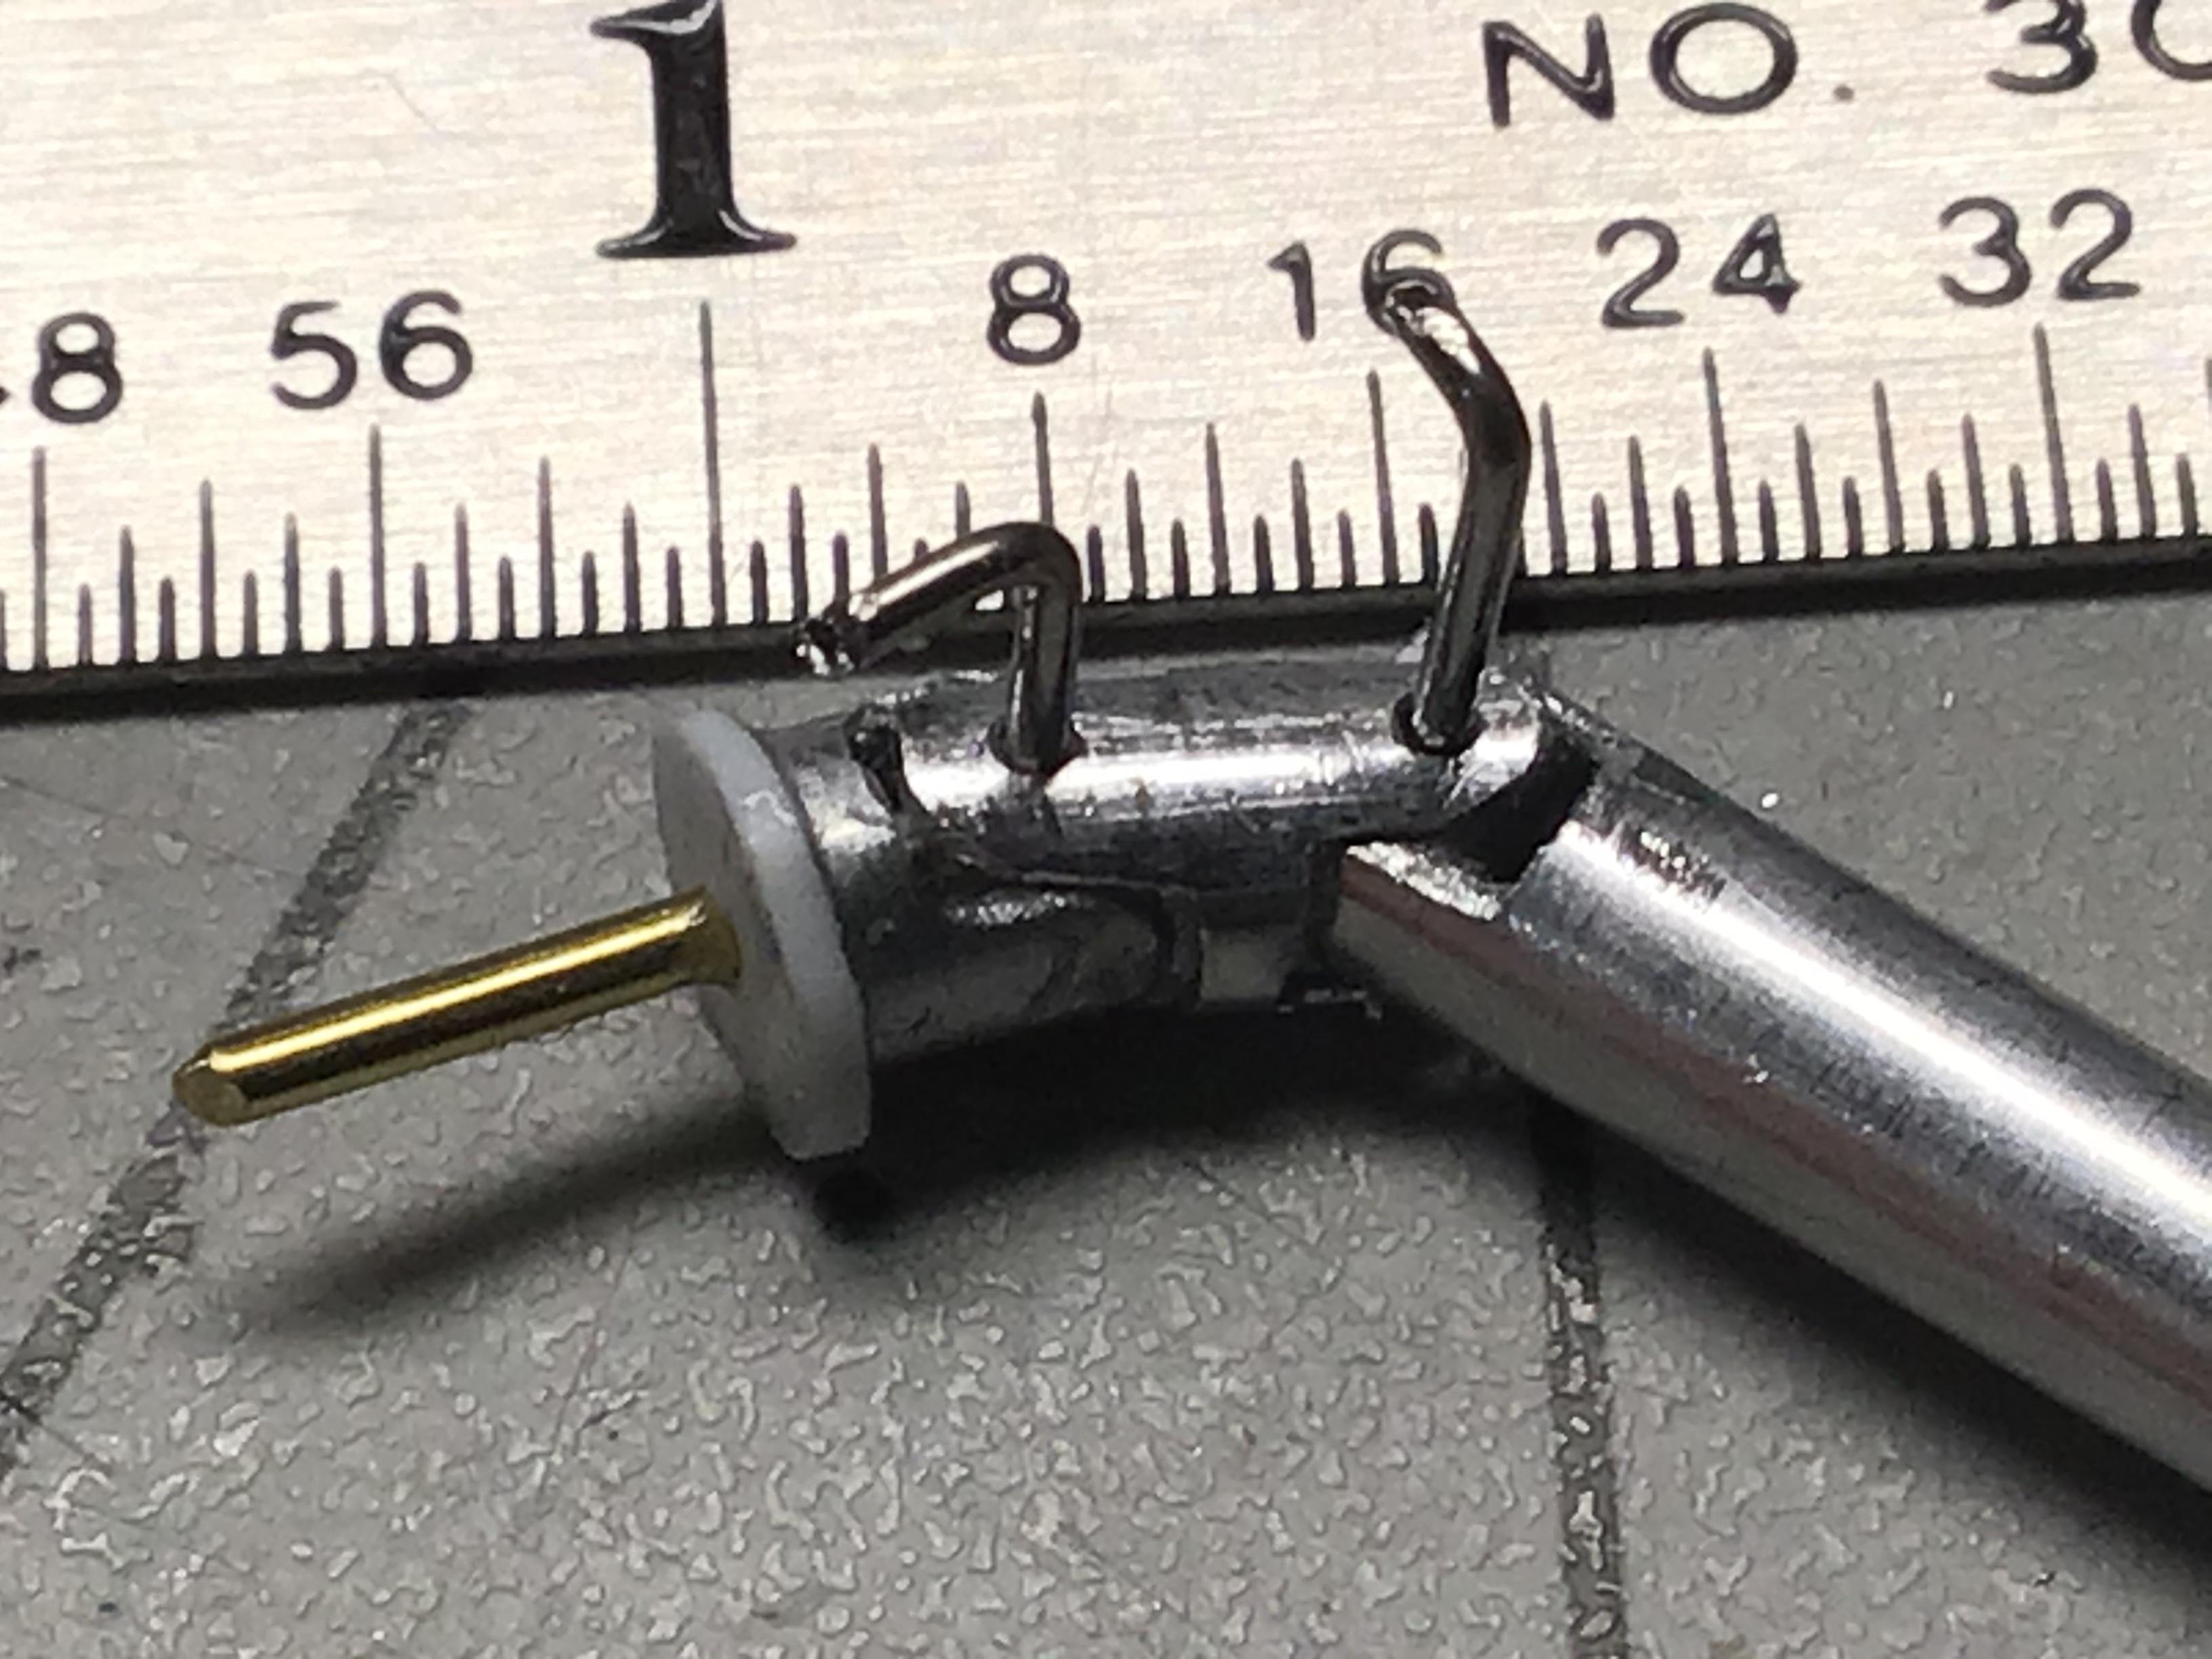
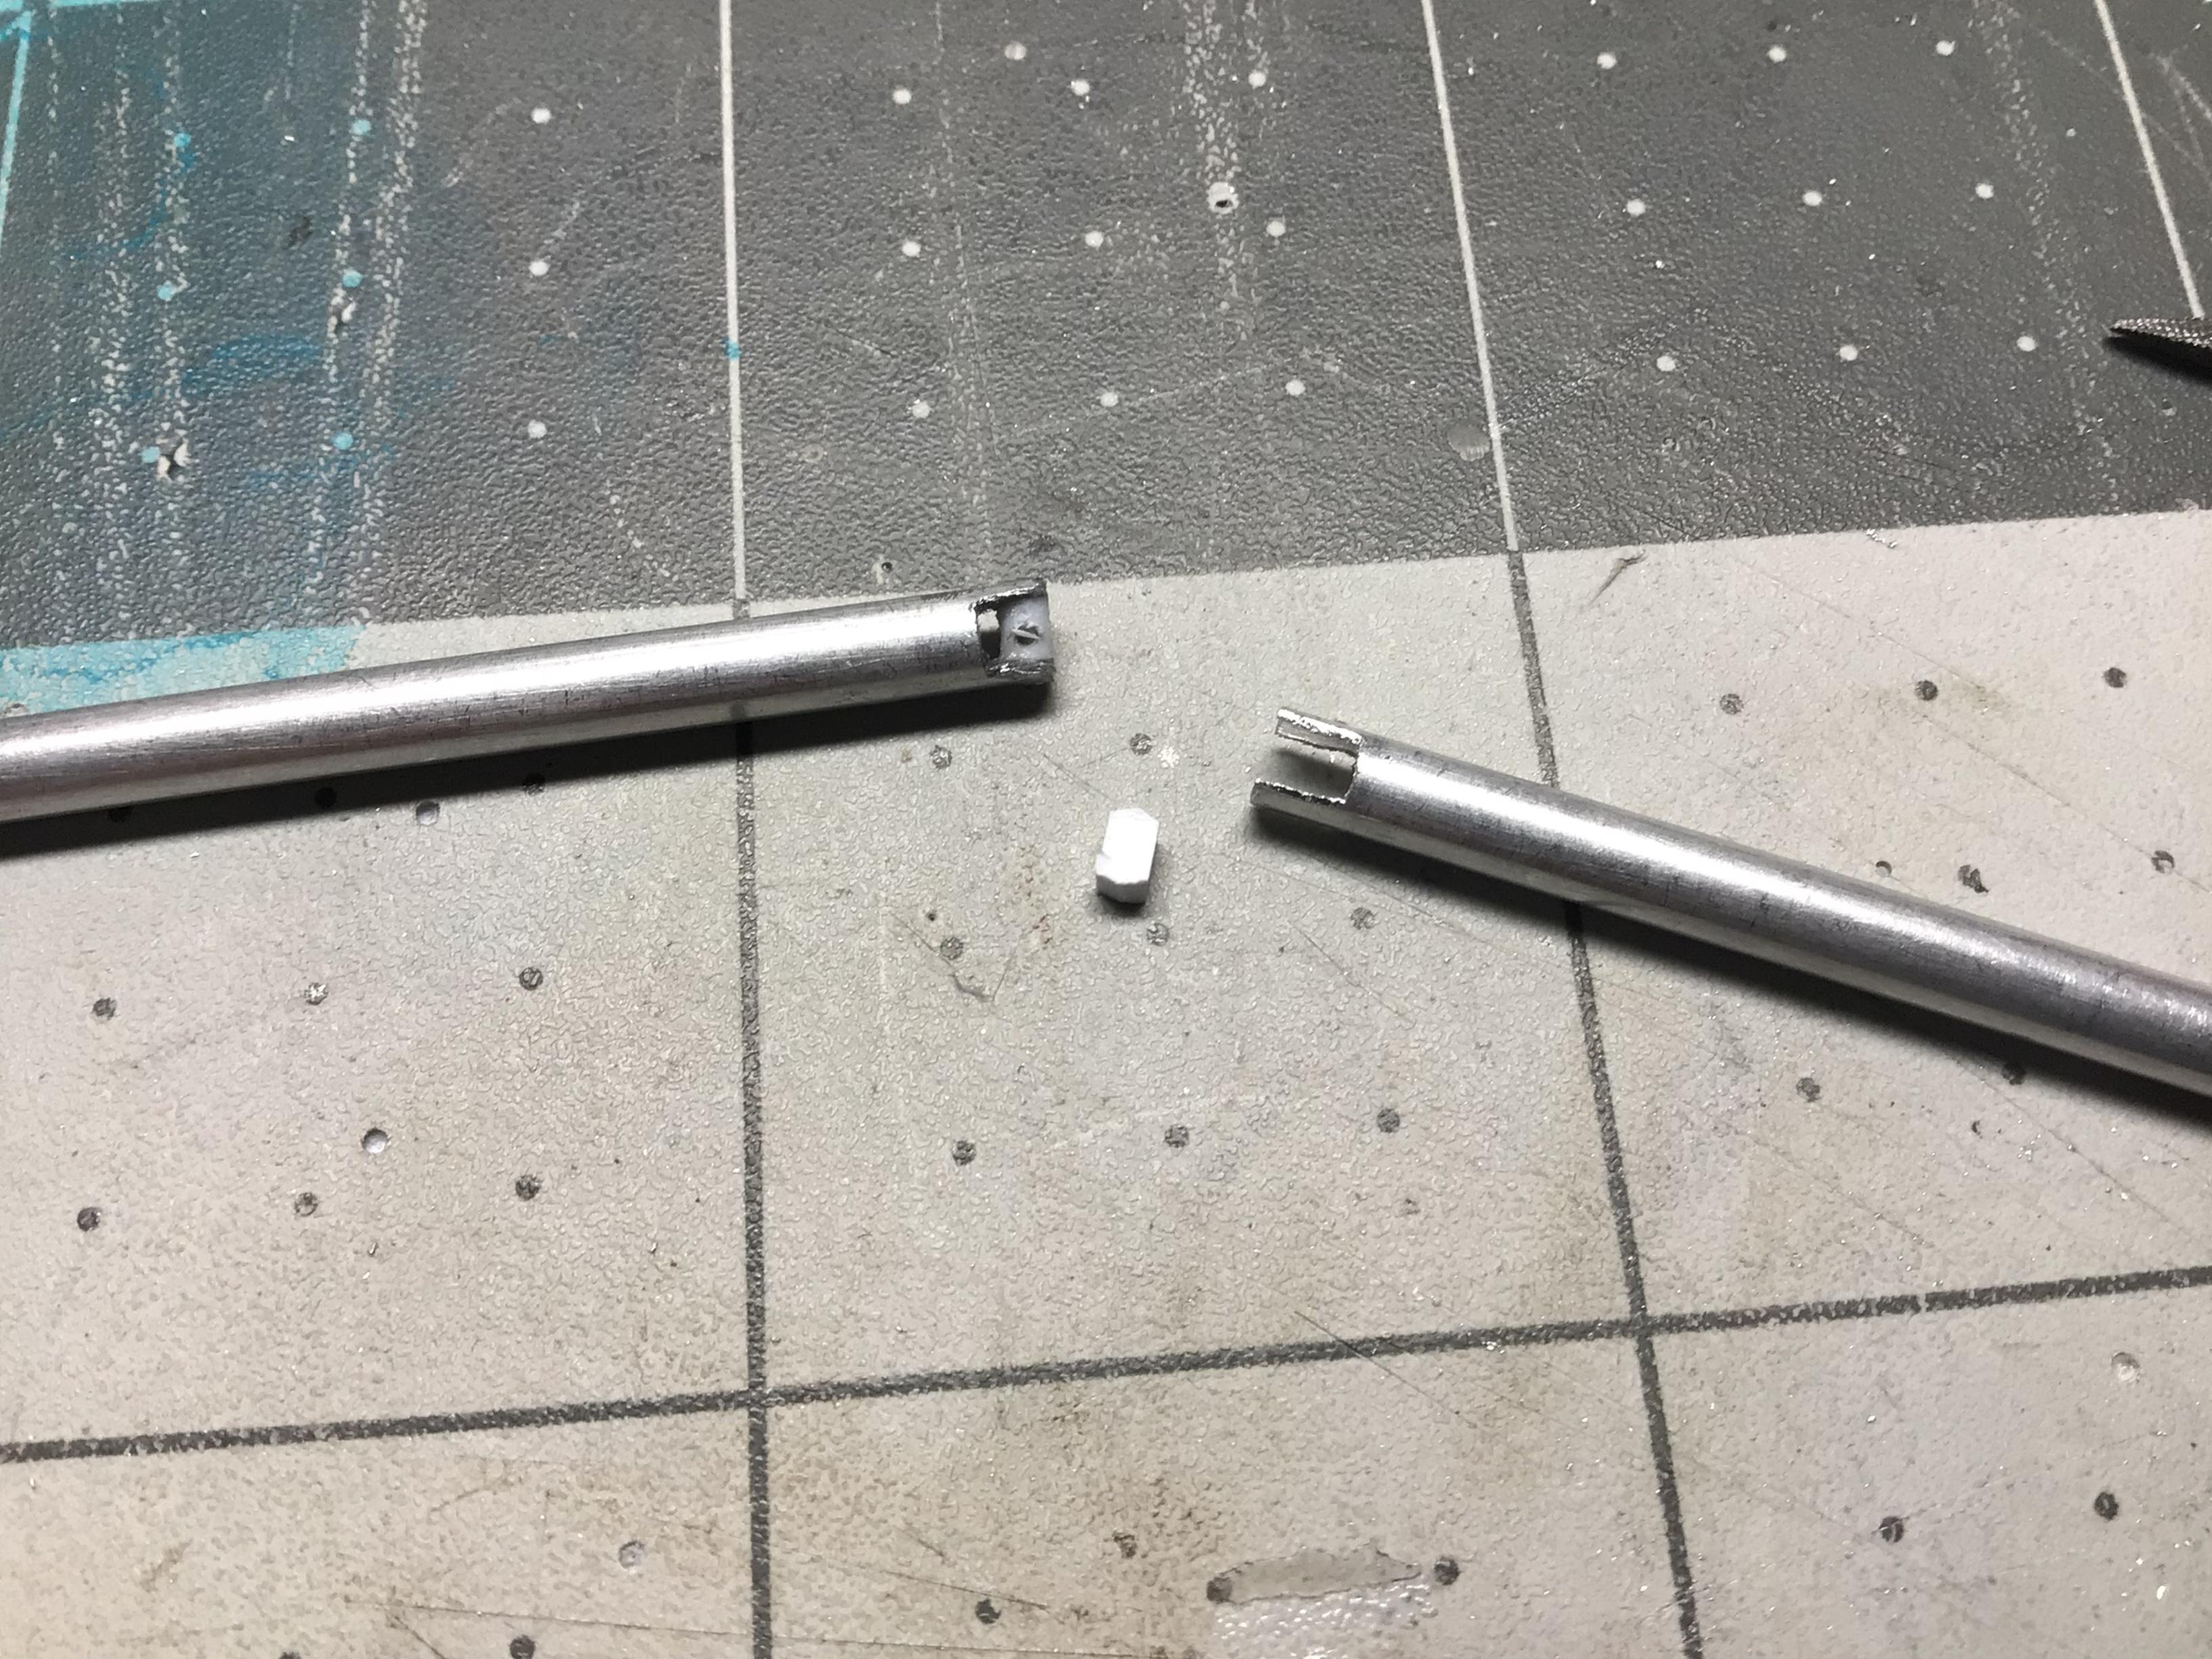
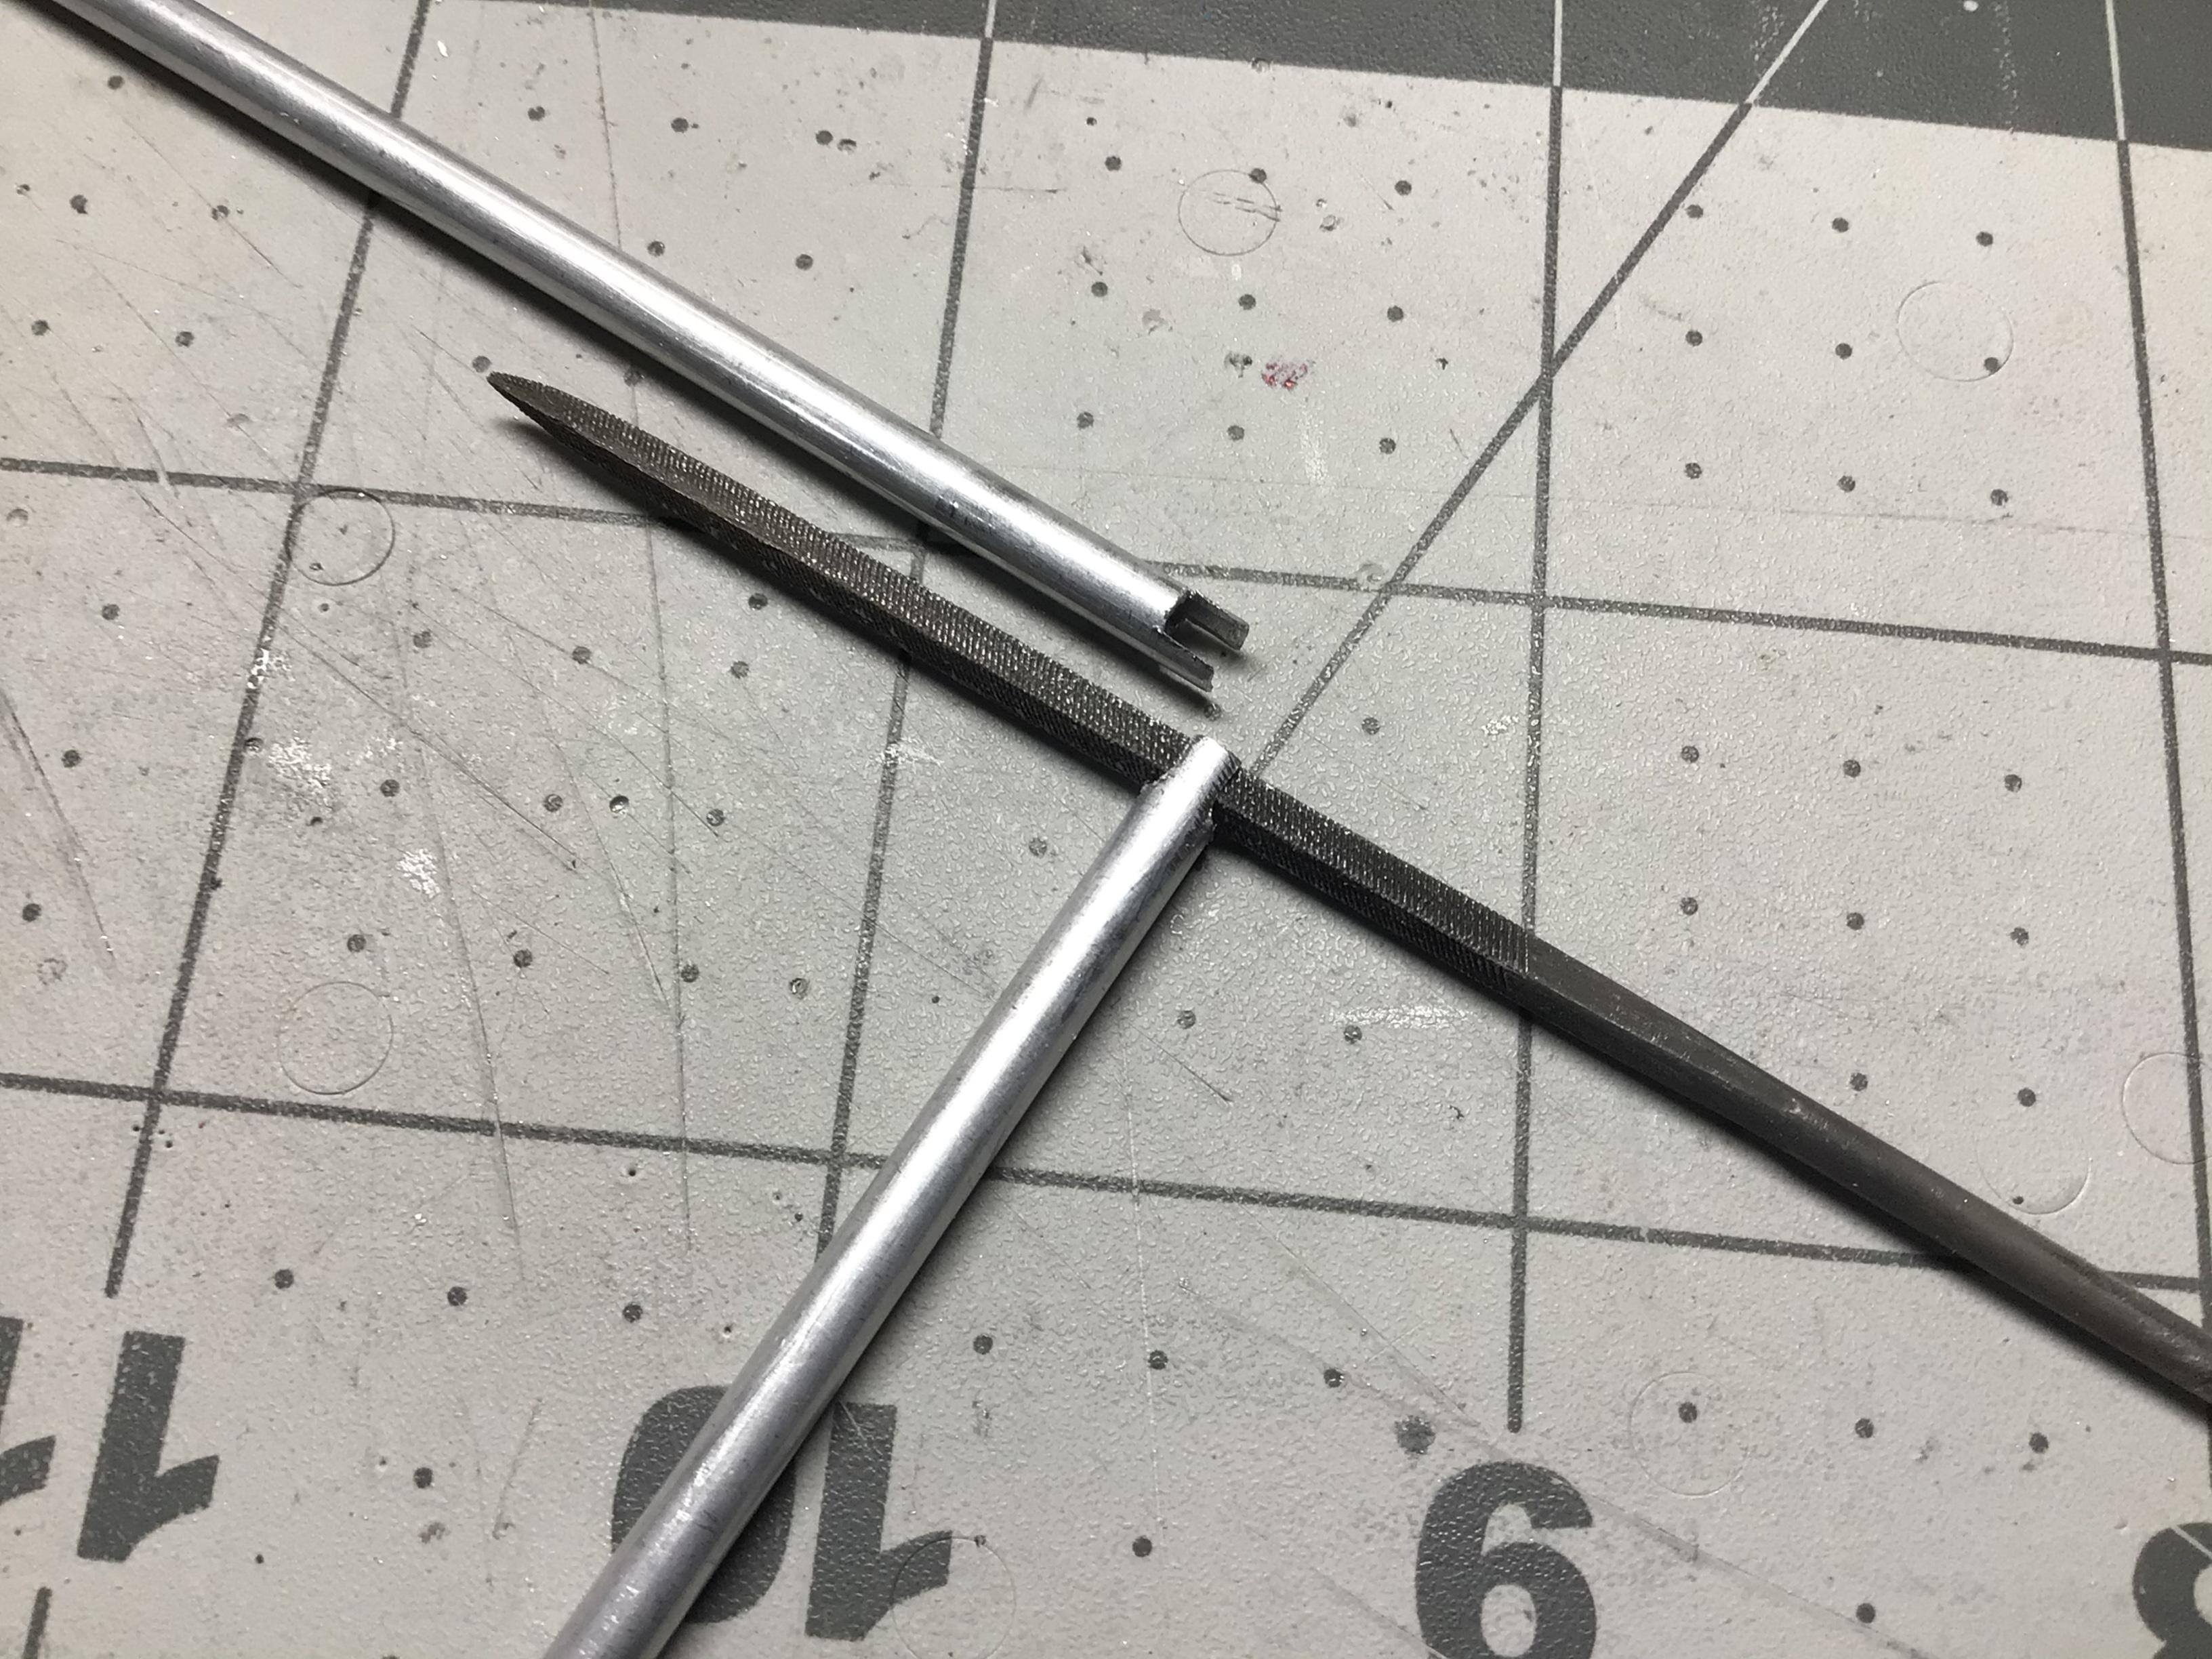
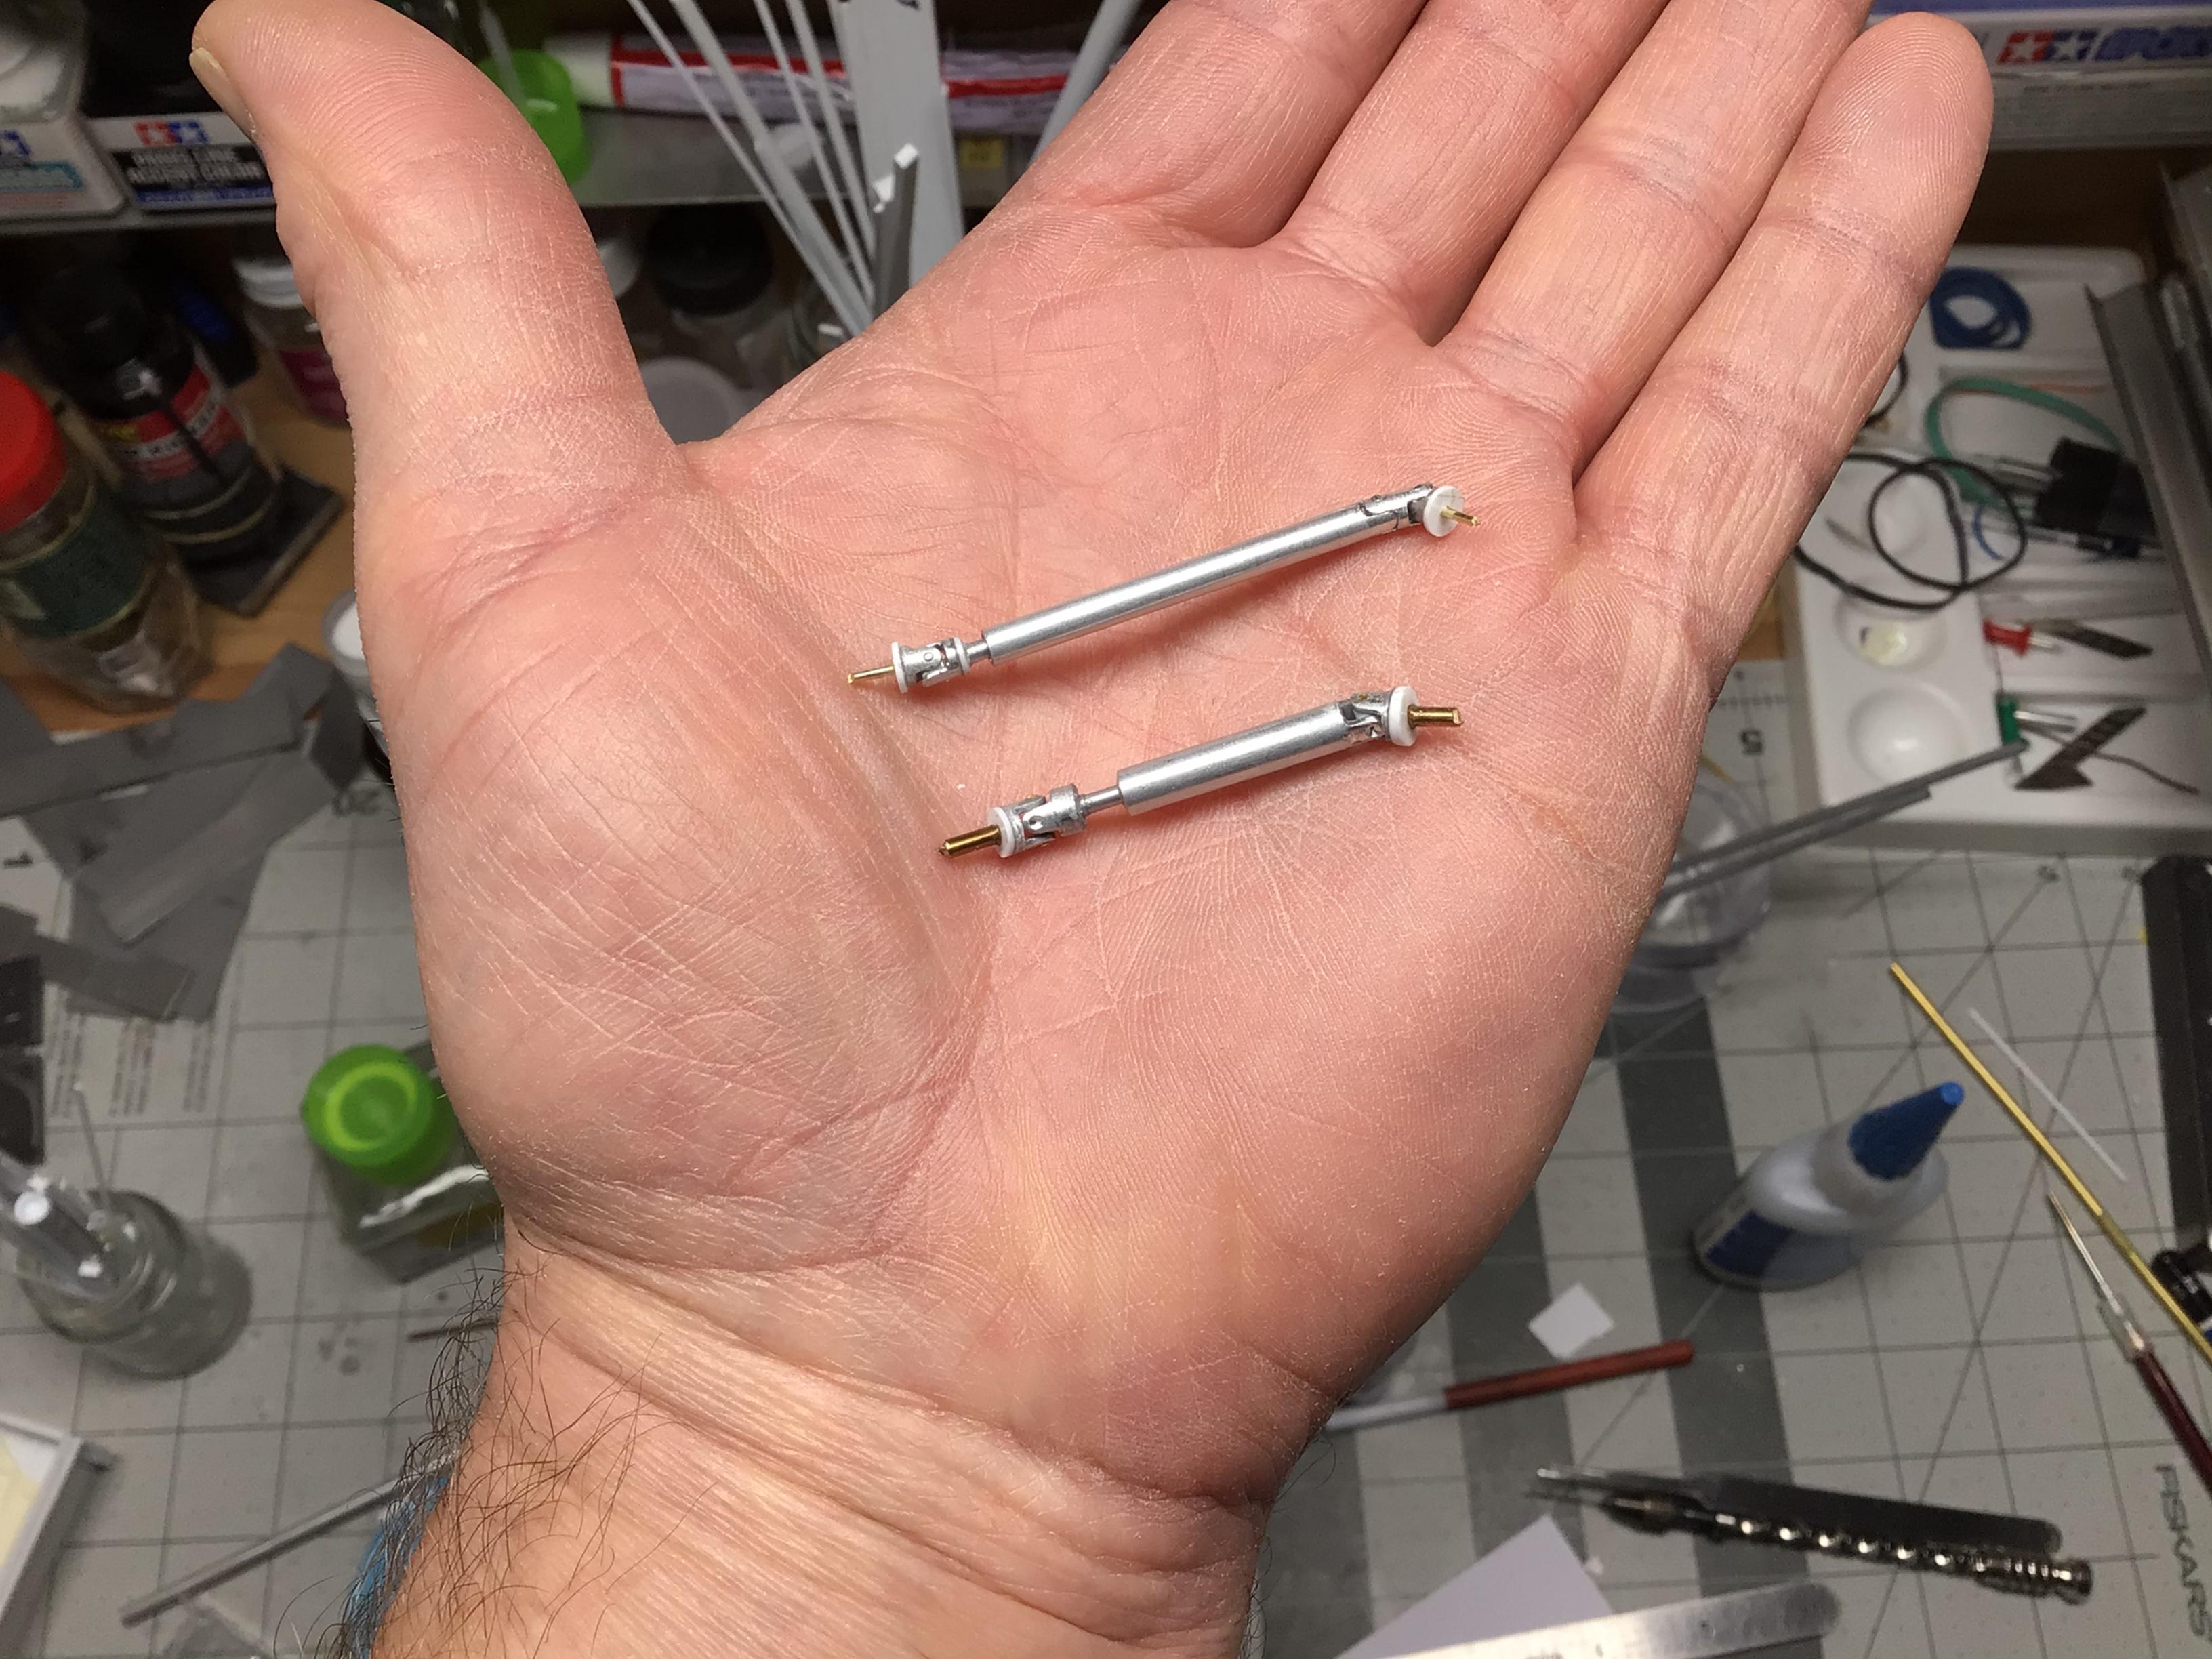
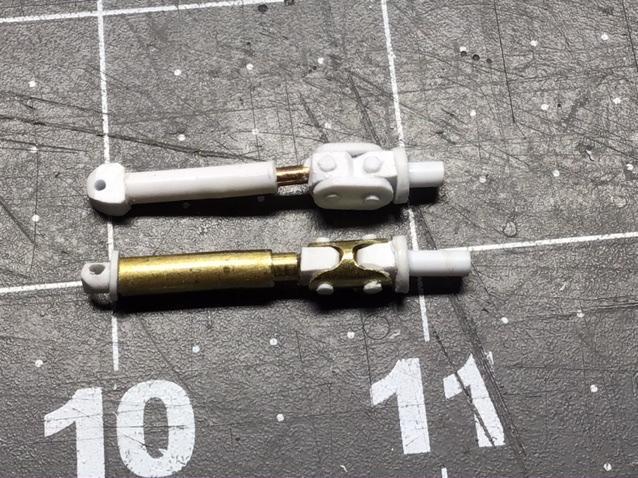
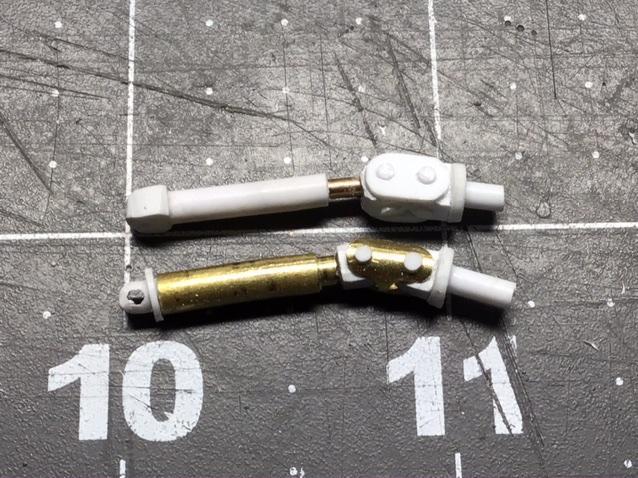
I managed to make a front shaft using 1/8” diameter for the main tube. This time I used a small file (.075”sq.) to slot the end of the tubes. I didn’t bother to plug the tubes with styrene this time as I don’t really think it is necessary. I used .023” welding wire for cross pins and I tried to use 1/16” aluminum rod for the u-joint, but I just couldn’t drill a hole through it. I wound up using 1/16” square styrene instead...much easier to drill a tiny centred hole in than round. The rest of the procedure is the same as the rear, just a little harder to hang onto.? Sometimes I think I do my best work between 9 and 10.? I think next time, instead of drilling dimples in the un-pinned ears, I will drill a shallow hole and insert dummy pins. It would add to the realism and it might look nicer polished than painted.?
-
Thanks. This is my second time building a driveshaft. I built a double cardan style on my Jeepster that turned out fairly well...for a first try. Thanks to Dennis E. for clueing me in to the telescoping tubing sizes.? I am going to try this method again for the front shaft using the next size down for the main tube. We’ll see how it goes.