NOBLNG
-
Posts
10,233 -
Joined
-
Last visited
Content Type
Profiles
Forums
Events
Gallery
Everything posted by NOBLNG
-
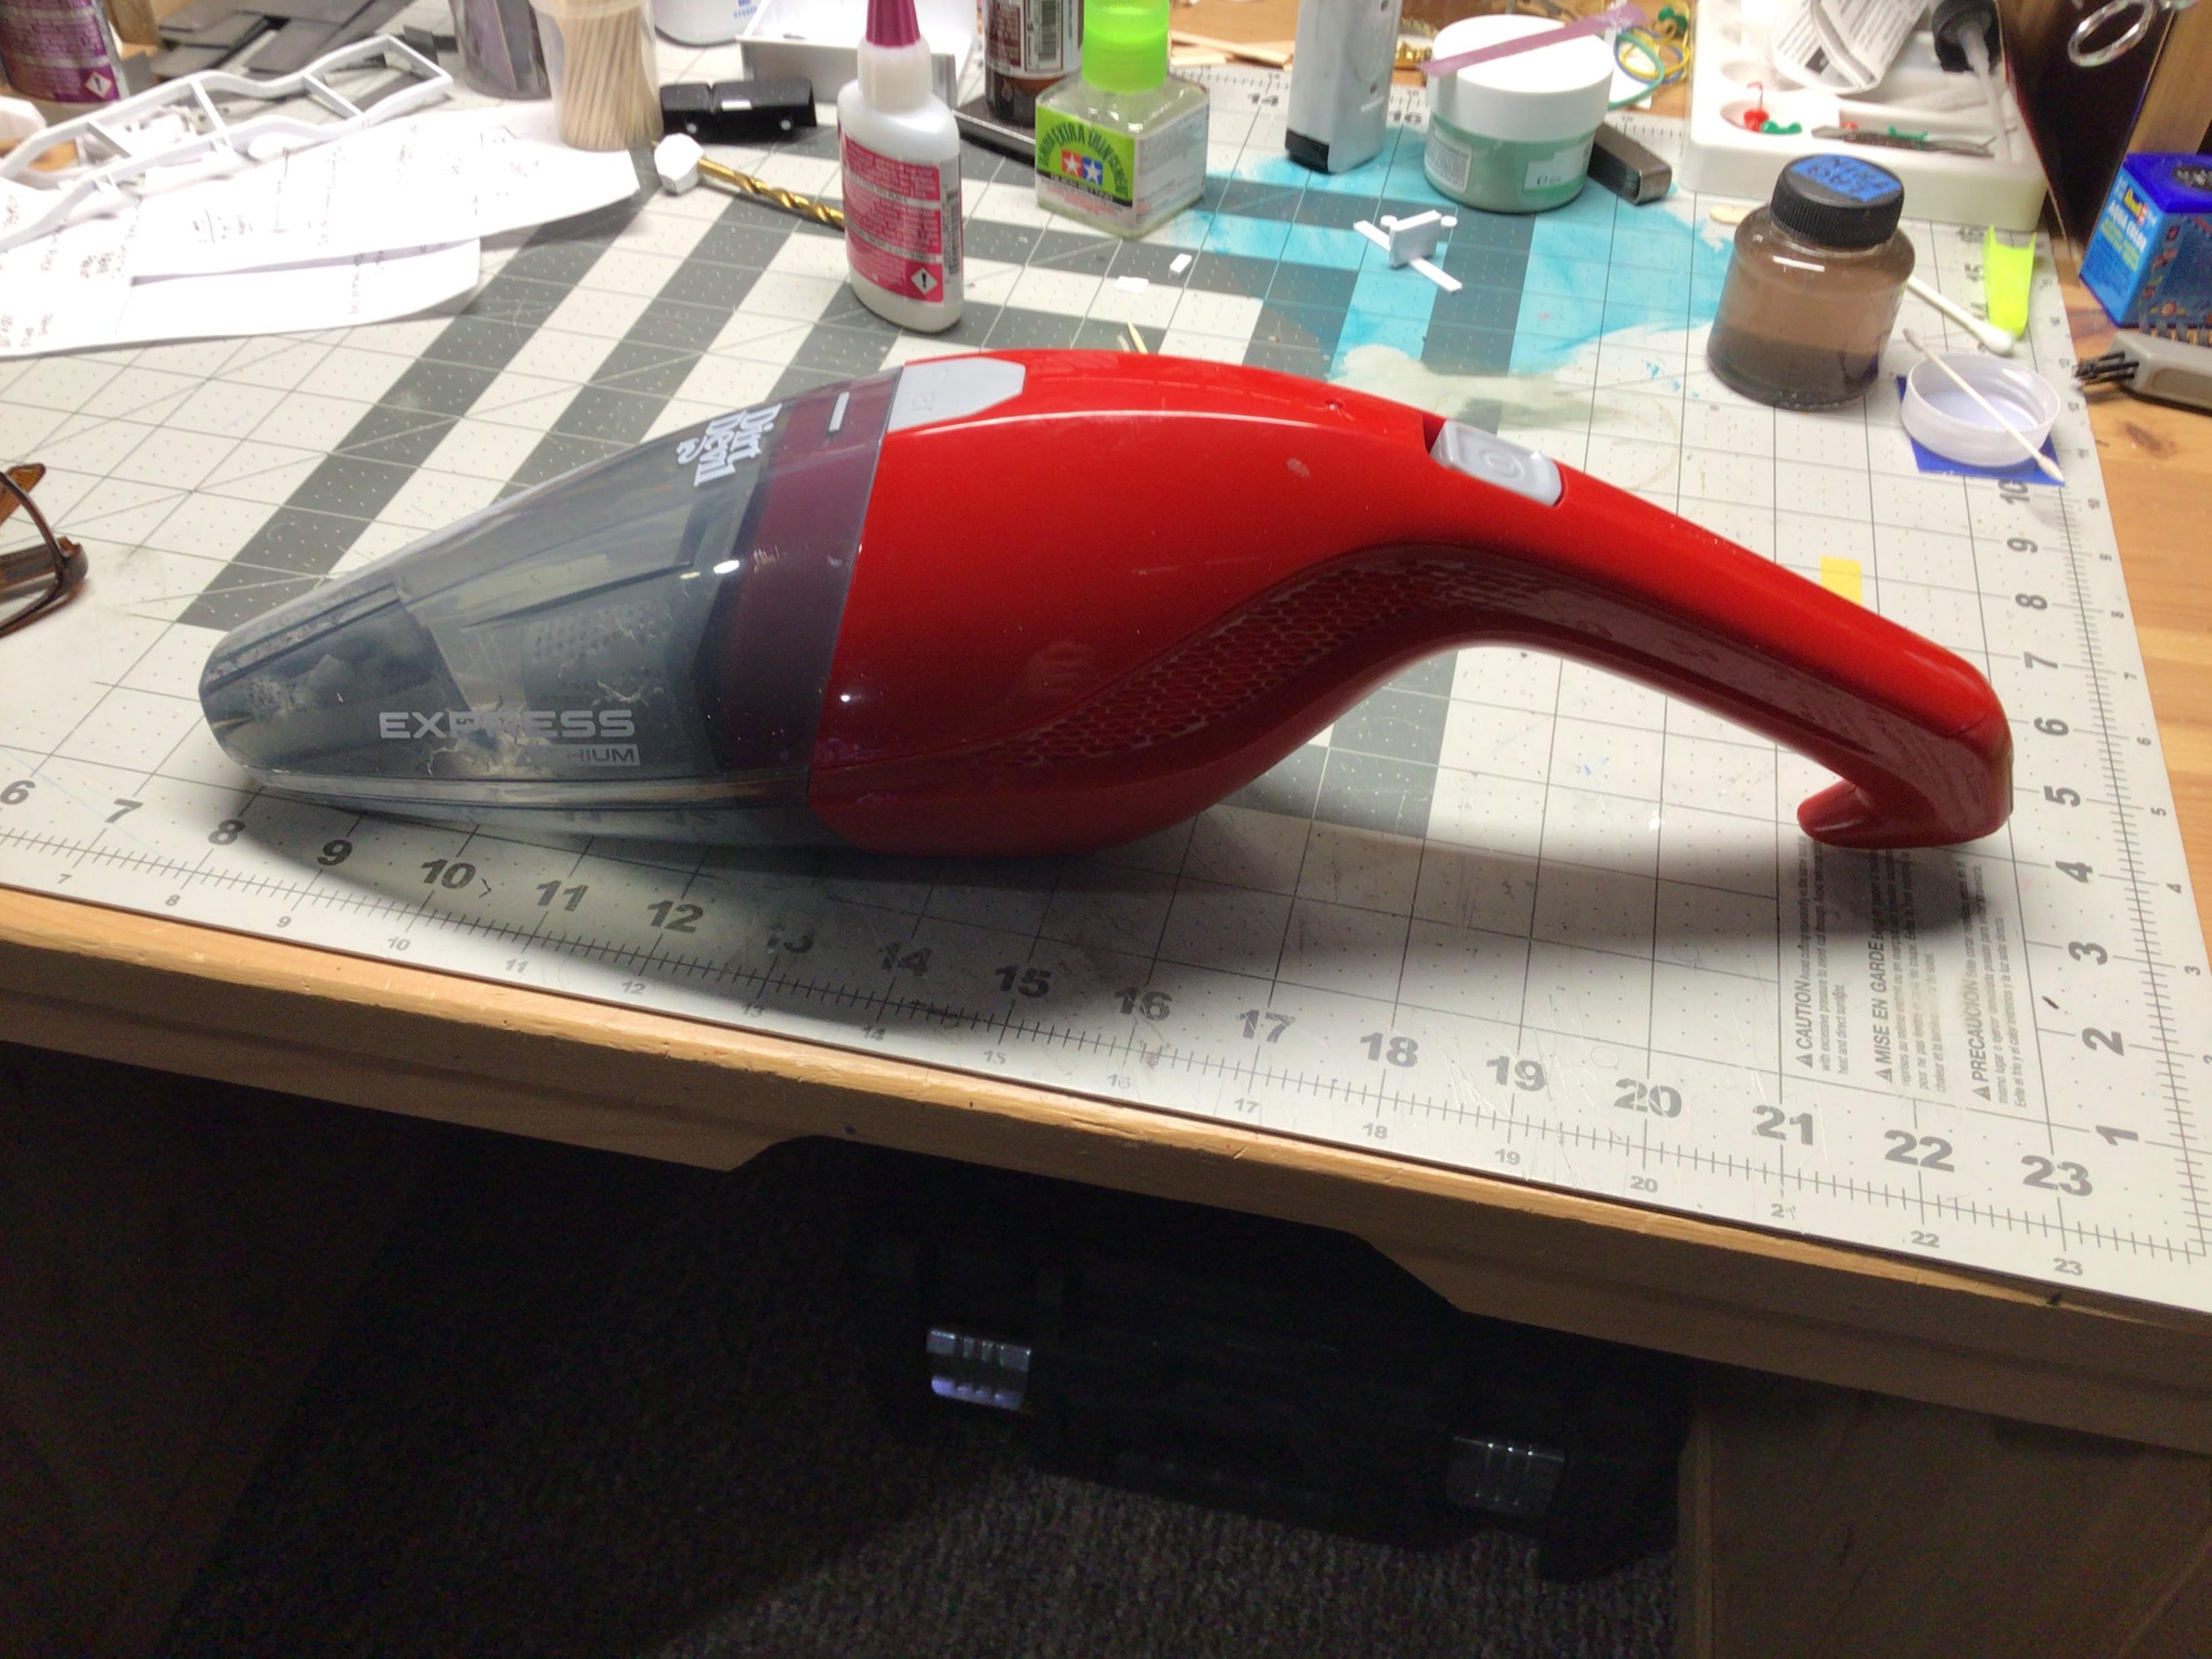
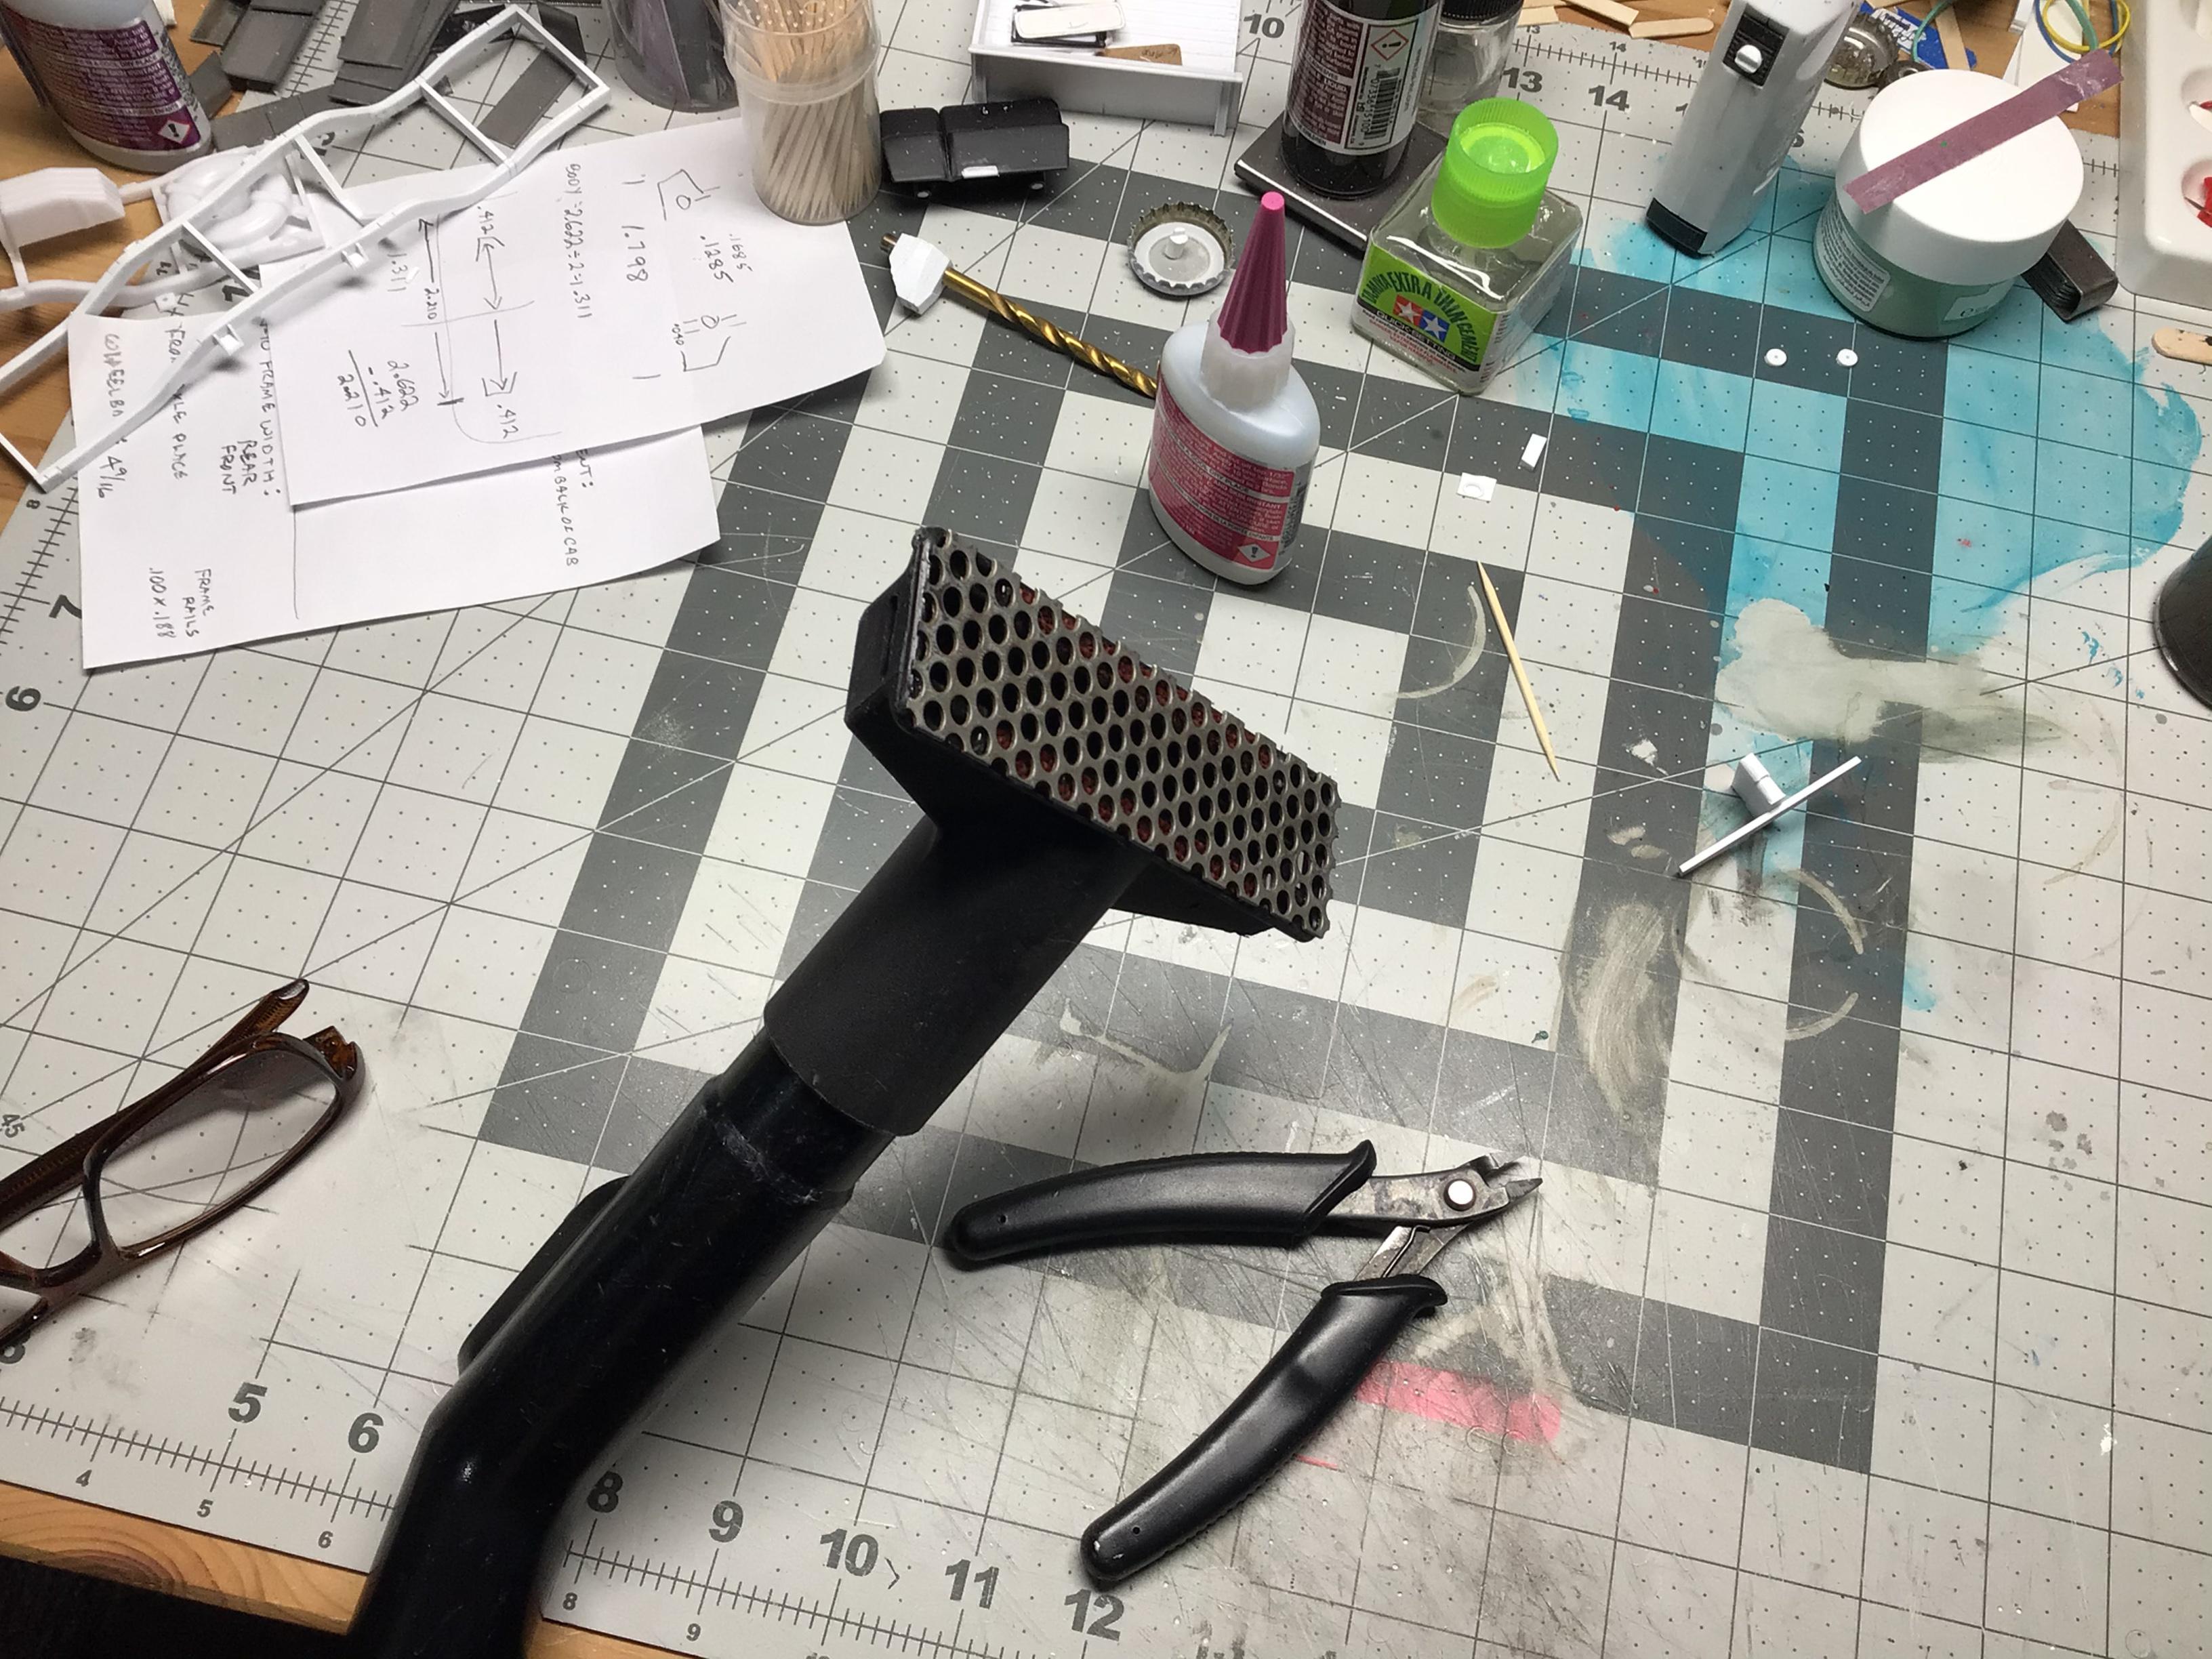
I bought this little Dirt Devil to do quick cleanups when I am sanding/filing/carving parts. It works pretty good and if I suck up any small parts, they are easily retrieved. It is a little tedious though for larger cleanups and requires frequent cleaning itself. I also have a central vac nearby, so I super glued a piece of perforated metal onto one of the attachments. The holes are 3/16” so just about no parts or useable scraps of styrene could get sucked up...and it sure outperforms the Devil!

-

ZZ 41: If Billy Gibbons dreamed of a 41 Lincoln Kustom
NOBLNG replied to Claude Thibodeau's topic in Model Cars
Beautifully done. Quite the imagination you have!??? -
40 ford pickup
NOBLNG replied to 5.0nut's topic in WIP: Model Trucks: Pickups, Vans, SUVs, Light Commercial
Looking Good! I like the detailing on that engine and drivetrain. -
Looking good so far!??
-
'29 Ford pickup street rod
NOBLNG replied to Can-Con's topic in Model Trucks: Pickups, Vans, SUVs, Light Commercial
Yeah, things can be very slow in the truck section. Outstanding job you did on this one! Are the door handles out at the chrome platers?? -
Revell '29 hotrod pickup.
NOBLNG replied to Can-Con's topic in WIP: Model Trucks: Pickups, Vans, SUVs, Light Commercial
Beautiful job. How did you hinge the hood panels? -
Yes. He was intentionally mis-pronouncing his name because he did not want to be associated with the ancestors.?
-
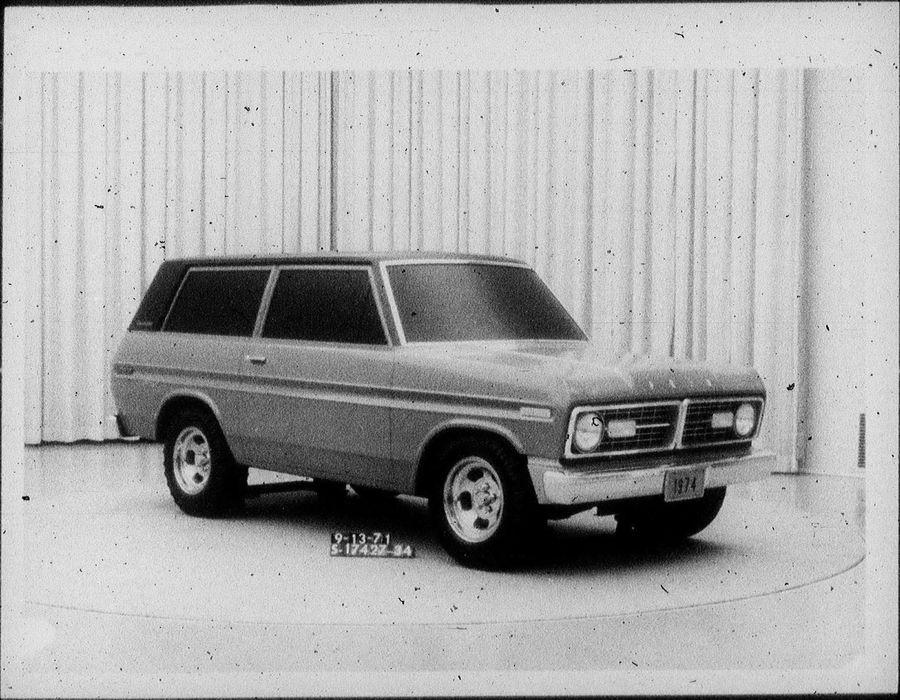
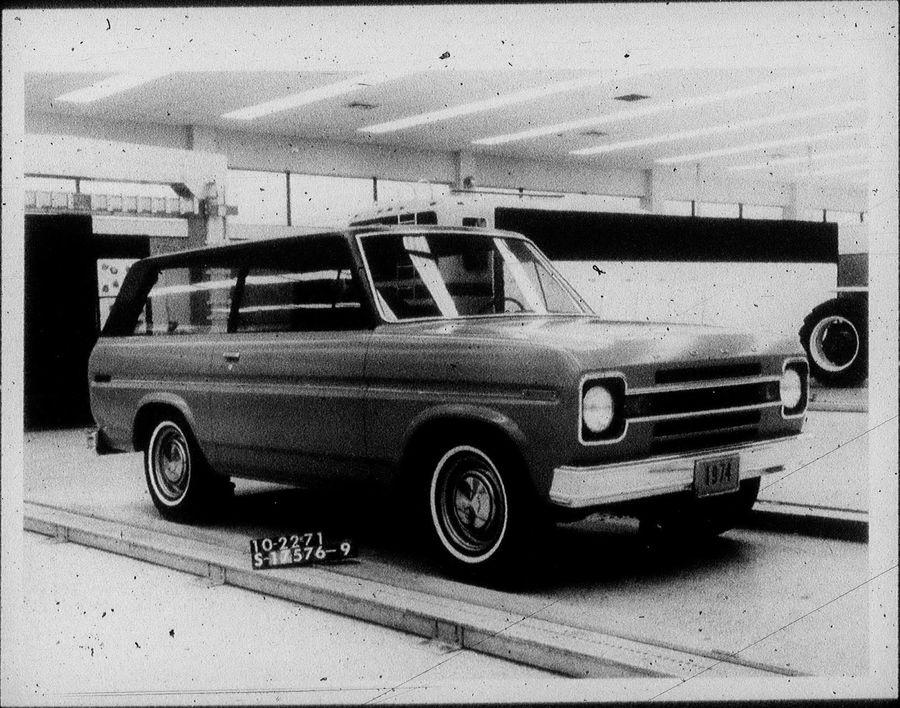
Second Gen Ford Bronco Design History
NOBLNG replied to Casey's topic in General Automotive Talk (Trucks and Cars)
Interesting read. I’ve got to say I like the first generation best....and what they came up with for the second gen is much better looking than some of the early drawings.?
-
jeep wrangler recall - terrible fix concept
NOBLNG replied to youpey's topic in General Automotive Talk (Trucks and Cars)
That could be. The first time I drove off road was in my Buddies CJ-5 in the rocky area east of here. He kept giving me heck for keeping my foot on the clutch pedal when driving. Just the weight of your foot on the pedal may reduce the contact pressure of the clutch. I’m not sure if the newer hydraulic styles are as touchy? -
My pleasure Steve. You’ve got an extra “L” in there now?
-
jeep wrangler recall - terrible fix concept
NOBLNG replied to youpey's topic in General Automotive Talk (Trucks and Cars)
My wife has a manual 2014 JK Wrangler and has had no issues with the clutch. It has never been upgraded or off-roaded in any way.I discovered when changing the diff fluid that the spider gears in the rear end had lost some teeth. The dealer repaired it under warranty thankfully. -
Nice job on this. I love the colors too.
-
Looks good. Those decals must have been fun.
-
Nicely done there Tom!
-
Super nice job.
-
I agree with everyone...it is one of, if not THE nicest paint job I’ve ever seen.
-
Thats a lot of foil too! It looks pretty darn good to me though.
-
Well done! You blended that roof seam in nicely. I agree that despite some fitment issues with this kit, it can be beautiful when finished.
-
Very nice looking car, and a beautiful colour. What paint is that?
-
Nicely done! Looks good with the extra accessories. It’s too bad Revell didn’t make this a fully detailed kit.
-
Yes, thanks for posting those pics Alan! That is one sweet looking rig. I just may have to convert my other ‘36 5-window that I have.?
-
Looking good Keith. Huge improvement on those wheels!
-
That has some really nice lines Steve!
-
She has no authority in 1/25 scale issues!?
-
You could possibly get one from a Big Rig and cut it down to size and add the tanks? Building a realistic looking one from scratch would be tough. That said, there are a number of builders on here that I am sure have the skills to do it.