Misha
-
Posts
1,014 -
Joined
-
Last visited
Content Type
Profiles
Forums
Events
Gallery
Everything posted by Misha
-

'36 Ford 5ive window coupe, old build being resurrected.
Misha replied to Rocking Rodney Rat's topic in WIP: Model Cars
I agree, the subtle body work with the dropped fender and running boards results in a major improvement on the stance. Thanks Rodney for offering the great construction photos and descriptions. I also have three 36 Fords on the go next to the workbench, a fenderless dry lakes chopped three window (my own chop, not the one included in the kit), a boulevard three window cruiser on which I’ll follow your fender mods, and a custom rag top. All have been long term projects which get better with time! Sorry for the digression, yet I’m a big fan of the 36. Cheers & Model On! Misha -
Great work and very informative, enjoying this a lot as I have the same orange kit and always wondered just what can be done with it to make it ? interesting. By the way, where is the rear panel for the interior from, is it resin or did you scratch build it? Cheers Misha
-
Hi Steve, you’ve got my attention! Looking at the proto-type photos, is that a suede/semi-gloss finish? Knowing how you work, I’m sure many will be along for the ride on this one. Cheers Misha
-
Thanx for the details on your chrome trim technique Ken. I’ve been successful with semigloss black window trim on Porsche 911s for example by using Tamiya tape masking followed by air brushing LP5, so experimenting with the various metallics being brought on the market I hope to find a decent chrome look. Cheers Misha
-
That is a stunning build Ken! The colour fits it so well, eye candy. I was curious about your great execution of the window trim, what paint did you use, or is it BMF? It looks great and with the recent issues with BMF, I am looking for alternatives. Enjoyed following your build from day one, cheers Misha
-
Fred´s Ford in light frost
Misha replied to kjohan's topic in Stock Cars (NASCAR, Super Stock, Late Model, etc.)
I do believe that the that is the 1966 full size Galaxie that was superceded by the Fairlane with the front clip from the Galaxie. Cheers Misha -
2022 Cannonball Group Build theme suggestion thread
Misha replied to Fat Brian's topic in Community Builds
Wow, a year sure does pass by quickly the older one gets. Unfortunately I’ve bowed out of the last two CBR, the current Stealth run is still on the workbench in need of more time than the week or so left. I am hoping for a better year with health and for an ole fart the Birthdate Run is intriguing, so had a quick look at possibilities for 1953… I was pleasantly surprised by the choices available. With more up to date drivelines any of the above would make for an interesting entry. Which one to choose? Cheers MISHA
-
1953 F-100 "The Pusher"
Misha replied to Painted Black's topic in WIP: Model Trucks: Pickups, Vans, SUVs, Light Commercial
Here is an example of a push bar on my Chev pickup. It’s scratch built out of plastic with a strip of balsa pinned to it. Cheers Misha
-
Wow ?! That’s such a smooth ride you’re achieving… the flush rear skirts, the tailights, and then the chop! Betcha you’ll go further than a curbside? Enjoying your work as it gets my mind to consider doing a forty chop, great look. Cheers Misha
-
Terrific job Tony, especially on a different type of kit for you. Your detailed paint scheme works well and the construction is top notch with attention to the engine, which can be difficult to get right. Overall a great presentation of an iconic custom! Cheers Misha
-
Great looking build Christopher, the paint job really stands out. I agree with the difficulties in attempting to fit the body to the chassis as I recently completed a 959 and had to trim the inner wheel wells a bit to fit the body while at the same time being careful not to knock the turbo piping off the engine or attempt to spread the body too far. Also found the mold lines a bit more pronounced than what one expects from Tamiya. While the kit has its problems, it remains one of the Tamiya’s lowest priced offerings. Cheers Misha
-
Replicas & Miniatures Company of Maryland
Misha replied to vamach1's topic in General Automotive Talk (Trucks and Cars)
Thank you for passing on the good news Bill. We all have Norm and Mary in our thoughts at this time and wish for a successful and speedy ❤️? recovery. -
I heartily agree with Tom as I have found my Pace 24” to be very quiet, and efficient in moving air. Sturdily built and about the size of a small bar fridge, it is a worthwhile investment. Up here in Canada I had to pay the freight, yet in the US I believe Bob still has free delivery. Check it out, many forum members have a Pace as well. Cheers Misha
-
Congrats Robert on obtaining this kit! I was fortunate enough to buy a complete unbuilt back in the 80s to rekindle my memories of first getting it when it was released 20 hears before that. Seeing what you have would make for a complete kit when kitbashed with a 64 Fairlane Thunderbolt, making for a much more accurate build. Fortunately you also have the ram air feature for the hood. Something to consider… also like the 62 you posted. Cheers Misha
-
I store most of my stash in a storage unit that is unheated though insulated. The temperature range generally is between -5 C in the winter to +30C in the summer. I remove the decals, tires and instruction sheet before storing the kits. These are then filed in plastic sheets and baggies for the tires. I haven’t encountered an issues so far, apart from a few missed decal sheets that end up cracking up on the surface making them unusable. That may be caused by excessive humidity being unheated. Cheers Misha
-
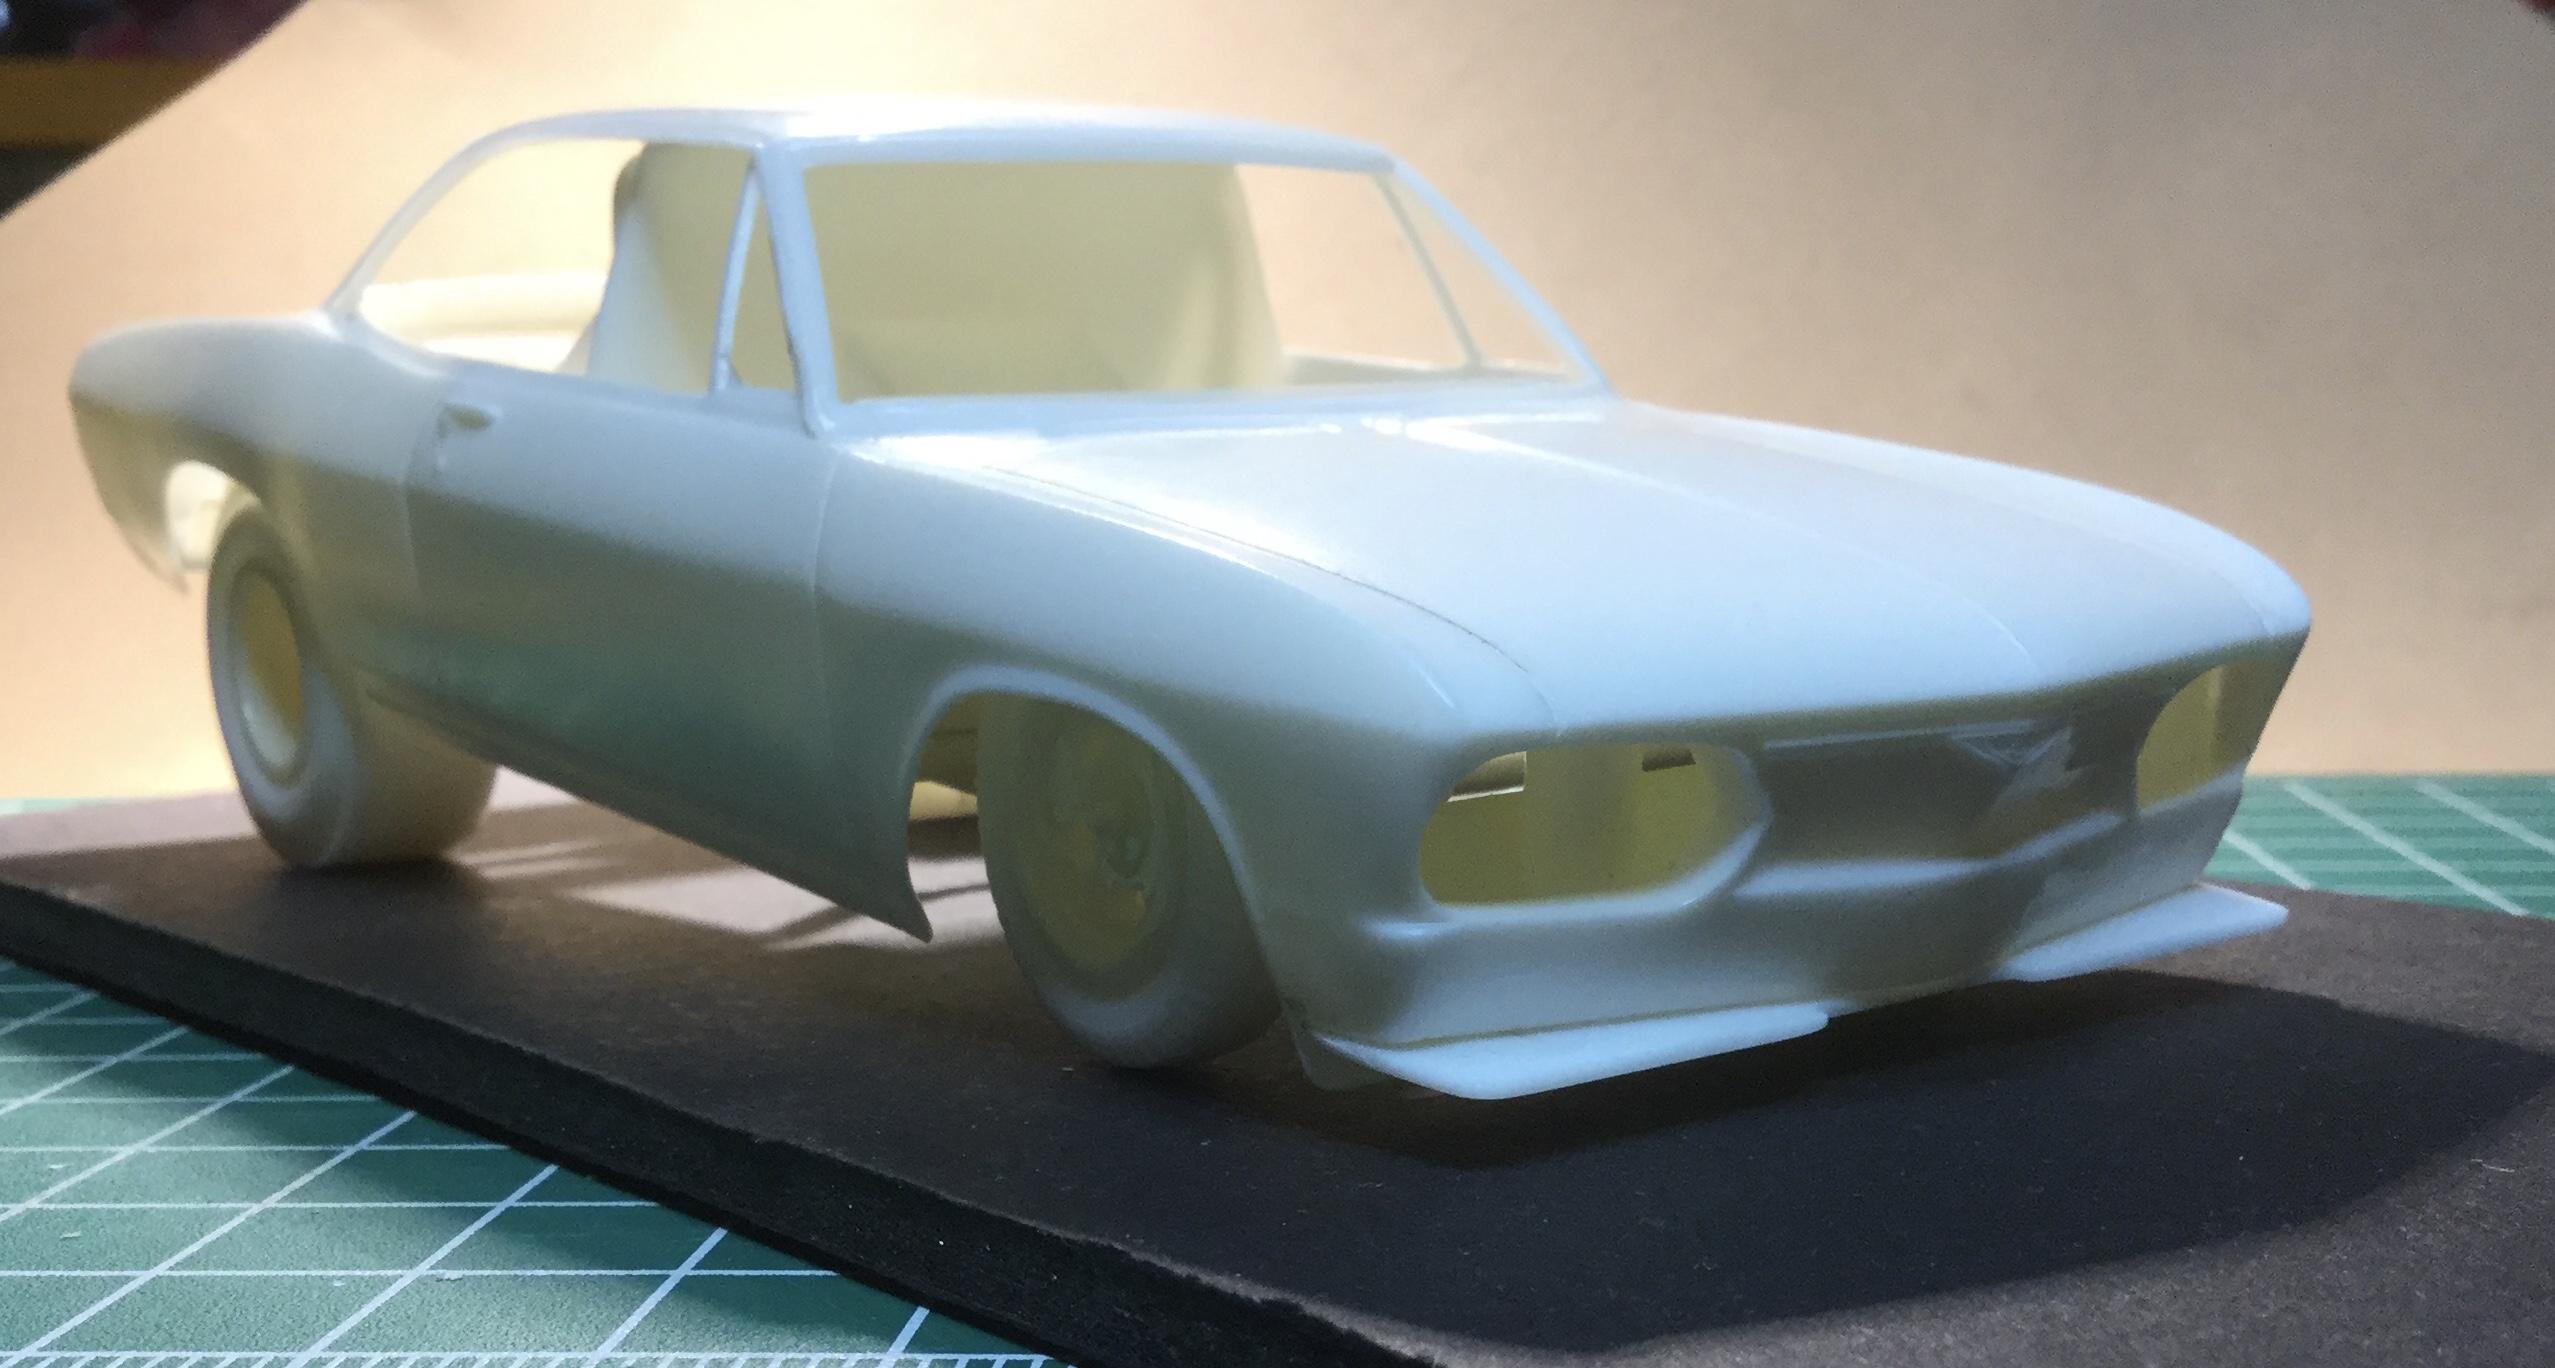
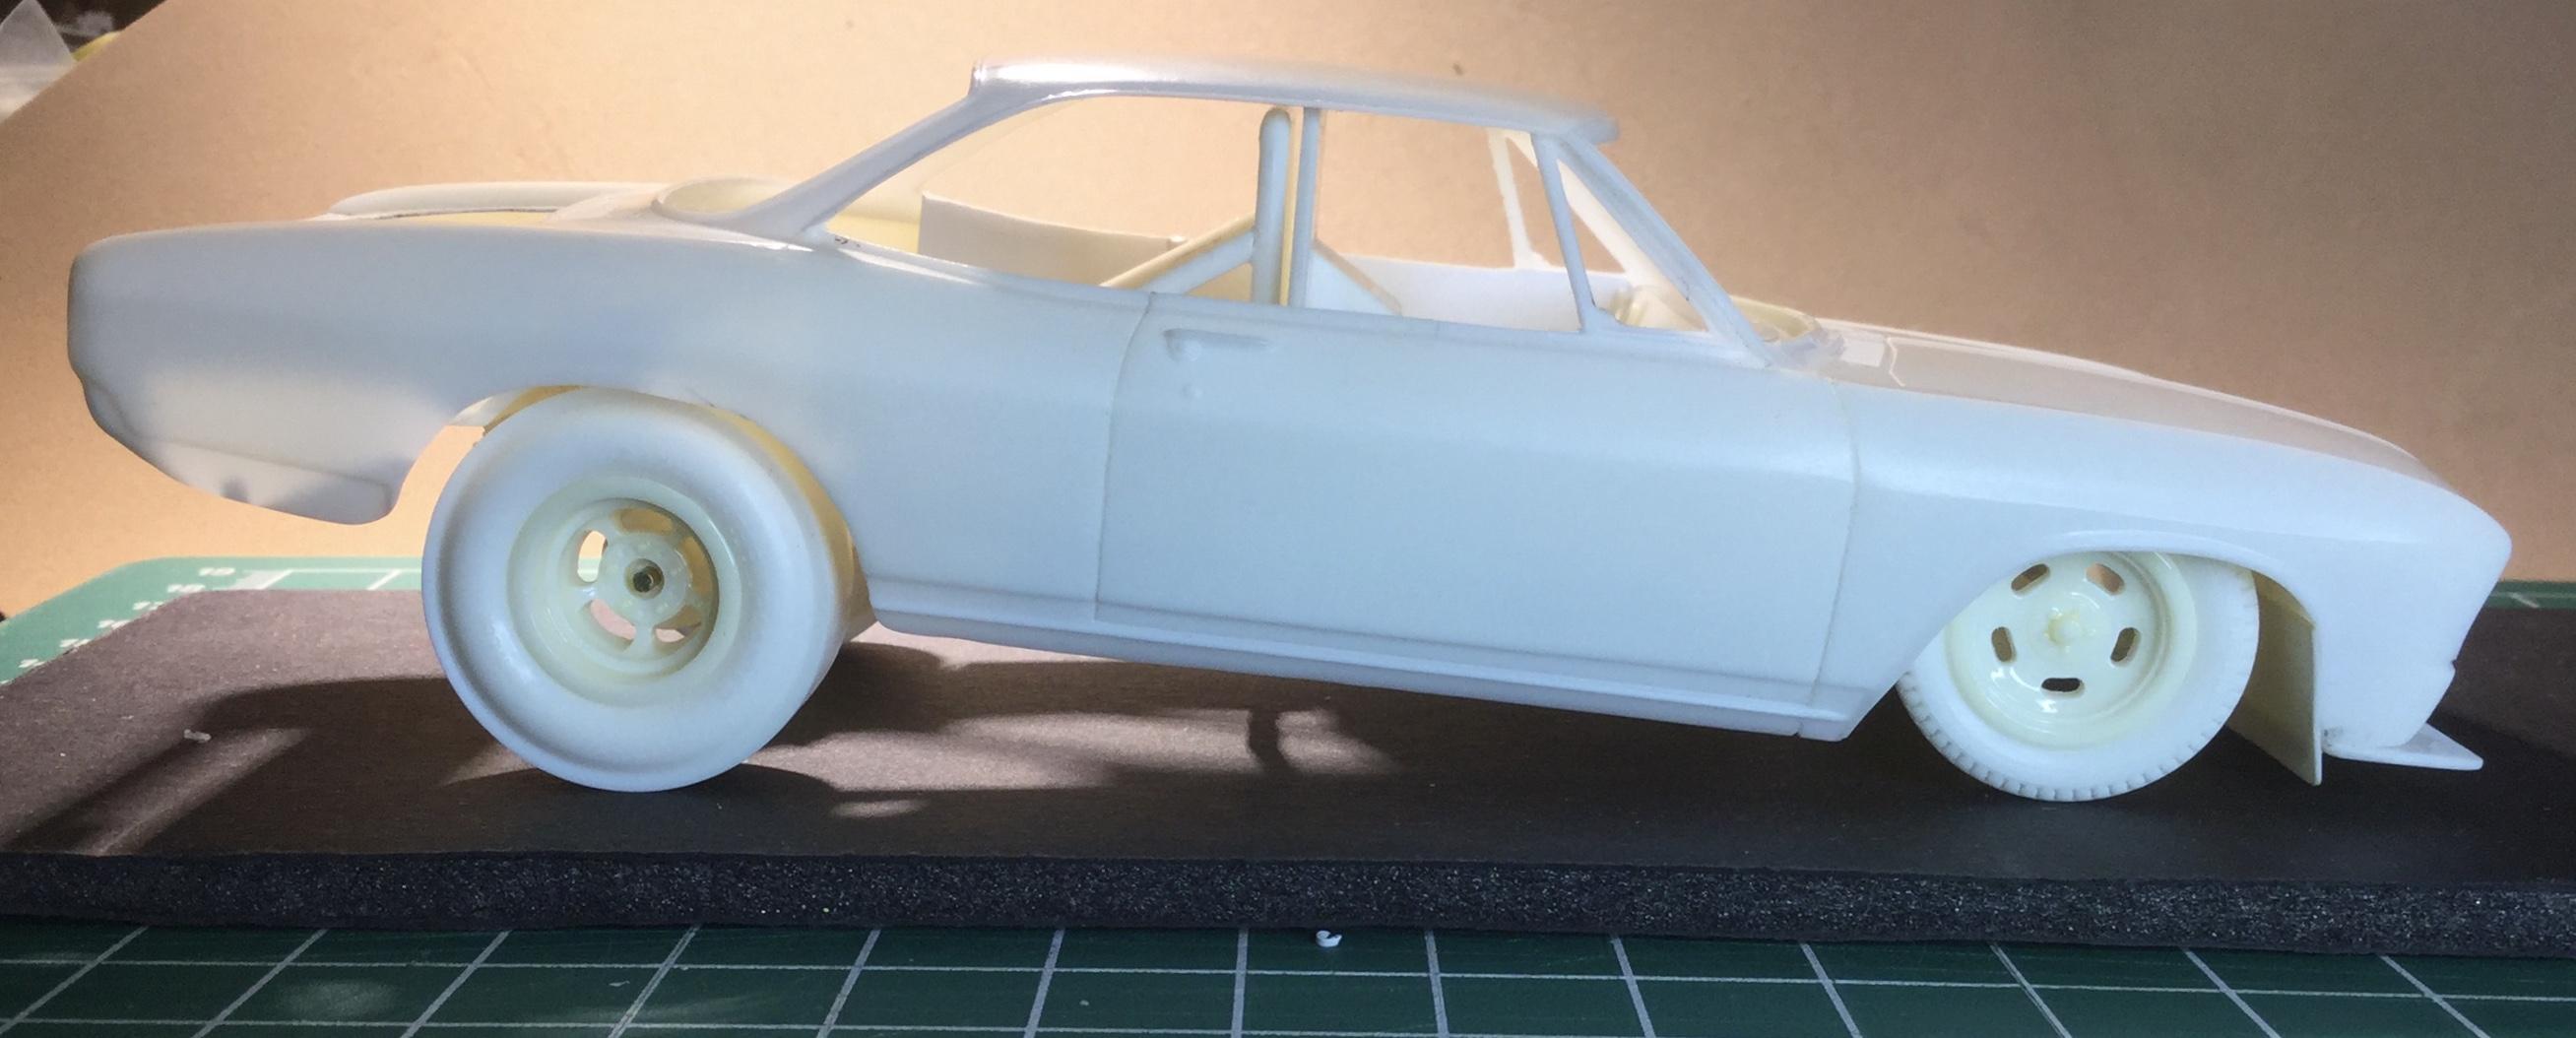
Thanks JC, it has taken its time to get back on the bench. I had to park a couple of other projects largely because of getting mired in details and with my current CannonBall, the IMSA Camaro, I had fallen behind too far to complete it by month’s end. So glad to be free of contest/display deadlines, model on! Thanks Bob, my favourite area is engine construction and all the recent metallic paints have helped to enhance the work with washes and dry brushing. My most recent completions have been curbsides, and it was neat to focus on the other aspects of paint finishes plus much quicker build times. Thanks guys for checking in, cheers Misha
-
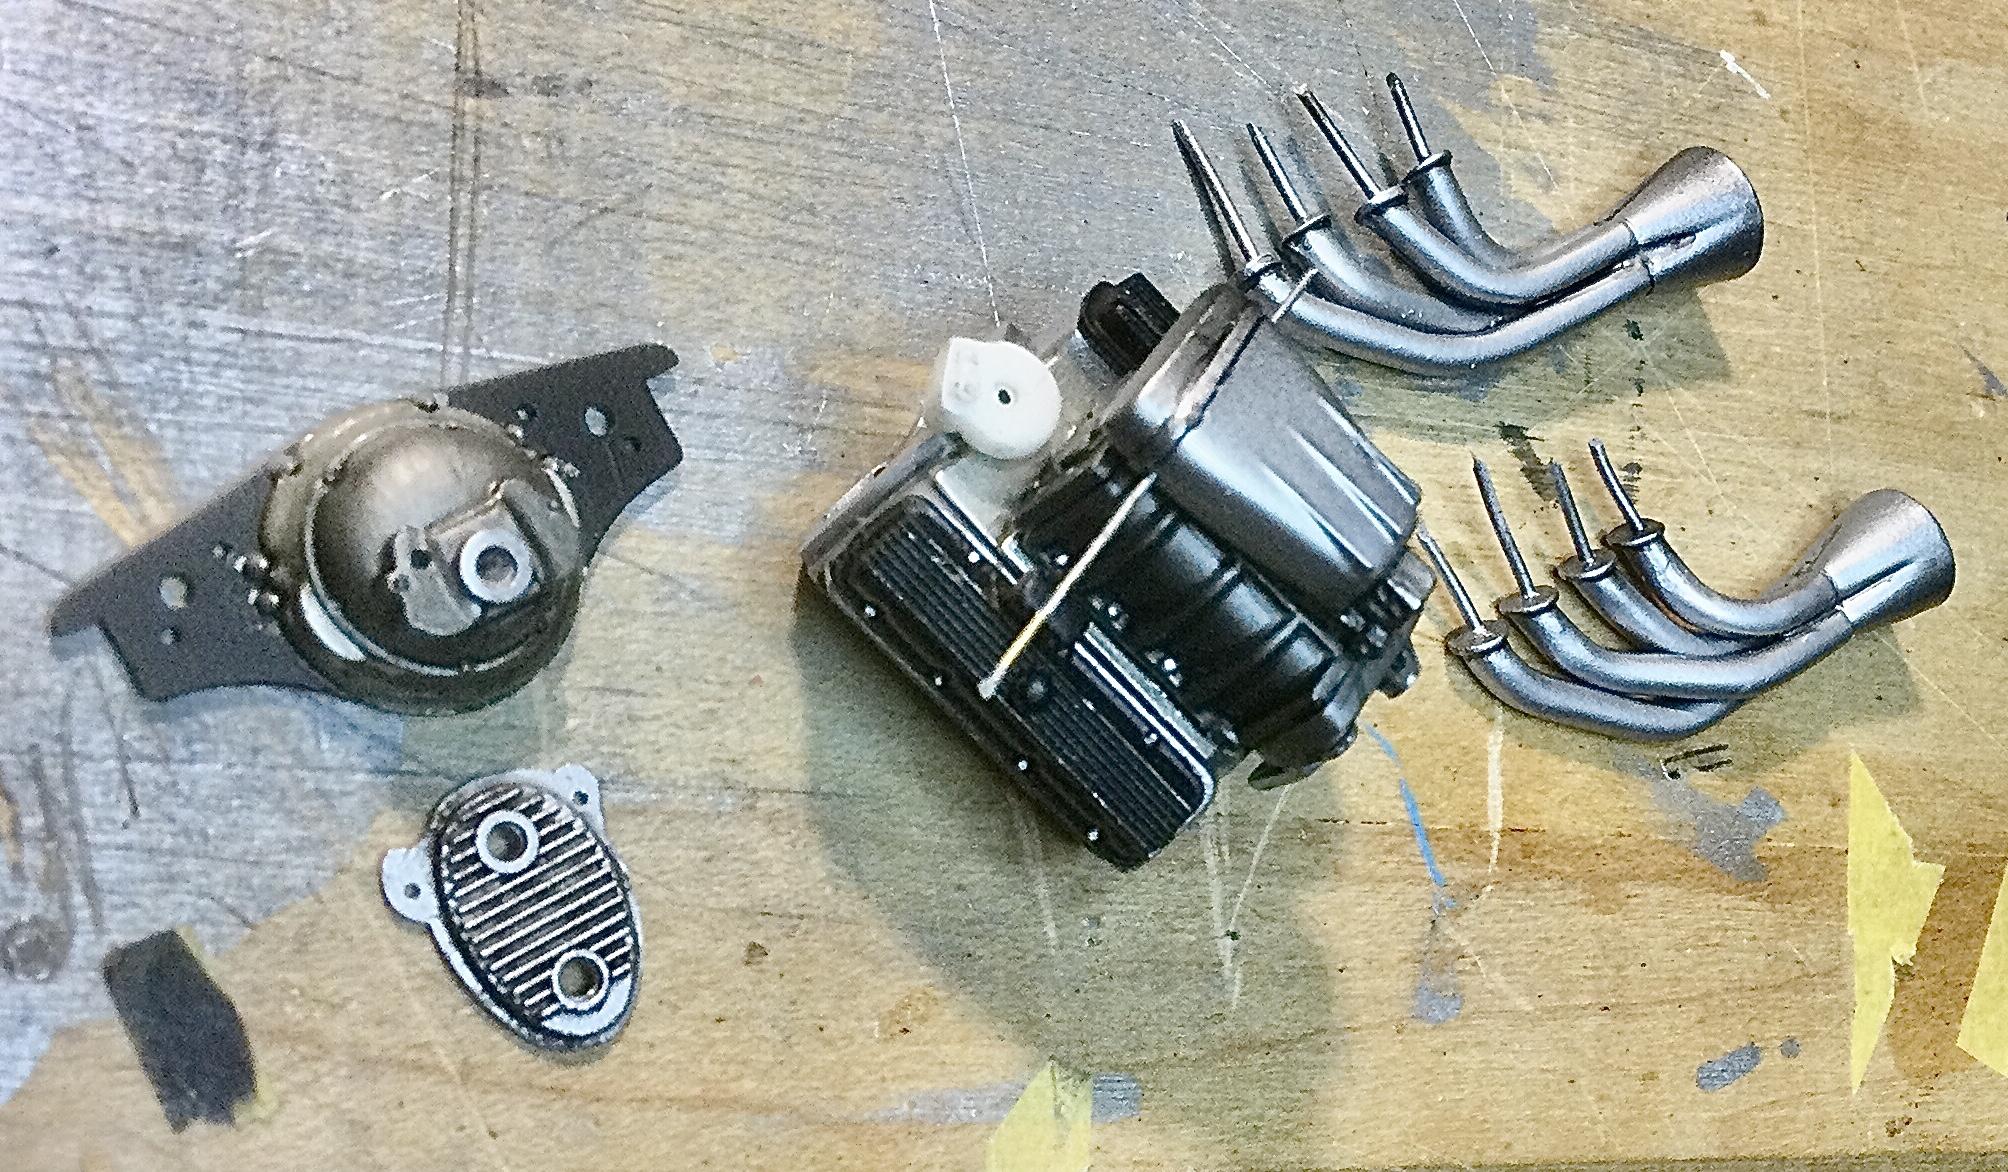
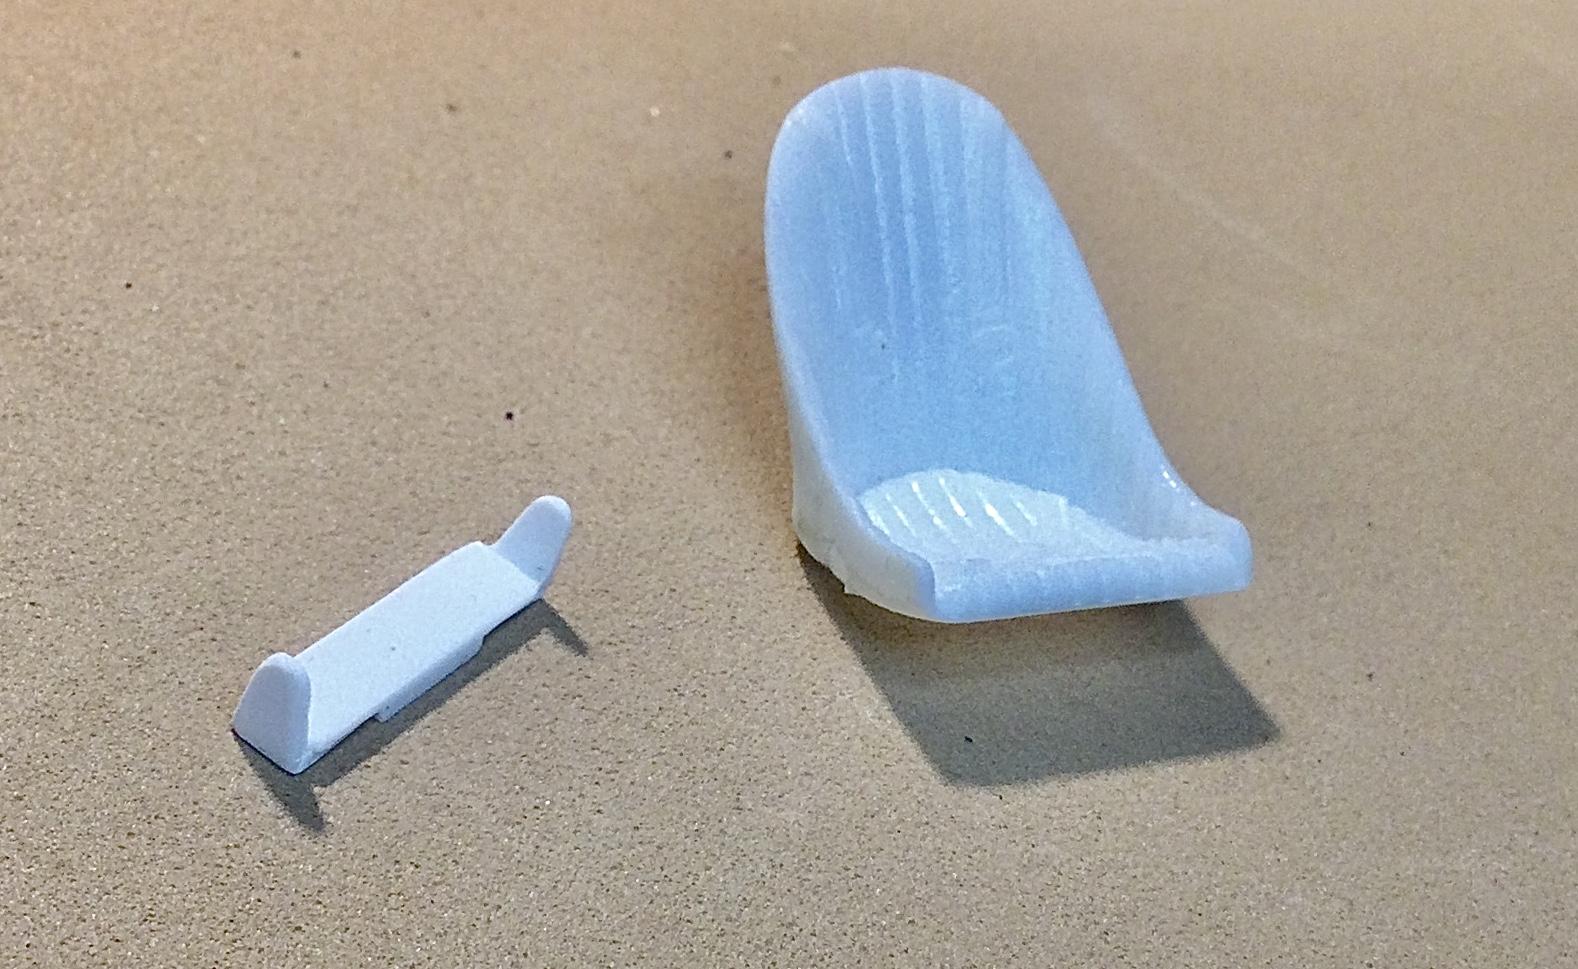
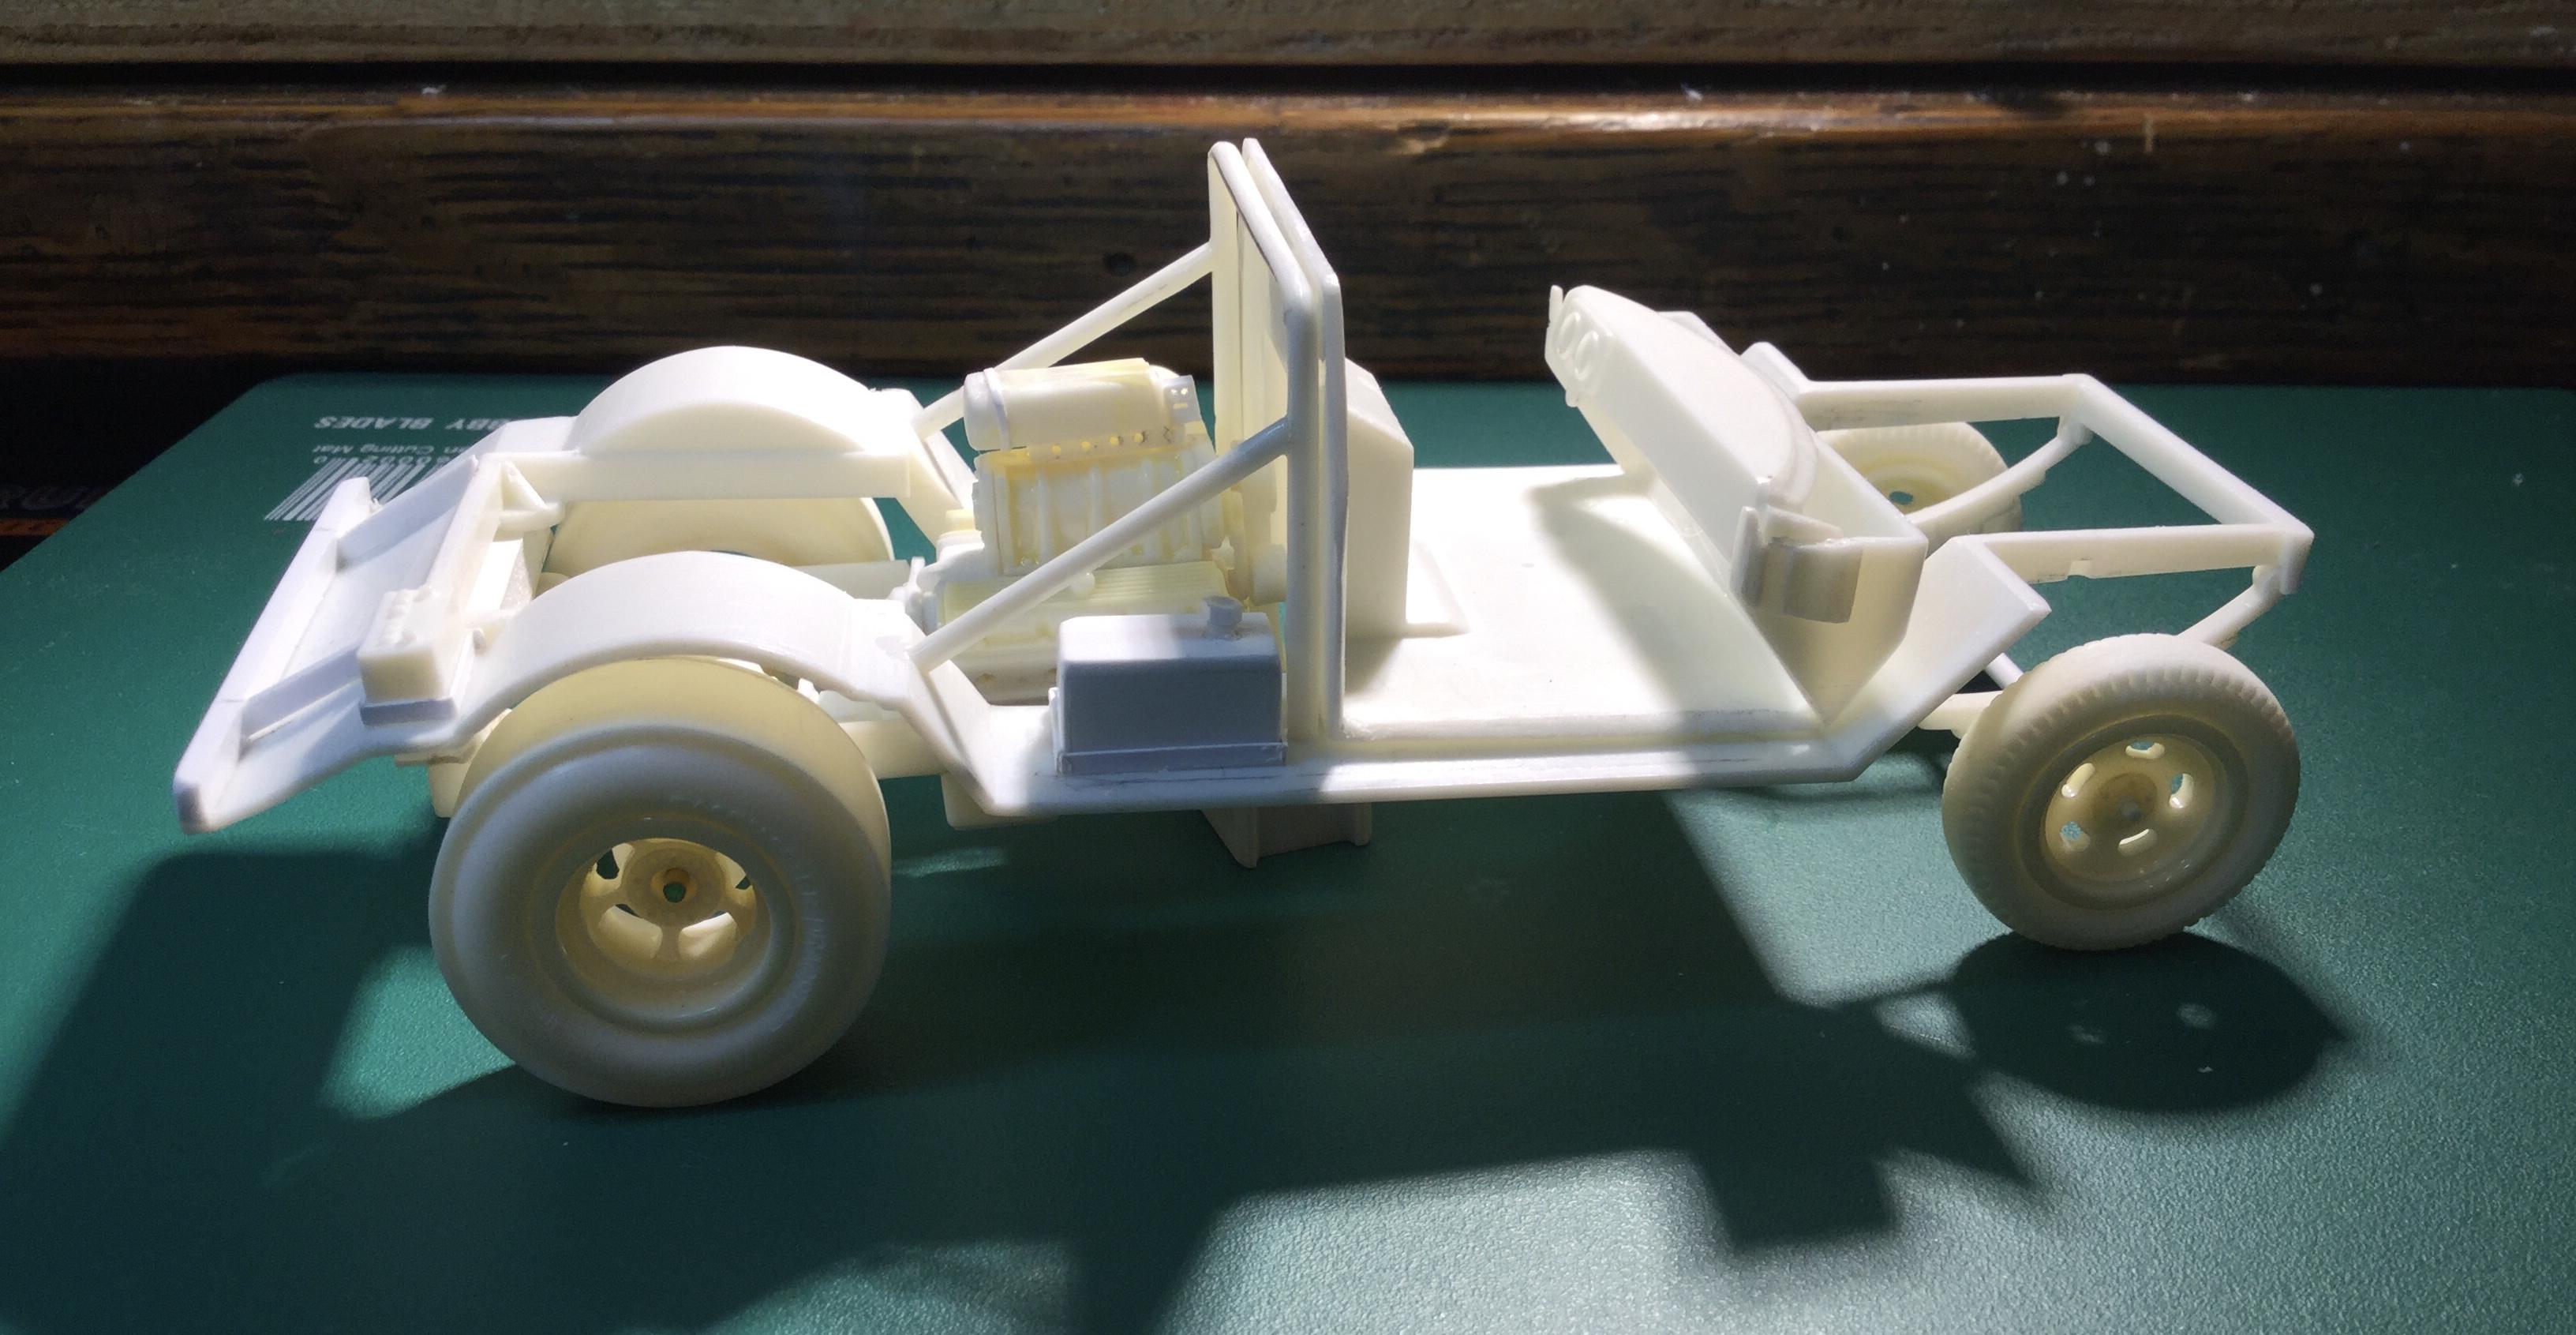
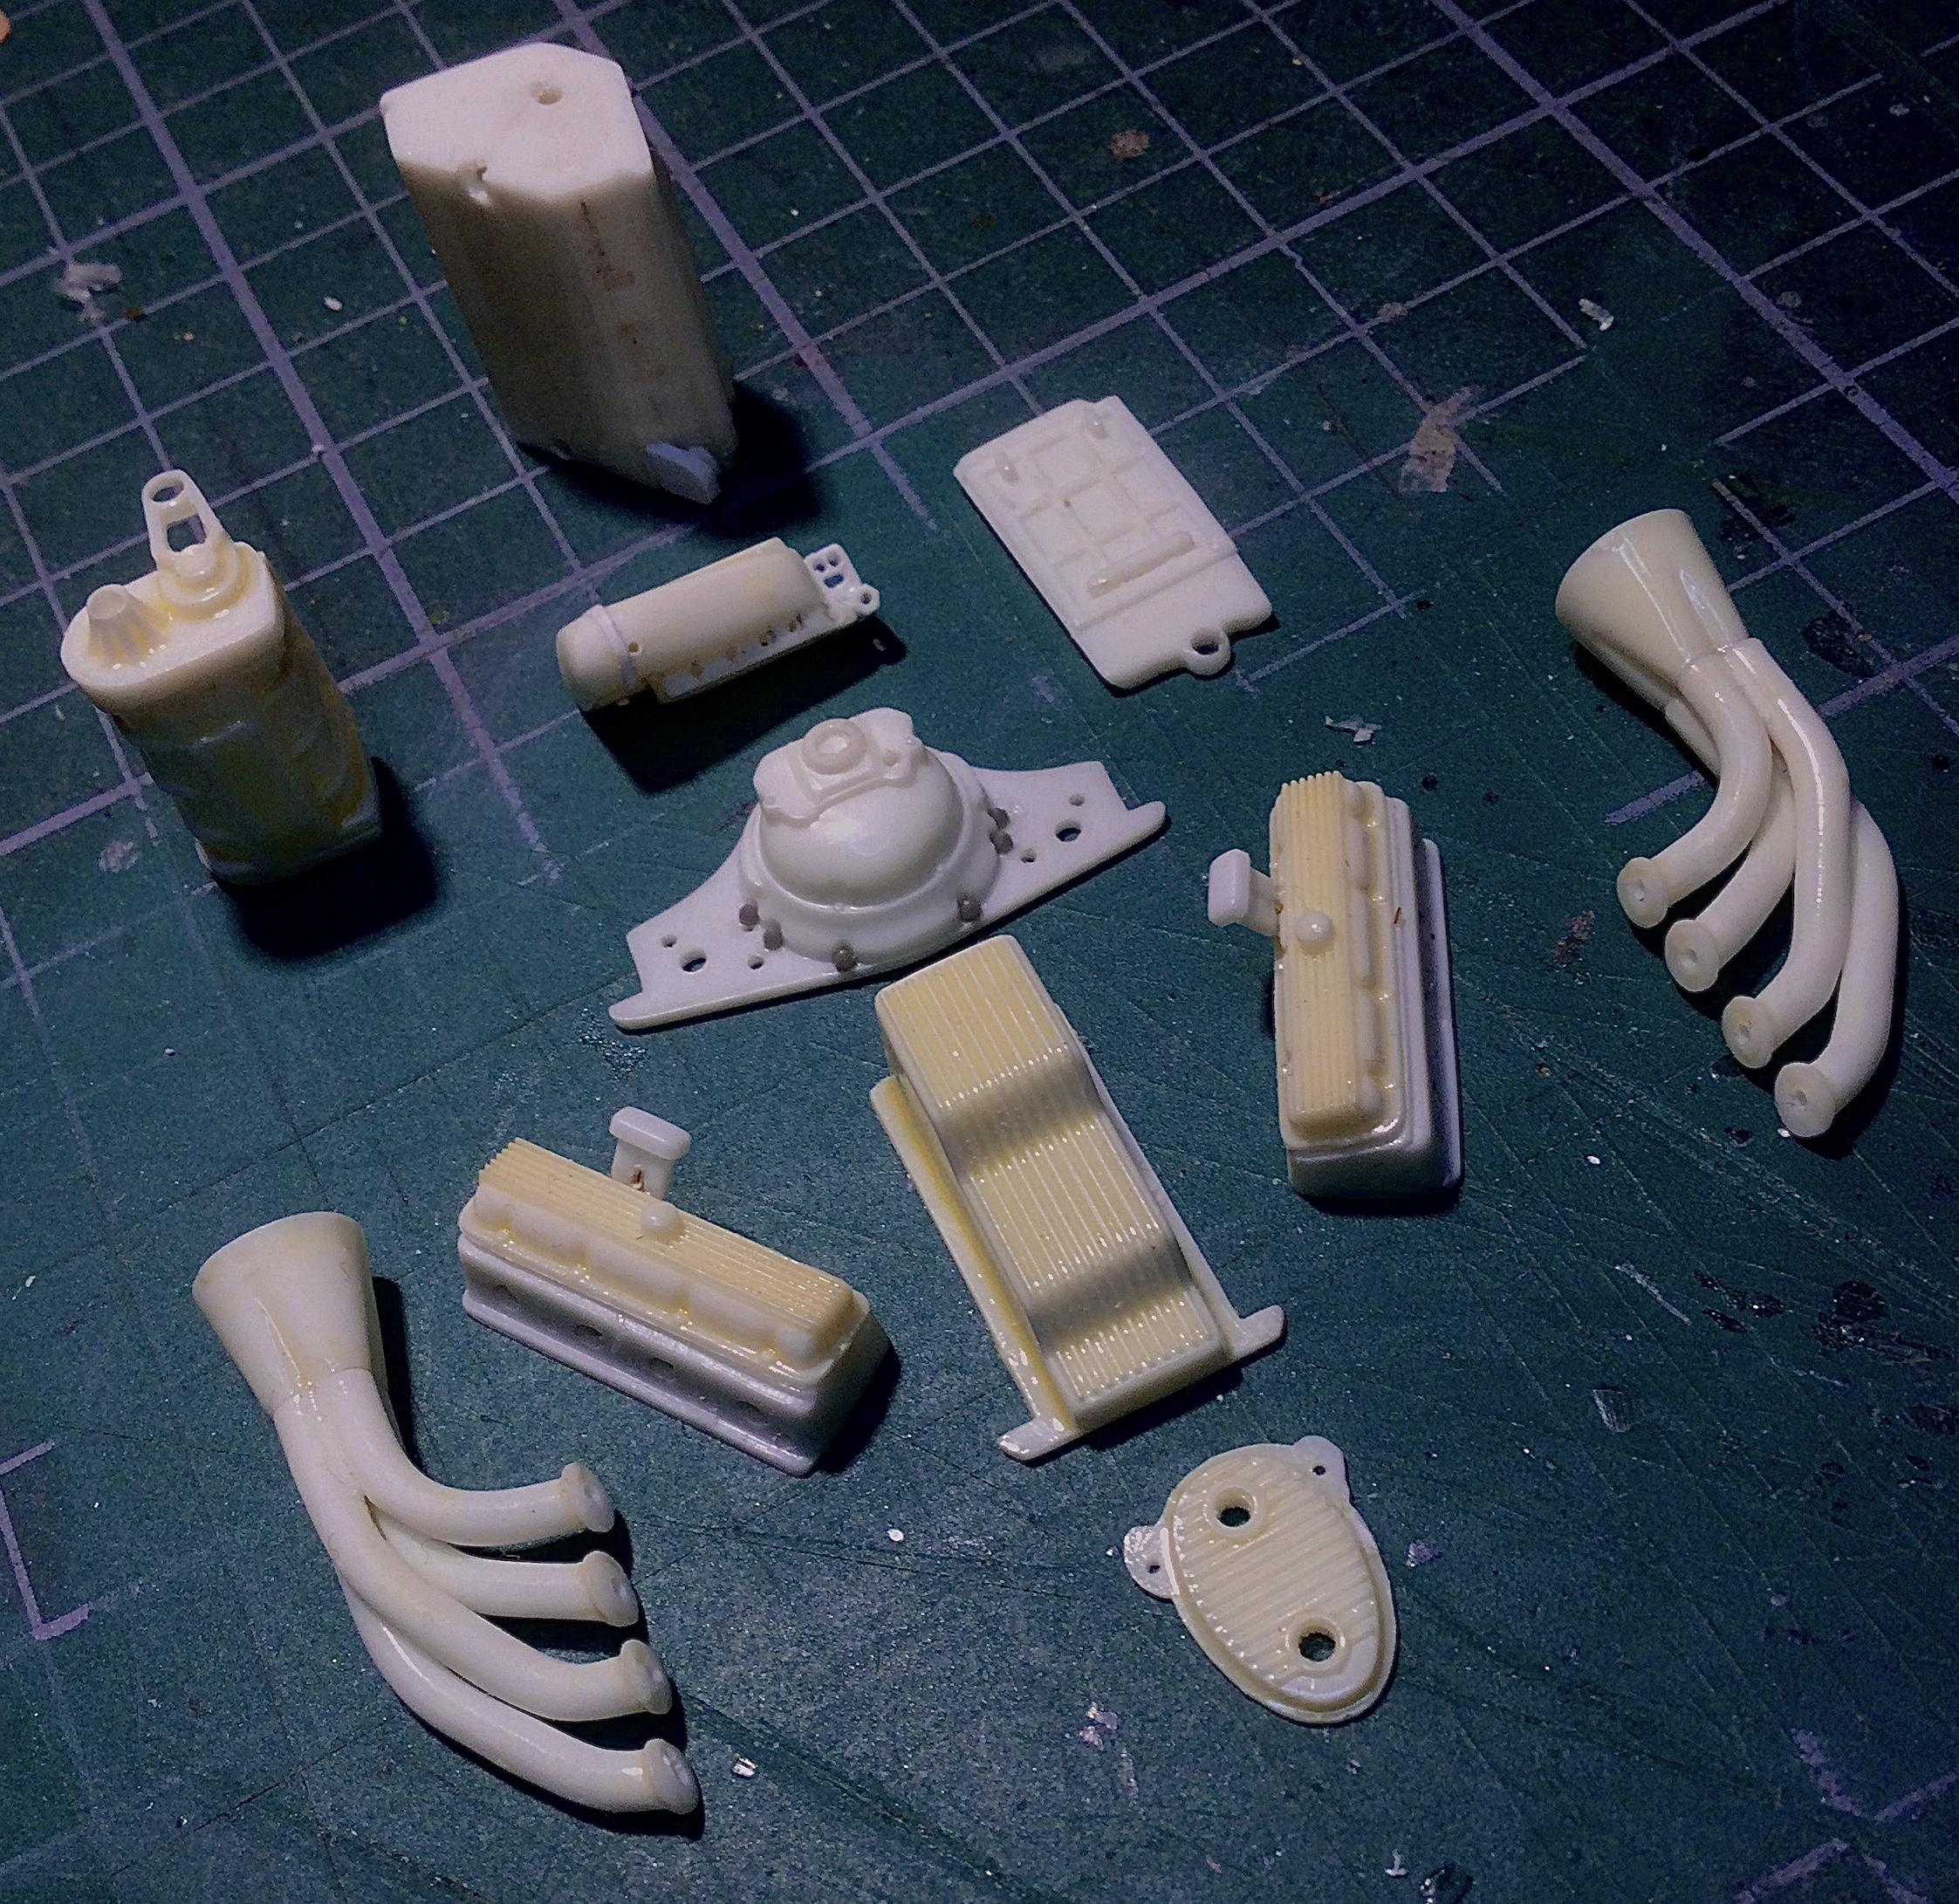
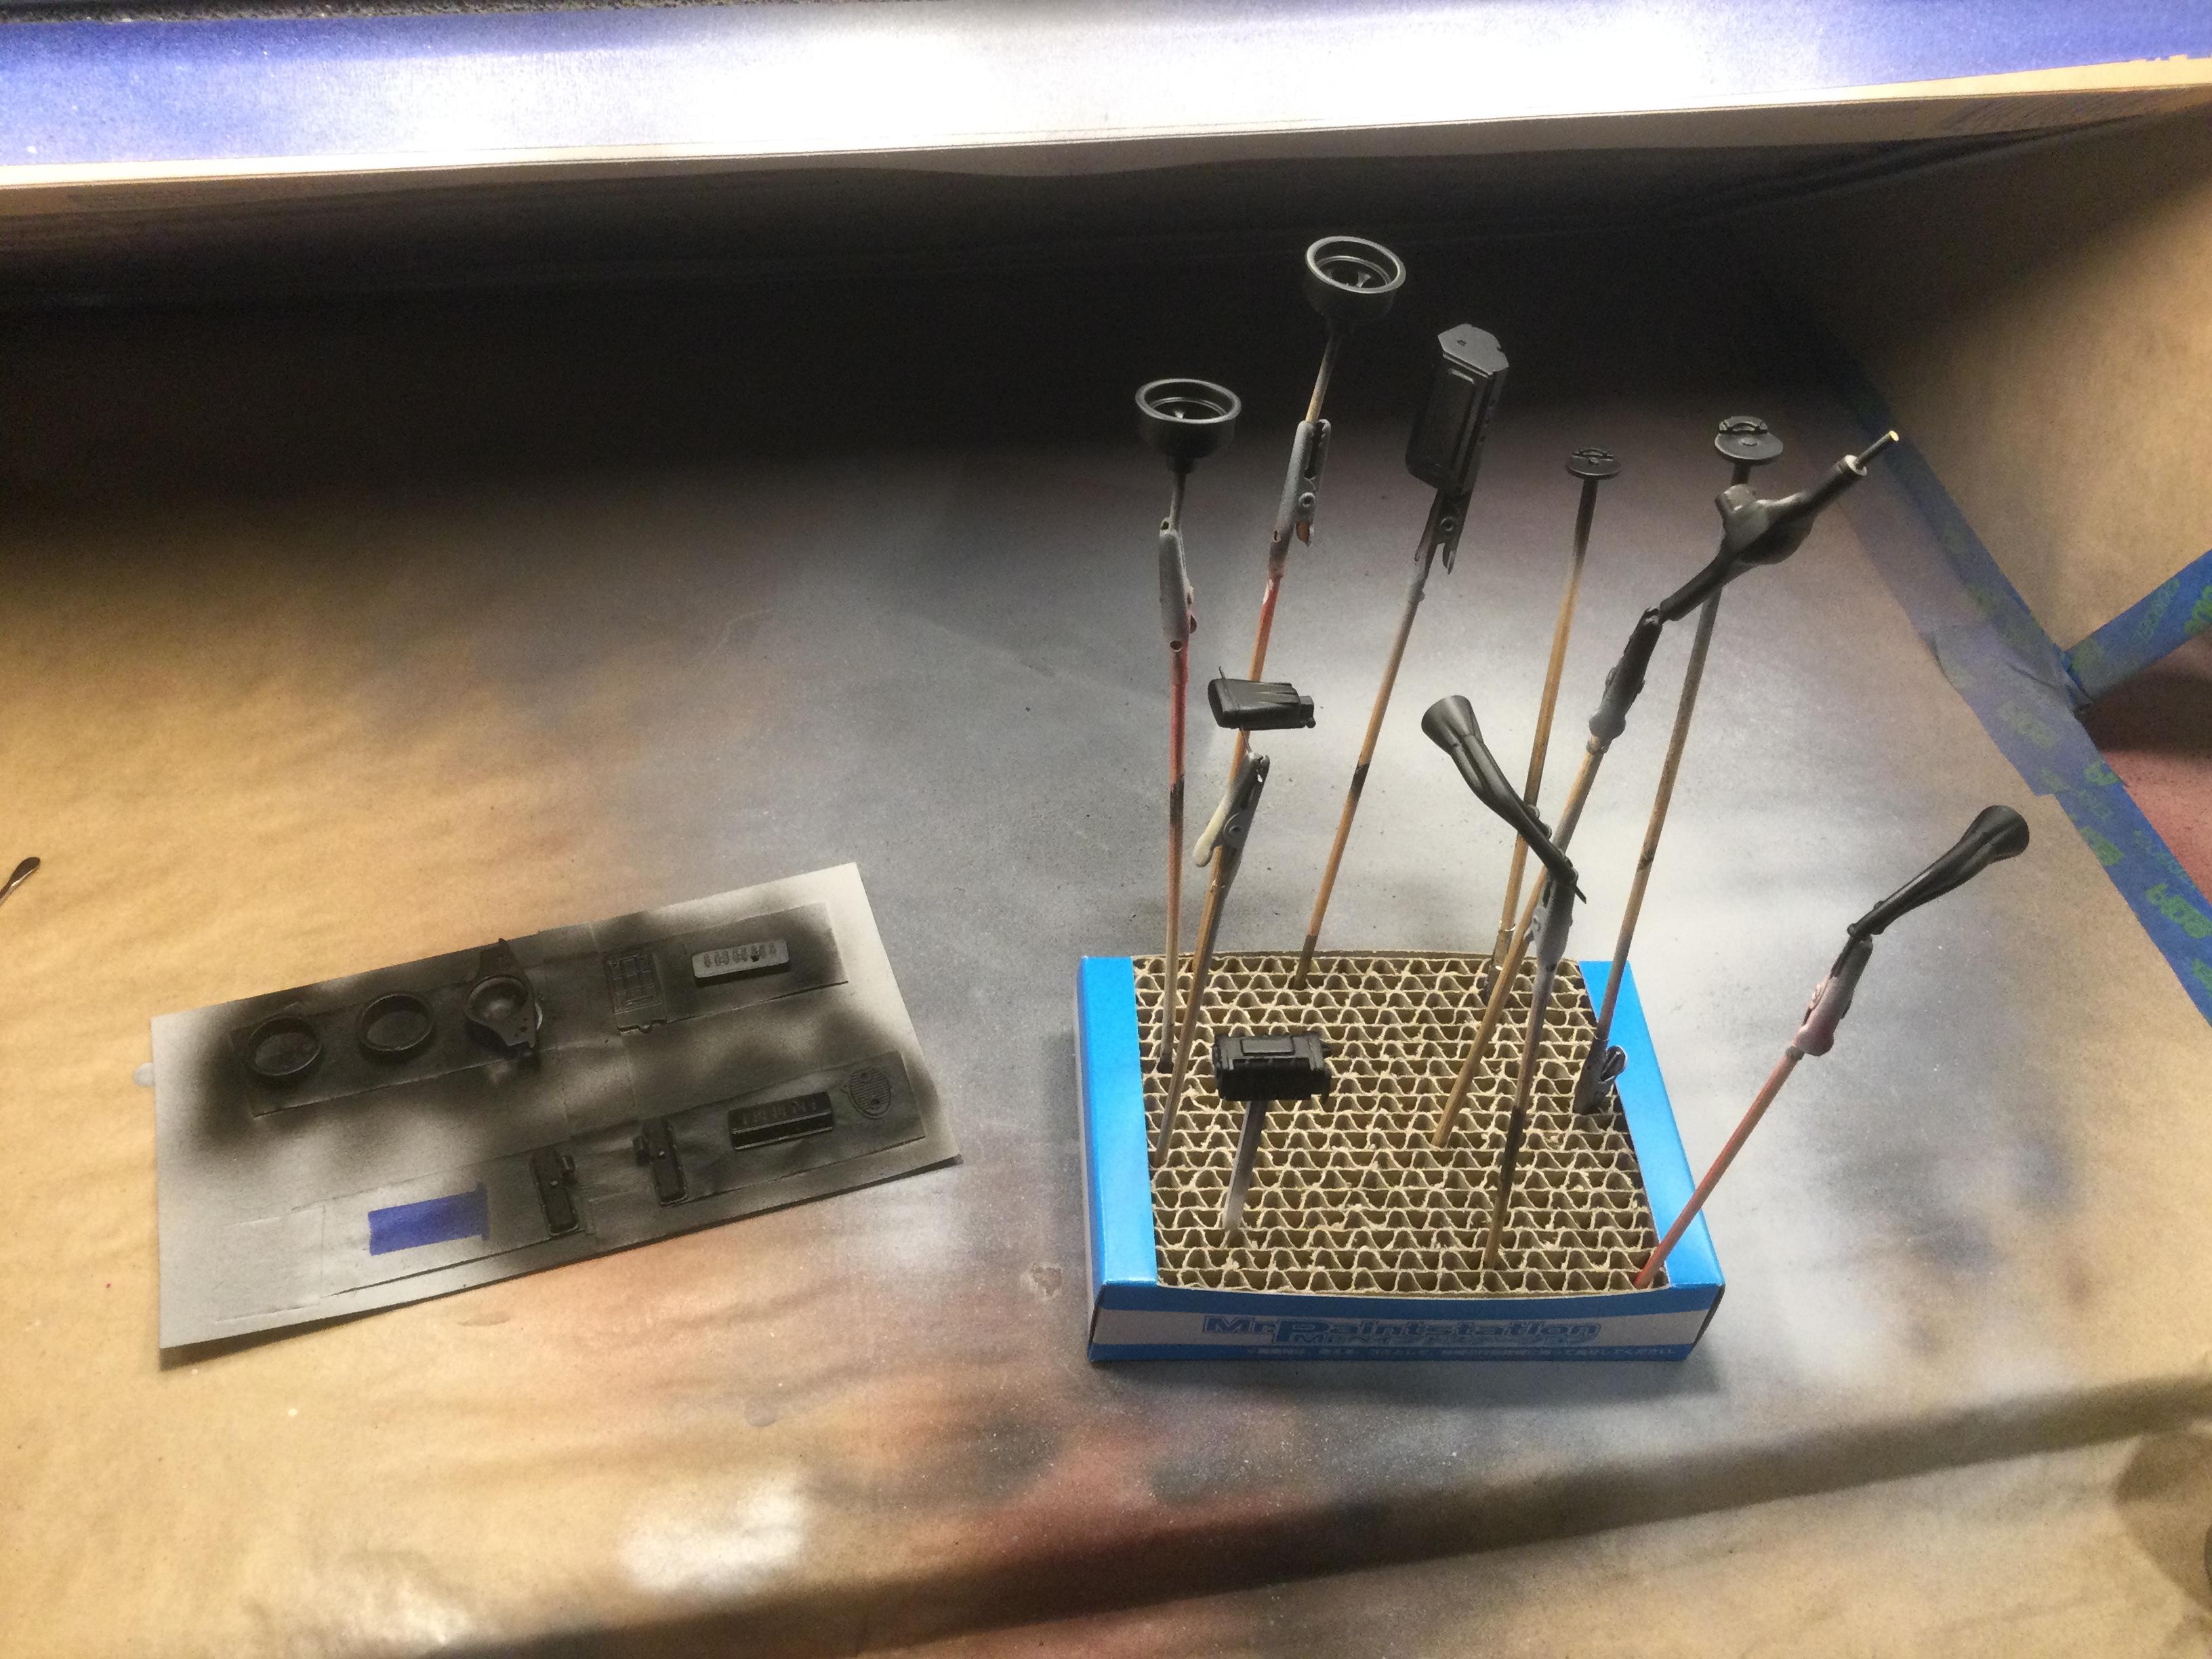
Had a chance to spend a few hours today on detail painting and further construction on the fuel & spark delivery, seat supports, and chassis detailing with bolt heads for the suspension (still in progress). Cheers Misha
-
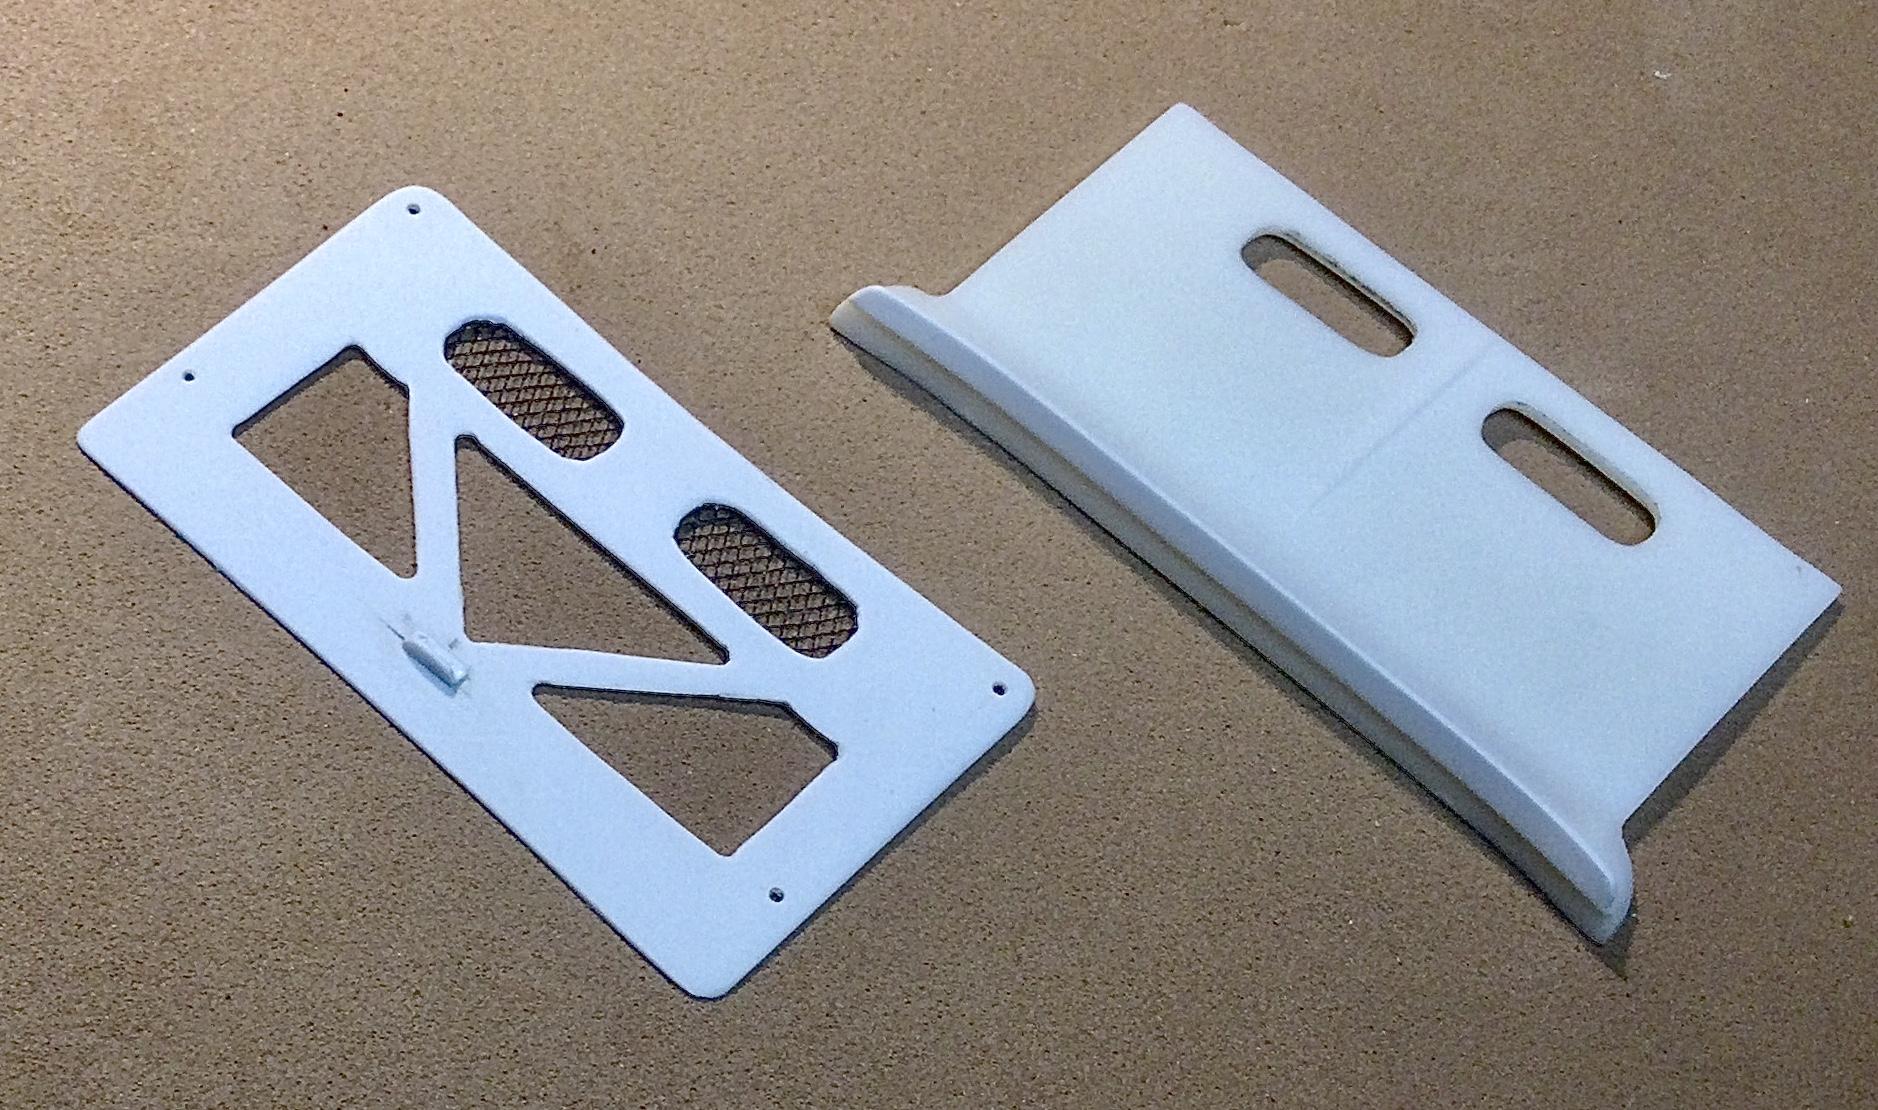
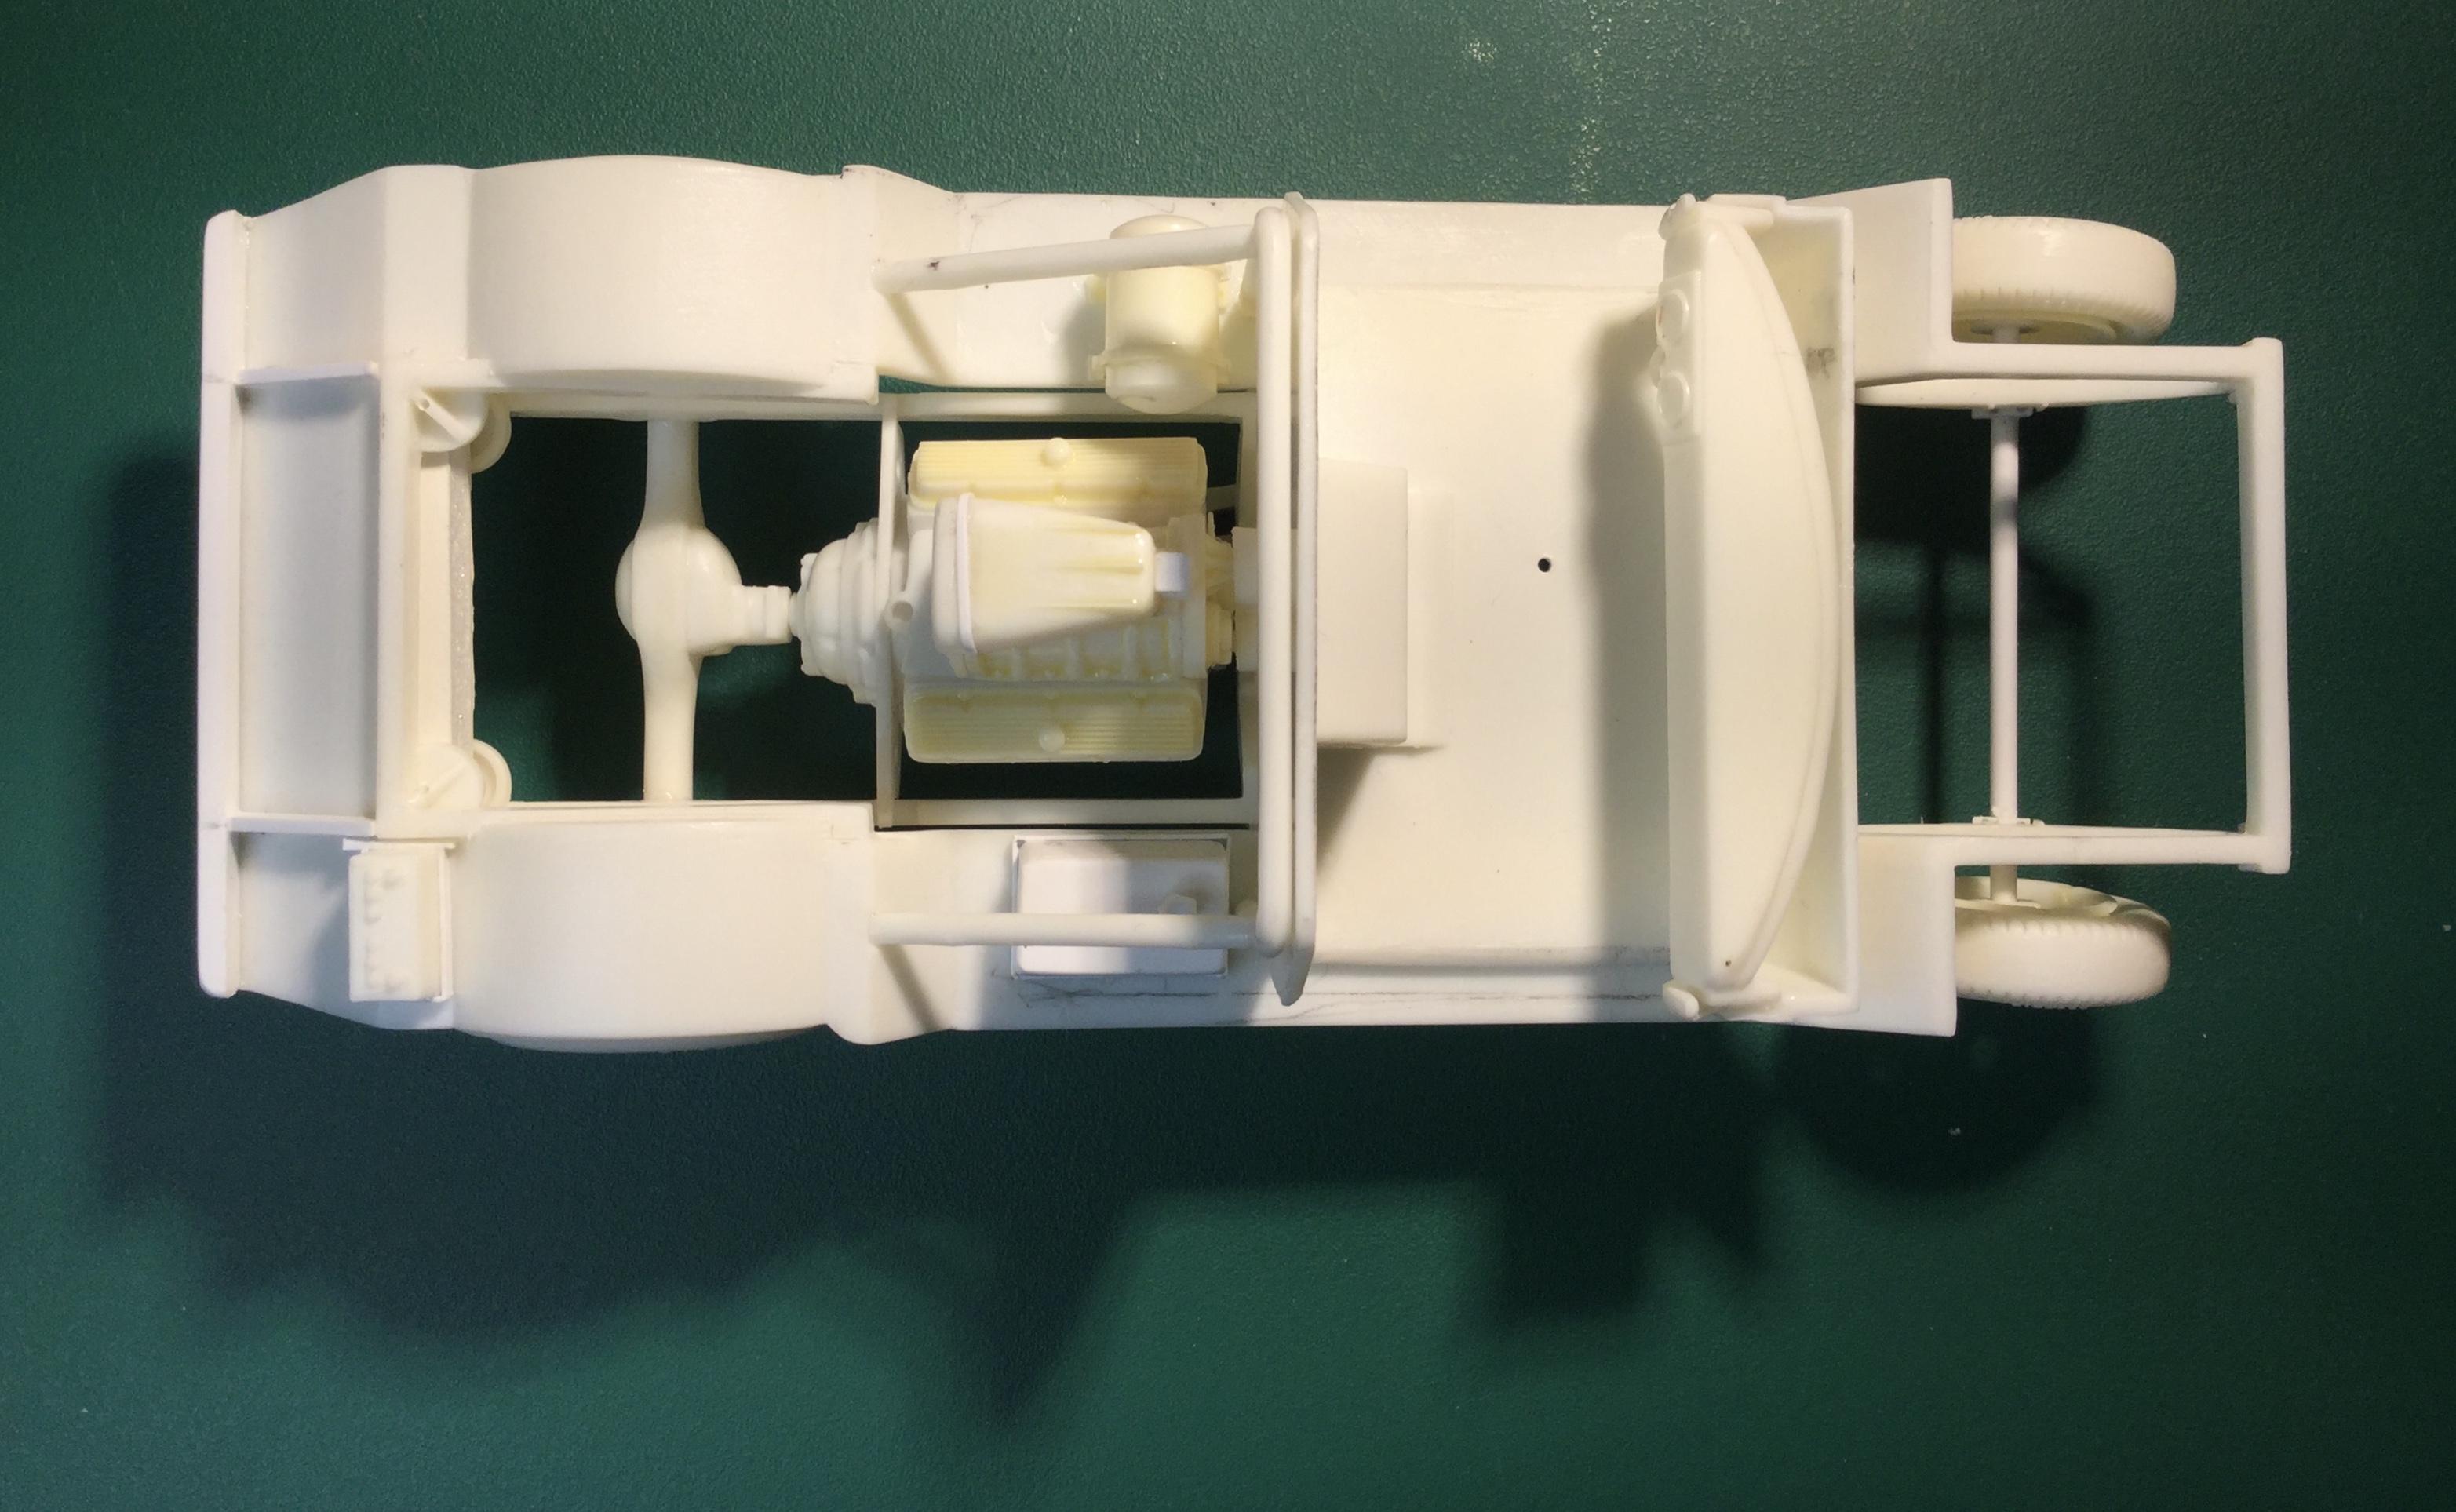
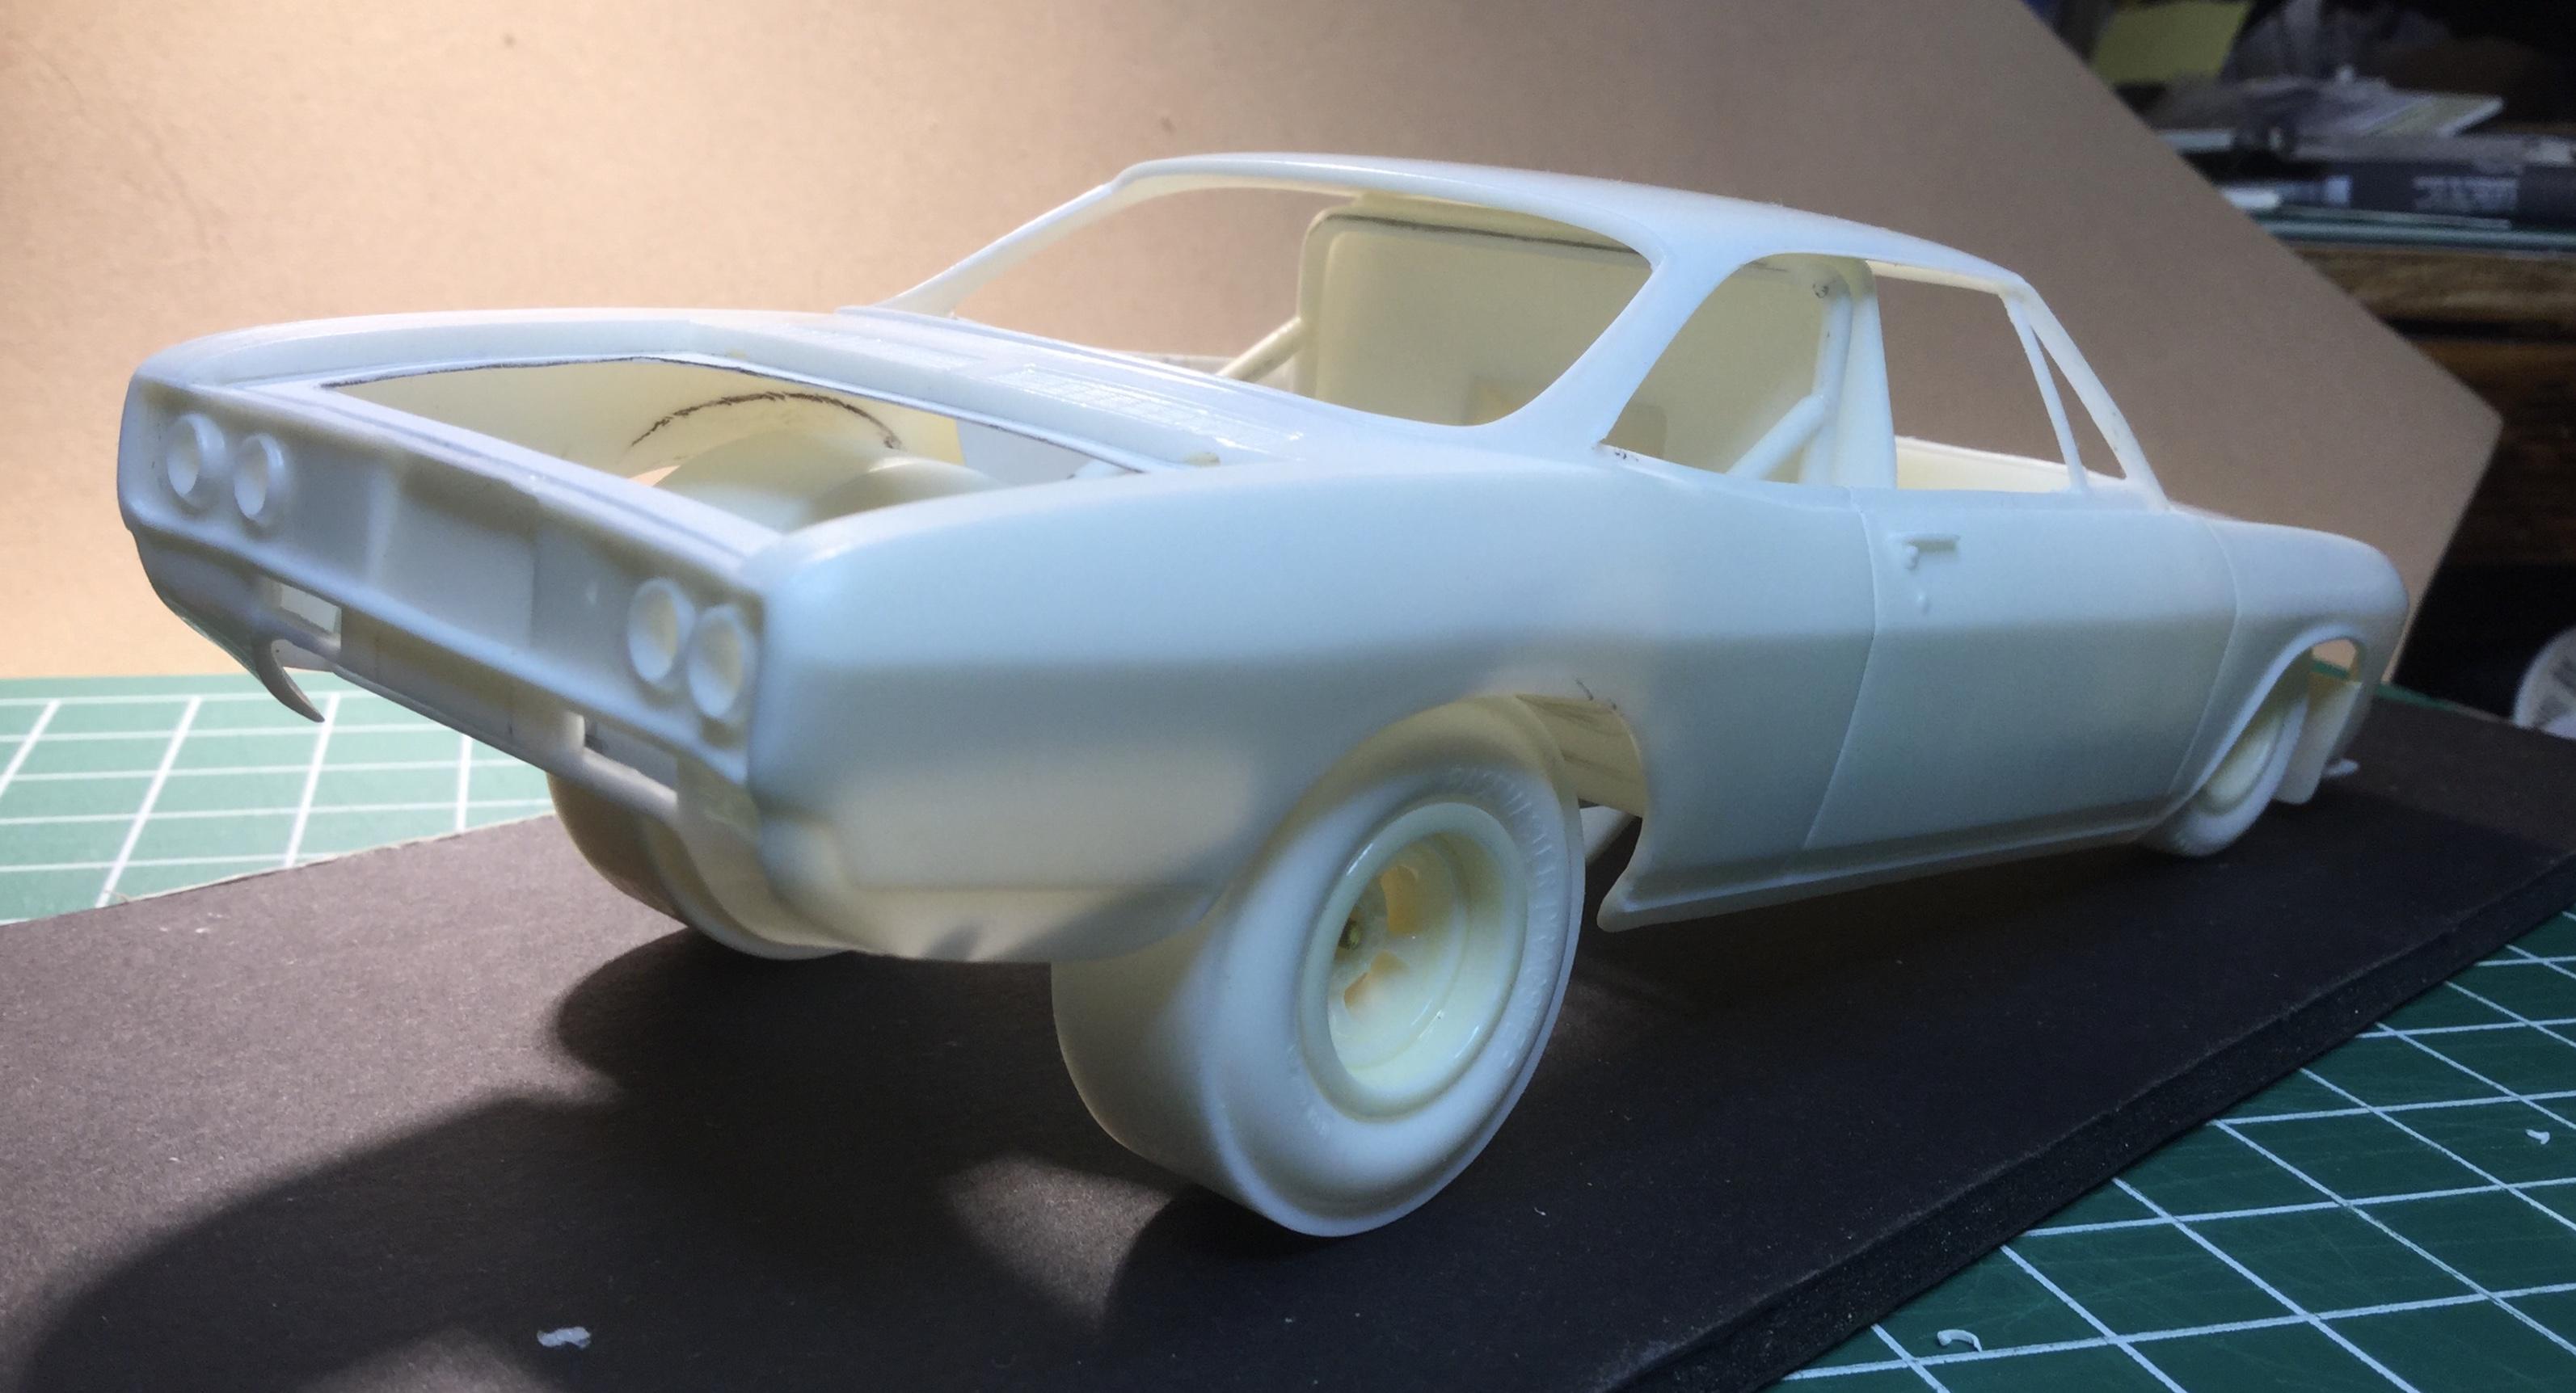
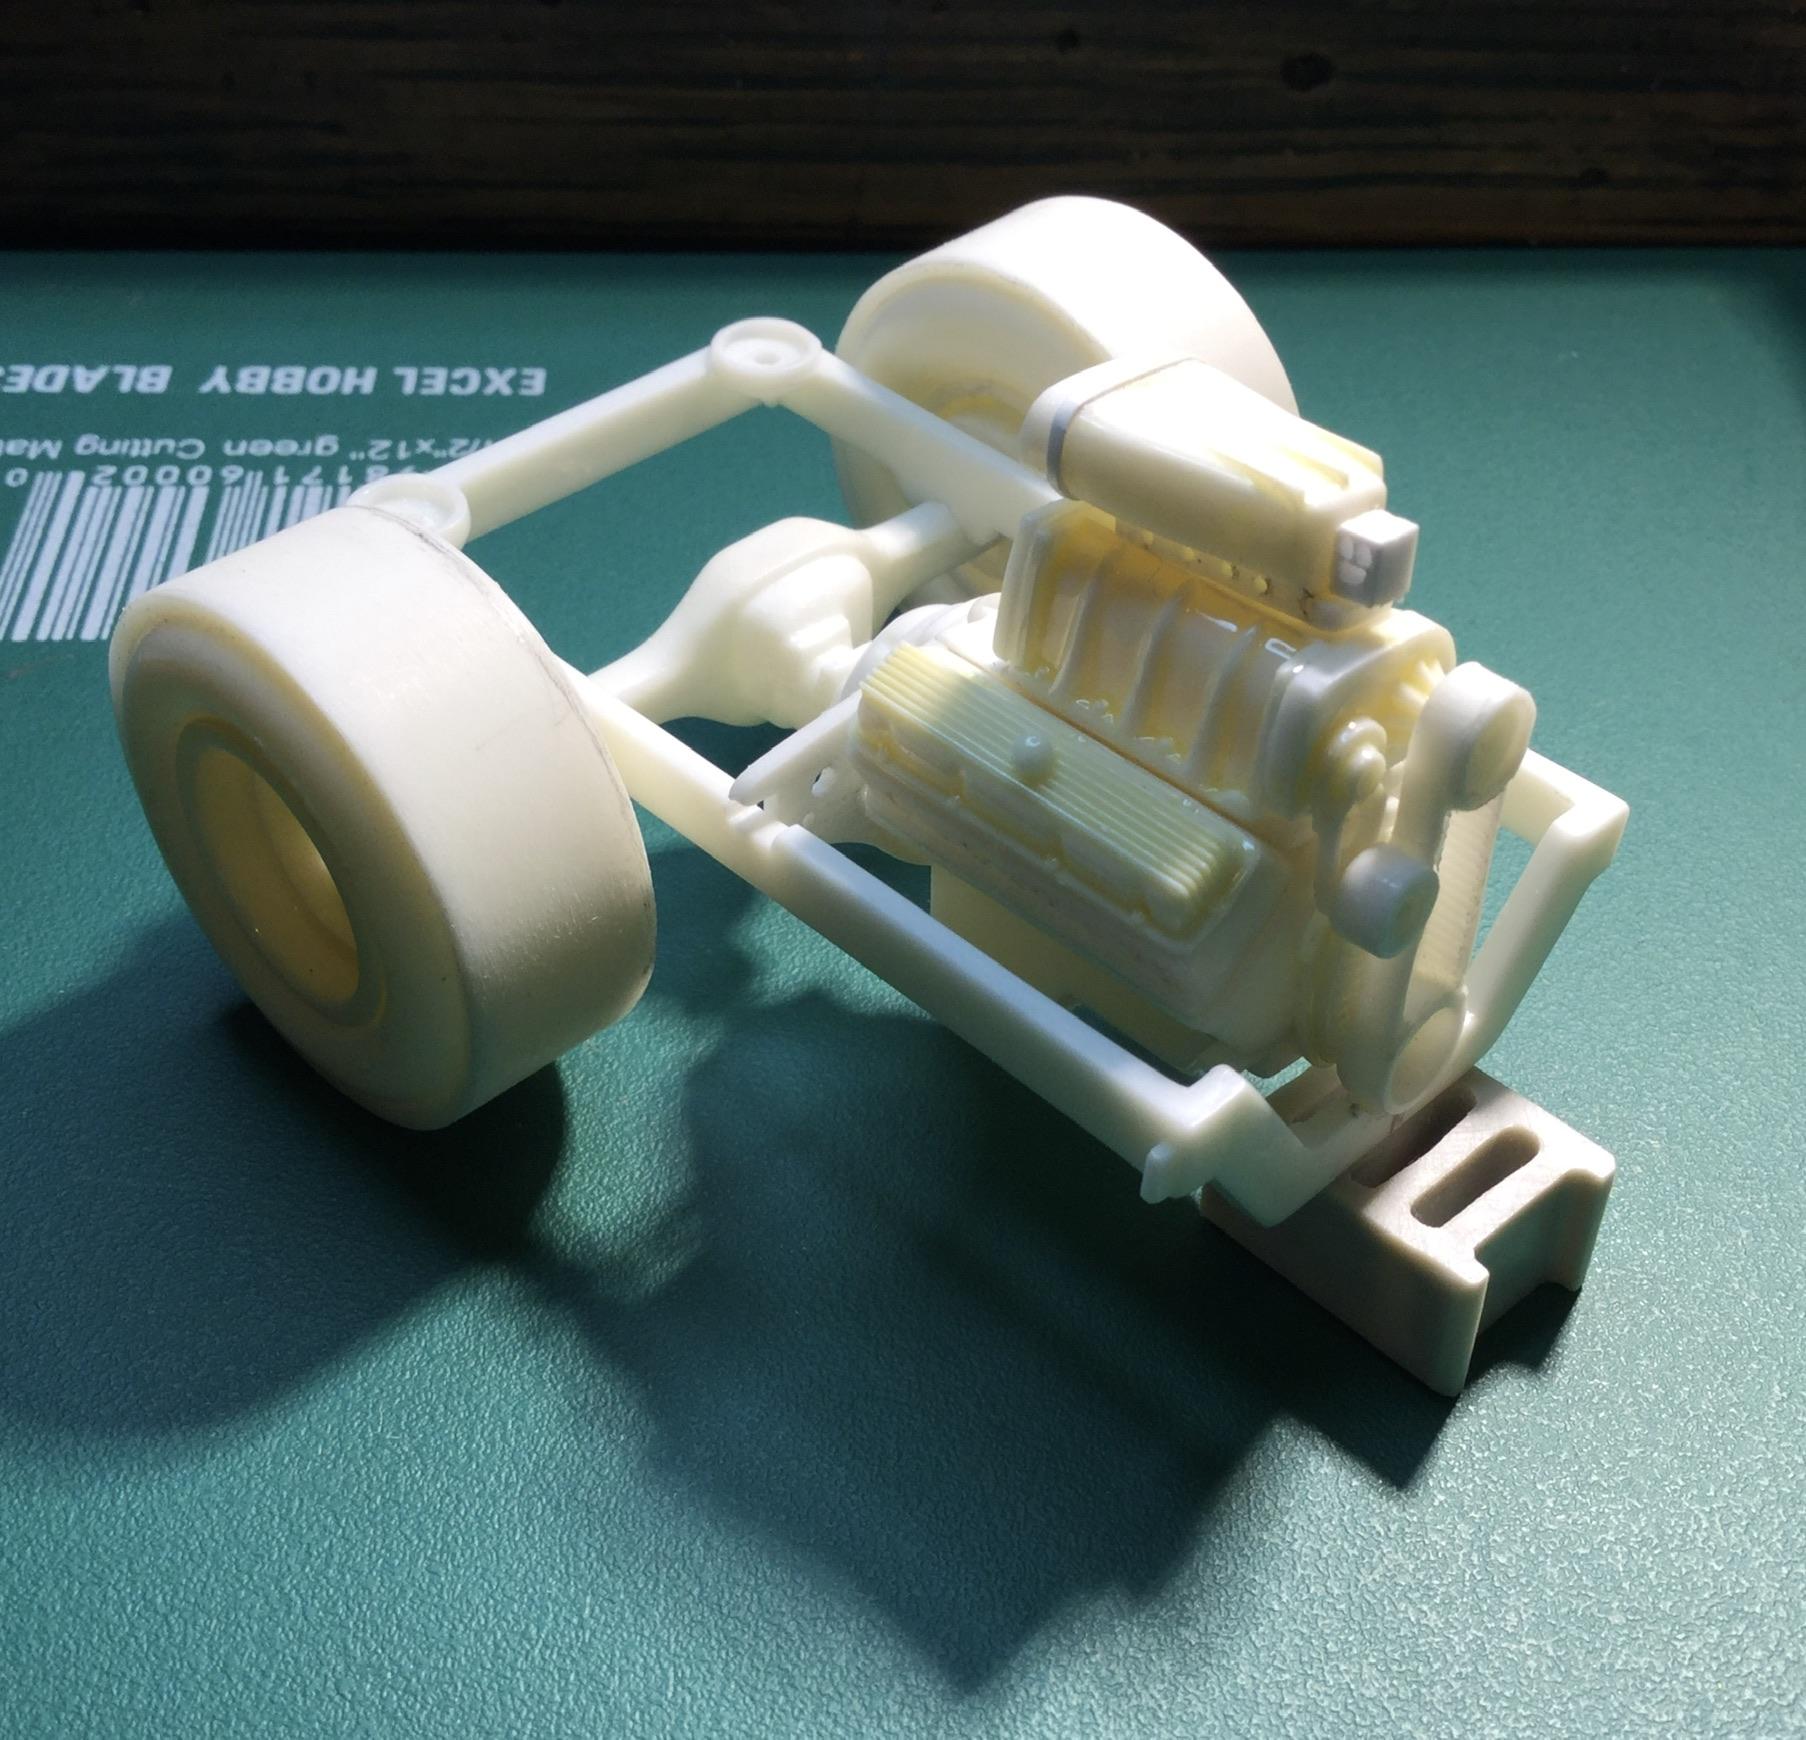
Here are some more shots from September 2020 that I haven’t posted before… Modifications to the rear engine plate and bellhousing. Throw out bearing arm added from solder. Bolts still to be added. The large tank in the foreground is for the water being circulated by an electric pump. Enough for the short runs being made. Small battery in rear will connect to an external battery boost panel and the Moon gas tank will relocate to the rear as well. Top view with the Moon tank in its original position. Intake scoop is mounted facing the rear for greater air. Corvair remains a Chevy powered rear engine car! By mocking up the major parts with the Aleene’s Tacky Glue it was possible to establish the stance I was looking for. It all takes time and patience to achieve that certain look, or at least come close enough for a cigar! Comments and suggestions are most welcome, cheers Misha
-
Hi Moderators? I just realized this thread ought to be in the Drag WIP section, would you please slot me there? Thanx Misha
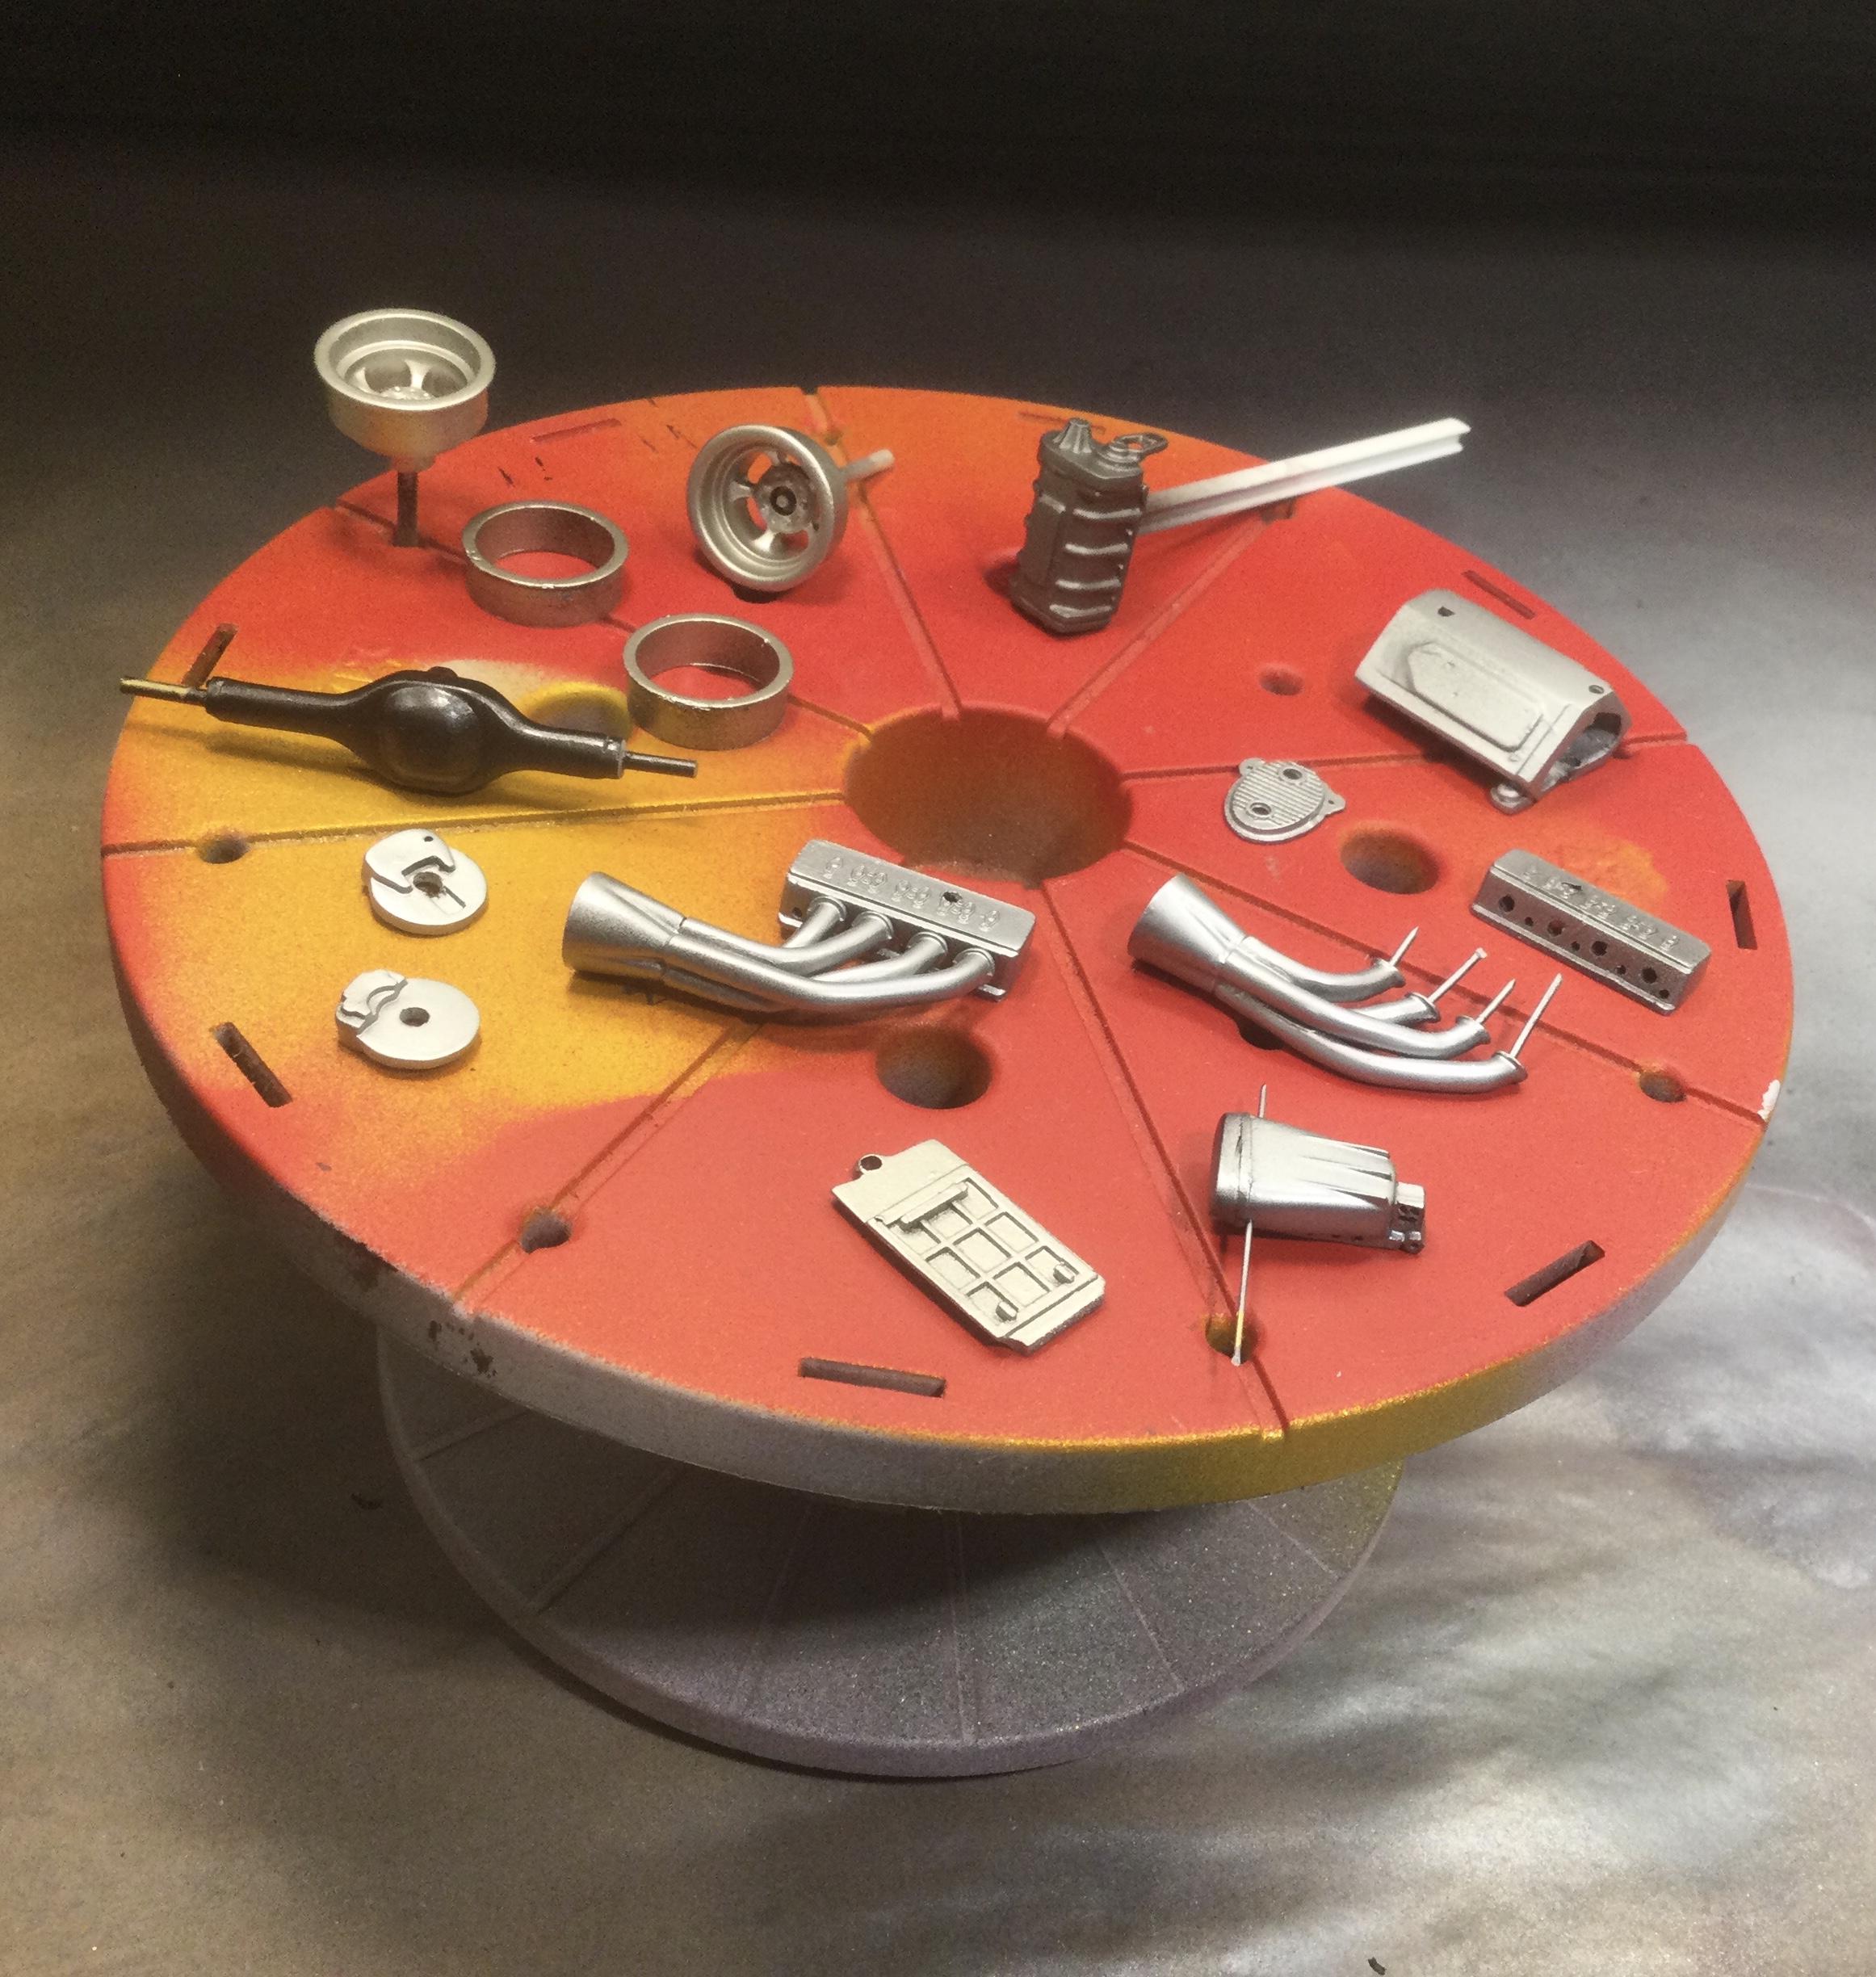
-
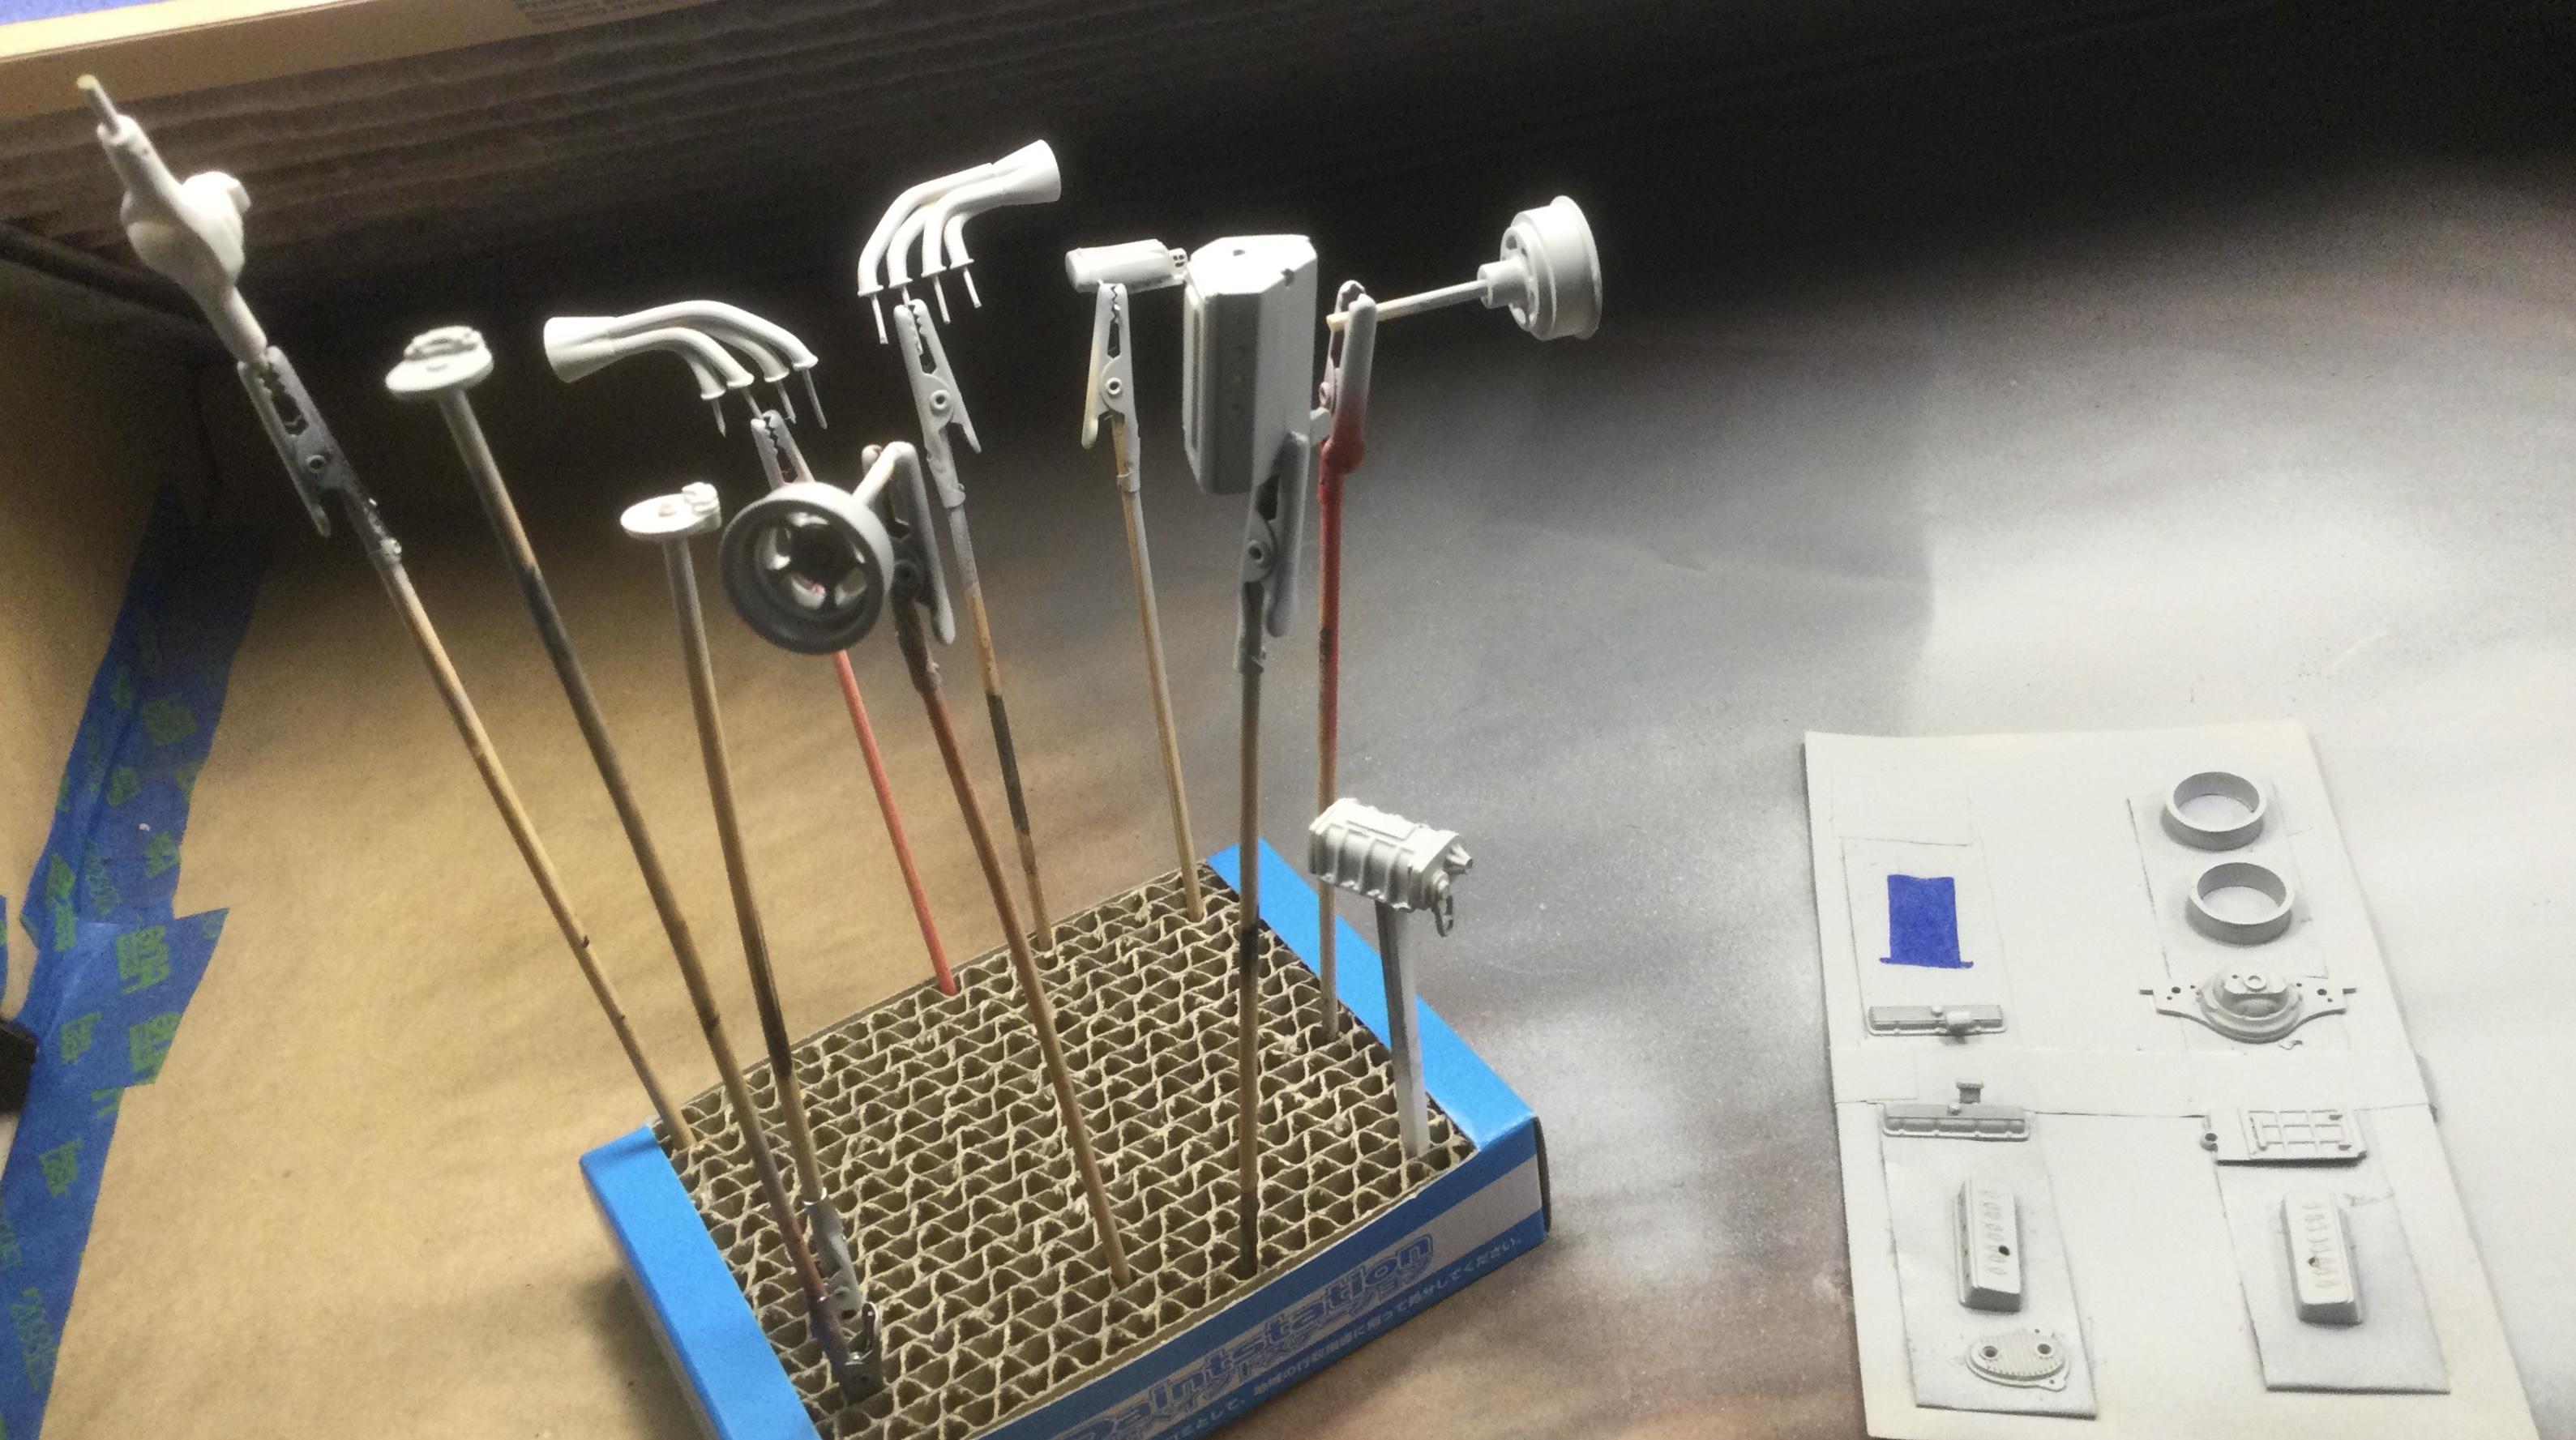
Hard to think about how long I’ve been away from this isolation project, nearly two years! A couple of Porsches interfered in grabbing my attention away from the Corvair. Yet it is now back in the top three on both the workbench and paint booth. I took the big block Chev apart as it was just tacked together for fitting and cleaned up the parts, made alterations, such as fitting the headers, adding oil breathers on the valve covers, and adding bolt heads to attach the clutch bellhousing to the engine plate. After spraying Tamiya grey primer from the can, I followed up with LP 5 semi-gloss black shot thru a Paashe VL to provide a base for the metallic finishes to follow. Last nite I sprayed the first coat of a variety of LP finishes on the main engine components. I am very pleased with the new line of bottled lacquer paints that Tamiya has recently brought out. I generally mix 1:1 paint to thinner using their brand of thinner, with the retarder only for gloss, not metallics or the semi/flat finishes. The next step will be detail painting with washes and dry brushing. Thanks for checking this build out again, Cheers Misha
-
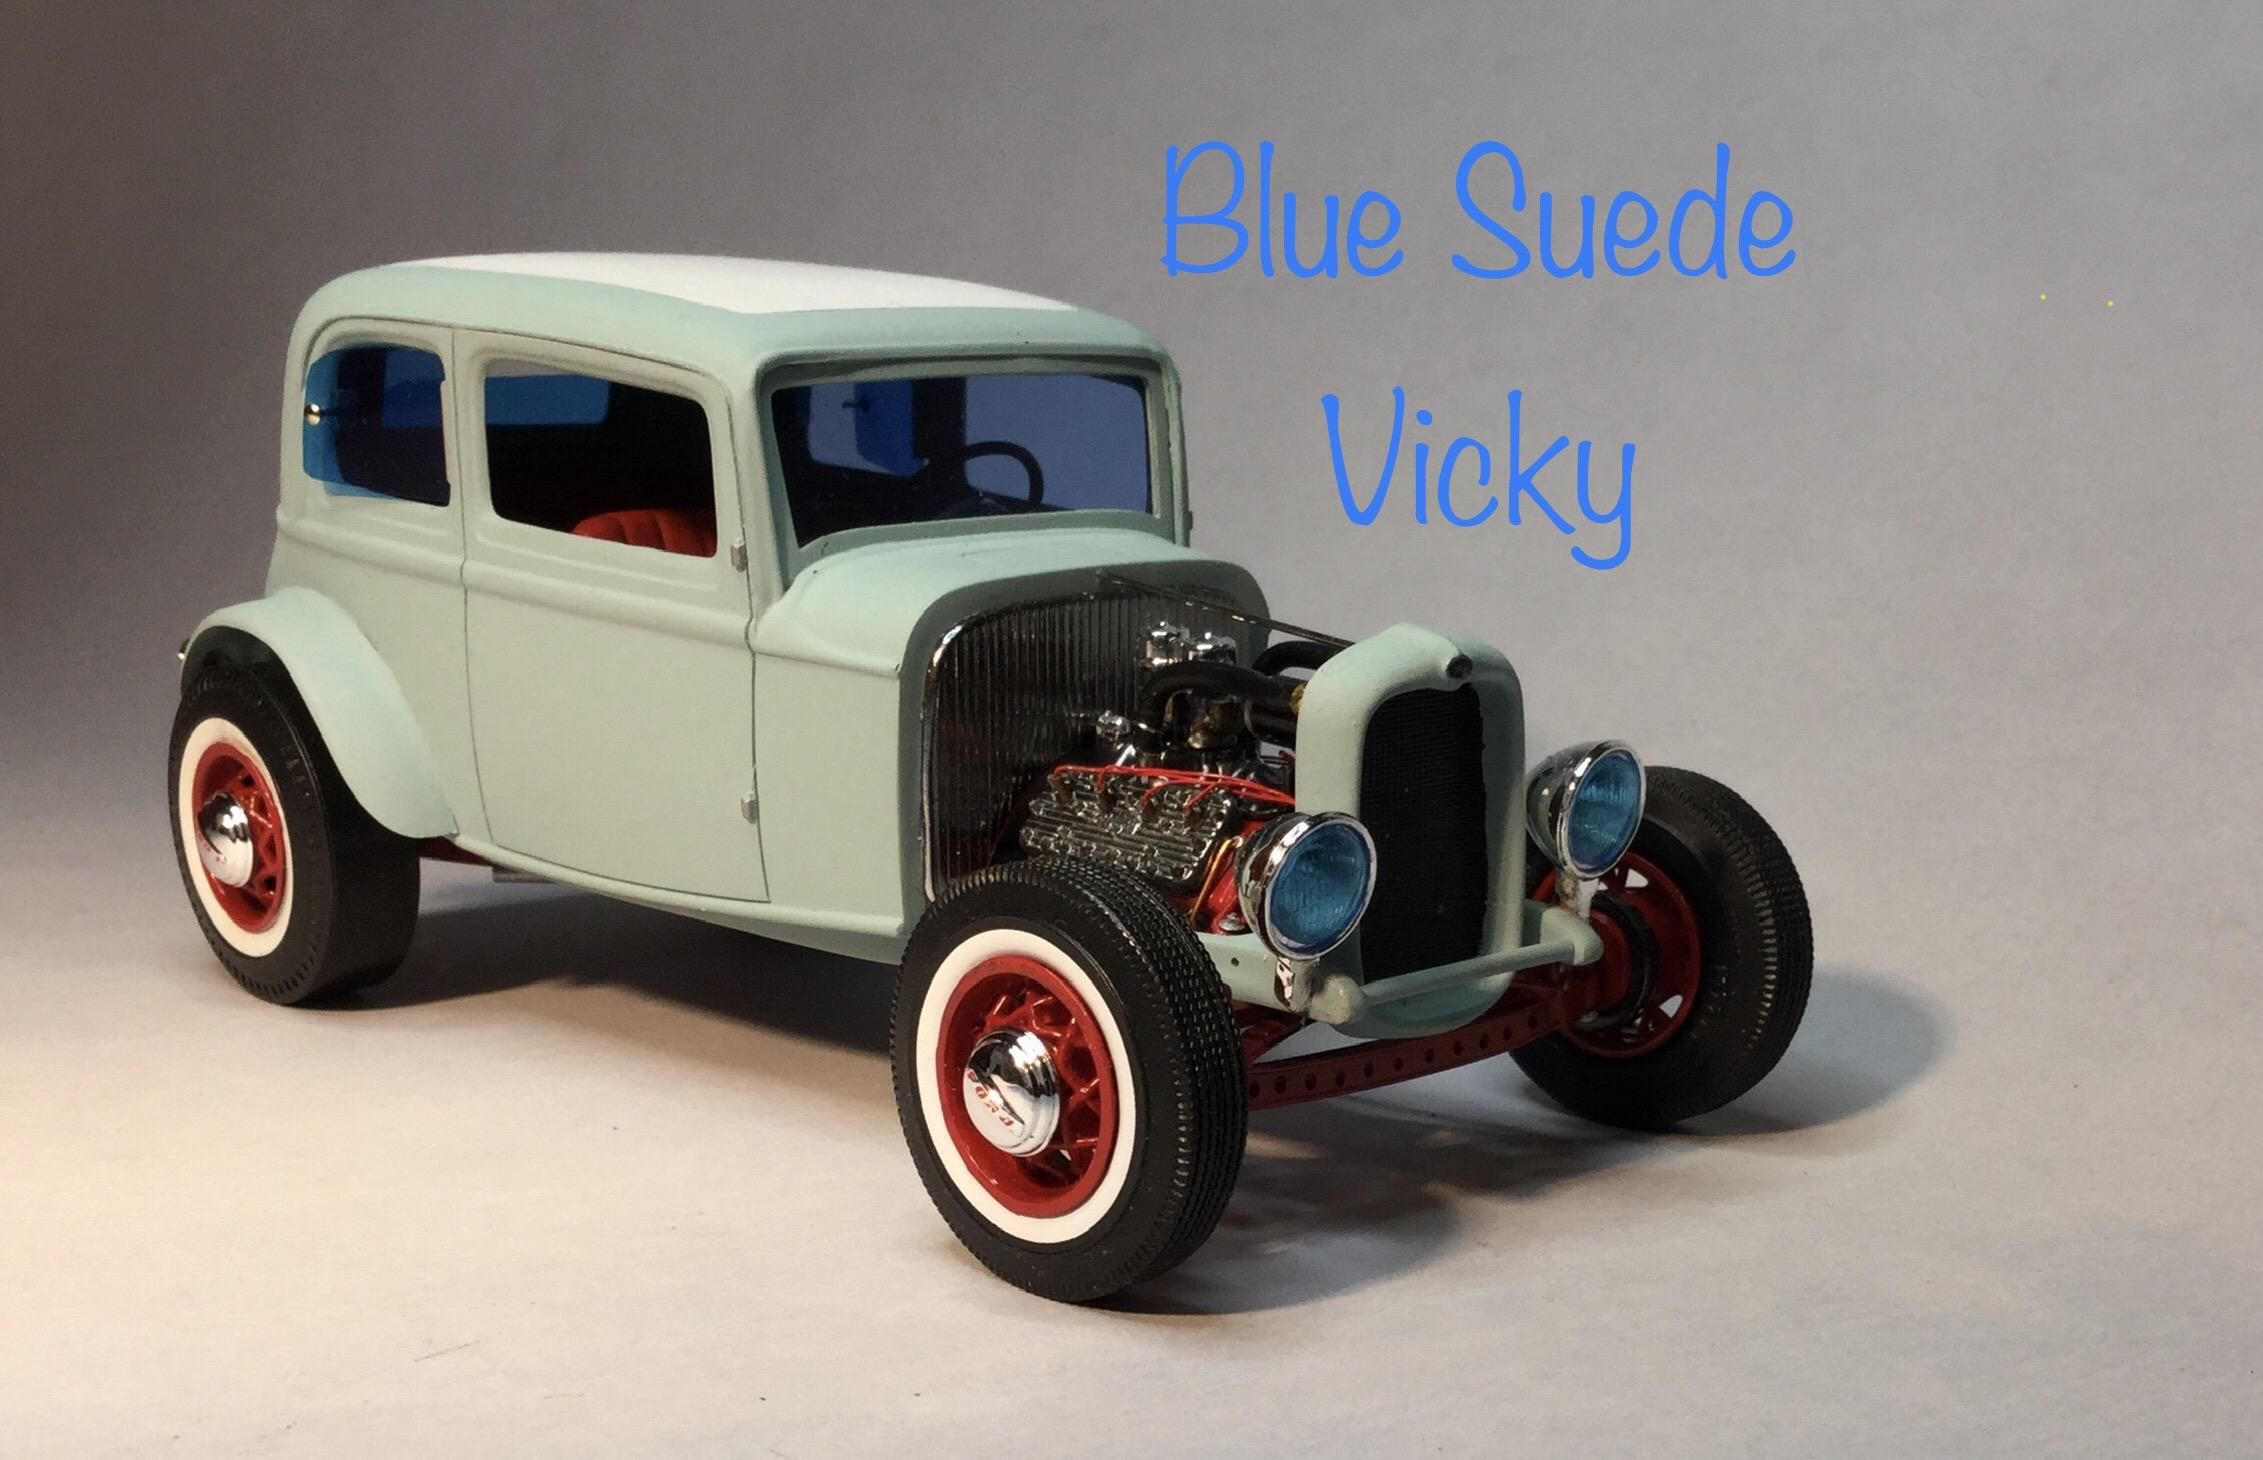
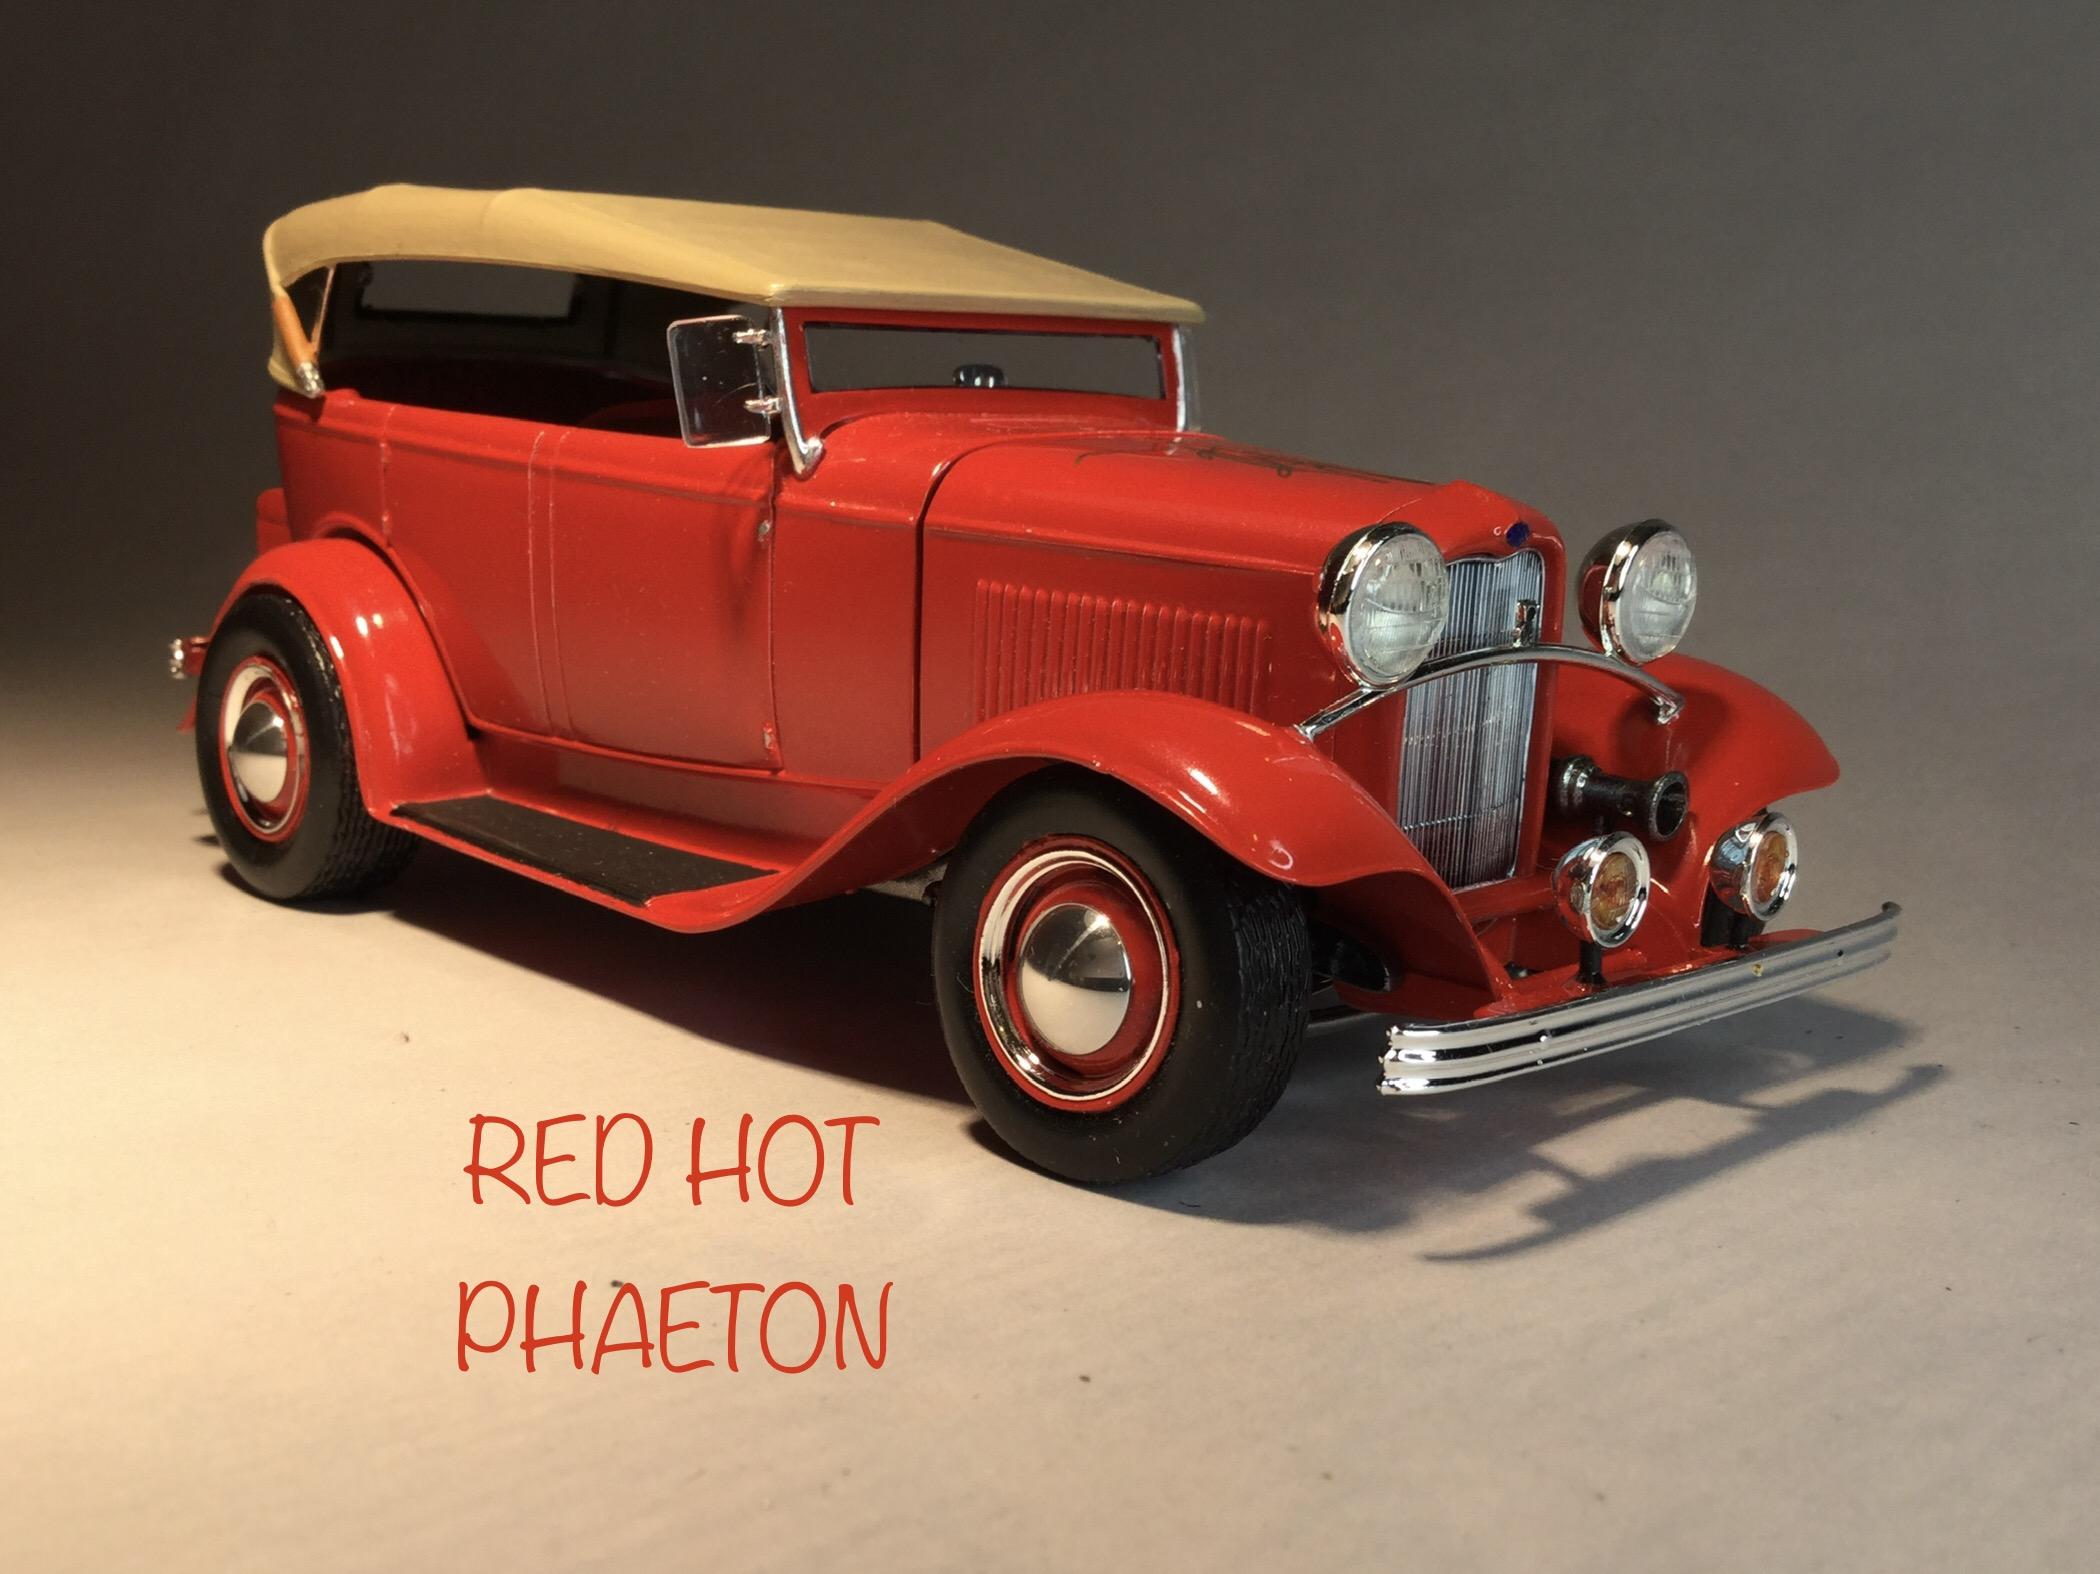
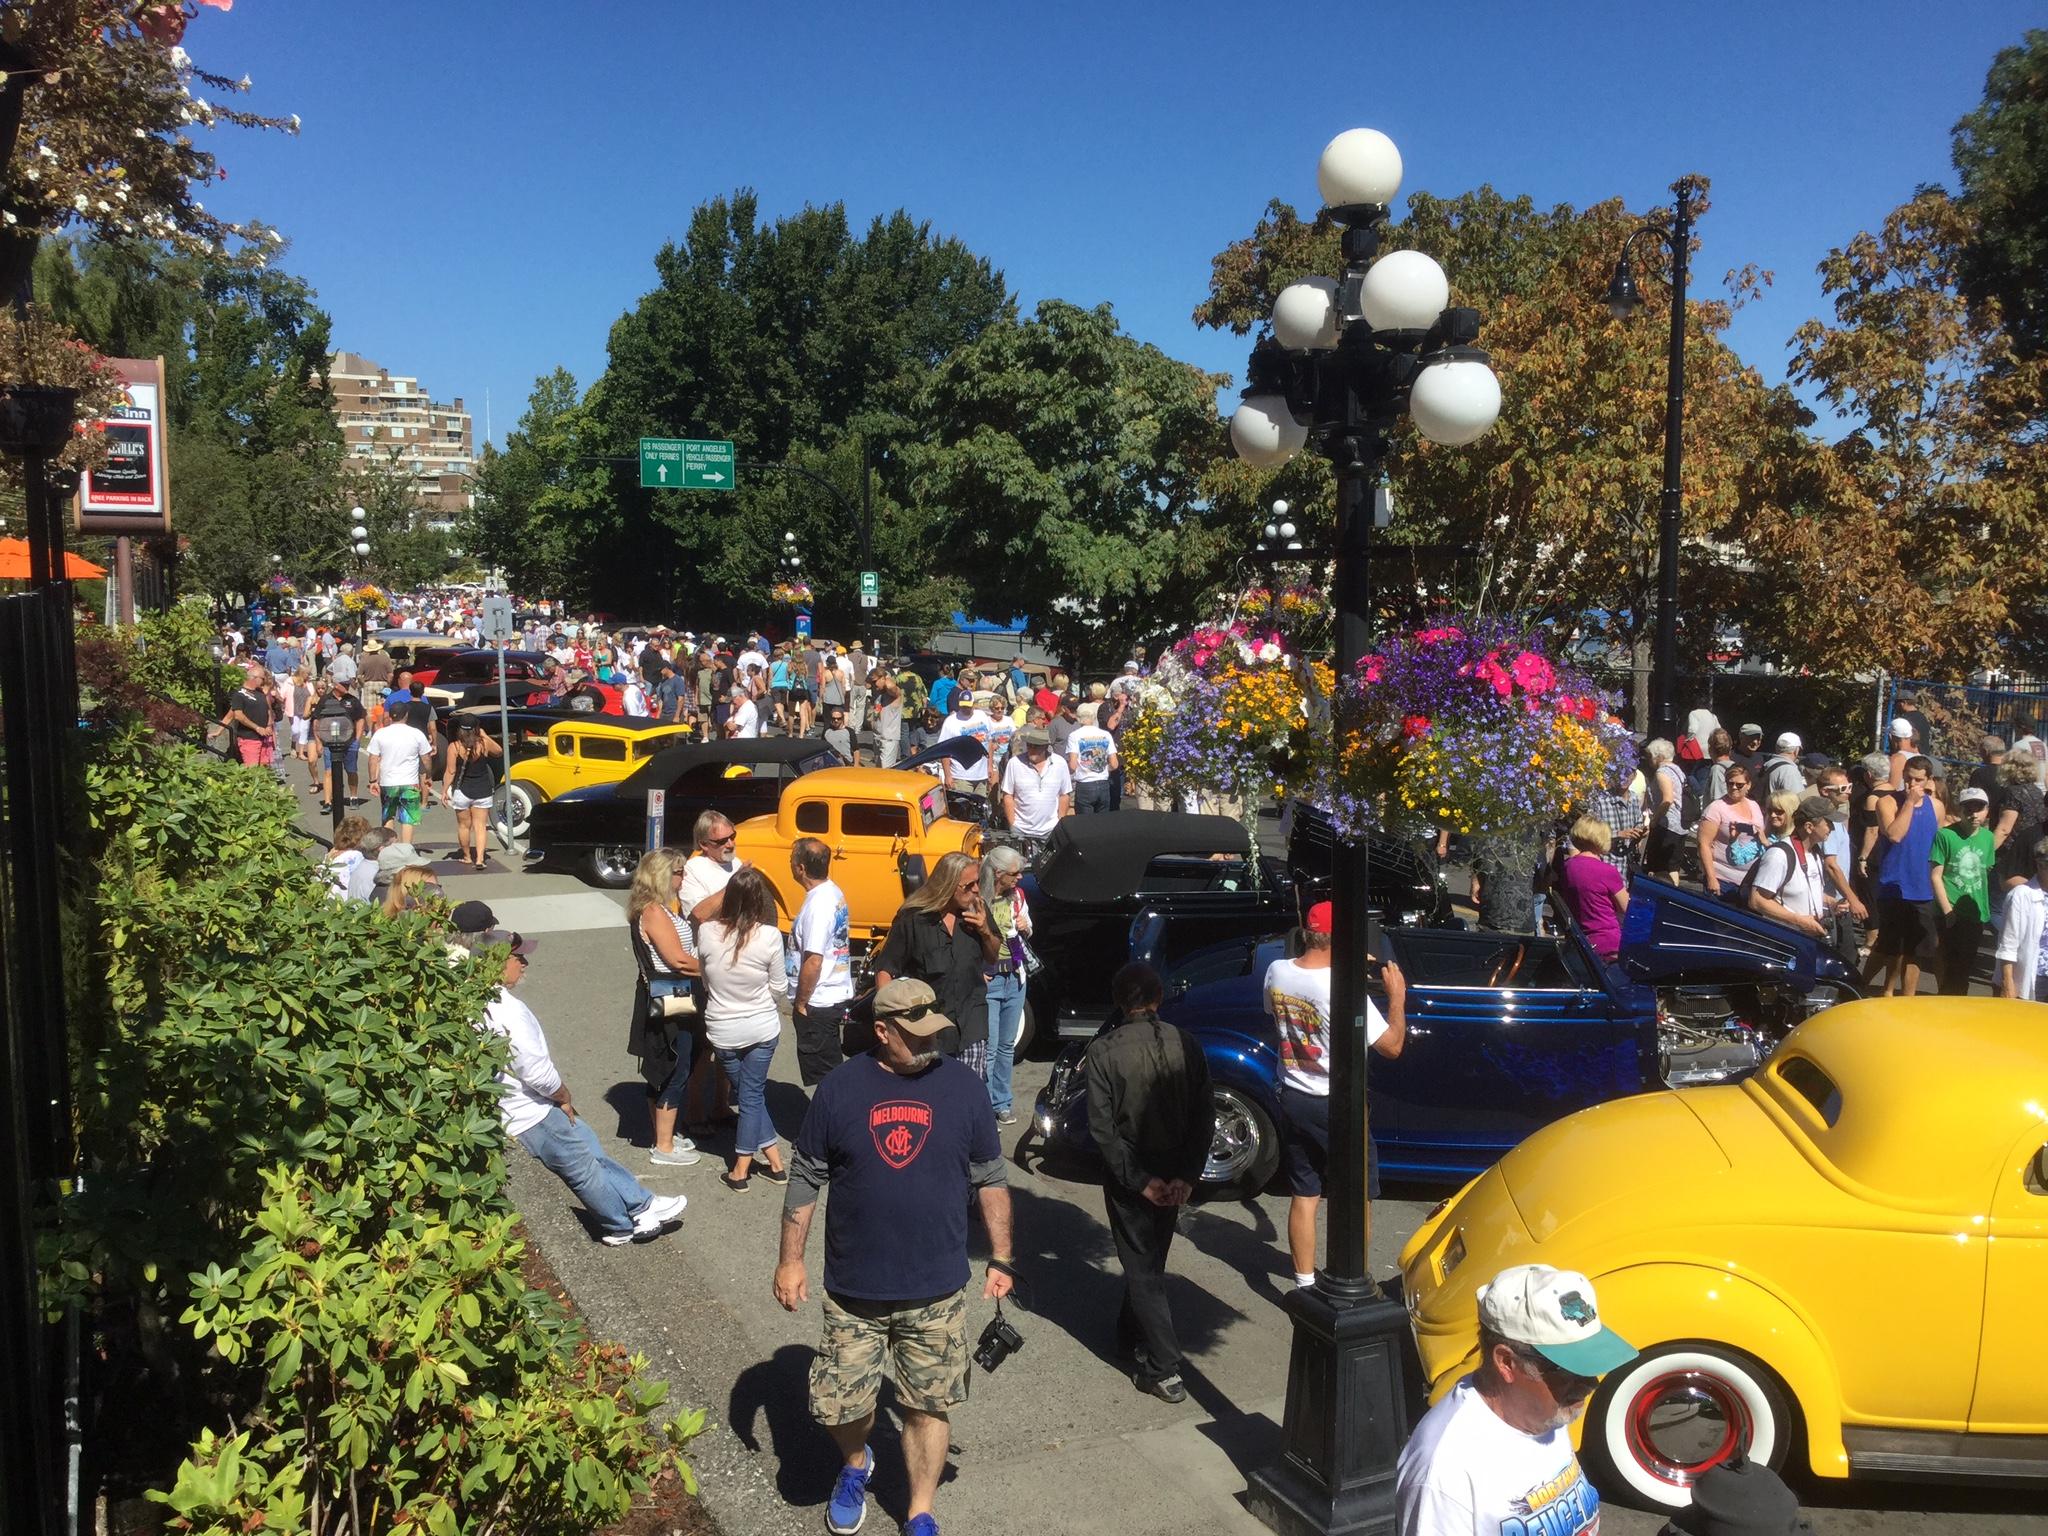
Great thread! Victoria, British Columbia, the provincial capital has been hosting the Pacific Nor’ West Deuce Days for a number of years and our club Scale Plastic Auto Modellers (SPAM) takes part with a Deuces in Scale display. The Blue Suede Vicky was built for 2016 and the Red Hot Phaeton for the 2019 event (it occurs every third year). Cheers Misha Here’s a sample from the event…
-
I’m in tune with all the above comments, these are such elegant vehicles, truely a flat top. Your build David shows off the beauty, topped off with the Connie Kit on the back, it’s the ? icing! There are many of us who missed out on the Modelhaus issues, much to our chagrin, yet it is great to see builds such as yours that bring the resin to life rather than in a box. Thanks for sharing, cheers Misha
-
Great looking Bonnie, Tom! Your build brings back memories of the Coke Bottle styling in 65. The appearance of motion while at rest was stunning especially with the Pontiacs. The colour combination the emerald green with a white interior really works. Any shots of the interior? Cheers Misha, oh, I would keep the skirts to further accentuate the Bonneville’s length.
-
That’s really smooooth Steve! The proportions for the two door work so well, too bad Chrysler never pursued it. The vintage Mopar scoop is a neat touch, wonder about its placement… is it to forward? How does it line up with the air intake under the hood? Any decision on which way the doors would open? Exciting project on your hands, be following closely, cheers Misha
-
Looking forward to see your progress Justin with the transkit. I’ve been eyeing this conversion as MGs have been on my brain ever since sitting in one in the dealer showroom back in the mid sixties. Did end up with a used TR-3 though, close but no cigar. Cheers Misha