Bills72sj
-
Posts
4,583 -
Joined
-
Last visited
Content Type
Profiles
Forums
Events
Gallery
Everything posted by Bills72sj
-
Gorgeous 57. I hope to make one just as nice someday.
-
 Thank you, I found and article about correcting the chrome grille surround to body color. It makes it more correct.
 -
White Freightliner SD
Bills72sj replied to raisin27's topic in Model Trucks: Big Rigs and Heavy Equipment
Great job on your completed build and awards. As someone who built two of these recently, my cabs came out ok because I was warned what to look for. The rest of the model went together pretty well for me too. However, the pesky fragile mirrors raised my blood pressure a few times. I ended up using two different adhesives on every joint to improve their strength.
-
Thank you Chris. ?
-
Thank you Philippe. ?
-
Airbrush Cleaning-Ultrasonic Cleaner
Bills72sj replied to 69NovaYenko's topic in Model Building Questions and Answers
If you do an immediate flush/back flush after every color you will rarely need to pull it apart to clean it. Just use the appropriate solvent based on the the paint you just sprayed. Stay away from soaking it in ANYTHING that can attack metal. -
AMT '67 Mustang Fastback-Now in Under Glass Section
Bills72sj replied to mustang1989's topic in WIP: Model Cars
Very sweet Mustang. Nice color. -
Kit bashing takes some finesse. I hacked an engine bay out of a 67 GT to install into a 68 Shelby because the Shelby kit's engine bay was so lame. I also mini-tubbed another 67 GT to make a drag racer out of it. The hard part was stuffing a 427 SOHC motor in it. http://www.modelcarsmag.com/forums/topic/156213-1968-shelby-gt-500/ http://www.modelcarsmag.com/forums/topic/155547-stalled-1967-mustang-gt-coming-back-in-the-queue/
-
Wow those prices are insane. I was fortunate to get an unbuilt JoHan Maverick missing the decals last Summer for $40.
-
California Hauler 359
Bills72sj replied to TruckerAL's topic in Model Trucks: Big Rigs and Heavy Equipment
Nice clean build. Did the instruction show putting the luberifiner on the drivers side cowl? -
Exactly. Let ink dry 24 hours. If you don't, the bonder solvents with make the colors run. Let decal bonder dry 24 hours (or longer). Apply like any other waterslide decal. They are tough and not too thick.
-
Thanks for sharing. Years ago I participated with my car at an autocross. It was the most fun I have ever had for $10.
-
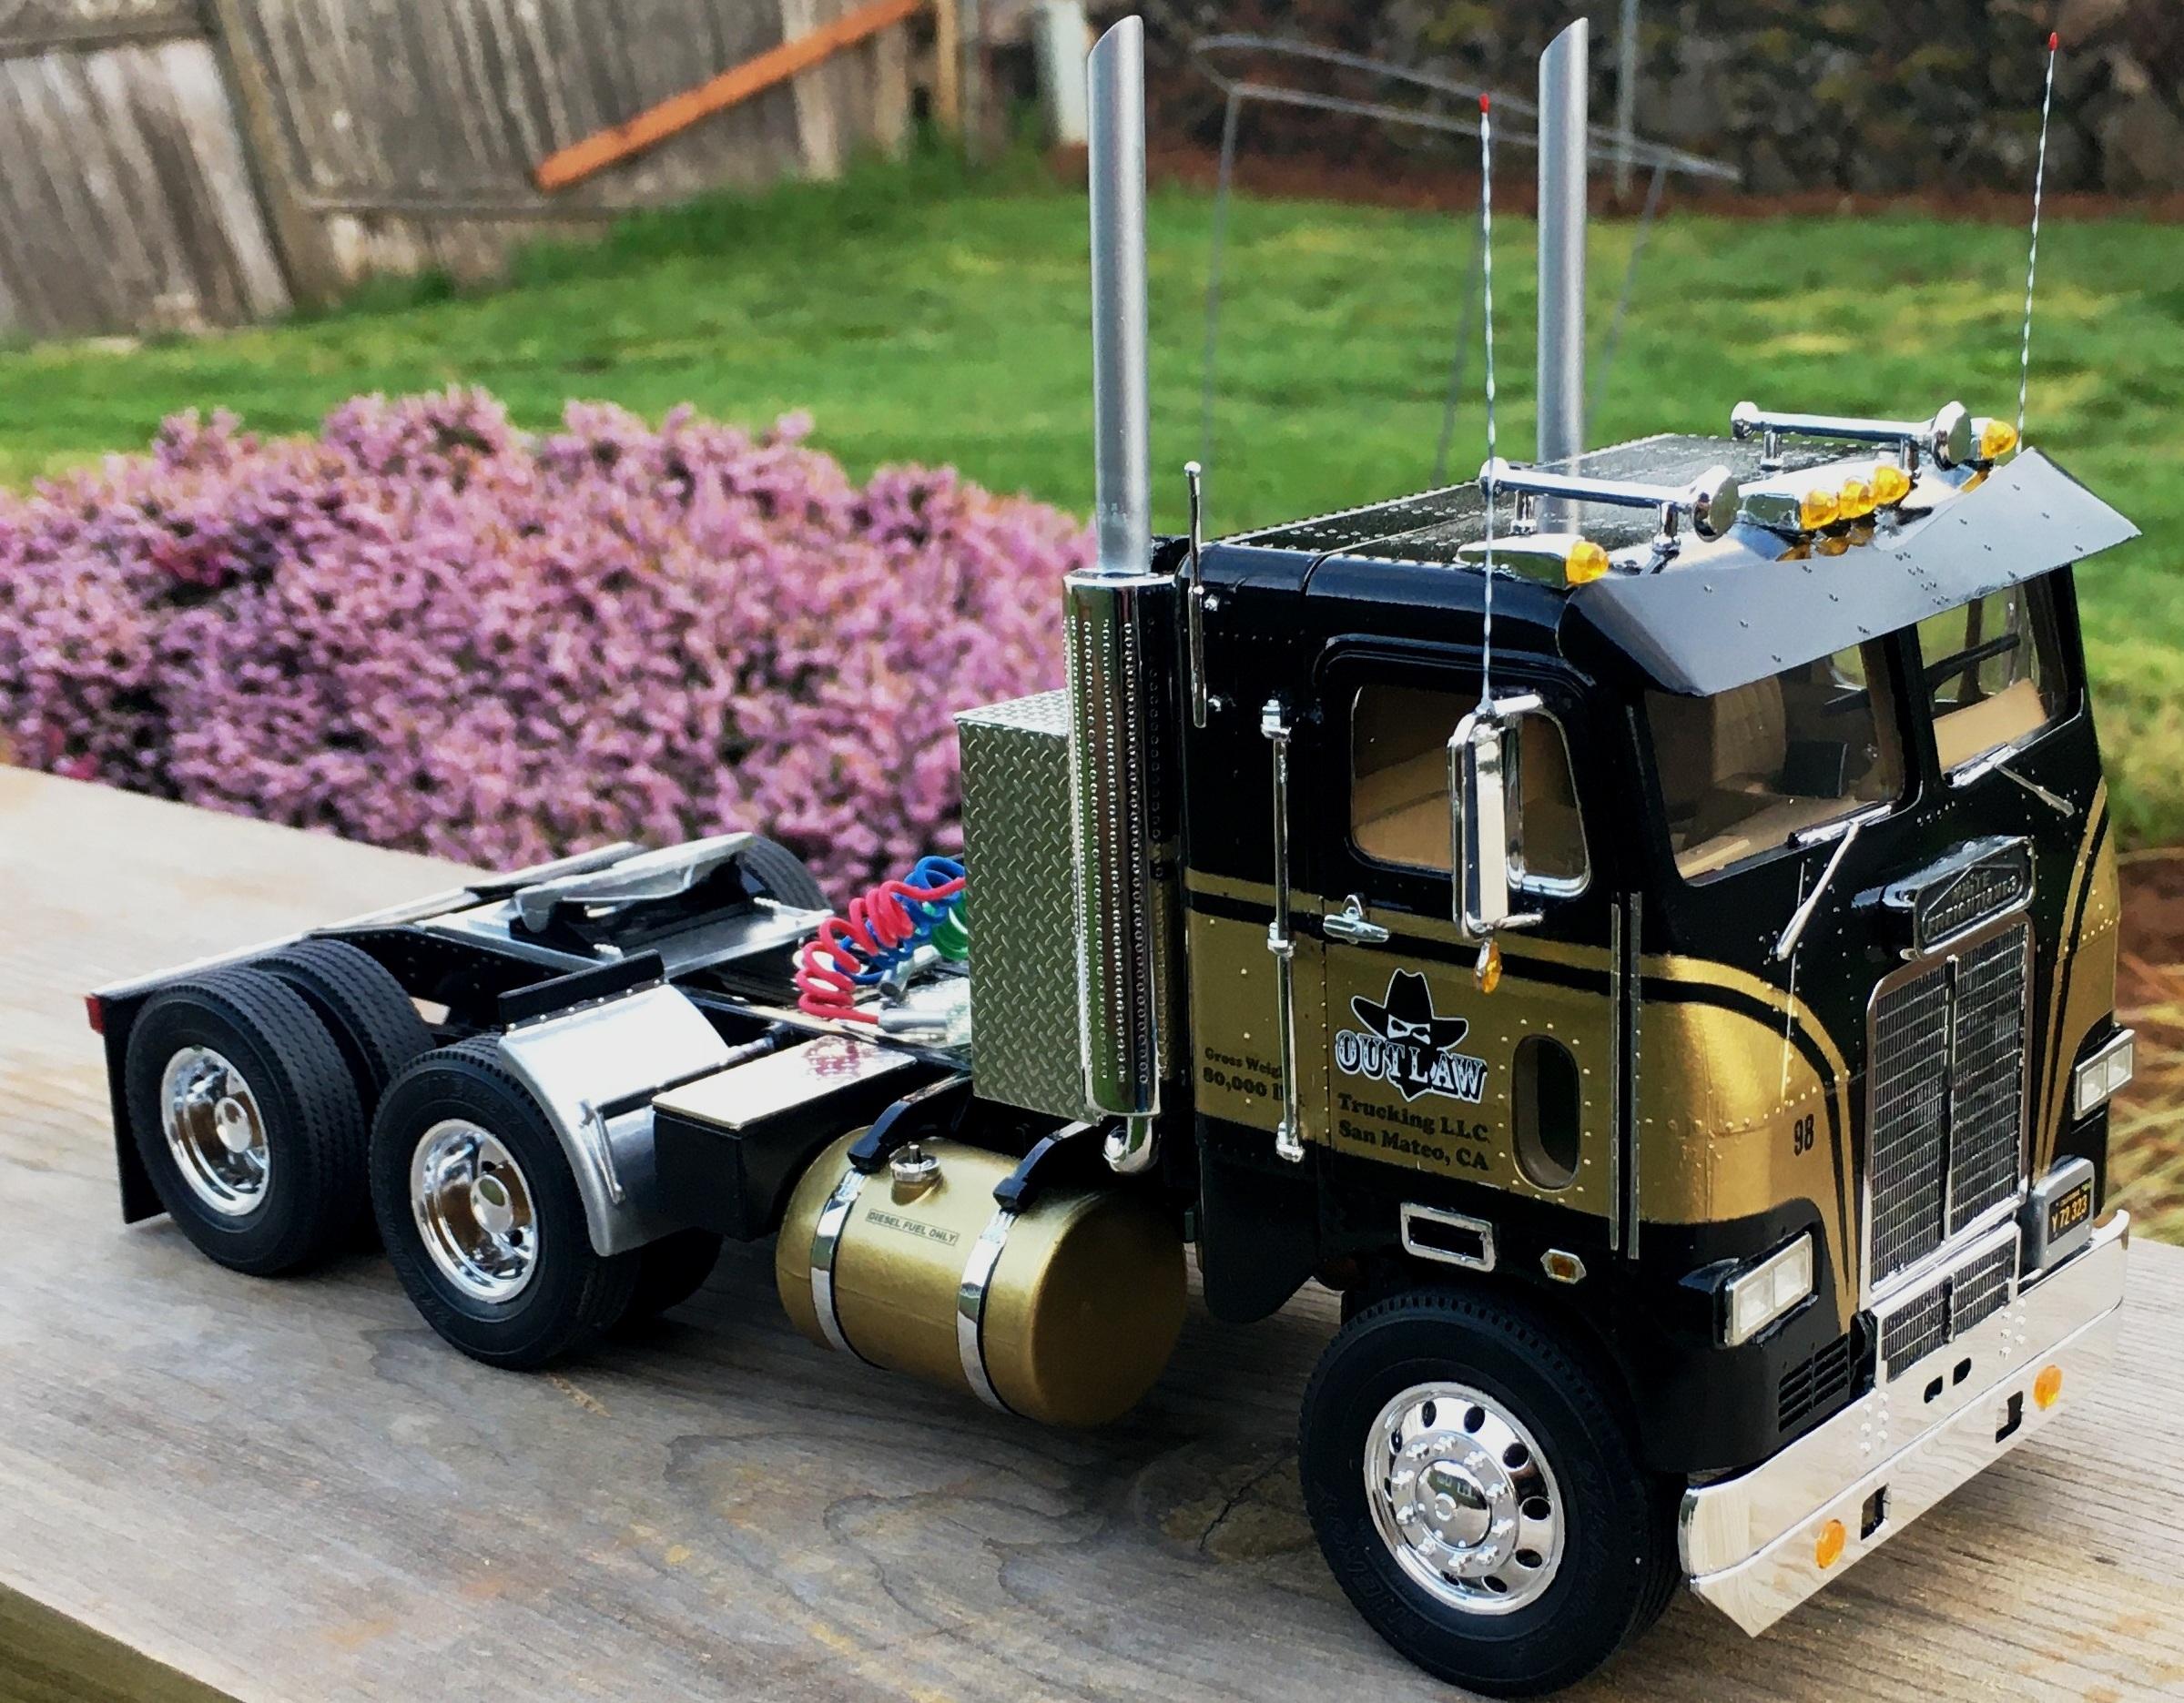
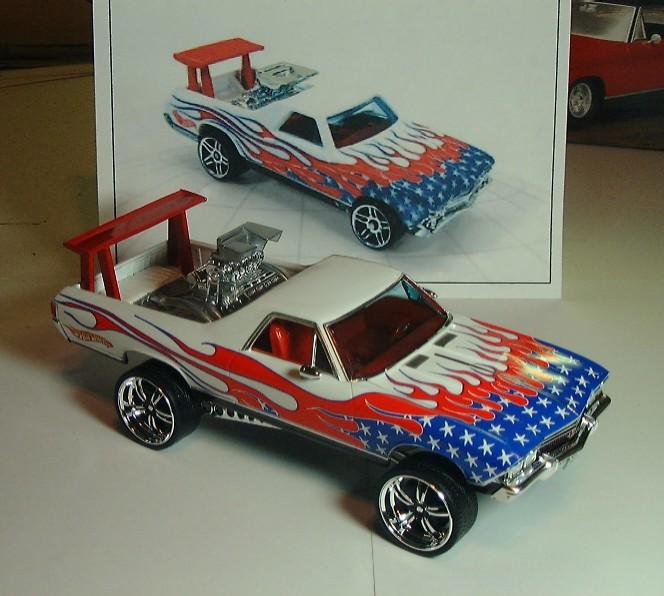
The eagle with the flags is a reprinted scanned copy of some Italeri Peterbilt 377 A/E kit decals. The door livery is artwork I made up on my PC. The flag flames are files cribbed from the internet. They were printed with an inkjet printer. I have decal paper in both white and clear that I got from ebay. I use old school MS Paint as it lets me reduce print size instead of file size. (Reducing file size KILLS the resolution). Again, they are coated with Testors #9200 Decal Bonder from a rattle can. To let you know the capabilities, I made these full length decals that all four huge pieces went on on the 1st try.
-
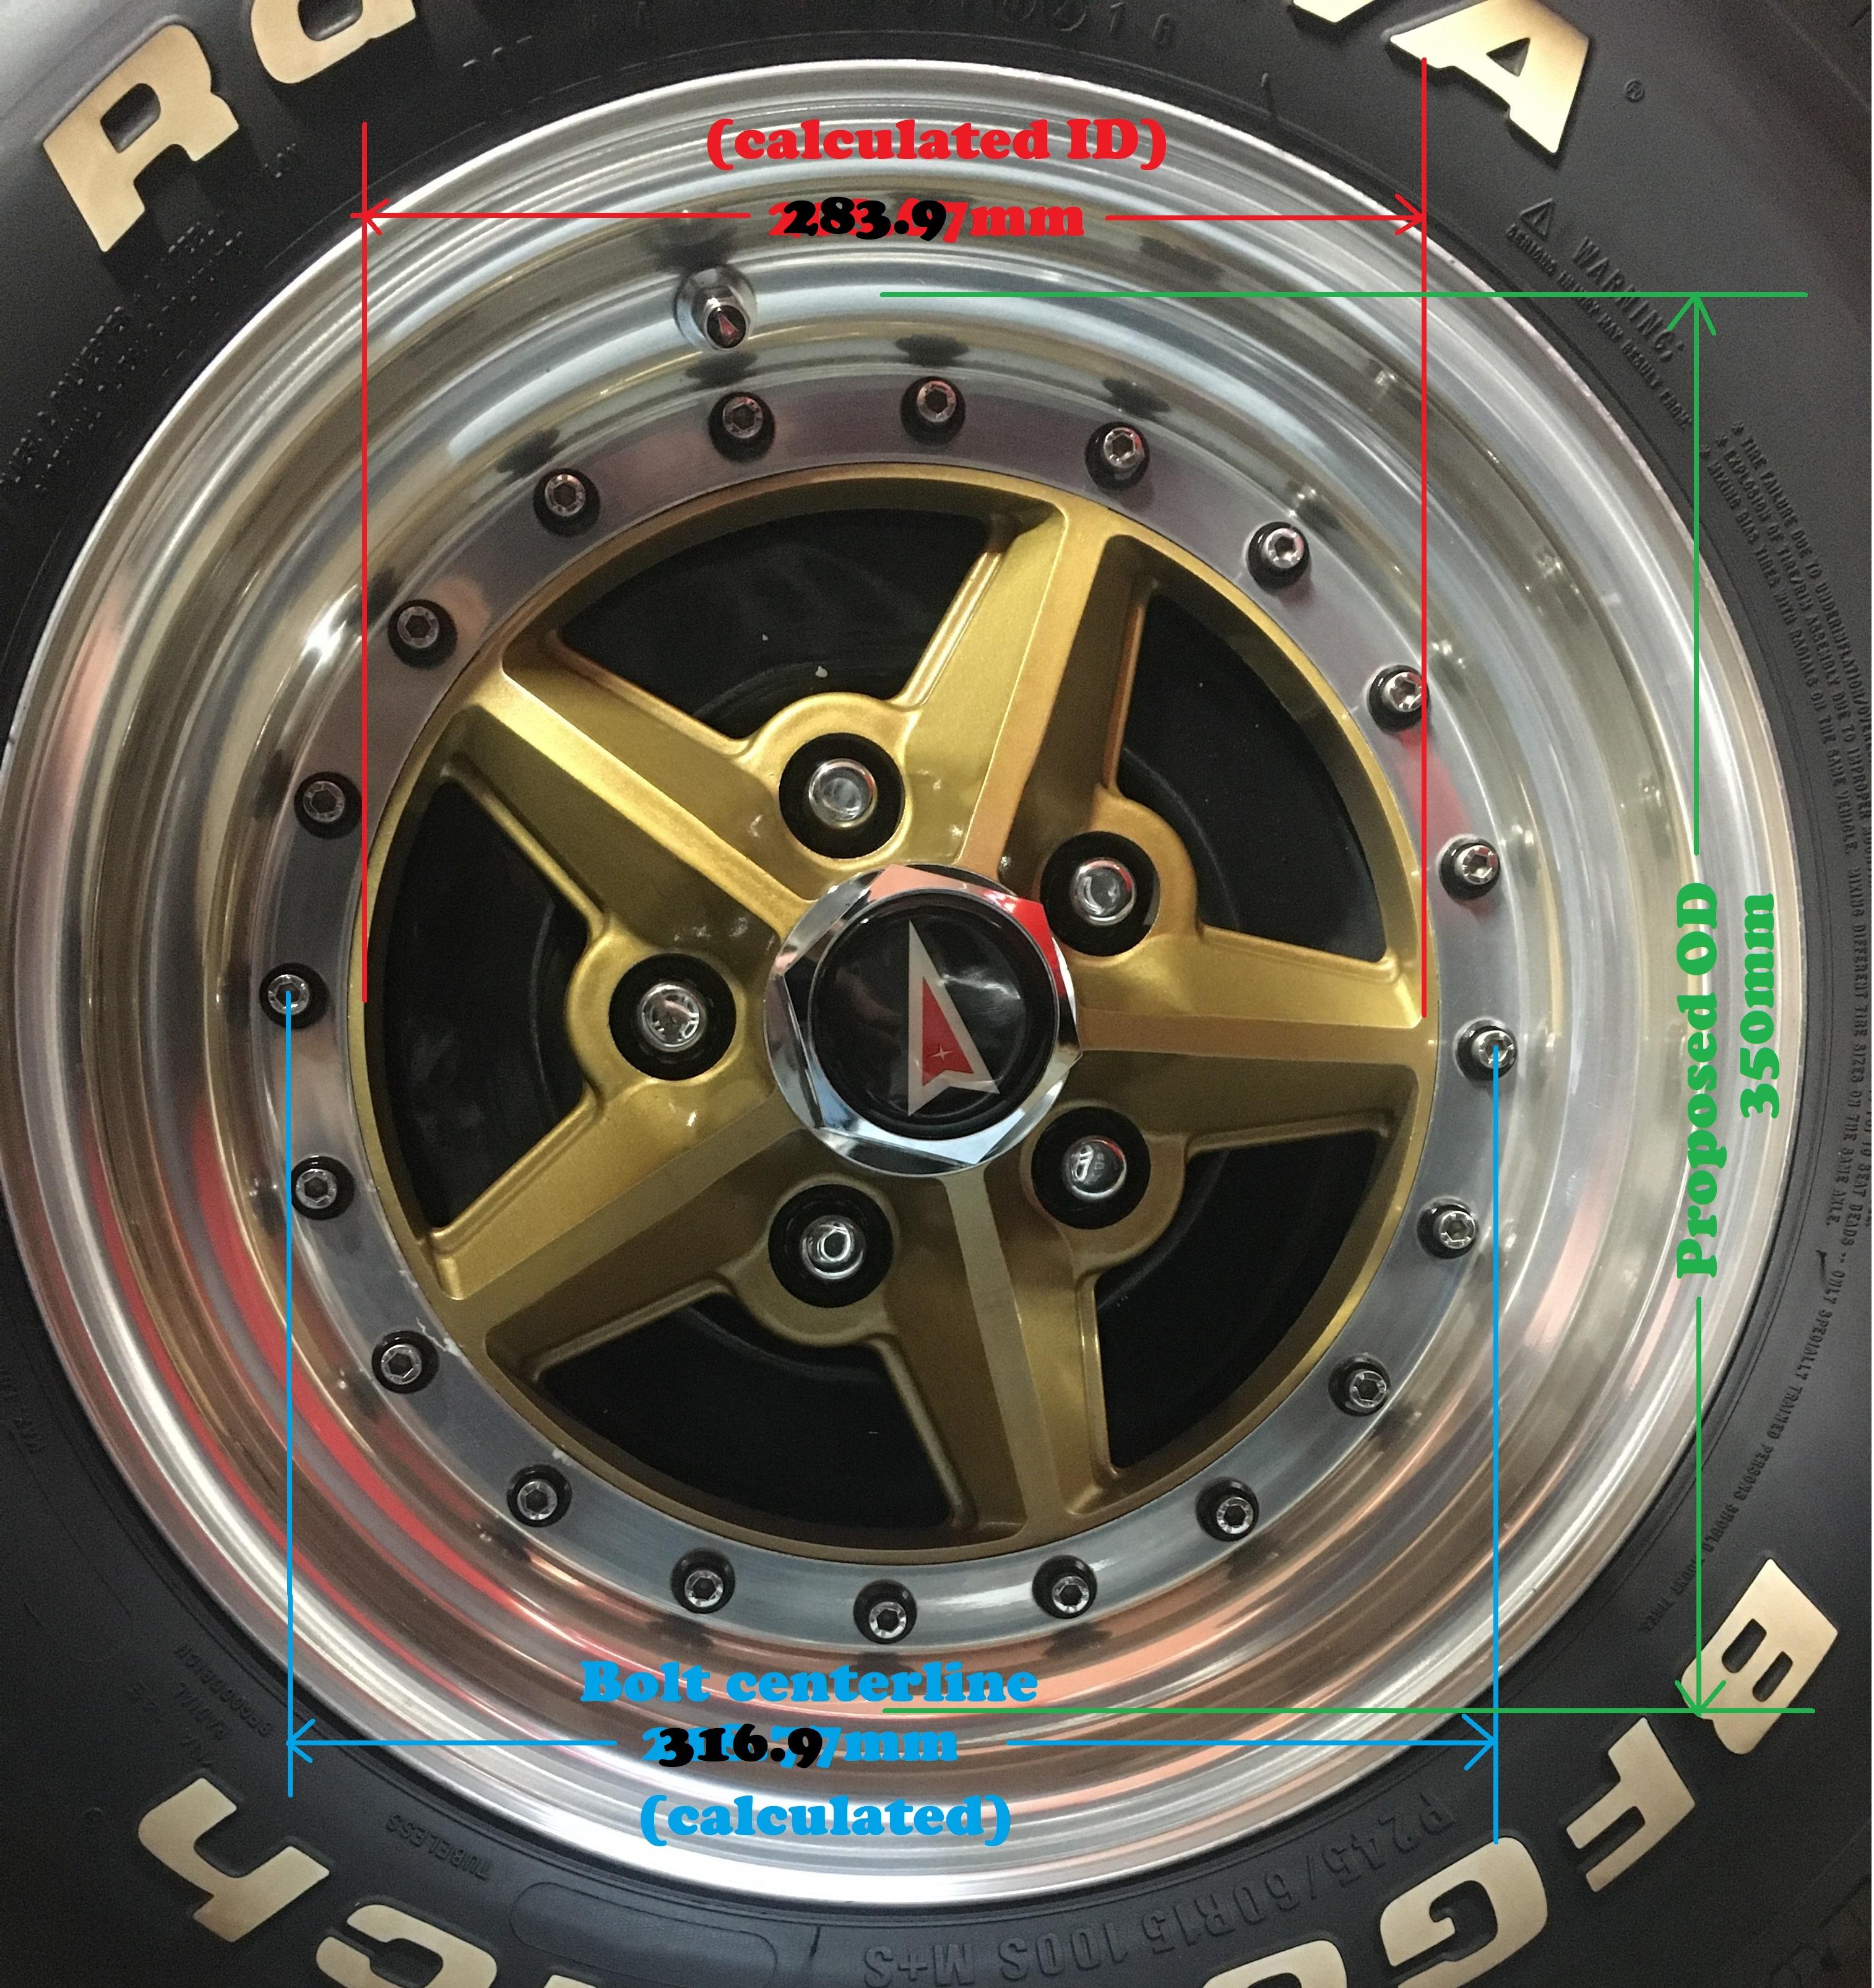
I have something simpler. A set of wheels to match the ones on my 1:1. I will PM you to see if you want pics and dimensions.
-
Mmmm. That has some potential.
-
Twins born 15 years apart
Bills72sj replied to Bills72sj's topic in Model Trucks: Big Rigs and Heavy Equipment
Thank you Larry and Brian. ? -
Thank you Larry and Jeff, ?
-
Advice for 1st time airbrush user
Bills72sj replied to Kevinch's topic in Model Building Questions and Answers
Since you are starting, I would go with water based acrylics. Water clean up and LOTS of colors available. I cannot speak to their adhesion to plastic but if it was an issue, I am sure it would have brought up as a topic in the past. I am still using decanted lacquers and enamels simply because of all the inventory I have. Be advised, this route can give good results but it is a hassle. Buy some white plastic spoons from the Dollar store and practice shooting them with your air brush. Experiment with different colors and types of rattle can primer. Practice with different air pressures, spraying distances, light coats, heavy coats, clear coats etc until you start to get the "feel" for the best results. Start with whatever paints fit your budget. Youtube Barbatos Rex has a lot of good content. I have learned a bit from him. Also get a bottle of Pledge floor polish. It is the most forgiving and least reactive clear coat out there. One bottle will last you for YEARS. Good luck. -
Thanks Doug. Yes I have a lot of time invested but they turned out as well as I envisioned. They actually kind of save space. I can park One semi truck and and AND 5 cars on about as much space as 4 cars would take.
-
It is finally done (except for the suzie coils).
-
Nice effort!
-
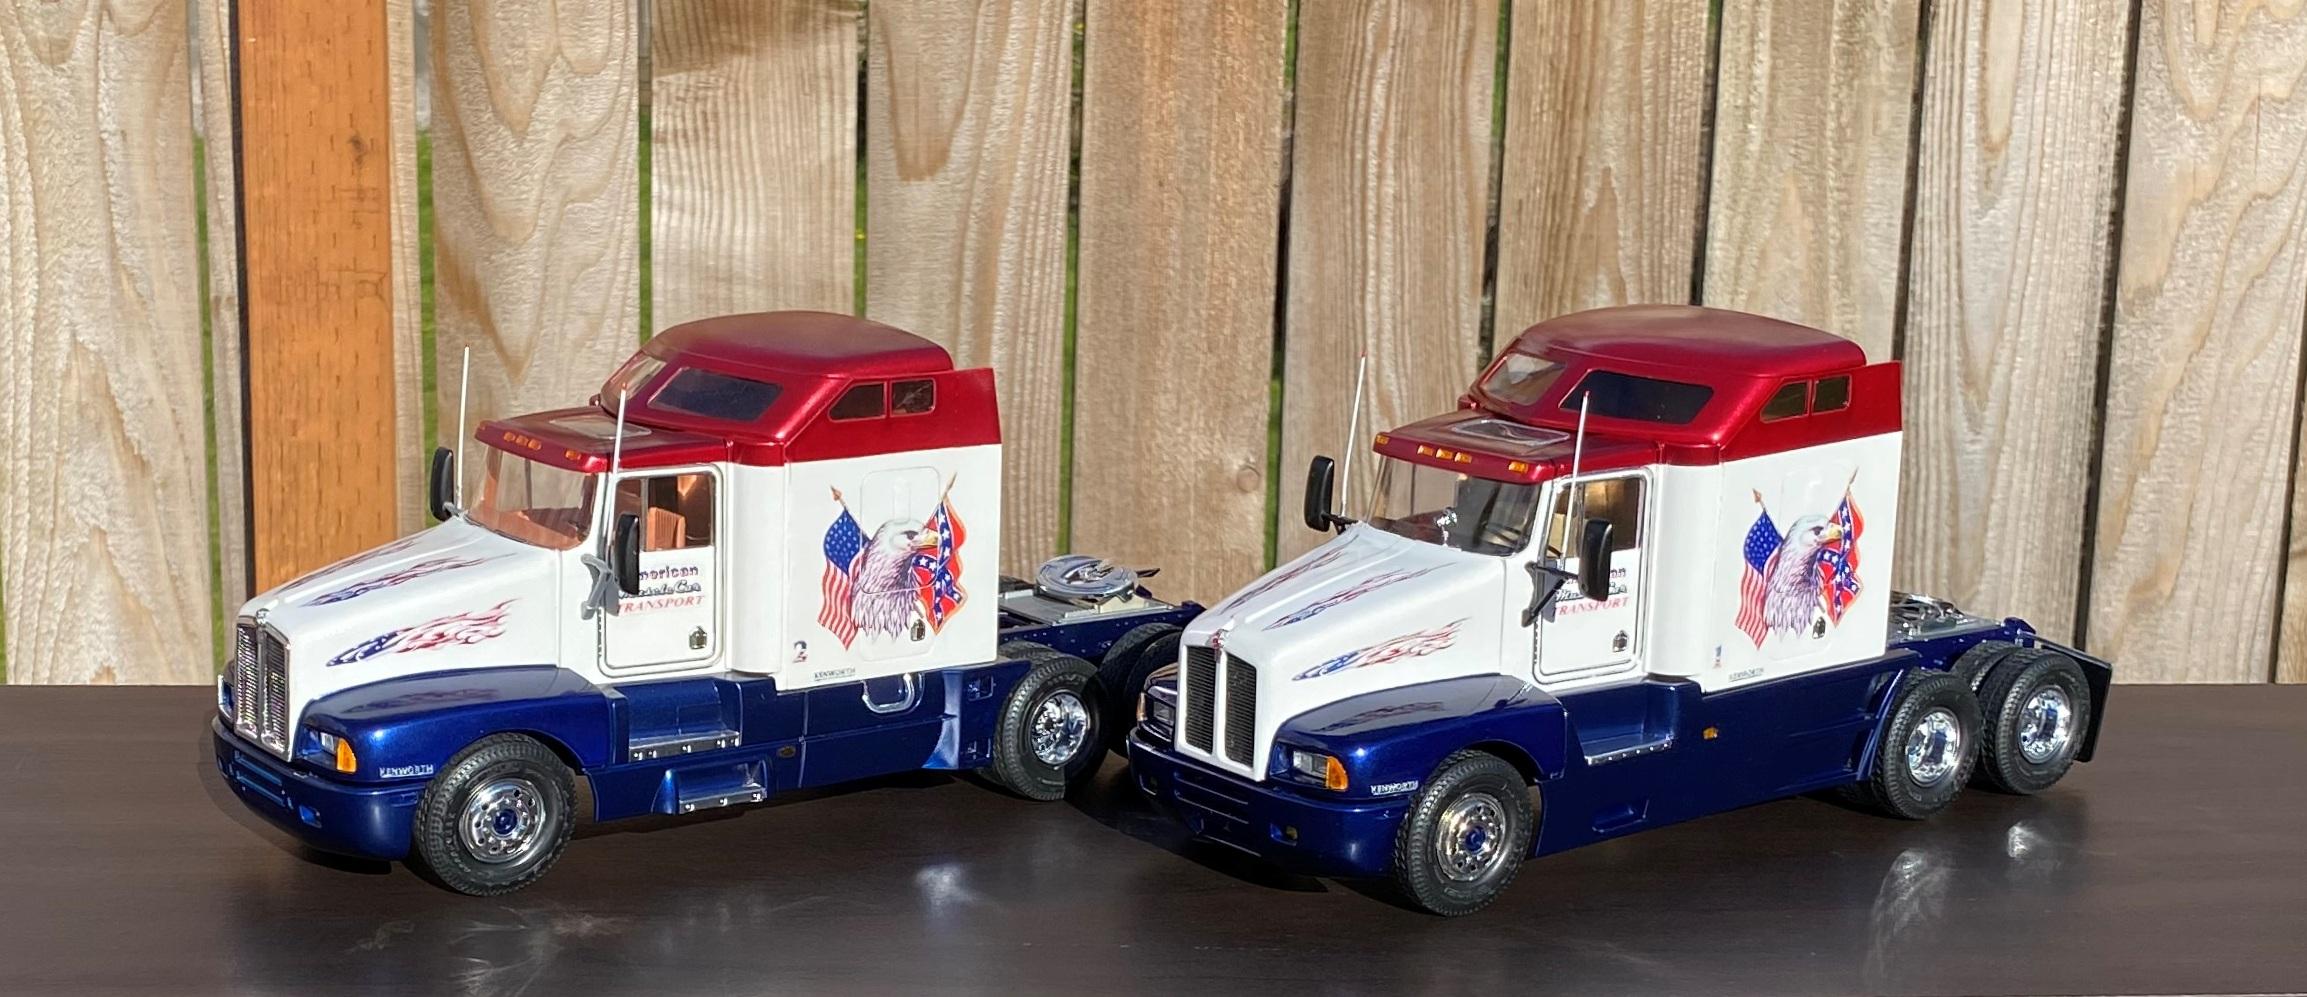
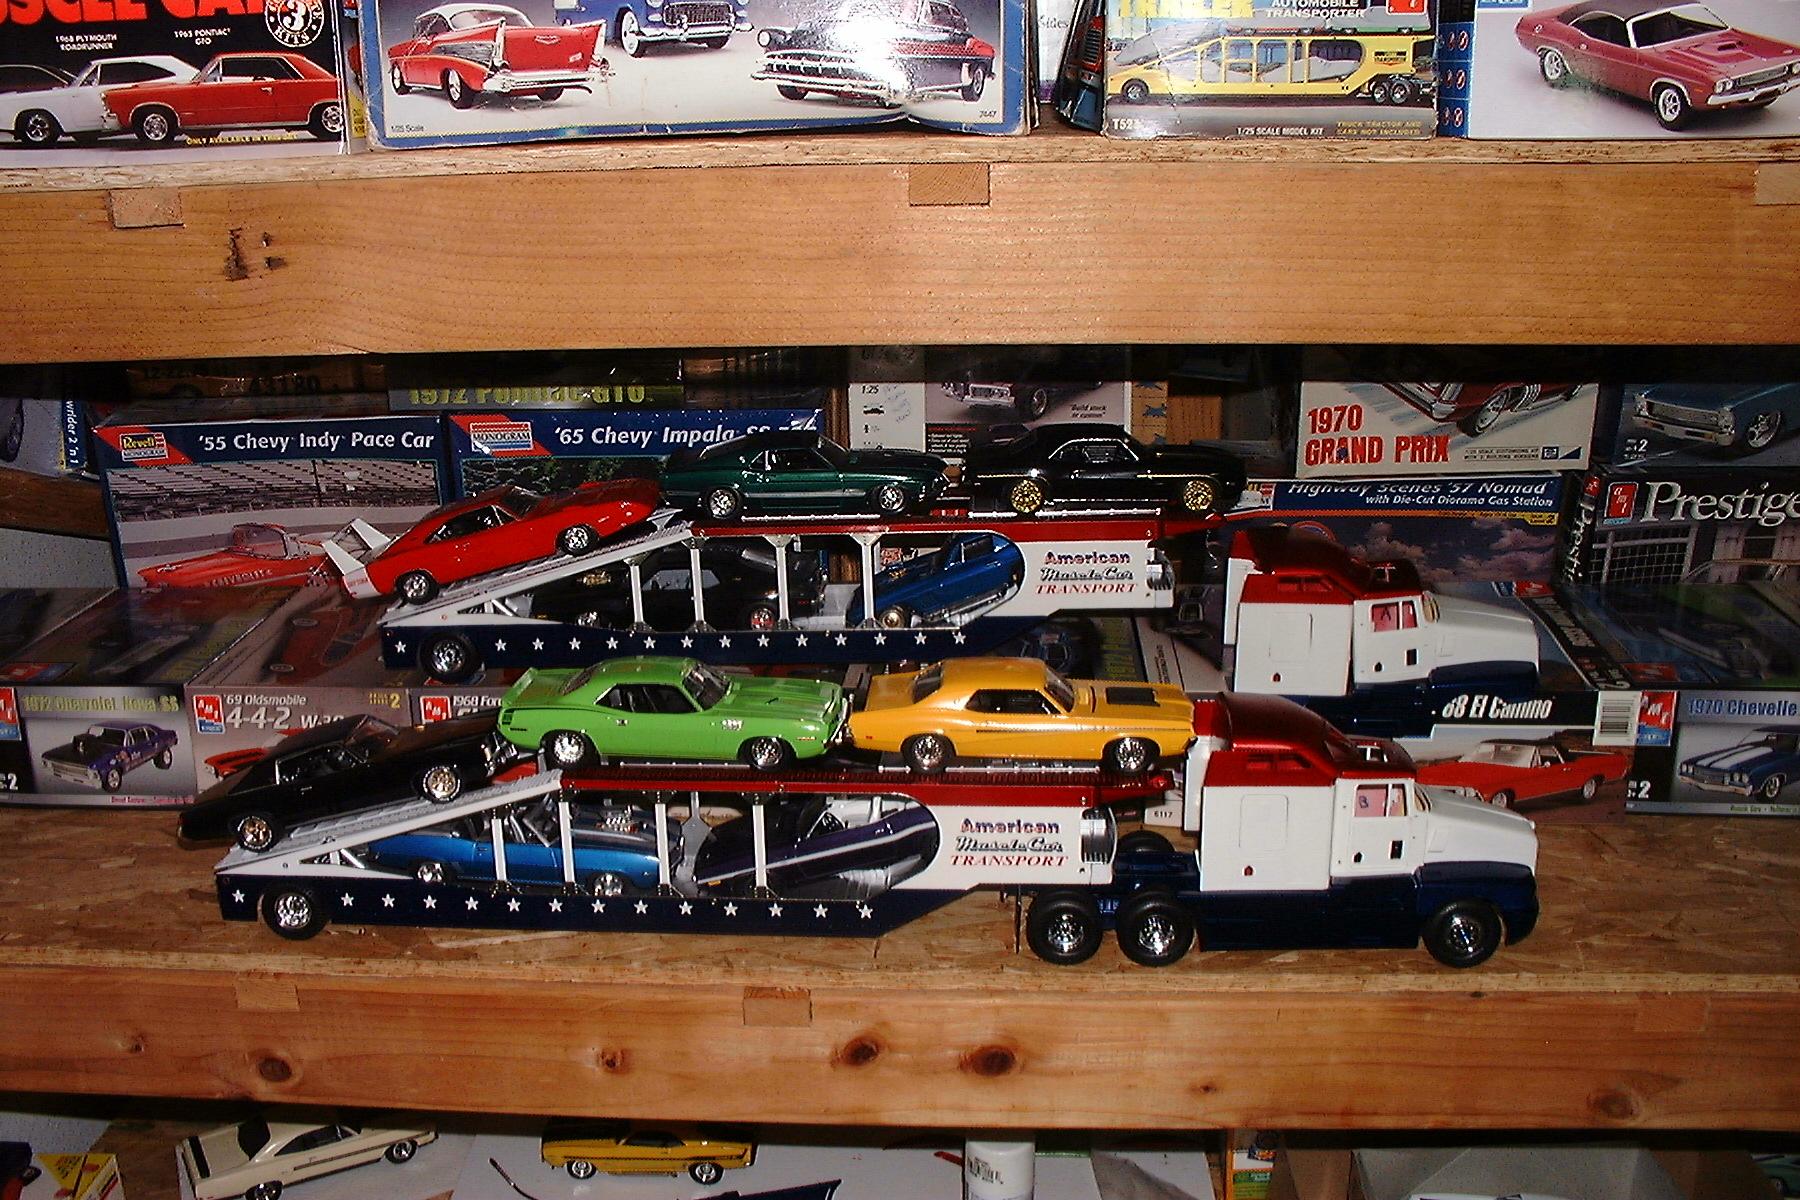
My 2nd AMT KW is finished. It was started 16 years ago but it is done now. It is mated with an auto transporter trailer that has been slightly modified. Below is the WIP thread.
-
My two "American MuscleCar Transporters" are finally both done. I started these 16 years ago. Back then, I got he trailers and the KW T600 done. The Canepa body was painted and the engine assembled but nothing else. When I got a few other rigs and trailers done these last couple of years, I found my 2nd trailer needed a tractor. The Canepa build stalled when I got the idea to LED light it AFTER it was painted. I had the switches, blinker circuit and battery mounted into the sleeper but I just lost the motivation to knock out all the installed lights to add in LEDs. The Canepa body gave me more fitment issues than I remember with the T600. Fortunately I was warned and tackled them as they arose. Here they are for you viewing pleasure.
-
GMC Trash Container Hauler
Bills72sj replied to Warren D's topic in Model Trucks: Big Rigs and Heavy Equipment
Nice combination. -
I use the sandpaper taped to the bench method too. Since I have a mini-lathe, I may experiment using it.