Bainford
-
Posts
5,189 -
Joined
-
Last visited
Content Type
Profiles
Forums
Events
Gallery
Everything posted by Bainford
-
 Cool concept Claude, and fine execution. I see you sprung for nitrogen to inflate the tires.
 -
Wow! Such a clean and tidy build. And the paint work is as close to perfect as I have seen. This is an absolutely stunning model, any photo could pass for the 1:1. A standard to aspire to, and simply lovely to look at. Great photography, too. I just can't say enough good things about this incredible build. I struggle to create that which you have achieved. My hat is off to you, sir.
-
Be aware, the photos at that link are a bit deceiving in that most photos are of the model, but the photos of the wheels are of 1:1 wheels, not the actual kit wheels.
- 38,867 replies
-
- 1
-

-
- johan
- glue bombs
- (and 1 more)
-
32 ford salt flats car
Bainford replied to charlie libby's topic in Other Racing: Road Racing, Salt Flat Racers
Somehow, I missed this one being posted. Impressive work, Charlie. So much detail to check out. Of all the glorious details, somehow the weld bead on the drive shaft stood out. Too cool. Great craftsmanship. -
ROVER BRM Le Mans 1963
Bainford replied to Giovanni La Rosa's topic in Other Racing: Road Racing, Salt Flat Racers
Fantastic build of a very interesting race car. I really love these uncommon subjects, especially race cars and sports cars of this period. Nice work here, very fine detailing, especially being small scale. -
#4 Zack Knowlden pavement modified.
Bainford replied to ClayK's topic in Other Racing: Road Racing, Salt Flat Racers
Beautiful modified. Lovely work. -
Very nice Lancia. Great save.
-
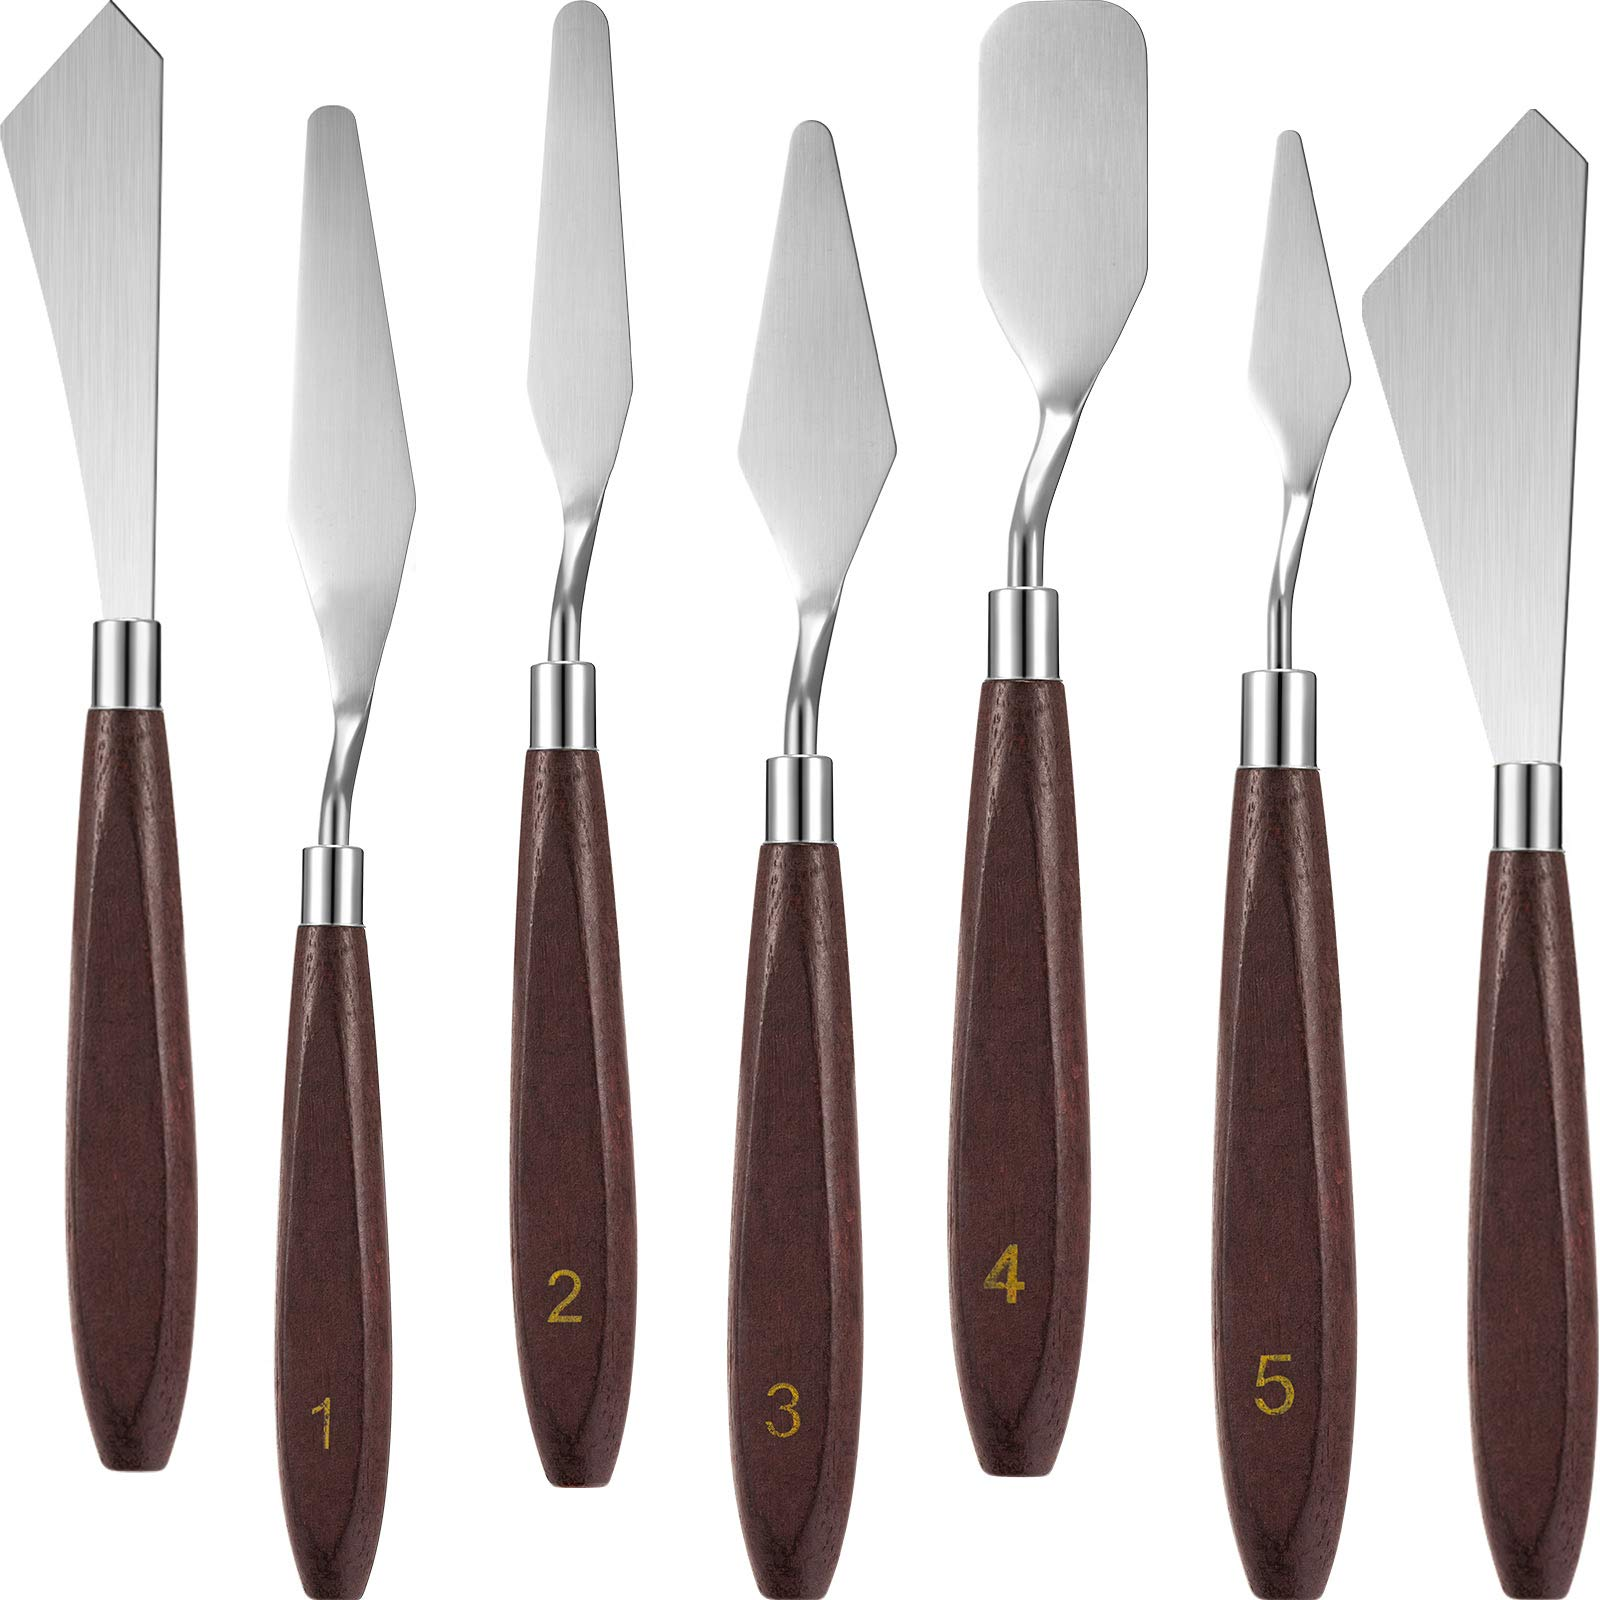
I use a paint knife or paint spatula. The one I have is similar to number 1 or 2 in the photo. They are made of stainless steel and very thin and flexible at the end, just right for applying putty. Get one at Michaels or anywhere art supplies are sold.

-
Prewired 8cyl distributor install
Bainford replied to CA Whitecloud's topic in Model Building Questions and Answers
I have not used these myself, but fitting one should be fairly straightforward. However, as Steve pointed out, it's a bit too late now for this build. For the next one... You need to delete the original distributor and drill a hole to accept the shaft of the pre-wired one. You must also drill a small hole in each spark plug location in the cylinder heads. These holes need to be a bit larger than the wires. A #73-#69 drill bit should work. The more easily obtainable 1/32" is ok too. You will need a pinvise for the drill bits. Glue the new distributor shaft in its hole. Once set, route the individual wires to the spark plug holes, cut to length, and apply glue. CA works well here, applied with a toothpick. Route and drape the wires for an authentic look before cutting and gluing. Adding PE wire looms can give your wiring job a tidy look. As for the boots, the material provided with your distributor kit looks quite out of scale. You'd be better off not bothering with it. ...or, better yet, give a shot at developing the skill of wiring an engine without a pre-wired distributor. Personally, I think many of these pre-wired distributors don't look any better than no wires at all. If you want a good, authentic looking engine, there is no substitute for doing it by scratch. And it's really not that hard at all. Once you have done a couple, the basic method becomes second hand. Many engines provide unique challenges, but that is also why wiring by scratch is better; it's not a one size fits all. Best of all, that cool looking engine you're admiring is all your own work. Either way, good luck with your project. -
How decent are the Gunze Sangyo 1/24 scale F1 kits. I have been interested in a couple of these kits, but I have no idea if they are worth the coin. I am expecting a somewhat simplified kit, but it needs to be fairly accurate with good tires/wheels. EDIT: Also, are they actually 1/24 scale, not 1/28 passed off as 1/24. I have fallen for that one twice before.
-
Hit and Miss With Chrome Plating
Bainford replied to dusty_shelf's topic in Tips, Tricks, and Tutorials
What did you use to try to remove the lacquer undercoat? That can be some stubborn stuff. Strippers that remove lacquer should take it off eventually. Isopropyl alcohol of at least 91% should work, as should brake fluid, and probably some of the bespoke hobby strippers such as Testors ELO (though I have no experience with this stuff myself). Some people have had good luck with Castrol Super Clean, but in many cases I found it wouldn't remove all of the undercoat. Some people seem happy with just removing the plating, which supports paint adhesion, but when stripping chrome, I want the detail-hiding lacquer undercoat off as well. It is the most common reason I strip chrome. -
’72 Dodge Demon Drag Racer 1/25 scale
Bainford replied to AmericanMuscleFan's topic in WIP: Drag Racing Models
Super impressive Francis, as always. I love what you have done with the underside of the hood. There are many things to enjoy about what you do, but the incredible cleanliness of your work always gets my attention. I am always amazed at just how tidy everything is. Cheers. -
What did you see on the road today?
Bainford replied to Harry P.'s topic in General Automotive Talk (Trucks and Cars)
Nice looking Nova. This photo illustrates well just how small older cars really are. There seems to be the notion, even among car enthusiasts, that old cars are big and heavy. A couple years ago I was travelling down a busy four lane road, two lanes of traffic coming towards me. Among the traffic was a car much smaller than everything around it. Still a way off, I couldn't identify it right away, except I could tell it was old. As it got closer, I saw it was a '59 Chevy four door sedan, with its little 15" wheels and skinny tires, looking positively tiny in the sea of modern SUVs and cross-overs. I just couldn't get over how small it looked. -
Welcome to the forum, Patrick. Good to have you aboard.
-
Barber-Greene SA-40 Paver Complete
Bainford replied to redneckrigger's topic in Model Trucks: Big Rigs and Heavy Equipment
Stunning. My mind boggles. This is a very impressive build. I'm going to have to dig up the build thread. -
Scratch end dump in progress
Bainford replied to cdntrucking's topic in WIP: Model Trucks: Big Rigs and Heavy Equipment
Very nice fab work. That thing is looking great. -
Autocar Wrecker
Bainford replied to Warren D's topic in WIP: Model Trucks: Big Rigs and Heavy Equipment
Love them Autocars. Looking great with the Holmes kit. -
Very nice build of a very cool old sports car. The engine looks great with all the added details. The piping looks good, too. Looking forward to seeing your XK SS.
-
Very cool!
-
Wicked looking Pontiac. I'm not a big fan of metallic black, but it is perfect on this big girl. Very nice, Bill. I love it!
-
STITCHES
Bainford replied to TopherMcGinnis's topic in WIP: Model Trucks: Pickups, Vans, SUVs, Light Commercial
Looking mean. Love the wheels. -
1972 ford highboy
Bainford replied to MsDano85gt's topic in WIP: Model Trucks: Pickups, Vans, SUVs, Light Commercial
Cool project! I have a couple Moebius '72 Fords in the stash, but haven't built one yet. I'll be watching this one. Man, I would love to park that 1:1 in my yard. I just gotta know, is it a manual? -
It's a shame those IMC Dunlops were so poorly done. The hobby could use more proper period sports car tires.
-
IMC Ford GT40 - Art Print
Bainford replied to Gramps46's topic in Other Racing: Road Racing, Salt Flat Racers
Stunning collection, Gary. There are some very cool versions of the Ford GT there. Very impressive, I would love to see that lot in person. -
My first model in 45 years! Whaaa?
Bainford replied to 4knflyin's topic in WIP: Other Racing: Road Racing, Land Speed Racers
Yes, you need a couple more coats of primer on that body work until you have good solid, even colour. Even colour of any base coat or primer is important, as a patchy result will often transfer to the final finish (especially with yellow). Painting the inside of the body with black helps a lot, but even primer application is important. Apply light coats. If the primer lays down dry and dusty/gritty (as the photo appears), you may need to get in a bit closer when spraying. Either way, a bit of light sanding with 1000 or 1500 grit sandpaper between coats and before final paint will keep things smooth. Sand wet, and rinse/dry parts very well before paint or further primer coats. It is also necessary to achieve solid, even primer coats to properly assess any places that need further work prior to paint. Small scratches and very minor imperfections can sometimes be sorted with another coat of primer. For small repairs, such as the spot at the top edge of the intake cowling, I use Gunze Sangyo Mr Surfacer. It comes in several 'grits' (grain size, I guess), but I use 1000 or 1500. It is basically a very thick primer that I spot-apply with a brush to fill small divots or deeper scratches. When sanding, it feathers out beautifully. It's good for filling the ejector pin marks on the underside of the bodywork, too. It shrinks while it is drying, so I apply a thick, heavy spot, allow it to dry/shrink, then sand it flat. It is a lacquer that dries quickly (though not CA quick, which I suppose it why many people use CA for such things). Just one man's method, of course. There are numerous ways to sort such things. Taping off the mating surfaces is not lame, just good forethought. You are doing well. Keep in mind that anything I say is just my way of doing things. Other builders will have other methods or techniques, and you will absorb and draw from these. There is almost no end to ways of 'skinning this cat'. There are definite wrong ways of doing it, but if you ask ten modellers the right way to do it, you will get twelve different answers. If other methods, or your own ideas, clash with any advise I offer, then those methods or ideas are not necessarily wrong. Just different. Eventually, every builder settles into their own methods or ways of doing things that works well for them, usually a mish-mash of things they've heard and read over the years that solidify into their own personal methods. This is why forums work so well at developing our own personal skills and techniques. We are all the result of a mash-up of everyone else's methods and experiences.