Modlbldr
-
Posts
6,887 -
Joined
-
Last visited
Content Type
Profiles
Forums
Events
Gallery
Everything posted by Modlbldr
-
Yeah, this is looking great! Nice work on that roof. Later-
-
 Got some nice kits yesterday in a trade with Sam I Am. Thanks Buddy! It's a good thing both of us are reducing our stash! ? Later-
- 39,276 replies
-
- 2
-

-
- johan
- glue bombs
- (and 1 more)
-
Who doesn't love a mock-up? Let's see yours!
Modlbldr replied to Belairconvertable's topic in WIP: Model Cars
Beek poking at this one for a bit. Working in some taillights at the moment. Later-
-
Nice builds! I love the color on that Challenger T/A. What is it? Later-
-
Did a run to the only hobby shop besides HL within 2 hrs of my house. Nicely stocked place! After an hour and a half of ogling over a lot of stuff I walked out with just this. Yes, my wife was waiting in the car so it kept me in control.... Later-
- 39,276 replies
-
- 2
-
-
- johan
- glue bombs
- (and 1 more)
-
model car kit Polar Lights 1:25 Volkswagen Beetle Coca Cola Snap Kit
Modlbldr replied to Lee_S's topic in Model Cars
That looks awesome! Low and wide. I also love the side by side comparison. Later- -
Great work! Those seats are perfect in it. Later-
-
70s cars as they really were!
Modlbldr replied to Oldcarfan27's topic in General Automotive Talk (Trucks and Cars)
Nice pictures of how they used to be. Makes me want to start a CBP using a pic from this thread as your build. I think that would be fun. I see a few I'd like to do a build of. Later- -
Cool video! A buddy of mine and I did a 3 min stop motion video similar to this about 30 yrs ago. Lots of work for such a short video. Great looking build though! Later-
-
Thanks guys! That sounds interesting. Not sure what route I am going to go yet. I was thinking of a shop rig with just bare steelies and narrow slicks in the rear. I'll have to give it some thought and do some mock ups to see what I like. I haven't seen that one. I did really dig this though when I saw it and thought the OB did a fairly decent job that should need little work (fixing the sunken roof and scribing rear hatch lines. Later-
-
Looking good! Nice smooth black paint. Should really pop with the chrome done. Later-
-
Thanks. Me too! Got the chrome glued on the hood this morning and I'm going to try to have it all finished by tomorrow night. Later-
-
Oooh, beautiful color! Later-
-
Beautiful color and vinyl top! That thing looks slick! I just finished polishing the body on my 67 Impala. Can't wait to see this one put together. Later-
-
Nice, subtle.flames. I bet it shines in the sun! I'd love to see your other builds too. Later-
-
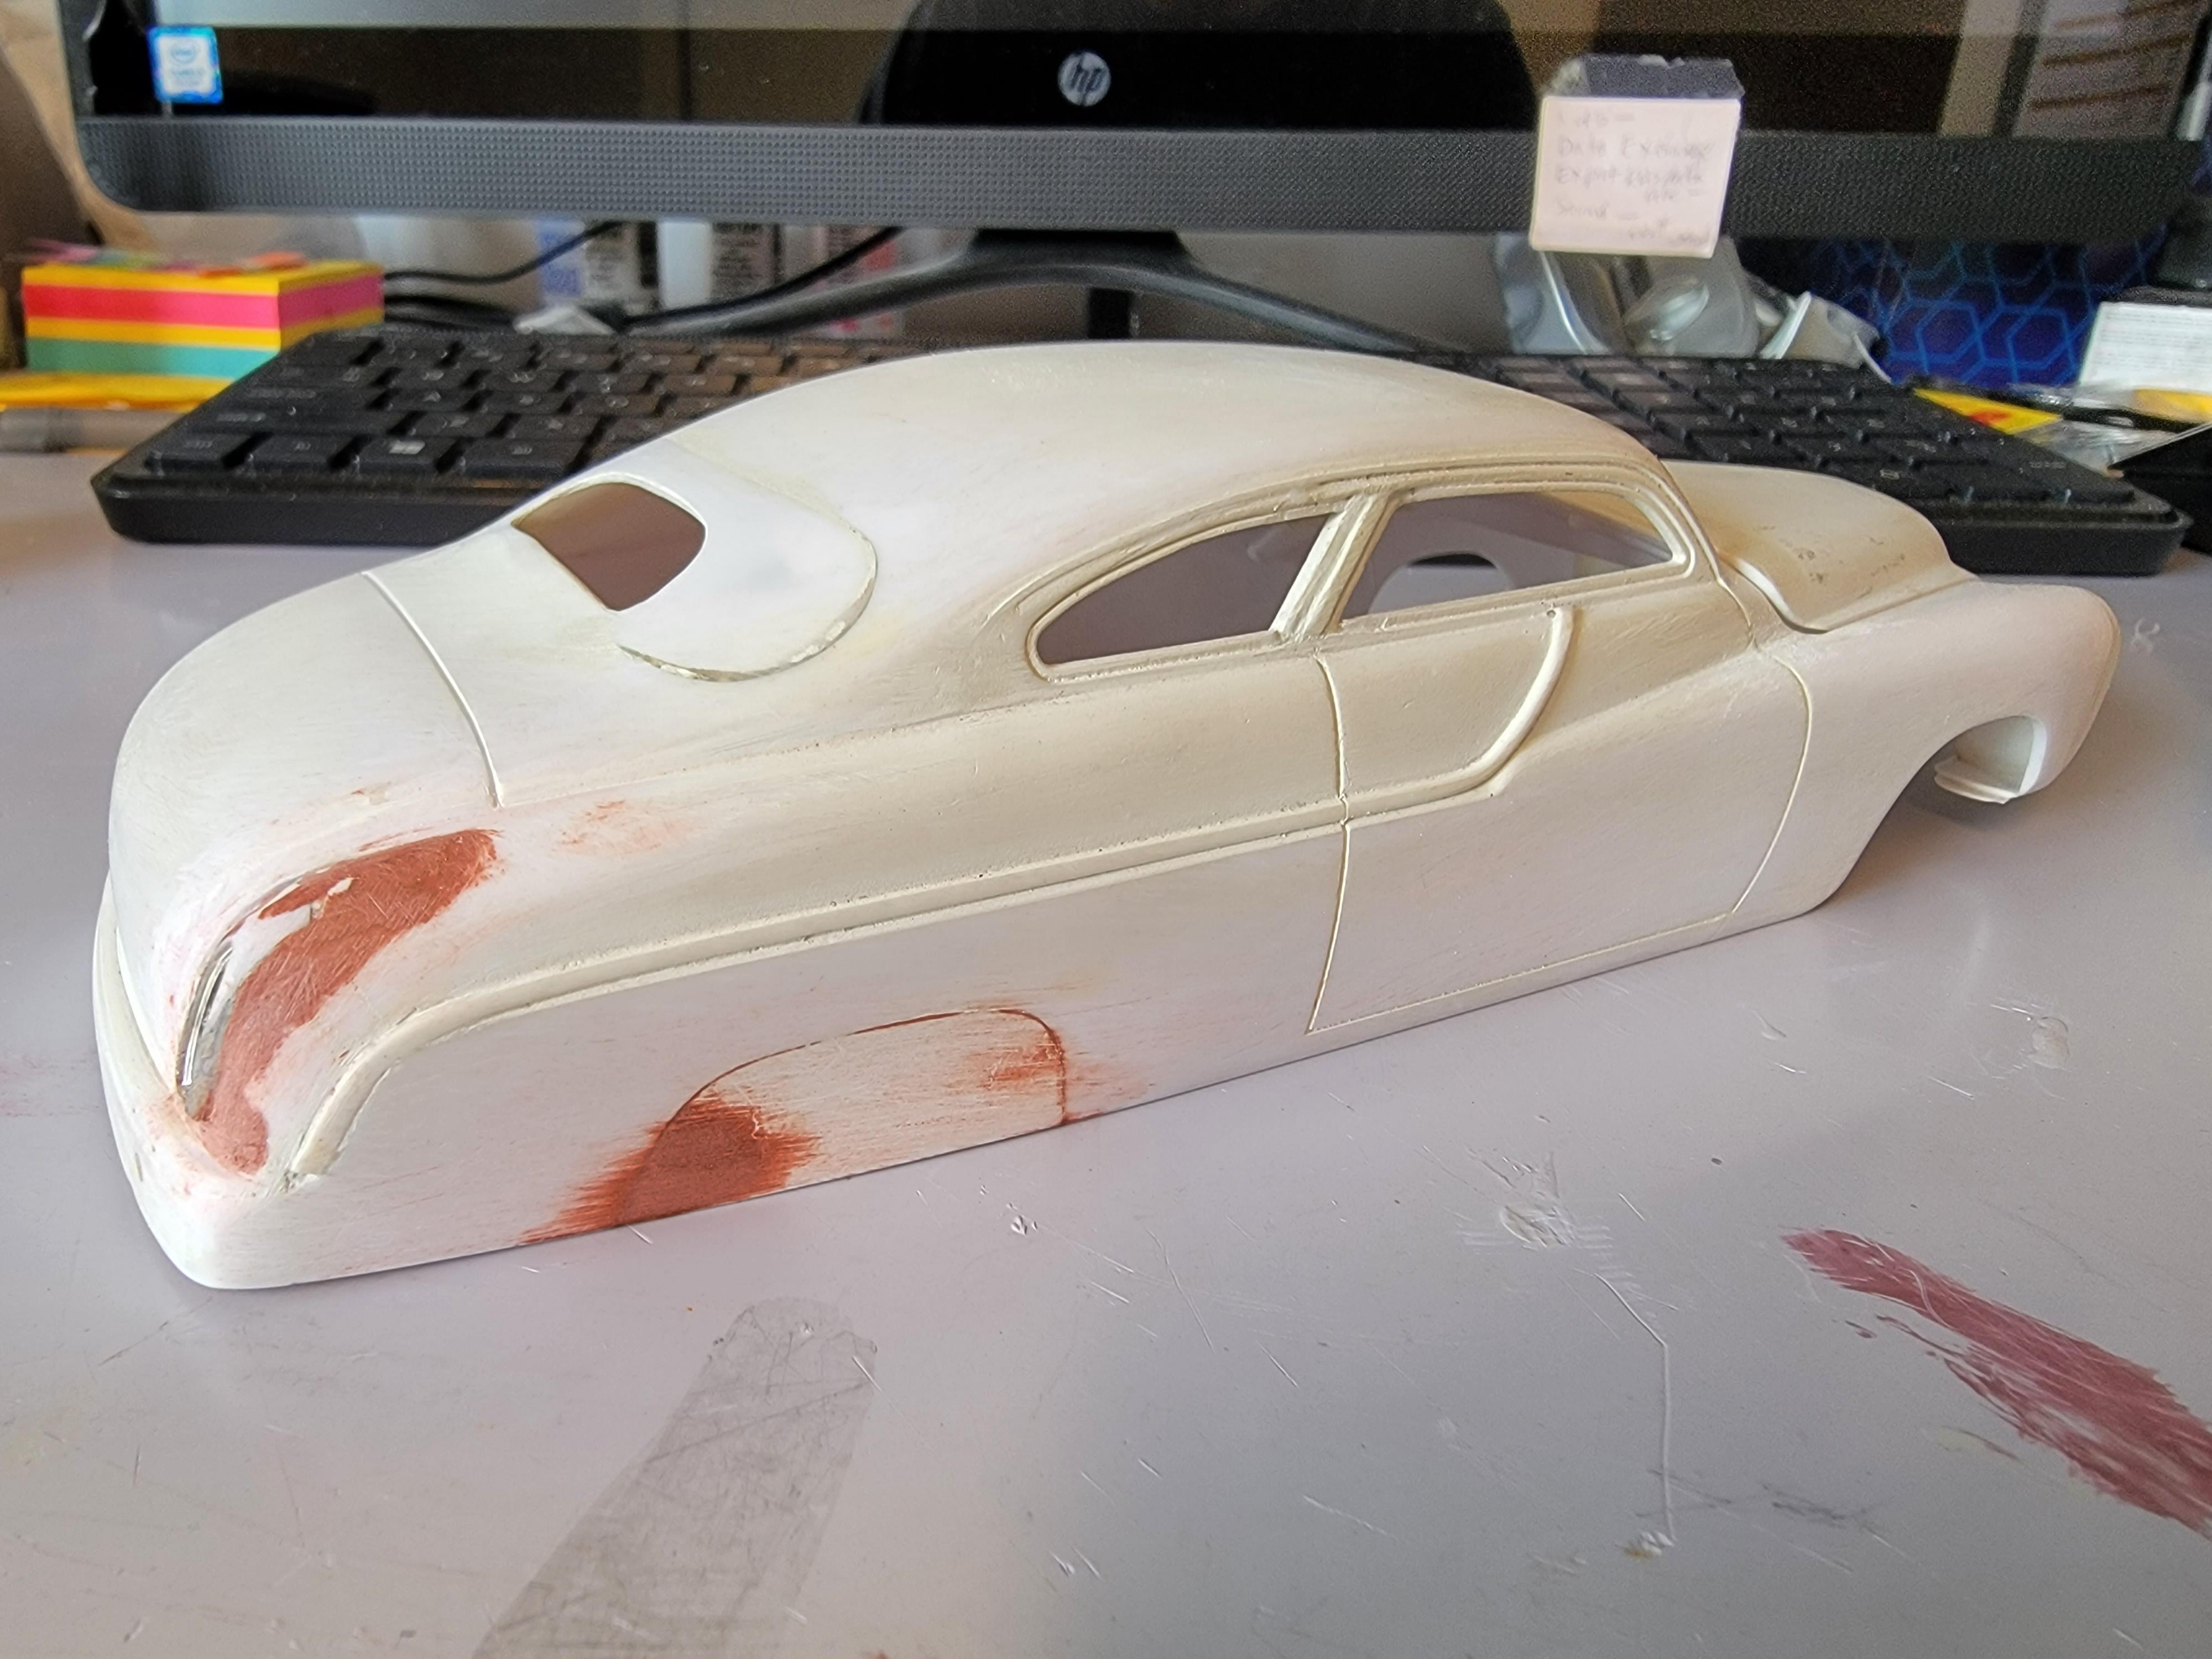
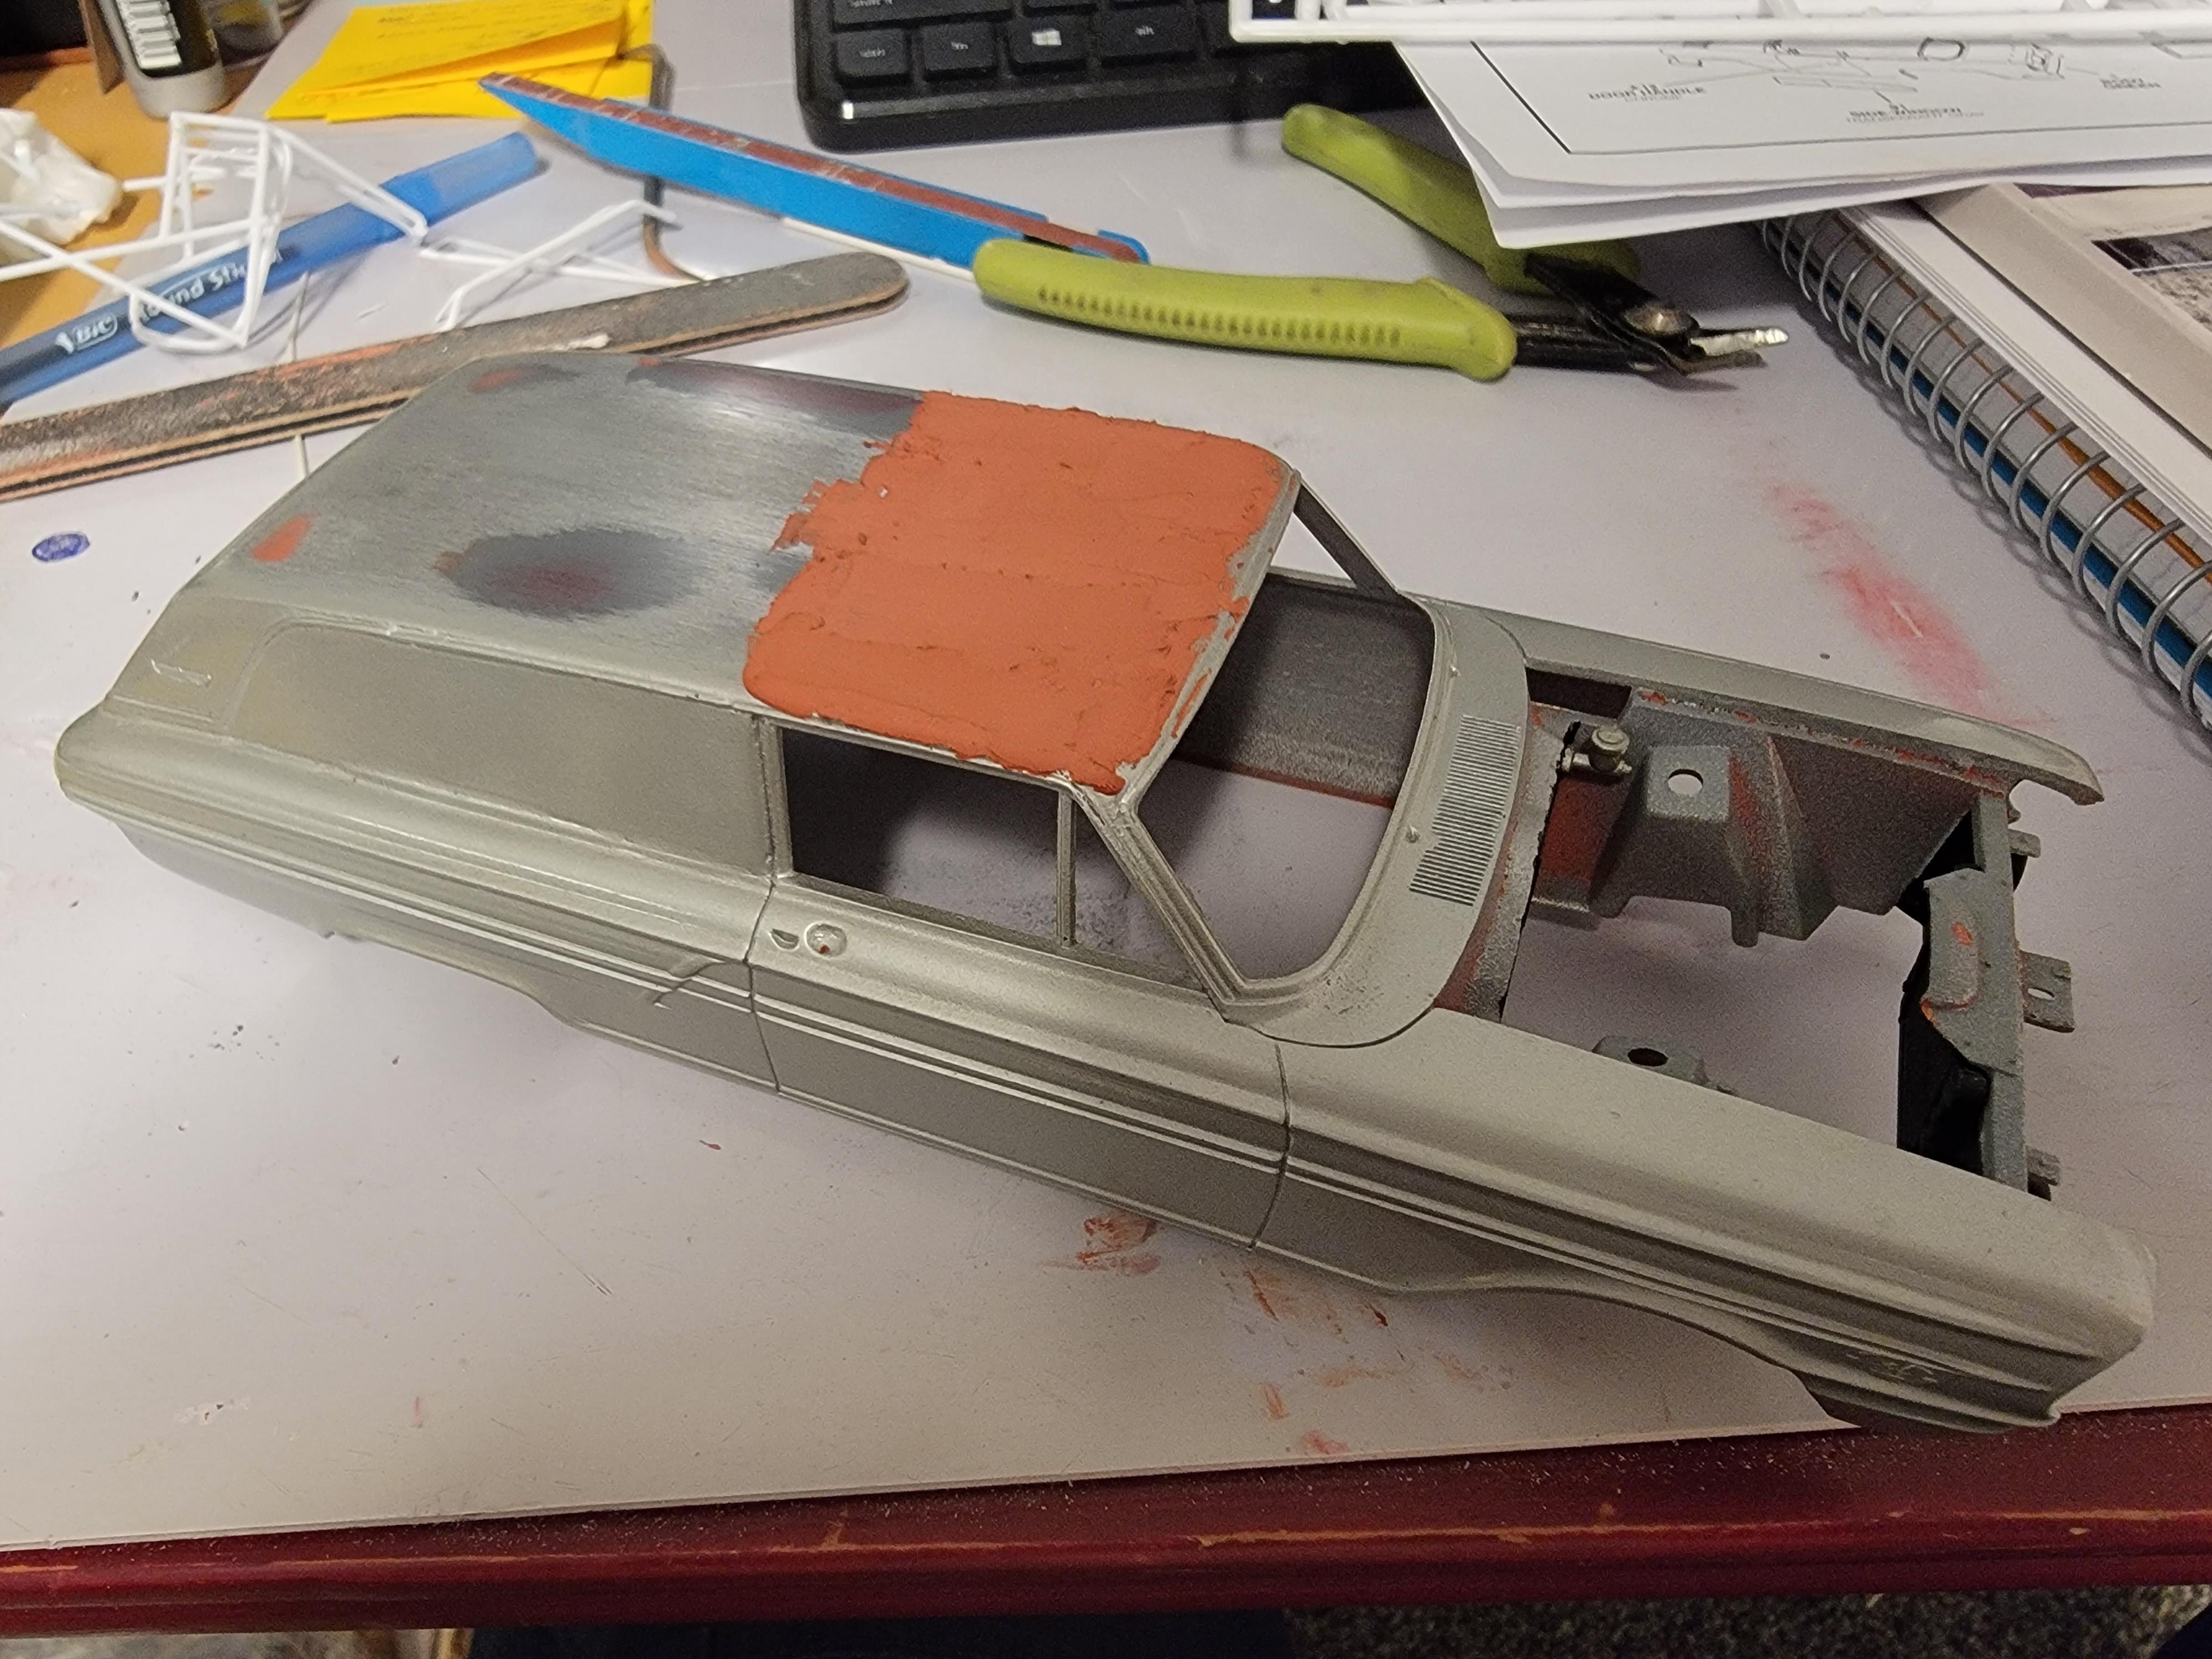
I got this rebuilder quite a while ago and liked the looks of it. Since I am getting close to finishing my 67 Impala lowrider I figured I would get some things started on it. The roof has a slight hump in it where the OB molded the roofs in. It can be seen pretty good from the side view. I think the easiest way to fix this is a skim coat of putty on the front section of the roof. After running a sanding stick over the roof the low spot was much easier to see. I put a coat of putty in that area and I'm waiting for it to set. I'm thinking I'll do a bit of detail to the bed floor with runners made of styrene and I'll pull the seats to carpet the floor with some embossing powder. Later-
-
I got the body and hood polished out today. Nothing left but to chrome the window frames, etc and slap it all together. I'm headed to the finish line! Later-
-
Nicely done! What a classic auto! Later-
-
Stunning! Very nicely done mild custom. I enjoyed watching your work on this one and I hope that mine comes out half as nice. Later-
-
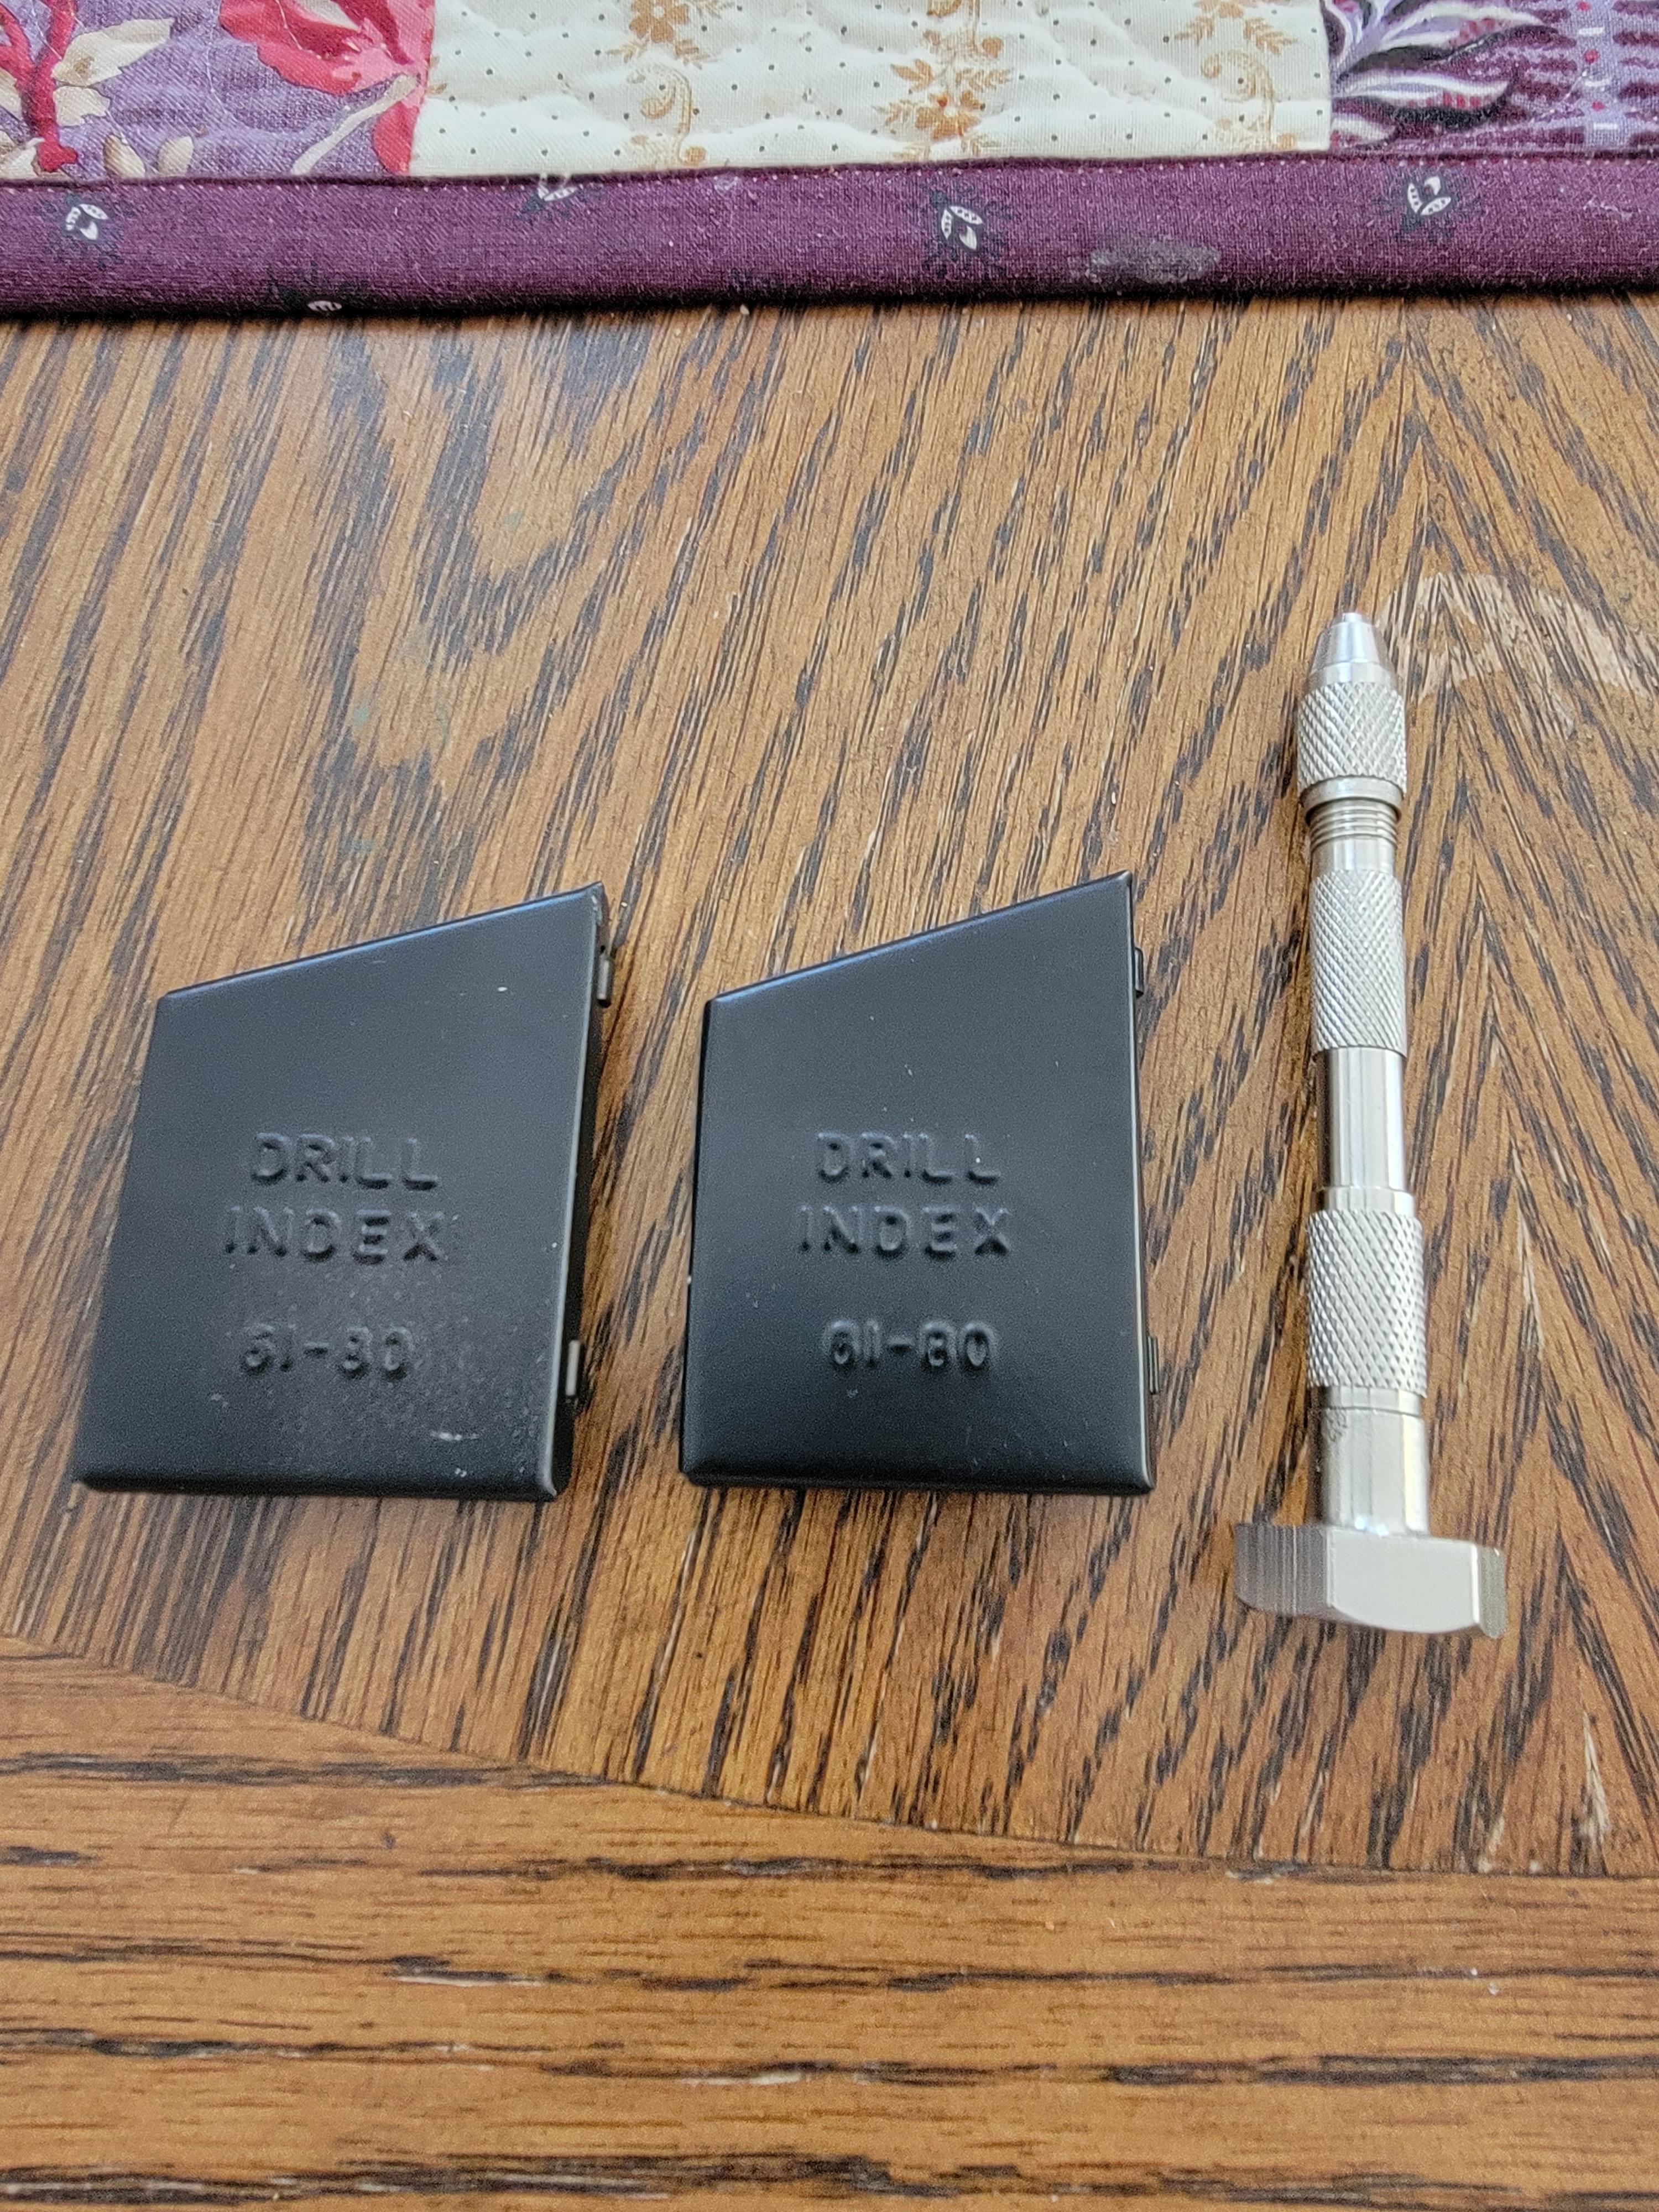
Got my order of bits and a drill from Micro-Mark today. The last sets of drill bits I got off-line were from China and couldn't drill their way out of a wet paper sack! I know these work since I still have a few from 30 years ago. Later-
- 39,276 replies
-
- 1
-
-
- johan
- glue bombs
- (and 1 more)
-
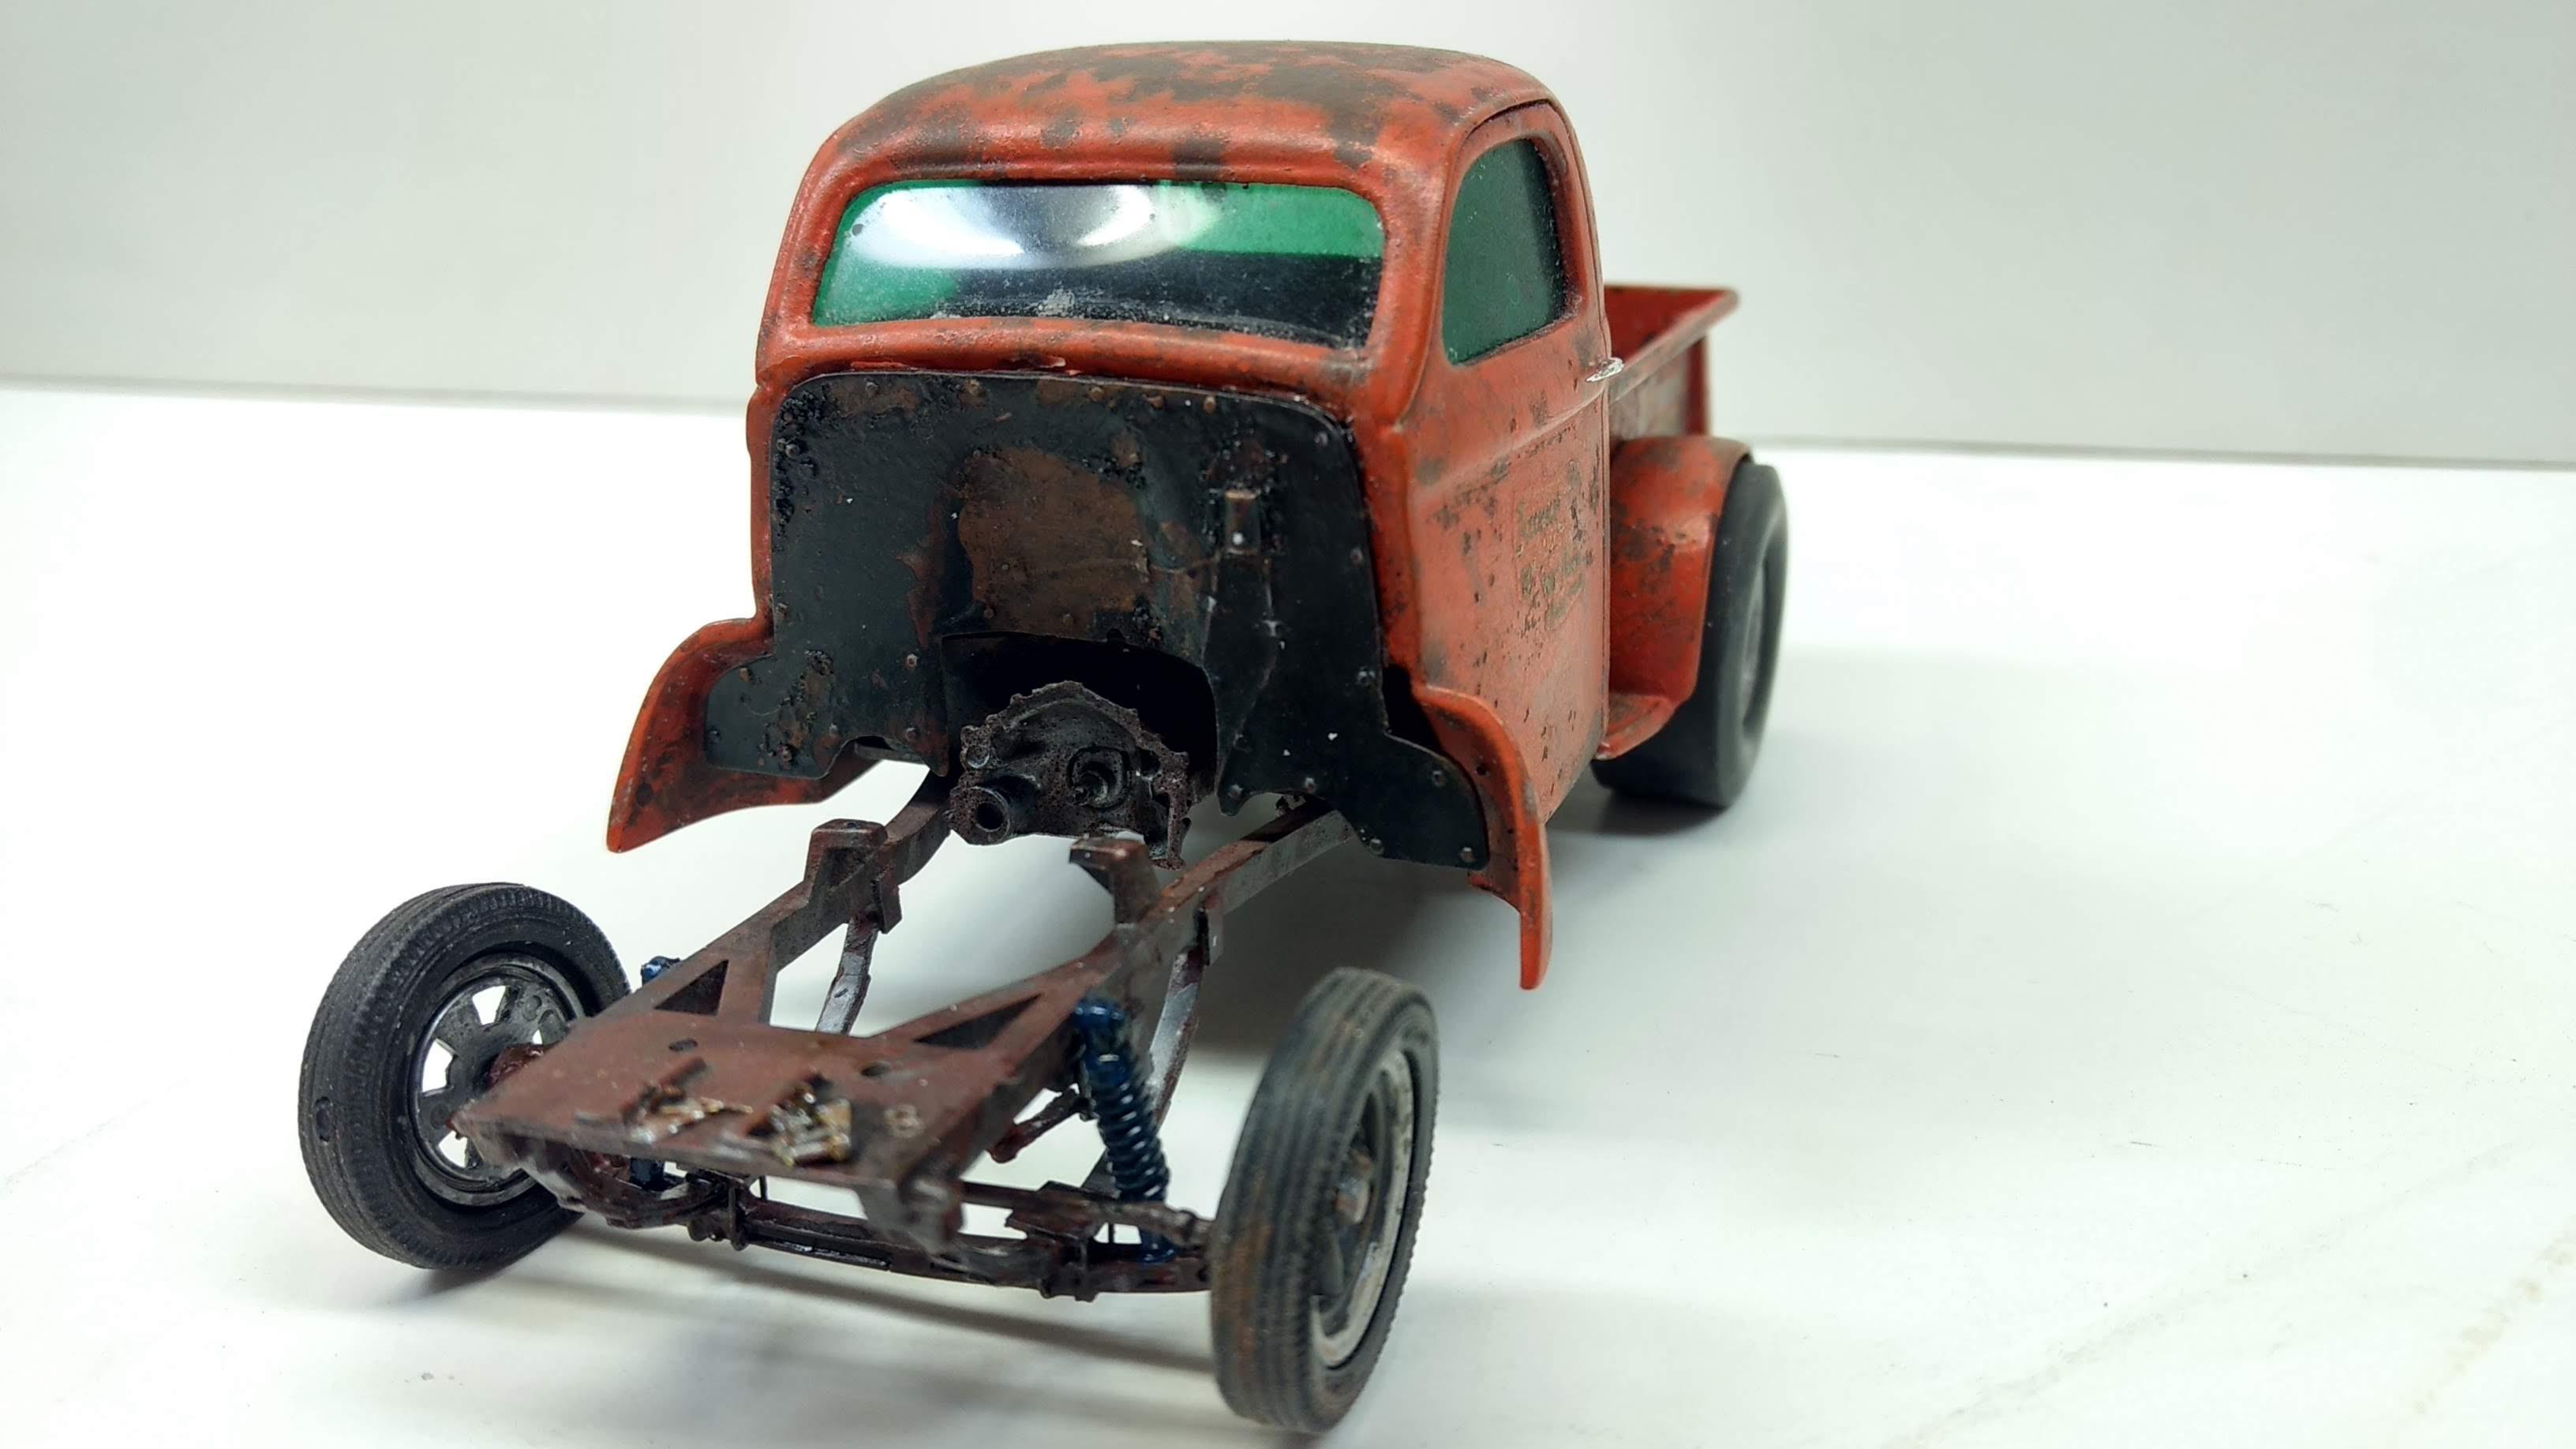
My story for the build was that this guy drag raced his years back and then updated to a newer ride. Shortly after, his buddy ran his Willys down the wall in a drag race, tearing up the front sheet metal. Being the good friend he was he gave his buddy the nose from his old ride. Years later, and a few more pulled parts, here it sits, neglected. Later-
-
This is looking great! I'll be watching too. I found one more way to deal with the poor fit of the hood and fenders when I built mine. Lol! Later-
-
69 "Jungle Jim" Nova (Fictional build)
Modlbldr replied to Modlbldr's topic in WIP: Drag Racing Models
Thanks! I've been keeping a close eye on your Beretta build. You're doing amazing work on it. I had thought about doing the door framework in styrene but wanted to try brass for a couple reasons. I have a ton of it from my buddy's supply and I want to teach myself to solder. I thought the door and trunk framework would be a relatively straightforward project to start with since it is mainly just straight bars and wouldn't require anything to be totally accurate and plumb. I think I need to try a smaller diameter wire though and try incorporating more bends (make the perimeter in one piece) rather than so many individual bars with many solder joints. It's all a learning experience! BTW- I got a bit more time to work on the chassis last night but nothing photo-worthy. Later- -
Great looking color combo. Nice work on the mild custom. I may have to do a similar grill idea on my 64 GP. Someone heavily glued the grills in and I broke one trying to remove it. Making it flat instead of the slight curve it has in it may be the easiest solution unless I can find a replacement. Love where you're headed. I'll be watching. Later-