Tom Geiger
-
Posts
18,967 -
Joined
-
Last visited
Content Type
Profiles
Forums
Events
Gallery
Everything posted by Tom Geiger
-

Another foose 56
Tom Geiger replied to Brudda's topic in WIP: Model Trucks: Pickups, Vans, SUVs, Light Commercial
Great work! I remember having an issue getter the interior into the body but I don’t remember how I solved it. I built mine as part of the 24 Hour Build a few years ago so it was no doubt towards the end in the wee hours of the morning! -
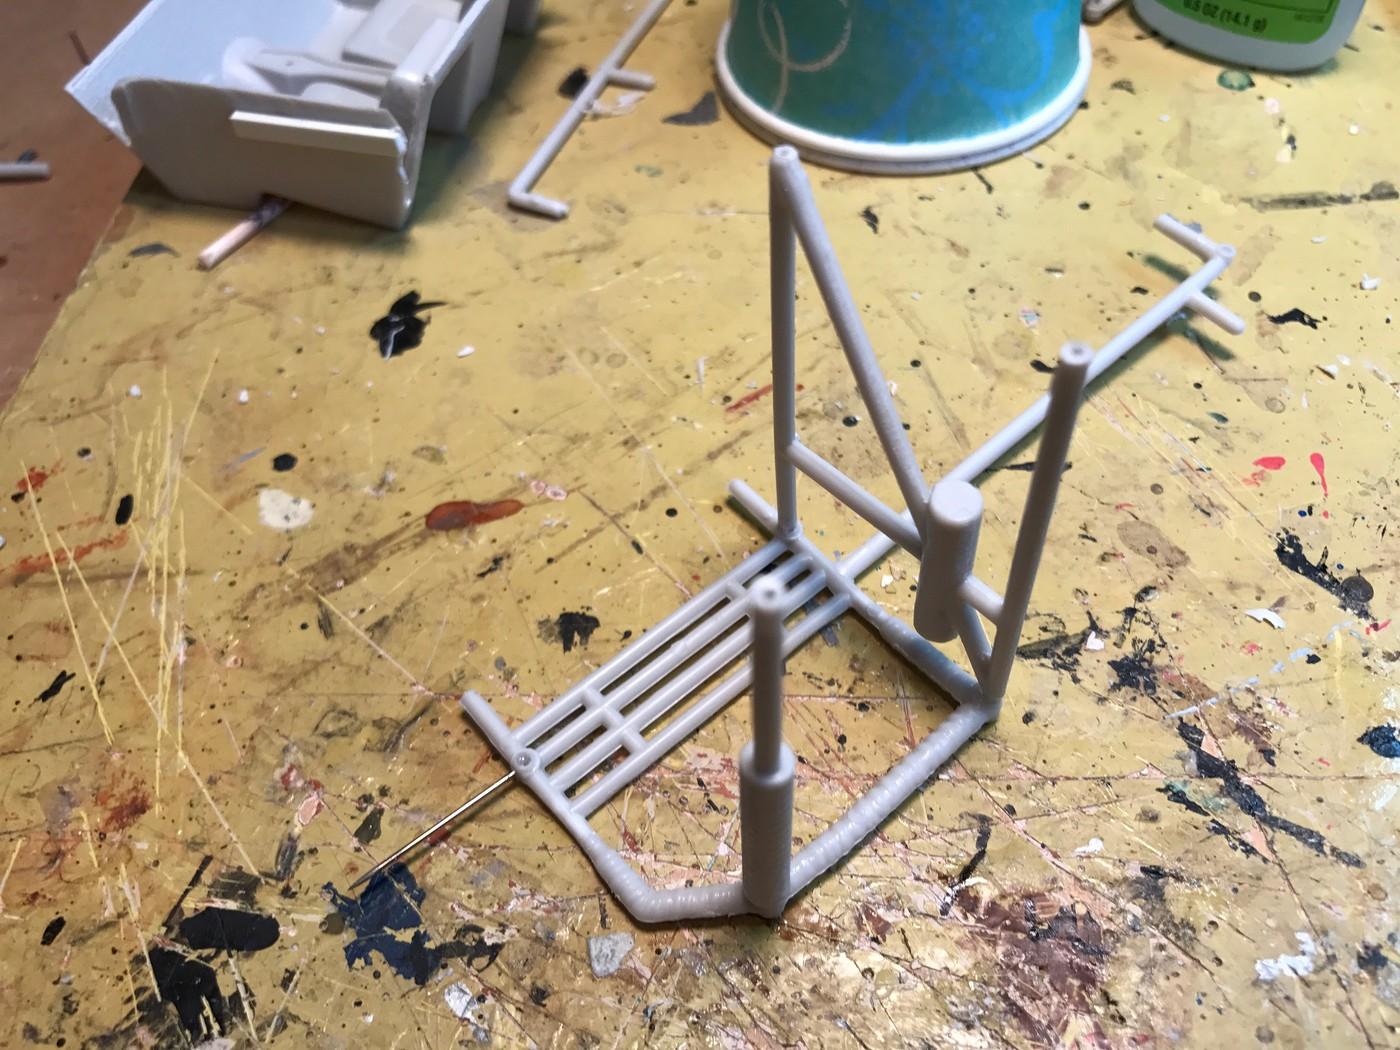
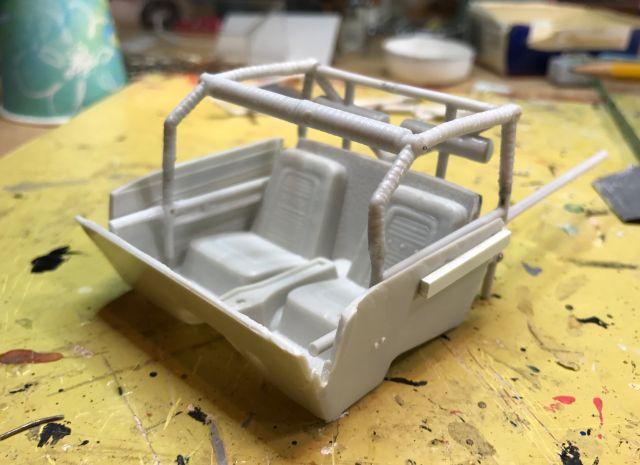
I assemble everything with pins. There have been times I’ve tried to shortcut and just glued parts together and was sorry! Nothing magic or expensive here.. standard straight pins, wire cutters from my garage tool box. I do have a small battery power hobby drill, the new Tamiya one would be a wise investment. I drill and press fit all the joints. I had to resize the cage to fit in this model so it helped me with the fitment. Here is everything dry fit. The cage also gets pinned to the floor for an exact and permanent strong assembly. I had this entire interior in and out of the body to fit it to roofline etc before anything was painted or finished. Here we are all finished and ready for final assembly. Yes it’s a bit more work, but aren’t we in this for great results ?

-
Hold that thought! It’s a logical conversion, someone will probably offer it
-
Or rotting shrimp ?
-
Very nicely done!
-
Cool, Unique, or Unusual Cars on Craigslist
Tom Geiger replied to JollySipper's topic in The Off-Topic Lounge
Just a comment- this thread will become useless in a month or so as these ads expire. -
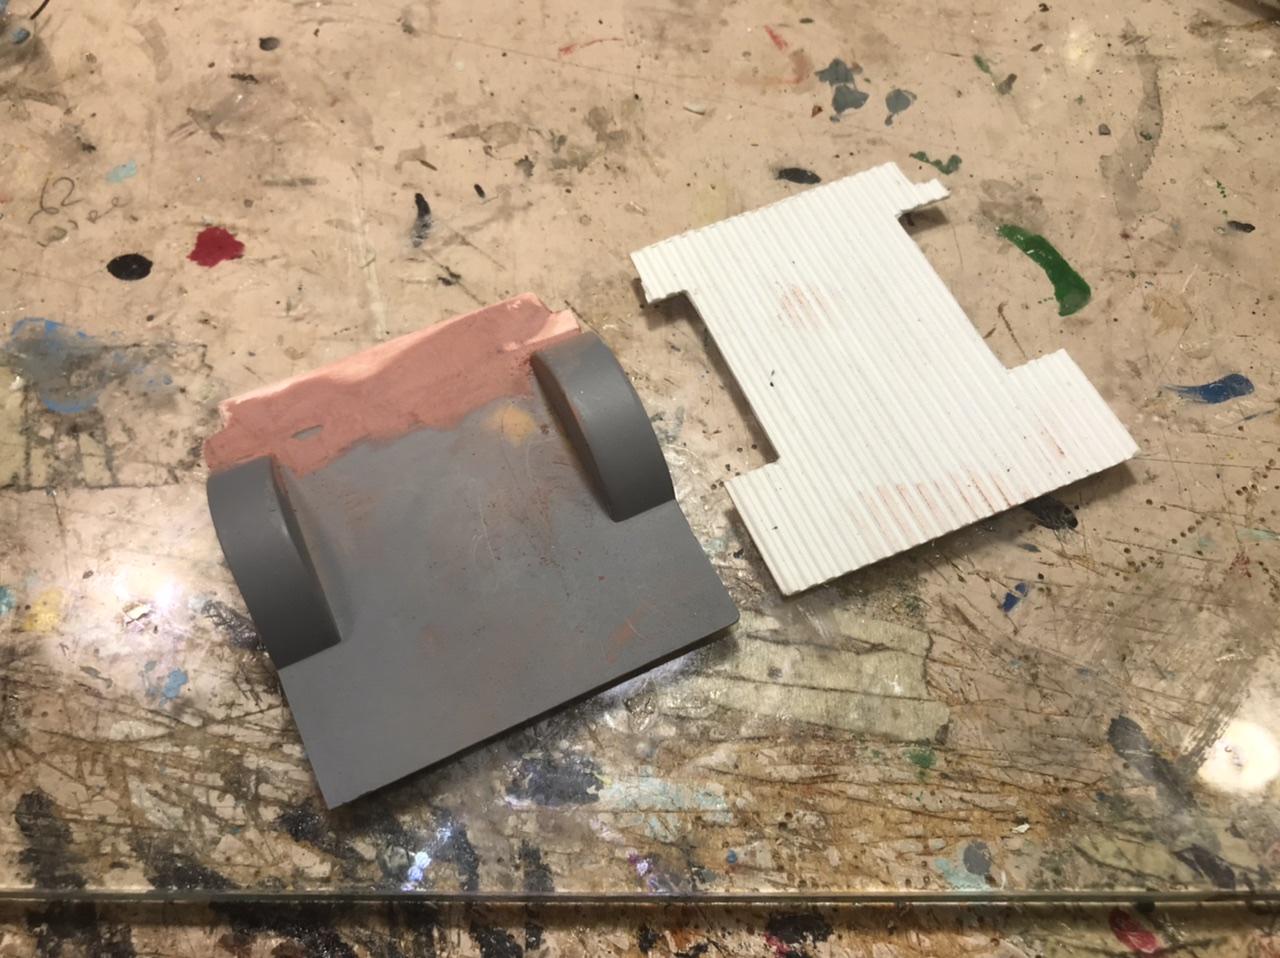
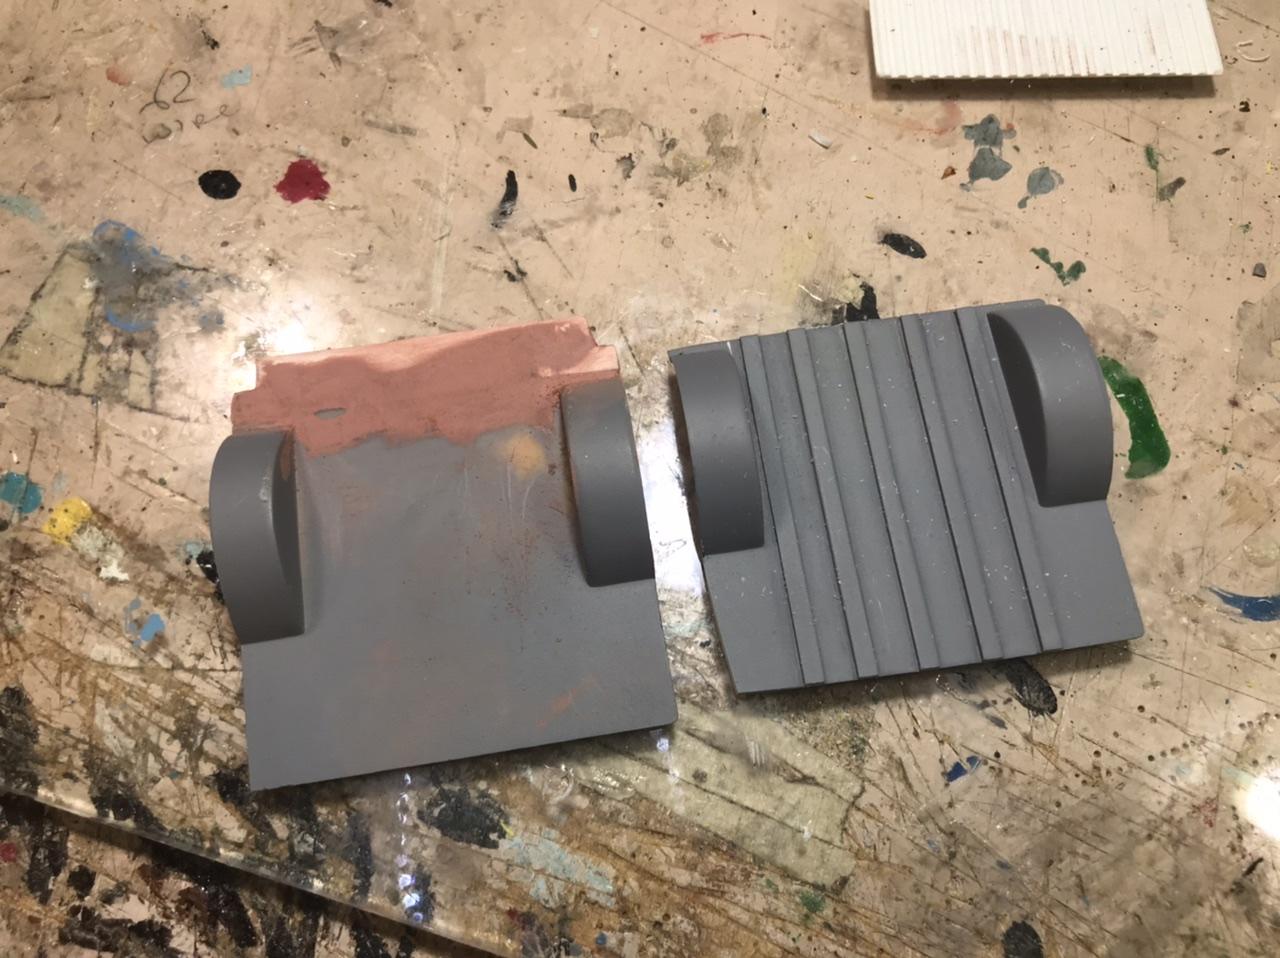
Never leave we’ll enough alone! For the Jeepster pickup, the bed is flat with no detail but the real vehicle has ribs like this one. Then discovered the bed was too short, the way the kit was done. Take two was creating the bed liner the proper length from Evergreen ribbed sheet. I had done the beds in my Trabant and Dodge Caravan vans with this. Then I just wasn’t feeling it.. So I separated the bed from the cab and decided to add the length and do the proper ribs. The kit bed just doesn’t look right and has gaps so I’m pretty much building a box insert. So much for a quick easy project!
-
In NY taxicab
-
Very neat! The Aussie Valiants are a favorite of mine!
-
Scout II Desert Racer
Tom Geiger replied to Karl LaFong's topic in WIP: Other Racing: Road Racing, Land Speed Racers
Fun project Keith! I’m watching! -
with biker dudes
-
Yes. This is a kit that AMT tooled up in the 1990s. It is a full detail kit and I use this chassis for my old Valiant builds. People say the body has some challenges, and that the original annuals had better scale fidelity.
-
Without social distancing
-
Into large trees
-
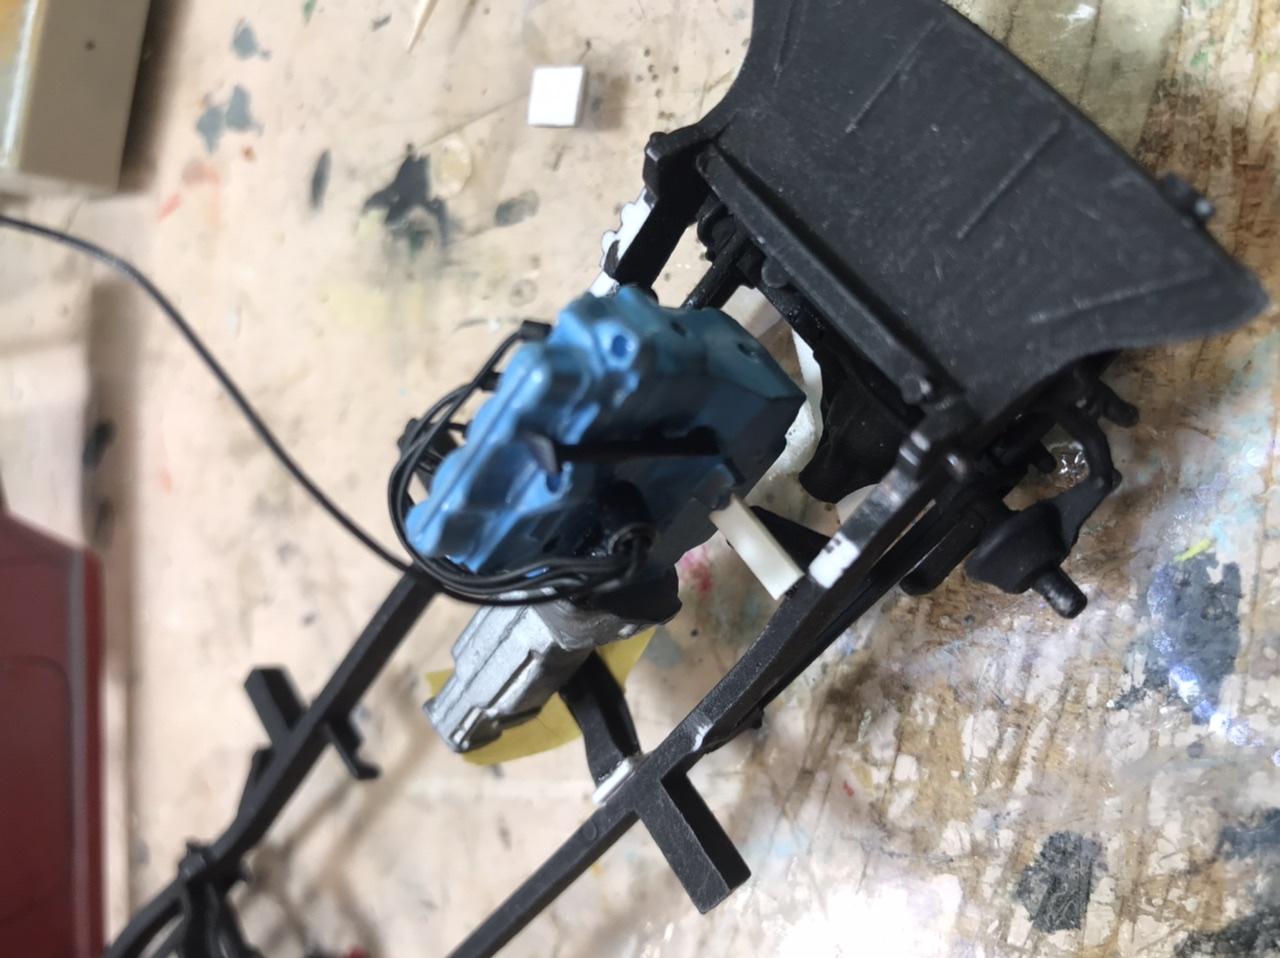
We spend so much time on tiny little details! The Jeepster comes with a V6 and I wanted to use a base 4 in one of the two I’m building. Here’s the 4 from the Dukes of Hazard Jeep sitting on the Jeepster chassis. Had to make motor and trans mounts. Now I’m making an exhaust system for it.
-
running in rain
-
It’s as heavy as a brick too!
-
I agree. I bought a tube of this at Walmart while the hobby shops were closed. It goes on smooth and sands easy
-
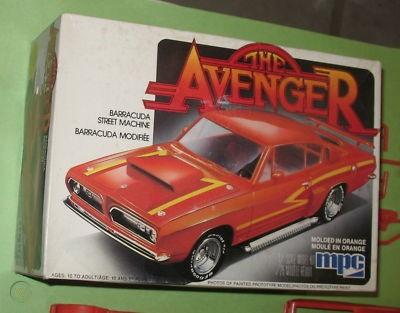
If the body is orange, it’s probably this issue. I have one I bought back in the day. I cut the roof off to make a convertible, didn’t get far!
-
imploded into flames
-
Looks great! Funny thing, I bought those two colors at Hobby Lobby on Saturday. One of them will wind up on the Jeepster I’m working on
-
In the sky
-
Cool! I’ve created both a 63 Valiant and 66 Falcon Modified Stocker, both based off the Falcon kit but I couldn’t use the no detail chassis so I did my own thing with full detail chassis. lf you want a GTO, why not use a stock kit with the stocker parts from the Skylark kit ?
-
Thank heavens for spoons! And being astute enough to test. I chuckle at the Facebook posts with photos of a body all wrinkled up asking what they did wrong!
-
Very nice ending! I enjoyed following these build