Tom Geiger
-
Posts
18,967 -
Joined
-
Last visited
Content Type
Profiles
Forums
Events
Gallery
Everything posted by Tom Geiger
-
I’ve posted this before, but if you need to steady your hand, get a bean bag or the large bag of M&Ms (if you can resist temptation) and rest the ball of your hand in it. It’s an old sign painter’s trick.
-
Cool!
-
I have a TV with a DVD built in and cable with DVR as well as a stereo in the model room. I can’t tell you the last time I used any of it. I pretty much build in silence. If I put something on I lose track of it because I am concentrating on what I’m doing. I don’t bring a beer there either because it will just go warm!
-
To two too
-
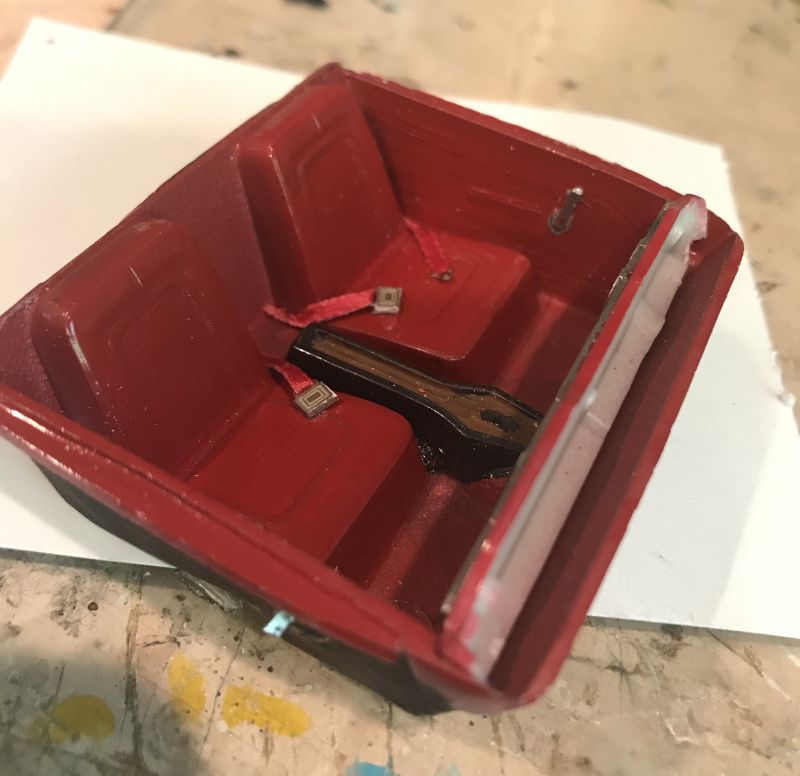
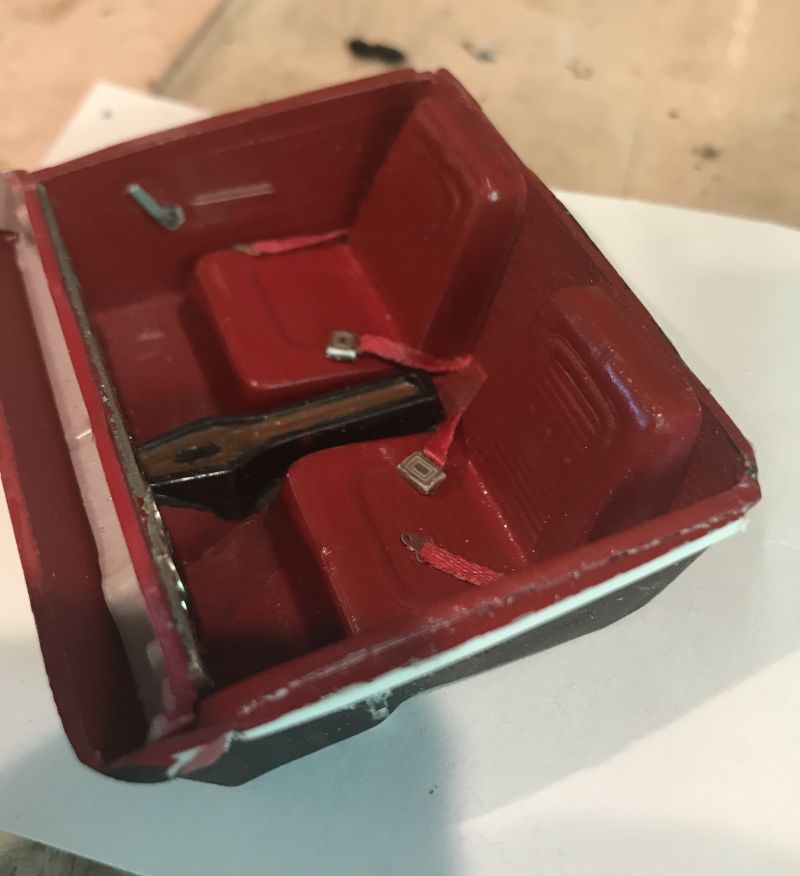
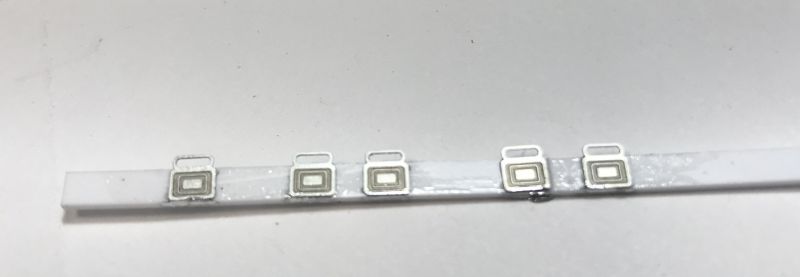
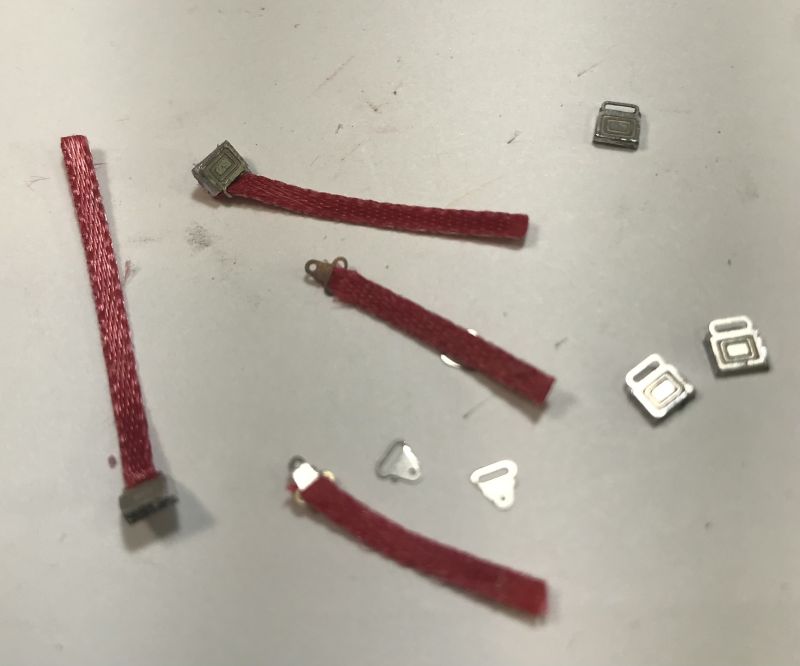
I thought I'd do this little bit, since nobody actually uses PE Belt Buckles the way Model Car Garage intended. The sets I have expect you to use their back piece and go through a series of complex bends. As such I see people just using the fronts, and without any thickness they look like potato chips on the finished models. I cringe whenever I see that! So here's what I do.. To add some thickness to the buckles, I take a piece of Evergreen, and glue them down. I don't know what size piece I used here since it came from their "Odds and Ends" Pack but it's not critical. Just look for something that approximates scale thickness. It doesn't have to be only as wide as the buckle, as shown here, you can cut three edges once glue is dry. The only important part is to line up an edge to the buckle loop edge since you cannot cut that without damaging those fine bits. To separate them, just line your exacto blade up against the edge and press! You should get a clean cut. Once cut, paint the white edges (no need to paint the back side) with silver. I use a silver Sharpie. Let it dry. You can buy 1/8" wide ribbon on eBay. I bought a few rolls, one gray, one black and one white. That's a lifetime supply for a few bucks a roll. The white one can be colored easy with Sharpies, as I've done here with a red Sharpie. Once installed, your belt buckles will have the proper depth to them. Some folks like to do rigid belts, I give mine the used and just laid down look. I think it's more realistic. This is the Valiant Speedster interior from the Fireball 500. There wasn't a lot of detail here, so the belts and door handles add some interest. Door handles are nothing more than half a staple. I hope this helps!

-
 I like Steve’s mention of PE keyholes for two reasons. First the added detail of the key recess etc, and second PE is the right color and tone. I believe Molotow is too shiny to be realistic. I have used a Metalizer silver in the past. To paint it, I’ve cut a round toothpick end flat at the appropriate part of it’s taper. Sanded it smooth and then used it like a rubber stamp on the keyhole.
 -
Amen! That was the Holy Grail kit for a lot of truck guys. I’ll bet we see a mess of originals on eBay soon! And after years of whining for a new tool truck, let’s hope buyers respond!
-
Thanks Jim! It came in the old Riviera kit. I was Jonesing to use it on a rod!
-
Steve was a great guy. We were in touch often on NNL issues. When we were together people joked it was where East meets West! He came east to NNL East a few times and I’d always see him at GSL. I was shocked at his passing since we were the same age and I wasn’t aware he was ill. Sad and a great loss for our planet!
-
Looks great especially considering what you started with!
-
On private parts
-
Poor quality styrene deterioration
Tom Geiger replied to oldscool's topic in General Automotive Talk (Trucks and Cars)
I posted this yesterday in another thread. A 3D printed part I got in 2005. Retrieved it from my display case and it’s turned white (it was milky clear like on the base) and is sticky.
-
And now a labor shortage. I was just watching the news.. most area companies are offering $15 or more. Valley Forge Casino had a job fair and nobody showed up despite $1500 sign on bonus. At the New Jersey shore one boardwalk company has 1800 summer jobs and only 350 filled.
-
In your hair
-
1/25 AMT 1964 Olds Cutlass F85 Convertible
Tom Geiger replied to Casey's topic in Car Kit News & Reviews
Sellers pop these listings out hoping to catch people off guard who don’t know about the new kit and believe they just latched onto an original at a great price. For instance this listing is in the “Vintage Kit” category with absolute no mention it’s a current kit. -
1/25 AMT 1964 Olds Cutlass F85 Convertible
Tom Geiger replied to Casey's topic in Car Kit News & Reviews
There are sellers who hope to catch people who aren’t aware of the reissue and think they’ve just jumped onto a deal on a rare old kit. -
Or dead pigeon
-
Why do people dig up these old threads???
Tom Geiger replied to Force's topic in General Automotive Talk (Trucks and Cars)
Why do people start new threads? Because this is an INTERACTIVE forum! People will pose a question and someone will answer. OP now has the opportunity to ask for further clarification, or specific advice. And we have crowdsourcing.. Jim asks a question... Bob answers it. Then Mike disputes Bob’s response. Tom backs up Mike. Then three more guys add additional information of value.. then Henry pops on with a completely different solution to the old problem. Then everyone has gained. And don’t forget that there are responses from people who have no idea what they are talking about. Oh yea, go ahead and soak a valuable old promo in gasoline! ? Take away the interaction, and you might as well cancel everyone’s ability to post and just have an archive of old information. -
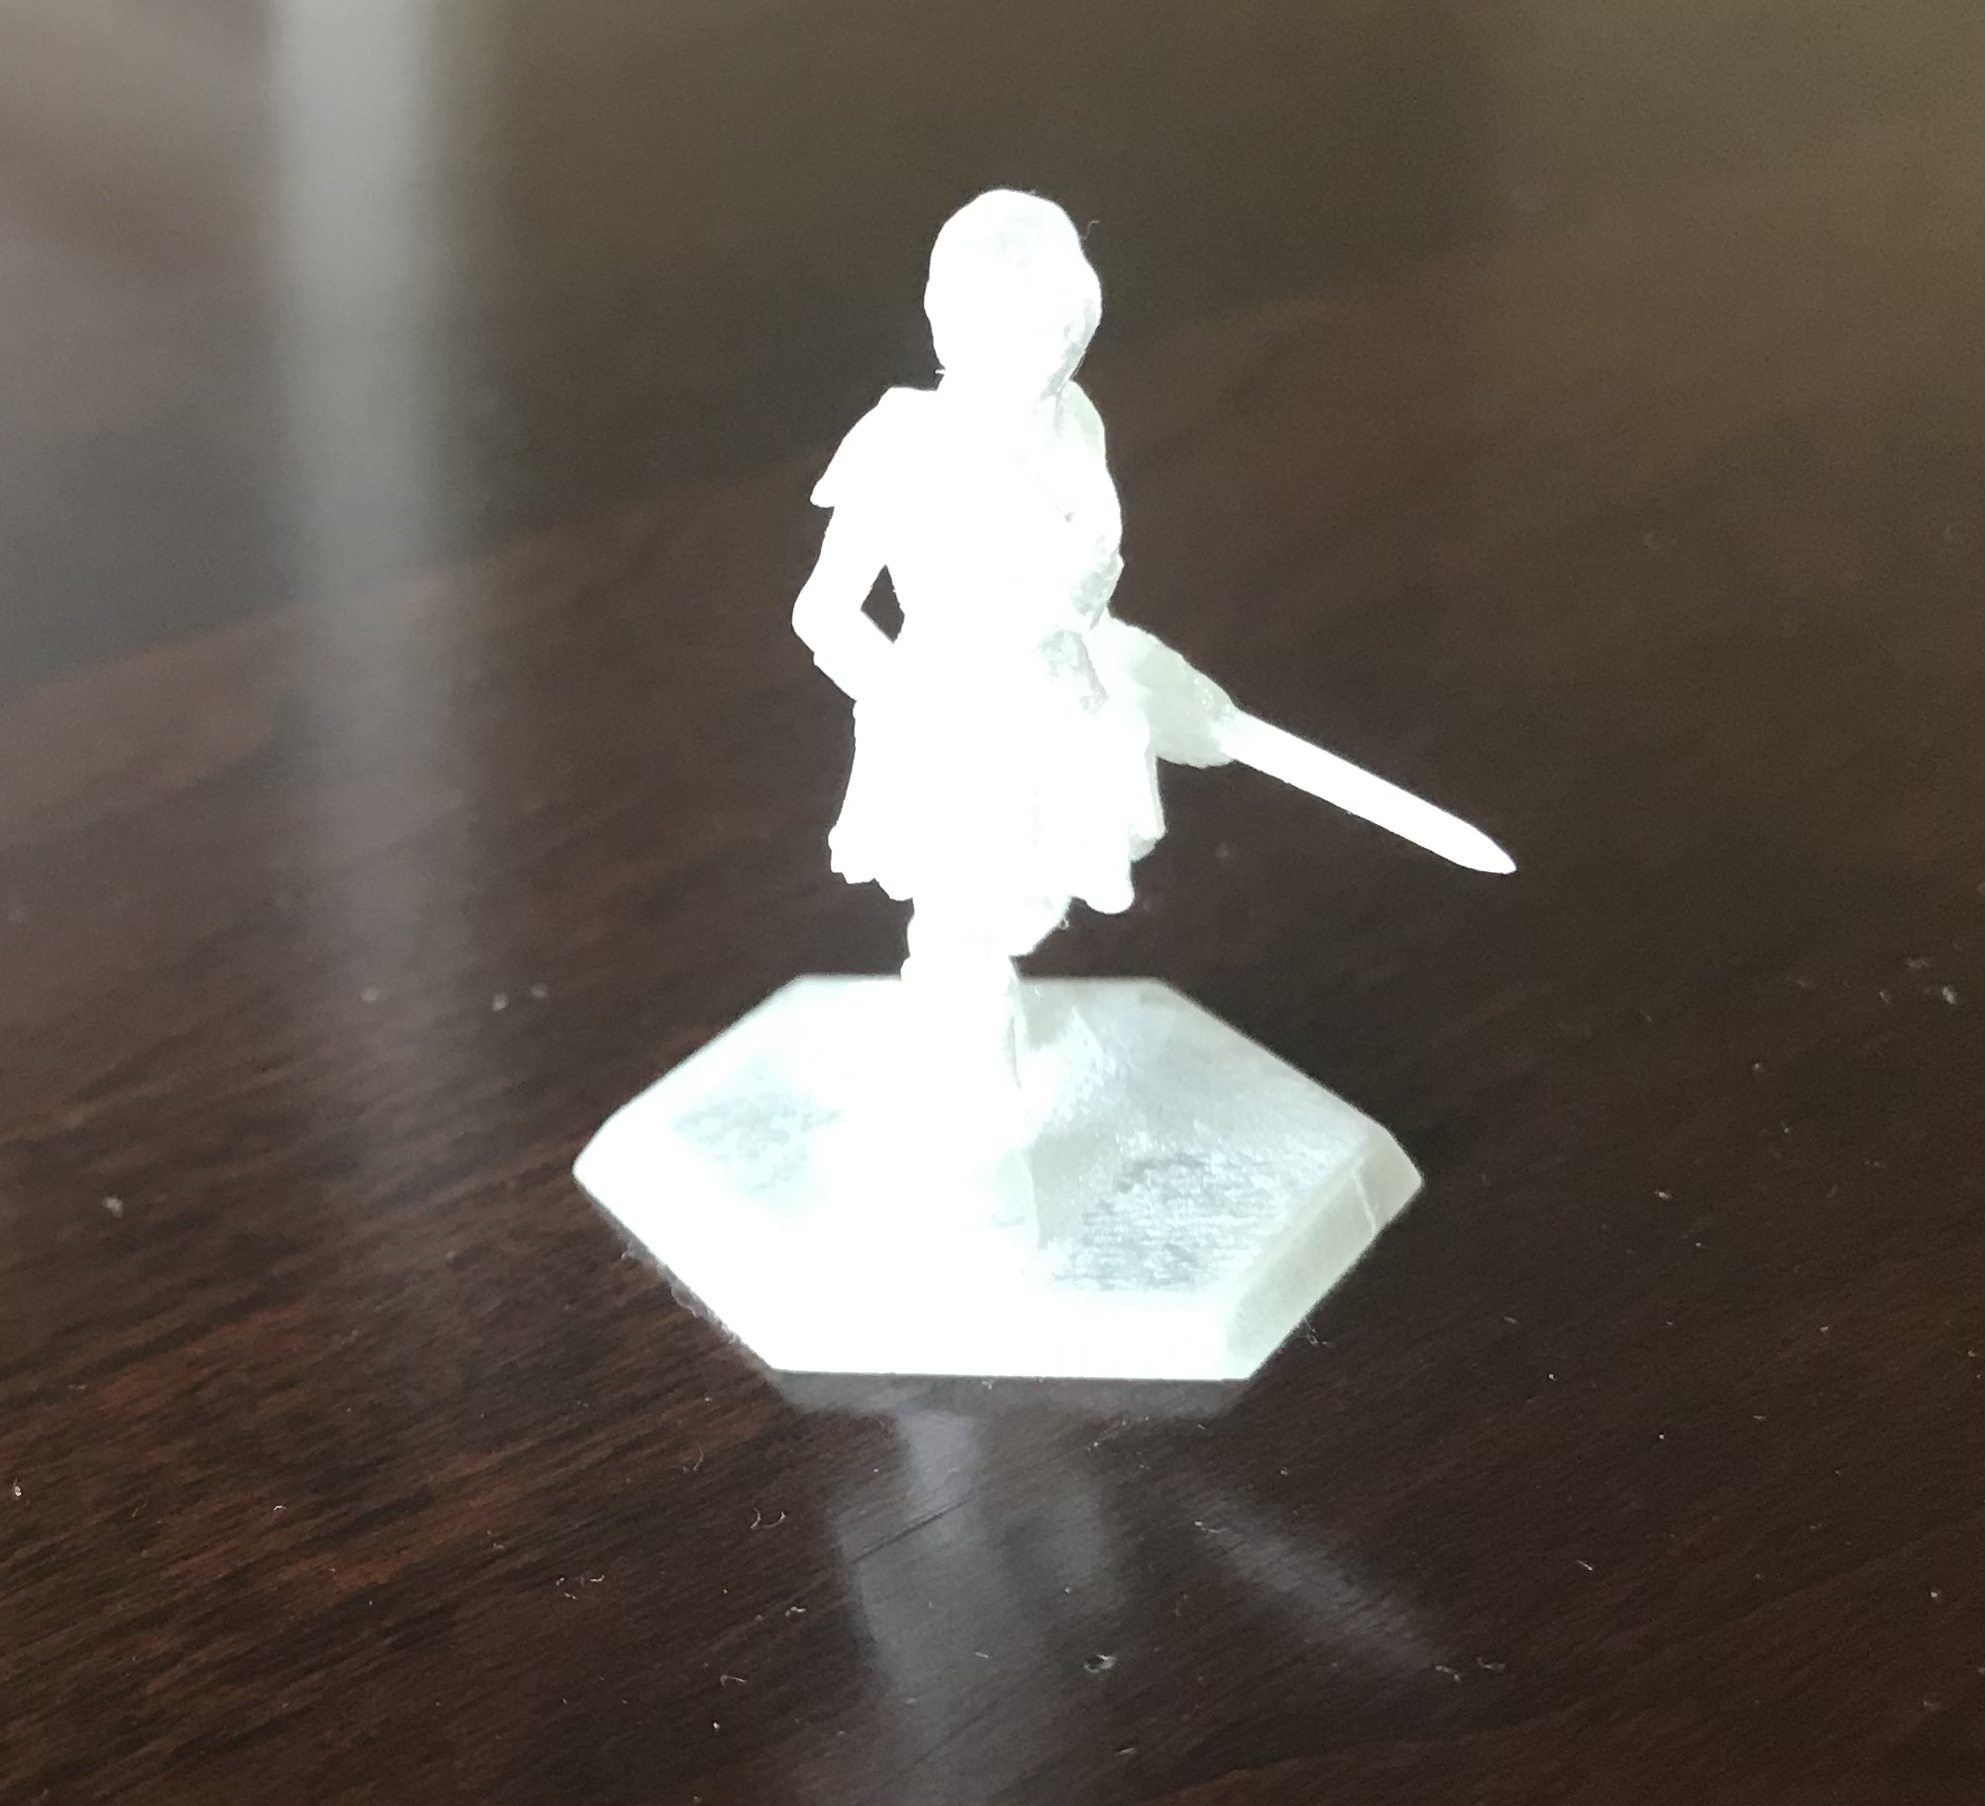
3D printed parts issue ?
Tom Geiger replied to Jon Haigwood's topic in Car Aftermarket / Resin / 3D Printed
This is a 3D printed figure, probably a gaming piece, I got at GSL in 2015. There was a very good seminar on 3D printing and these were given away as samples. I couldn’t get a decent pictures of it, but notice it’s changing color. It originally was more like frosted clear plastic but has toned. It’s also sticky. No doubt deteriorating. The original look is still on part of the base, but most of it is now a solid white. It has just sat in my display case with my models. The question is if this would’ve been avoided if it had been painted, or if the paint would’ve come loose over time. Also is it done gassing out or will it continue to deteriorate?
-
Great work Pat! A car that looks like it should have been produced! I will definitely get one from my buddy Jimmy when he offers them!
-
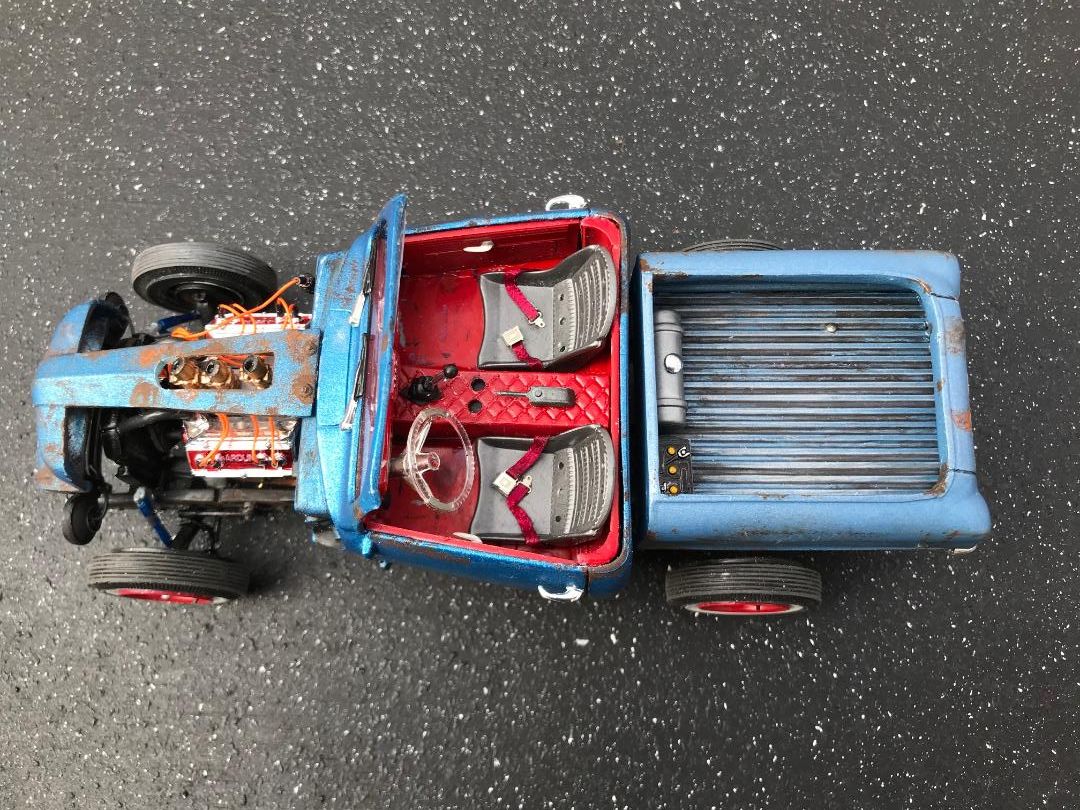
Here’s those bomber seats... I drilled out all the holes. Seat looks a bit heavy molded in plastic. I’m sure the photo etch ones look more realistic.
-
Like Tootsie Rolls
-
What did you screw-up today??
Tom Geiger replied to TransAmMike's topic in General Automotive Talk (Trucks and Cars)
Sometimes the easiest things... it’s like a comedy routine. In finishing the Valiant Speedster I decided a nice thin red stripe would be nice right below the lower body line. I had one on my 1:1 silver Valiant back in the day. So I found a nice set of decals and set them aside on the bench.. now gone! I searched for too long, then went for alternative stripes. I found a pair I needed to cut free from a larger decal. I have gone through SIX of these so far. They kept tearing.. moving and coming off! I finally got a pair on and left to let them dry. Went back a few hours later and one was crooked! So I pulled it off and got another fresh decal.. as I was applying this one, the decal on the other side came off! At this point they are drying again.. and if there’s any issues they are coming off for good! -
Where cats roam
-
Sleeping all day