hedotwo
-
Posts
1,551 -
Joined
-
Last visited
Content Type
Profiles
Forums
Events
Gallery
Everything posted by hedotwo
-
Love the color choice! Great build!
-
It'll be great I'm sure! Sounds like a cool combo to assemble too.
-
The texture is probably a bit too coarse for the scale, but I'm happy with it. I tried spraying flat black from a rattle can at a distance a couple of times but I just couldn't get enough of a texture. Thanks
-
Yes the wheel cover decals are from Speedway and they worked great. The front seat wasn't really hard to do but you need a spare rear seat to convert and then fab up the backside. I like keeping the stock pleats and those chrome tabs. Thanks for the tip about Speedway Decals Lee ?
-
I did.
-
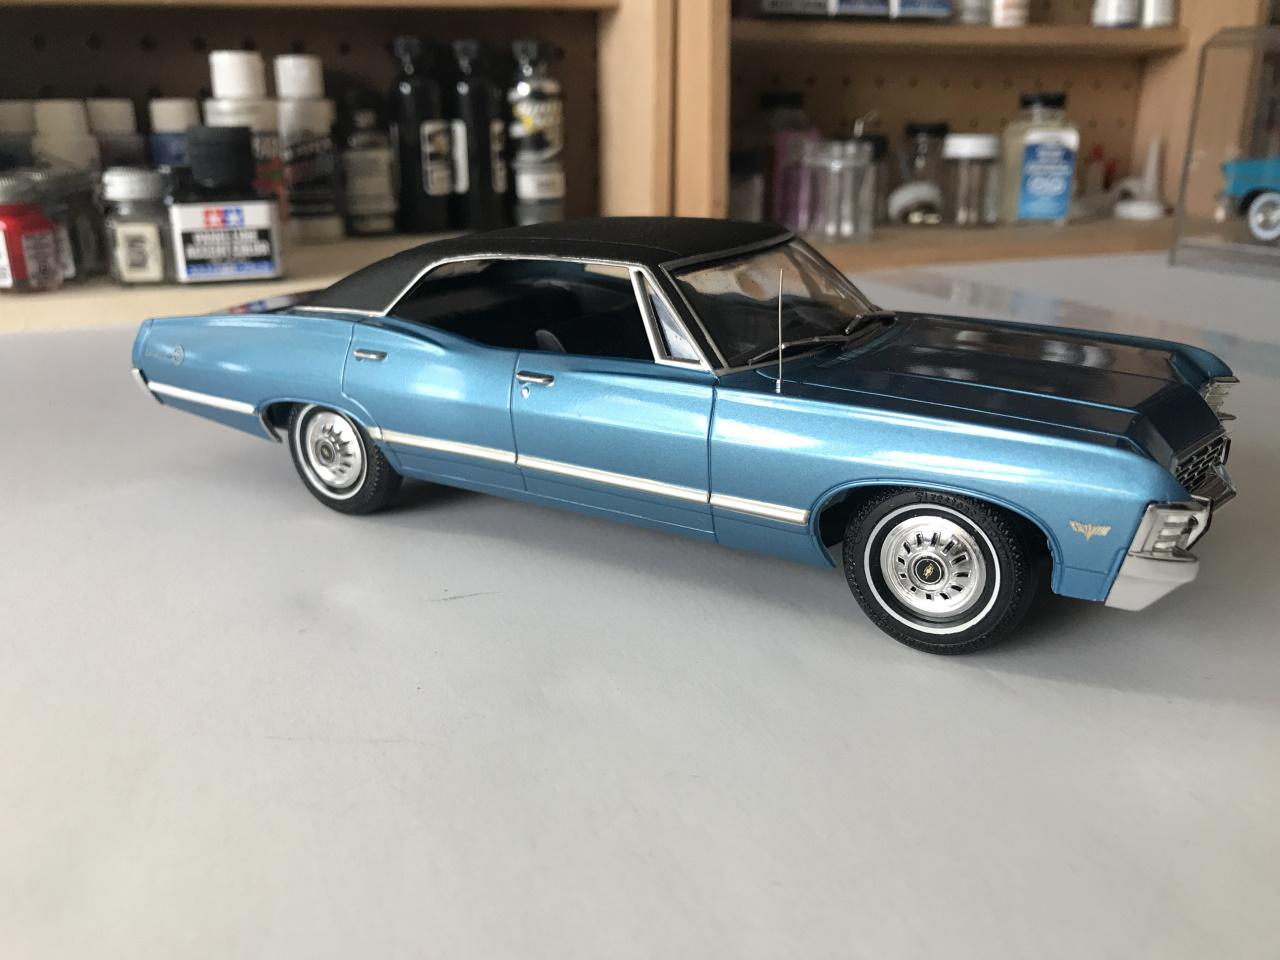
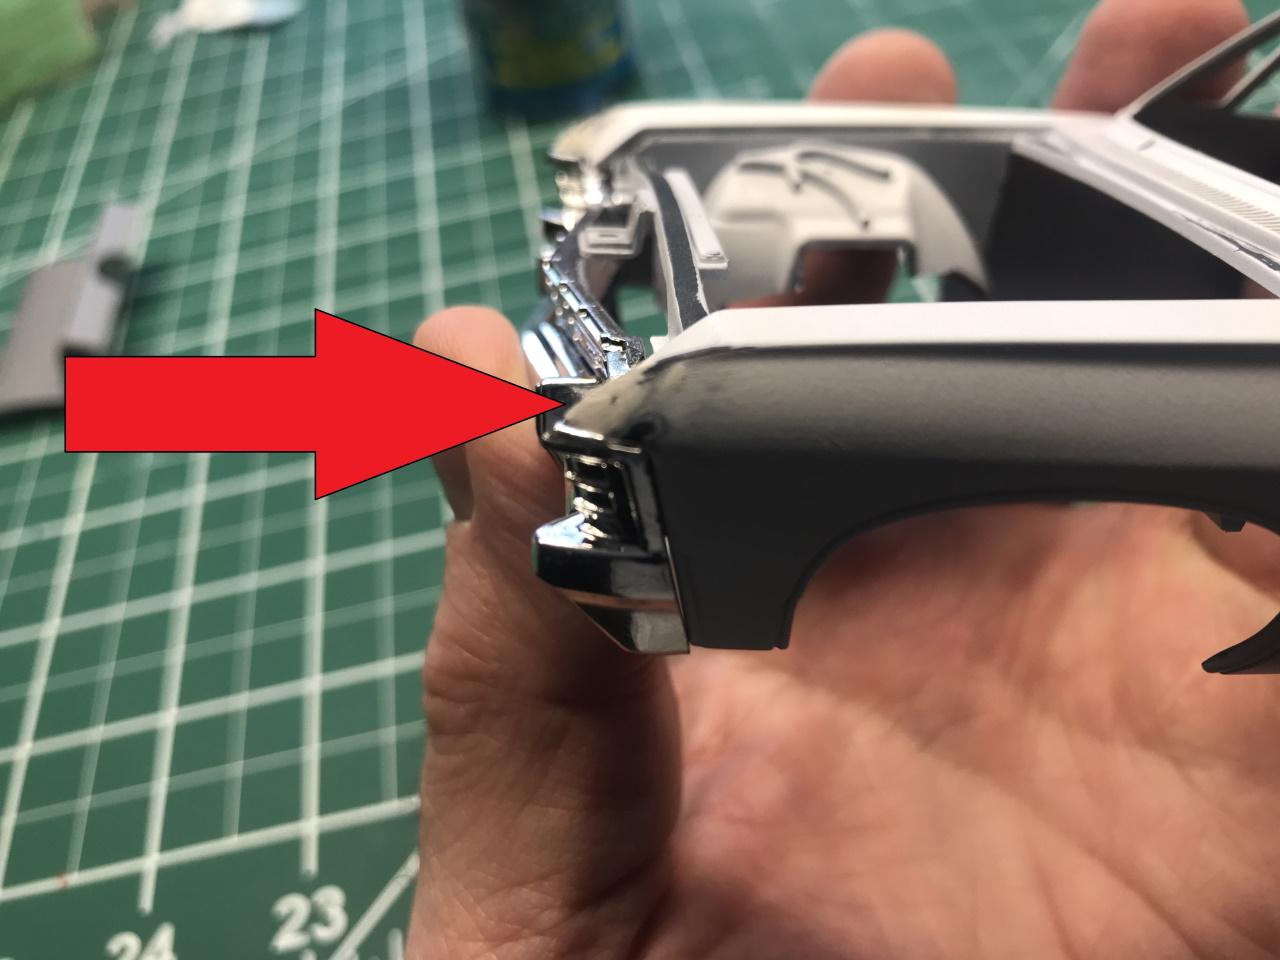
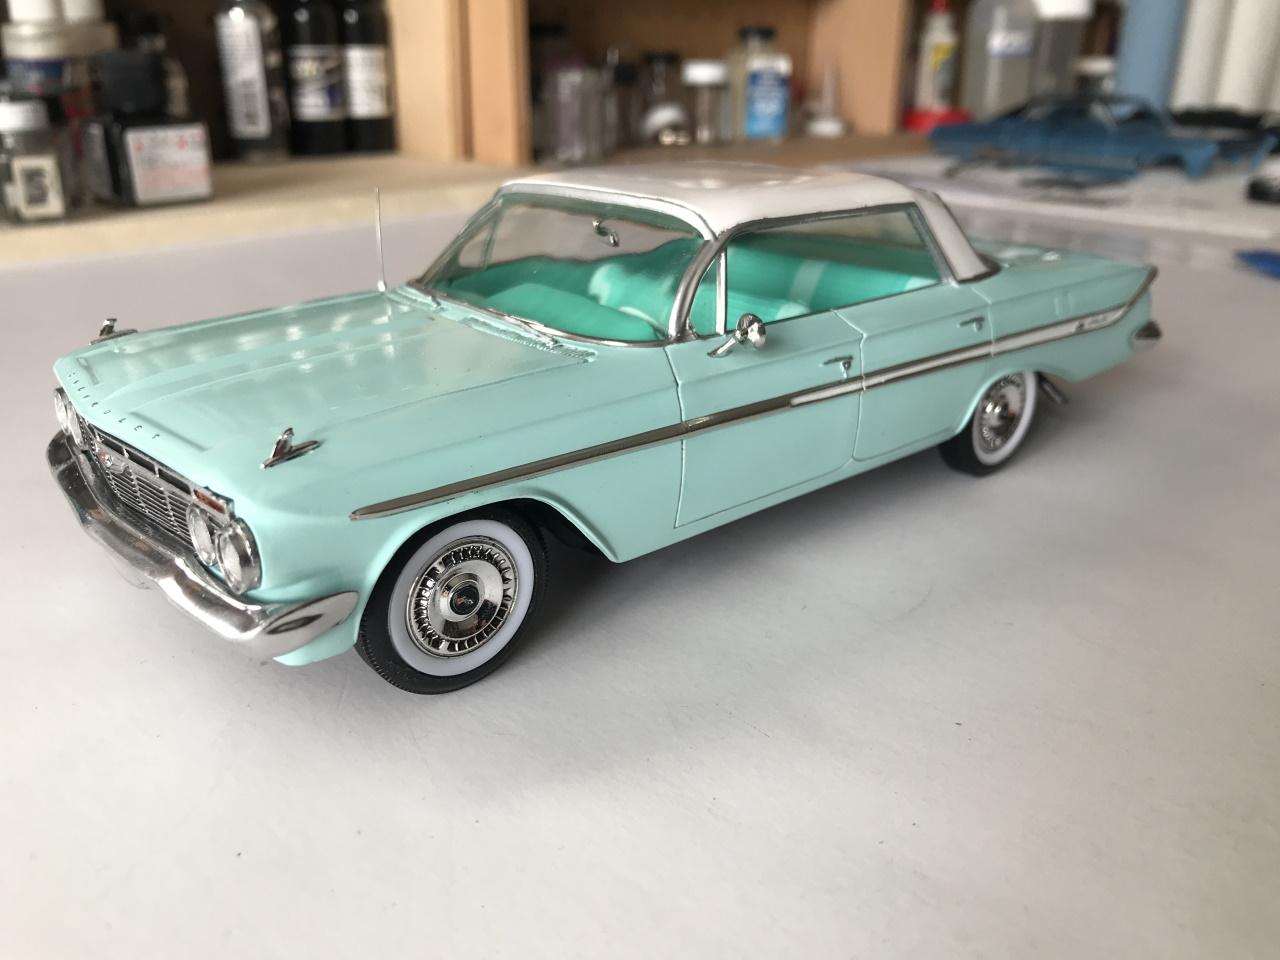
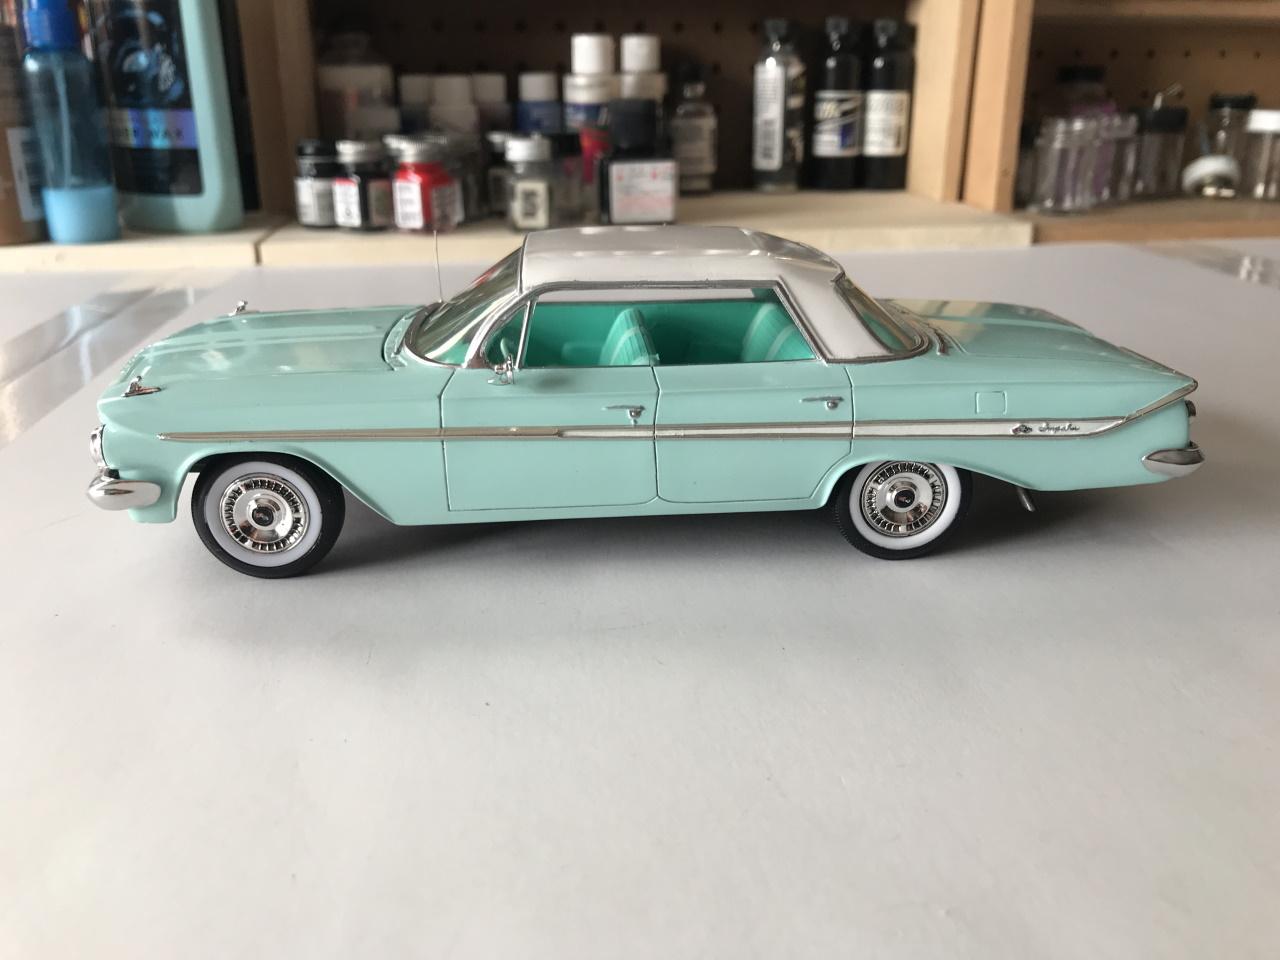
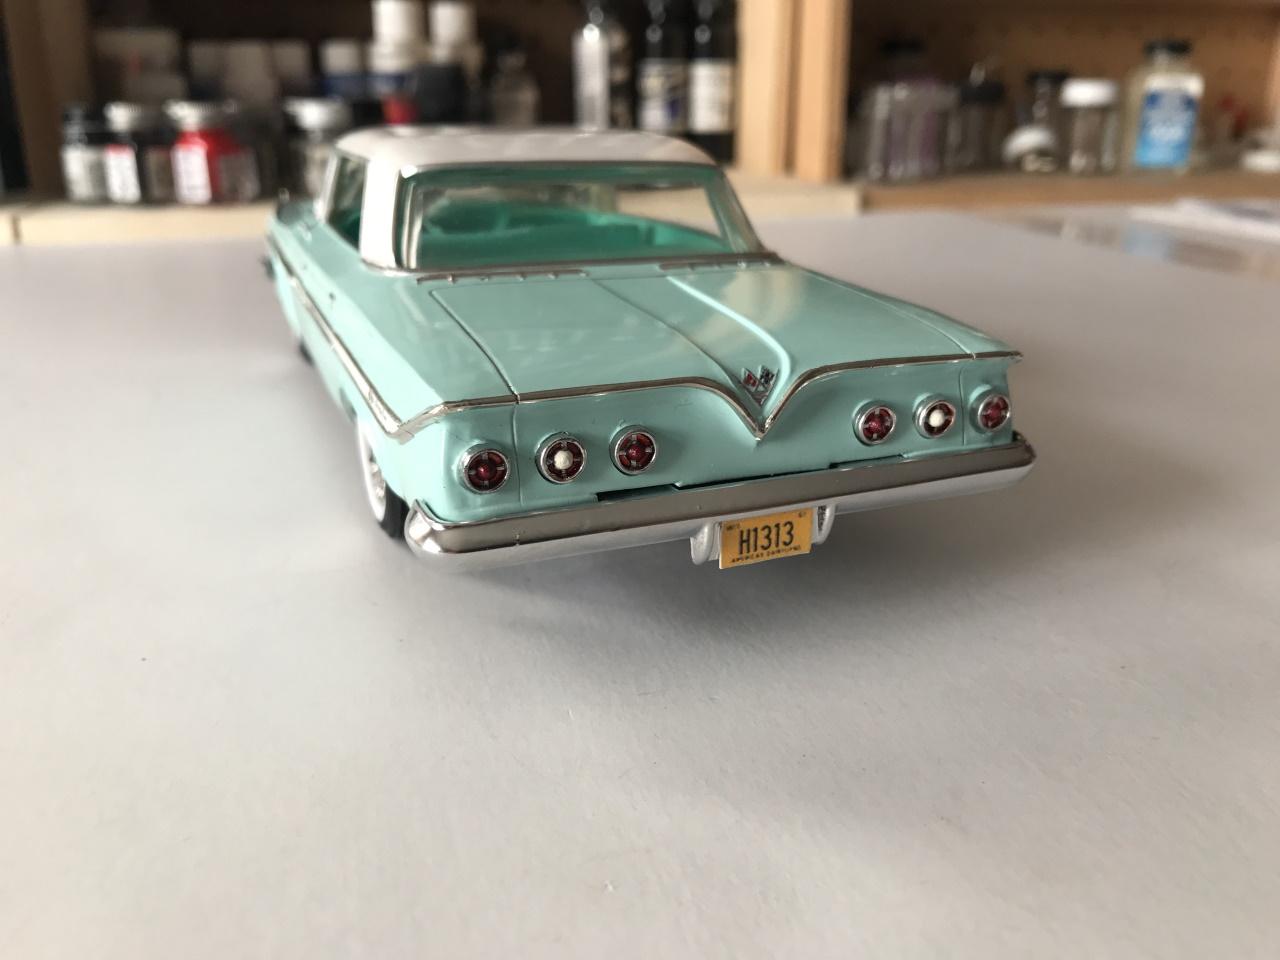
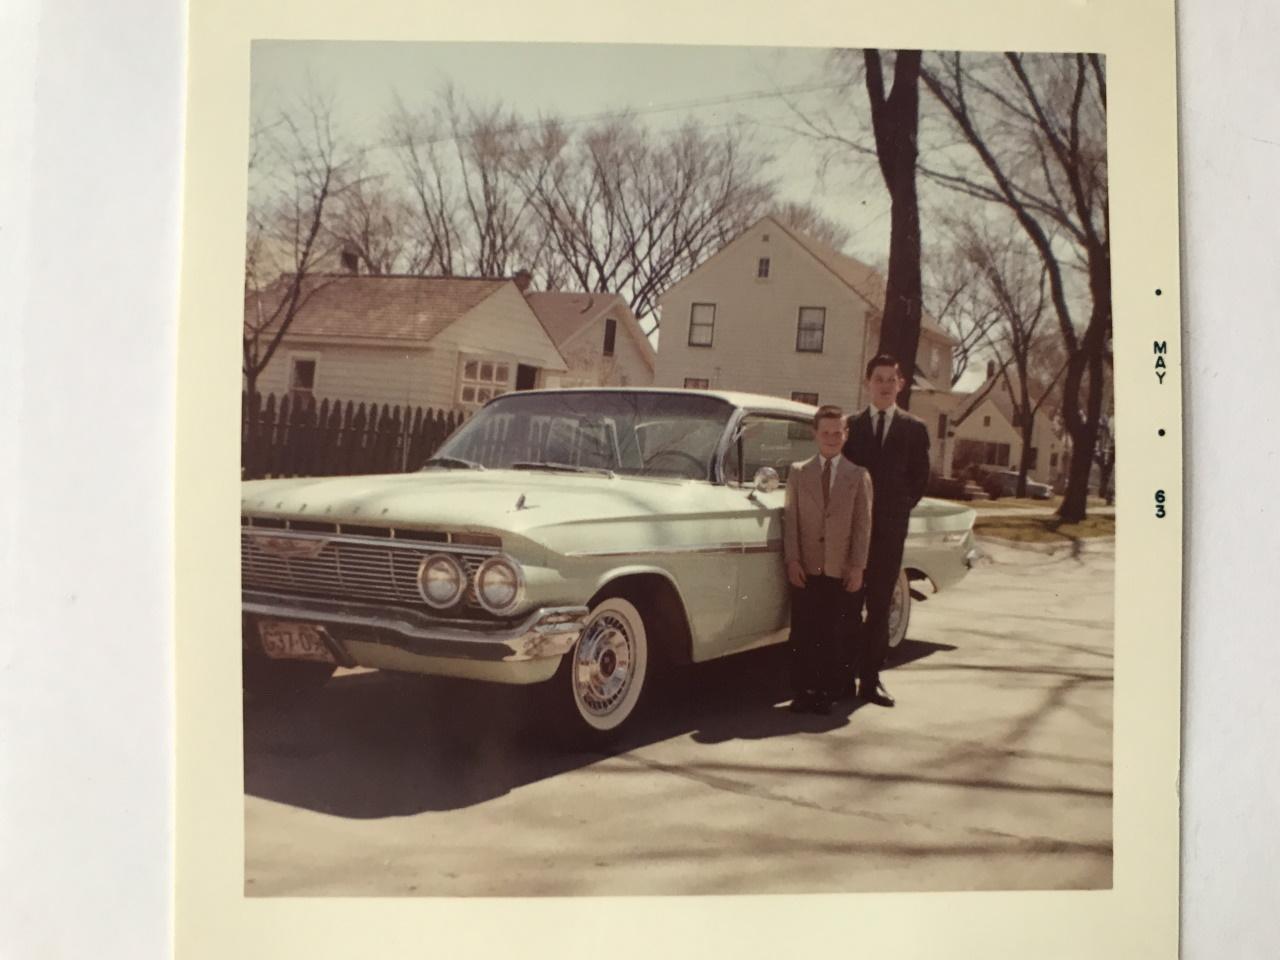
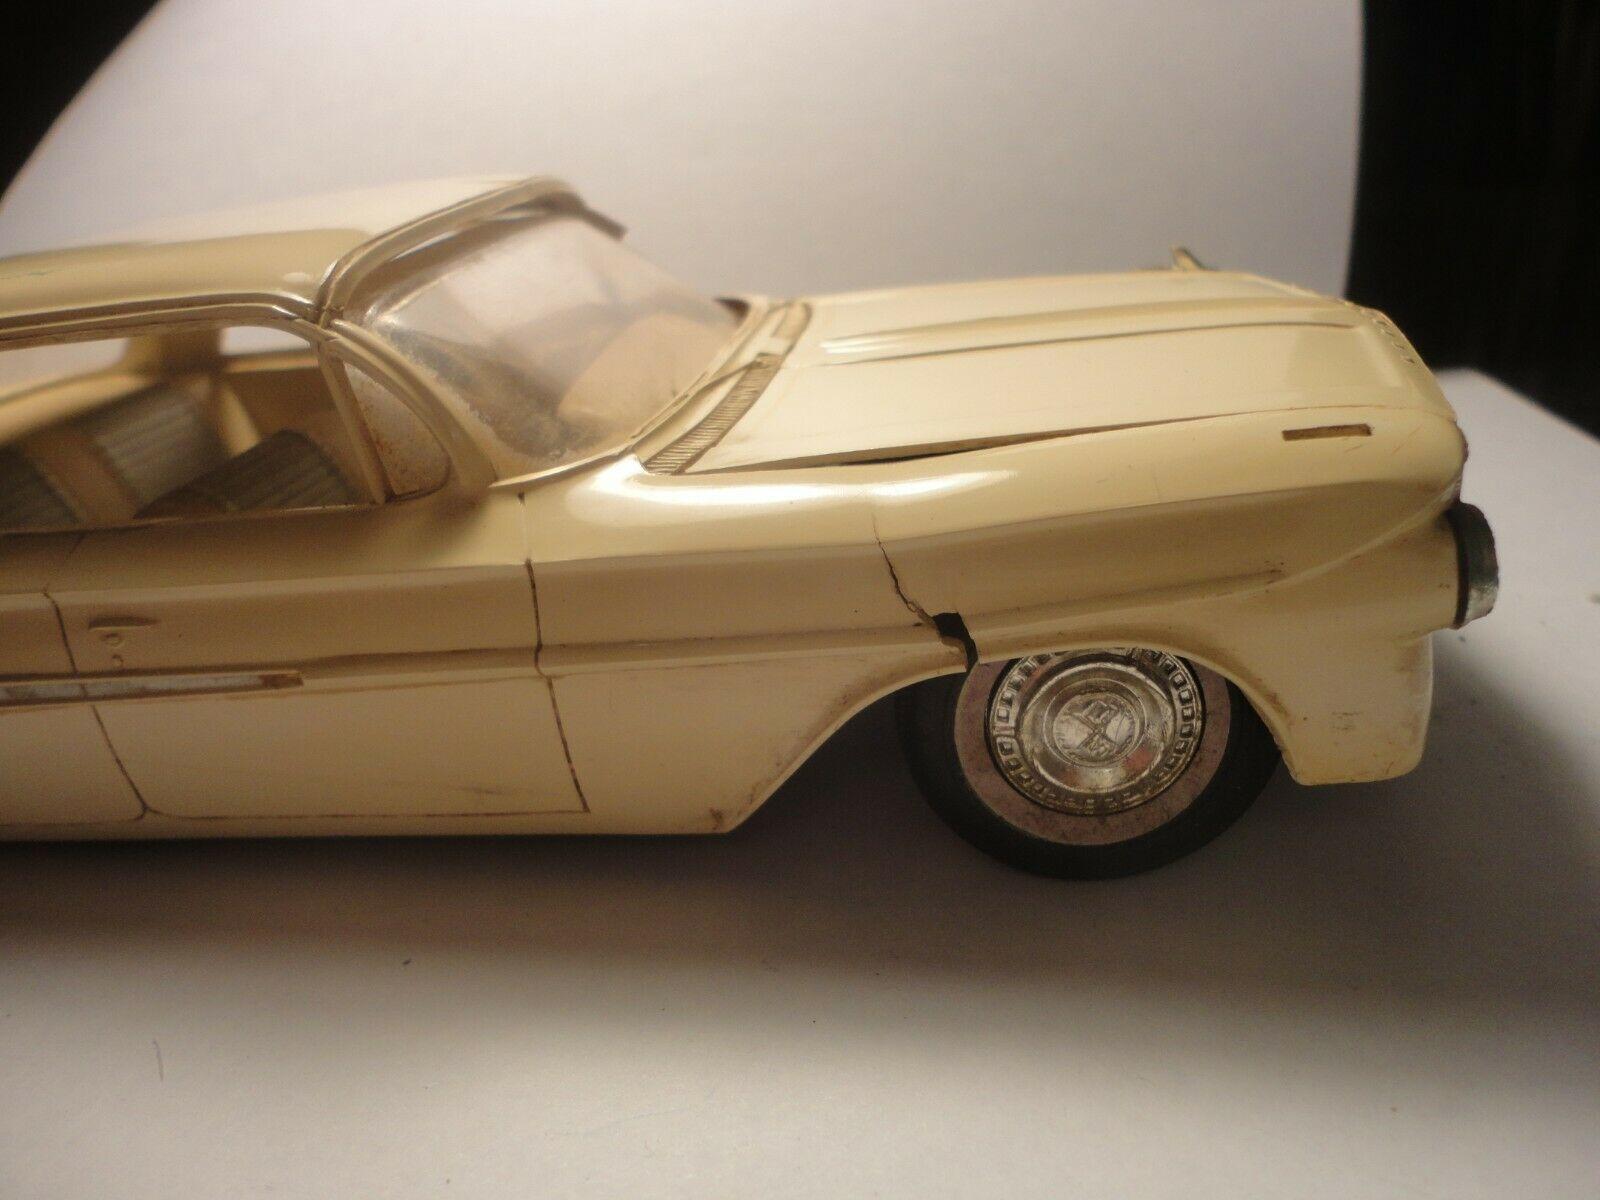
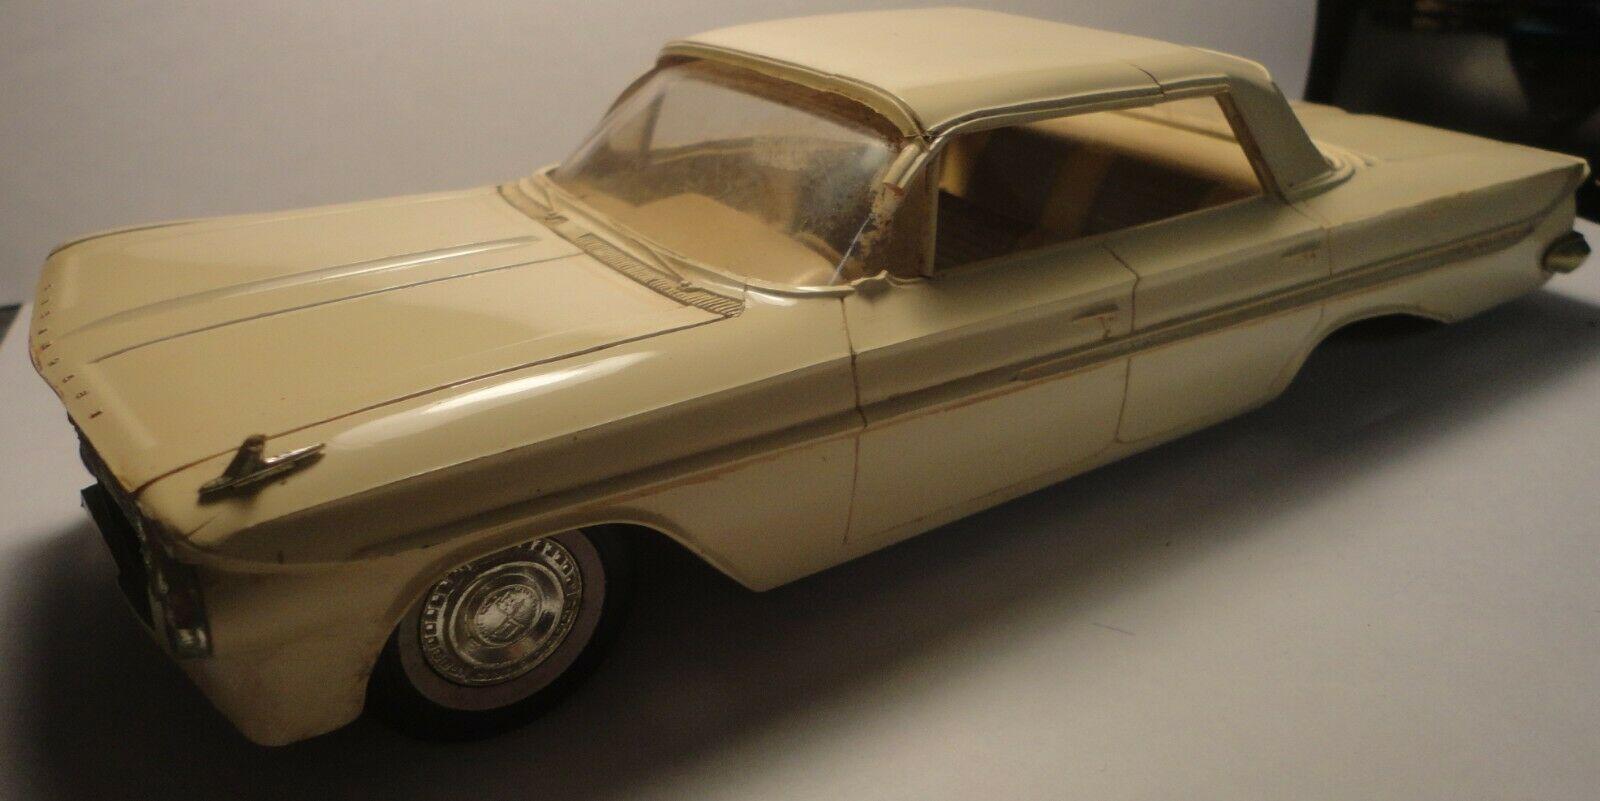
I described some of the issues I had with this build in my thread in the WIP category and also listed some of the mods I made including the seat backs, wheel covers and vinyl top. Shout out to Tom Geiger for printing up the exact copies of the license plates for this build of one of our family cars. Not having a color printer it was great for him to make them for me. I used MCW Marina Blue Metallic and for the vinyl top I used Testor's Fabric Black. Our car did not have the wheel opening chrome trim from the family pics I have so I did not foil them. I did miss chroming the trunk key piece when I took the pics but since corrected . I ended up very happy with the finished build in representing our car and the color is spot on. I wasn't real happy with the chrome taillight assembly being so proud to the trunk but I didn't really notice it until after I'd painted. If I had to do anything over I'd try and get the assembly to fit more flush. Thanks!

-
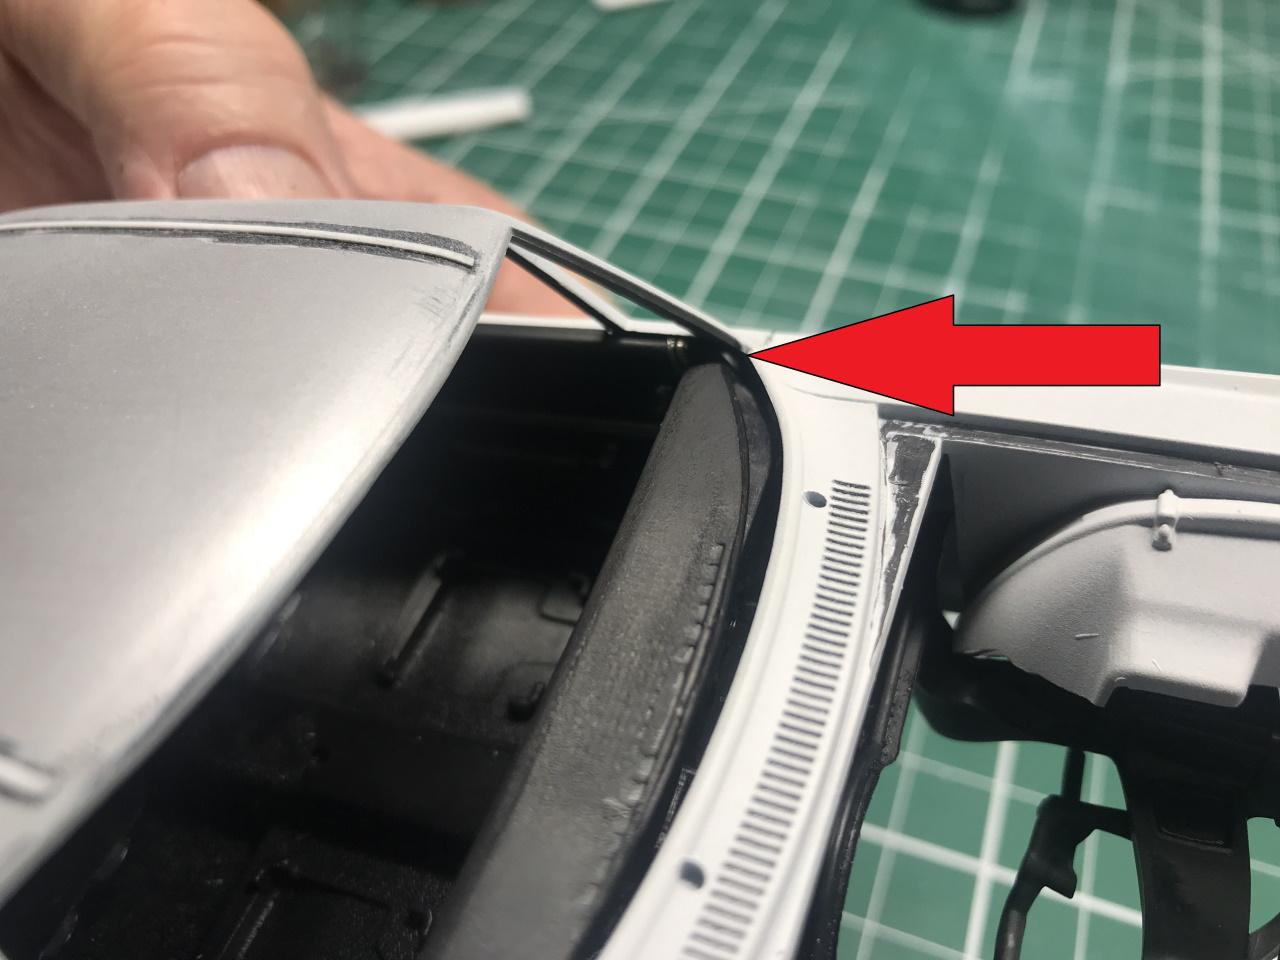
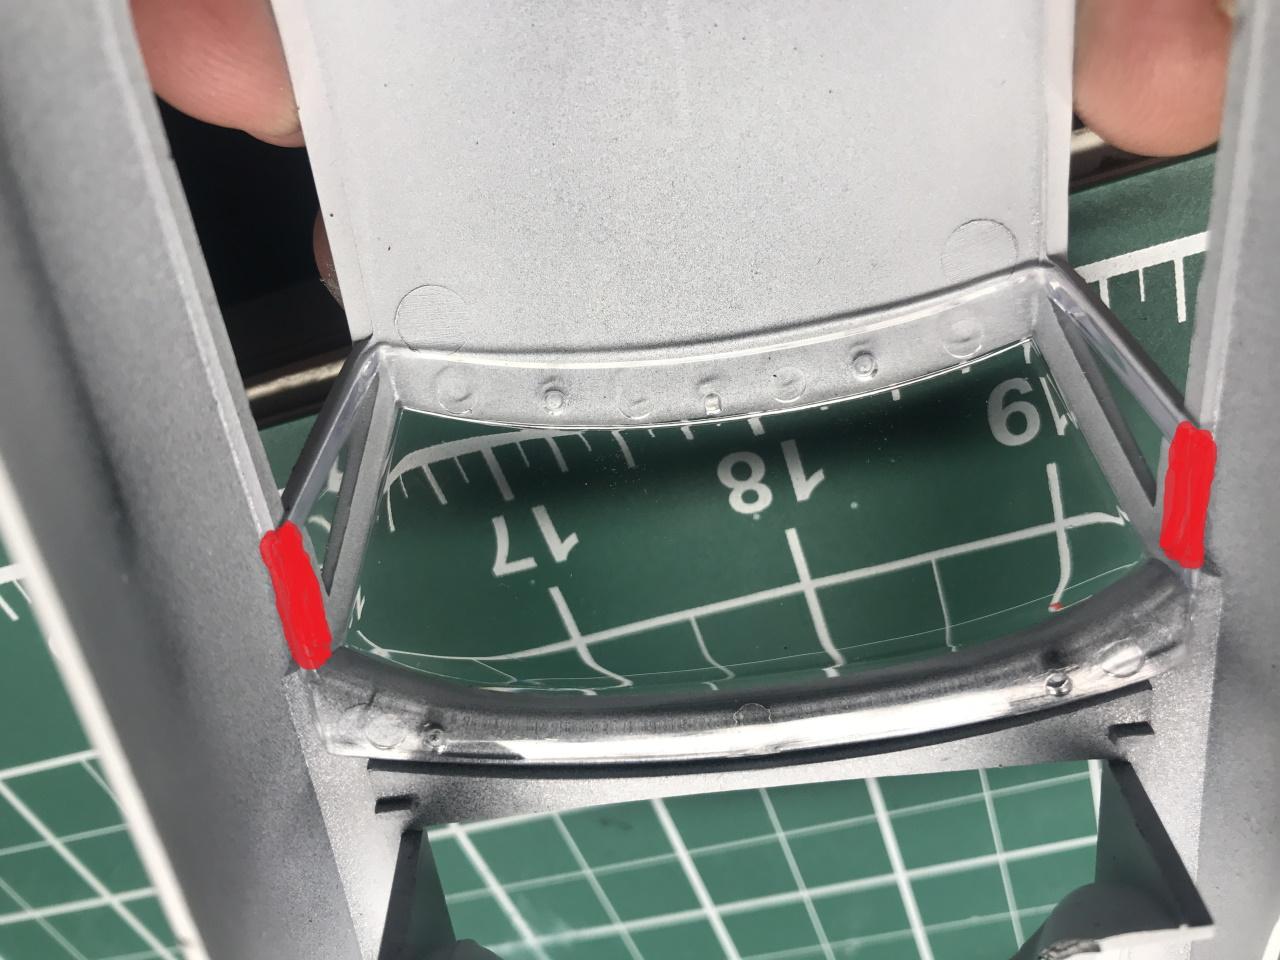
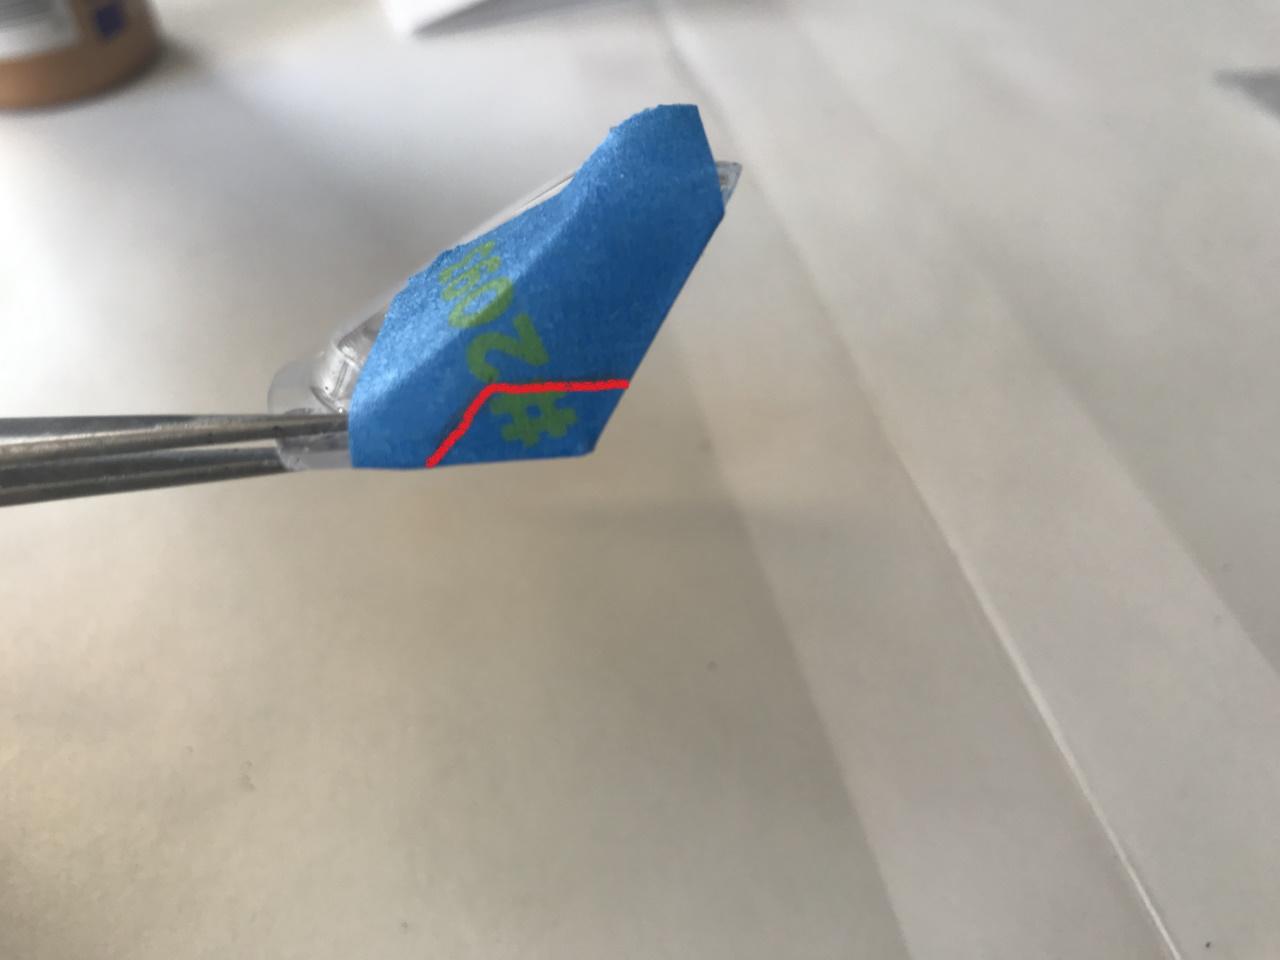
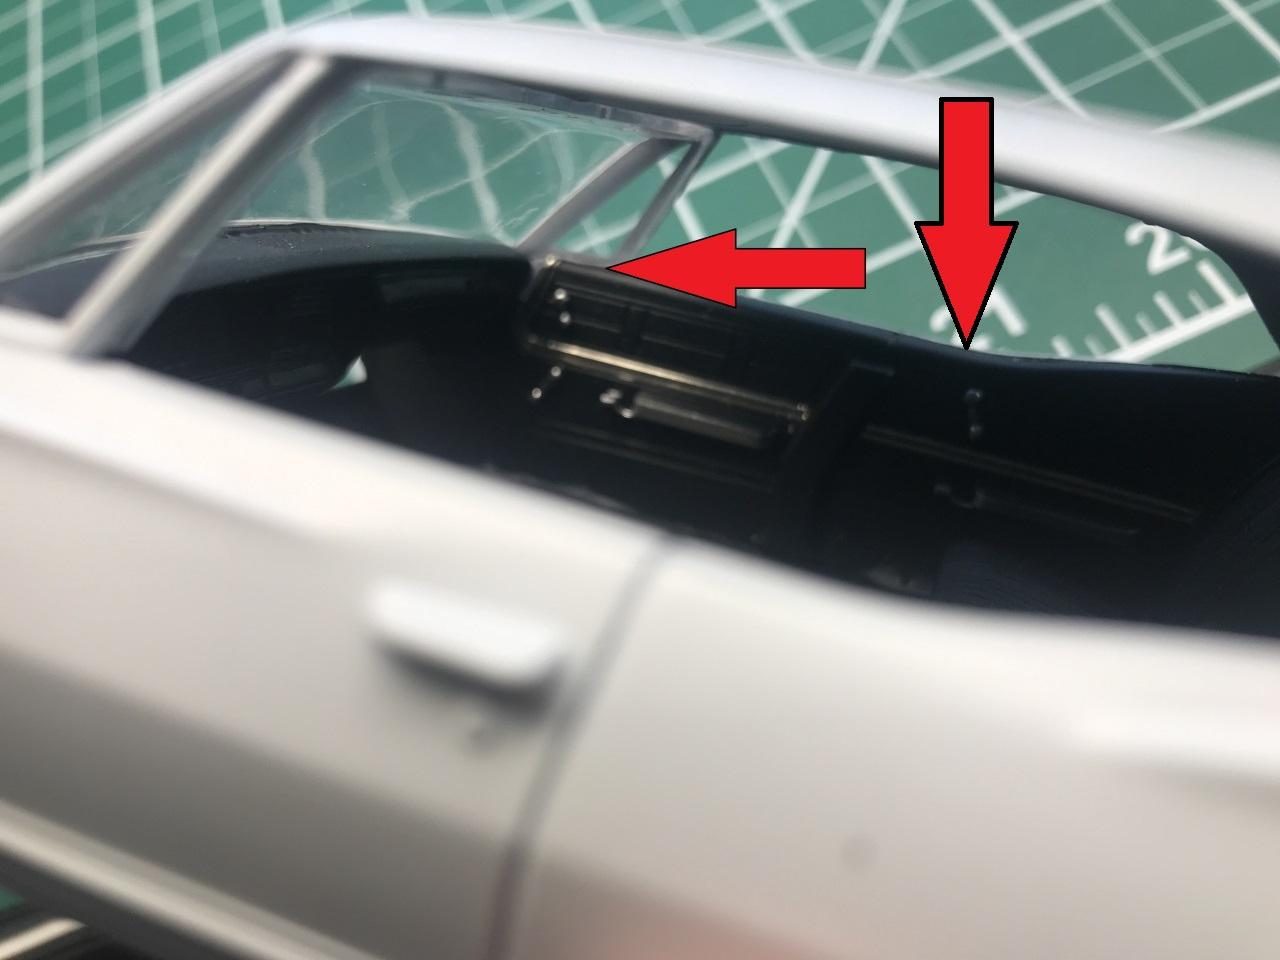
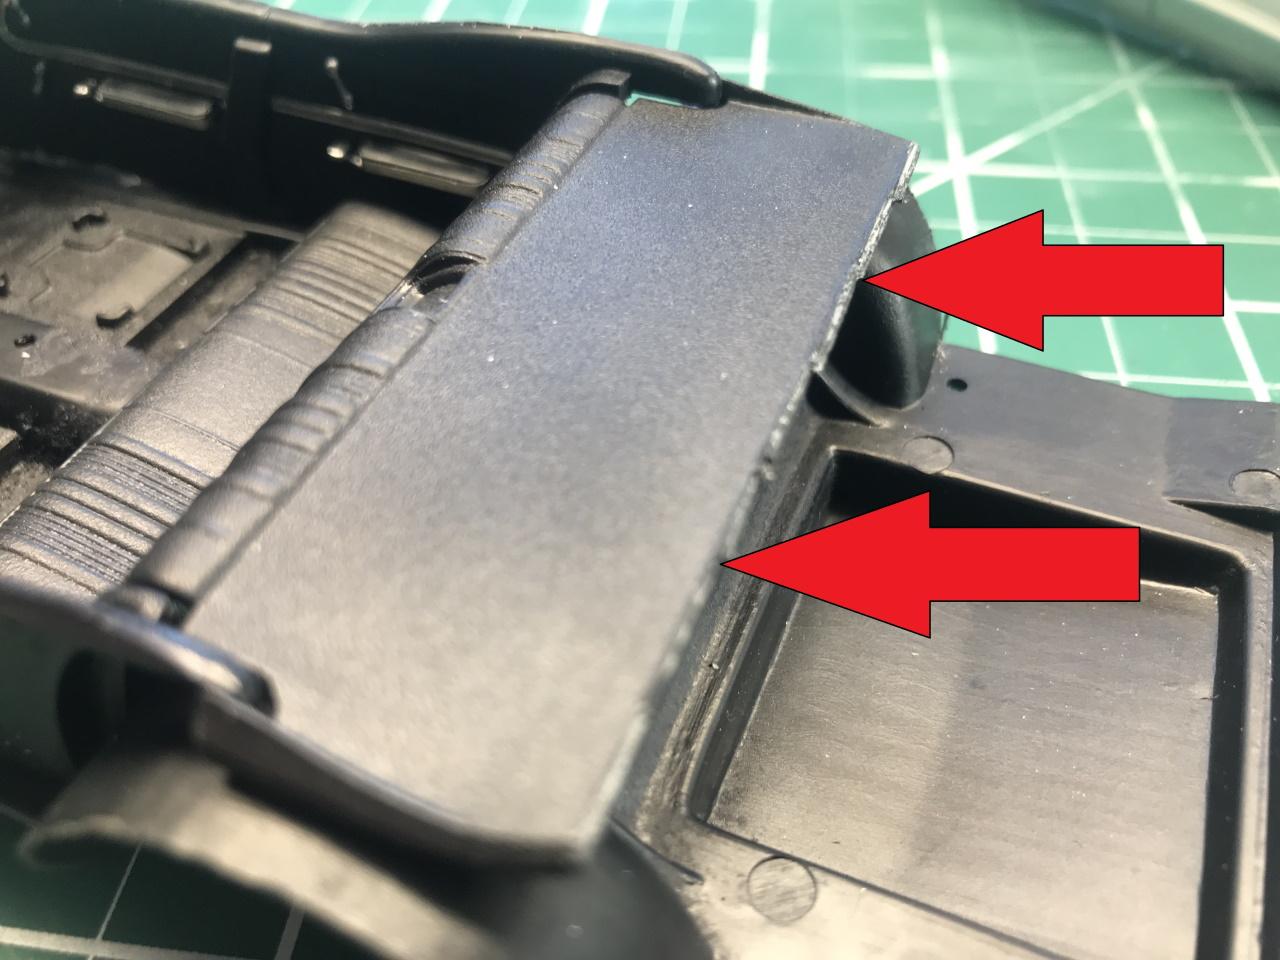
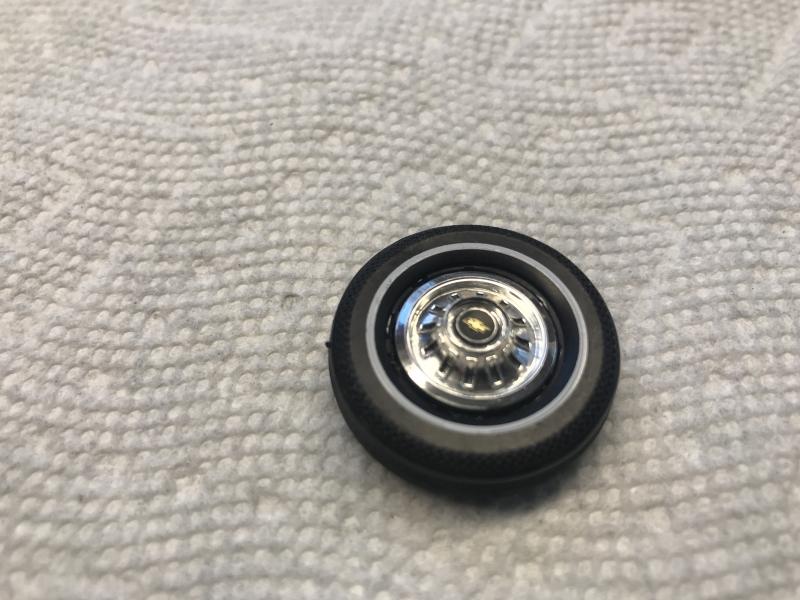
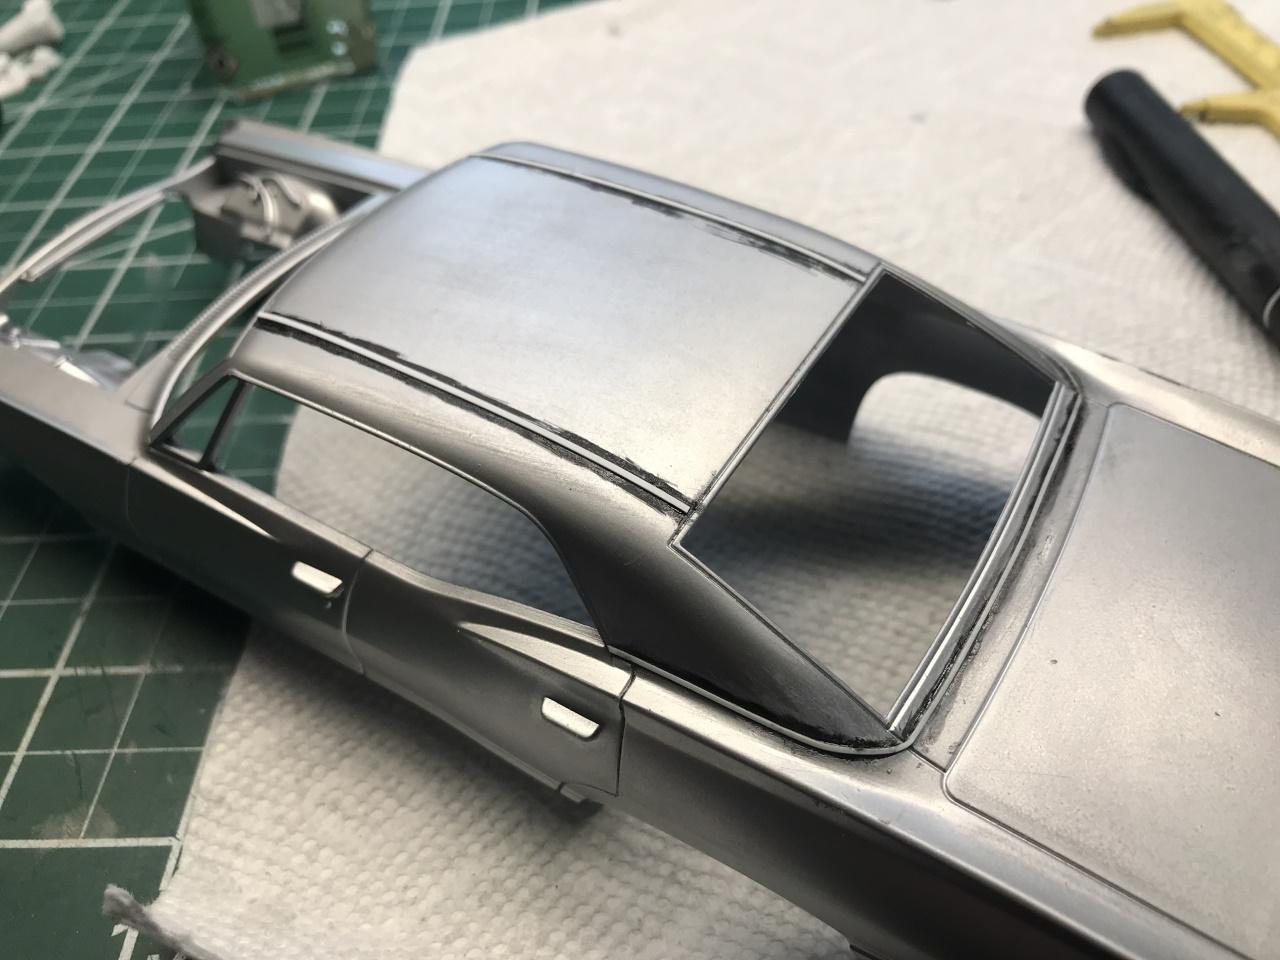
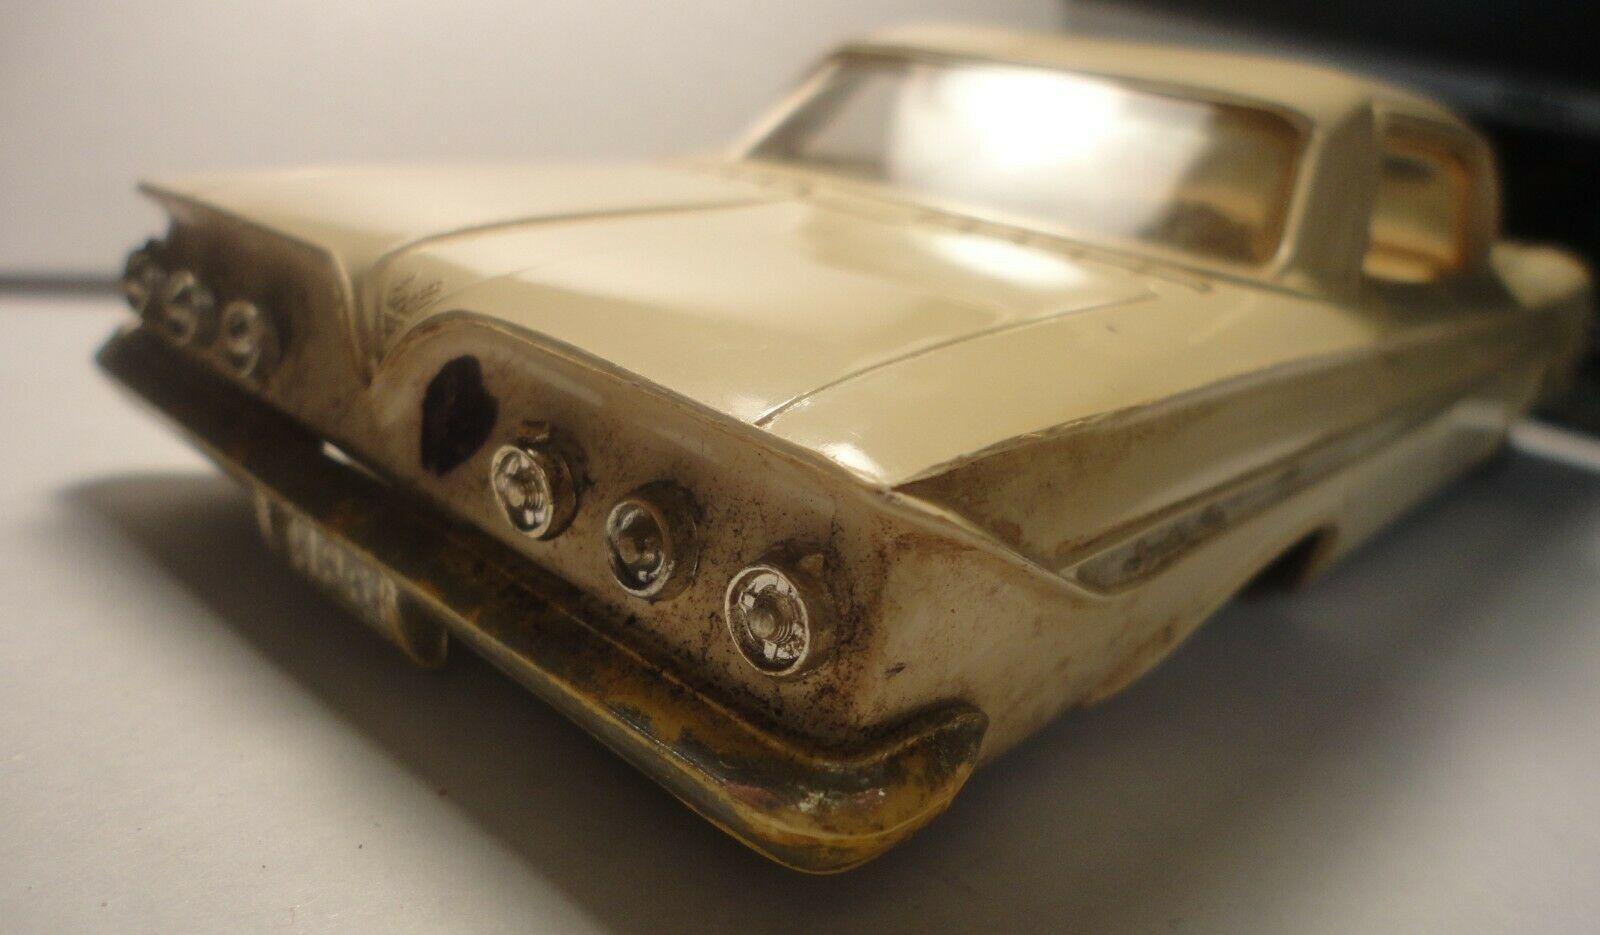
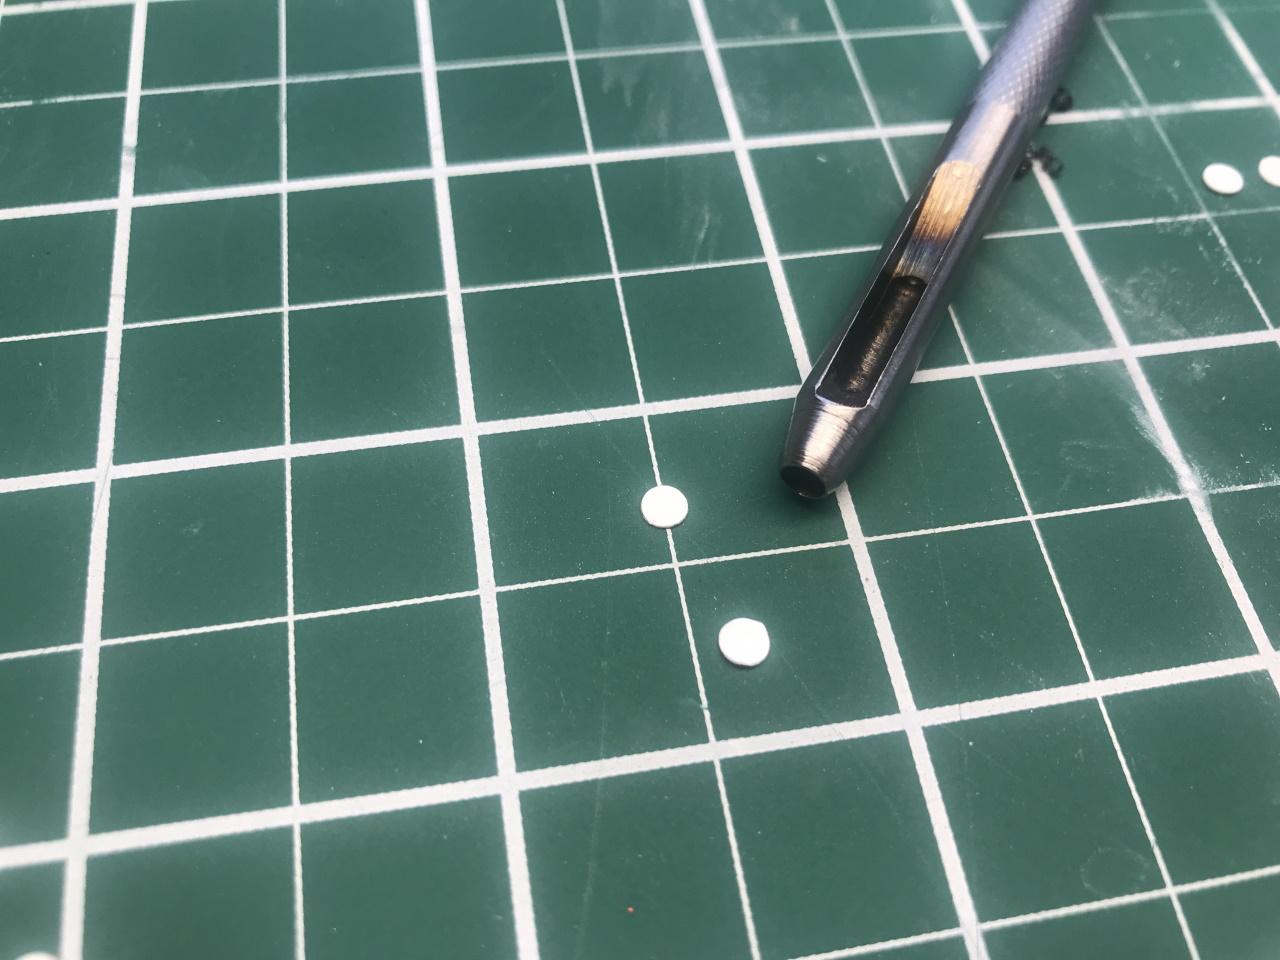
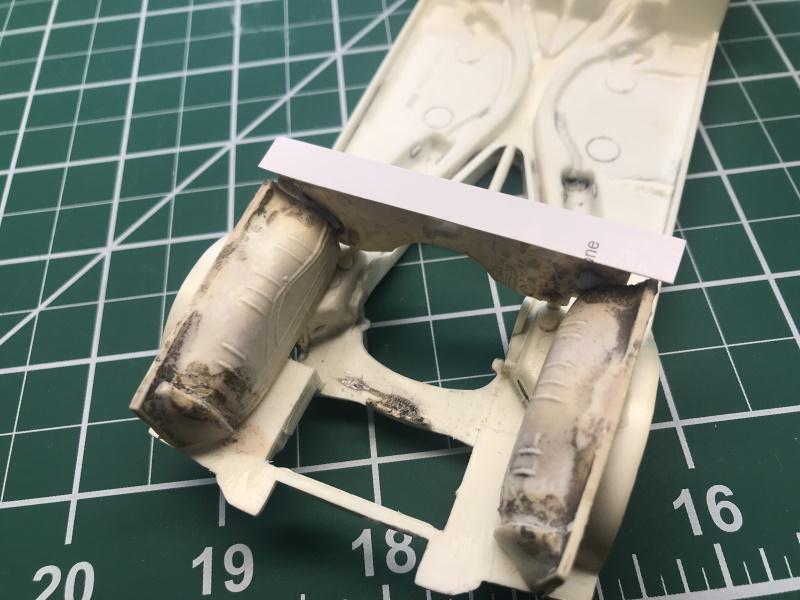
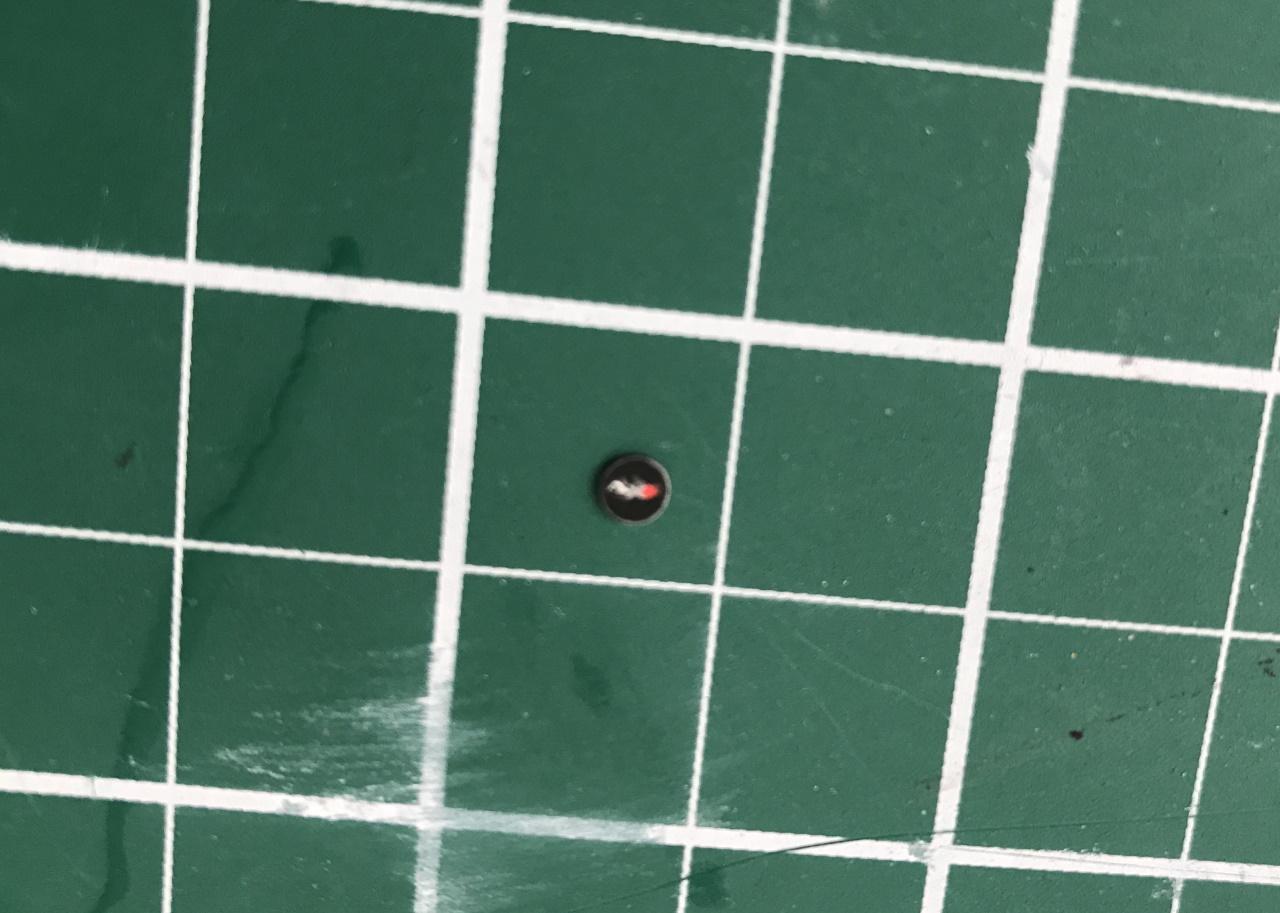
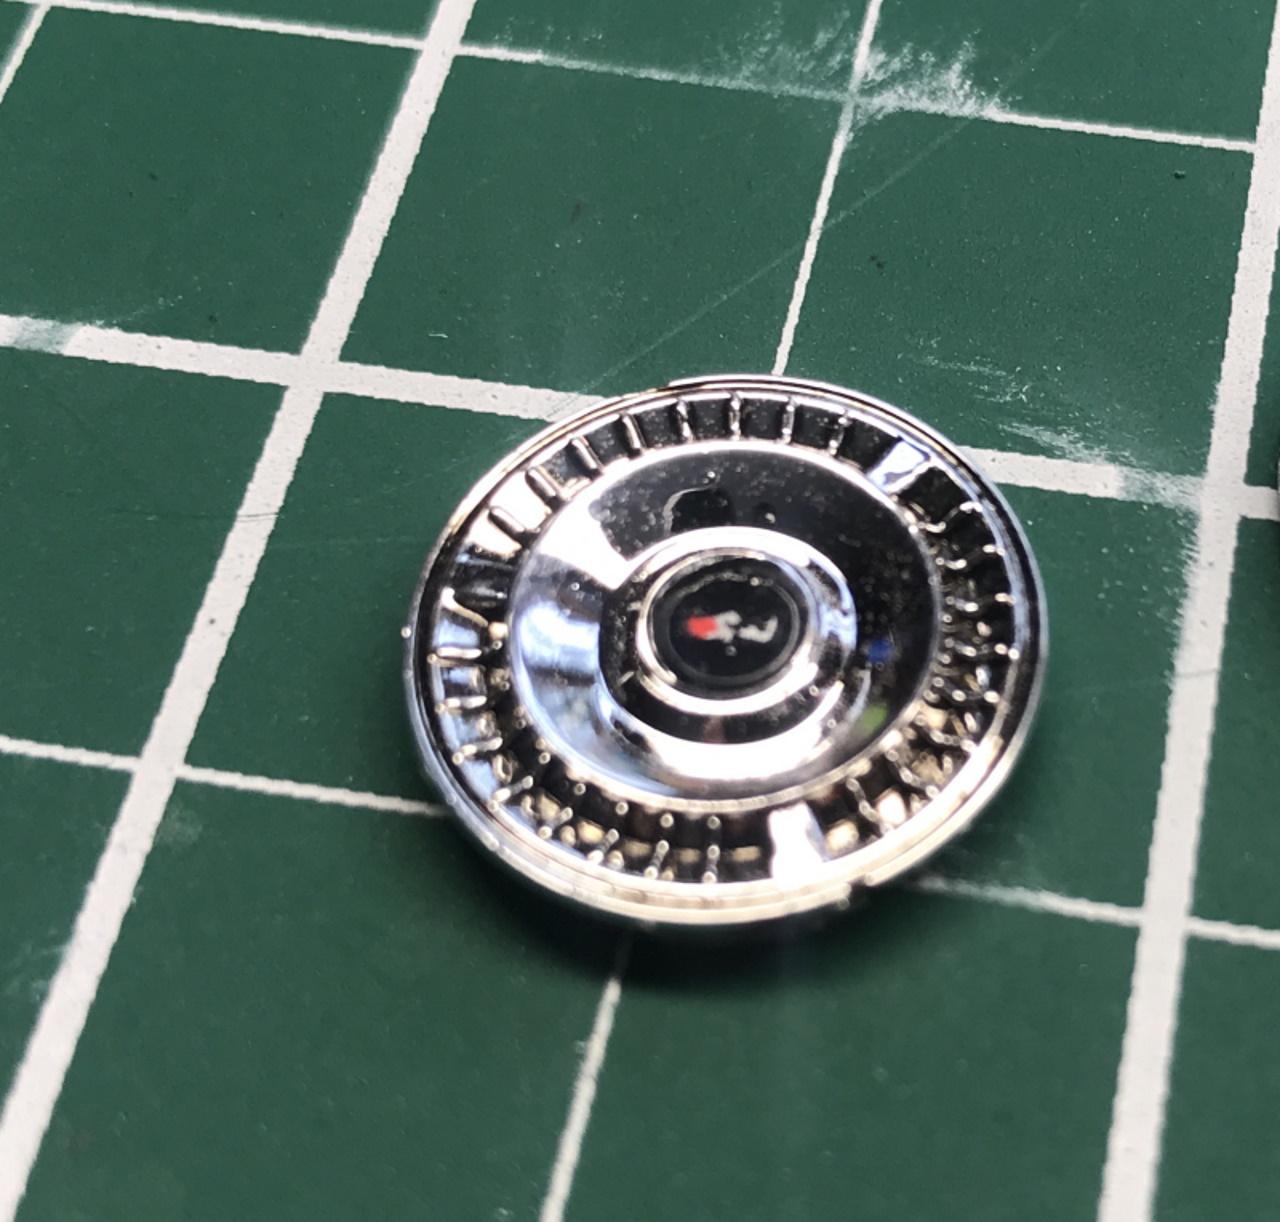
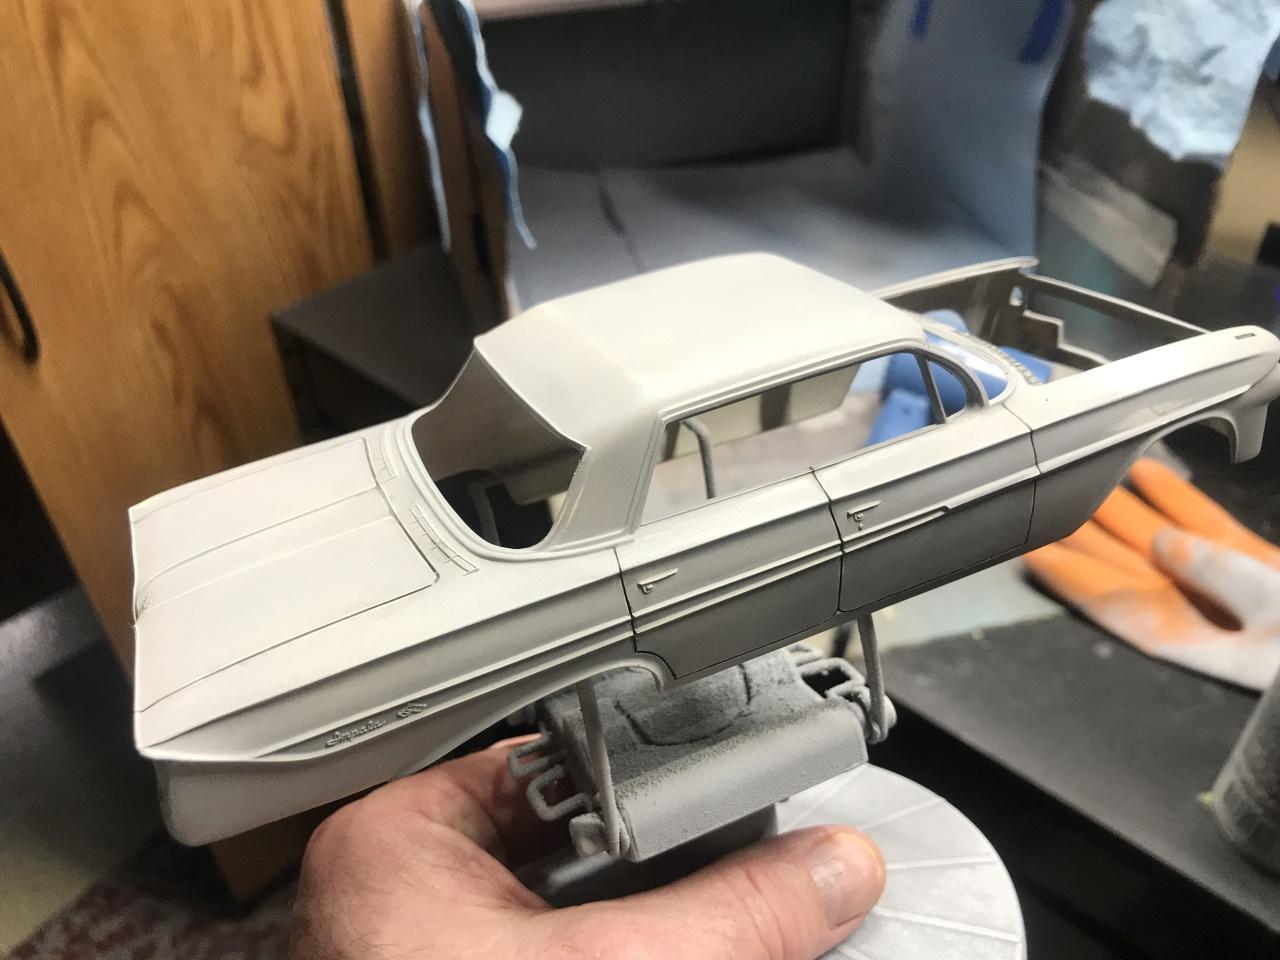
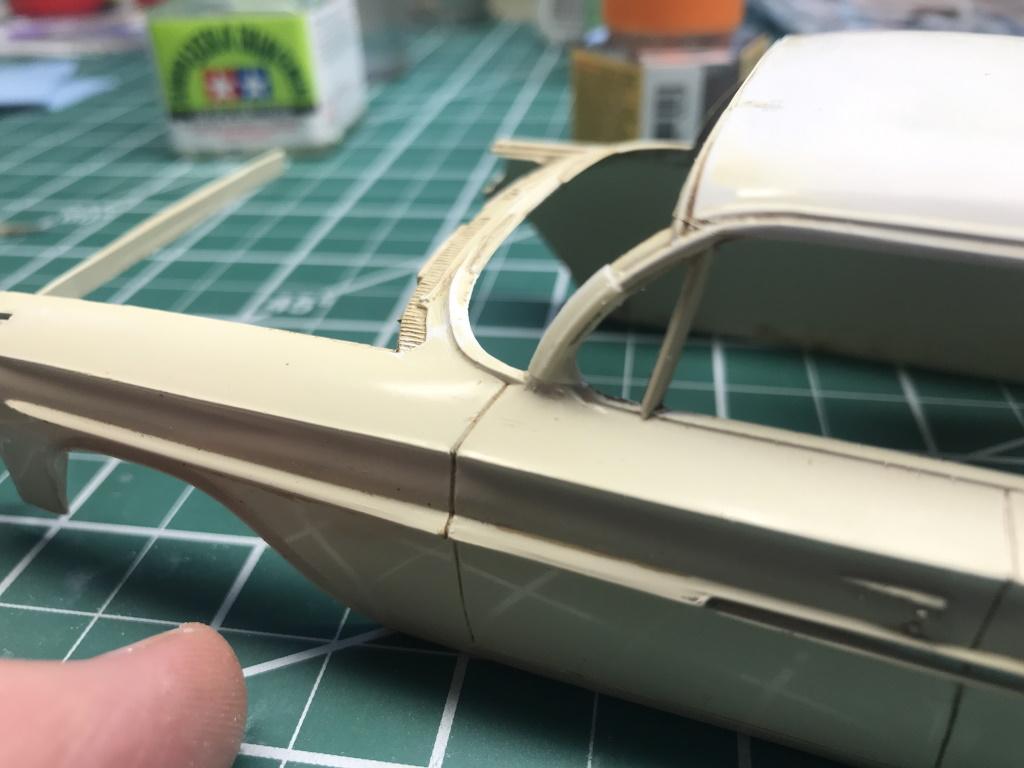
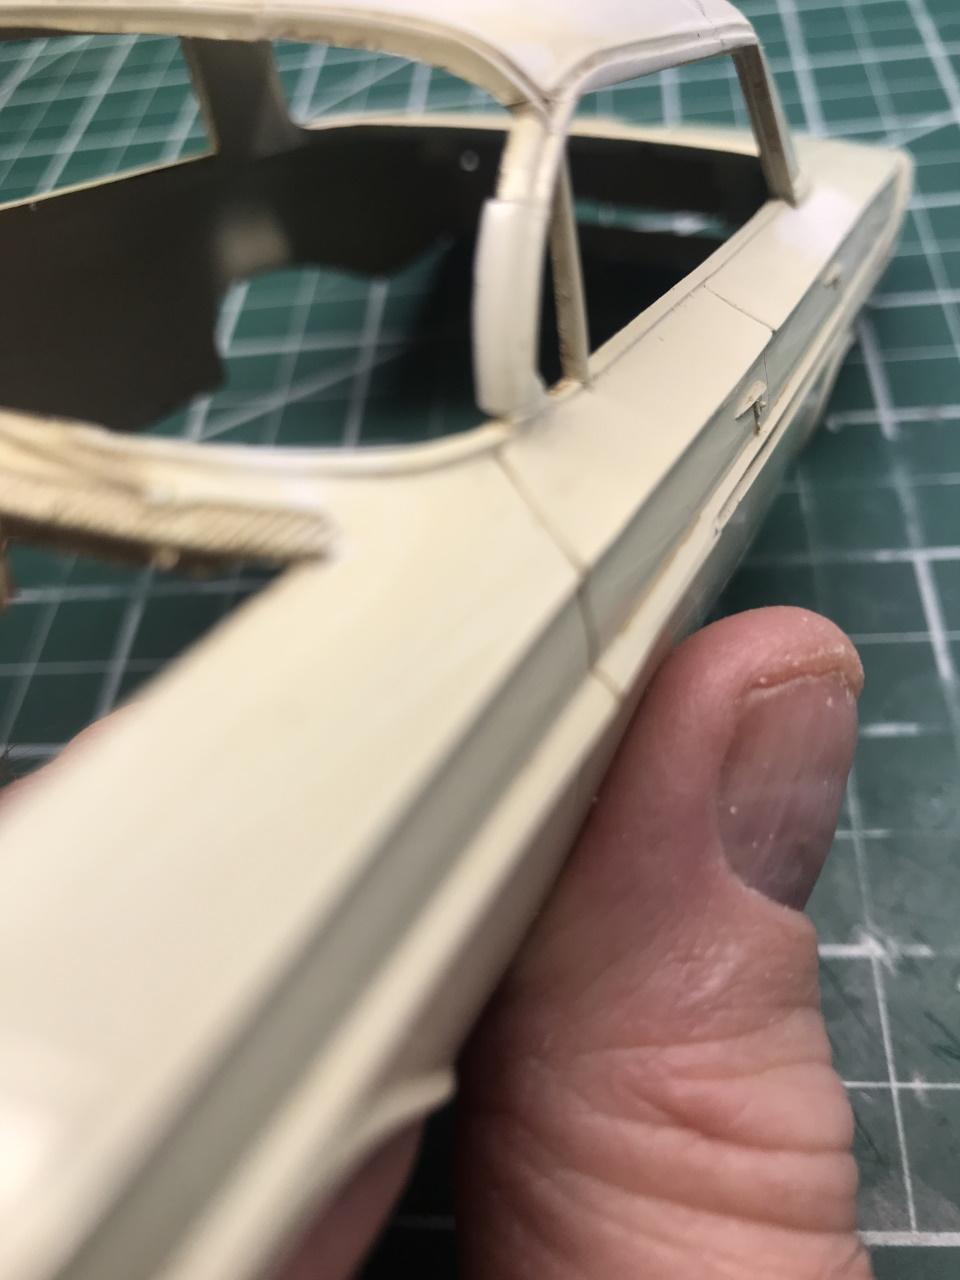
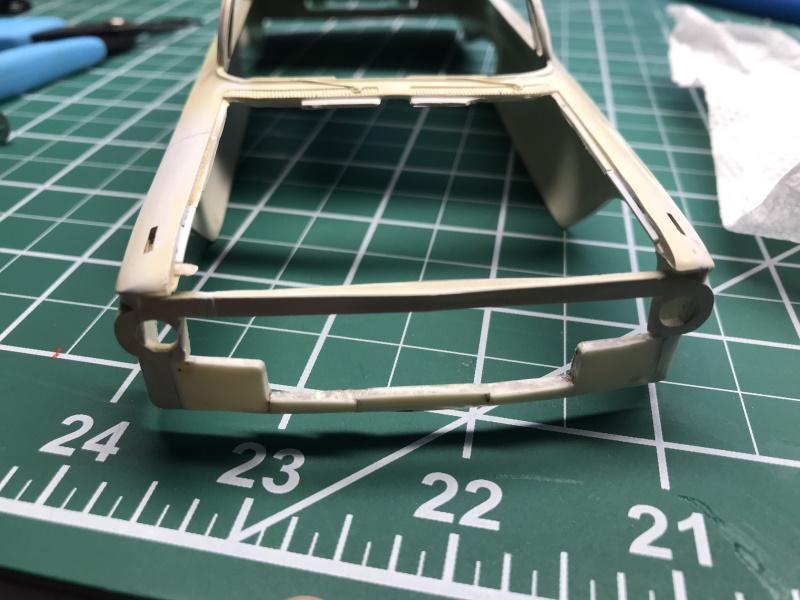
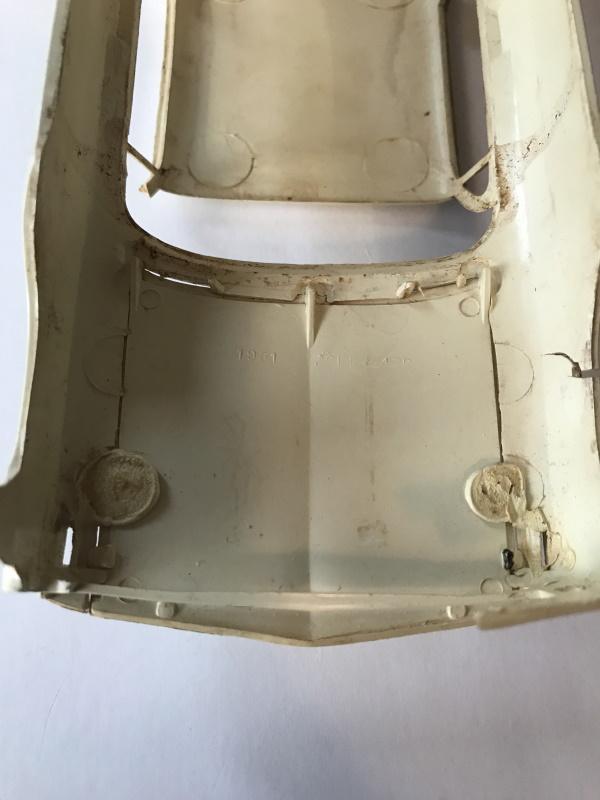
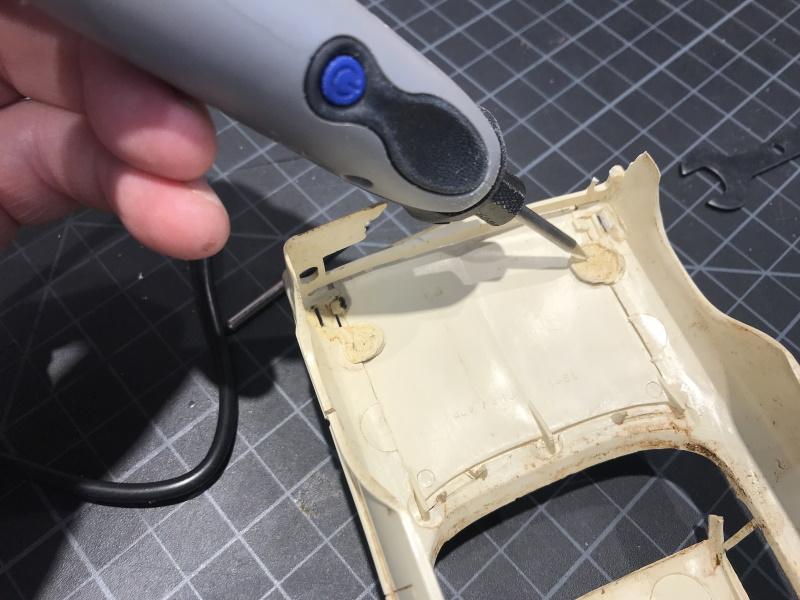
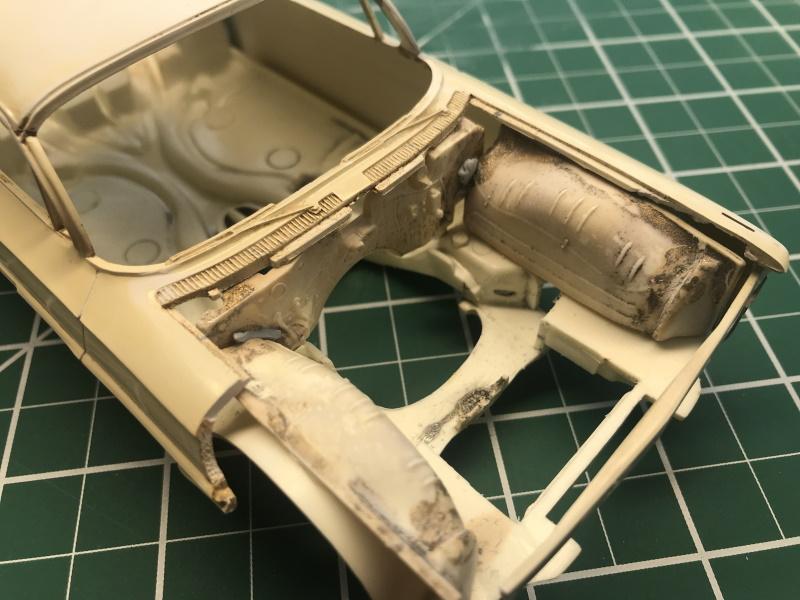
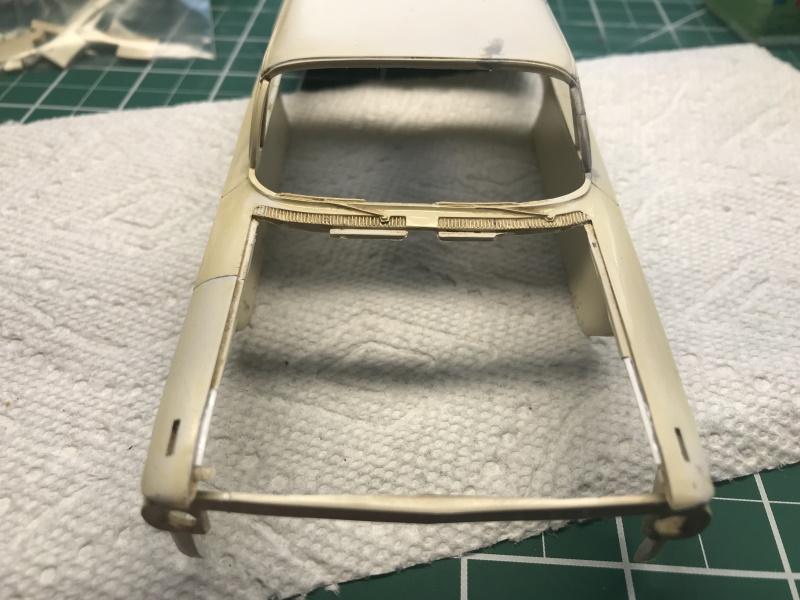
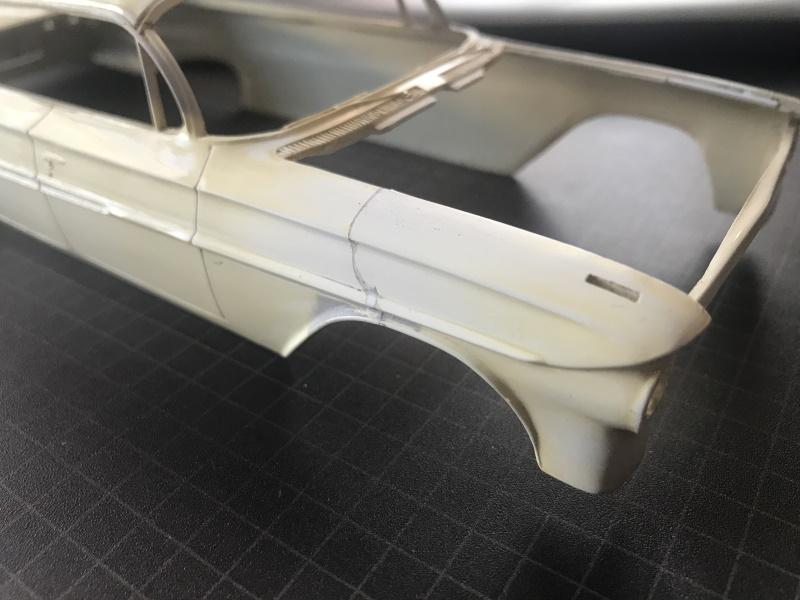
Doing test fits of the glass/dash/interior tub to the body/frame I noticed right off that there was a problem getting the body down to the frame at the front fender well. To me, not getting it down would keep the front high. There was interference at the spot marked where the dash met the body. Filing on the corners of the dash and part of the tub. Interference with the vent window glass kept the body from being flush with the top of the tub at the door panels. I cut a section out of the glass and filed until it all fit. I've marked in red the material I needed to remove. Also needed to remove part of the package tray for the tub to sit high enough in the body/glass. I used wheel covers from the SS annual but wanted to replicate the stock bowtie center. I punched out small discs from 015 sheet, painted black, and added homemade decals to the discs.
-
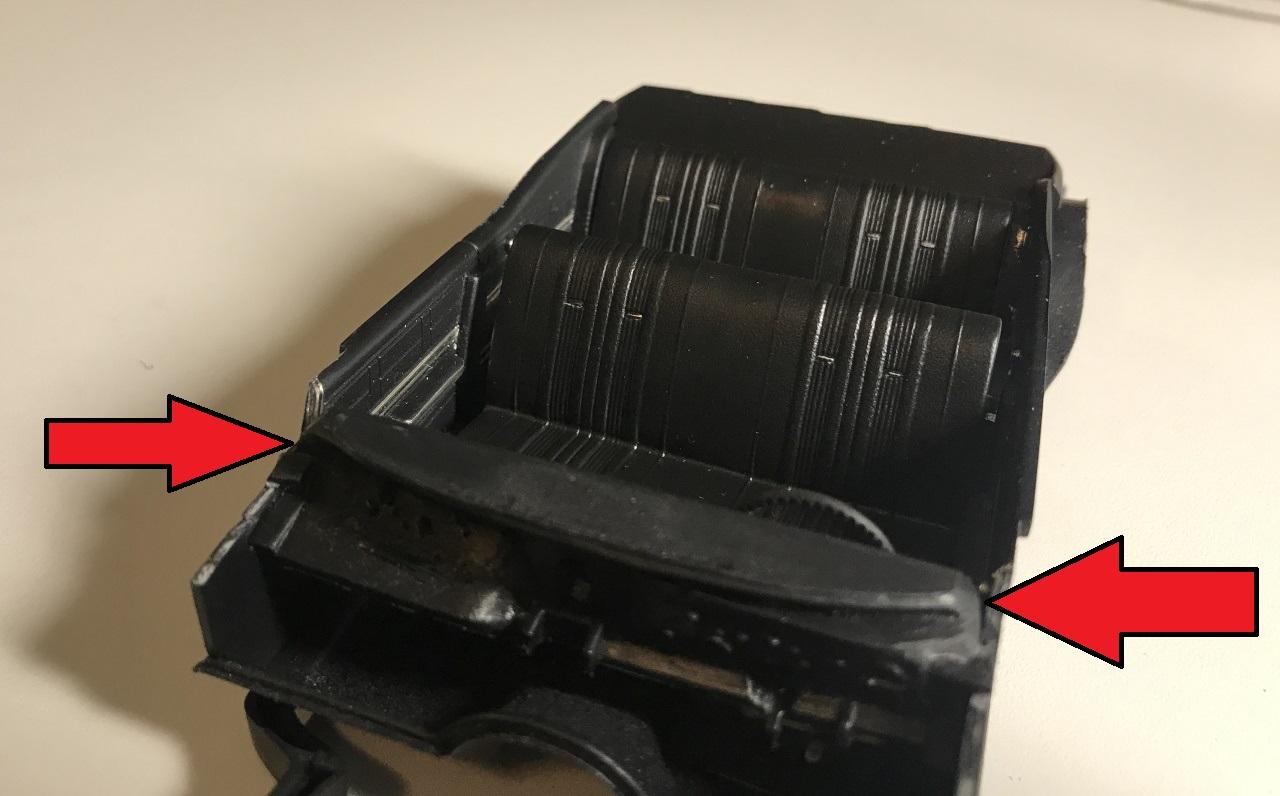
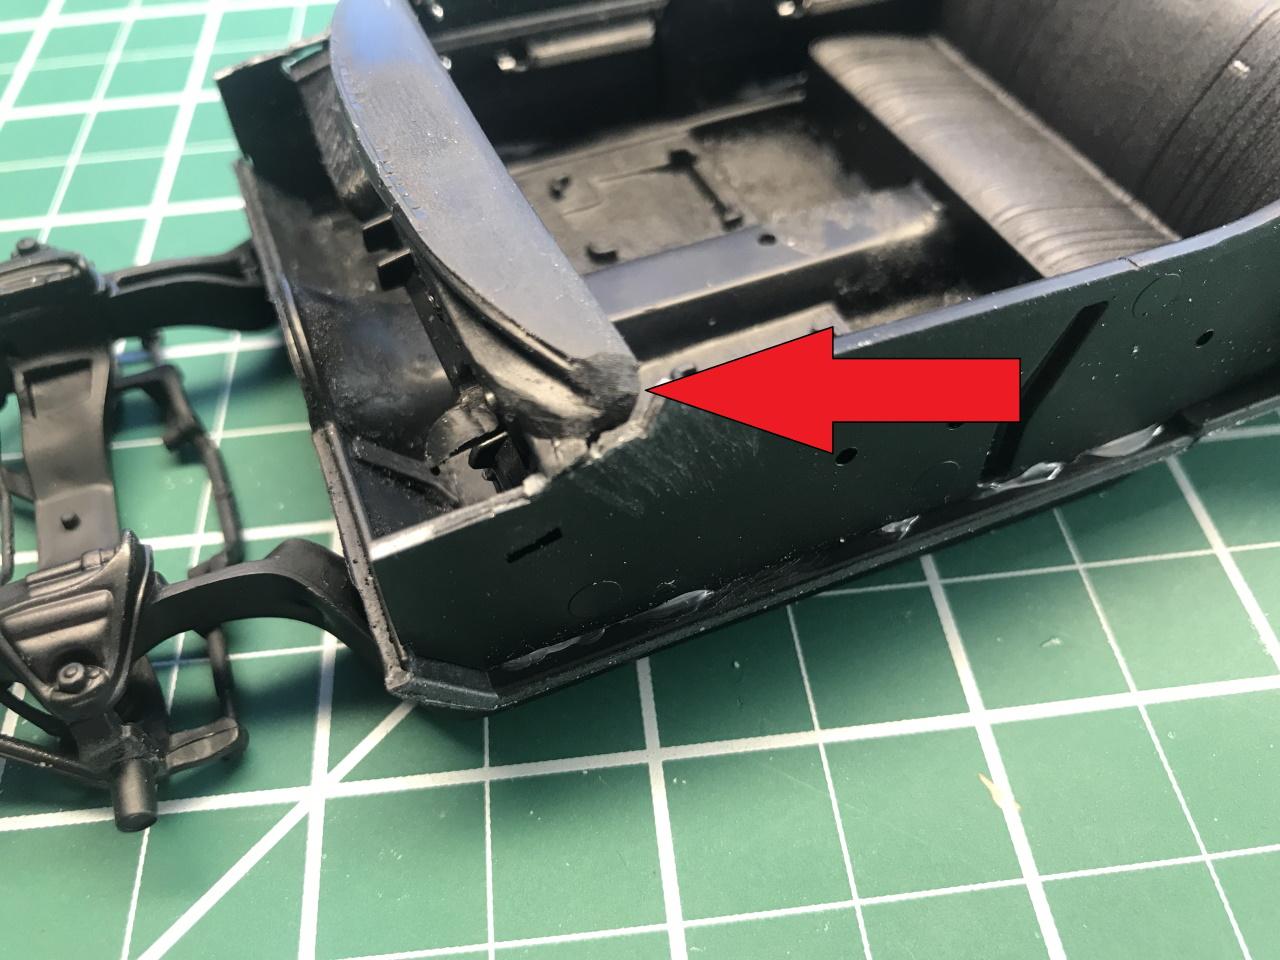
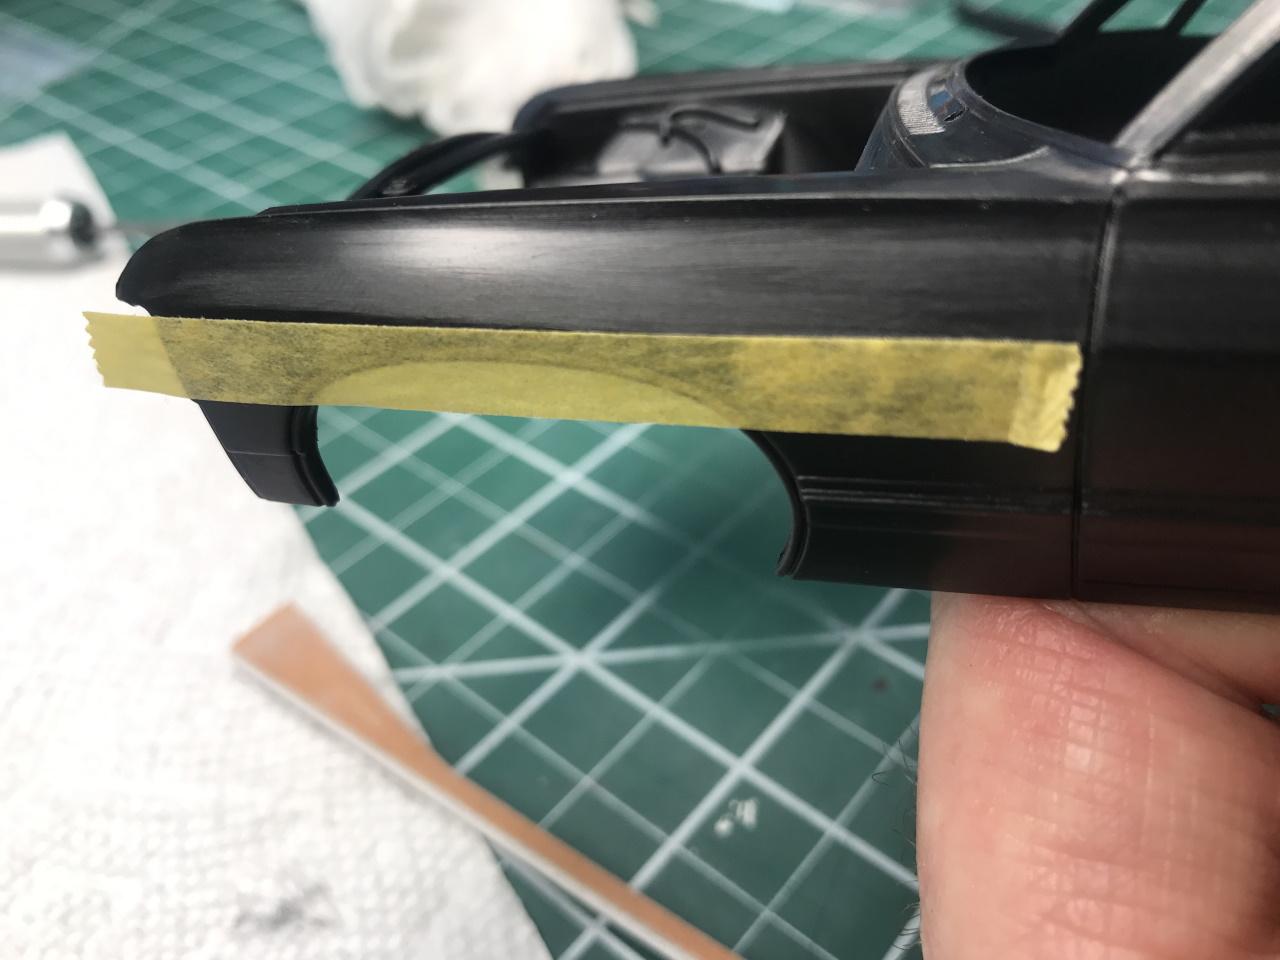
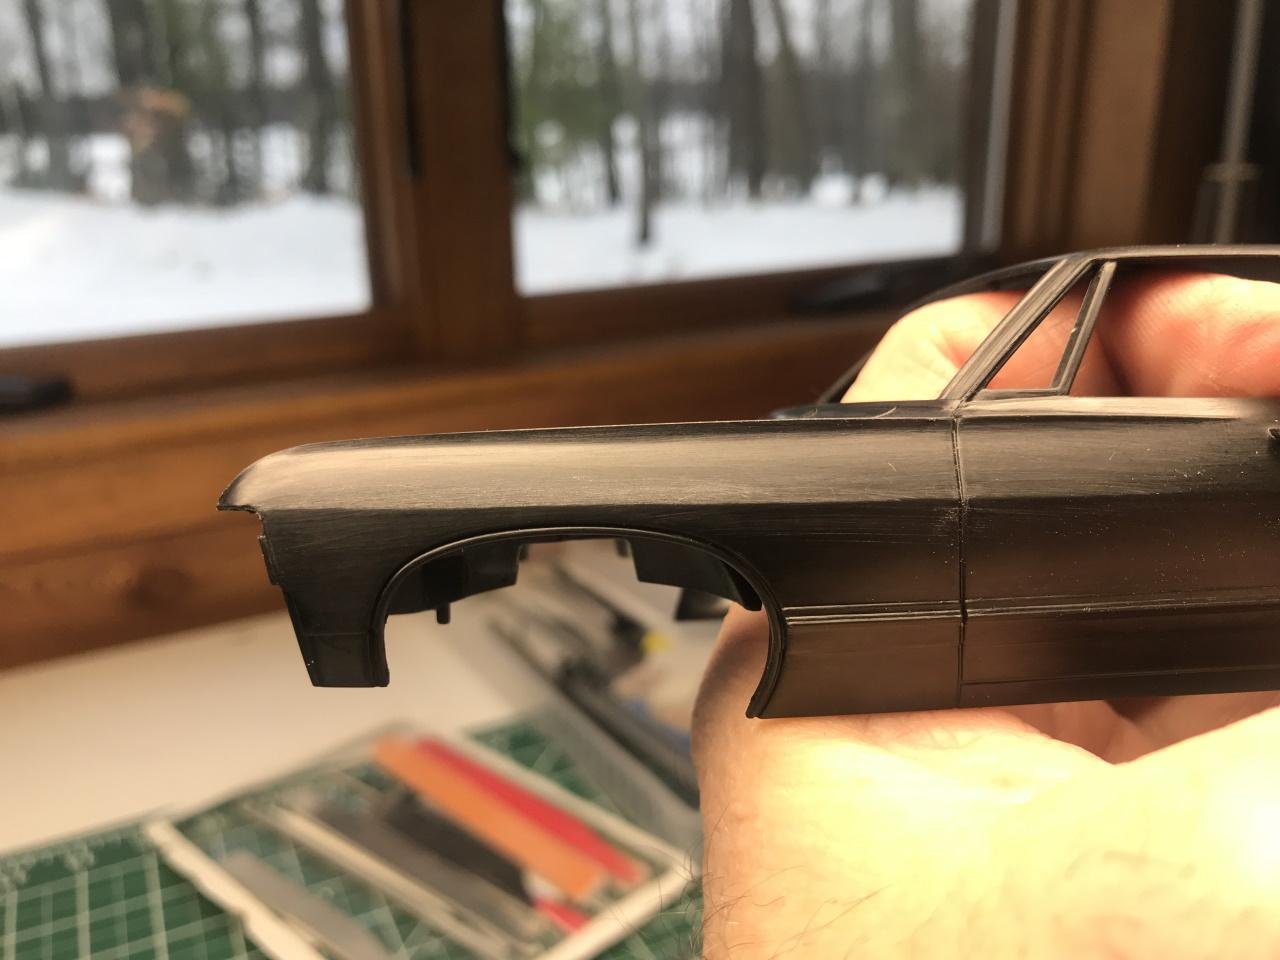
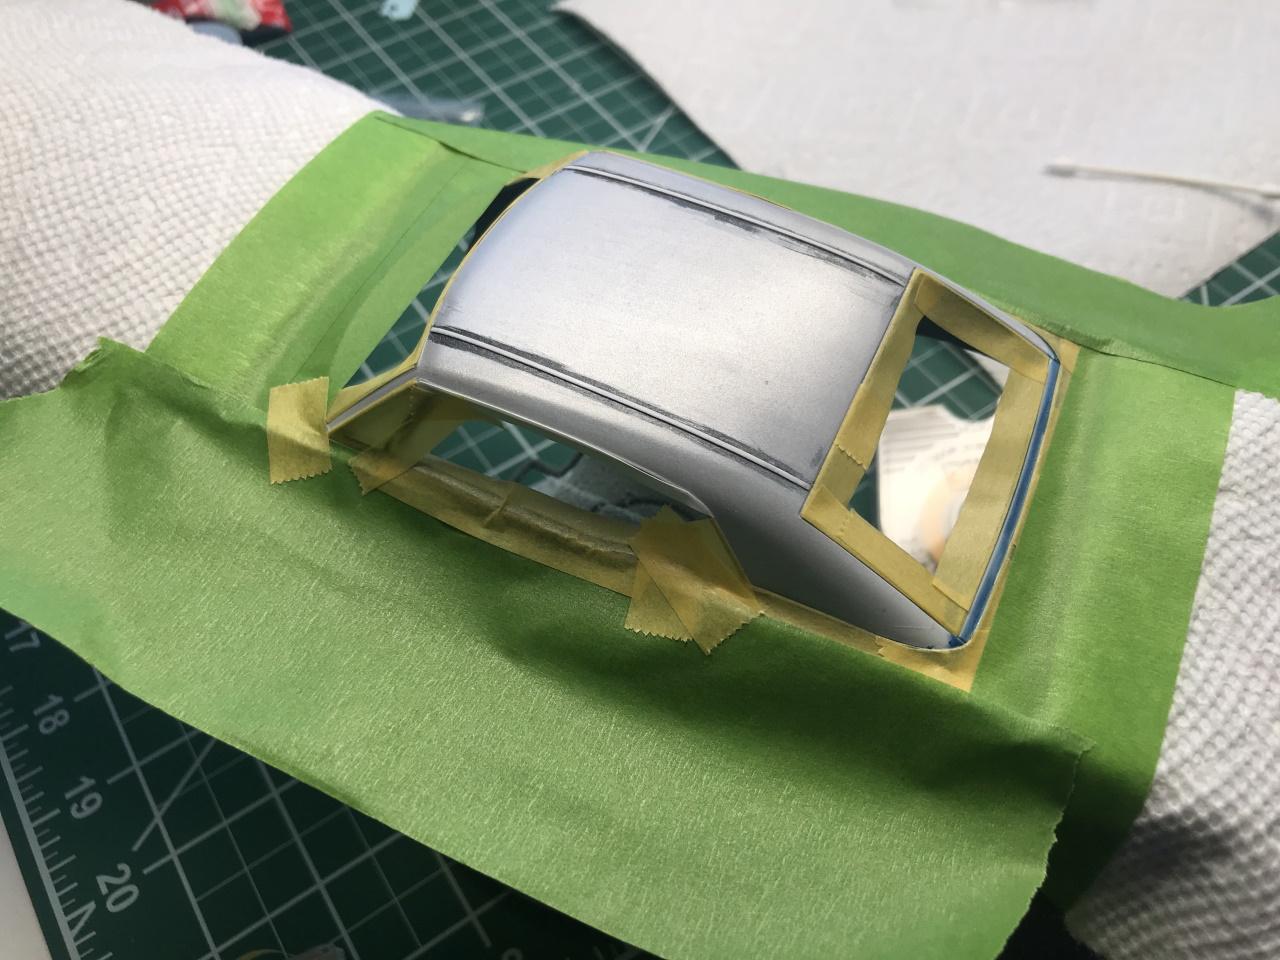
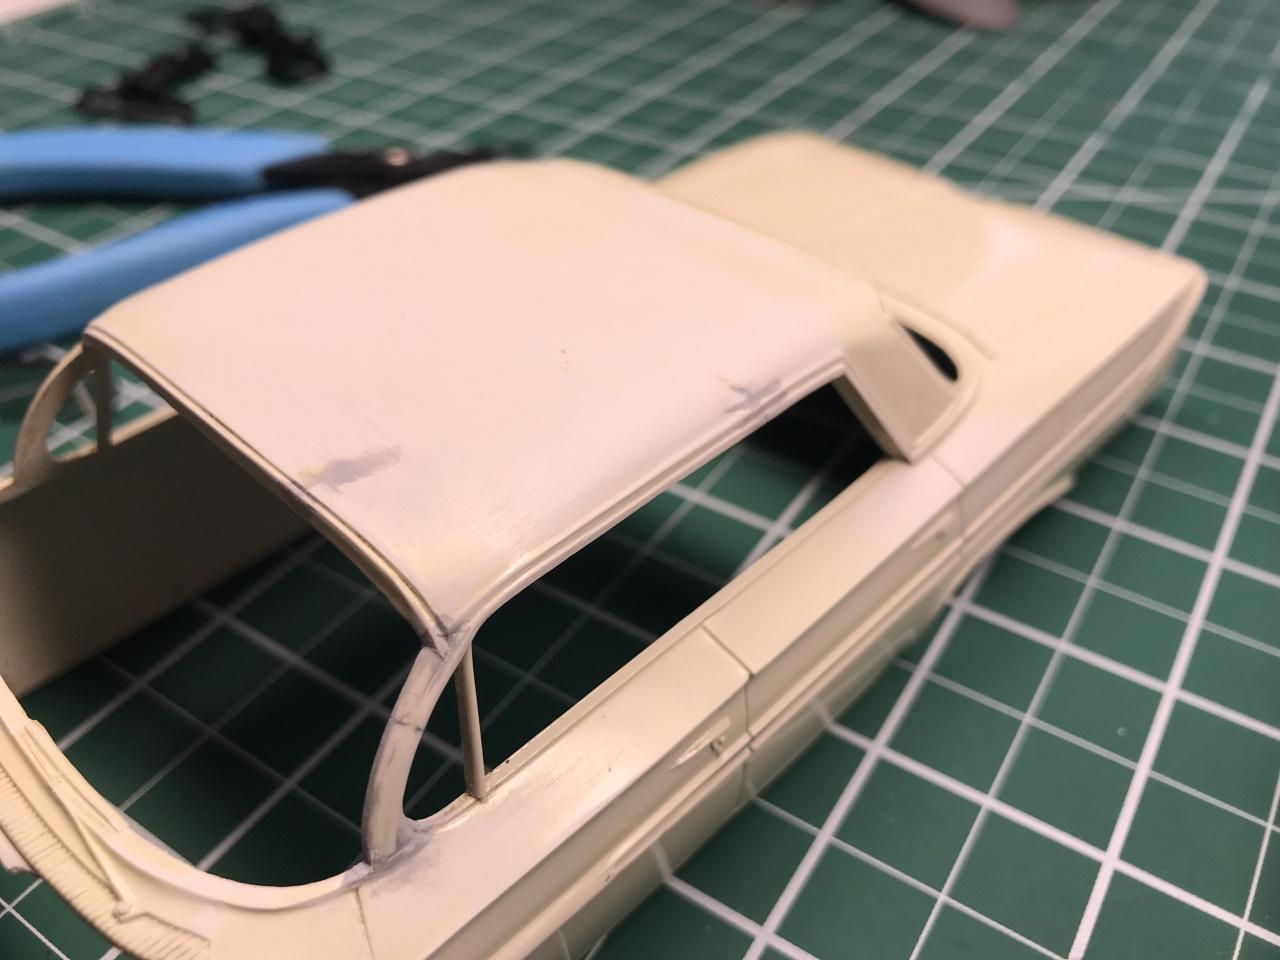
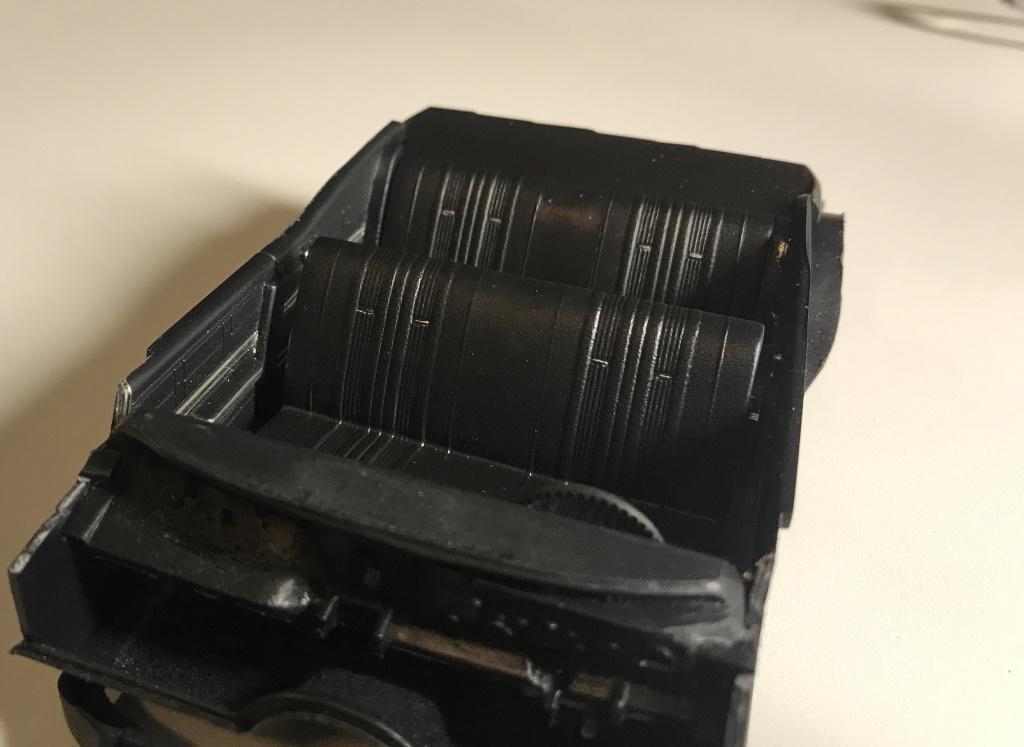
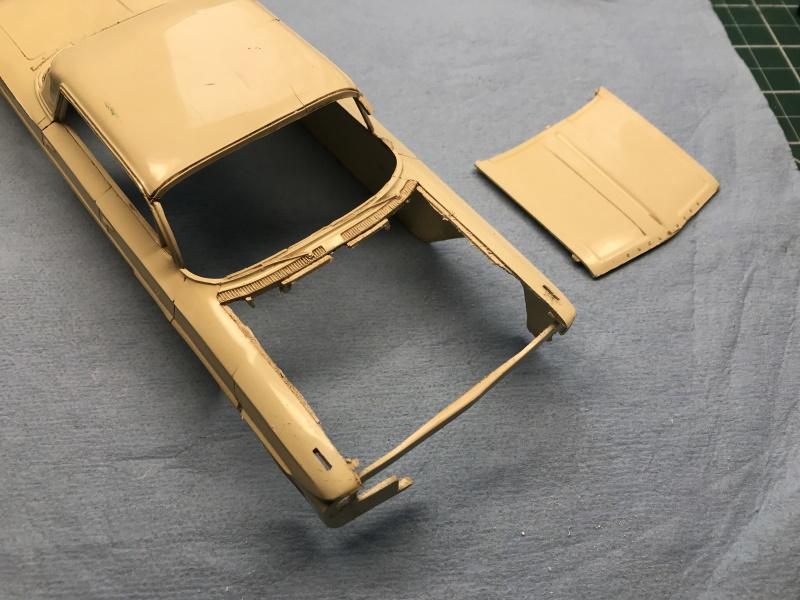
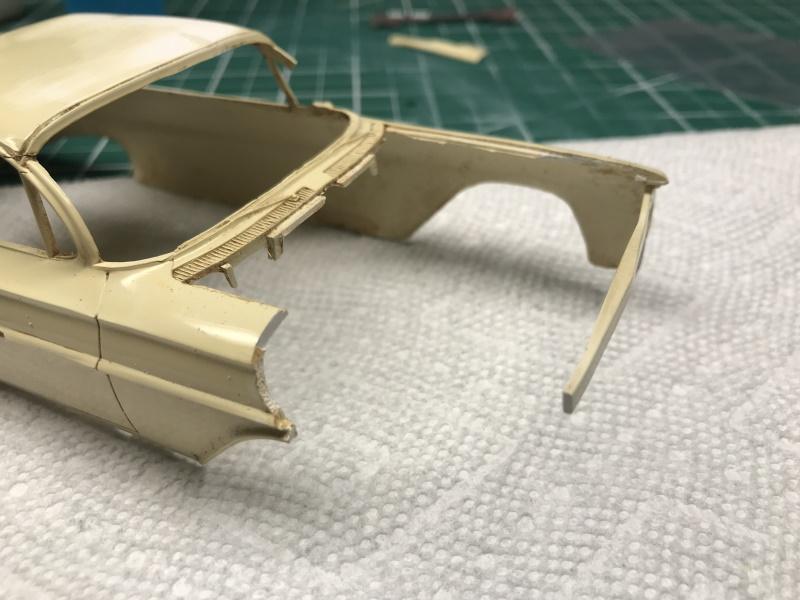
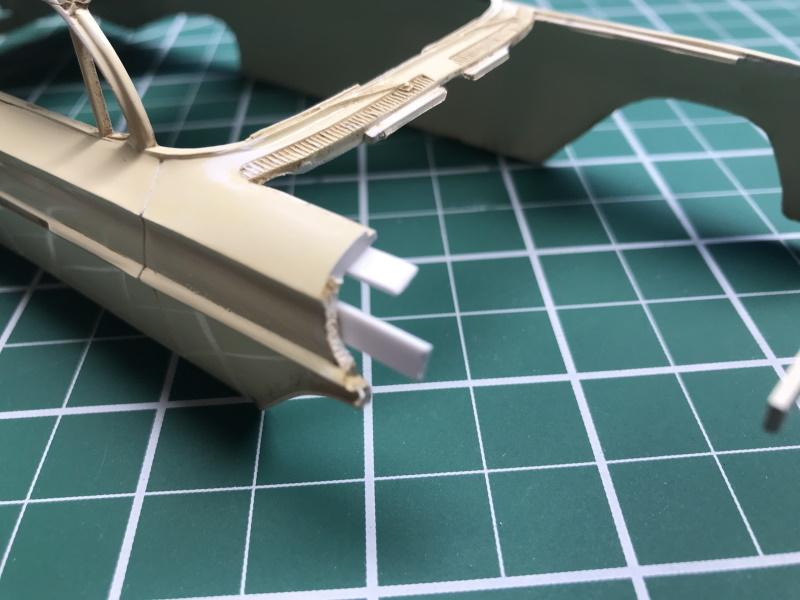
I'd been working on this build along with the '61 Impala 4 door for the past couple of months. This '67 build is about as close to our family's car that I could realistically get it. Dad bought it new in early '67 and it was the car I took my driver's license test on my 16th birthday in October of 1968. At times this was a frustrating build, trying to correct a number of issues that I found with the Supernatural kit. At least on my kit there were issues. I'm not embarrassed to say I built this into a curbside, although I'm sure many of you will roll your eyes . I saved a number of photos while I was doing the build and after I've got them all up I'll do an Under Glass on the finished car. First thing I wanted to try and correct was what I saw as an upward swing of the body line on the front fenders. After some shaping I was happier with the look, however that was only part of the story with how the front end just didn't look right. Too high and that upward swing. I'll post pics of how I dealt with the whole body/frame/interior/windshield fitment. Next I wanted to correct the leading edge of the fenders where they meet the grille trim. My kit needed an extension puttied in to correct it. We had a vinyl top our car and this was the first time I've tried replicating one. I needed to add the trim at the rear and the C pillar (or would it be the B pillar on a hardtop?) and ended up using Testors Fabric Black which I was happy with. I wanted to try and replicate the stock Impala pattern on the front seat rather than use the Supernatural bench. I used the rear seat from a spare '67 kit, filled the speaker, and then needed to fab a seat back and sides. I used quarter round and flat sheet and I think it looks pretty good. Not a perfect front bench, but at least the pattern is correct. The rear seat was easier as I only needed to fill the speaker opening. Our car did not have that option but had a speaker on the package shelf.
-
 If you haven't used it before you'll love their paint. Lays down so nicely.
 -
Welcome Bobby! Lots of sharing and helpful folks here. Ask away when you have questions.
-
x2.... and welcome aboard John!
-
Beautiful build Mike! Great color choice too!
-
Great set of builds!
-
Welcome Charlie!
-
muscle car From SoCal on the verge of retirement
hedotwo replied to Capt. Speirs's topic in Welcome! Introduce Yourself
Welcome Ric! -
Great start!
-
It's done Tom ?... I posted in Under Glass
-
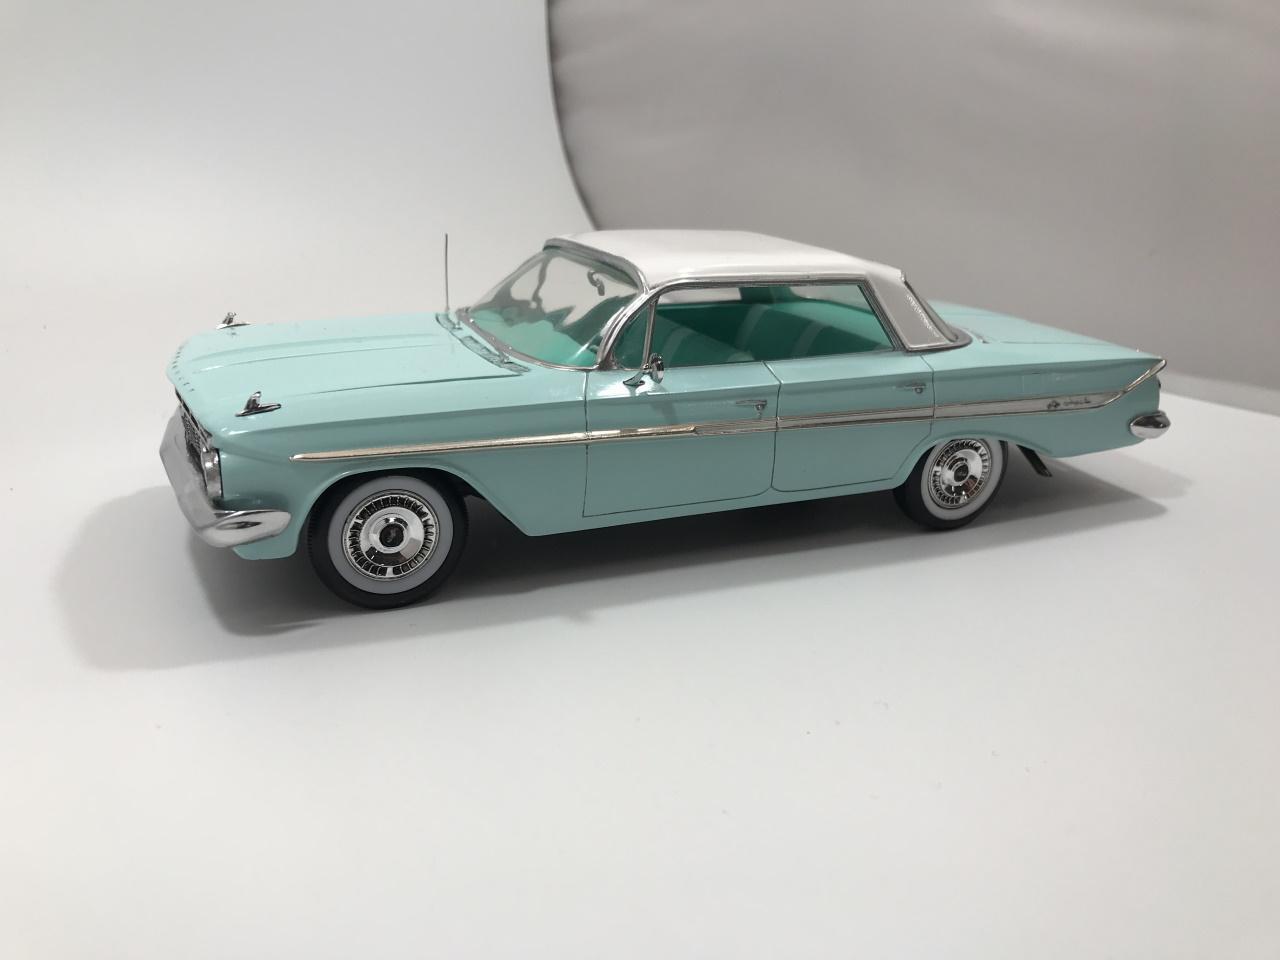
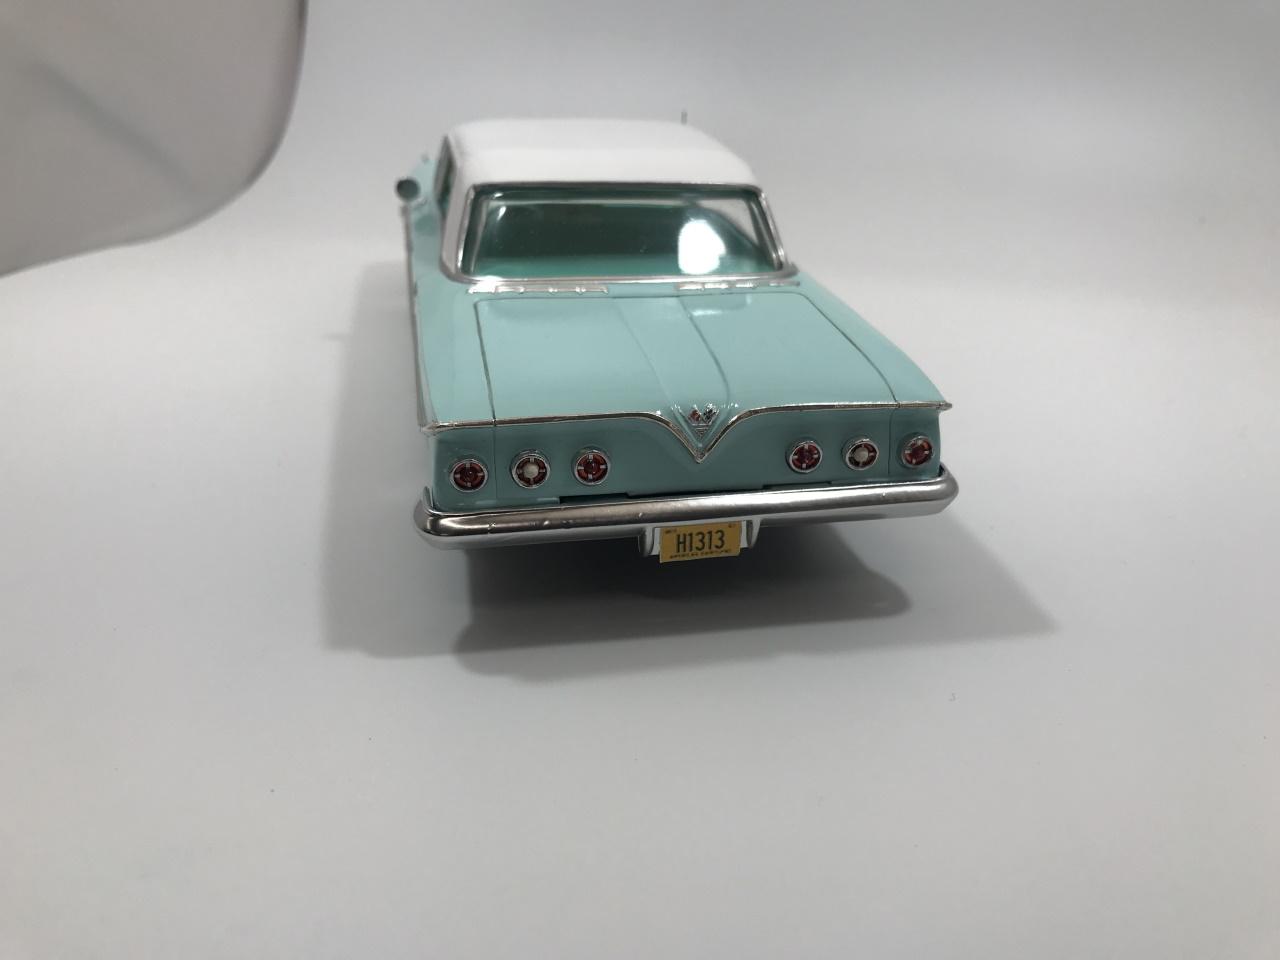
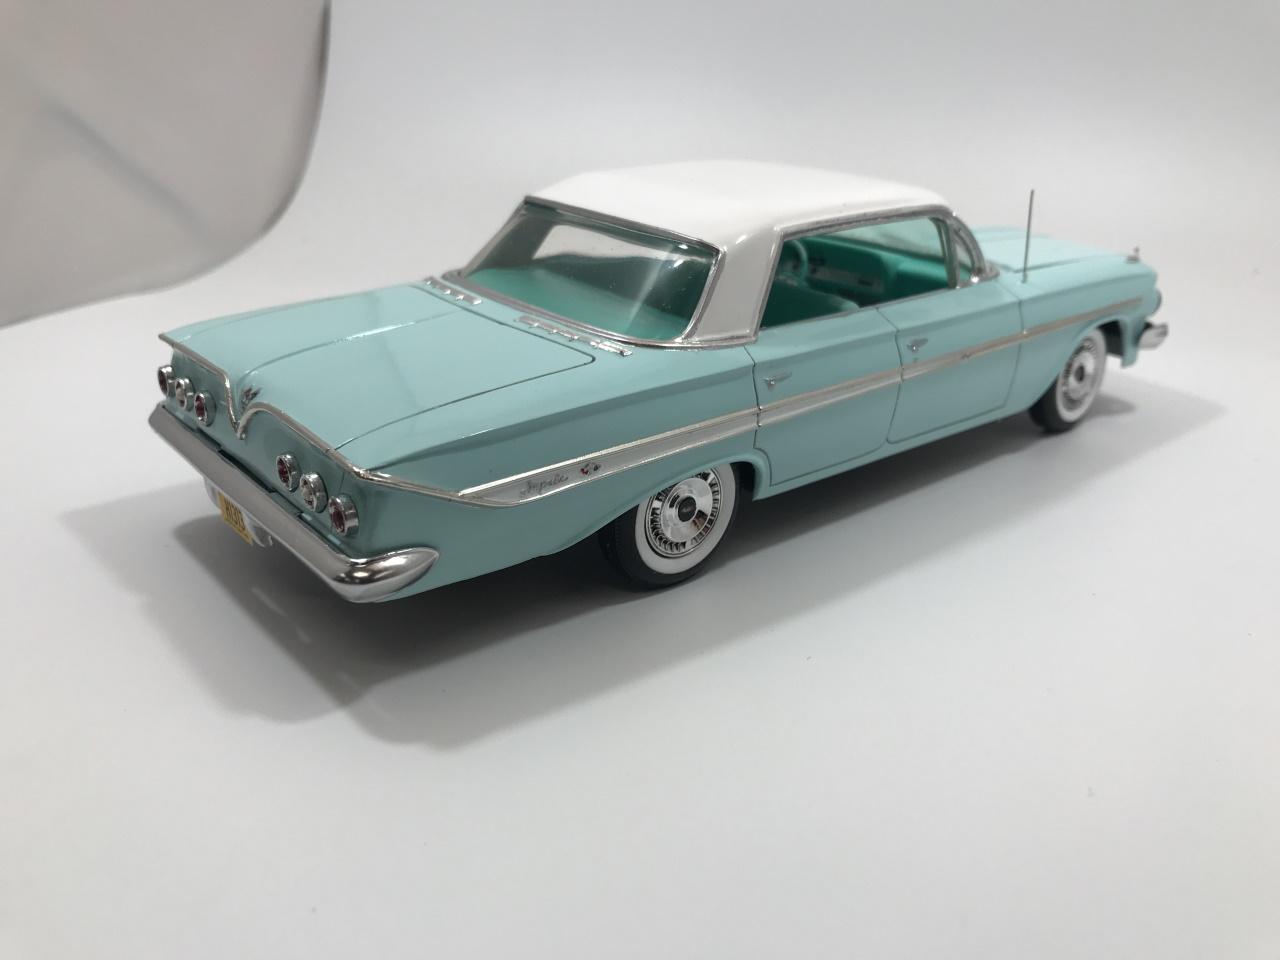
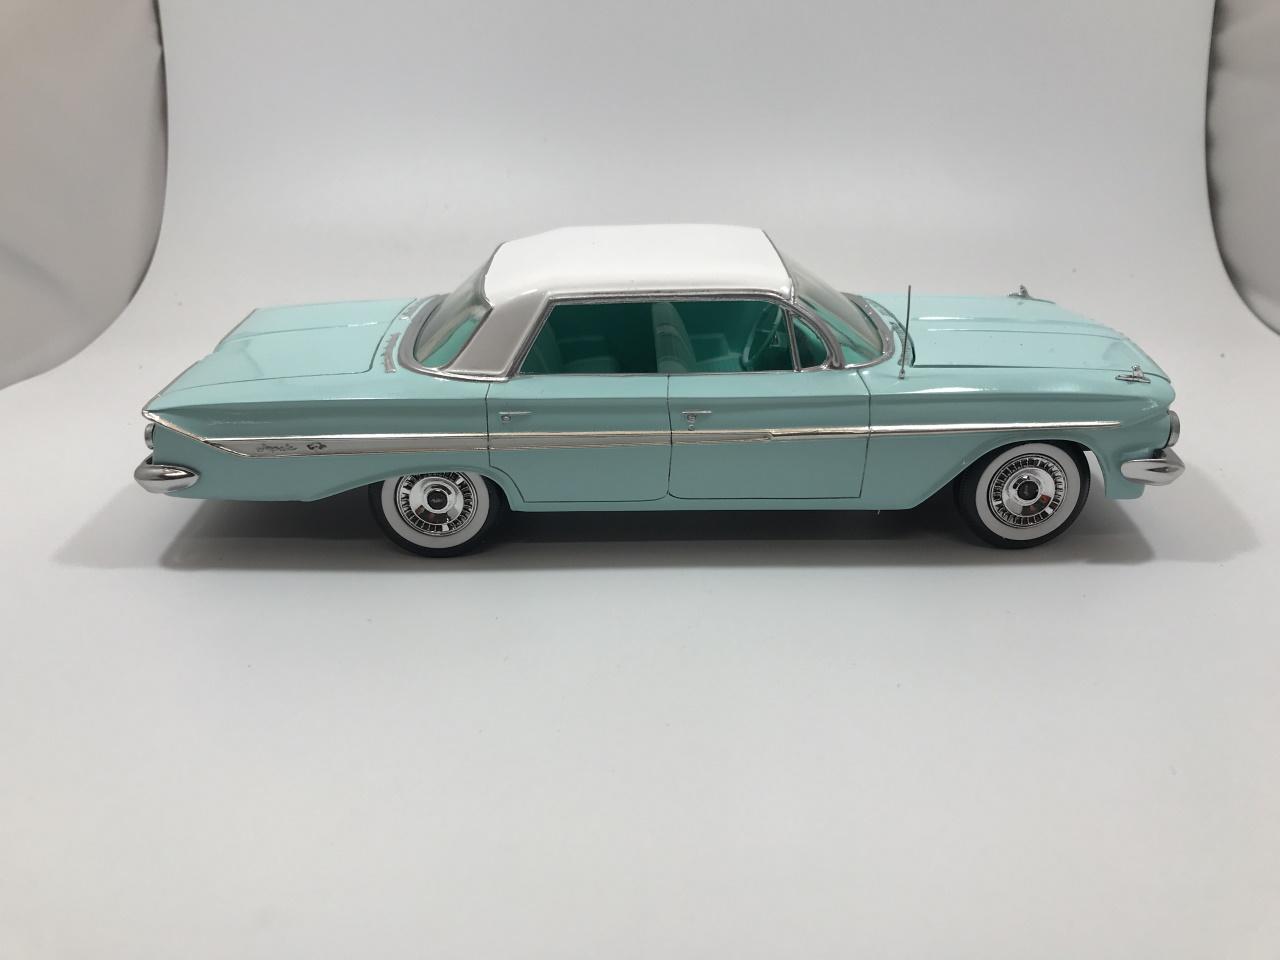
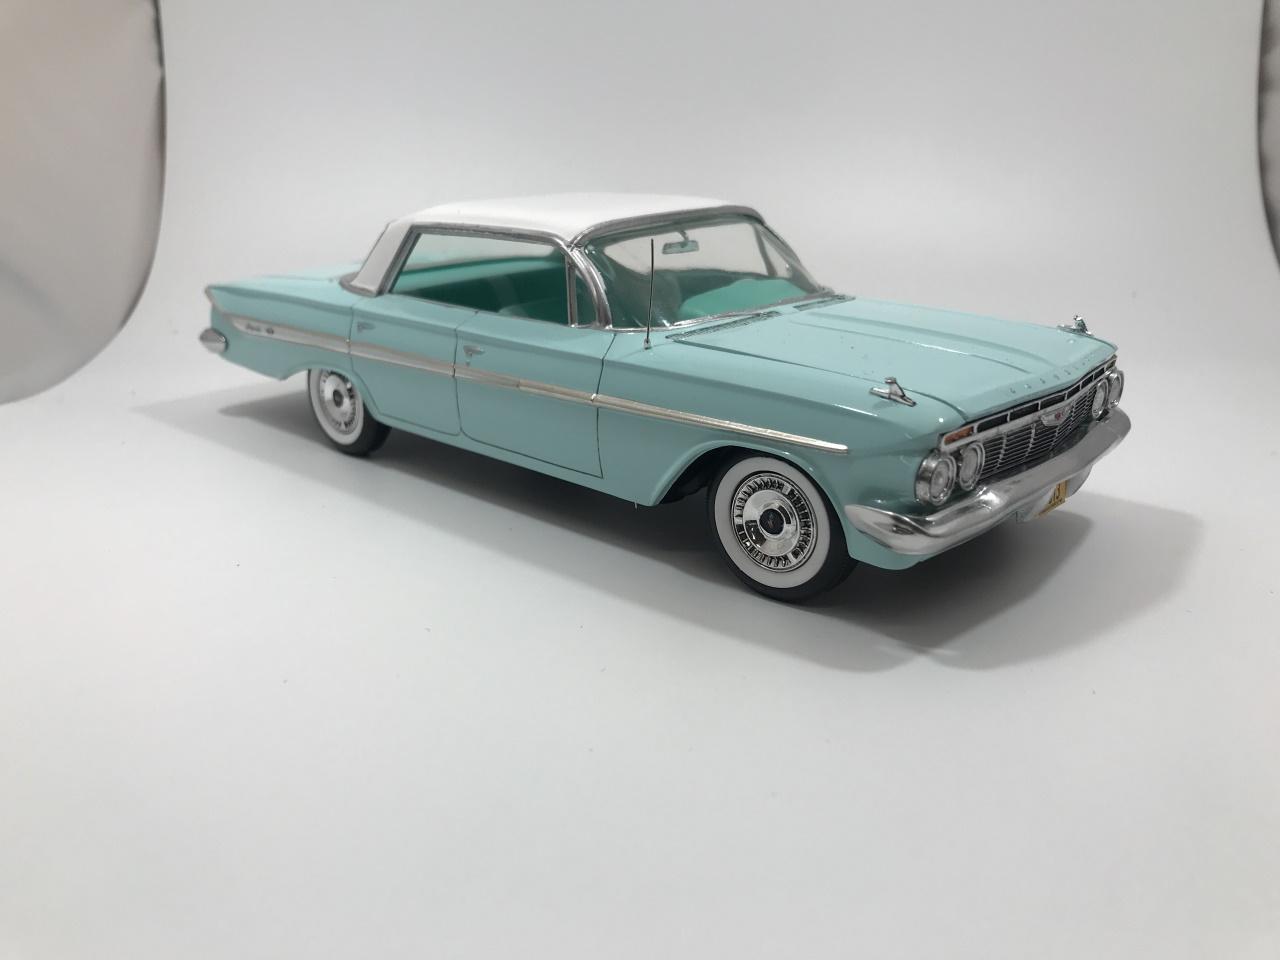
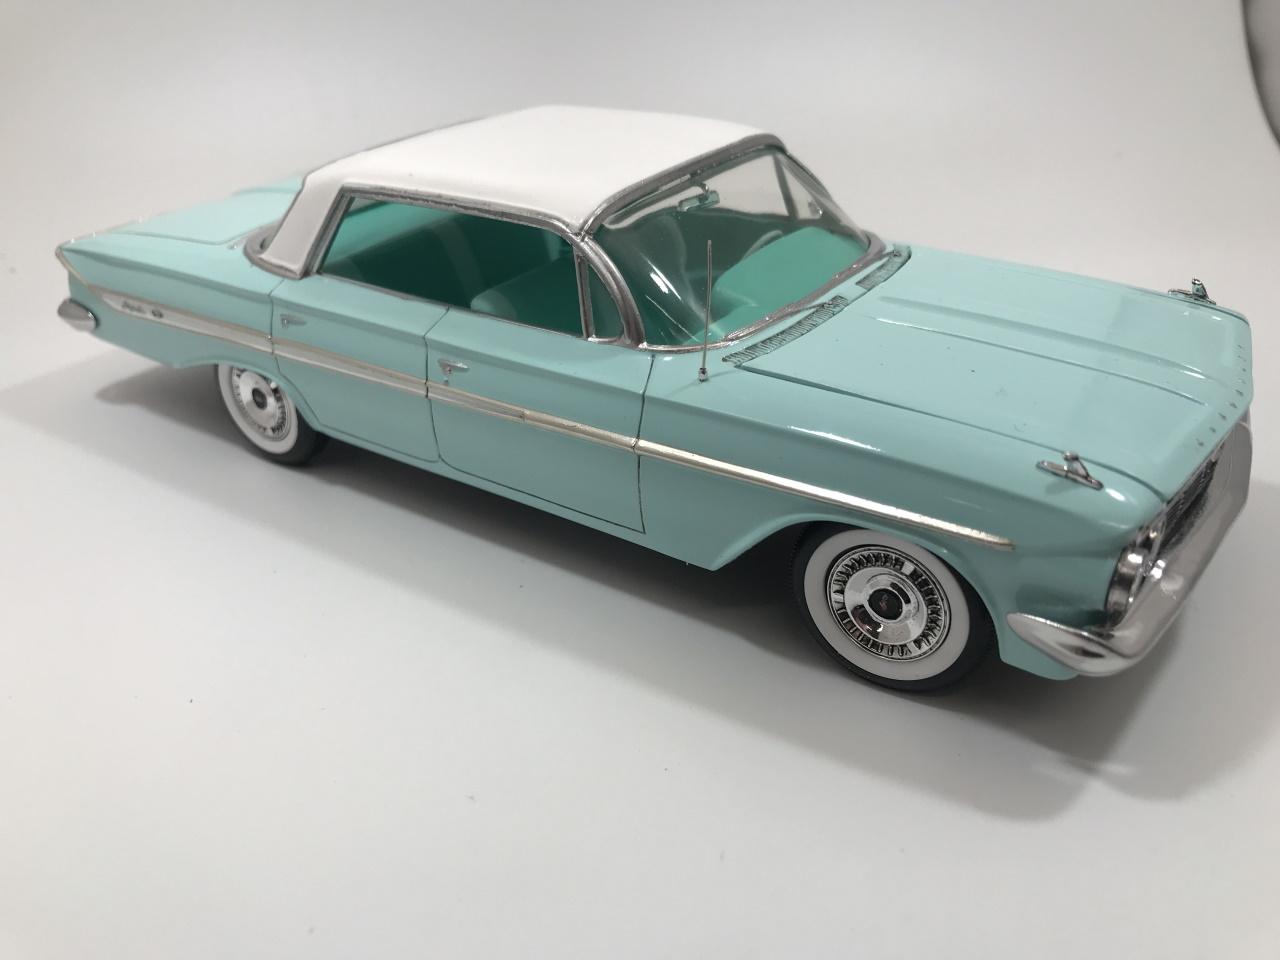
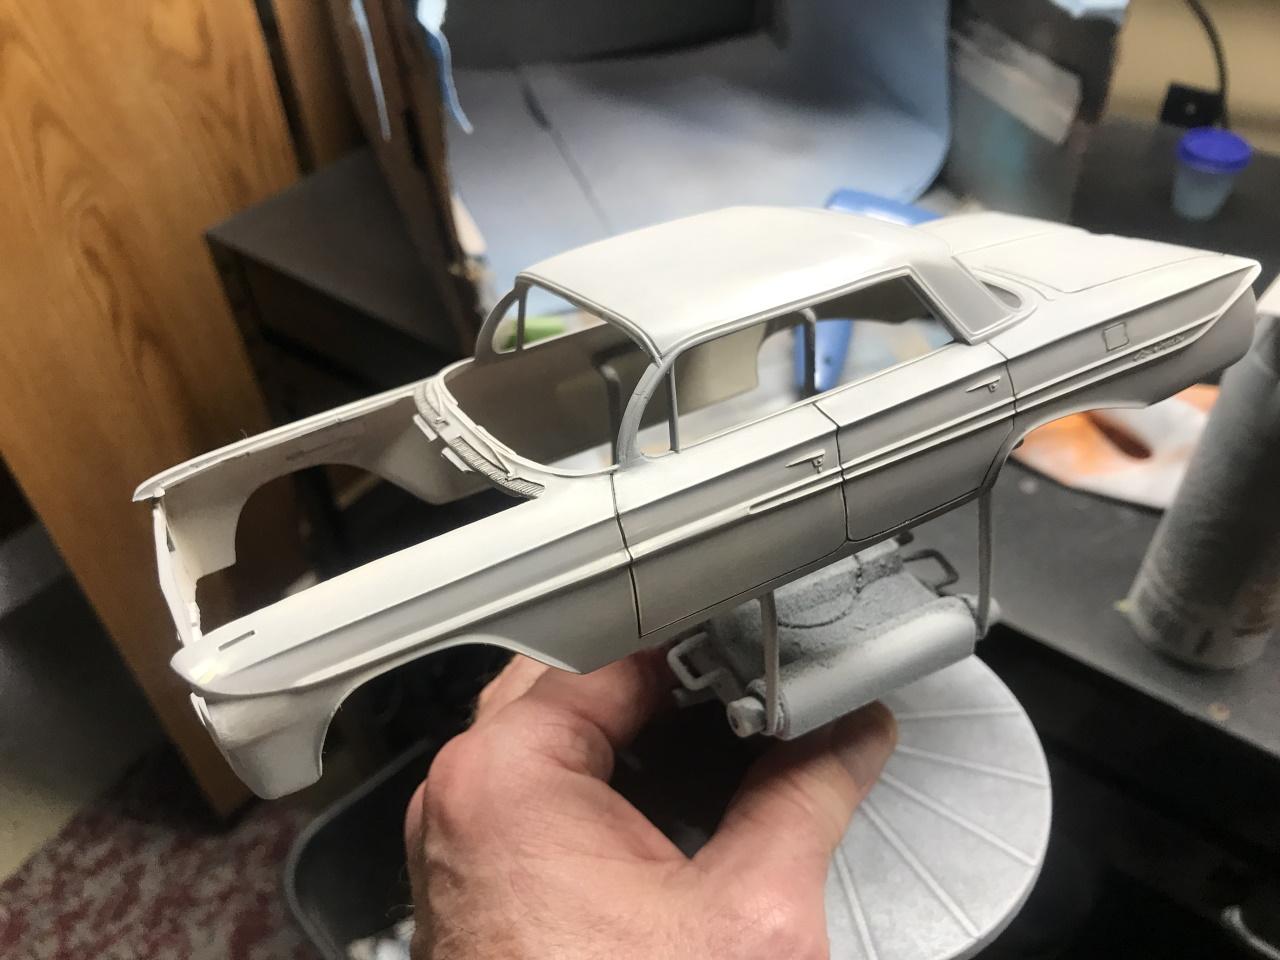
Finished the build of one of our family cars, a '61 Impala 4 door. Dad bought the car new and kept it til he traded it in on a '67 Impala. I started with a rough friction promo that needed a fair amount of work, but fit my budget. I posted a thread in the WIP area of some of the repairs I had to make. I used MCW Seafoam Green and Tamiya Pure white lacquers for the exterior colors and Apple Barrel Key West and Aquamarine acrylics for the interior. I replaced the promo metal chassis with an SMP '61 annual along with the firewall and other engine compartment items. I can't say for sure where the small block came from. Wheel covers were from the Lindberg '61 Impala along with the fender ornaments. I modified the wheel covers to represent the centers a bit better than the annual did. Overall I'm really pleased with the result of the build but there are things I could have taken more time with and done better. I think we all come to the time when we're ready for the build to be done so we can move onto the next project. Shout out to Hi-PO for a couple of my wheel cover decals and to Tom Geiger for printing out replicas of our license plates. Thanks a bunch for looking!
-
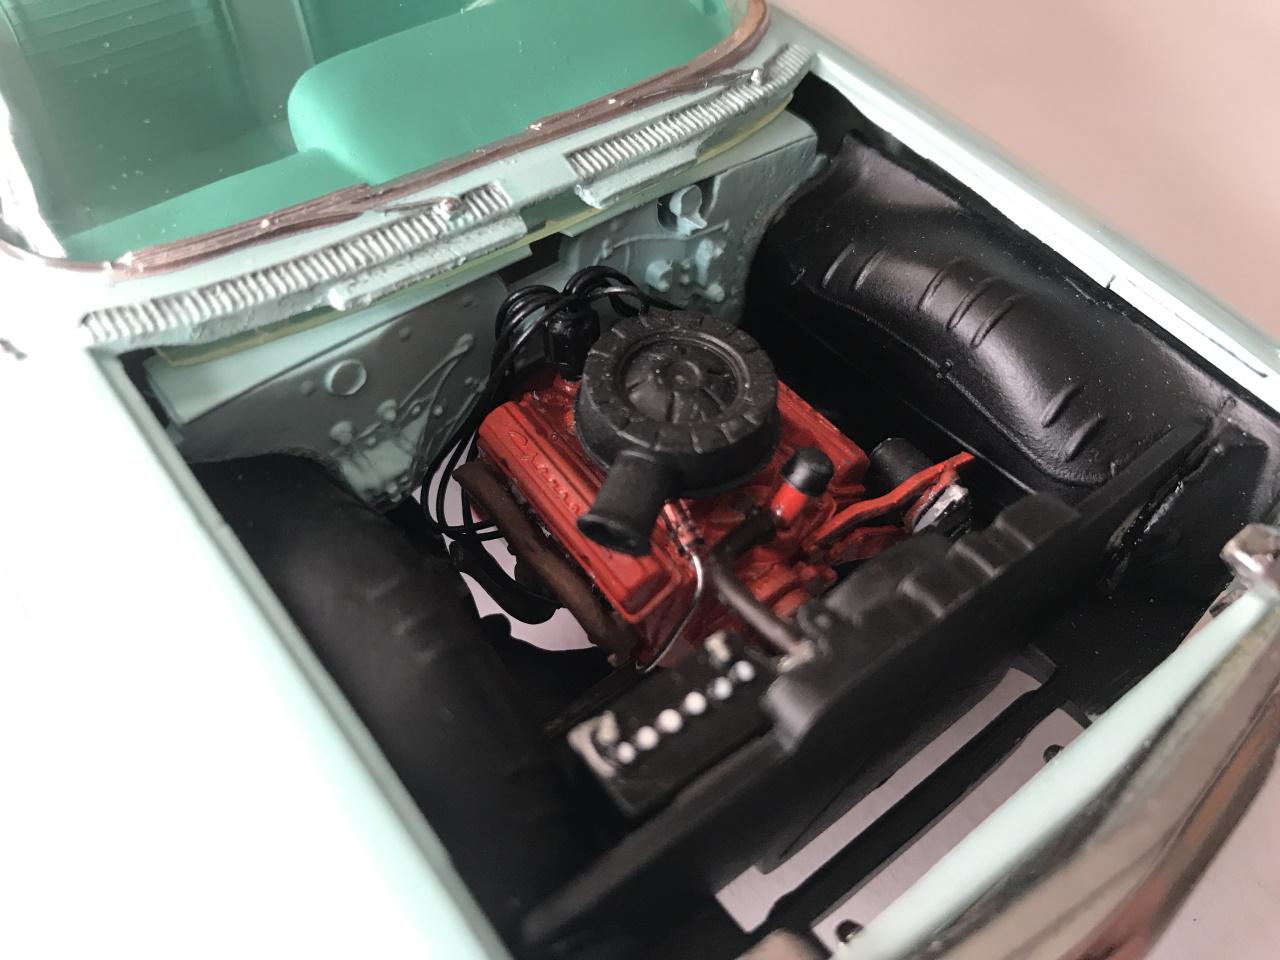
Last set of pics. I decided to ditch the friction chassis and use a '61 annual instead along with a spare engine/firewall too. A few years back I would have taken more time and done a better job detailing the engine and engine compartment but I ended up doing just enough to make me happy . For the wheel covers I used Lindberg covers which I lightly drill out, punched out small discs from 020 stock, painted black, and added small crossed flag decals from the Lindberg decal sheet (thanks Hi-PO). While they're not exact replicas of stock they're better than the stock annual covers in my opinion. I also used the Lindberg fender ornaments that to me looked more accurate than the kit ornaments. I cut off the bottom half of the ornaments so they sat a bit lower. Thanks for all the interest in my build! I'll post the final pics in Under Glass soon.
-
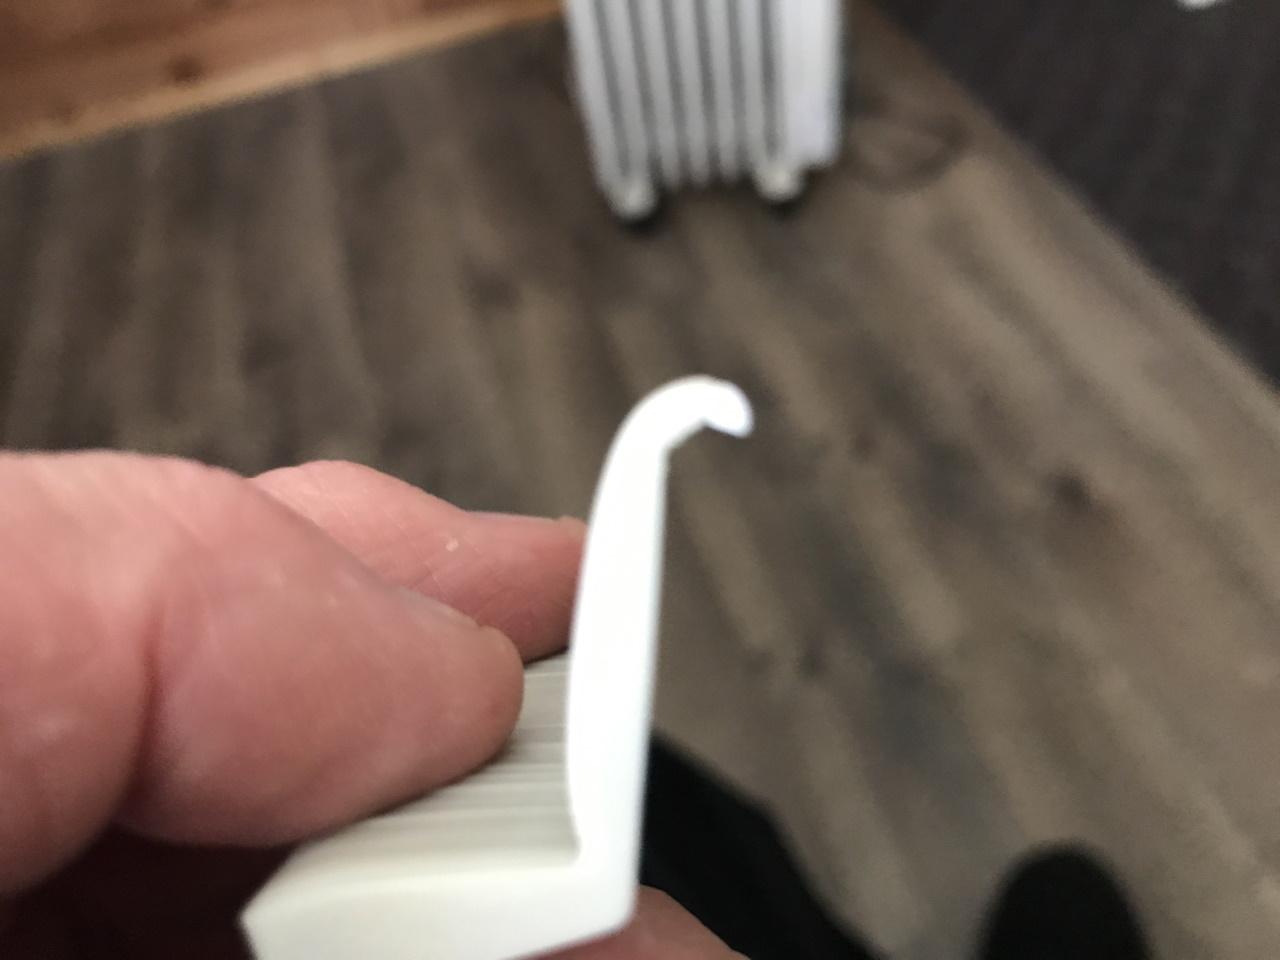
If you take your time they're fine. They're actually pretty sharp. They come in different shapes and thickness. I use them alot.
-
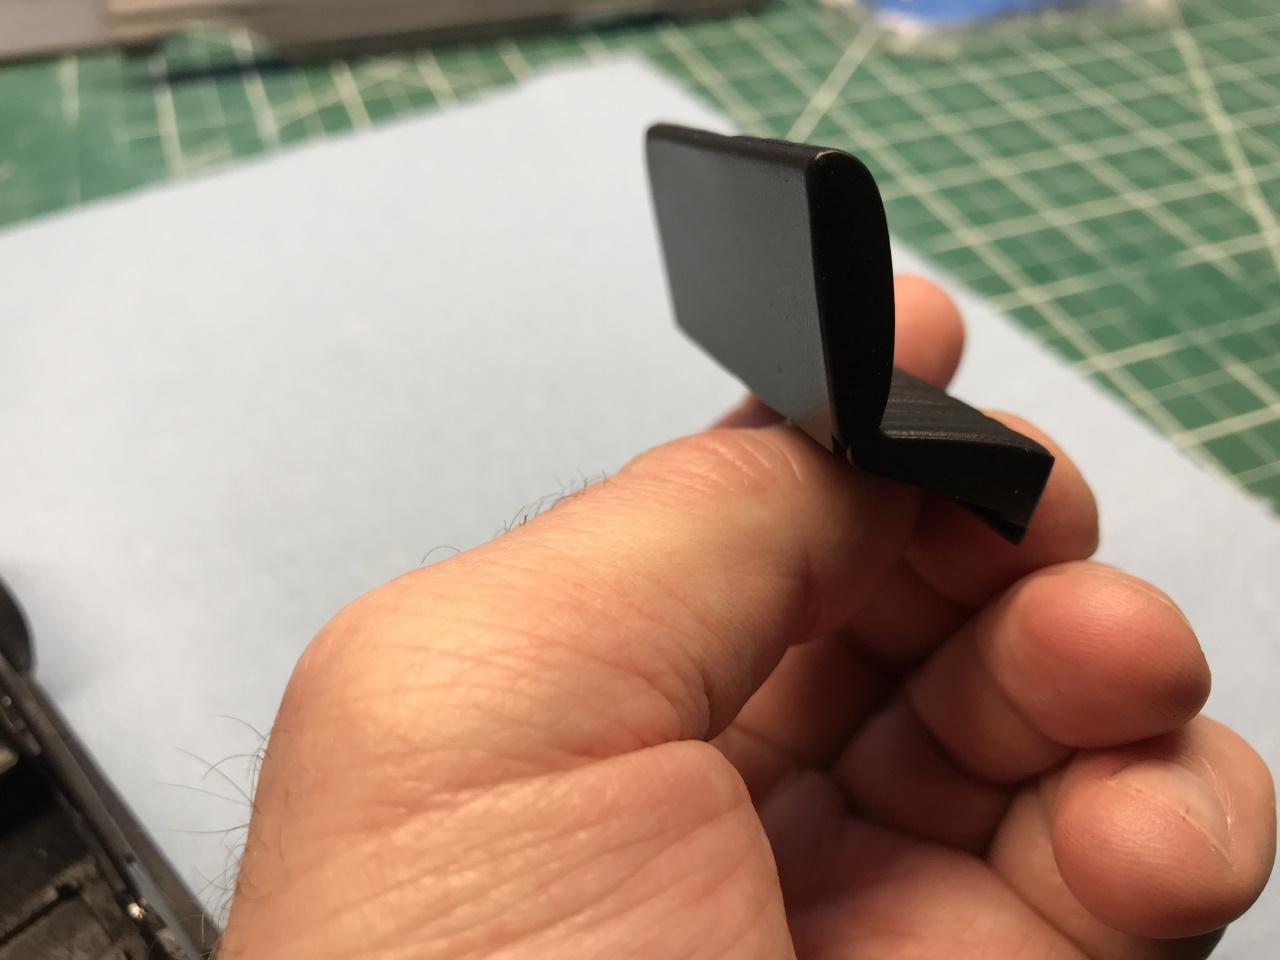
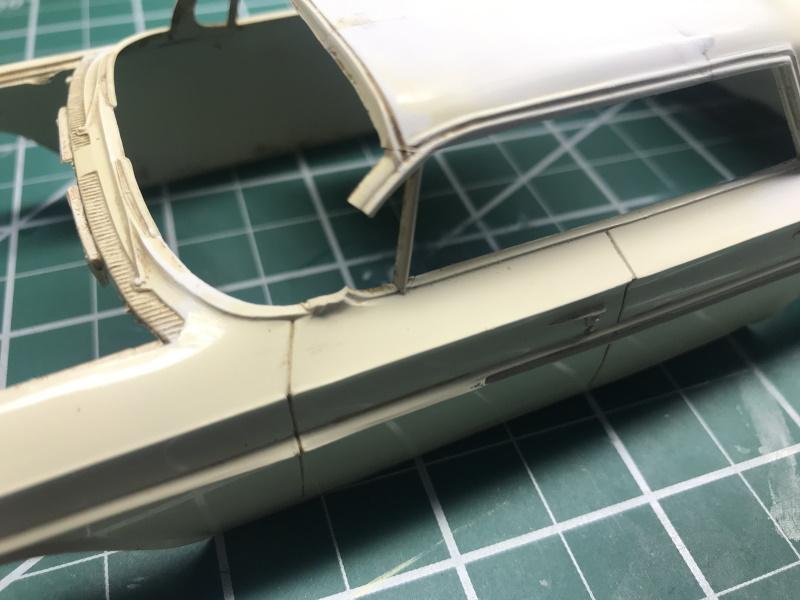
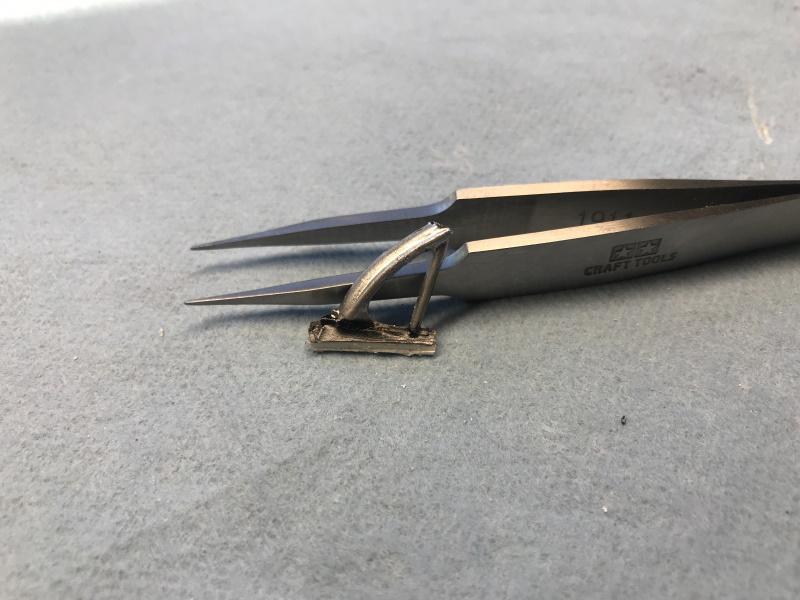
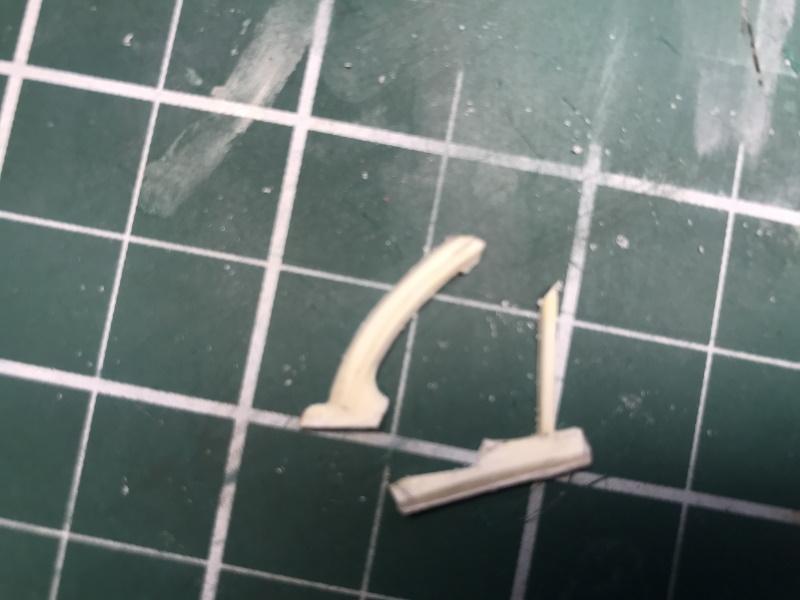
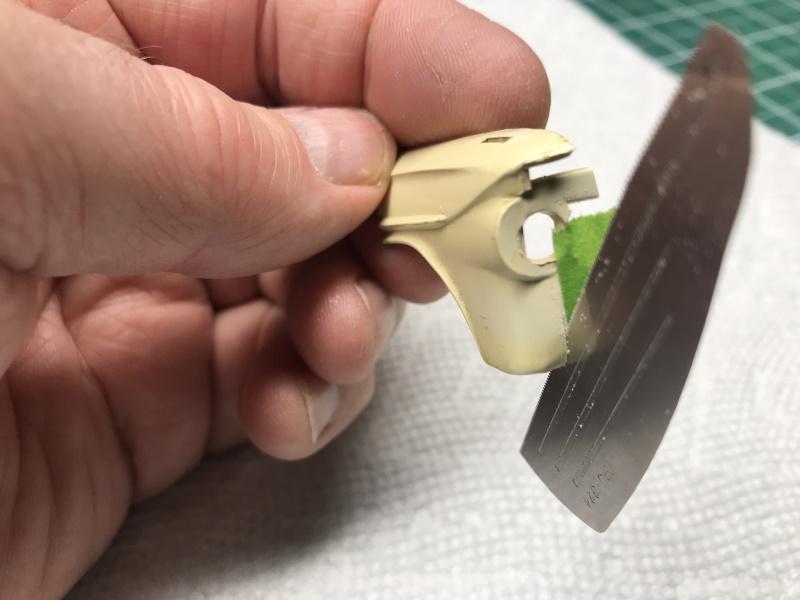
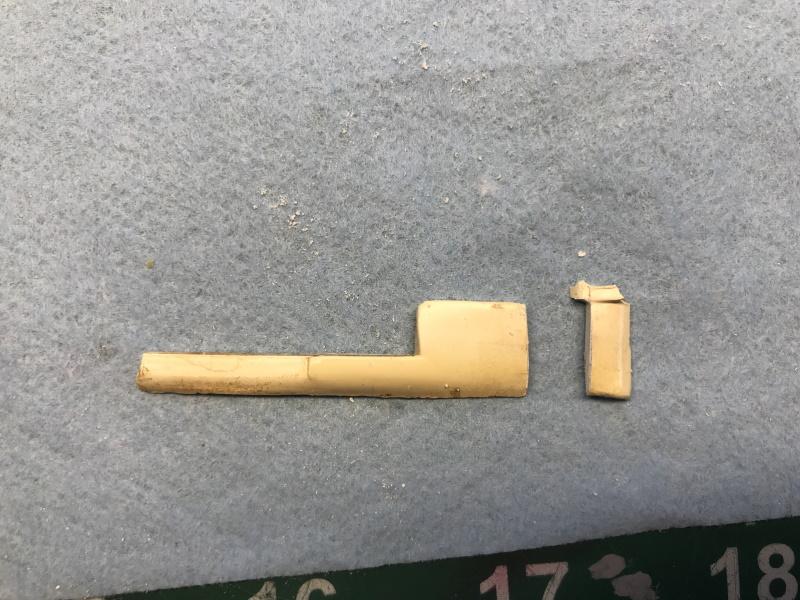
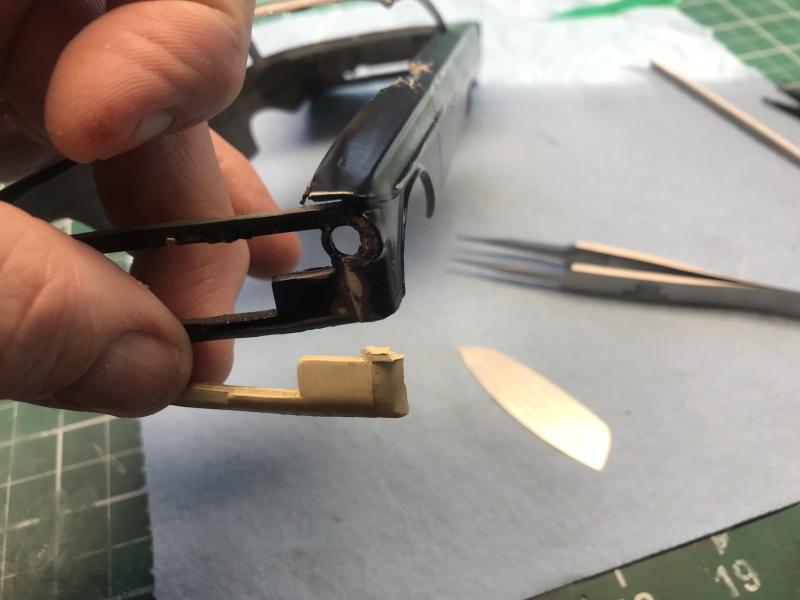
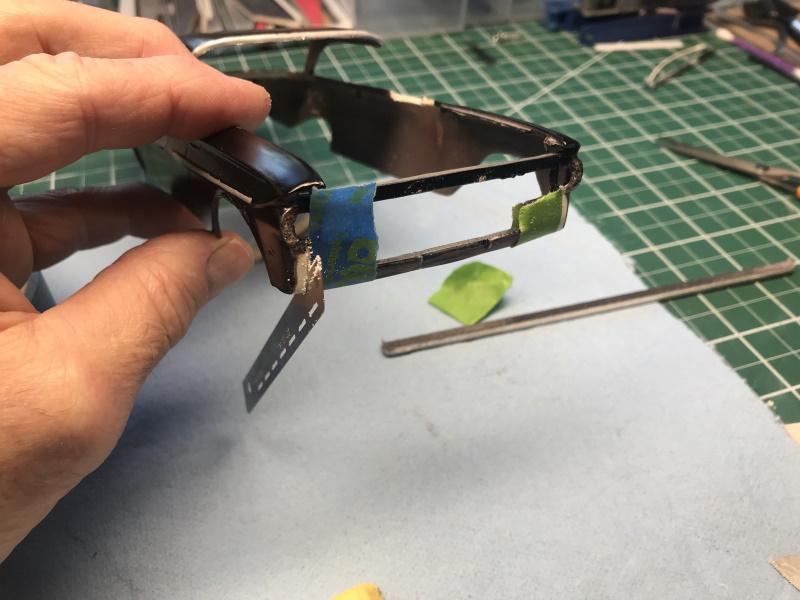
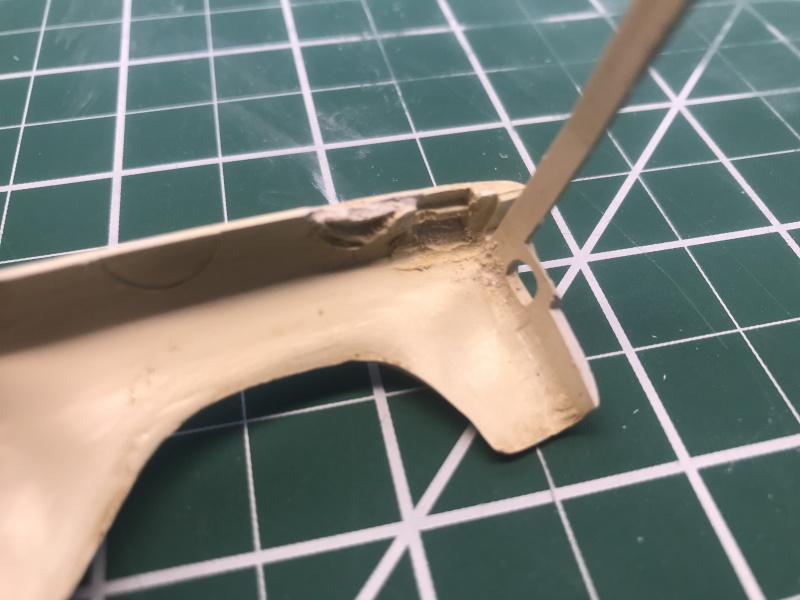
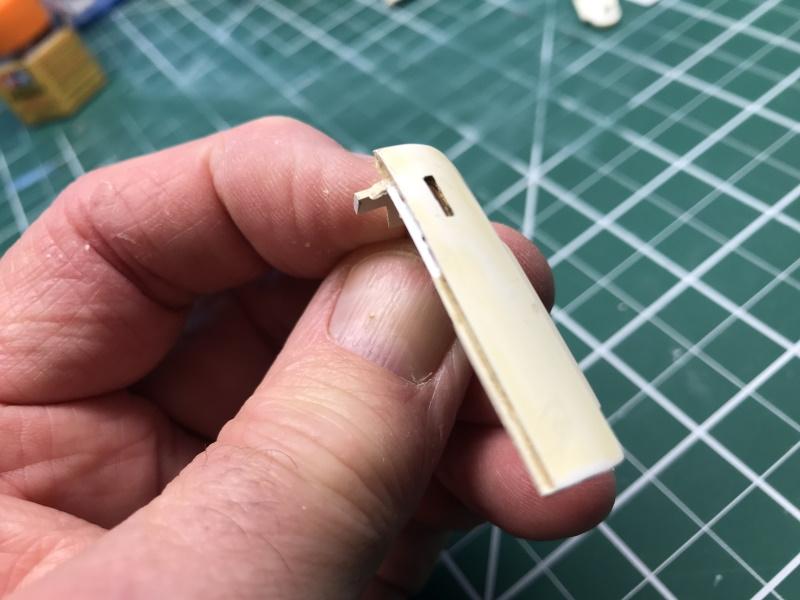
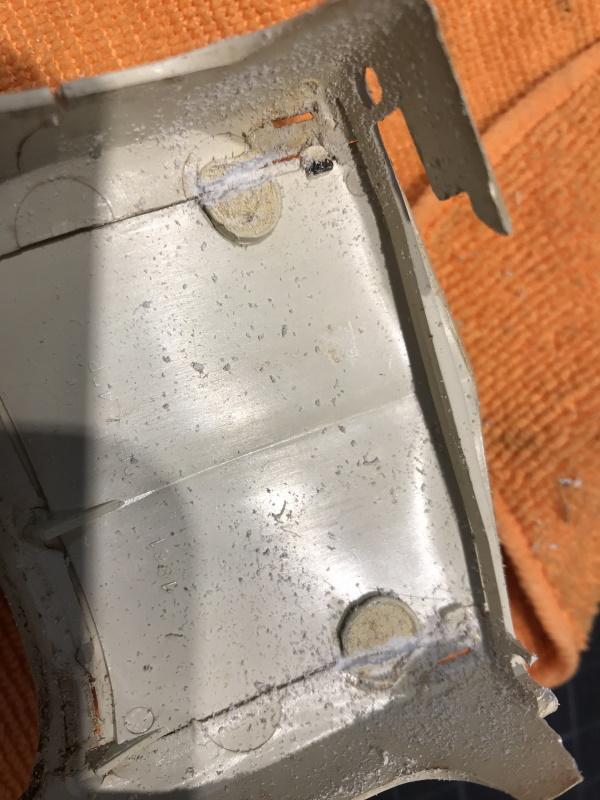
A pillar repair. Had a derelict 61 HT body to use as a donor. Rather than replace the whole section, including the vent window, I chose to only replace the part of the pillar that was missing rather than cutting into the body. The promo pillar was thinner than the annual donor pillar so it needed some massaging.
-
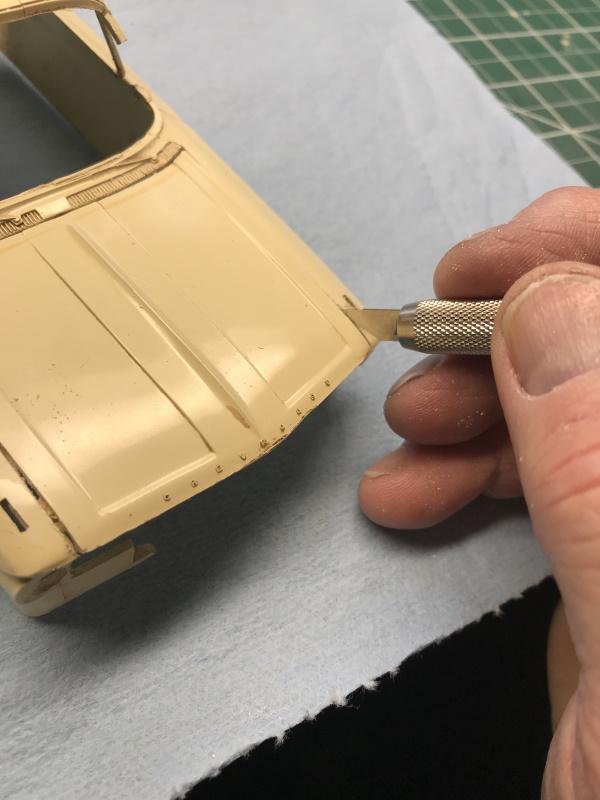
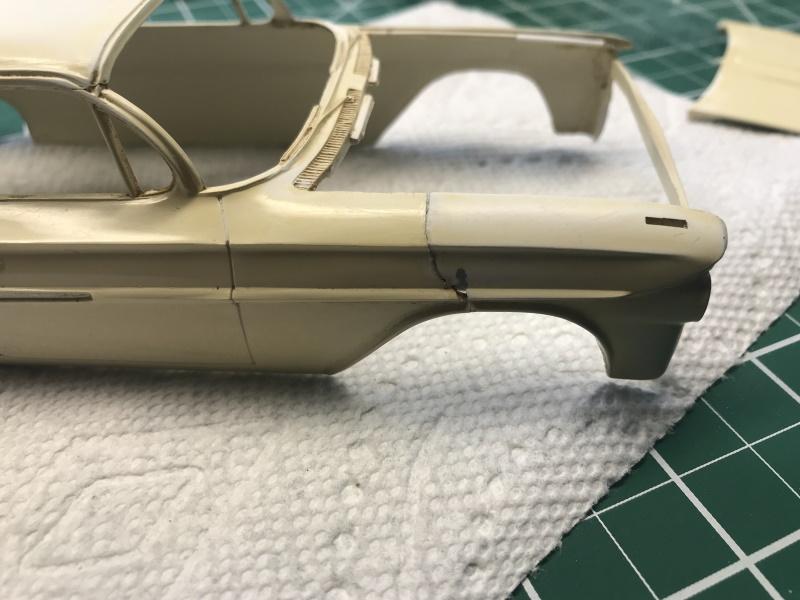
Next up is repairing the front valance.
-
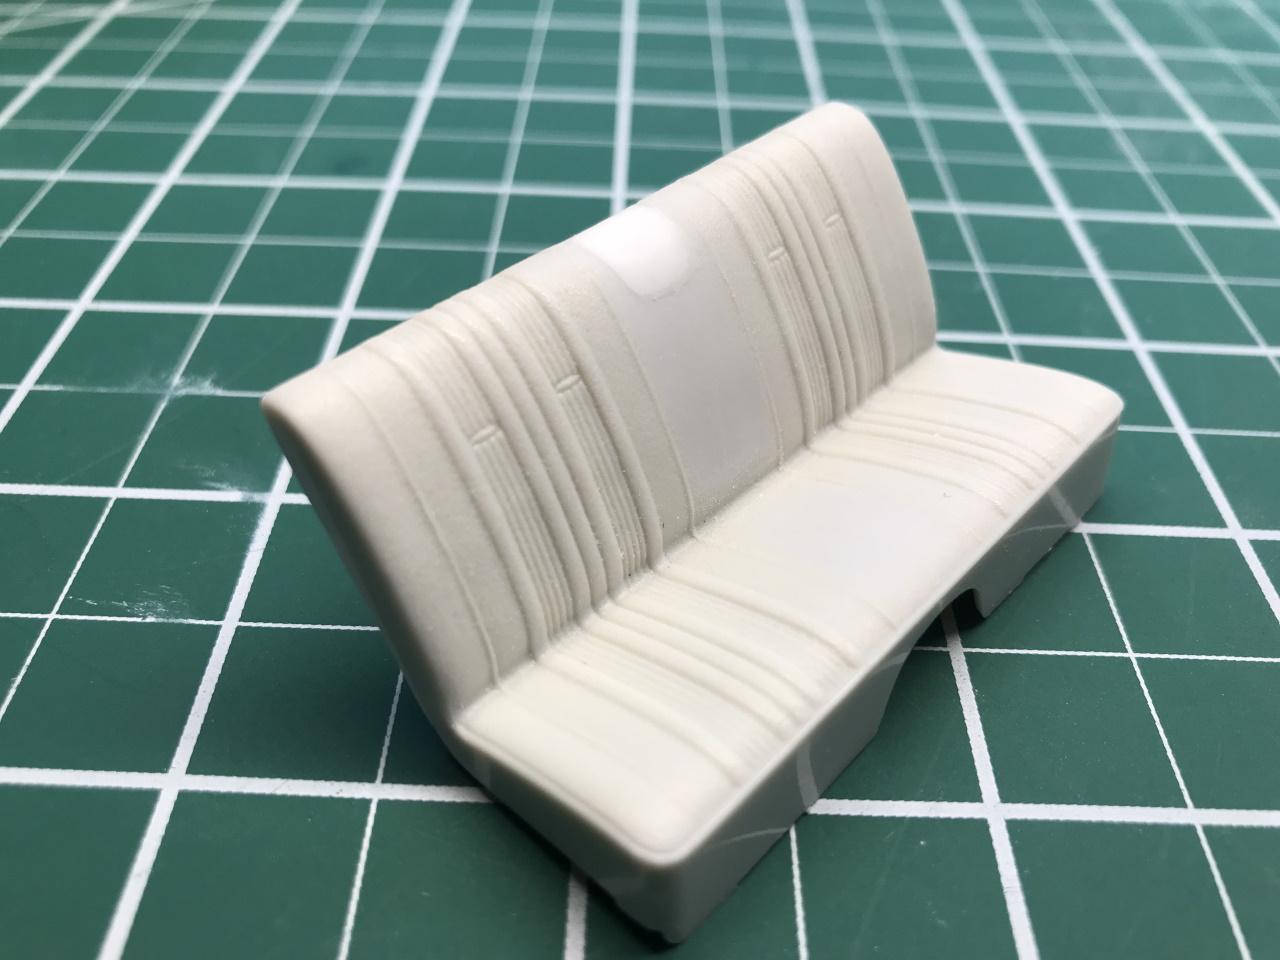
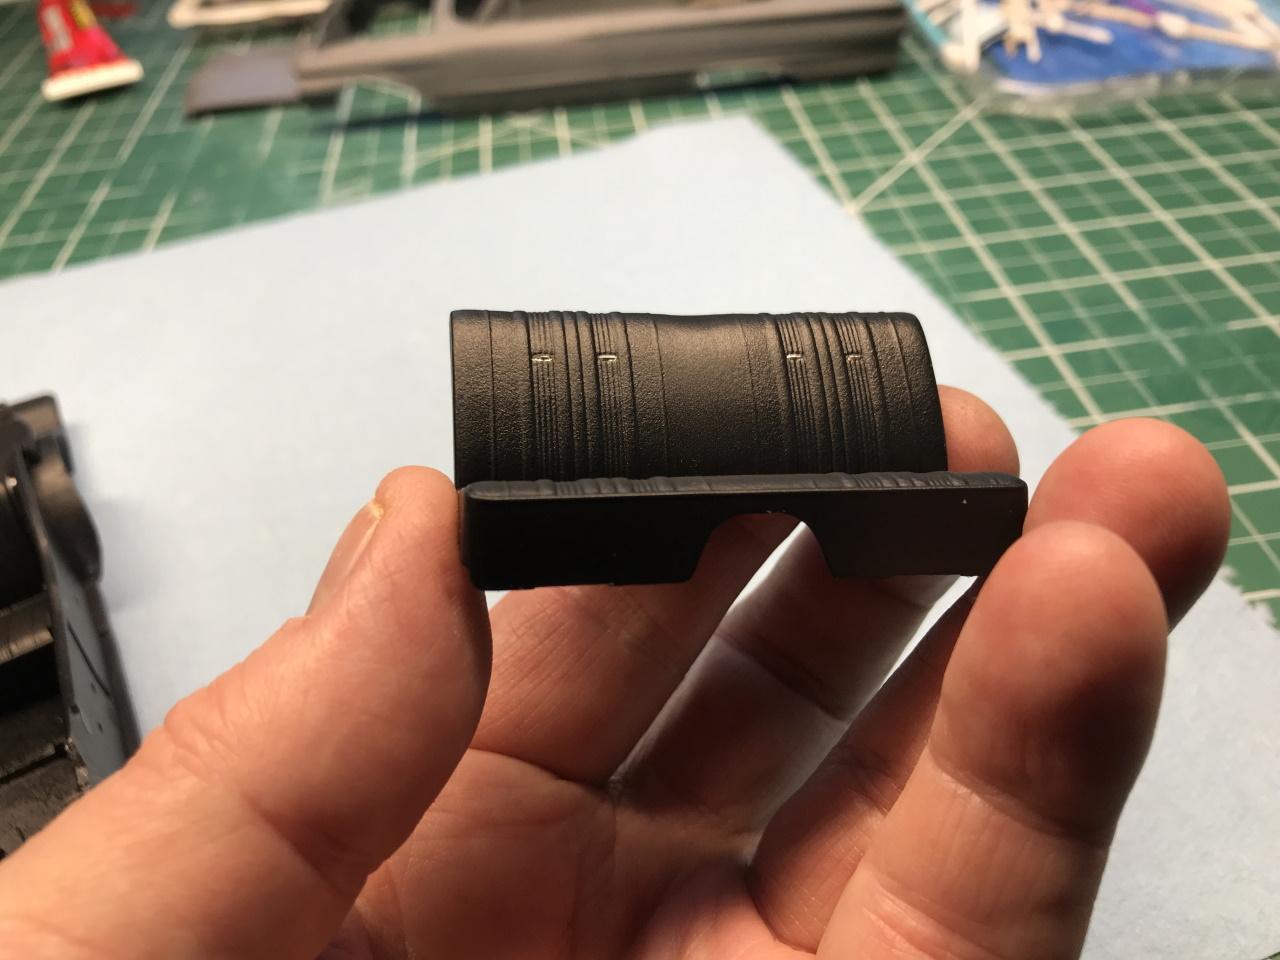
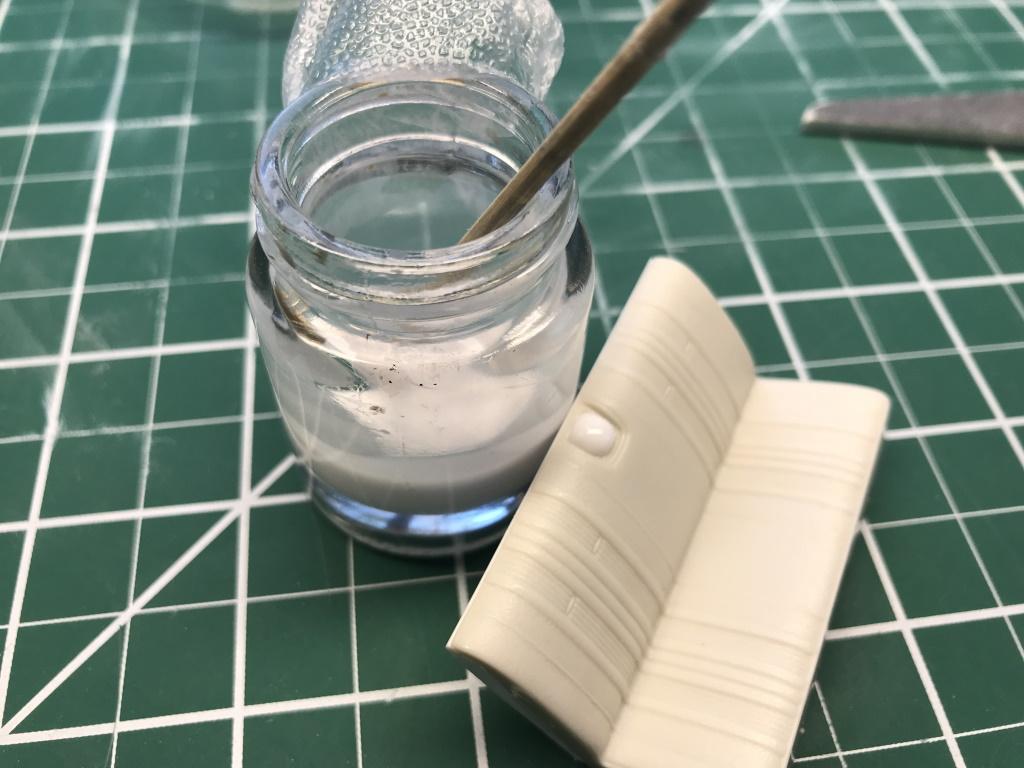
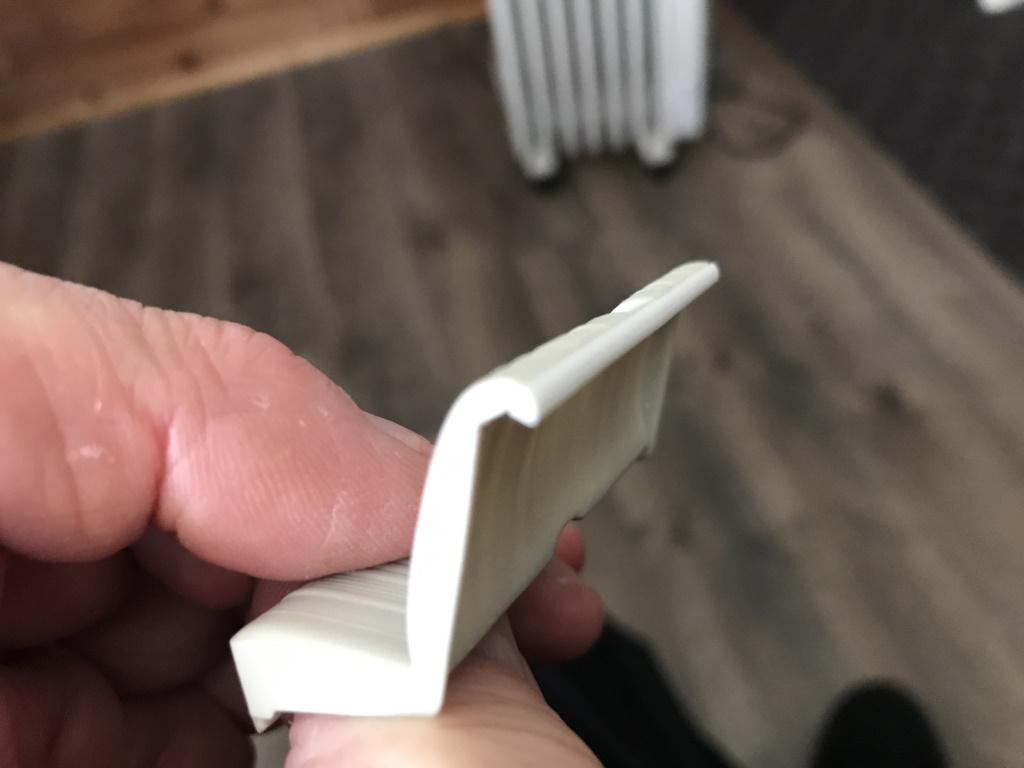
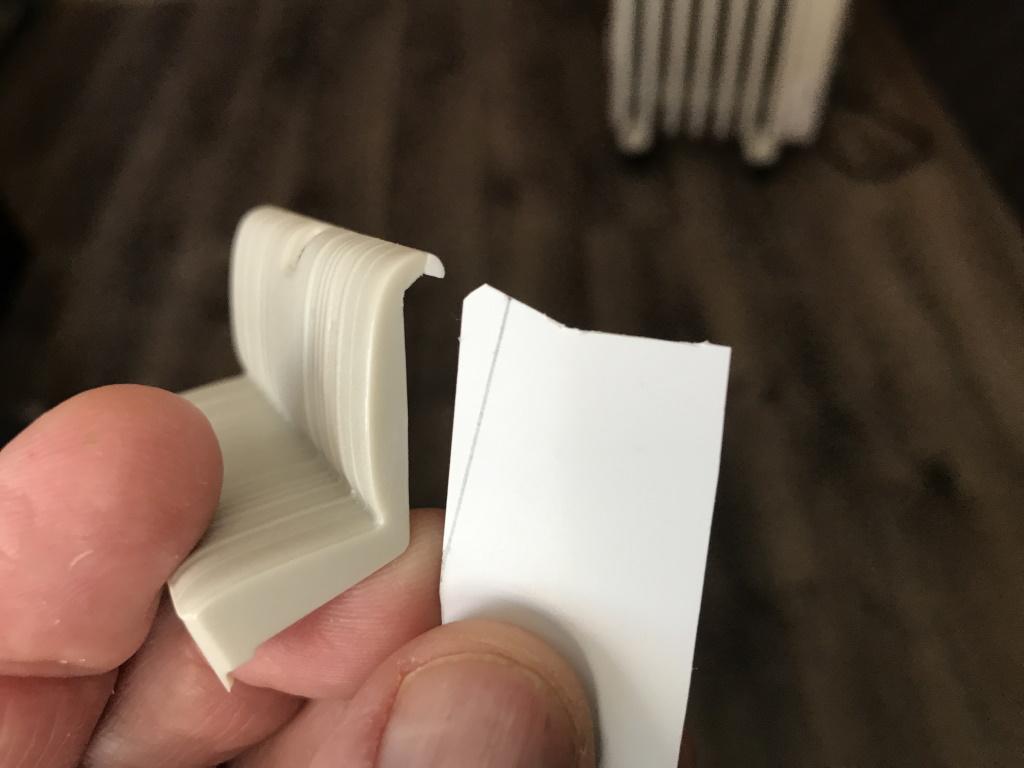
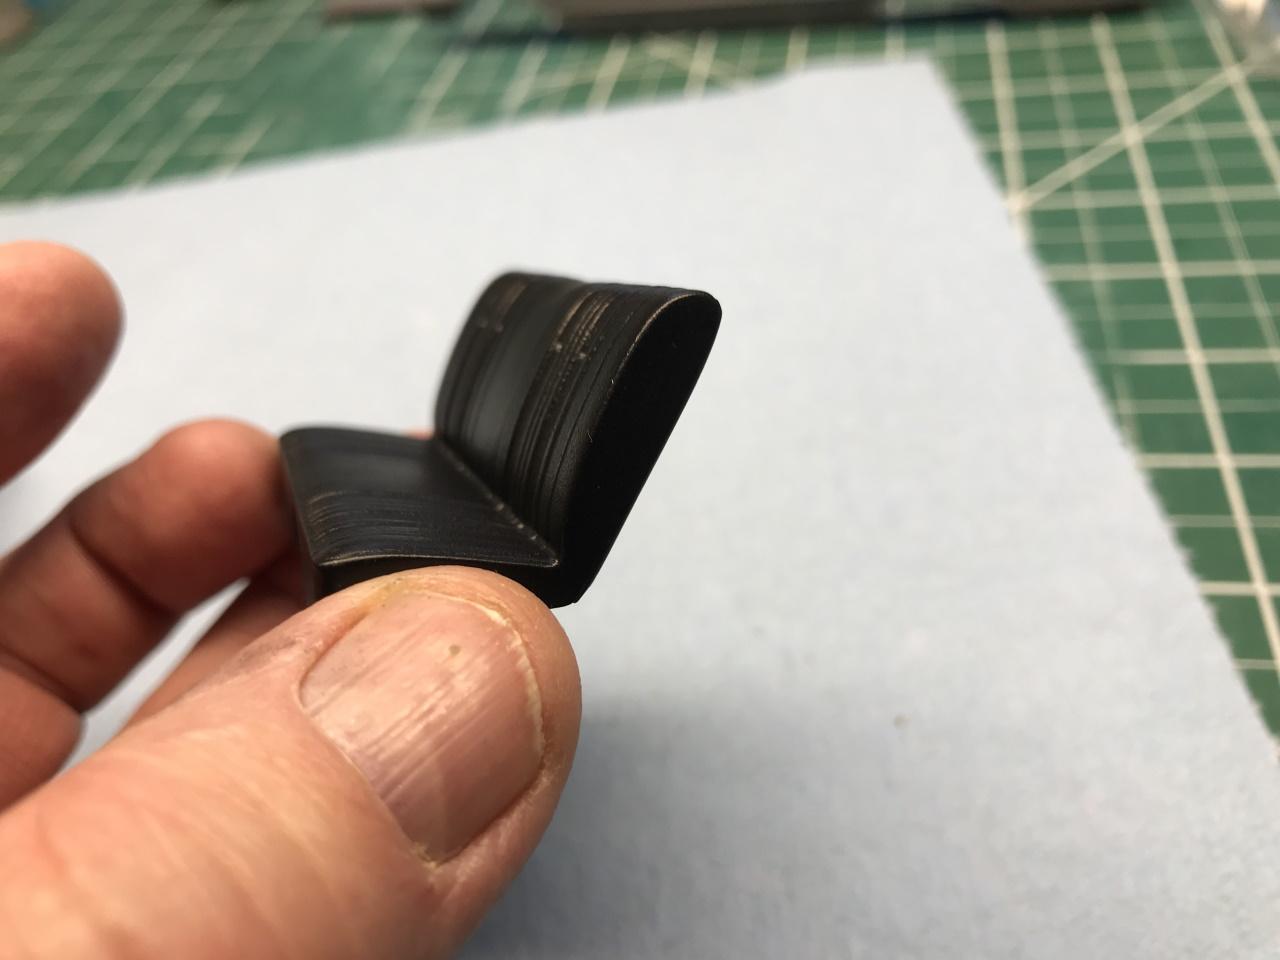
Finished up my '67 Supernatural Impala front seat conversion to a stock bench. I used a rear seat from the two door kit, filled in the speaker with styrene slurry, cut off the package shelf, sanded the center of the seat cushion and backrest smooth while leaving the textured remainder of the bench. I then fabbed a seat back using quarter round and 020 sheet. For the back seat it was much easier, only having to fill the speaker hole and sand the center sections of the seat cushion and backrest. I did not modify the front seat cushion to give it rounded corners, but rather just left it squared off "convertible style".
-
Welcome Murray!
-
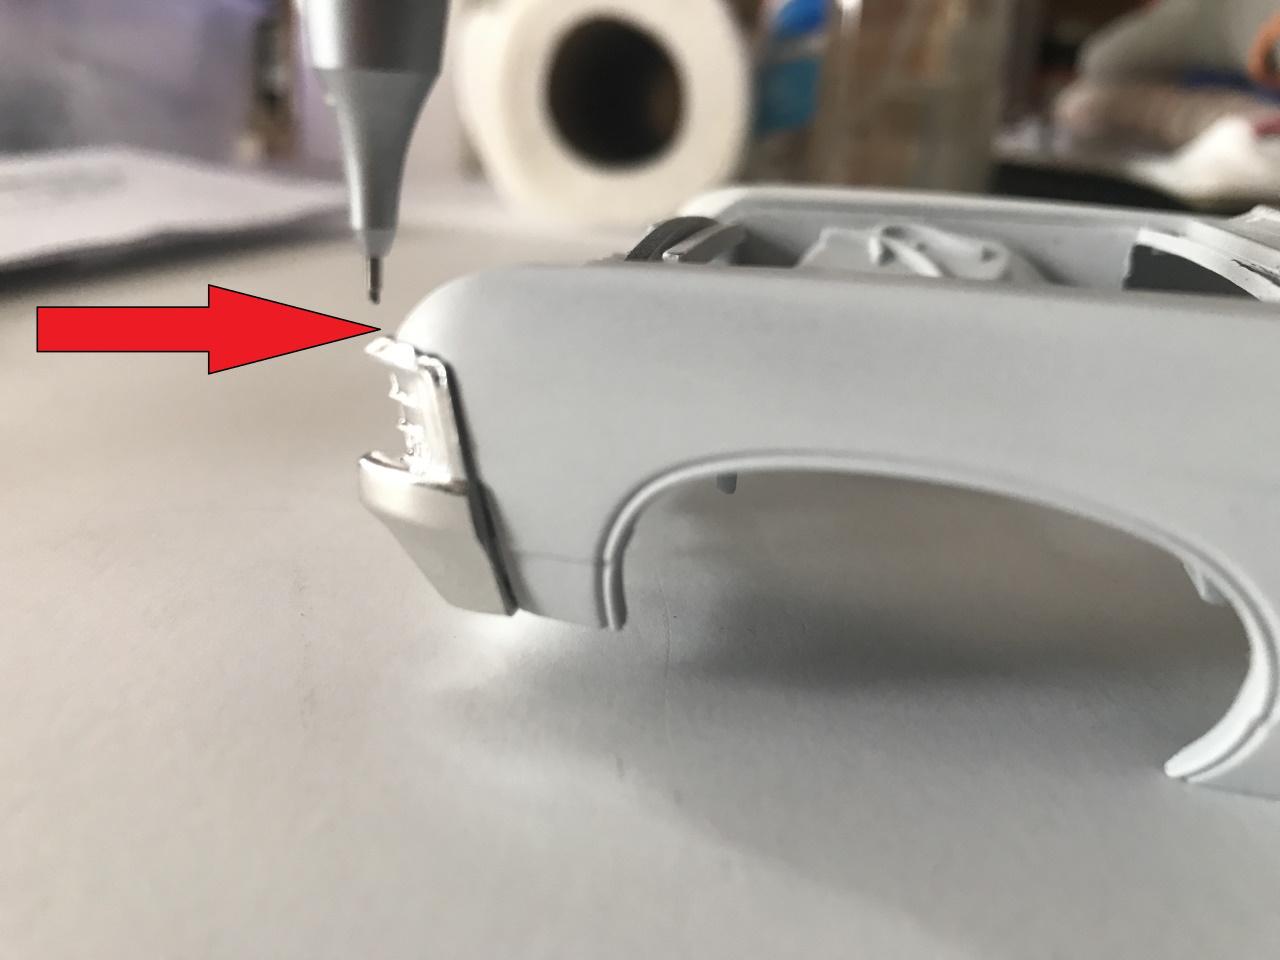
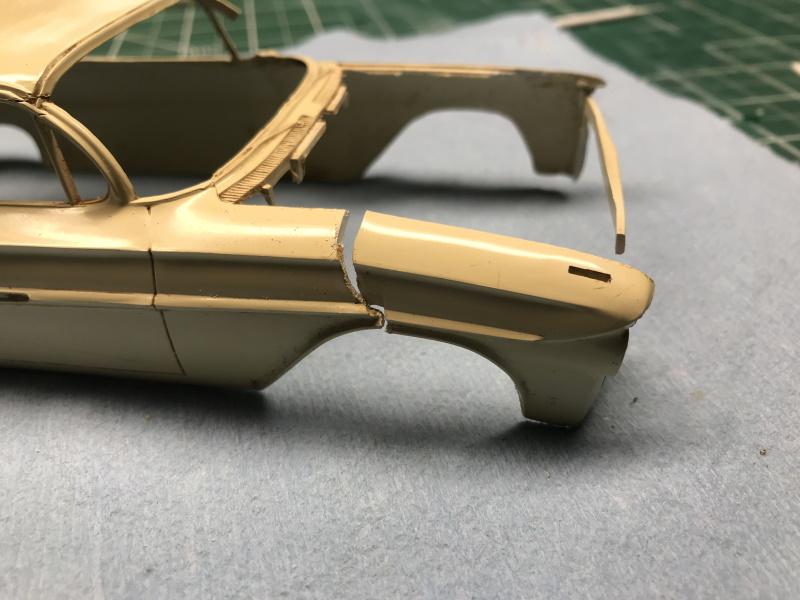
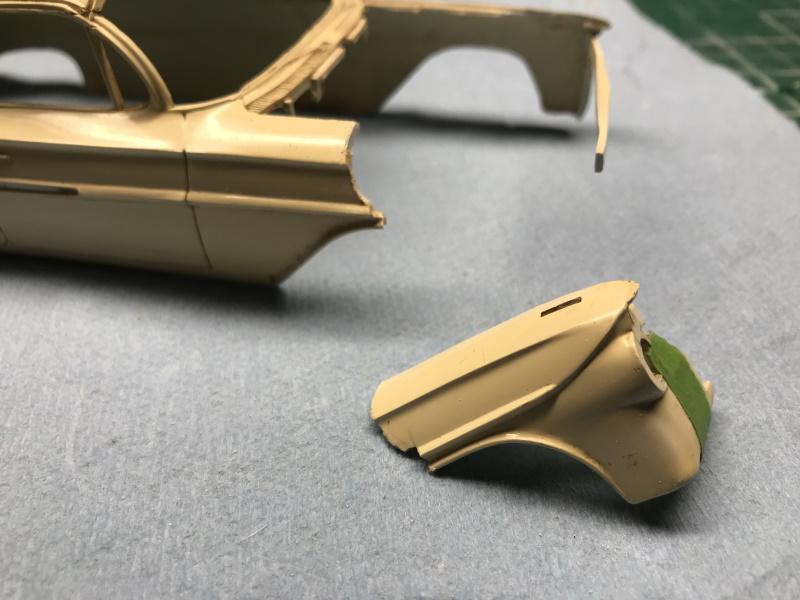
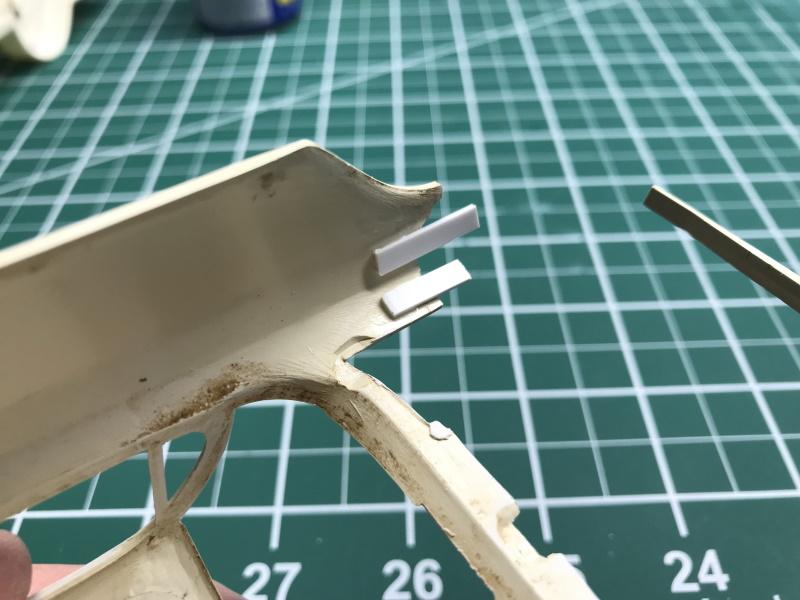
The plastic is very brittle, eliminating any hope of simply bending the fender back into shape and gluing. Add the fact that being a promo it had a stationary hood I chose to remove the hood and then the fender. I reinforced the joint with strip, which also made lining the fender back up much easier. After cutting the hood free, and losing some of the material on the fender, I needed to add some narrow strip to give support to the hood to keep it level with the fender. Roughed in the refit of the fender