Snake45
-
Posts
22,539 -
Joined
-
Last visited
Content Type
Profiles
Forums
Events
Gallery
Everything posted by Snake45
-
 I hear you on the dust. It shows up in most of my pics too. For some reason the camera pics up stuff that doesn't show up in real life, just as it makes metallic and metalflake paints look "sparkly-er" than they do in 3D. Cool build, by the way. Now you need to do a Porsche (1)911.
 -
Fantatsic Treasure found on Ebay
Snake45 replied to Modelmartin's topic in General Automotive Talk (Trucks and Cars)
I don't think even Snake-Fu could help that poor backbirth. -
She's about the only one of that whole era who does anything for me. She was apparently some sort of genius, and held some patents for radar or radio or sonar or something, too. I forget the whole story but I'm sure it's easily googlable if anyone's interested.
-
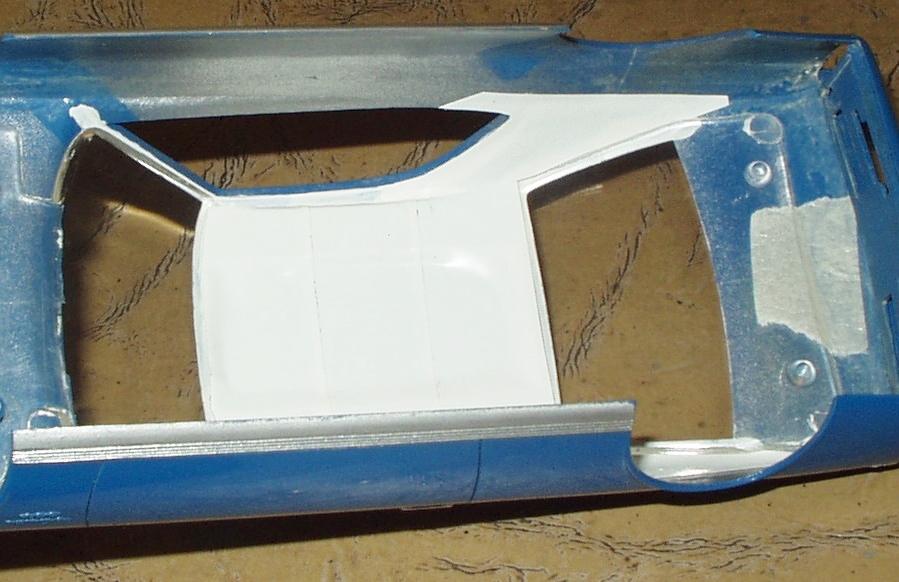
As I said, I can't explain it. Each was made directly off a loose AMT roof and they seem to be identical. That would have to mean that the Welly C-pillars are not identical. At any rate, I've now done the filework and didn't match either template exactly. I did file to the exact angle on the forward edge, but not to the template depth. I went about .030" past the roof drip rail on each side, so I could work a piece of .030 styrene onto the edge and make a new drip rail out of it. Will show how I did it all when I start the thread on this car in Diecast, soon.
-
Murphy was right!
Snake45 replied to Oldcarfan27's topic in General Automotive Talk (Trucks and Cars)
Similarly: A rare or expensive decal will not stick, or will flake or fall off later; conversely, if trying to remove an unwanted decal and save the underlying paint, no known method will remove it without also damaging the paint. -
So here's what I ended up with. I covered my work (the taillight area) with Walmart aluminum tape, and then covered that with red cellophane from a Valentines Day candy box. I was gonna cut the red away at top and bottom for the trim strips, but got lazy and just drew the trim on with my beloved Silver Sharpie. This is a Glue Bomb Rescue, after all, not one of my "A" builds. I'll do it right when I build MINE. No, it's not perfect, but I think it looks 100% better than the kit parts. Meanwhile, back at that Welly, I put masking tape on the sides of a spare AMT roof and cut templates, and then stuck them on the Welly roof to show how and where the shape of the C-pillars is wrong. I can't explain the difference between the two sides. I've now filed this roof back and finished the fix, and should be finishing up my Snake-Fu treatment on the thing soon. Will post pics in the Diecast section when it's done--stay tuned.

-
Painting The Inside of A Car Body
Snake45 replied to Markalister's topic in Model Building Questions and Answers
Go to an office supply or crafts store and get yourself some 3M white vinyl tape. Apply it to the inside of the roof like a headliner. Then you can paint the tape black, and you'll have an extra layer of opaque white between it and the black paint. Next time, prime the inside of your body with a good opaque flat white like Walmart flat white primer BEFORE you paint the outside, and then mask it off. Most of the headliner of this Javelin is white tape as described, which I did this way to avoid having to either brush-paint it white or mask it off having already finished the outside.
-
Very nice! You can't beat youth and enthusiasm.
-
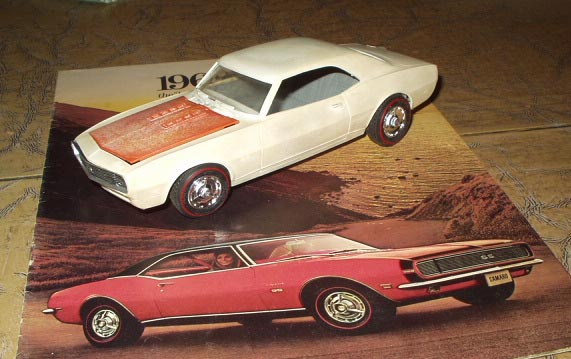
I pulled a set of them from an AMT '63 Impala to use on my own MPC '68 Camaro rebuild, to match (more or less) a car in the '68 showroom brochure.
-
I built one of these first go-around as an unmarked police cruiser. Burgundy with tan interior, IIRC. I remember it as a fun a relatively painfree build.
-
No I'm talking about a 1/24 diorama of a couple guys setting up a 1/6 scale RC Connie like the one in the video.
-
Promo Model's from the late 1950's to early 1970's
Snake45 replied to ranma's topic in Model Building Questions and Answers
Well, basically, all of 'em. But these are the ones I'd actually spend my money on first: '65 GTO '68-9 GTO '64-5 Chevelle '68-70 Javelin '66-7 Bonneville '65-6 Corvettes '66-7 Comet Cyclone '63-5 Chevy II '66 Skylark -
If someone makes a 1/144 scale kit of Connie, you could build a legit 1/24 scale diorama around it now! I'm thinking a truck of some kind (probably a trailer, too) is involved....
-
If that's not it, it's in the right ballpark--definitely the right idea.
-
I missed this the first time around. I've now done a few things in the same general vein and would get one--but ONLY if it's molded in color (preferably a metallic/pearl) to match the other stuff in my collection.
-
In '68, Camaro also offered wheel covers that looked remarkably like '63 Impala SS items. .
-
Murphy was right!
Snake45 replied to Oldcarfan27's topic in General Automotive Talk (Trucks and Cars)
Commonly done in Model Airplane World with Solvaset and some kind of super liquid cement. ALMOST did it myself once. -
There's very little from California--especially Frisco and LA--that can surprise or shock me with its sheer stupidity anymore.
-
removing enamel from resin
Snake45 replied to cobraman's topic in Model Building Questions and Answers
You don't need to leave Easy-Off on longer than 15-20 minutes. It'll do what it's gonna do in that time. Spray on, wait 15-20-30 minutes, attack it with a toothbrush under warm running water, repeat as necessary. Some enamel jobs can require 3-4-5-6 treatments to come all off. Others will come off with just one or two cycles. -
I like it--looks pretty good! Drive on!
-
The break's an easy fix, and the bend MIGHT work itself out with windshield installation (last year I restored an original Monkeemobile that had an even worse bend than that, but it straightened right up with careful gluing and clamping of the windshield--I was amazed)--but BOTH together compounds the problem. Here's how I THINK I might handle this: 1. Remove the support brace--it'll just get in the way. 2. Try to bend both A-pillars back as straight as possible. 3. Tape the windshield in place with masking tape. You might be surprised at how well everything fits. (I was with that Monkeemobile.) 4. Remove JUST enough tape to superglue or epoxy the windshield to the A-pillar on one side--I'd go with the right, since it's straighter. LET DRY/CURE THOROUGHLY. 5. Repeat step #4 for the other side. You might have to bend the A-pillar away a little to get your glue in. Again, let cure thoroughly. 6. Superglue or epoxy the top of the frame to the top of the windshield. There might or might not be a small crack or gap. Don't worry about it. 7. Reinforce the joint by running epoxy all along the edges of the windshield and frame (on the backside only). 8. Fill any gap or crack on the top of the frame. Did I mention I would do all of this FIRST THING before doing anything else on the model? That way if it doesn't work, I haven't wasted time ruining a body I've put a bunch of other work into. So then, step 9 is: 9. Mask off the windshield front and back with tape or liquid mask. Proceed with building/painting/finishing as normal. You won't remove the masking until the rest of the body is painted, polished, and finished.
-
It looks fine. Model on!
-
Magnificent!
-
White might work better. I use it on the end of the "stems" of headlights of diecasts and some models to avoid the beady google-eyes looks and it just makes that black center disappear. Might work for you in this case, I dunno, worth a try.
-
And if you want '67 Camaro hubcaps, I think R & M of Maryland has them. I lent one from an AMT '67 Camaro to Brad many years ago, and I think most of his line ended up with R&M, unless he went back into business.