swede70
-
Posts
727 -
Joined
-
Last visited
Content Type
Profiles
Forums
Events
Gallery
Everything posted by swede70
-
Thanks for the kind notice... Seen is the addition of a coolant expansion tank done with resin castings of this and that combined with some scratch built brace work. The tank is based on a turned aluminum 1:25th part done by S&S Specialties, while the cap is a 1:18th Lane '68 Shelby Mustang GT500KR radiator cap also reproduced in resin. Tedious to do in total... ...and seen just below is a test fit of the new dash roughly matched to the standard but extended steering column. The steering wheel is from a GMP '69 Trans-Am Camaro and will eventually be painted semi-gloss black across the spokes, while a Hwy. 61 '69 Camaro will sacrifice steering column decorative collar/trim to slide over what is made out here. Proceeding slowly then. Thanks... Mike K./Swede70

-
Very nice - looks really clean.
-
Just the revised dashboard with the heater vent panel otherwise positioned below cut off, while the instrument binnacle grew along the top and shrunk along the bottom and sides. Tidier in total, although almost invisible to behold. Thanks... Mike K./Swede70
-
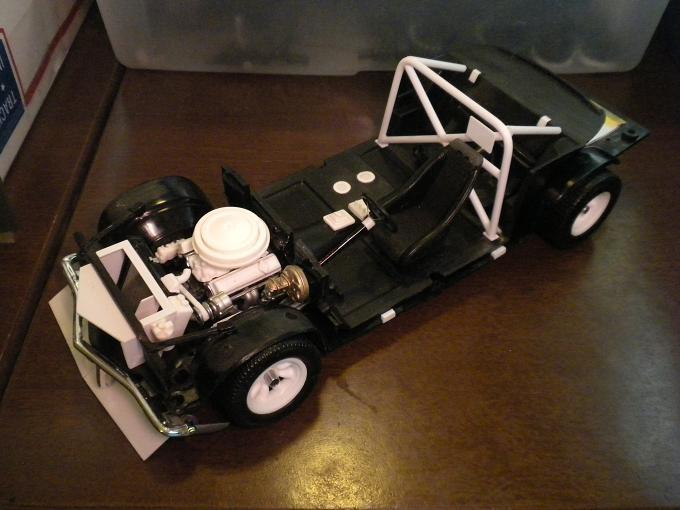
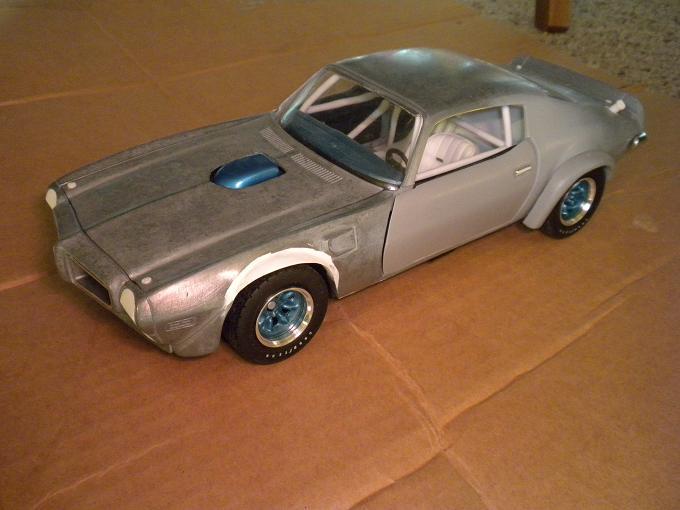
Another mild update to this project... Seen will be the roll cage starting to take shape after first filling in some holes and such across the interior. It only took three attempts to come up with the appropriate dimensions, but is finally looking and fitting as it ought. The soft radius for the top bend on the main hoop looks odd, but nevertheless reflects reality. Also and the cause of much worry, I was happy to discover that the standard ERTL steering column and steering mechanism (such as it is) will coexist with the GMP small block Chevrolet Trans-Am engine as well as the power booster chamber without any modifications required - whew! Thanks for reviewing this most recent project update... Mike K./Swede70
-
Nicely done. Thanks for taking the time to gather your insights and relating them so. Mike K./Swede70
-
Sort of a minimal update; i.e. just enough to telegraph that I have a pulse if you will with regards to this project... Most write-ups concerning the Chaparral Trans-Am Camaro(s) will speak of the special fiberglass dash board or pod fitted to the cars, while for review of photographs it seems to me that the instrument binnacle was so-fabricated and fit into a more or less stripped standard dash with the raised sections cut or ground off. Consistent with this impression and needing to fashion such before a roll cage can be made, the photo attached suggests a start. I'll have to fabricate the binnacle again, making it longer front-to-back across the top while tucking it in a bit better along the bottom, but as a start it isn't horrible... ...and a revision of past work here, the duct work forward of the radiator support drooped a bit (it likely still should - a bit) and furthermore, the relief cut into the top panel of the duct ought not to have been there; i.e. the cast-in hood latch assembly extended further down than I'd desire and needed to be finely trimmed out so the contour of the aforementioned top panel might be straight instead. Very tedious to do given how soft the plastic of the ERTL chassis and related parts are. Further updates in this regard include the addition of side tank detail on the radiator core proper, a scratch built inlet/hose attachment point, and an evened up photo etched radiator surface matrix overlay that otherwise wasn't sitting down properly. Sometimes all the trouble just makes me want to reach for a well-engineered Tamiya plastic kit and forget about the fabrication of well nigh everything necessary to get anywhere at all... Sort of a bore in total, but it's what I've been up to! Thanks... Mike K./Swede70
-
Greetings, I think the color is known as Ontario Orange which is a pleasant and warm tone certainly. Nice work performed consistent with bringing this good tool up to snuff. Thanks for sharing... Mike K./Swede70
-
Thanks for the interest and replies... For isolating parts from damaged, ruined or discarded projects of my own as well as those afforded by a few other 1:18th enthusiasts, some of the most egregious expenses associated with fitting out my projects with this part and that have been minimized. Sometimes I've pushed too far and have wrecked a body or chassis, while at other times perhaps a private buyer has purchased two or three cars necessary to complete a custom project, leaving whatever remains in my hands or the hands of hobby friend or friends who in turn may trade items back to me. Further, limiting my focus to period road racing topics and homologation specials so-themed and sticking with 1:18th diecast from about 2000 to the present, in addition to experiments made with hand cast resin has allowed me to stretch what resources I have across time and across projects - not that such measures strictly make things cheap! I've never taken on or solicited intensive build projects for pay, and hence I'm largely clueless as to what I dedicate to my efforts in terms of time and money. For me it's been a hobby and about networking with like-aligned friends rather than calculated self promotion, so in a sense I really don''t do the math... Concerning what parts have gone into the Chaparral project, within the past year I effectively destroyed the paintwork of an old 1:18th scale GMP 1967 Penske Camaro and subsequently cloned this and that from it before sending along the shattered remains to a friend. For long I didn't have a single four barrel intake to mate to the off the shelf ACME/GMP replacement Chevrolet small block Trans-Am 302 engine, so this spurred my interest, while recently a 1:18 GT 40 Mirage missing a lexan headlamp cover and loose/out of the box was picked up for the near nothing price of $9.99 at a local hobby shop as a trade-in. Combing this with news of the Replicarz Chaparral Camaro to be and to register that their effort would have no opening panels, scant chassis detail, no engine, etc., and the reader will begin to understand how things start to come into focus. In a sense, nothing is ever going to be cheaper looking out into the future, so why not see this or that project through however long it might take? The picture seen above communicates what I isolated and incorporated into the engine build so to speak, these being the best rendered items I could find across tools... Definitely I'm underwhelmed by where the 1:18th diecast/resin cast automotive hobby is going; i.e. continually rehabbed old tools showing their age, diminishing detail, spotty build quality, and the pressure of ever increasing prices. The new generations of resin models sans opening panels can sometimes be good, but if a topic has been done before and the rudiments of a project exist to be tapped consistent with turning up something better, how can one cheer the arrival of $239.95 sealed rendition of anything? Although I'm super pokey and slow in relation to what I do and what I accomplish, at this point I don't think (for example) that some injection molded plastic roll cage is strictly going to be a match for something done in hand bent plastic tube with a brass wire core. For application, I believe I can amp up the content consistent with affording myself what the market won't. Oh - and a great 1:18th GMP based late Trans-Am Camaro you have there J.F.! I'd seen it lurking in this and that photo of your large collection, and can't help but marvel at how deftly accomplished it appears. Thanks... Mike K./Swede70
-
That looks very good and certainly sound. Sox & Martin will have expressed interest at the very least I'm sure! I'm thinking of picking up a white Chevrolet angle back before it vanishes from store shelves, but I fear the model plus a certain Chaparral Camaro will wipe out display case space remaining, with the result being my having to live outside - sigh... Mike K./Swede70
-
Greetings, I don't know if it would help you, but a favorite and non-obvious hobby accessory for 1:18th scale aluminum wheels to reach for would be something called the Pegasus 23 inch Stepped Aluminum Sleeves sold as a pack of four with tiny sidewall tires intended for use on 1:25th lowrider topics. If you find suitable ARE CP-200/'Daisy mags' wheel centers, chop up and adjust the aforementioned aluminum parts to come up with whatever depth and width of wheel you desire. I've attached a picture of a Welly Trans-Am BOSS 302 with modified ERTL wheels with just plastic GMP outer lips to communicate what can be done. Also, I've seen a resin transkit for the wheels in particular for the topic you've taken on, although they represent something old and acknowledged as out of production and stock. For application it might be possible to find that which you require, although I don't have any solid leads to afford you to my regret. Good luck! Mike K./Swede70
-
1967 Petty Enterprises Hart-Fullerton Plymouth Belvedere
swede70 replied to ibj40's topic in Diecast Corner
Looking nice and making good progress. Mike K./Swede70 -
Some other work then... Seen above, the cast-in drip rail trim and weather sealing has been filed off and flattened as necessary. Further, I found that the side window openings seemed a bit chopped and lower than what I'd desire, hence each side was filed up to effectively open the greenhouse to a modest degree. The exterior door handles have been ground flat and replaced with '72 Welly Pontiac Trans Am Firebird items, while in some photos one will see a '68 Lane Firebird exterior side view mirror in a pretty standard spec. Even without flares the model doesn't appear horrible. Nothing epic, but the cast-in chassis identification has been sanded out, while the cast-in fuel tank has been removed, plugged, and replaced with a fabricated fuel cell housing. Lastly, the white rectangular plugs disguise where side pipes might otherwise be mounted on this ancient tool. Thanks... Mike K./Swede70
-
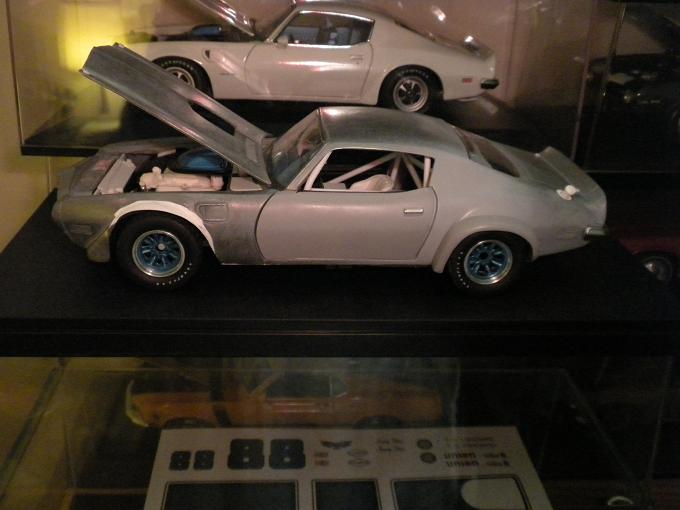
Moving along then... The old ERTL '70 Camaro is usually found as a Z/28 with the early season rear lip spoiler in place. Such won't do on this model as the '70 season gathered pace, hence a less common Pro Stock release had to be purchased to come up with the rudimentary D80 high spoiler that was homologated and fitted later. Trouble is encountered given the ends of the spoiler are too pronounced and rounded, while the end caps aren't fully finished and had to be supplemented for the addition of plastic, Microballoons filler and light putty work. Happily the refueling port cut into the trunk wasn't ghastly difficult to do, requiring only that I file down a small section at a slight angle without further complication. Generally the effort is bearing fruit. Thanks... What's needed then... ...sort of a starting point in terms of the rear spoiler largely unmodified at this juncture. Notice the missing end cap profile along the bottom sides... ...looking happier for reasoned additions. I shouldn't have carved out the deck lid pin retention cut outs straight down as I did and will need to fill in the bottoms of each to create access holes instead, but still - not terrible in sum. Notice the refueling cut out taking form on center section of the spoiler along the bottom... ...looking better still for further shape refinement, some plug work, as well as filing consistent with affording space for the refueling point. Lastly, the surface profile of the rear bumper on this tool is pretty lumpy, so I've sanded out what I could to even things up. Notice too that the tiny overriders otherwise a feature of the back of any ERTL second generation Camaro were removed at the same time. Thanks... Mike K./Swede70
-
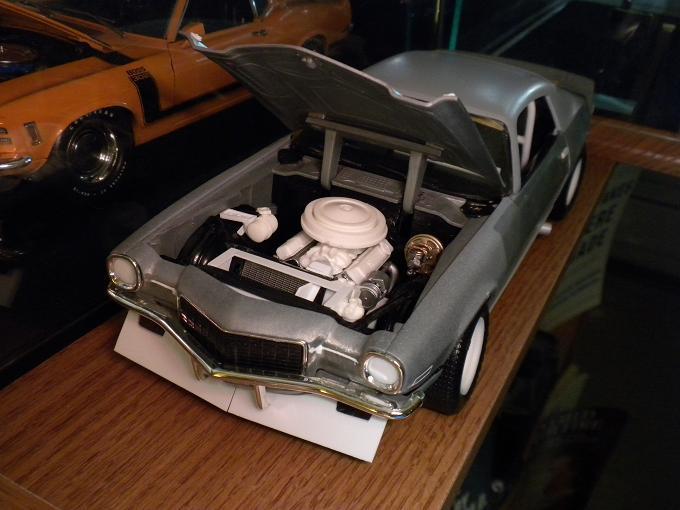
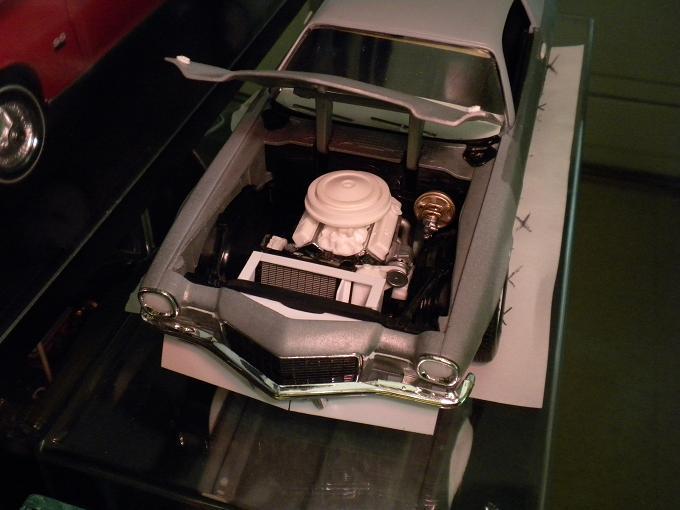
This would be some stuff done underhood in recent days, Shown is the updated ACME/GMP engine wearing resin Hwy. 61 '69 Camaro Z/28 finned valve covers, as well as a GMP '67 Penske Camaro single 4BBL intake. Notice too the angled radiator installation plus oil cooler, most of which is either modified GMP Trans-Am Camaro stuff or material fabricated from sheet plastic sized to suit. Just cleaning up the radiator support and perforating such was a challenge given the chassis plastic employed on this old ERTL tool is very soft and is hard to work. Thanks... The topic seen at Laguna Seca '70 and photographed by Karl Ludvigsen. I had to do the aforementioned radiator installation, come up with the fresh air seal and AC air filter lid, as well as reposition the alternator versus how the ACME/GMP engine is configured as-delivered. Compressing much effort, this is how things are looking. Partial upper control arms may be spied, while the master cylinder and power booster are GMP Trans-Am Camaro stuff again. The cast-in battery and windshield wiper fluid bottle have been cut off and hence vanish from the scene for reasoned application. Note that stripping the paint off of the ACME/GMP engine takes determination, although it can be done. I had no confidence that I could simply paint over all that ORANGE finish, hence it HAD to come off! On a happy note, but for some installation pegs that required grinding down as well as pretty modest firewall sanding, the engine plus headers pretty much drops in. Thanks... Mike K./Swede70
-
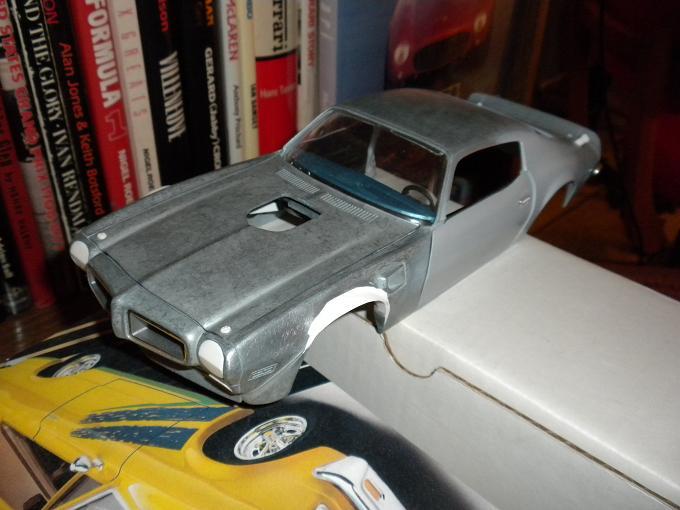
Greetings, Intent on creating a coherent grid of factory-backed 1:18th SCCA Trans-Am entries even as my focus shifts from project to project, this would constitute the beginnings of a '70 Chaparral Camaro. Replicarz intends to release a sealed resin version of the topic for $239.95 about a year from now, and needless to say - I think I'm priced out! So, that said, my aim is come up with something competitive with all opening features, fabricating (if ever so slowly) that which will be needed consistent with doing what it is I do. Expect the usual activity, followed by dead silence, followed by renewed activity... The topic in all its glory, seen at Mid-Ohio '70. I'm pondering flares, while most of the difficult parts gathering has been done; i.e. the less-common ERTL standard-nose/full front bumper shell '70 Camaro material is in hand, complete with a flat hood, doors nonperforated for exterior side mirrors, while the tall D80 rear spoiler is also mine to use with necessary modifications. Wheels will be 'my' resin Minilites, tires will be Jouef/Eagles Race/Universal Hobbies Ford GT40 Mirage Firestones, the engine, an ACME/GMP Trans-Am Chevrolet small block 302 with mods. to reproduce the spec. needed. I tend to get lost fabricating and mocking up this and that, hence nothing really changes does it? Thanks... Mike K./Swede70
-
Greetings, A short '70 T/G Racing Jerry Titus Trans-Am Trans Am Firebird update this - albeit nothing dramatic. Some notes outlining what is seen may be found beneath each image uploaded. Thanks... ...given the removal of the honeycomb-shaped trim center cap on the stock steering wheel couldn't be achieved cleanly sans use of a lathe, I decided to employ a pair of wheels so that I could sand off the center of one example, drill the spokes, and then mate a second padded rim to what remained. It will work! ...seen above is the old '70 chassis with the new '69 ACME Firebird Pontiac 400 (nee 303 c.i.d. then) engine installed plus mods. Surely an improvement given how primitive the old ERTL tool is in this regard. ...noticed are the cleaned up and revised refueling sites drilled through the shell and plugged and depressed slightly for use of plastic rod situated in plastic tube. The fuel cap employed here is a resin clone of a Hwy. 61 '70 340 Dodge Dart piece. Only seen obliquely, a fabricated radiator support holds in position a 1:18th GMP '70 GMP radiator as well as other items. ...while here I decided to pull off the fill panels made for the headlamp buckets as well as the front indicators. Each was puttied and reshaped before being duplicated for the creation of a urethane mold. A bit cleaner then... ...and finally, the front flares integrated into the filed out front fenders. For heating the flares in hot water I was able to subtly reshape each consistent with coming up with a more balanced profile, and hence matters are better. The rear flares need further mass and shape refinement, but aren't wildly off for purposes of being a starting point. Thanks for reviewing this update... Mike K./Swede70
-
Excellent weathering technique. Thanks for sharing... Mike K./Swede70
-
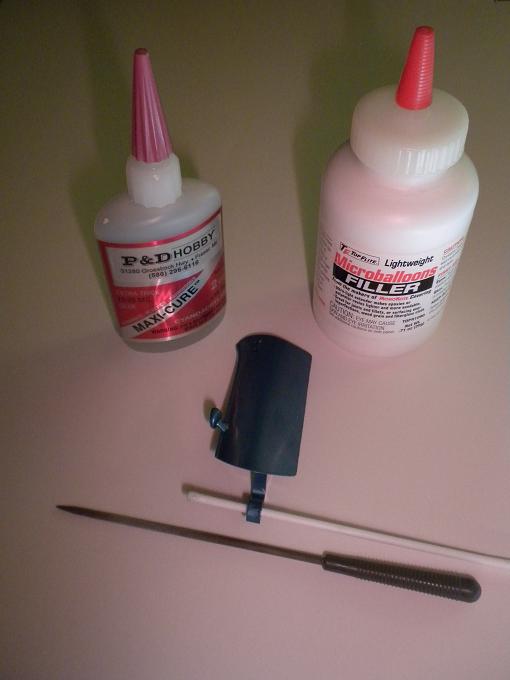
Greetings, Picking up on a project, I've been unhappy with the loose and floppy operation of the doors on an old 1:18th ERTL Pontiac Firebird Trans Am and tried the following to tighten their operation. One can only achieve so much for applying torque to attachment screws in excess or for doubling up washers, hence what is suggested here has value. Kept brief, I applied some thick CA glue to a plastic rod intent on evenly applying a coating of the stuff to the inside of the hole cast into the dog leg hinge as-delivered. I needed something to take up the slack in the hinge, and this seemed a low-tech way to do it. While things were still wet and setting up, I further applied many a dusting of MicroBalloon filler to lend greater substance to what was just glue at this point. I dusted from either side, trying to apply the filler from all directions so as to be consistent. After waiting for the doors/hinge castings to dry, I was pleased to discover that enough bulk had been added to the inner diameter to each hole that I couldn't fit either door into position; i.e. I'd have to employ a small round file to open up each for a selective fit. The process was slow for the stuff is hard, but then I view this as a plus given one can very deliberately creep up to what degree of tightness is desired. Something to try then if one isn't strictly availed the option of pounding down on the top of a rivet, etc. Thanks... Mike K./Swede70
-
1967 Petty Enterprises Hart-Fullerton Plymouth Belvedere
swede70 replied to ibj40's topic in Diecast Corner
It's looking very good thus far. Thanks for sharing... Mike K./Swede70 -
Looks terrific! Thanks for sharing and compliments on a task well-done. Mike K./Swede70
-
Removing lettering from a diecast
swede70 replied to junkyardjeff's topic in Model Building Questions and Answers
Greetings, Just a light update of what's been said thus far. Try to go with a non-tinted variety of whatever nail polish remover you employ. The tint can stain a light colored surface, hence the need to go with whatever clear or modestly-tinted option (light yellow is better than medium pink for example) exists. I used to apply Marlboro decals to many a McLaren F1 topic, while it was a horror to discover that the white painted sections could be (temporarily) damaged in this fashion. As many a hypocritical parent has shouted - do what I say and not as I do! Also - be sure to have a large supply of cotton swabs on hand consistent with introducing new swabs on a quickly rotating basis before the nail polish remover evaporates away and allows material to be dumped back onto the surface to be cleaned. Turn the cotton swab consistent with drawing away the tampo print and pulling residue from the surface, while very soon indeed you'll need to toss the swab out and grab another. Straight acetone is of course 'hotter' than nail polish remover which contains only a percentage of such. Oh - and maybe consider seeking out what are termed 'makeup removers' which are sort of super cotton swabs with tighter wound cotton balls with a blunt profile on one end, and a comparatively sharp point formed on the other. All drug stores have them, while the flexibility of these becomes apparent through use. If it helps (and even if it seems to border on overkill), my own practice is to scrub down the majority of whatever tampo prints are seen with usually about 50 to 100 swabs employing nail polish remover without risking underlying paint damage for using too powerful right up front. This 'done', I've found it helps to take digital photo images of the work to reveal what has been missed. I've discovered that residue that isn't strictly visible to the eye can be turned up for taking a few images and inspecting such carefully. Having isolated what work remains to be done, I'll then pull out the 100% acetone and apply some to a buffing rag and work over the entire surface that was formally home to the tampo print to basically carry away what goo remains. Further photos are taken and inspected, another round of 100% percent acetone cleaning is done (quickly and without great pressure applied), and then things tend to come together. Good luck! Mike K./Swede70 -
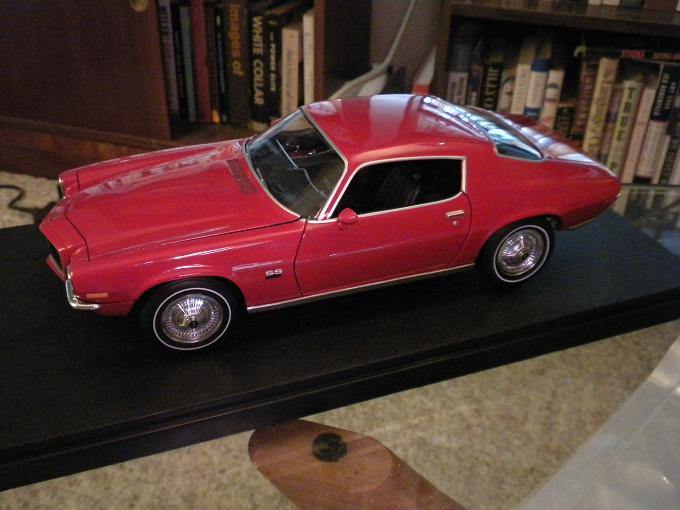
Greetings, Having secured a set of actual AutoART '69 Corvette wheels and tires, I decided to swap out the resin clone wheelcovers and Hwy. 61 tires with what is now seen. Fortunately, the wheels are zero offset, hence to trim the gray rings bonded to the AutoART wheelcovers down to half the thickness of the rim width is all that was strictly required to ensure they'd be happy on this model. The fit is tight enough across assemblies to the extent that no glue was required. The model sort of looks like a period game show giveaway at this point, although at least it's a bit different! A new ACME '65 SS396 Chevelle engine has been ordered and will be added soon. Thanks... Mike K./Swede70
-
Thank you for posting these - certainly it looks to have been a nice outing. Mike K./Swede70
-
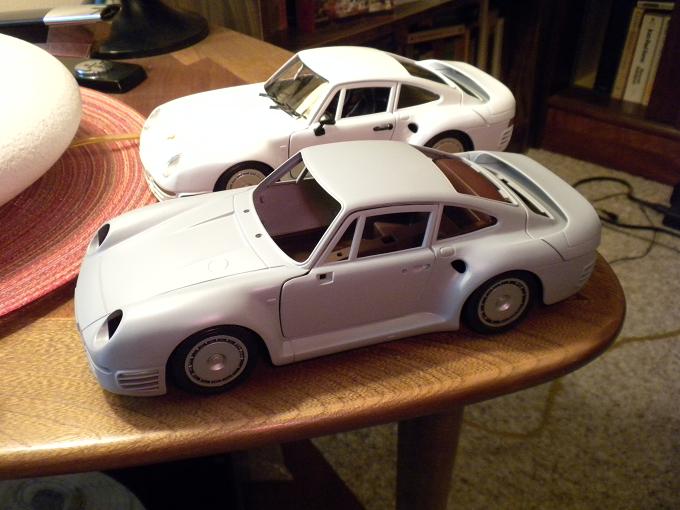
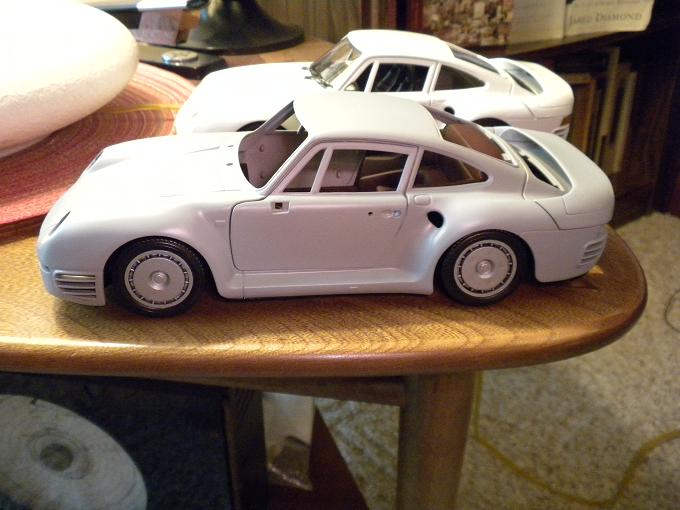
Greetings, This would be a 'foundling' 1:18th scale Tonka/Polistil Porsche 959 that was traded in at a local automobilia store in lieu of the delivery of a svelte AutoART rendition of the same topic. In essence, this is an early unsophisticated tool of the most sophisticated automobile of the period. Yes - it does look like a generic jelly bean/aerodynamic marshmallow on wheels, although in the early 1980's it was startling and the stuff of boyhood poster art. Technology dripped off of this pathfinding near-200 mph supercar, and yet it could be driven just as a car and would vanish in a Wal-Mart parking lot today. As to this scale example, most would consider the Tonka model rubbish, and less than a cost-effective basis for a project - but it was free and constitutes a low-impact challenge. It does come with the flush/covered wheels which were not seen on the 1:1 production model, hence this is something, while in truth the proportions of the model really aren't horrible. It unscrews and/or snaps apart much like a period Burago release, while sanding down assorted body shell mold lines proved feasible enough. The door window frames are thick, but in a low-key way I'll try to get the better of it. Seen back of the shell in primer is a $16 parts car picked up recently, hence know they go for almost nothing. Thanks... ...note the early flush covers on the wheels then. ...the body scrubbed of mold lines, the wheels sanded, repainted, and lightly black-washed then. ...heavy door window frames, but not horrid. Given it isn't a shatteringly sophisticated tool or build, I think I'll just leave the wing/deck lid gap alone given it isn't all that distracting... Still looking fresh no less than 30 years after it's debut. Thanks... Mike K./Swede70
-
Thanks so much for the video walk-through. Surprised by the absence of proper door panels, while if it helps the two steering wheel and instrument panel options aren't really trim level related, but rather how the '74 and later cars were typically outfitted; i.e. faux wood instrument surround trim as well as the four spoke steering wheel. Certainly it's neat to see the aftermarket come through with one engine option, while at some point I suspect another firm will render good interior panels to introduce into the build. I had a '72 and later a '74, hence it was a thrill to see a modern manufacturer step up to the topic given it's dear to me. My 1:18th diecast garage has three examples within it. Again, my thanks... Mike K./Swede70