89AKurt
-
Posts
8,428 -
Joined
-
Last visited
Content Type
Profiles
Forums
Events
Gallery
Everything posted by 89AKurt
-
Oh good.... thanks! Thank you too! ? Appreciate it. ? Thinking of putting in the truck cab to help cure some more, trying to not touch it! I'm also waiting on wires that I ordered.
-
but smarter cats
-
When I read "Callaway", I think of Bill Ruger's Stutz DV32 Turbo. Was lucky to see his collection in Prescott, at his firearm factory. Sorry, had to share this, back to the regular program, of building something we never see.
-
filtered by chemtrails
-
Even the sedan. I would be tempted to get the panel, just because I might want to build another 170V Roadster.
-
of amber wane
-
... magic calibrated eyeball and spidey sense ... I use that all the time, because I don't have a fancy digital micrometer. ? Ride height has always bugged me too, manufacturer makes no difference. When I built the Tamiya Mercedes 600SEL AMG, box said big wheels, I measured a size smaller, *had to* lower too because it looked stupid. Usually the first thing I do when opening a new kit, is look at how easy it will be to lower.
-
 I still don't draw on the computer, learning curve a mile wide. I didn't see many posts of successful results. For now, old school continues. Matching the second part, in reverse is always fun. Will take some tweaking to get it easy enough to take in and out.
-
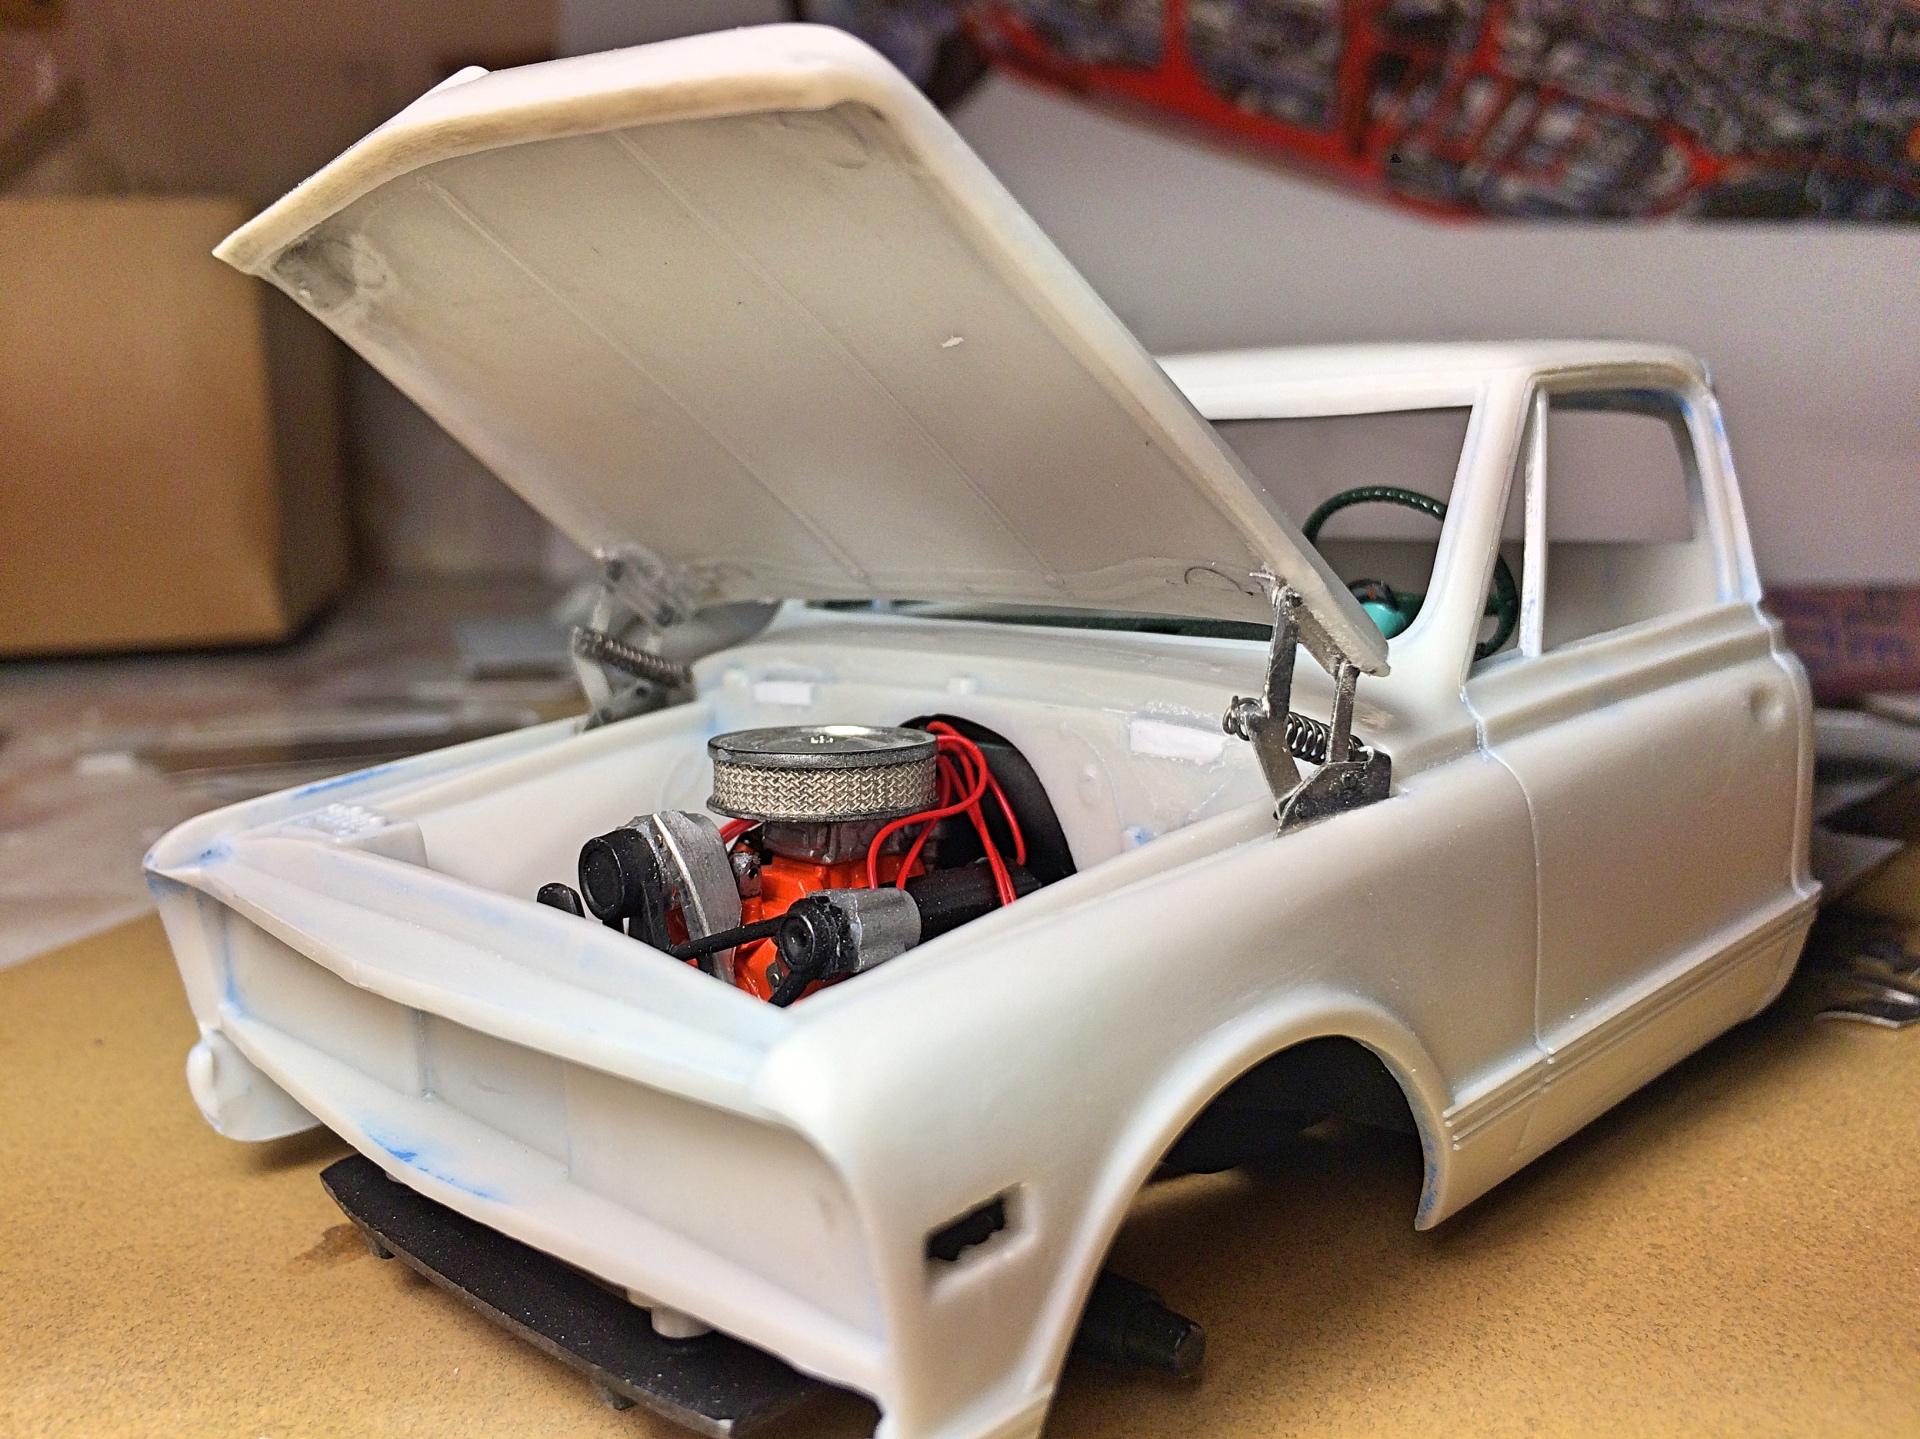
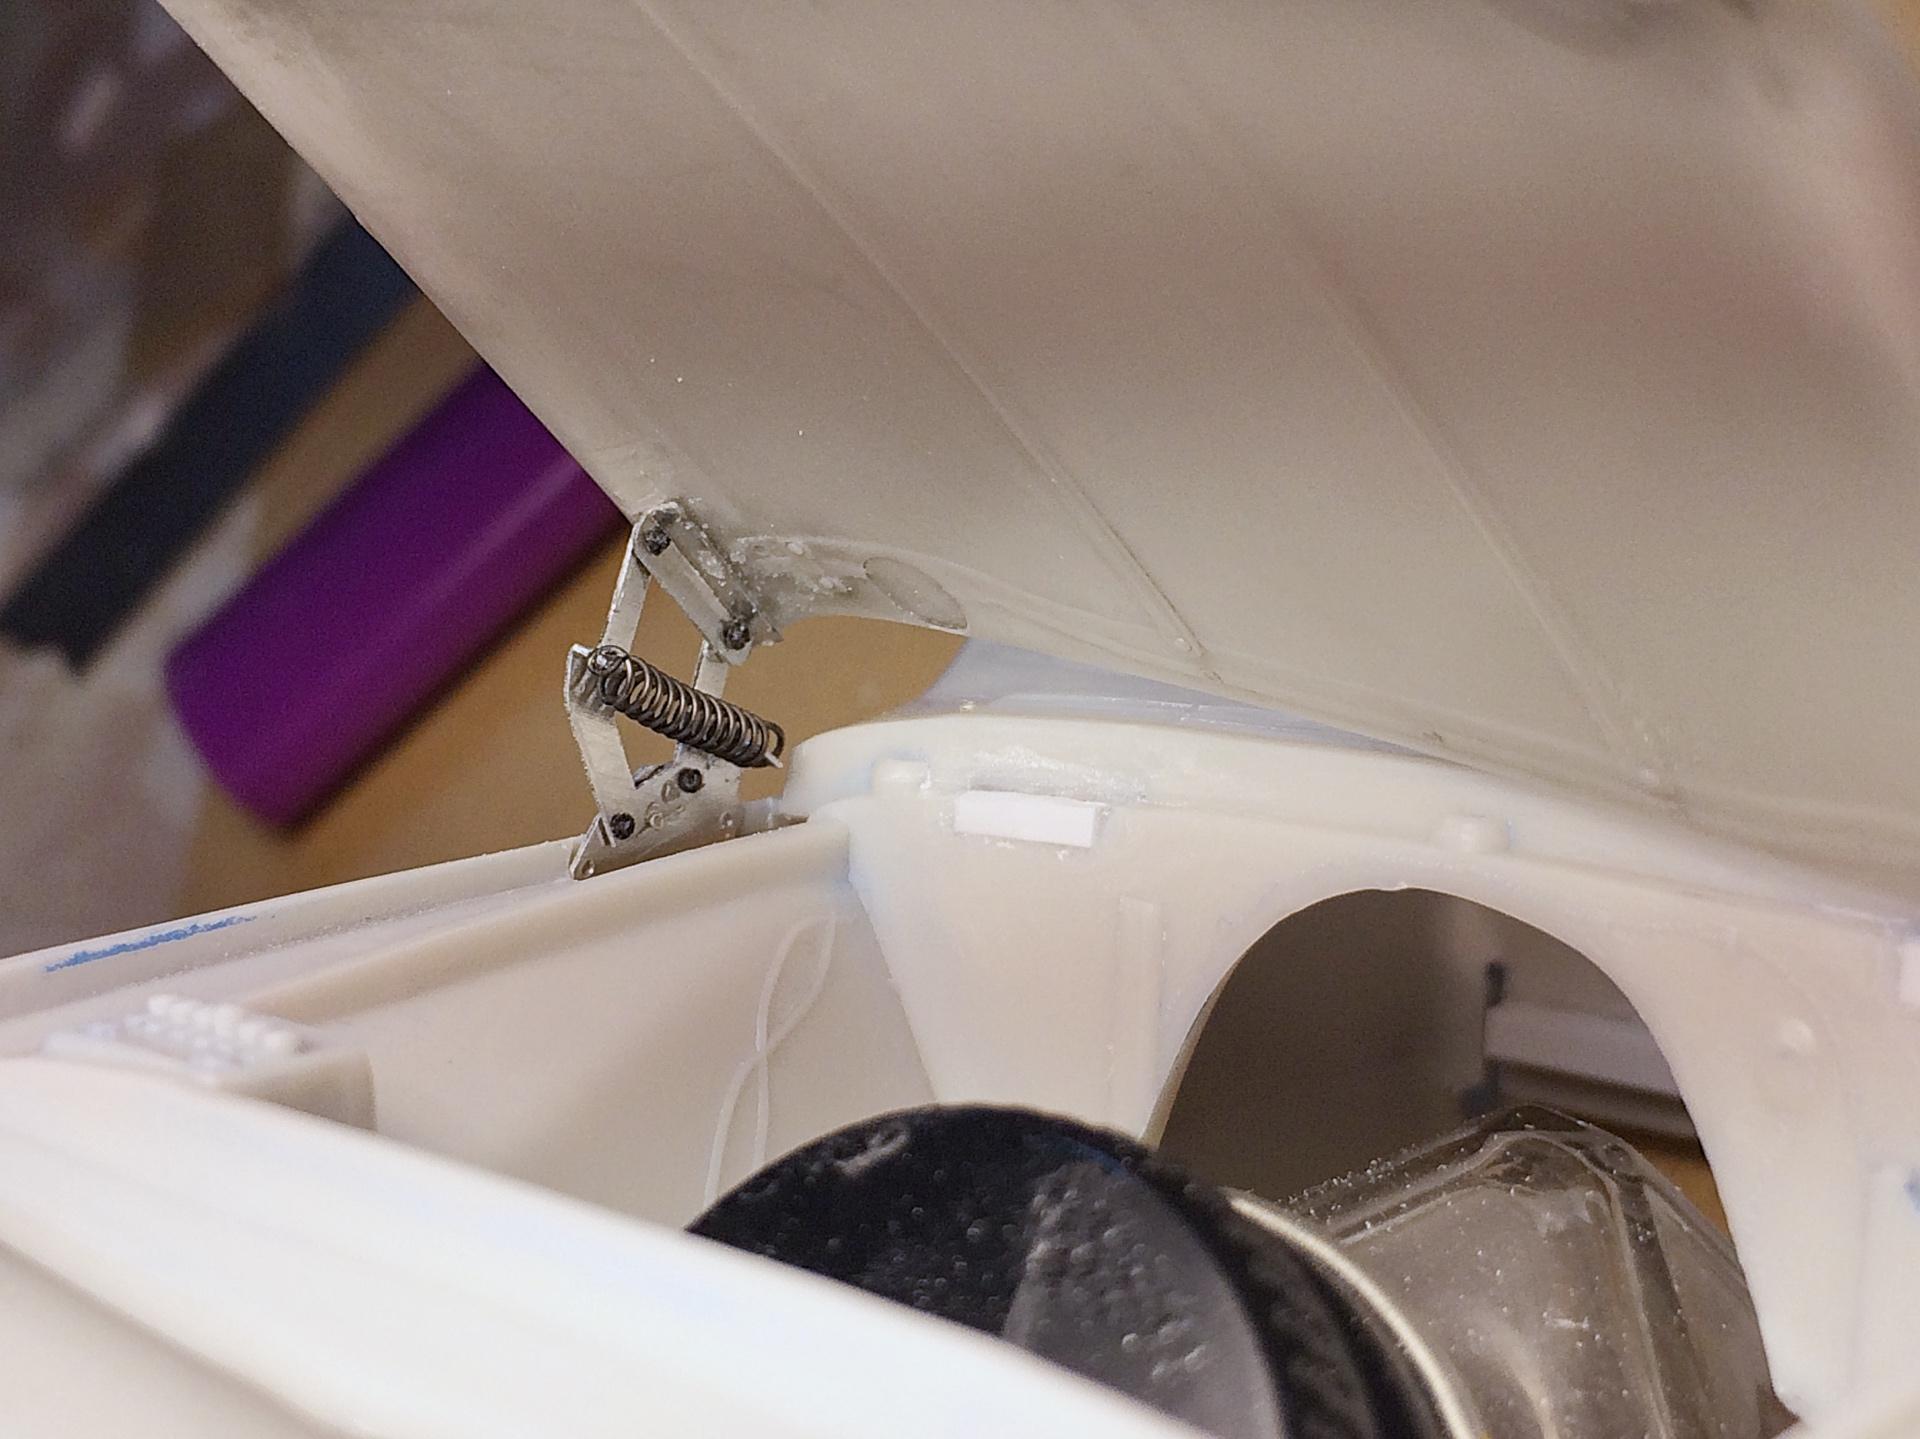
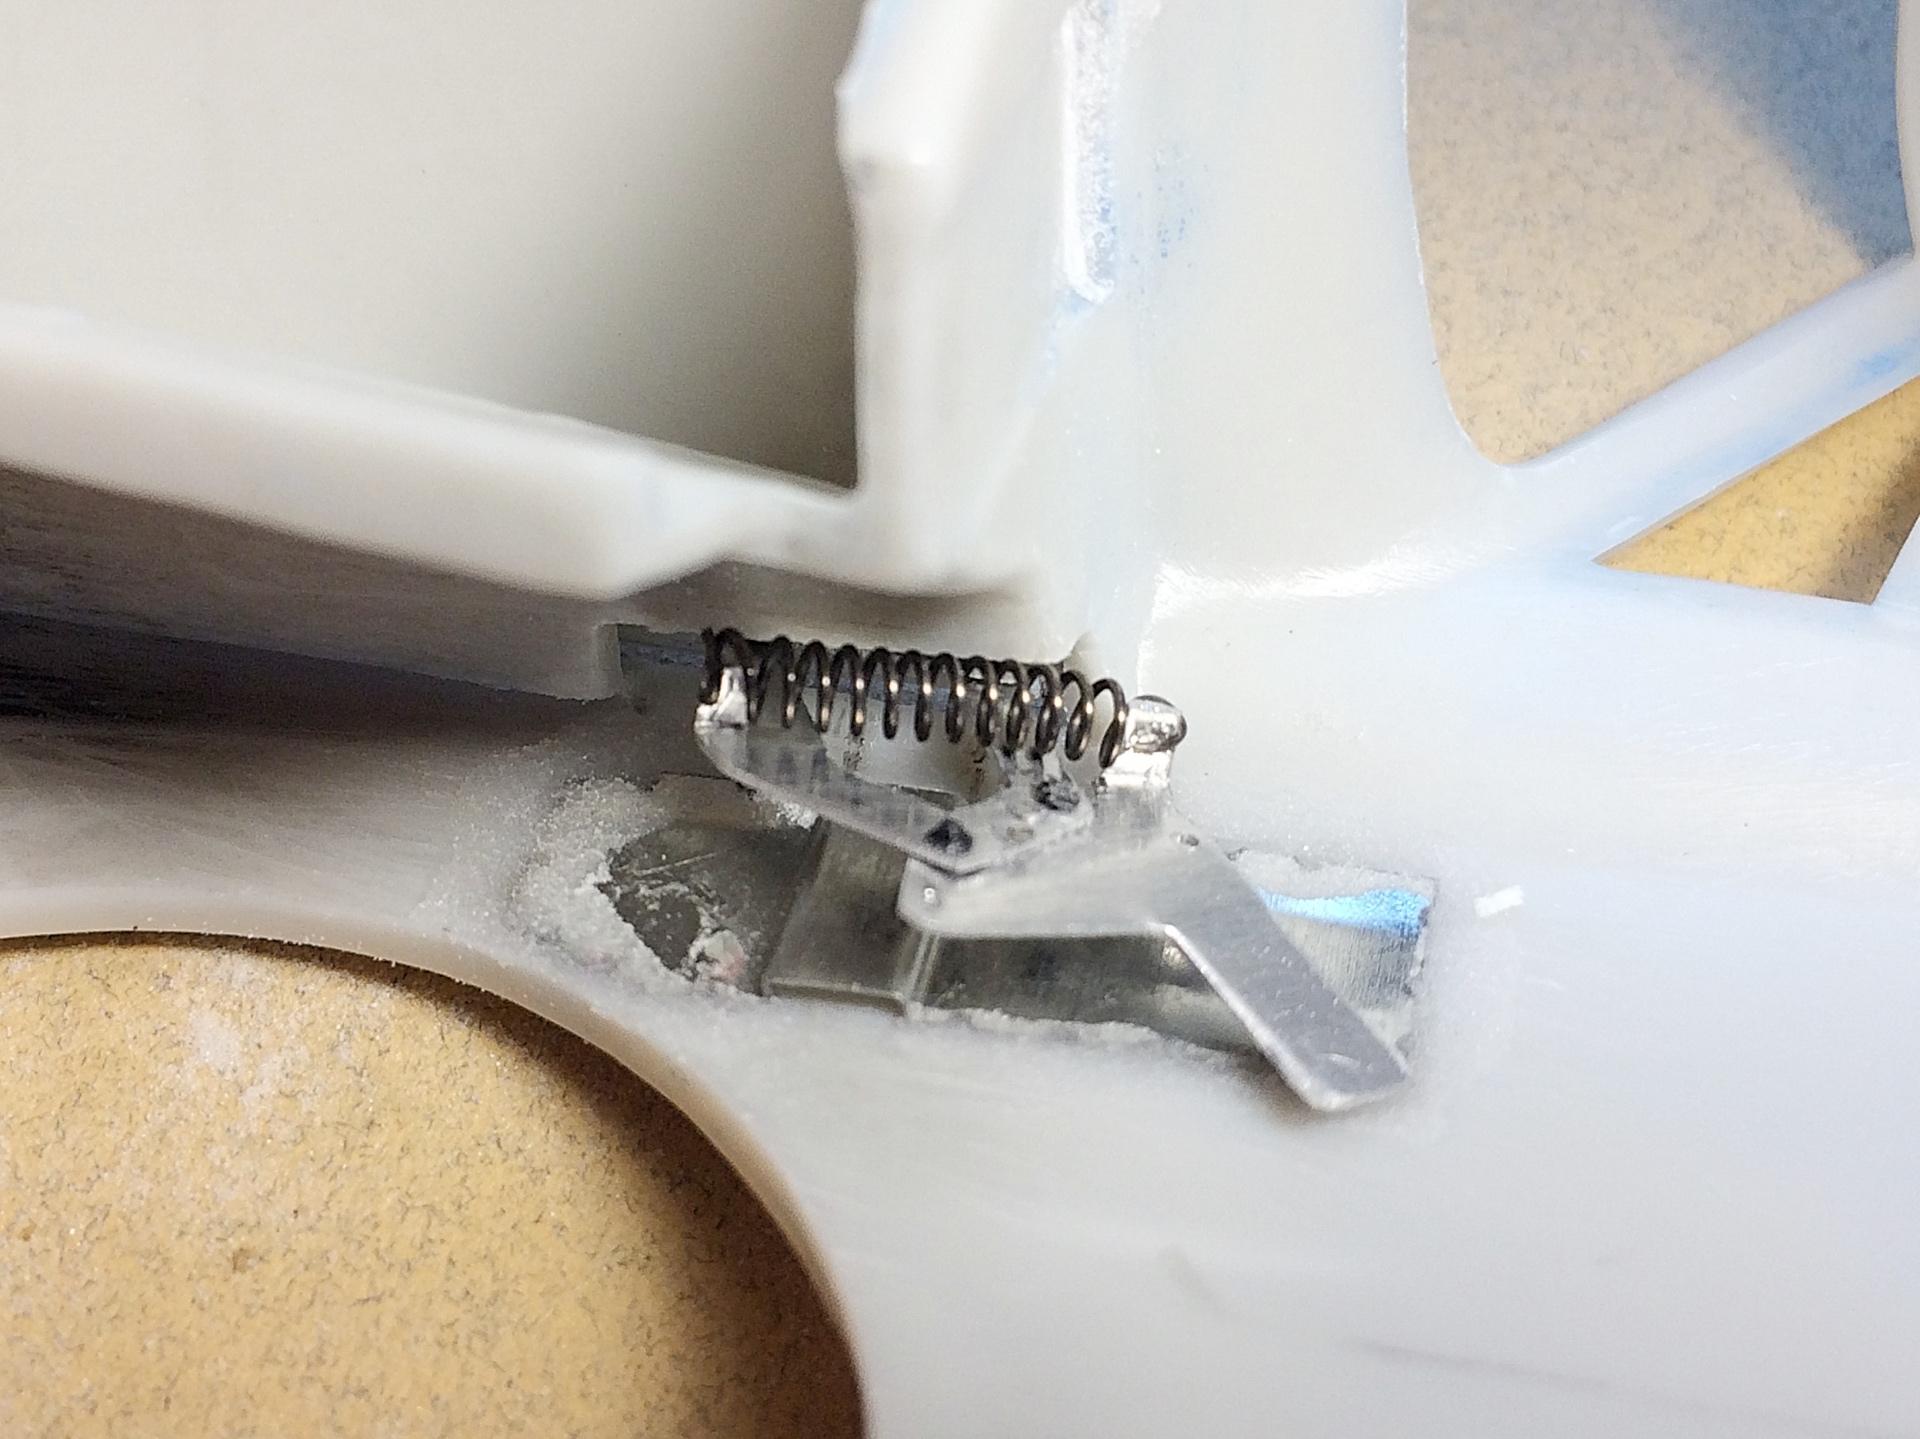
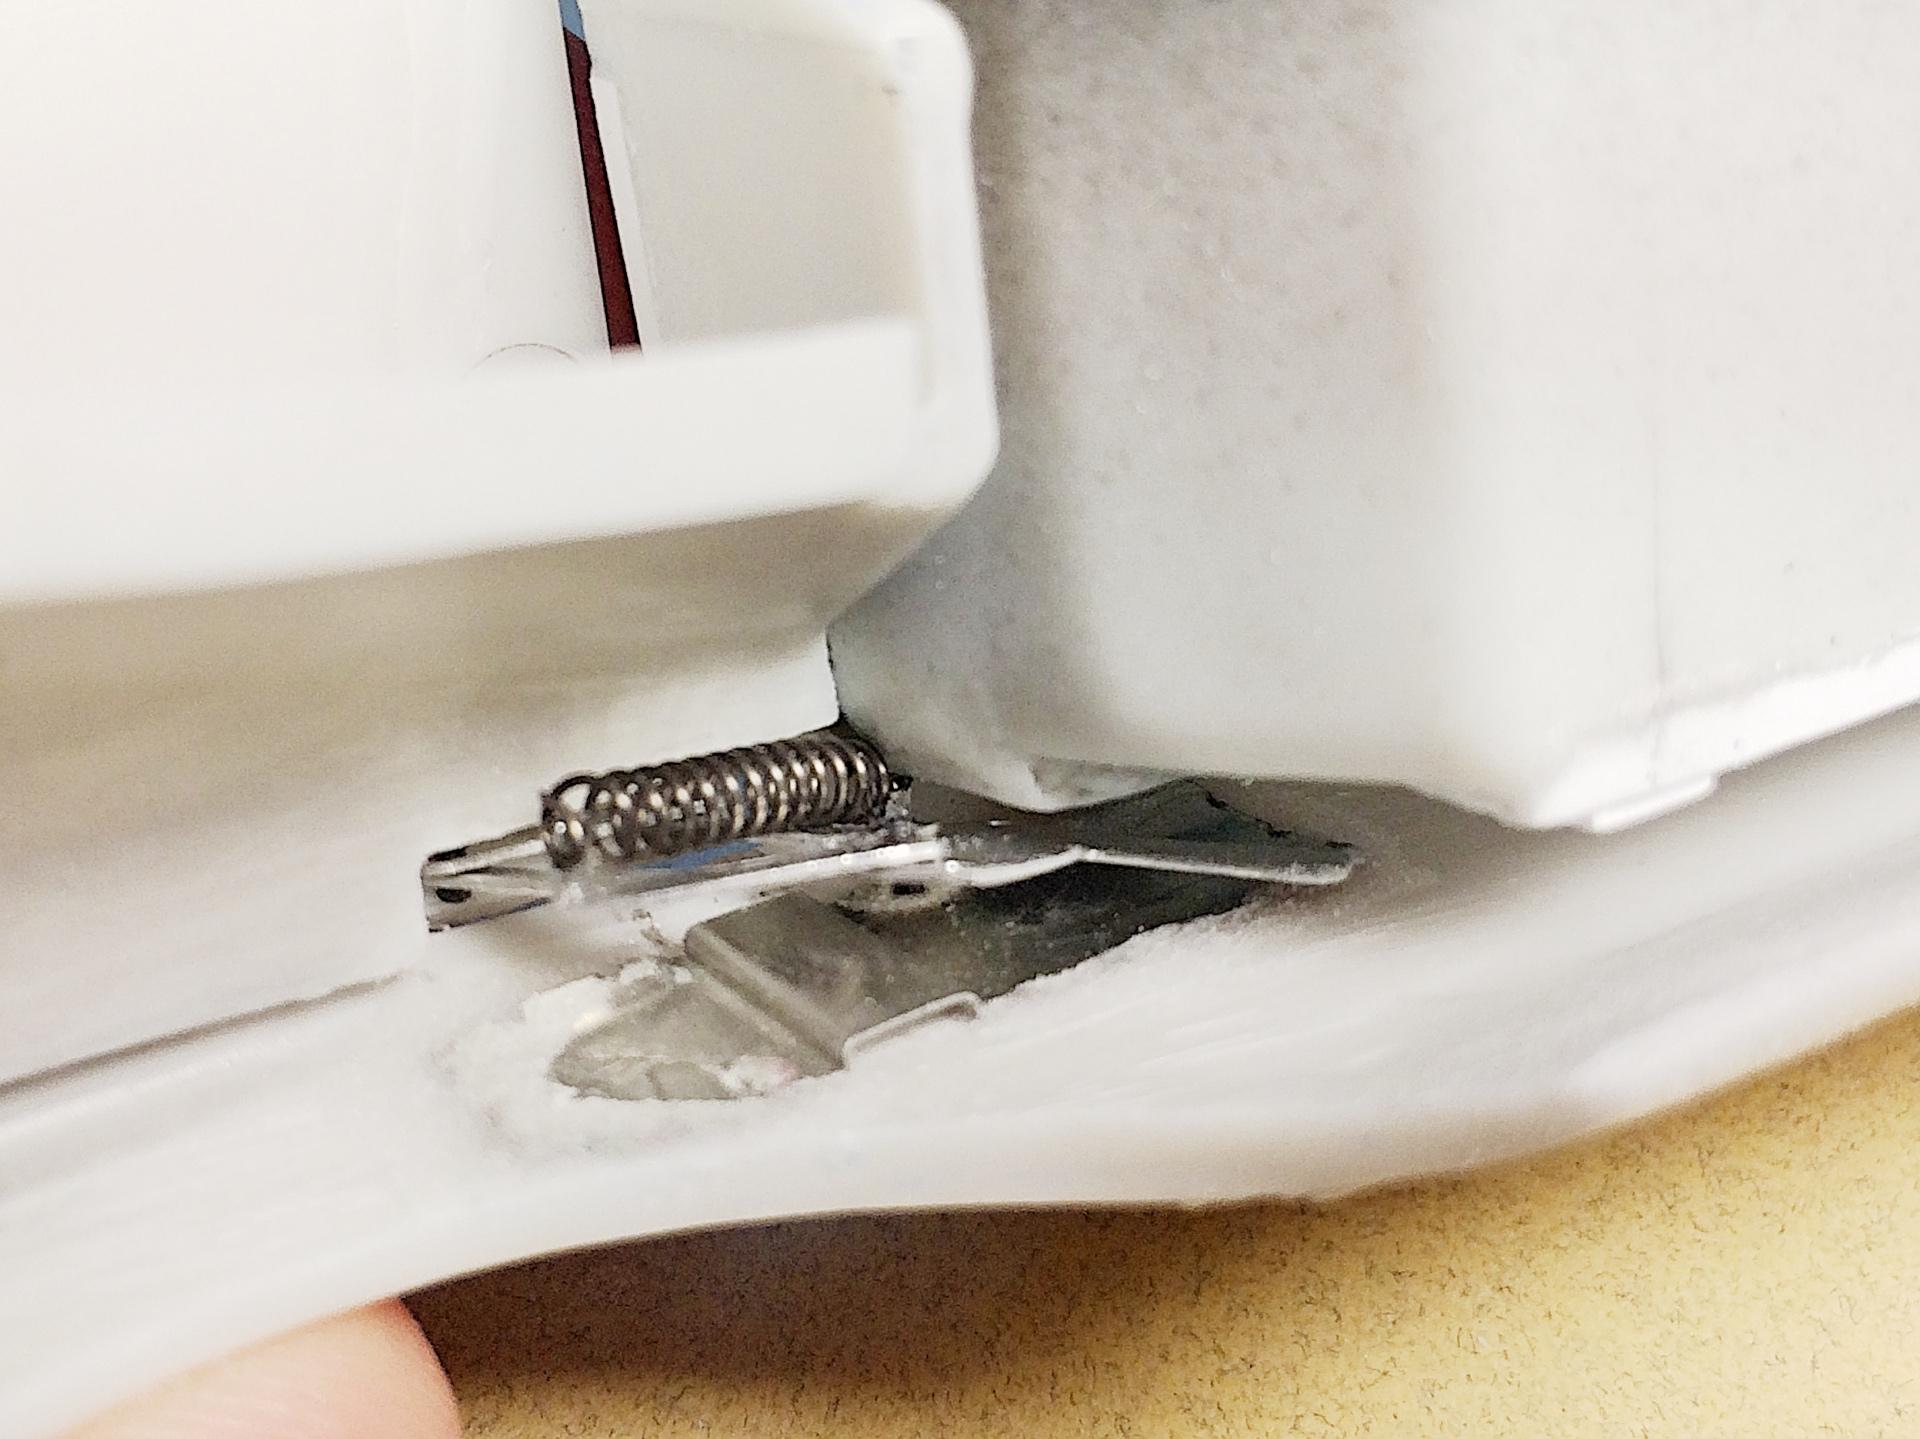
Successful seat-of-the-pants engineering of the hinge! ? What it looks like on display with the hood open (I better take care of the giant ejection pin marks): Worm's eye view: Made the body plate from coffee can steel: When the hood is closed: First test fit of the interior, will need to remove plastic at the corner:
-
RE Amemiya's Lotus Europa (1 of a kind custom build by me)
89AKurt replied to Kennyboy's topic in Model Cars
That is extremely COOL! ? Now I'm wanting to get that kit. ? Did a fine job considering the compressed timeline. -
have mutated into
-
Very impressive!
-
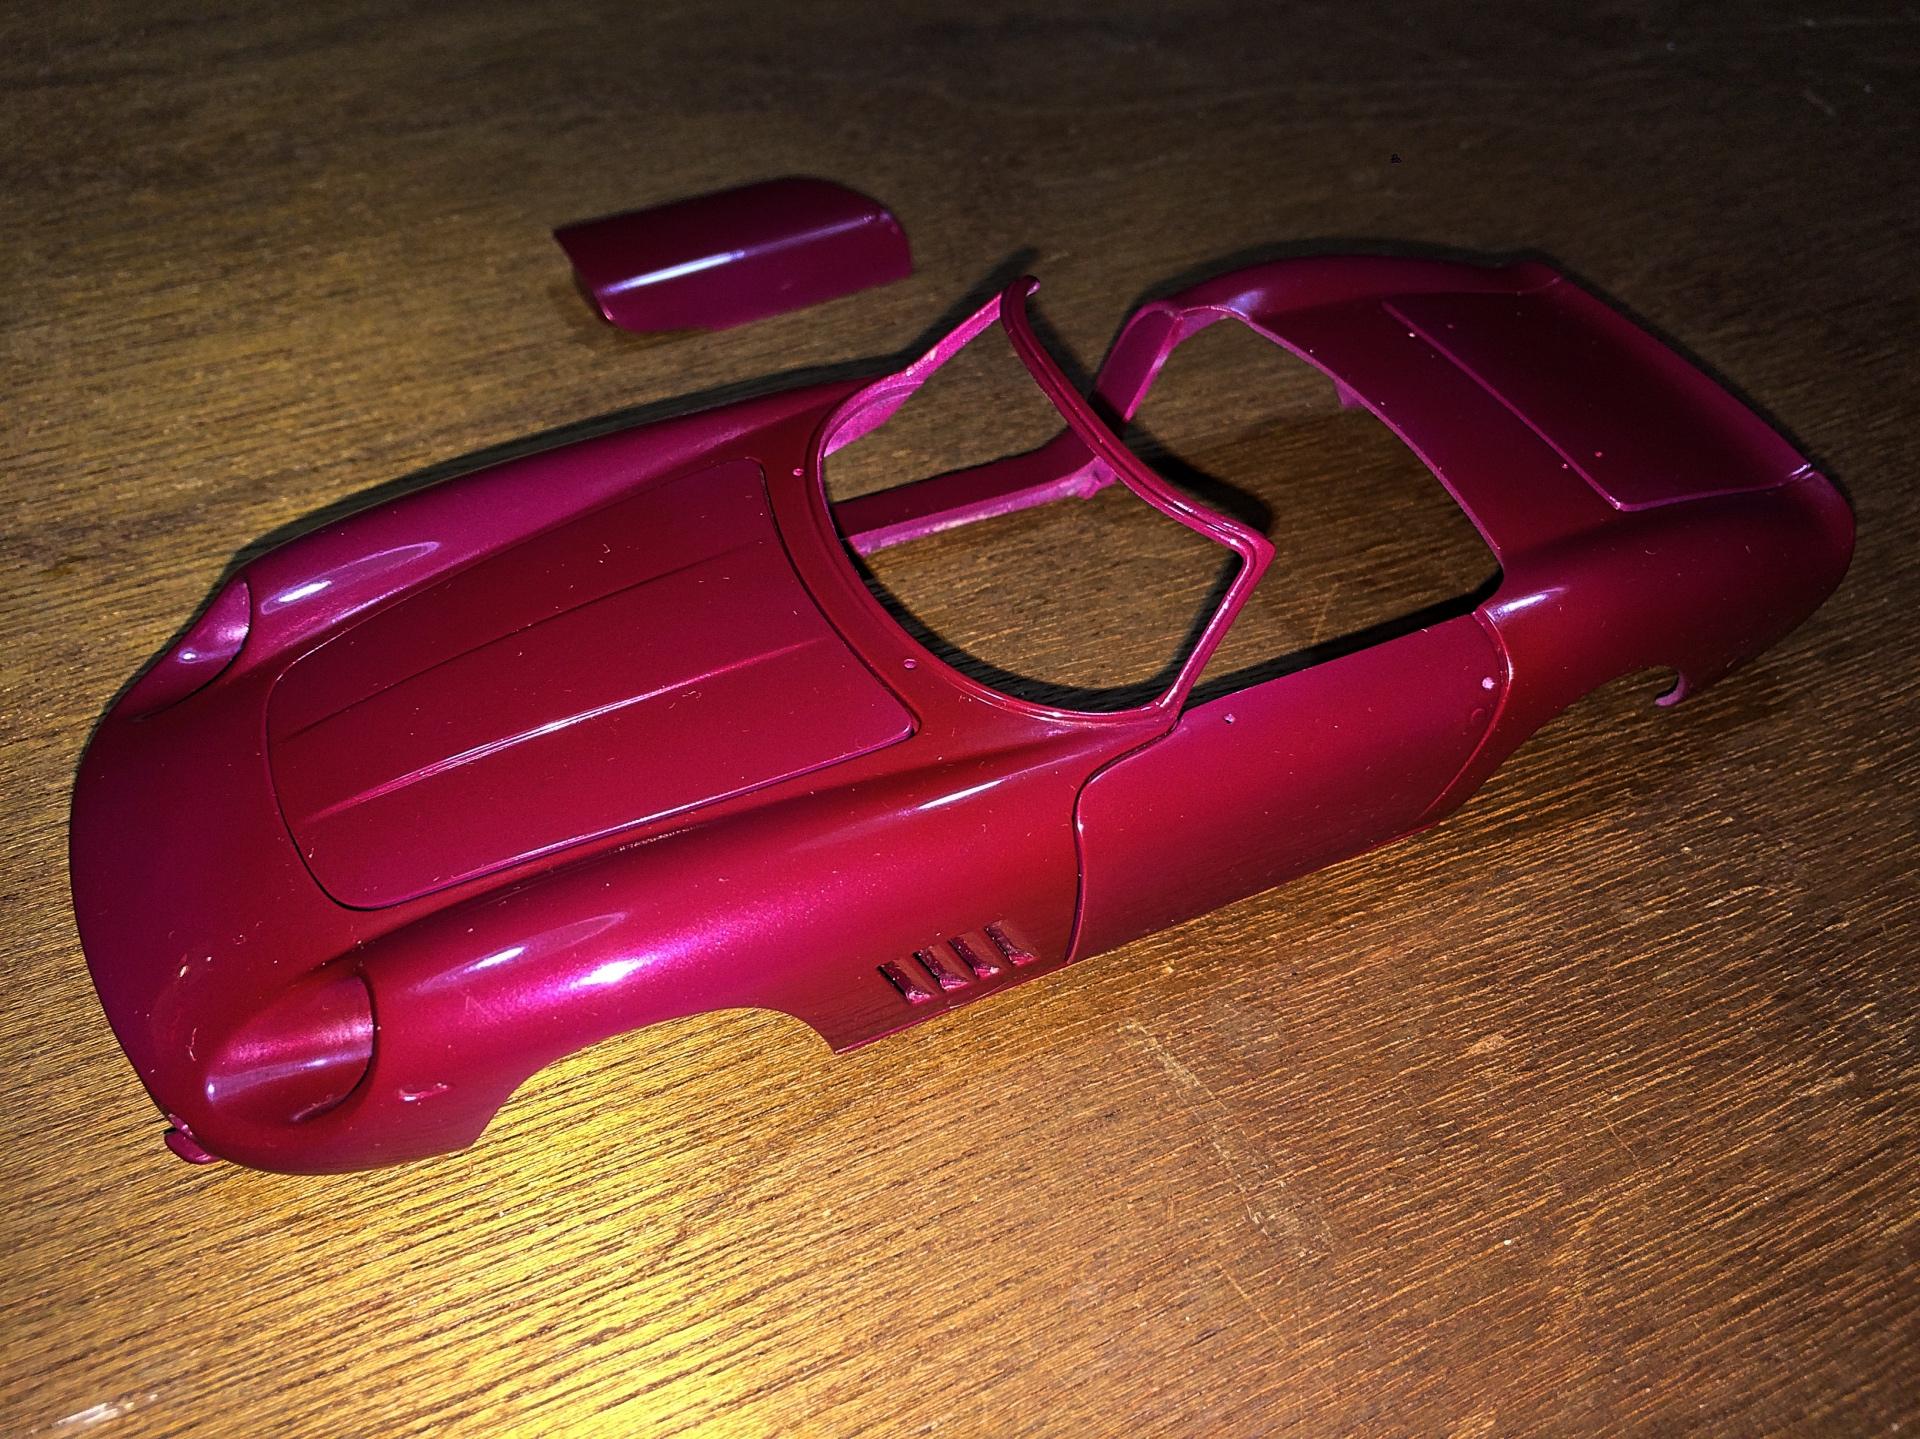
Just checking in, I'm trying to be patient in allowing the paint to cure, can't wait. ? Polished it out last night.
-
made in China
-
I built this last century, Box Stock but added scratch-built hood pins. My original intent was to make a tuner, but because it's curbside without the turbo 5, I did this. The T5R with the day glow green, that's what I wanted.
-
Now that I have been building my '69, just wanted to encourage you to get this past the finish line! I've noticed the MPC kits are worth more than the AMT on eBay, holy smokes! ?
-
Thank you! I'm now considering doing Rhinoliner in the bed. The original owner had a plastic liner, it was junk especially the tailgate piece. Though not authentic, I've been dying to do that for a pickup. ? Also checking out this Chevy Step-side Pickup Restoration in progress topic. I'm noticing some differences (beside the obvious bed), such as a spare tire molded on, exhaust not molded on, booster on the brake reservoir.
-
for horse glue
-
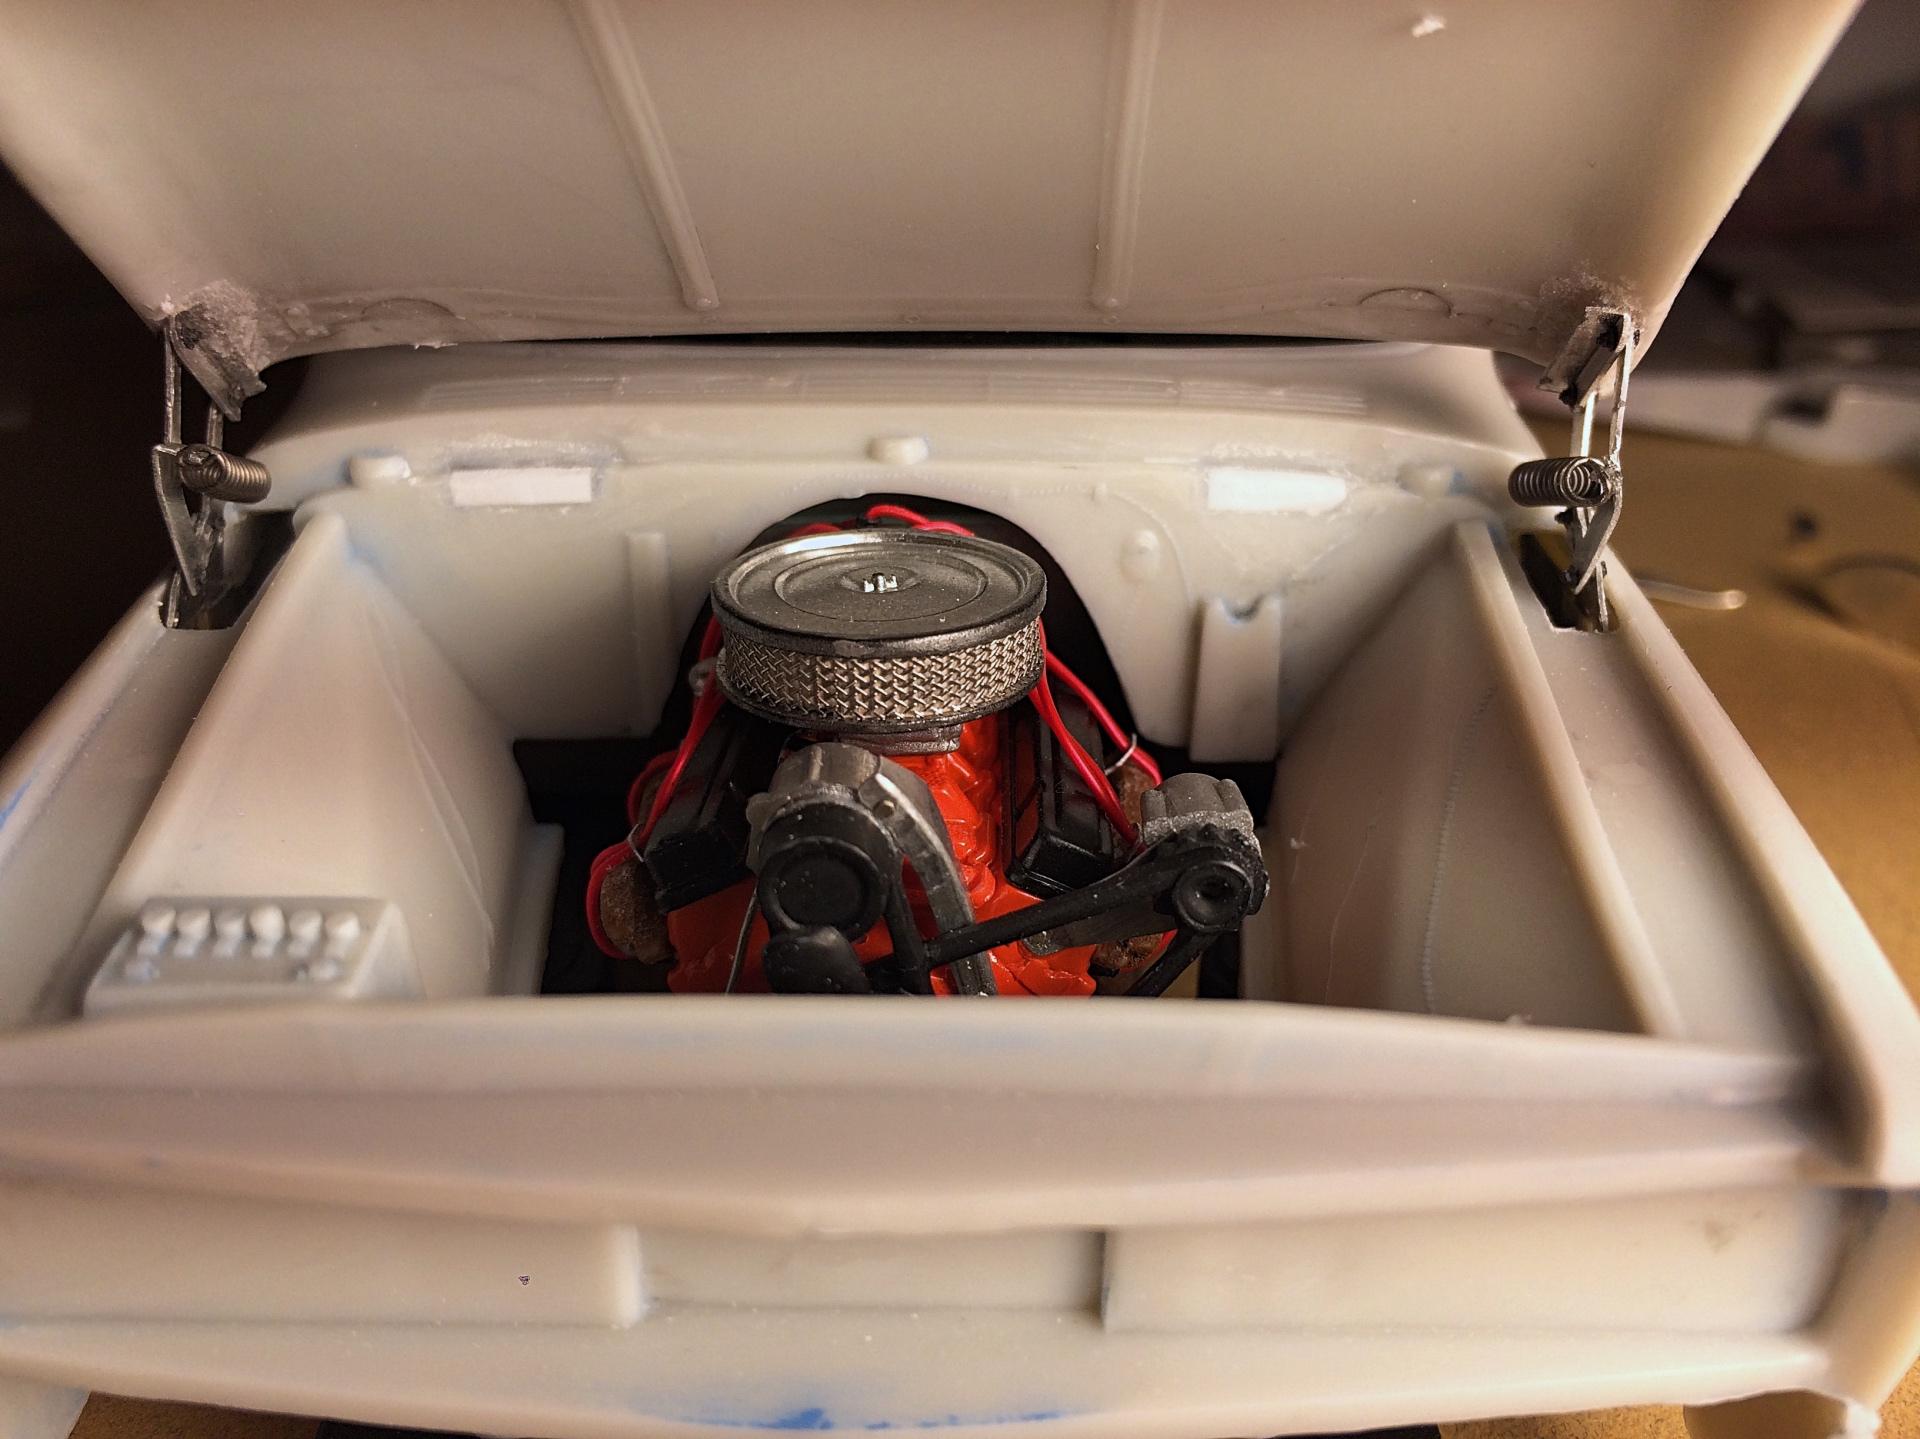
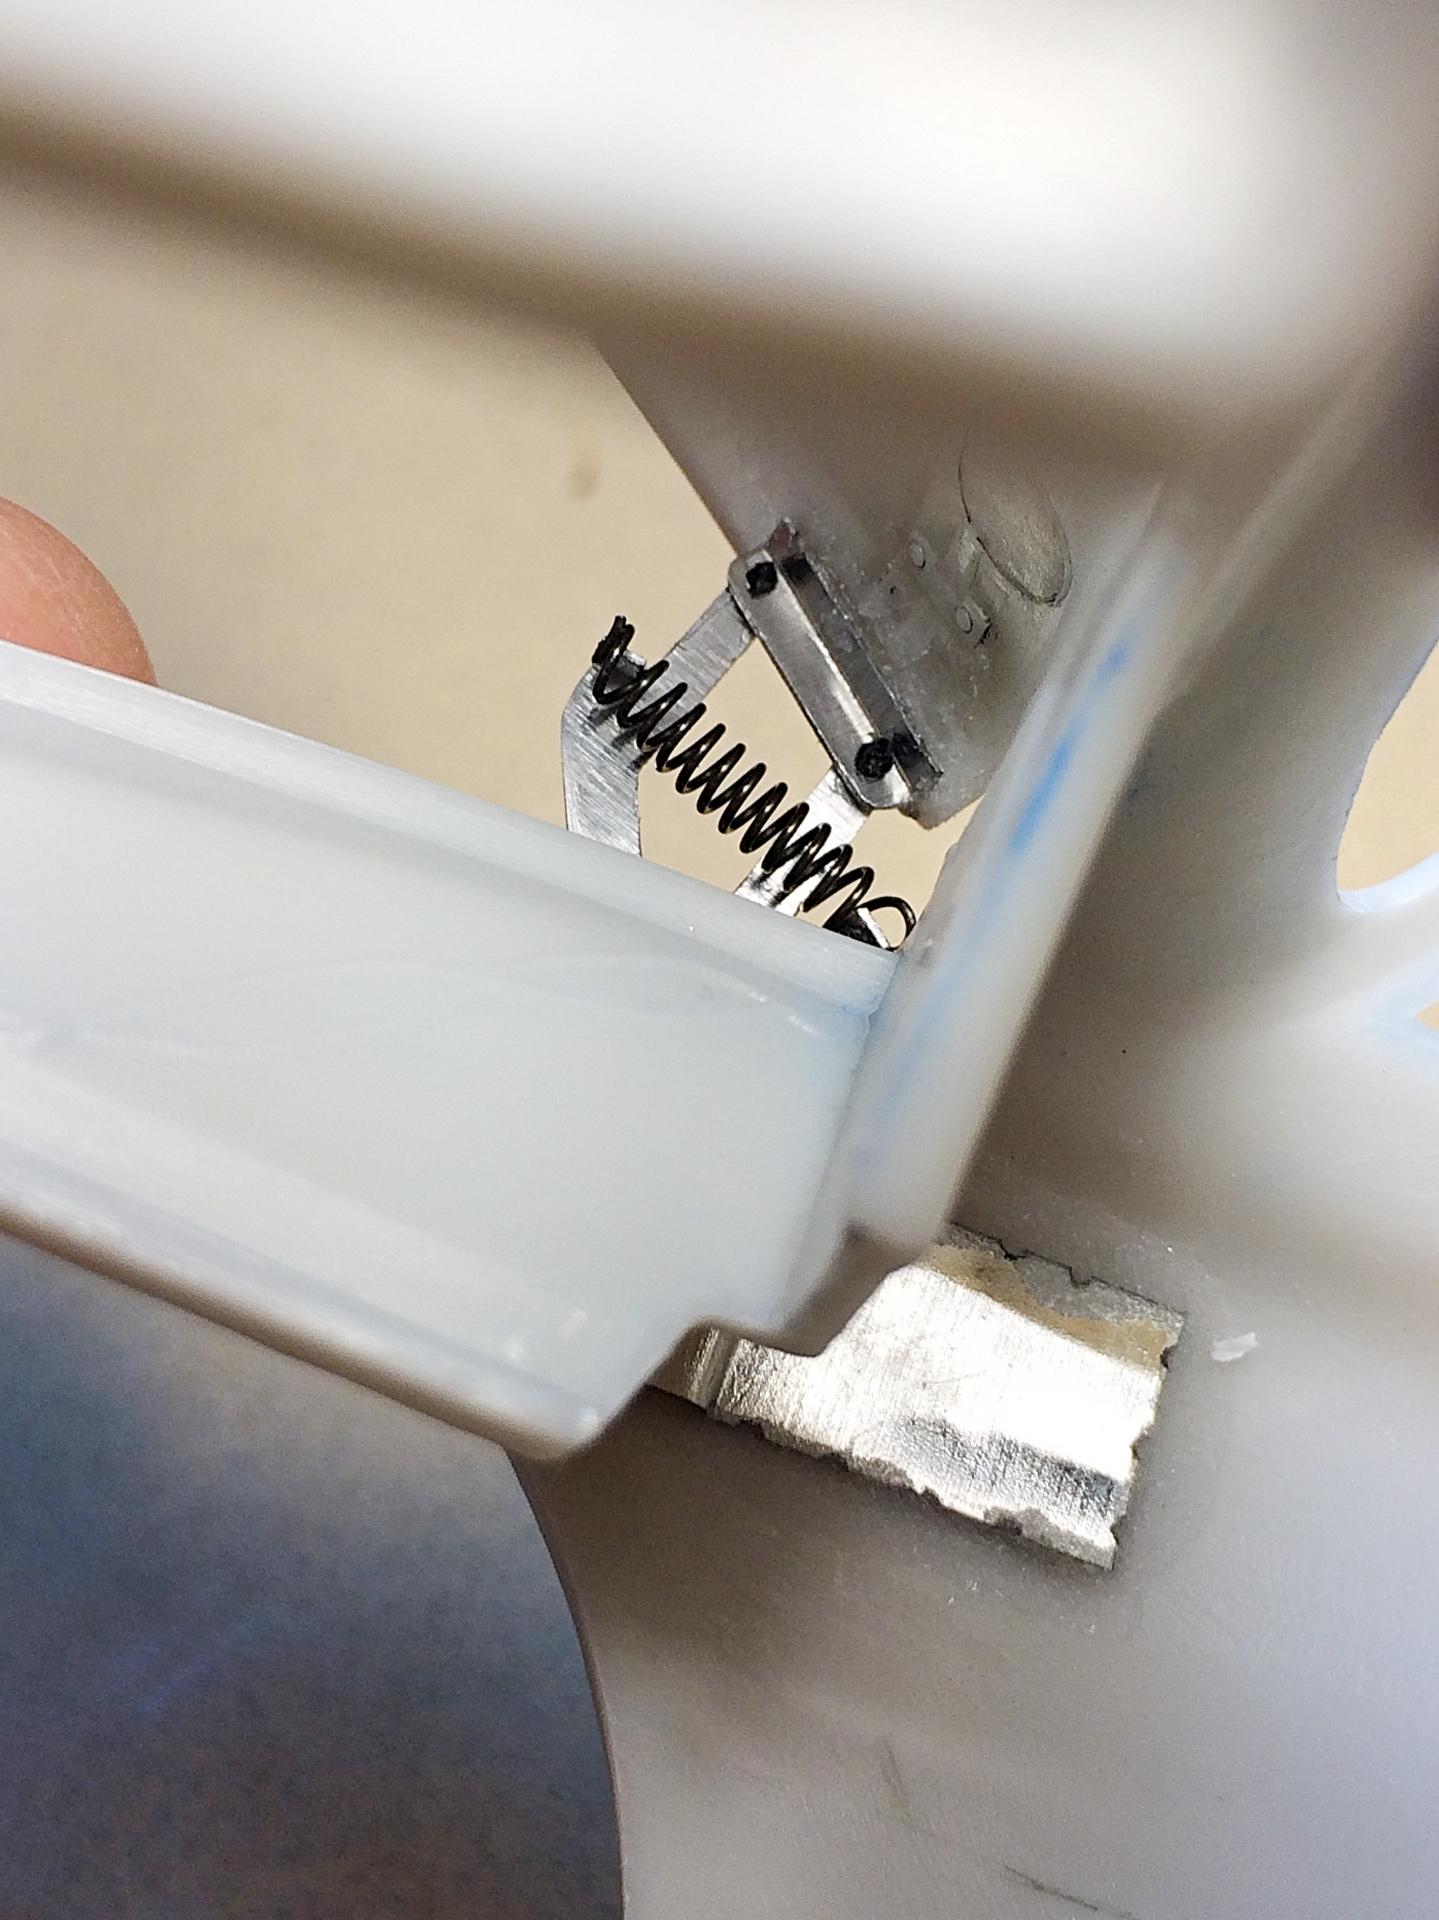
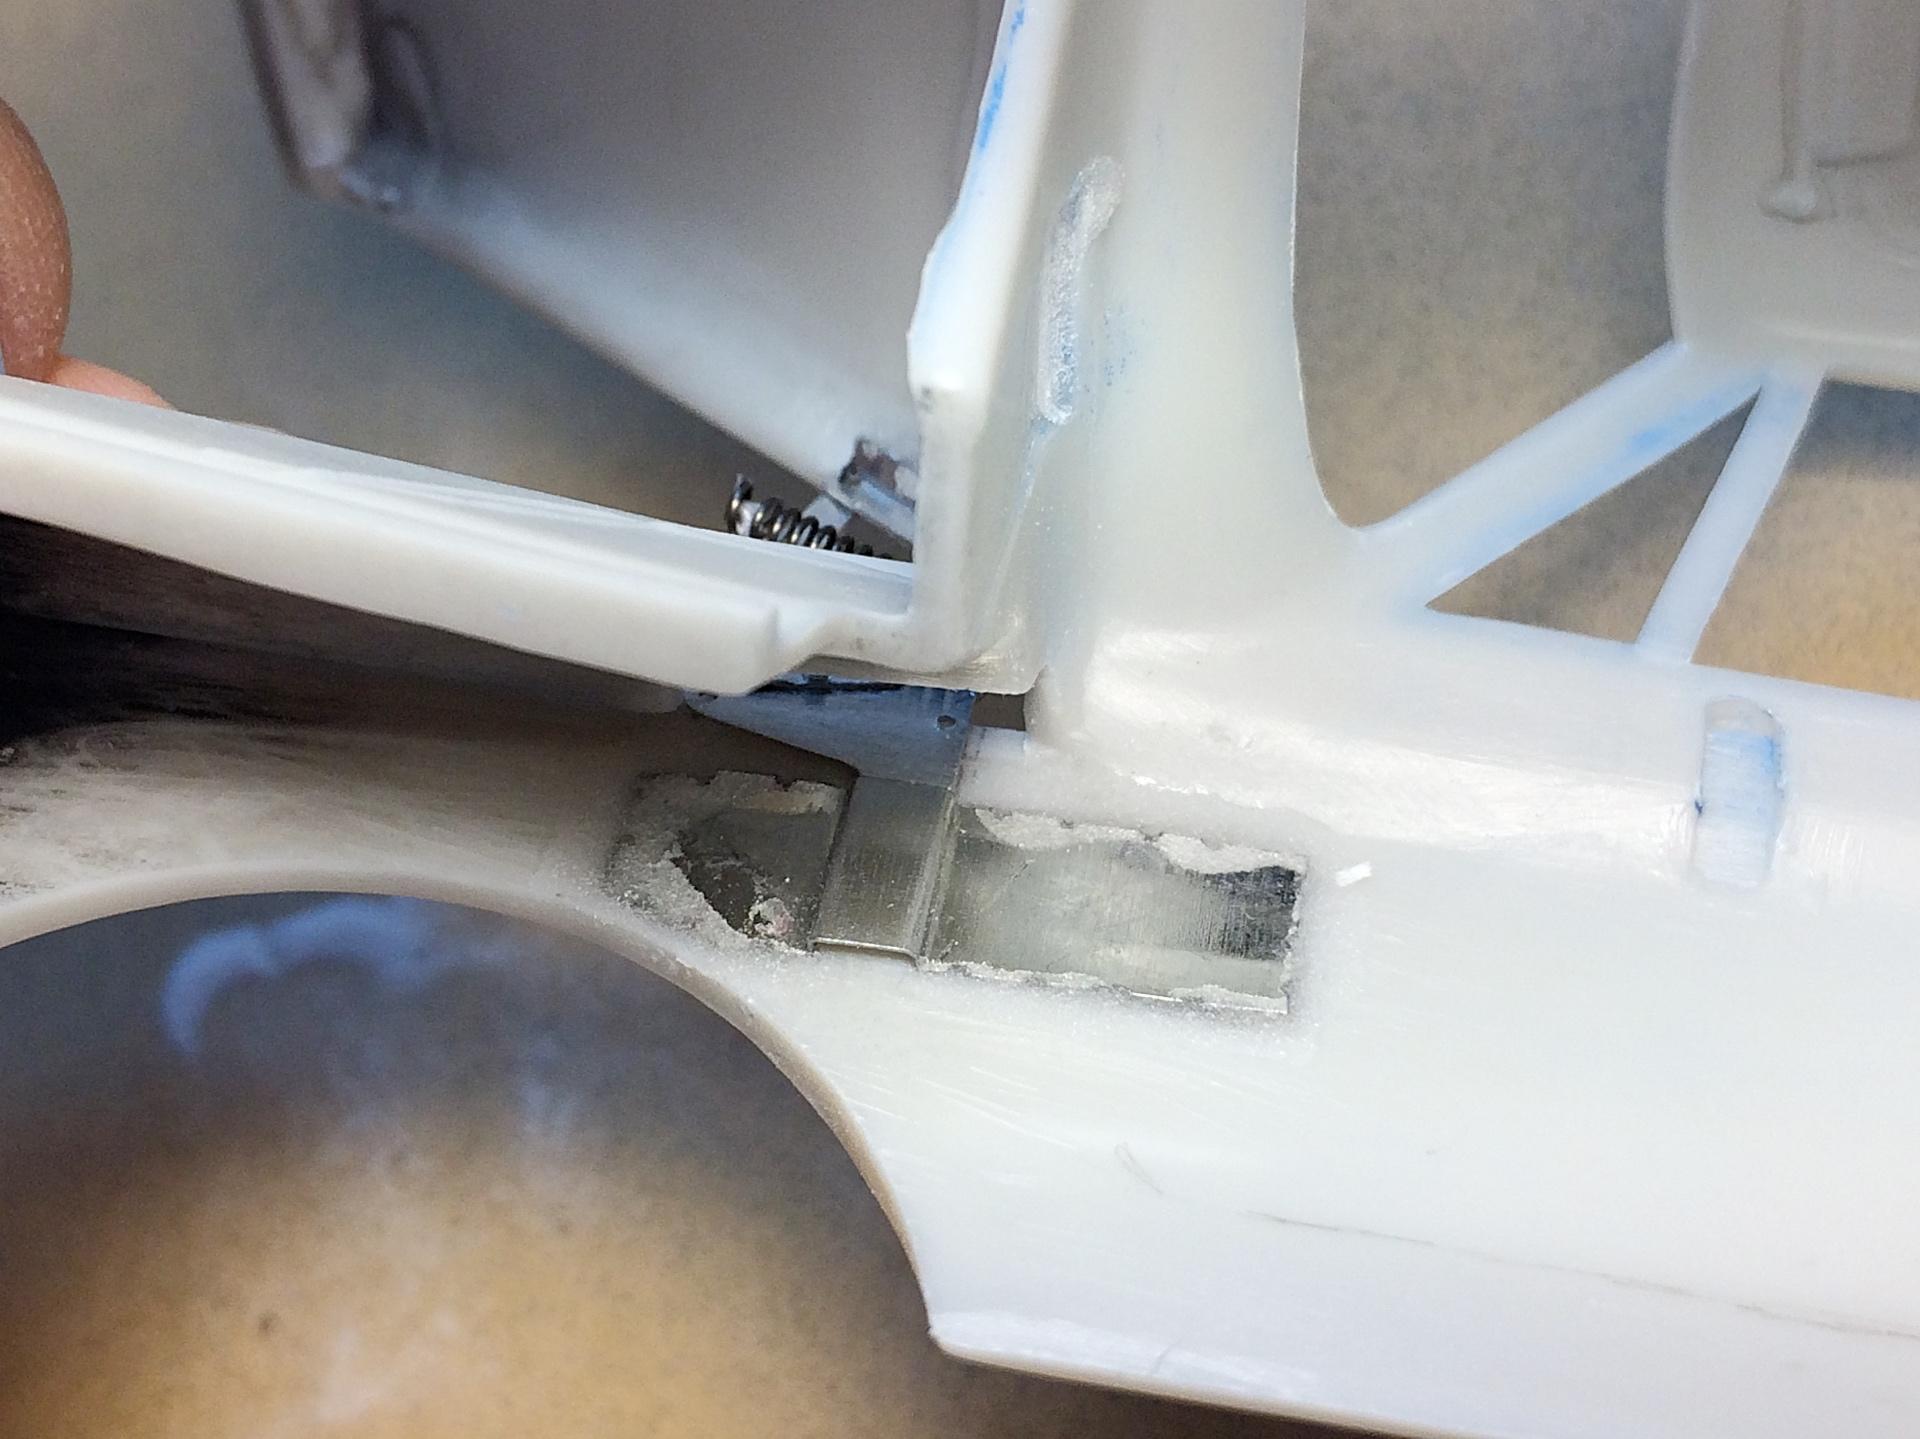
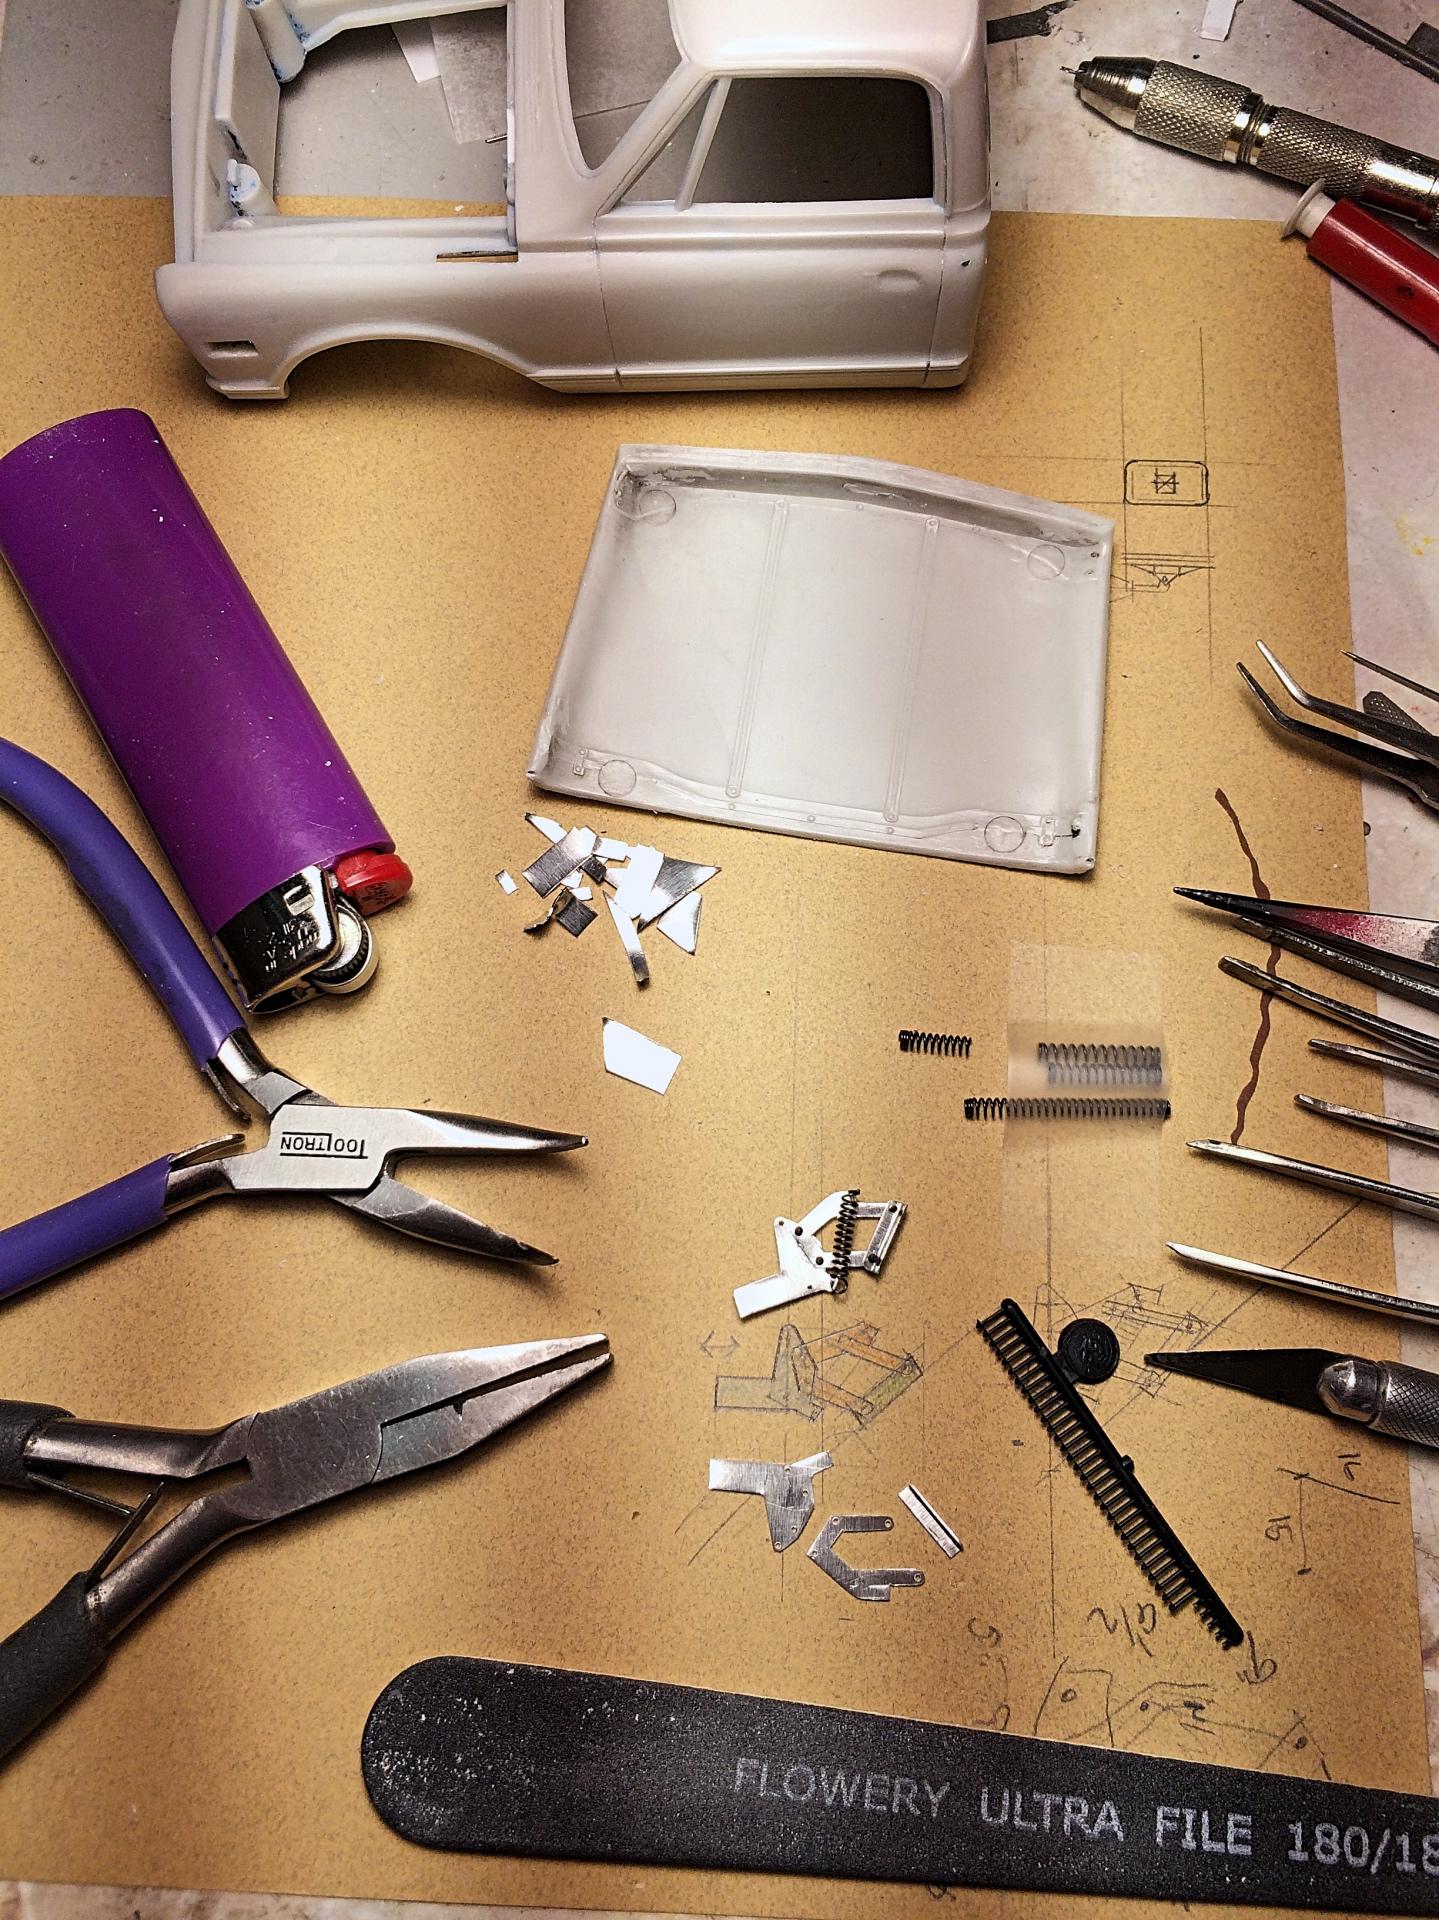
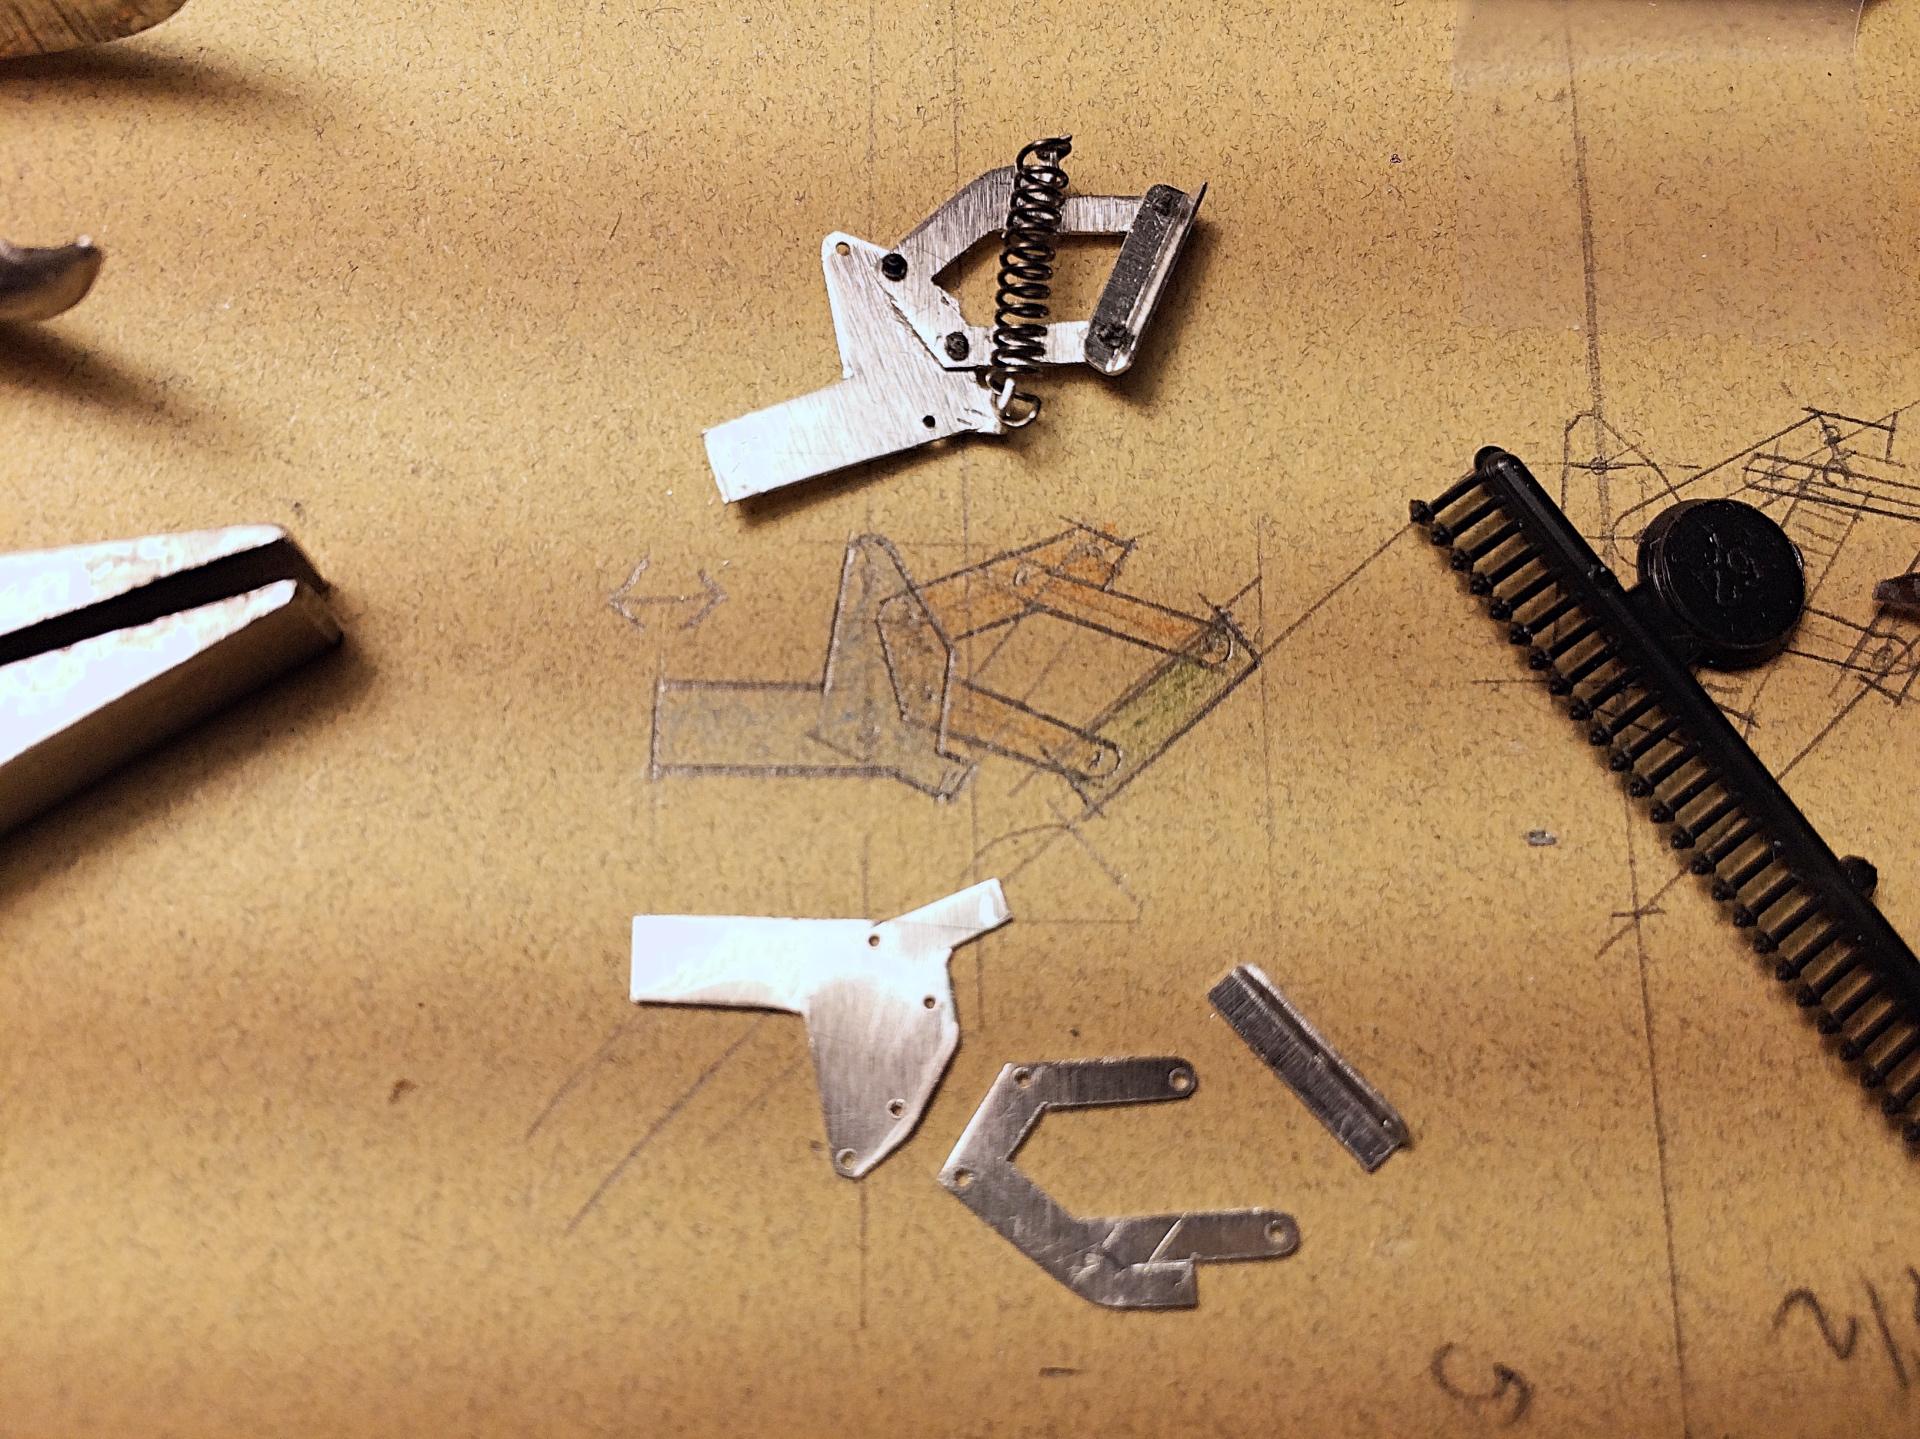
One of those details, can I do it? Got this far tonight, the true test will be to see if it works for holding the hood up, then closing. A little trick, the Grandt Line bolts, after assembling, having everything clamped together and the bolt shoved all the way in, took the lighter and melted the nut end. I also glued the parts together, seems strong enough. This is making me want to learn to make photo-etch......
-
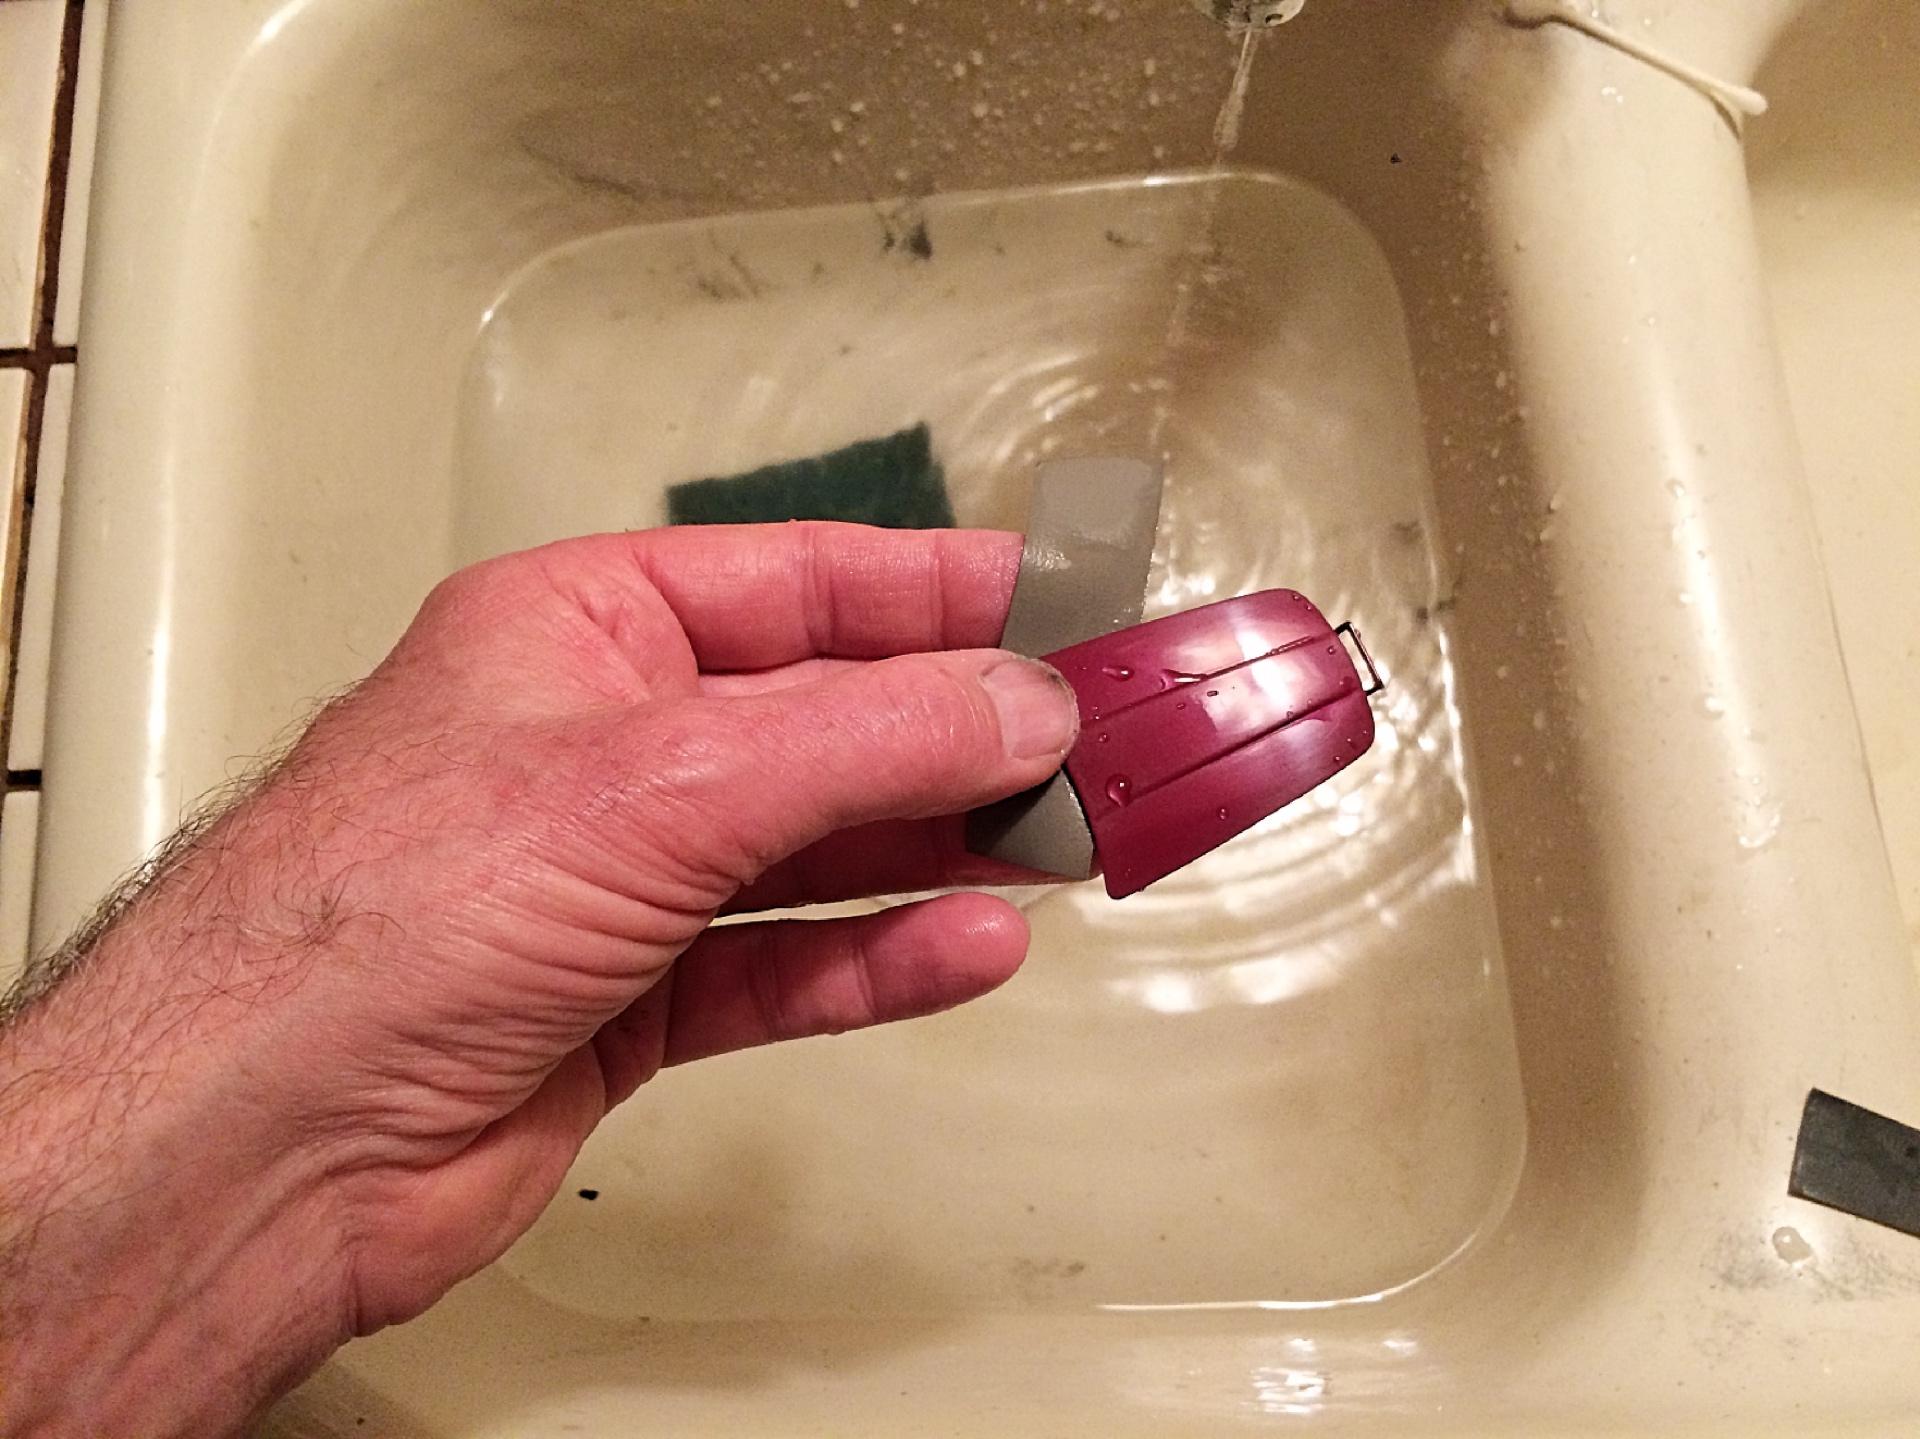
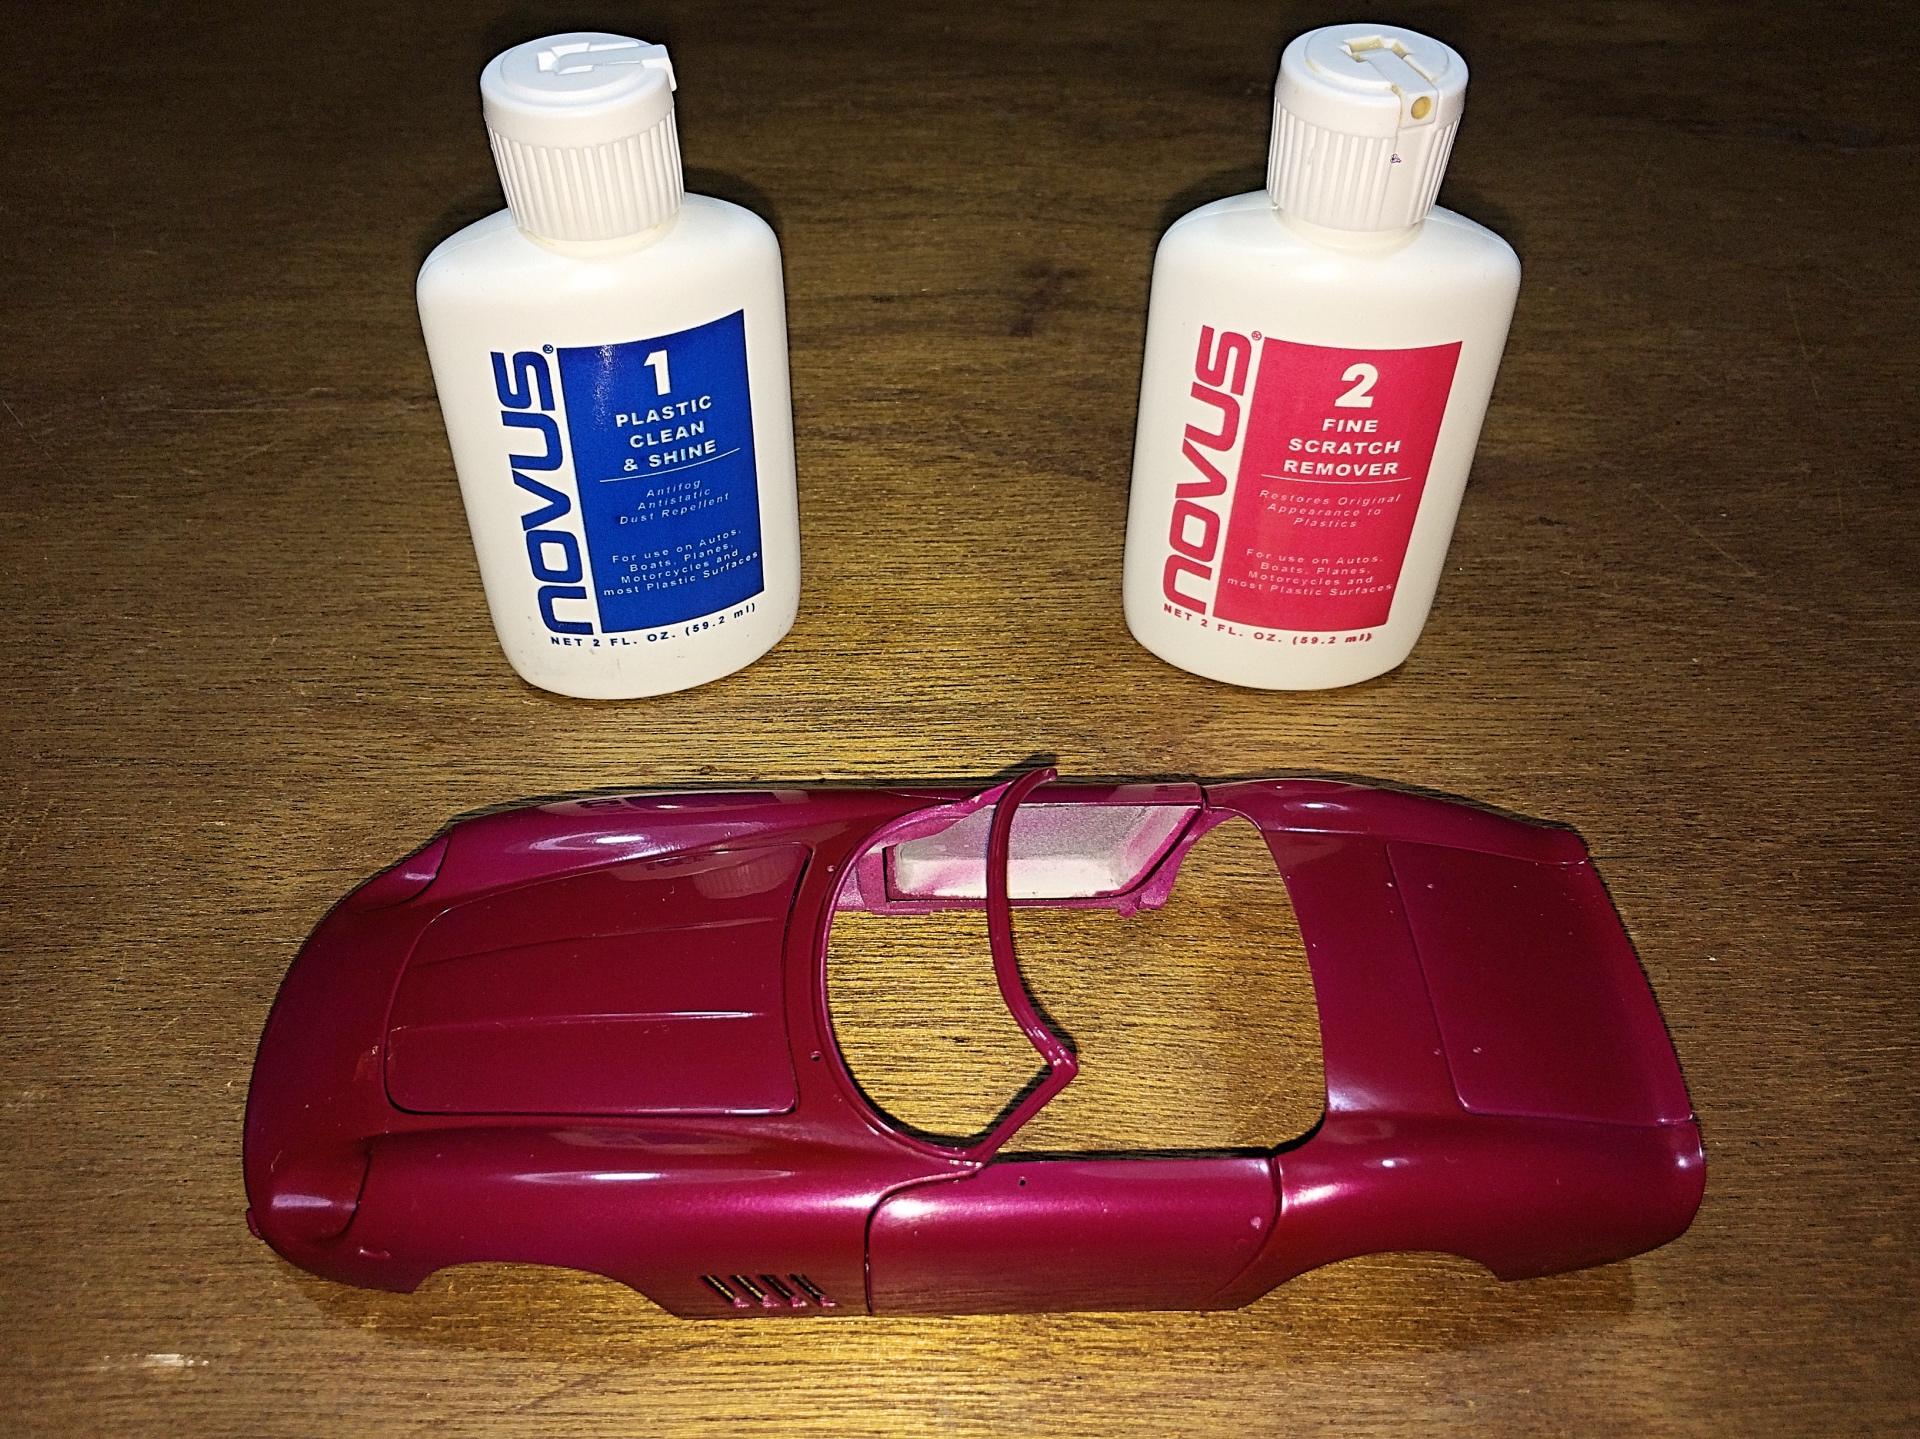
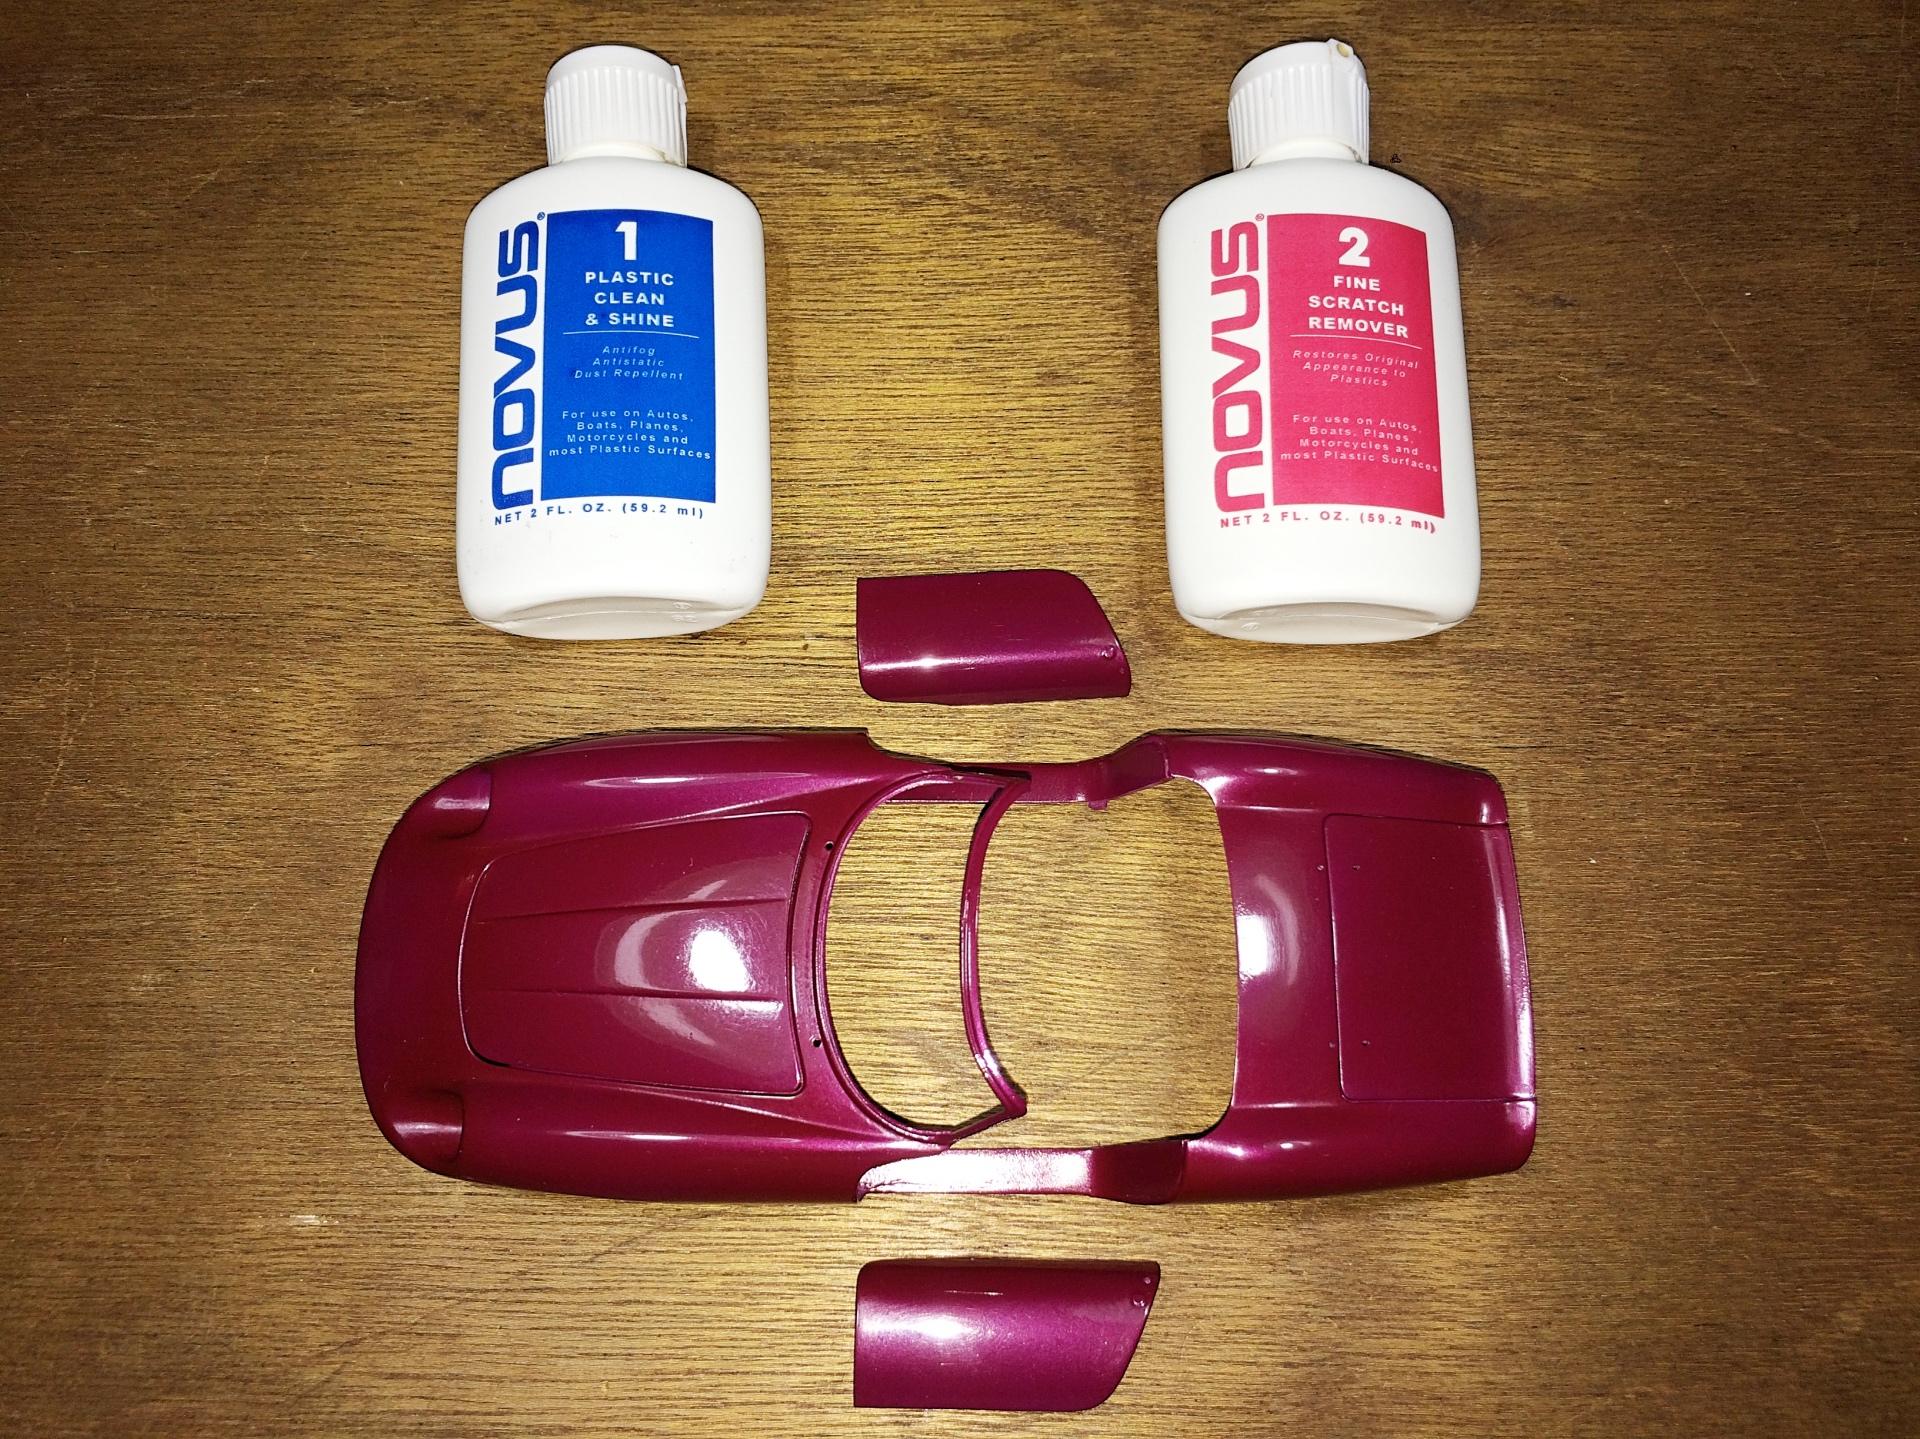
Polished the paint, been 11 days since I touched it. Guess this is good enough for gubmint work. Got the polishing emory cloth set from Detail Master last century, used brand new pieces. I've seen people saying they use Novus, so I recently got some and have tried it out. Need to work fast with it, softens the paint so the risk of leaving fingerprints and paper towel imprints is high. Going to avoid touching for awhile again. I should be happy. ?
-
Modeler's Lola T89 Formula 3000
89AKurt replied to Art Laski's topic in WIP: Other Racing: Road Racing, Land Speed Racers
First that I saw this, cheering you on with building something! ? -
CHROME plating, plater, outsource company (2020)
89AKurt replied to 89AKurt's topic in Model Building Questions and Answers
I can be just as cranky as anyone. ? Don't understand why that thread did not come up when I searched within this forum, but found it using Safari. -
~bump~ DUH
-
for disgusting procedures
-
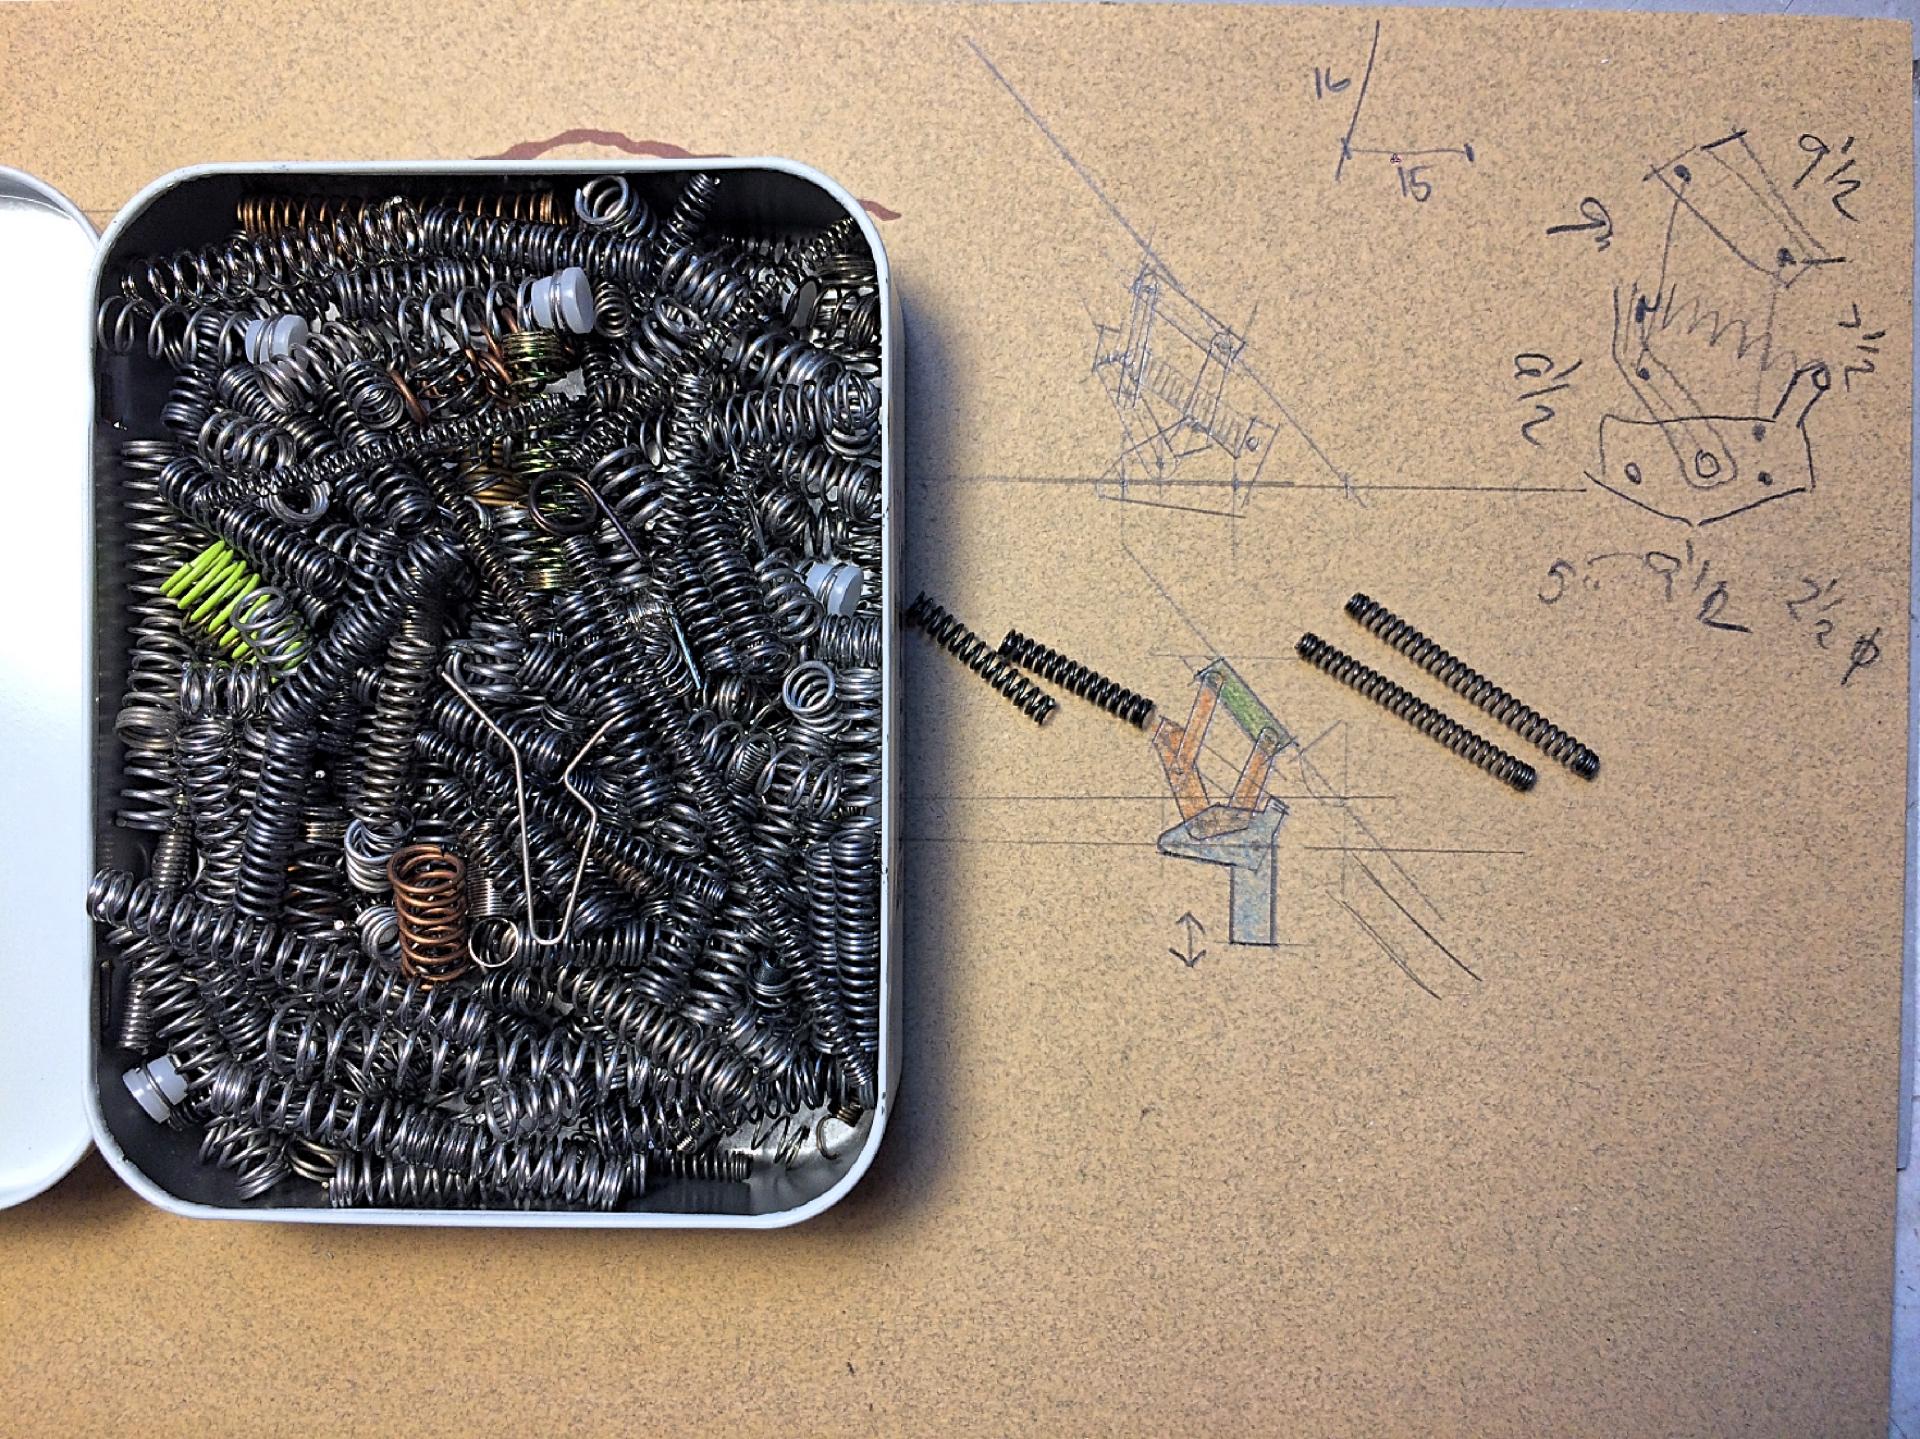
Since I have this spring collection, thought about making realistic hood hinges. I've seen photo-etch hinges, that don't work, but sure look better than setting the hood on the table. Think I can make it so the hood can be in open position, then pull out of receiver-type holes, then set the hood down and have the tab go inside past the interior tub, there seems to be room. At least that's what I thought when I woke up this morning. Reference picture: