NOBLNG
-
Posts
9,564 -
Joined
-
Last visited
Content Type
Profiles
Forums
Events
Gallery
Everything posted by NOBLNG
-
That is very nice Ken! I like it lots!?
-
Your panel lines look great Bob!?
-
 I hope I didn’t kill your plans.? A 4-door TJ is still a really cool project. It just won’t look like a 2020 model.
 -
A Mack and a Snorkel
NOBLNG replied to Chariots of Fire's topic in WIP: Model Trucks: Big Rigs and Heavy Equipment
Beautiful work on that brass! Looks like a fair bit of engineering went into it.? -
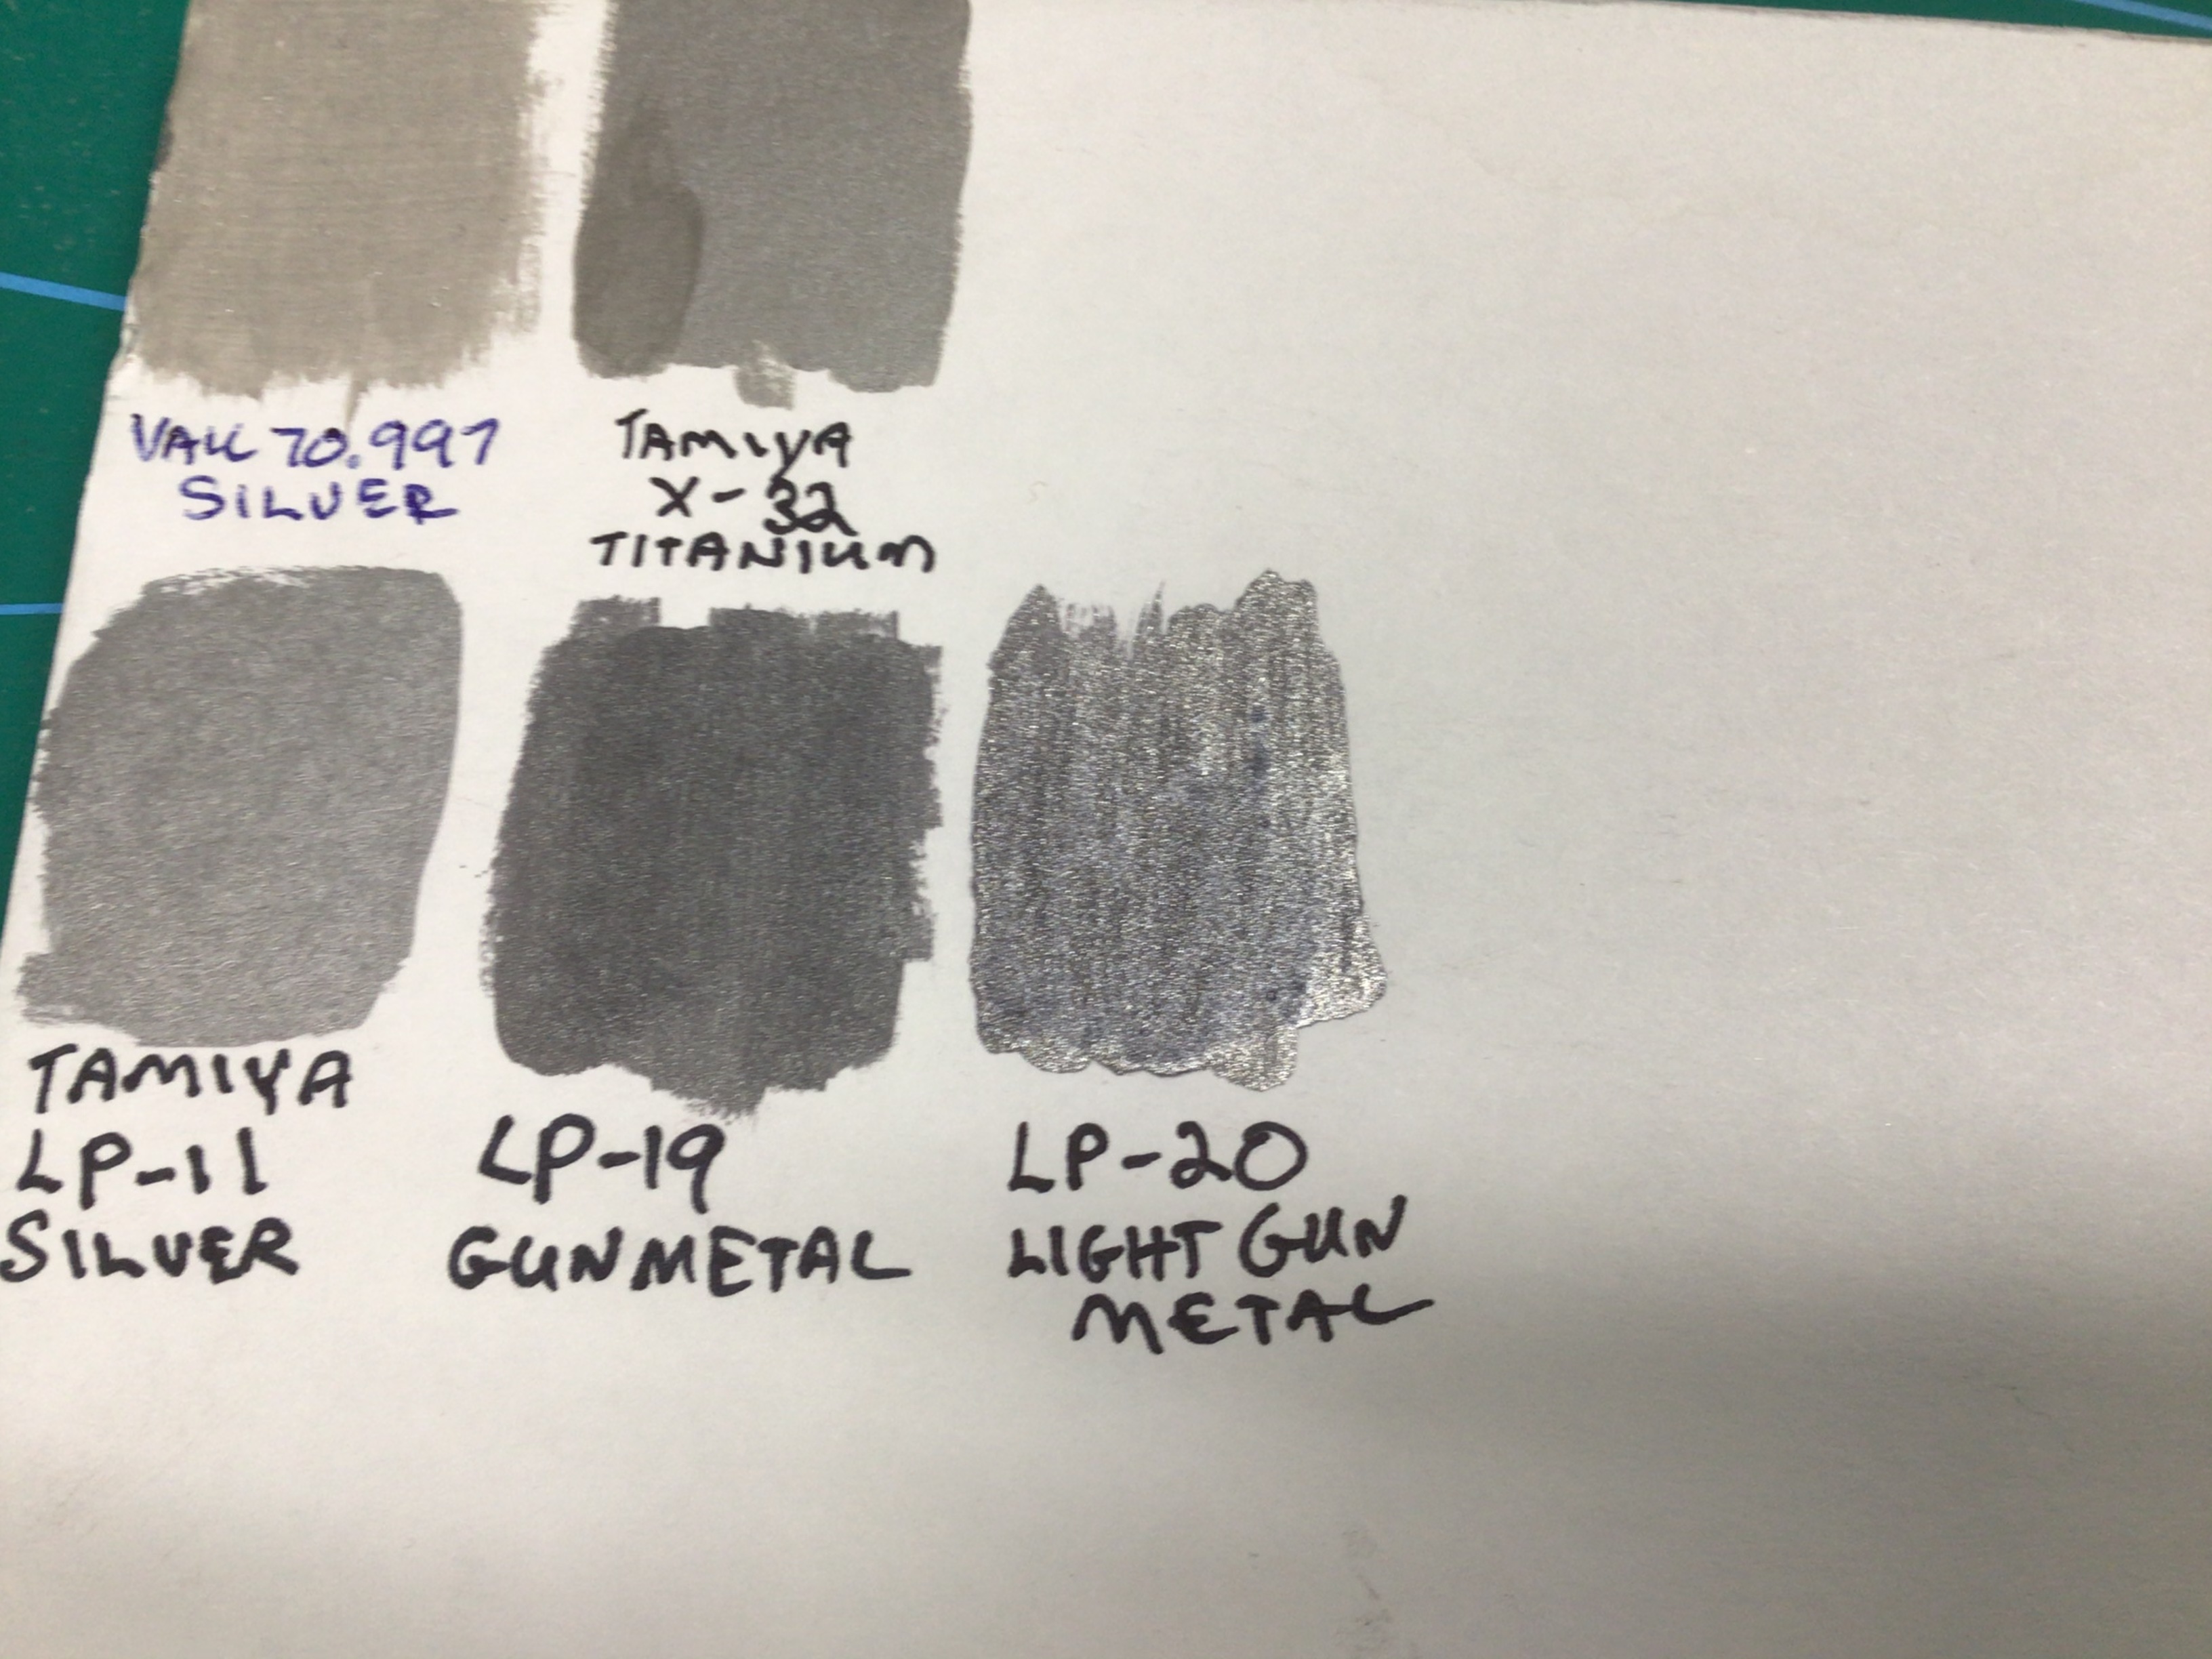
Winchester Gray Metallic paint
NOBLNG replied to Modlbldr's topic in Model Building Questions and Answers
Yes, it looks blueish to me. The gunmetal has none of that.
-
Yes, nice work on that cab! Nice work on everything so far!?
-
Found a good way to strip the peeling decals off my 5th wheel. Warm slightly with a heat gun and scrape them off with these plastic scraper blades. It gets the decal and 95% of the glue off. Gunwash on a rag will take the remainder off.
-
First Kit in 20 Years
NOBLNG replied to bluestringer's topic in General Automotive Talk (Trucks and Cars)
Is that the Revell of Germany kit in the flat box? I have opened mine a couple times and put it back. I find the instructions a little intimidating. You can always put it on hold and start another simpler kit. Get a kit that you’re not in love with so it won’t bother you as much if you mess up a bit.? -
No kit available of the Willys, only a diecast stake box....so I cast one.? Link to my long, slow build. http://www.modelcarsmag.com/forums/topic/156181-‘54-willys-pu/
-
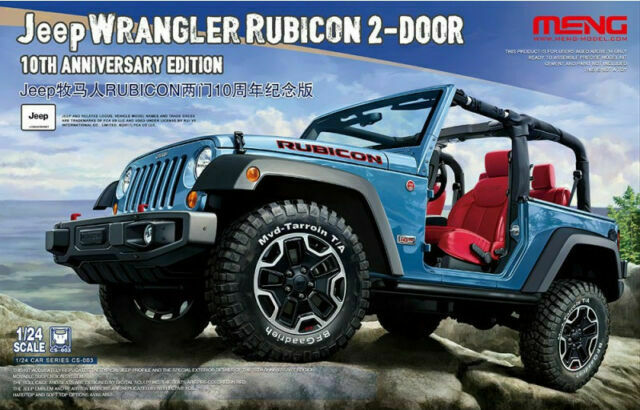
This 1/24 diecast would be a better starting point, as it is a JL. Unfortunately it is a truck, but it has the correct grill, fenders, hood, taillights and the four doors. I am surprised with the popularity of the new(er) 4 door jeeps that no company has kitted them??? https://www.amazon.com/exec/obidos/ASIN/B08DL94PHL/rocketfin-20
-
You’ve got your work cut out for you! That kit is a TJ body style (turn signals in the metal fenders). After that body style came the JK and JKU(4 door), then came the JL which is what a 2020 would be...or JLU? There are as far as I know, minor differences between the JK and JL. This kit may be a better starting point. I have messed with the Revell kit but have not seen the Meng kit so I don’t know how detailed it is. Good Luck! Some good info: https://carbuzz.com/features/history-of-the-jeep-wrangler-in-five-generations
-
You WILL need patience while waiting for sprue glue to cure, if that’s the route you go.
-
Little jars that I got from Michaels.
-
I agree, but evergreen rod might be softer than the original styrene. I haven’t tried the epoxy that Bill recommends, but I have made “sprue glue” using styrene chunks and liquid cement. Preferably use the sprue from the original kit if possible. Dissolve chunks of it in liquid cement until you have a thick paste. Fill the cracks and let it dry thoroughly. It may take a long time, (start another kit in the meantime) but when it is fully cured it will be just like the original plastic. Then the lines can be re-scribed. If you have an old scrap body...experiment a bit.
-
Copying and Printing License Plates
NOBLNG replied to NOBLNG's topic in Model Building Questions and Answers
Thanks All! I took another pic of it with the flash on and it looks a lot brighter...in fact I can tell how dirty it is now.? I’m going to wash it off and give it one more try. If I can’t get a decent facsimile, I will try the Plate Shack next. -
I would like to copy my custom plate. I have downsized and printed a photo of it, but it is dark and the definition is poor. Has anyone tried putting an actual LP on the printer/scanner? Or any other ideas? Thx.
-
I remember Mr. Magoo and the Pink Panther being shorts that they would play before the movie started in theatres. Now all we get is advertising.?
-
Channels? Channels...you had more than one? I wasn’t real big on the Banana Splits either, but it was something different! Bismark, ND ( I think that’s where it was broadcast from?) is 280 miles from my hometown so we could only pick it up over the air on certain days. On most days the only channel we got was CKX Brandon. I remember those too.? And Quick draw McGraw also.?
-
Bugs Bunny, Road Runner Hour. With Wile-E-Coyote, Foghorn Leghorn, Elmer Fudd, Pepe Le Pew. Daffy Duck, Porky pig, Taz, The Martian. ( I think these were all on the same show)? Popeye The Flintstones Heckle and Jeckle. Huckleberry Hound. Magilla Gorilla Yogi Bear On good days when we could pick up Minot or Bismark ND. I would watch “The Banana Splits”. not really a cartoon but...
-
Rare 'Cuda up for auction
NOBLNG replied to ksnow's topic in General Automotive Talk (Trucks and Cars)
Only worth a hundred grand then!? -
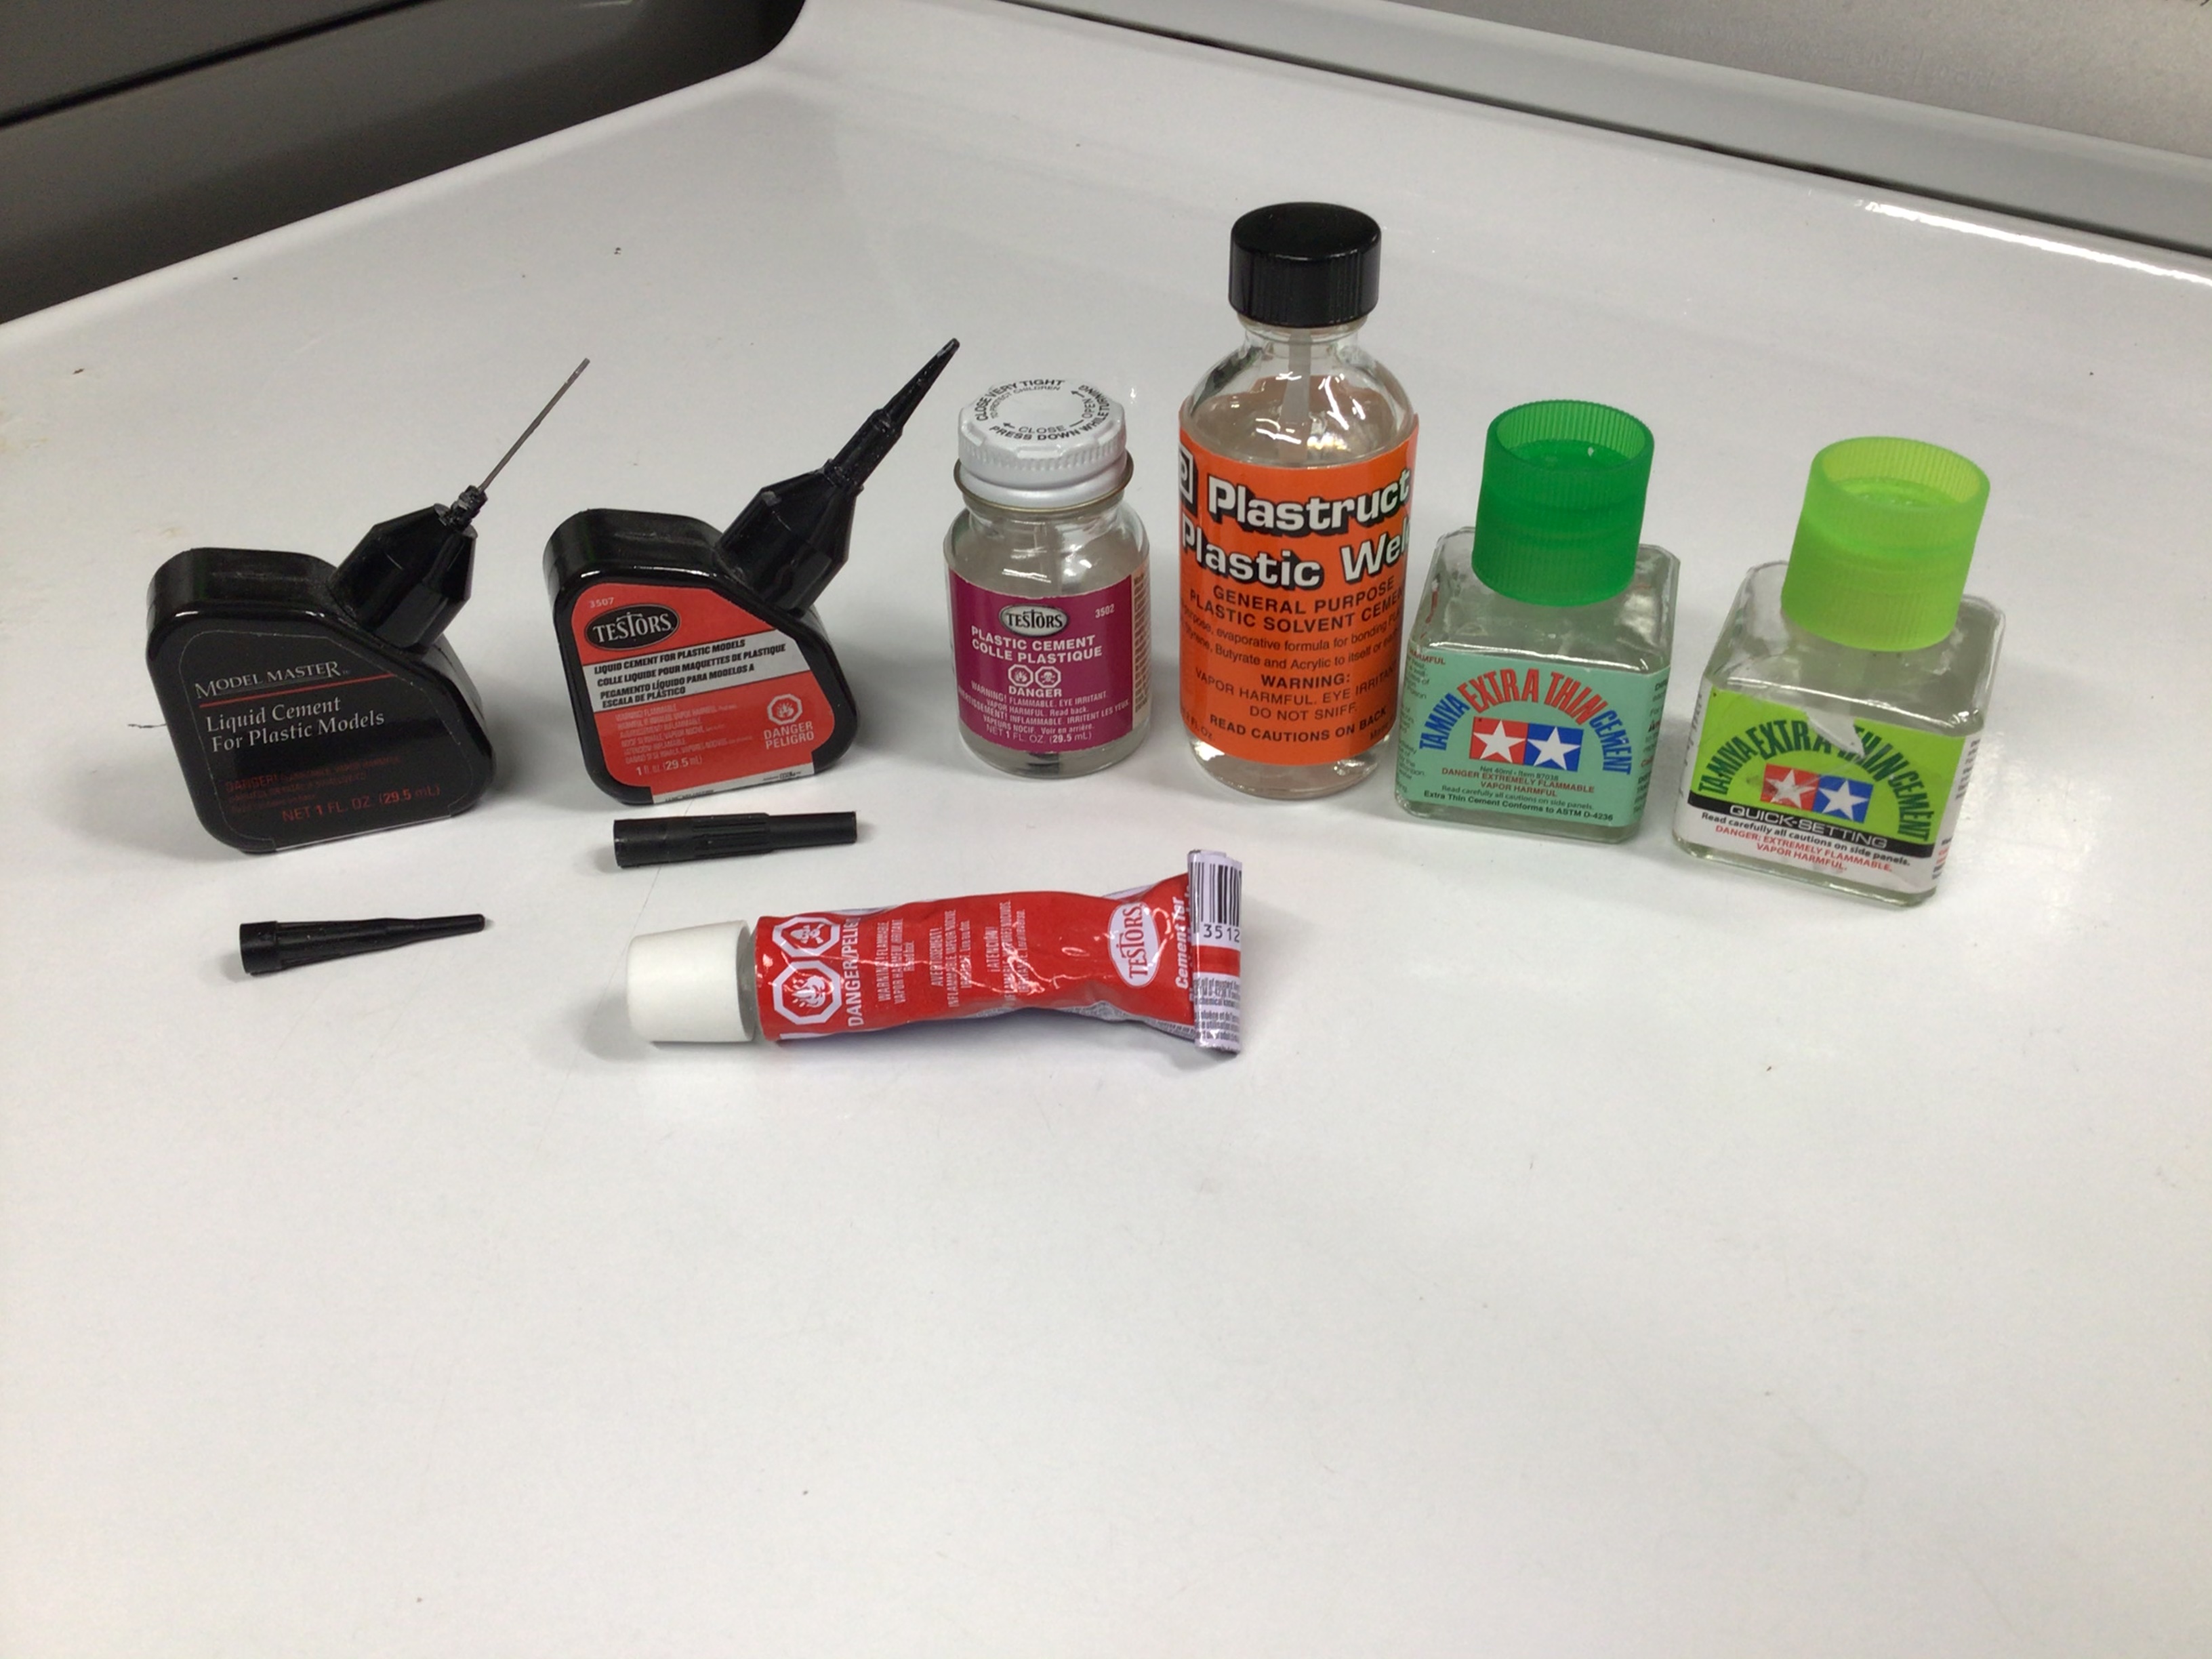
I'm having trouble with hobby cement.
NOBLNG replied to Plumcrazy Preston's topic in Model Building Questions and Answers
These are all of the “plastic melting” glues that I have. I use the Tamiya Quick Setting stuff now almost exclusively unless a non-solvent glue is required. They all work well in my experience, except the Plastruct. I bought it last week because the shop owner had it on sale so I figured why not? I glued some .156” half round styrene to some rectangle to make a muffler. When dry, I used a pin to dimple the end so I could drill a hole and it split apart.? Oh, and the plastic nozzle on the testors always plugs up.?
-
I'm having trouble with hobby cement.
NOBLNG replied to Plumcrazy Preston's topic in Model Building Questions and Answers
I’m not familiar with this kit, but I imagine the oil pan should have large flat mating surfaces. So if it is falling off, perhaps your glue has gone bad? If the lid was left off, maybe the solvents evaporated? -
I'm having trouble with hobby cement.
NOBLNG replied to Plumcrazy Preston's topic in Model Building Questions and Answers
Thin super glue (CA) will work on close fitting parts, but you will need an applicator like “glue looper” or a home made one in order to apply very tiny amounts. I prefer medium CA as it is easier to apply tiny amounts and doesn’t set instantly like the thin stuff. Either will bond to paint, but the joint will only be as strong as the paint-to-plastic bond is. The best thing to do is get some .020” brass rod (or any tiny wire) and make pins to join all the finicky little parts before paint. Then you are not relying on the glue for the strength and it saves a world of grief during final assembly! ? -
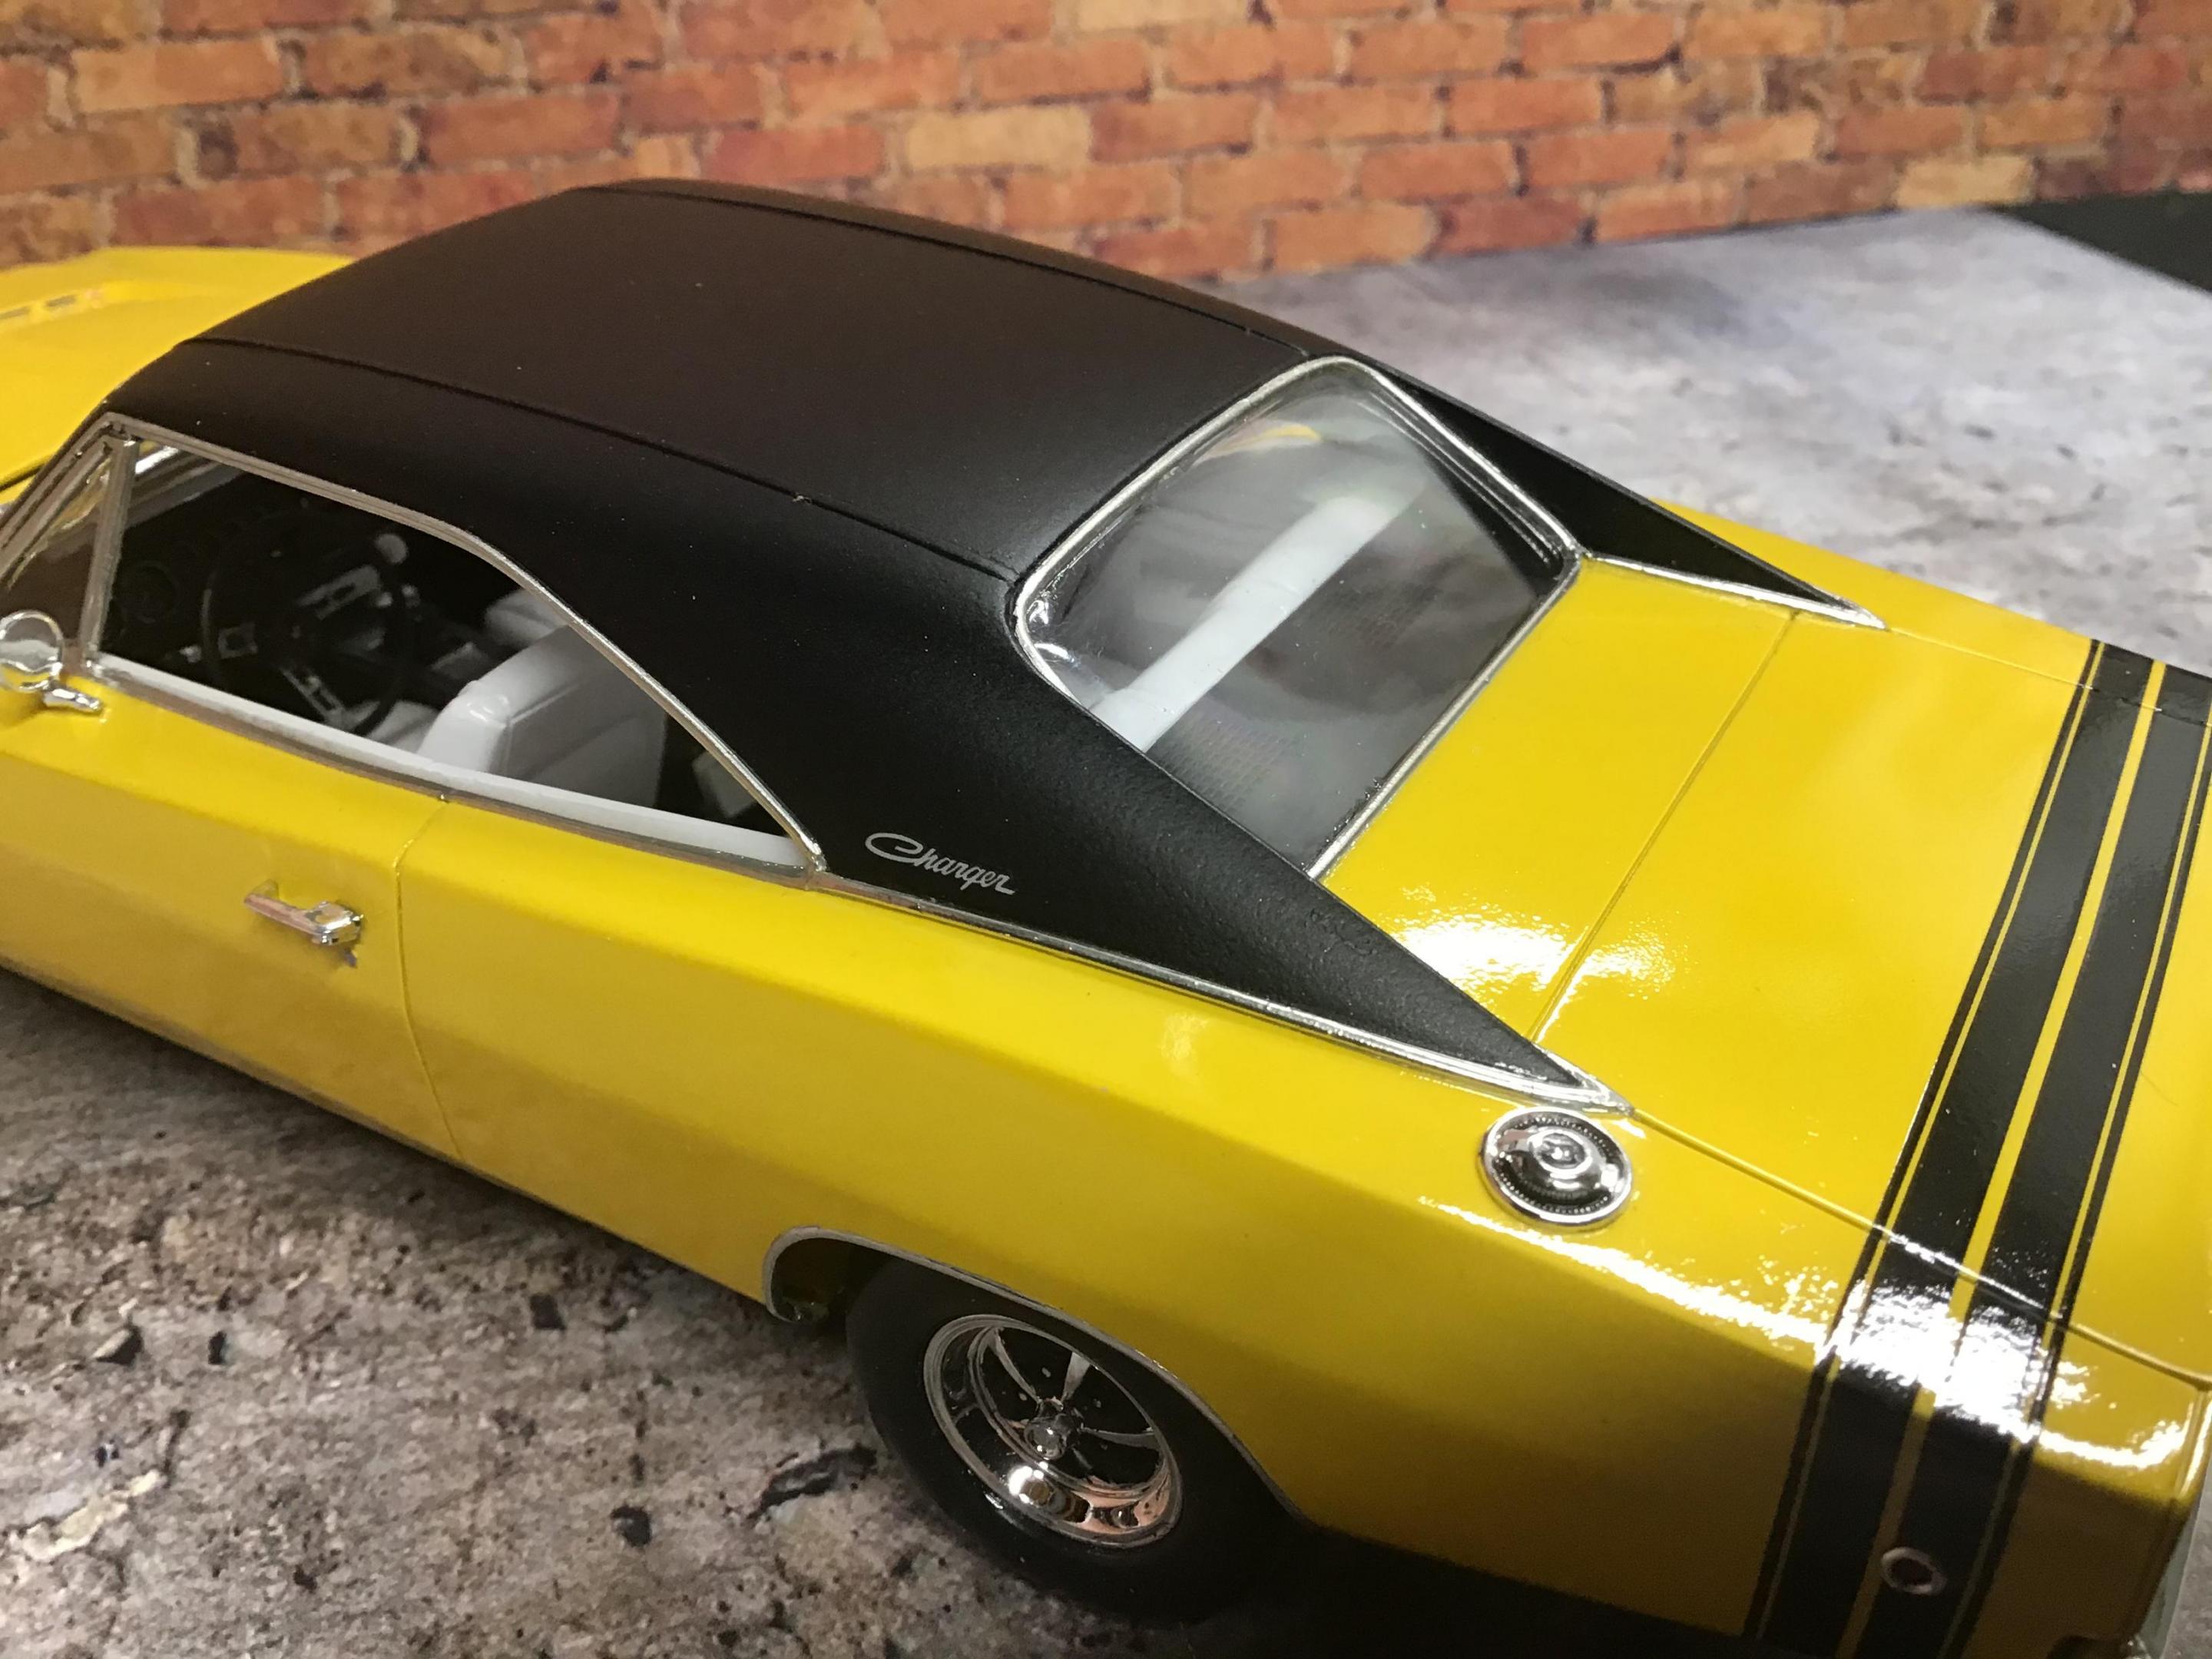
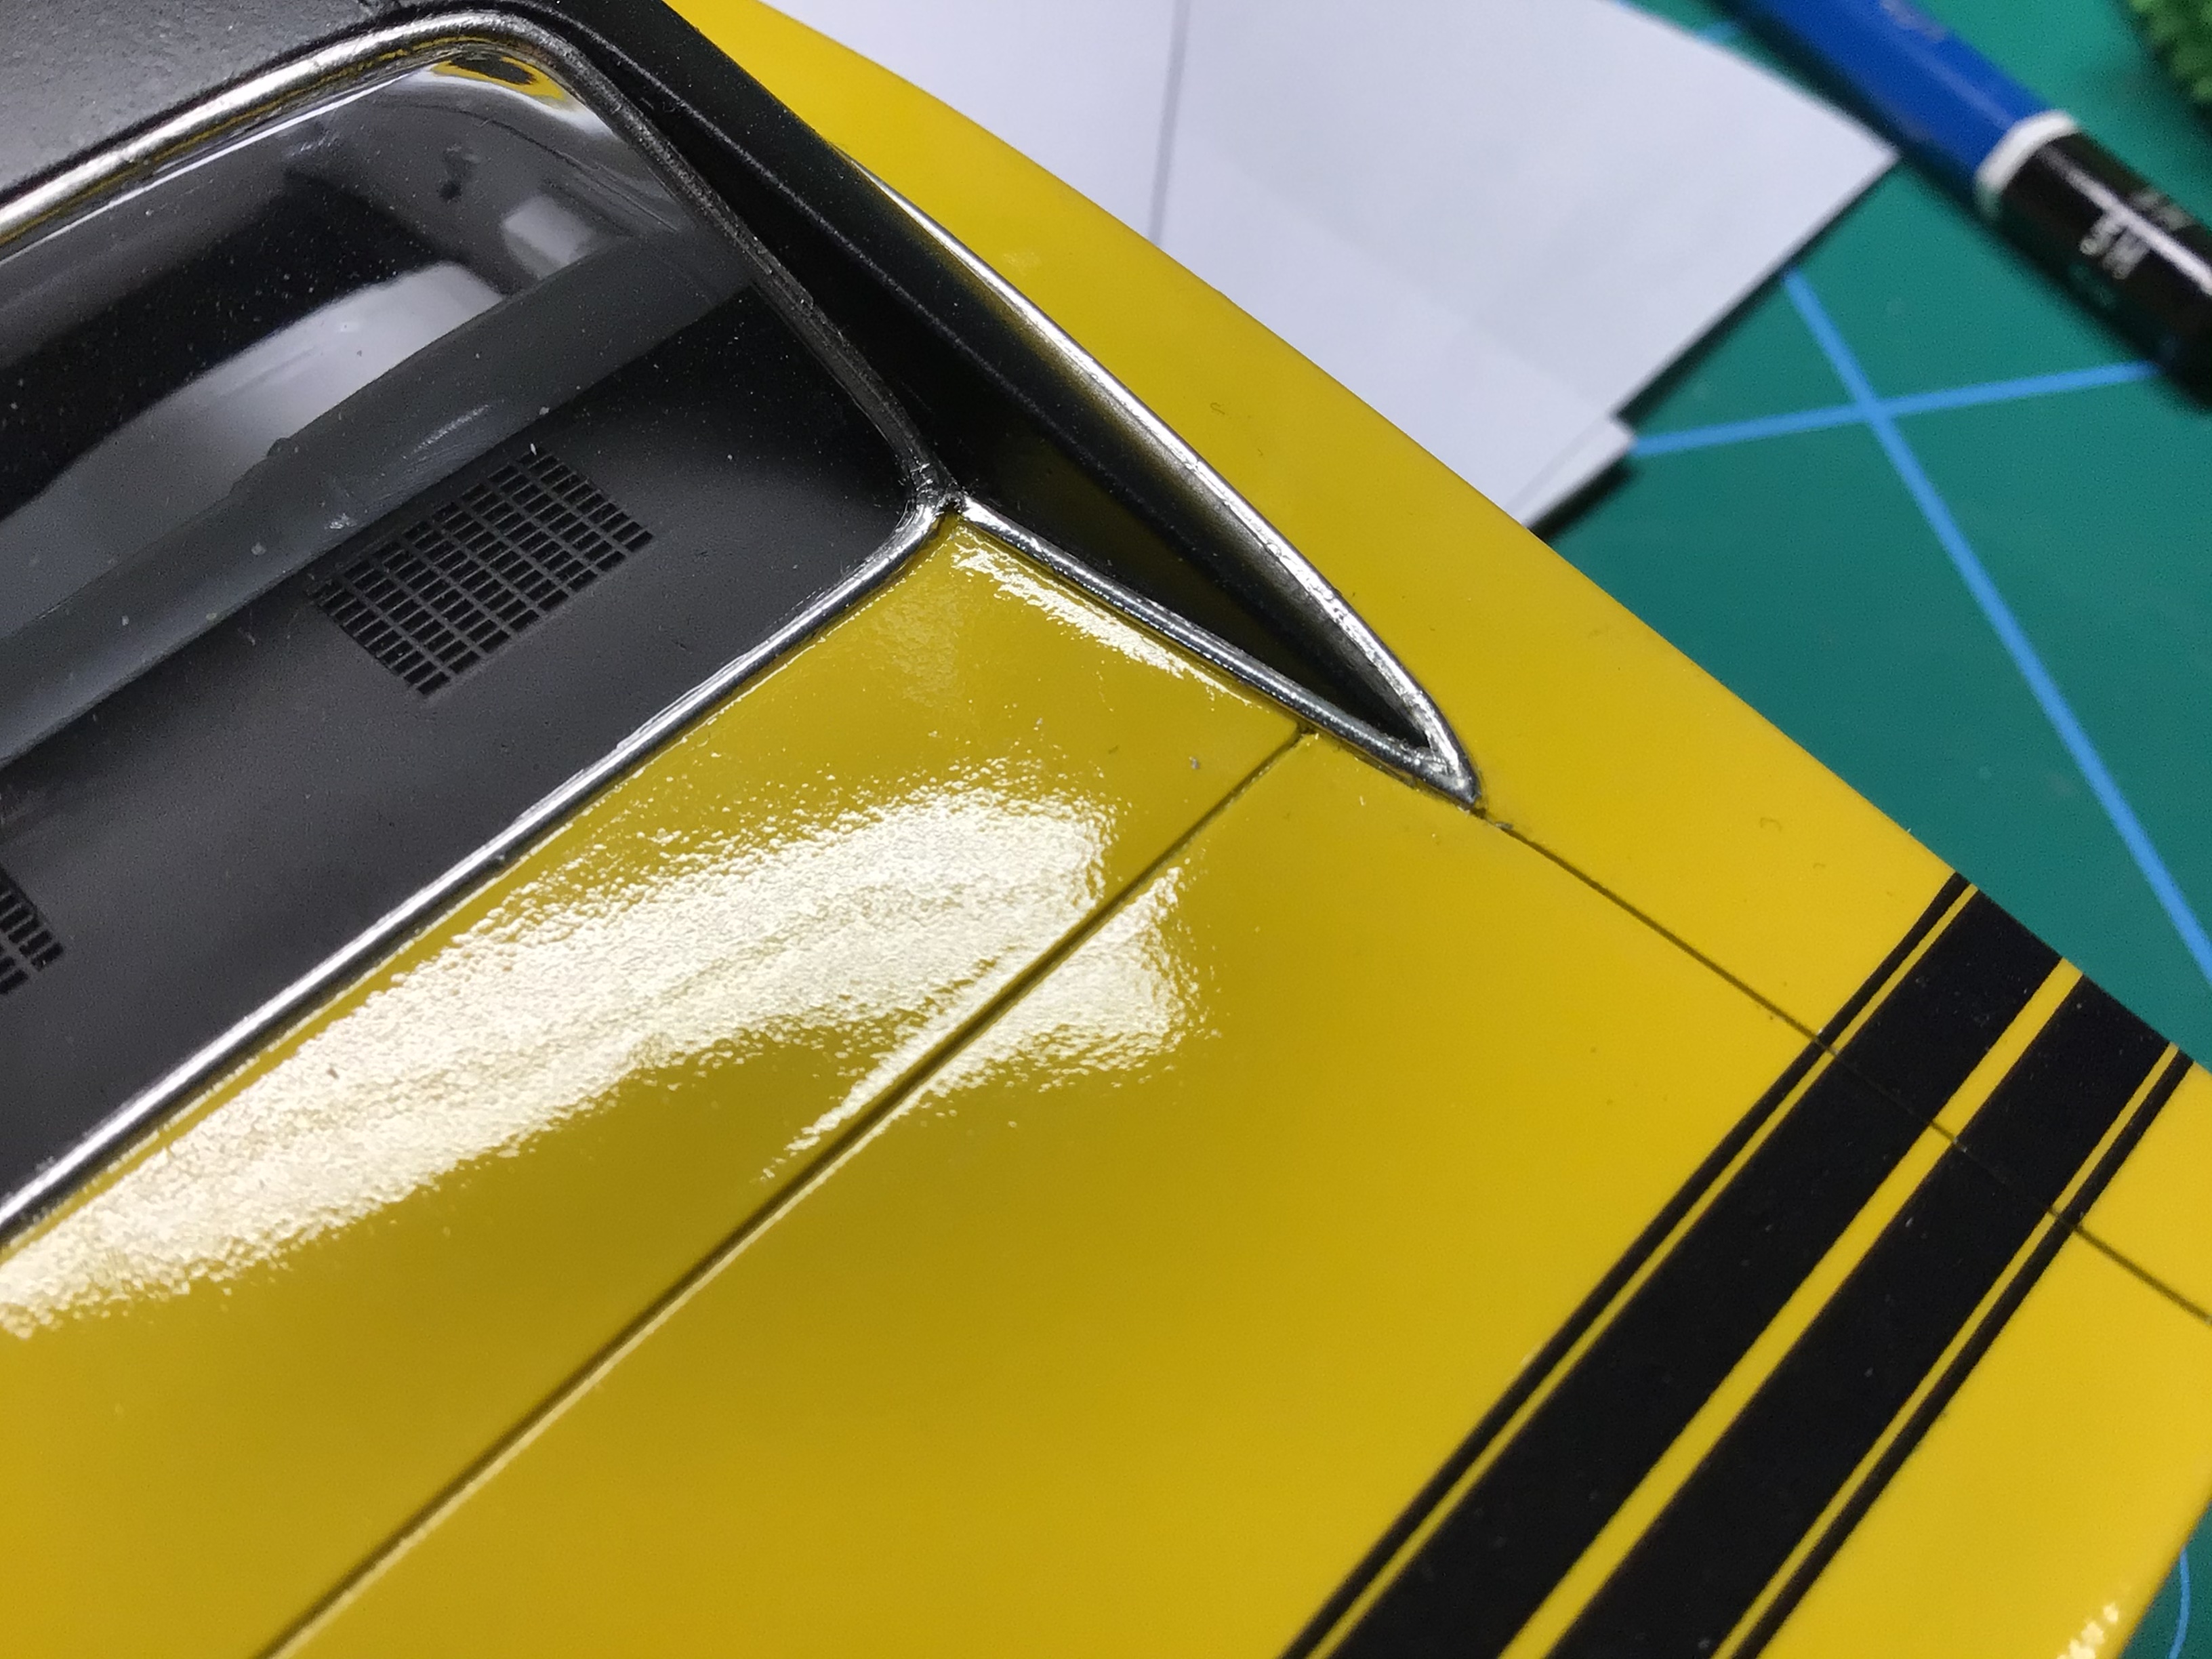
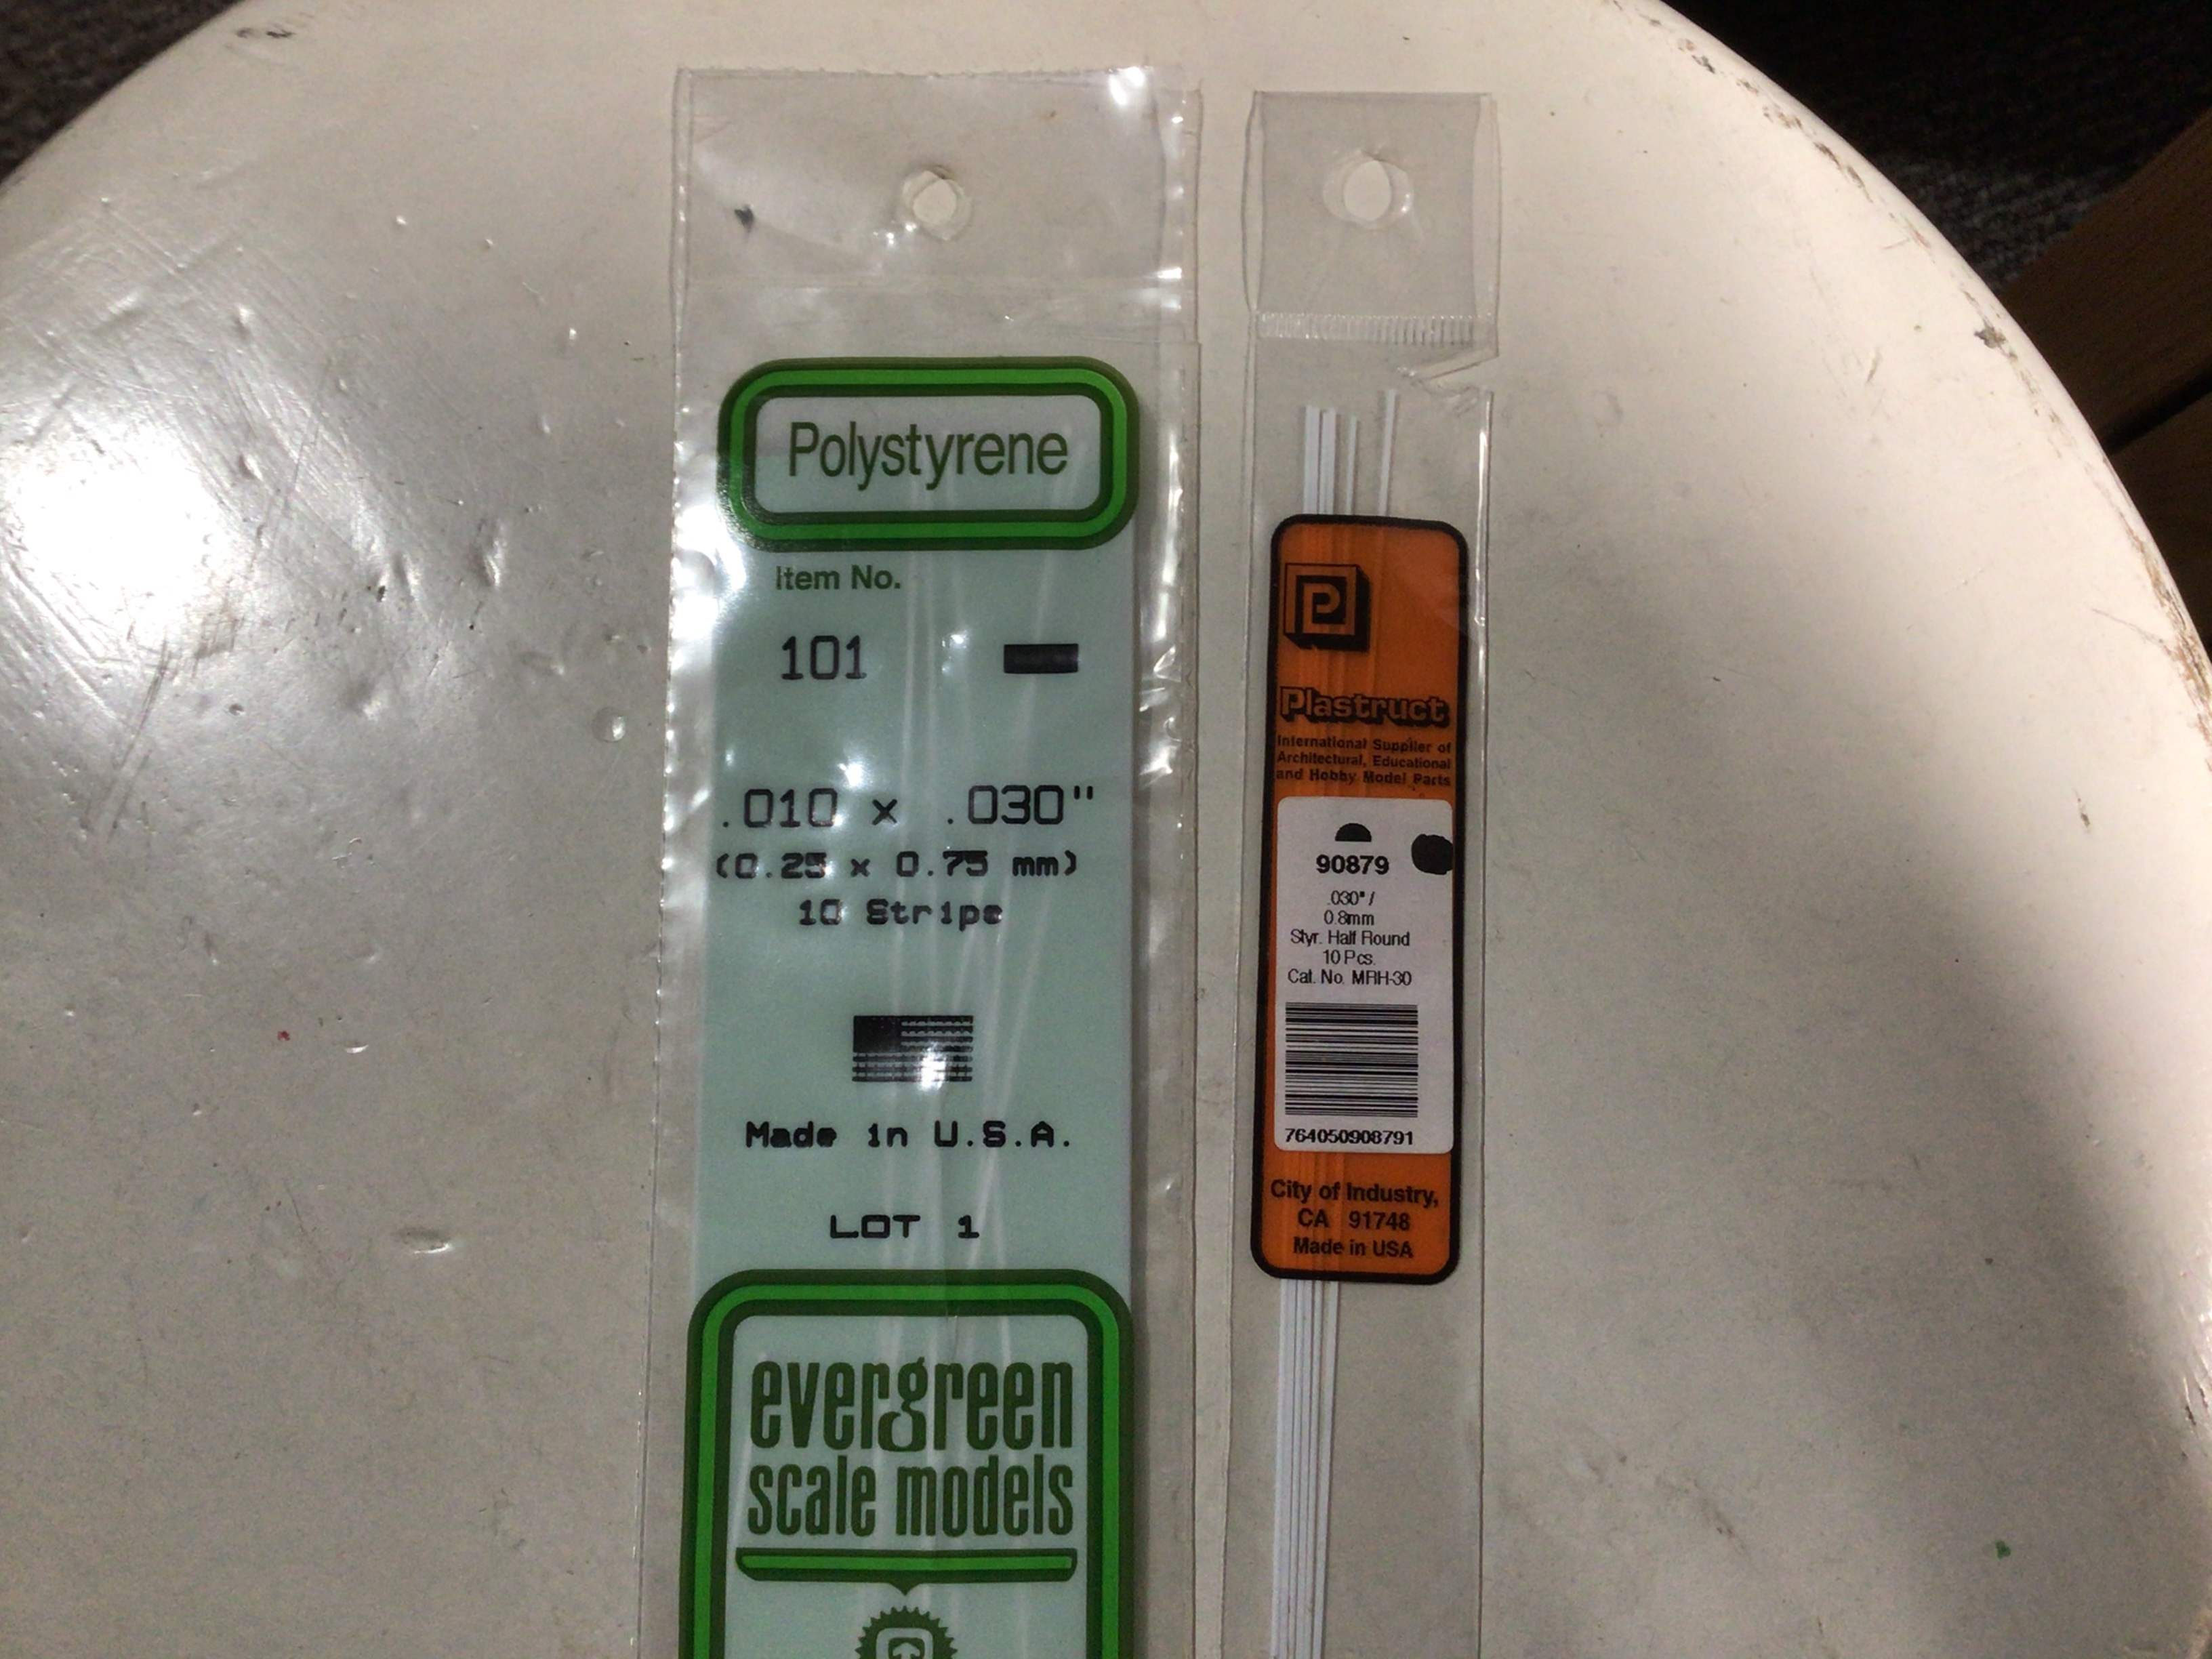
I think I used .010”x.030” flat strip for the seams on the roof, and .030” half round for the chrome trim. You can sand the half round slightly to make a half oval shape? I cut the first piece I installed just a hair long and glued it in place. Then made the second piece overlap it. Then with a very sharp (new) blade, I trimmed both strips with one cut.
-
Can you right click on the pictures on Fotki and save them to your computer? Then upload directly to your post by clicking “choose files”?