Bills72sj
-
Posts
4,589 -
Joined
-
Last visited
Content Type
Profiles
Forums
Events
Gallery
Everything posted by Bills72sj
-
Very nice. Please continue to share.
-
I would take LESS out from in front of the rear wheels. The visual centerline of the C-pillar should intersect with the center of the wheel. Have you ever noticed SAABs from the 80's look weird? That is why.
-

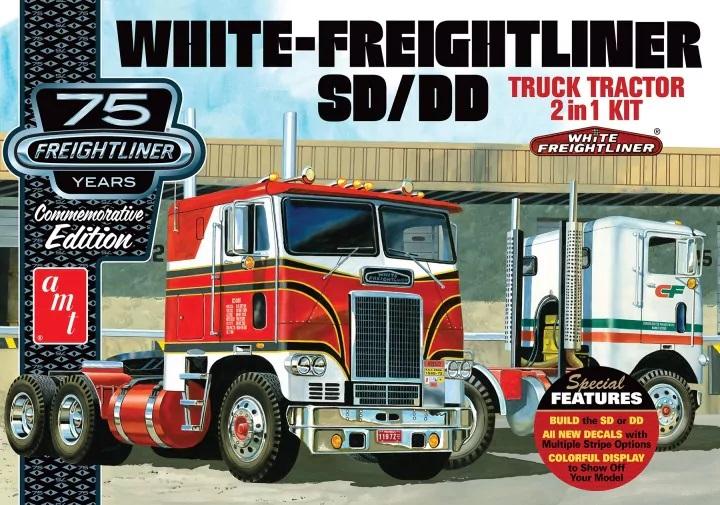
Italeri/AMT 378 Pete versions?
Bills72sj replied to Oldmopars's topic in General Automotive Talk (Trucks and Cars)
Low sleeper: Italeri #746 issued 1997 reissued 2008. High sleeper: Italeri #3857 issued 2010, AMT #1169 issued 2019 Day cab: Italeri #3894 issued 2015 Info from Scalemates.com https://www.scalemates.com/search.php?fkSECTION[]=Kits&q=378&fkCATNAME[]="Trucks"&fkGROUPS[]="Vehicles"&fkSCALE[]="1:24" -
Are you going for a public service garage or a private workshop? My next project shall be a garage diorama. I will be following yours.
-
I think there is a limited amount of time that editing is available after a post. I would suggest a PM to a moderator to have them edit it.
-
Enjoy your families and have a Merry Christmas! ??? Bill N. Salem, OR
-
I have 2 WIPs that I think can meet the AUG 1 deadline. Do they qualify? I would like to participate and would like the motivation.

-
Can we see your model stash?
Bills72sj replied to Fifer's topic in General Automotive Talk (Trucks and Cars)
I am going to consider myself fortunate as I only have 2 genre of interests. Muscle car era cars (+/- a few years before and after) and American semis. I have 98% of what I intend to build. My build ratio is about 20%. I am still young enough that I MIGHT actually get most of them built. However the purchase compulsion is VERY hard to resist. The fist pic is the wife's view. The 2nd is only HALF of what is in the cabinet. The 3rd is the builts at the end of 2018.
-
Can we see your model stash?
Bills72sj replied to Fifer's topic in General Automotive Talk (Trucks and Cars)
OOOOOH! Power tools..... -
Can we see your model stash?
Bills72sj replied to Fifer's topic in General Automotive Talk (Trucks and Cars)
Due limited budget and space My duplicates are probably less than 5% (Except for 68,69,70 Chargers) -
Can we see your model stash?
Bills72sj replied to Fifer's topic in General Automotive Talk (Trucks and Cars)
Nice stash!!! The 68 R/T the 66 Bonnie and the 69 GP are a some of the last few I am looking for. -
Peterbilt wrecker body into car hauler
Bills72sj replied to Sam I Am's topic in General Automotive Talk (Trucks and Cars)
It might be long enough for a 63-76 'Vette, If the front wall to where ramp starts down hill is 5-5/8" or longer it will work. -
I am a little late to the fan club meeting but, very nice build of one of my favorite subjects.
-
in the chamber
-
Well the 3 on the bench are not getting done this year. So, here is my completed builds from a very abbreviated modeling year. I spent EVERY weekend from Memorial day to Labor day prepping and painting my house. Some of you know how hard it is for us detail oriented people to tackle such a project with so much surface area!
-
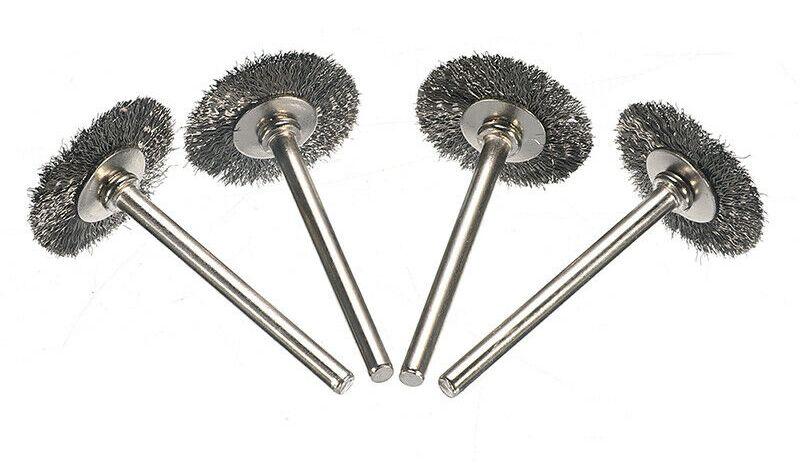
I have a fine wire wheel about 5/8" dia that mounts in my dremel. It cleans up my files lickity split.
-
Curt, I remember that there was no groove to "guide" the knife when trimming the BMF. If I had a Molotow chrome pen, I would have used that instead. I am glad to inspire you. Any links/pics of you progress?
-
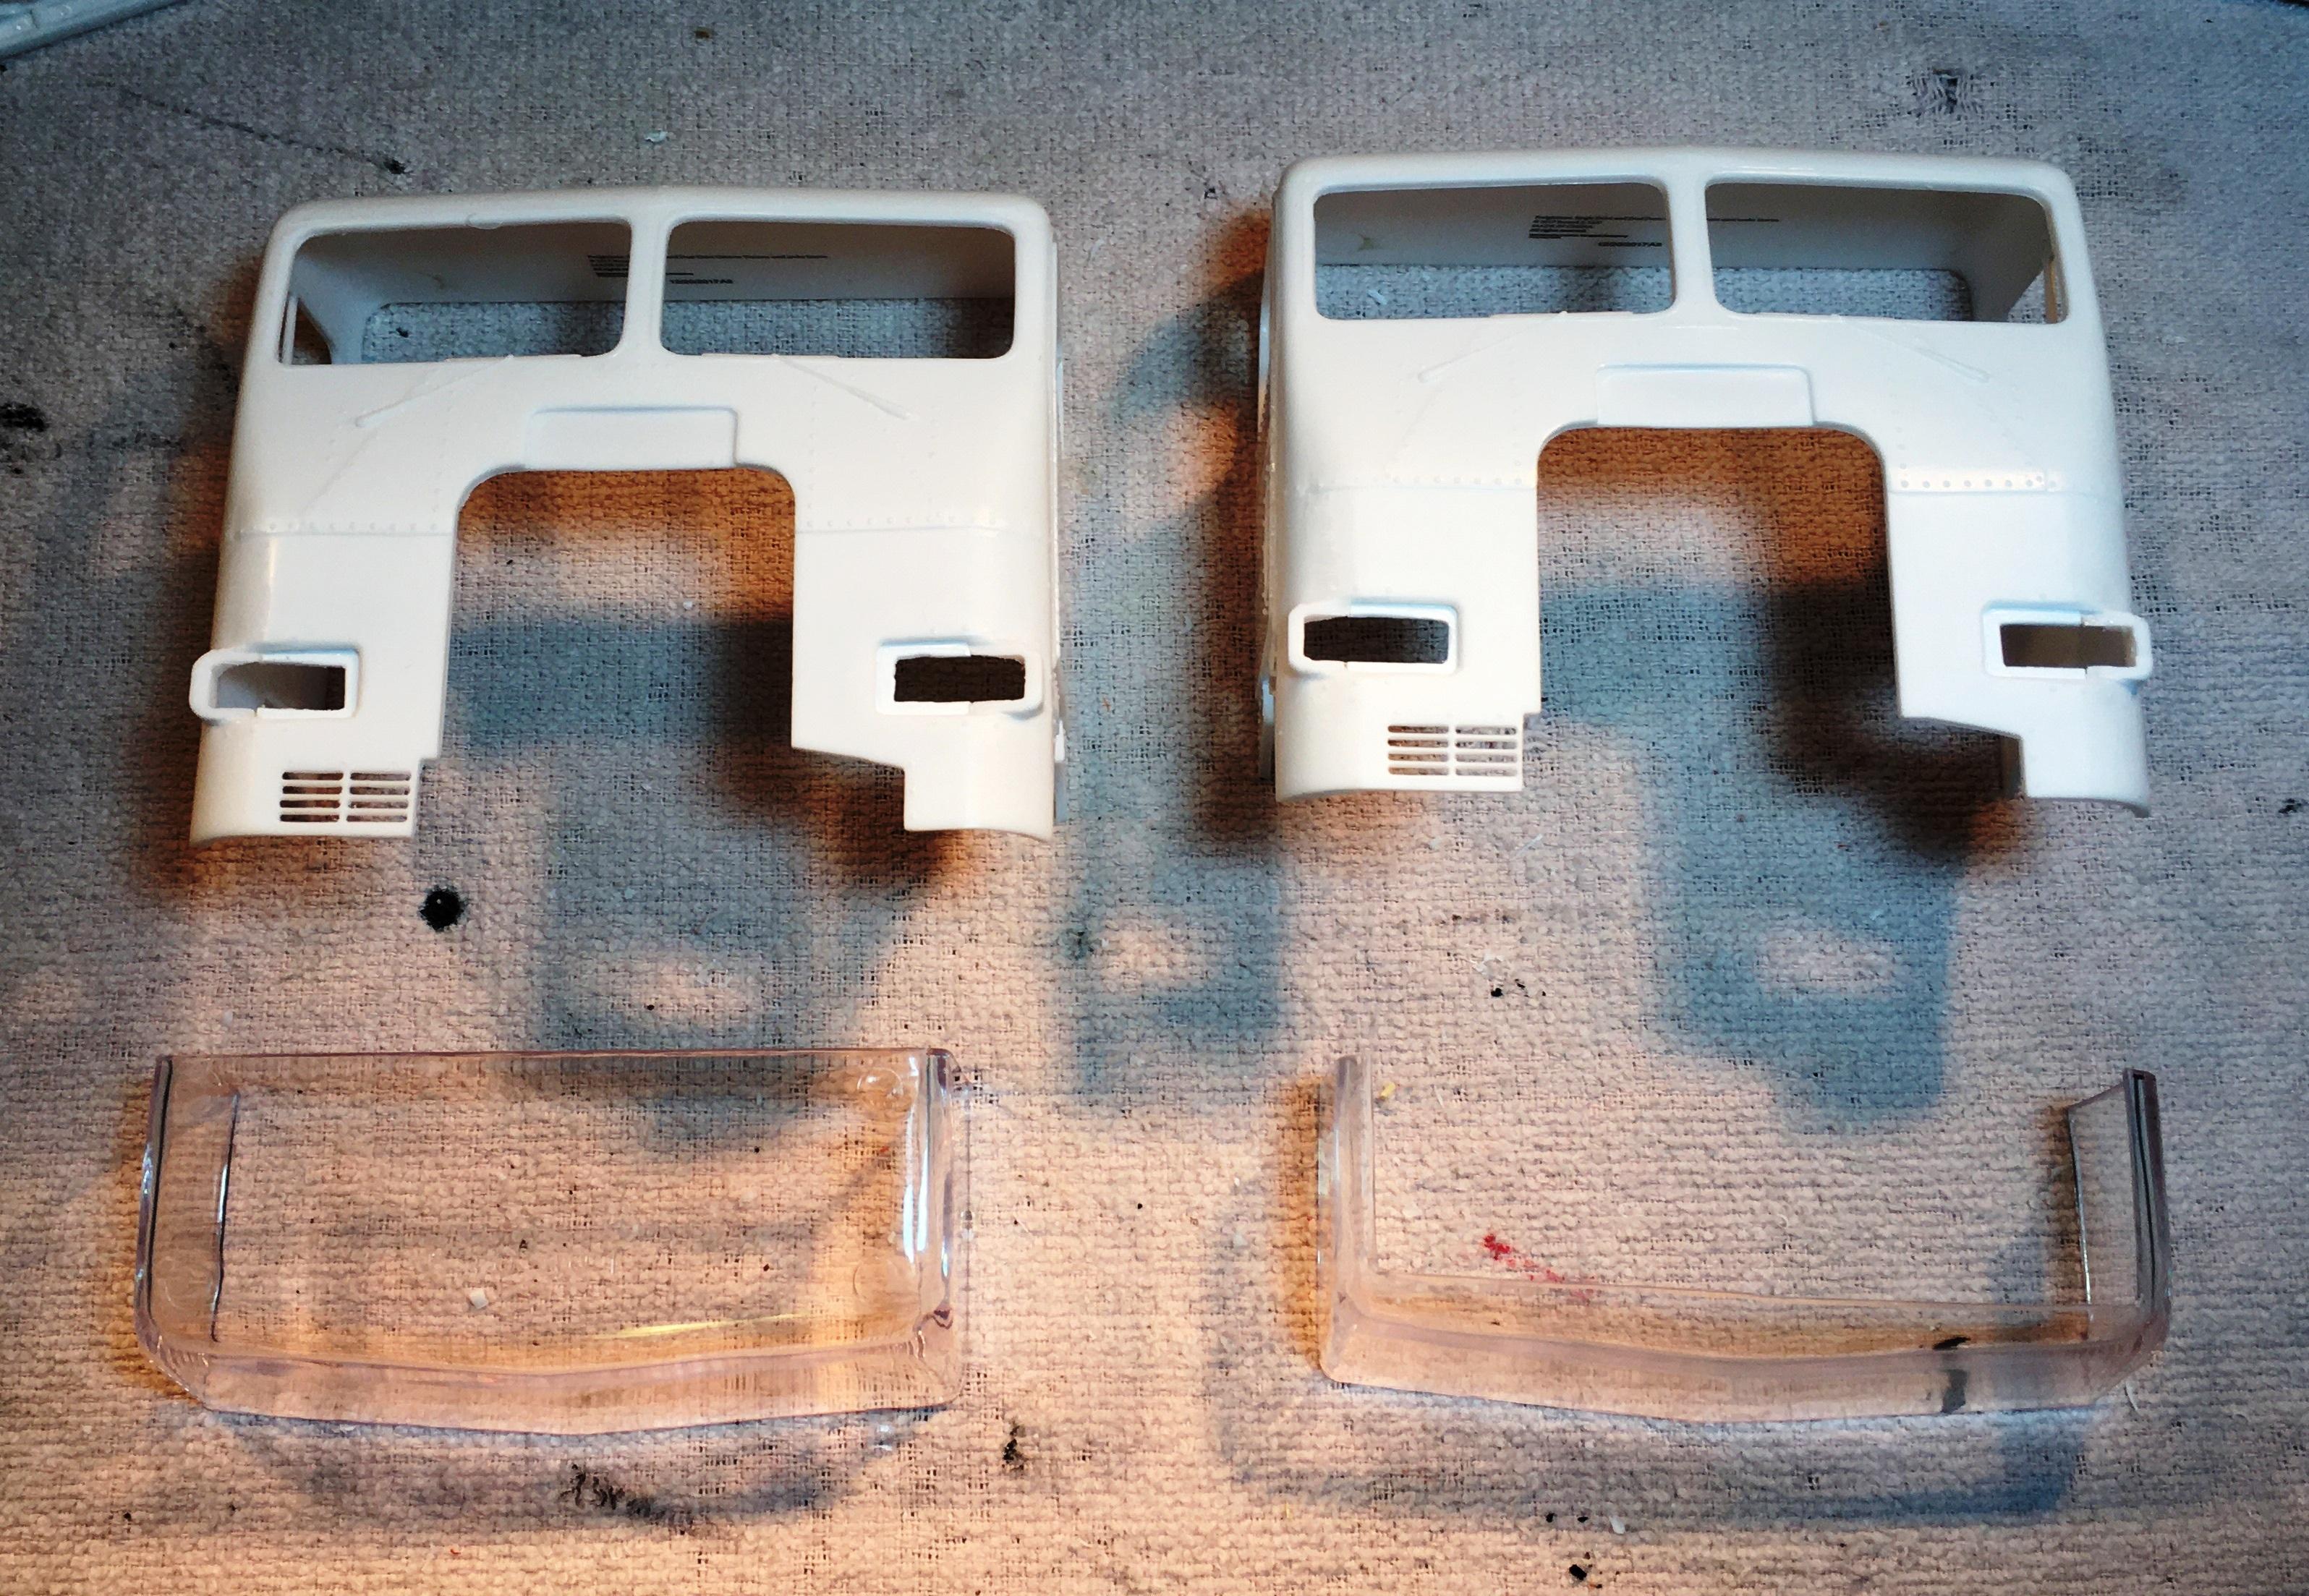
Spent yesterday and today making a tail light bar from scratch. I had so trial and error but I think the result will be good in the end. The pis show my inspiration and materials used. I will share an update once I get it painted and assembled.
-
Awesome work. So where is the museum that you are sending the too? lol.
-
I love the rims on the Chevelle. That Olds is really sweet. I pray you have a better life next year
-
Awesome work. The color on the Vette is gorgeous. The one I want you to send me is the Cyclone (lol). I dream of having one of those on my shelf.
-
Nice builds. Thank you for sharing.
-
Very nice work. I like the Elco.
-
It looks like you have a beautifully productive year.
-
Very high quality results. Your painting and detailing are top notch. Your eye for proper stance is SPOT ON! (The Chevelle is my favorite)