David G.
-
Posts
11,326 -
Joined
-
Last visited
Content Type
Profiles
Forums
Events
Gallery
Everything posted by David G.
-
 Thanks for the update Si. Looking at the one photo from the bow along the ventral center-line of the craft I noticed that you've added the little detail bits to half of the ship and have yet to add them to the other half. I just wonder how symmetrical you plan to be with the application of detail bits between the two sides. The photos look great btw. David G.
 -
I'm definitely interested in seeing how this one turns out. Looks like you're off to a great start. David G.
-
Food Vendor Truck
David G. replied to BIGTRUCK's topic in WIP: Model Trucks: Pickups, Vans, SUVs, Light Commercial
What a fun little project! I'm actually a little surprised at the amount of detail provided. What you've done so far looks great Your color choice is perfect. David G. -
Thank you for all your kind comments and Edsel anecdotes. Almost everyone over the age of 50 has an Edsel story, even if it's only that of a neighbor who had one in his back yard that he used for a chicken coop. The Edsel is without question a car that achieved a legendary status, though not for the intended reasons. I have sometimes wondered how the Edsel would have been received if Ford launched it as the new Crown Victoria instead of trying to create a new market tier which was, for the most part, already occupied by the Crown Vic. I'm working on the interior now and should soon have more photos to post. Thanks again, David G.
-
Bat-Missile: Finished
David G. replied to David G.'s topic in All The Rest: Motorcycles, Aviation, Military, Sci-Fi, Figures
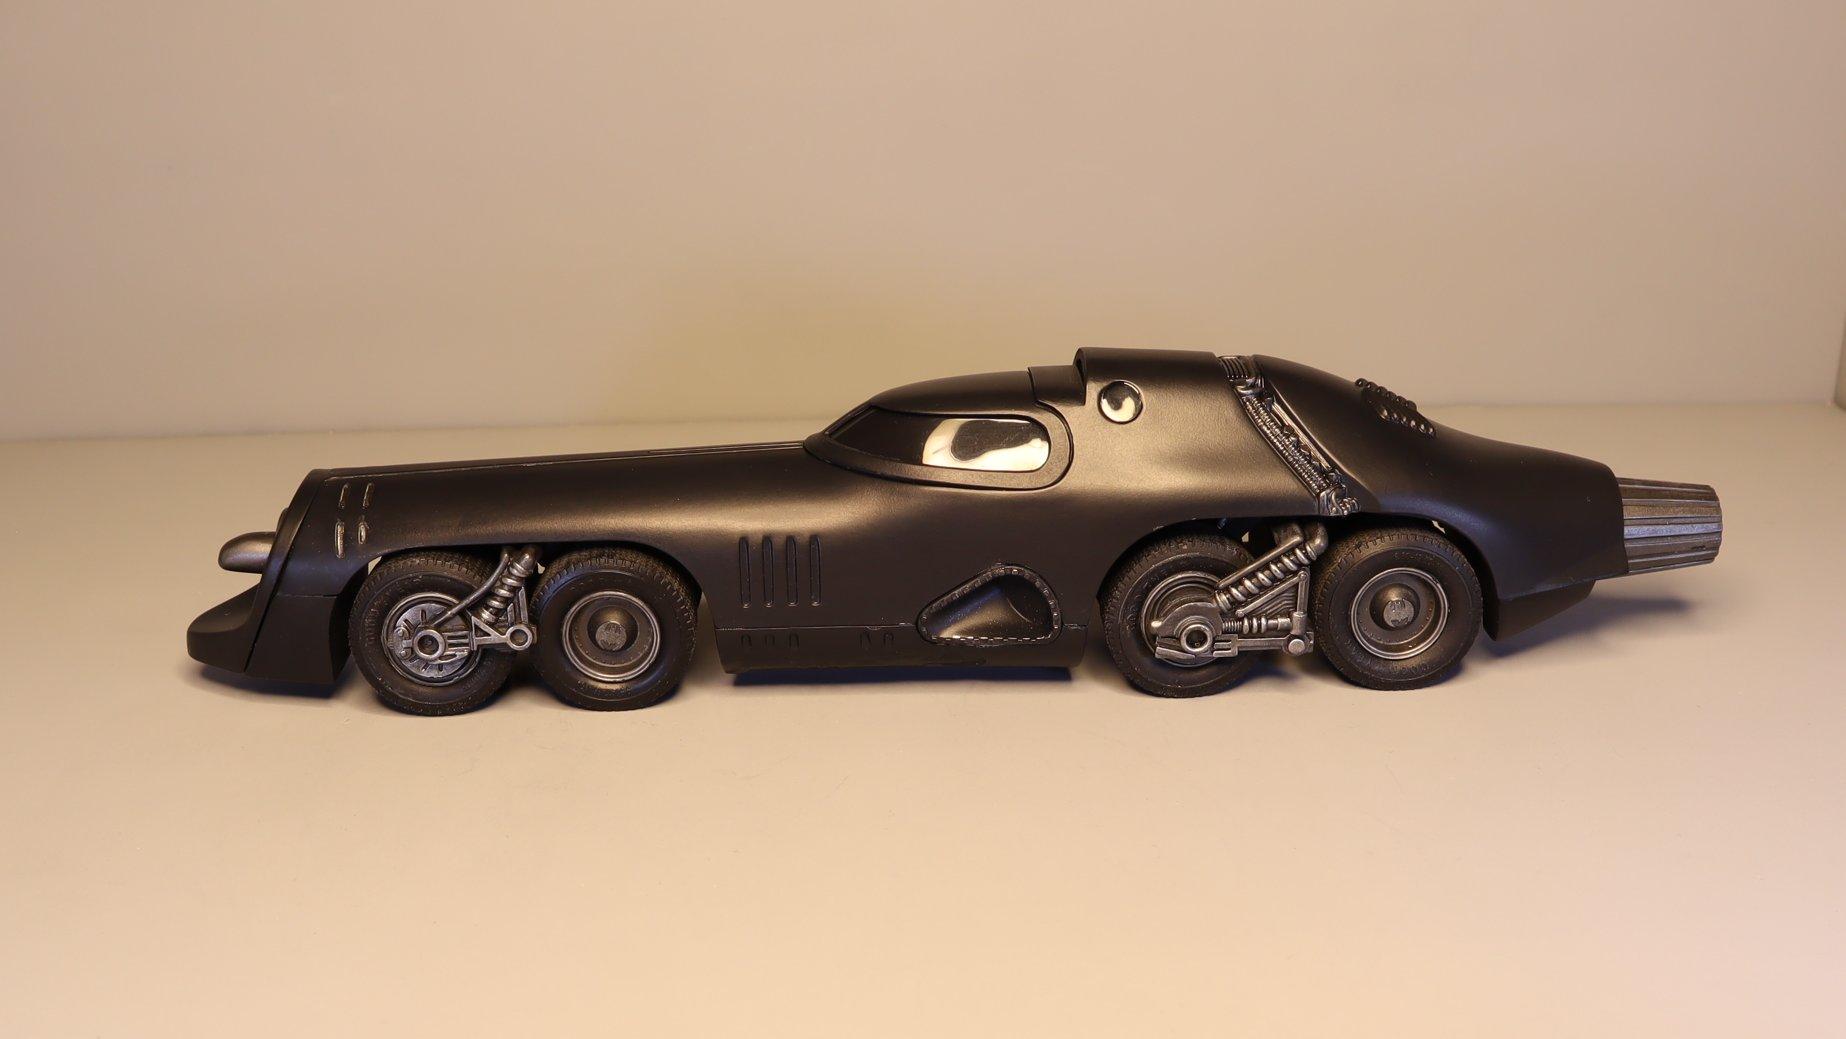
Thank you Larry, I'm glad you like it. As a bonus, here is my traditional "At home in the display case" shot. Welcome to The Bat Cave! Thanks again! David G.
-
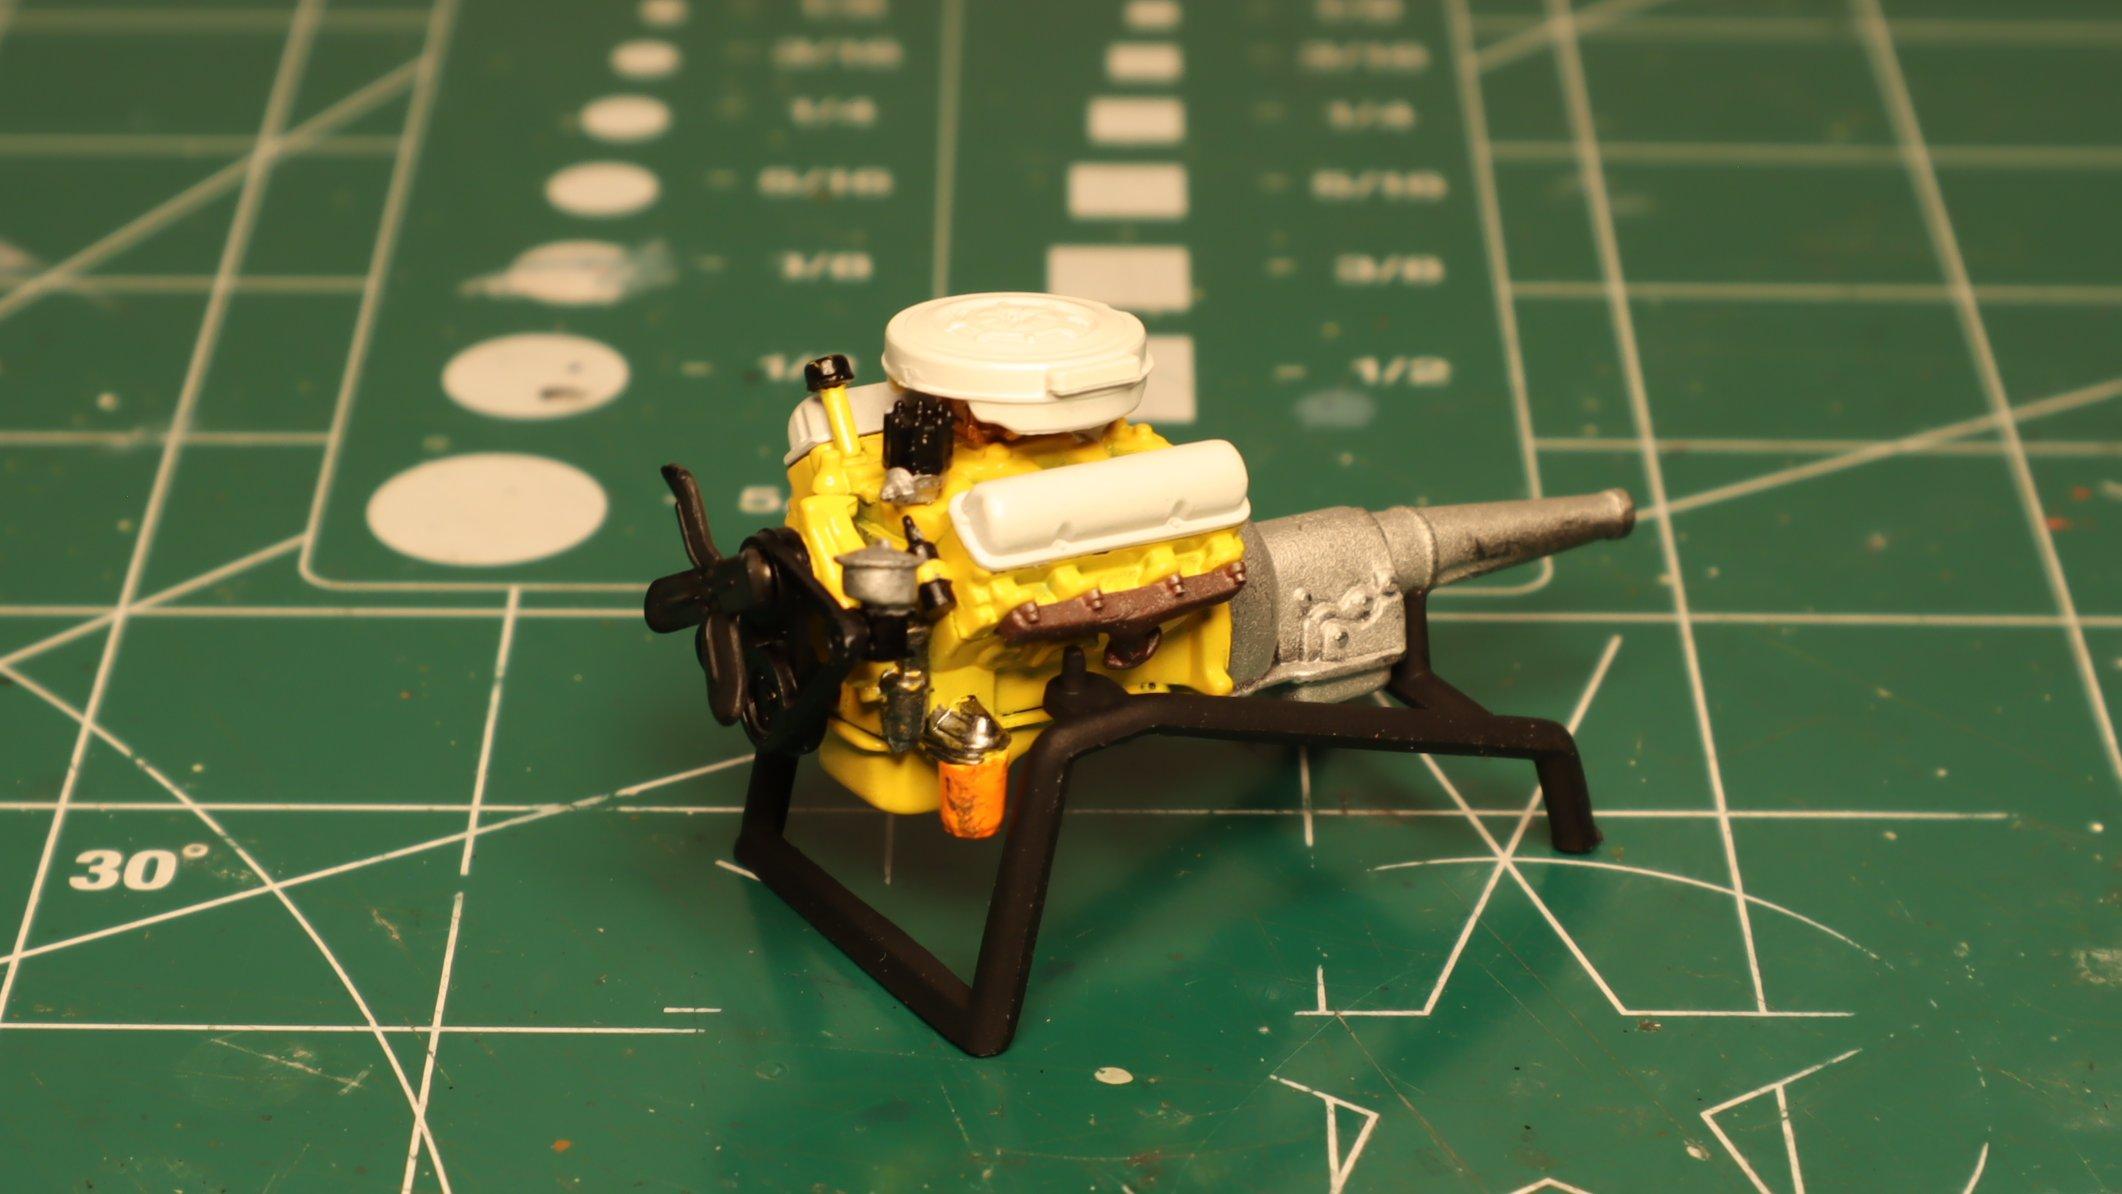
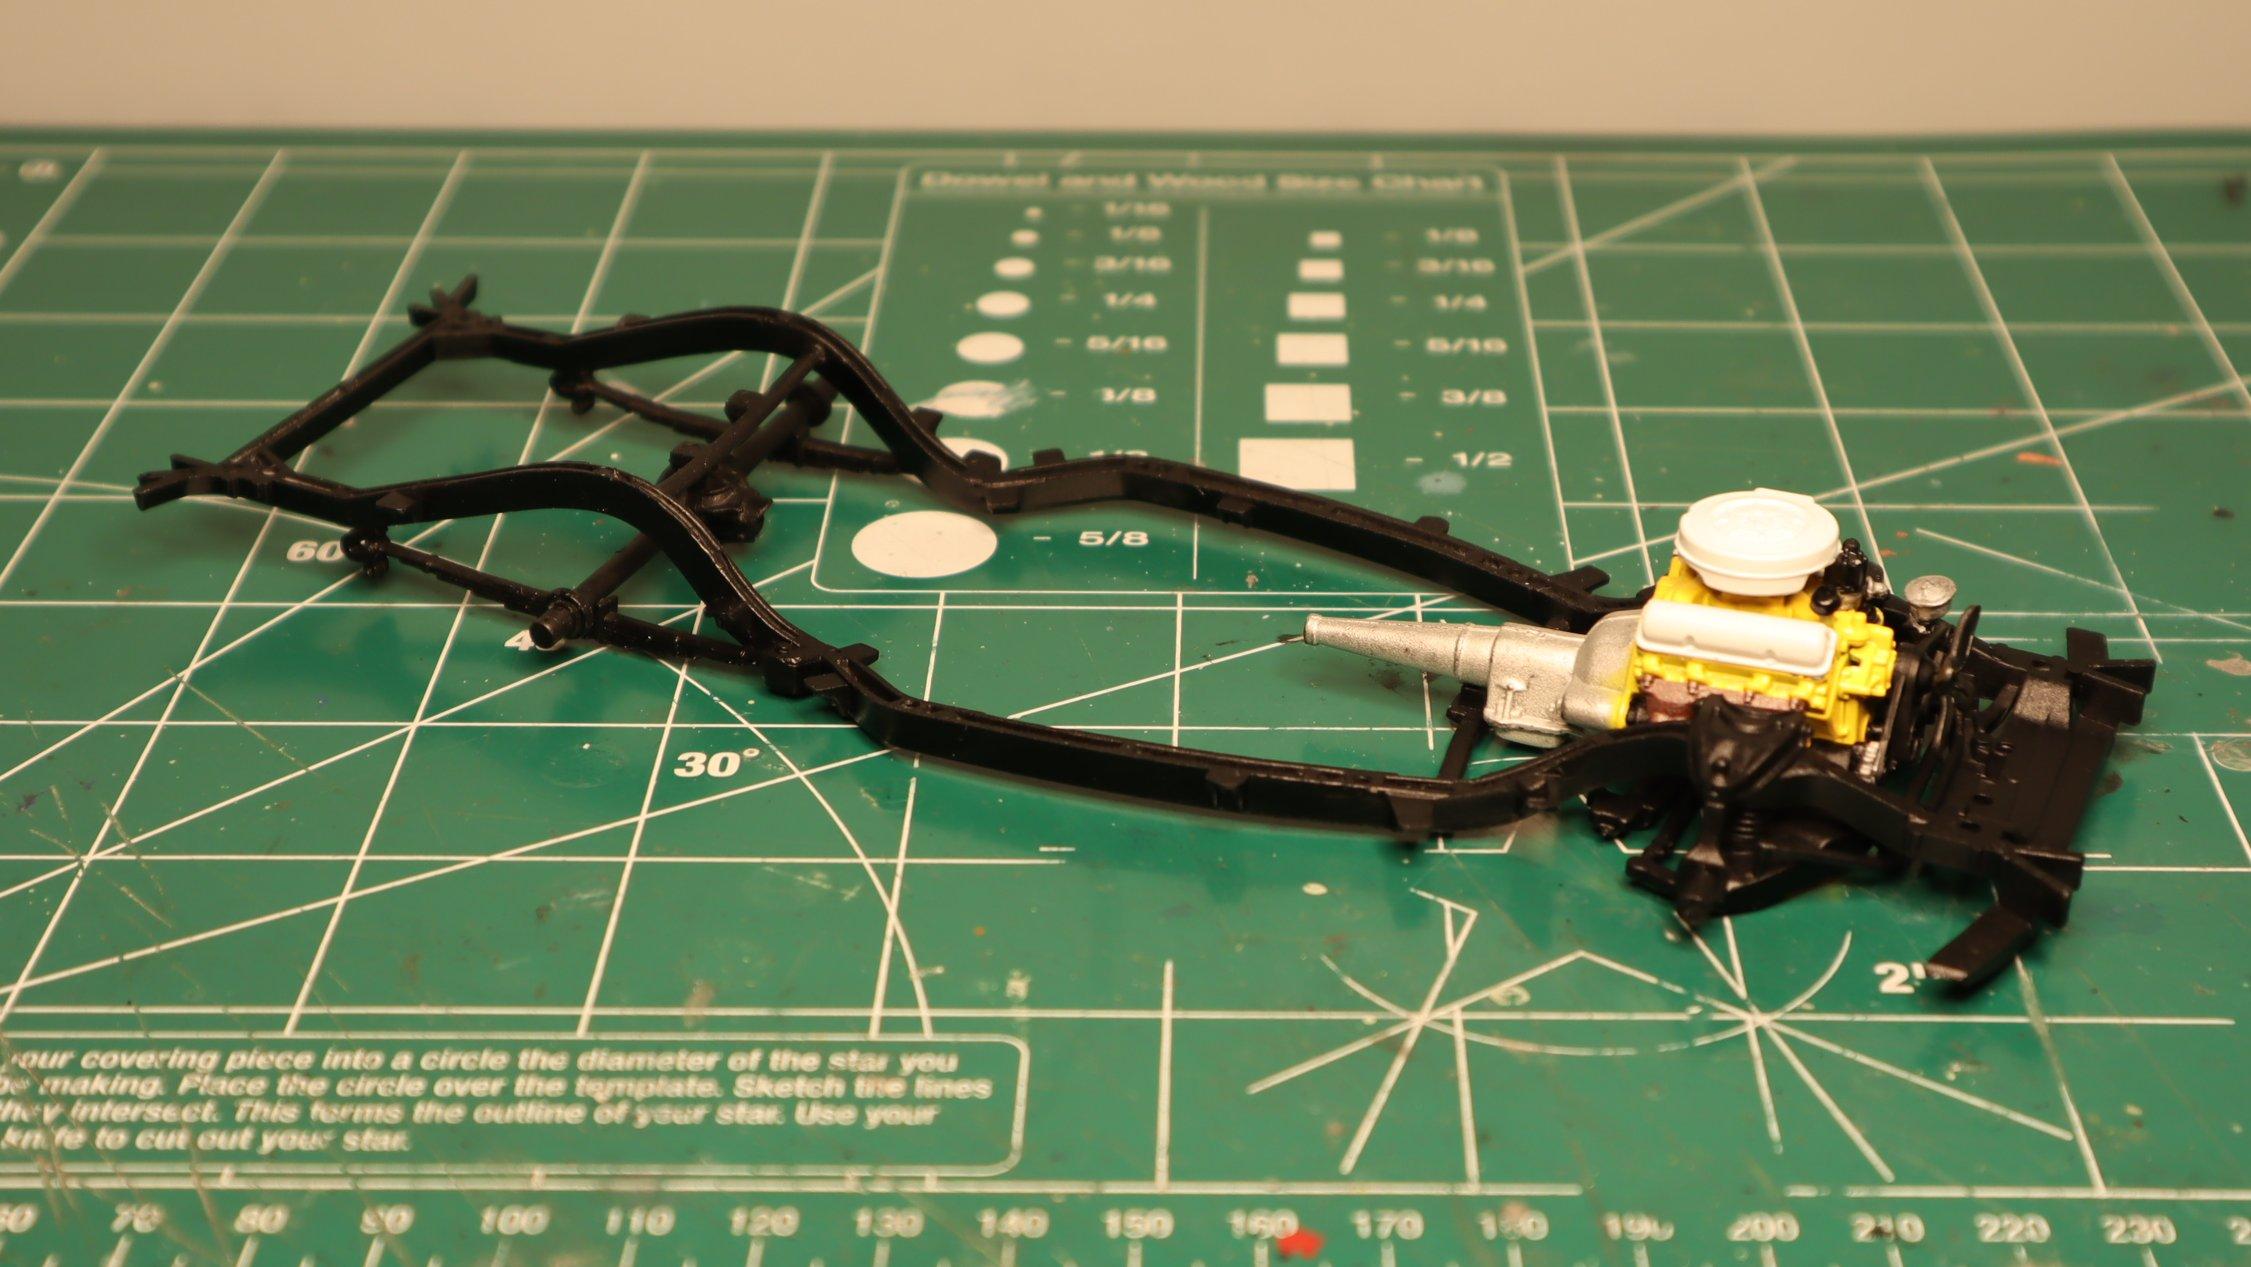
This is my next project AMT's 1958 Edsel Pacer. I've wanted an Edsel as long as I can remember. Despite popular opinion, I always saw them as good looking cars. Besides, when have I ever cared about popular opinion anyway?I plan on using my new Canon M50 camera (a birthday gift from my wife) for the entire photo spread. So please bear with me as I navigate the learning curve. Of course, any photo taking tips are also appreciated. The engine went together fairly quickly and is nicely detailed. Of course, I still have to do a little more detail painting and add a little light weathering. Test fitting the frame and engine assembly. As always, thanks for taking the time to look and please feel free to comment. David G.
-
Spectacular work on this! Your skill at capturing the feel and appearance of various materials is phenomenal. David G.
-
Pooh Jeans Mustang GT4 .
David G. replied to Silver Foxx's topic in Other Racing: Road Racing, Salt Flat Racers
Great looking paint and decal work! David G. -
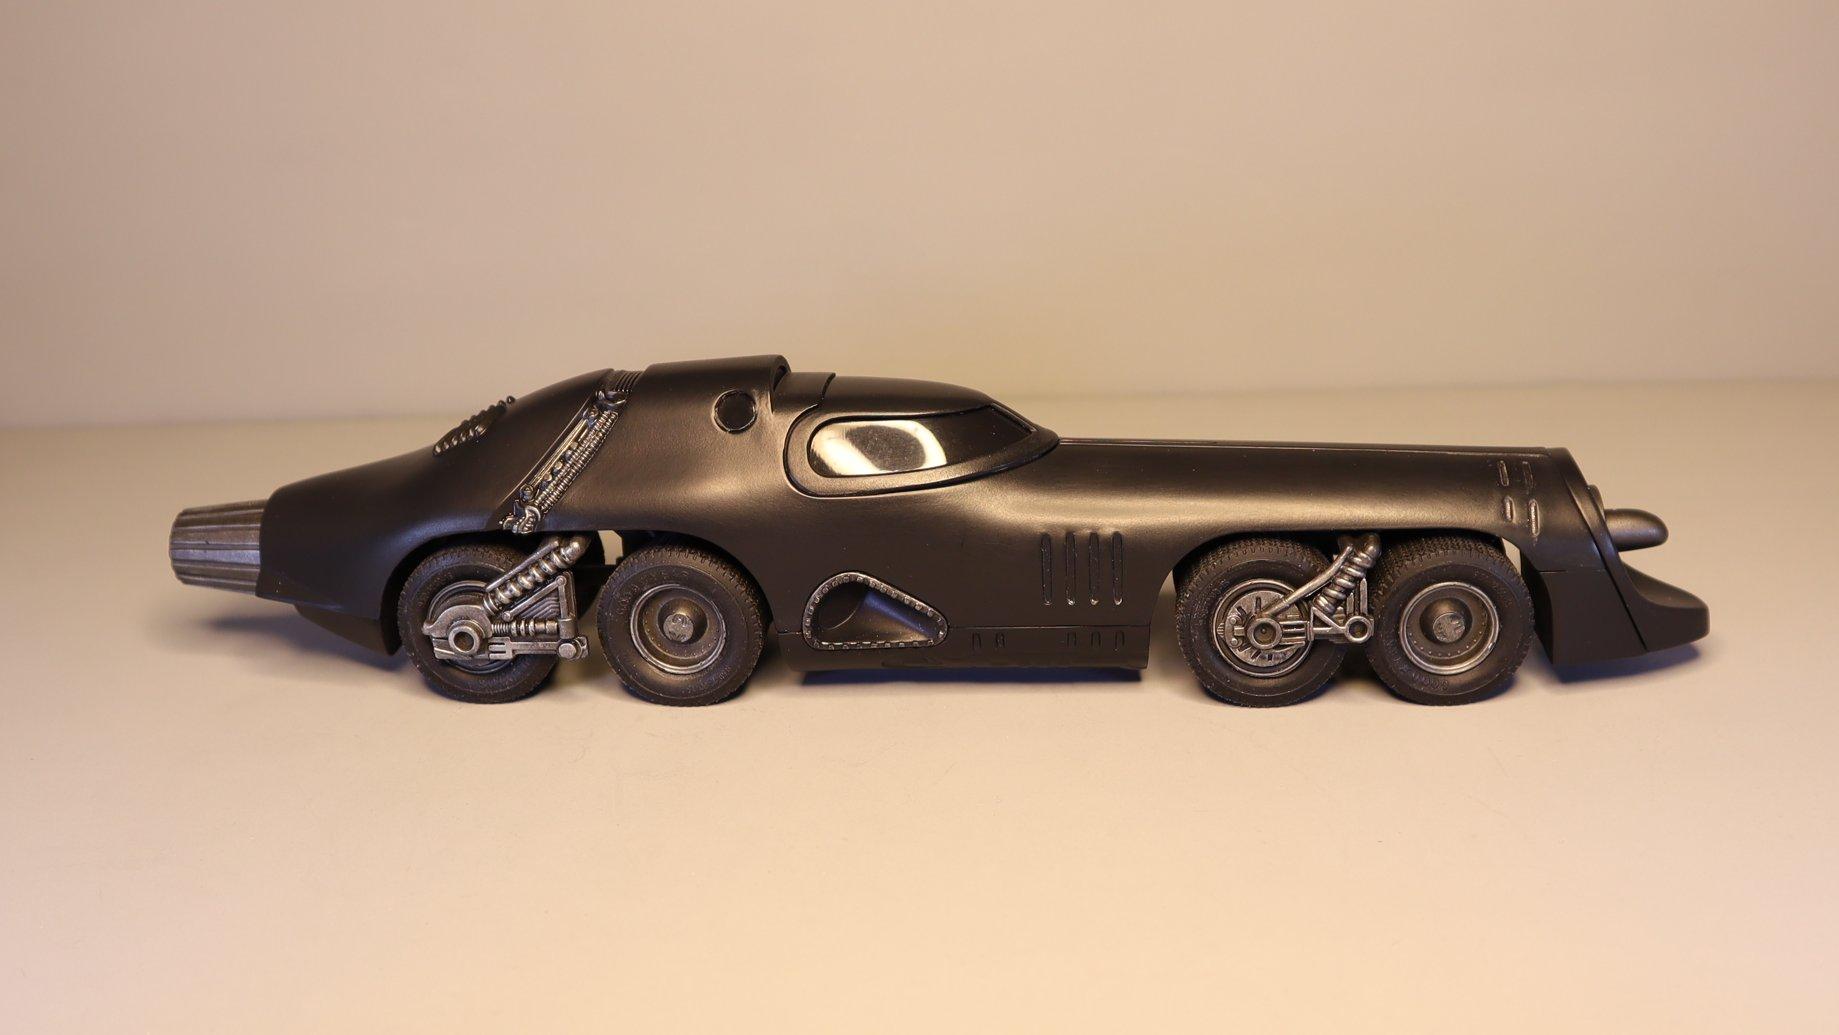
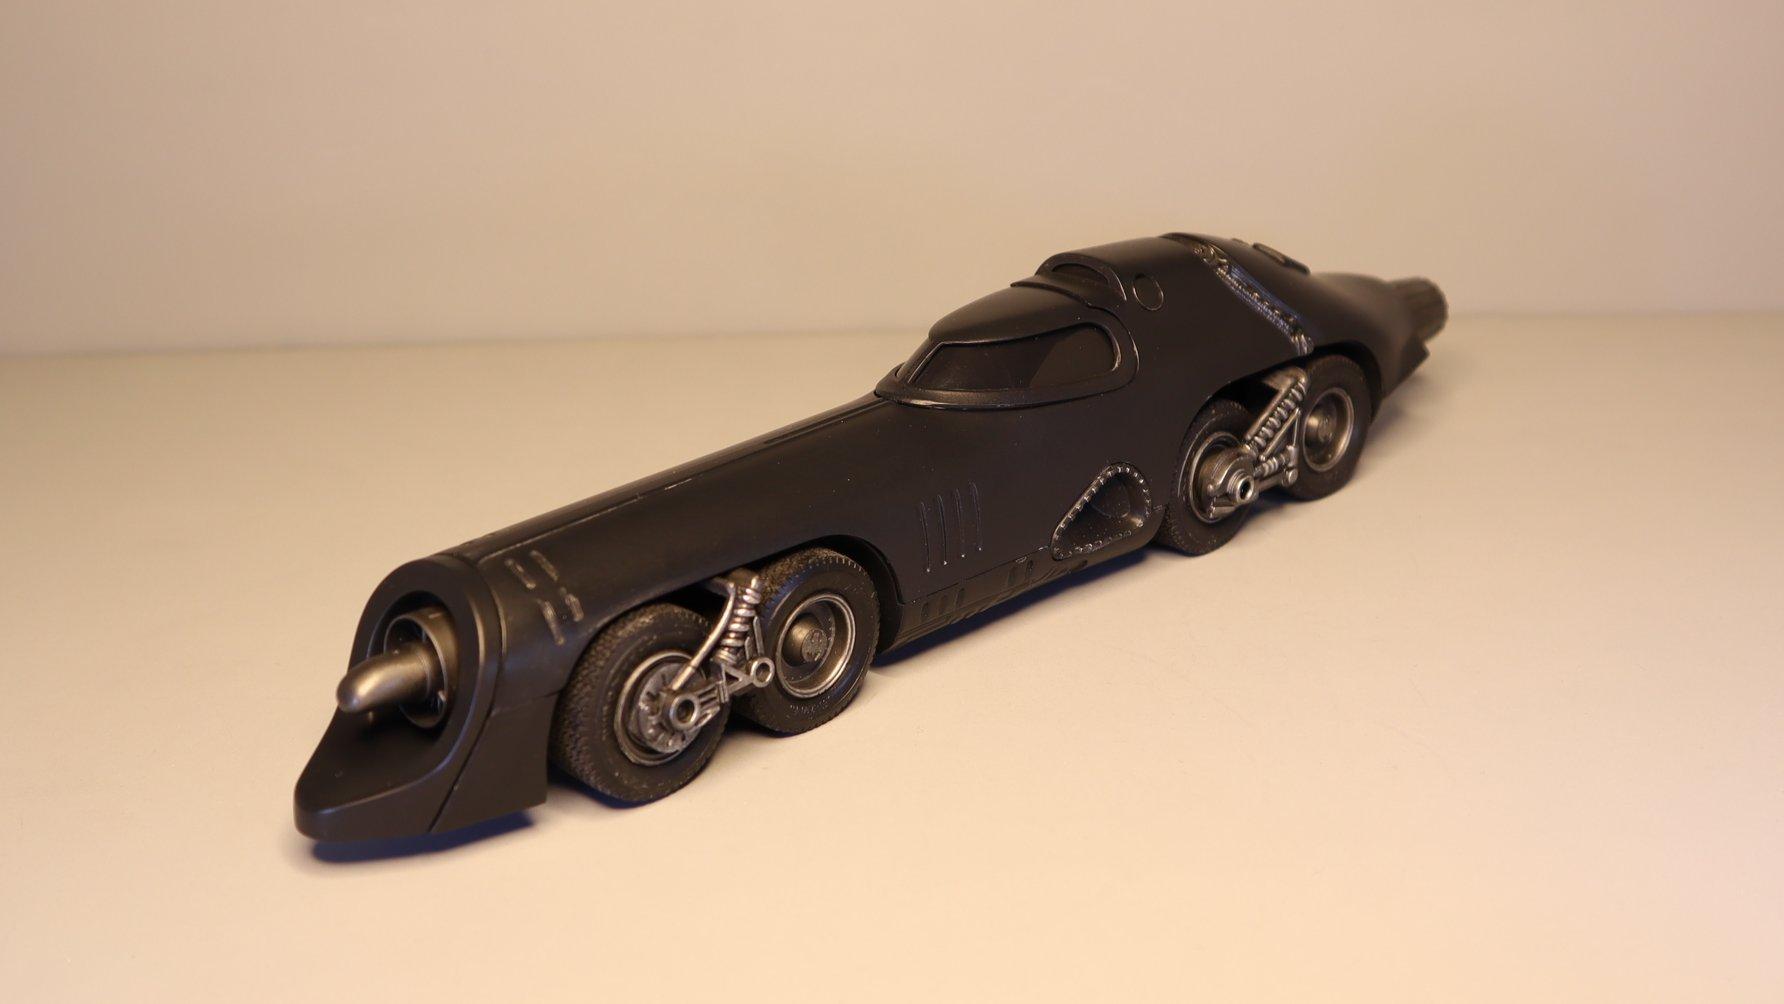
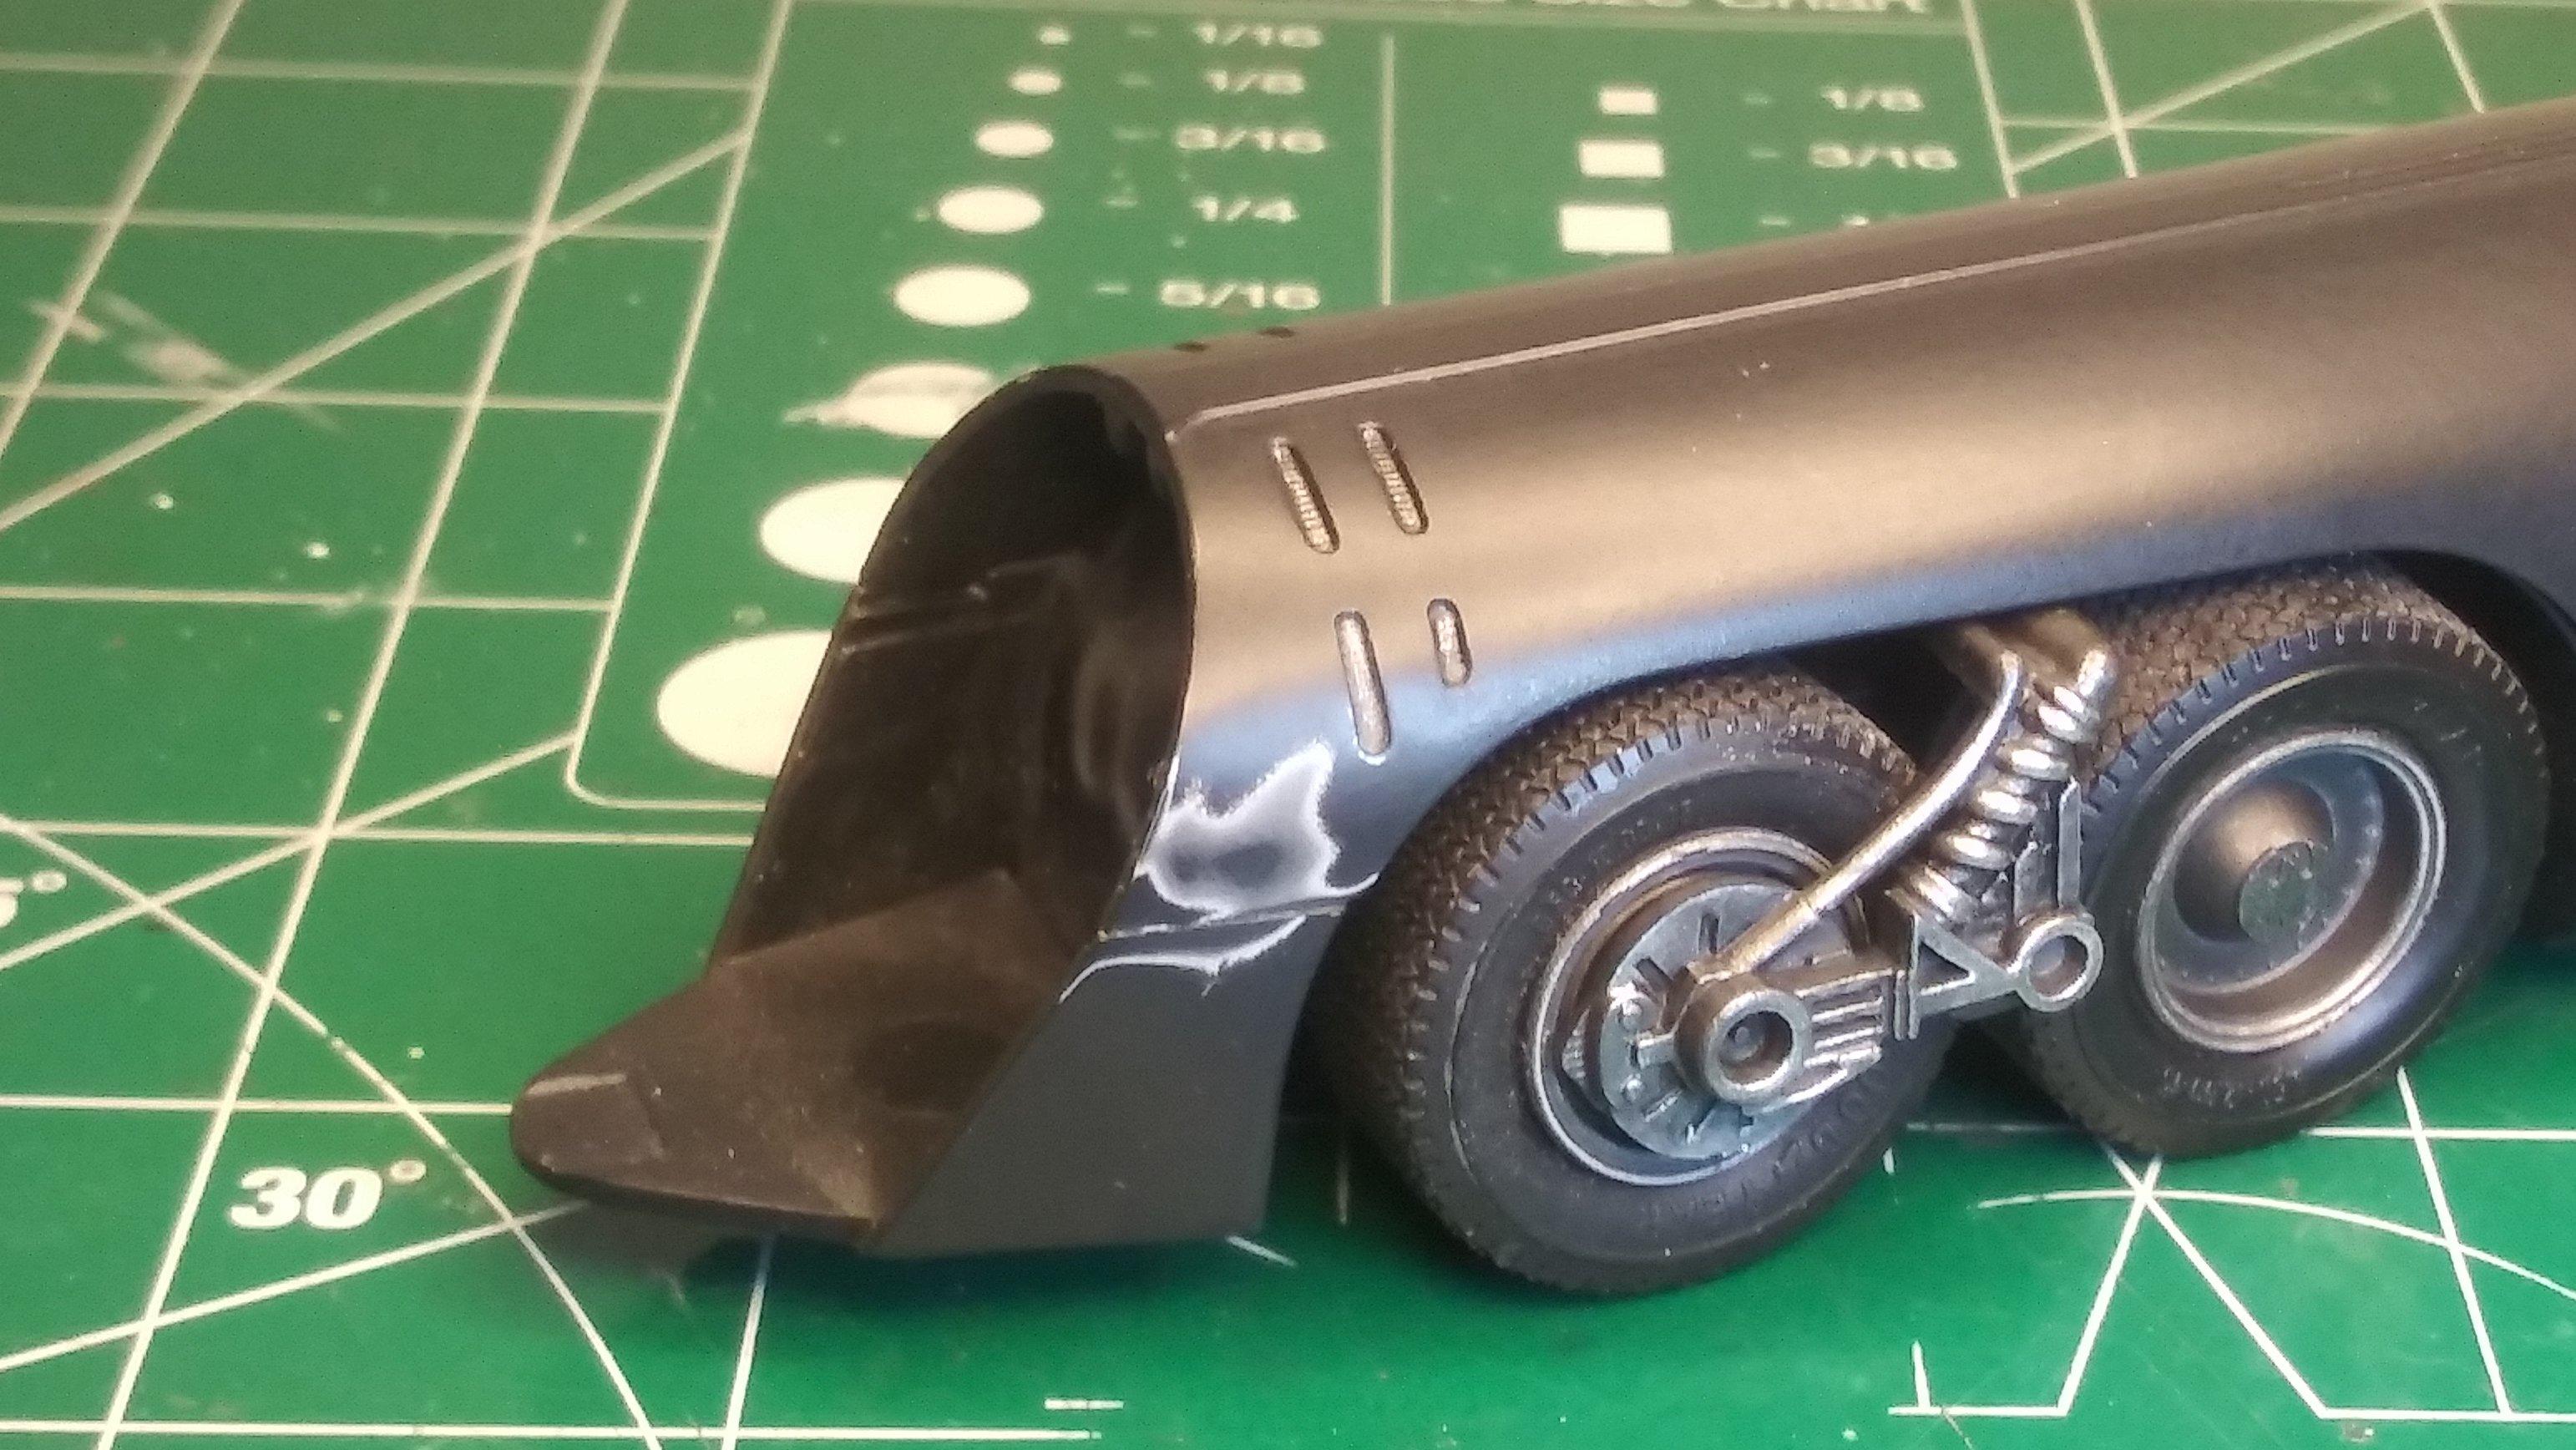
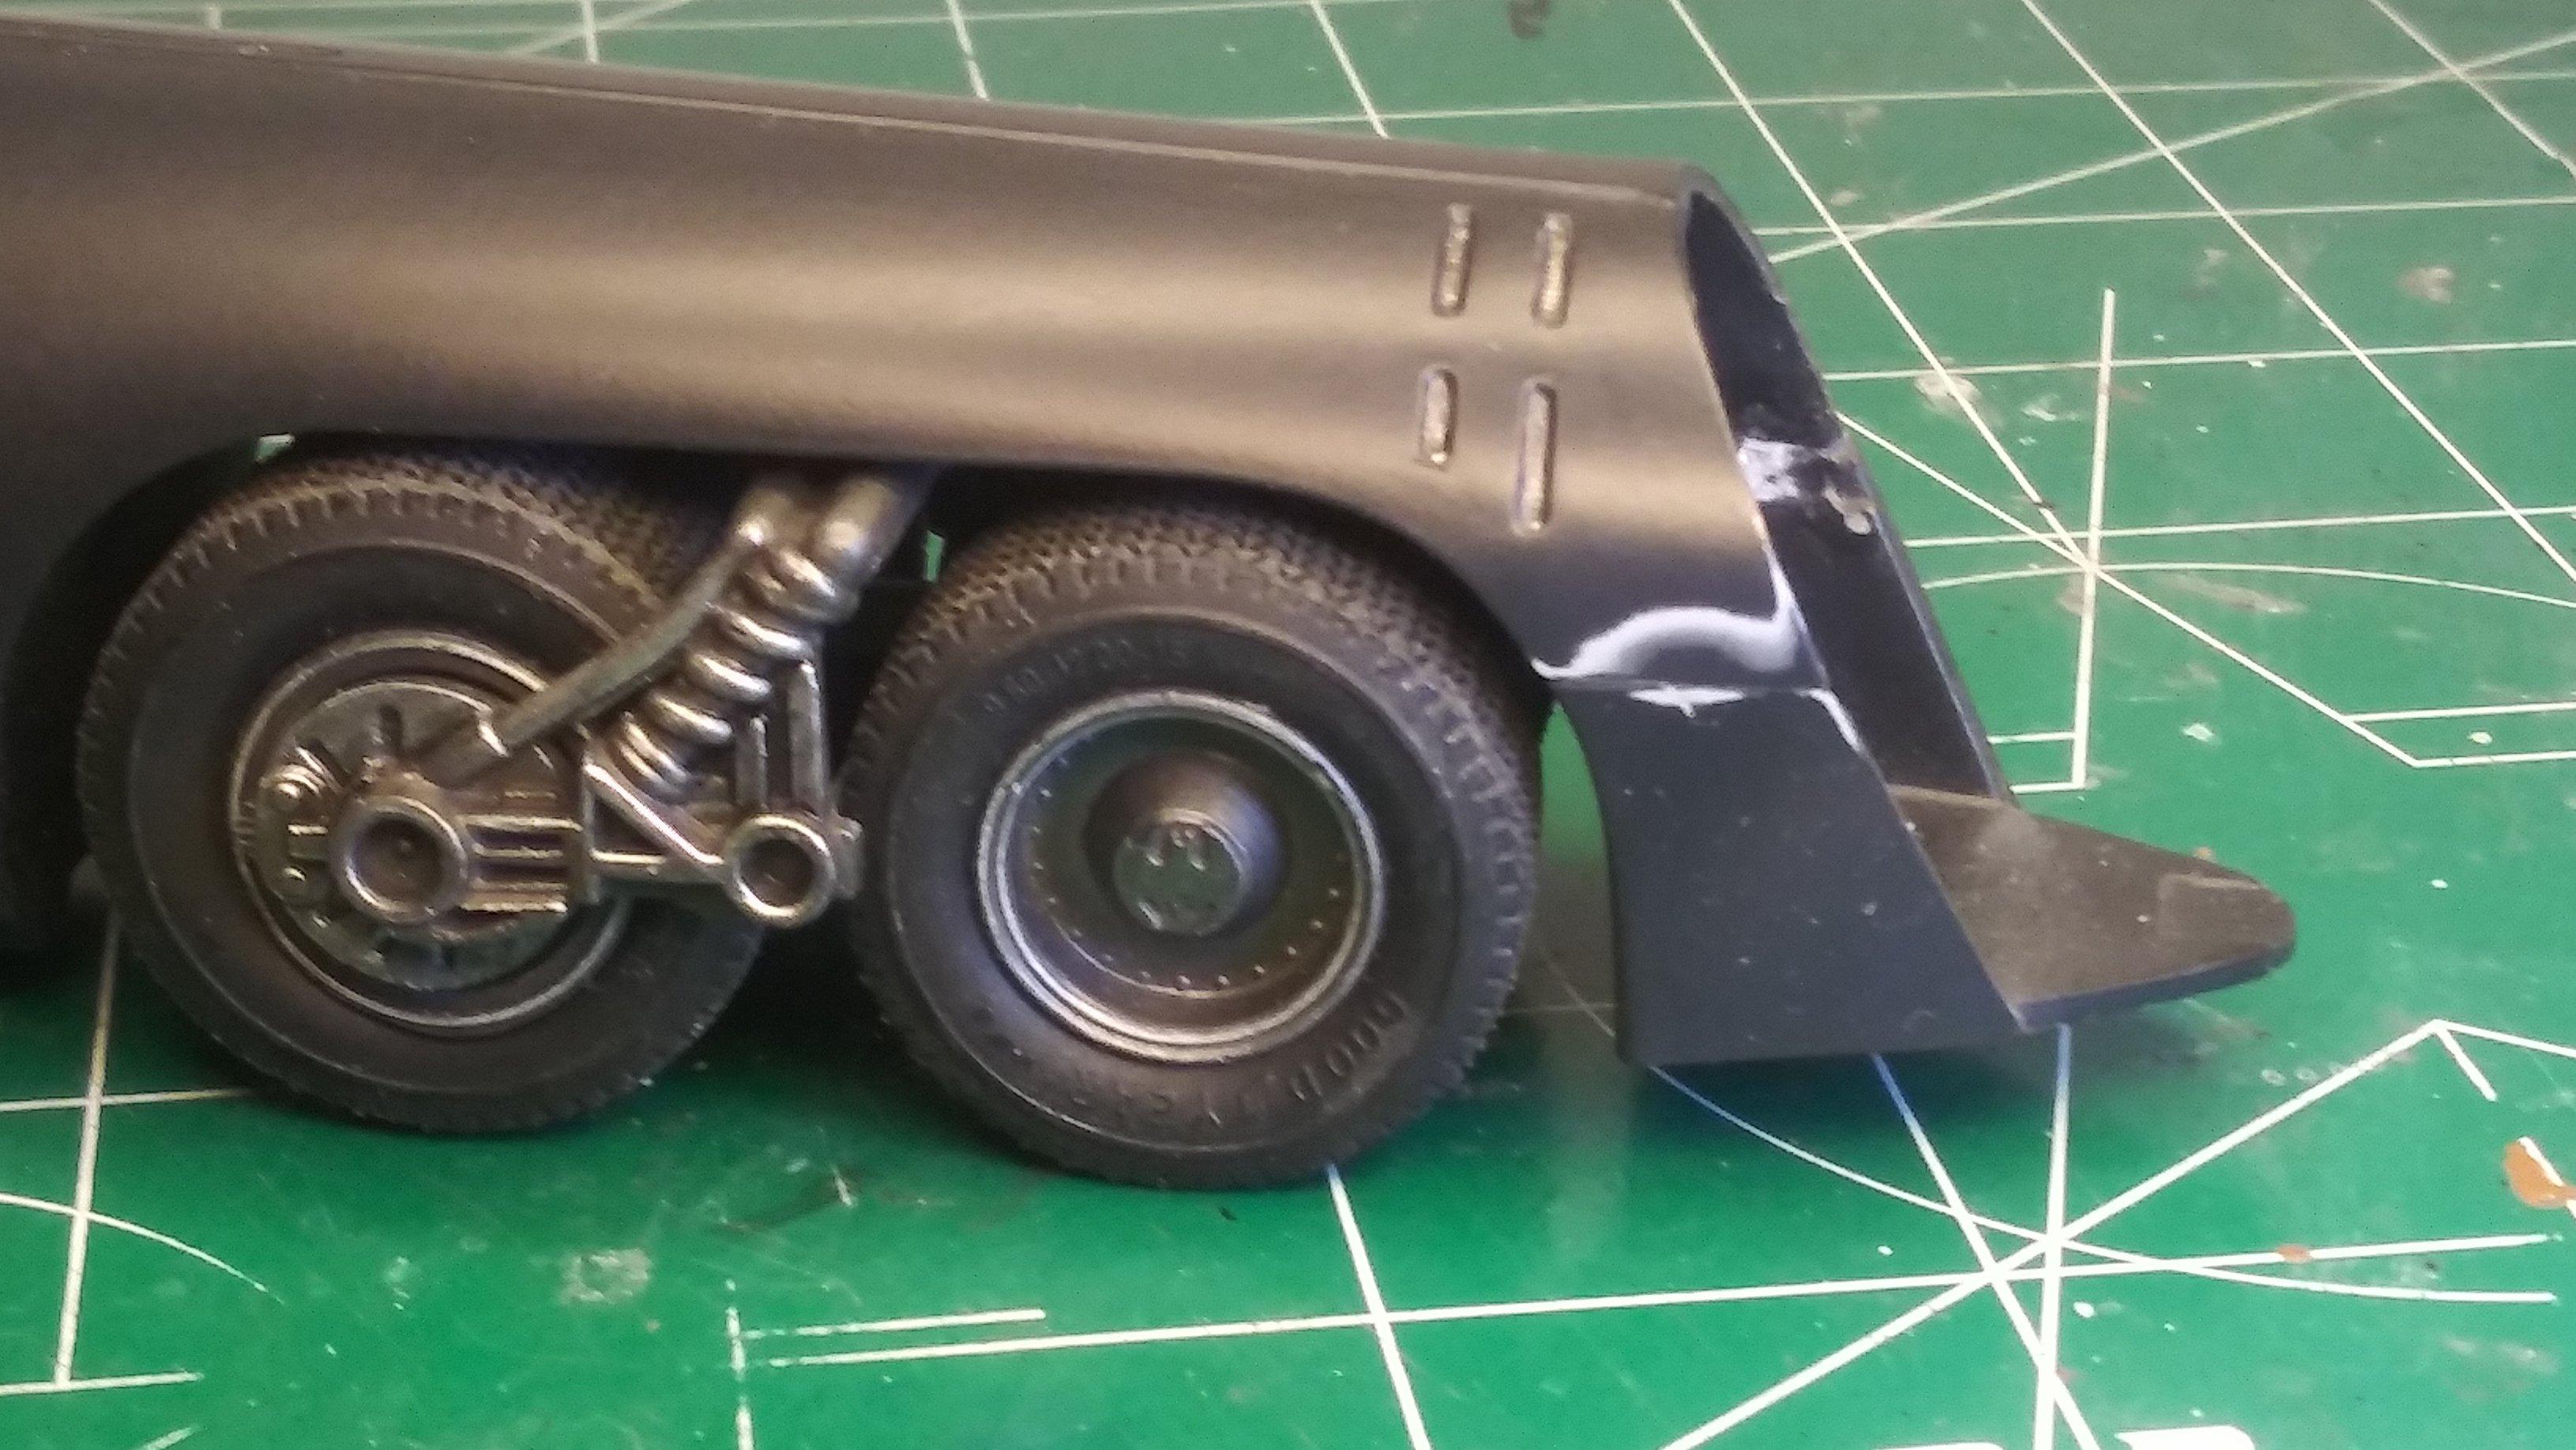
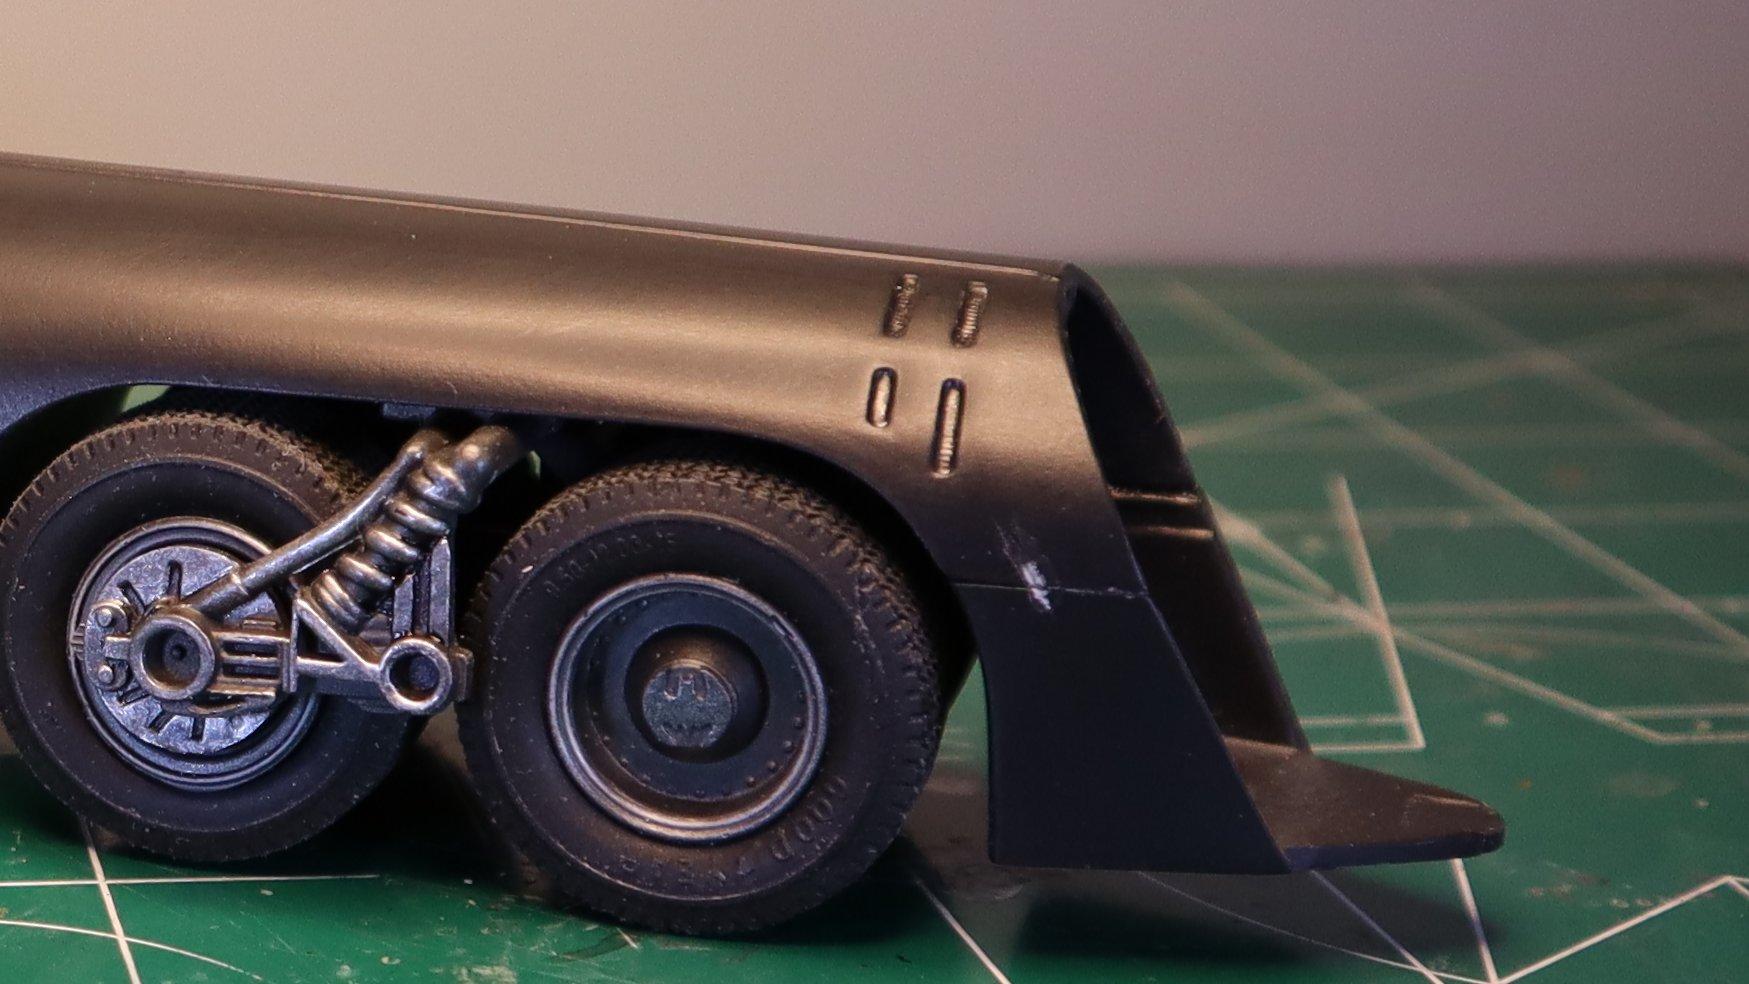
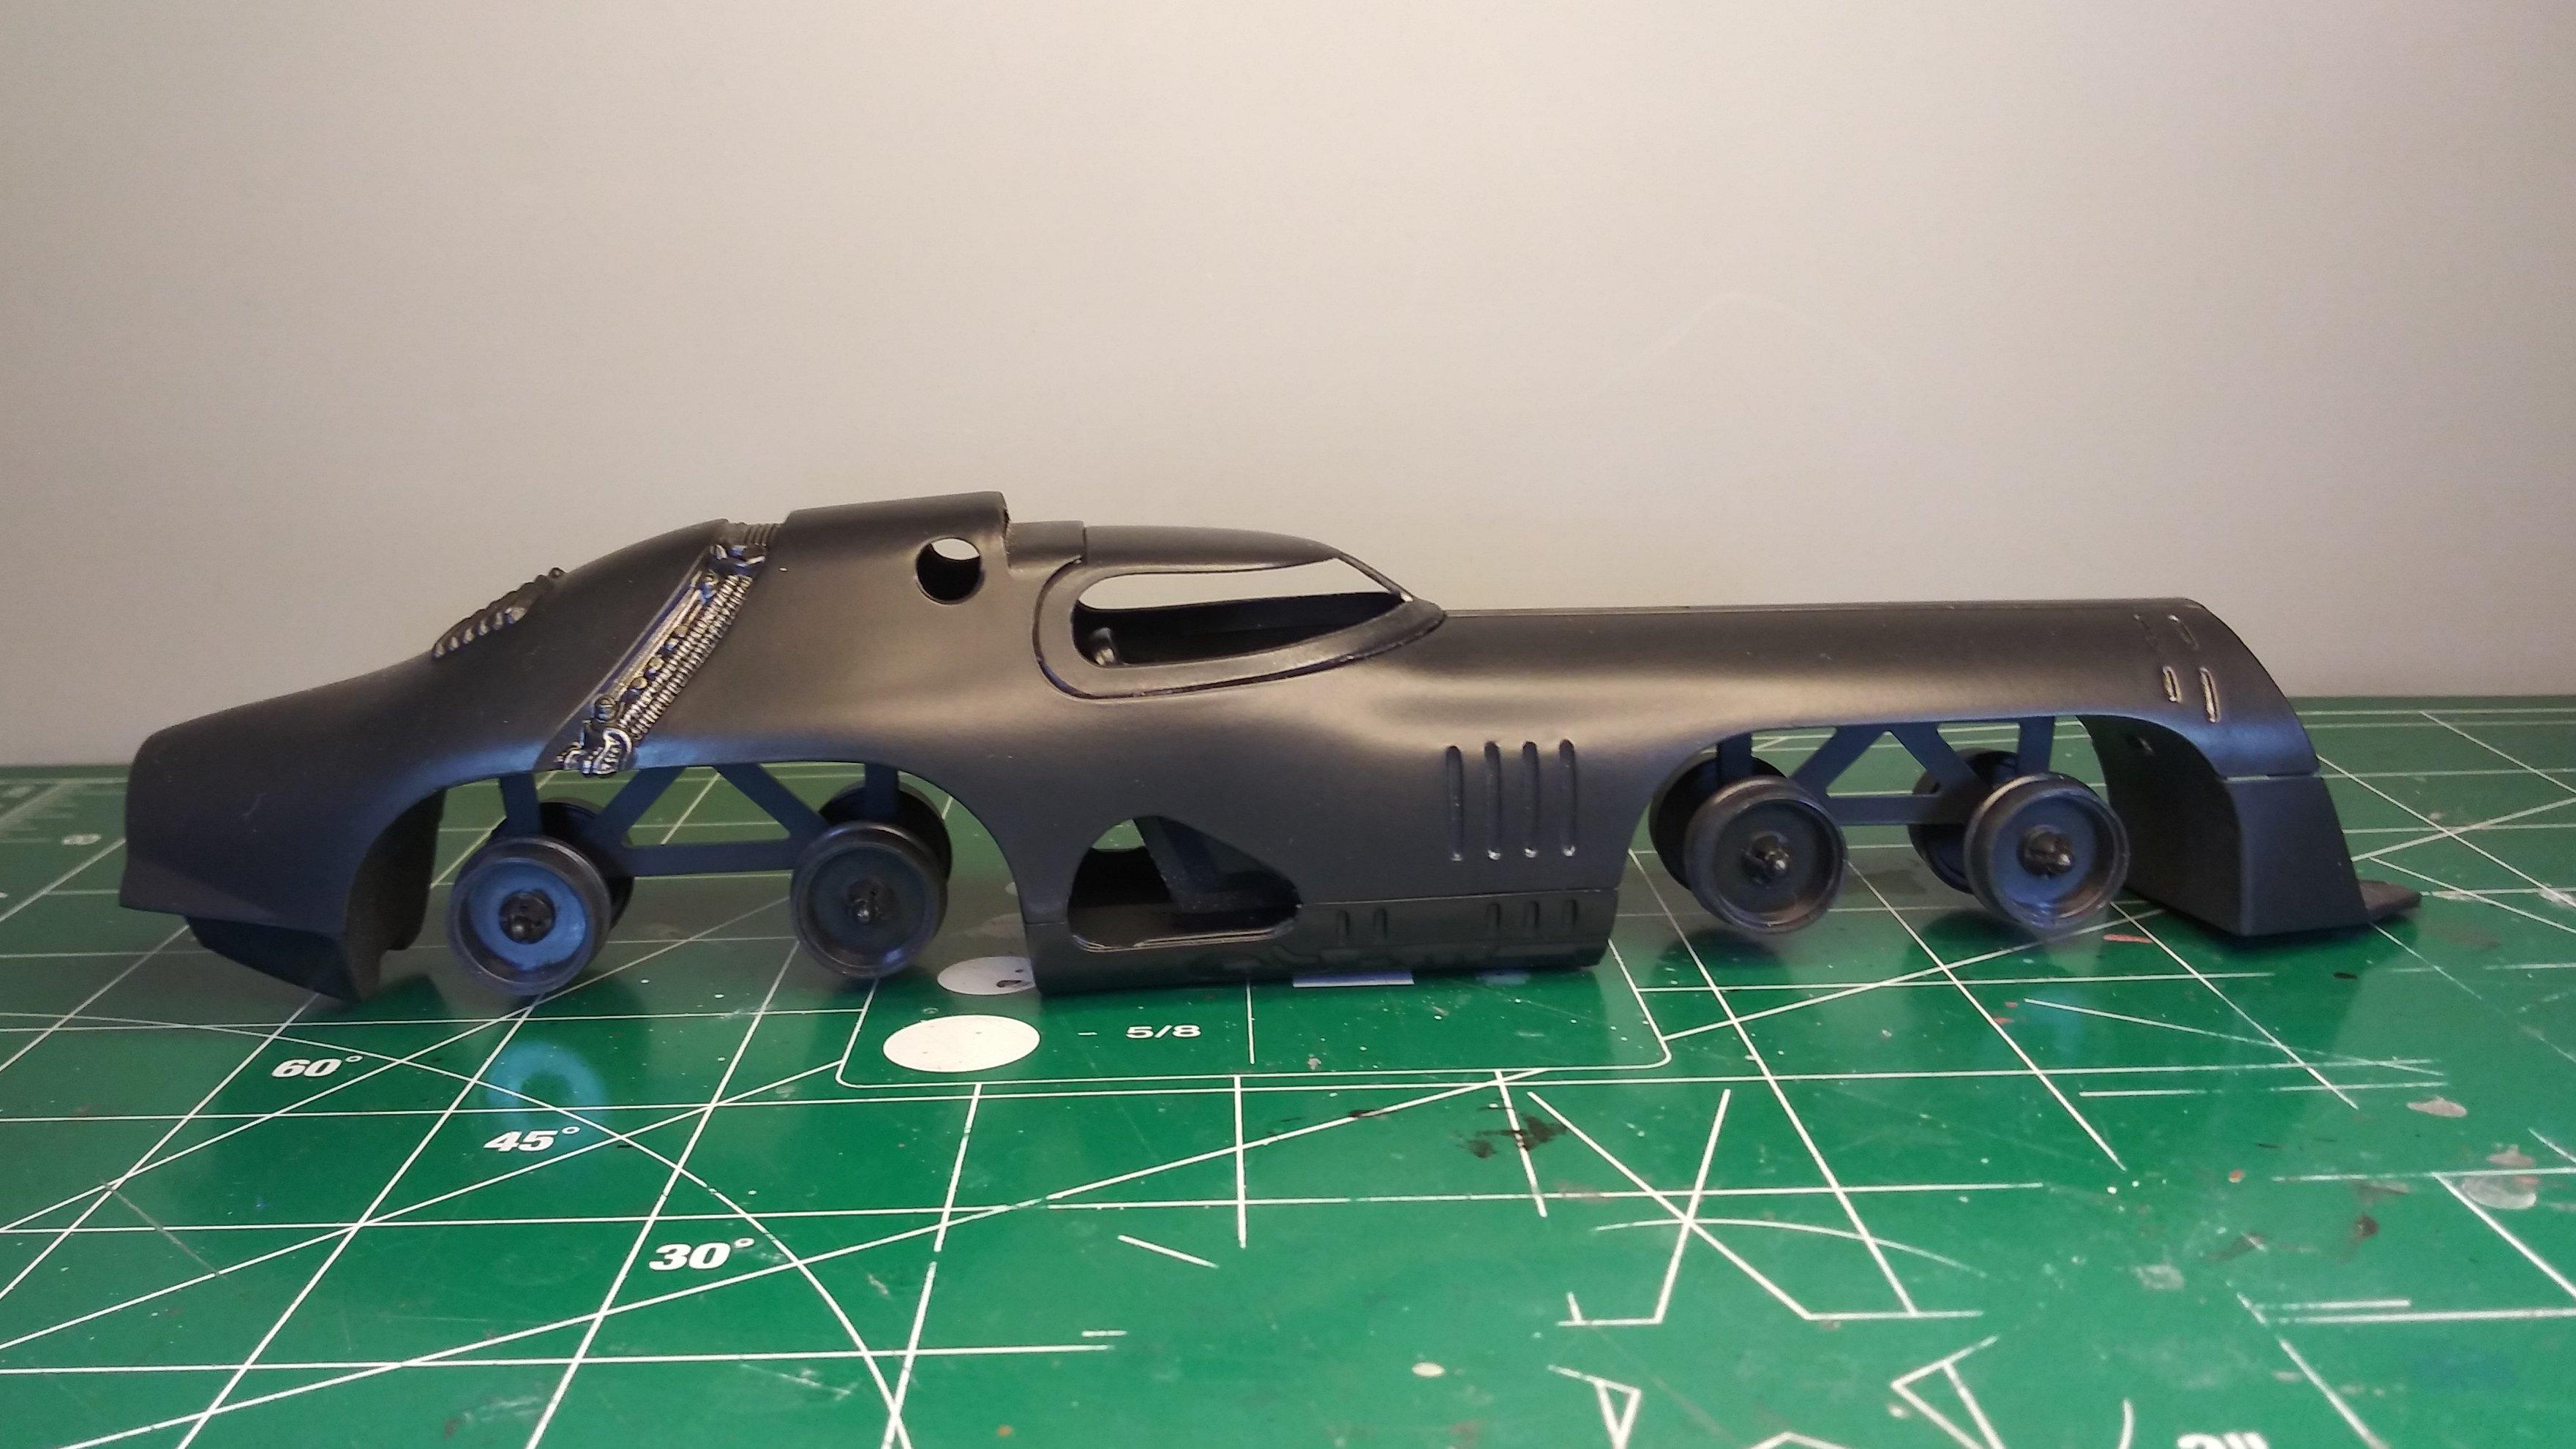
Hello everybody! The Bat-Missile is done. I finished it a while ago but I've been working on coming up with some decent photos. My wife got me a nice digital camera for my birthday and I have quite a lot to learn about its usage. I had considered placing some type of view block along the center-line between the wheels to prevent daylight from showing through as in this photo. I may still do that but given the ridiculous nature of this vehicle, I have to consider, how much effort do I want to put into making this thing more "realistic"? If I could get a couple more of these kits on the cheap, I would consider a few alternative building options. I would like to attempt to build one of these kits as either a Steam Punk personal locomotive or an exposition style dragster. Well, on to the next project. As always, thanks for taking the time to look and please feel free to comment. David G.
-
Beautiful work on both! David G.
-
Wild conversion! Very well done. David G.
-
New Project
David G. replied to dave branson's topic in WIP: All The Rest: Motorcycles, Aviation, Military, Sci-Fi, Figures
That's one wild looking bike. Great work so far. David G. -
Thank you Joe. For my next build I plan to use my new camera as the sole camera of record. There is a bit of extra work in the set-up but the only way I'm going to teach myself to use is to use it. So I'm just going to push through and accept that I will take some disappointing photos in the process knowing that I'll be much more pleased in the long run. Thanks again, David G.
-
Beautiful Paint! David G.
-
‘64 Chevy shop truck
David G. replied to Steve H's topic in Model Trucks: Pickups, Vans, SUVs, Light Commercial
Excellent color choice and graphics! The parts in the bed are a nice touch. David G. -
Nicely Done! A fitting tribute to your father. David G.
-
Hello everybody! I was able to correct the marred paint without any issue. The biggest problem was blending the masking lines. With that, the Bat-Missile is done. I finished it a while ago but I've been working on coming up with some decent photos. My wife got me a nice digital camera for my birthday and I have quite a lot to learn about its usage. The rest of the photos can be seen in the "All The Rest" section Well, on to the next project. As always, thanks for taking the time to look and please feel free to comment. David G.
-
Excellent idea! I would certainly consider that. David G.
-
Wow! Impressive paintwork so far! David G.
-
Thanks for your reply Rob. Yes! That it would too! Kind of like the ultimate dragster, eh? Thanks Joe, It's pretty much done and I'm working with the photos now. I received a new camera for my birthday and I'm learning how to use it. I'm literally at the "The box is still on the floor beside my desk." stage. Here are a couple of snaps from the bodywork phase. In the end it's not a big thing and certainly not a catastrophic failure. I just occasionally find myself muttering, "Gah, I could be done with this by now." Bodywork is bodywork regardless of scale. At this point, my biggest concerns are masking lines and color-matching. Even though you're using the same paint, it never lay down exactly the same way. Thanks again! David G.
-
Hello all! It's time for another update. Test fitting the warped chassis with the body to see what adjustments I will need to make. This looks like it would make a great locomotive! Because the chassis plate had a bit of a warp to it, I ended up using rubber bands to clamp the chassis and body together for assembly. I had the front similarly secured when I discovered that the rubber bands wicked some adhesive from the joint and marred the paint. You can also see the gap that I was trying to close with the bands. This side is not as bad. I had to remove the rubber bands before they adhered to the body which still leaves the gap to deal with.. Now the front seam is not as well aligned as I would like. Back to the paint shop. It just goes to show that I can create problems with even the simplest of kits! As always, thanks for taking the time to look and please feel free to comment. David G.
-
Love the color! David G.
-
Absolutely the best-built version of this kit that I've seen! David G.
-
Excellent work so far! The Caddy swap-out is a great idea! This is such a great to work with, its versatility allows for almost unlimited building options. I bought one about 25 years ago and built it as a side-yard derelict in just about the same color as you chose for yours. I can't wait to see how it all comes together. David G.
-
Baja Bandito
David G. replied to TooOld's topic in Model Trucks: Pickups, Vans, SUVs, Light Commercial
Nicely Done. The shag carpet is the perfect touch! Excellent preservation build. I don't know if I've ever seen this kit before now, let alone the other versions. It's a shame that there will be no re-issue. I would buy it for the mini-bike alone. David G.