David G.
-
Posts
11,326 -
Joined
-
Last visited
Content Type
Profiles
Forums
Events
Gallery
Everything posted by David G.
-
Great looking engine! David G.
-

T-Bucket (the pickup kind)
David G. replied to OldNYJim's topic in WIP: Model Trucks: Pickups, Vans, SUVs, Light Commercial
Wow Jim, everything looks fantastic! I really like the way the wood for the bed turned out and the chrome looks great. BTW, do you buy a new cutting mat for each build? David G. -
That turned out quite well. It must be great having it done. David G.
-
A gorgeous build, everything looks spot-on! David G.
-
That's quite an interesting build, it looks like a down-sized European edition. Nicely done! David G.
-
A great looking build, excellent photos too. David G.
-
That looks like a great start Tom! Your first commission! That must be very exciting... and a little intimidating, yes? David G.
-
I try to leave the chrome trim as close to being bare plastic as possible. I cover the trim with masking tape and trim tape right where I would cut the foil leaving the trim covered. Doing this keeps the trim strips clean and smooth without much more than primer on them preserving the finer details. Cutting the masking tape at the edge of the trim also starts a kind of kerf for the razor blade for when it's time to cut the foil. Hopefully resulting in less chance of wandering blade syndrome. Hope that helps, David G.
-
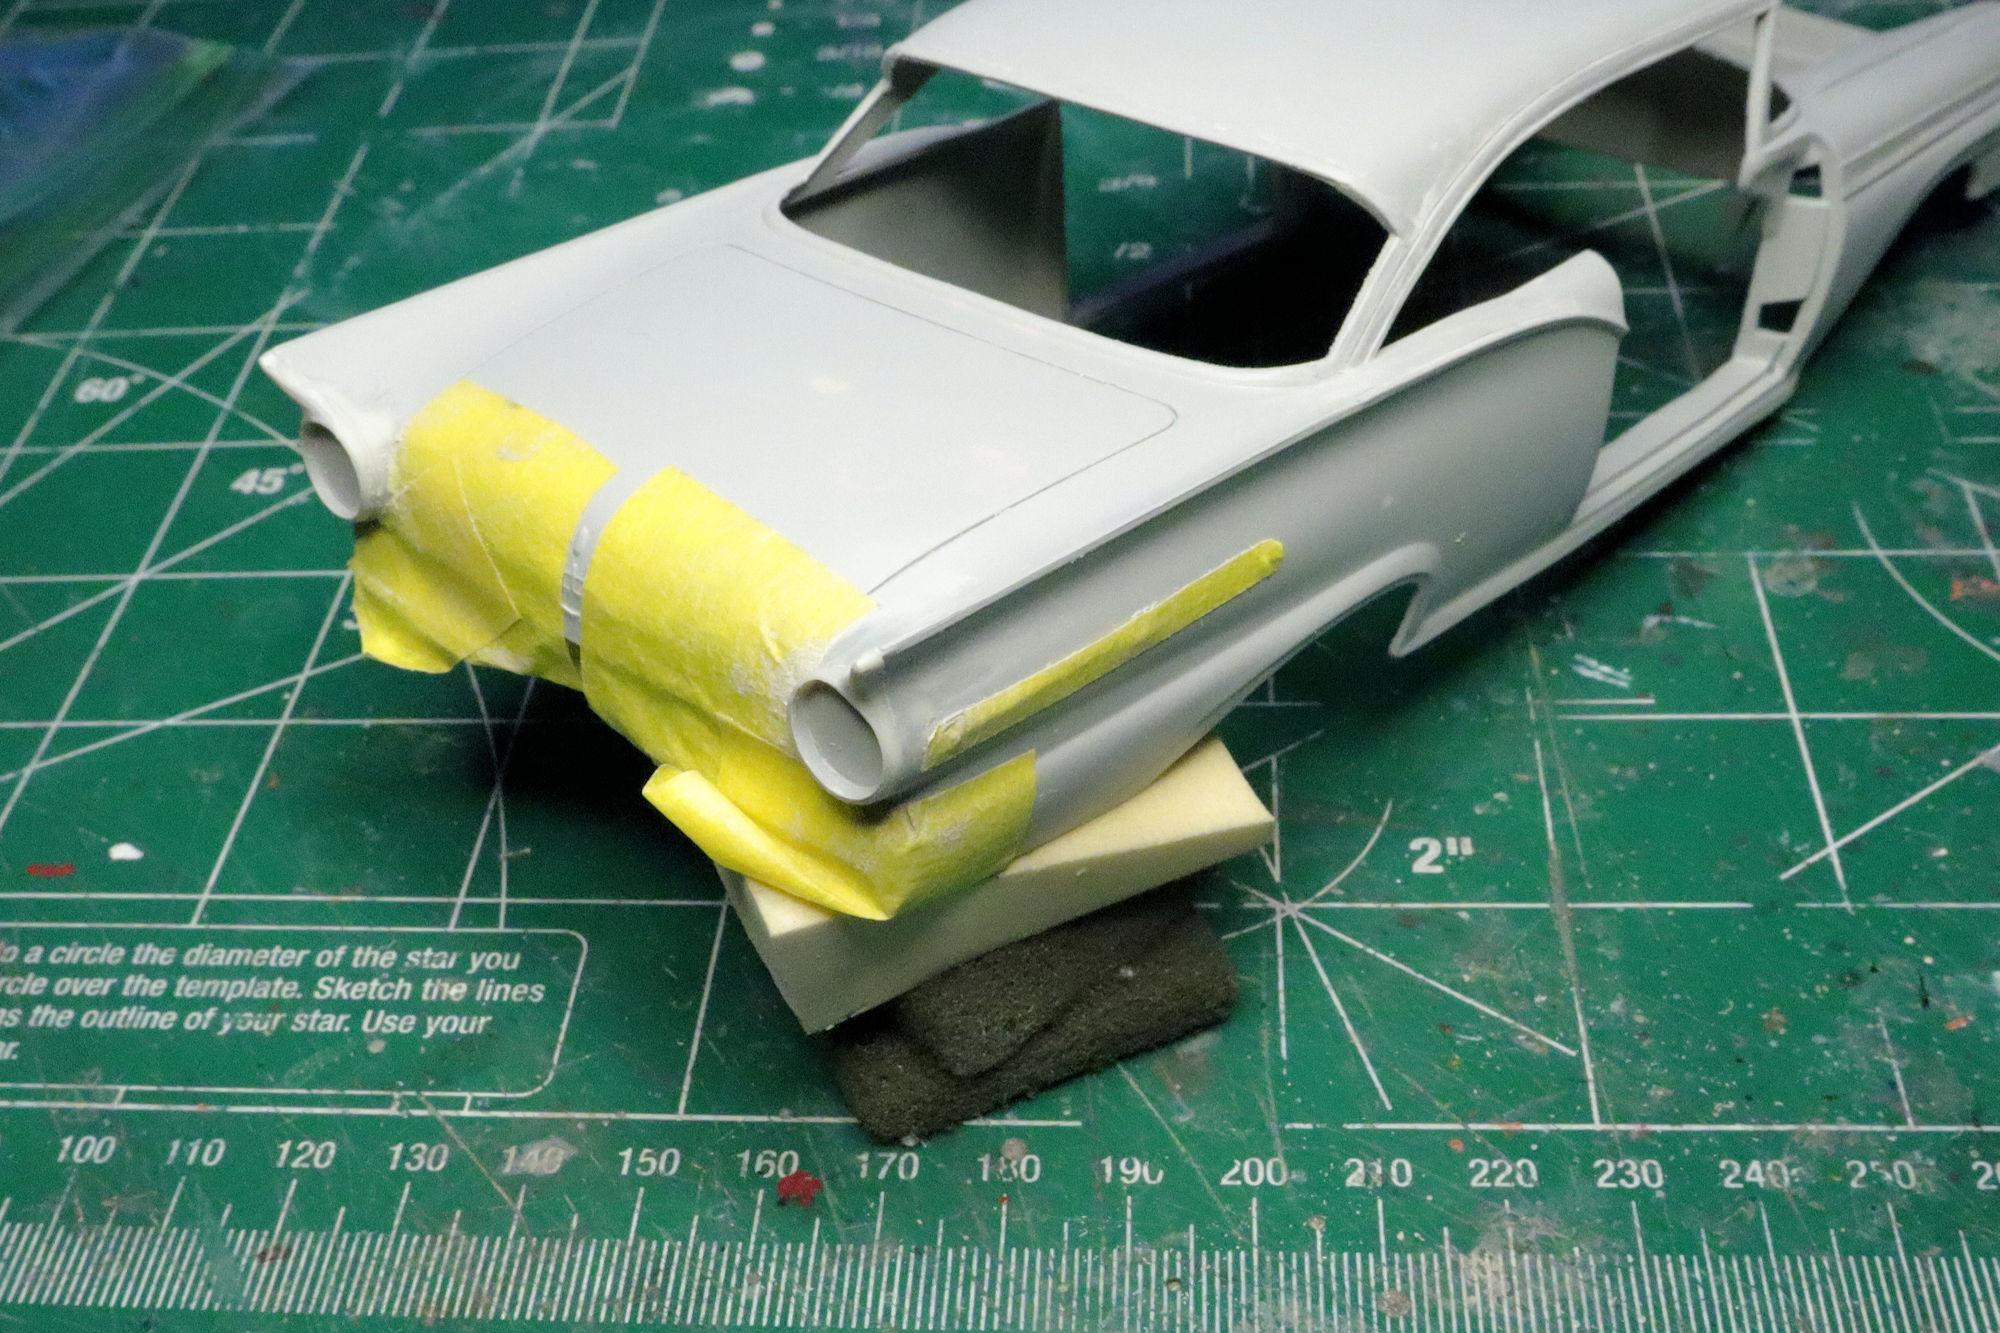
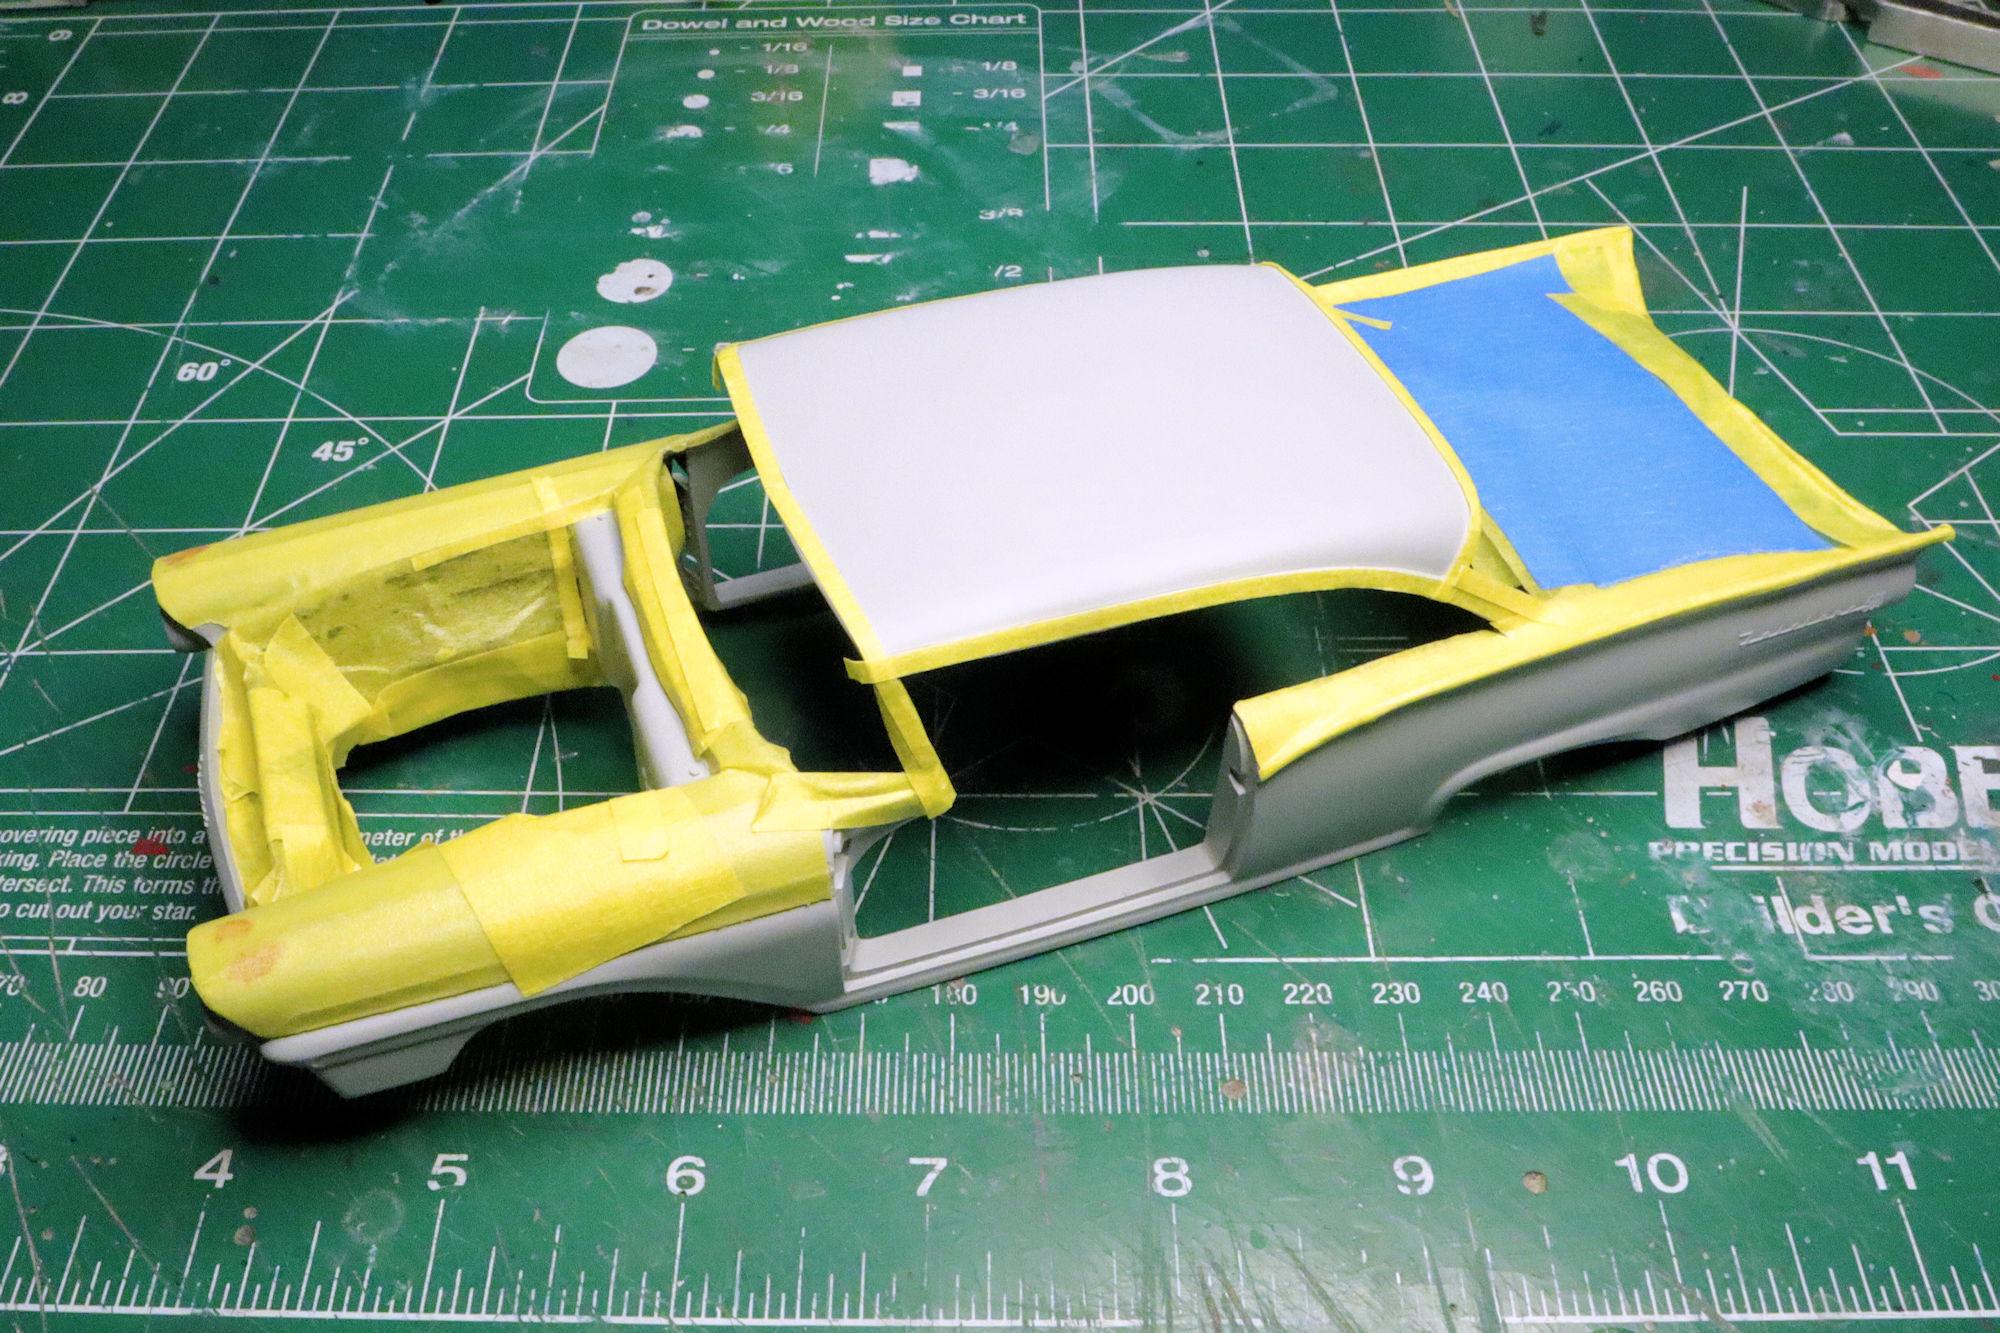
Hello Everybody The work continues on AMT's 1957 Ford Hardtop and here's the proof. I still have a couple of sink marks on the front fender tops to deal with but I just had to start getting some color down. Here's the masking work for the main body color, Tamiya TS-102 Cobalt Green. And yes, I did catch and trim the overhanging tape on the left front fender. As always, thanks for taking the time to look and please feel free to post a comment if you so choose. David G.

-
Ah, I see now. I actually considered painting mine like this but ironically that would have been more work to do with a model. The bezels would almost have to be painted separately then attached rather than attached then painted with the body. Doing it that way would have made fitting them without marring the paint trickier. And I don't think I would have been able to mask them for the kind of clean paint line that would be required. David G.
-
1:16 Gunze Sangyo 1937 Rolls-Royce Phantom III Sports Saloon
David G. replied to Anglia105E's topic in WIP: Model Cars
The interior is coming along quite nicely David! It's an unfortunate turn with the clear parts but I agree with the consensus. The marks may polish out. If not then the parts seem to be fairly flat so they should be easily enough to replicate. David G. -
Looking good Niko! I like the work you've done with the engine. David G.
-
It looks good Greg, nice and smooth. Hopefully the solvent in the sprue goo has finished its work and will leave you in peace from this point foreword. David G.
-
Odd in what way Jim? To me it looks like Ford picked the center-line between the two panels and split the colors there. How would you have done it? Thank you Carl. Thank you John. Red and white isn't bad. But if I were going to use red in a two-tone, it would have been with black. Thanks, David G.
-
Hello Everybody! Just a short, quick update. I spent most of this build session filing and sanding to get the tail light bezels to match the body contours. Thanks, David G.
-
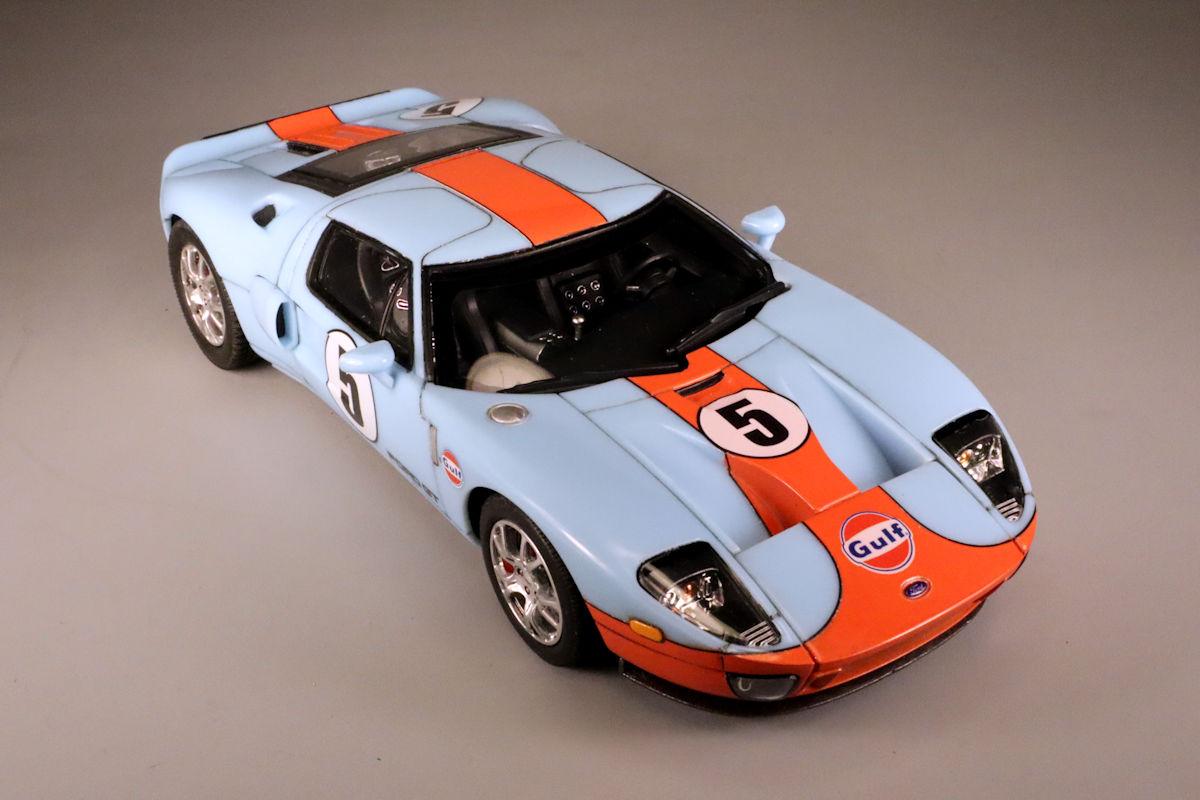
Now that you mention it I do remember that part of the build being rather challenging. I do recall test-fitting the chassis and body together early in the build and being concerned that I was doing something incorrectly. And as I disassembled them to continue the build I thought to myself: "Wow, I won't be able to do that too many more times without breaking something!" I think I actually ended up trimming away a bit of the front apron on the chassis to make it work. Mine was cast in light blue to simulate the Gulf livery colors. I decided to challenge myself and build it in the color it was cast. No paint on the body except the stripe and details. I think it worked out pretty well. I actually ended up using a photo of it as my avatar. Cheers, David G.
-
That's a great work space, it looks like it has good light too. Nice work! David G.
-
1937 Ford Pickup Monster Truck
David G. replied to Zippi's topic in WIP: Model Trucks: Pickups, Vans, SUVs, Light Commercial
This is shaping up to be an absolutely gorgeous build Bob. David G. -
1937 Chevy convertible: 1/32, old Pyro model, BOX STOCK???
David G. replied to ismaelg's topic in WIP: Model Cars
An unfortunate break and an excellent recovery Ismael! That's one problem working with ancient kits. Plastic fatigue. I really like the color combination. David G. -
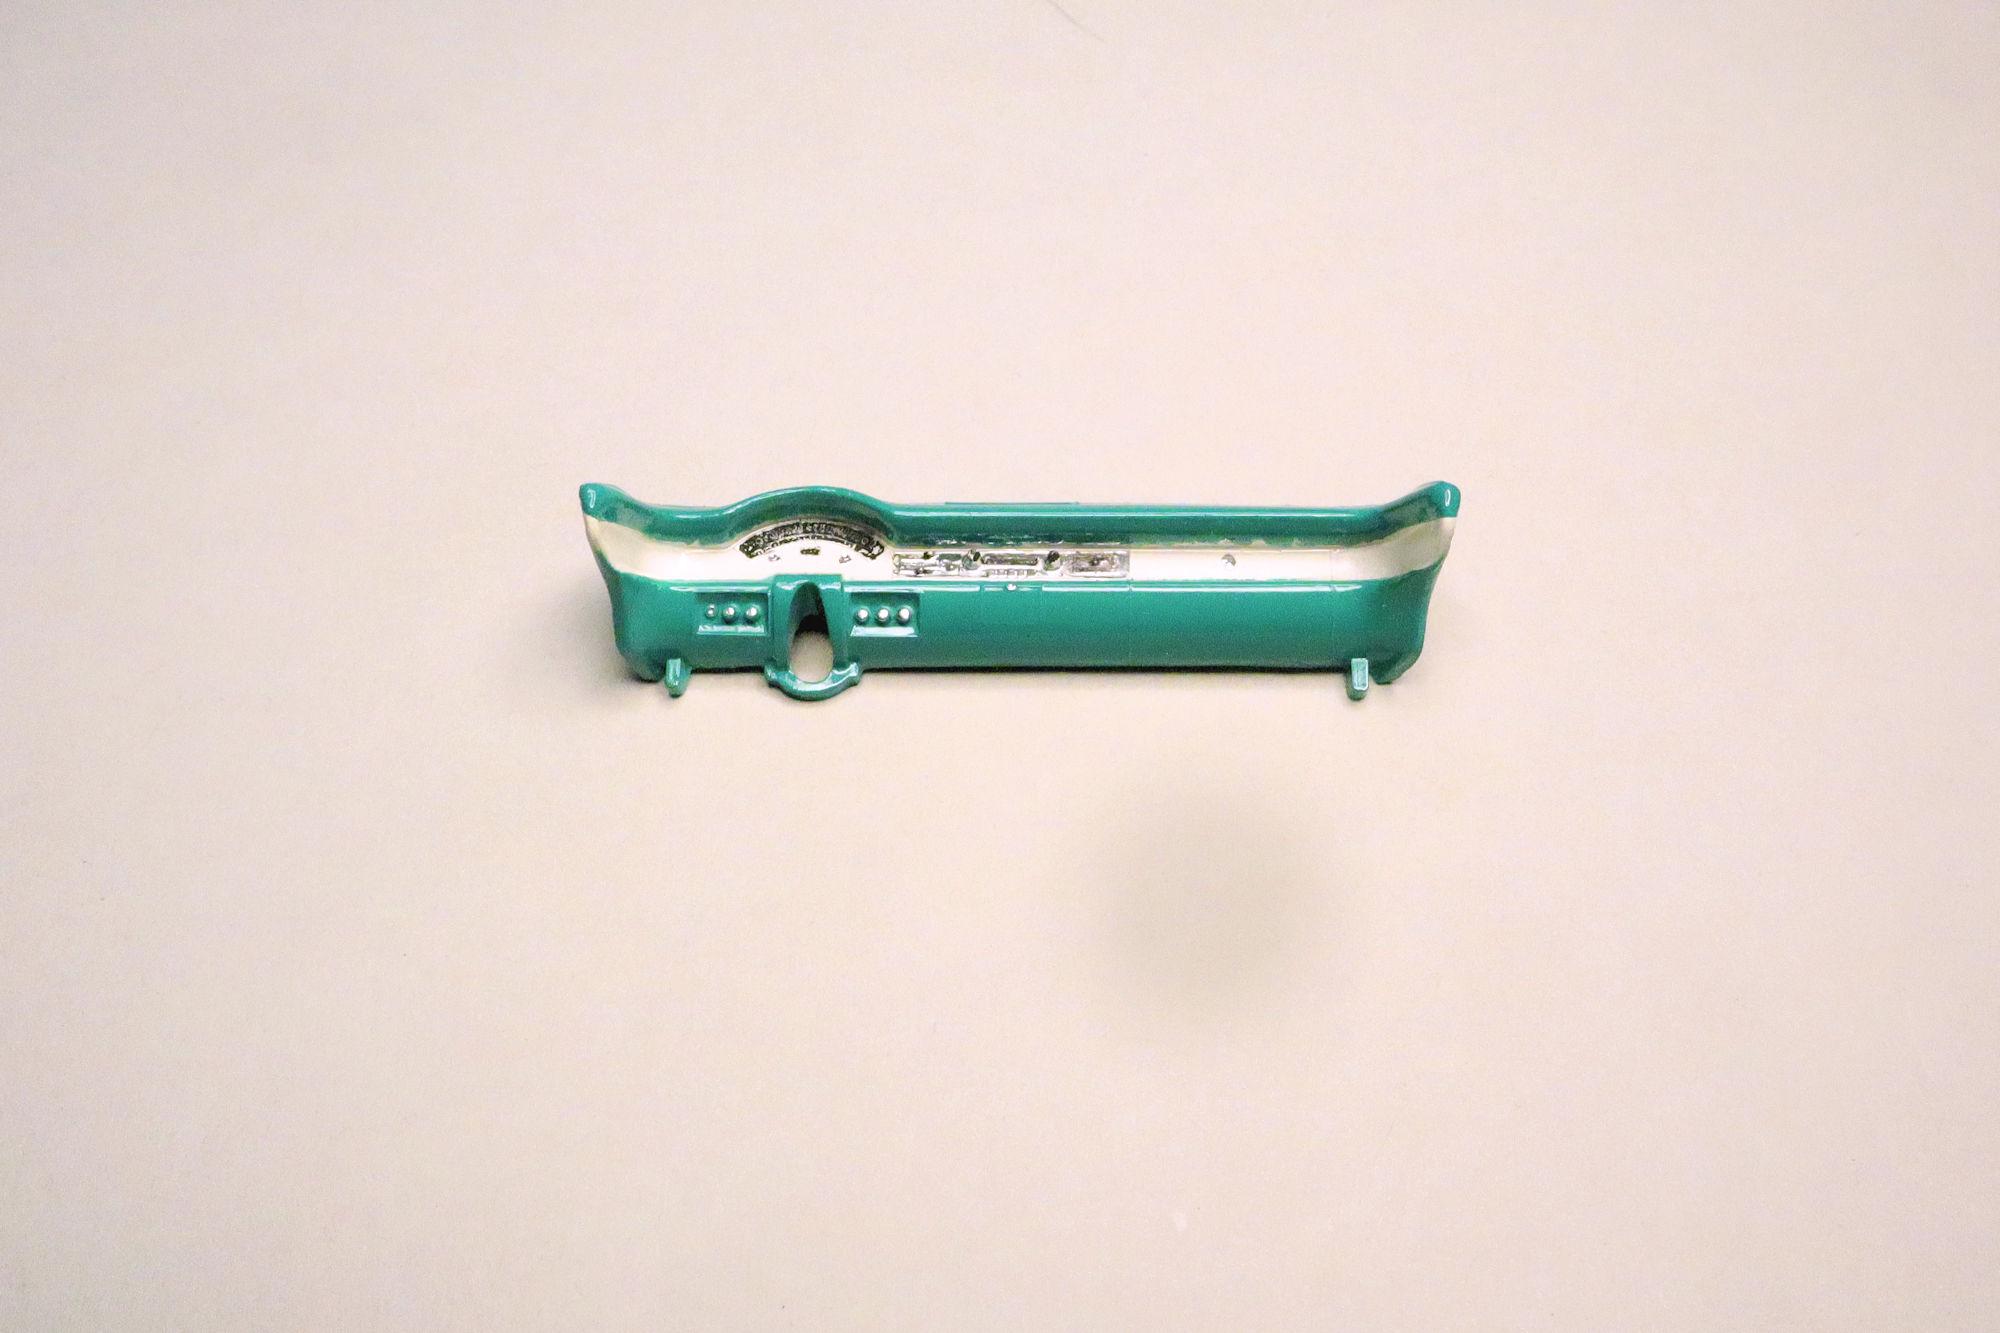
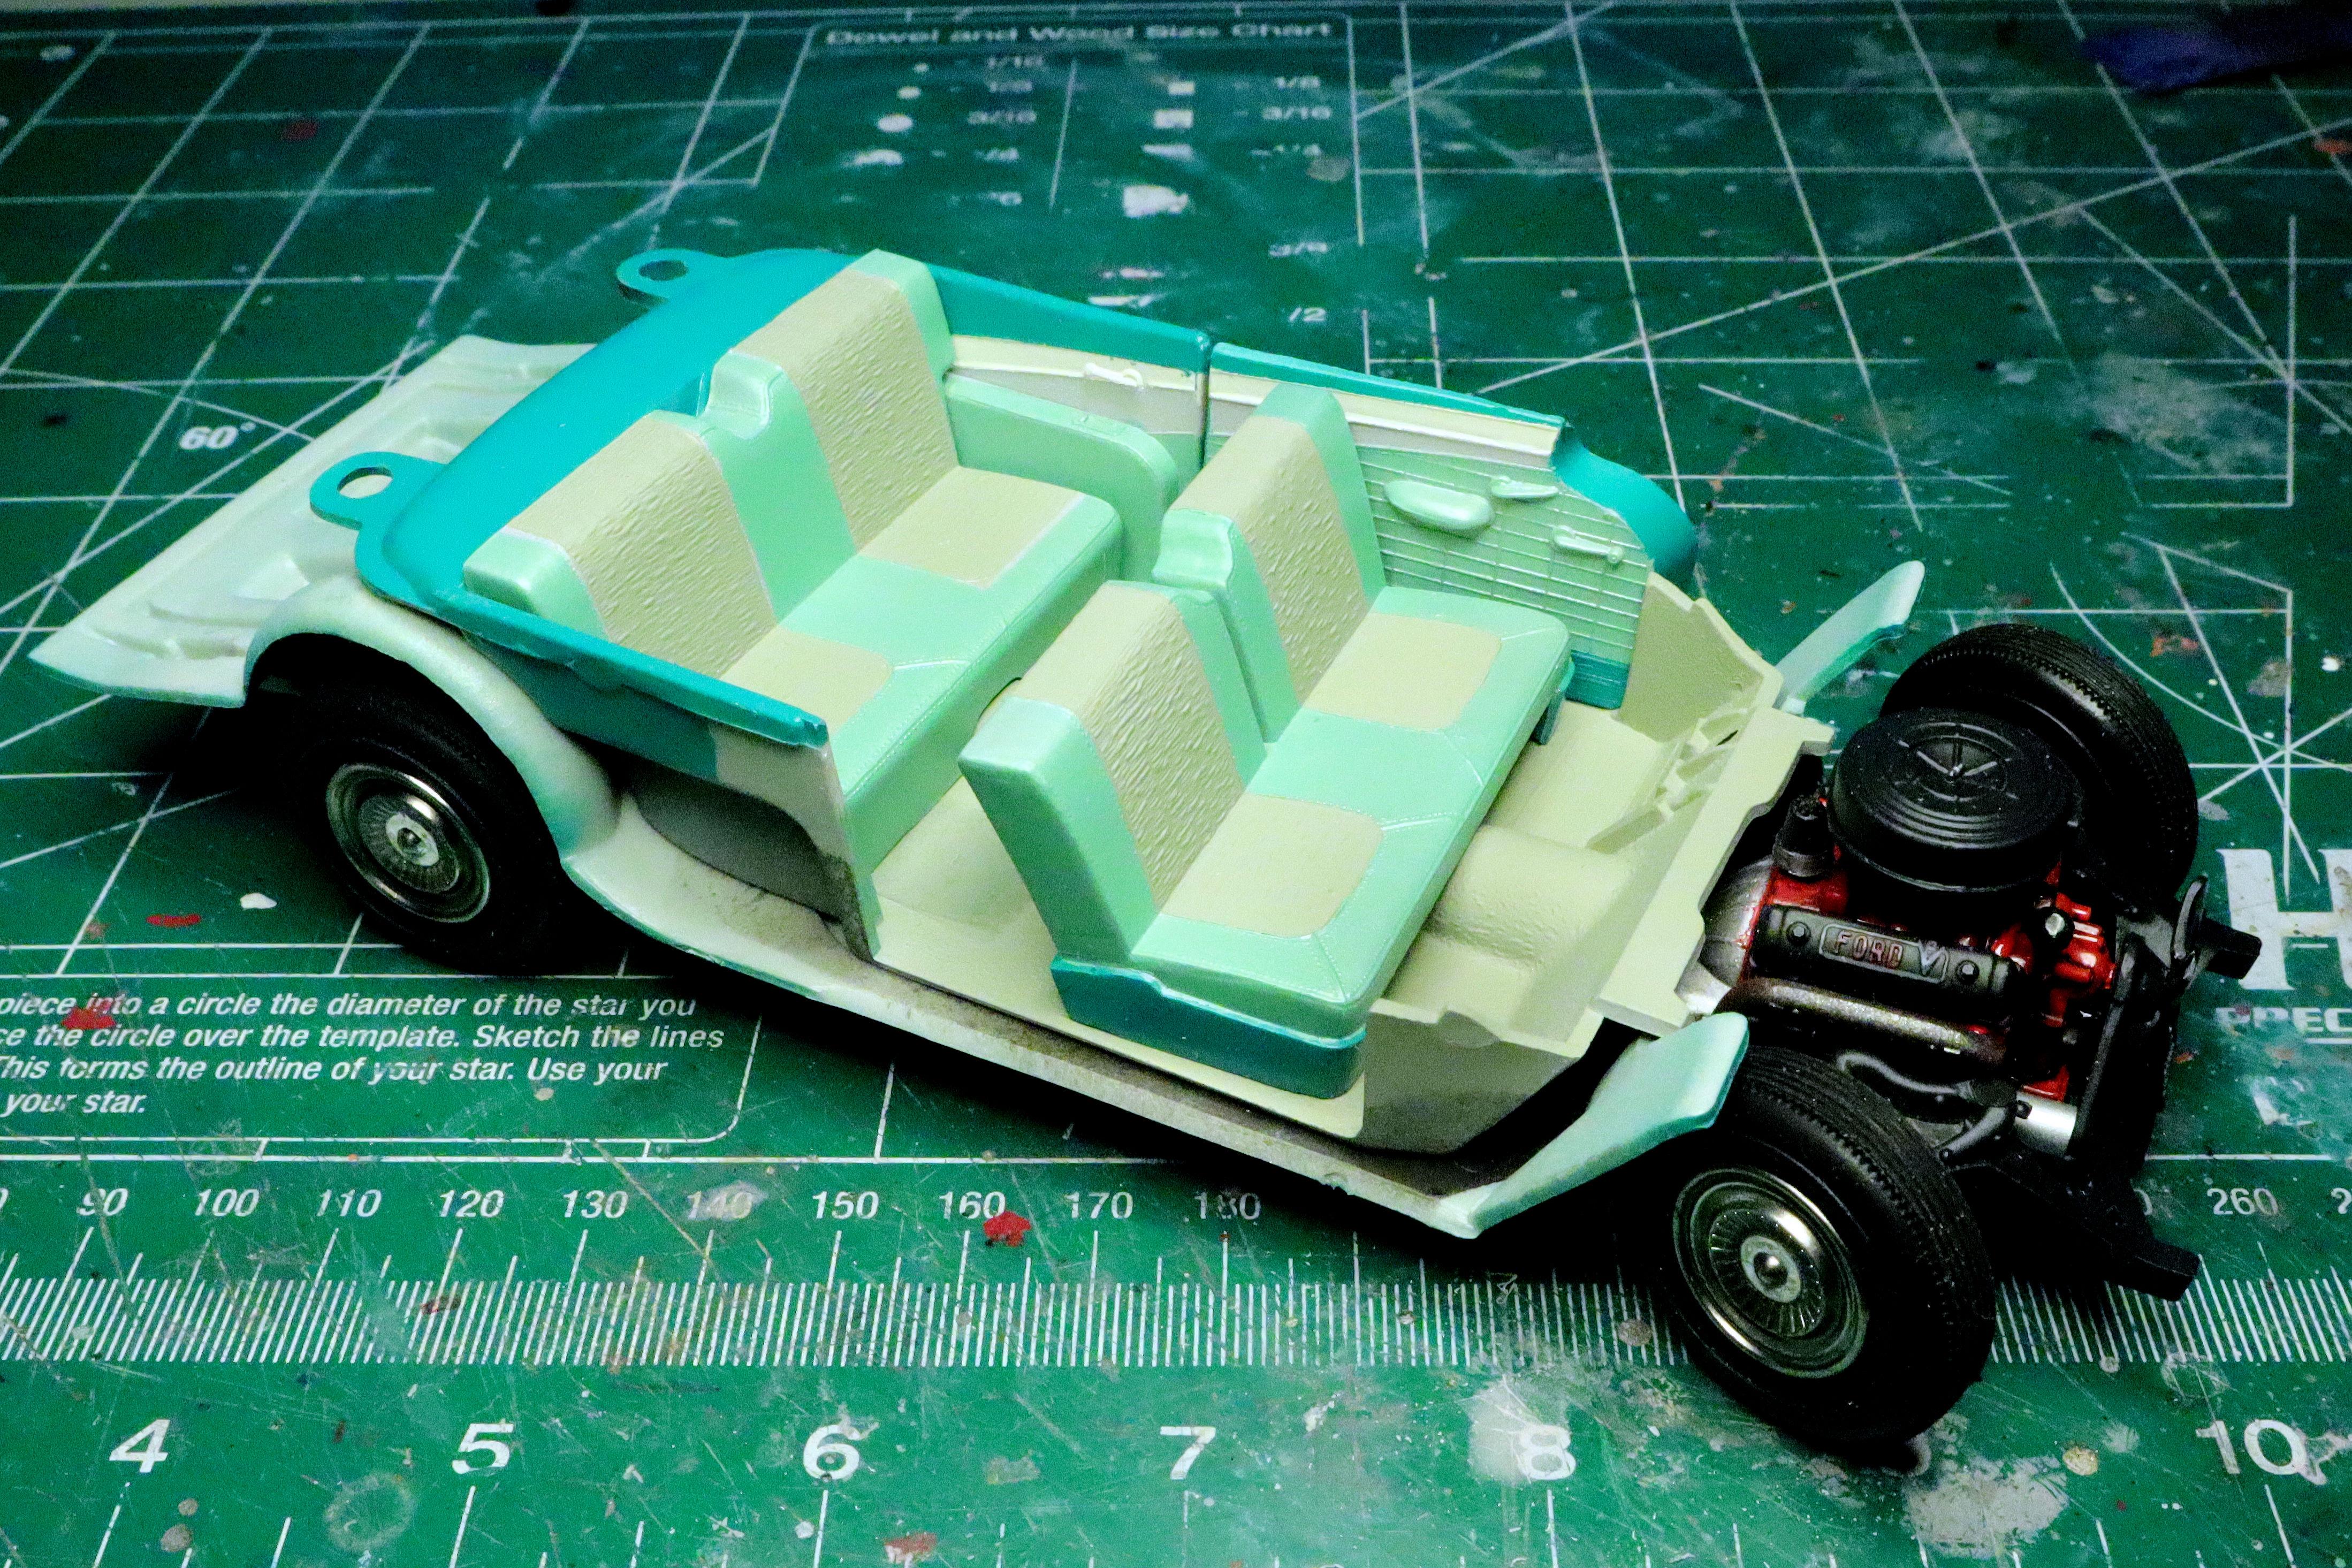
Hello Everybody! You may notice odd shadows on some of the photos for the next couple of postings. This is due some dirt that found its way onto the image sensor on my camera necessitating a trip to the camera shop for some cleaning and maintenance. They had it for about a week and after I got it back it took me a couple of days to get everything set back to my specs. Now that I have my camera back from the shop and all its settings are mostly dialed in, it's time to get back to business. A quick test view of all the interior bits together. The colors work well in person but apparently they're difficult to photograph well. I think I'll try a different background next time. Maybe adding some of the detail features will help out too. A quick shot of the dash detail... and one of those pesky shadows! As always, thanks for taking the time to look and please feel free to comment. David G.
-
1937 Ford Pickup Monster Truck
David G. replied to Zippi's topic in WIP: Model Trucks: Pickups, Vans, SUVs, Light Commercial
The paint looks really good Bob. I'm still trying to wrap my mind around the pairing of that chassis and body. It sort of reminds me of one I saw years ago, a VW bug on a similar chassis. Don't get me wrong, I like where you're going with it. It's just very unique... attention grabbing. David G. -
1:16 Gunze Sangyo 1937 Rolls-Royce Phantom III Sports Saloon
David G. replied to Anglia105E's topic in WIP: Model Cars
That's a lot of progress David. The interior is coming along nicely, I'm sure the body work will follow suit. David G. -
Dang John! That sounds like a nearly complete overhaul! I'm glad that you stuck with it. The end product is well worth the effort you put into it. David G.
-
Wow! That's so small I can barely see it Randy! I would feel compelled to wear a mask when dealing with such tiny parts. Lest an unexpected sneeze send it flying off into the void to be lost for ever. David G.
-
1:16 Gunze Sangyo 1937 Rolls-Royce Phantom III Sports Saloon
David G. replied to Anglia105E's topic in WIP: Model Cars
It's all coming together quite nicely David. You've hit upon a good mix of colors for the interior. I'm still impressed with the look of the leather upholstery. As is Mr. Webb it seems. David G.


.jpg.6b733d1a3e7ddef44ac0b76aff7f58a1.jpg)