Old Buckaroo
-
Posts
1,977 -
Joined
-
Last visited
Content Type
Profiles
Forums
Events
Gallery
Everything posted by Old Buckaroo
-
 Now that's what I'm talking about - thanks for showing those pictures, I'm way impressed Ive always like building my own also - when I was a teen those "Designer Specials" box'o'parts was the greatest things ever. I would do a string test, some flew great and some did a perfect arc for the ground. I'm considering getting another Saturn V now that they are E&F compatible.
 -
Dan no place in Montana is good in Jan or Feb.. Since you are in Sydney - there is a great hobby shop (or was) called Ribbon & Rail on main street. Its a cloth store of sorts on lower level and hobby shop upstairs. Mom and Pop place
-
That video is hilarious - as much as I despise ice and snow, I sure got a good laugh out of that situation.
-
Caboverdose
Old Buckaroo replied to Rockford's topic in WIP: Model Trucks: Big Rigs and Heavy Equipment
It makes me wonder what kind of optics he has - I sure cant see that little even with the help of cheater reading glasses and a optivisor. Truthfully I'm more impressed with the work you are doing here rather than dropping in a resin or 3D printed version. This one is all yours. Have you ever seen the old Diamond Reo Phil Jensen built that the cab is made mostly from wood ? Now that is something Id like to try building. -
Jim growing up with hundreds of flat acres surrounding me I learned at a early age to cut holes in the parachutes. Otherwise they would catch a thermal or normal breeze and head for the horizon.
-
Caboverdose
Old Buckaroo replied to Rockford's topic in WIP: Model Trucks: Big Rigs and Heavy Equipment
Steve I love this engine , I'm such a fan of actual scratch built items. If you begin to question your sanity watch this video, especially around the 13:00 minute timestamp. Enjoy! -
Does anyone build or fly them? I grew up less than 50 miles from Estes Industries but I was a Centuri fan that was out of Phoenix Az. Their catalogs really grabbed and sparked my Imagination at a young age. I still build and fly them 50 some years later, most are scratch built to resemble the catalog models I never could afford at a young age.

-
Duel Peterbilt
Old Buckaroo replied to Bugatti Fan's topic in Model Trucks: Big Rigs and Heavy Equipment
I'm even more impressed that's how you figured you're dimensions. I'm guilty of the same old tech methods - although I stepped a bit into the future. For example I'm building a Grumpy toy Monza, I needed a template for the rear wheel wells. I found a pic online, saved it to my laptop and then made the picture the same size of the model body on the screen. Grabbed a piece of paper and lightly traced the outline to make a pattern. We actually have a vhs in our bedroom, I think the quality of movies are better, no pixilation and the sound isn't off like so many dvd's When I build my models - they are for my entertainment, they may not be prototypical , have sand scratches or paint flaws , but they are built for my own entertainment. Your Duel model would definitely be a front shelf item in my collection. -
Ive got spare windshields from the '66 Pro Street cars. I bought them for the chassis and other parts. If you want one its yours..
-
Billet Style Grill
Old Buckaroo replied to Perspect Scale Modelworks's topic in Model Building Questions and Answers
Ive got this from a junk box - it is about 60mm wide and 12mm high, If you can use it it yours.
-
That white stuff is just another day here in Montana. I have two seasons here - work on 1/1 cars and work on model cars.
-
What non-auto model did you get today?
Old Buckaroo replied to chunkypeanutbutter's topic in The Off-Topic Lounge
The nose cone has such a "classic" style to it!! I'm sure if you started a rocket thread up in "All the Rest" you'd be surprised at how many others dabble in the sport. I belonged to a Rocket forum once upon a time - they were about as intense as armor modelers. This place is way friendlier 👍 -
Aurora 1/32 scale Meatwagon - major restoration!
Old Buckaroo replied to Alan Barton's topic in WIP: Model Cars
Wow - what a great way to start the day seeing a restoration like this and a great backstory. I never even knew these kits existed and I like old Aurora models (aircraft & figures) You definitely gave this model a work over. -
A lot of cool stuff has been acquired over that 18 year journey.
-
Perfect - I'm really happy you posted this . Years ago I had seen something similar in a FSM or SAE magazine but didn't pay that much attention to it as I was building aircraft models back then more than cars. For several years Ive been regretting not paying better attention to that tip. You've solved my dilemma and I will be making one similar myself.
-
Add one more semi truck for the day. This was the first semi truck I ever built back when I was a teenager. There is a 10 yr old thread that recently resurfaced on "What was your first truck model" that I had mentioned this kit. I found this kit on ebay with a really cheap buy it now price. I took a gamble (that's how low it was) and bought it - I wasn't really worried about the kit contents, I wanted the Box itself. Yes I know all the inaccuracies and other blah blah on this kit not being like the prototype. I don't care - I wanted it again for the nostalgia of it. But it is complete, not started and has 4 extra metal axles. That's what I call a bonus!
- 39,276 replies
-
- 11
-

-
- johan
- glue bombs
- (and 1 more)
-
Mack AC Dump Truck with Pneumatic Tires
Old Buckaroo replied to Pete68's topic in Model Trucks: Big Rigs and Heavy Equipment
Ive never been a real fan of these kits but I really like what you did with this one. It was the kit tires in all honesty. But you have made this one definitely awesome and changed my mind on this kit. If those are the AITM Resin tires - Ive got some hid away, but I'm not sure of the wheels. I bought them for a tri axle Pete I was building years back - but used different tires. -
AMT 1970 SuperBee, another one from the long lost archives
Old Buckaroo replied to gtx6970's topic in WIP: Model Cars
Time to finish this one up it looks great - funny how some models get shelved. I actually like the white interior with a bit of yellow to it. Looks more real to my eyes Do you have the glass for the body ? This is a beautiful car! -
Duel Peterbilt
Old Buckaroo replied to Bugatti Fan's topic in Model Trucks: Big Rigs and Heavy Equipment
I really like this - the trailer really impresses me. Did you use the old SAE article for reference on the trailer? Your base needs a rattlesnake somewhere ! 🐍 Those snakes at the fuel station terrorized me more than the truck did !!! -
I have a motto - if the wiring harness going into the door is larger around than a , ummm kielbasa sausage - I want no part of it. Way too much electronics for me.
-
Looks great, this is a most useful tip. Thank you for sharing it. (no more scavenging old kit parts to saw off decent caps)
-
What Did You Get Today? (Not Model Related)
Old Buckaroo replied to LOBBS's topic in The Off-Topic Lounge
I got to hear a 10 minute rant from my wife when she told me a dozen eggs were $7.90 a dozen at the local store here in Montana. I would've thought she had served in the US Navy...😲 -
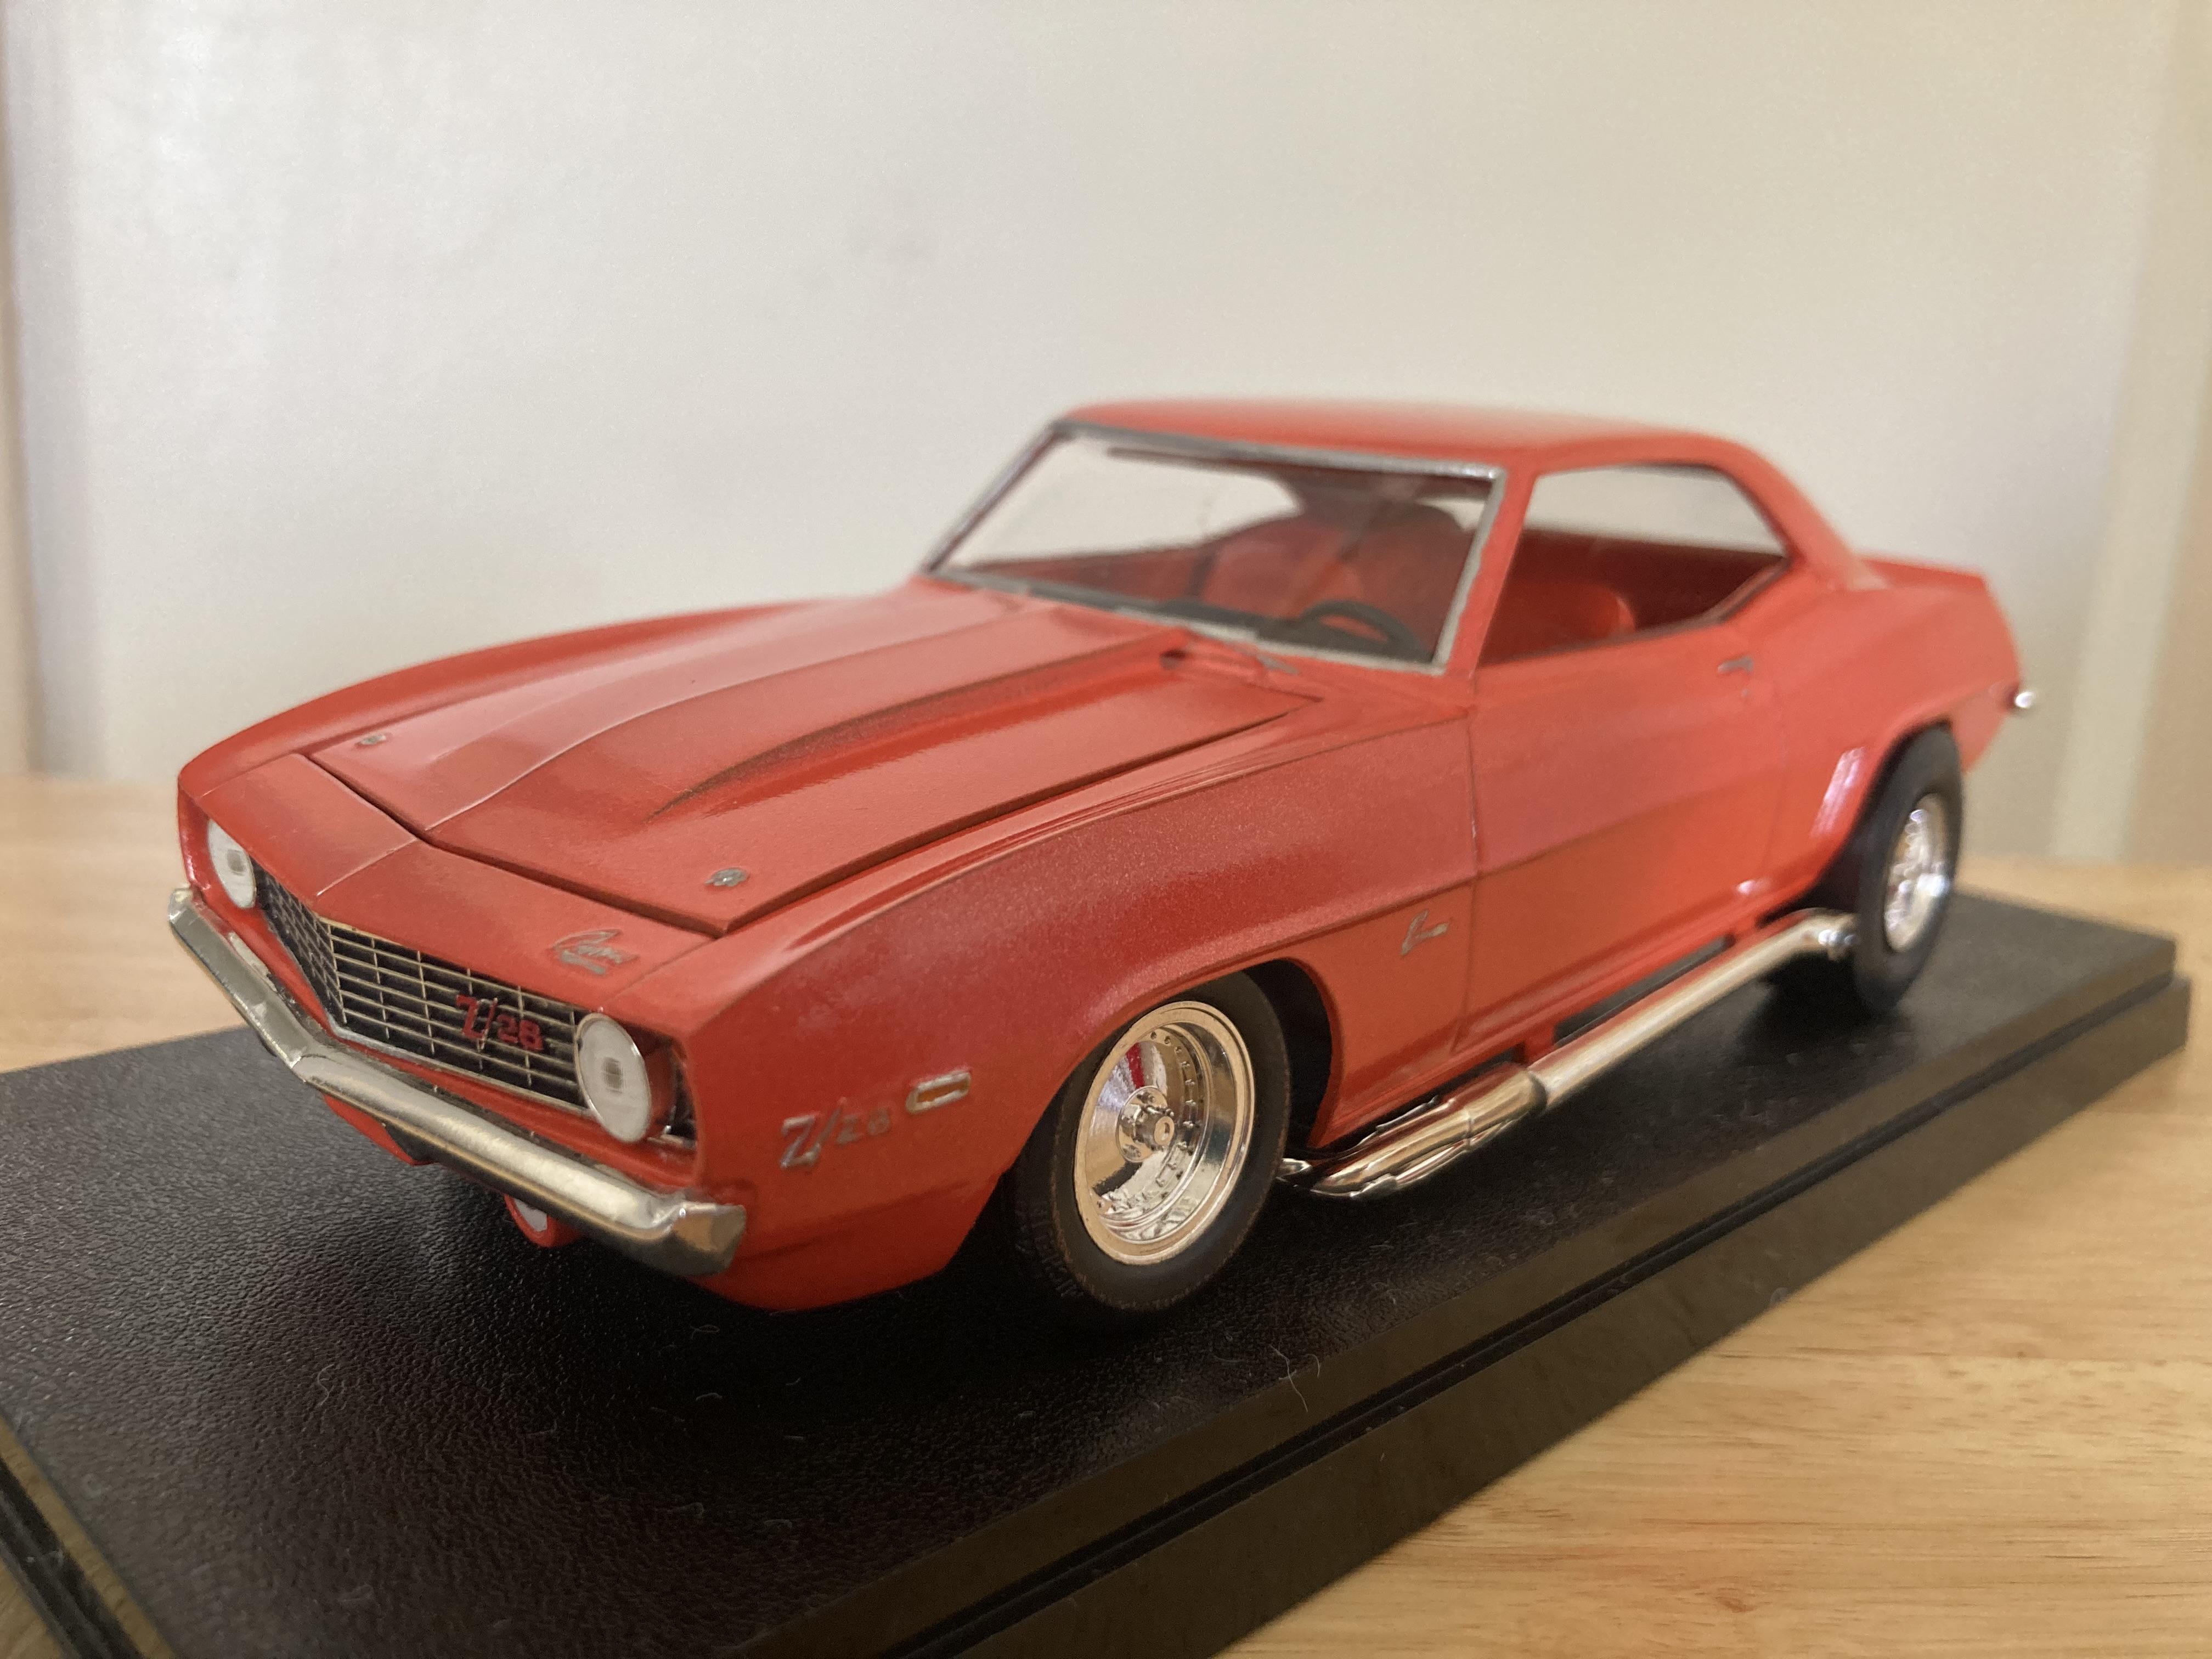
My oldest car models - JoHan Olds, ever so often I see the dash and steering wheel turn up in another kit box. This was built before I was married (34 + years) The Monogram Z28 was a gift from my wife our first Christmas together.
-
What Did You Get Today? (Not Model Related)
Old Buckaroo replied to LOBBS's topic in The Off-Topic Lounge
In these parts we refer to that as "French Toast Alert" when everyone races to the store and buys all the bread, milk and eggs - but you didn't get eggs. -
Jeep CJ5
Old Buckaroo replied to TonyK's topic in Model Trucks: Pickups, Vans, SUVs, Light Commercial
Very nice build up , even has the KC lights everyone had back then. Love the color 👍 I had a 73 CJ 5 with the 304 in it. I never spent so much time stuck in bad places as I did on those old undiscovered mining roads in Colorado. I had 4wd so I was gonna see where it went - also I was 21 at the time.