Search the Community
Showing results for tags 'Revell'.
-
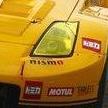
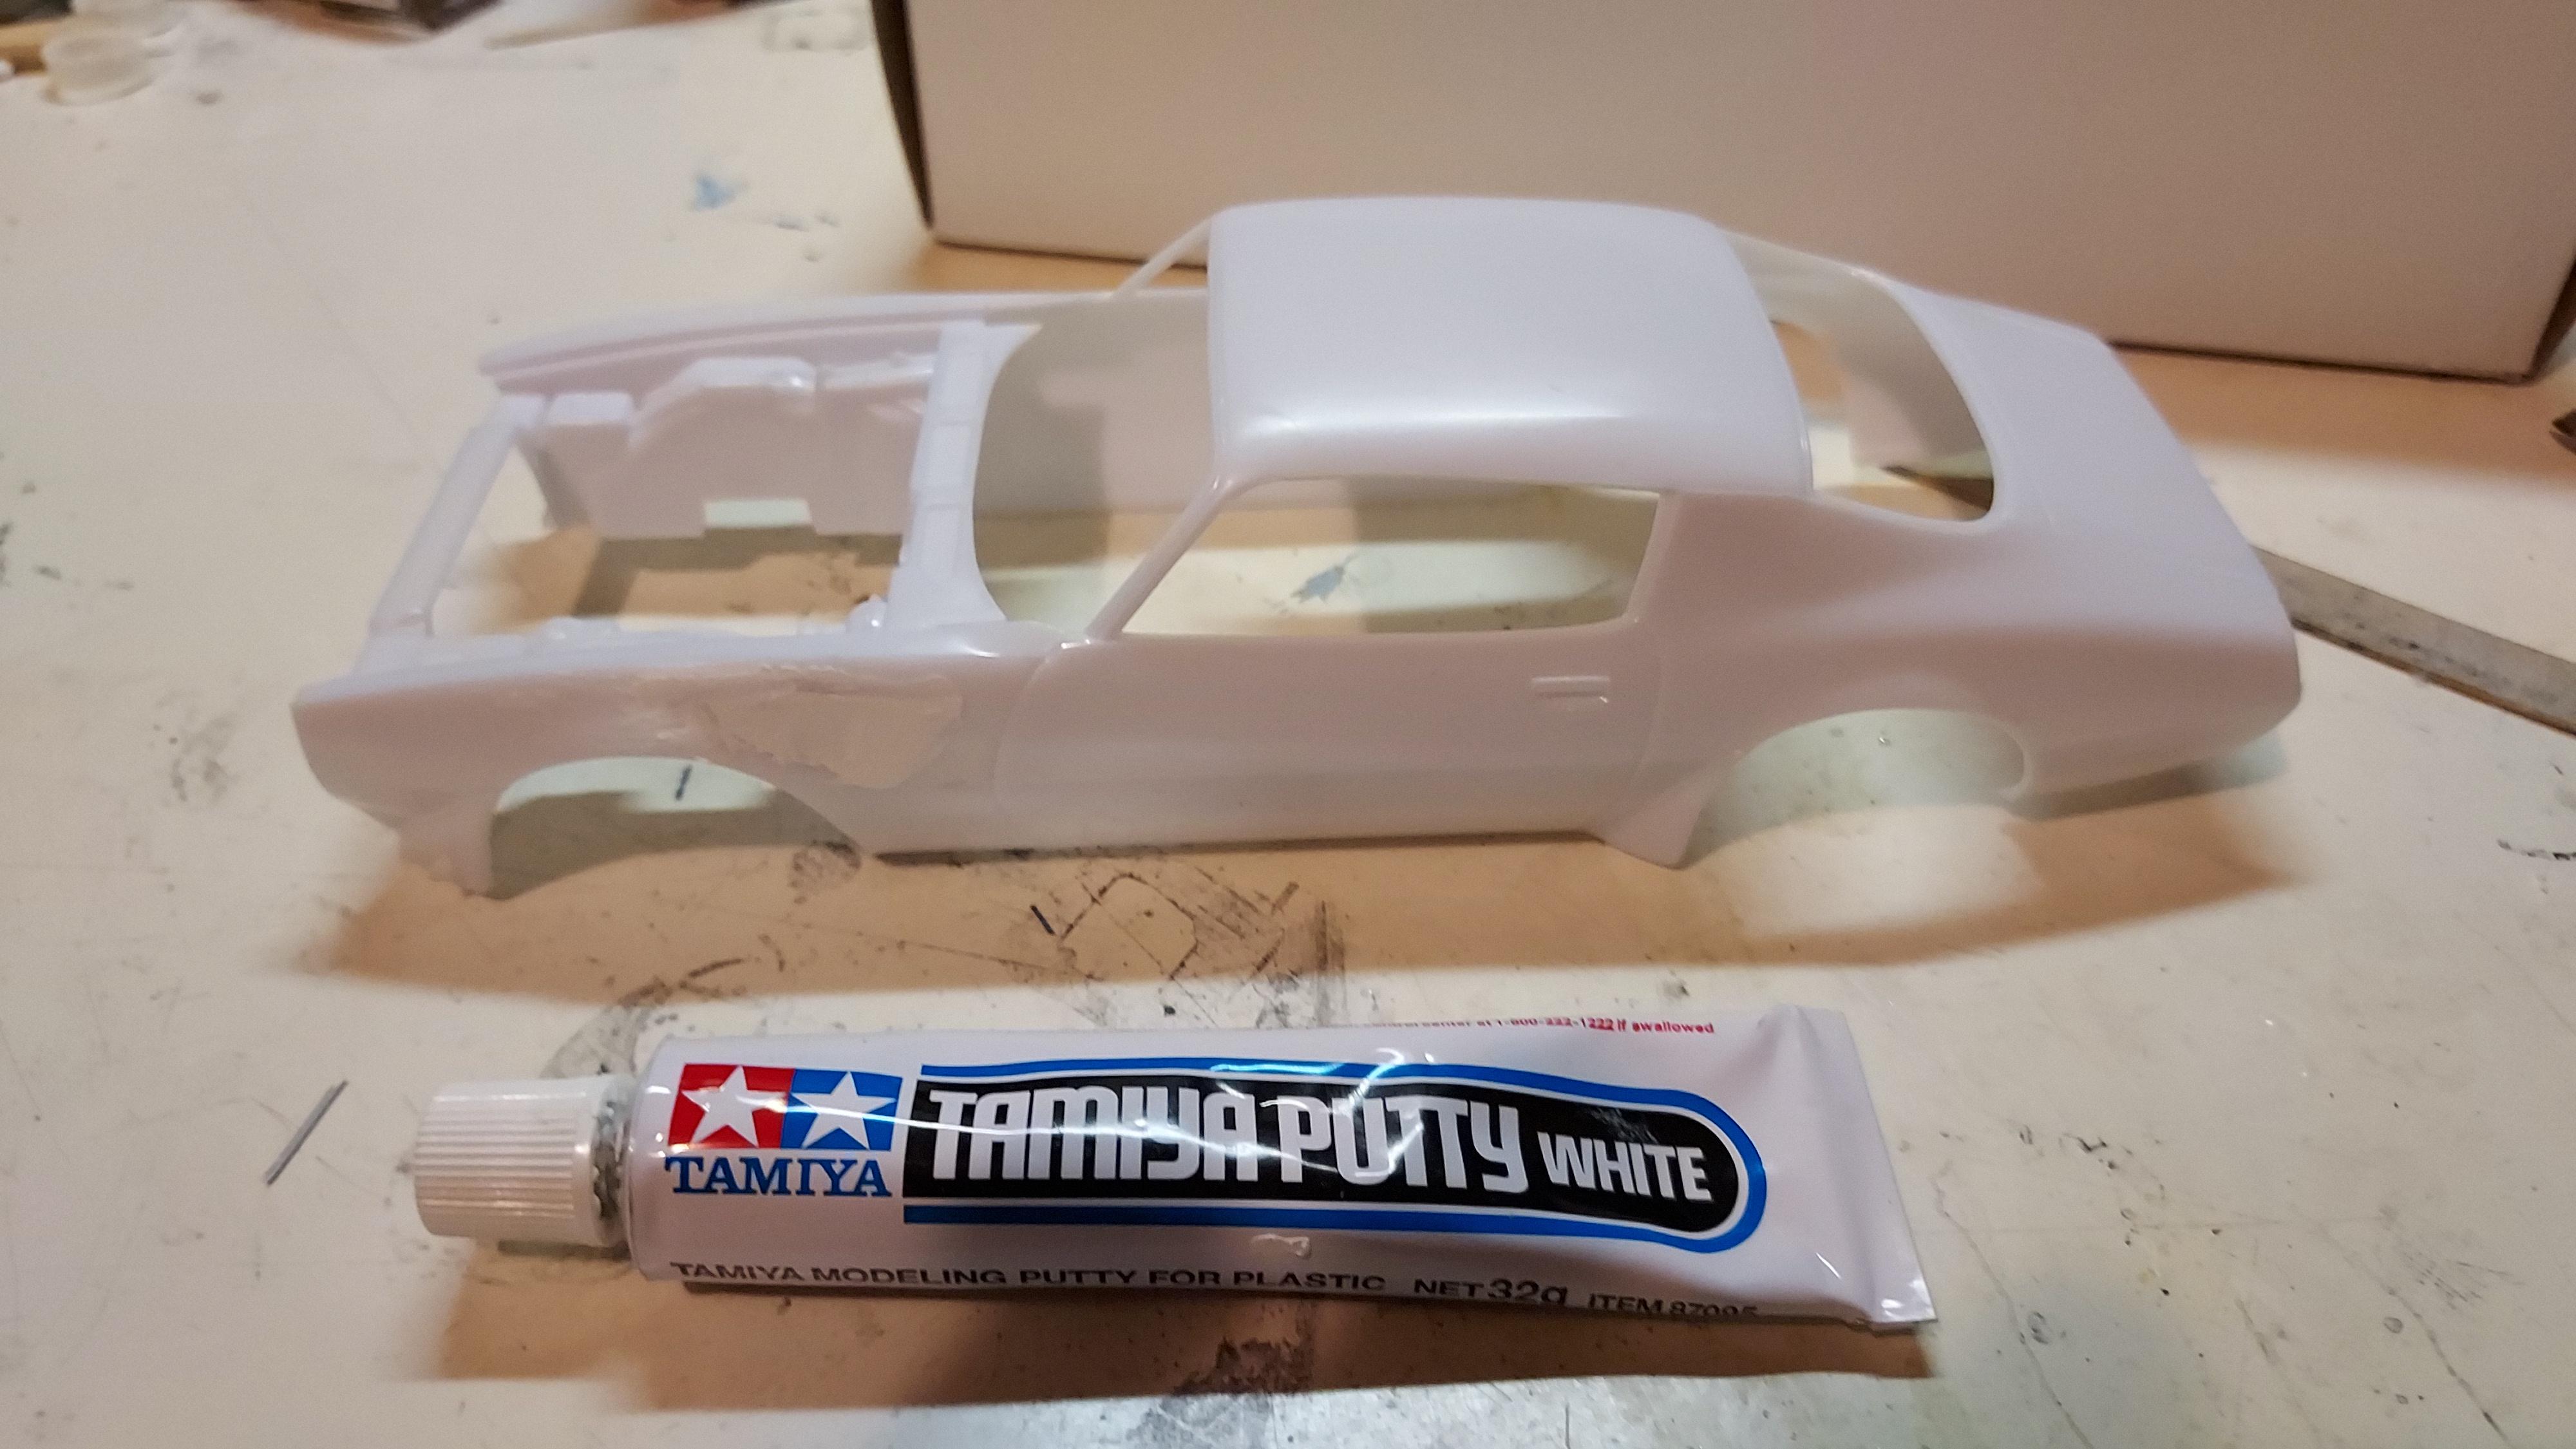
This is just the very beginning stages but you gotta start somewhere. A slight touch with the Dremel and some light sanding with an emery board then a little dab of Tamiya filler Putty and the side scoops are a thing of the past. I'll let that dry overnight. Next I'll have to make a Ram Air Air cleaner. For this I was able to trim the bottom half if the shaker scoop and the top half of an extra Deserter Air cleaner. The rally lls are soaking in Mr. Clean as they way too shiny chrome and need to be painted Argent. Revell did a pretty good job on these also. You just need a little paint detailing work. The Firestone Wide Ovals are really nice. I think I might just keep the front spoiler and the wheel well pices. I know the y were specific to the T/A , but I kinda like the look of those. The same for the engine turned instrument panel applique. I always liked the look of that over the boring, wood grain of the Formula. They give you a nice decal for that.

-
 After watching it collect dust on the shelf at the local hobby store for several years, I finally bought the Hemicuda. The Dodge 426 I built a little while ago. (These are die-cast and plastic kits.) The fuel linkages from the fuel pump to the carbs required a lot of work. I used hot water baths and a hair dryer to bend them and shape them so they would fit around the other components and meet up properly. Each is a little different in that regard. The spark plug wiring on the Dodge 426 is correct, but I took some liberties on the Hemicuda as some of the wires were just not long enough to fit on the distributor properly. The Hemicuda’s power steering pump didn’t fit very snugly, so I glued a thin strip of sheet plastic around the mounting post and then sanded that down until the fit was snug. On the Dodge 426, I didn’t really get the angle and fit of the choke control body correct, as I had to fudge it in order to get the choke control tube to line up. I fixed that issue on the Hemicuda by extending the attachment post on the choke by gluing on a piece of styrene rod of the same diameter. There were four types of screws (which I believe were self-tapping) supplied to join the die-cast parts, and most of them proved very difficult to get in. Overall though, very neat looking (and heavy) kits when finished!
-
 A fantastic looking race car but I found the suggested yellow livery a bit boring - even if it is traditional. So I had some custom decals printed at Indycals and made up my own livery based on the colours of Ryobi Power Tools - including some Porsche Peridot Green metallic paint I had left over from a Cayman build. The kit is OK. Some grinding was involved to get it all to sit together properly. It's well detailed in some places (engine, interior) and entirely lacking in others (suspension, poseable wheels).
 -
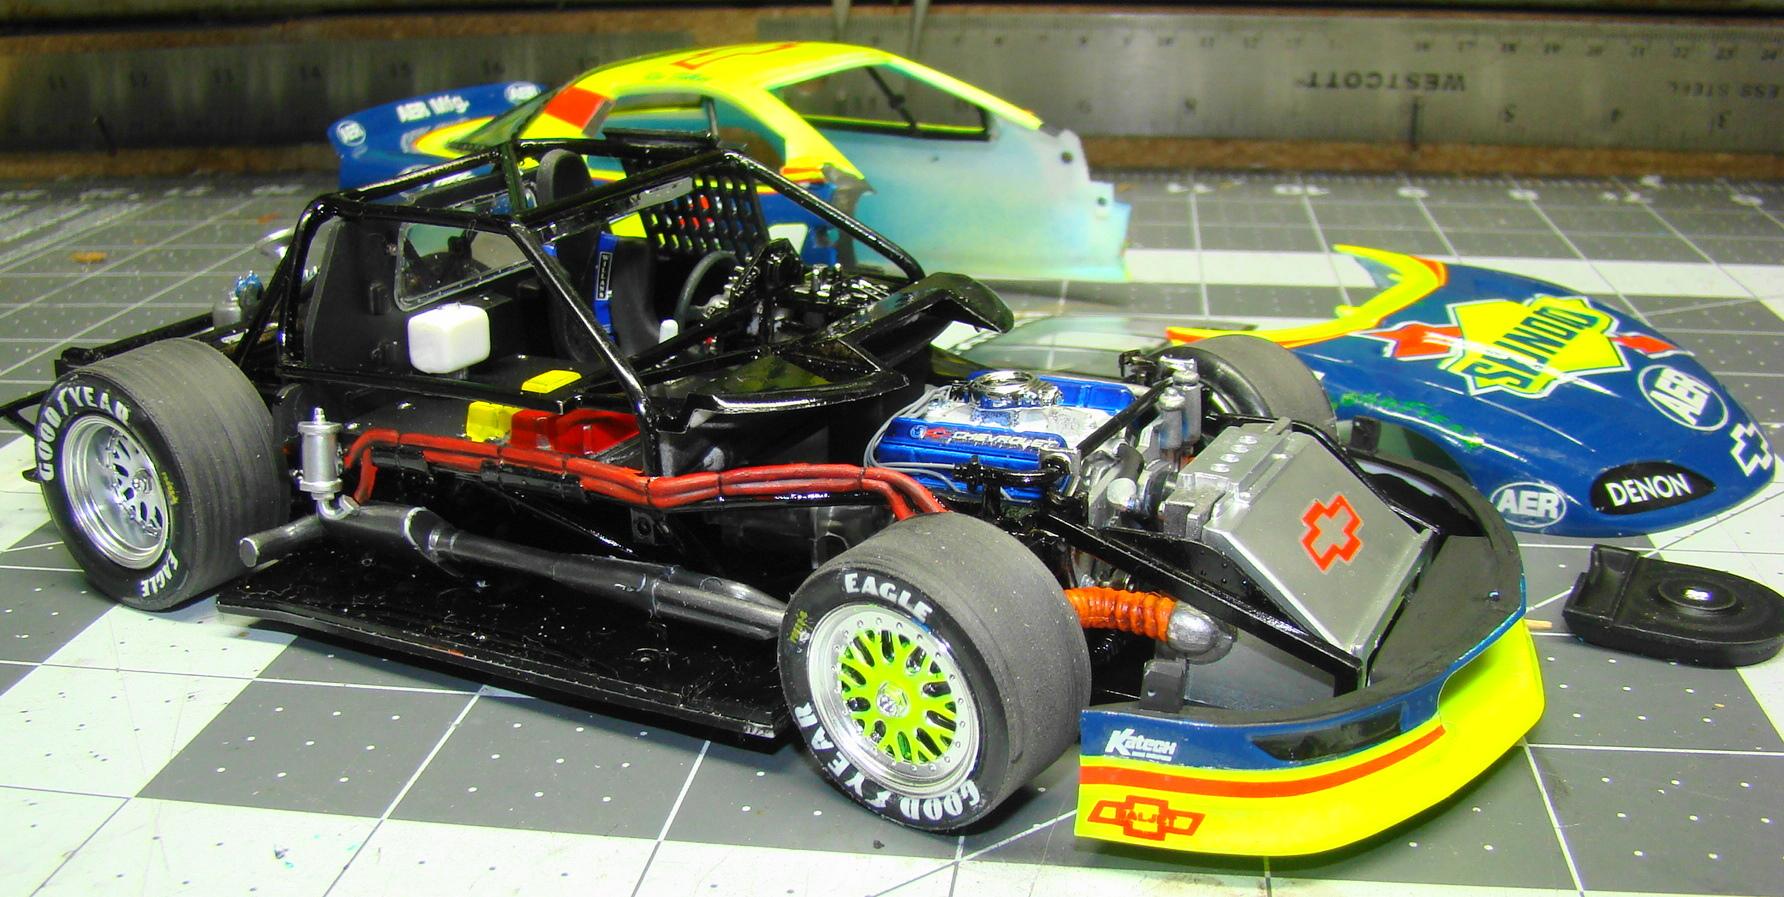
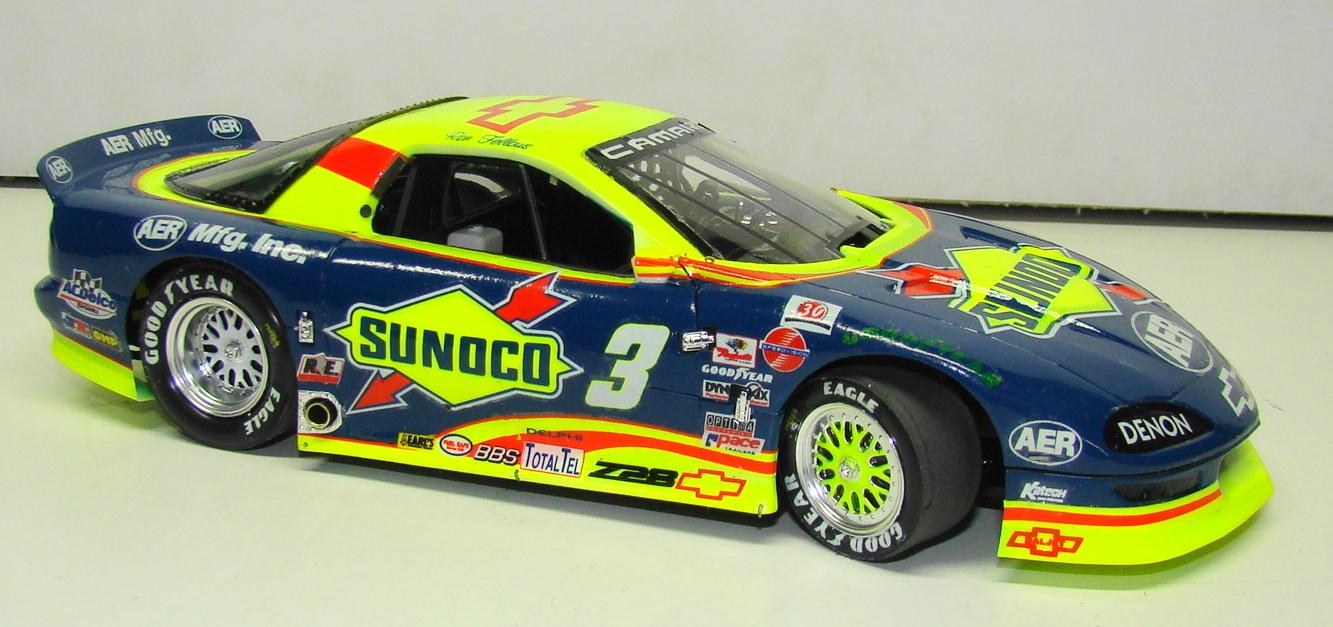
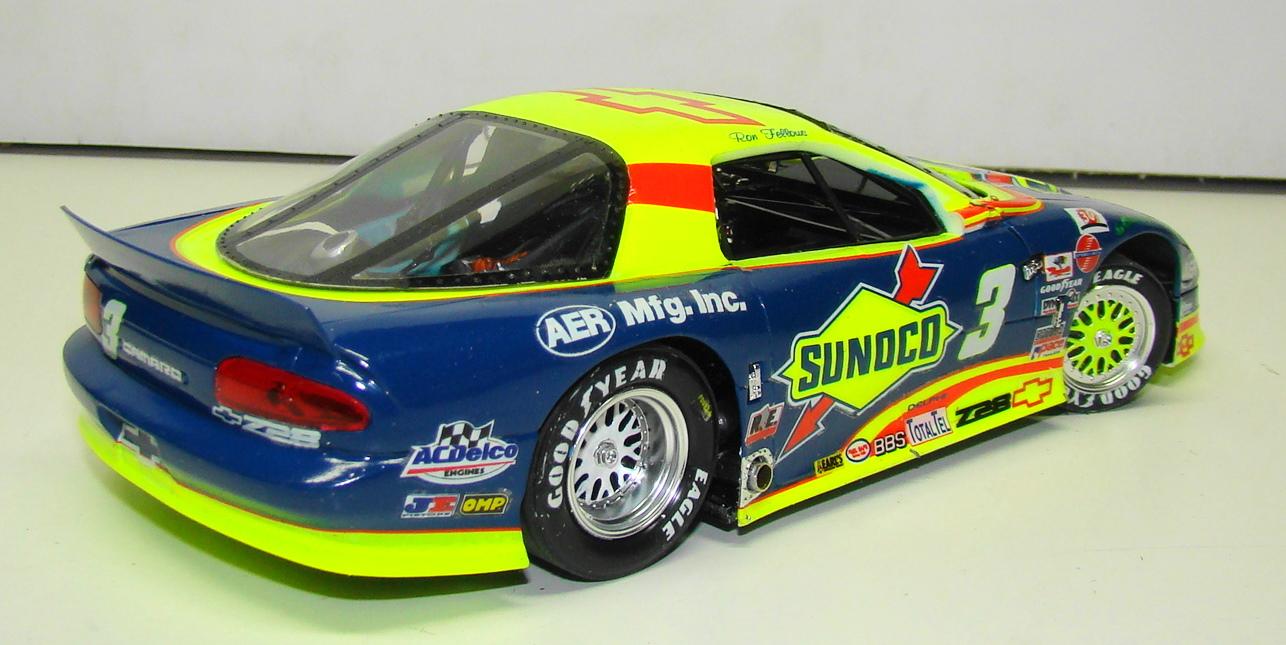
Makiing good use of some time off. This is Revell's 1/24 Sunoco Camaro that Ron Fellows drove in the 1996 Trans Am season. This kit was on and off my workbench several times mostly waiting for paint to cure. The flourescent yellow is Testors 1177 Neon Yellow airbrushed over white. The blue is Mr Color #322 (70%), Mr Color #328 (30%). This was done to match a diexcast in my collection which turned out to be a kind of mistake. You will see why. I chose to paint most of the yellow even though it was represented as decals. The large area on the roof was sure to wrinkle and the nose had to be painted anyway. I used a latex clear over the flourescent because it changes the color very little but takes 2 months to cure. The rest of the details are captioned under the pictures. Thanks for looking. The chassis was very detailed for a domestic kit. I added a few touches here and there but mostly it is detail painting. Getting all the pieces to sit right in the interior proved to be a challenge. Not my first time doing this chassis but it was still fussy. Body is three pieces and required several (10) small locator pins for it to sit right on the chassis. You can see three of them at the very bottom of the body. I always like this rear three quarter view. Note the chrome exhaust tips. This was cut from a radio antenna. A good source for chrome tubing of different sizes. I went way out of my way to obtain this GMP 1/18 diecast of the same car. Only to discover they got the yellow all wrong. I am seriously considering masking and spraying it.
-
 I want to covert the 78 GMC truck to a 2WD and lower it. Any suggestions on what kits provide the best chassis and/or suspension to do this?
 -
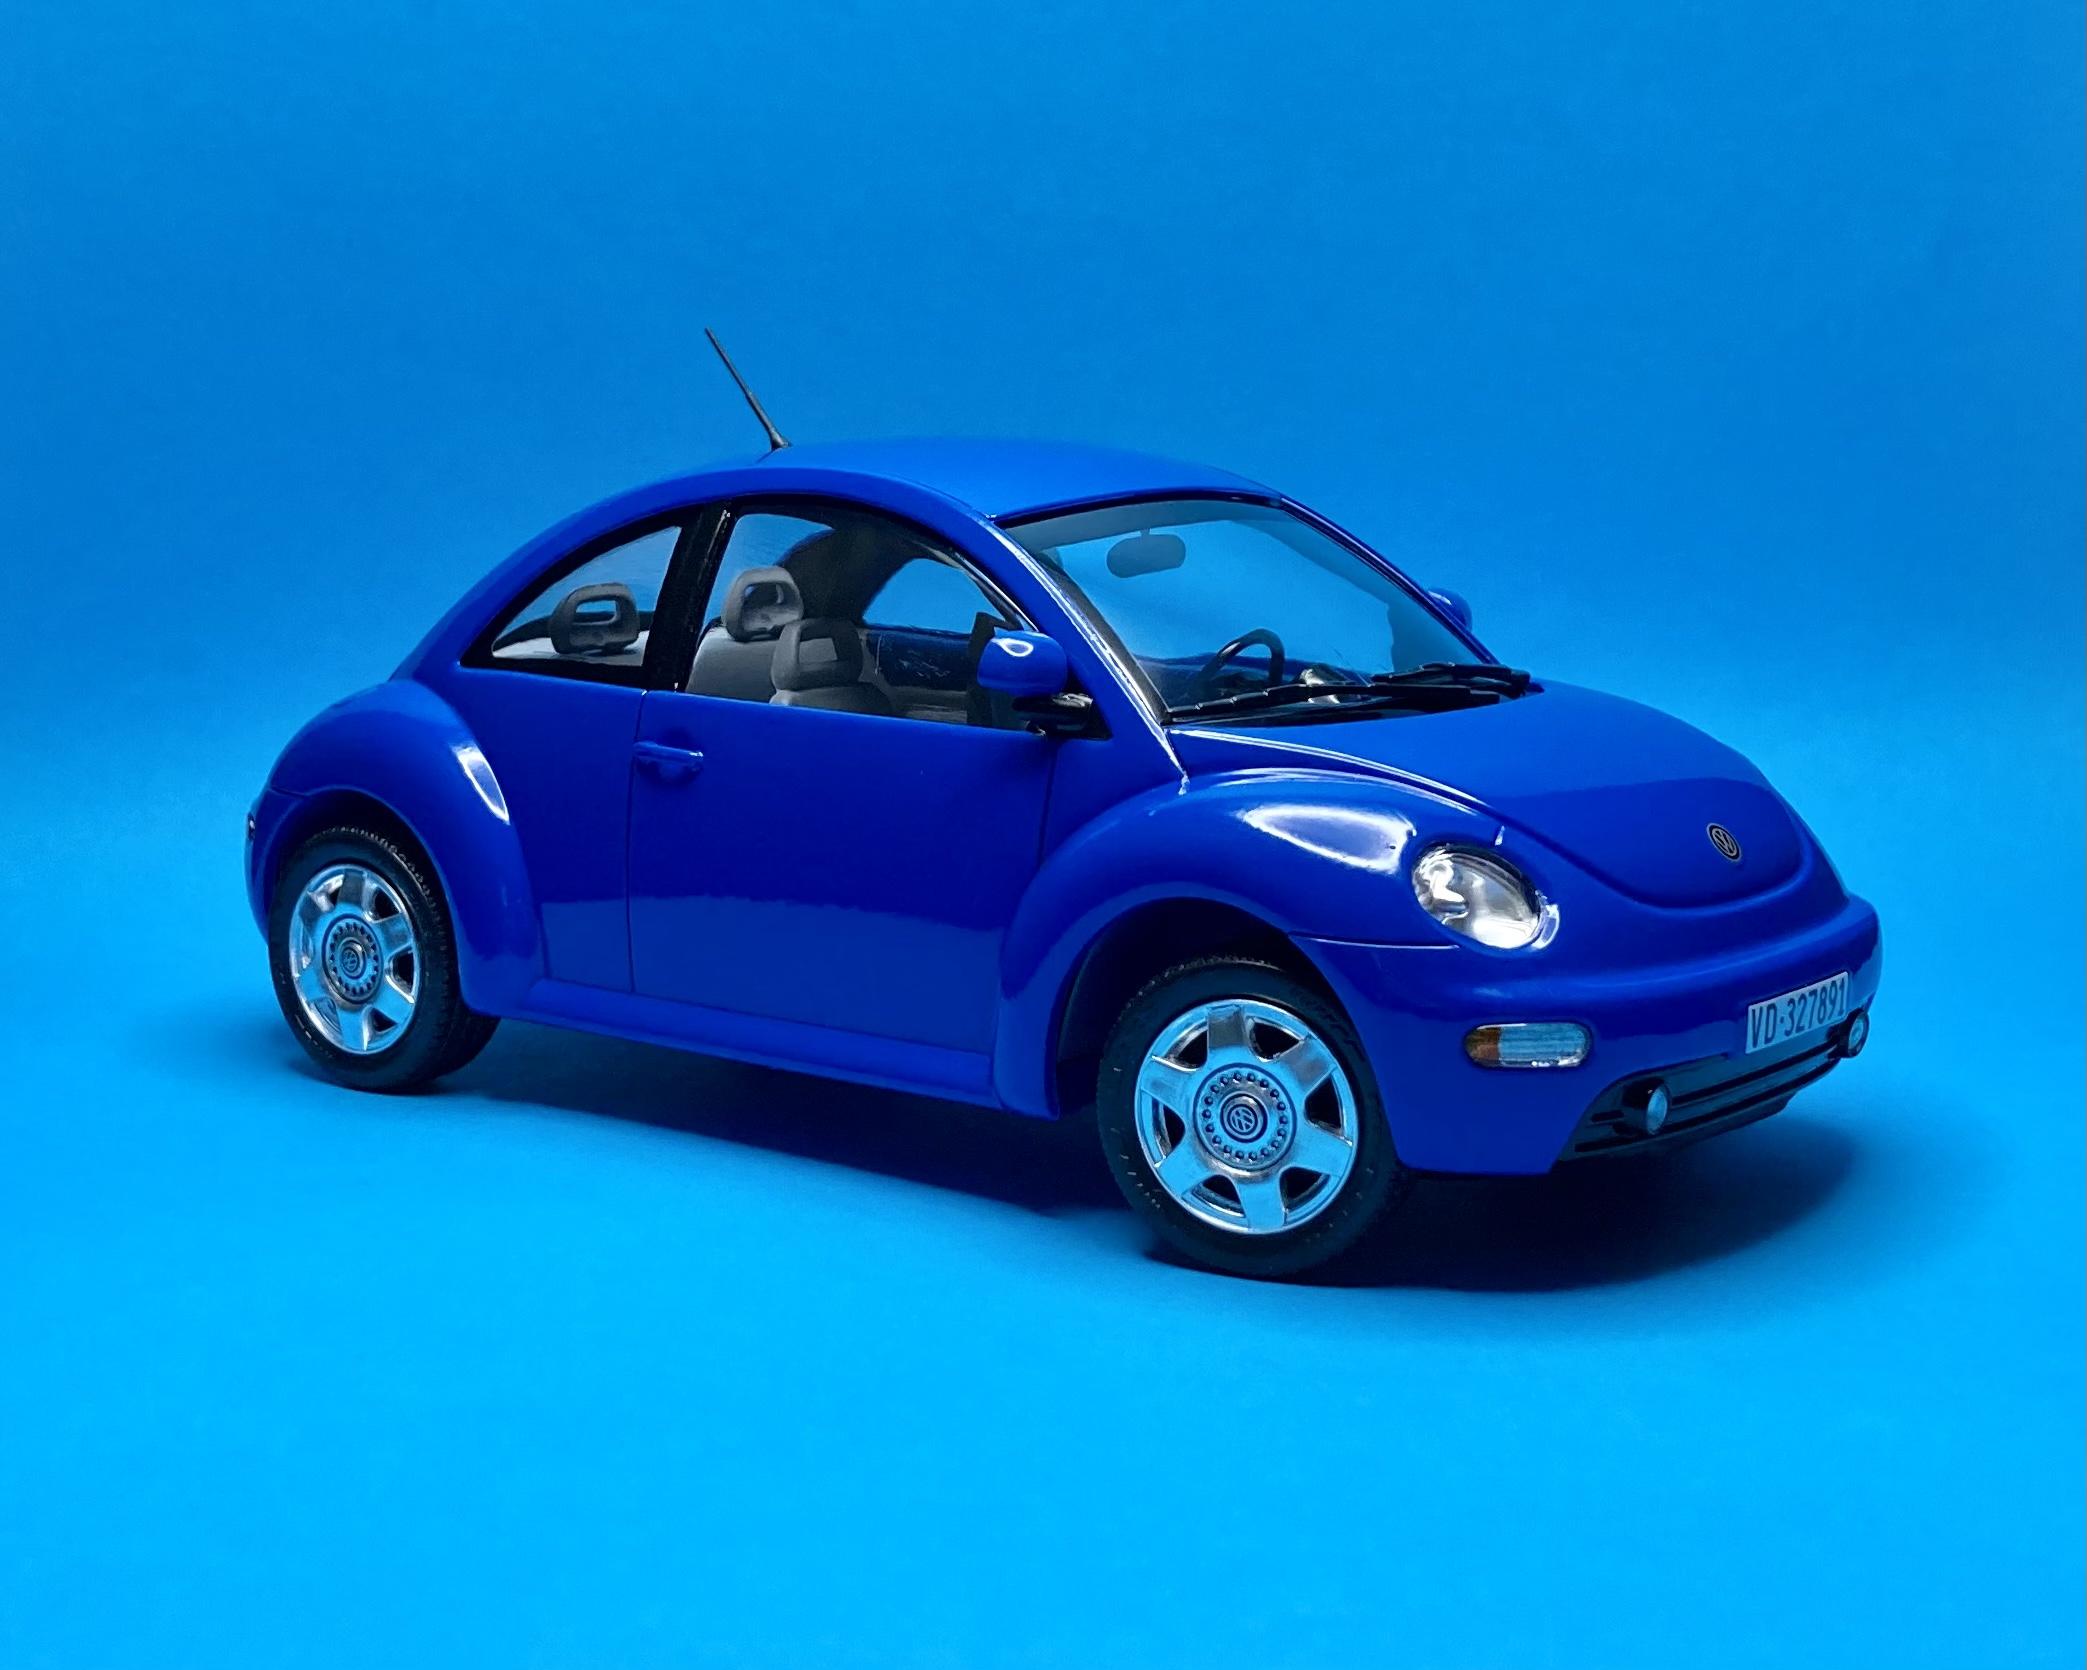
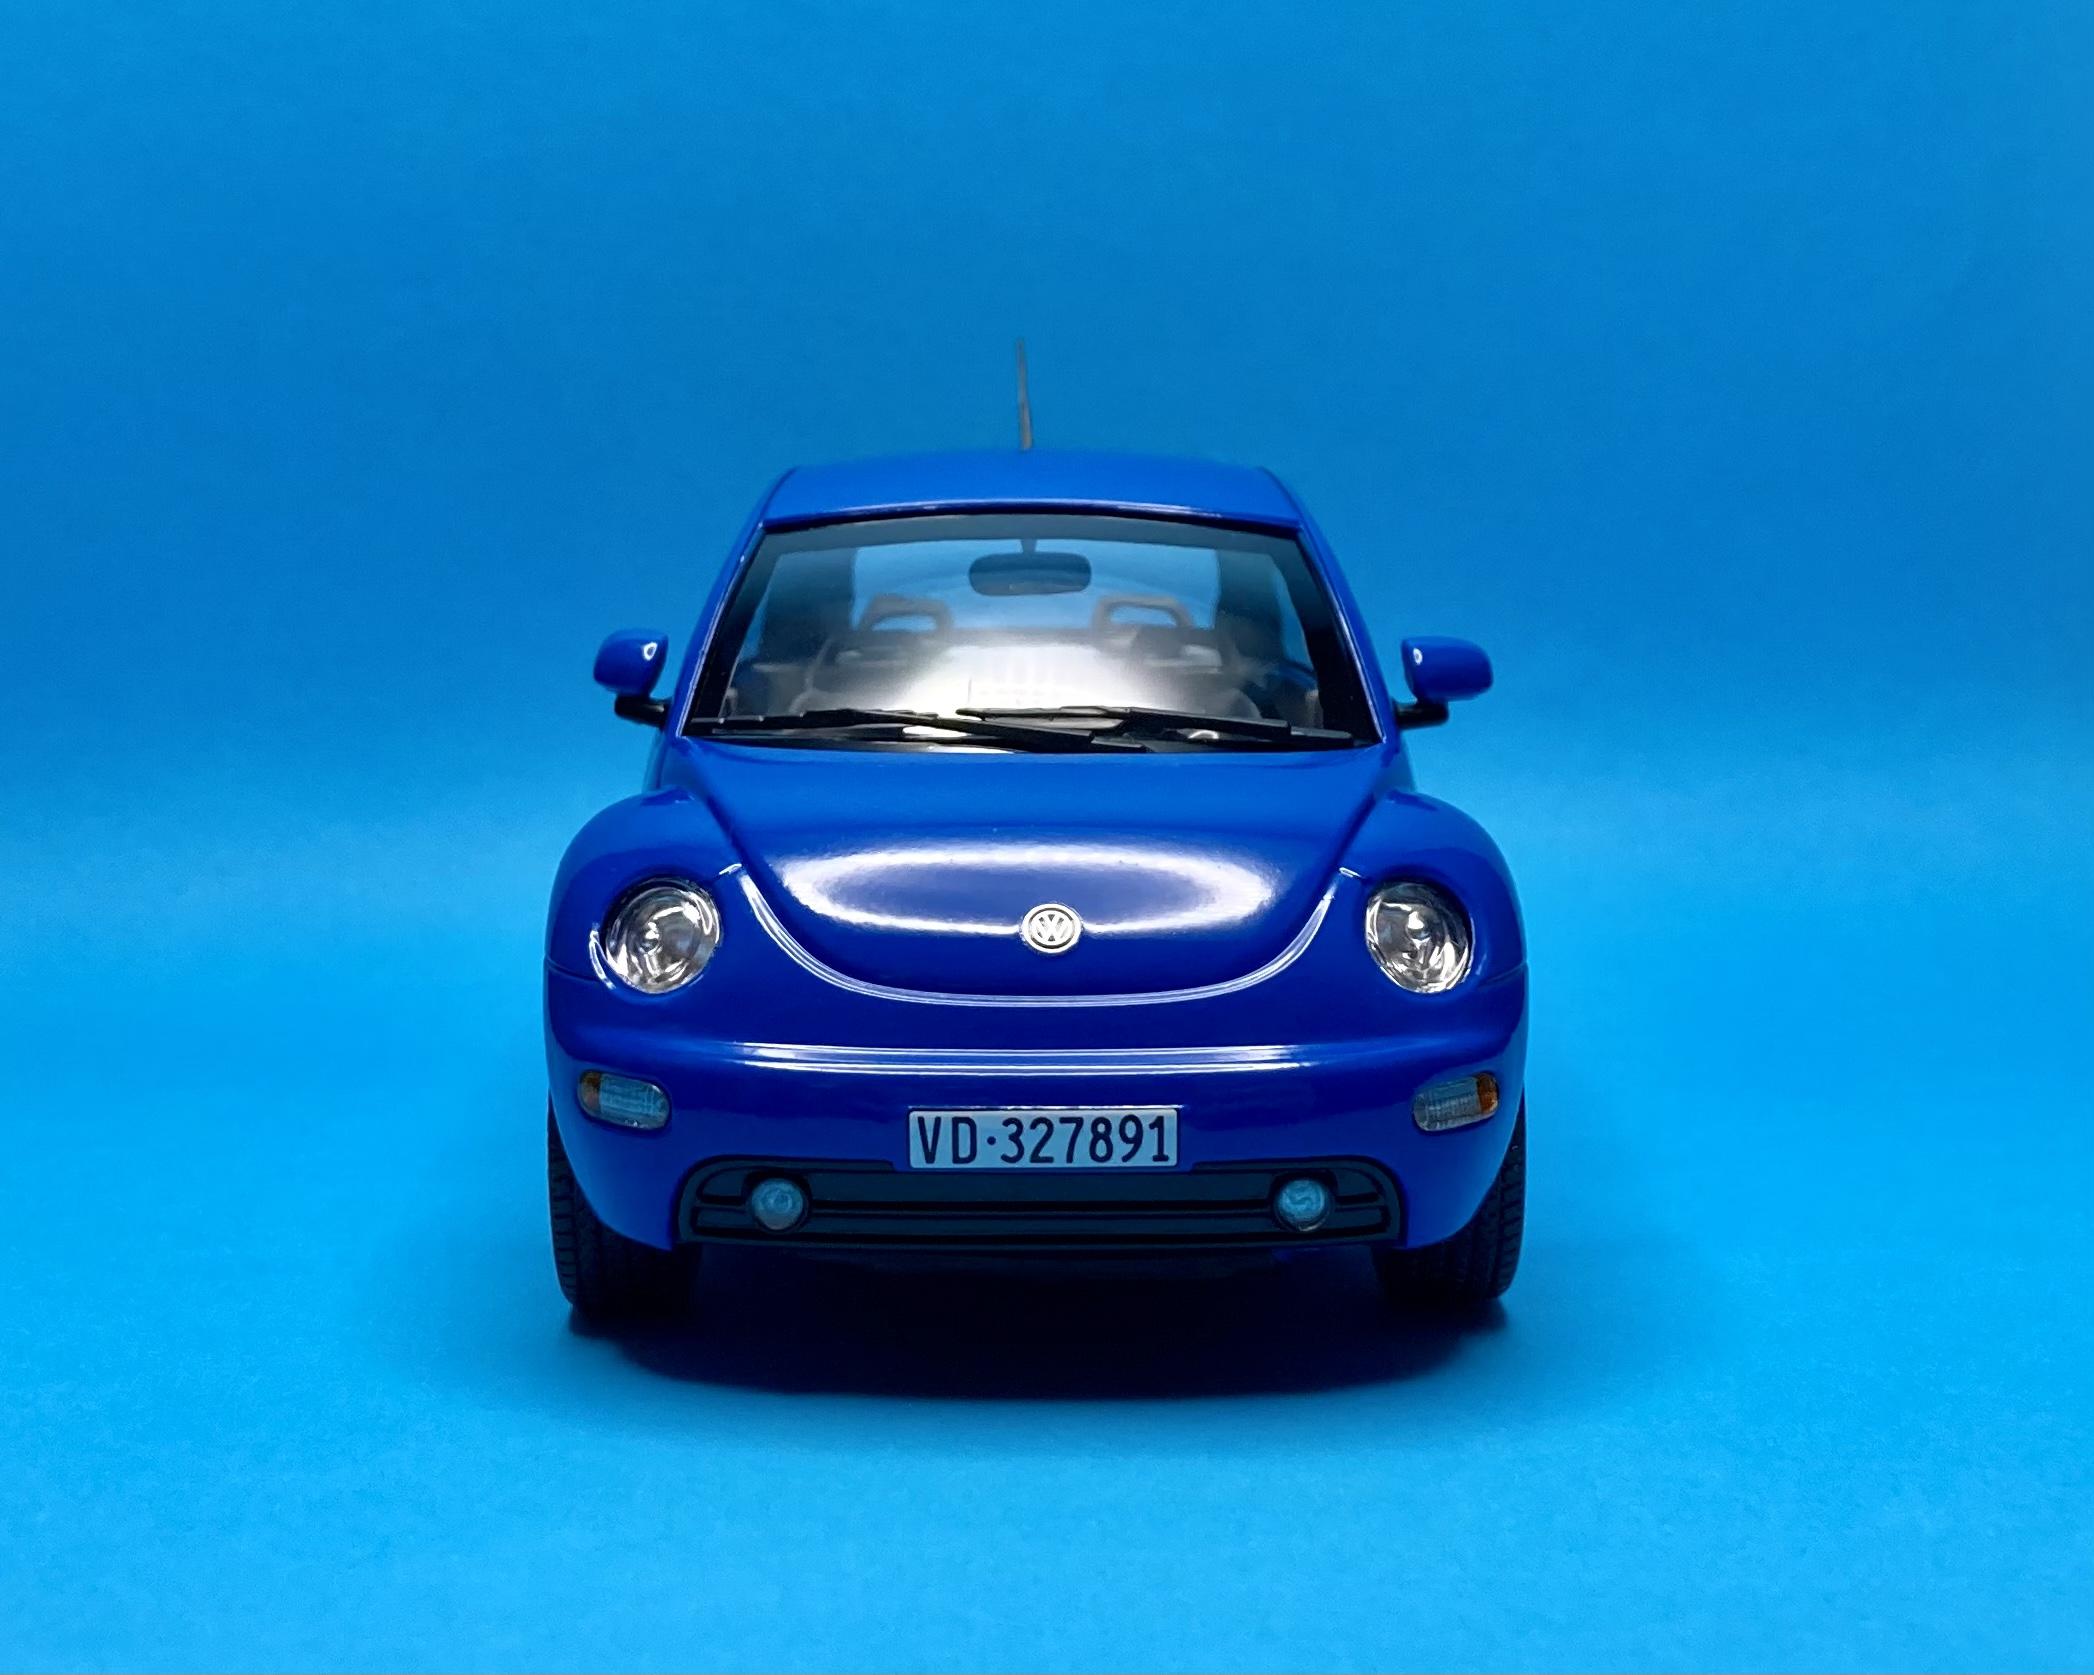
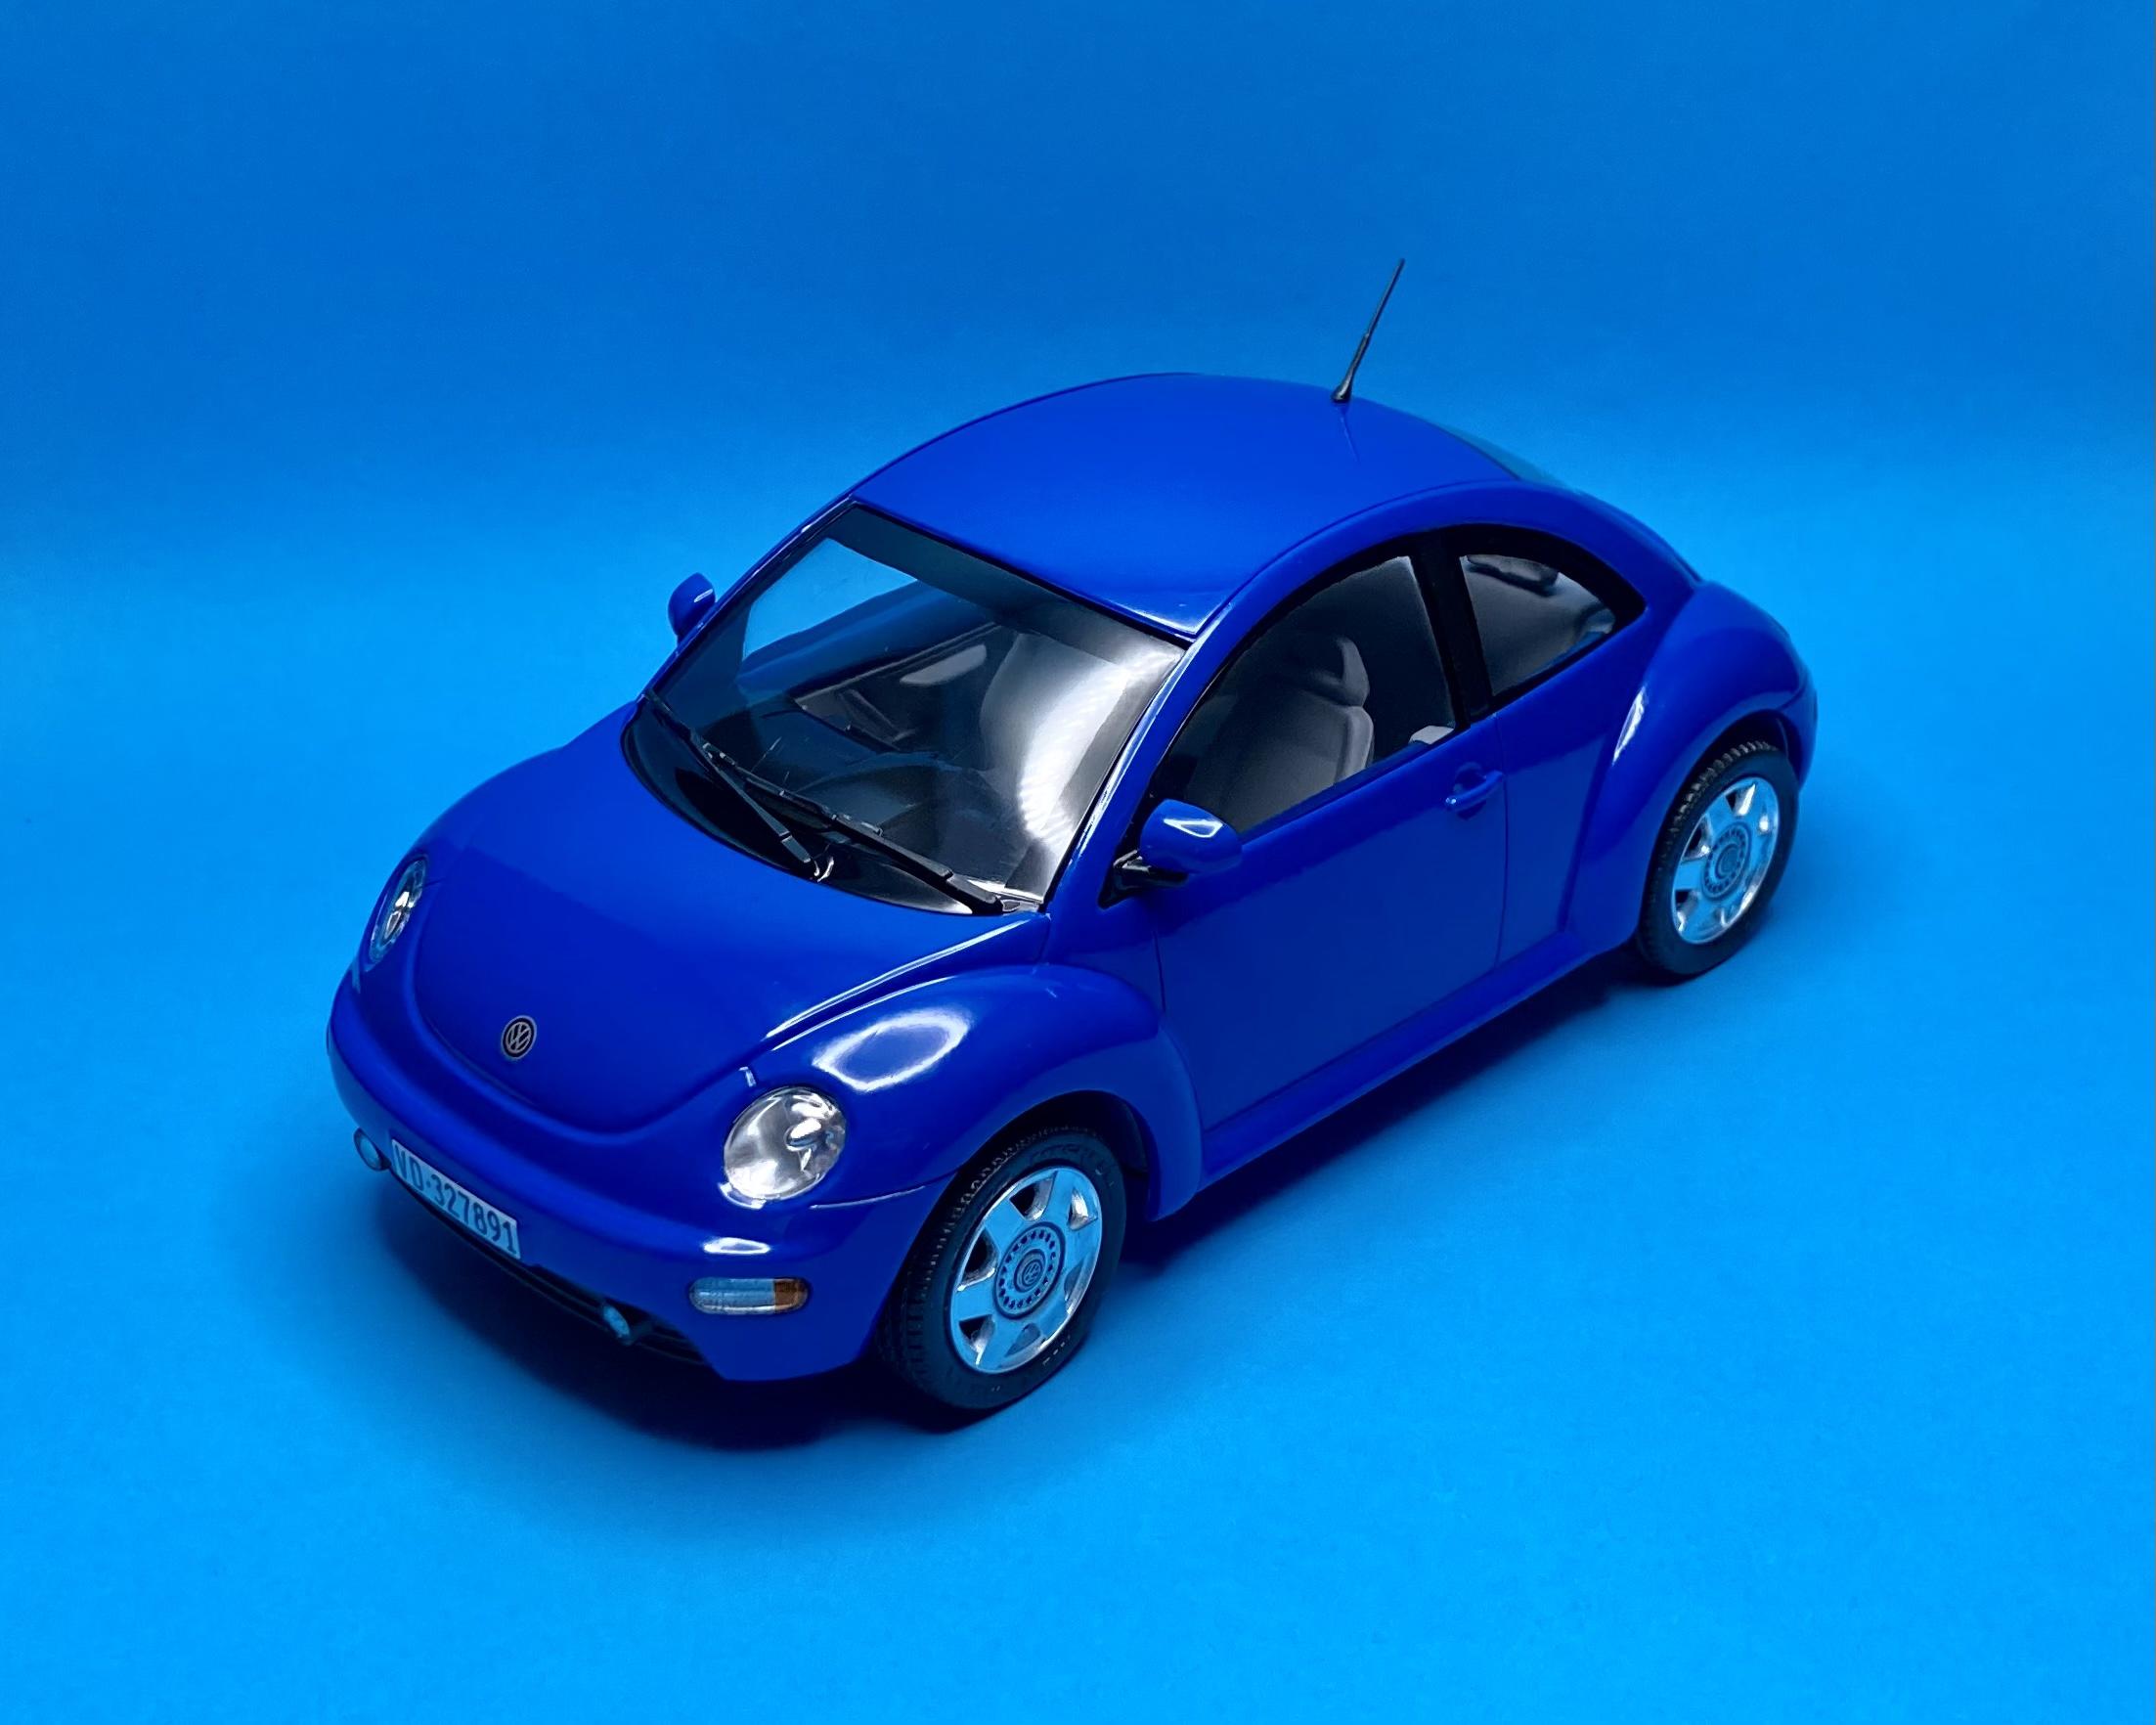
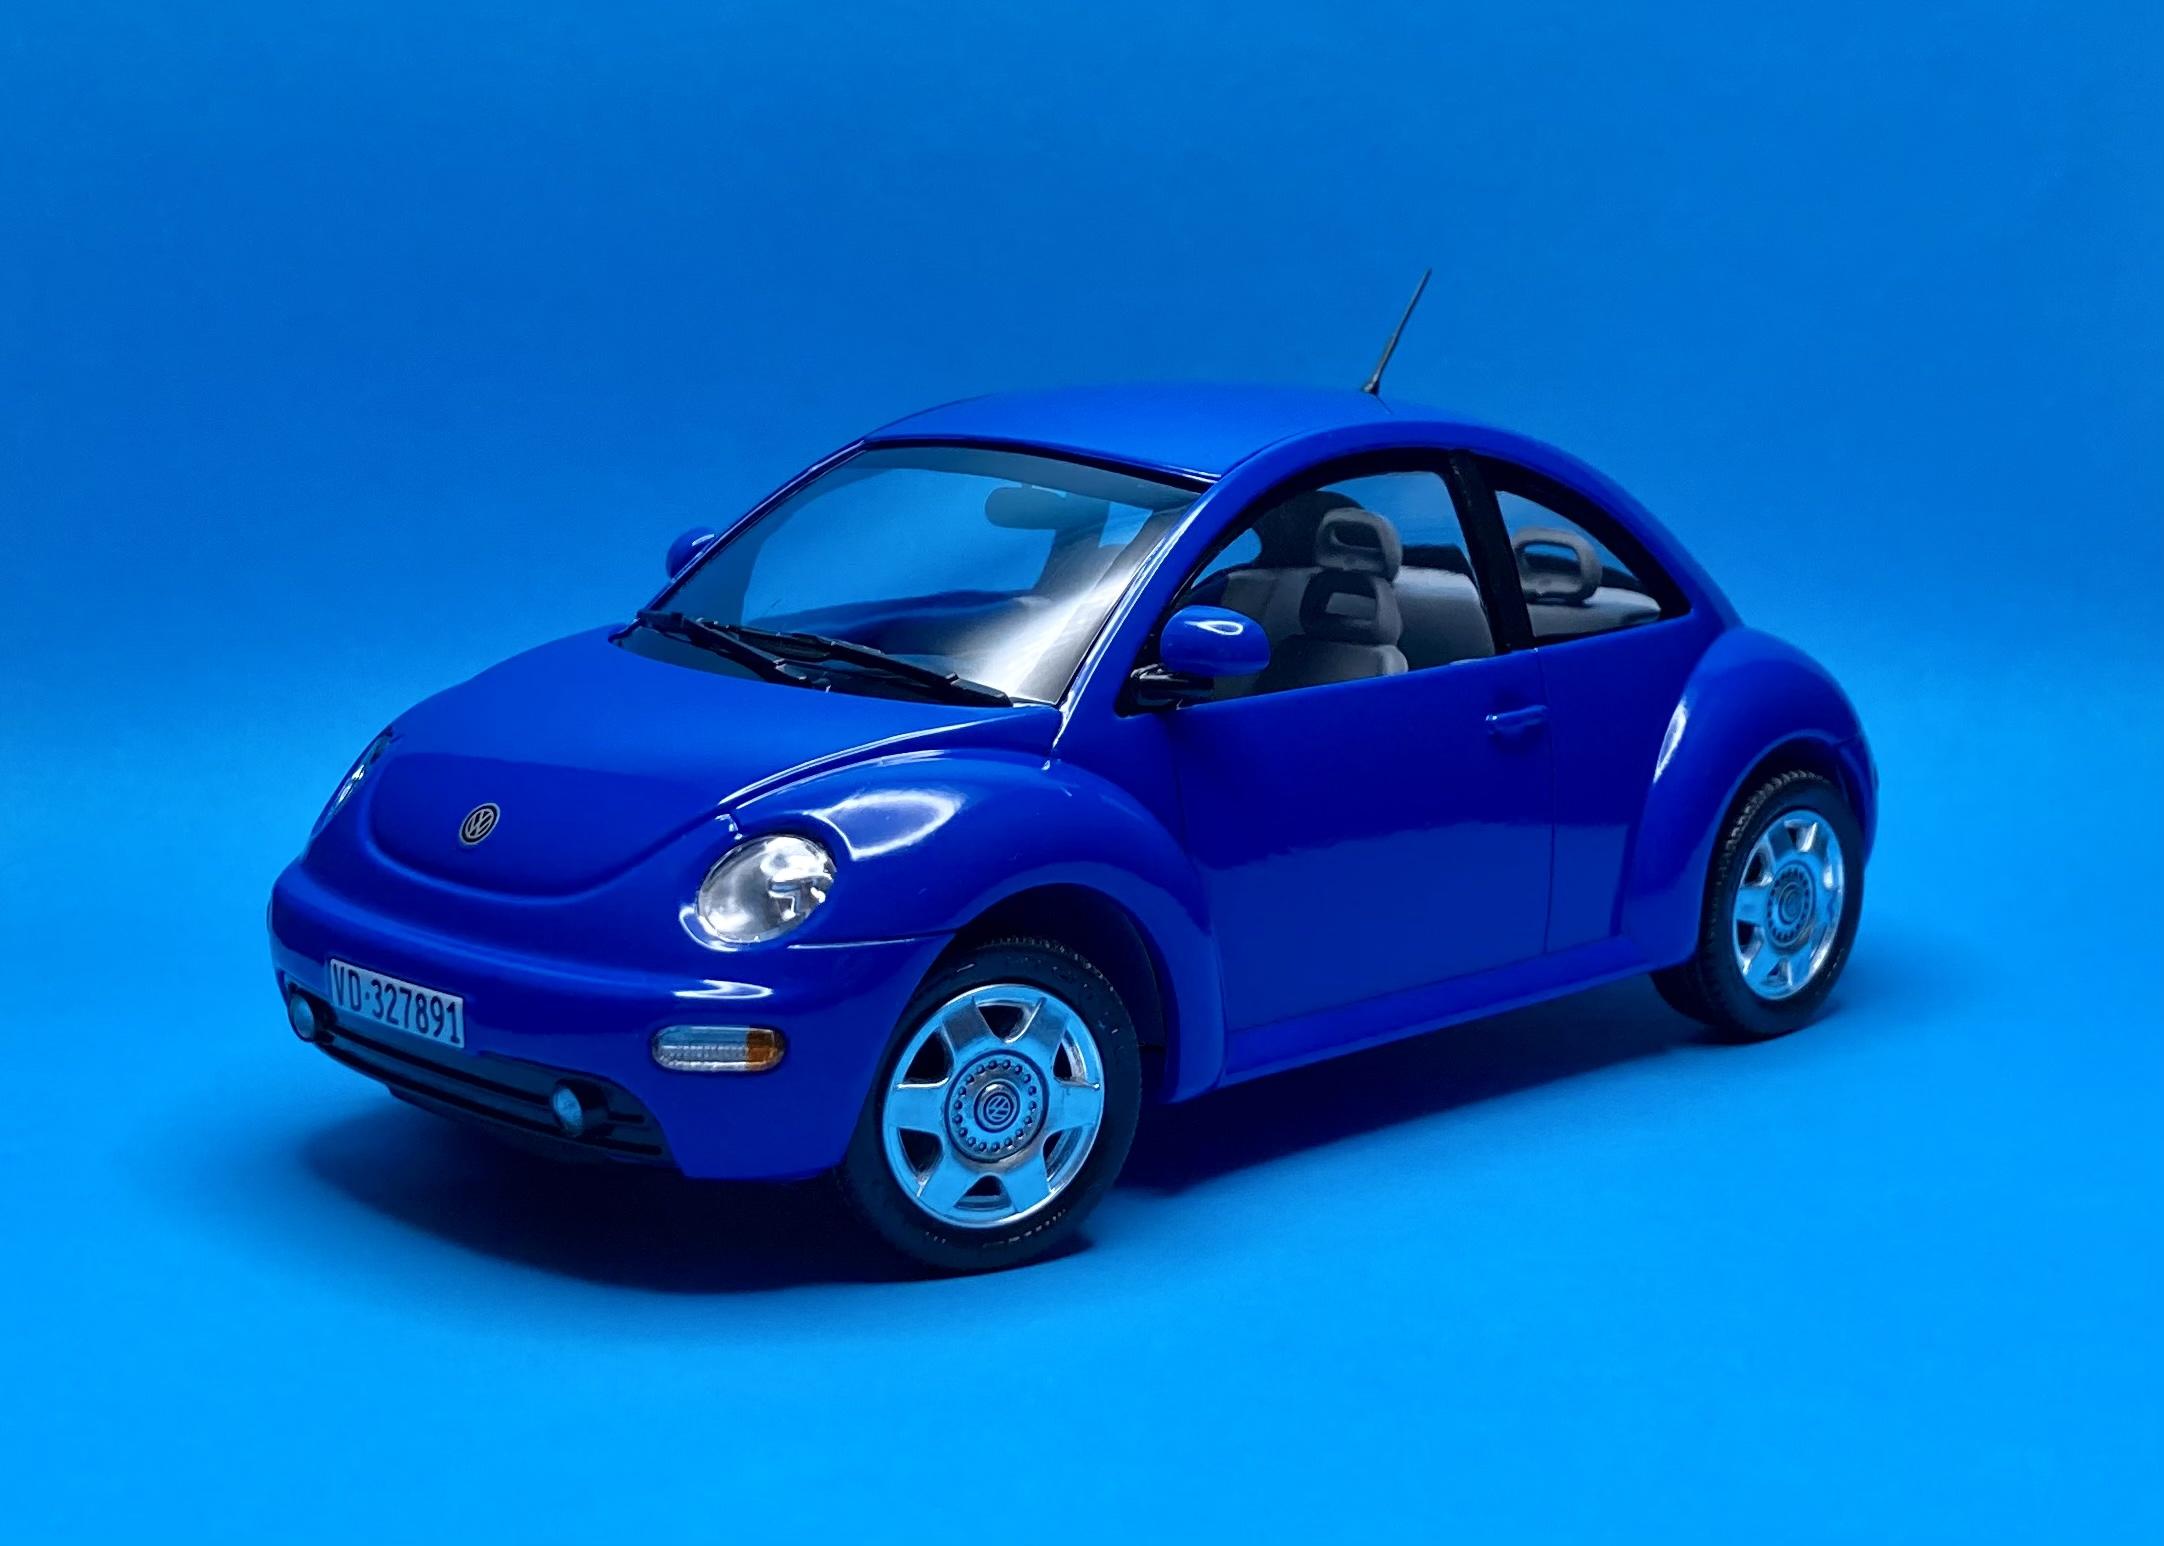
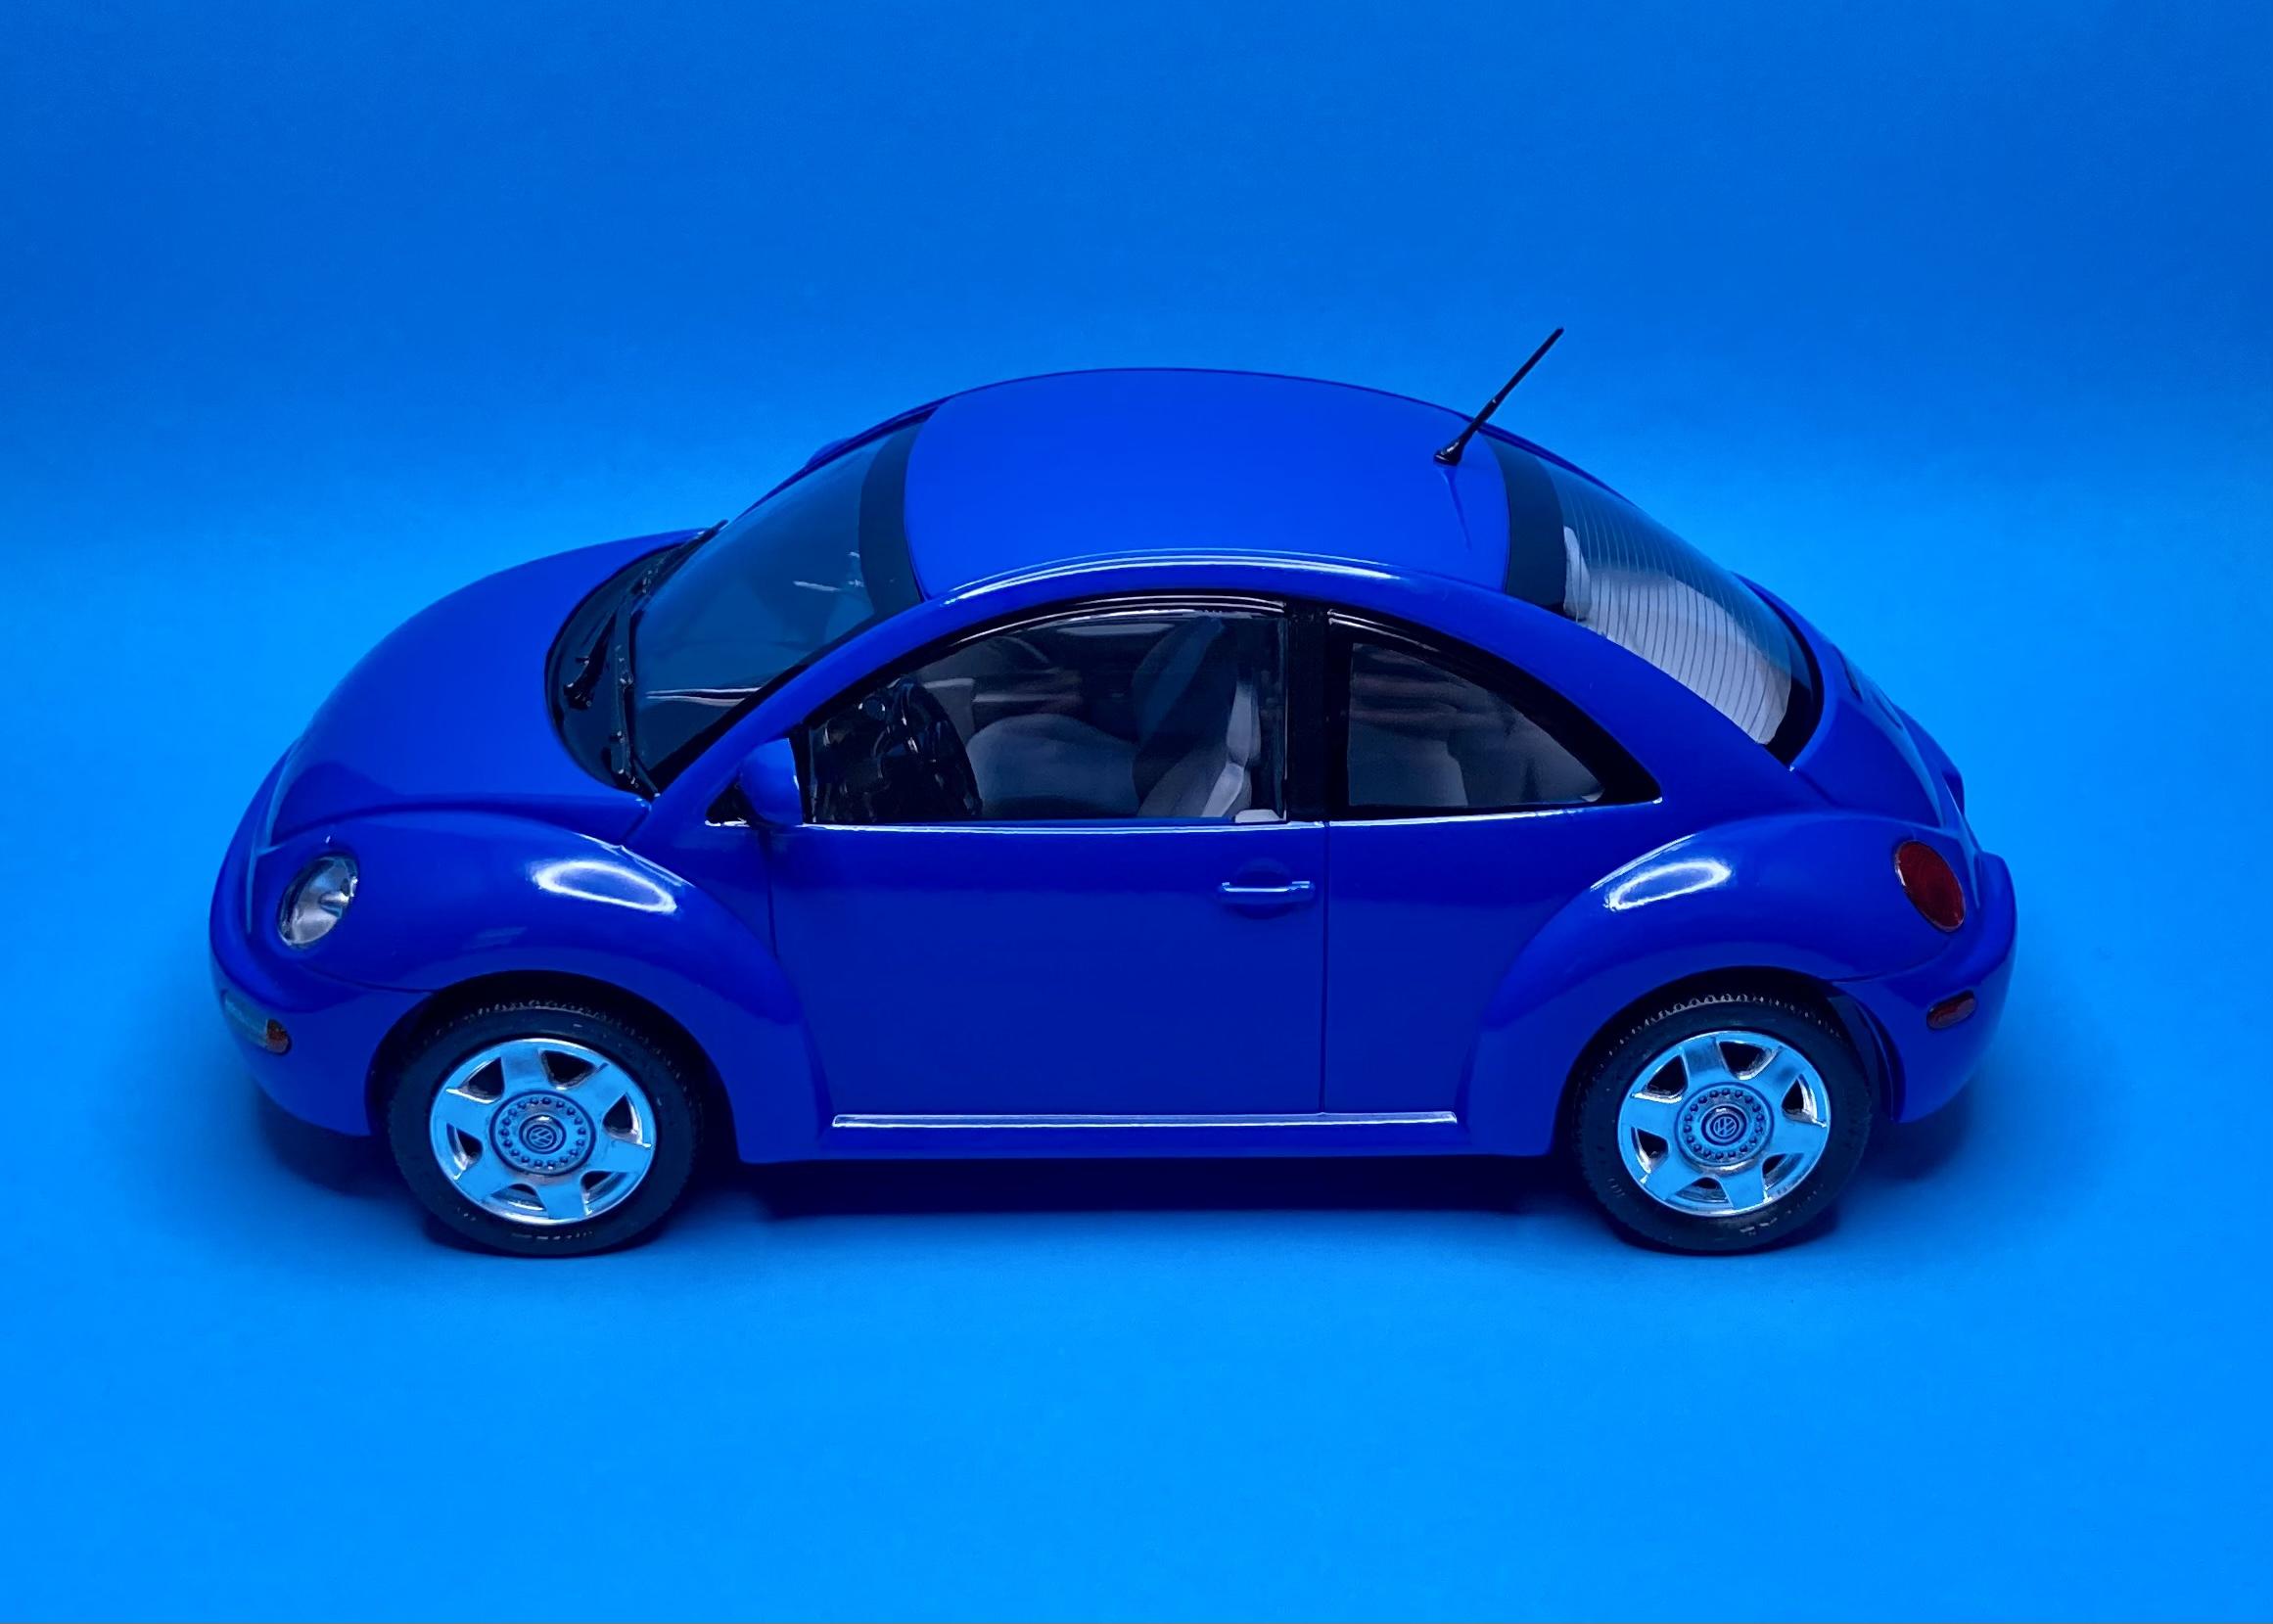
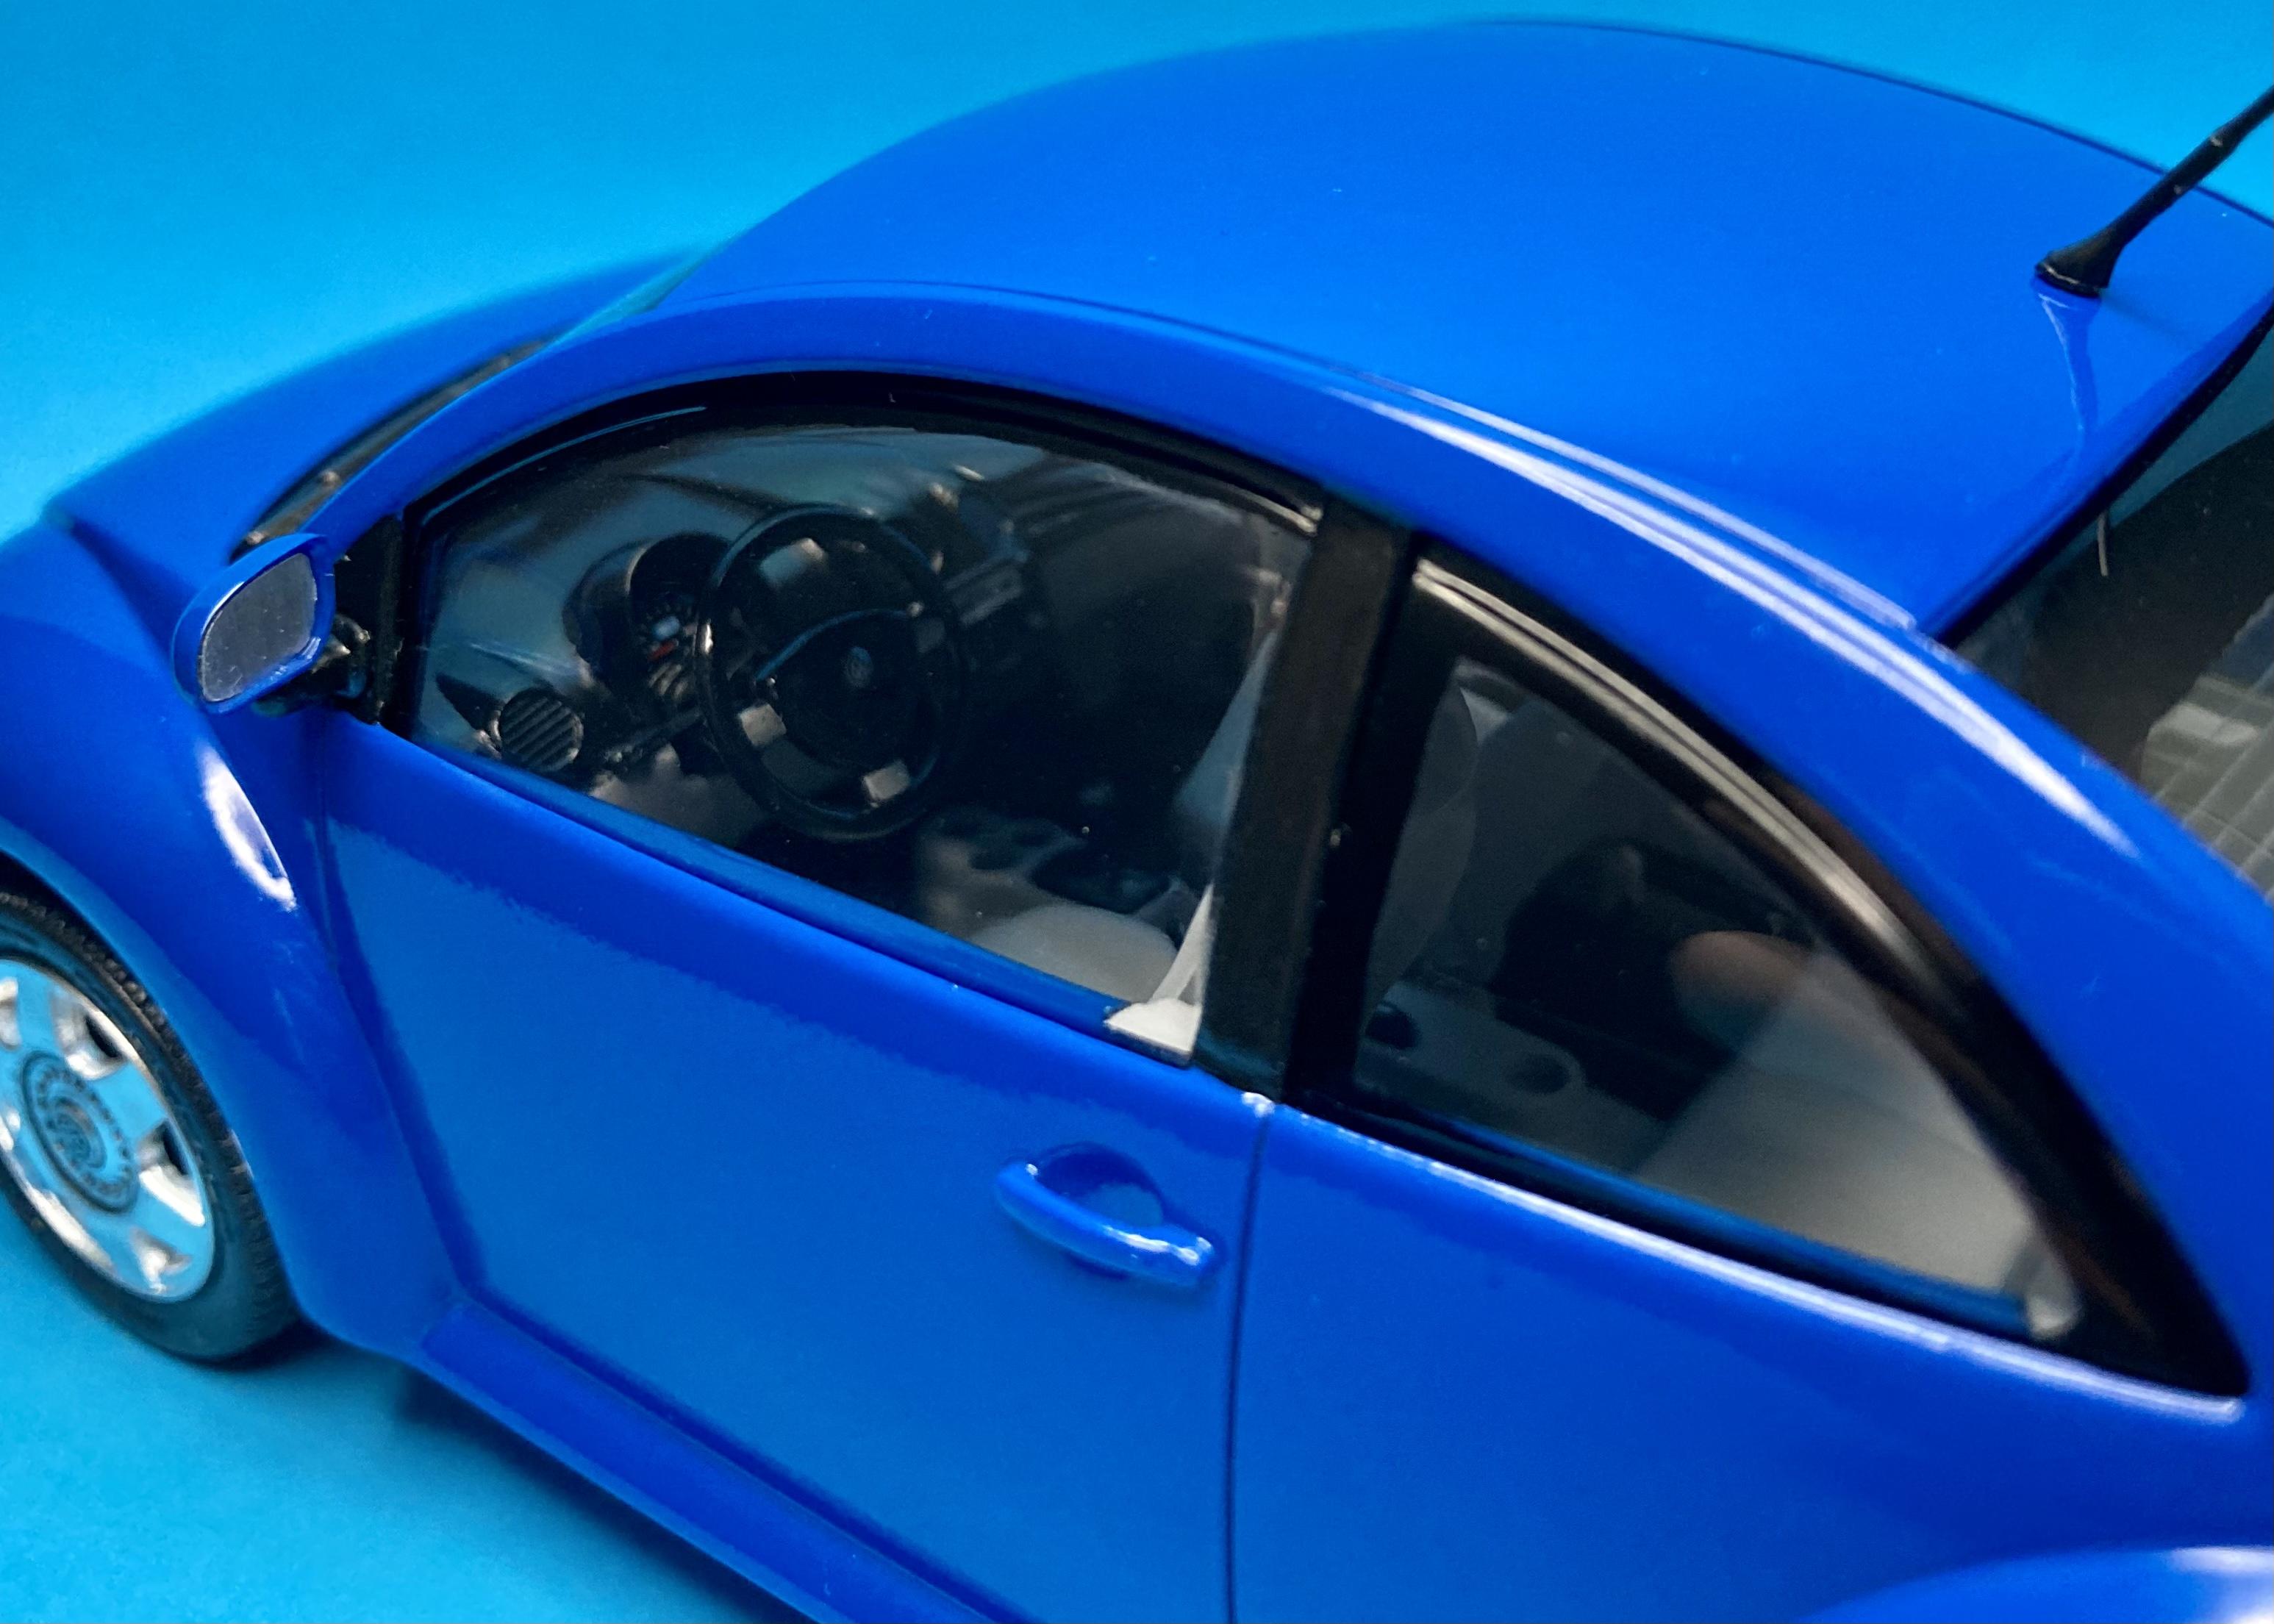
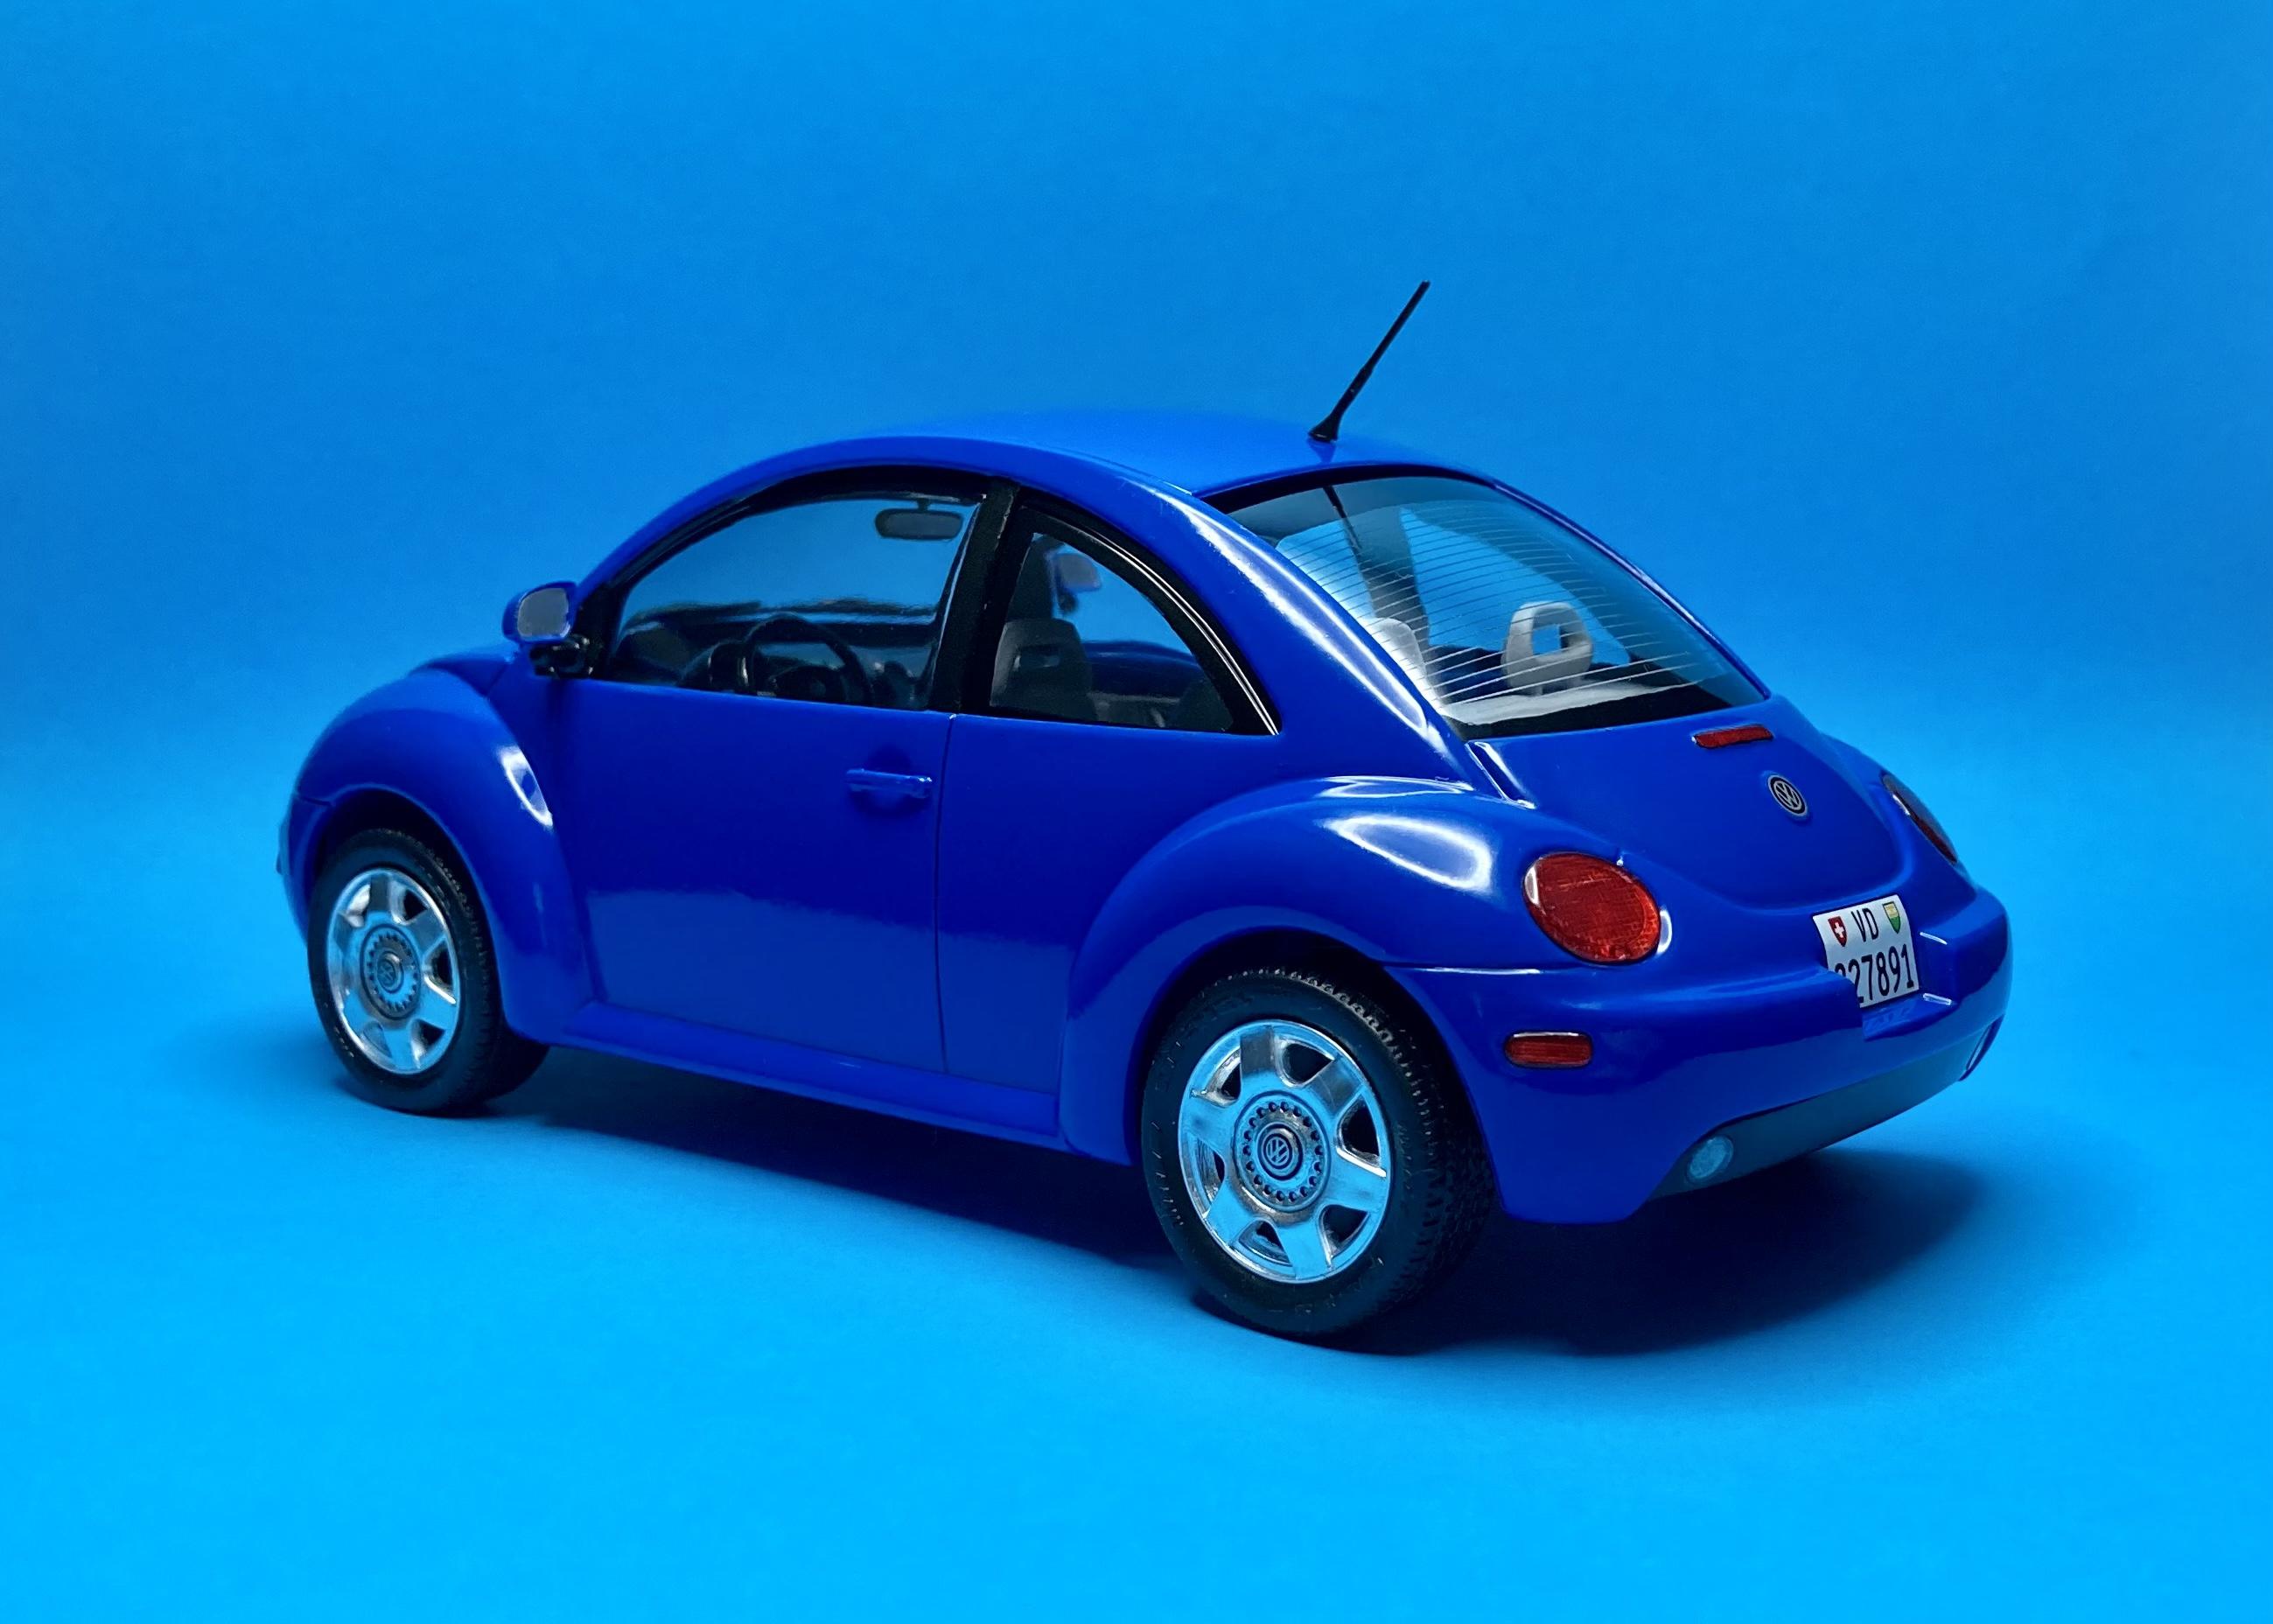
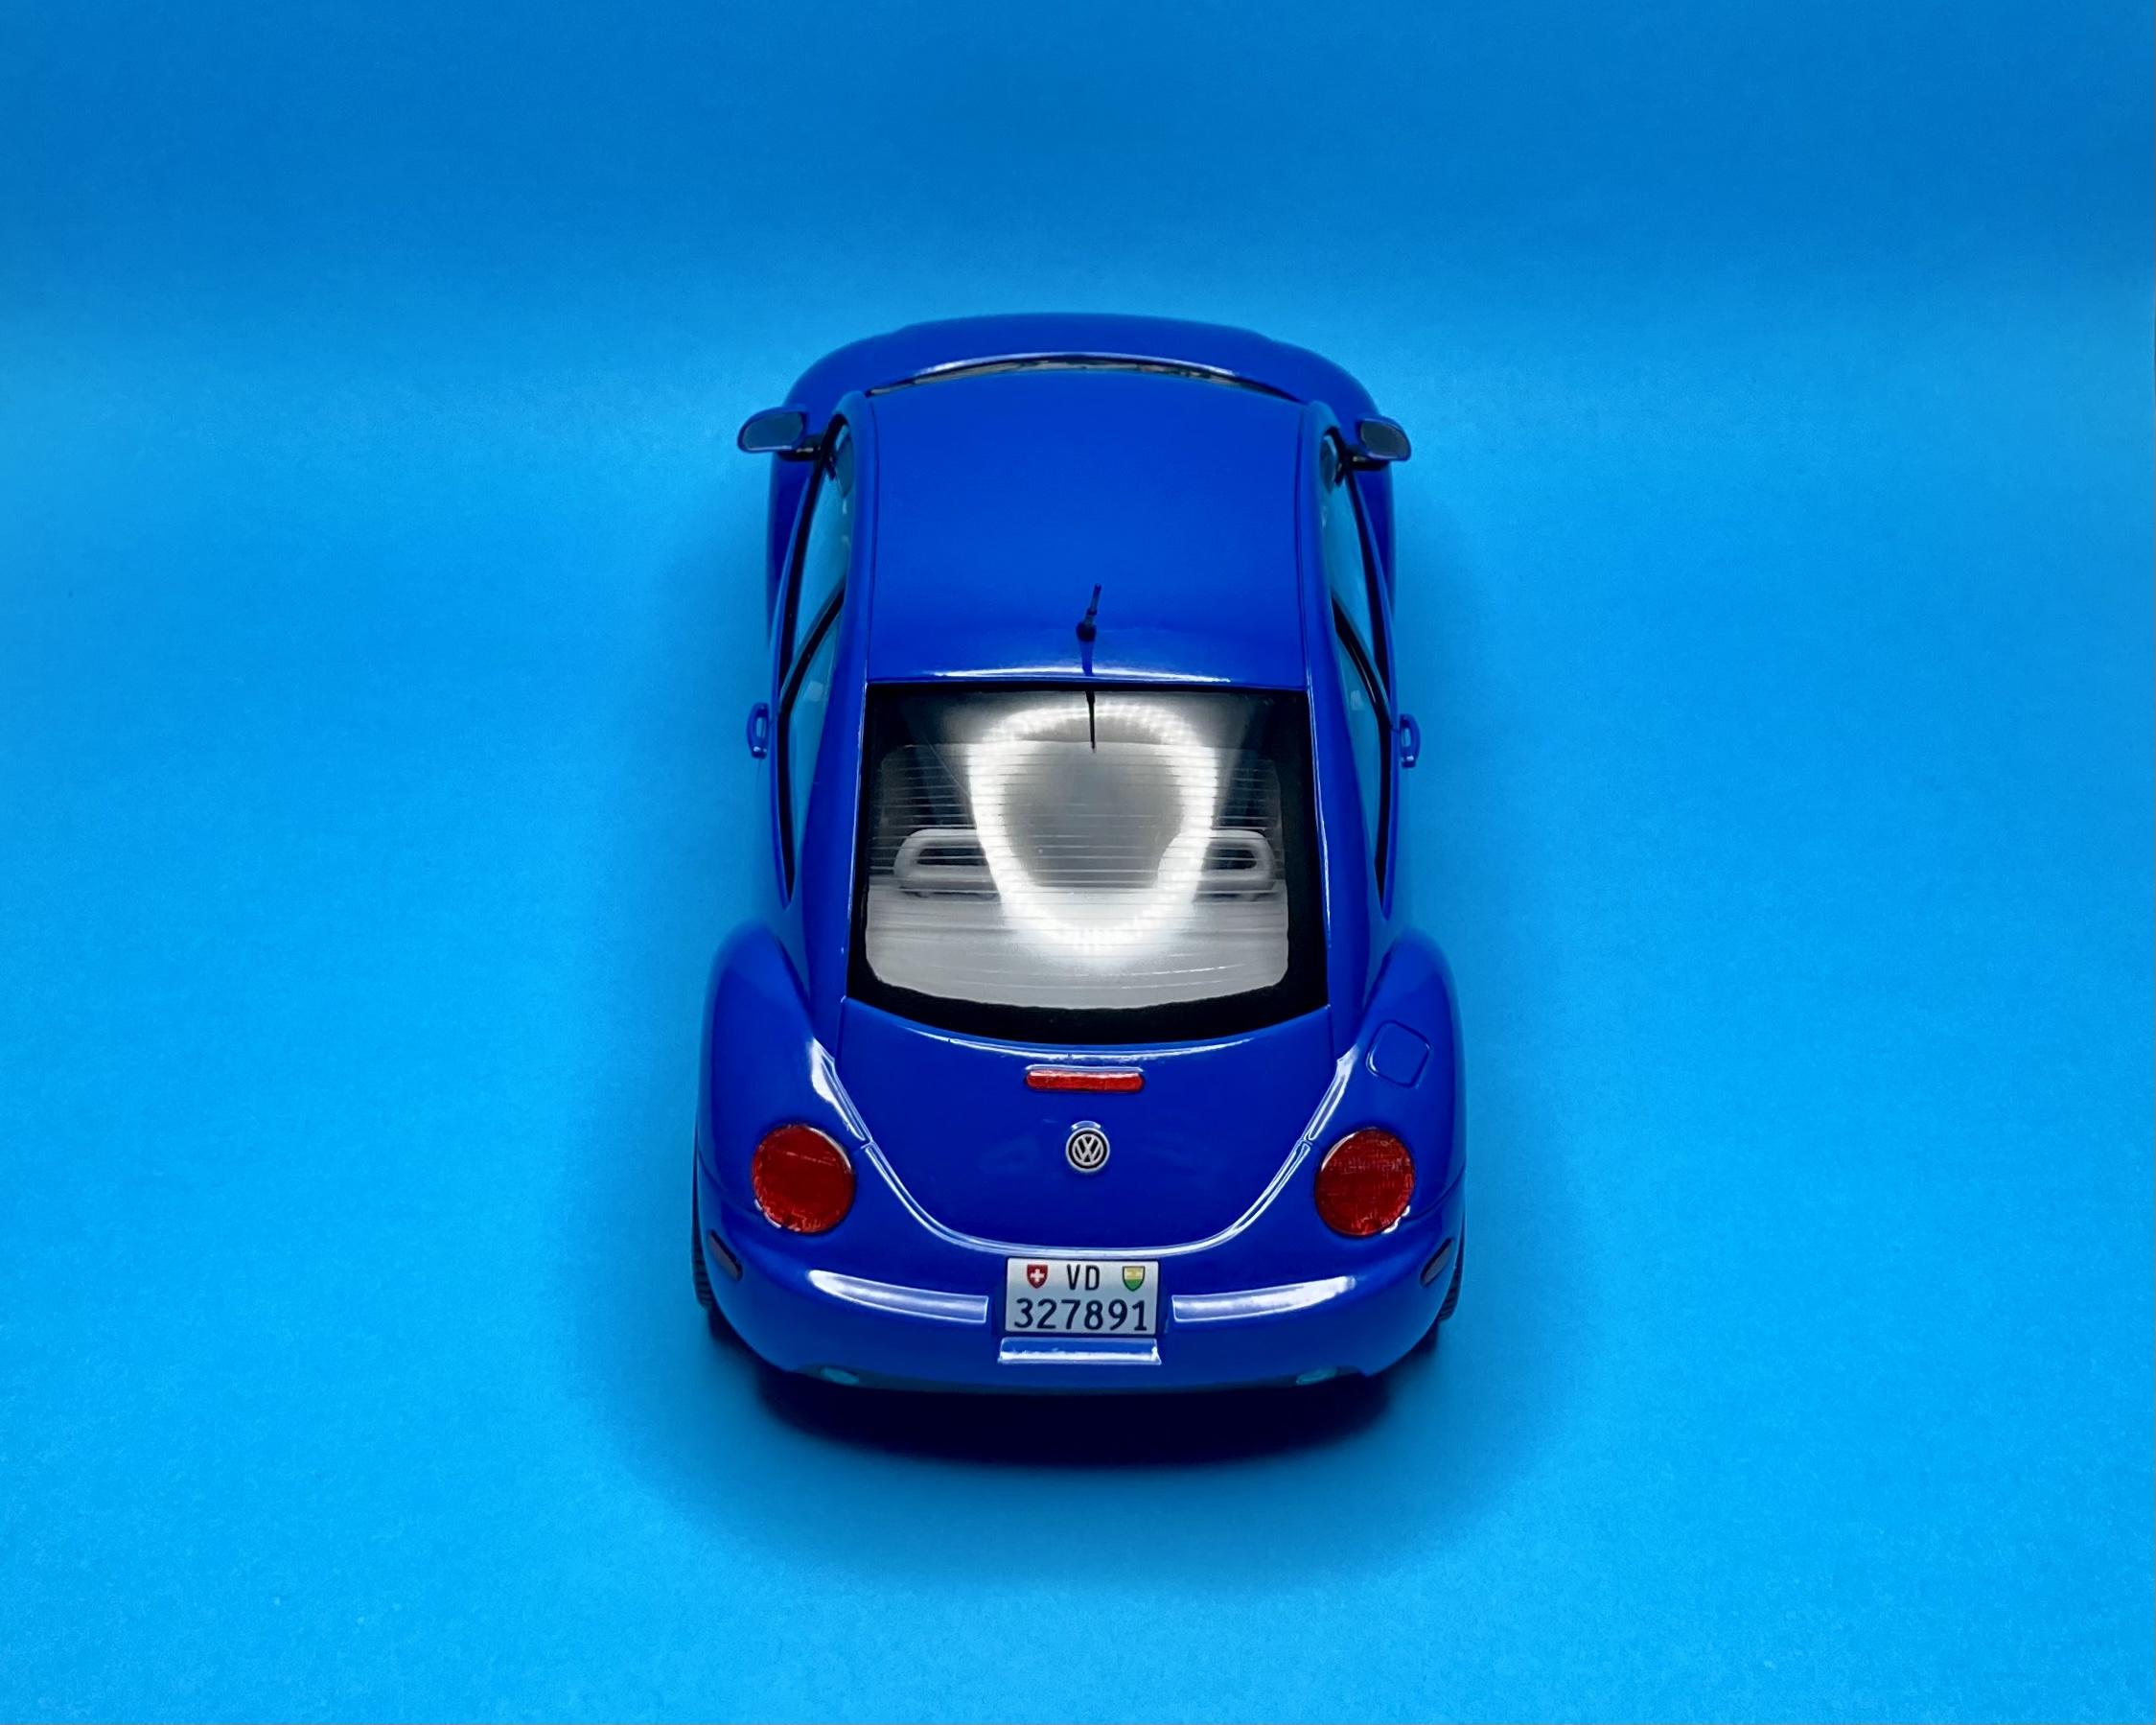
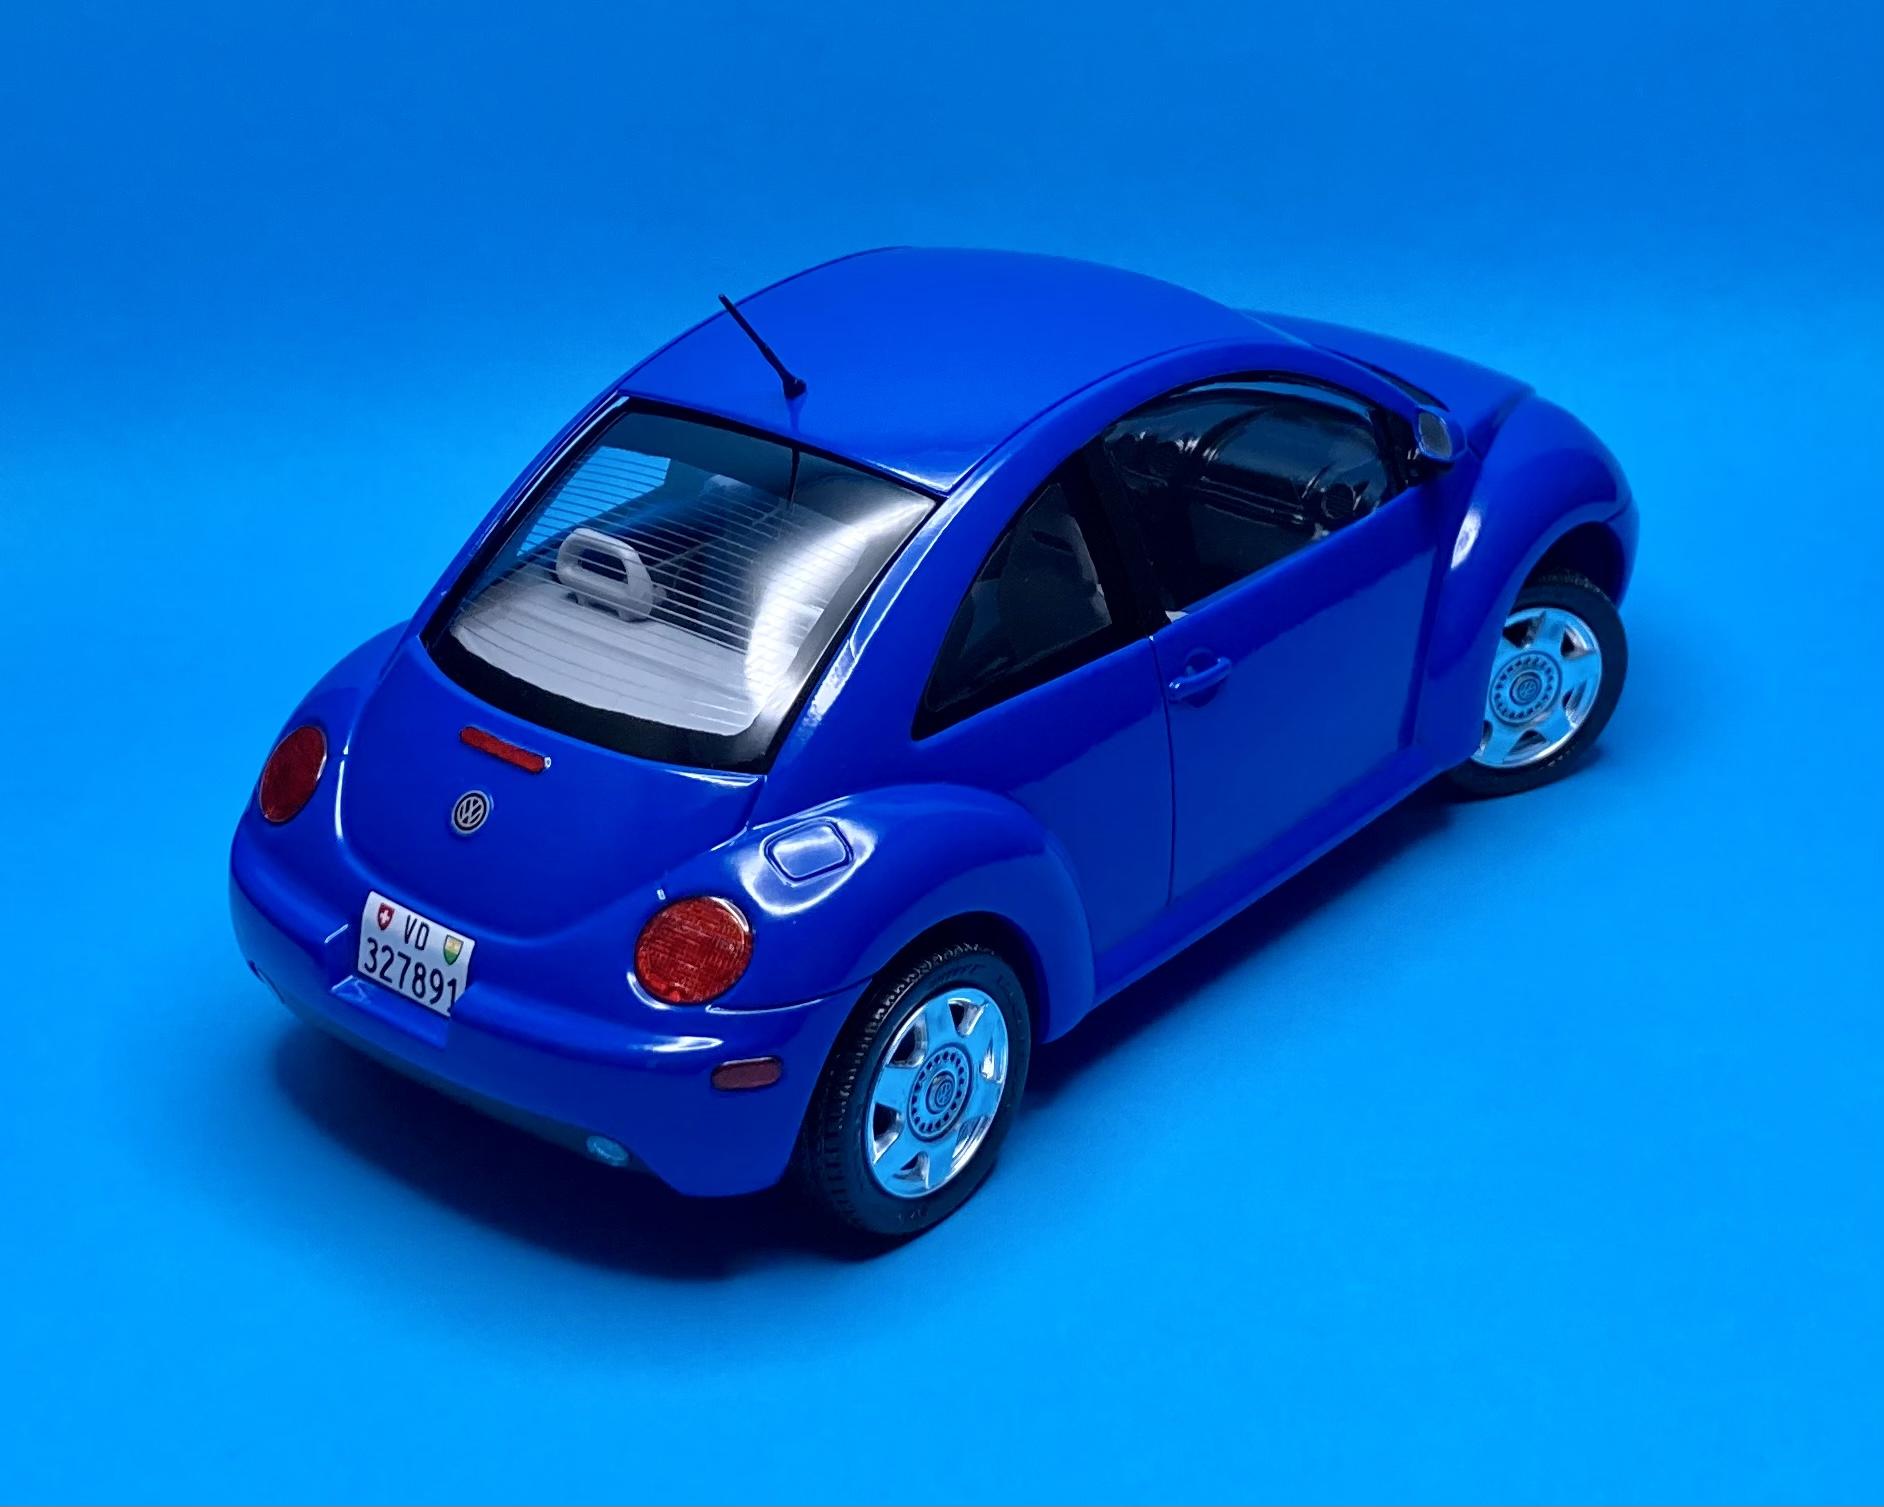
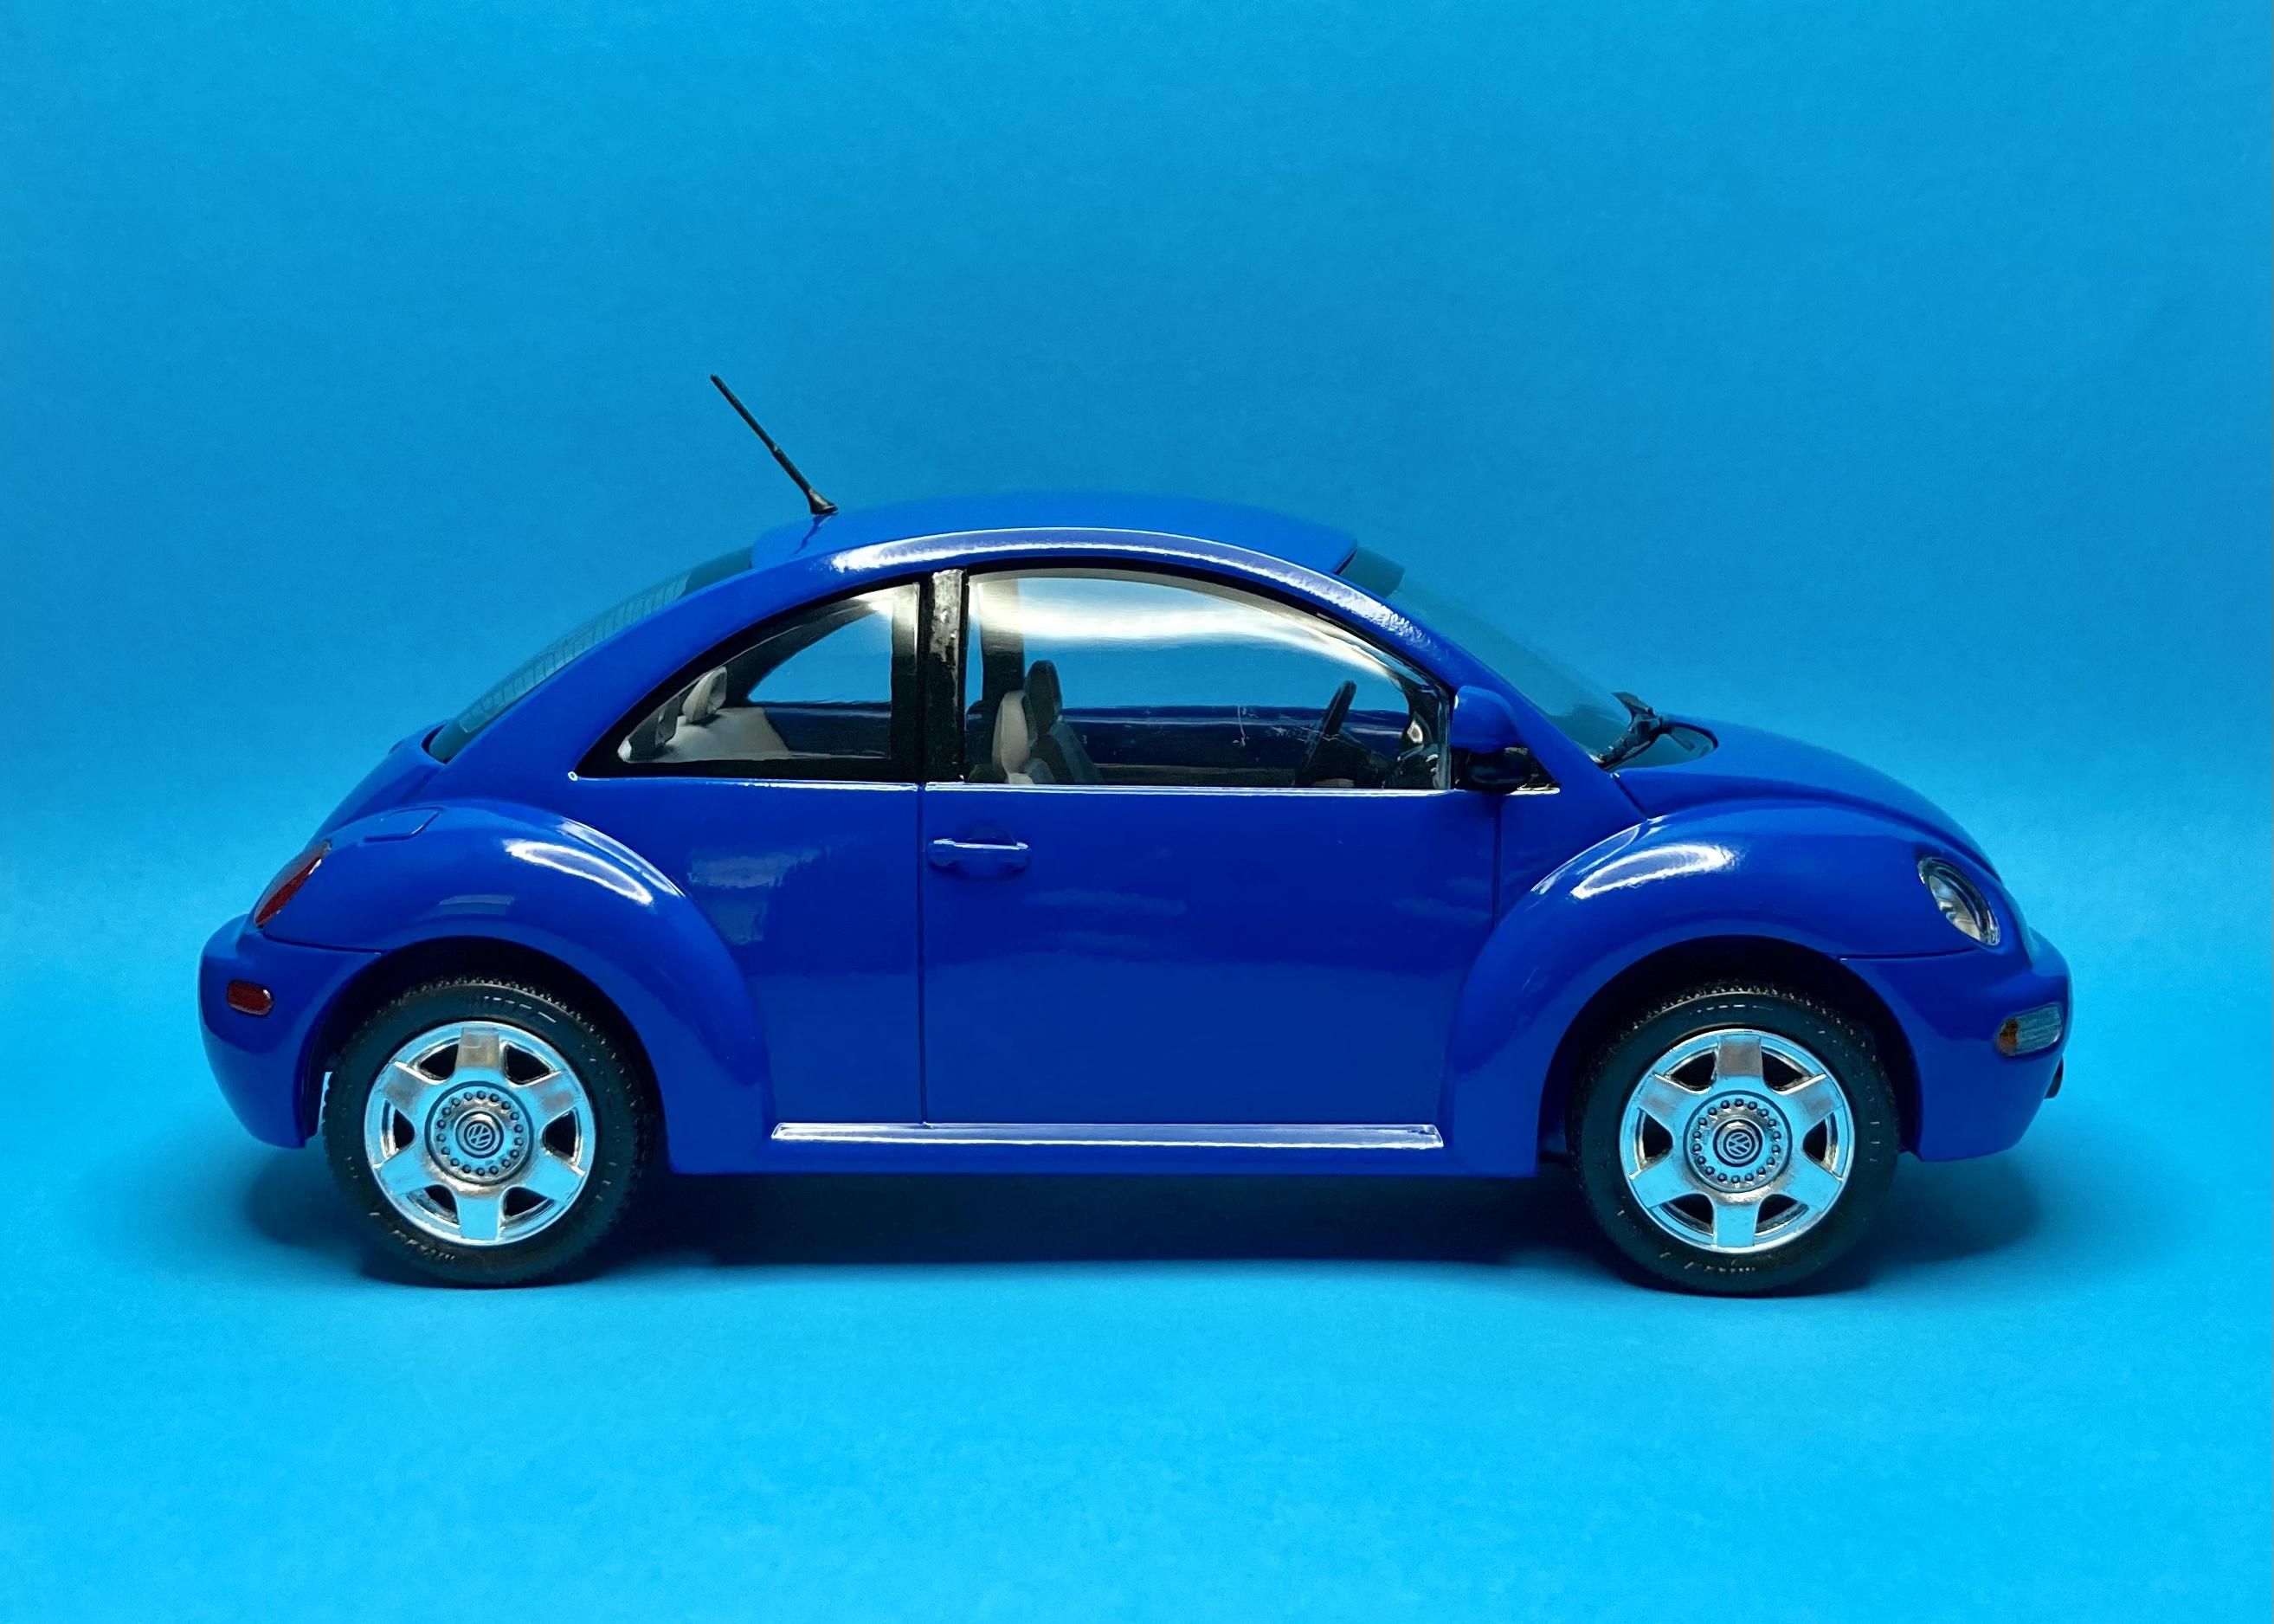
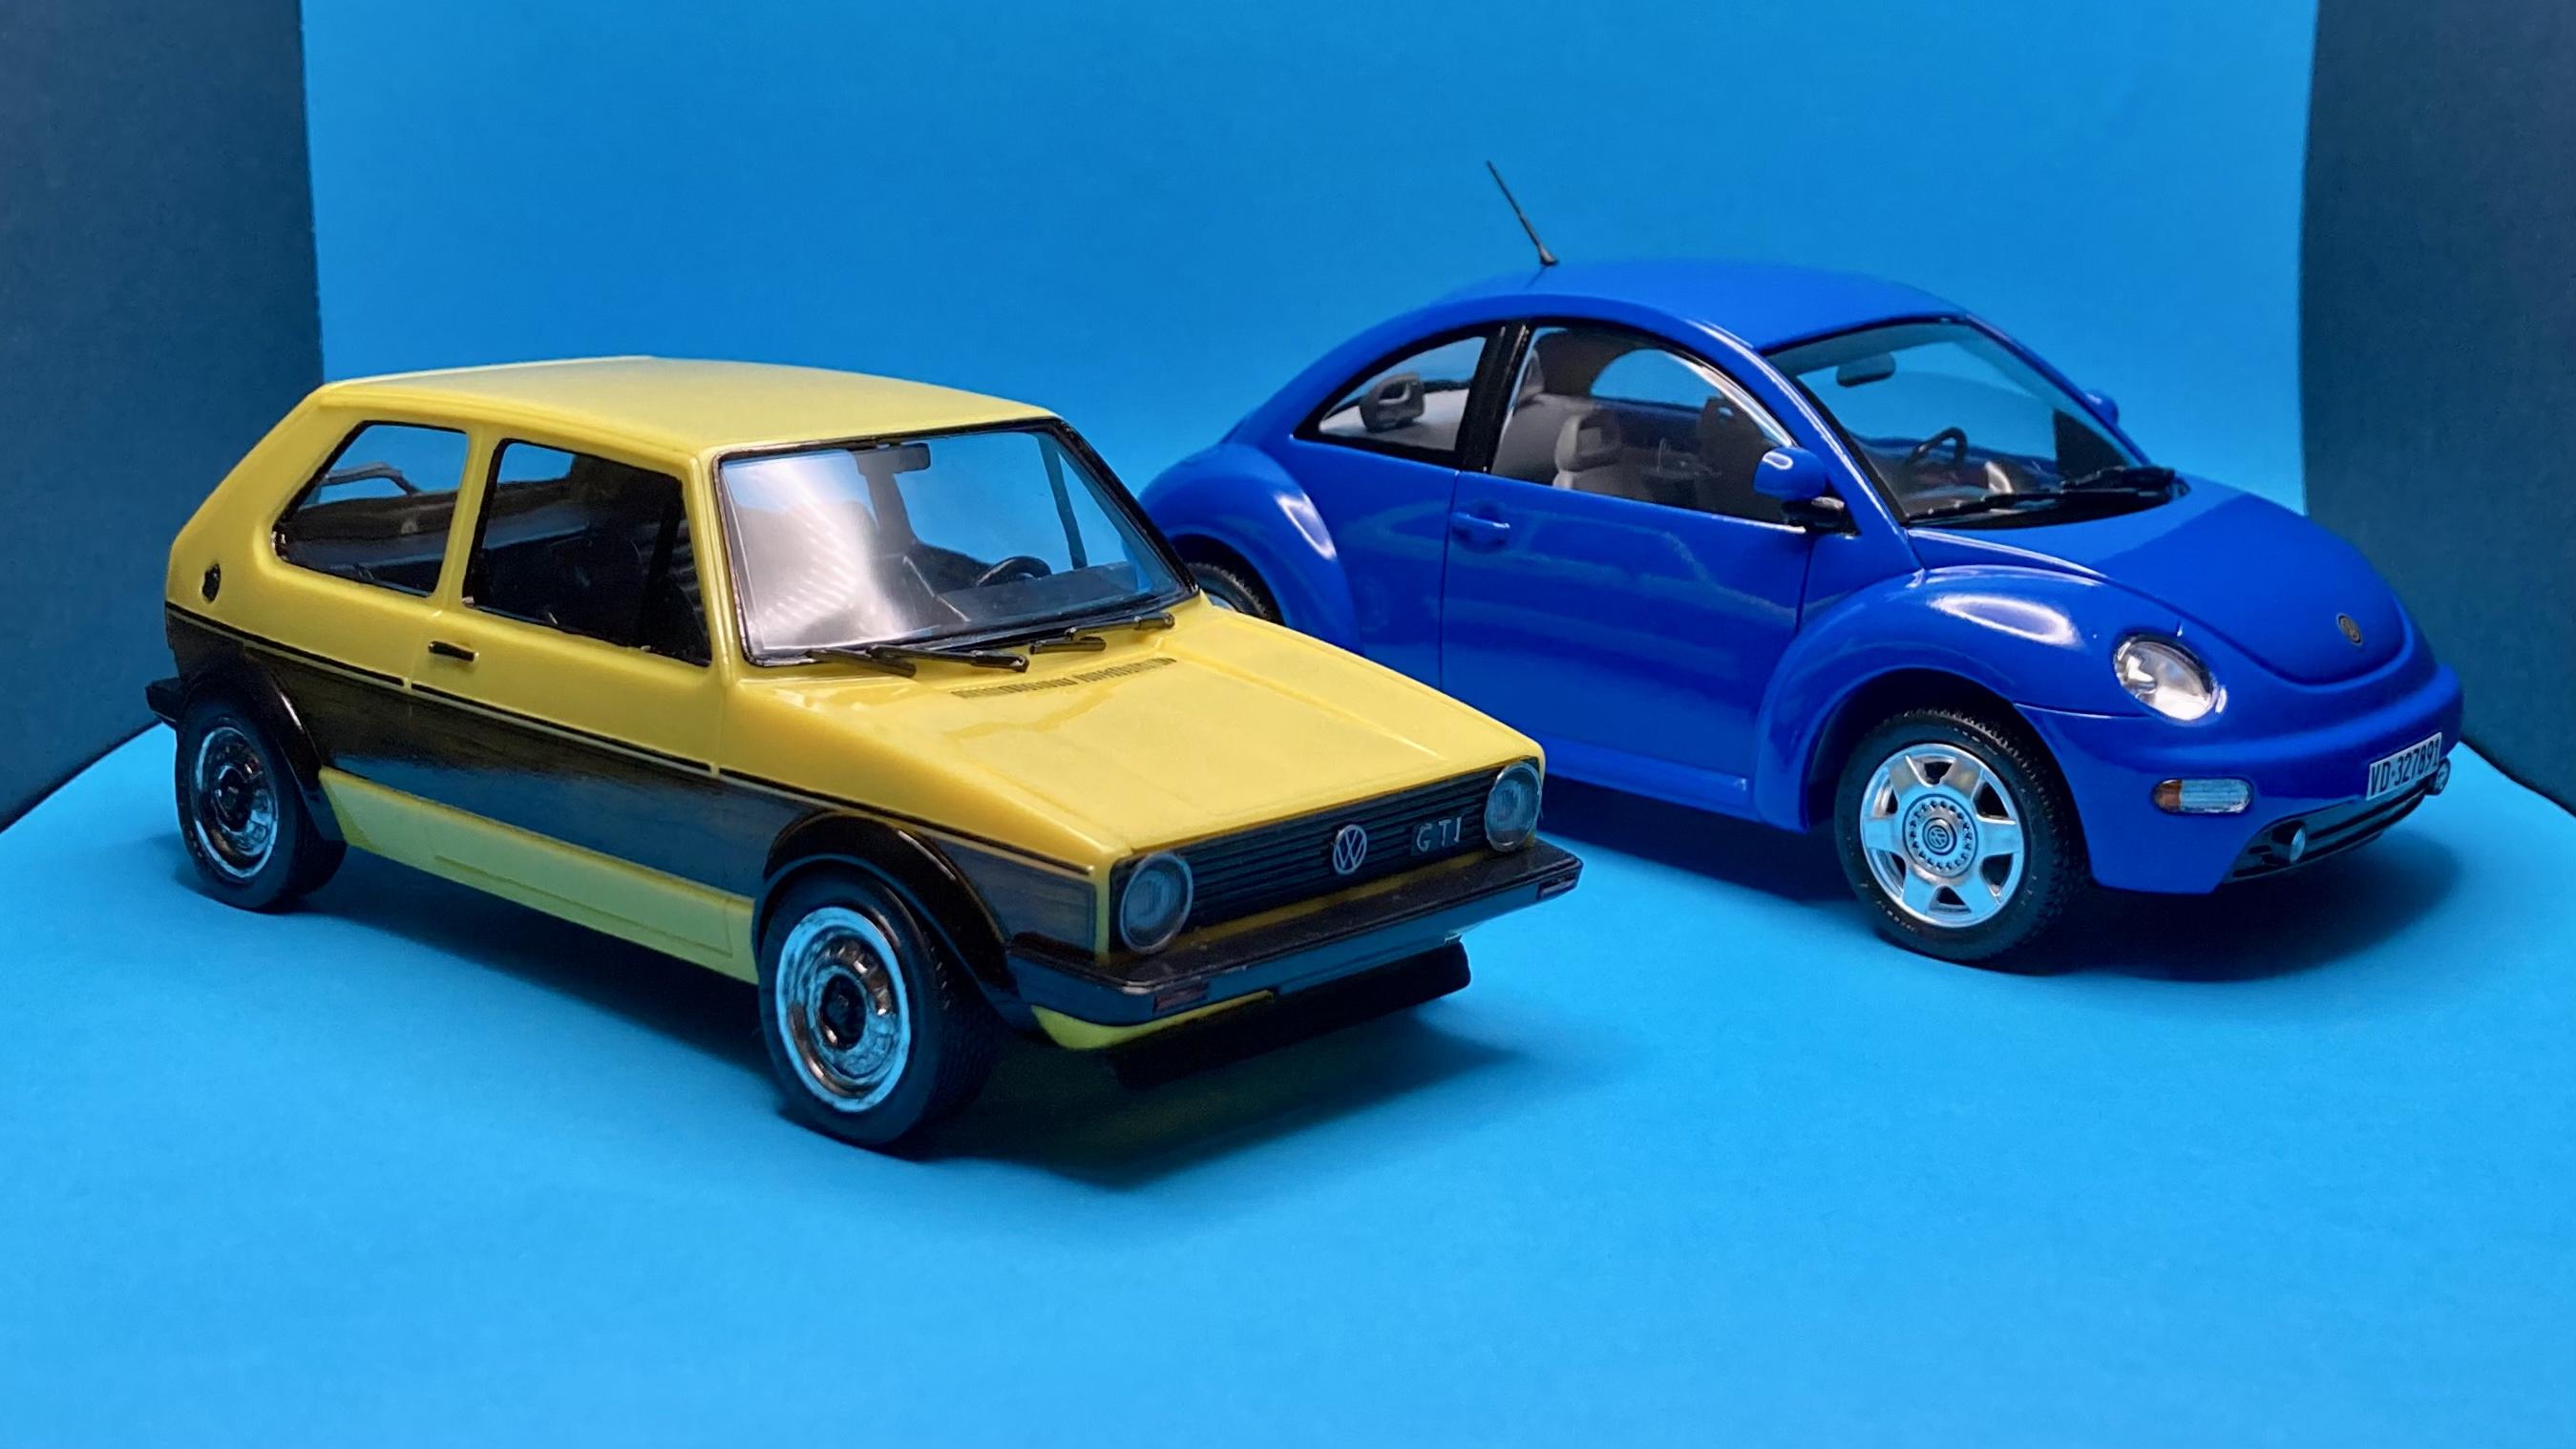
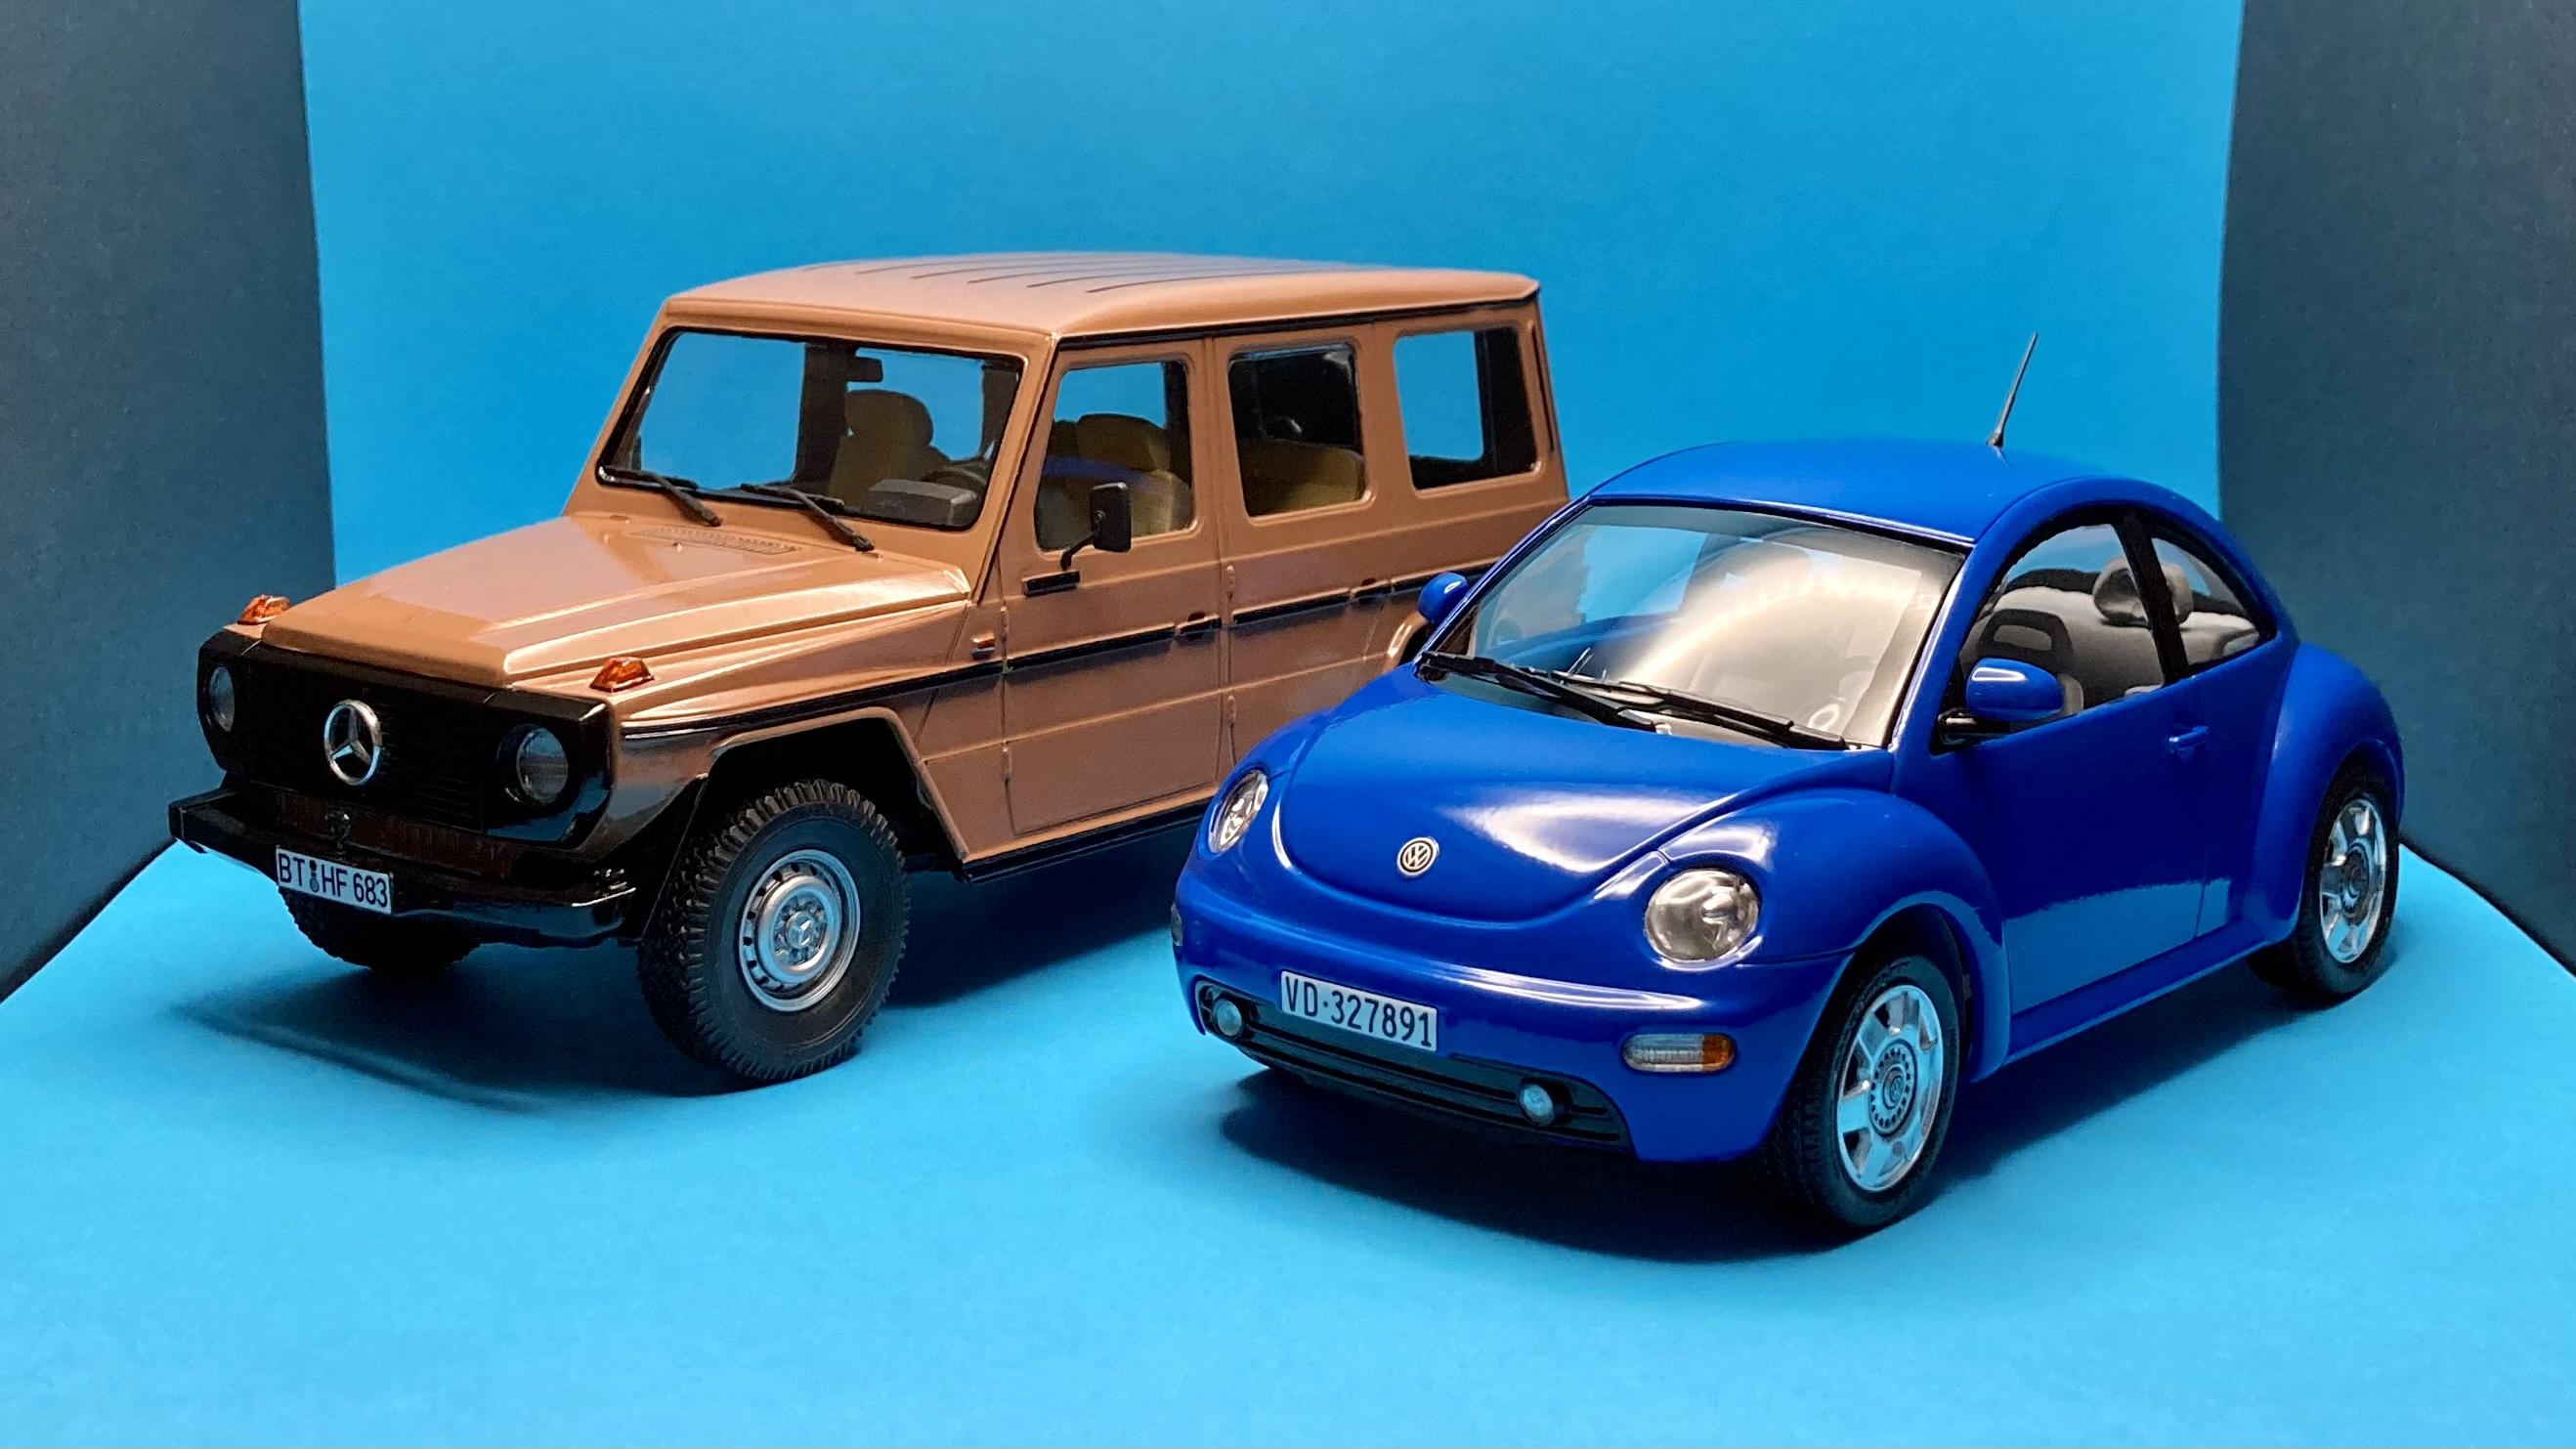
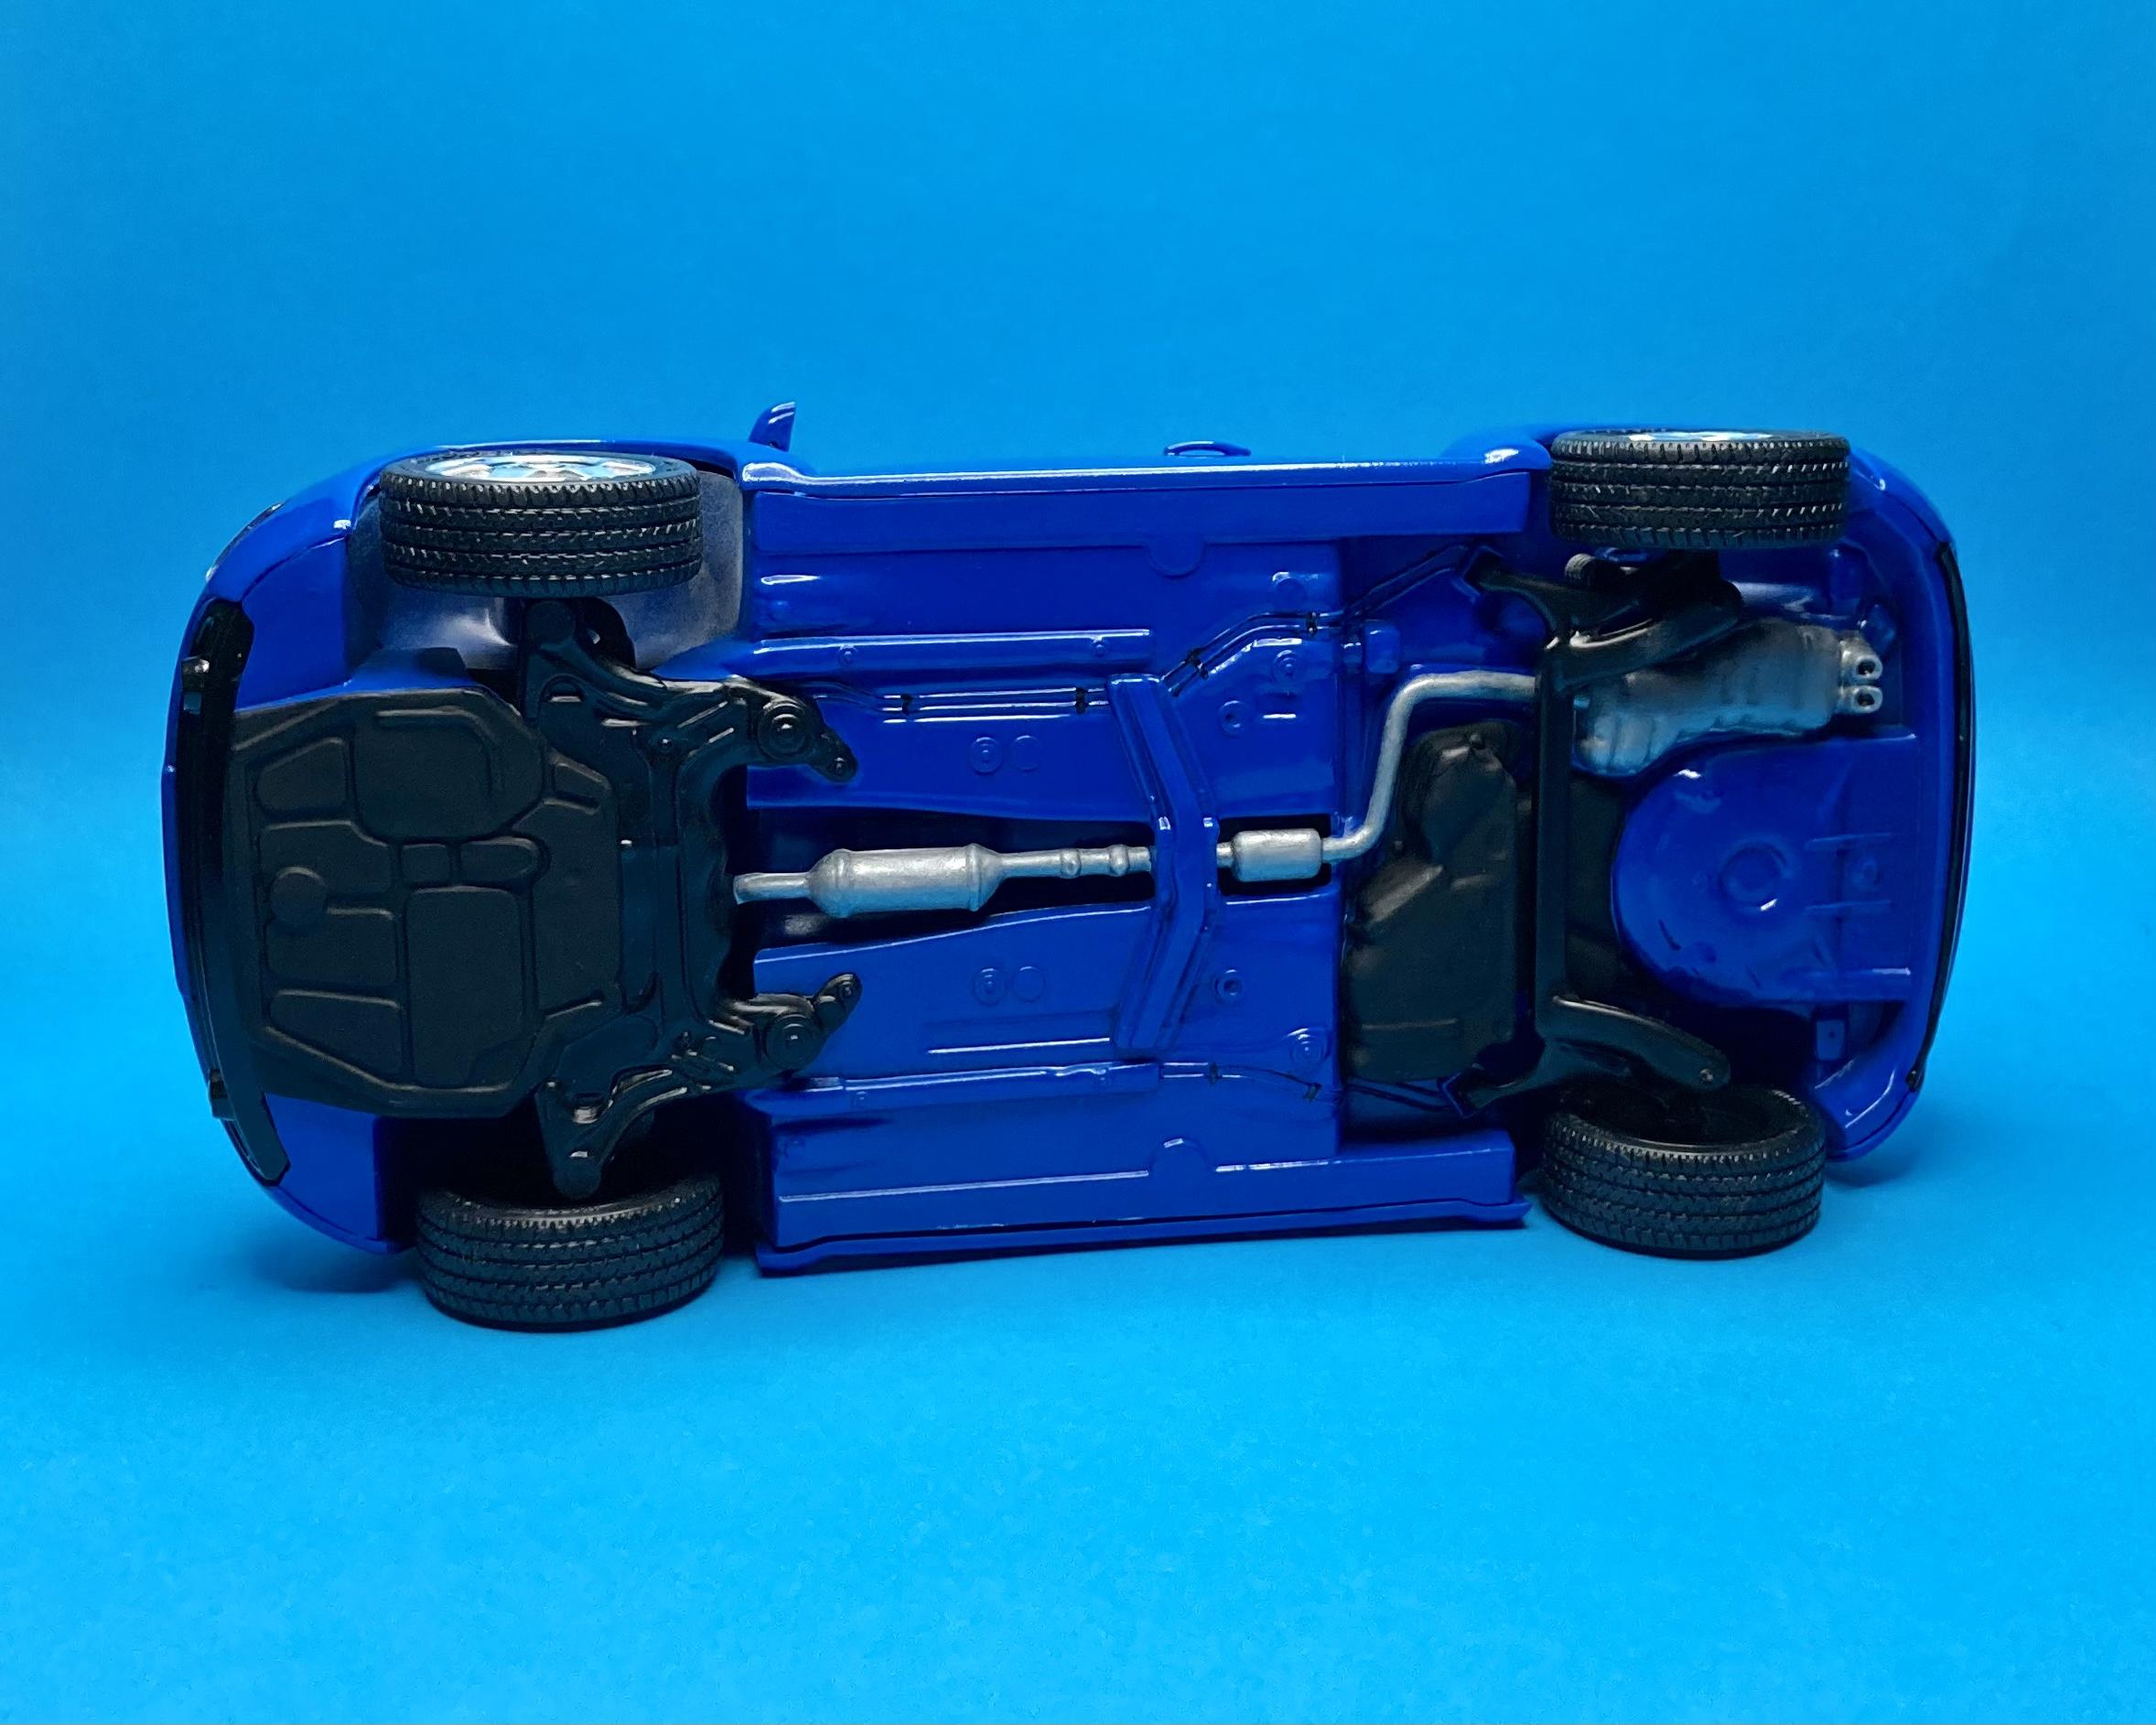
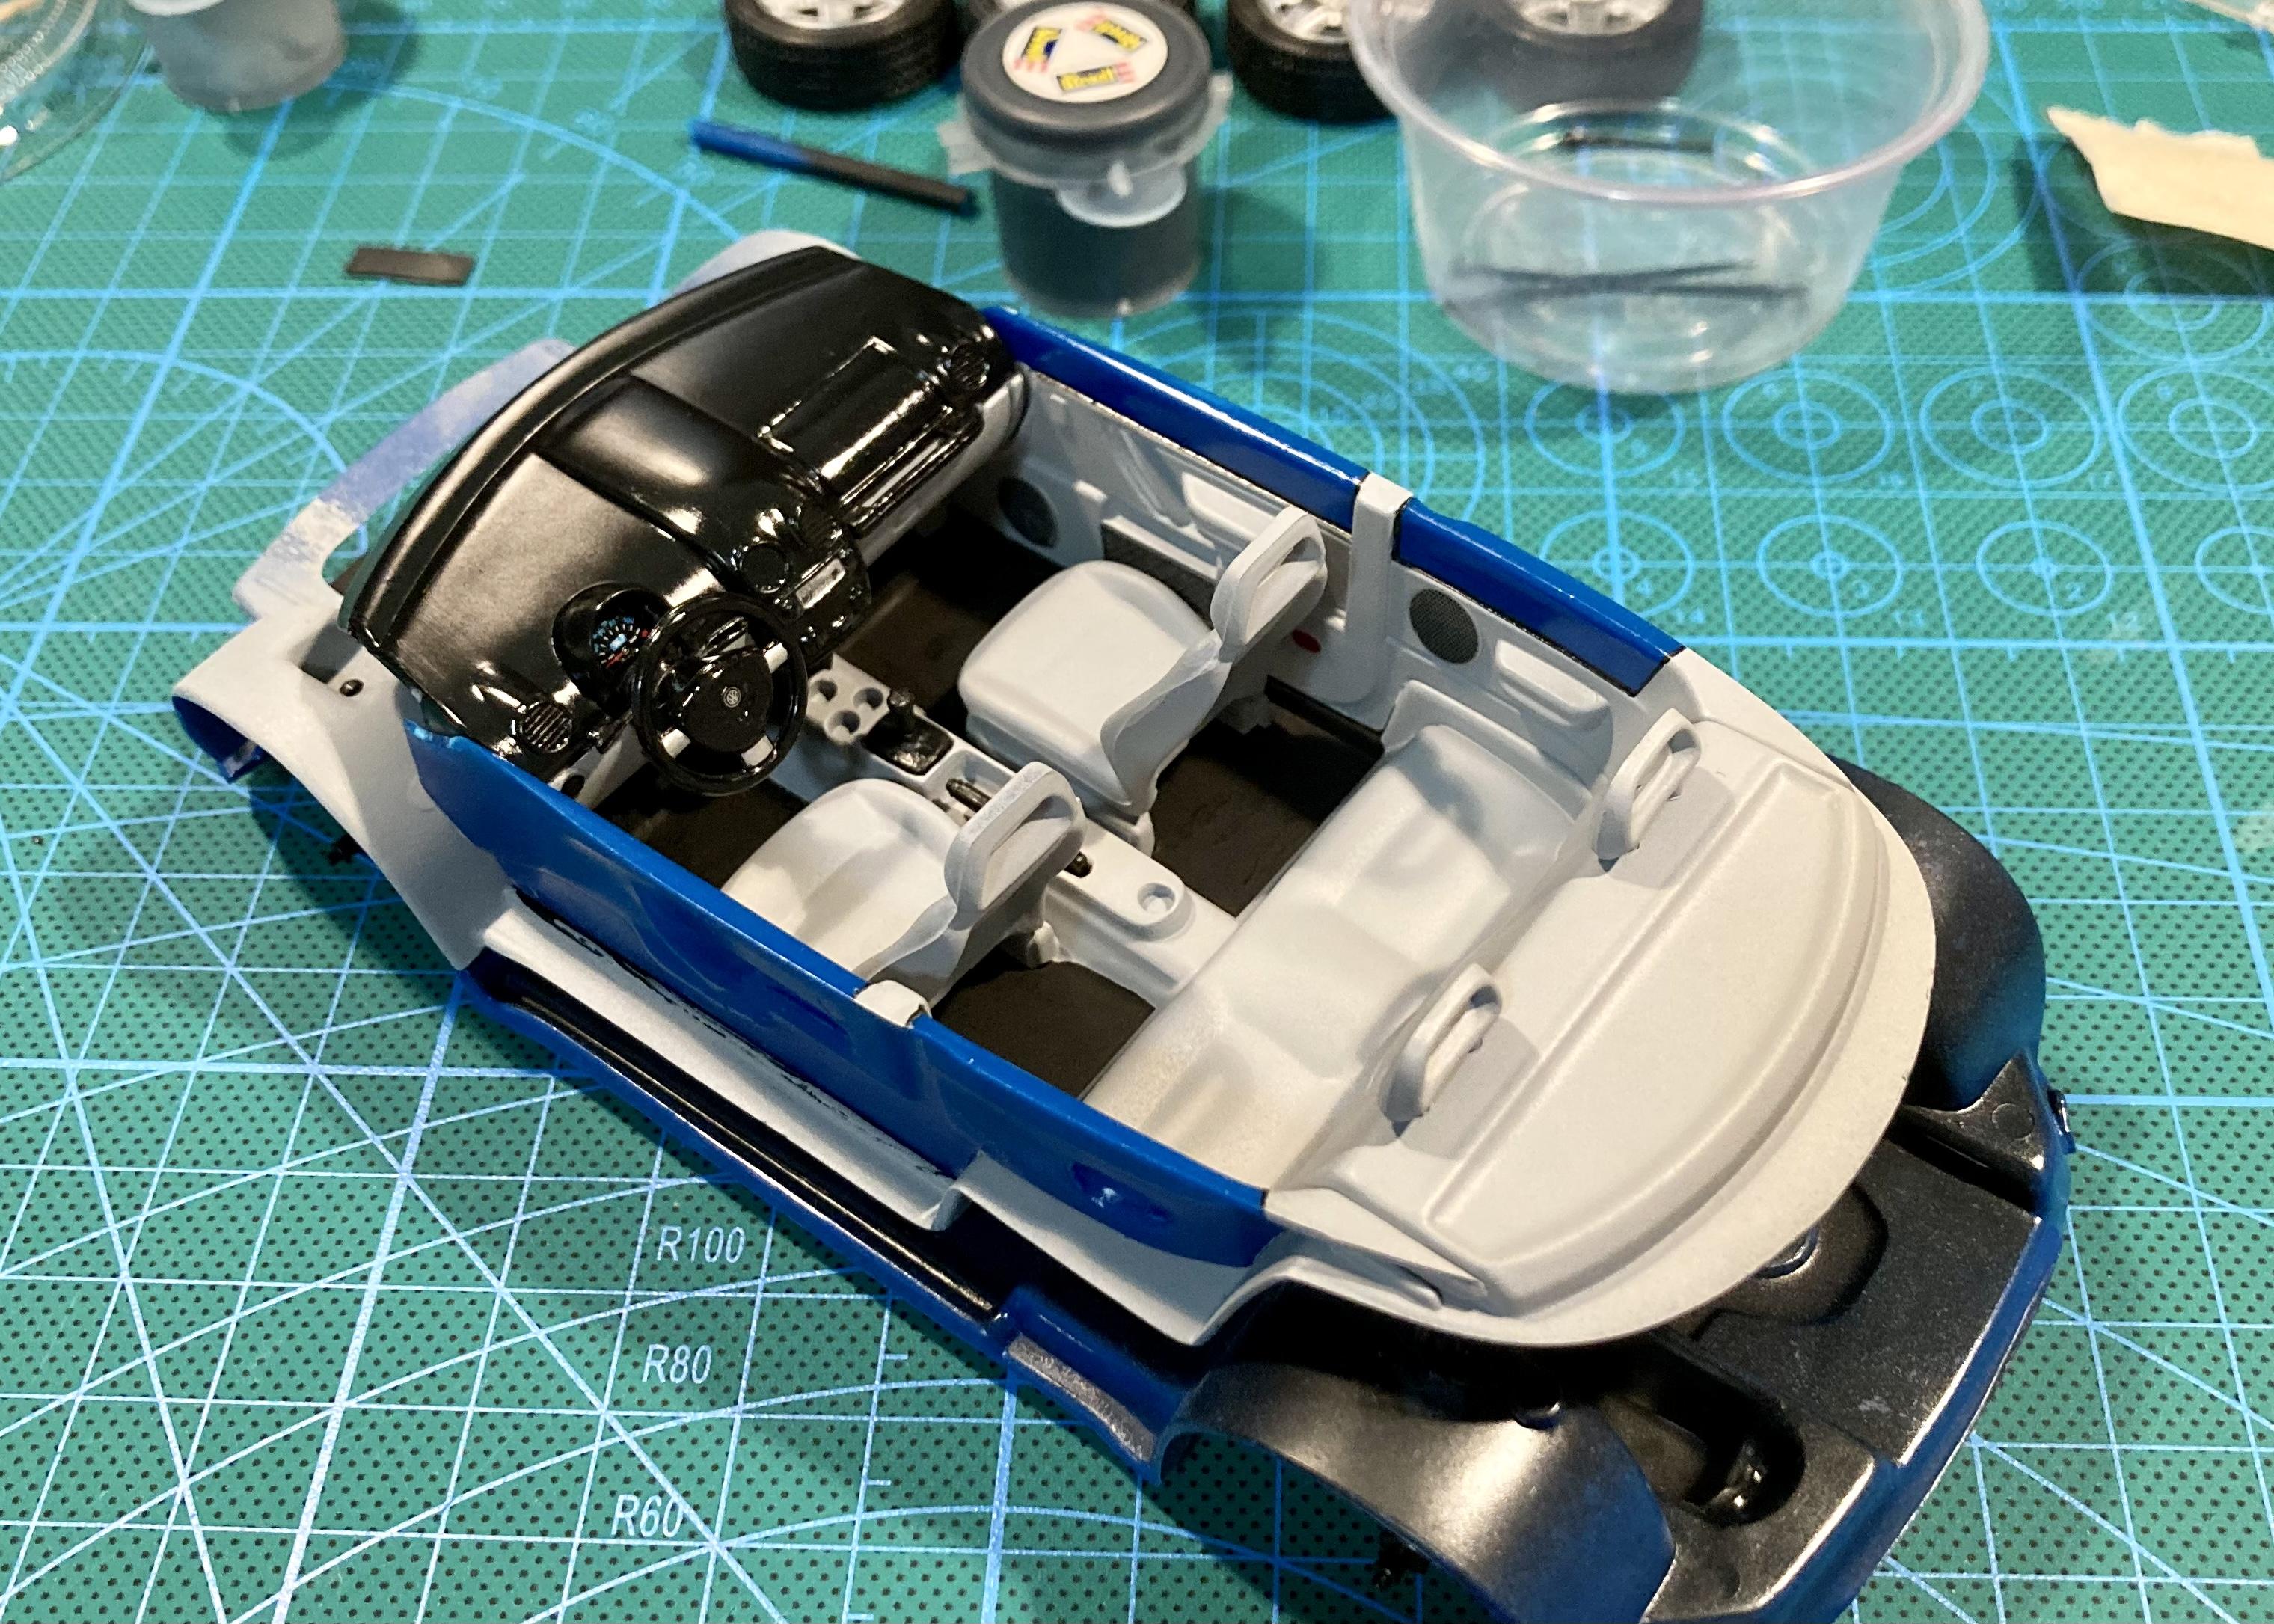
Here’s my build of Revell’s New Beetle! This kit is from the 2000 “Complete” glue issue that included paint (silver, gray, flat black), a brush and glue. After 20-odd years the glue was no good, but the paint was surprisingly ok. The kit was molded in blue and black, I guess with the idea that you’d leave the body in bare plastic and paint the details. The body had a lot of scratches and mold seams so I definitely couldn’t leave it bare. I painted the body in Krylon “True Blue” with a coat of Pledge floor Gloss, and the gray part of the interior is Tamiya primer. I left the black suspension, interior and trim parts in the bare black plastic. Swiss license plates came from my decal stash, I believe from the Italieri G-Wagen. It’s a simple curbside kit for sure but it builds up to a decently detailed model! The kit fits together perfectly and no warping issues. This is a great slump-busting kit, and would be perfect for a kid’s first glue and paint build.
- 12 replies
-
- 2
-

-
- volkswagen
- revell
- (and 1 more)
-
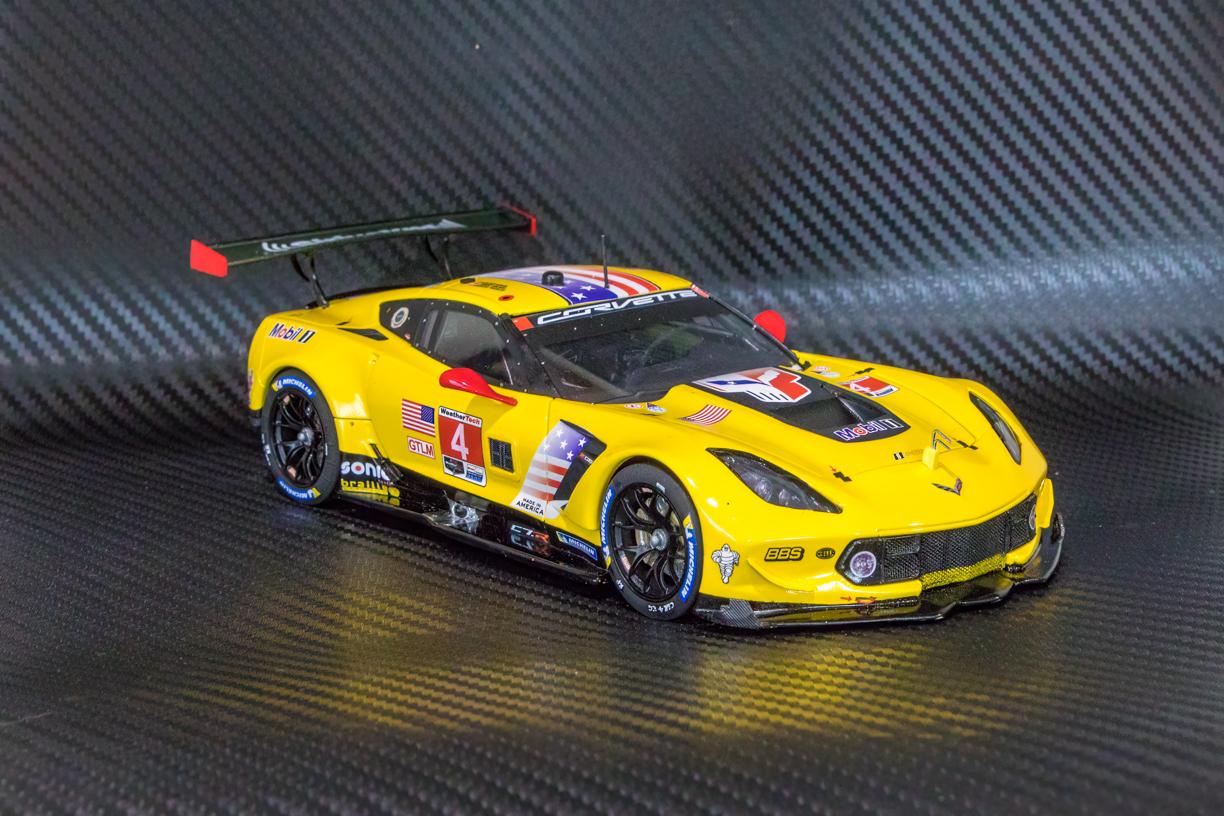
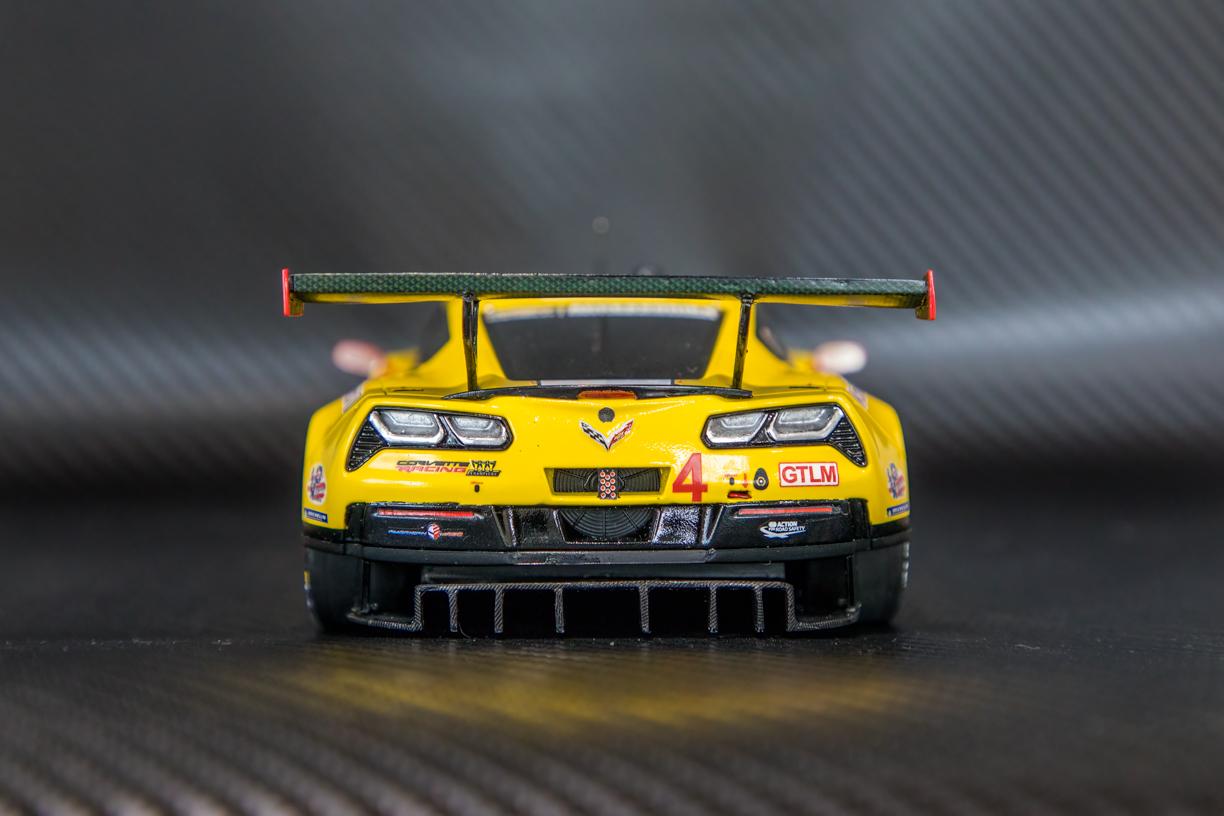
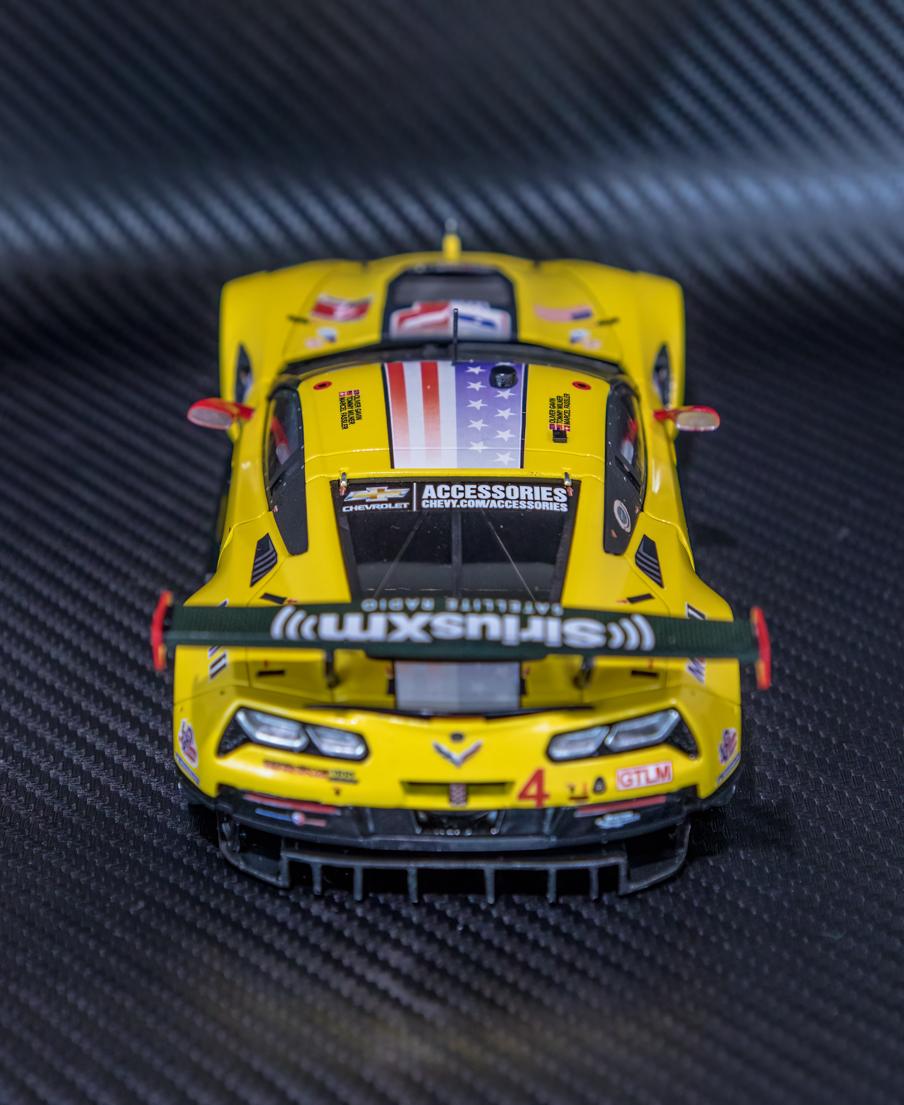
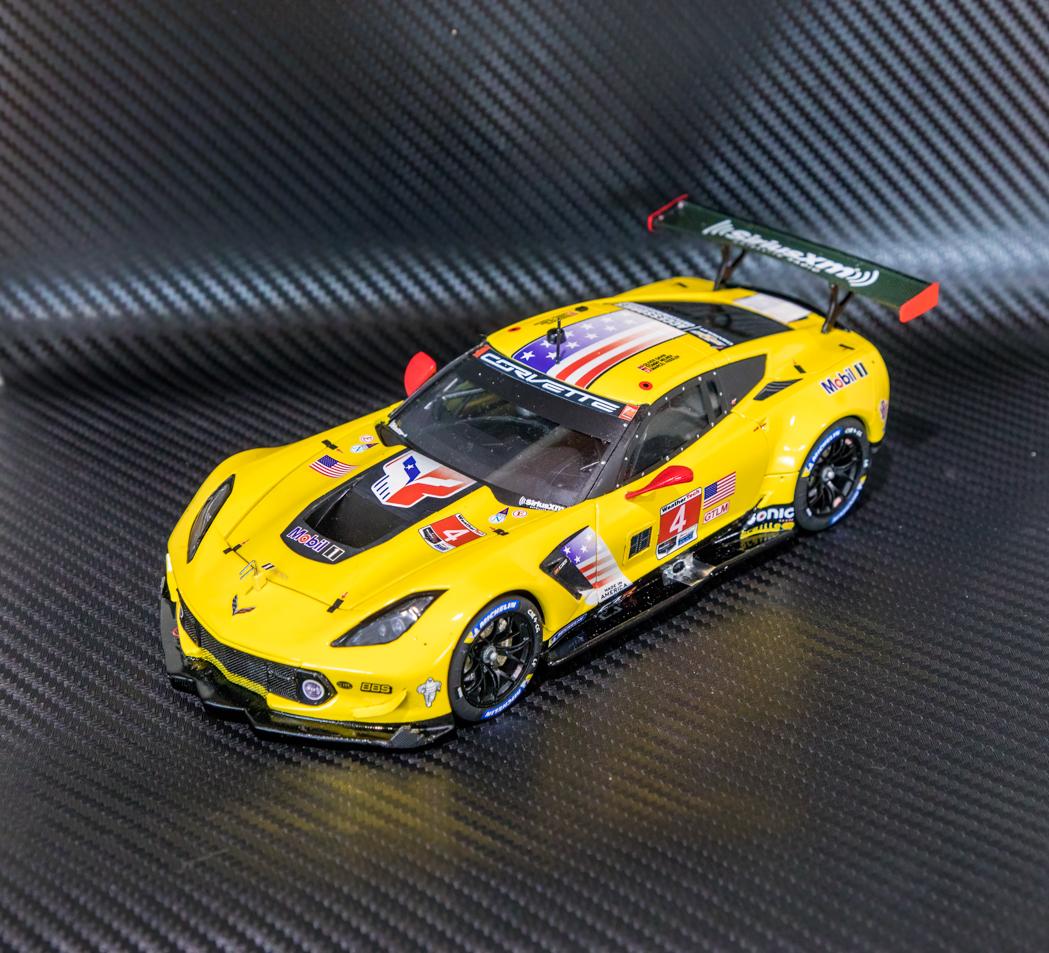
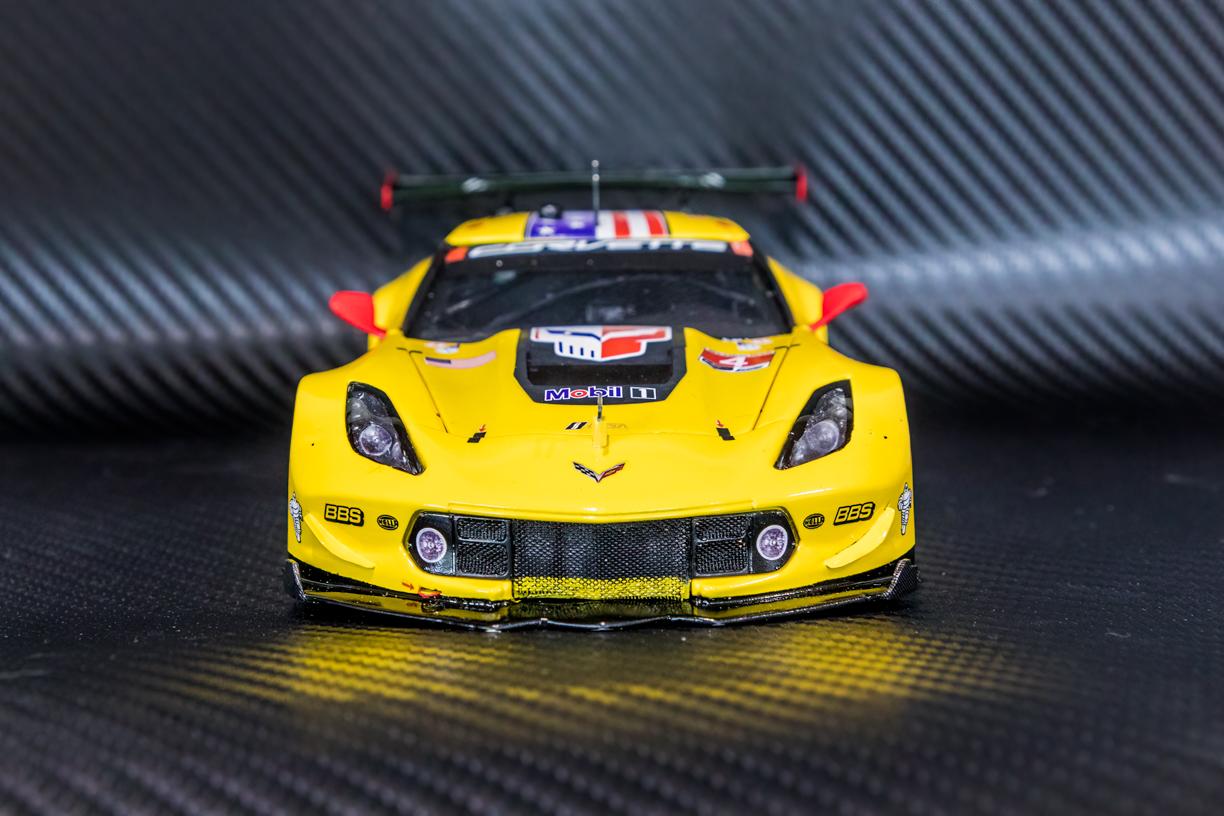
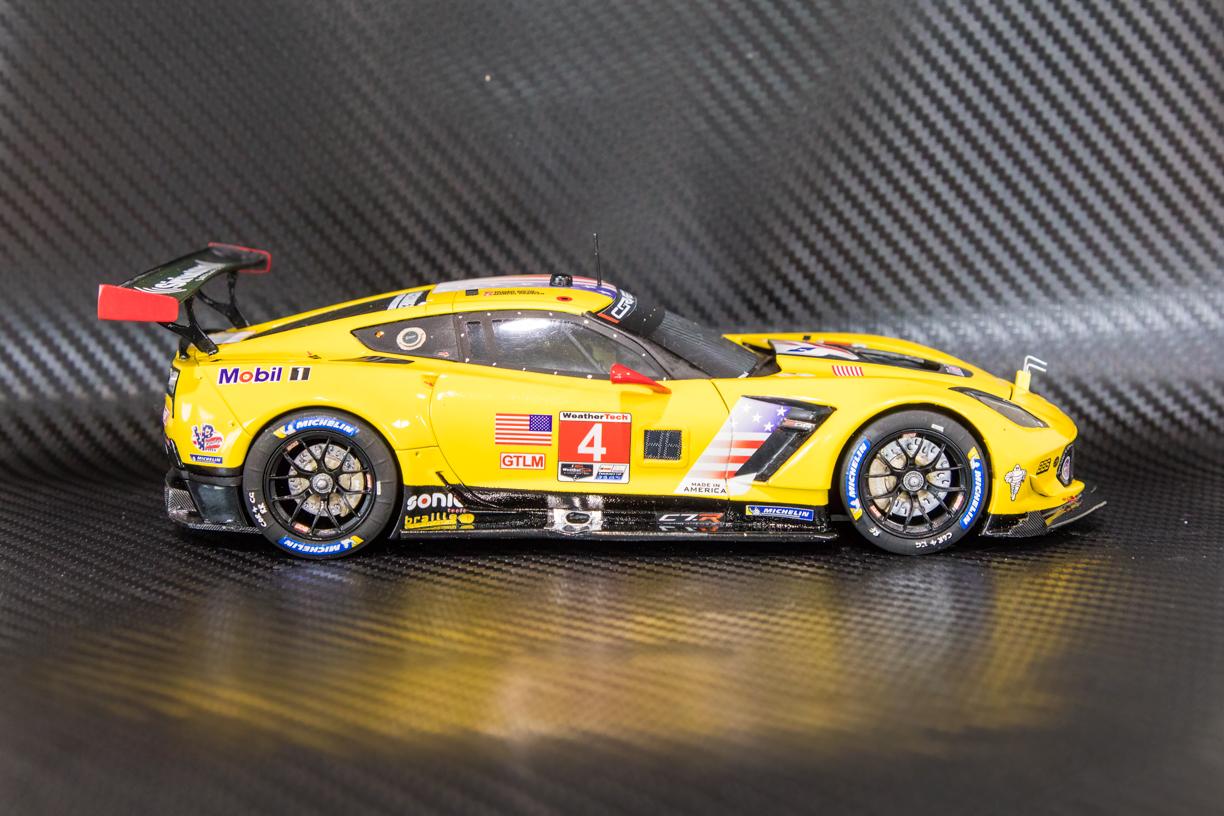
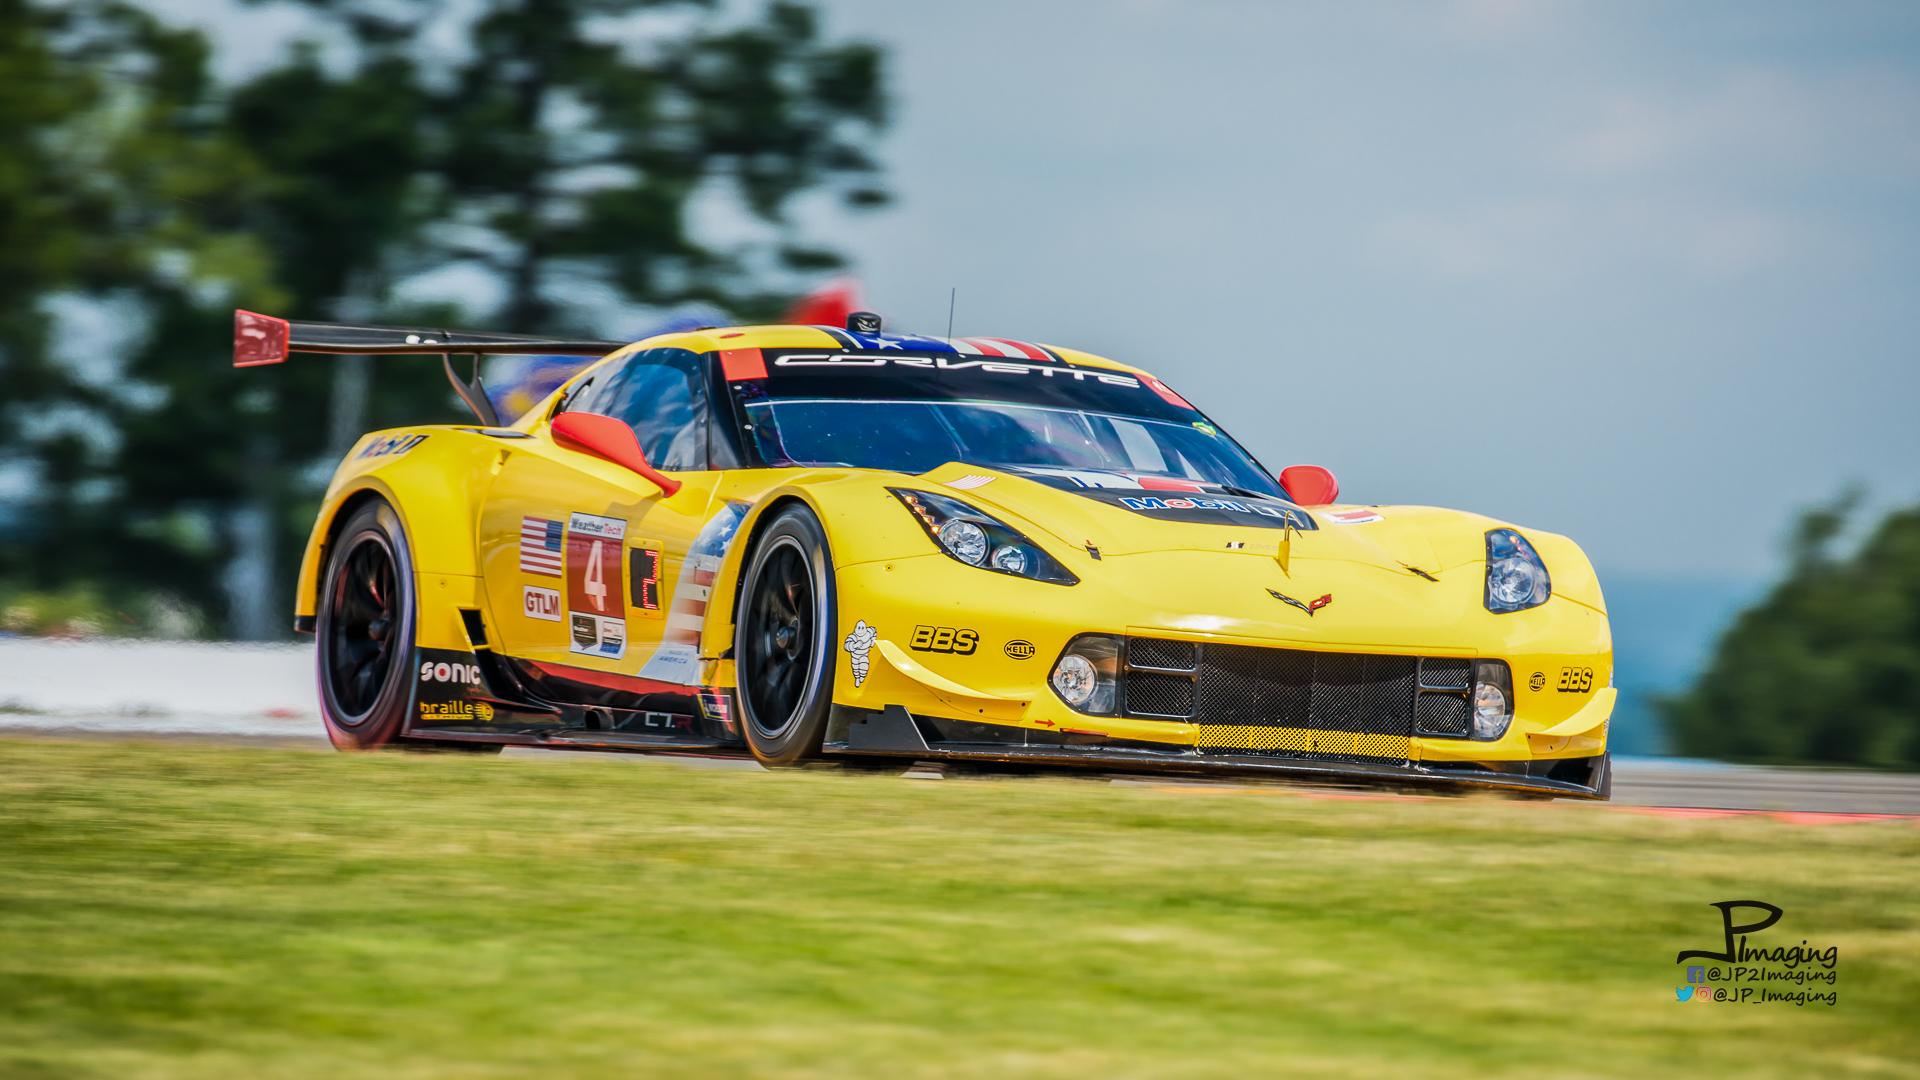
 Finished up my take on the Revell Corvette C7R. This one is done to replicate the #4 C7R ran at the 2019 Sahlens Six Hours of The Glen at Watkins Glen International. Unfortanently, the #4 car didn't make it more than 4 turns on lap 1 before being turned by an RSR... The build - Started with the Revell C7R kit - arguably one of the most frustrating builds I've had in some time!! This kit is borderline terrible in fit and finish. A LOT of test fitting and sanding / cutting, followed by more of the same. Thankfully I was able to glean some tips from those of you that came before me! Used the Classic Racing Resins C7R upgrade kit that upgrades the nose, rocker panels, wing, and rear diffuser. Fit and finish of the resin parts was okay, a fair amount of sanding and profiling had them looking decent. Cutting the nose and diffuser was pretty straight forward and a decent fit. Required some body filler to get the high/low but otherwise fairly pleased with them. The clear pieces on this kit were a royal challenge... ended up cutting all windows and headlights apart and fitting individually. A Dremel with a thin cutting wheel works great for this. Gravity Colors USA paint was used and dressed with Indycals and few customs I made to directly replicate the 2019 Sahlens Six Hours livery. Wheels and brakes are KMP-Scale Modeling which I feel really dress up the car and add realism to the kit. Thanks for looking! Inspiration: IMSA 2019 Sahlens Six hours of The Glen, #4 Corvette Racing C7R.
-
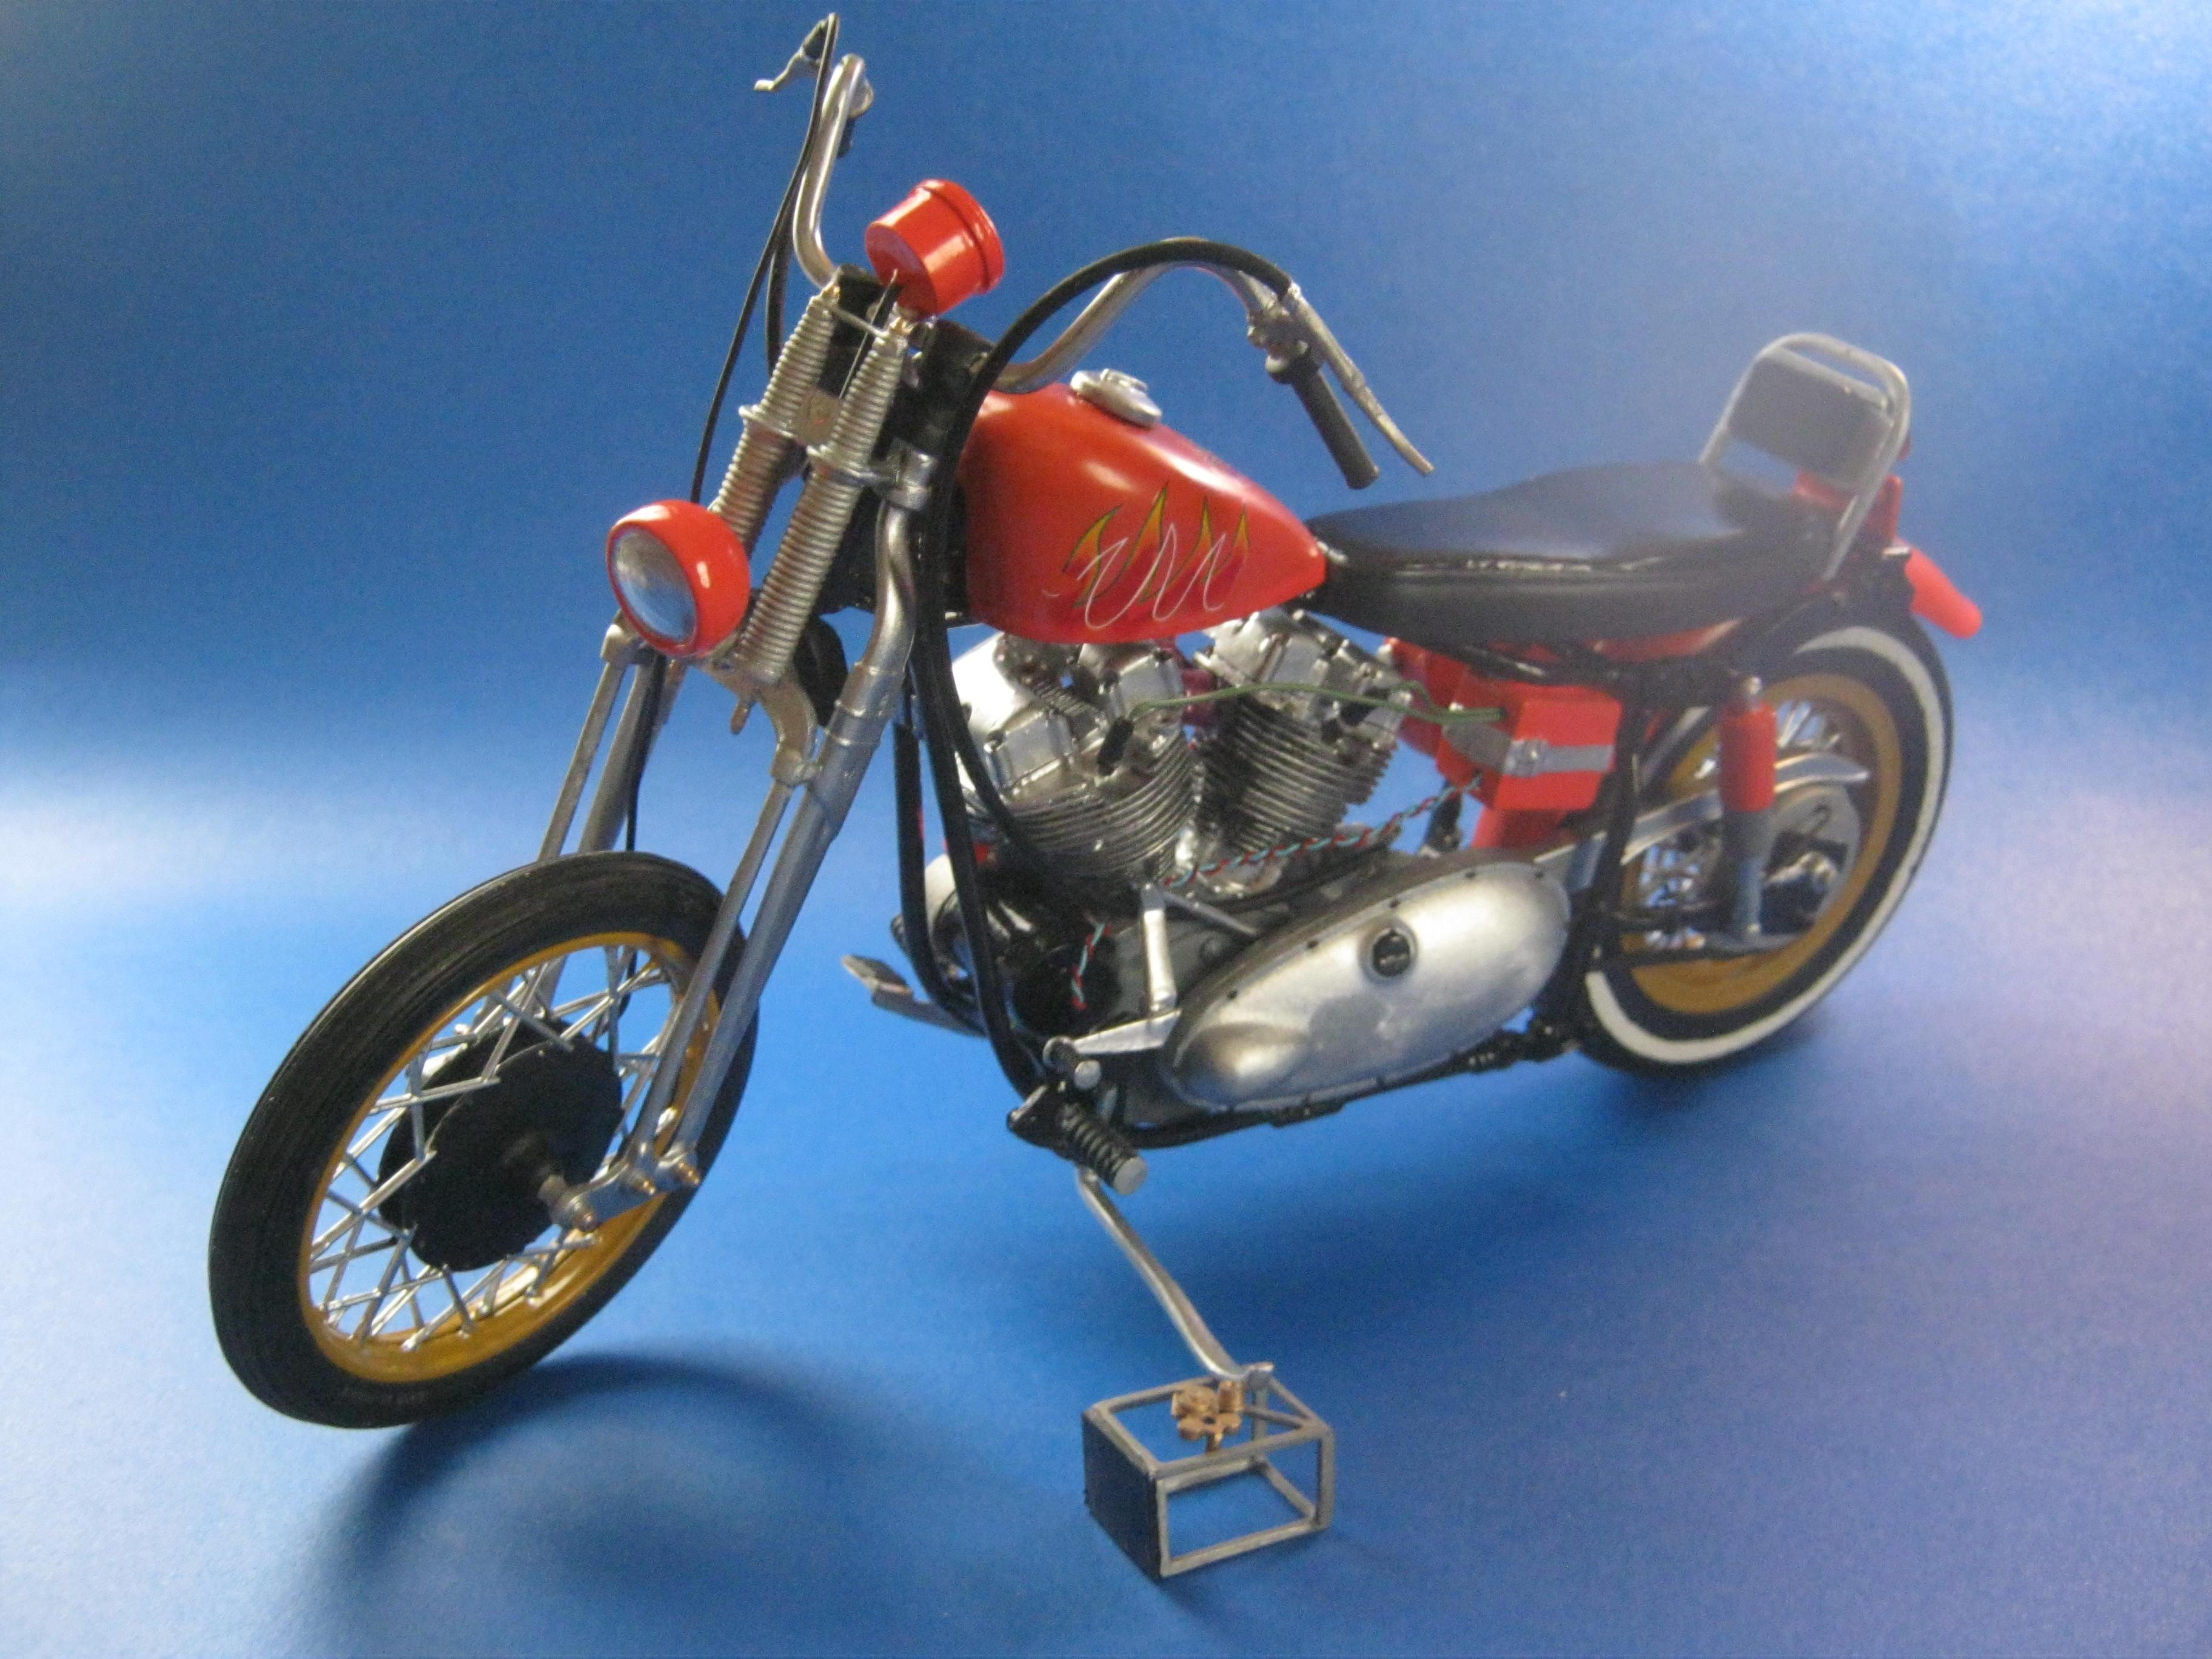
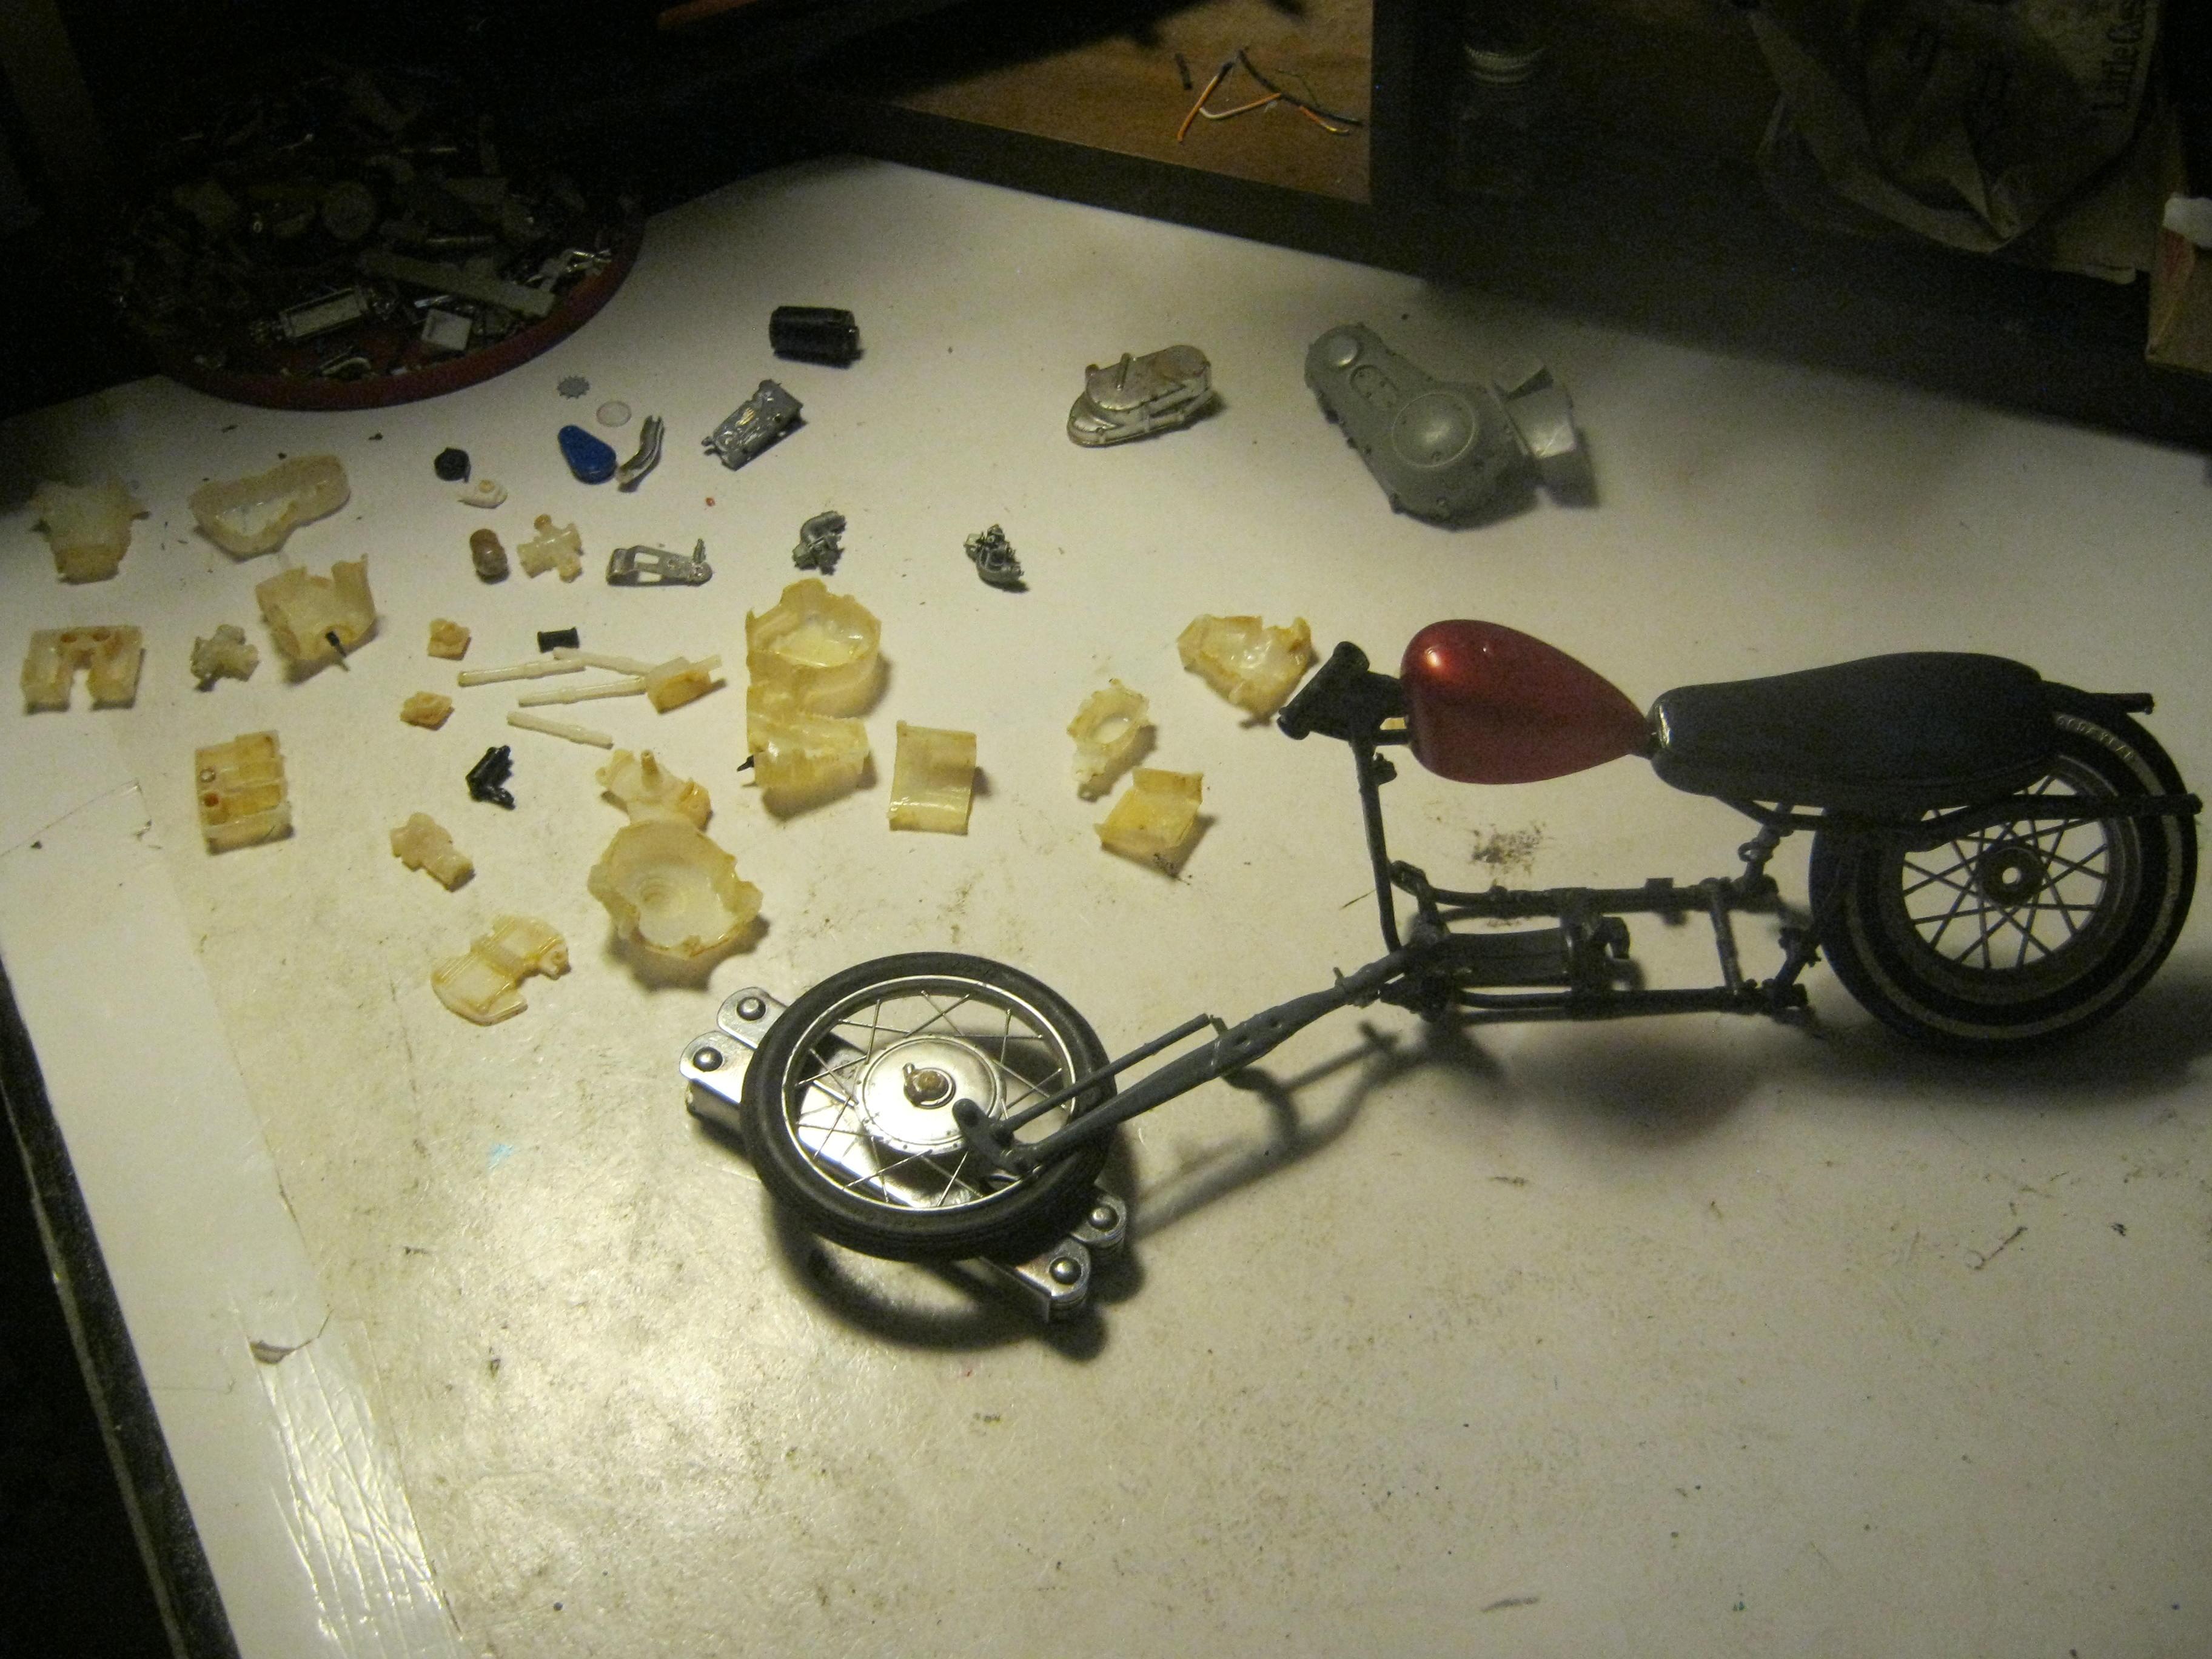
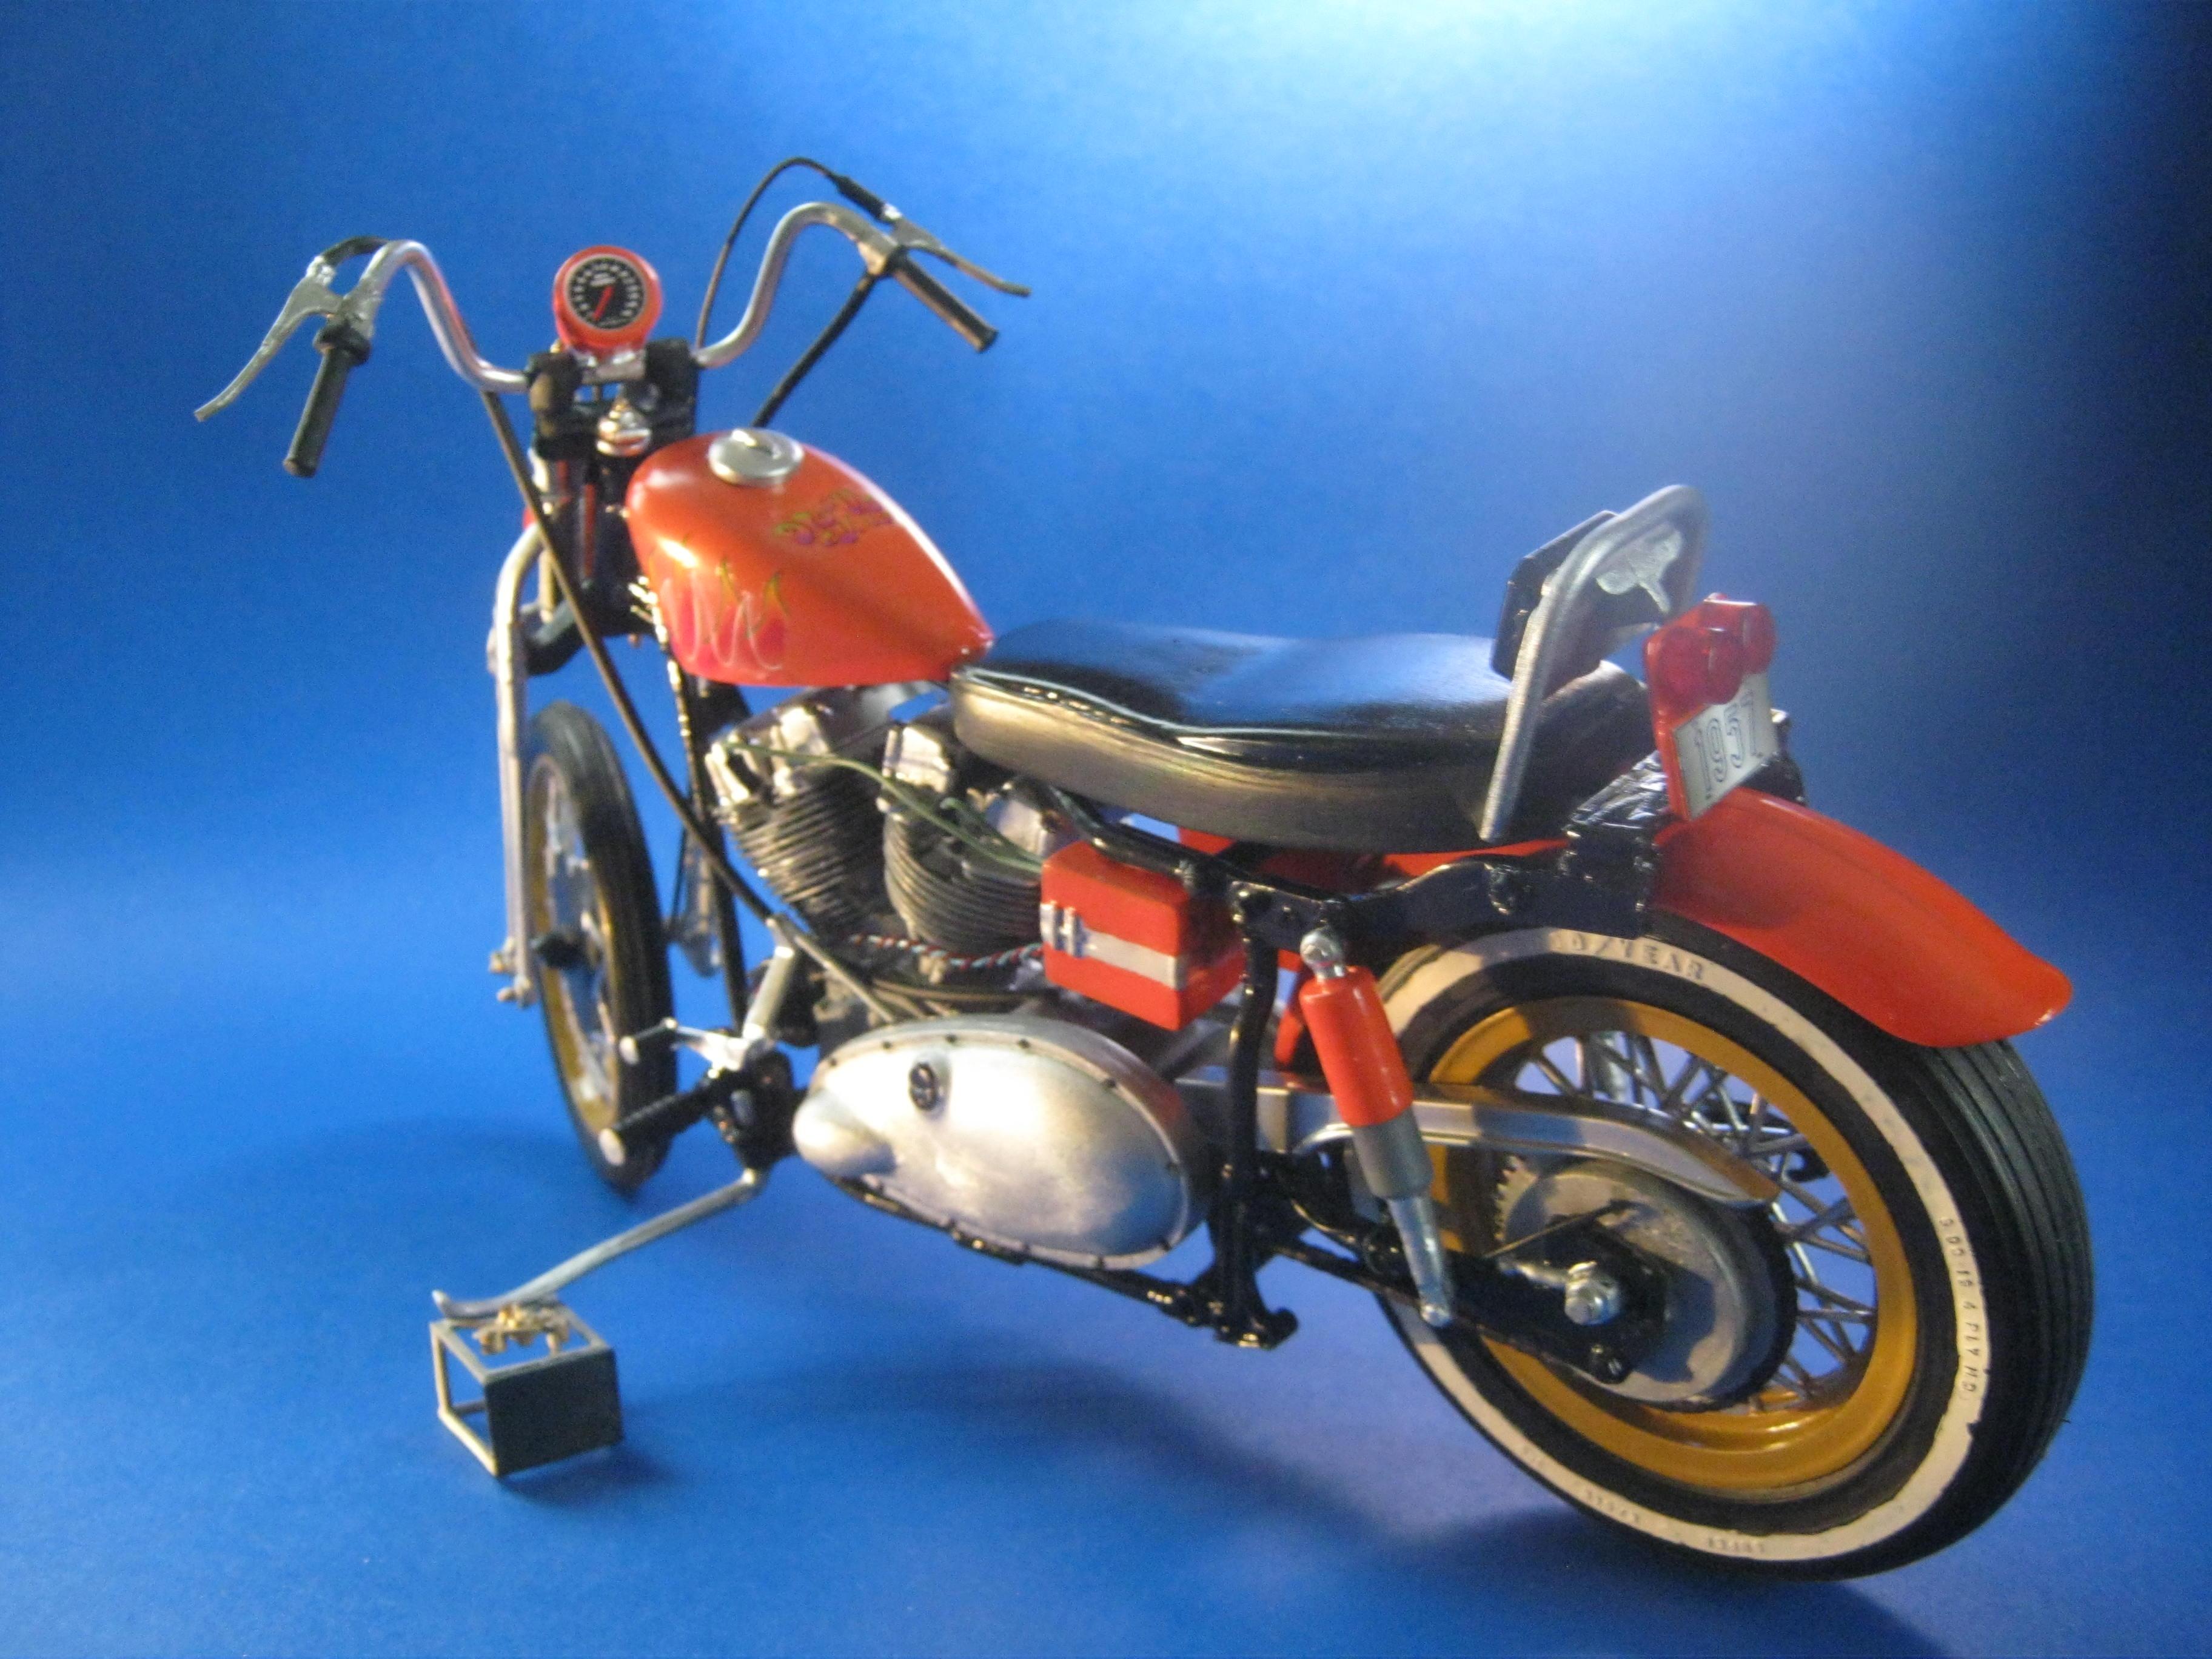
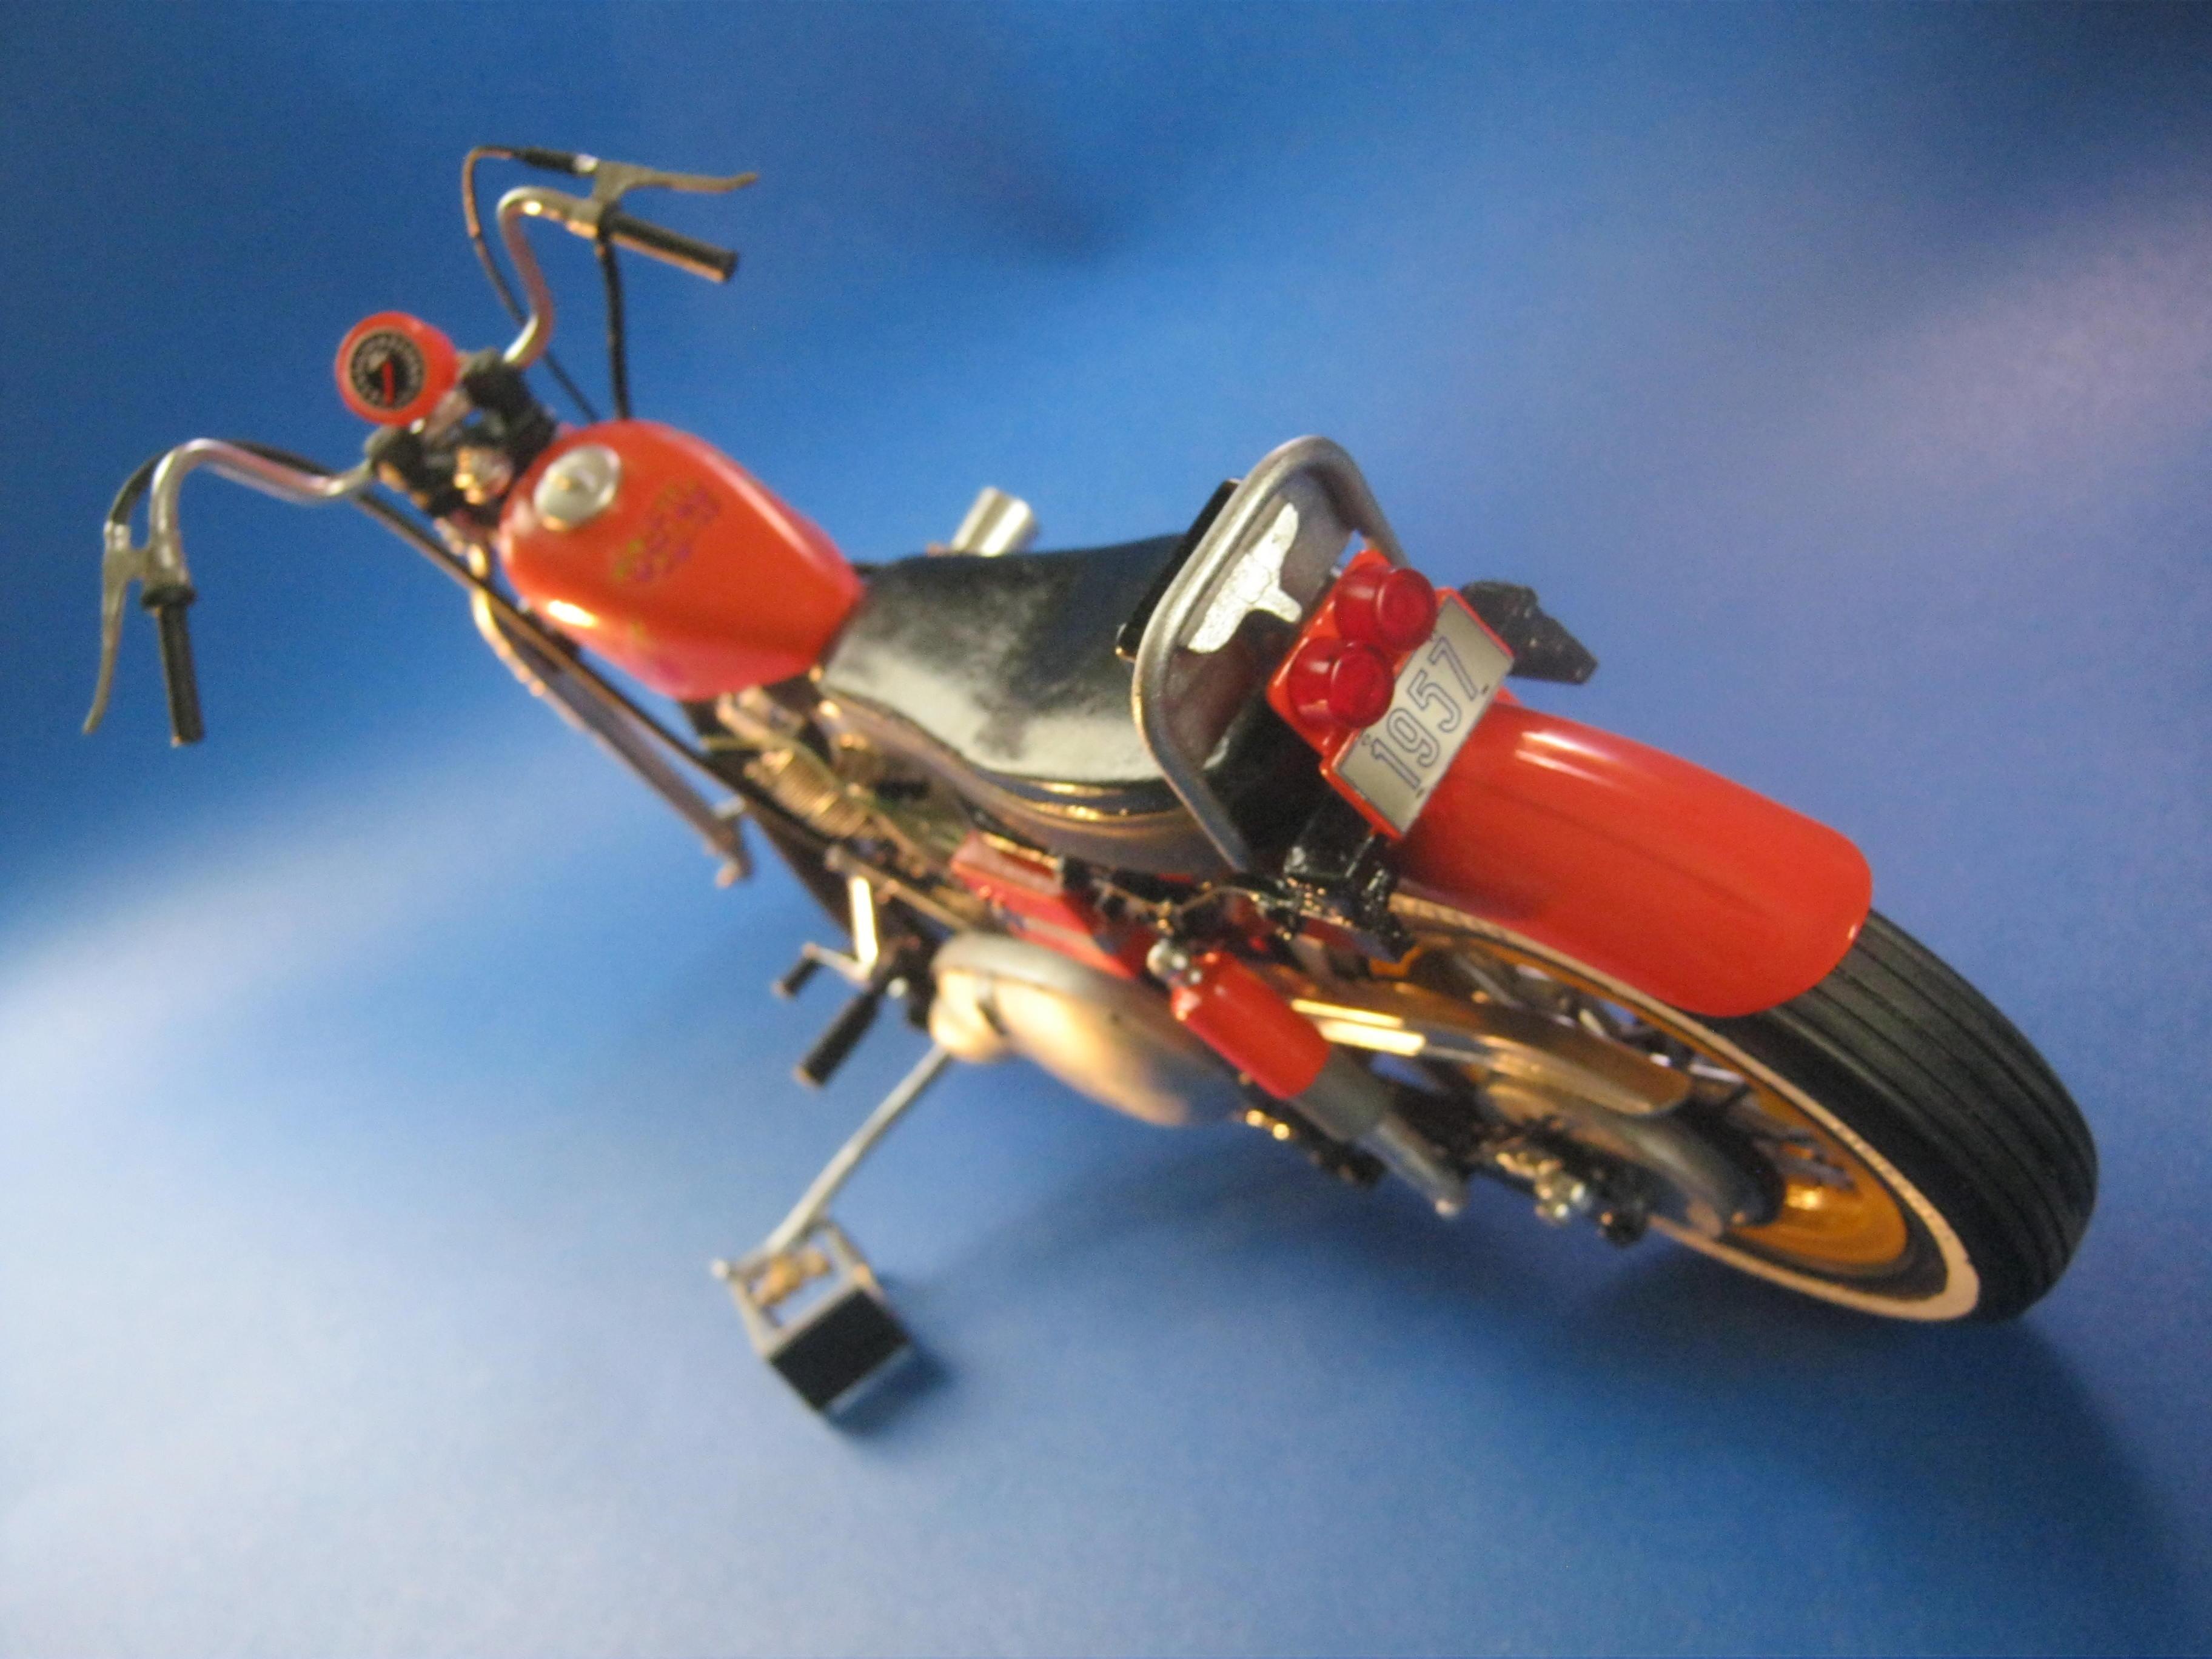
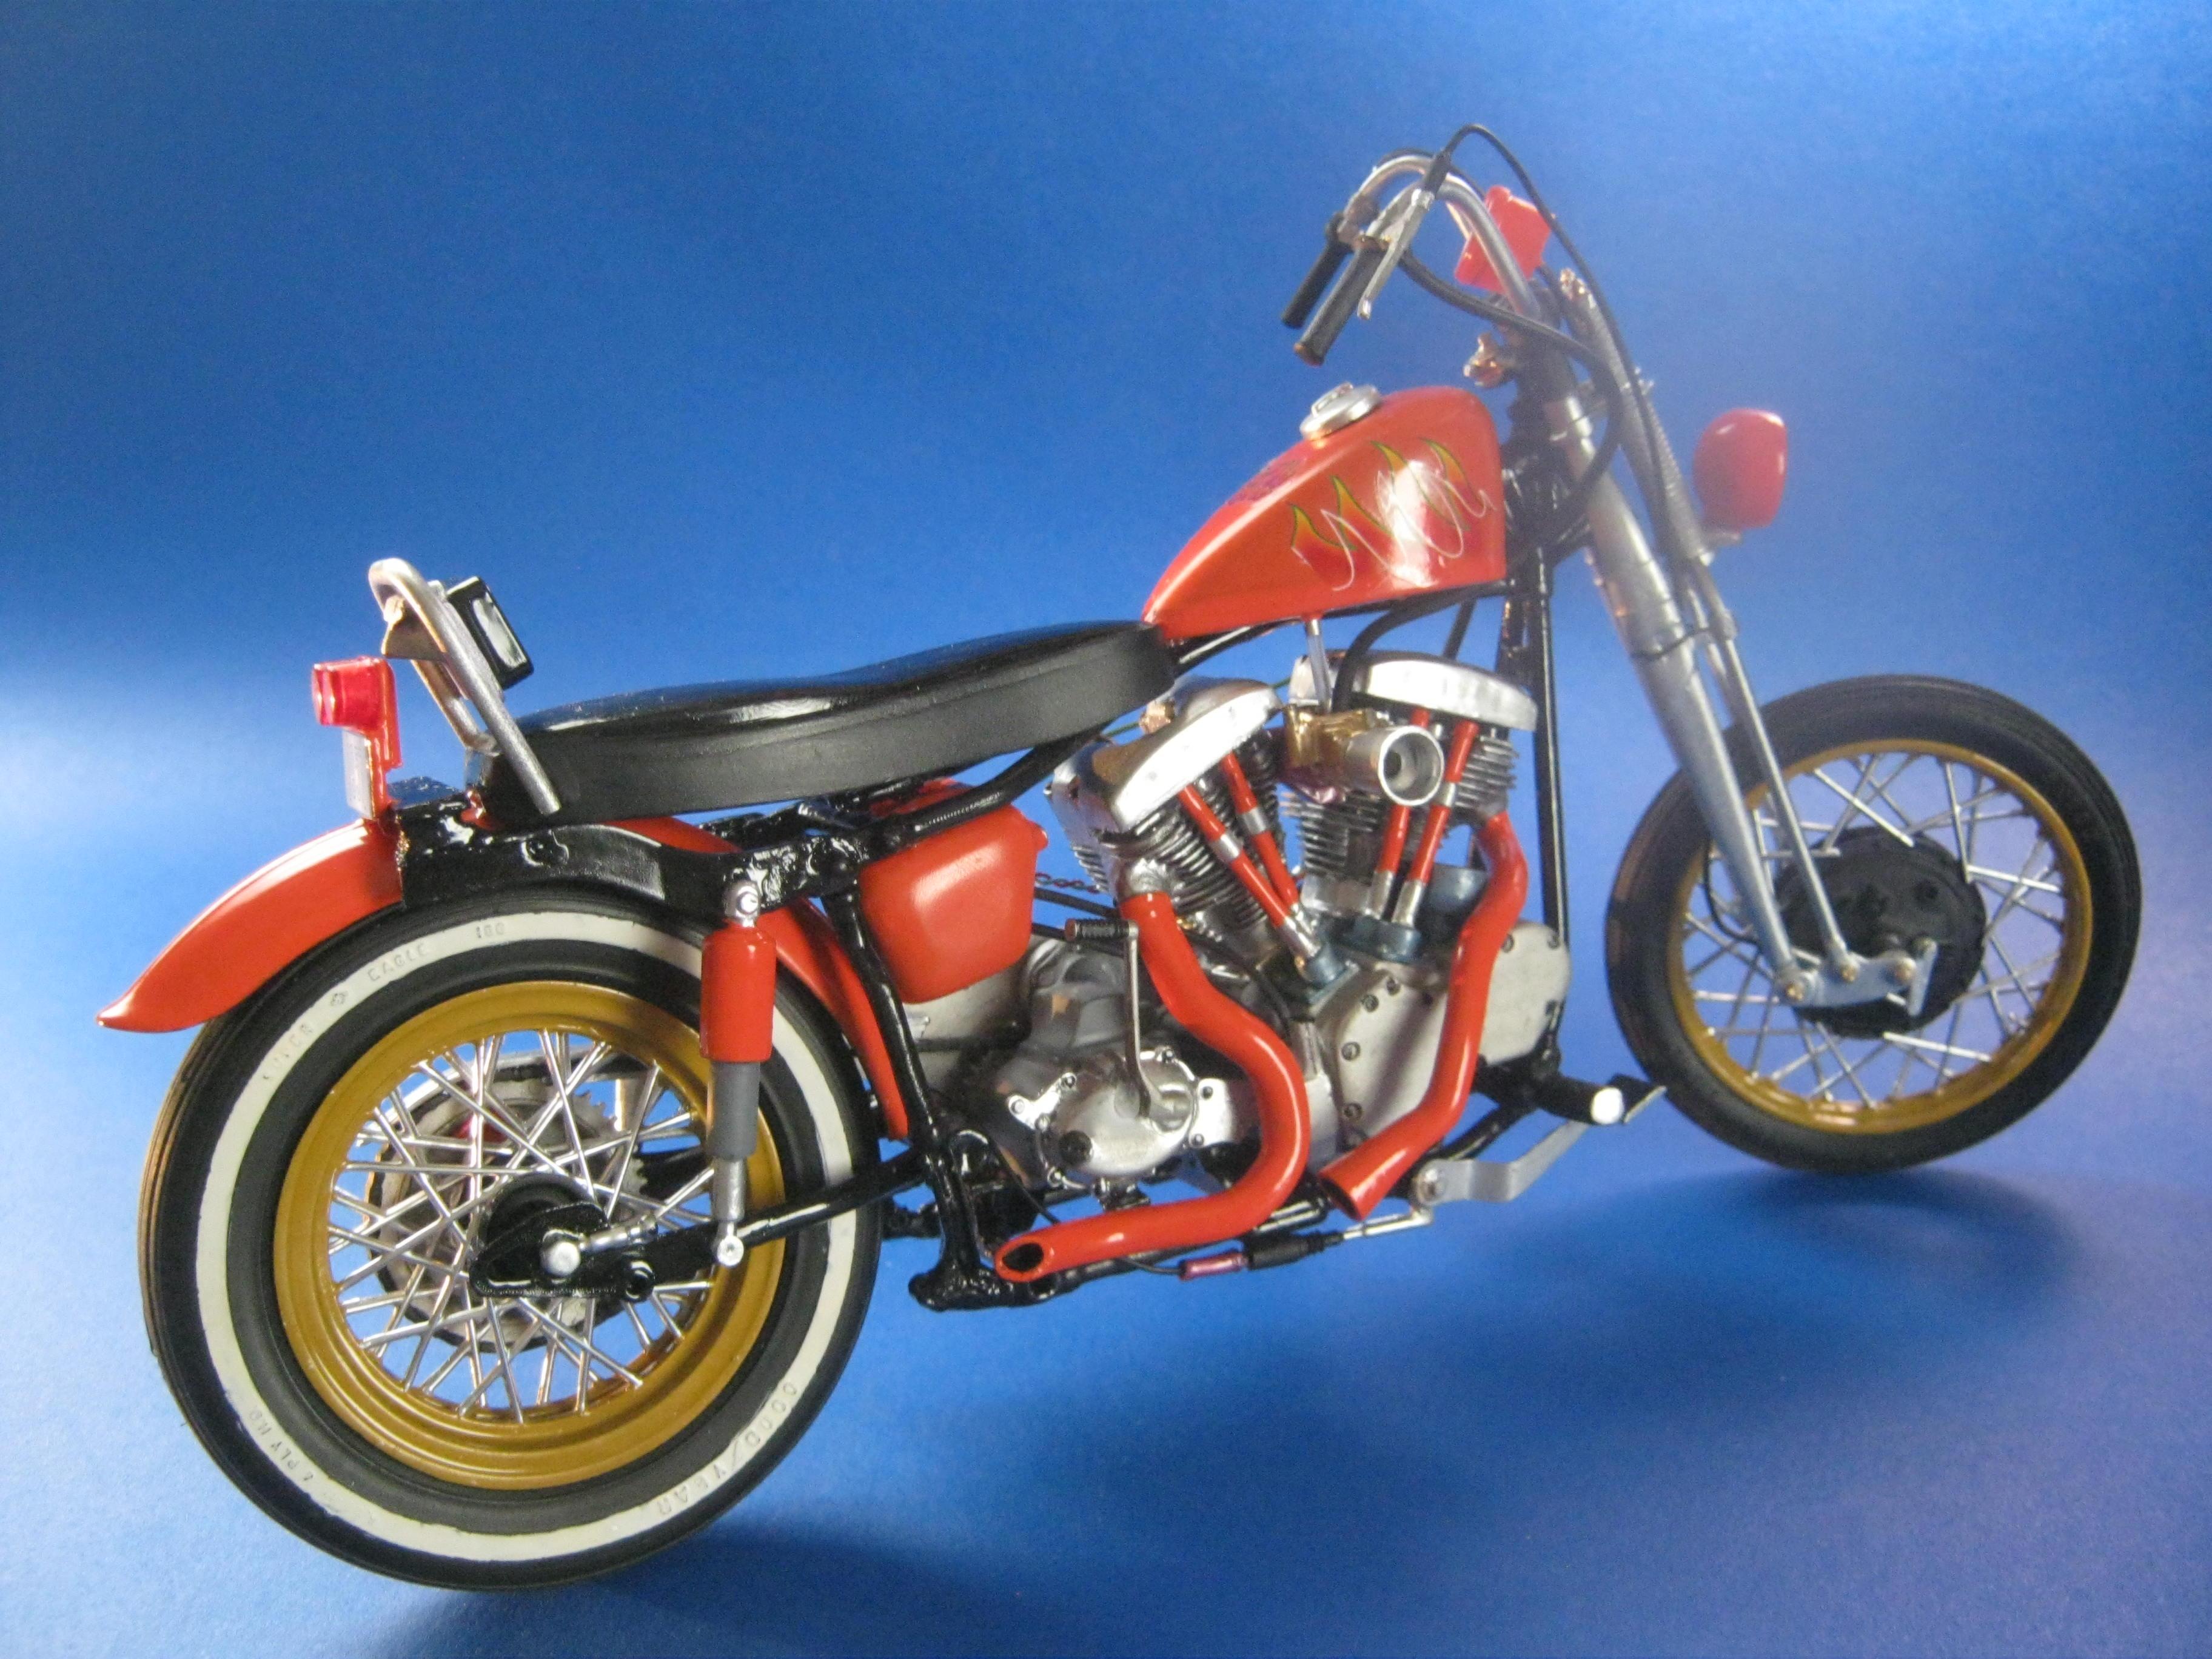
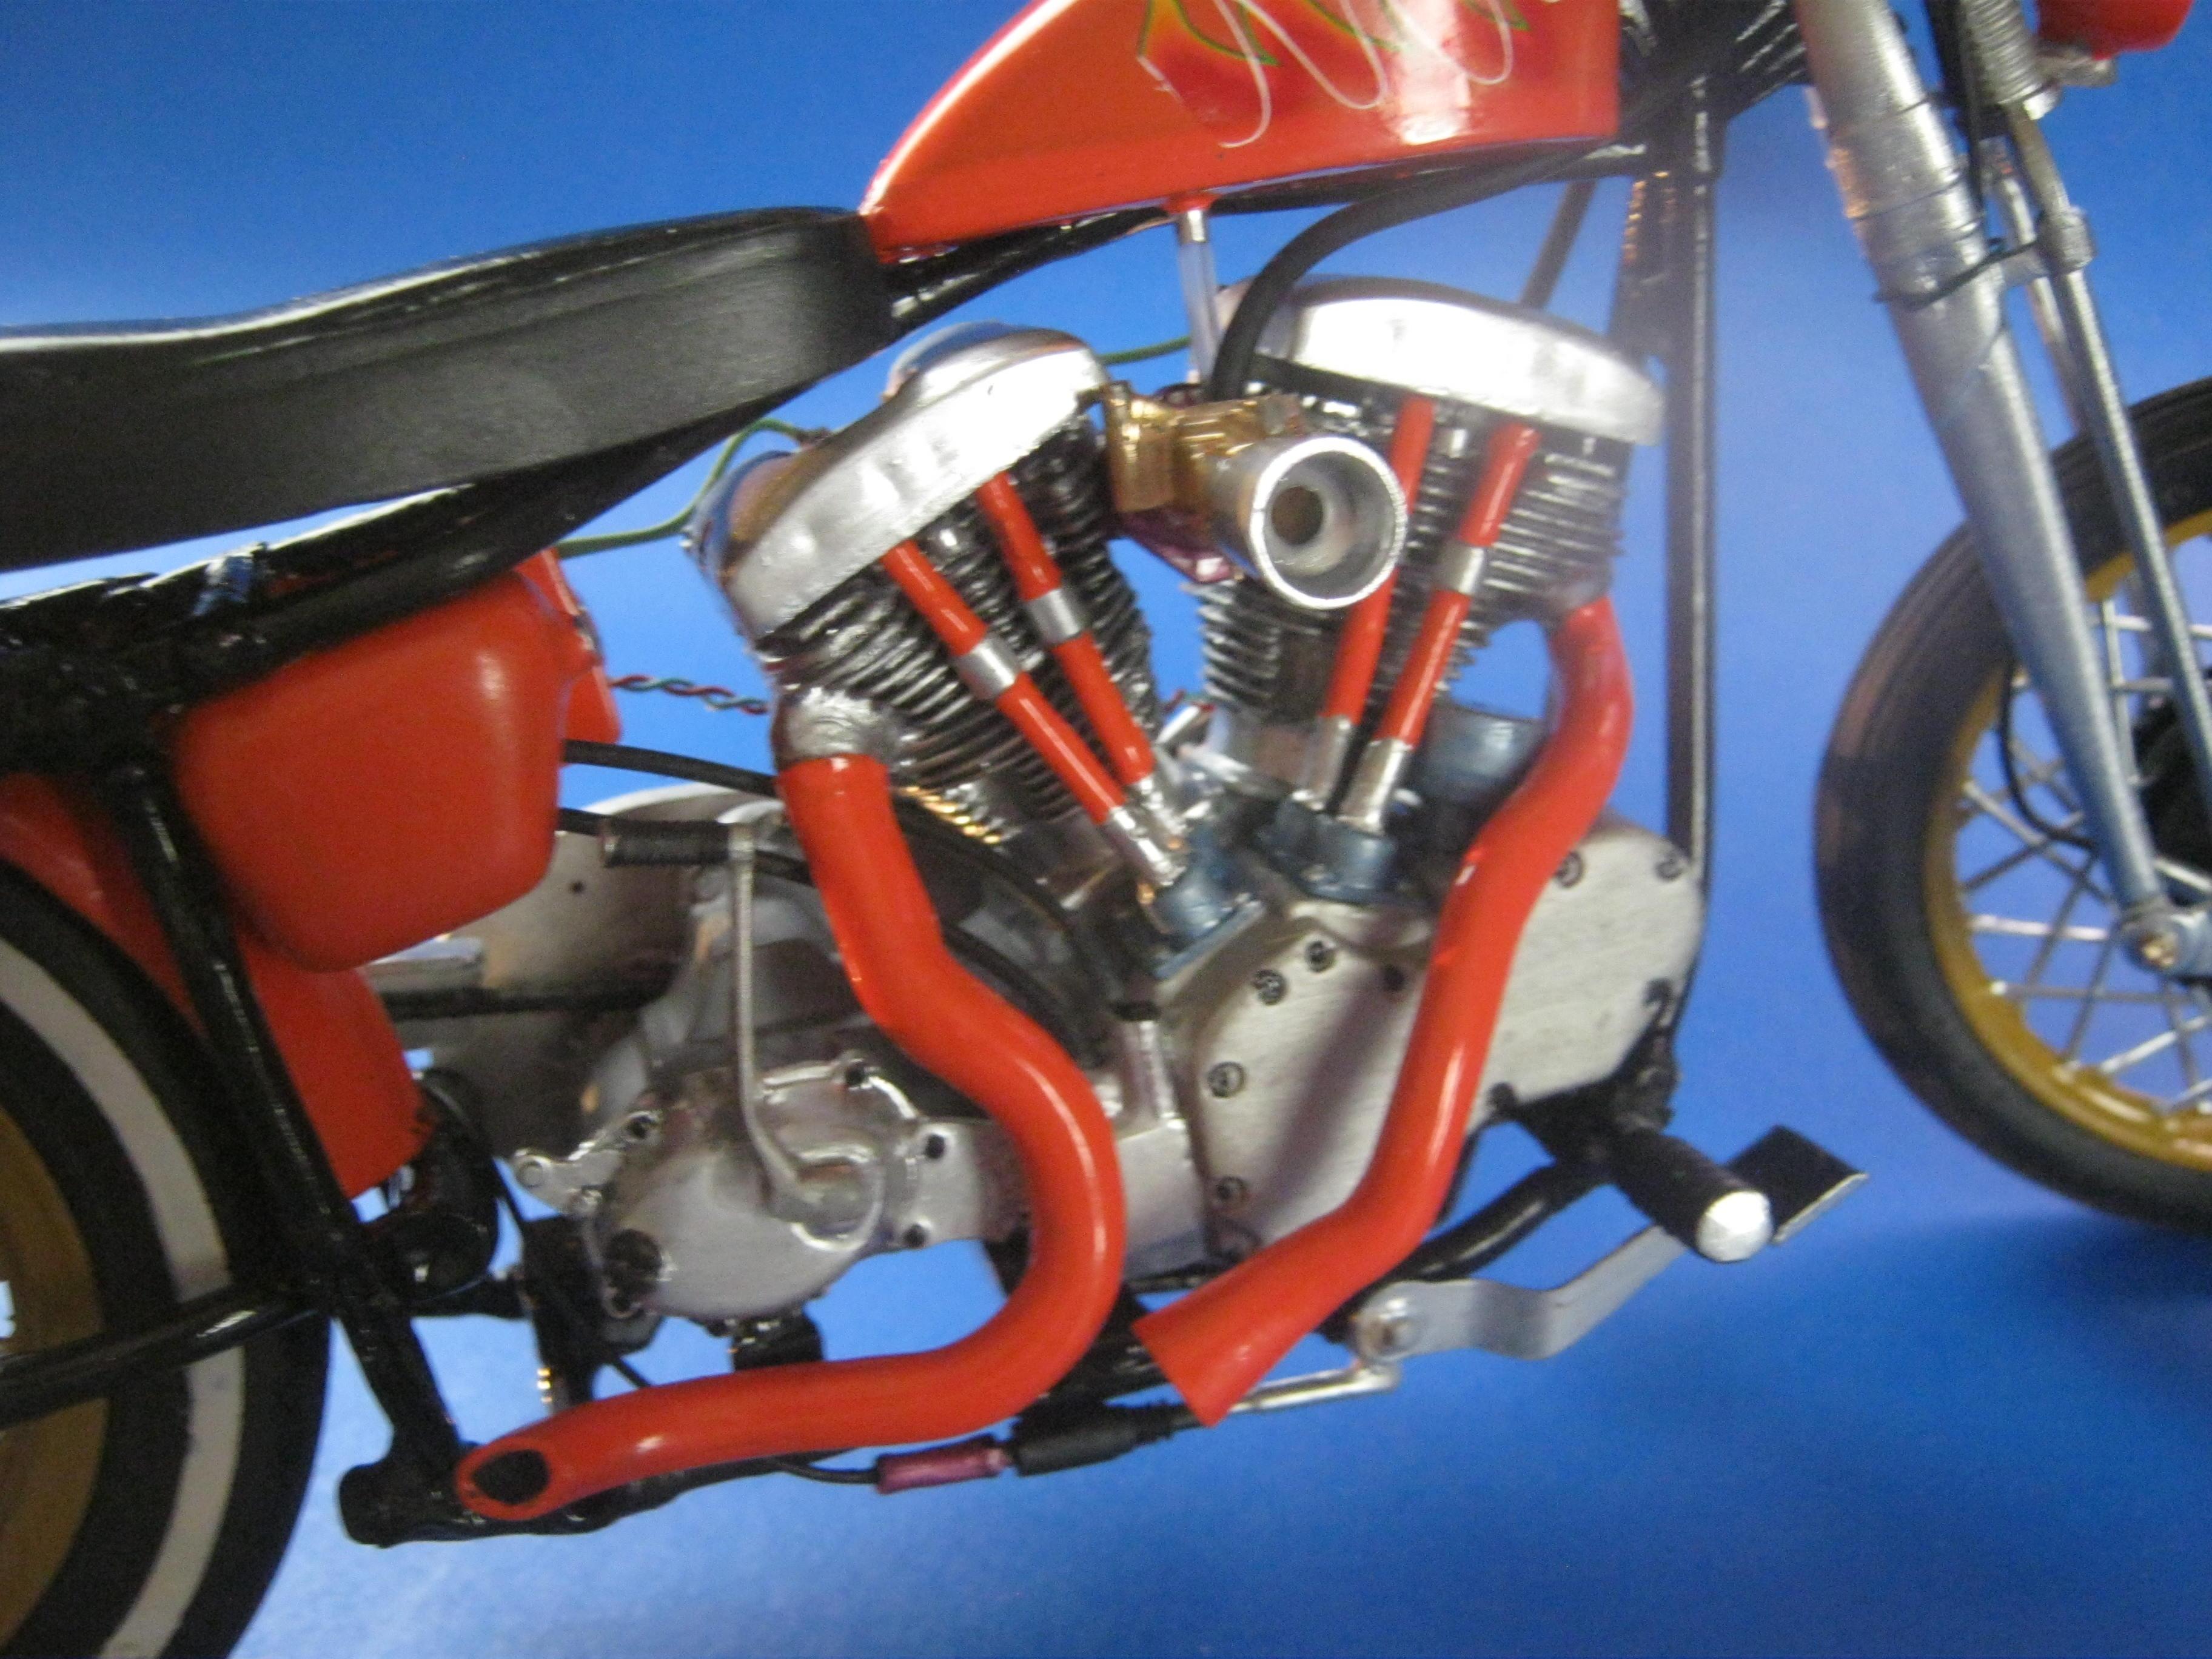
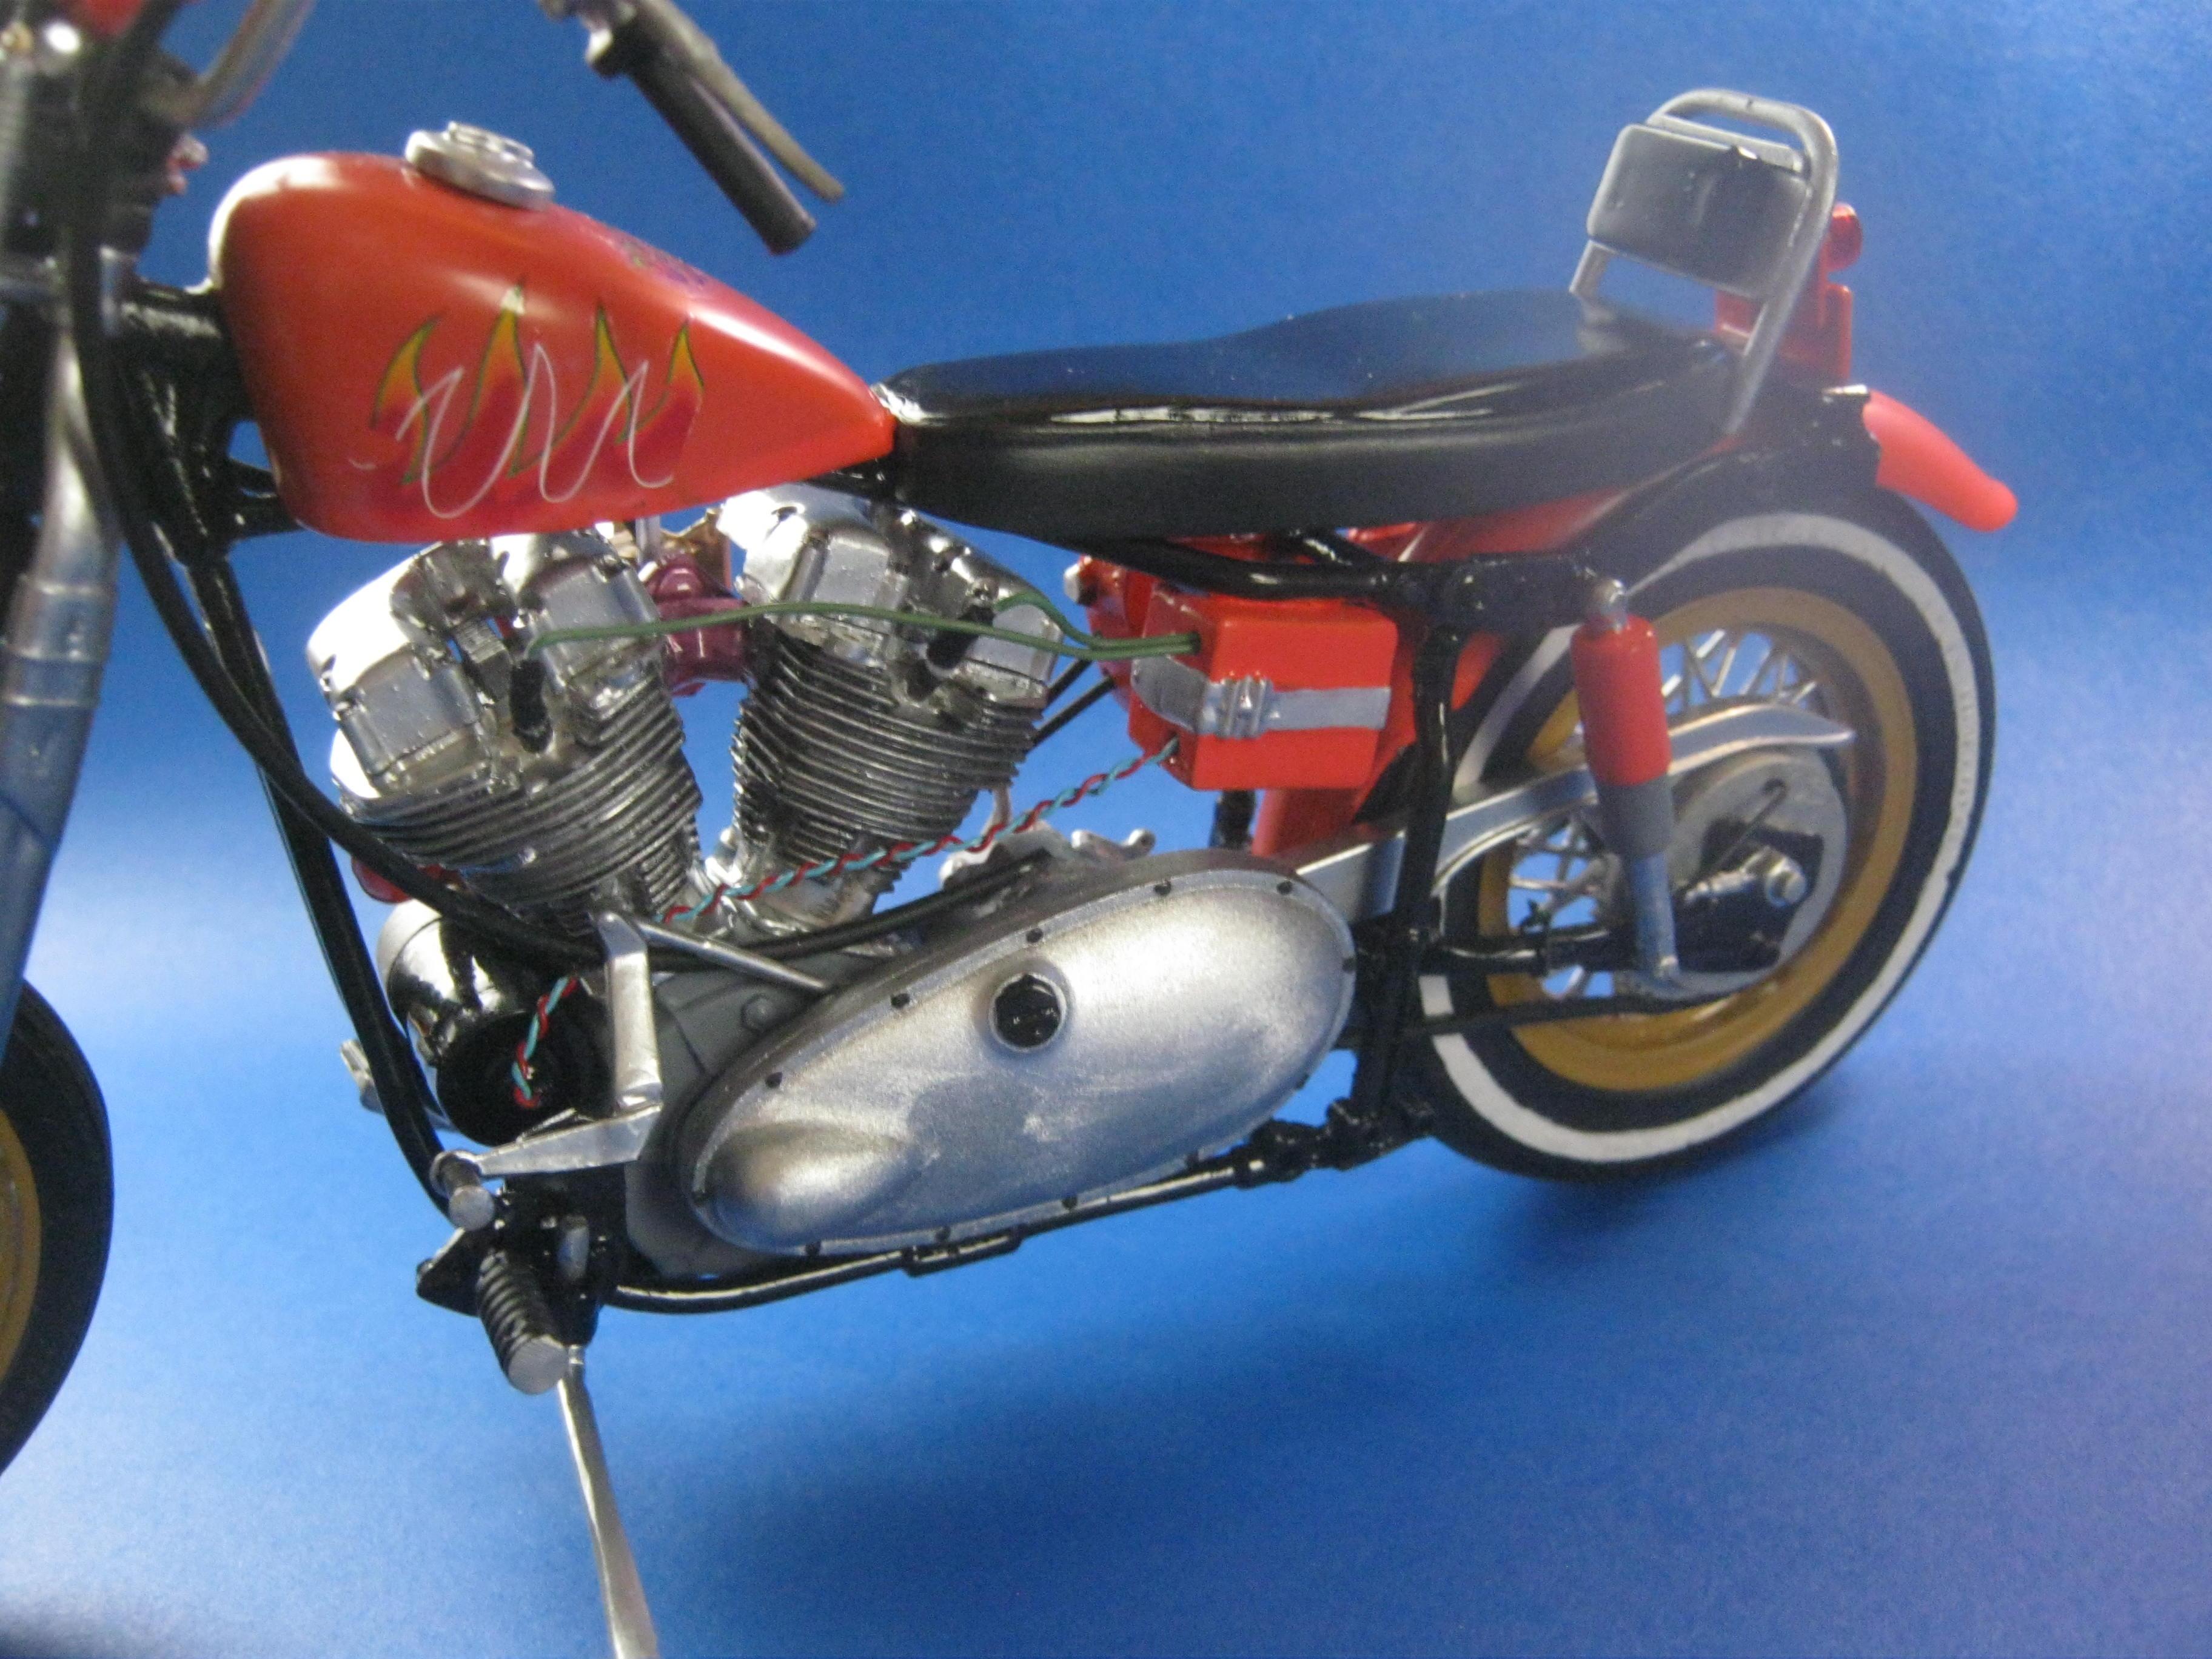
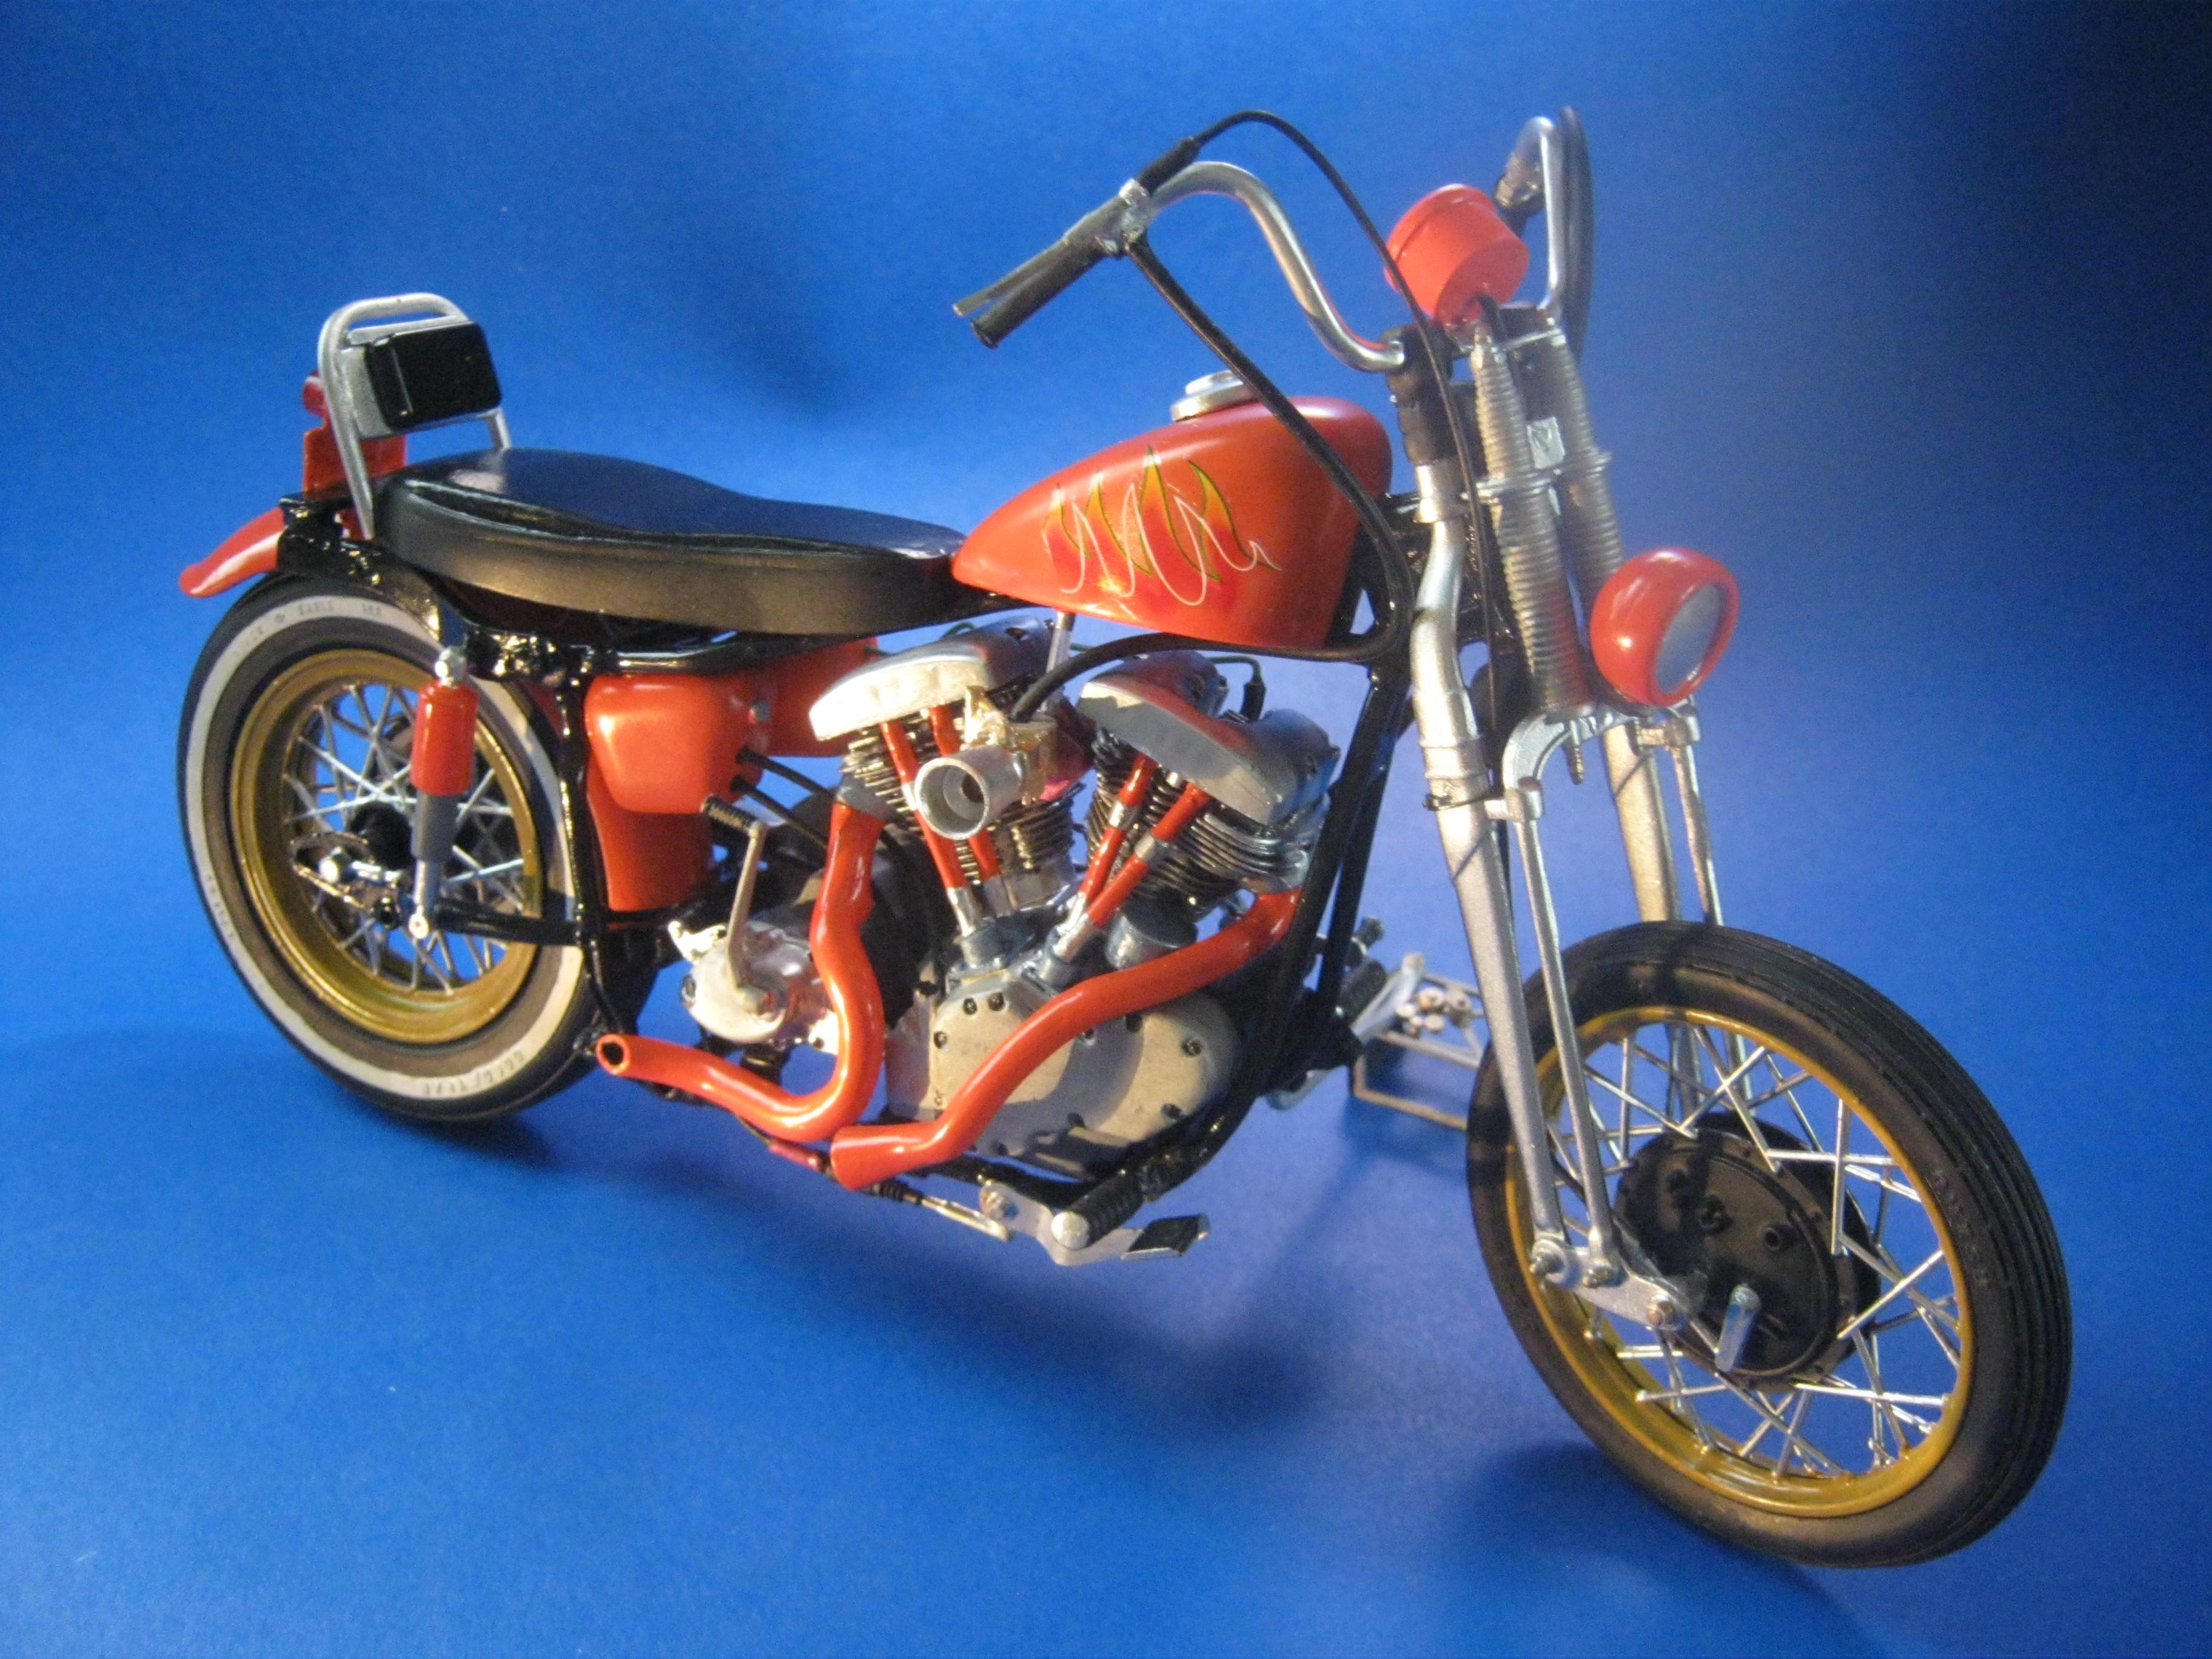
 Happy spring to all,,just finished this up,,its actually 3 large scale Revell kits in one. Started with glue blob 1/2 assembled bag of parts from the swap meets. The Revell large scale police bike,circa mid to late 70's for the motor and frame,back wheel. And then I used some leftover parts from the large scale Triumph chopper kits for drive box,,rear fender + oil + battery box,, And drag style seat. Front springer ++ handlebars are from the large scale snap harley kit from the 1990's. Front wheel is from one of the ol Revell drag bike kits as is the speedometer+light. Scratch built the rear grab bar + and plate/rear light setup. Sprayed rattlecan testors orange,,hand painted everything else. Decent results from glueblob bag for 5 $ Thnx for lookin.
-
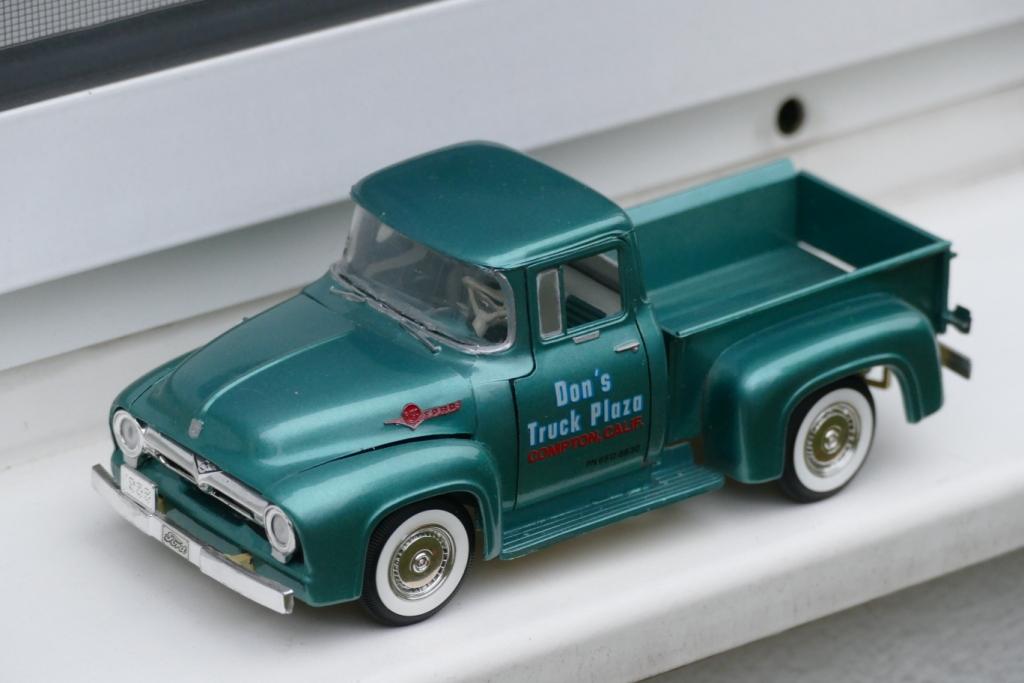
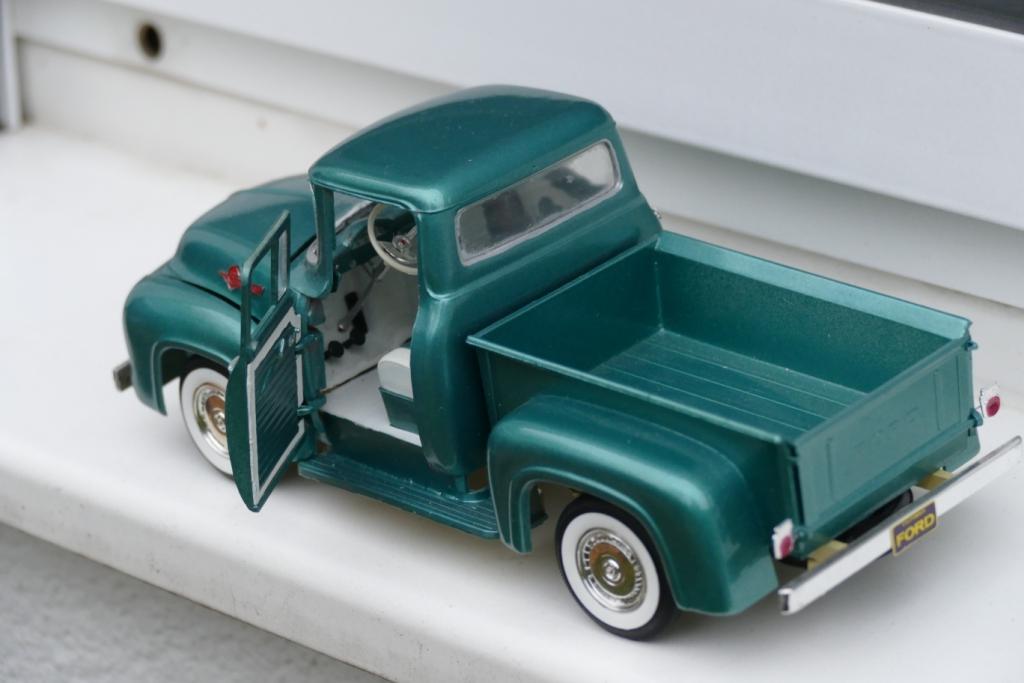
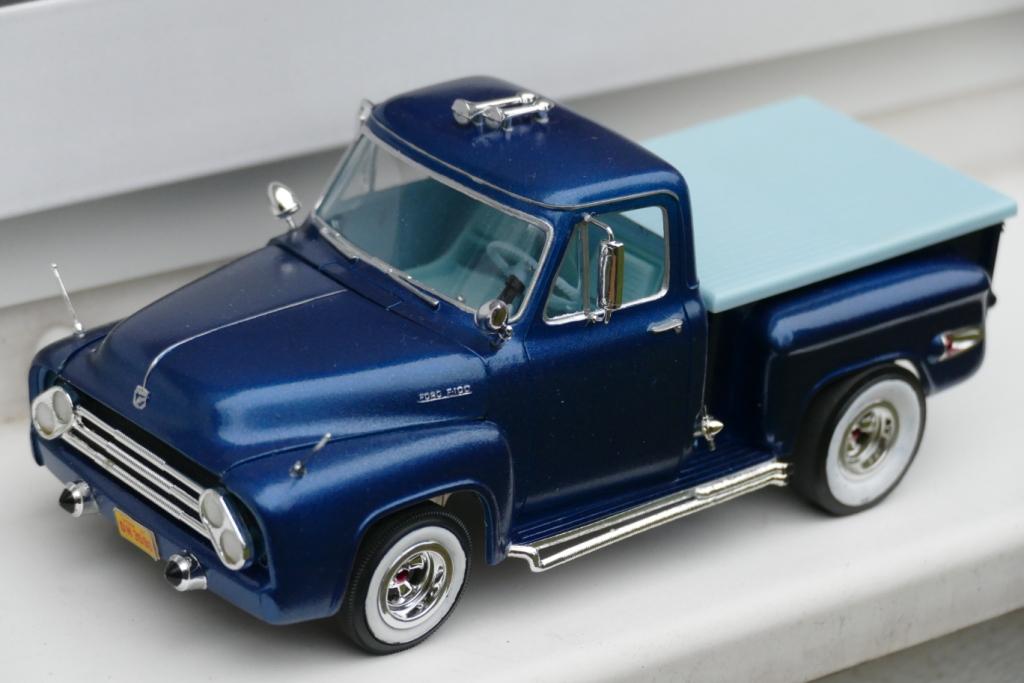
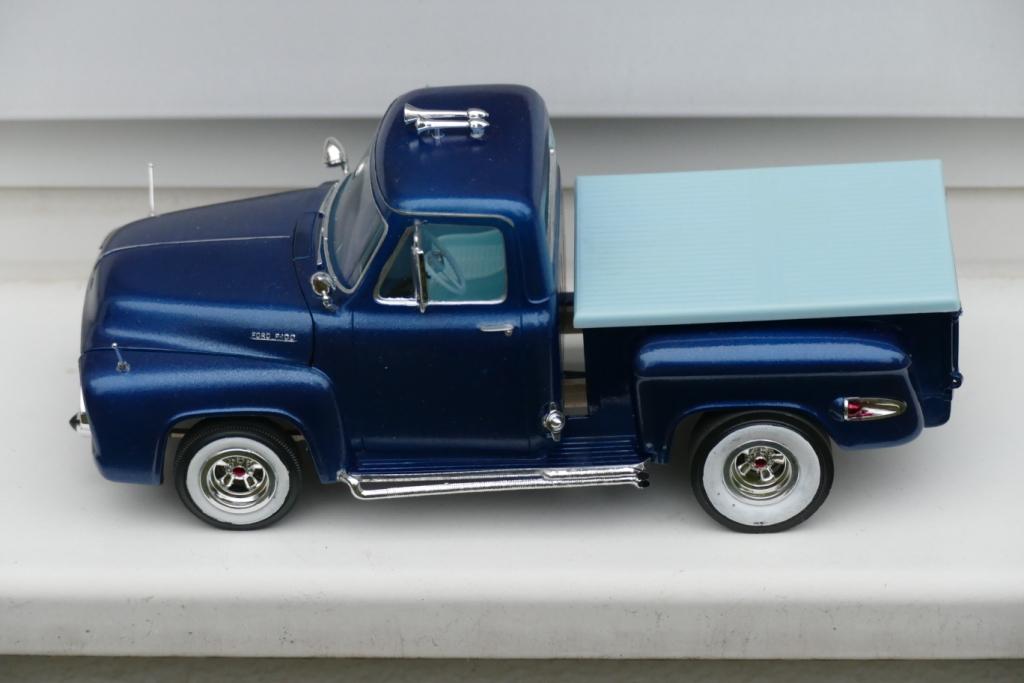
 2 old builts from the mid 80's (pictures taken in 2020,beforse selling them off): The notorious F-100/1956 (Revell kit) is from the 1983 "Street Demons" series and could not be built stock - I discarded the ugly 2-piece plastic wheels and replaced them with Monogram's 56 T-Bird units. The interior is also customized - this kit gave me hard times: fitment was very bad, especially in the windshield/firewall/hood and the interior footwell/floor area - horrible (noticeable gaps everywhere) ! Decals are from amt's Pete Wrecker, color is car laquer sprayed from the can: The other one is amt's famous 1953 F-100 kit: I wanted it to look like a typical (?) late 50's custom so I used as many of those ugly custom parts (which were included in the kit) as I could stand; auto laquer from the spray-can, whitewalls are brushed with Humbrol matt white enamel - trim Humbrol silver, bare metal foil for the rails in the bed - this was the final result:
-
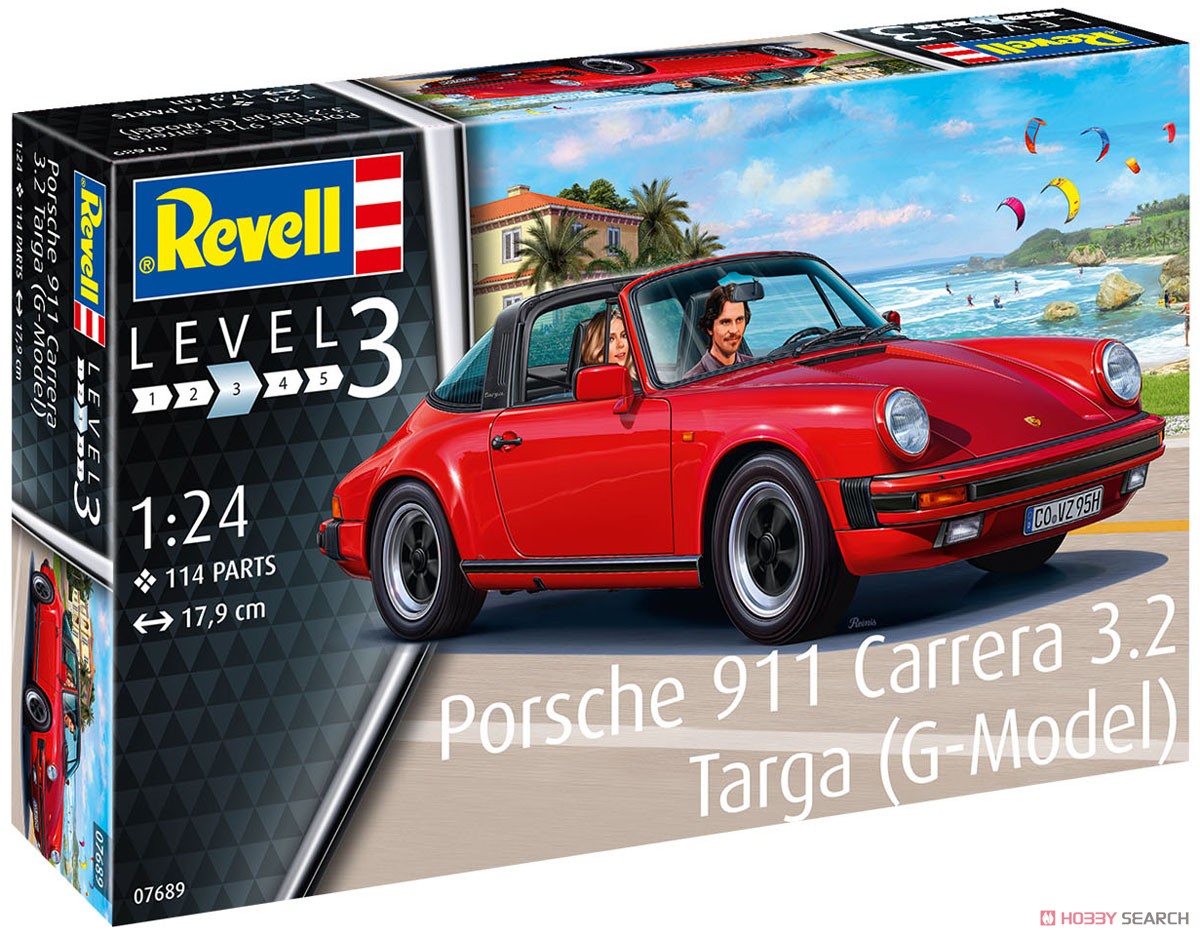
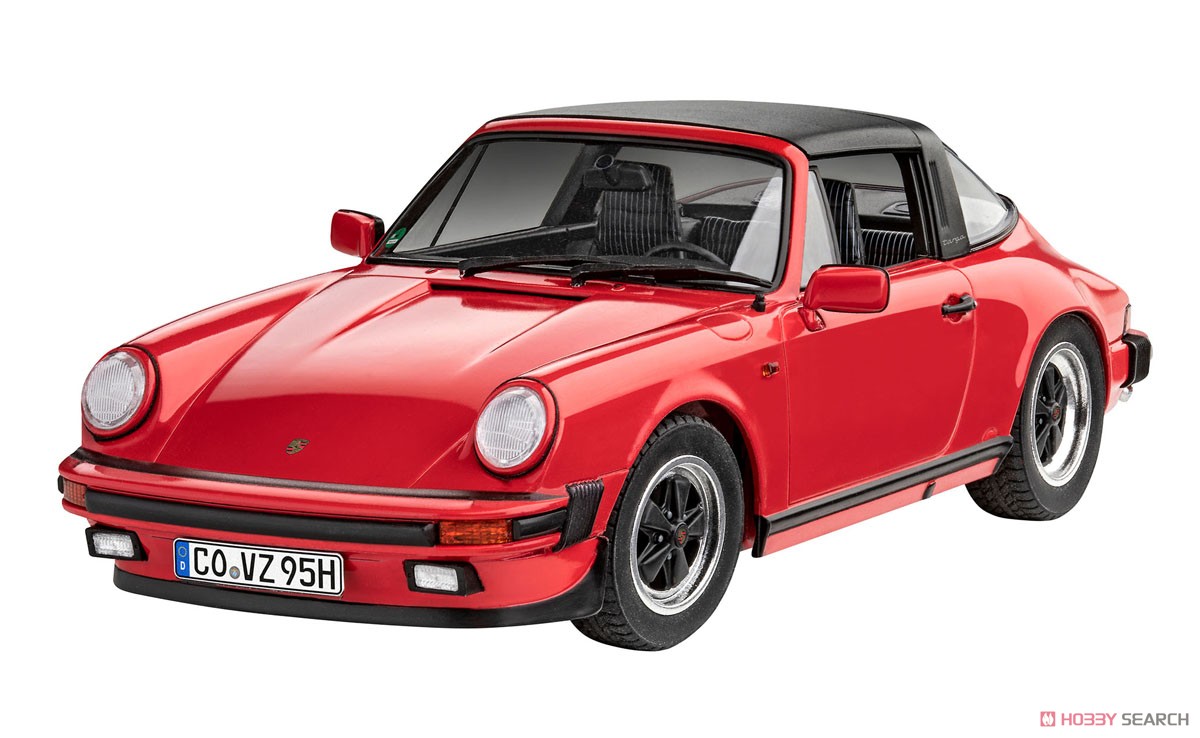
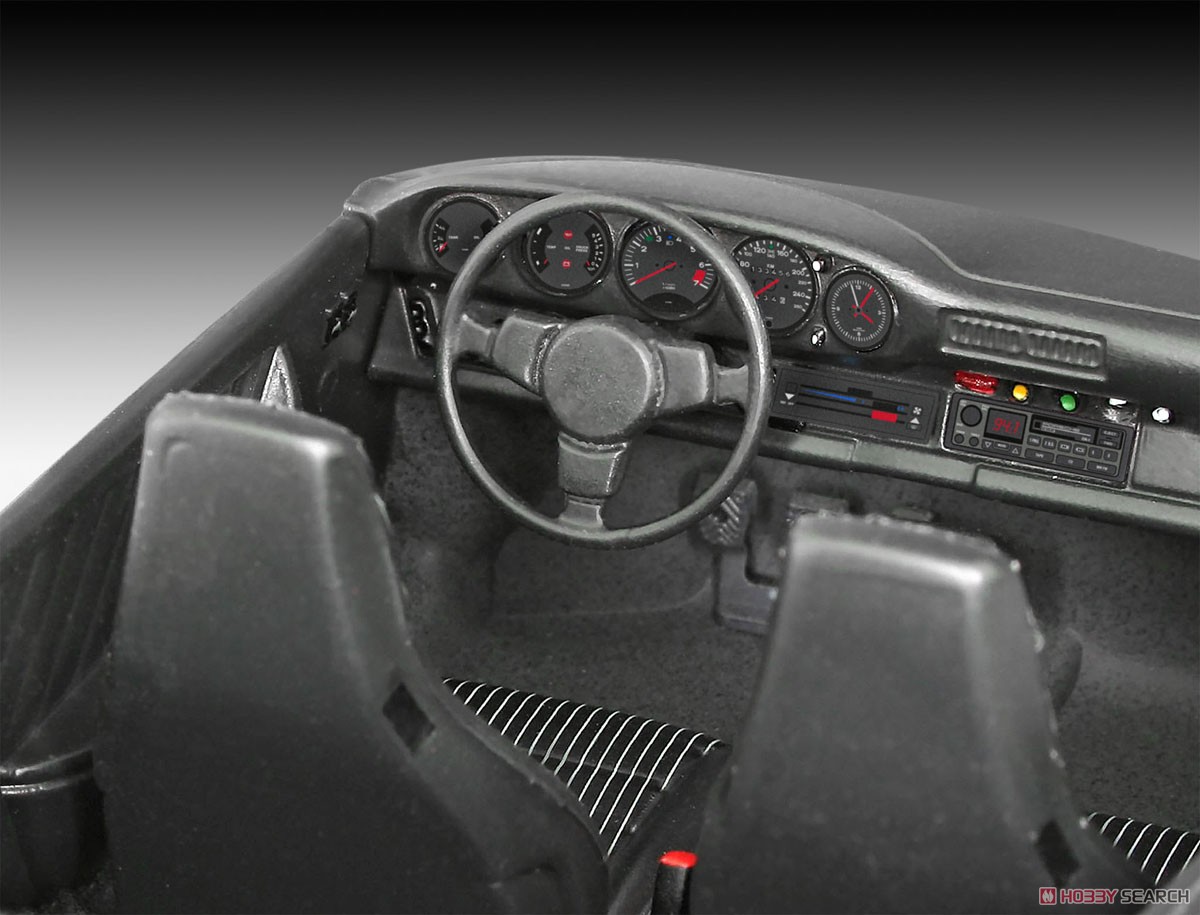
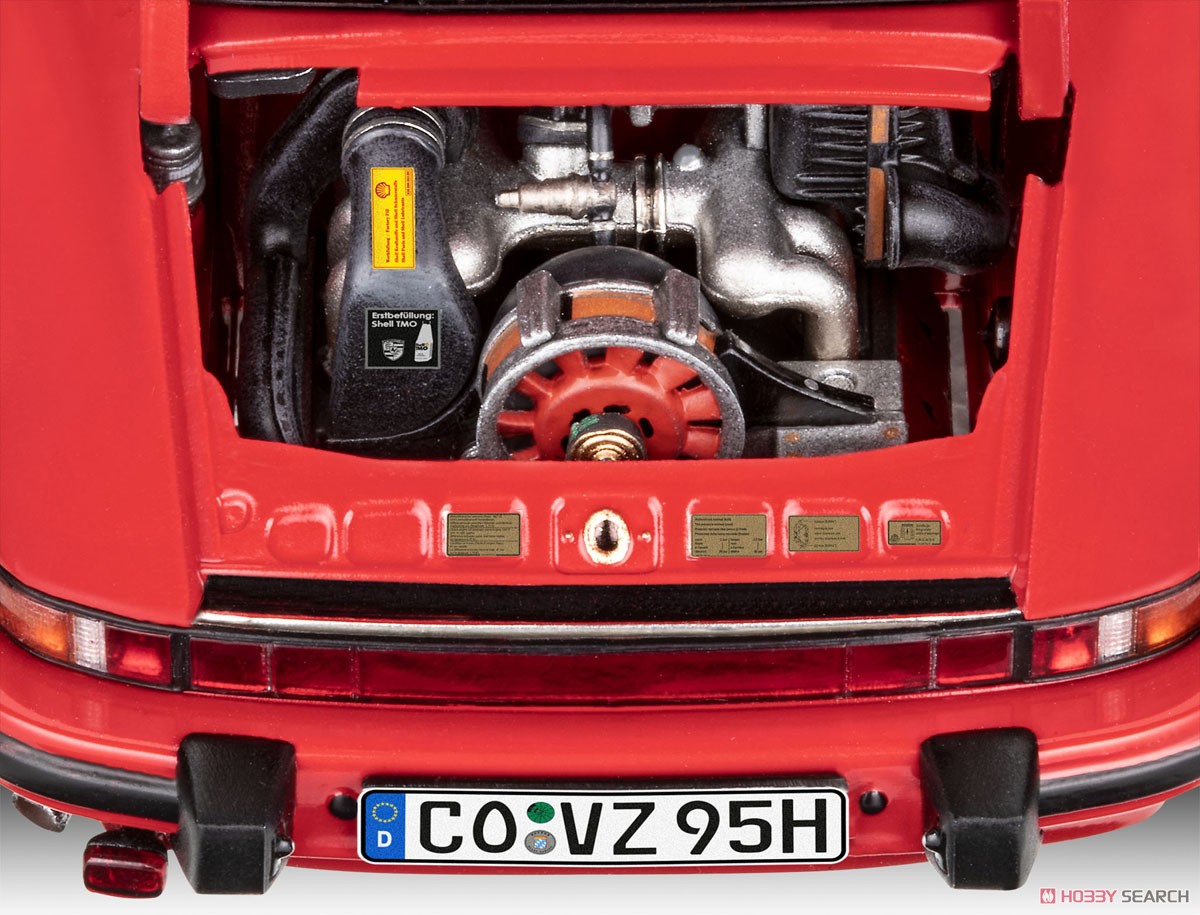
Following James breaking the news on this kit at the IPMS show, found here...: I figured there'd be enough interest in this kit to merit a topic of it own. All pics found here: https://www.1999.co.jp/eng/10807406
- 31 replies
-
- 1
-
-
- revell
- porsche 911
- (and 2 more)
-
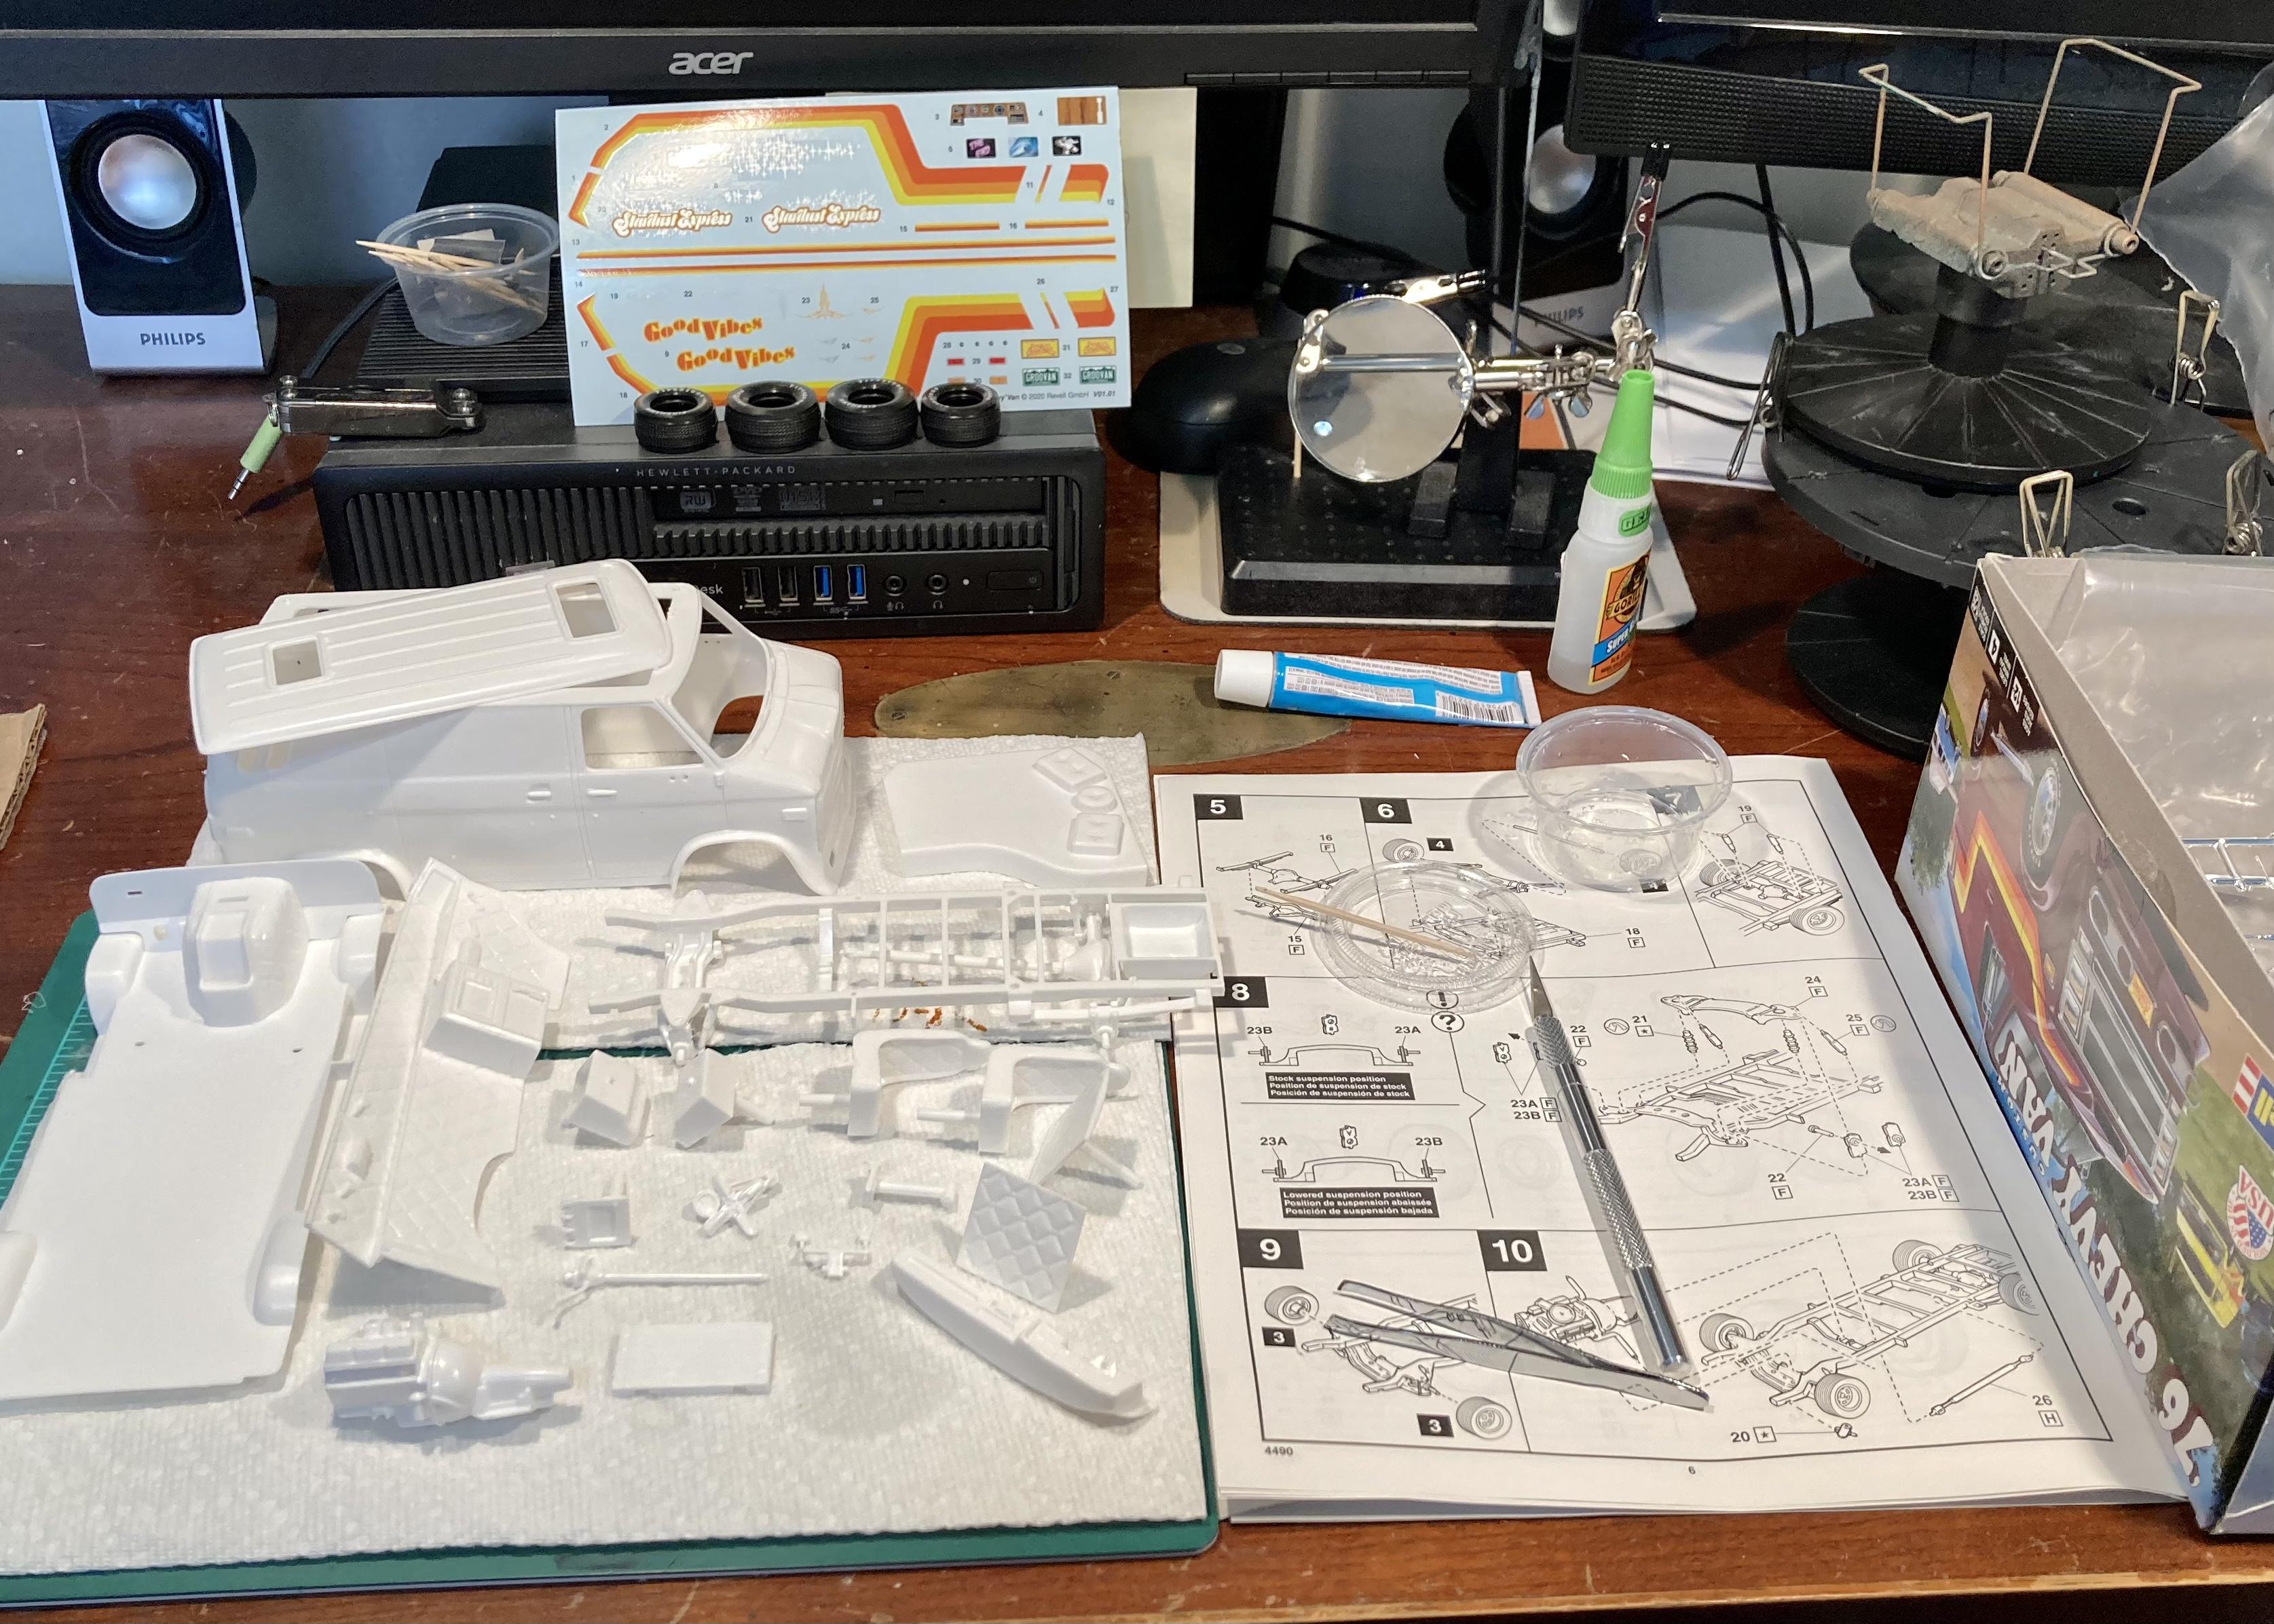
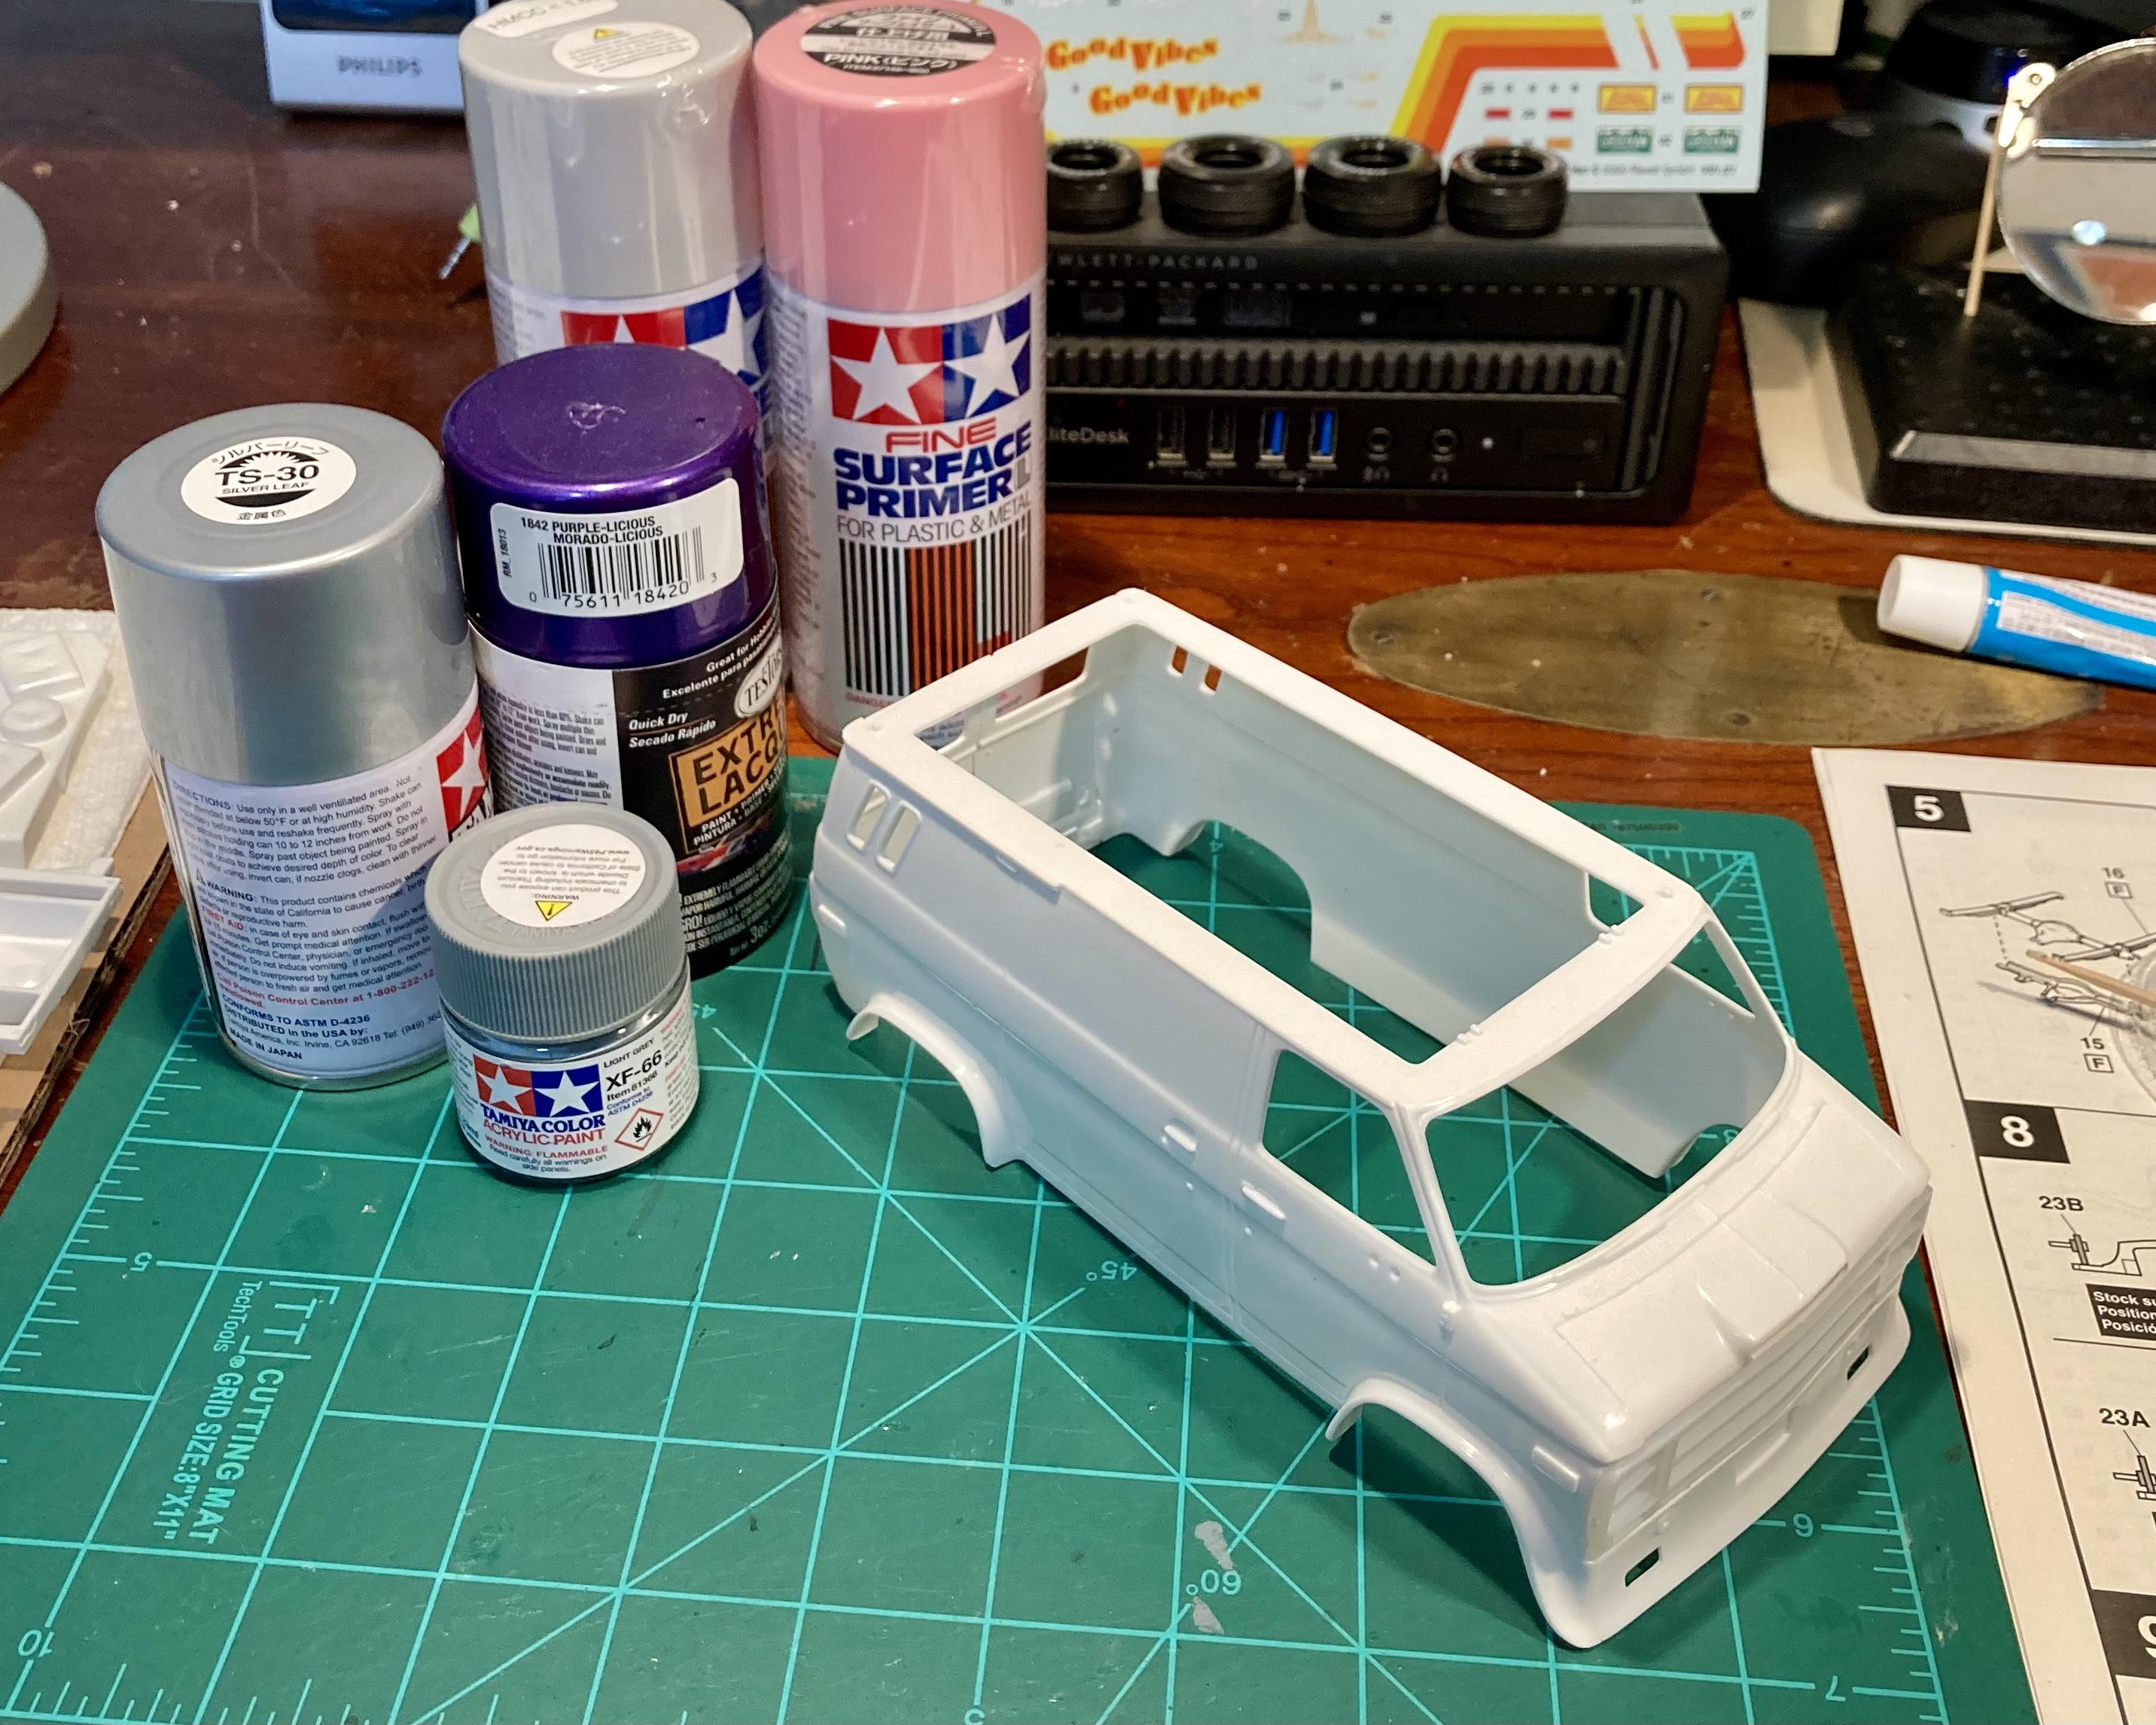
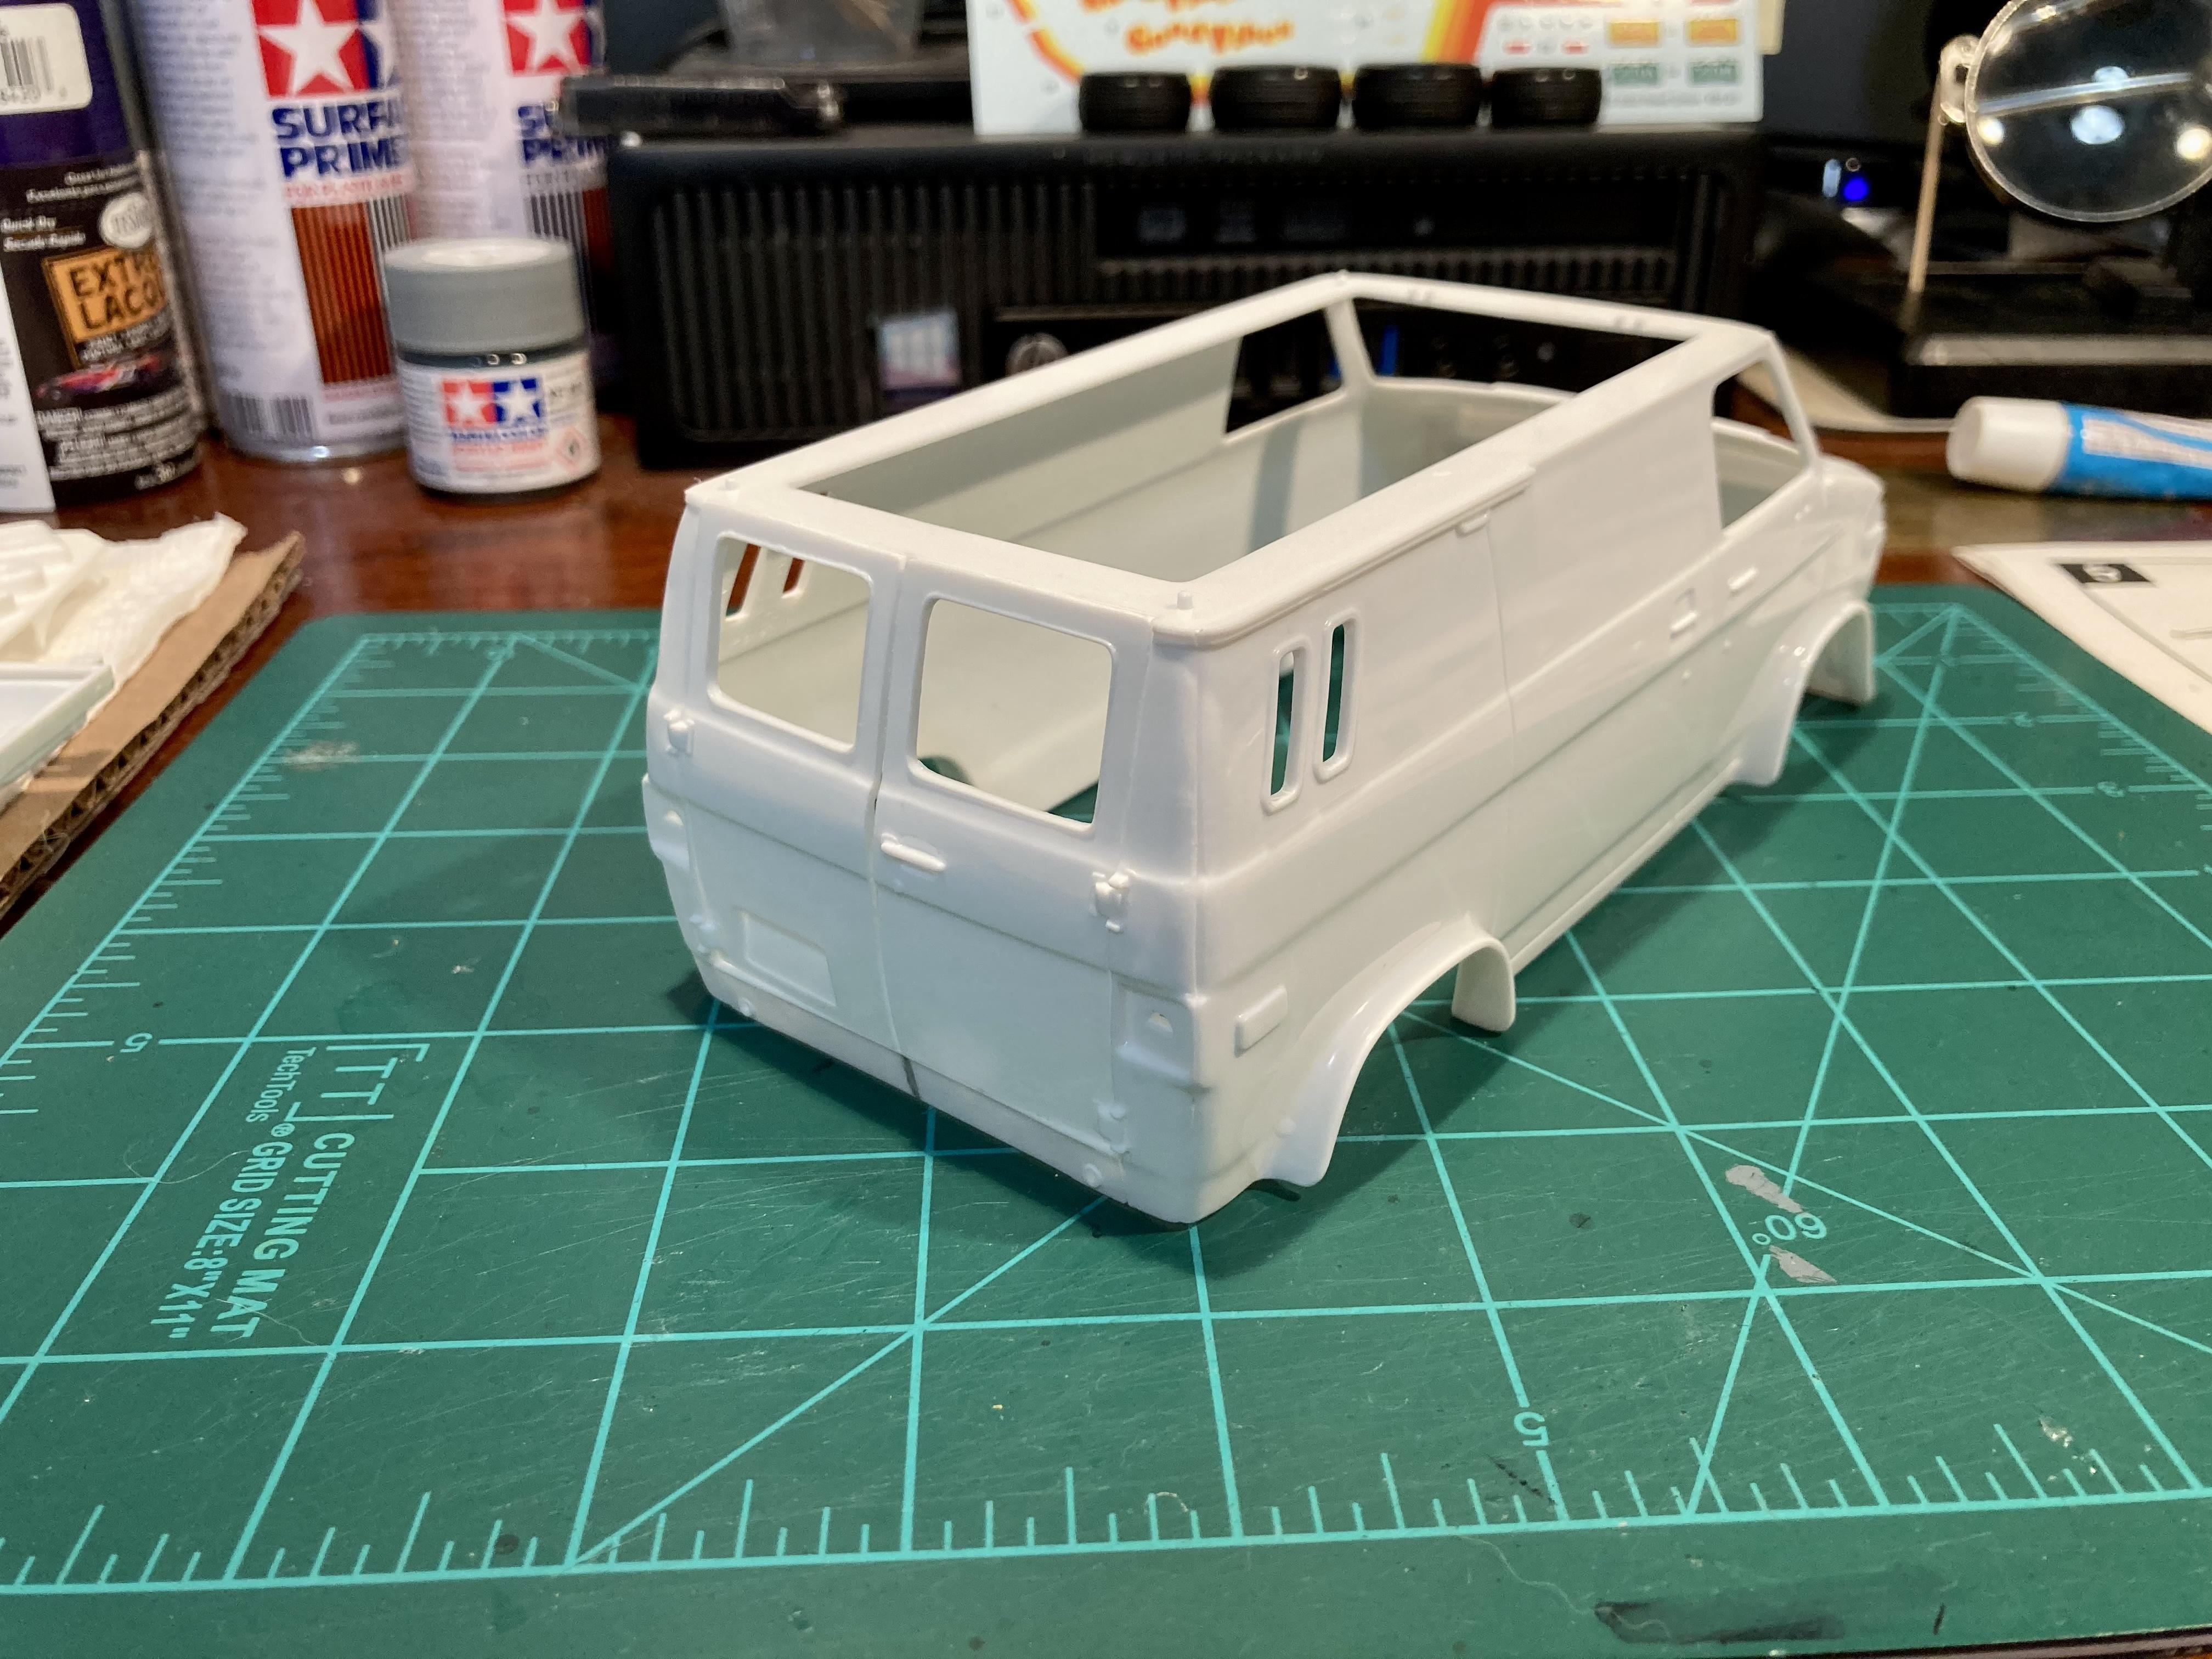
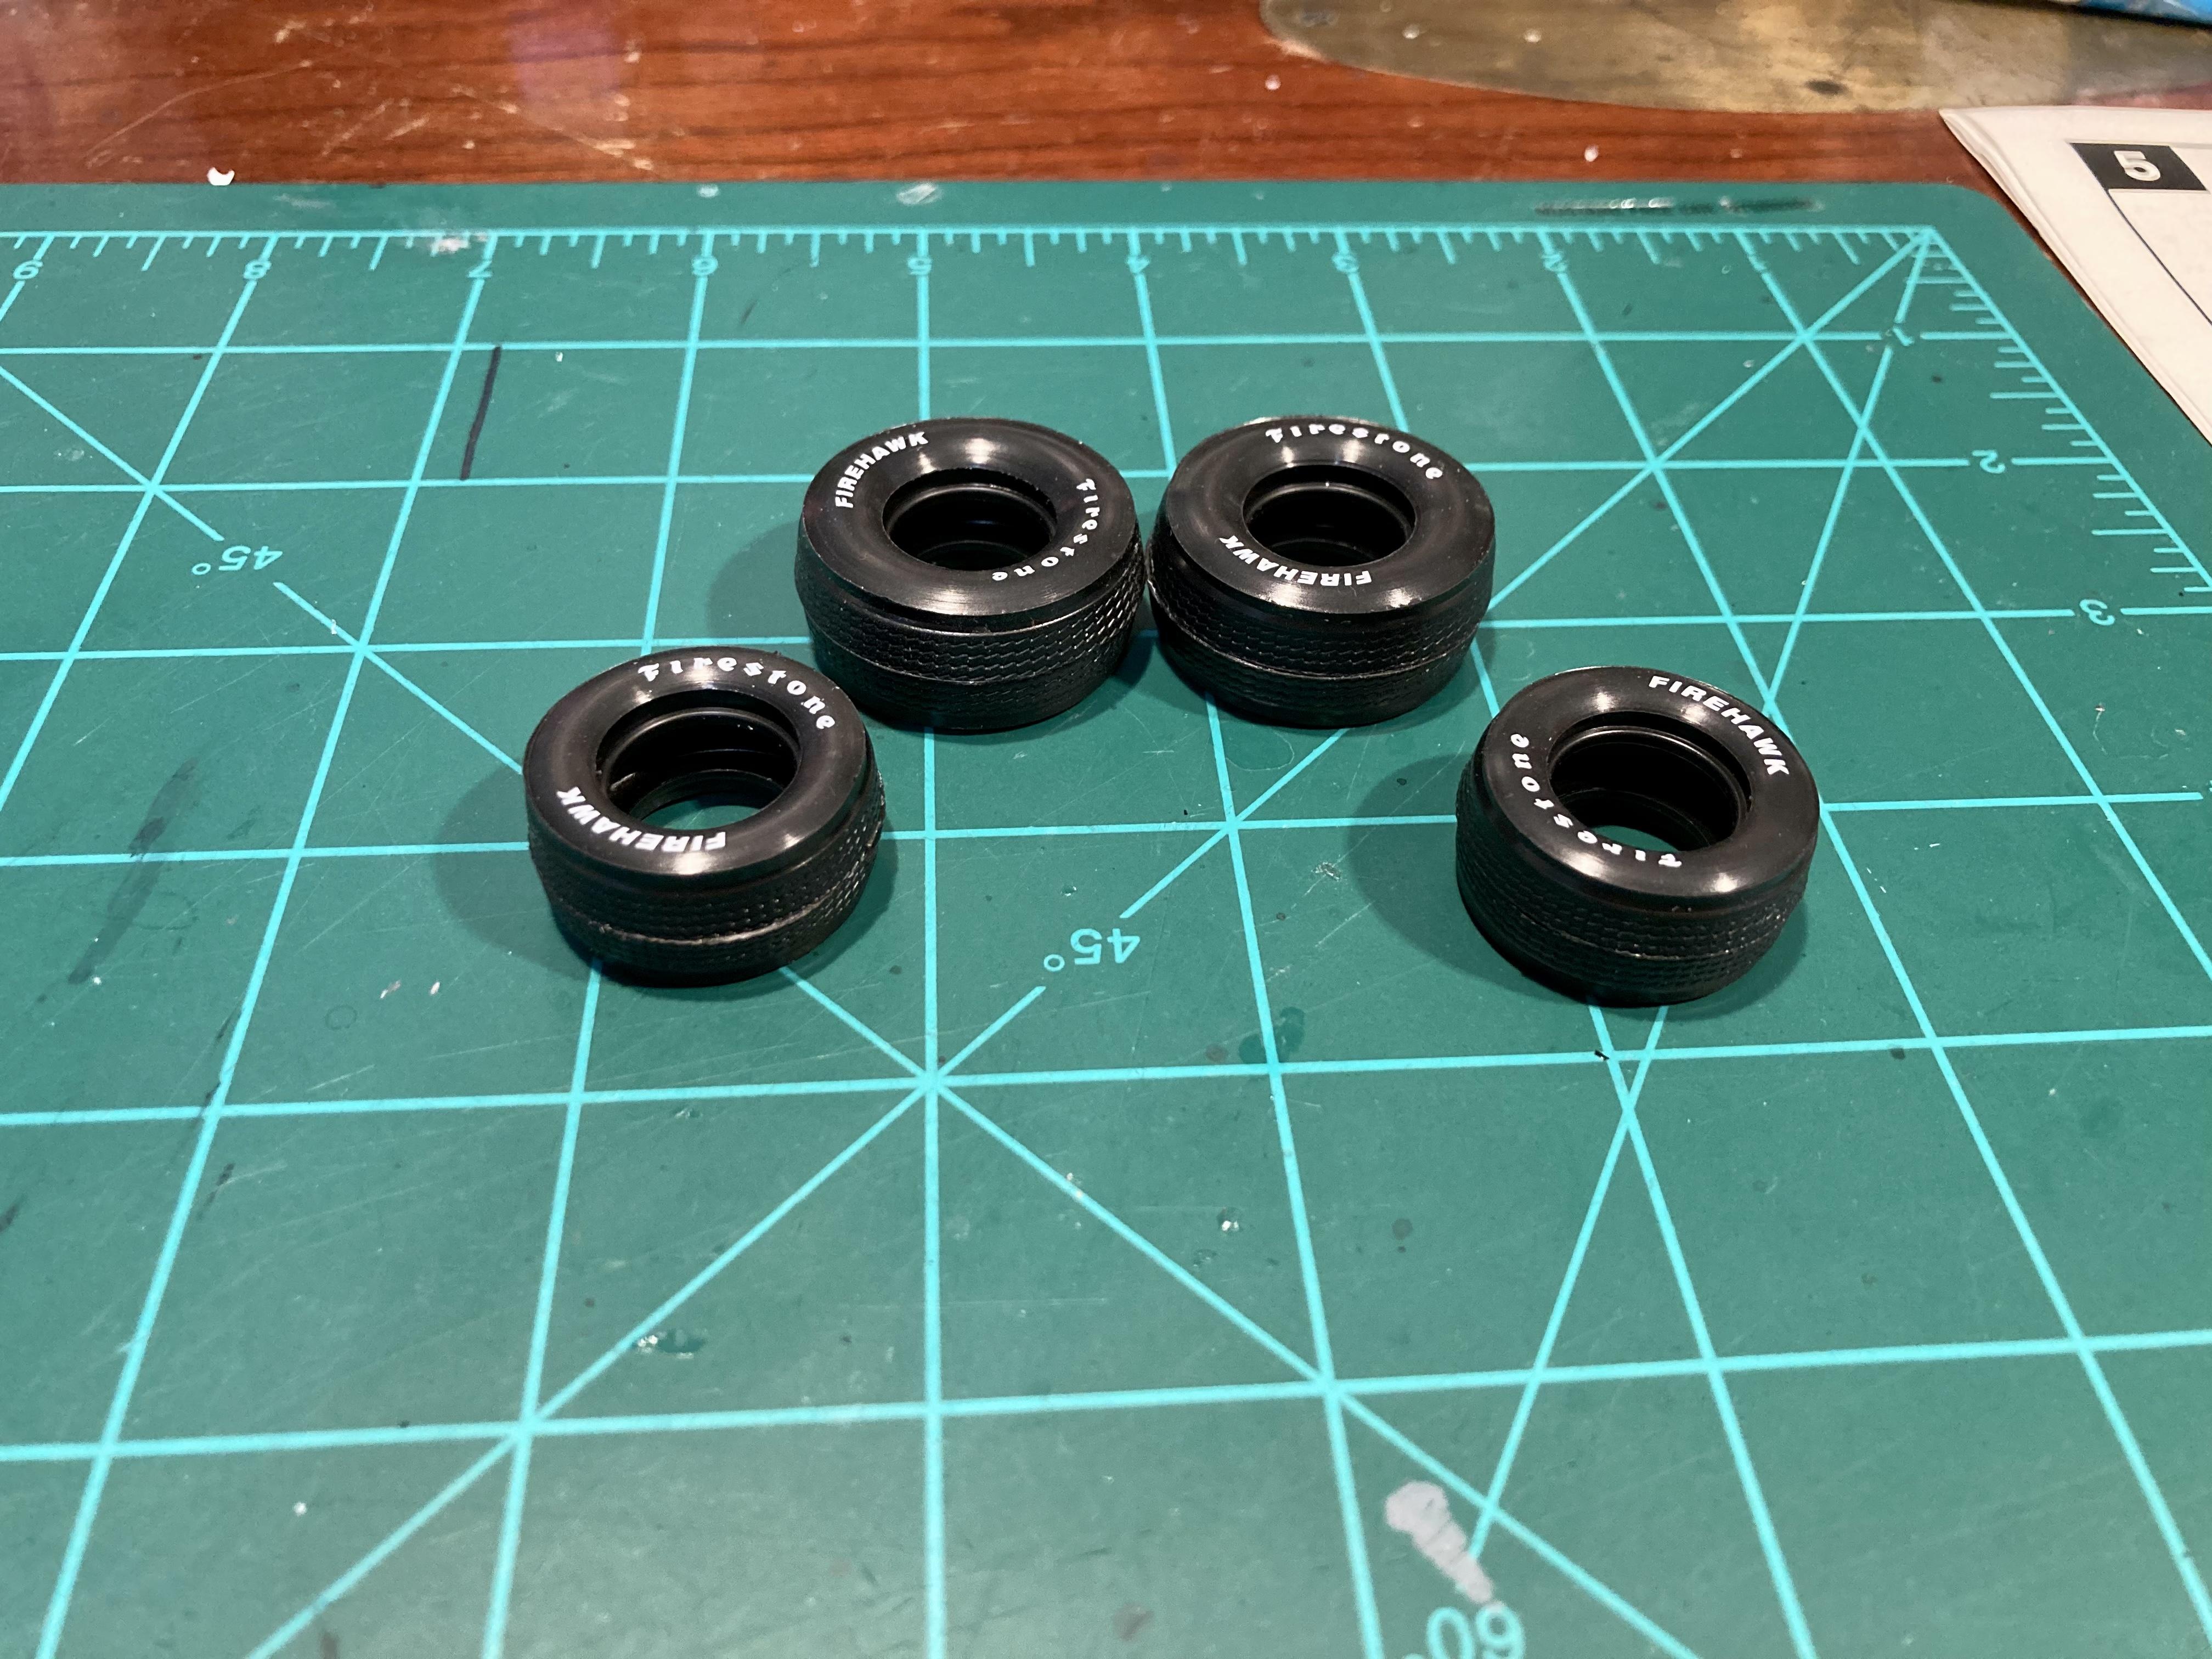
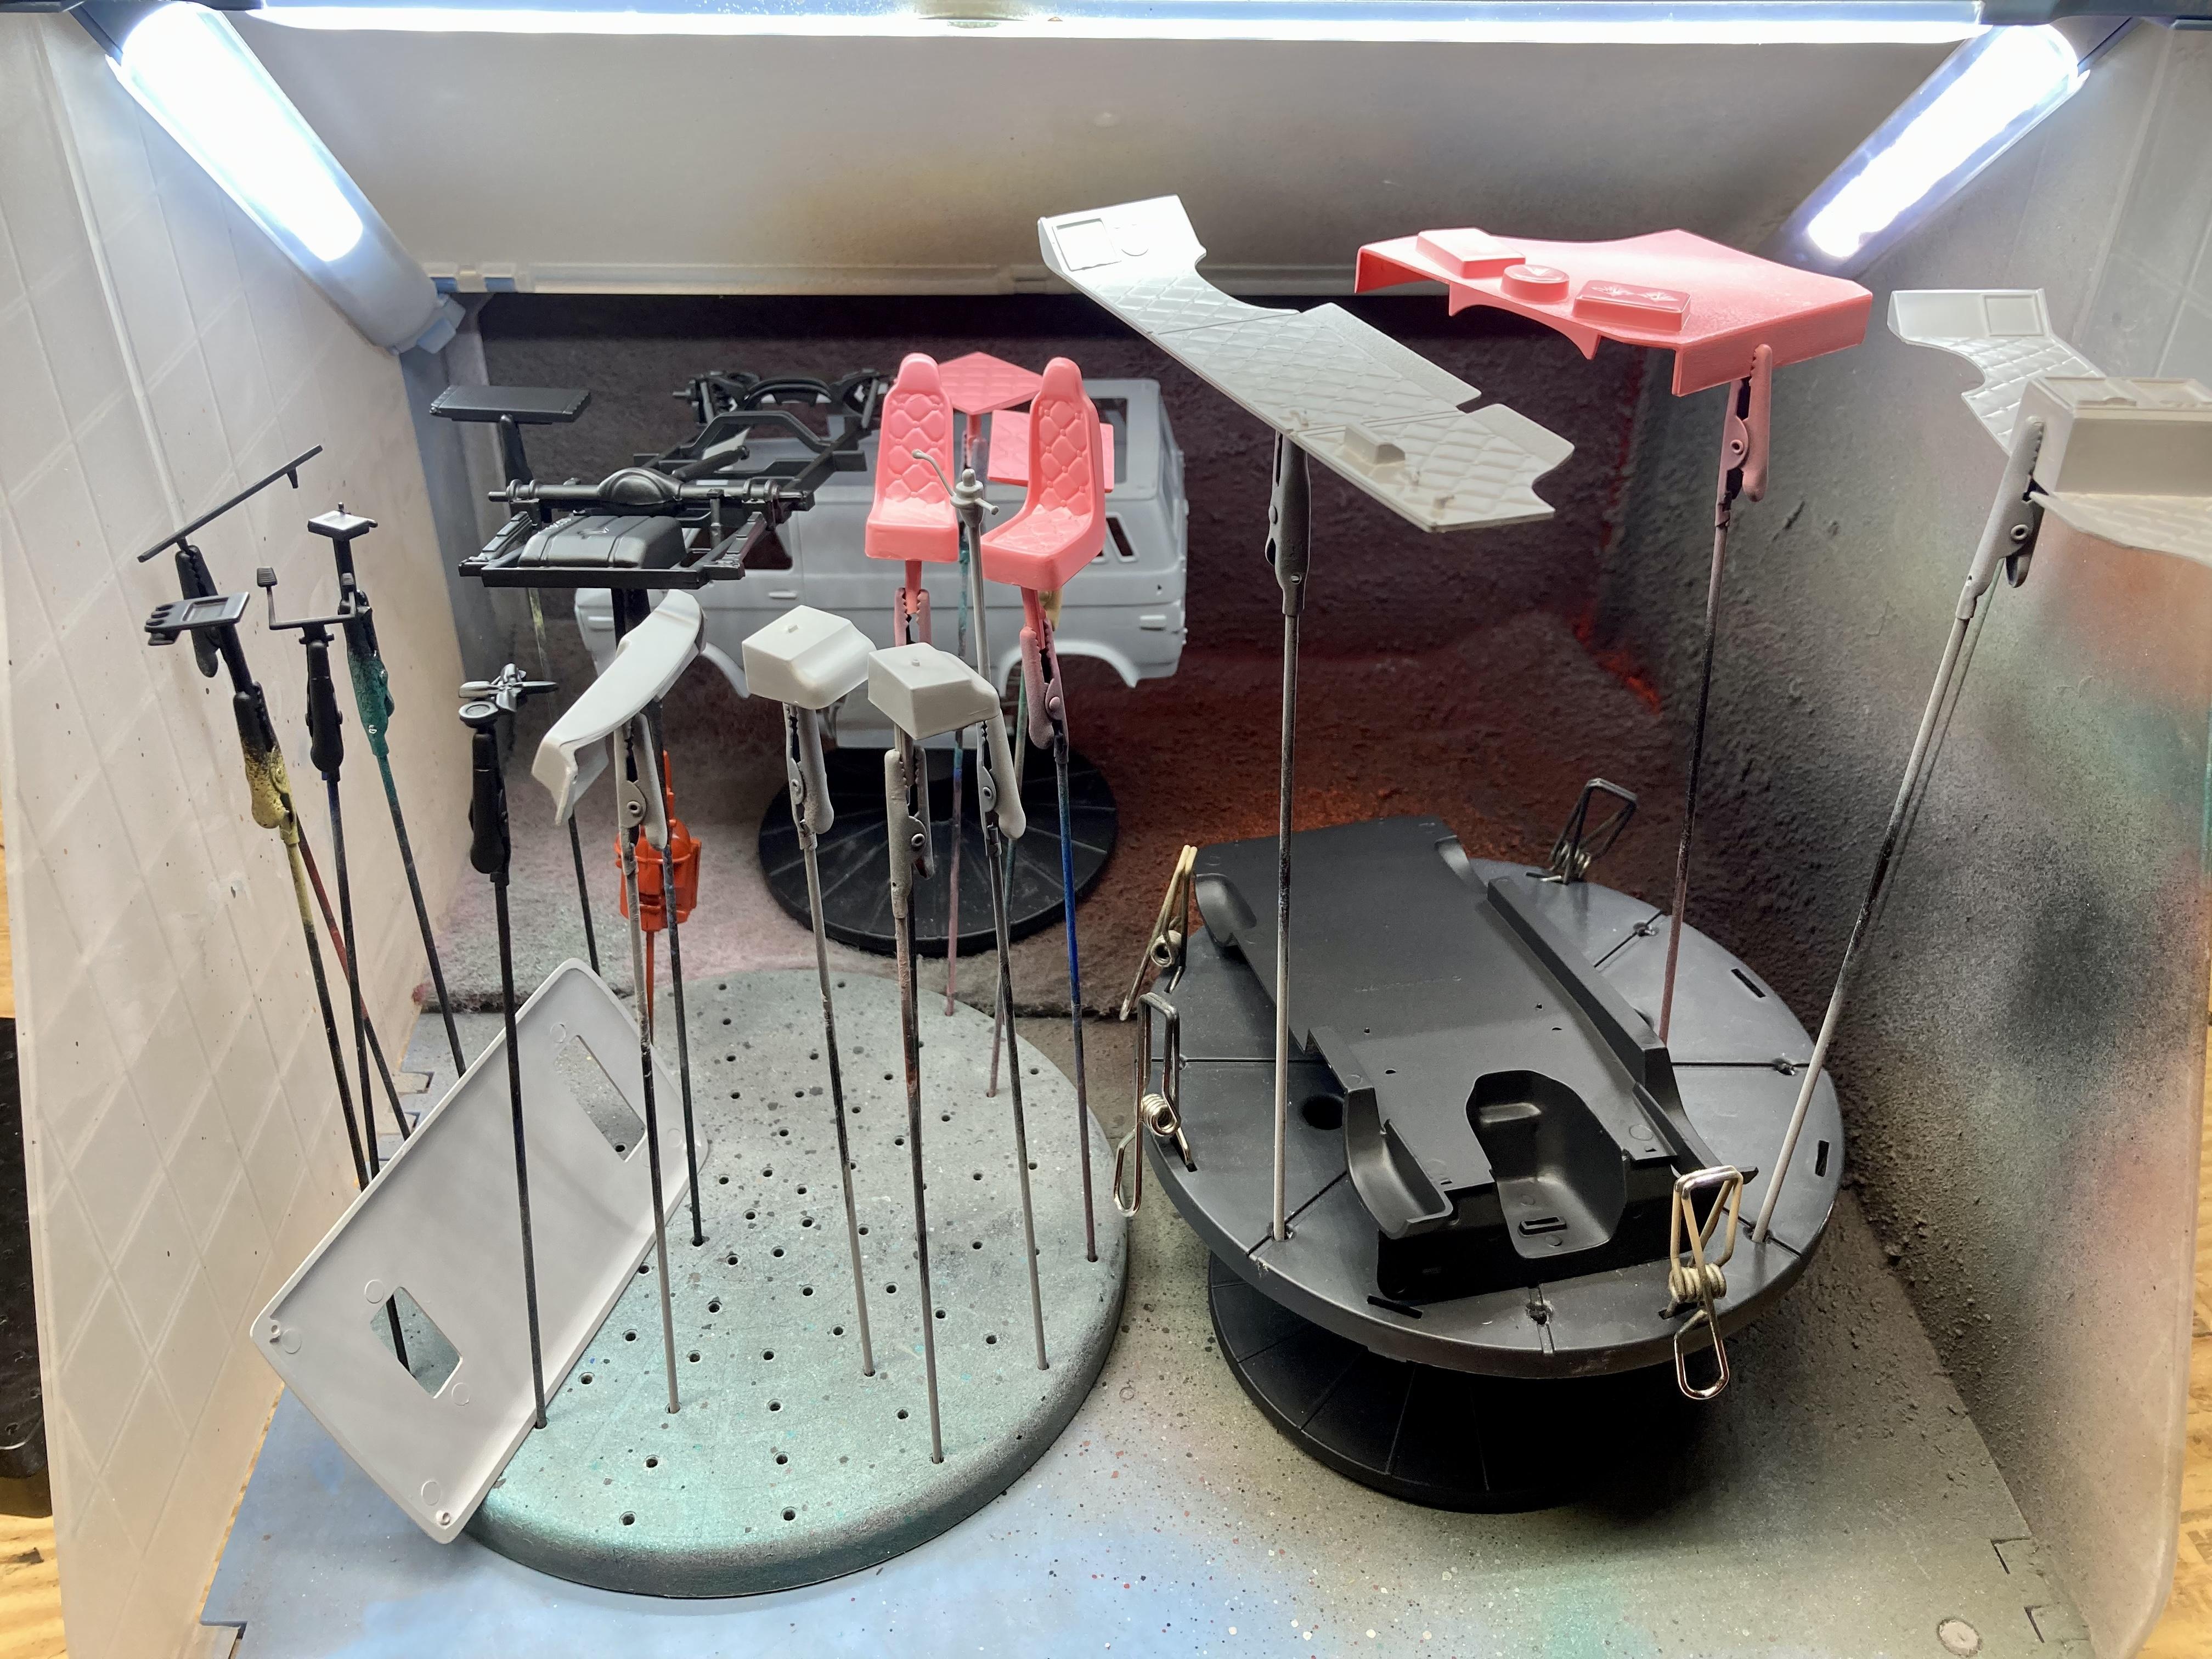
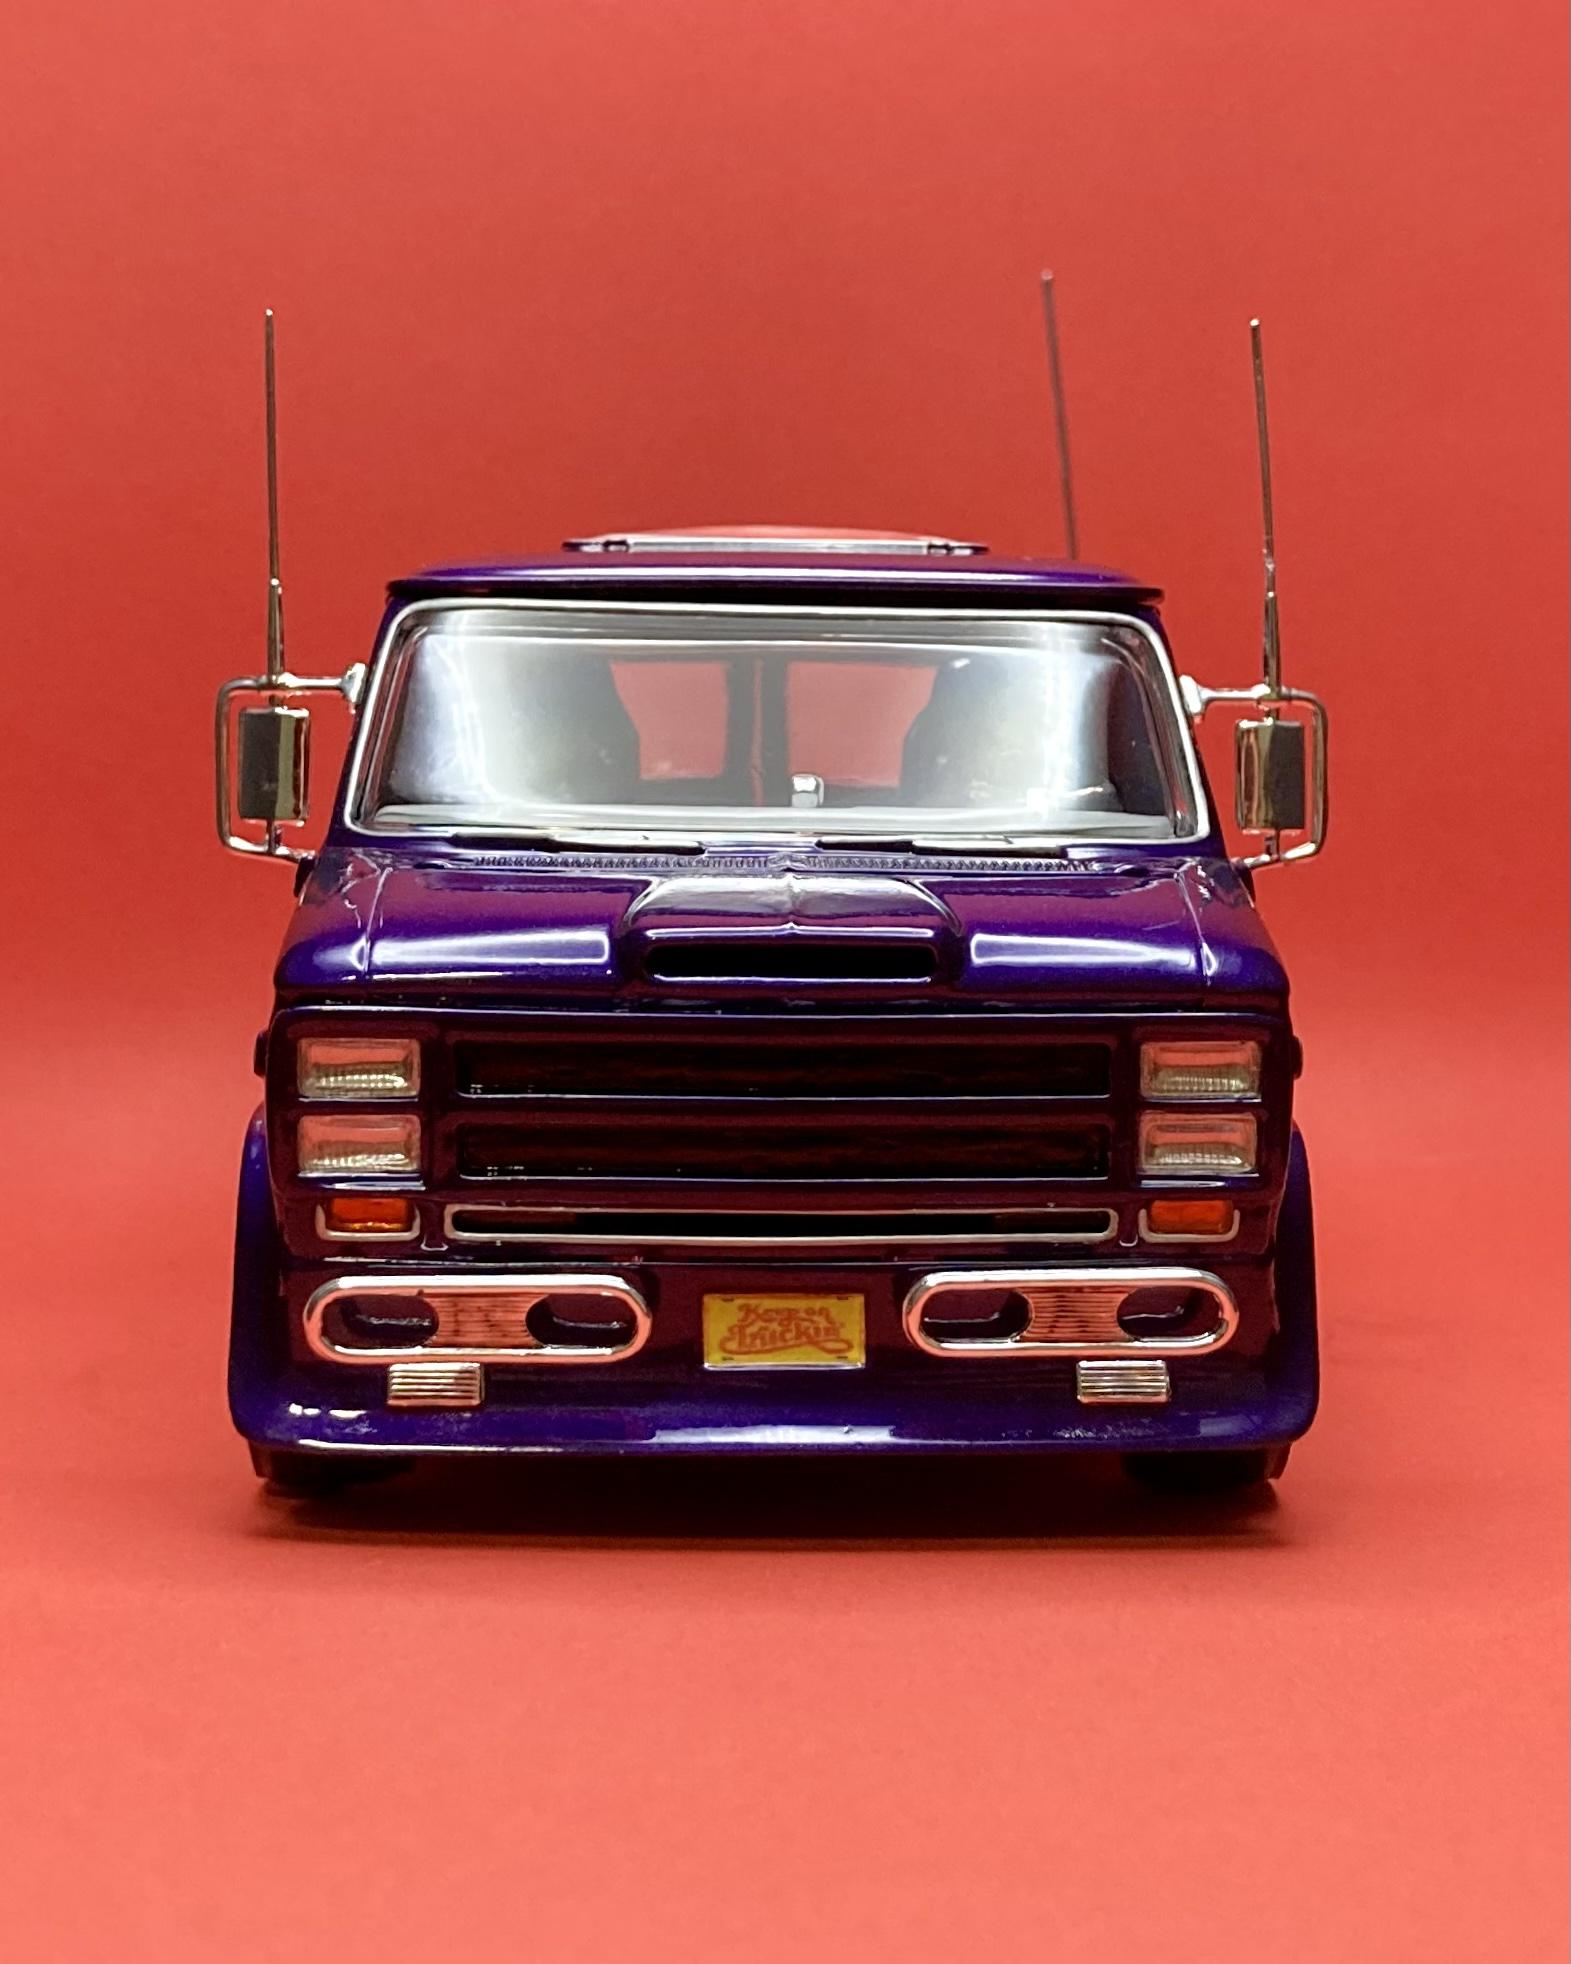
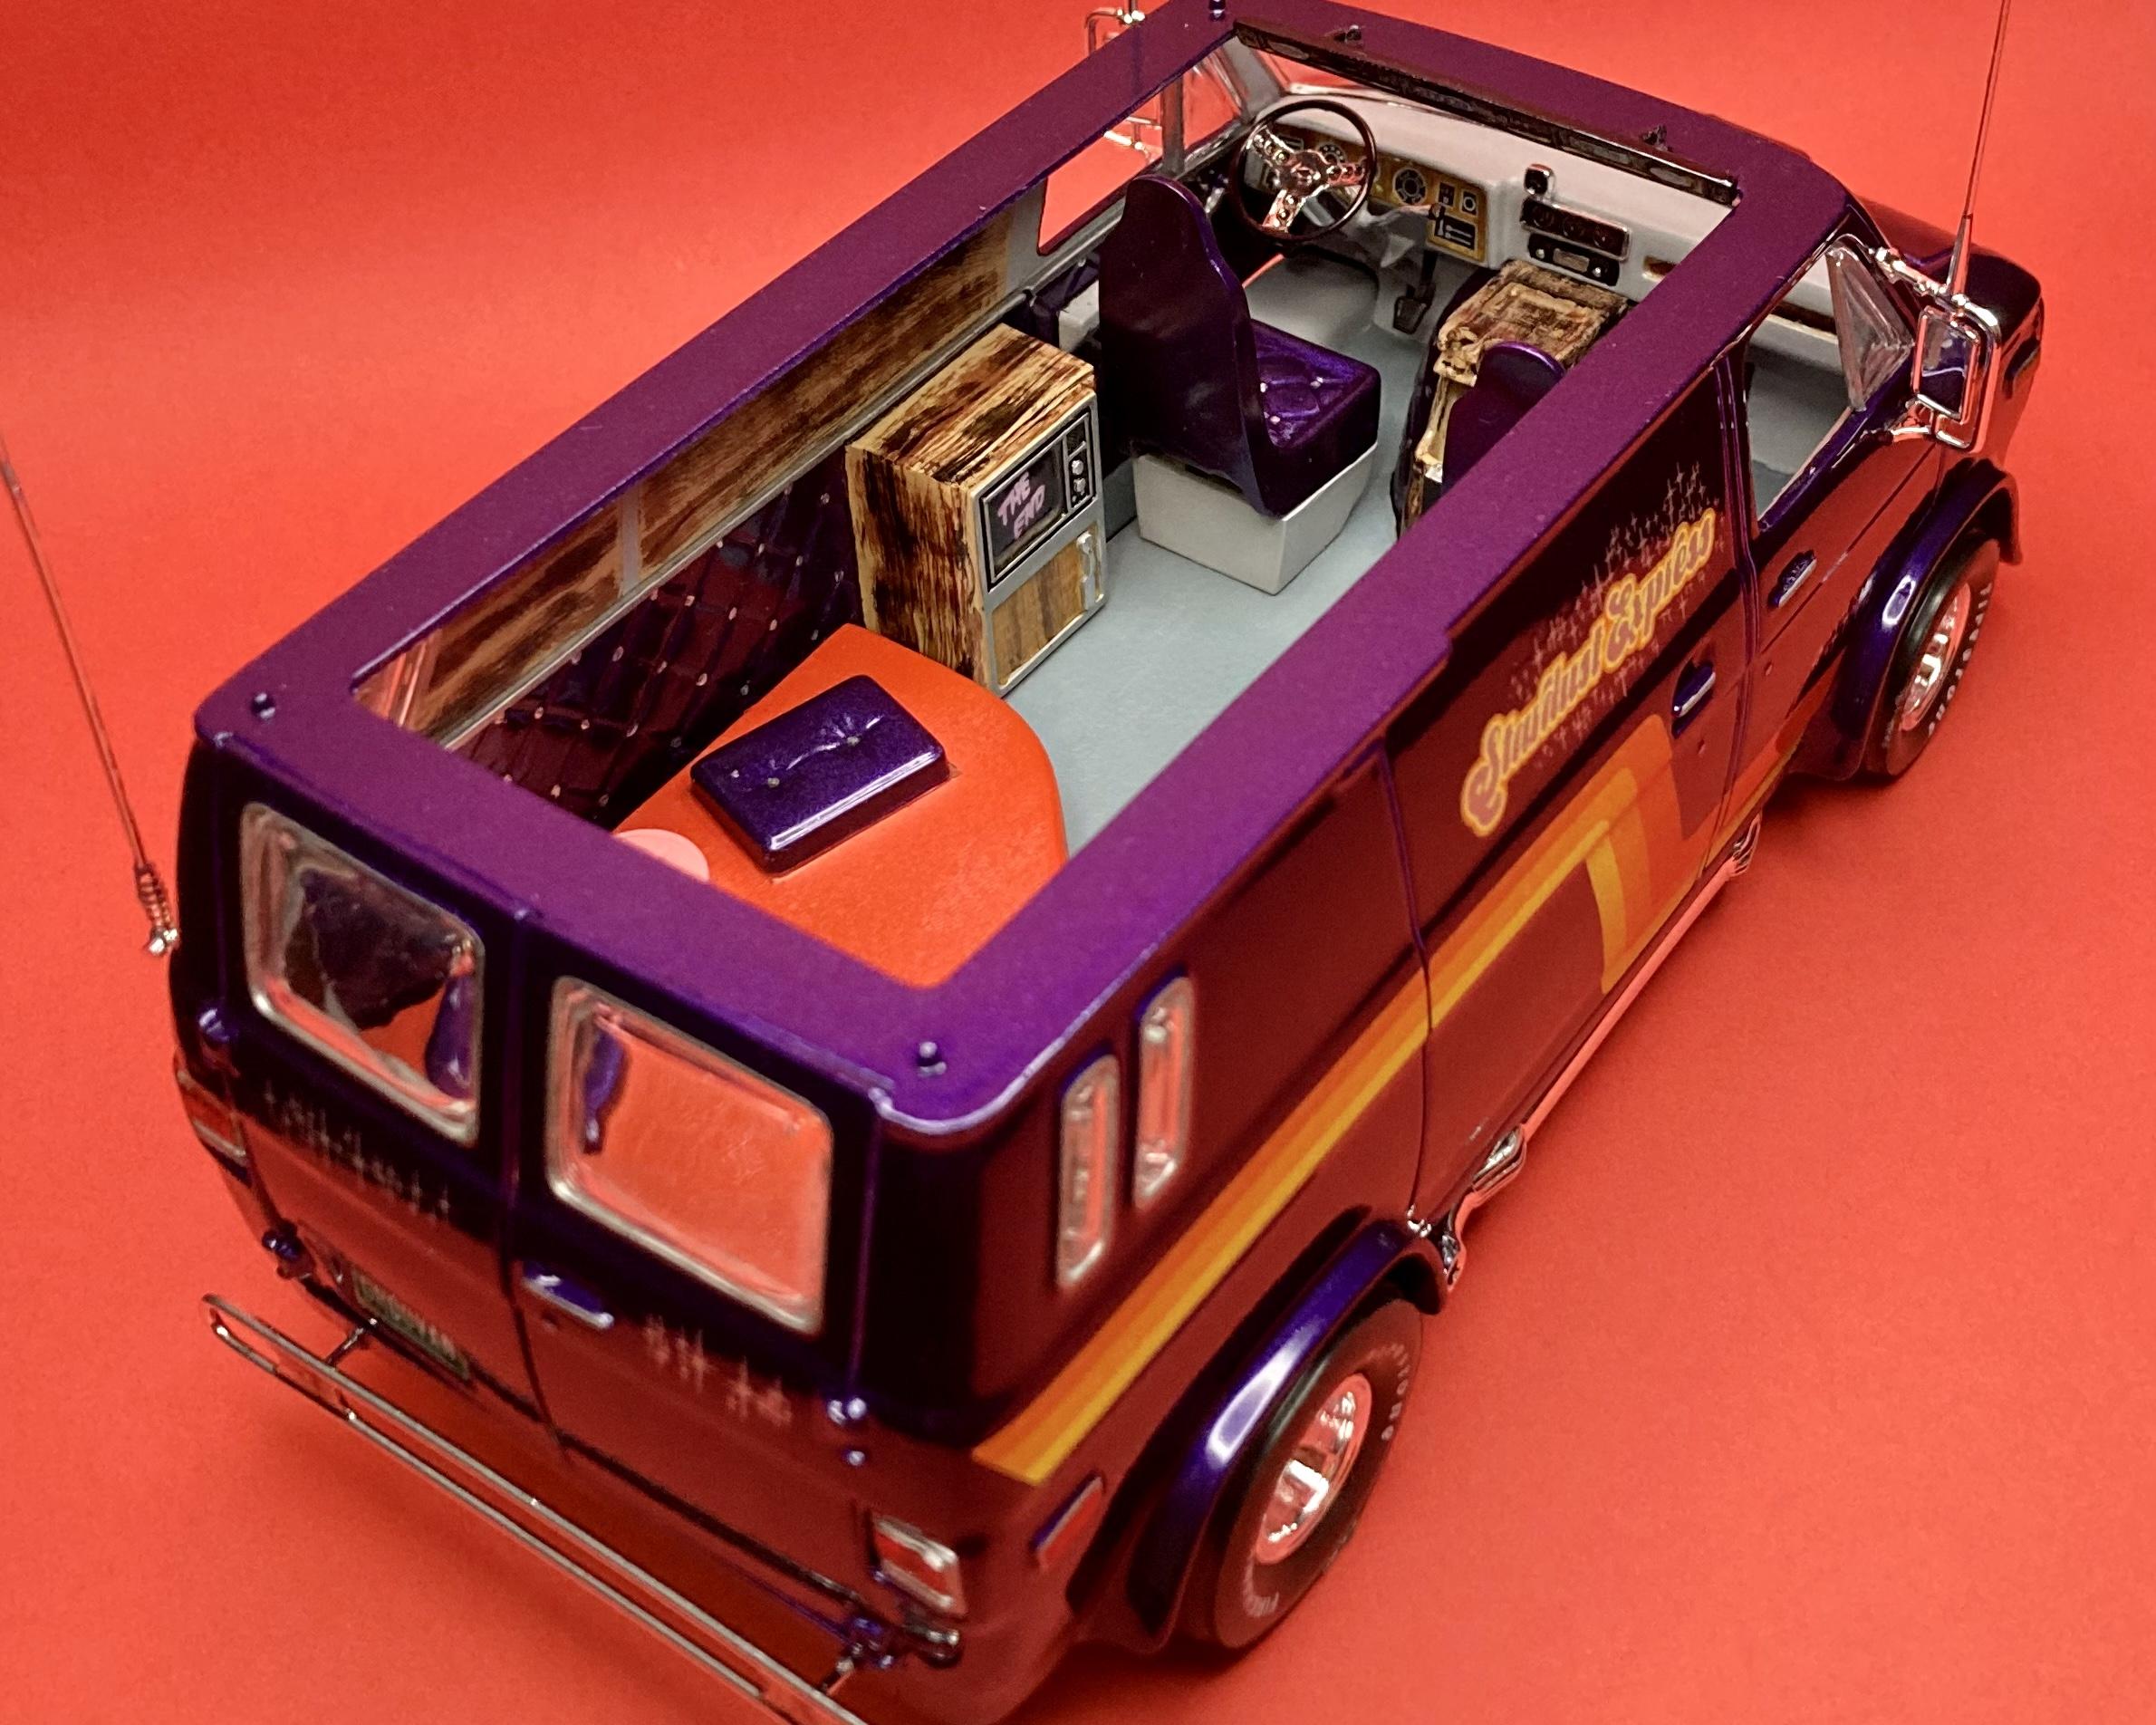
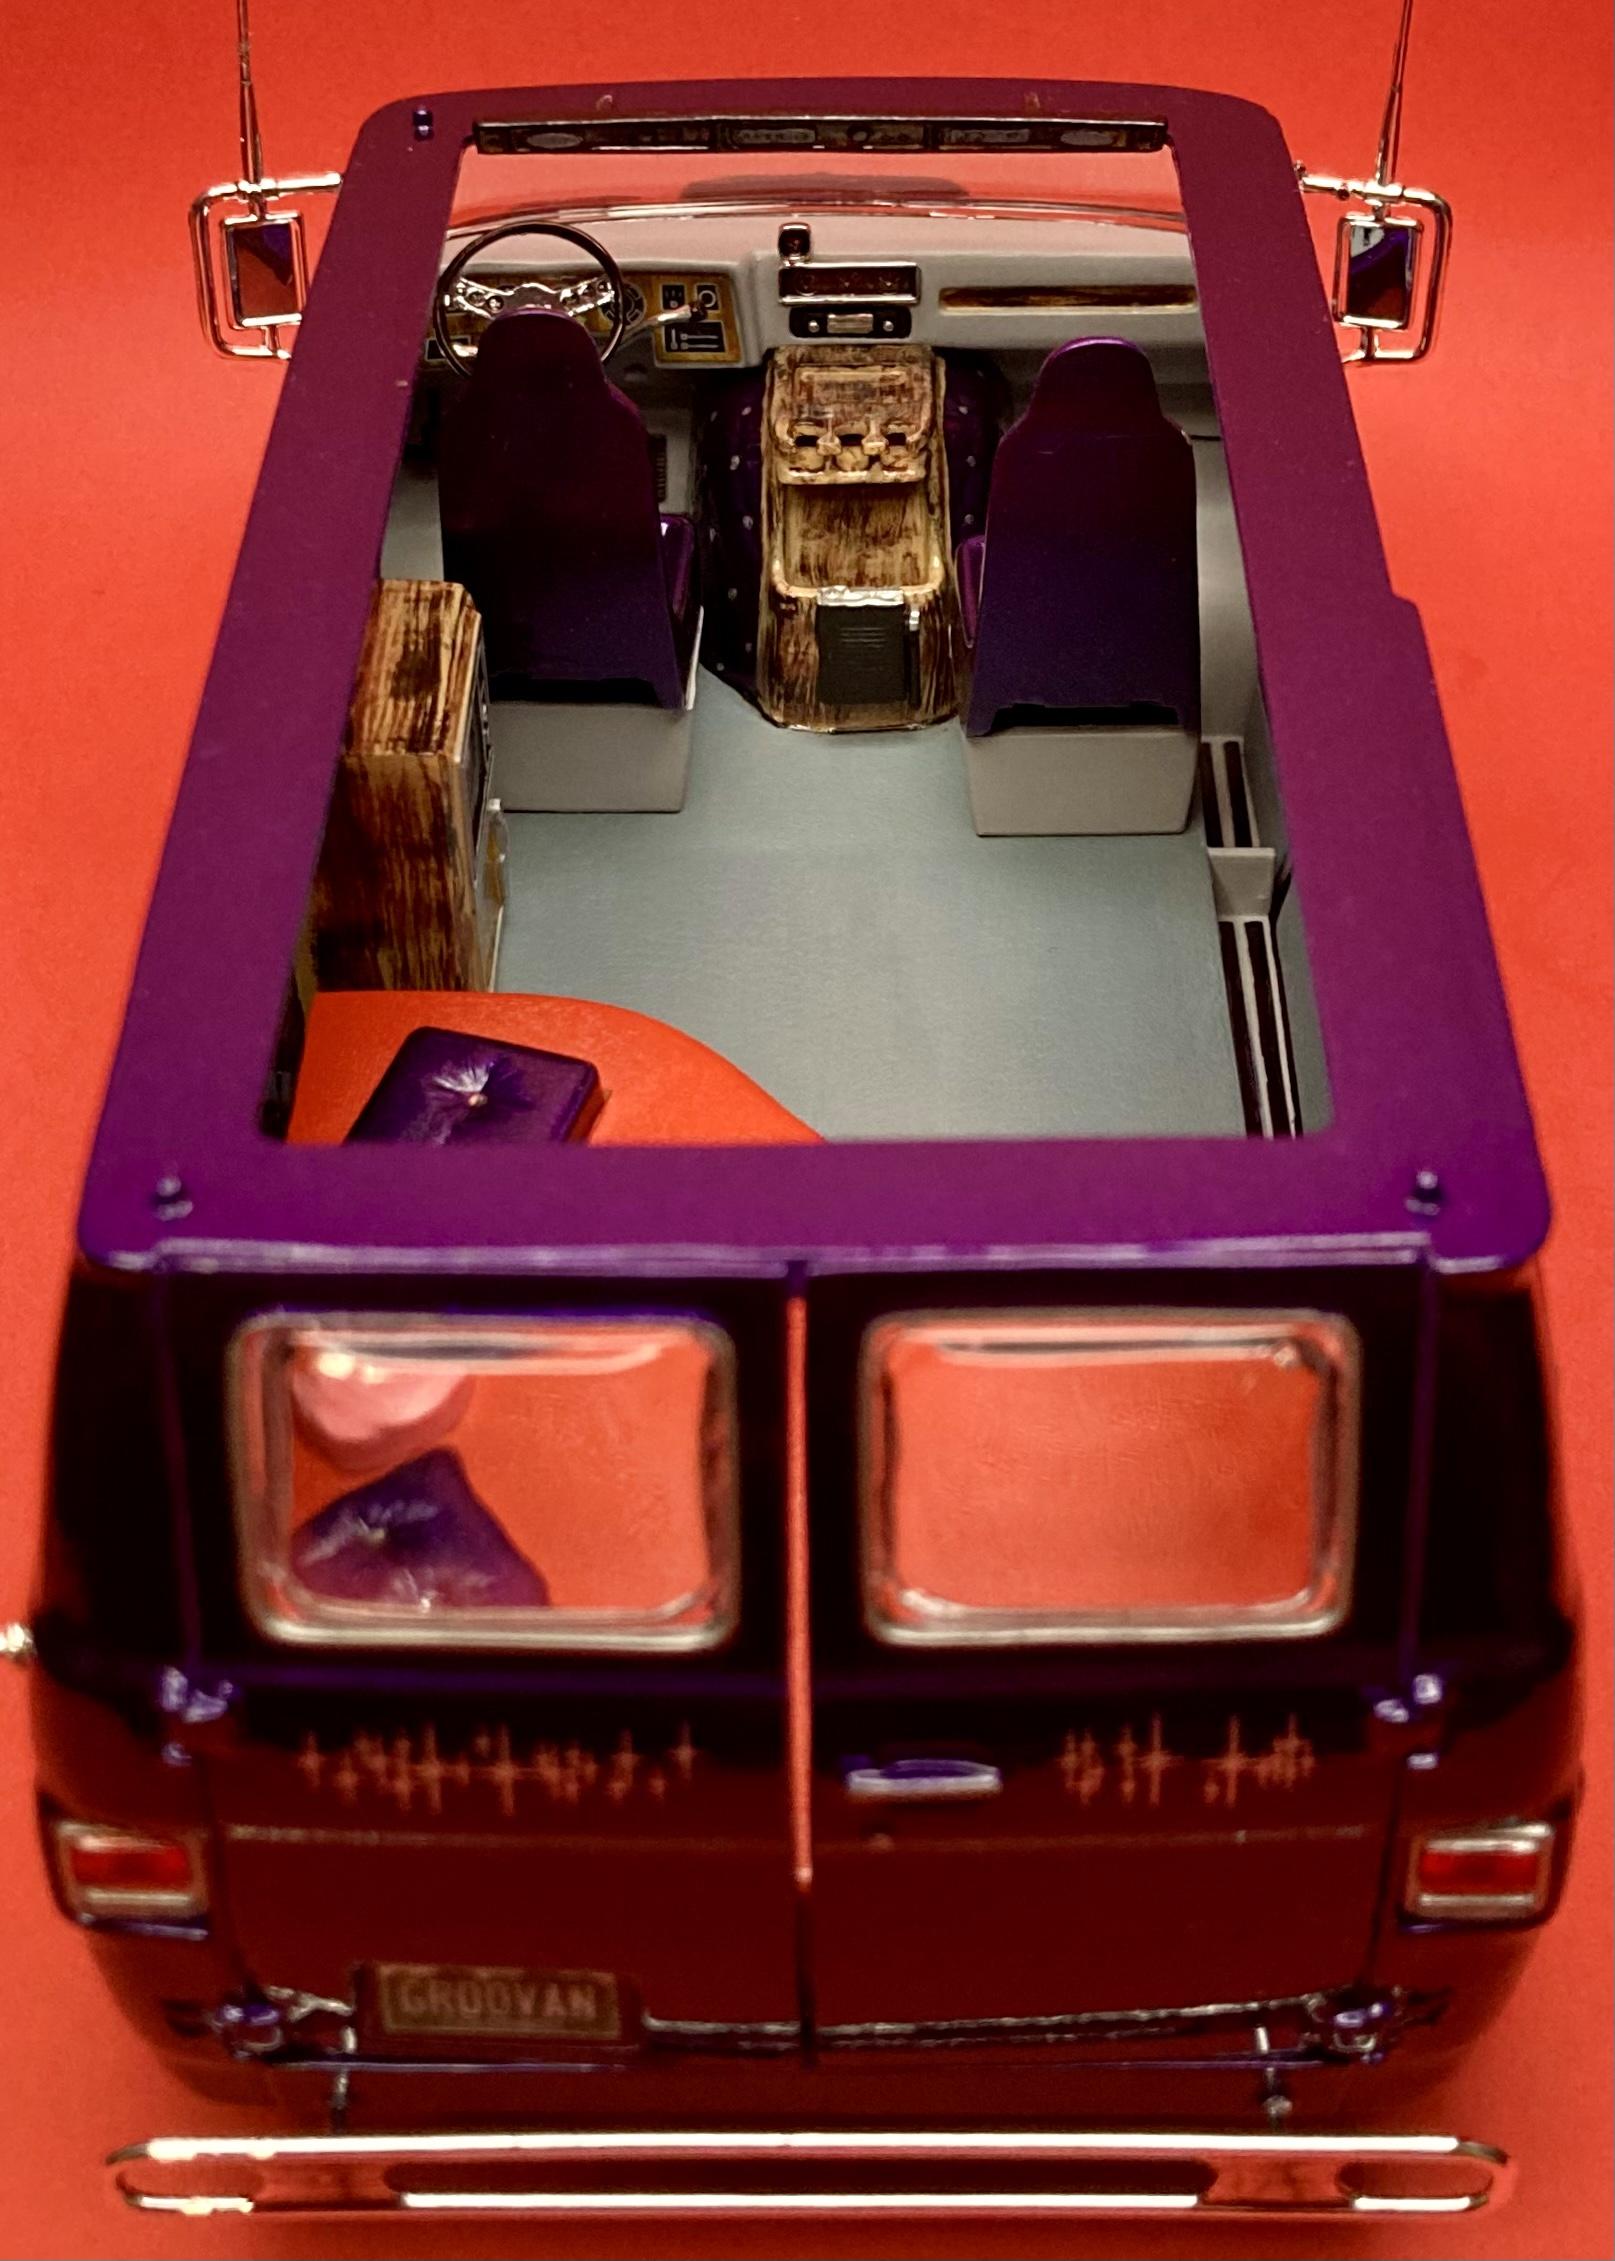
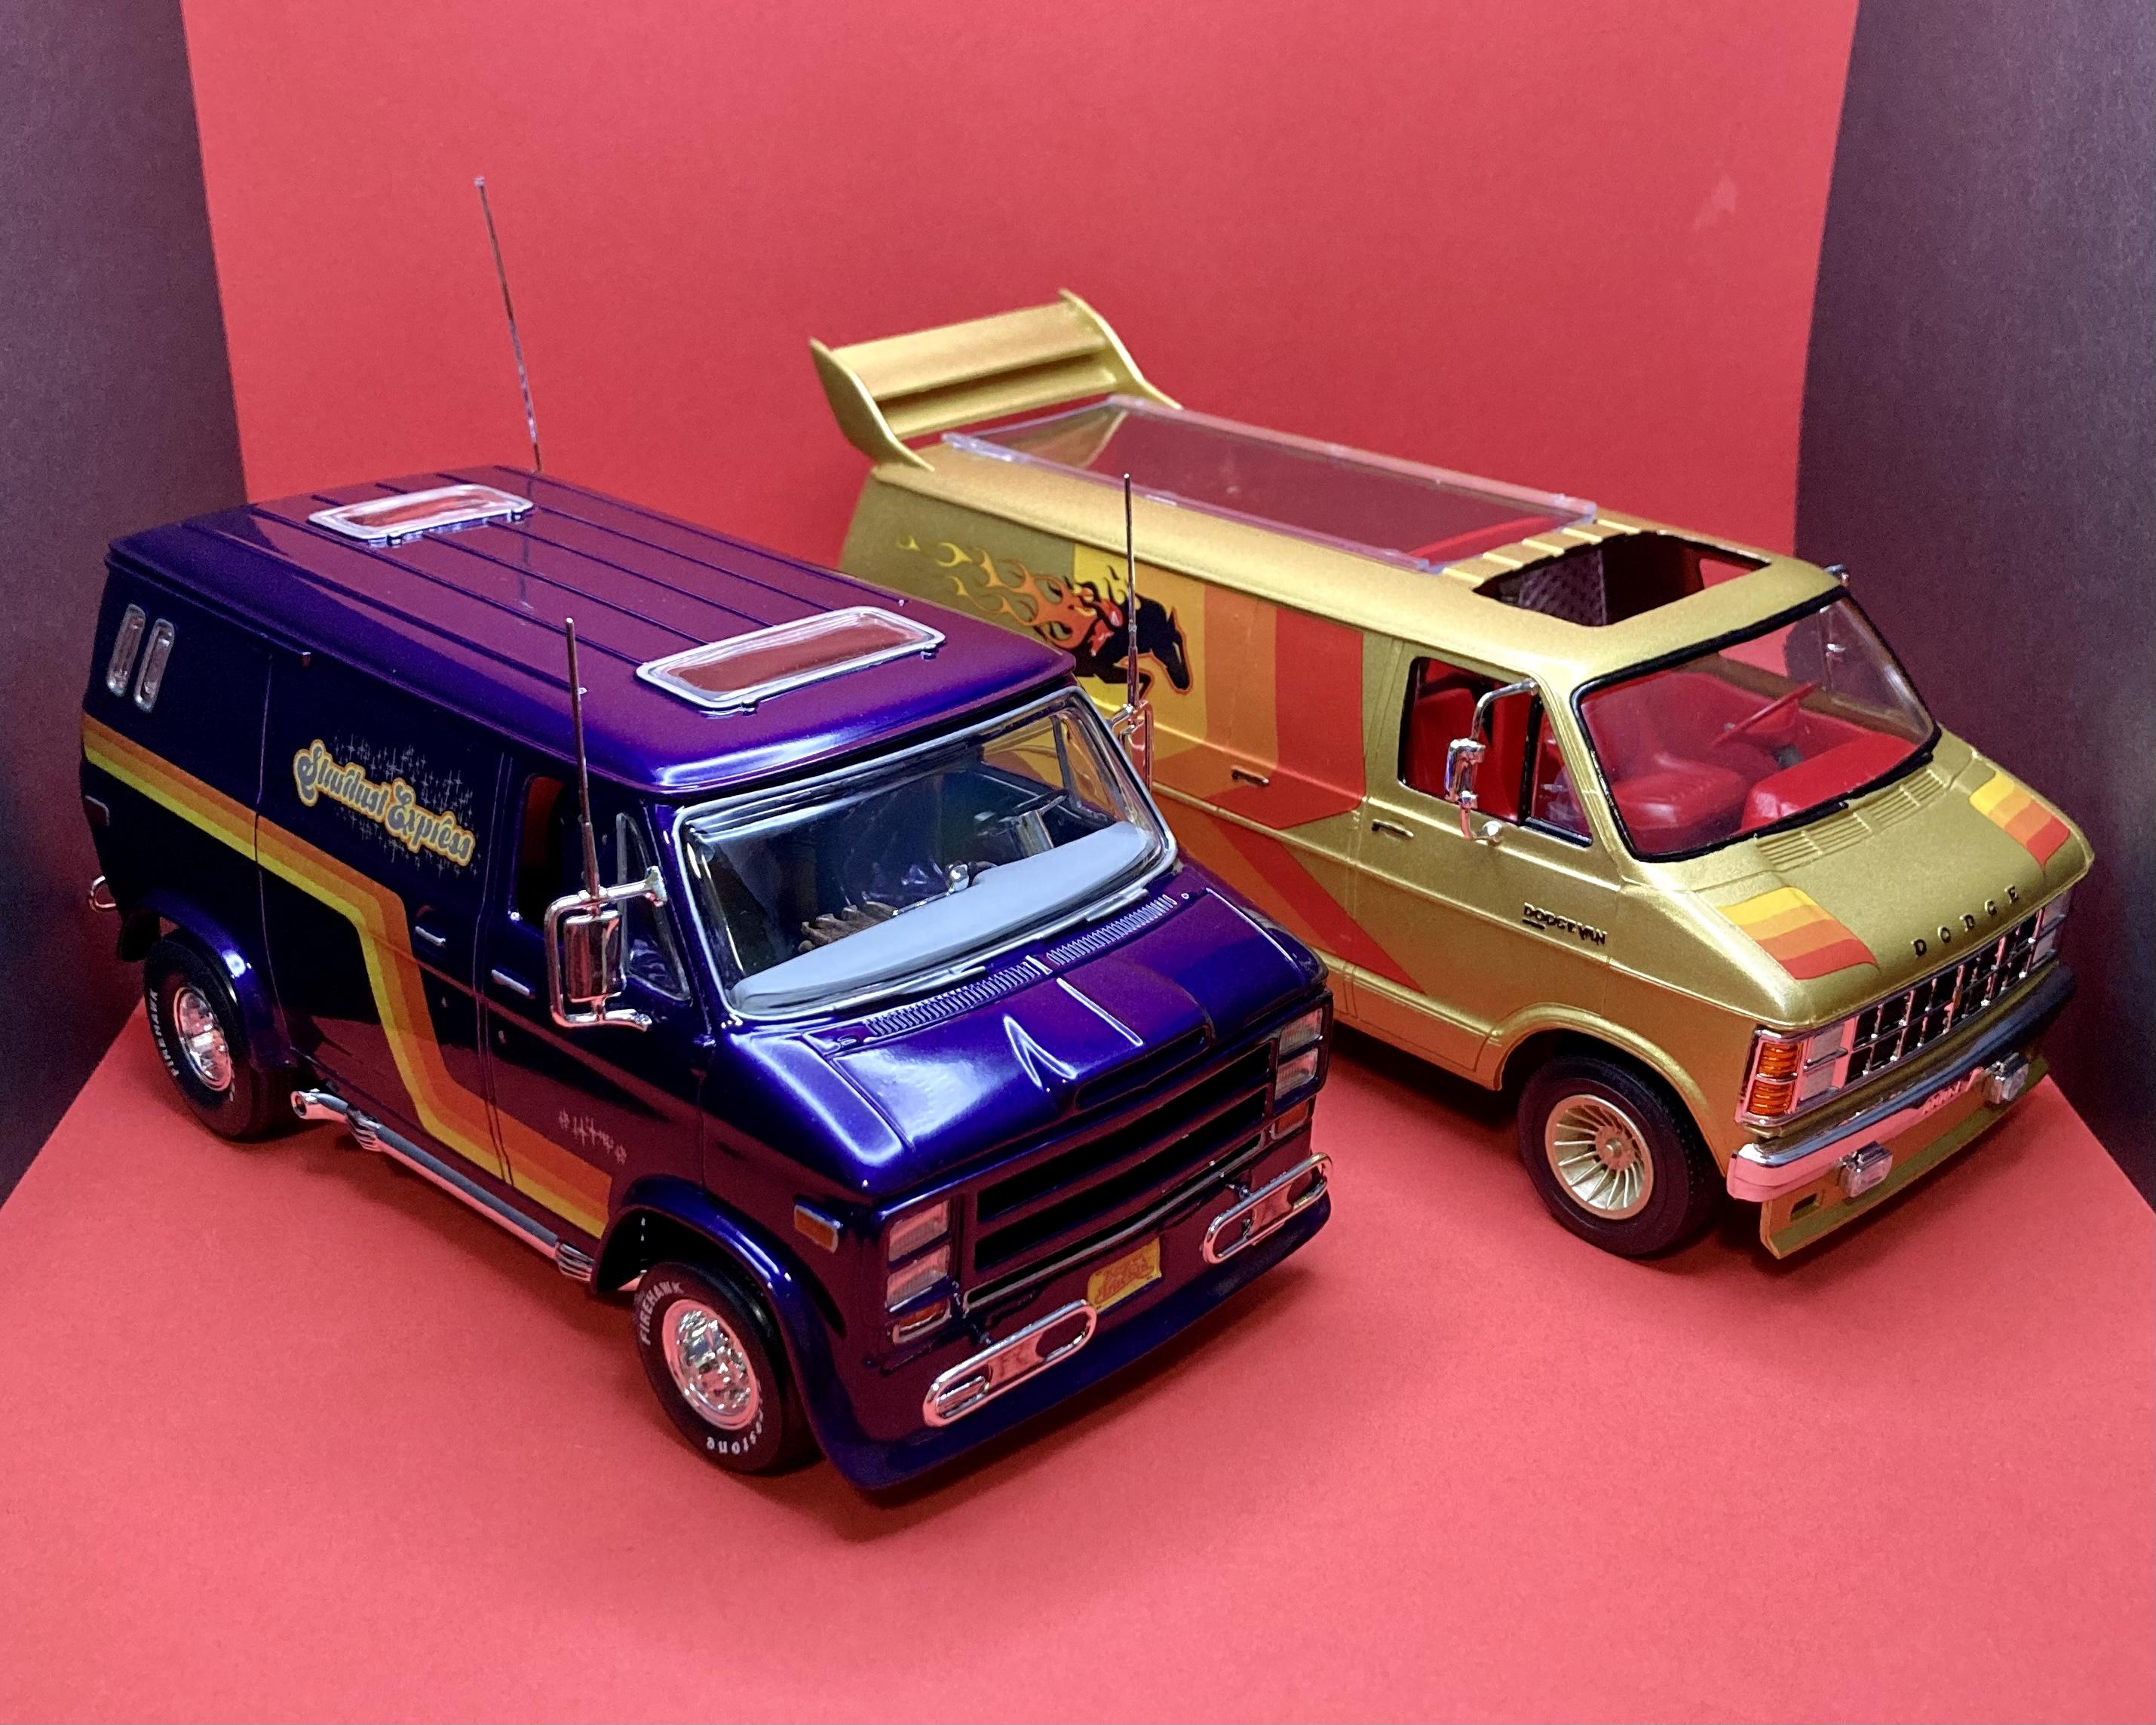
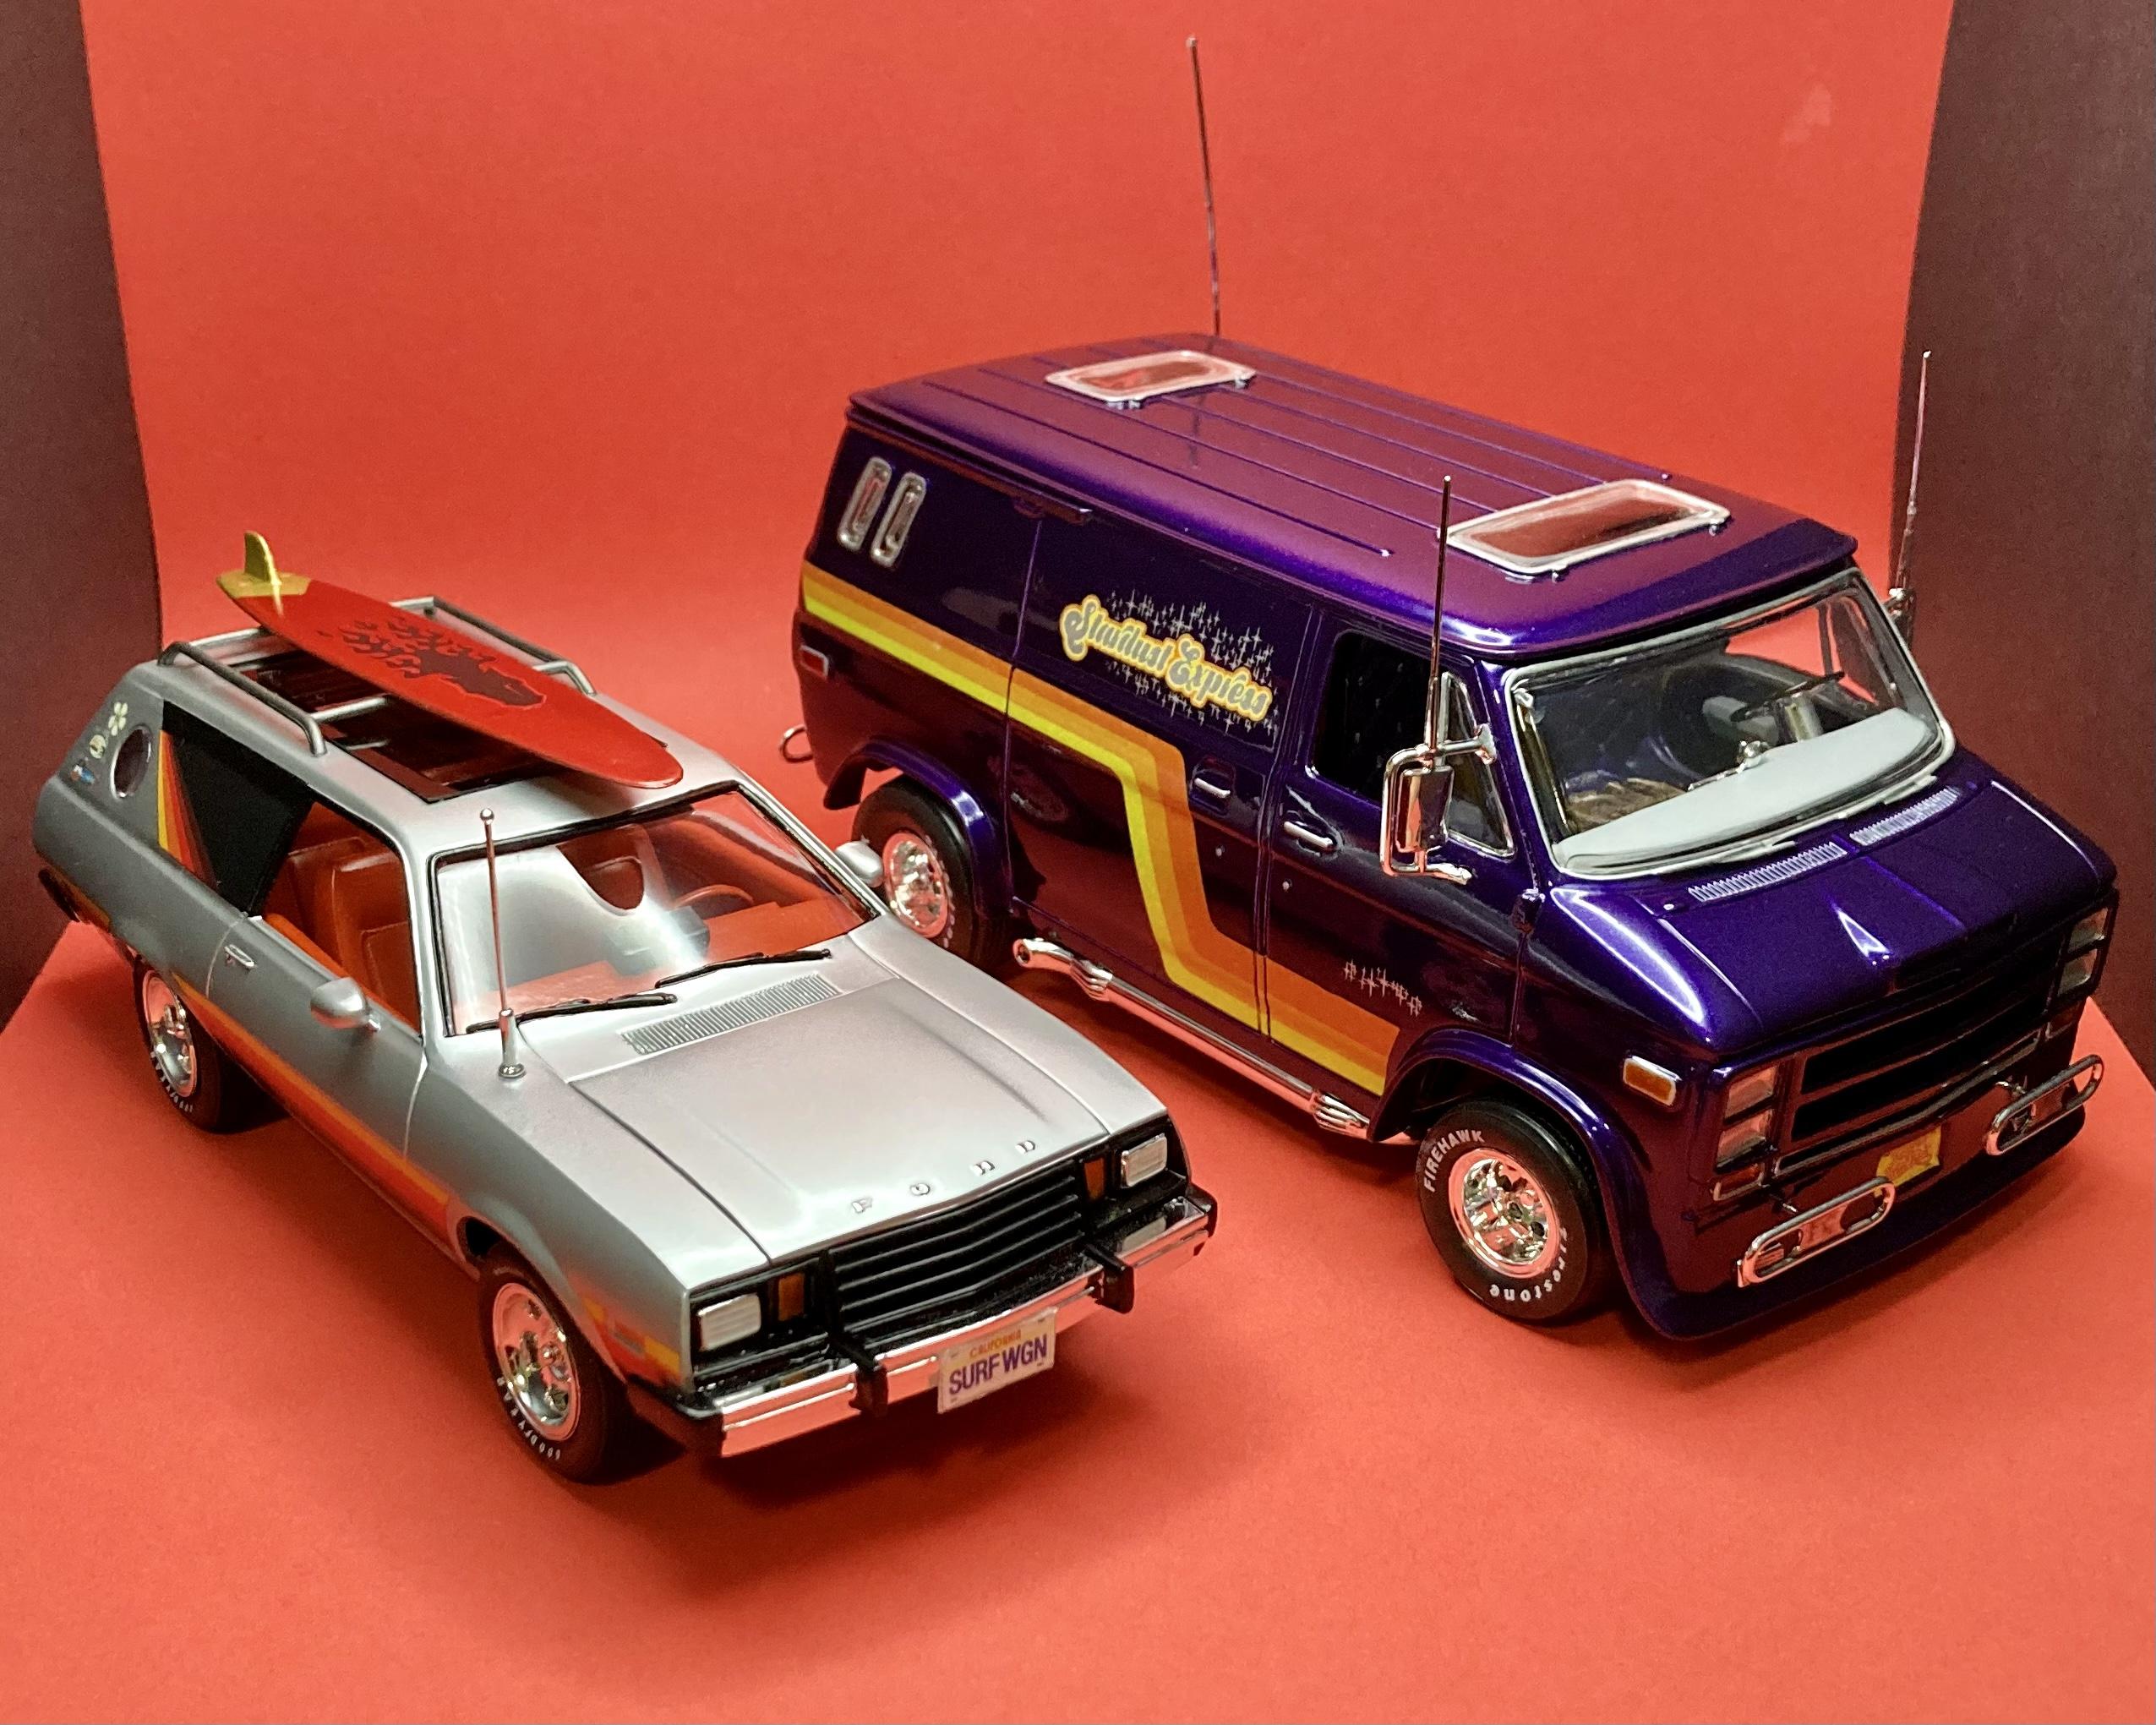
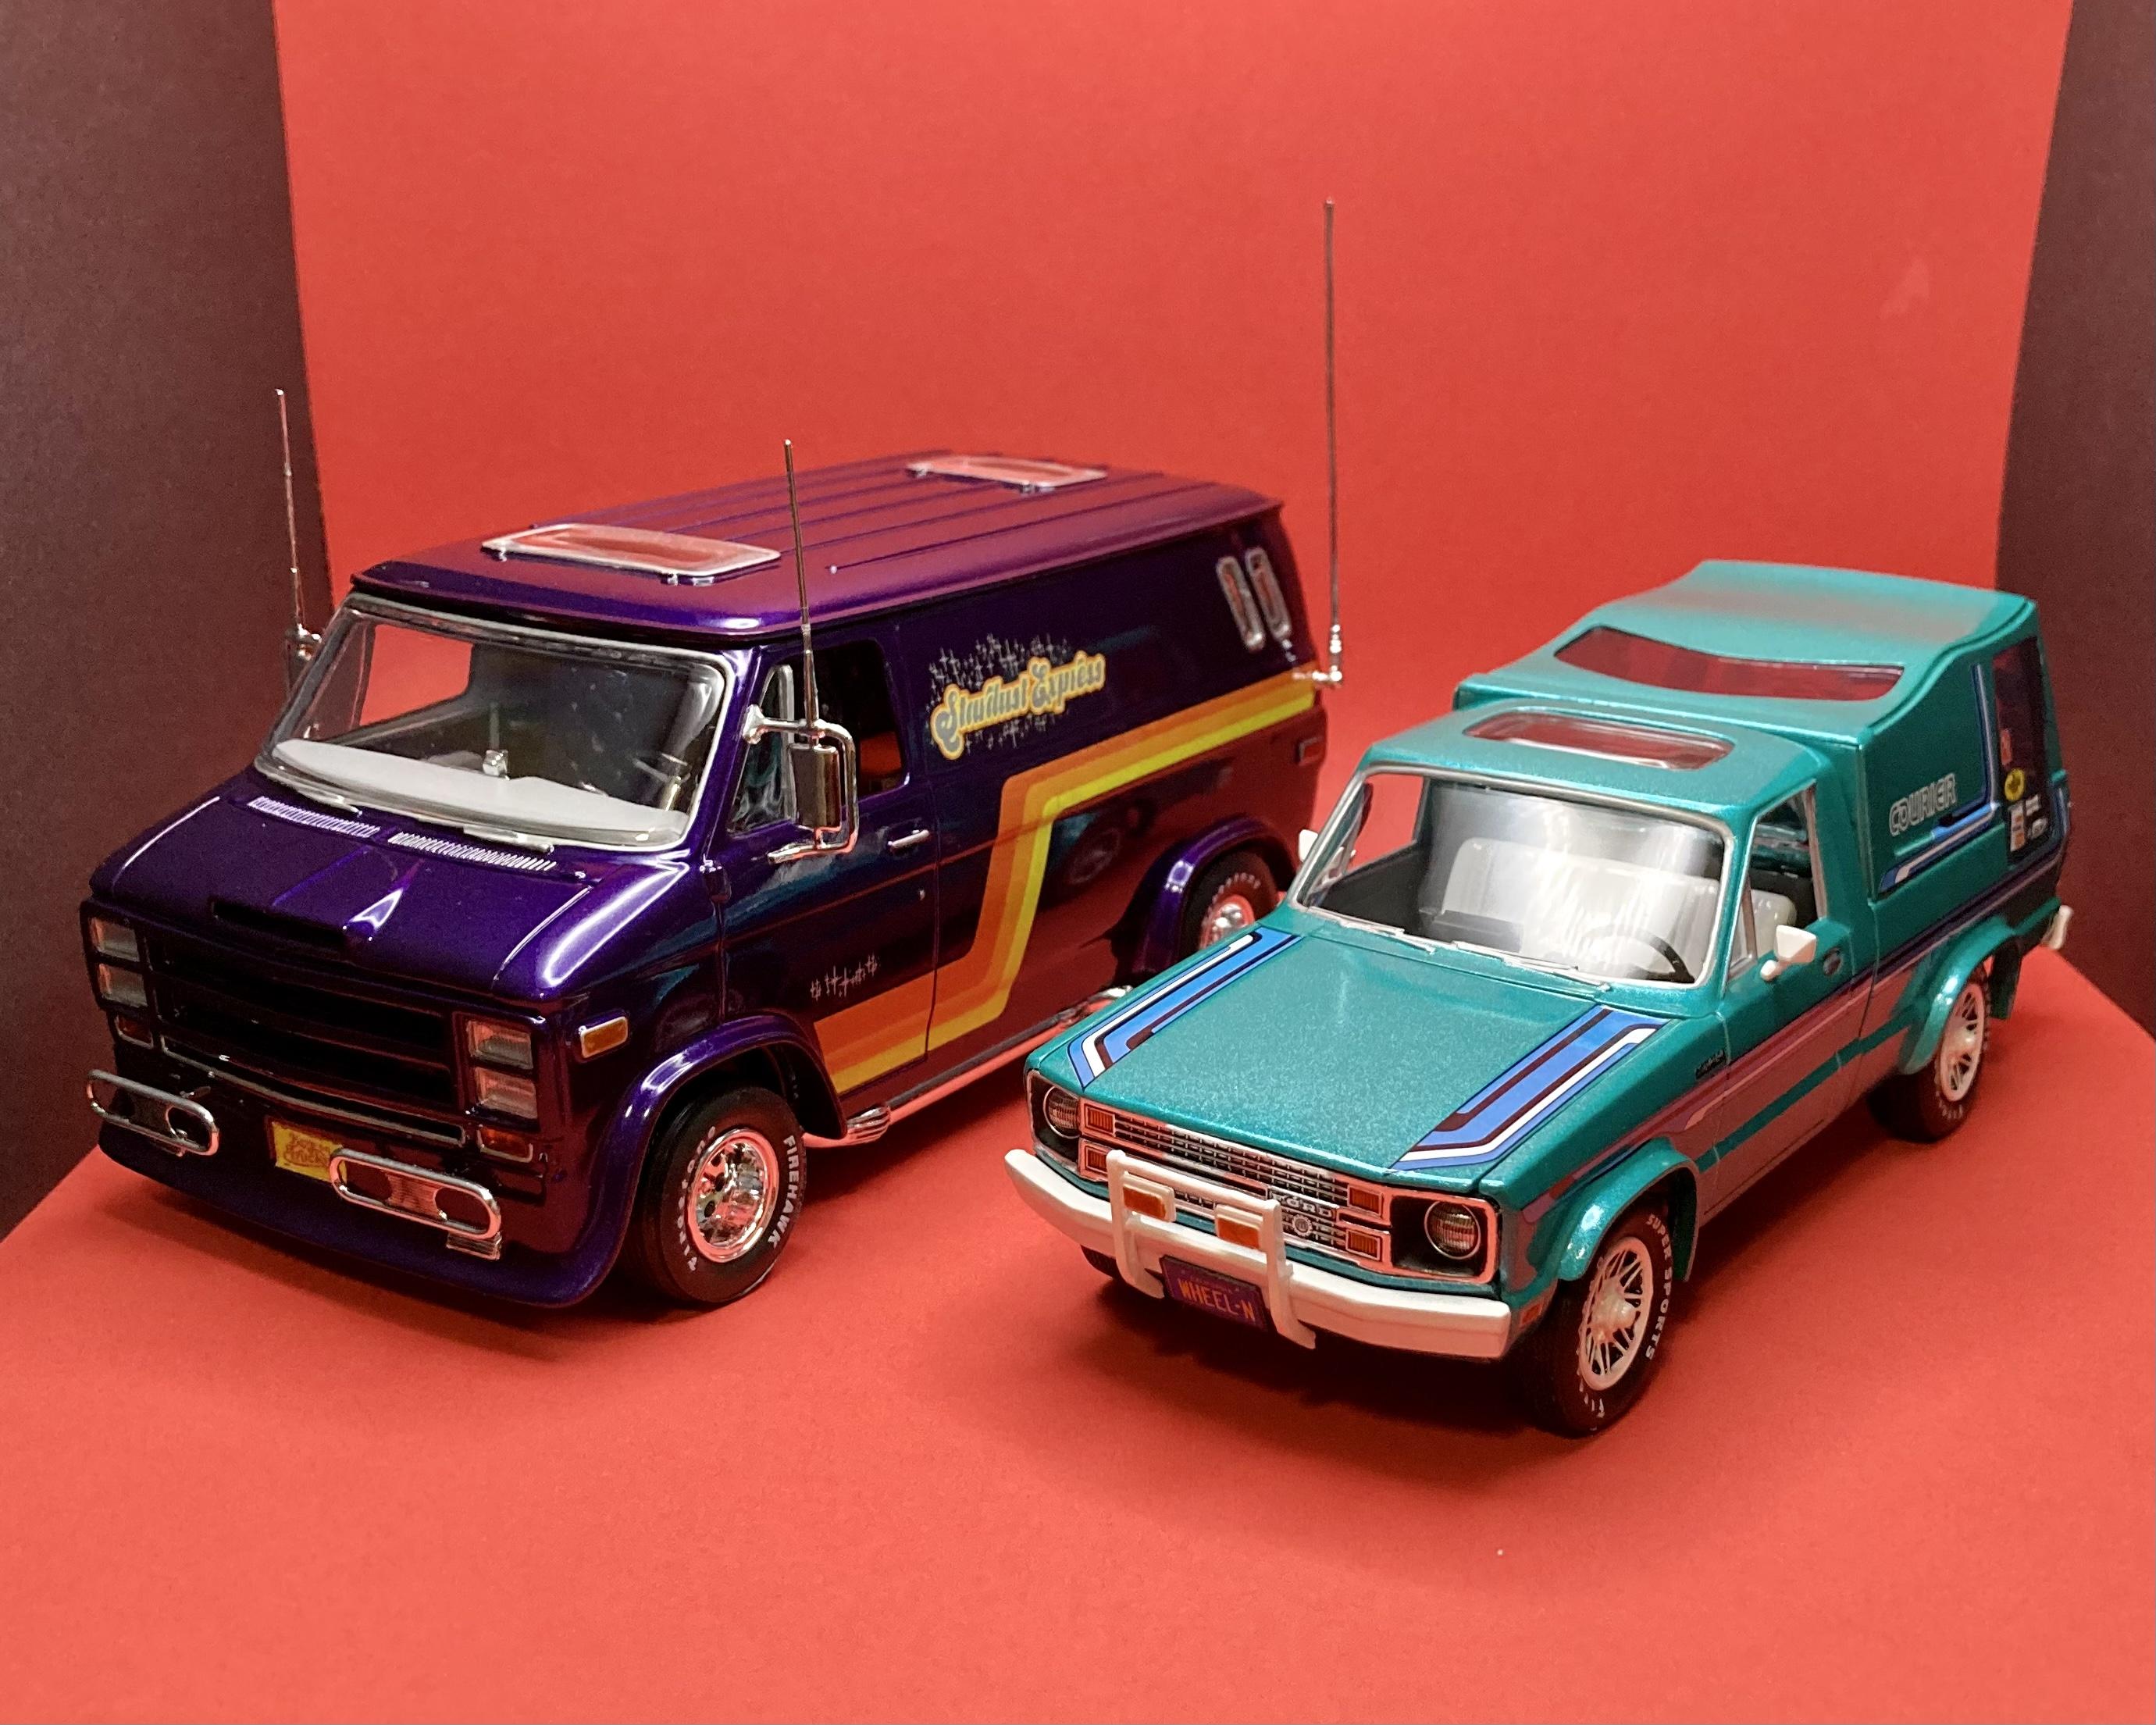
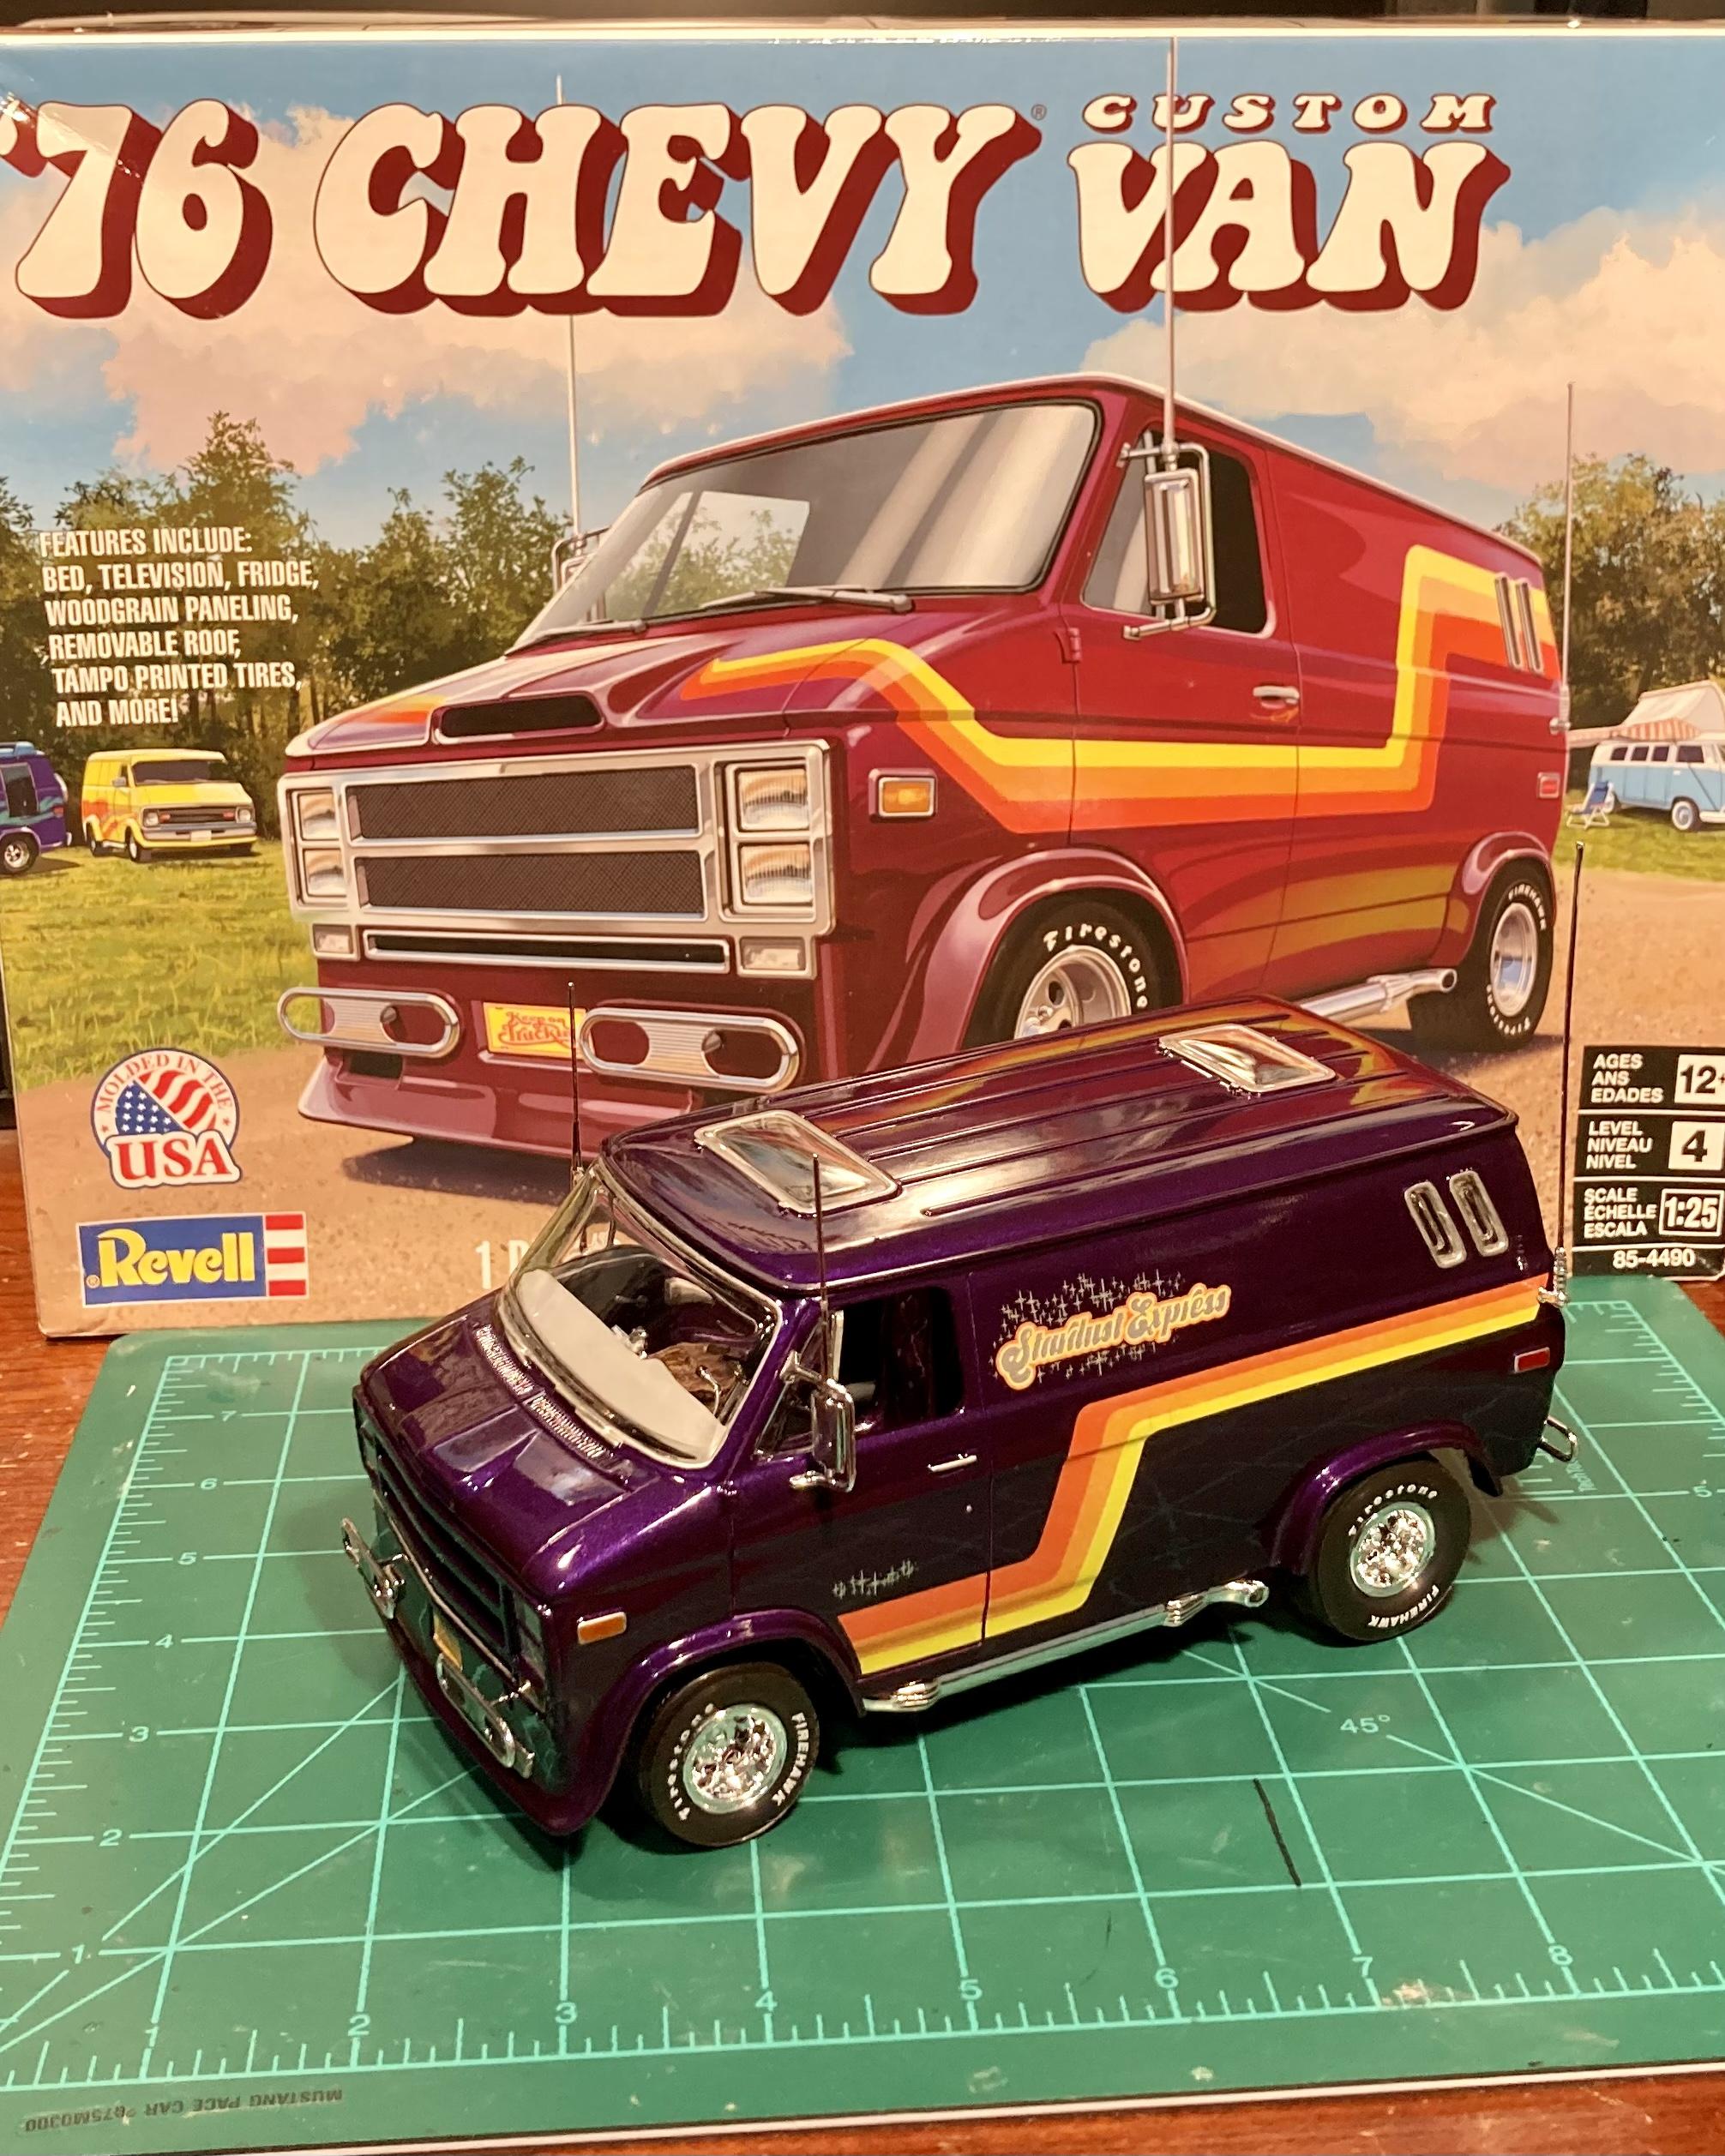
 Here’s my latest project: The recent release of Revell’s custom Chevy van! I started off by stripping the chrome from the front fascia/grille, scribing the door gaps, gluing together all of the subassemblies and prepping them for primer. This build is going to be box stock with minimal engine and chassis detailing. Partly because there’s not much detail in these areas to begin with, but mostly because these 70s vans are all about the body, paint, and interior. So that’s where I’m going to focus my attention. I glued the hood shut to simplify the painting process and since you can’t really see the engine anyway. After stripping the chrome from the grille, I glued that in place along with the front air dam. I added some scrap sprue behind the air dam, in the corners to help reinforce the front end. Since the roof is removable, I glued the rear doors shut. The body is very flimsy if you don’t do this, plus it will help with my planned two tone paint job. The body will be painted Testors’ Purple-licious with Tamiya TS-30 Silver Leaf as the secondary tone. My plan is to do the “Stardust Express” graphics, so the top half will be purple and the bottom will be silver. I think I’ll do the fender flares in purple too to accentuate them. The interior is going to be various shades of gray, with the quilted vinyl wall panels and seats in metallic purple. Plus tons of brown wood grain. The bed spread will be orange to tie in with the orange in the graphics. The elephant in the room: this kit has two piece rubber tires. Everyone on this forum has been complaining about these since the kit was announced. In my experience, they’re not *that* bad 😂. I used Gorilla brand super glue and they seem to be holding together. There’s definitely a raised ridge at the seam, so I’ll try sanding them down. They definitely won’t win you an award, but they’re *fine* for a shelf model. I don’t have anything else that fits and I’m not interested in paying for aftermarket tires so they will have to do. Here’s everything in primer so far. I’m using Tamiya’s pink primer under the purple. It’s my first time using it so we'll see how it looks! Once everything cures, I’ll tape off the portions of the interior that will remain gray primer and hit the body and wall panels in pink. The body is definitely going to need some further work to blend the air dam, and the mold separation lines at the fenders and rear corners are pretty bad. Thanks for following along! Feel free to share any tips, suggestions or ideas!
-
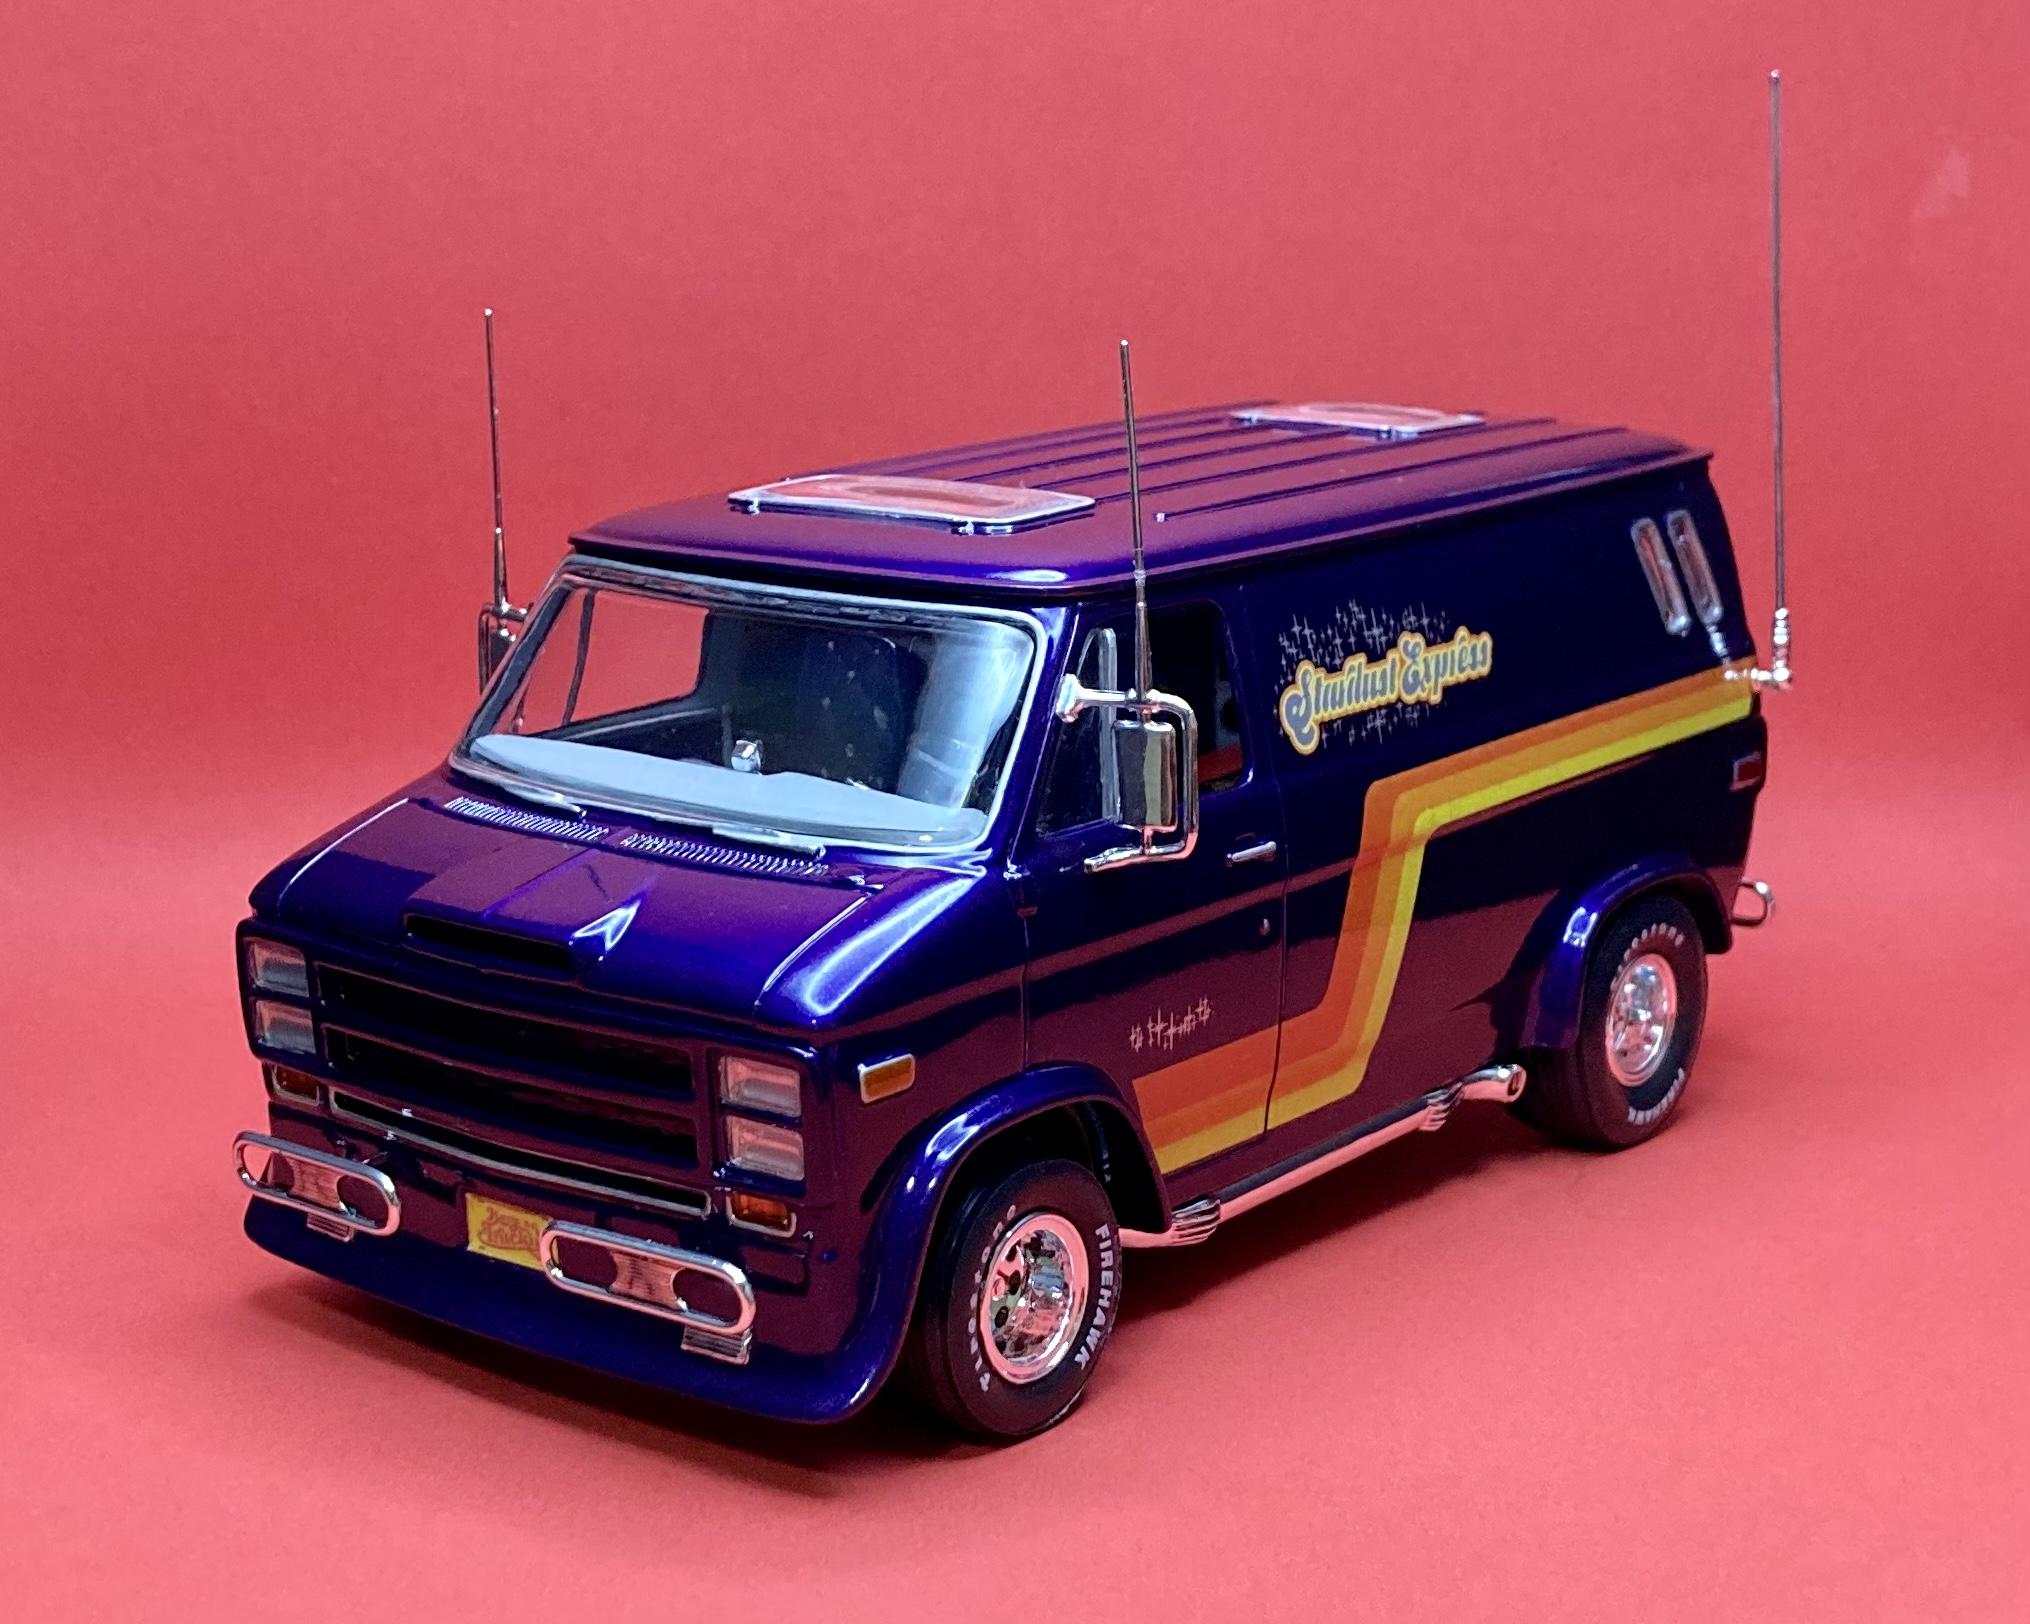
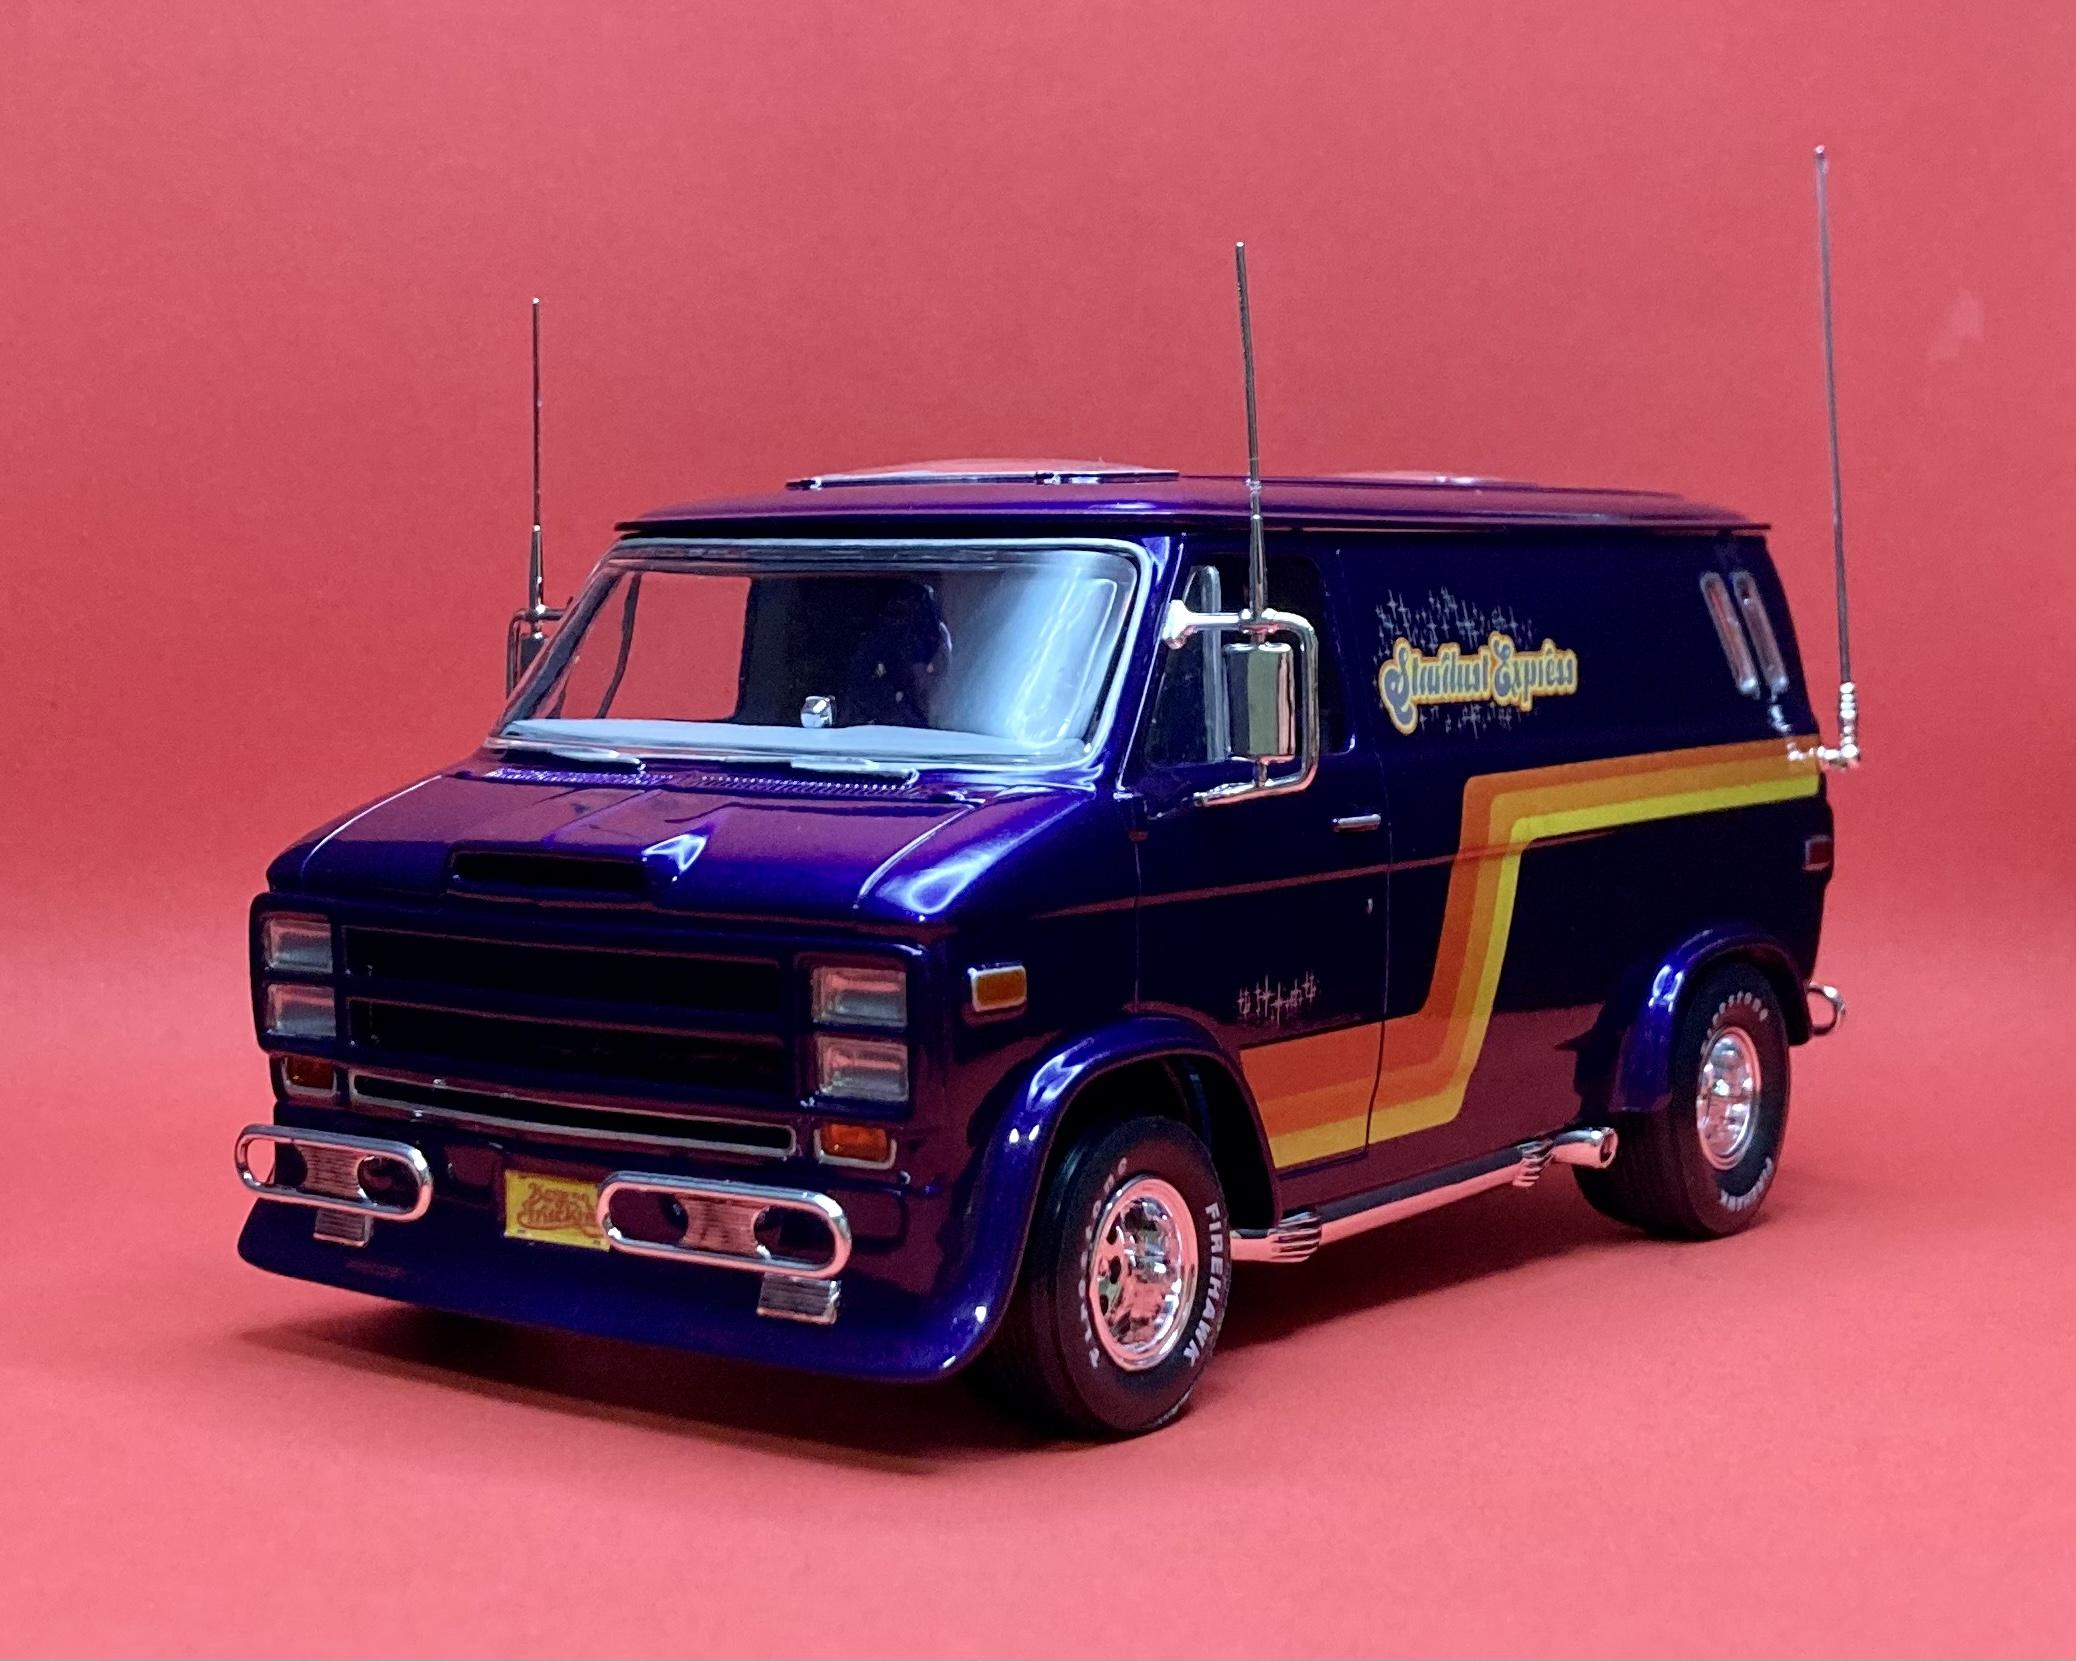
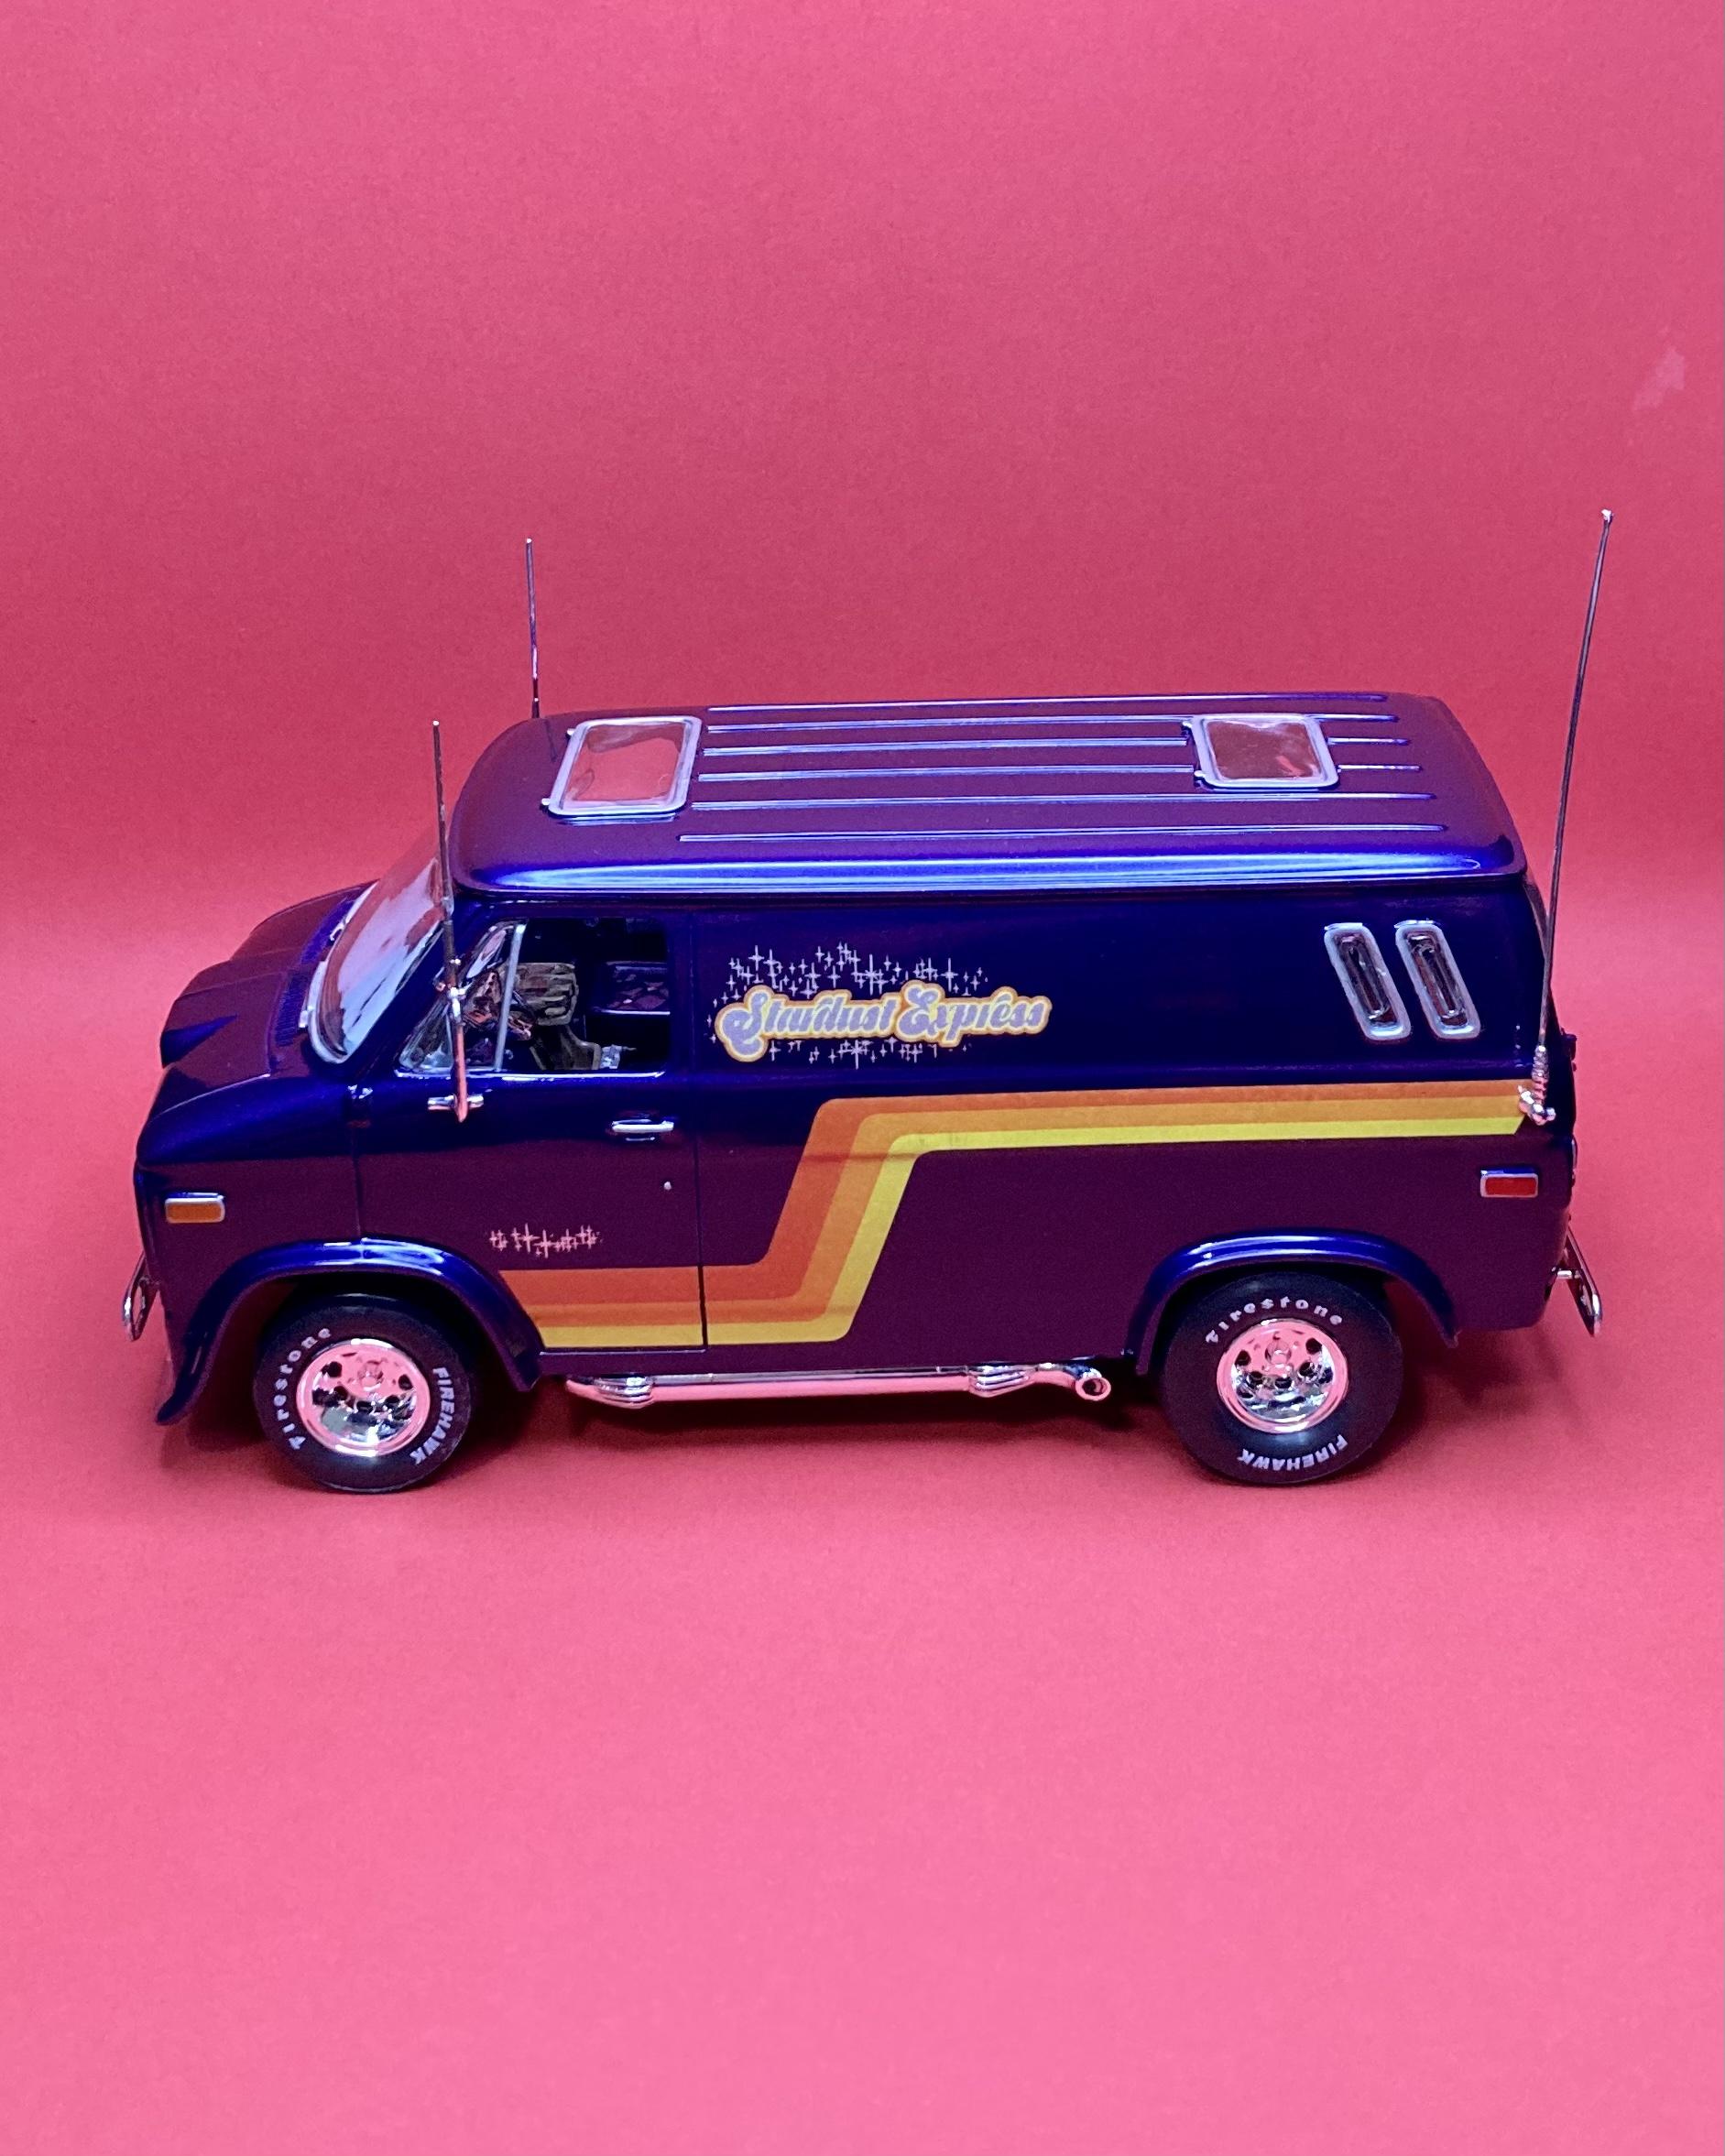
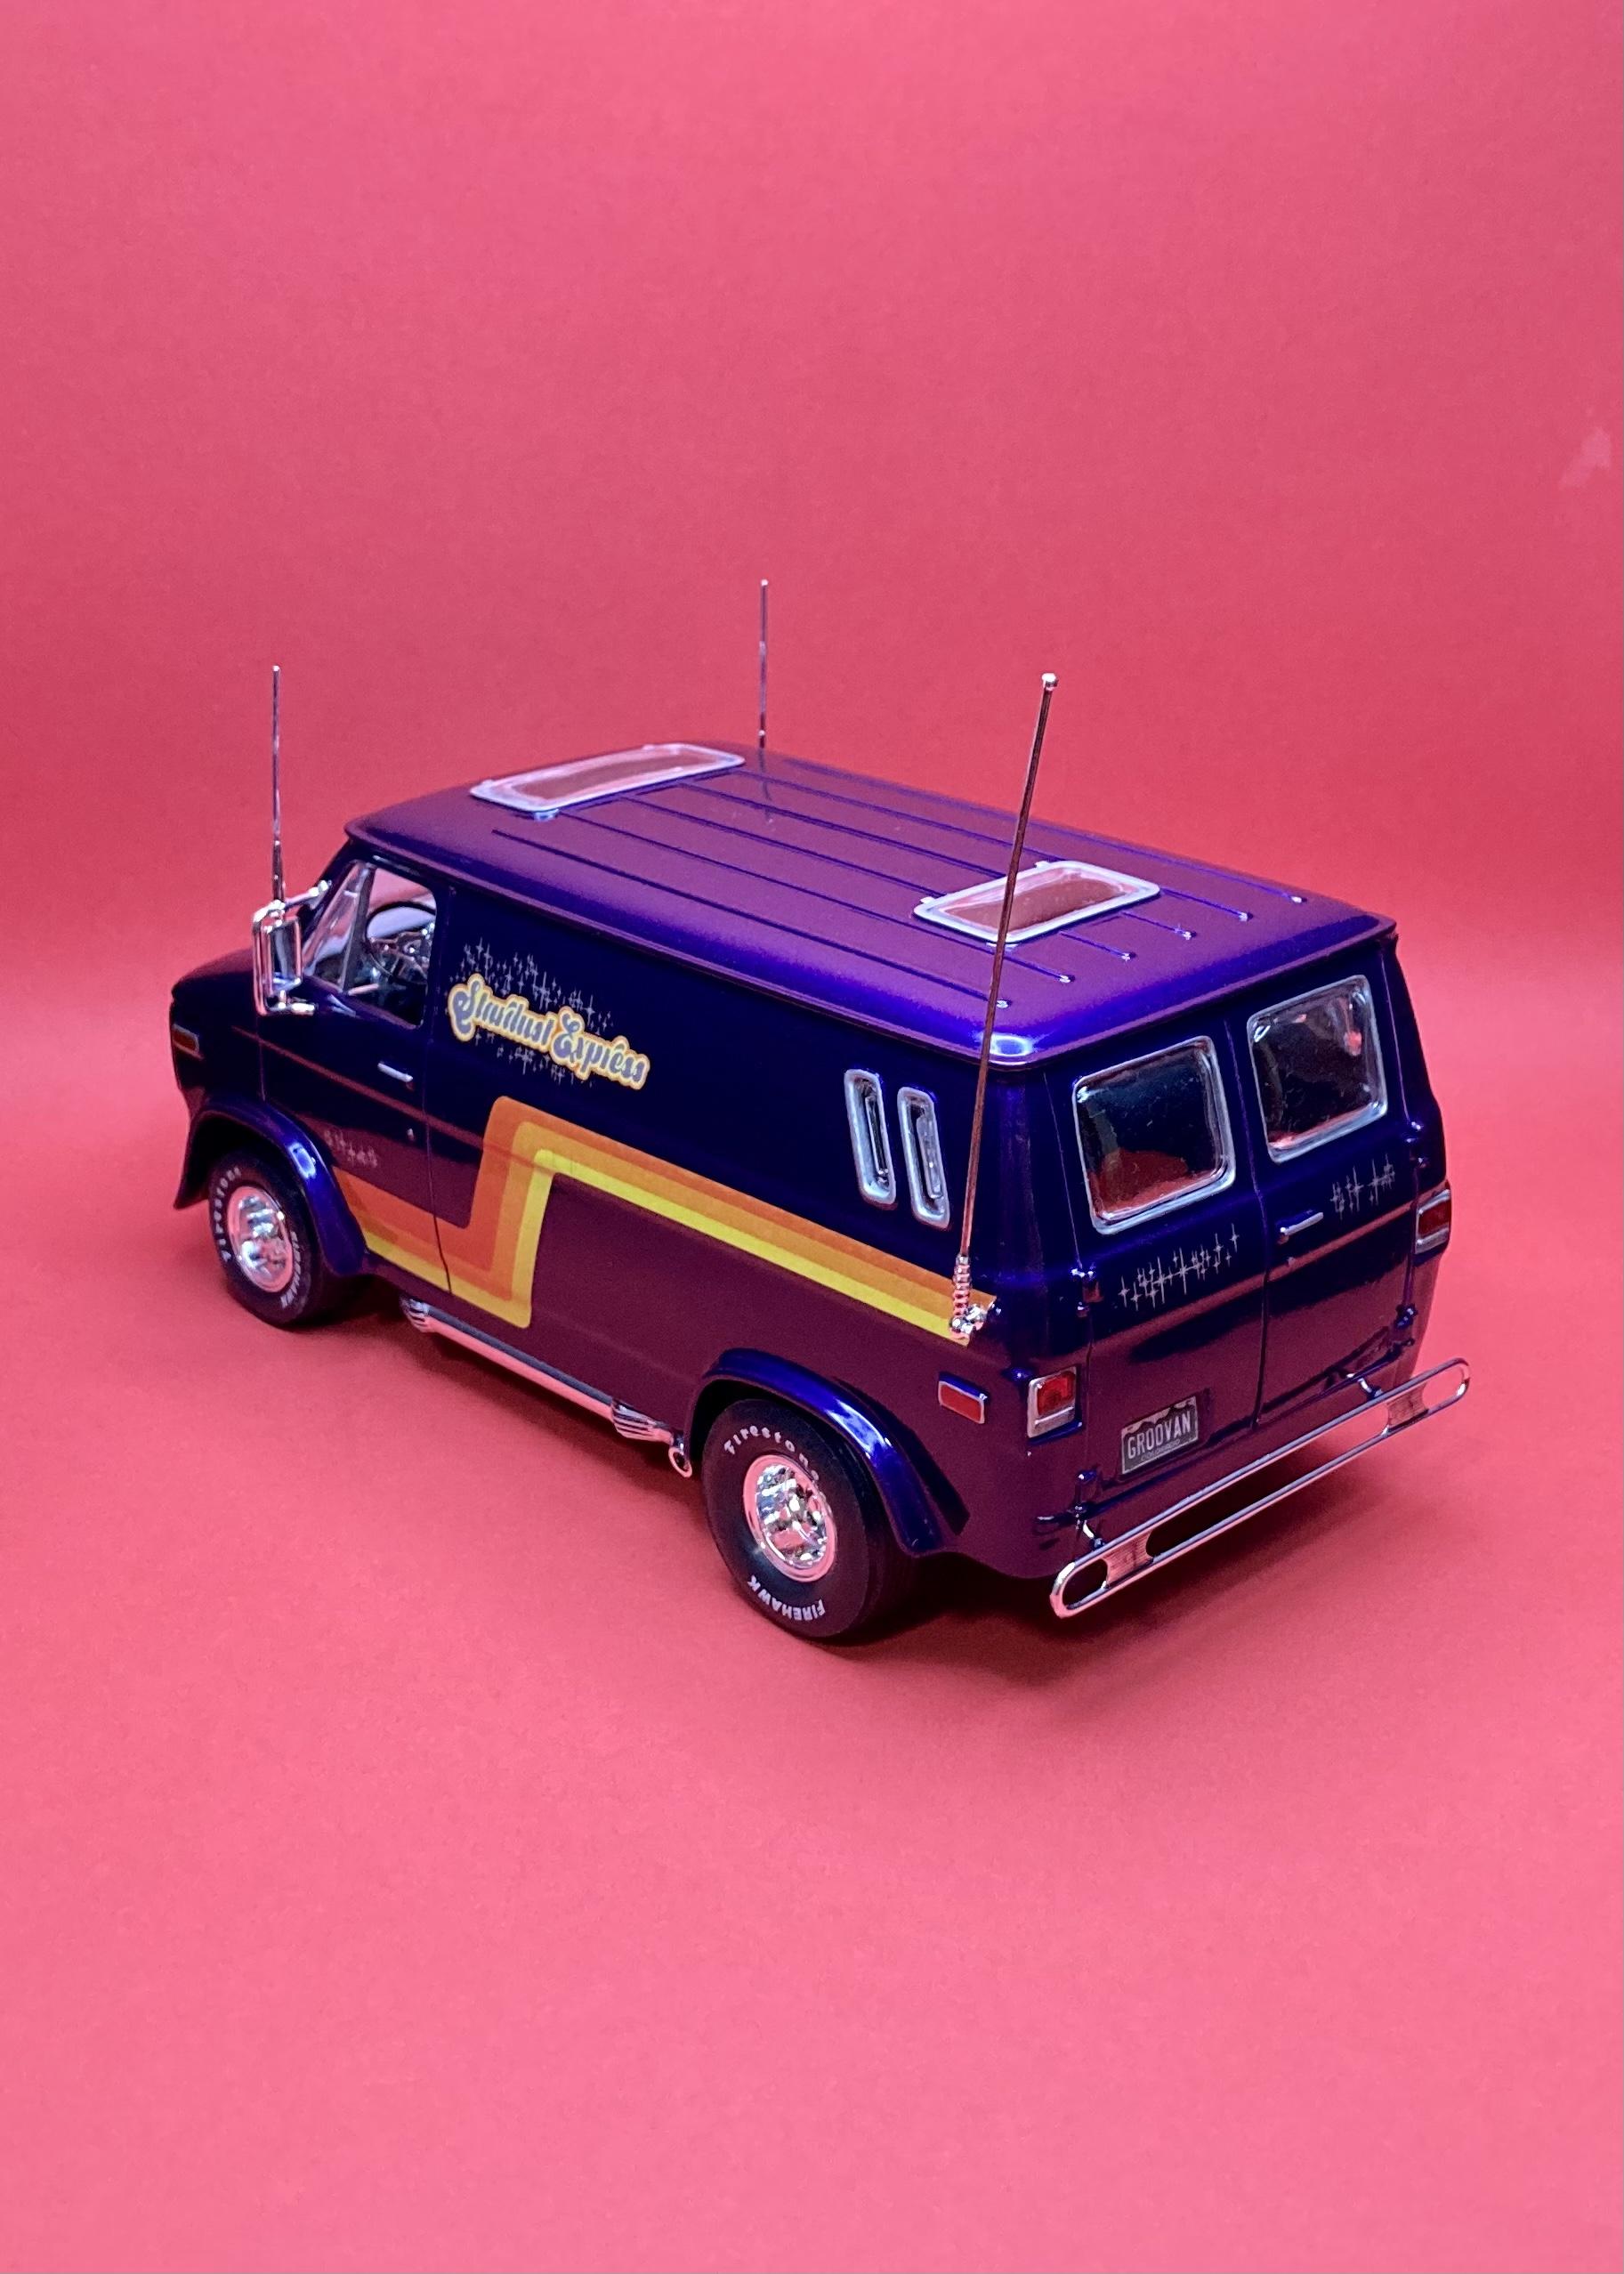
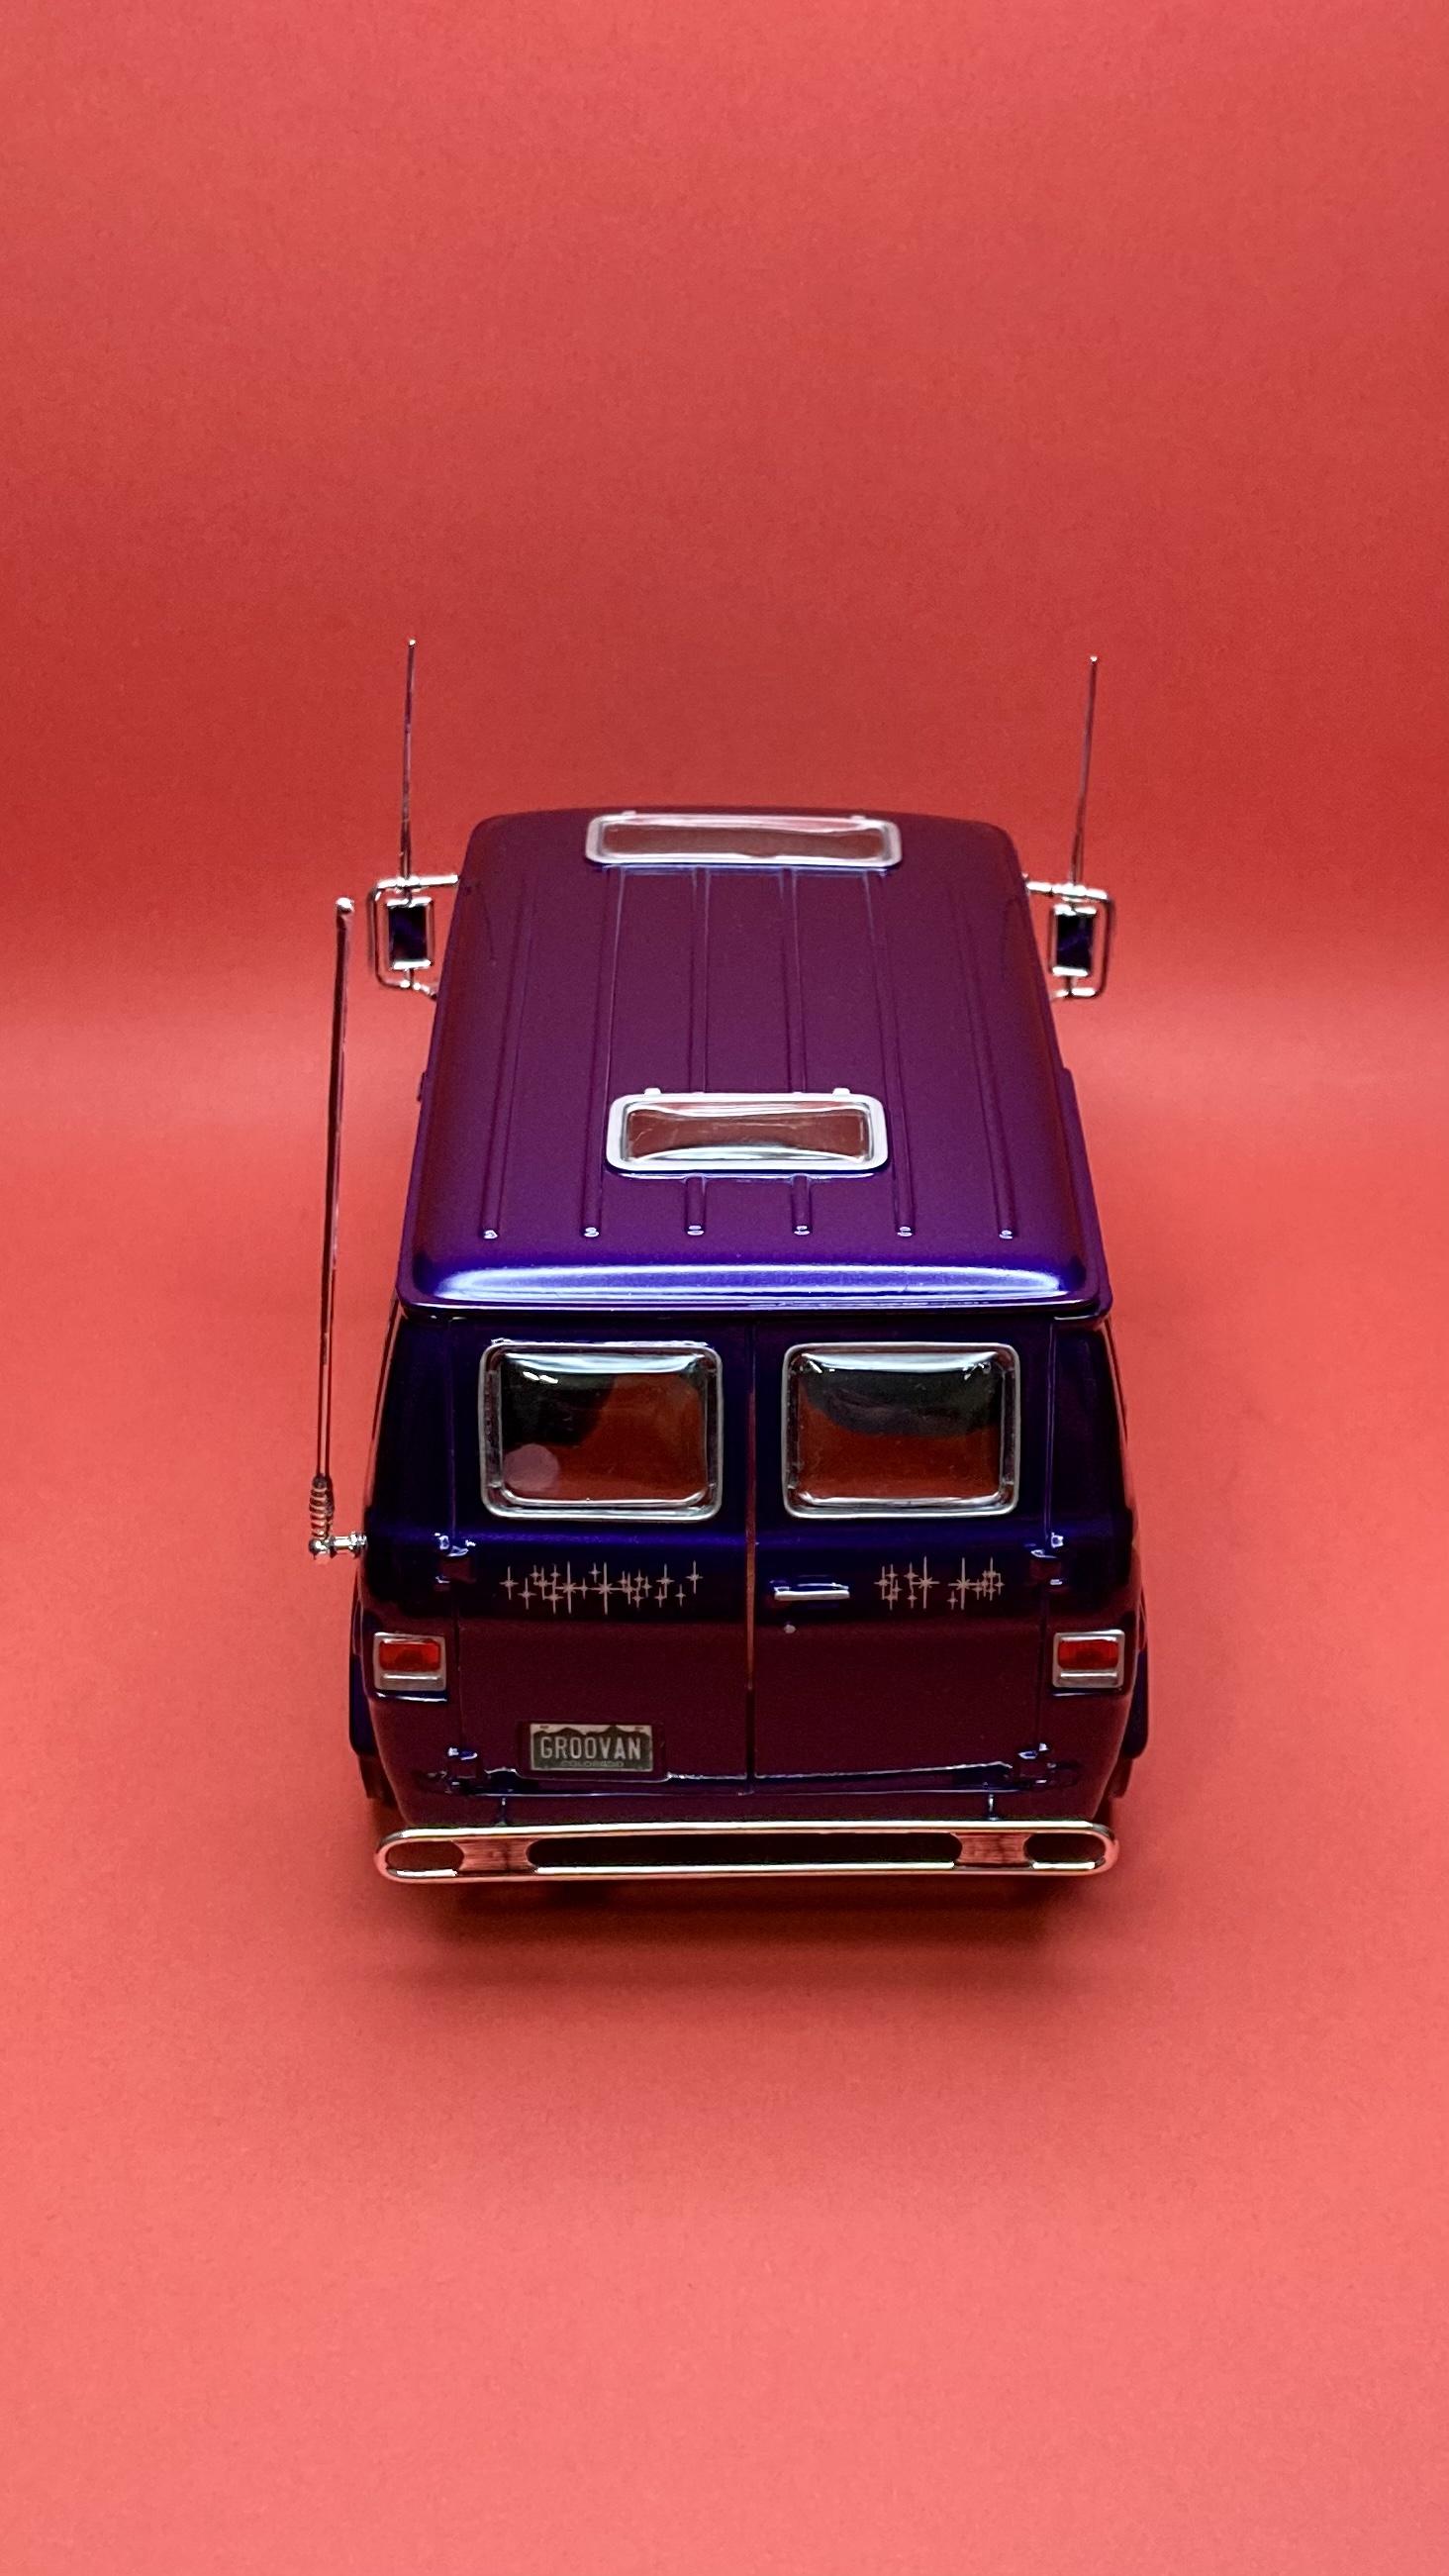
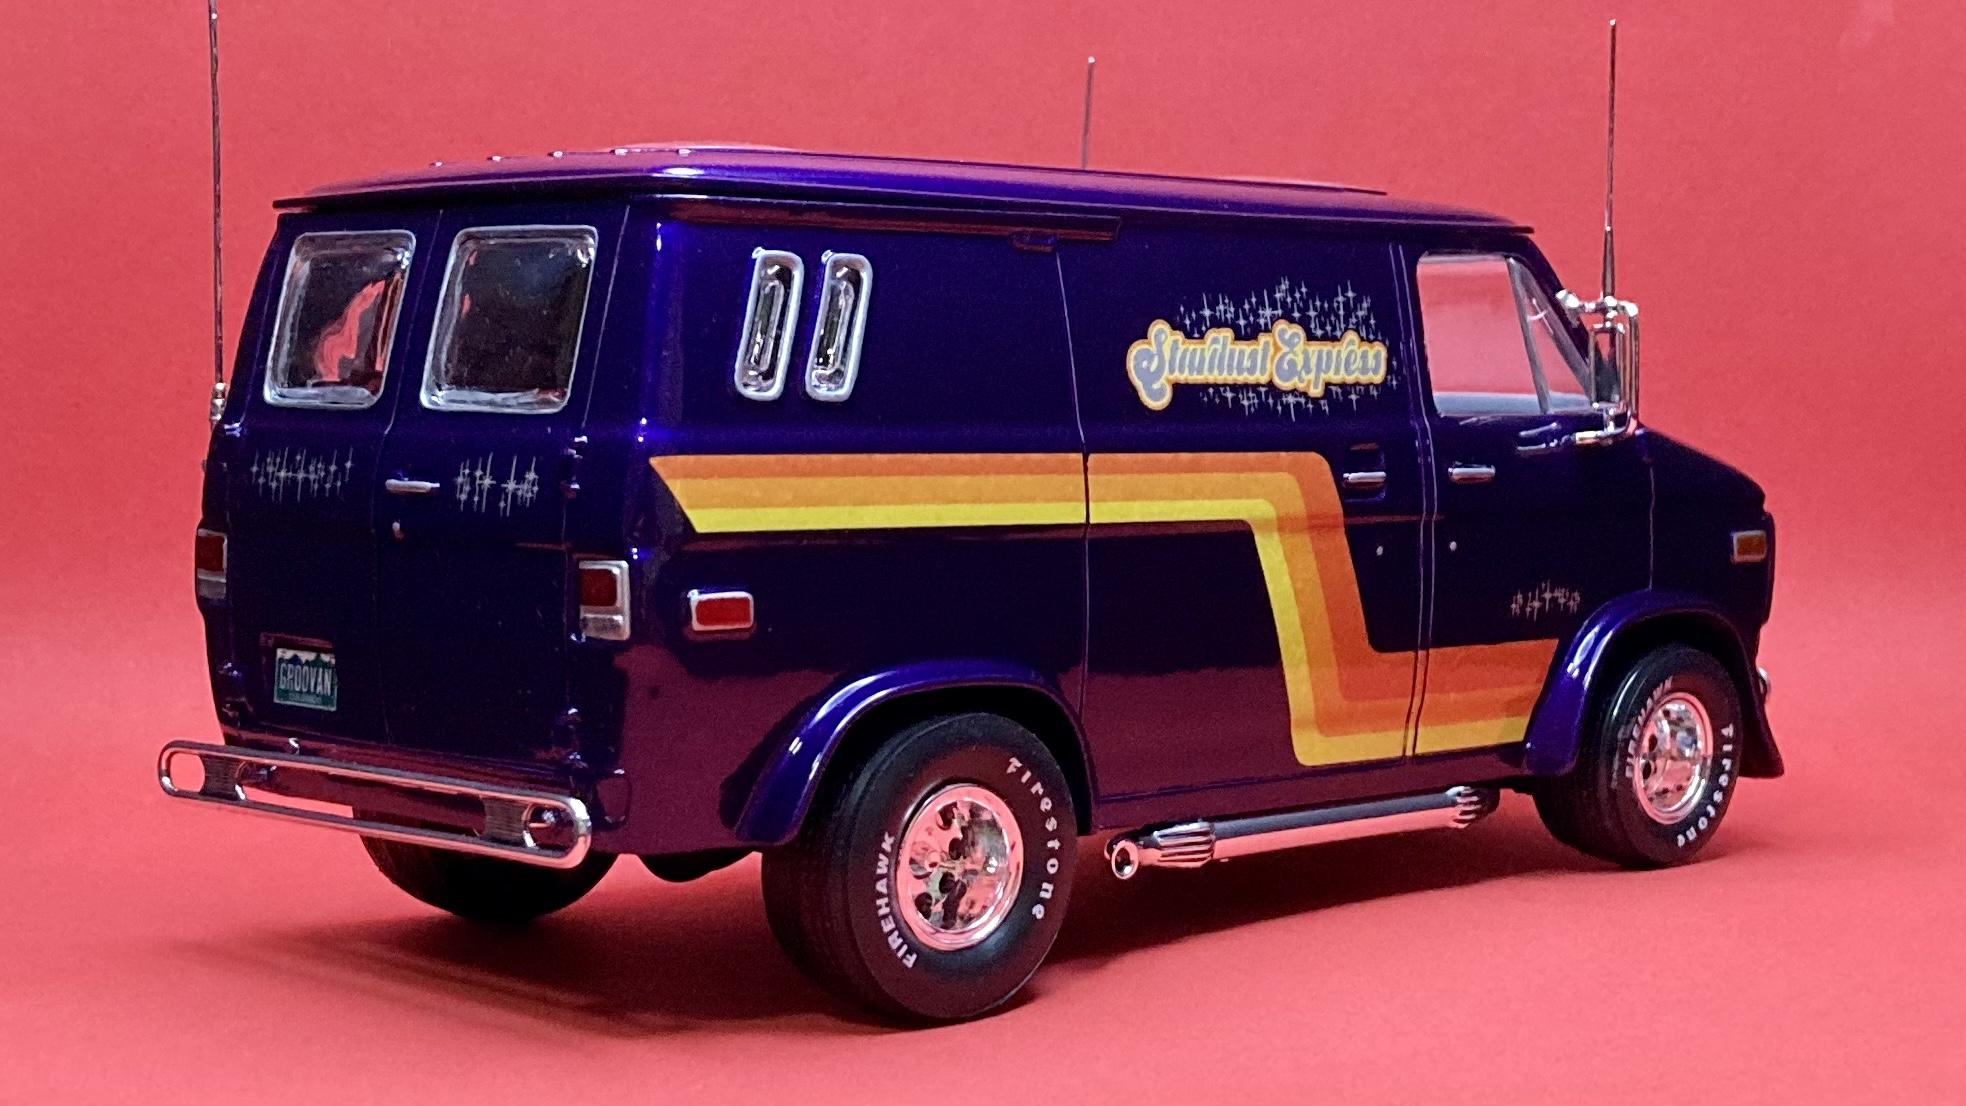
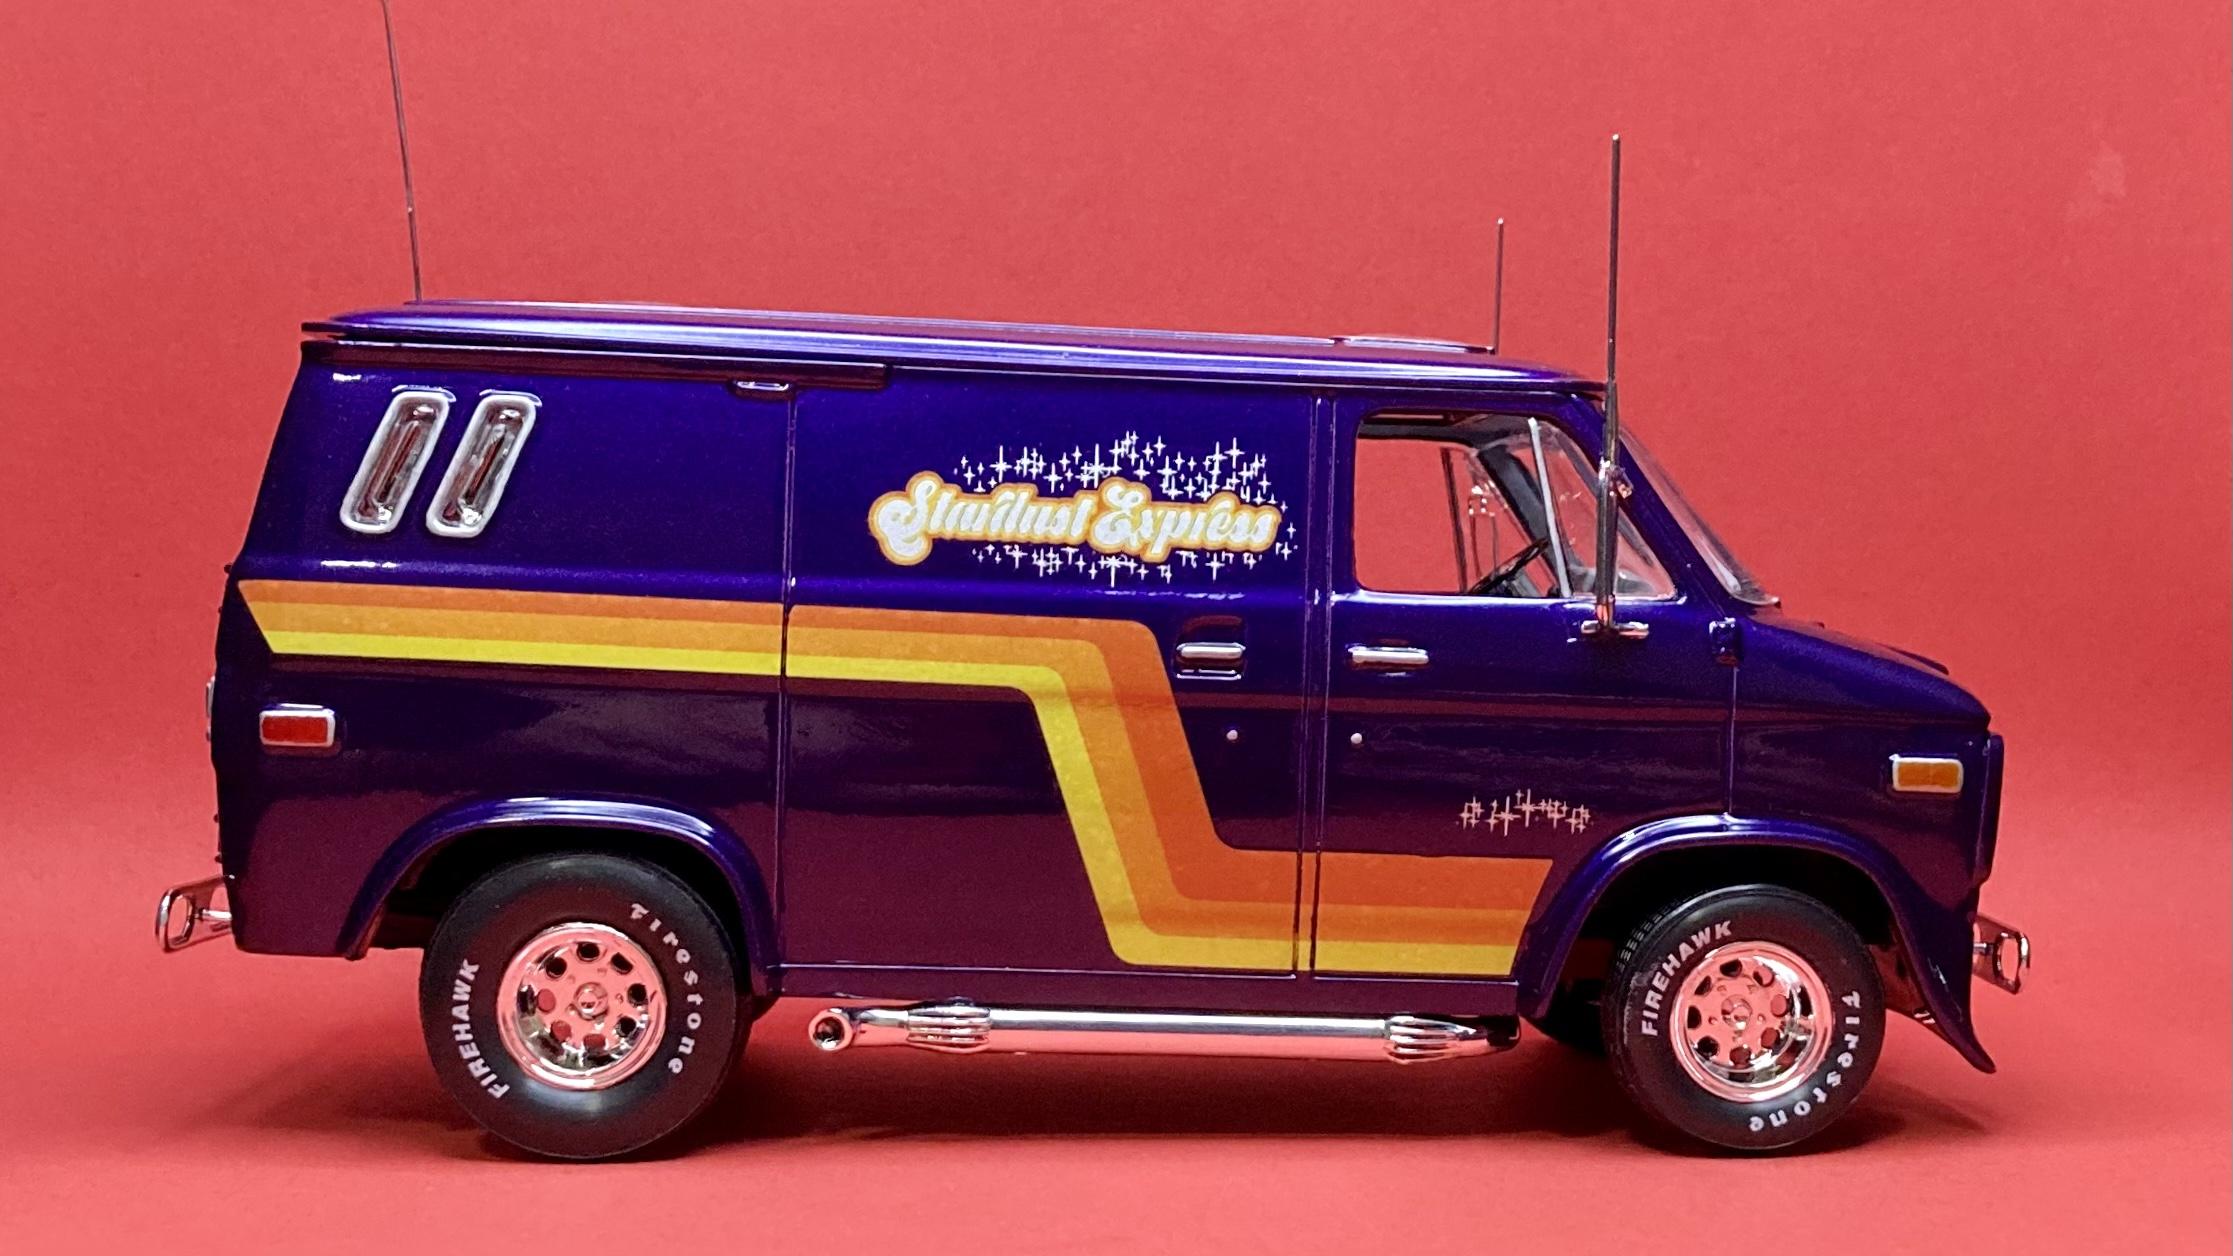
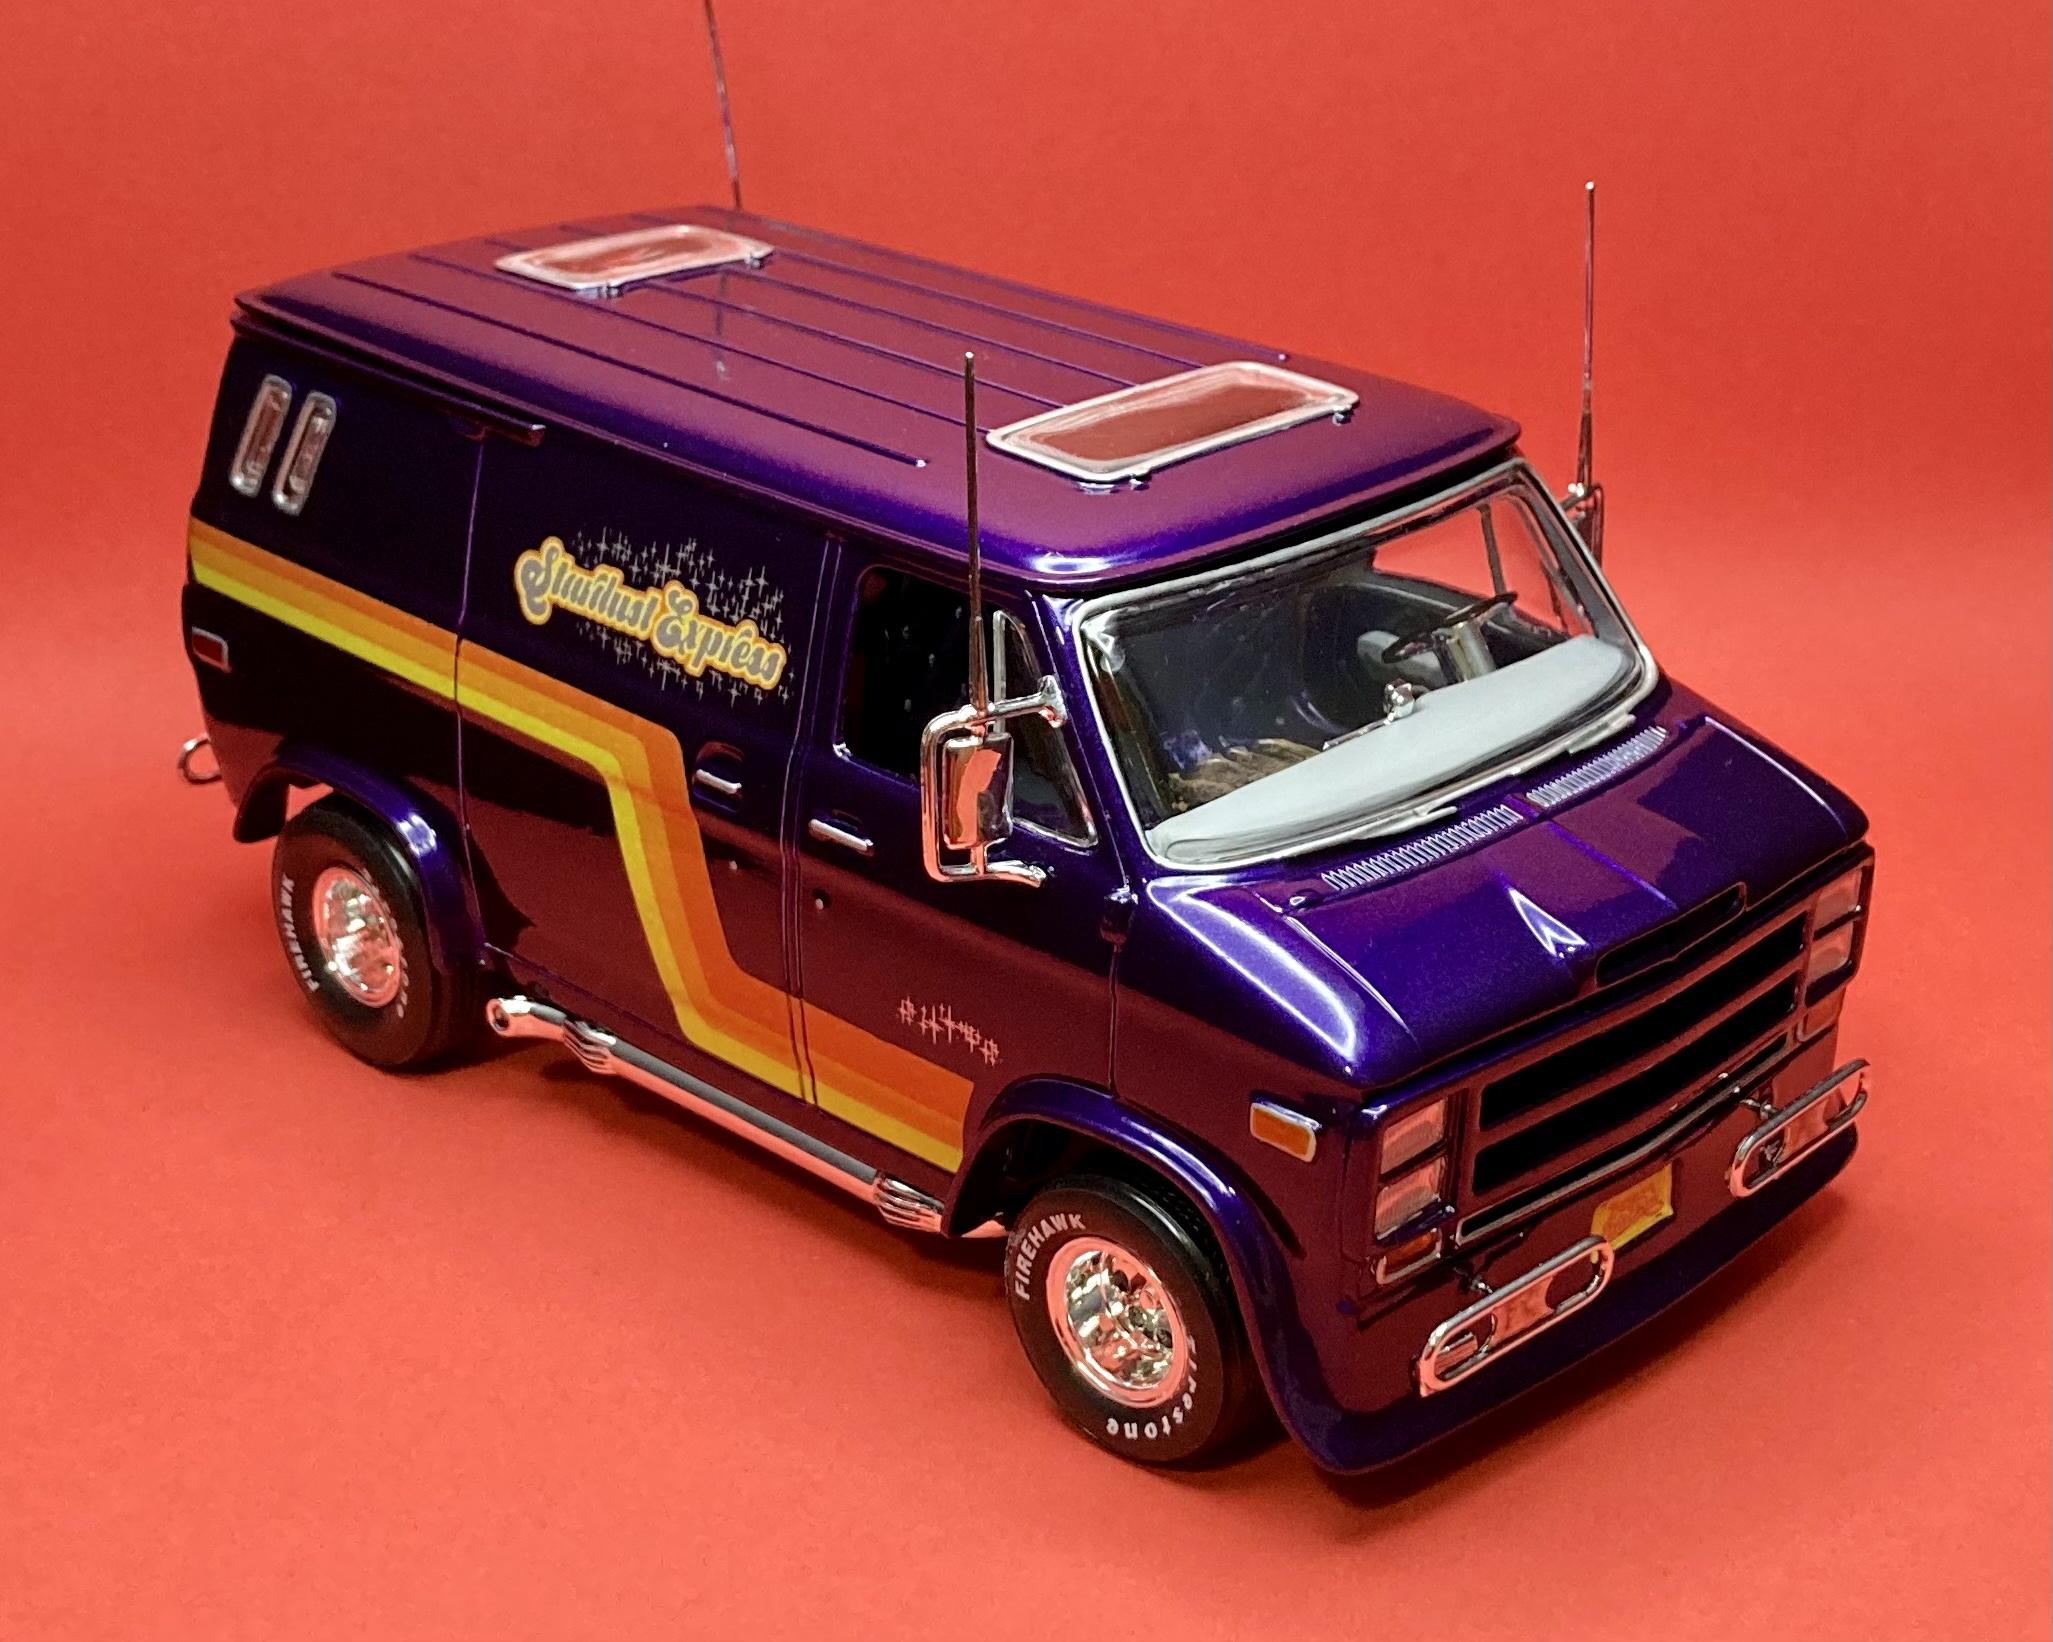
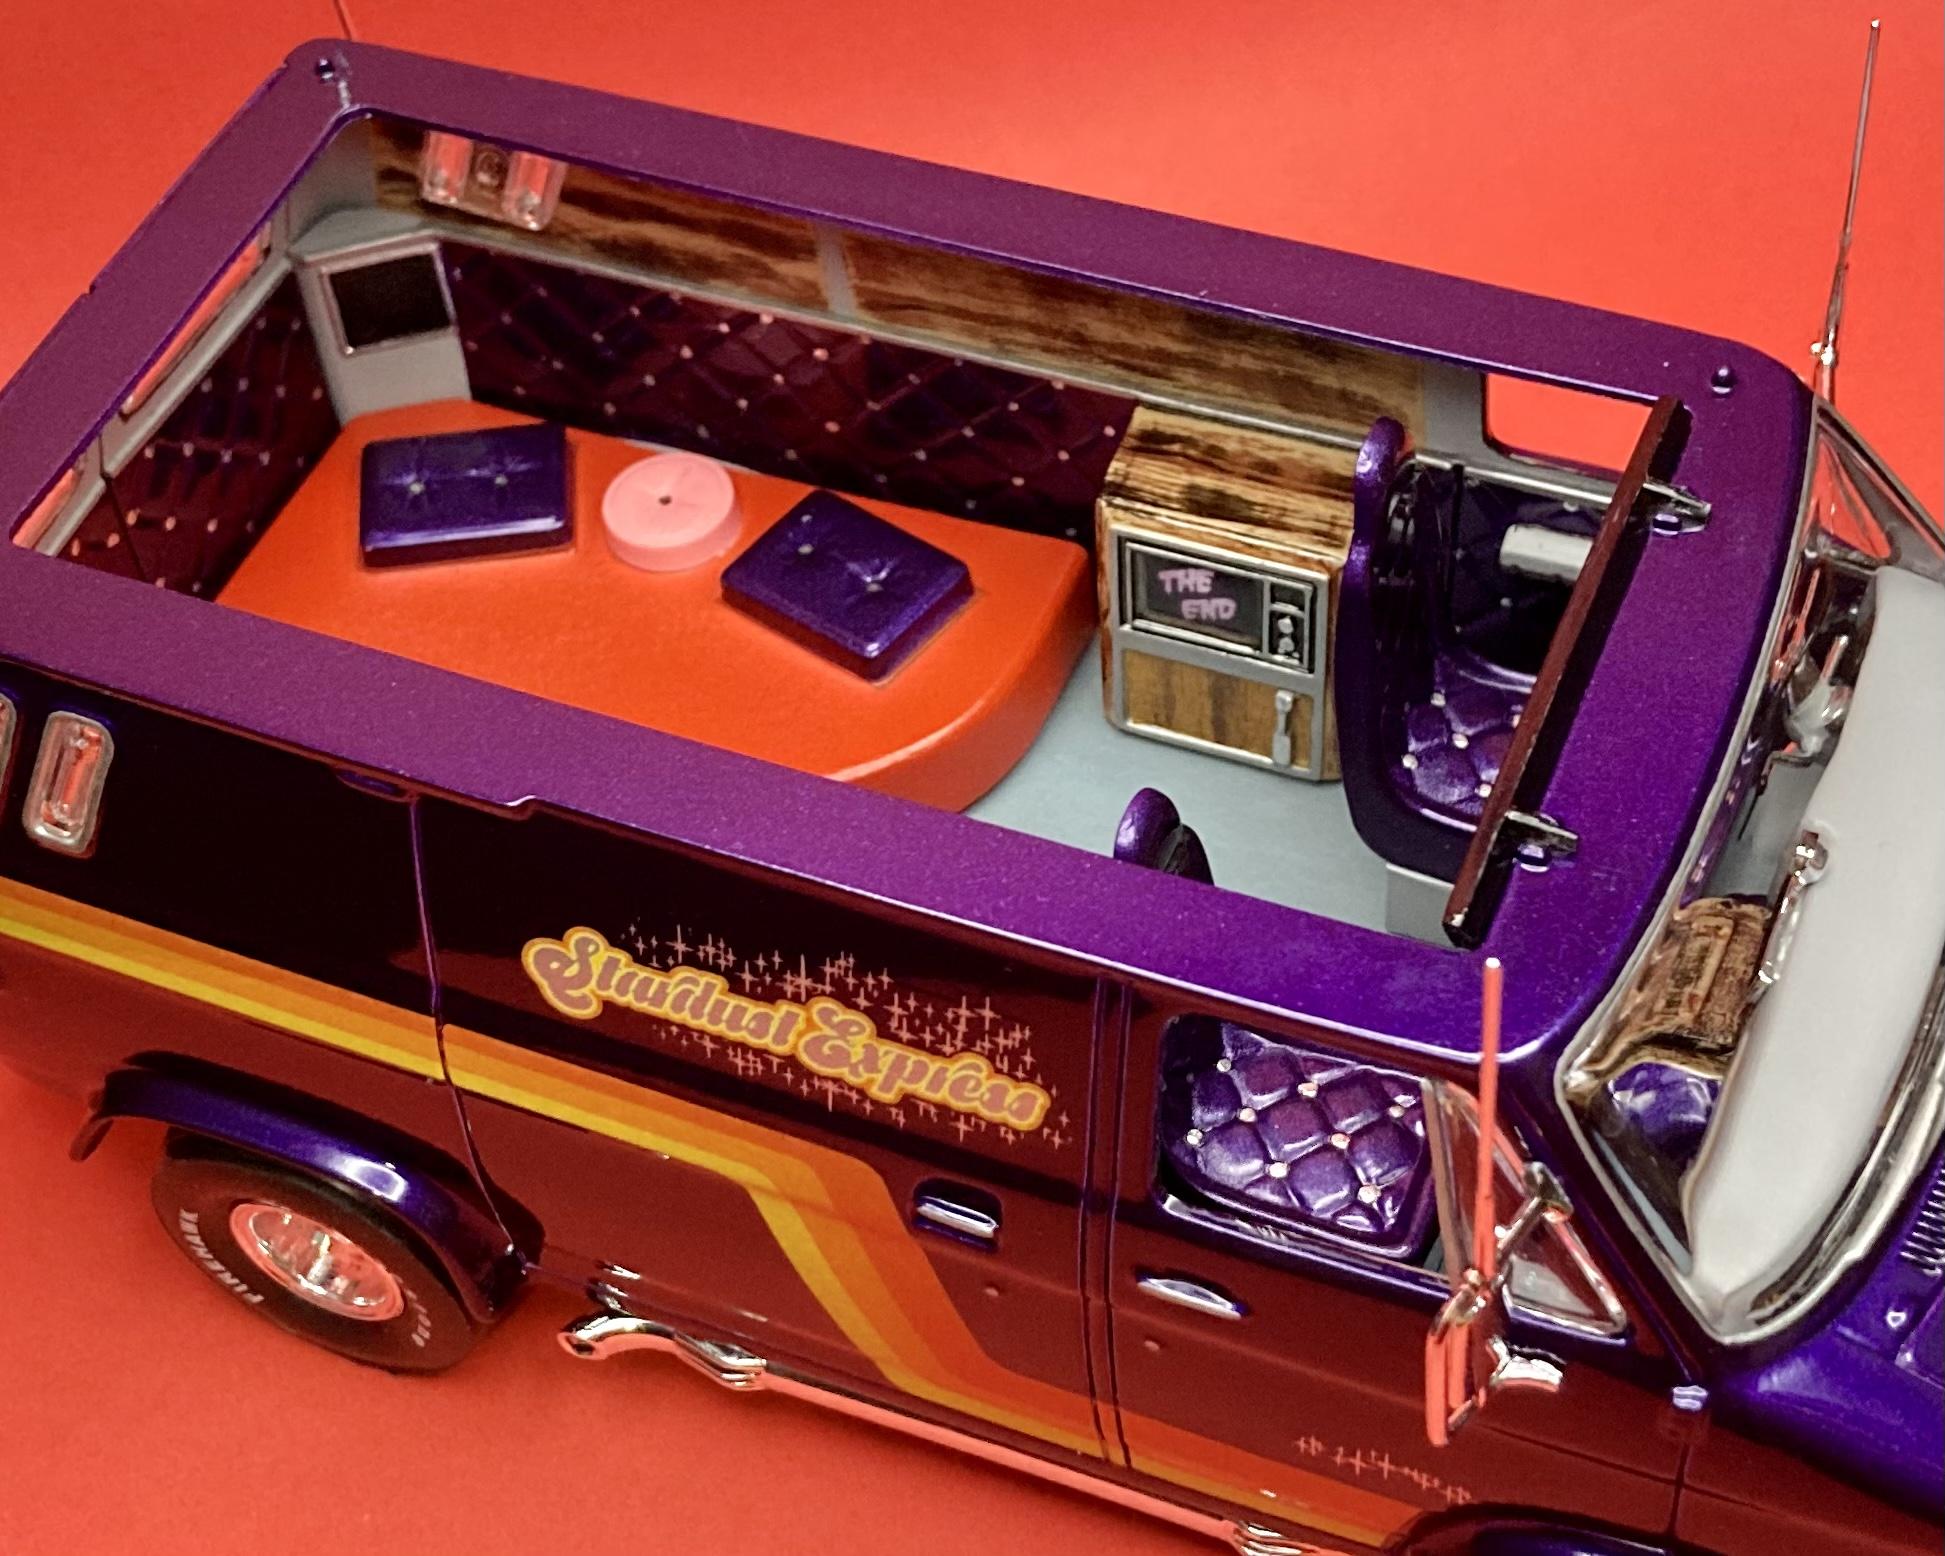
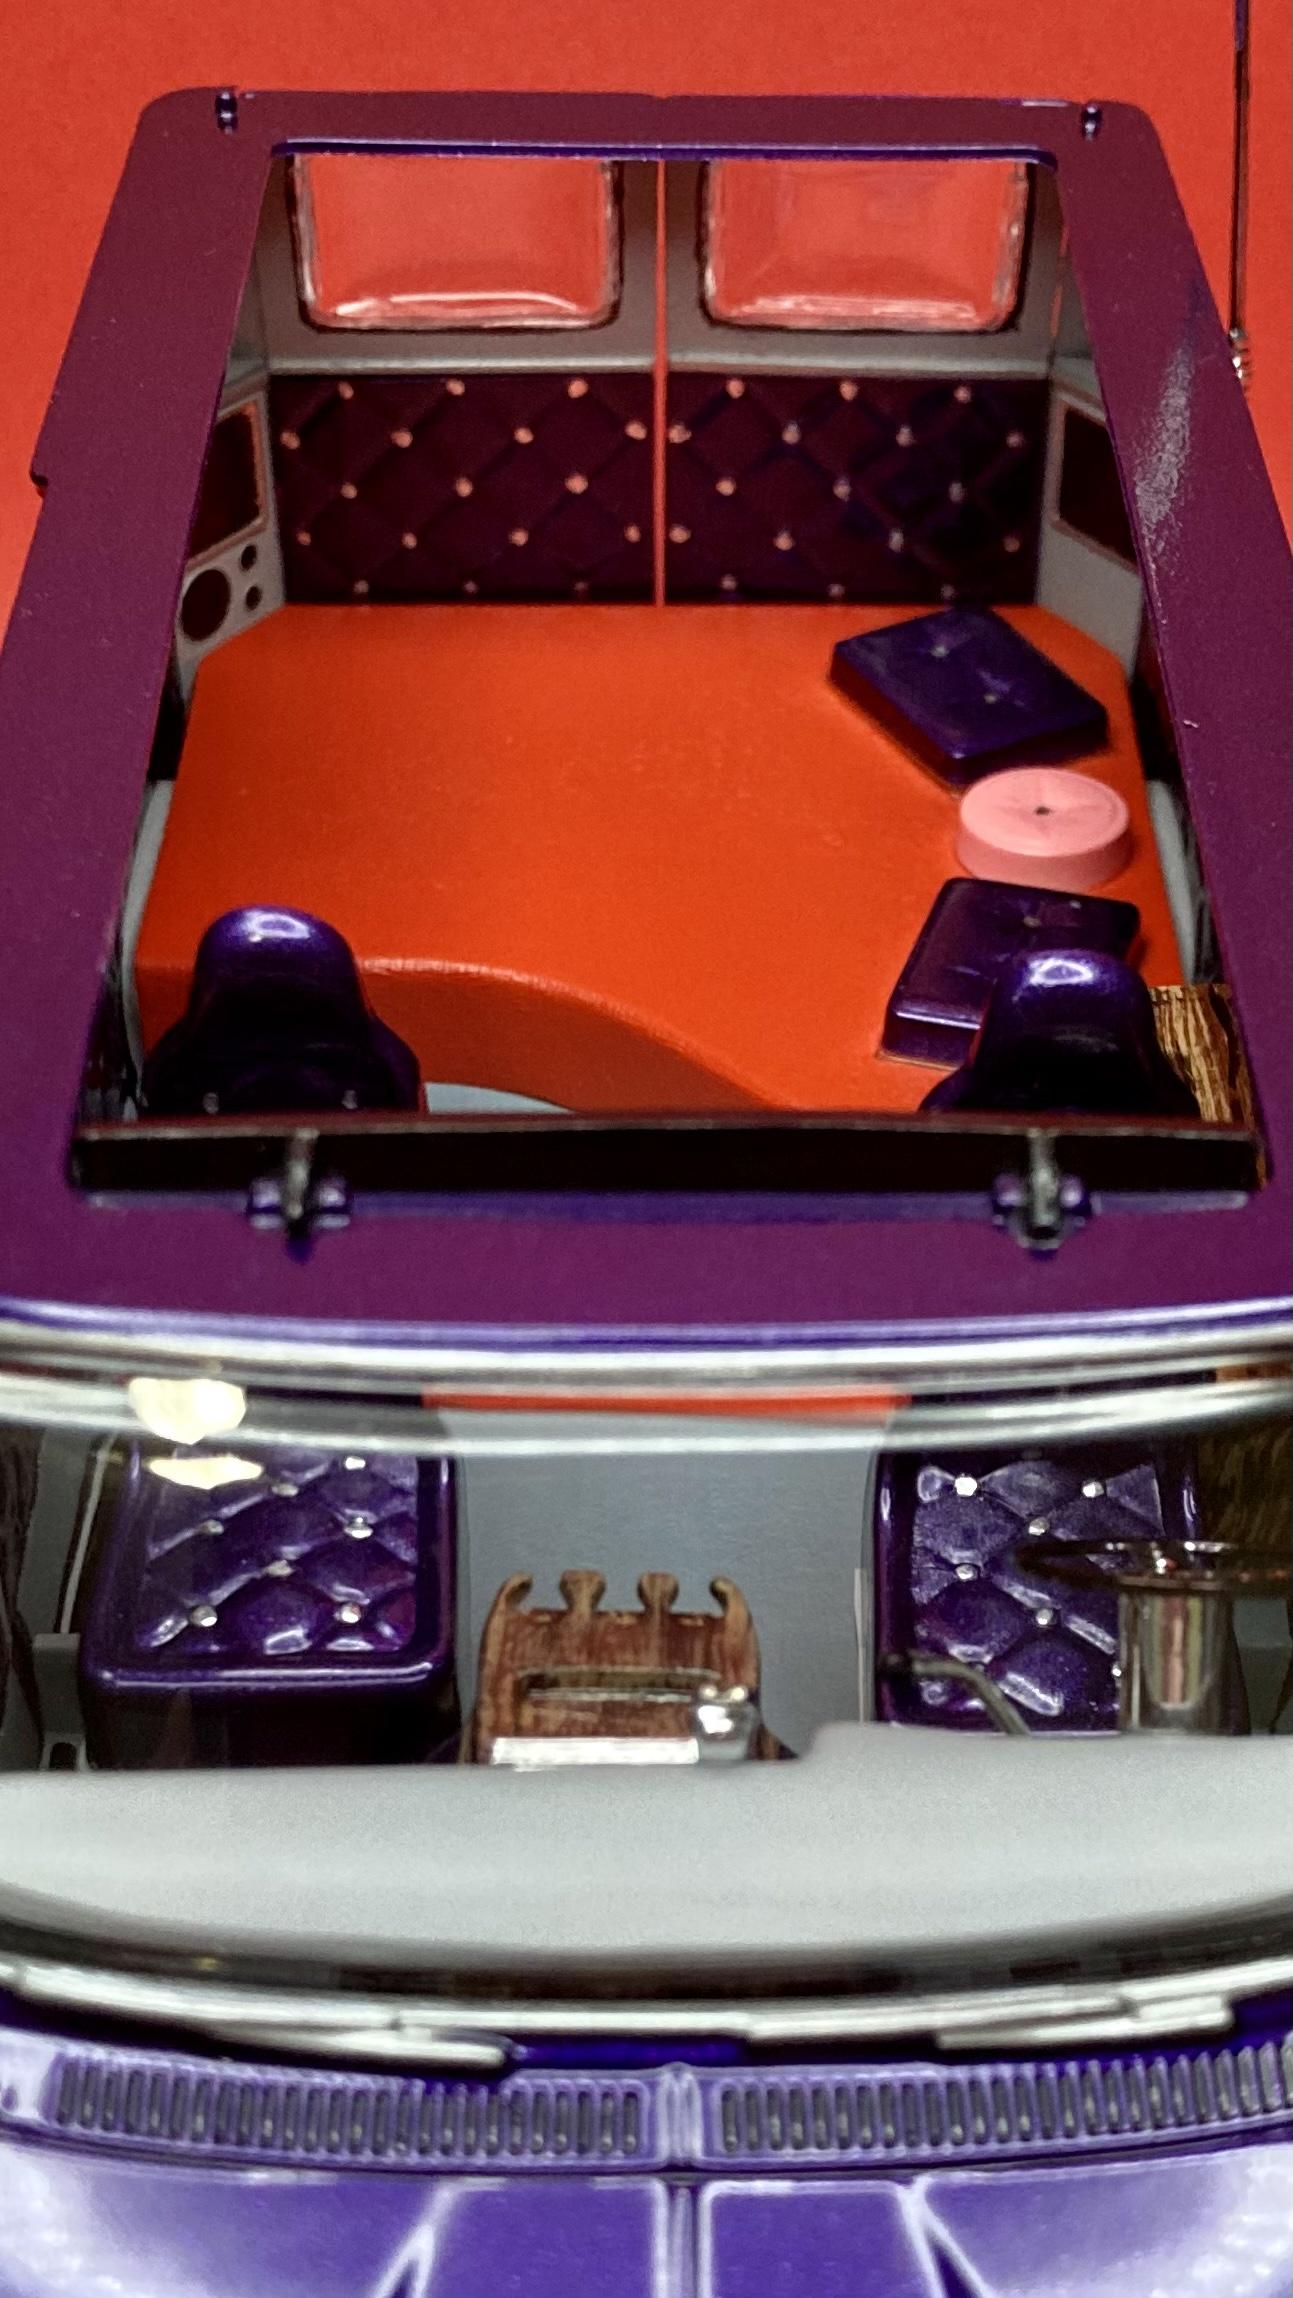
Here’s my finished ‘76 Chevy van custom from Revell! I have a WIP posted under the Workbench if you’re interested. Built box stock with Testors Extreme Lacquer Purple-Licious on the body, with two coats of Wet Look clear and two coats of Pledge Floor Gloss. Interior is the same purple for the upholstery, and Tamiya gray primer and various acrylics for the details. This is a fun kit that goes together well!
- 20 replies
-
- 3
-
-

-
- revell
- custom van
- (and 1 more)
-
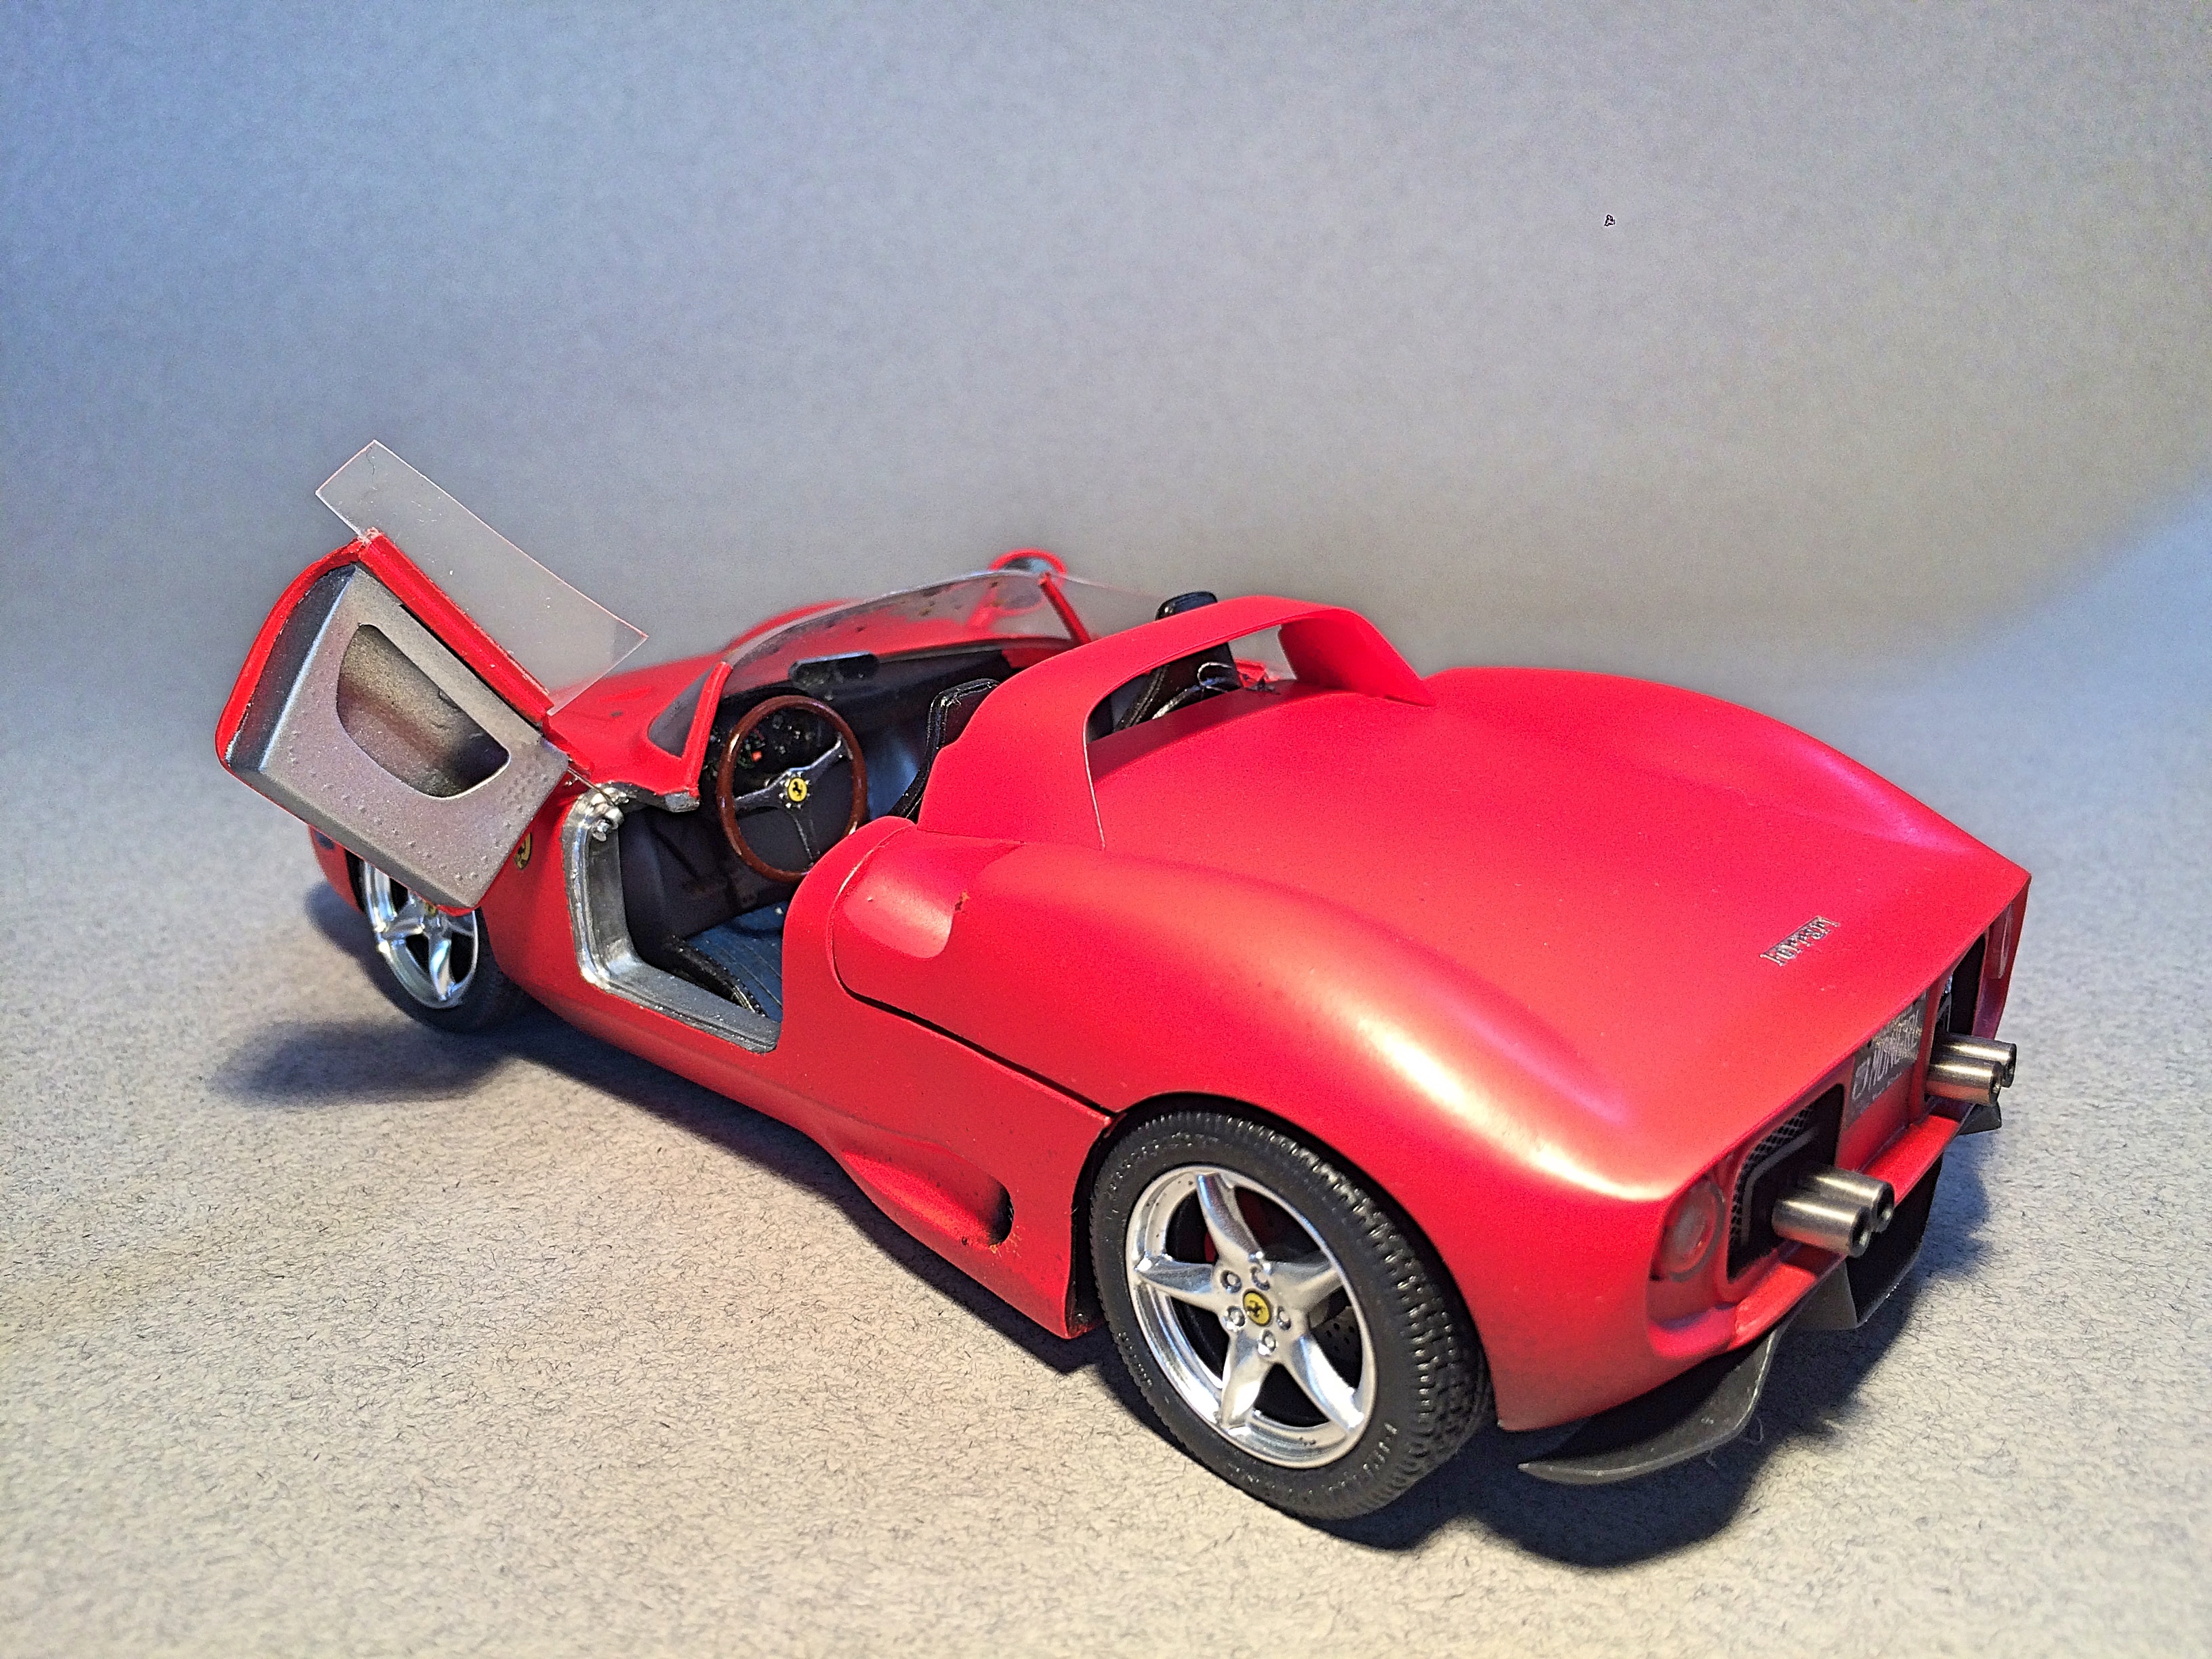
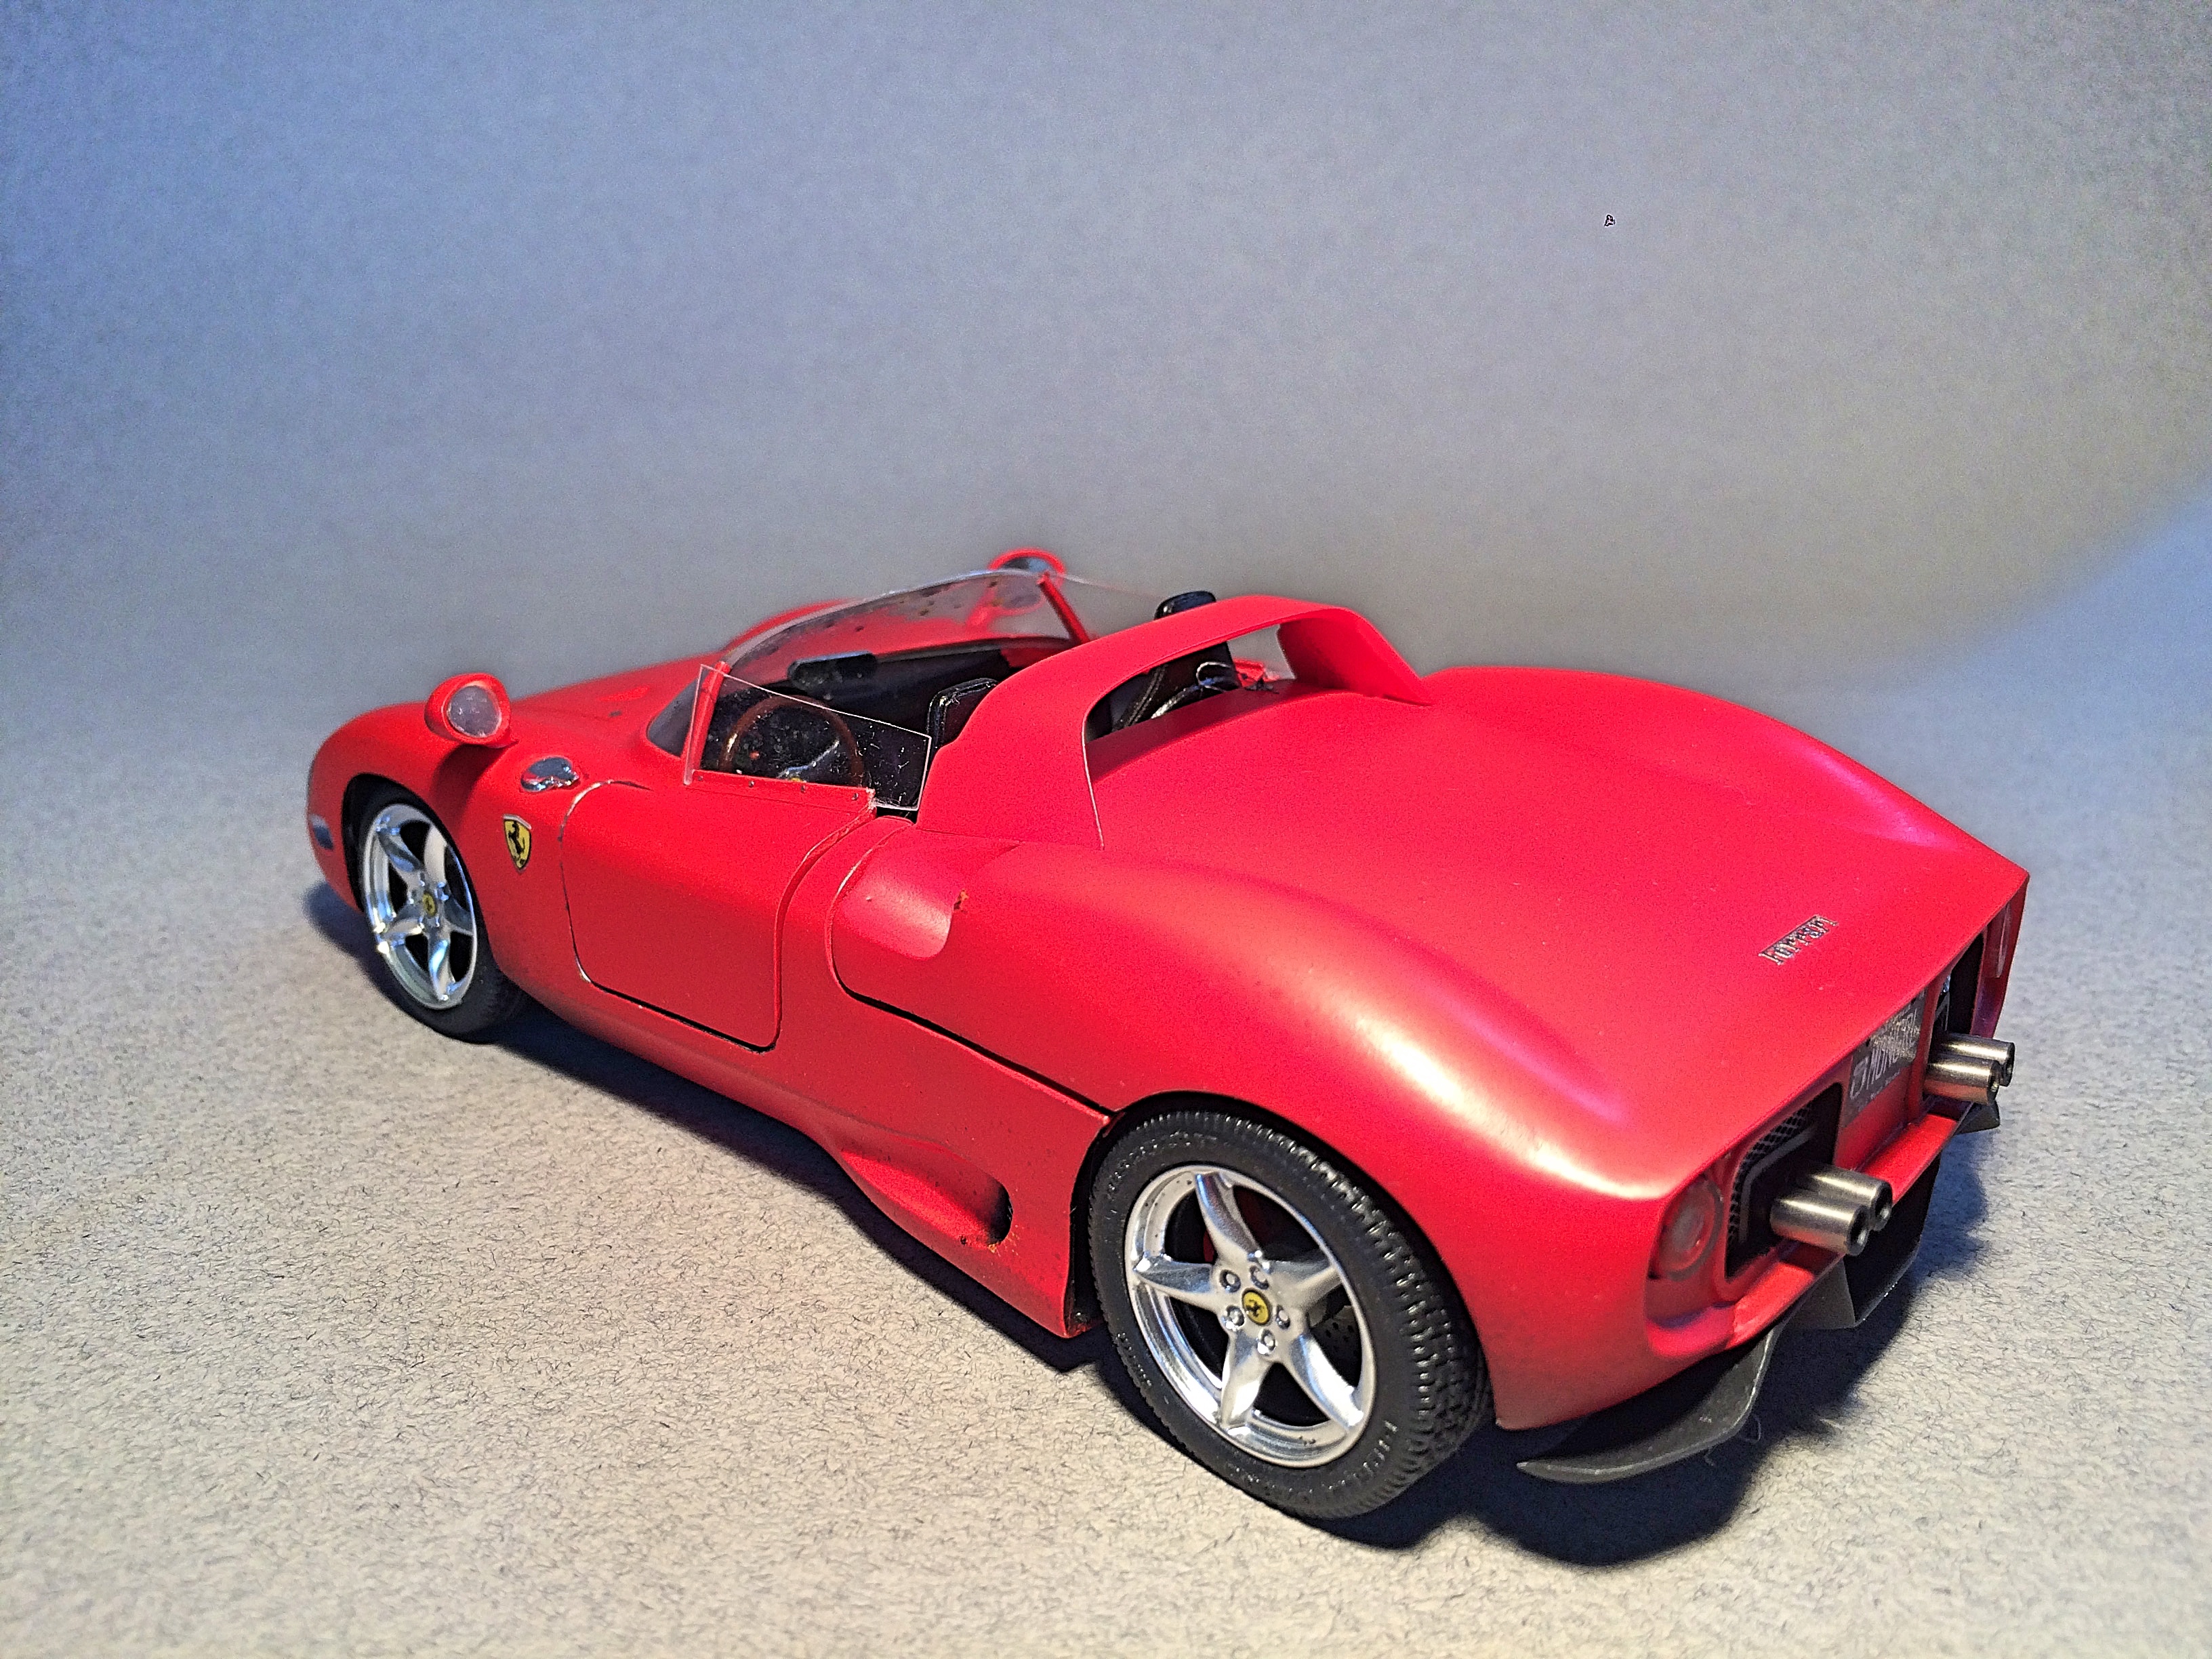
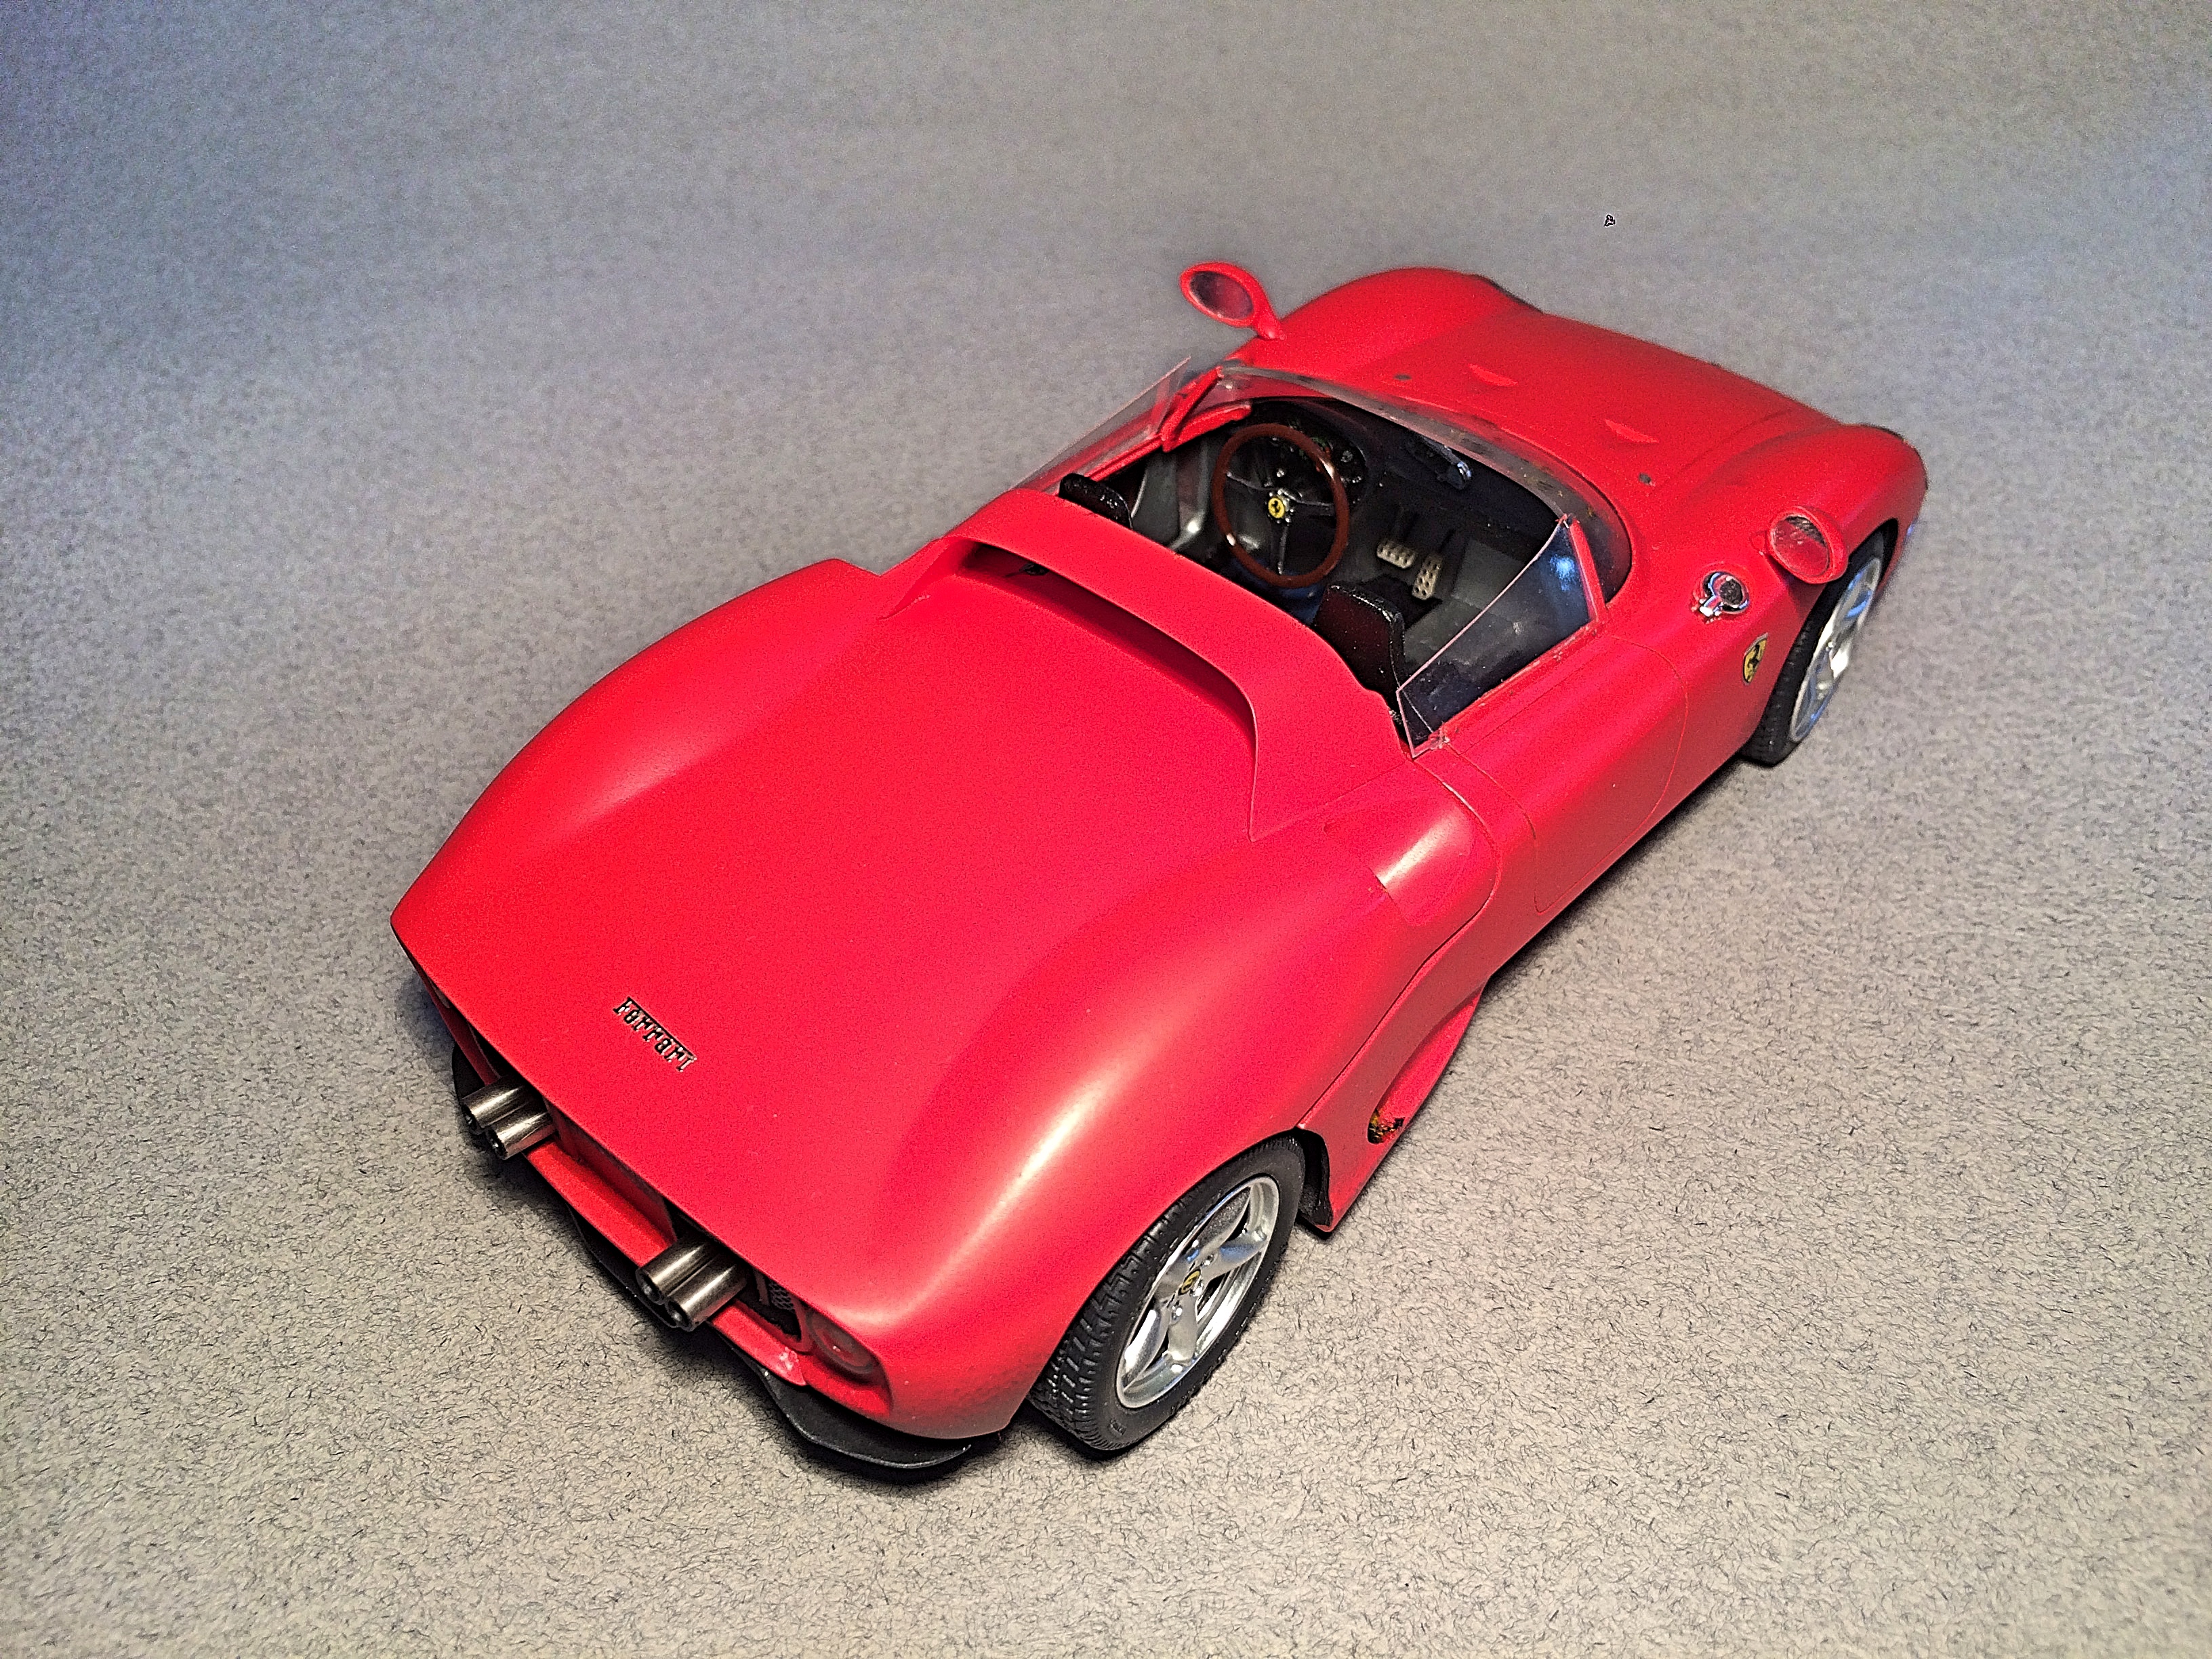
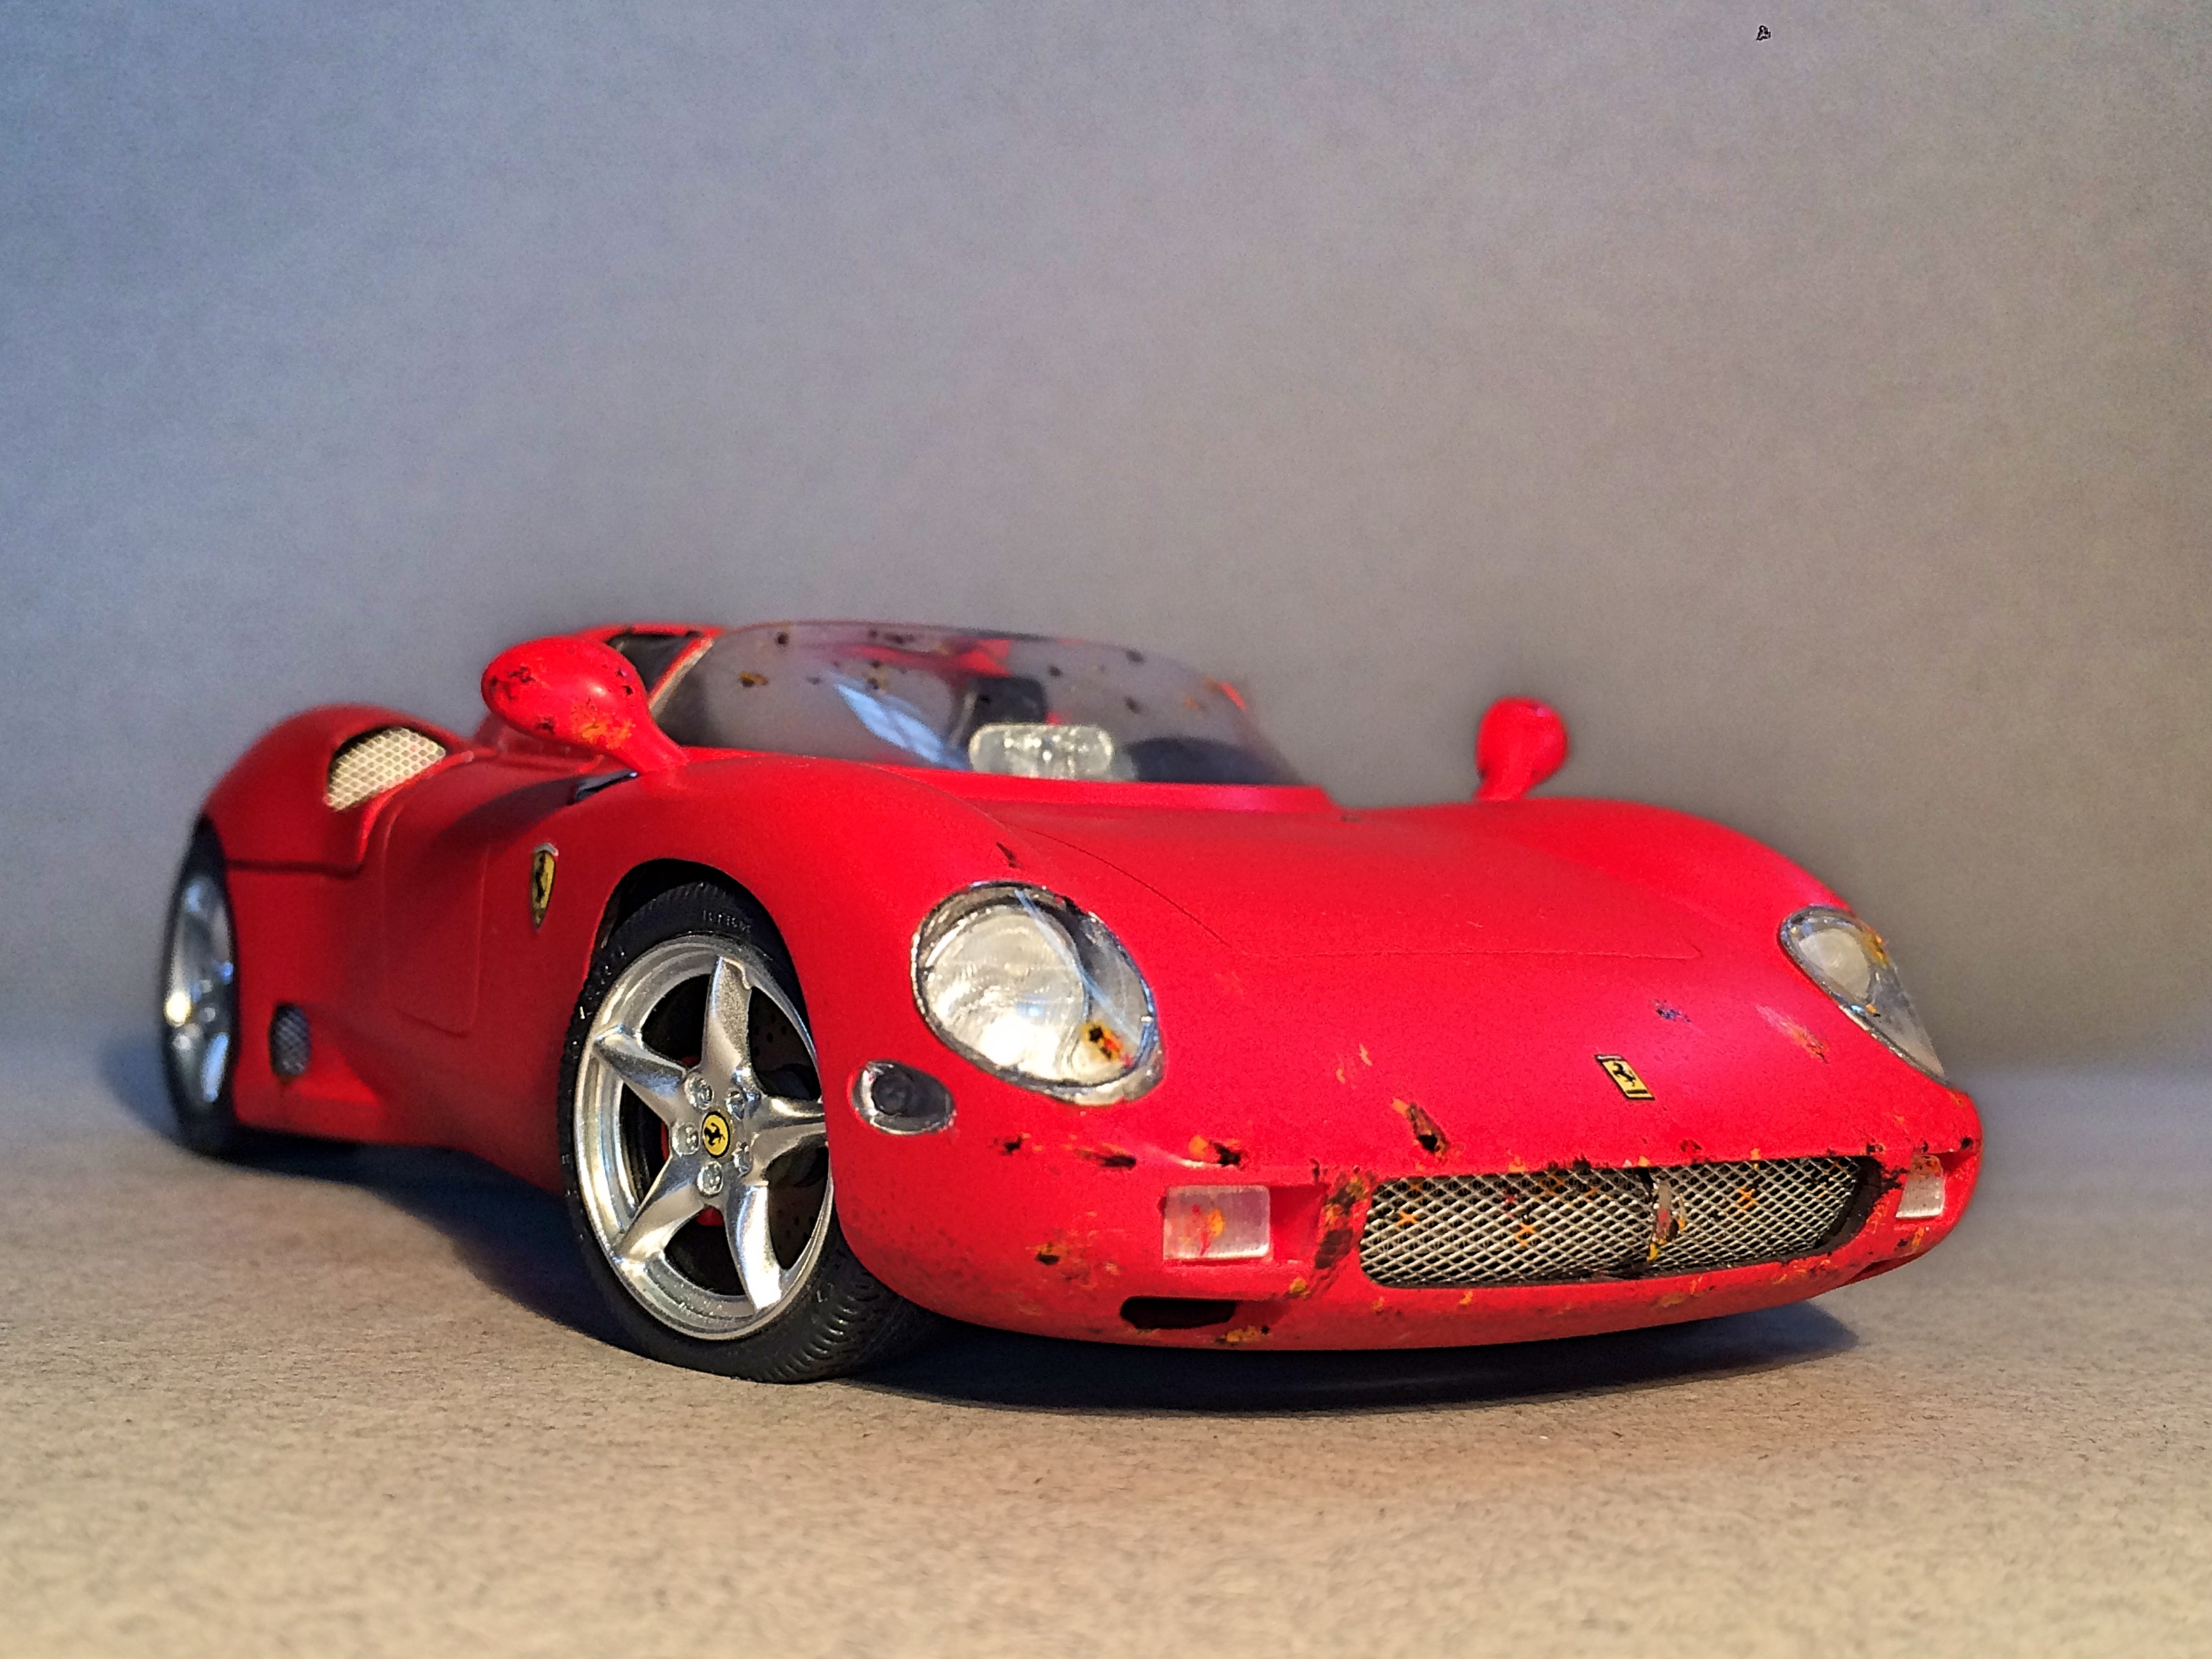
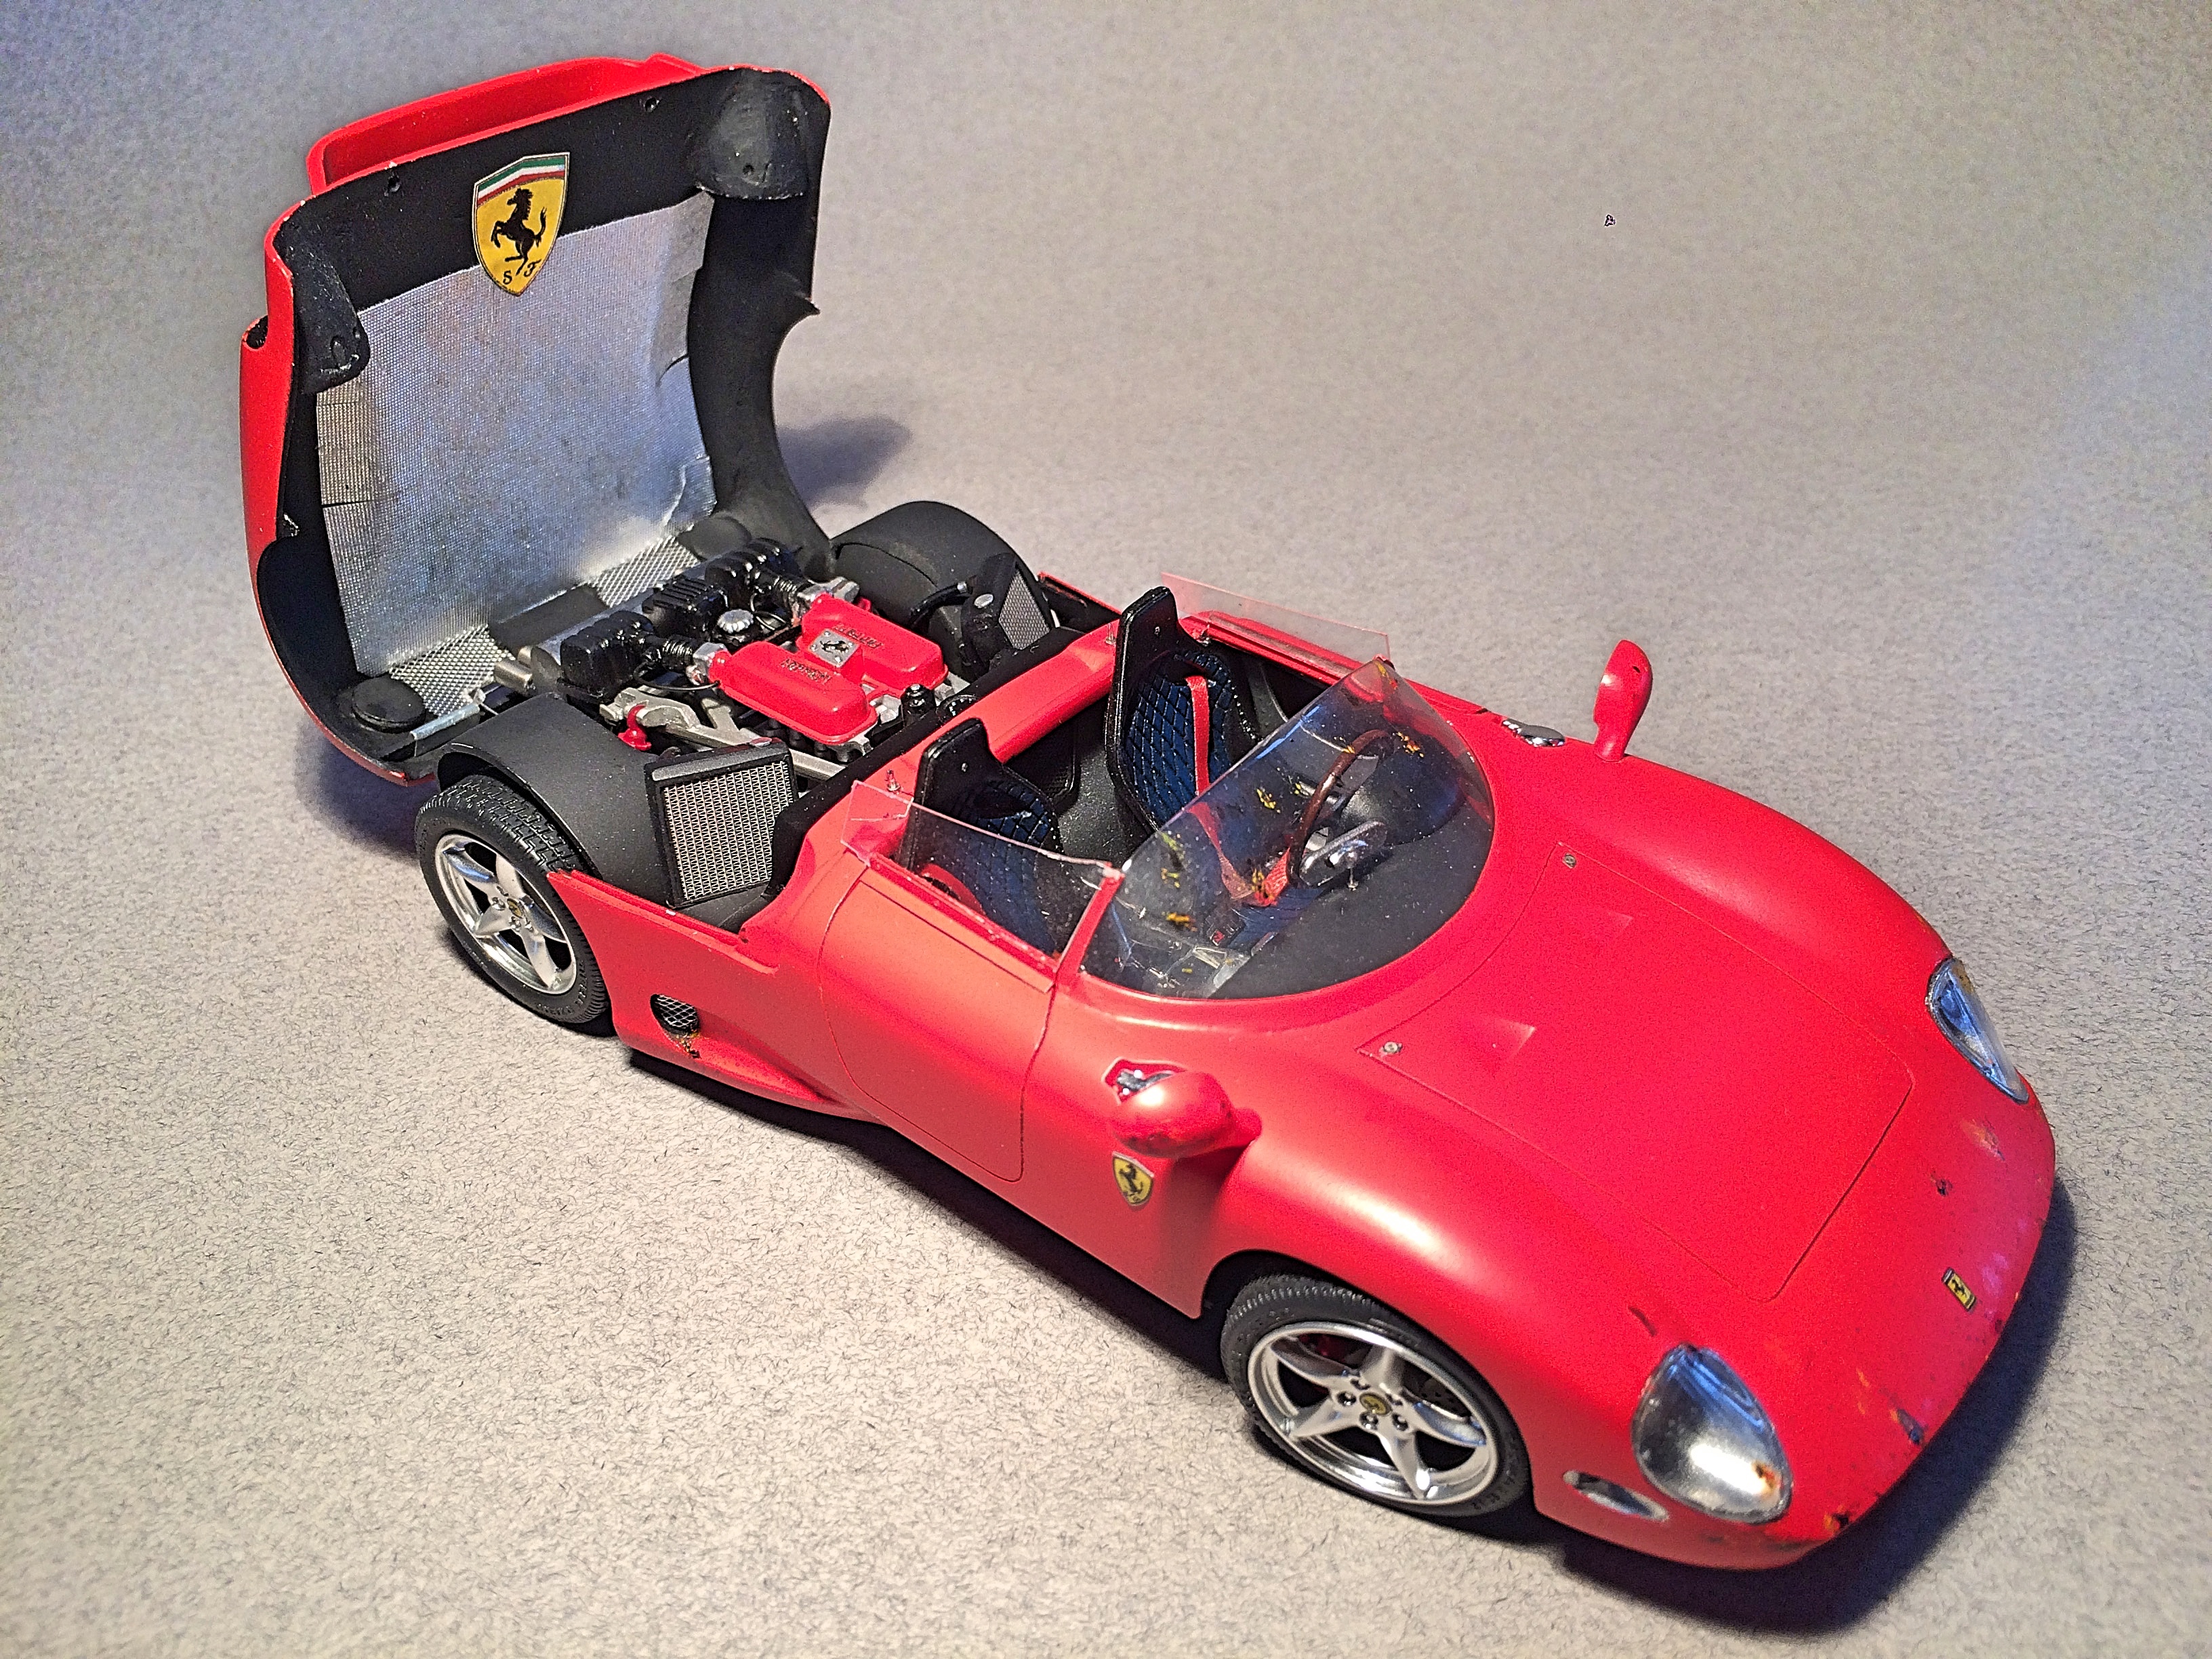
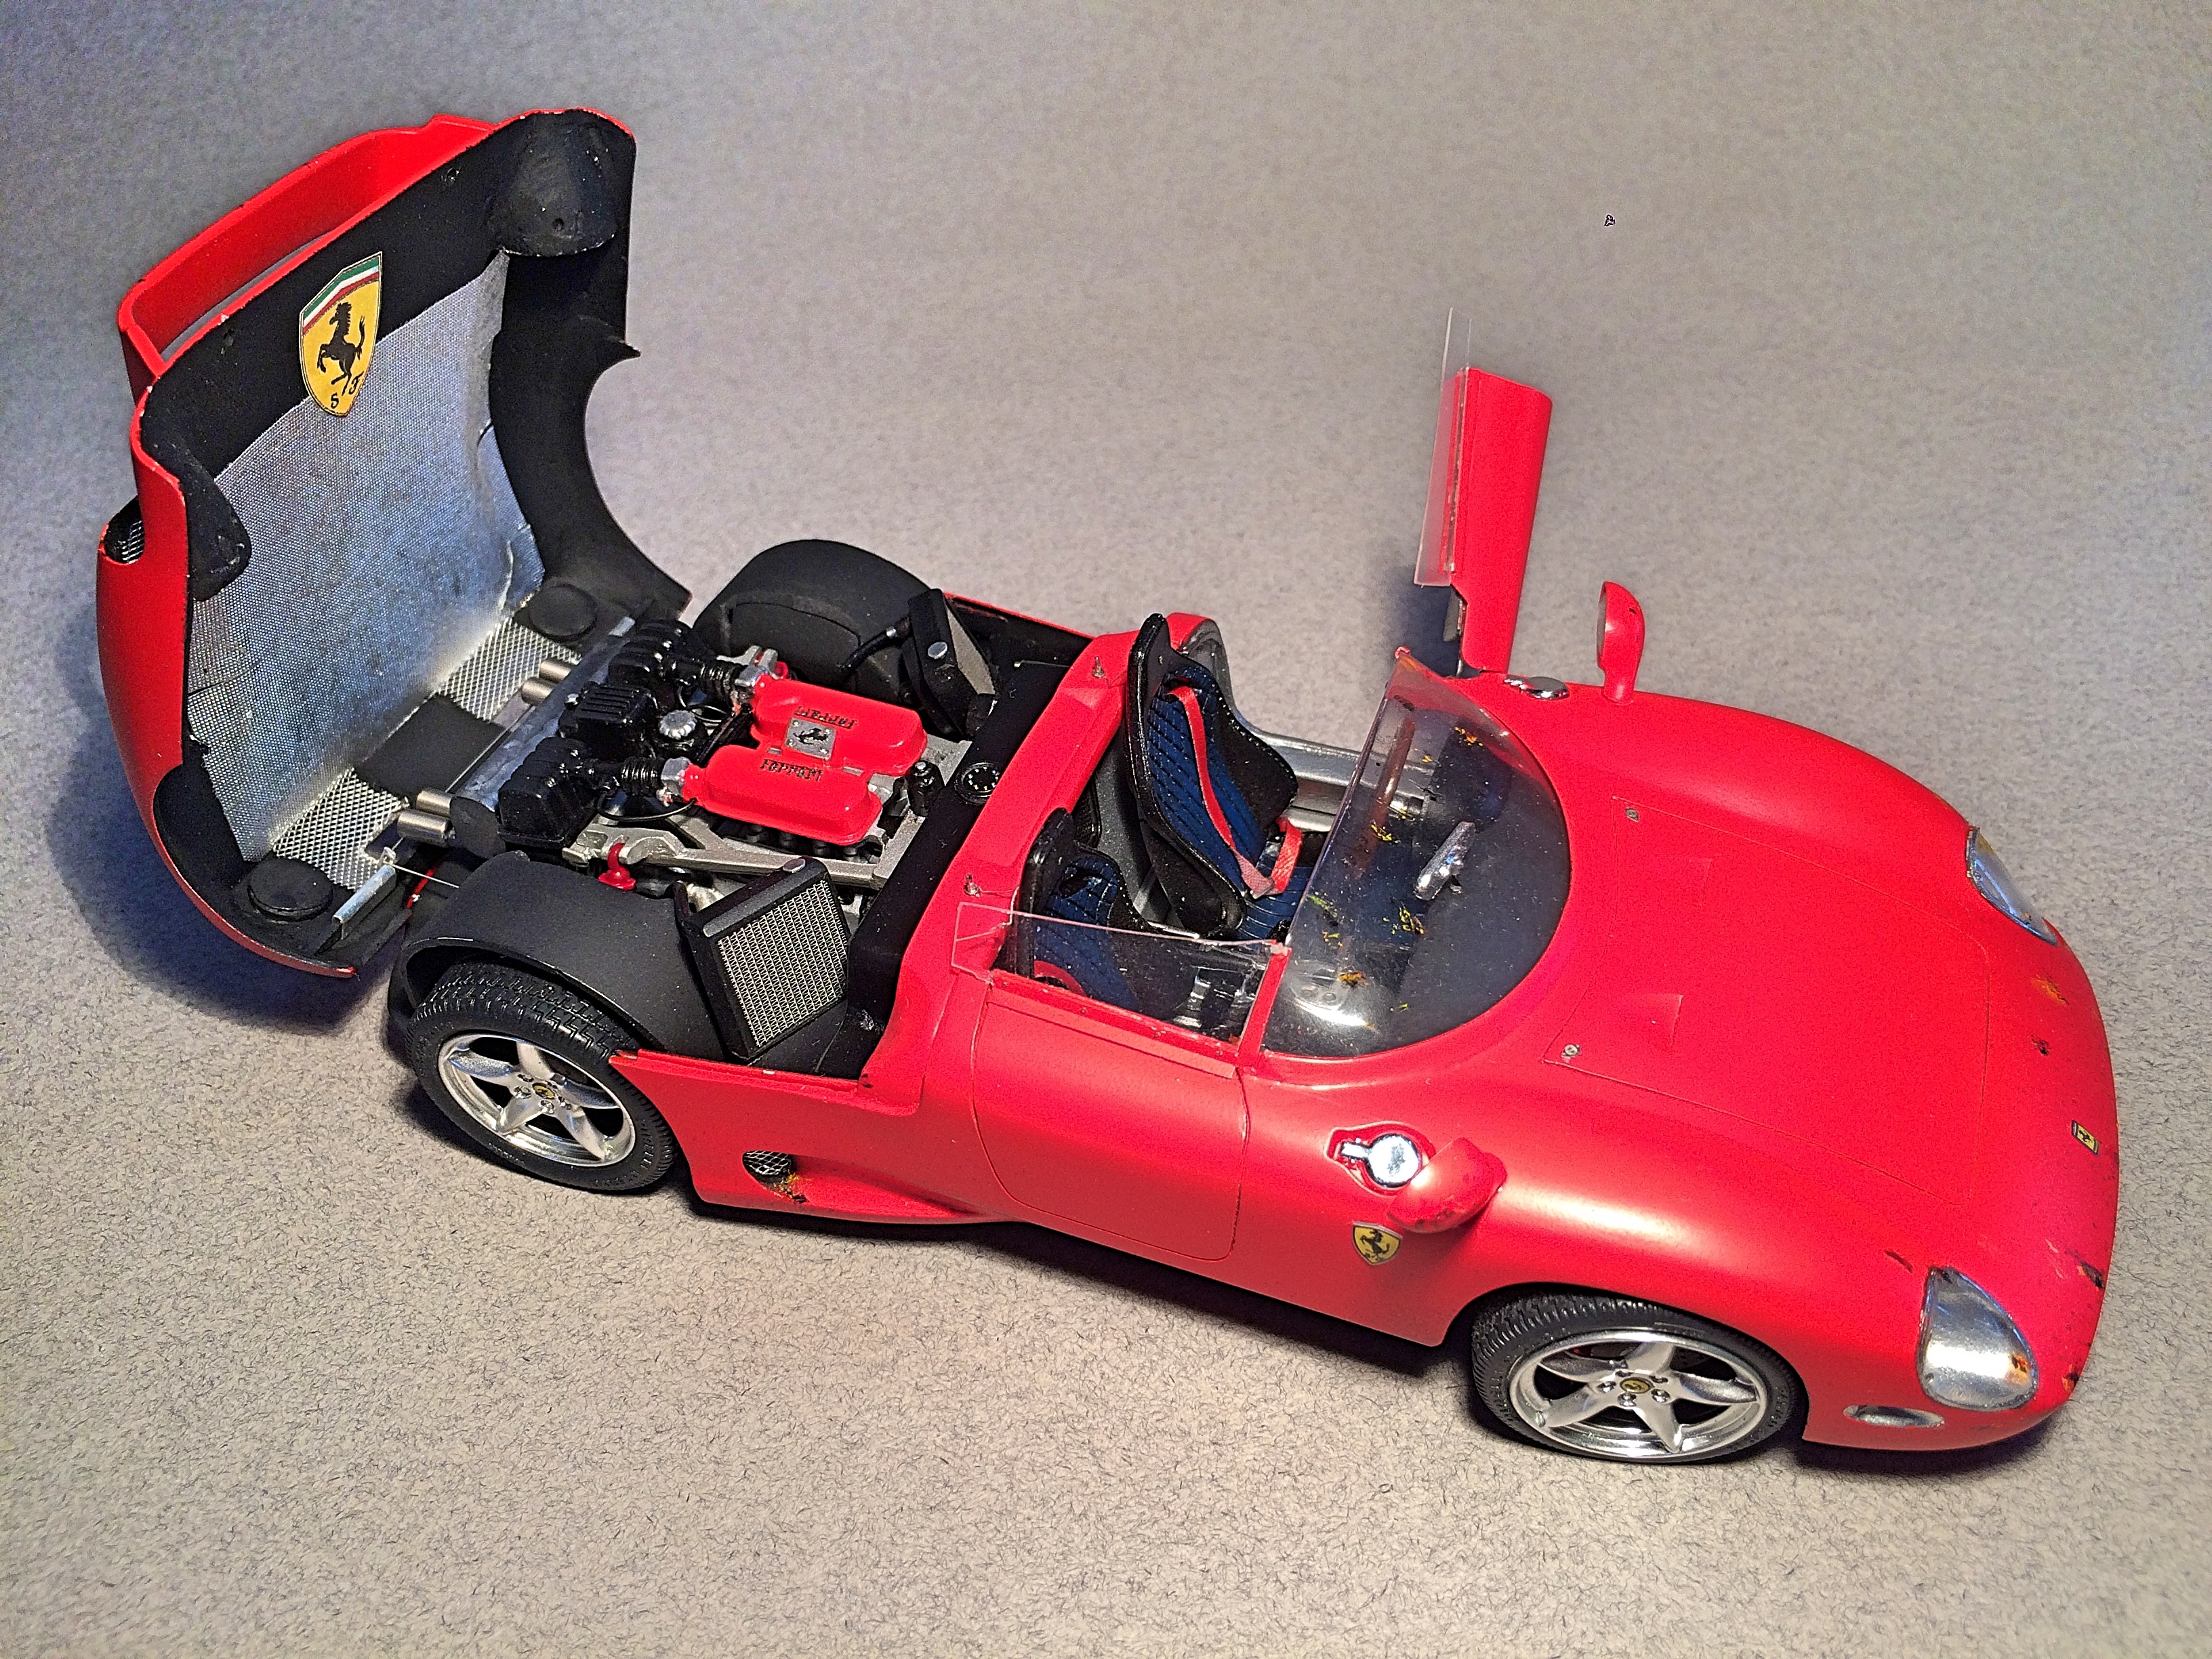
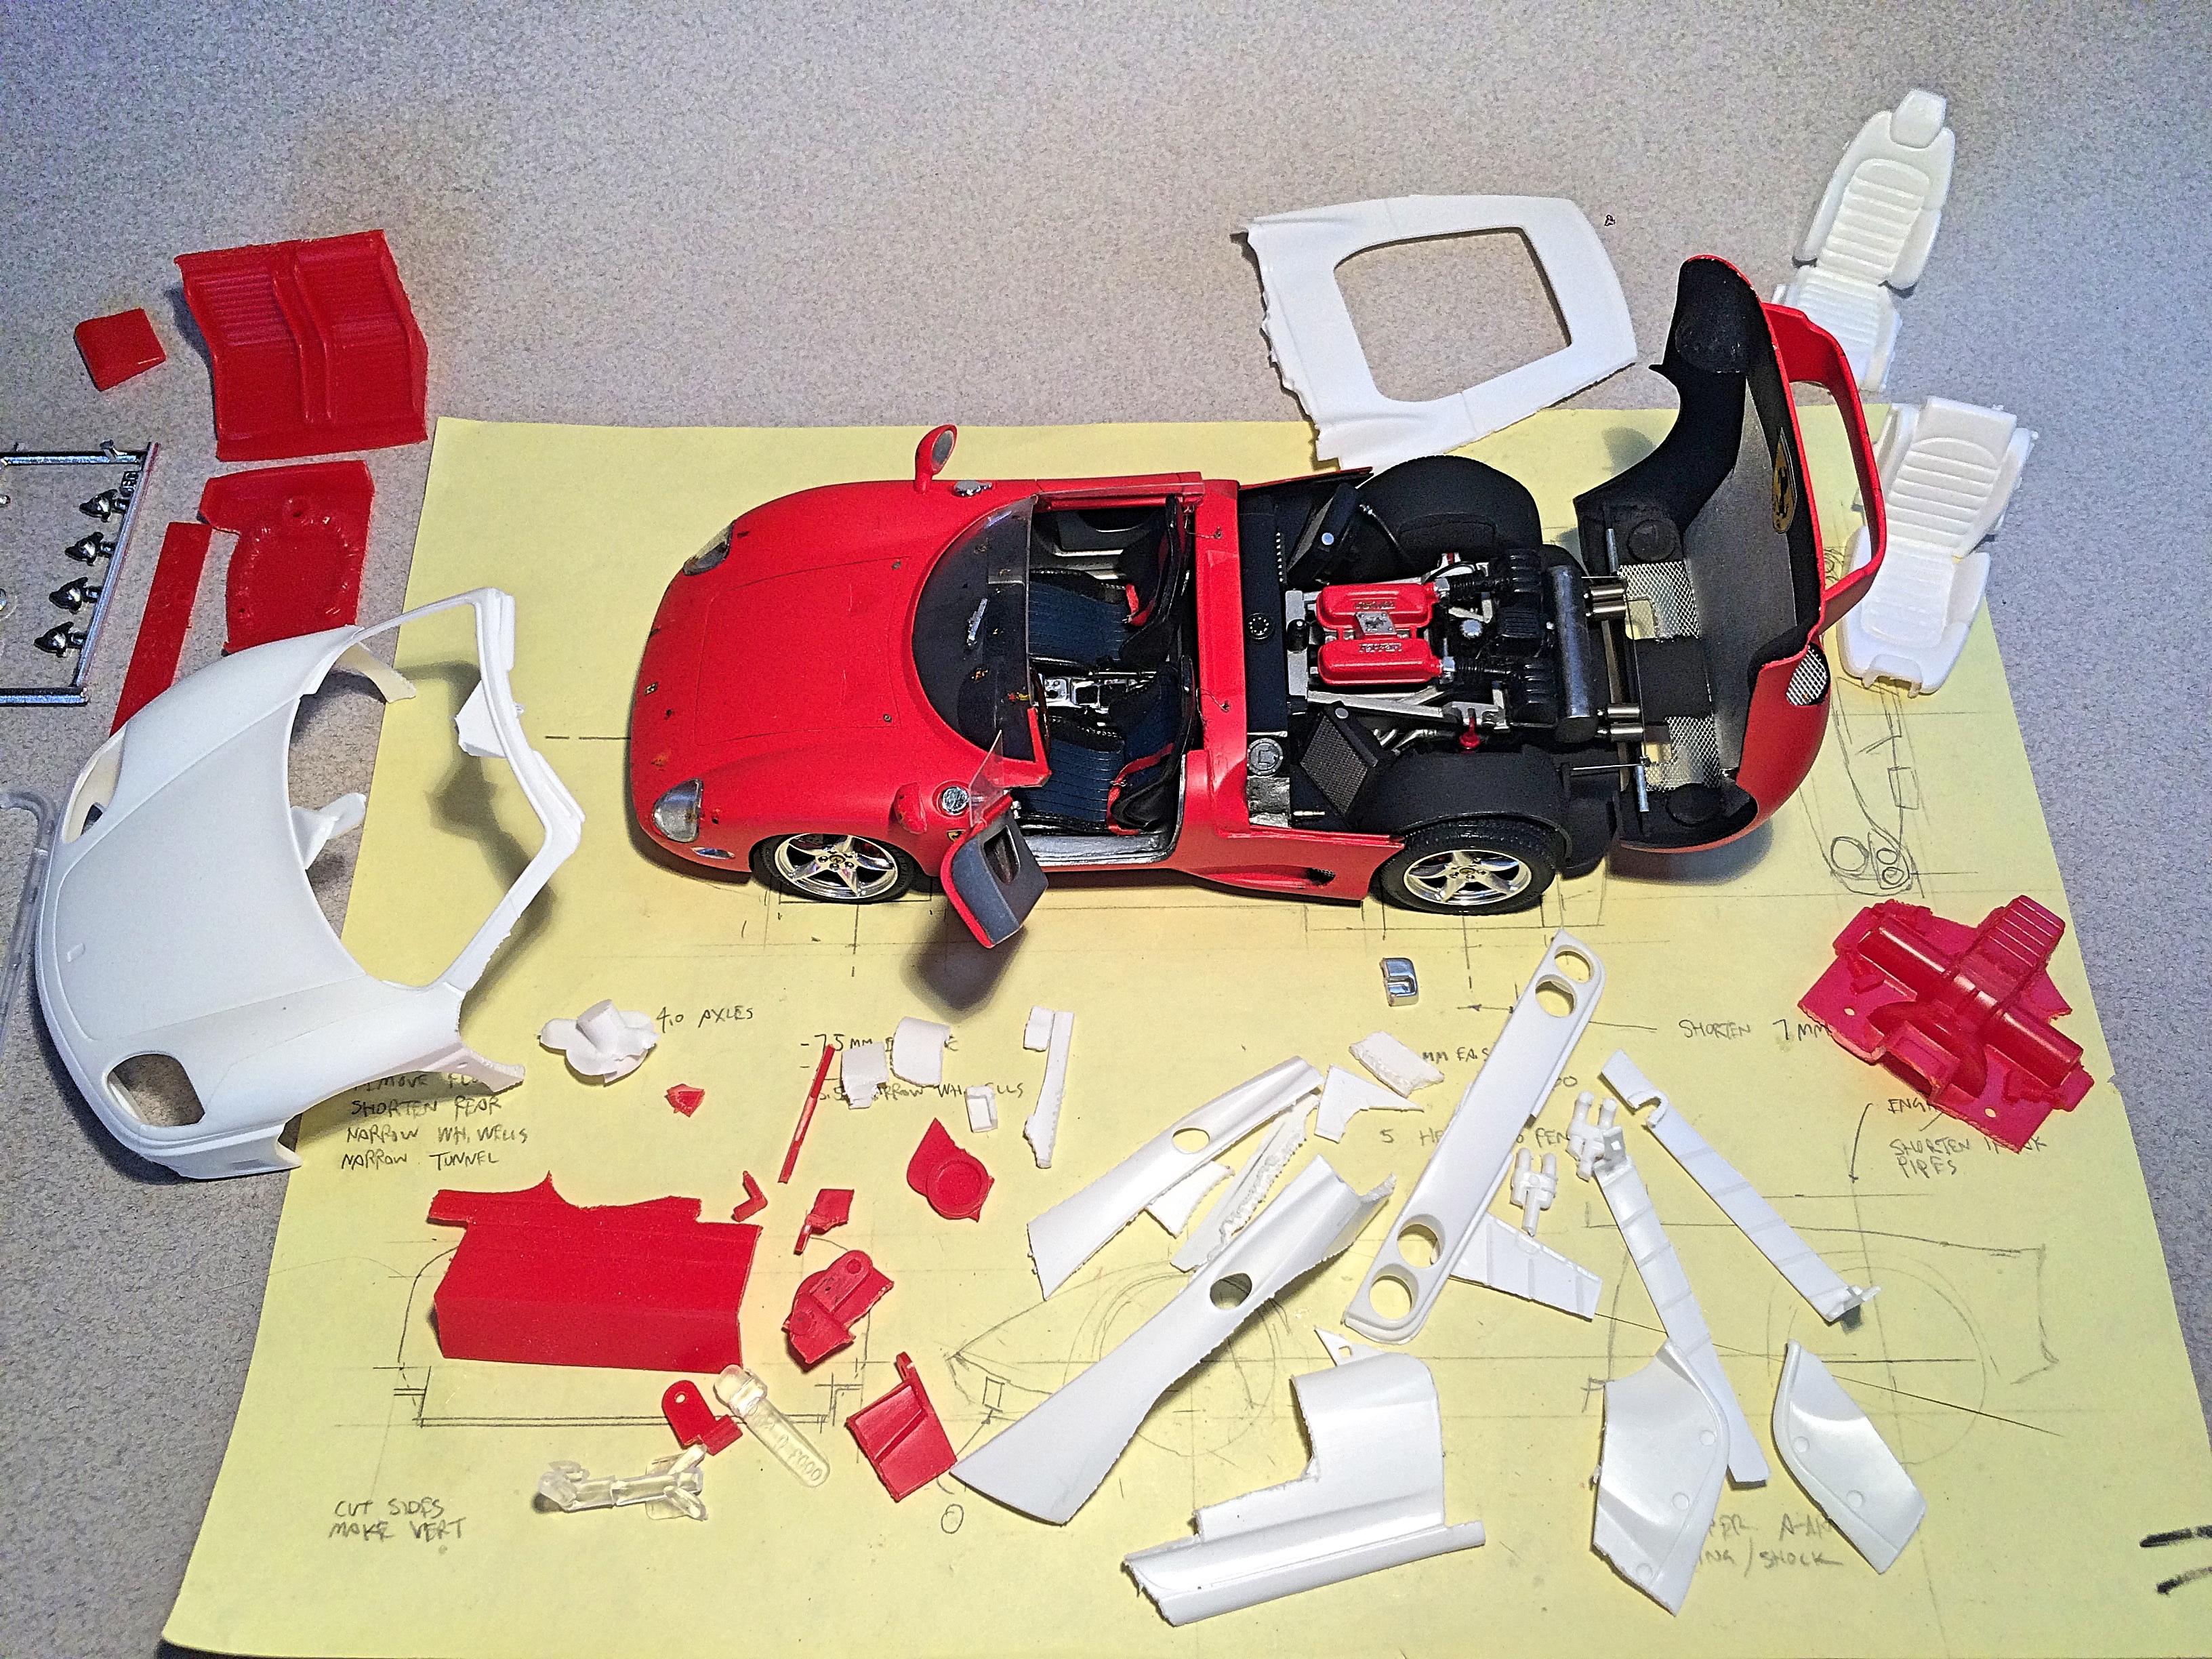
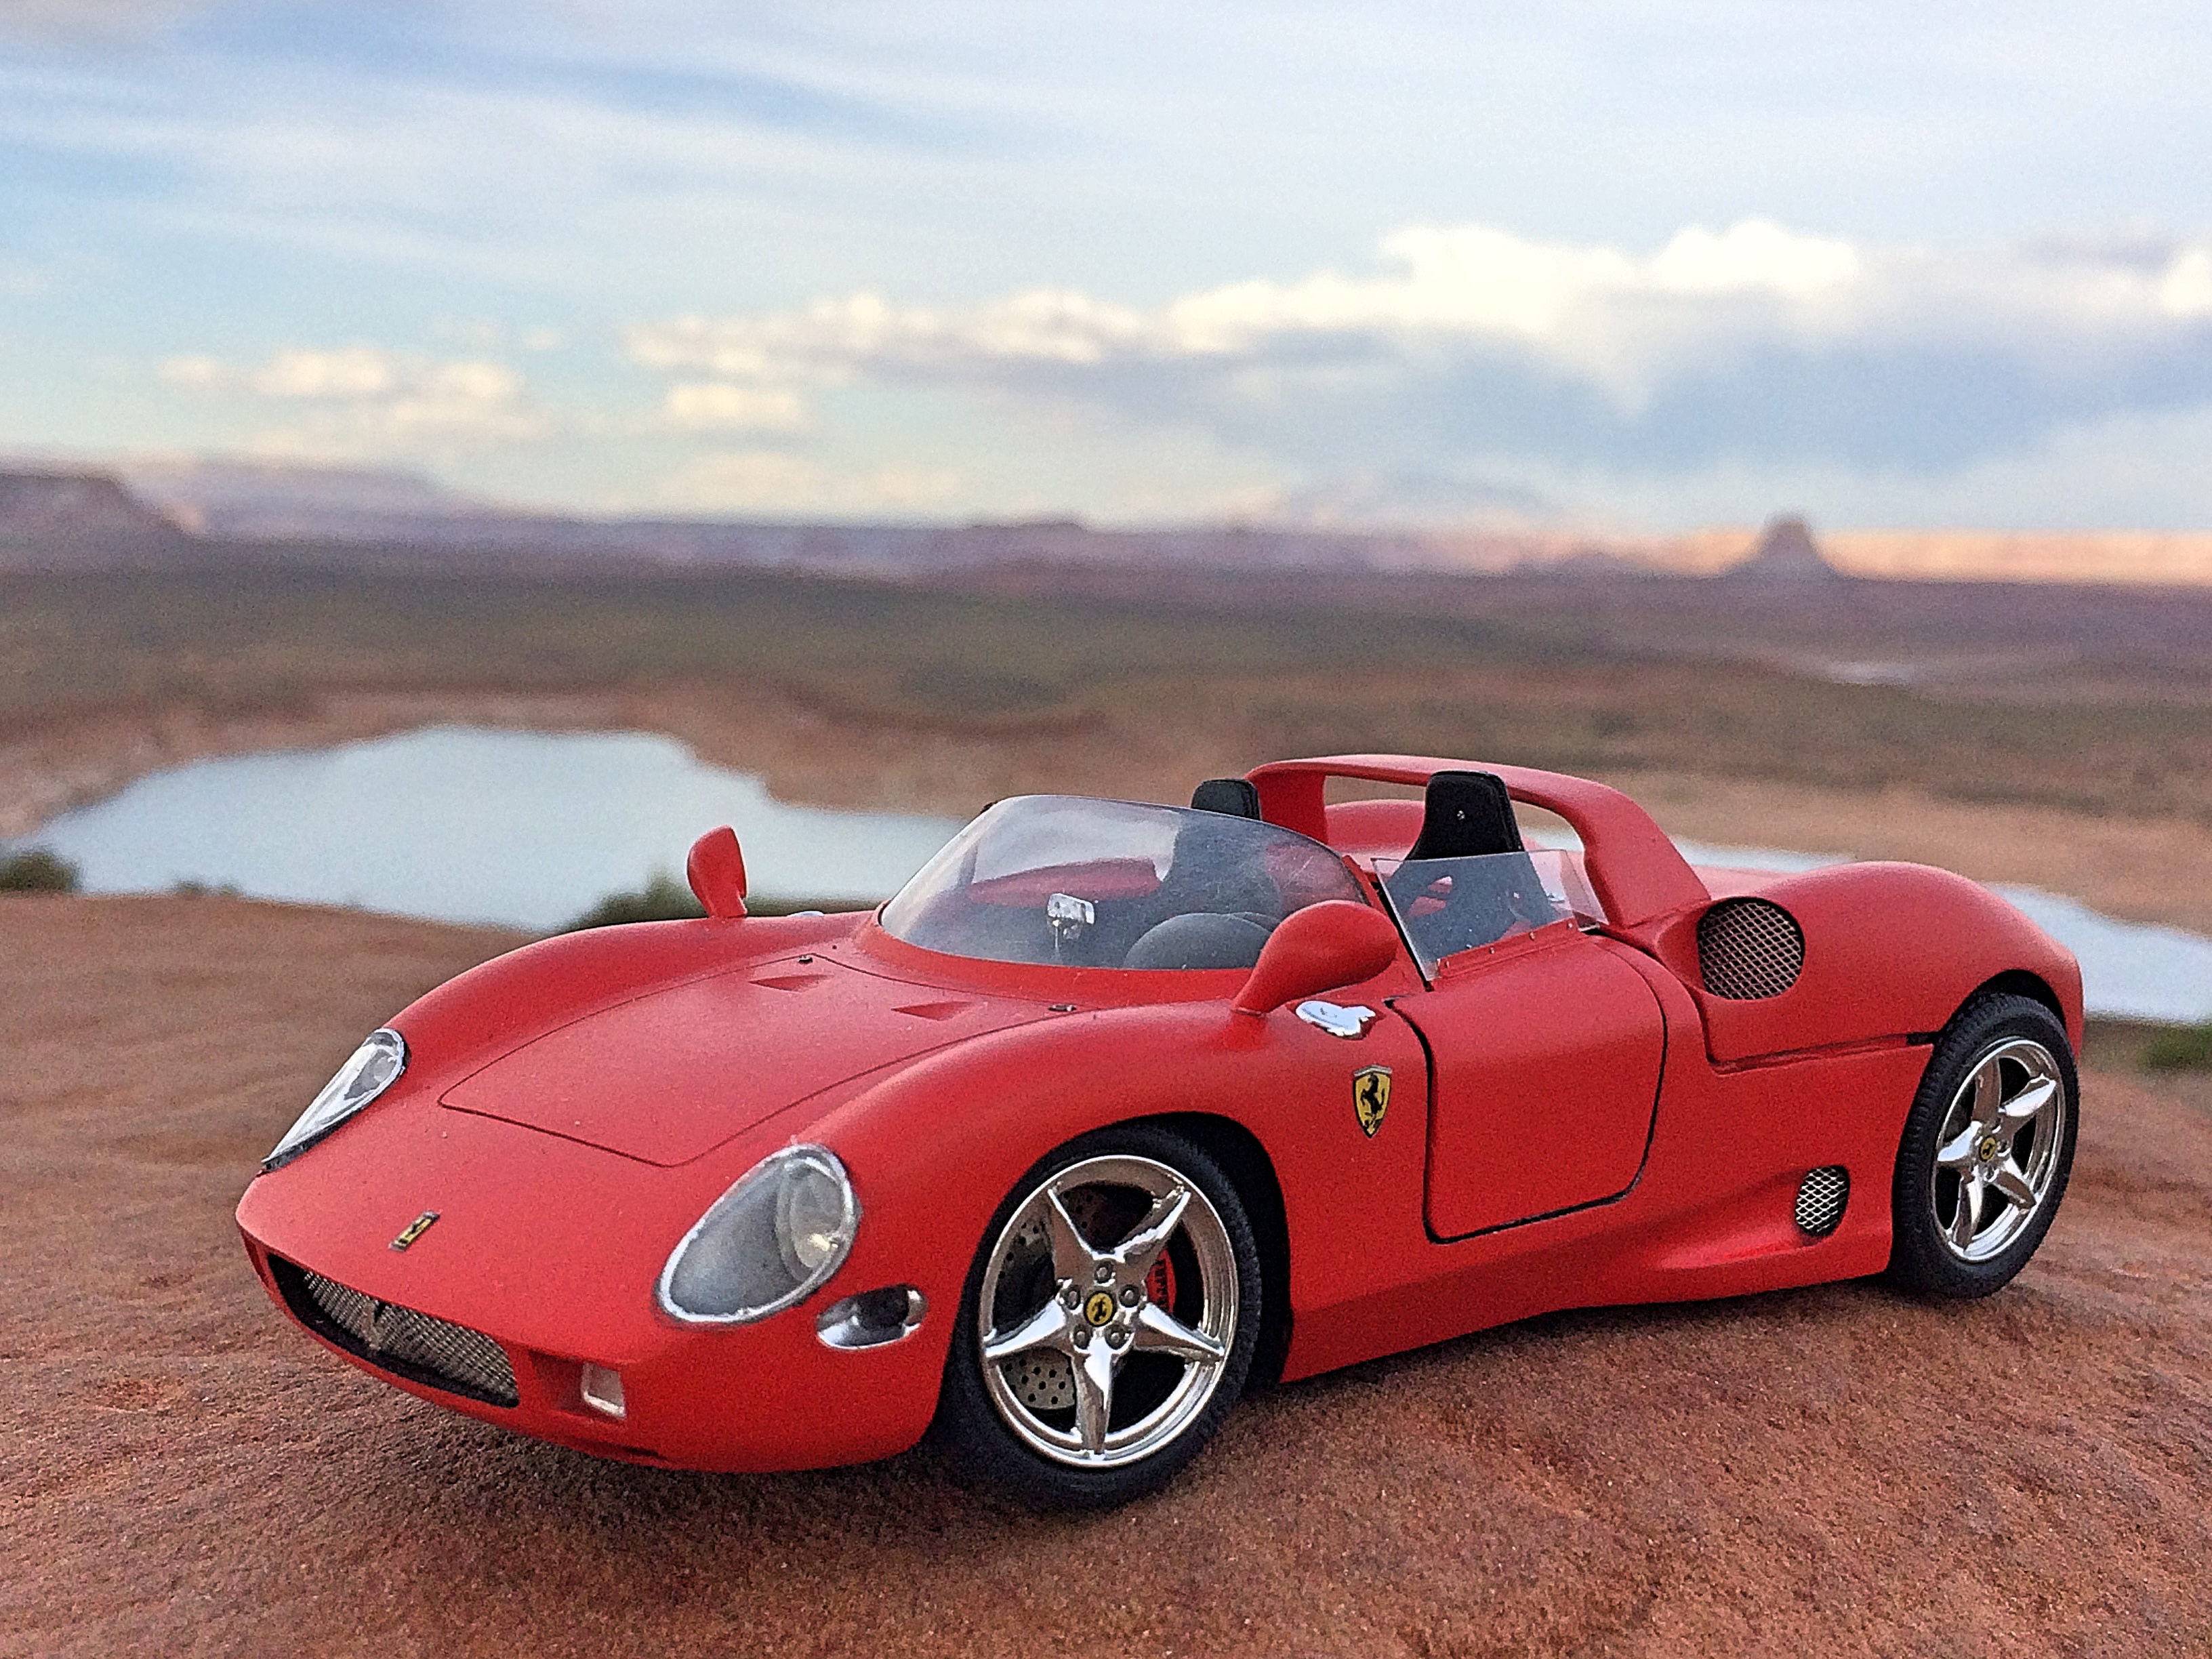
Kitbash of the classic Monogram Ferrari 275P curbside/slot-car, a 1990 reissue of the 1964 kit, and the Revell 360 Modena Spyder that is sort of a curbside since the hood did not open, but had a window over the engine. Work In Progress I found the 275P at a Phoenix model swap last month, then saw the Modena and it was crazy time. Started Tax Day with a mock up, started butchering on the 18th, worked like a dog until the 3rd at Noon, just before heading up to GSL, 132 hours. I did rush it, could have spent a couple of weeks sanding and polishing, and it would probably would have ended up in the box like a few other projects. I just wanted something different than the typical super dooper shiny muscle car on the table. I didn't have time to write a build document, but had this for the description: Blasphemous and sacrilegious kitbash of a historic Ferrari race car that won Le Mans two years in a row, and another Ferrari that only has a 3586 cc 395 HP V8. Story is, this car was found in a chicken coop somewhere in Venezuela, missing the 3285cc 320 HP V12 engine and transmission, the aluminum tub was badly corroded from chicken poop. The Modena was bought at a tax auction, it was rolled by the drug dealer during a police chase. Built by a shop wanting to do a reality TV show, but never got funding because it’s just a Ferrari and not an American muscle car. Some of these pictures were taken at Page on the way home.
- 18 replies
-
- 1
-
-
- ferrari 275p
- monogram
- (and 2 more)
-
I needed to get the 65 Impala for the engine for another project (home grown ZL1 69 Camaro). I got a Revell 69 Z/28 Camaro to build it and would have a left over 302. What to do? I'm taking the valve covers from the Revell 64 Impala and putting them on this 302, instant 327! The engine looks small in there. I have used the victor intake from a Moebius 64 Nova kit and almost have the engine built, but no pics. Here is how I'm building it. I've secured a set of Cragers from an AMT 65 El Camino kit and I need to find some tires.
-
Has anyone put the 1/25 Revell Snap Tite Mustang convertible body/interior on the detailed glue kit fastback engine/chassis?
-
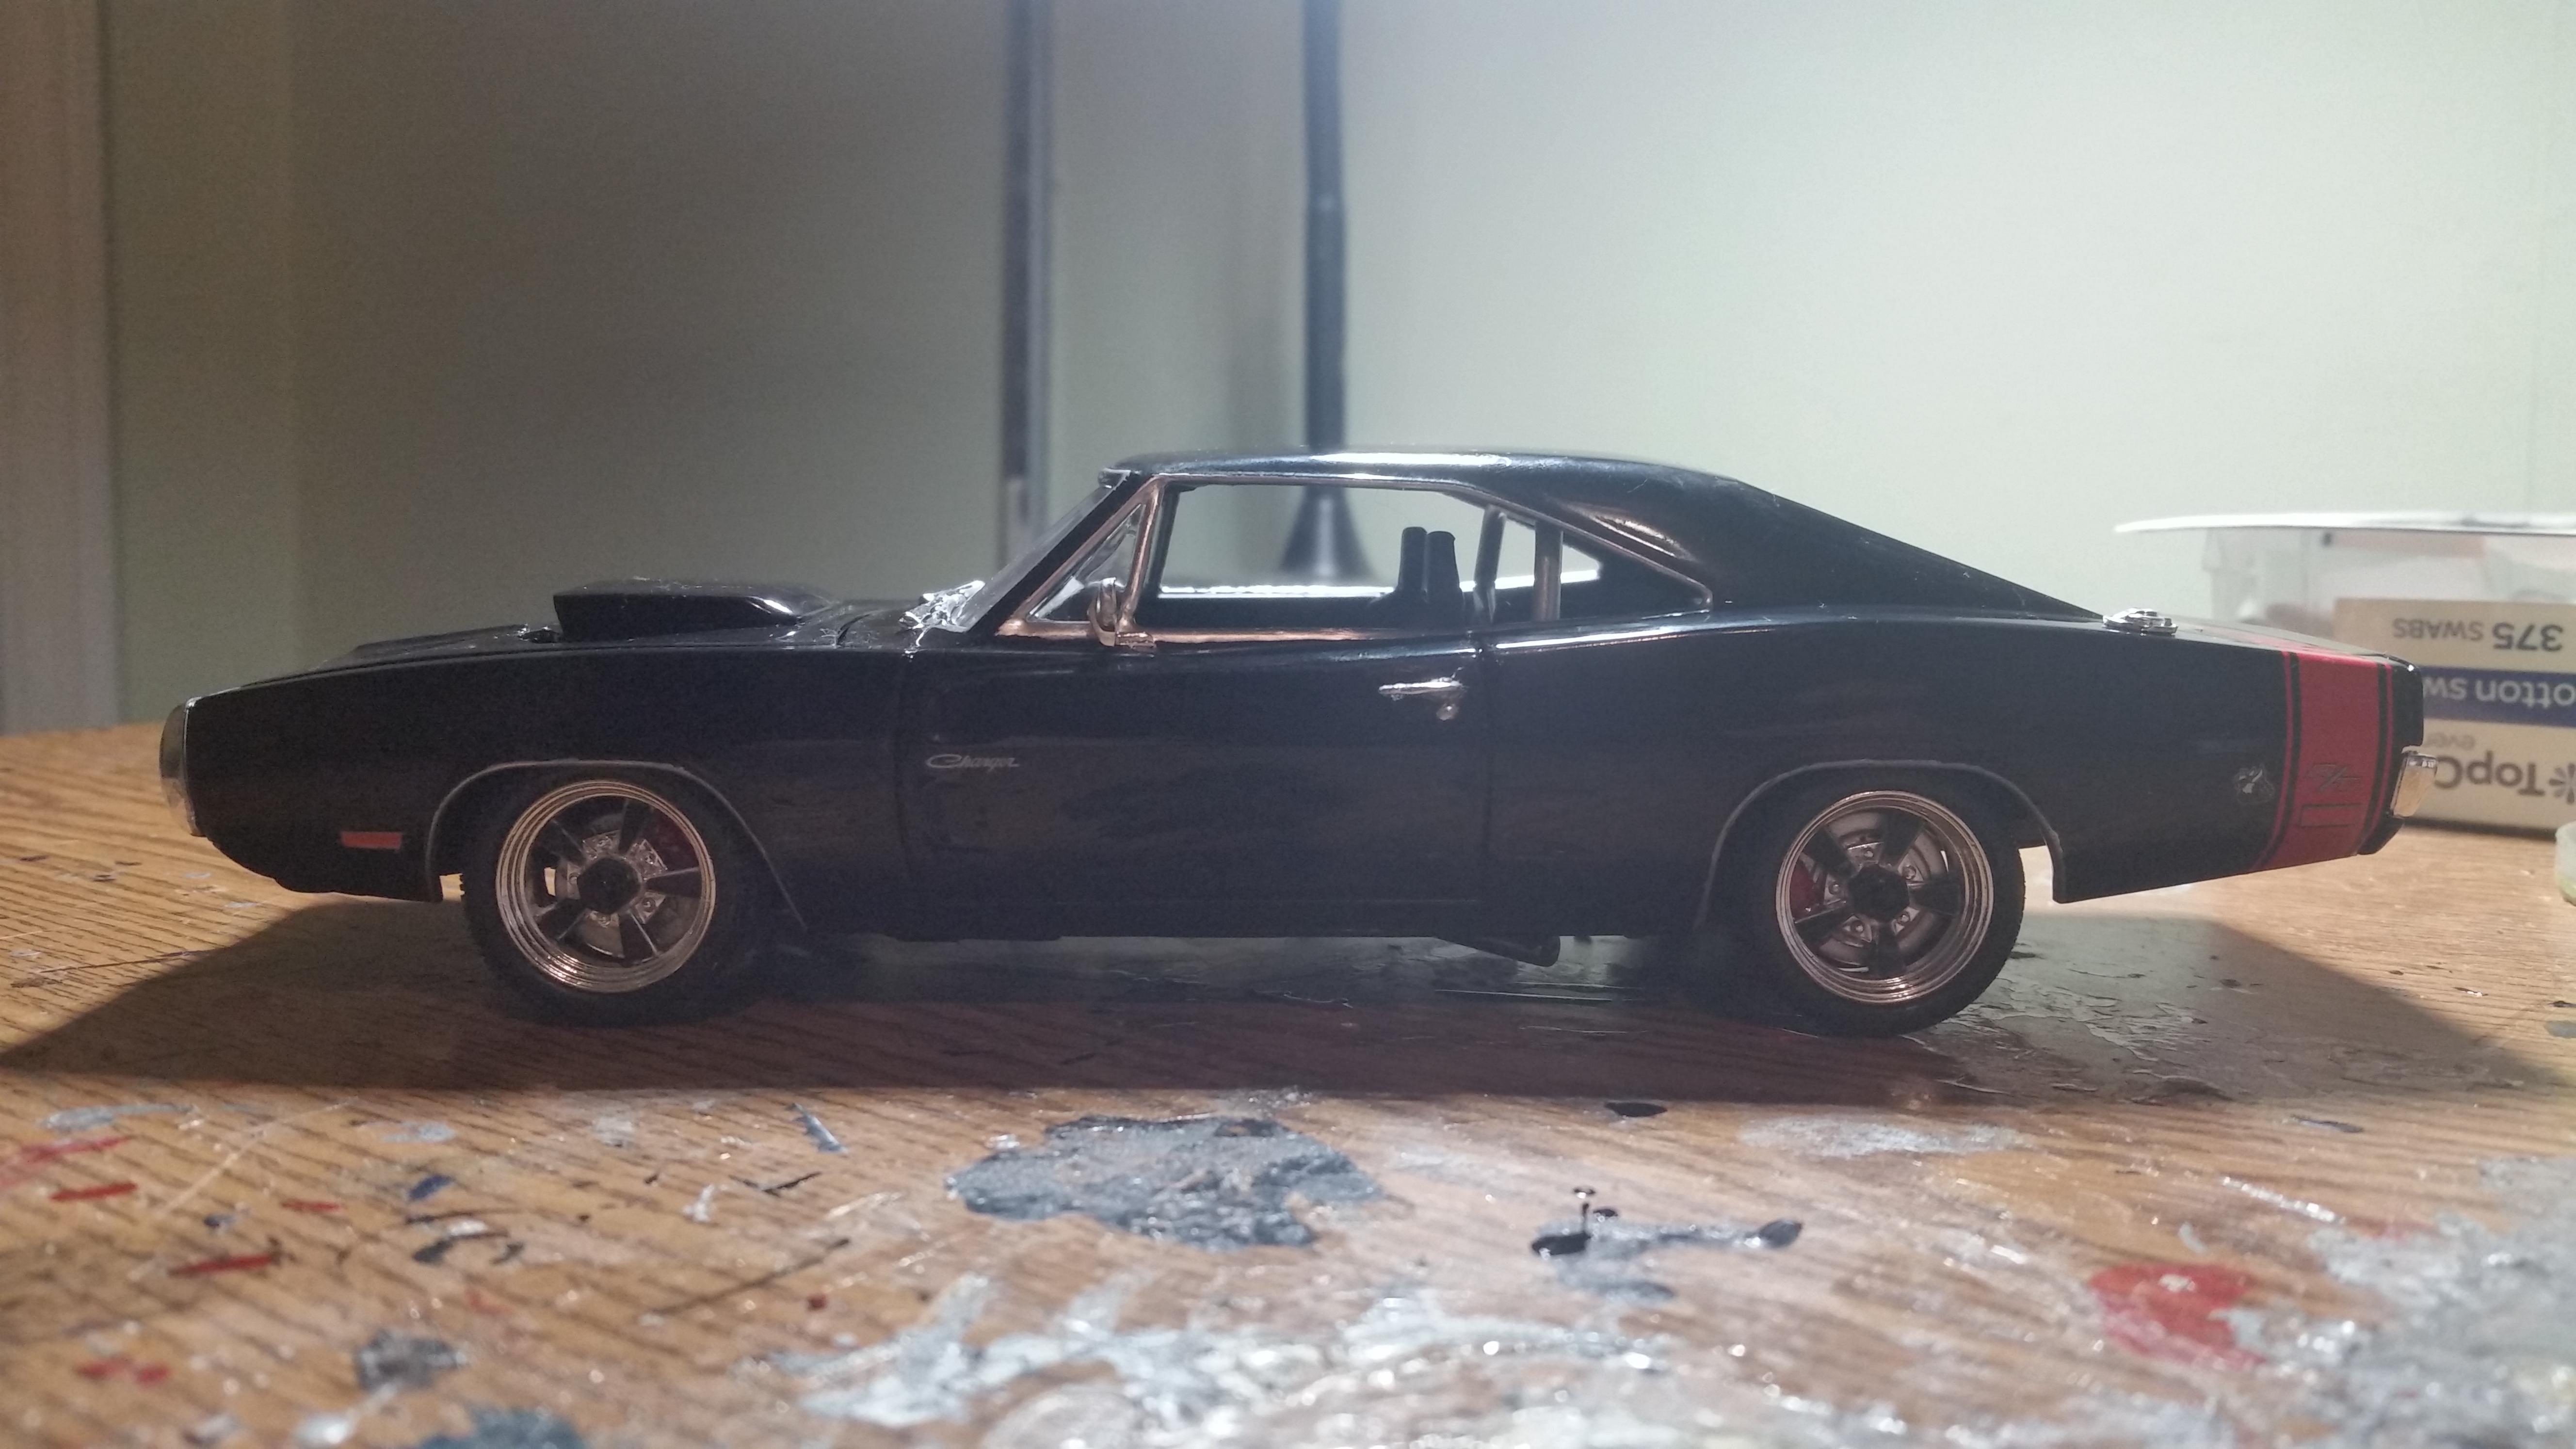
Built from Fast and Furious Dom's Charger kit. Kit's parts like the motor+ blower and wheels/tires were raided for other projects, but as I had most of the essential parts present I was customizing anyway. Mods as followed: Hood scoop from Revell '68 Charger drag option placed on '70 hood. 7.0 litre Dodge Viper motor from scrap Revell Viper ACR build, with a custom made vortech style super charger setup using a resin turbo, exhaust and sprue pieces. Styrene scrap trees bent as intake tubes and oil filters turned into air filters as the original pieces were missing. Electronic fan/radiator comes from an unknown source. Custom built side exhaust. Seats from Dodge Viper ACR. Wheels are Radio Shack X-mods, with front tires sourced from an AMT Fast and Furious Supra and rear tires from Revell C5 Corvette. Disc brakes were also sourced from the Viper ACR. Various decals were used from the 68 charger, and the red tail stripe is from the stock '70 Charger. Exterior is Walmart Color Place Gloss Black, cleared with Pledge.
-
Found this kit at a flea market not to long ago. To my surprise it's complete other than a decal sheet if it came with one. Was wondering if anyone has any information or interest in this kit. Can't find any for sale on eBay Is it rare or has been reproduced in the recent past? Thanks!
-
Time to get this back on the bench. Started the kit in 2016, but like some of my others it stalled. Wheels. Current state of the parts. These pics are from when I set up the stance in 2016. Engine is already complete. Work that was previously done 2016. Modified the oob kit suspension to look like it has the hydraulic cylinders.
-
Started this kit back in 2013 but it stalled out and I lost interest. But decided earlier this year it will get completed. For more details. Here is the WIP thread This build is a tribute to Richard Manson, aka Ramfins59 for his love of cars from the 50's.
-
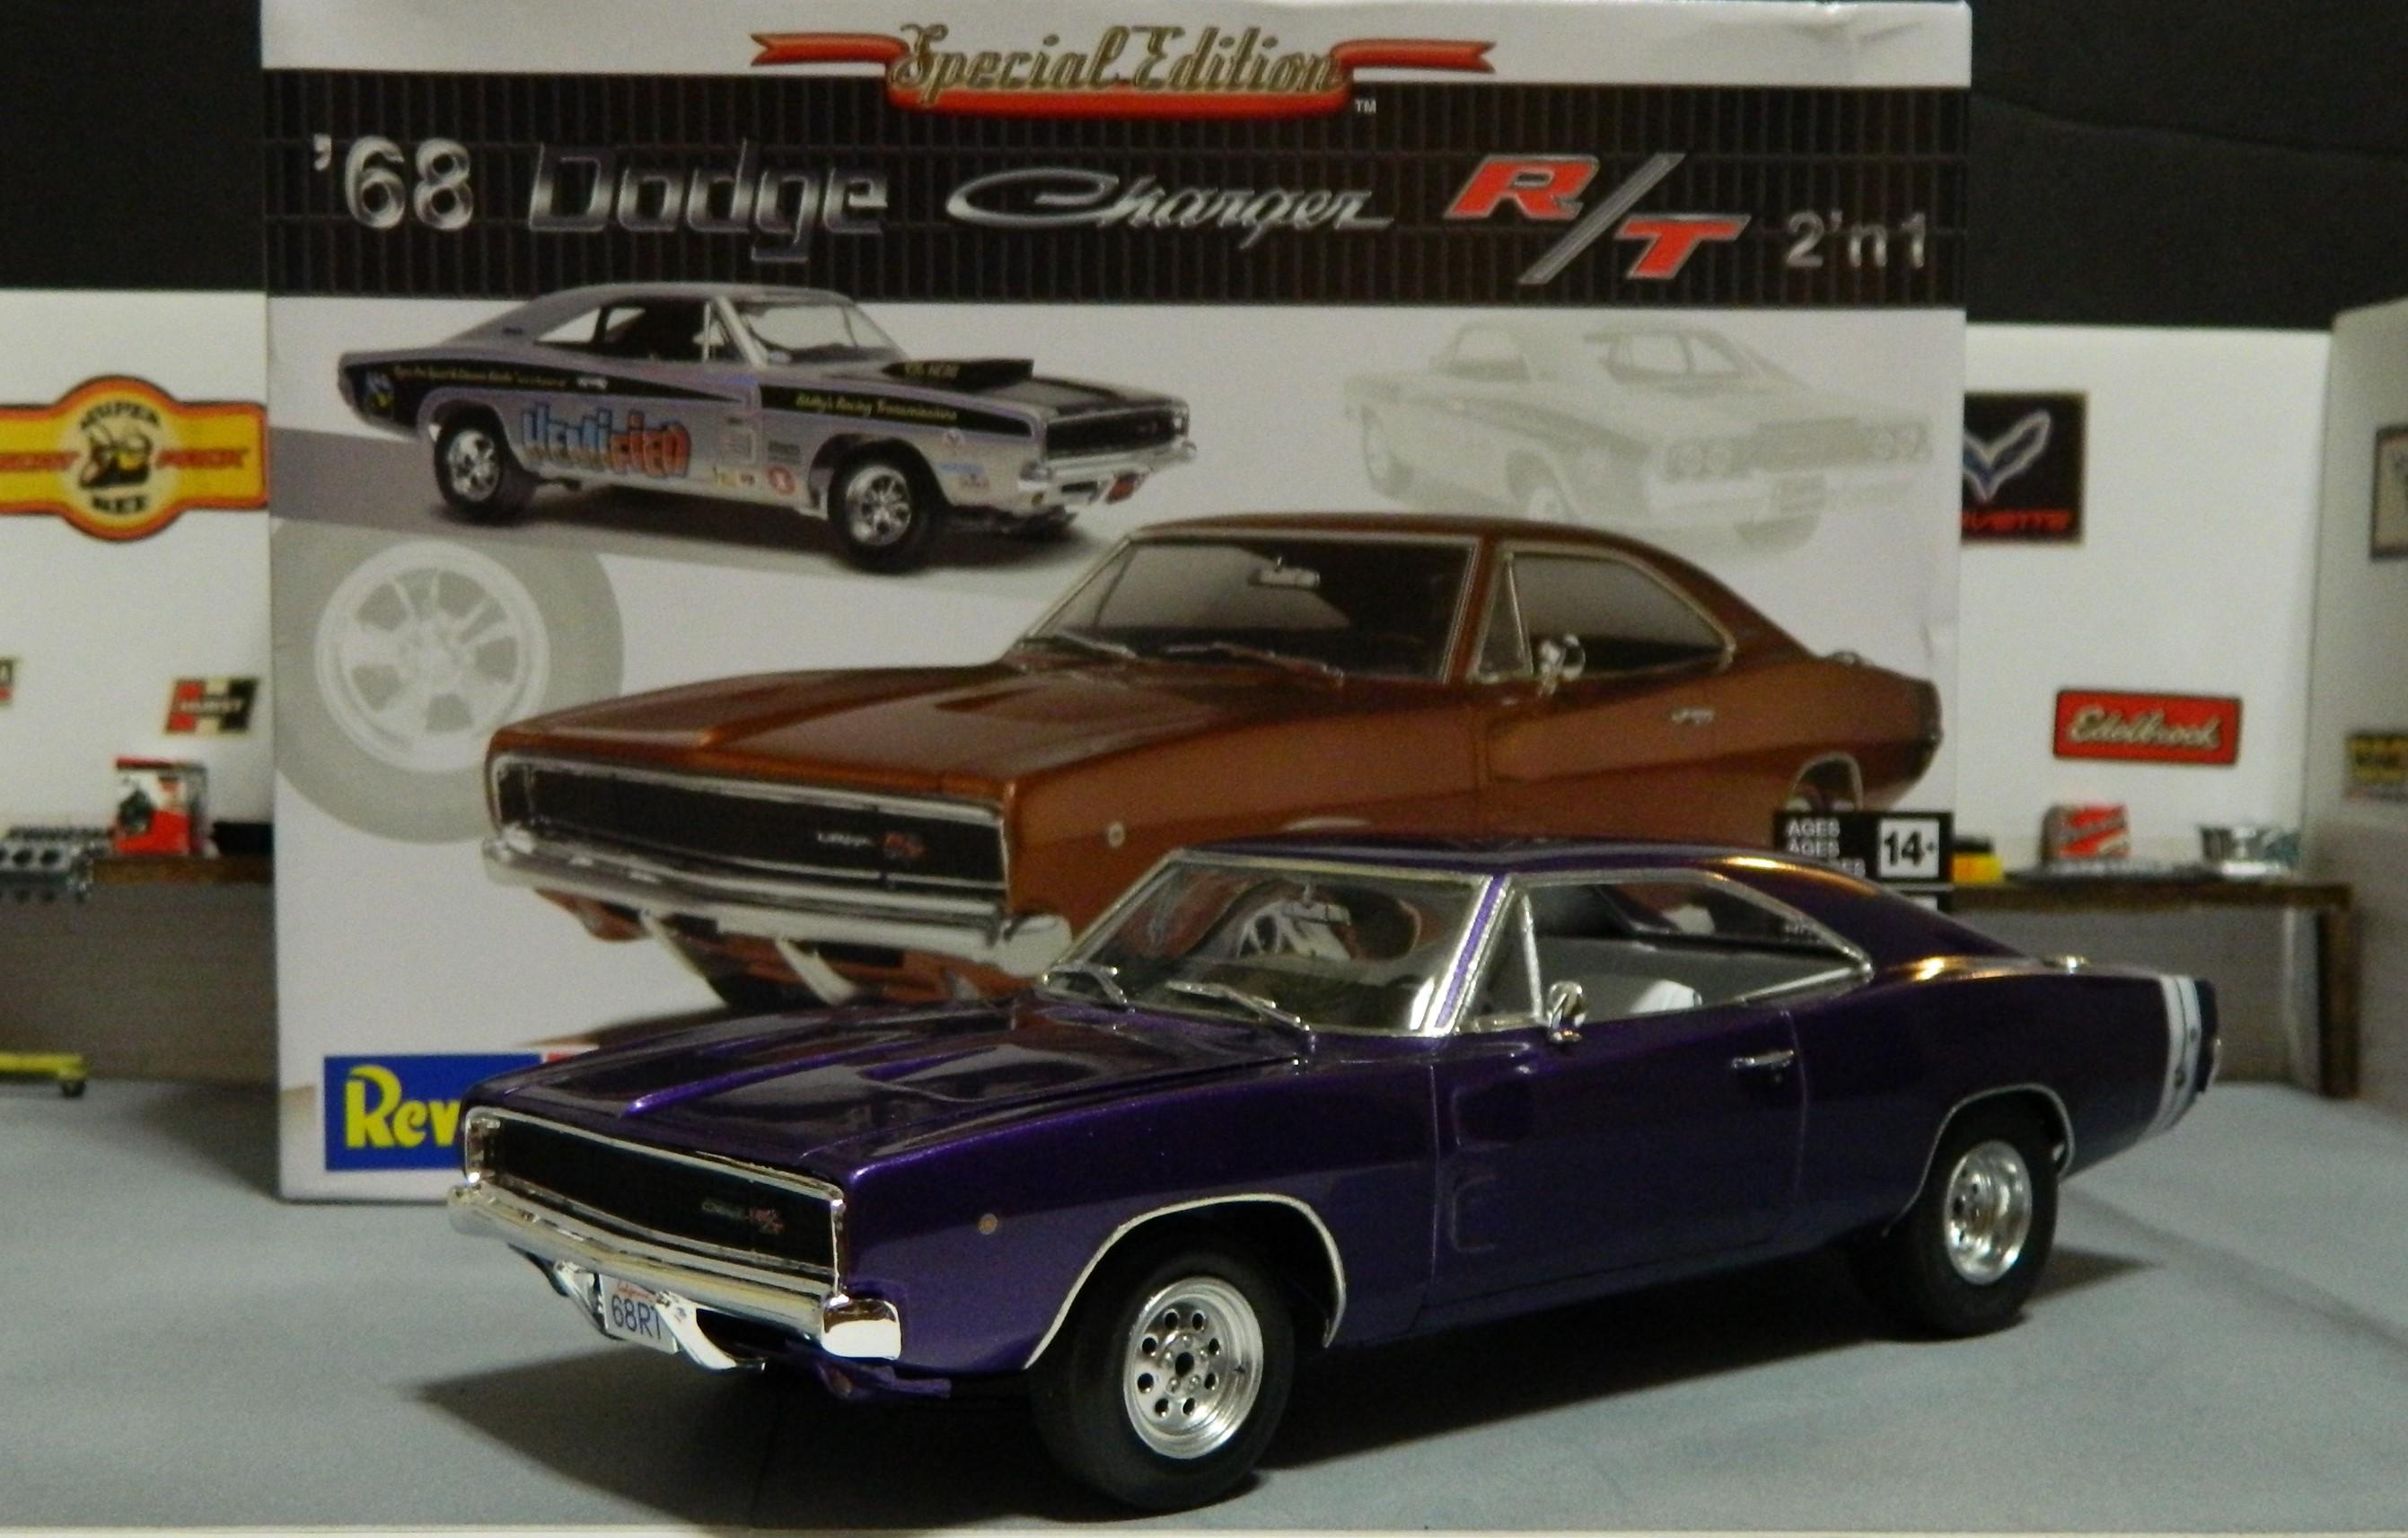
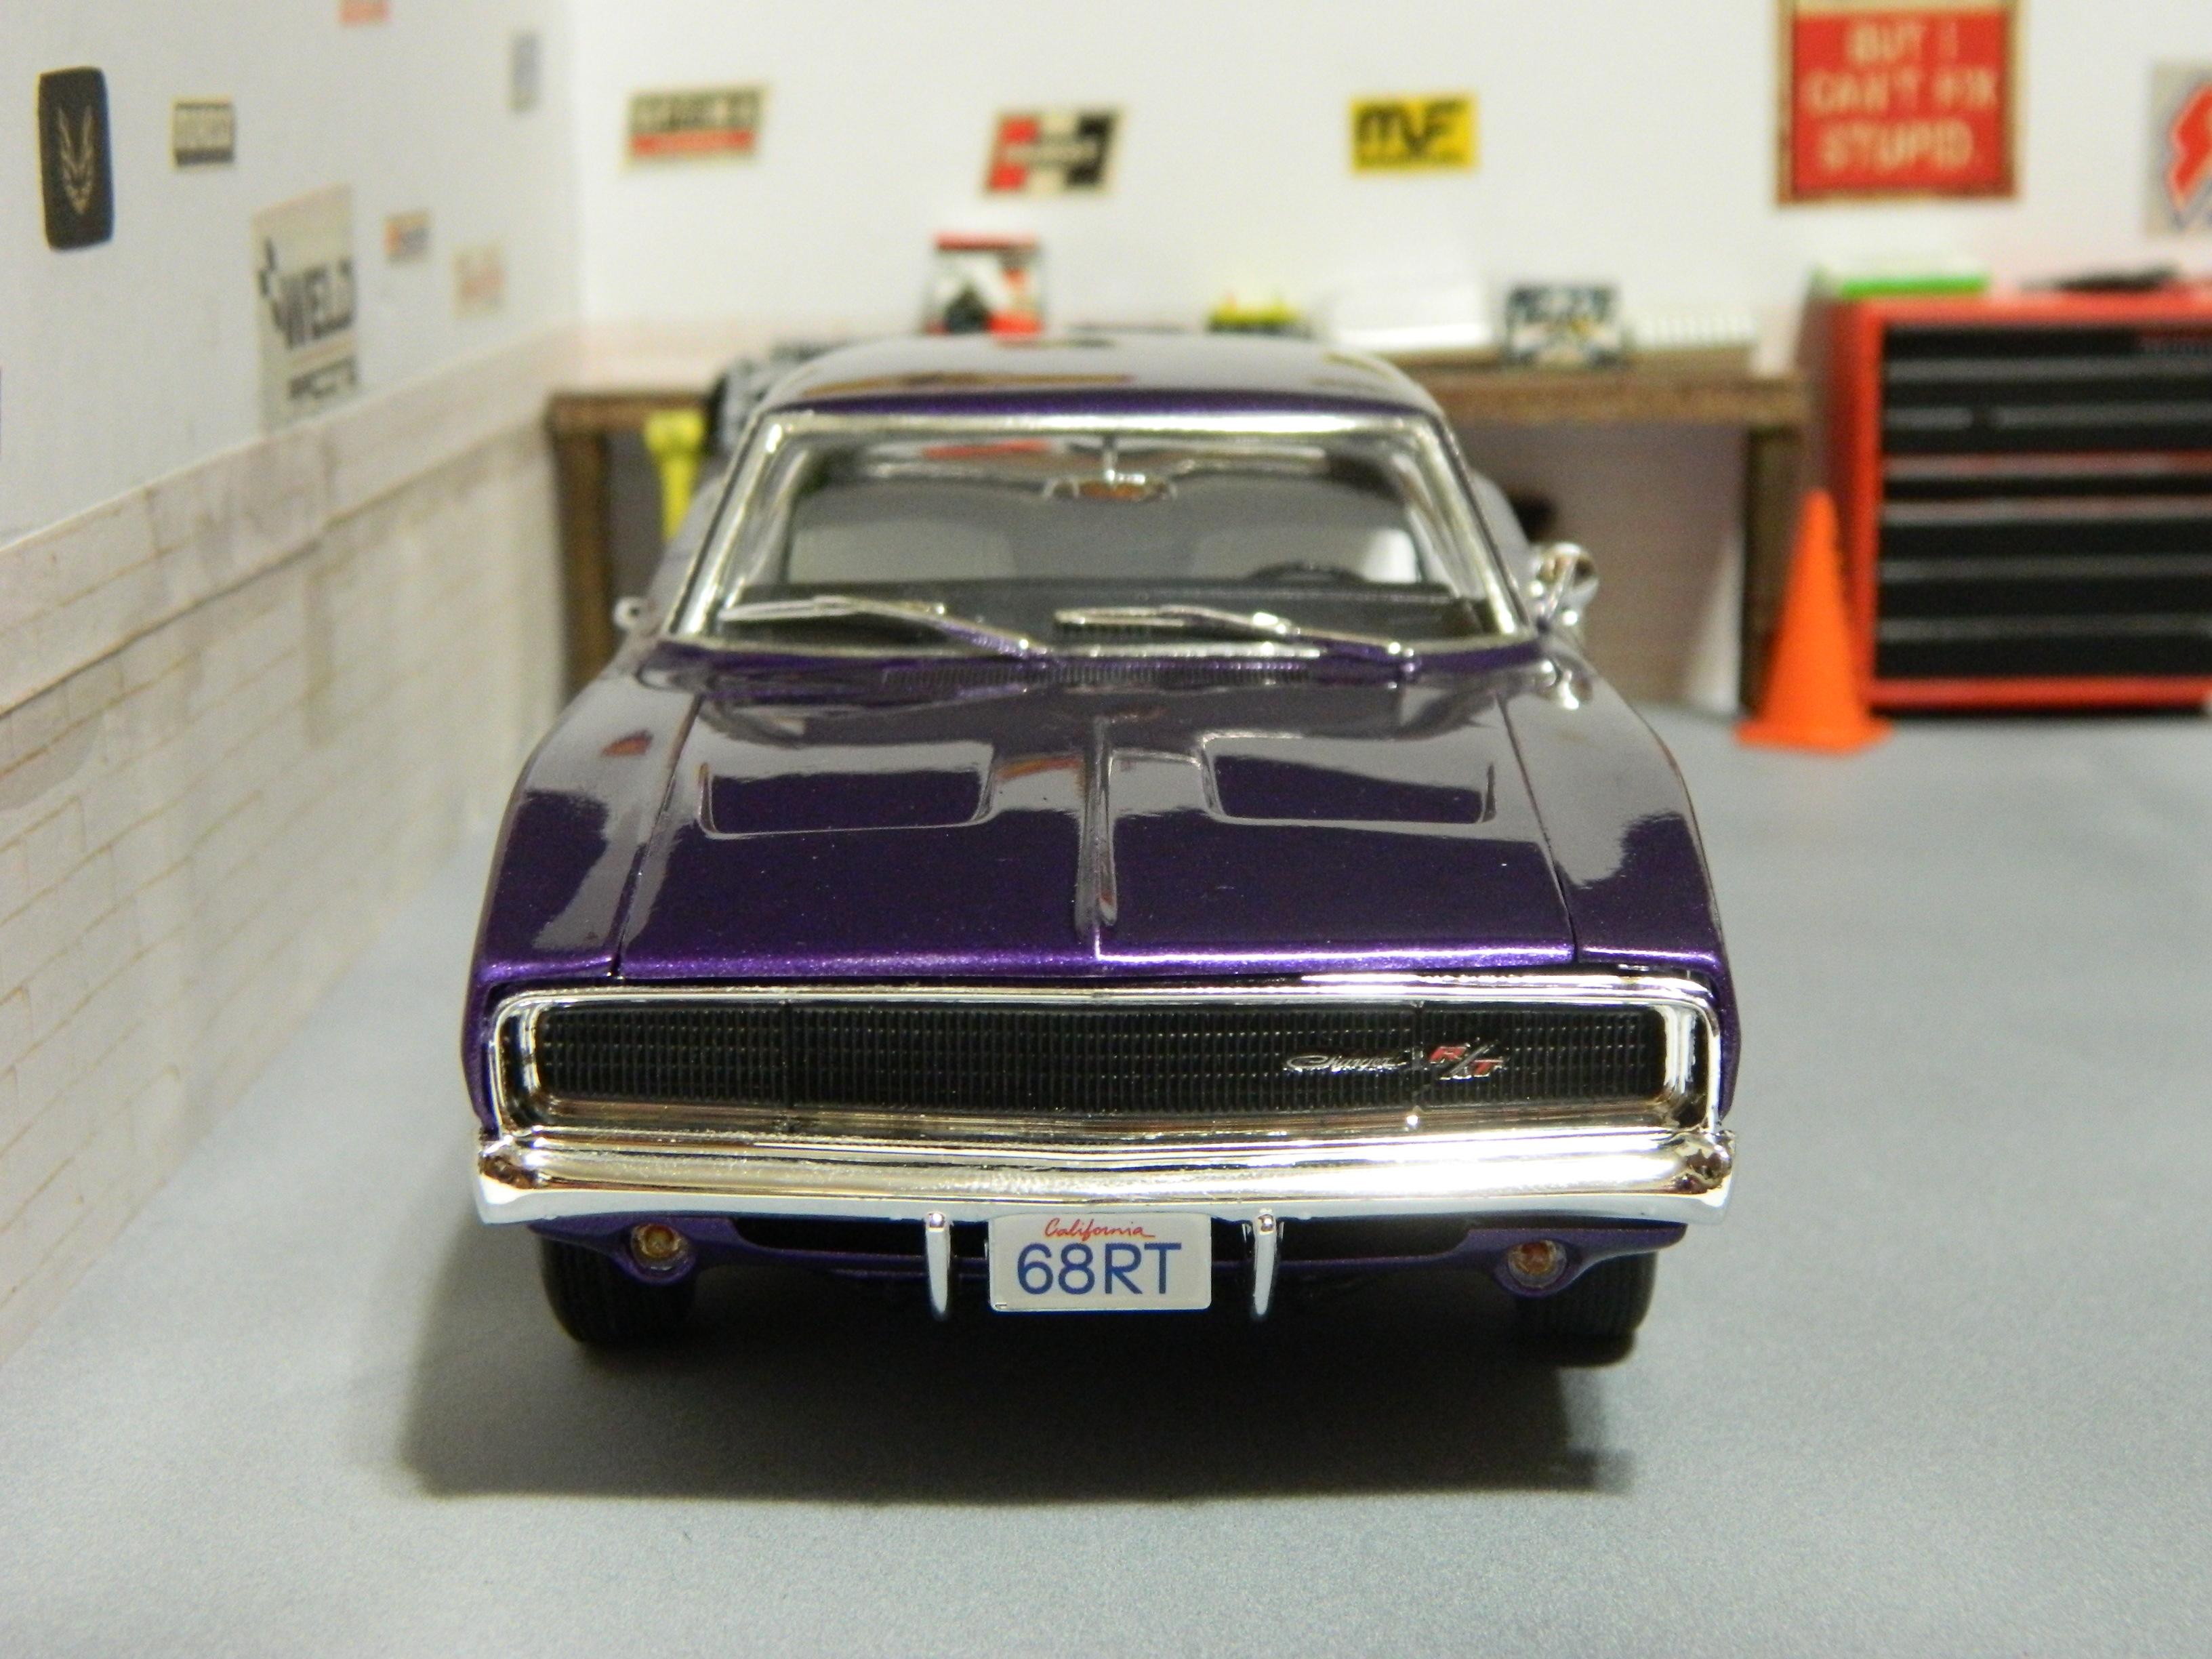
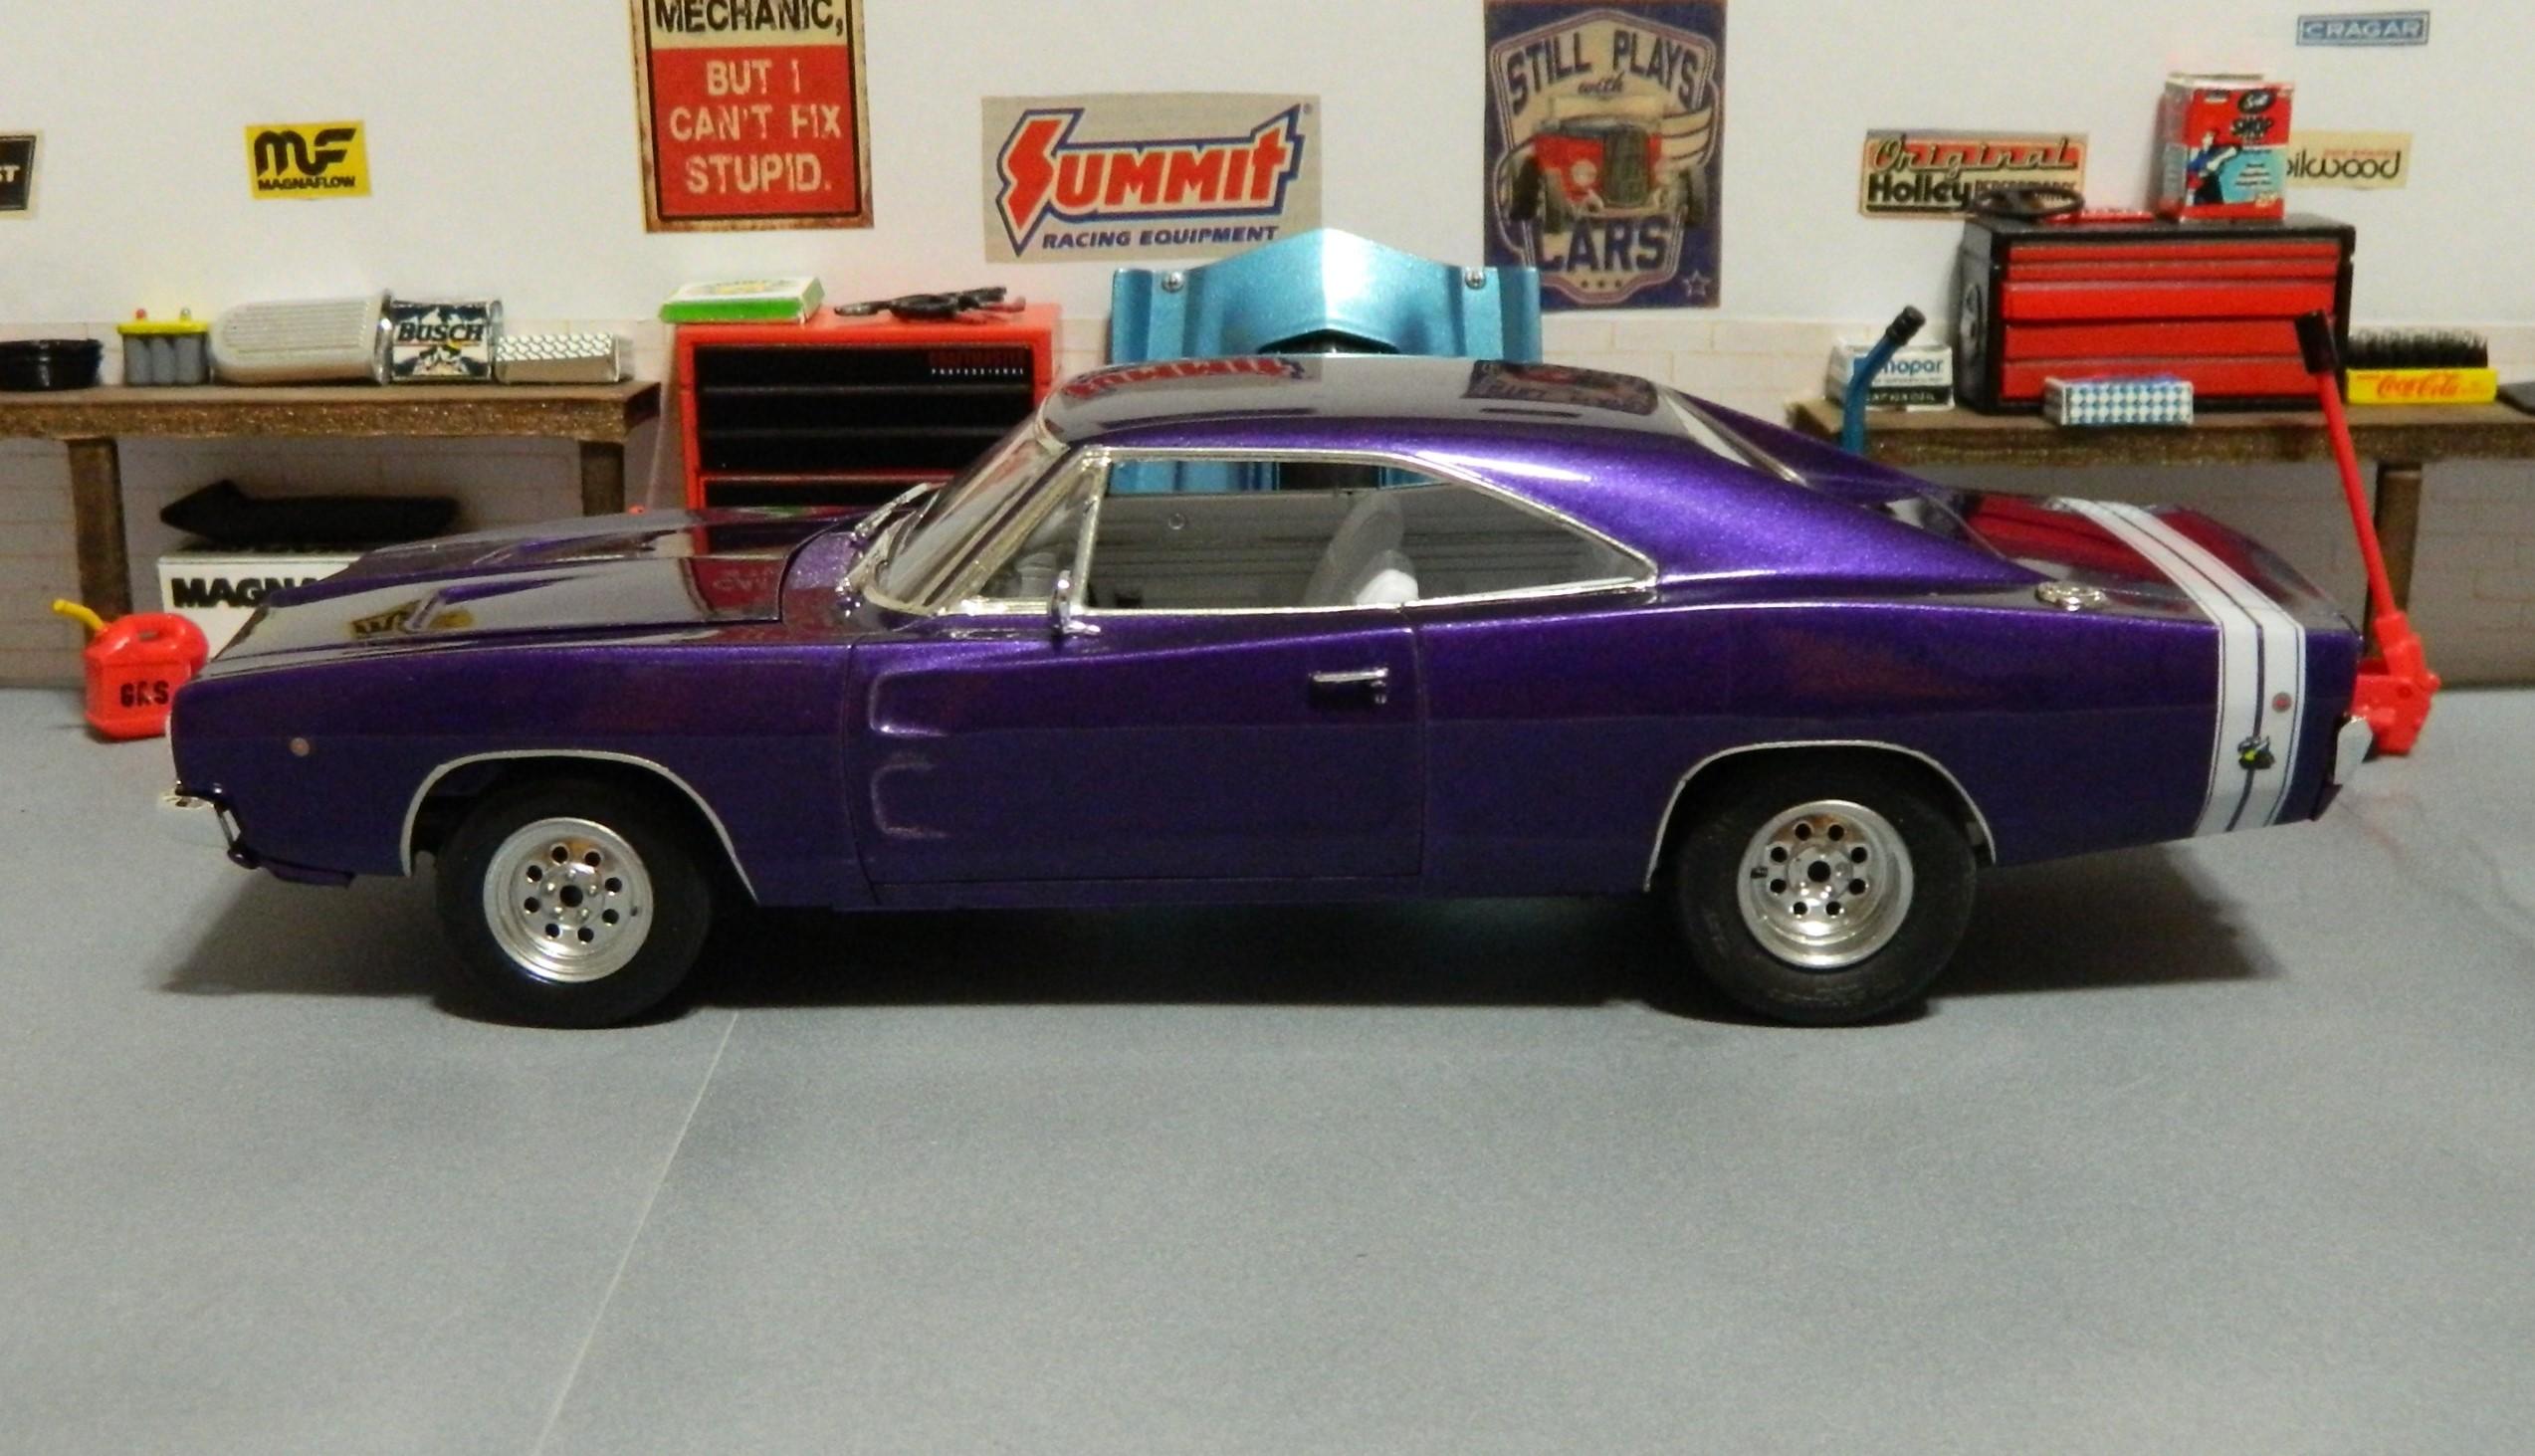
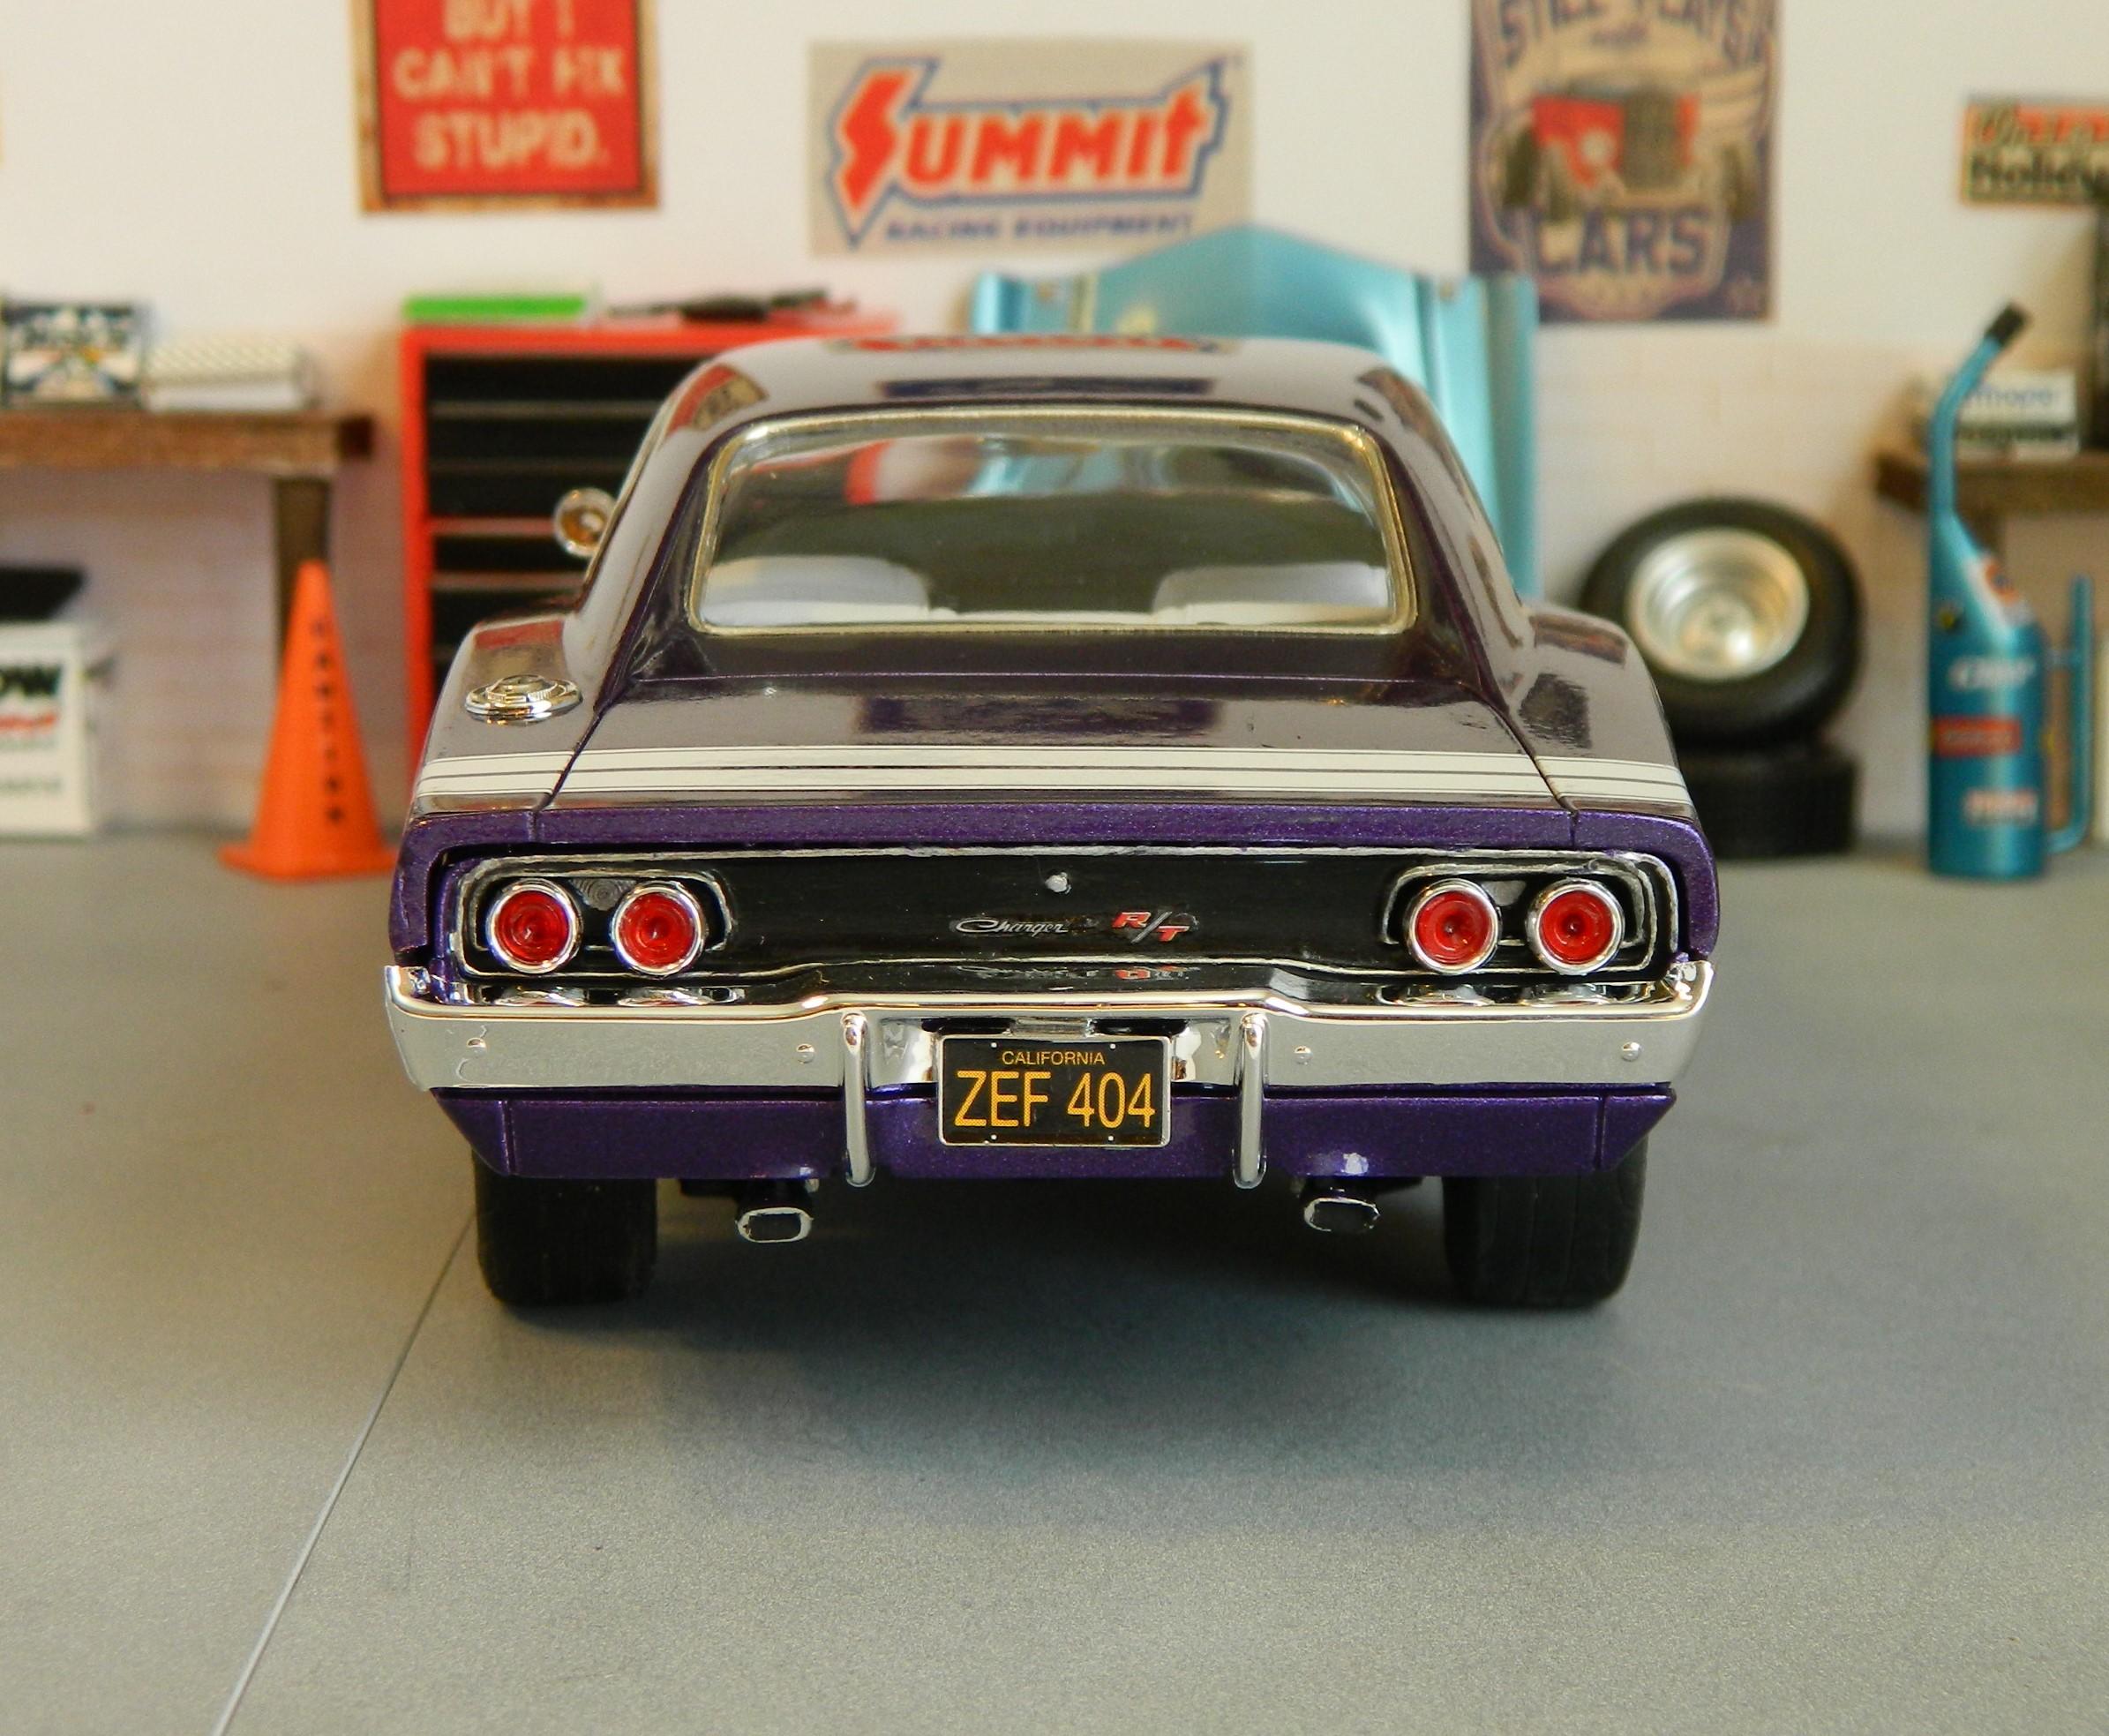
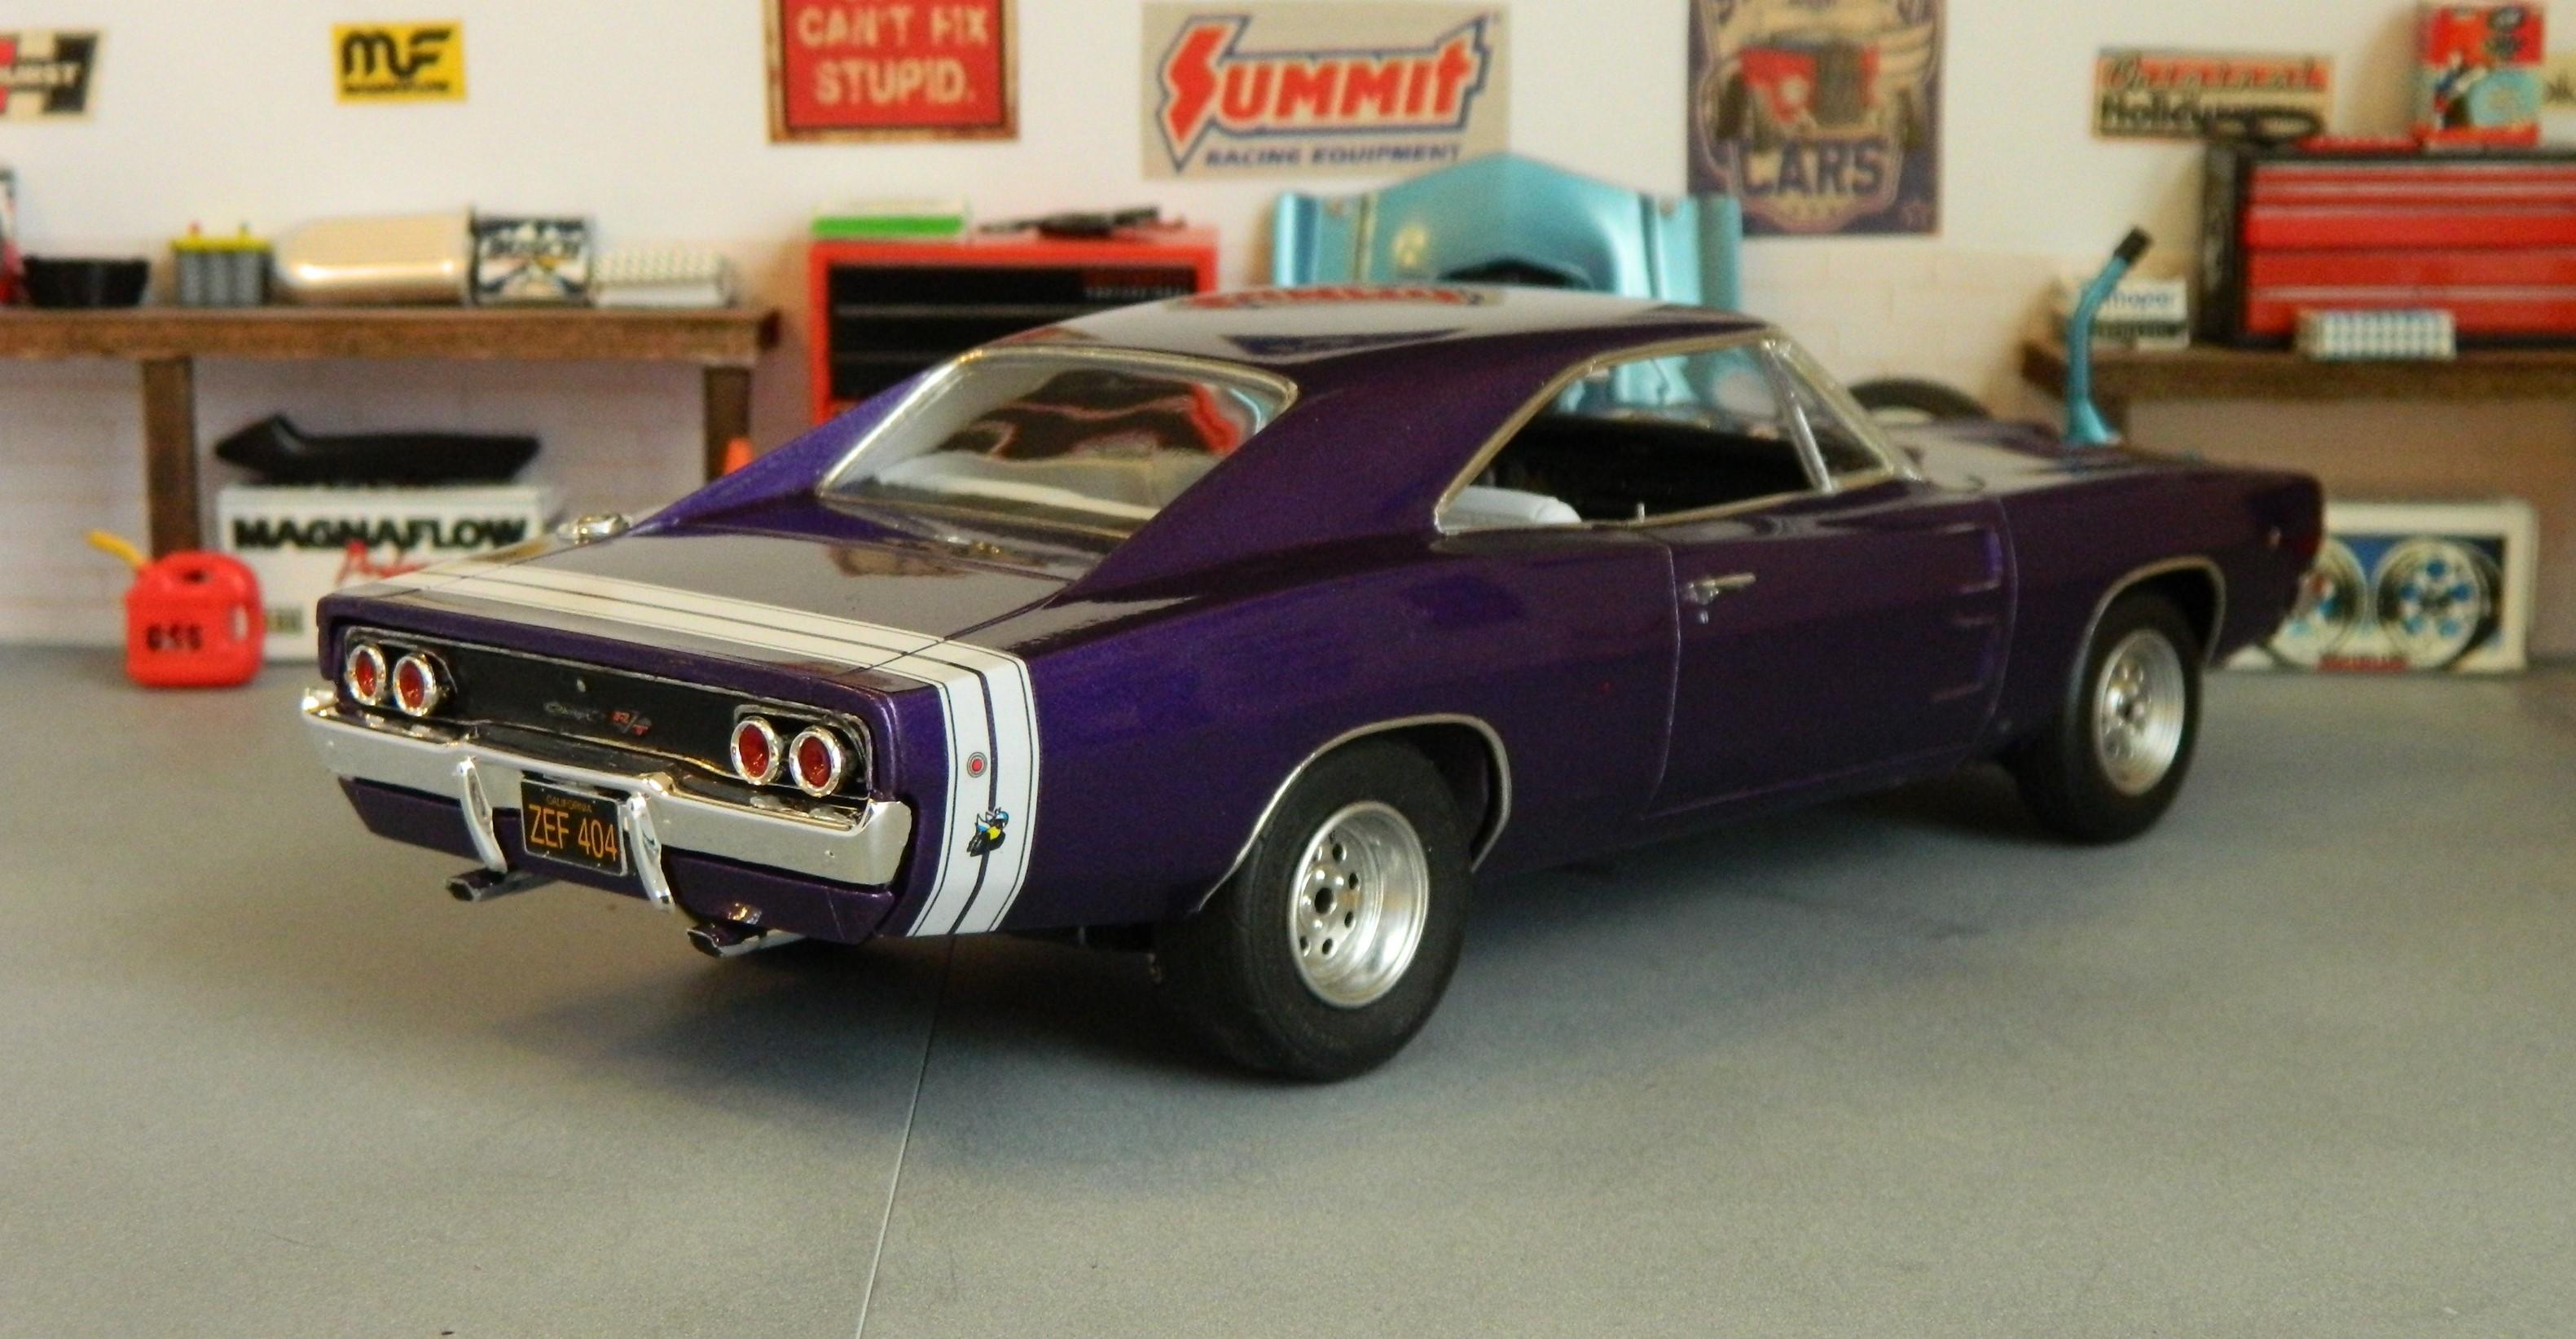
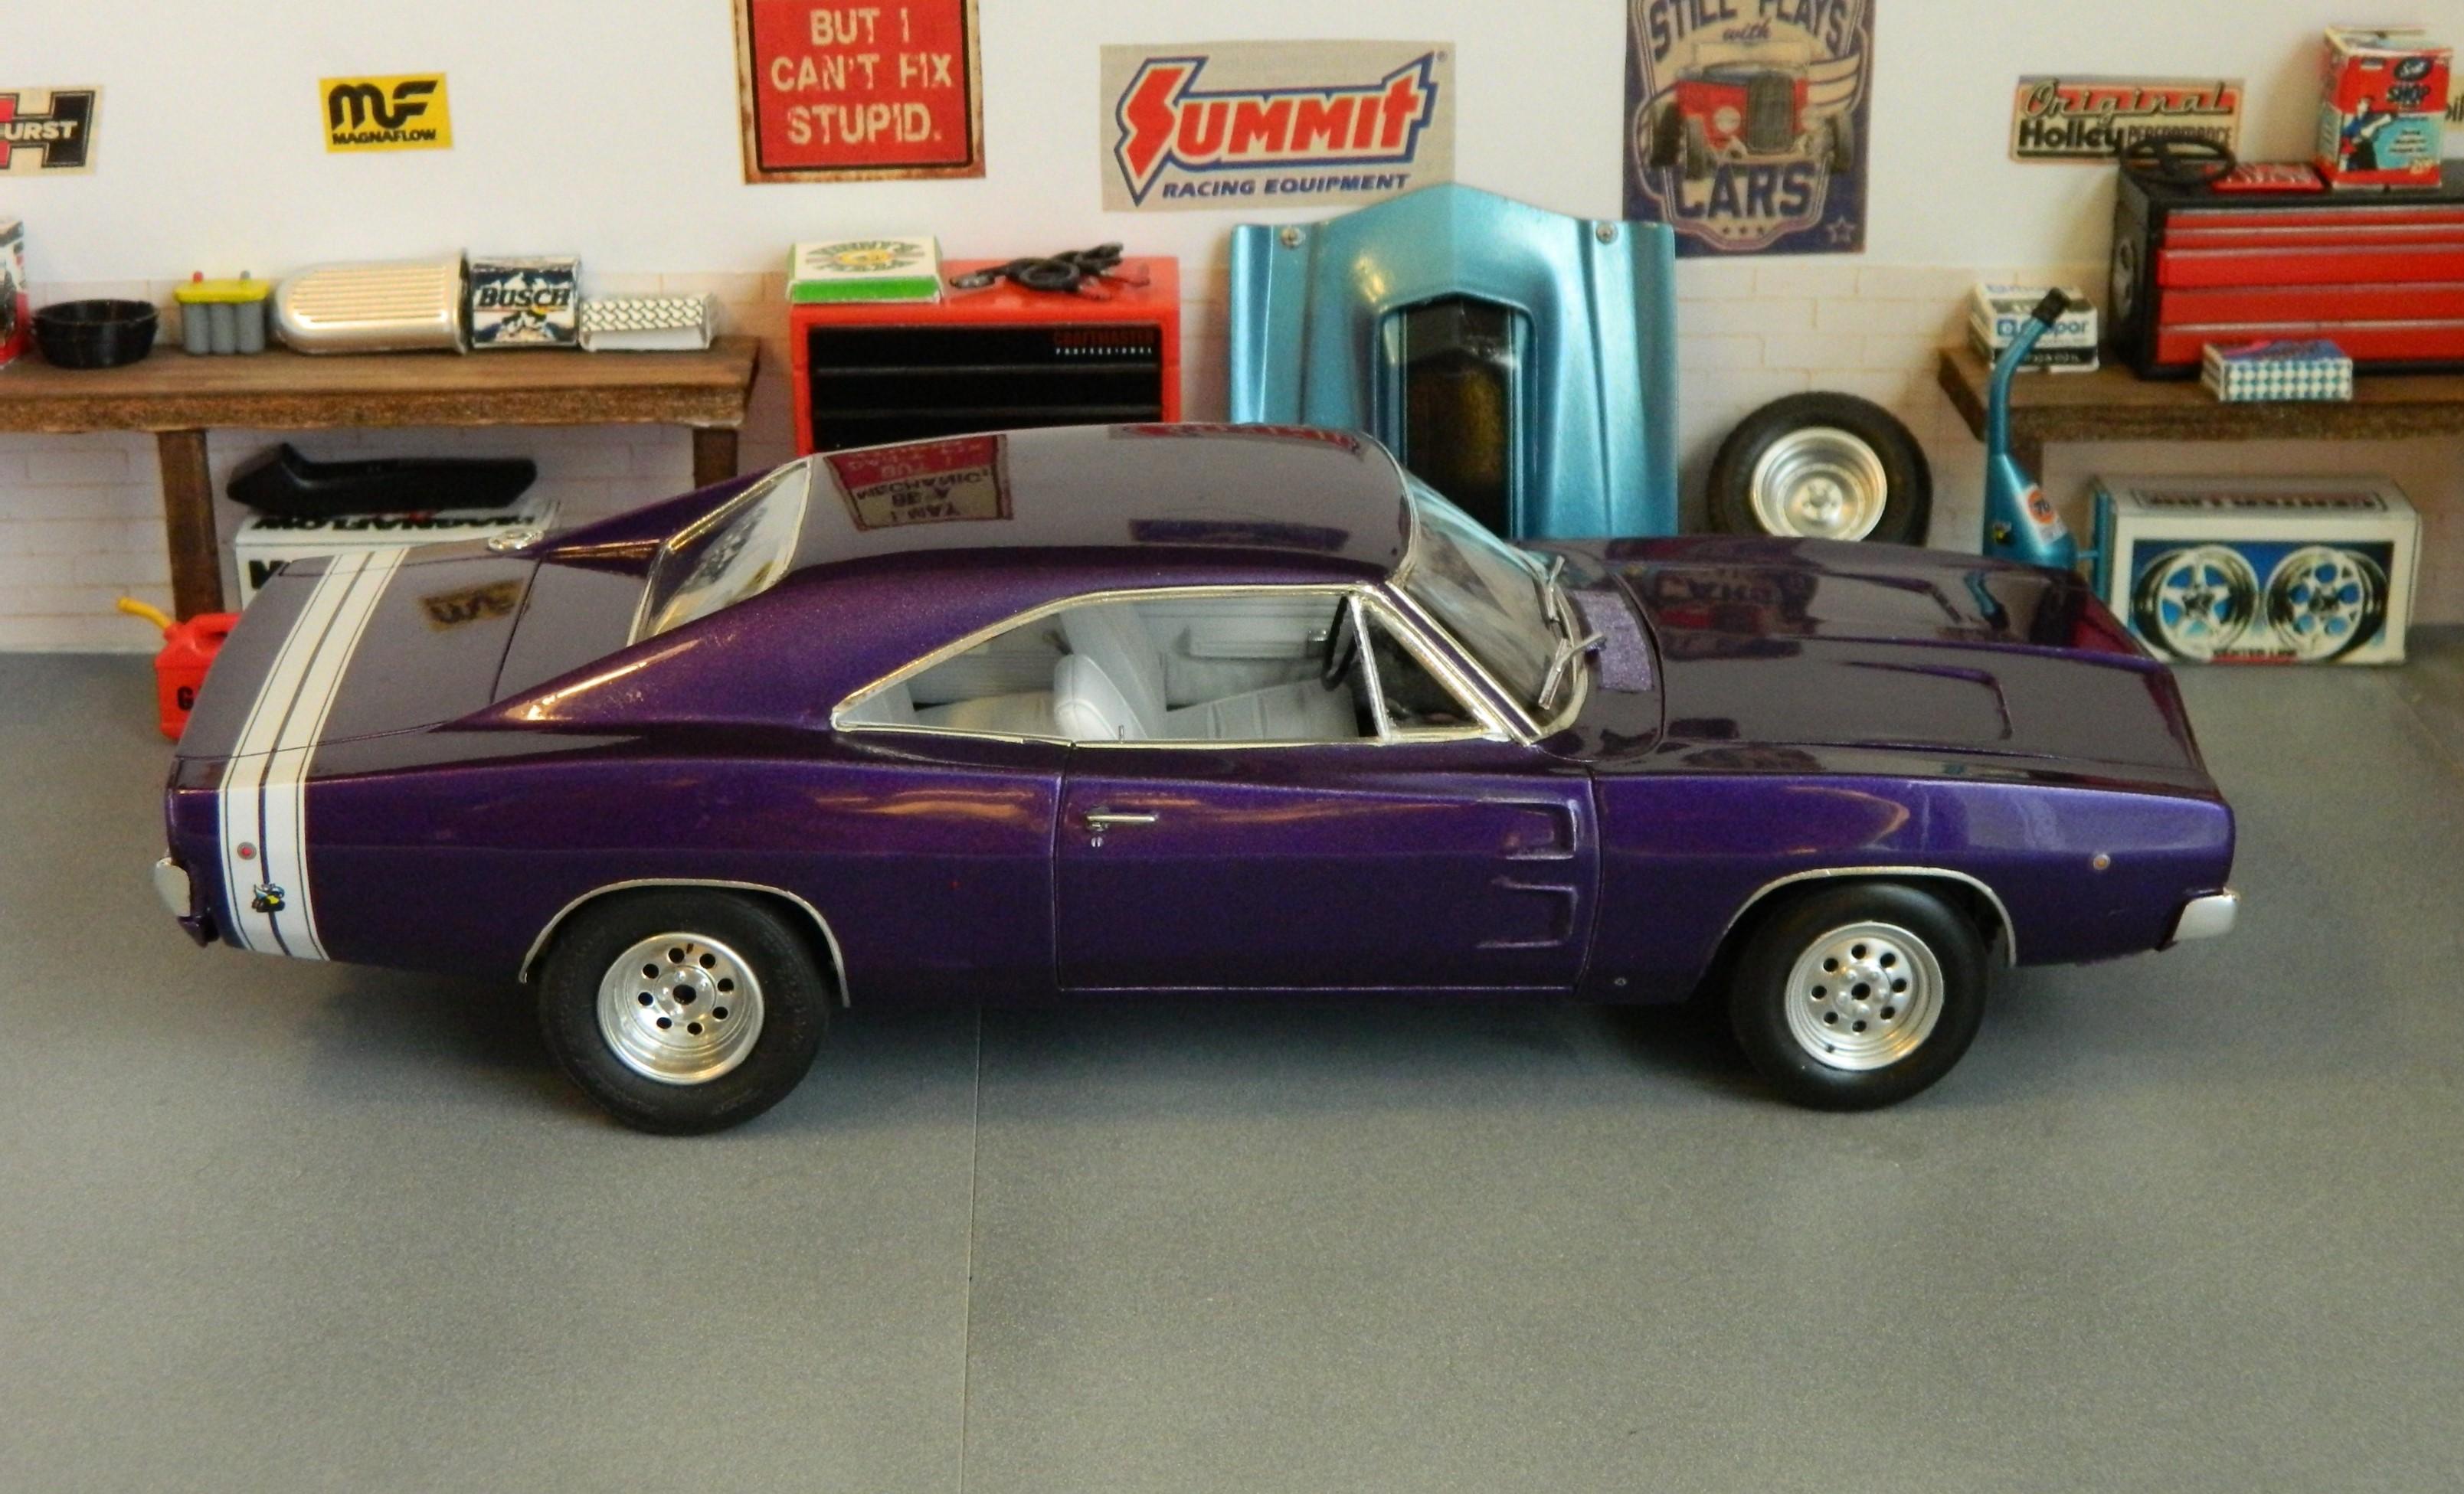
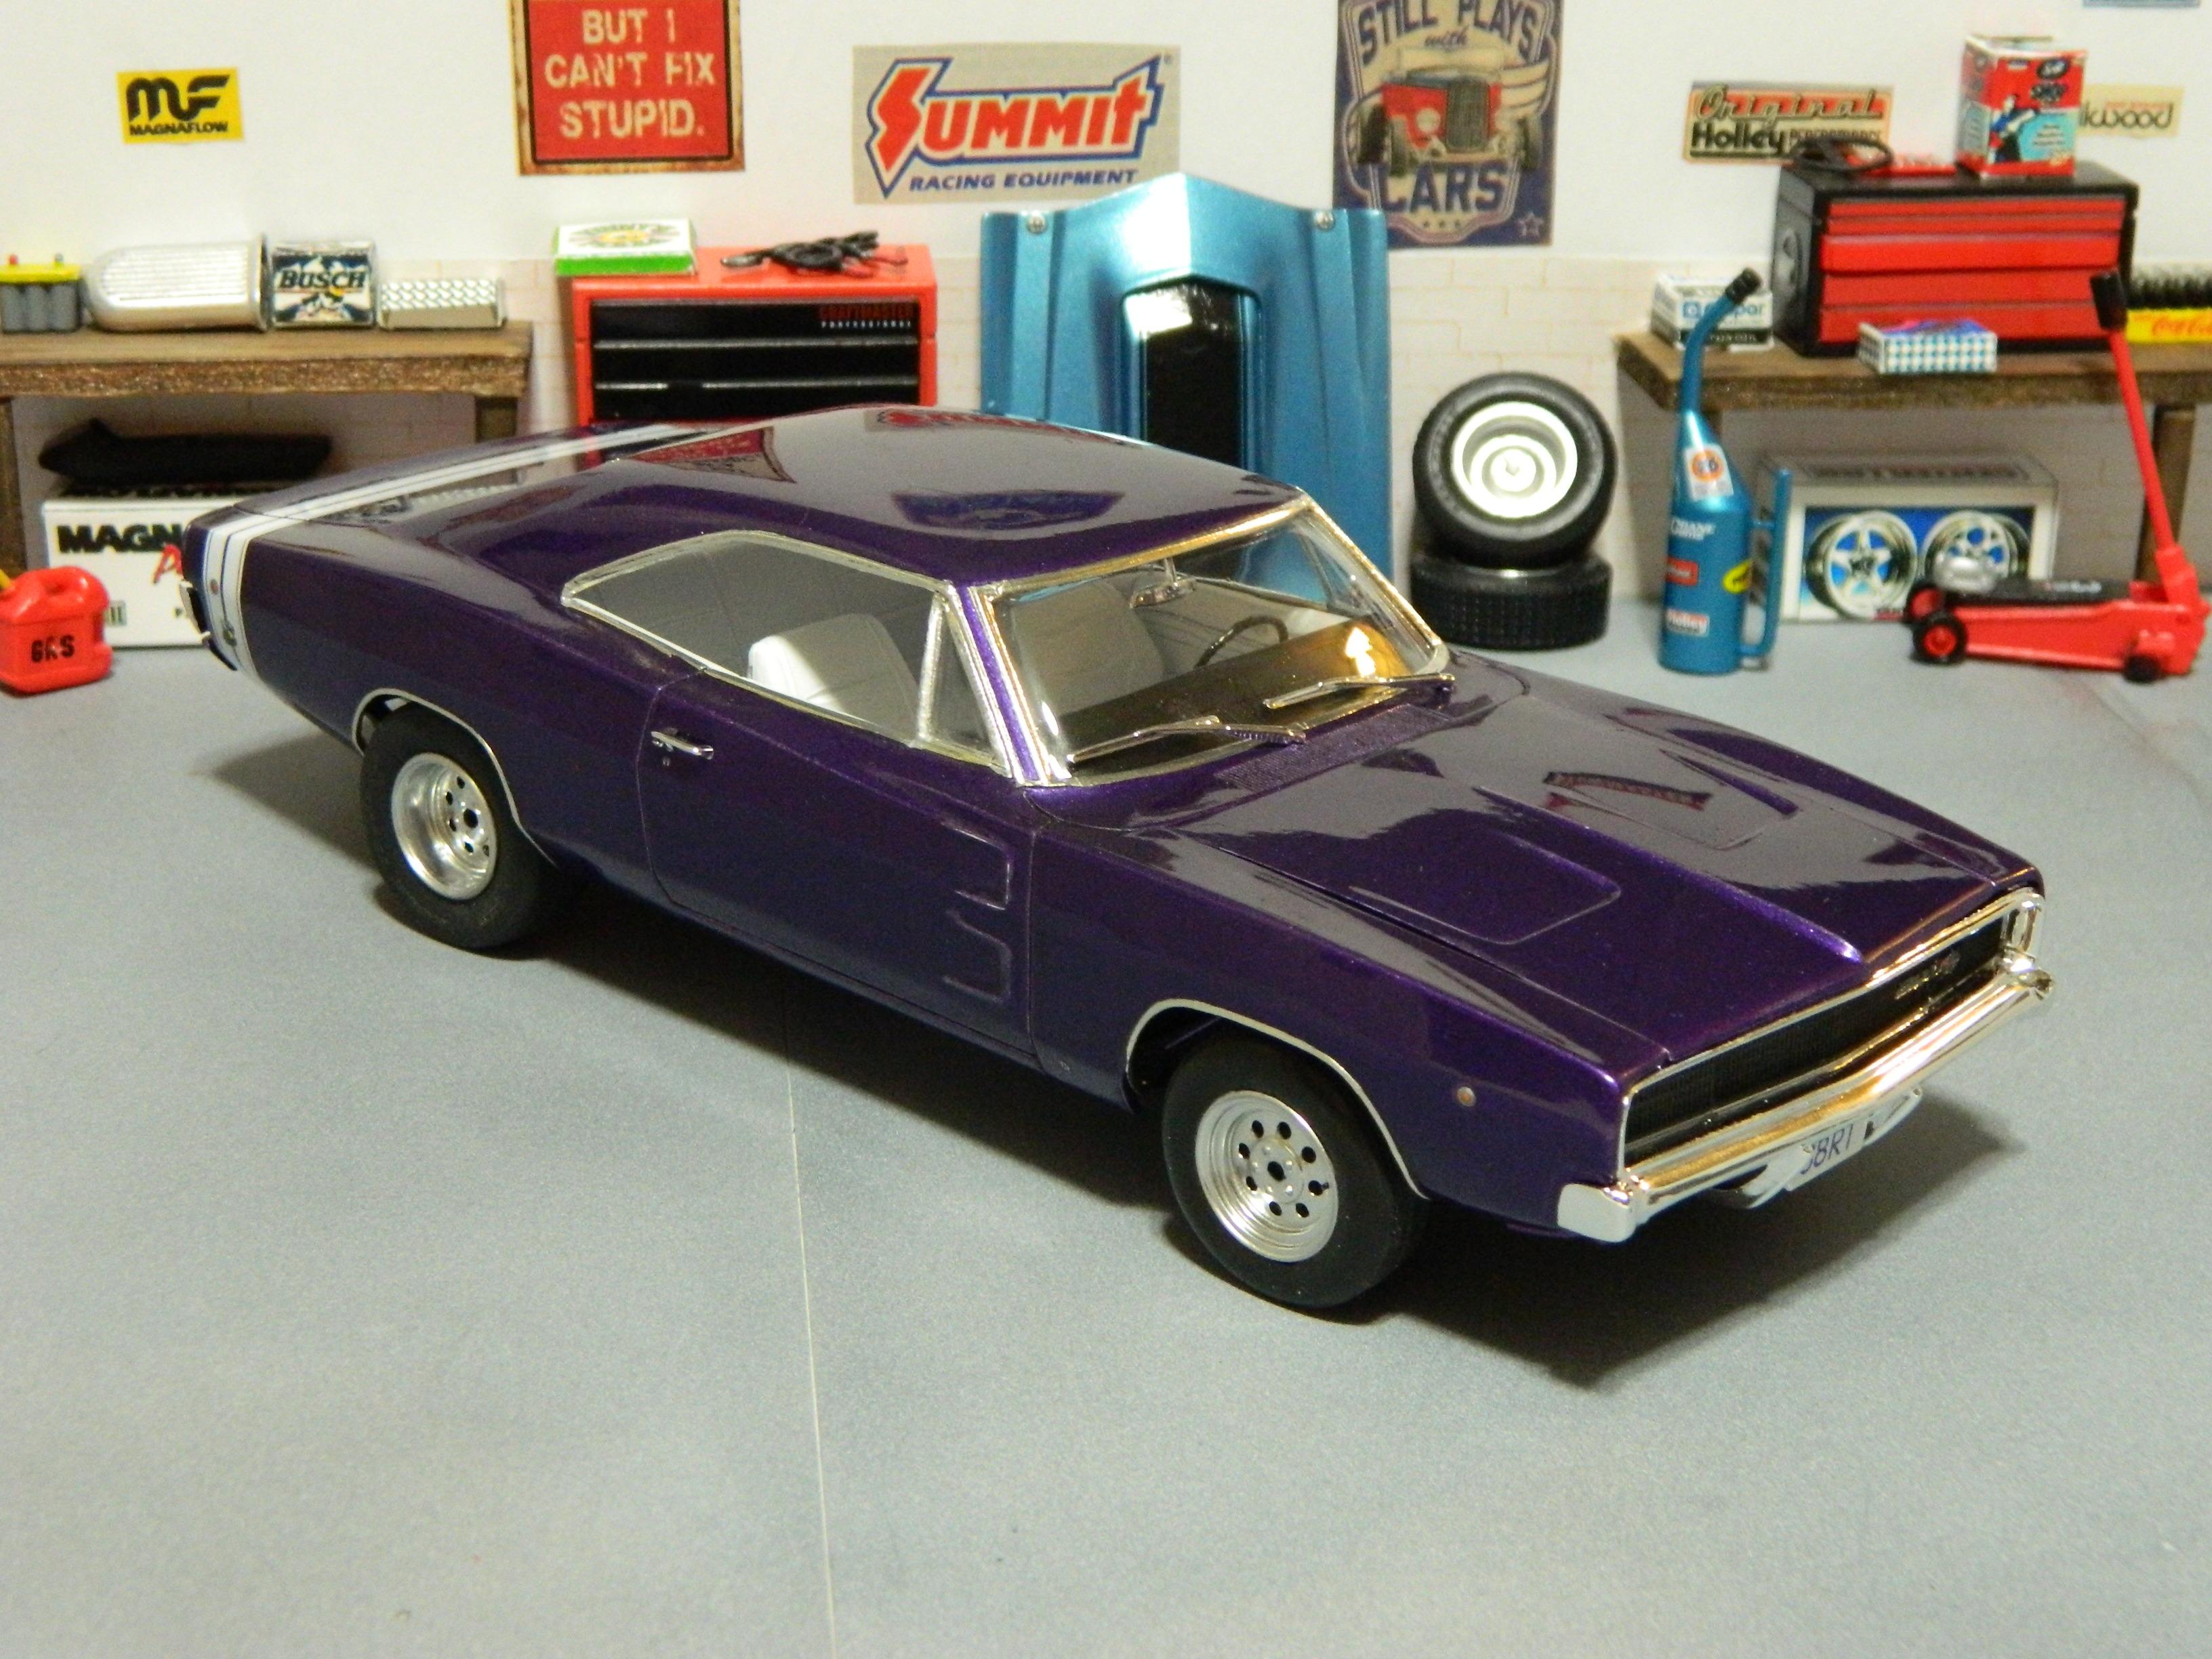
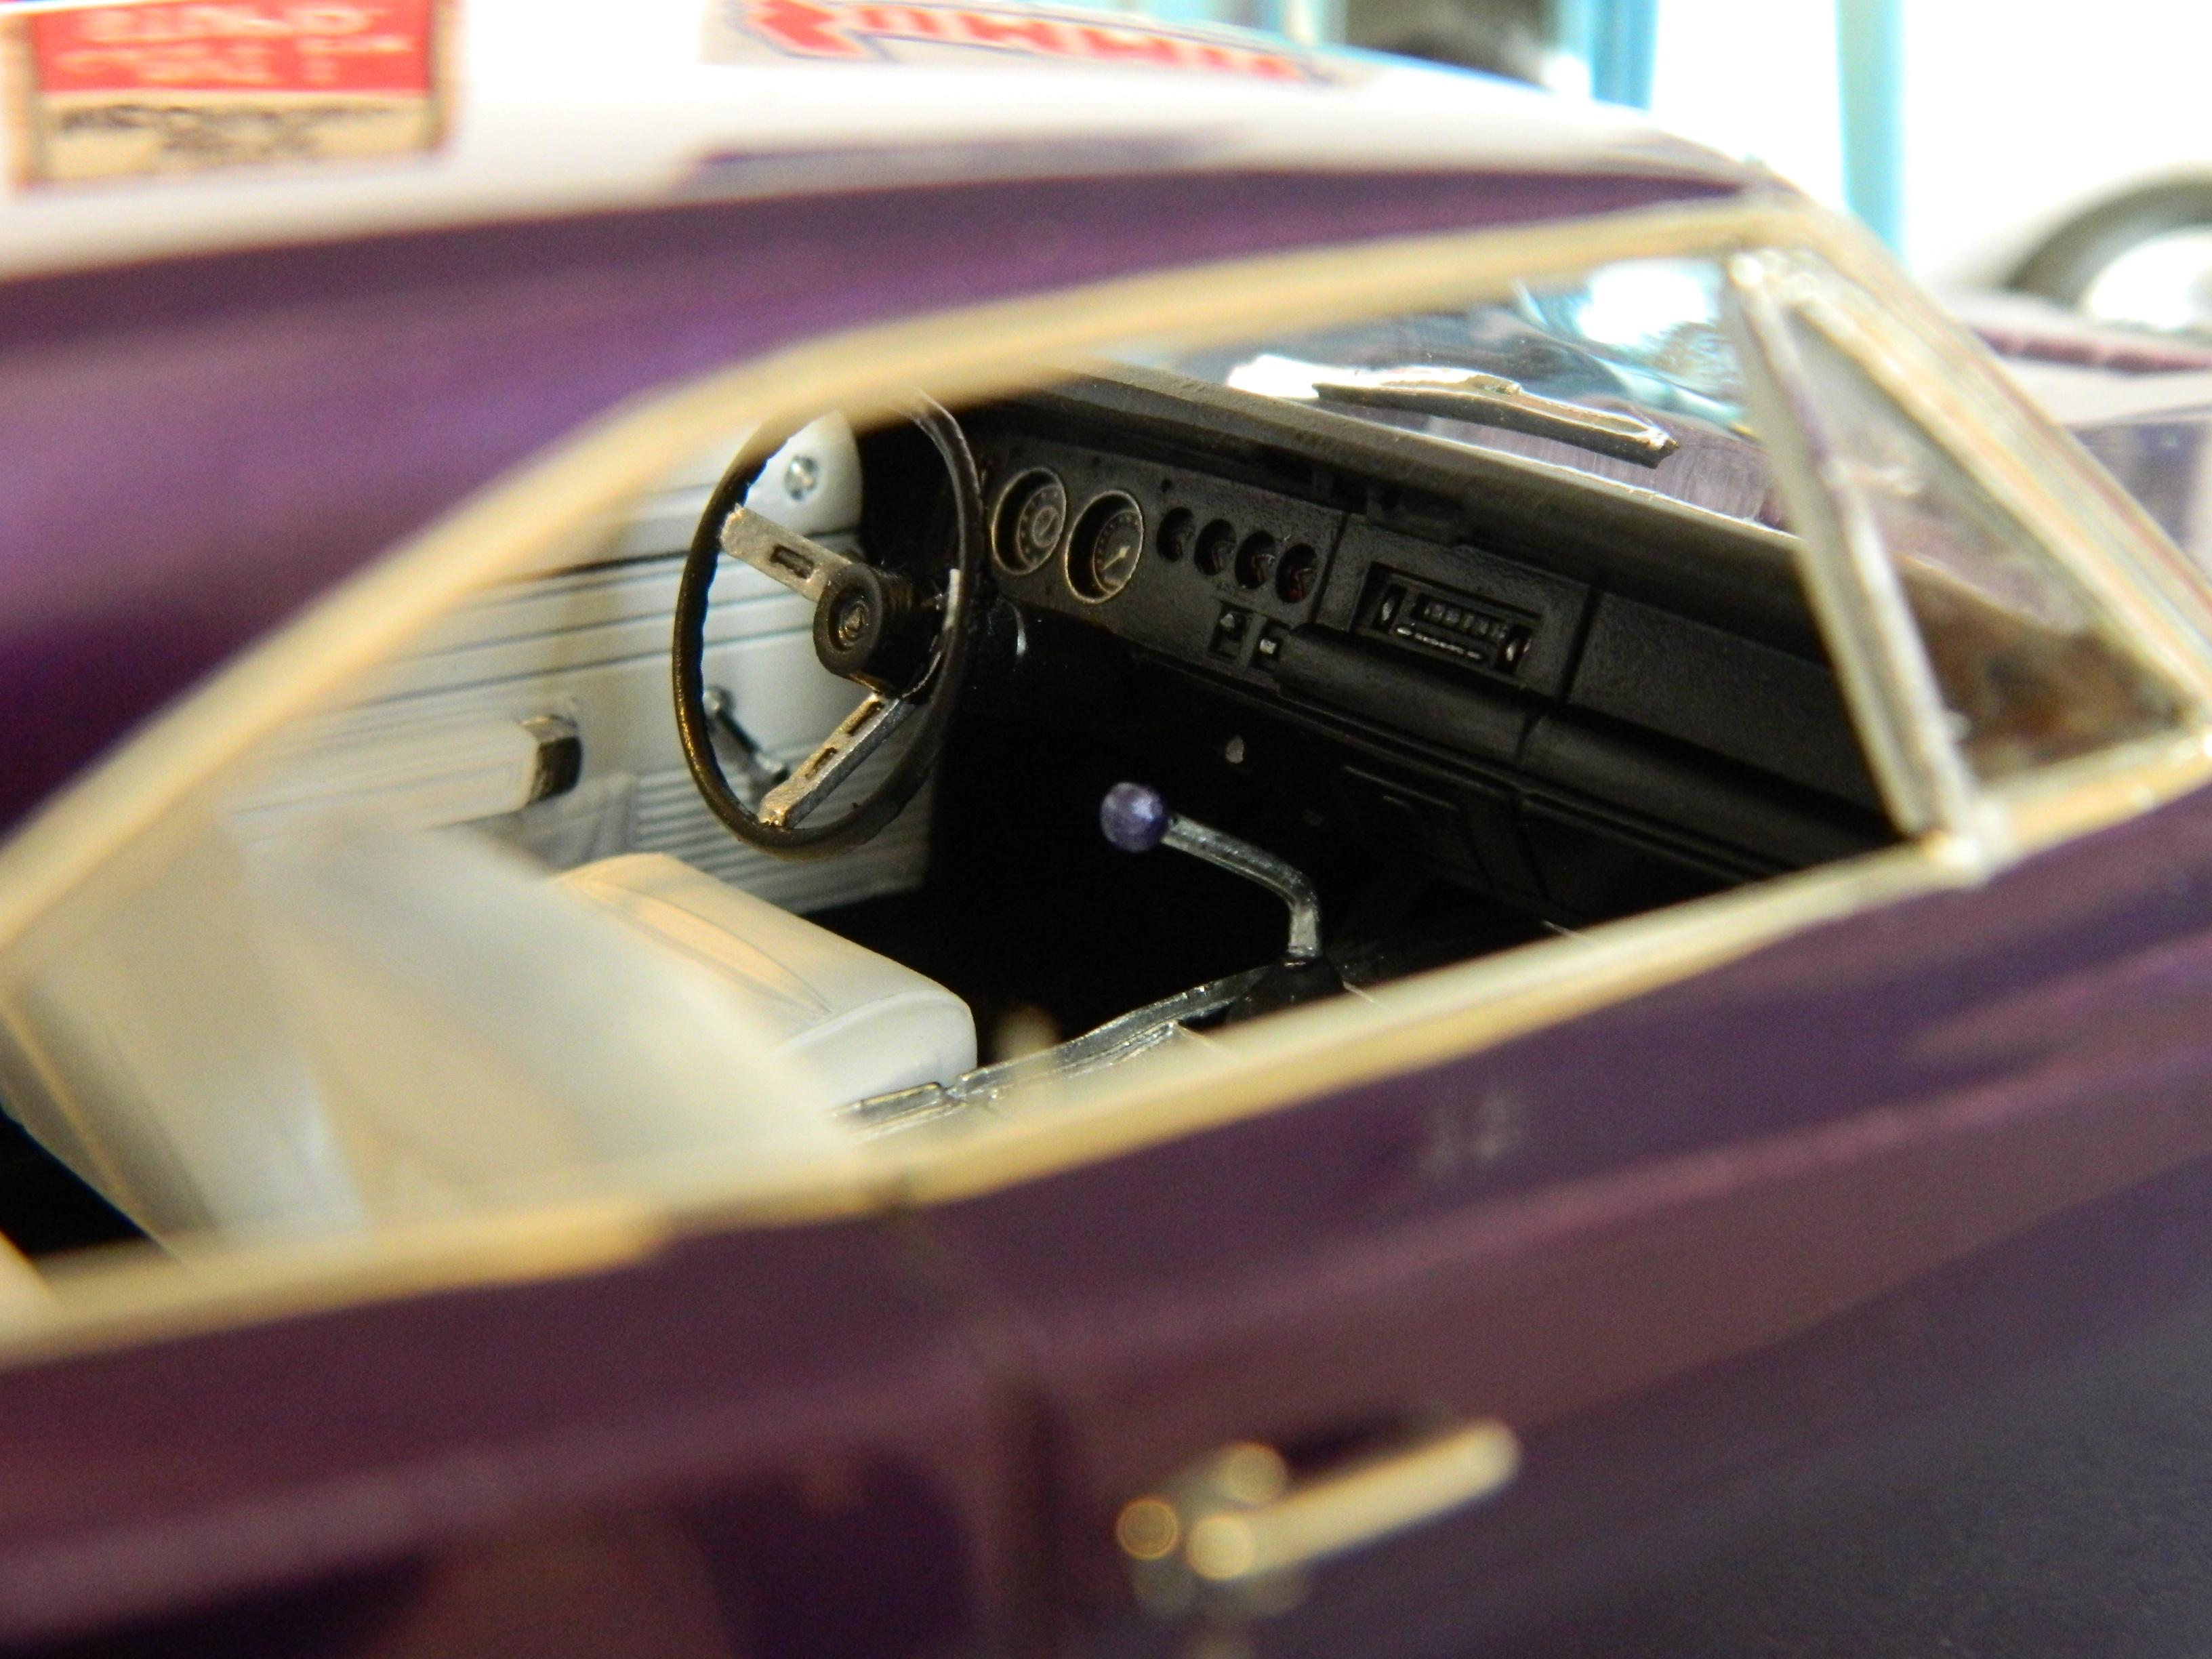
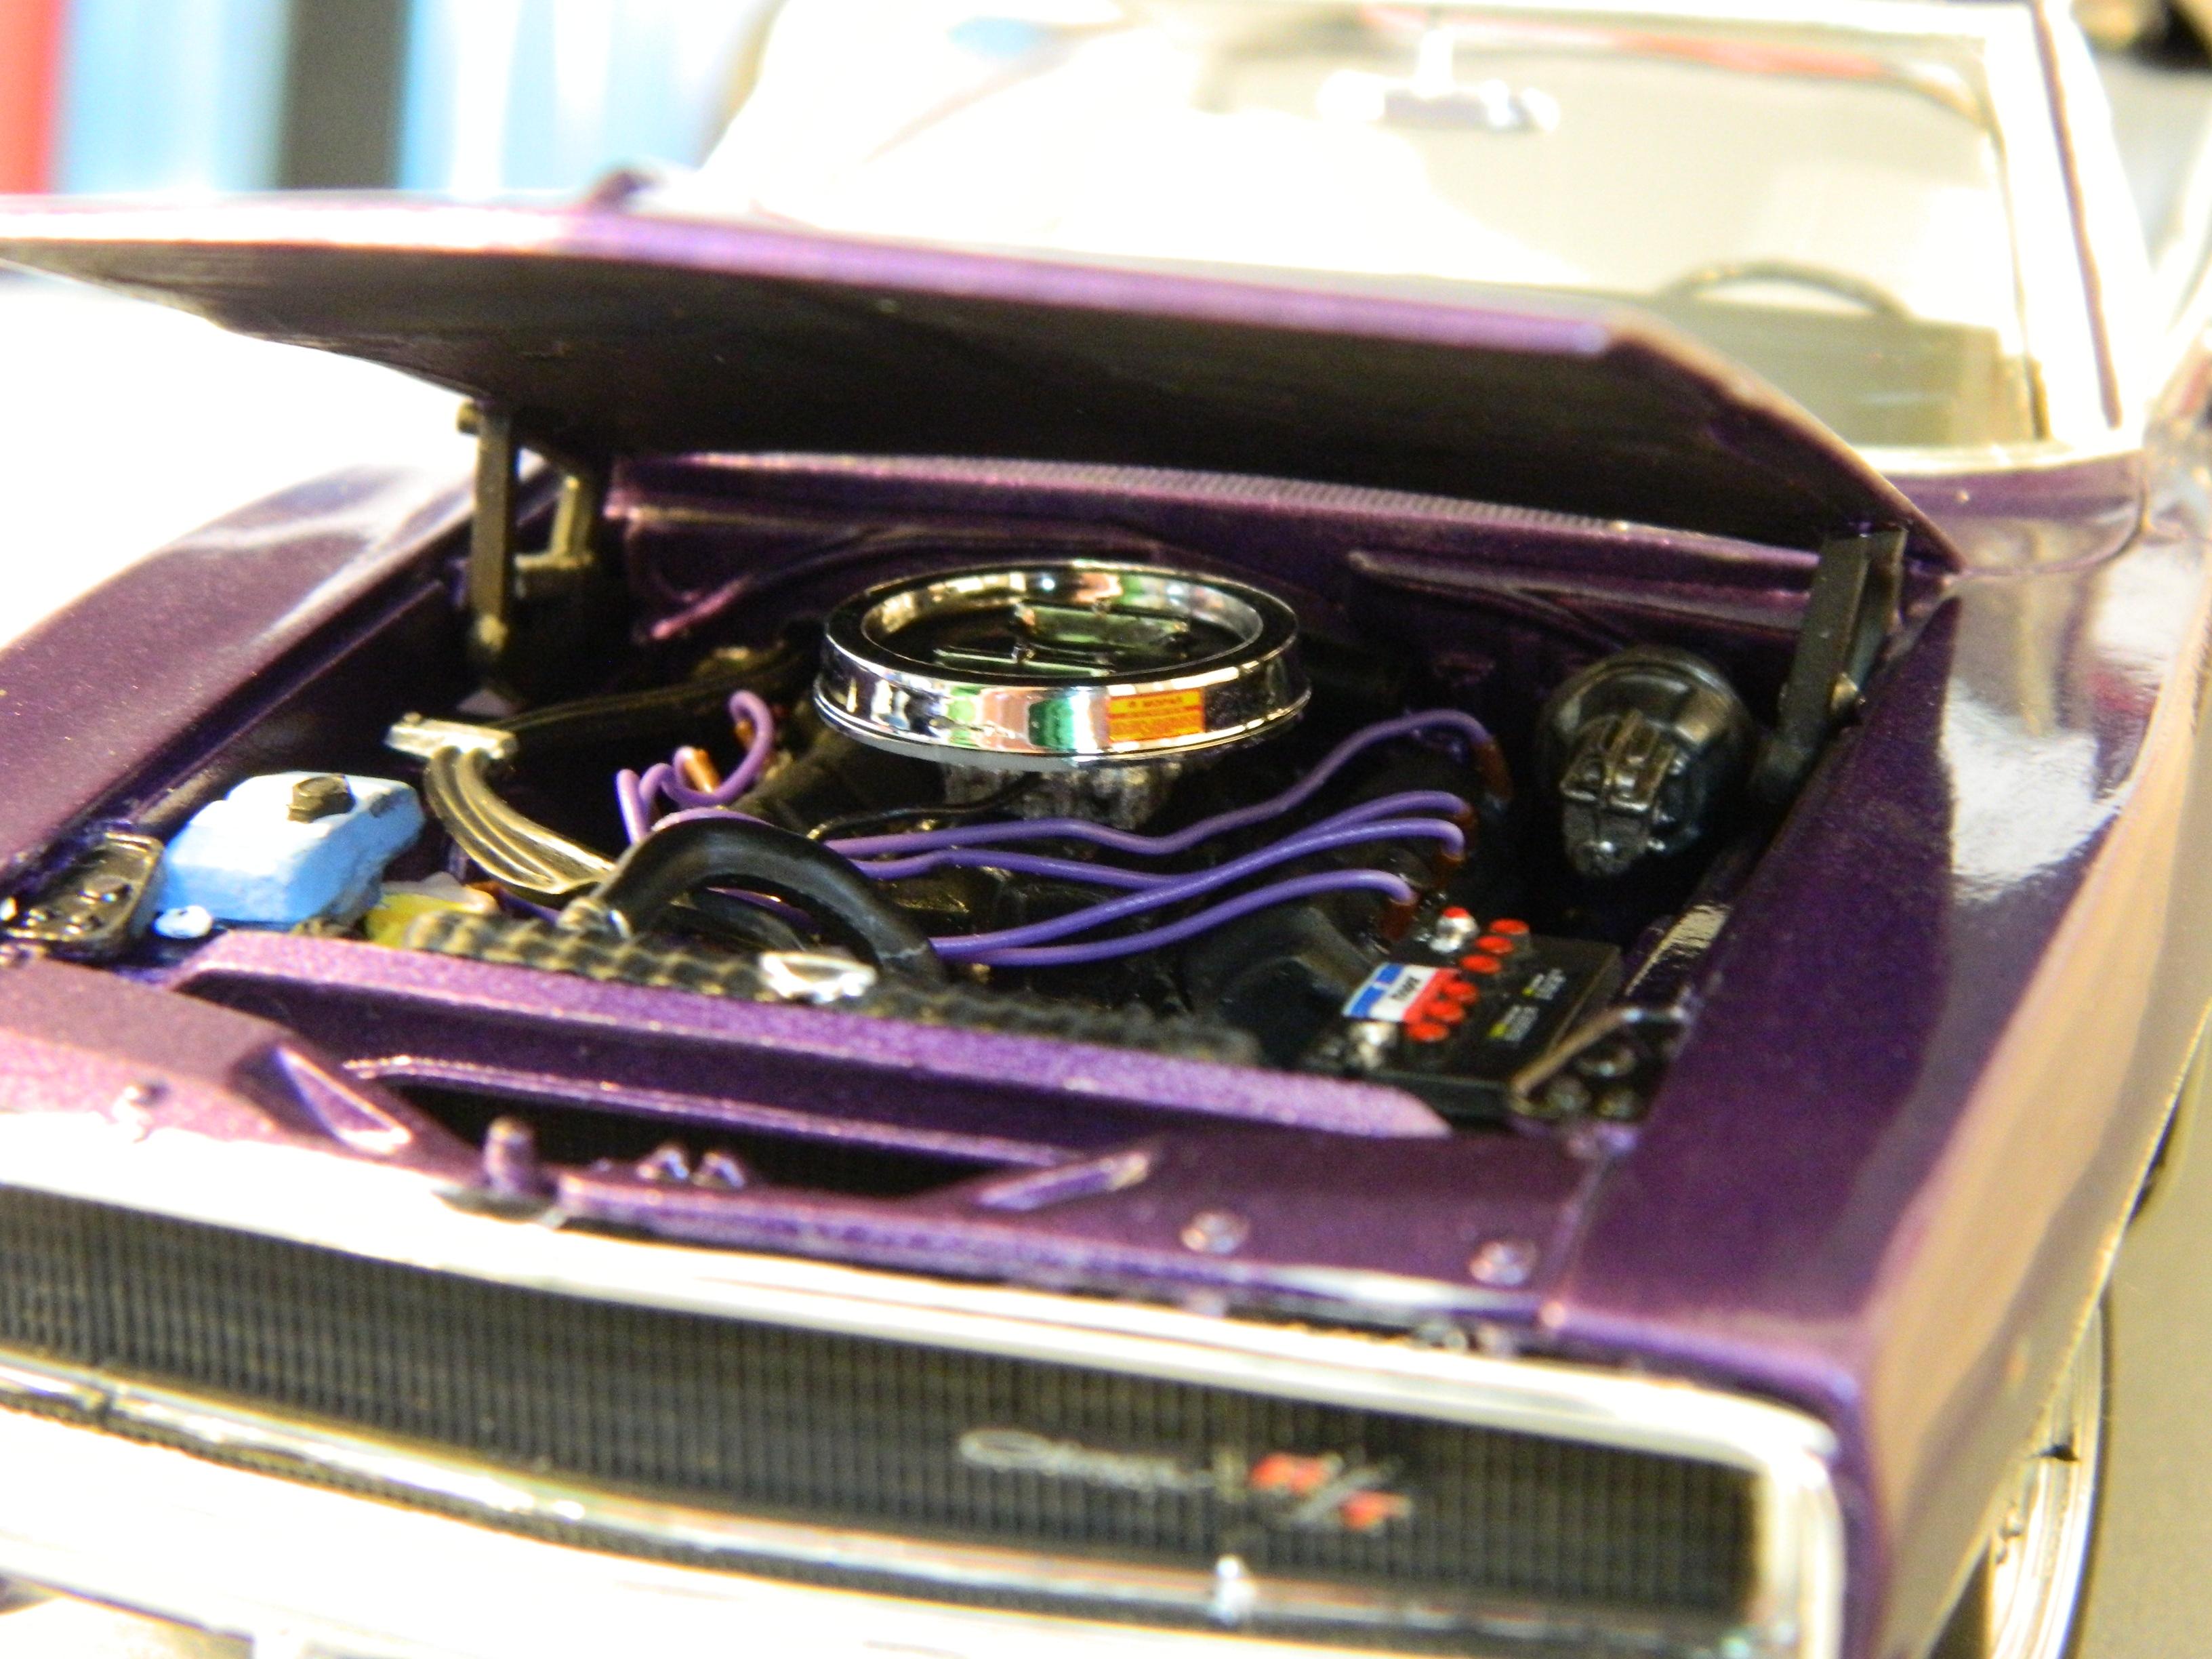
 I finished up the Revell 1968 Dodge Charger R/T yesterday. The paint is Model Master Plum Crazy Metallic Lacquer with Model Master Clear Gloss. The wheels were airbrushed with Molotow Chrome and are from Mad Modeling, while the front tires are from the kit, and the rears from Fireball Modelworks. The interior is a combination of Apple Barrel Gloss White for the seats and door panels, Stynylrez White Primer for the headliner, Stynylrez Black Primer for the carpet and rear shelf, and Apple Barrel Gloss Black for the dash. I used the optional 426 Hemi and cut and bent the exhaust to mate with the headers. I used BMF for the window and fender trim, and hand painted Molotow for the taillight panel trim. I added valve stems, door locks, and ignition wires for extra detail. This is an excellent kit with lots of extra parts, including an engine stand, to build the stock, custom, or drag version. I can definitely see myself grabbing another 1 or 2 of these in the future. Thanks for looking!
- 28 replies
-
- 3
-
-
- revell
- charger r/t
- (and 1 more)
-
Dug out this stalled build which was started in 2013. At that time, adapted the wheels, set the ride height and got all the parts cleaned up and that's when I stopped working on it. Got the body out last year for prep and a coat of surfacer, then stopped working on it again. This time im going to try get it complete. The kit. As per usual my favourite wheels. Parts are all good to go, just need a wash and then paint. Makes me laugh they have been in this container for 8 years. Box stock chassis. Separated the x part of the frame so the join line could be cleaned up properly. Reason for that will come about later. Modified the oob inlet manifold to have a dual carb set up. And a surfacer wheel mock. Got some nice warm summer days all week, so fingers crossed I can get the usual black paint applied.
-
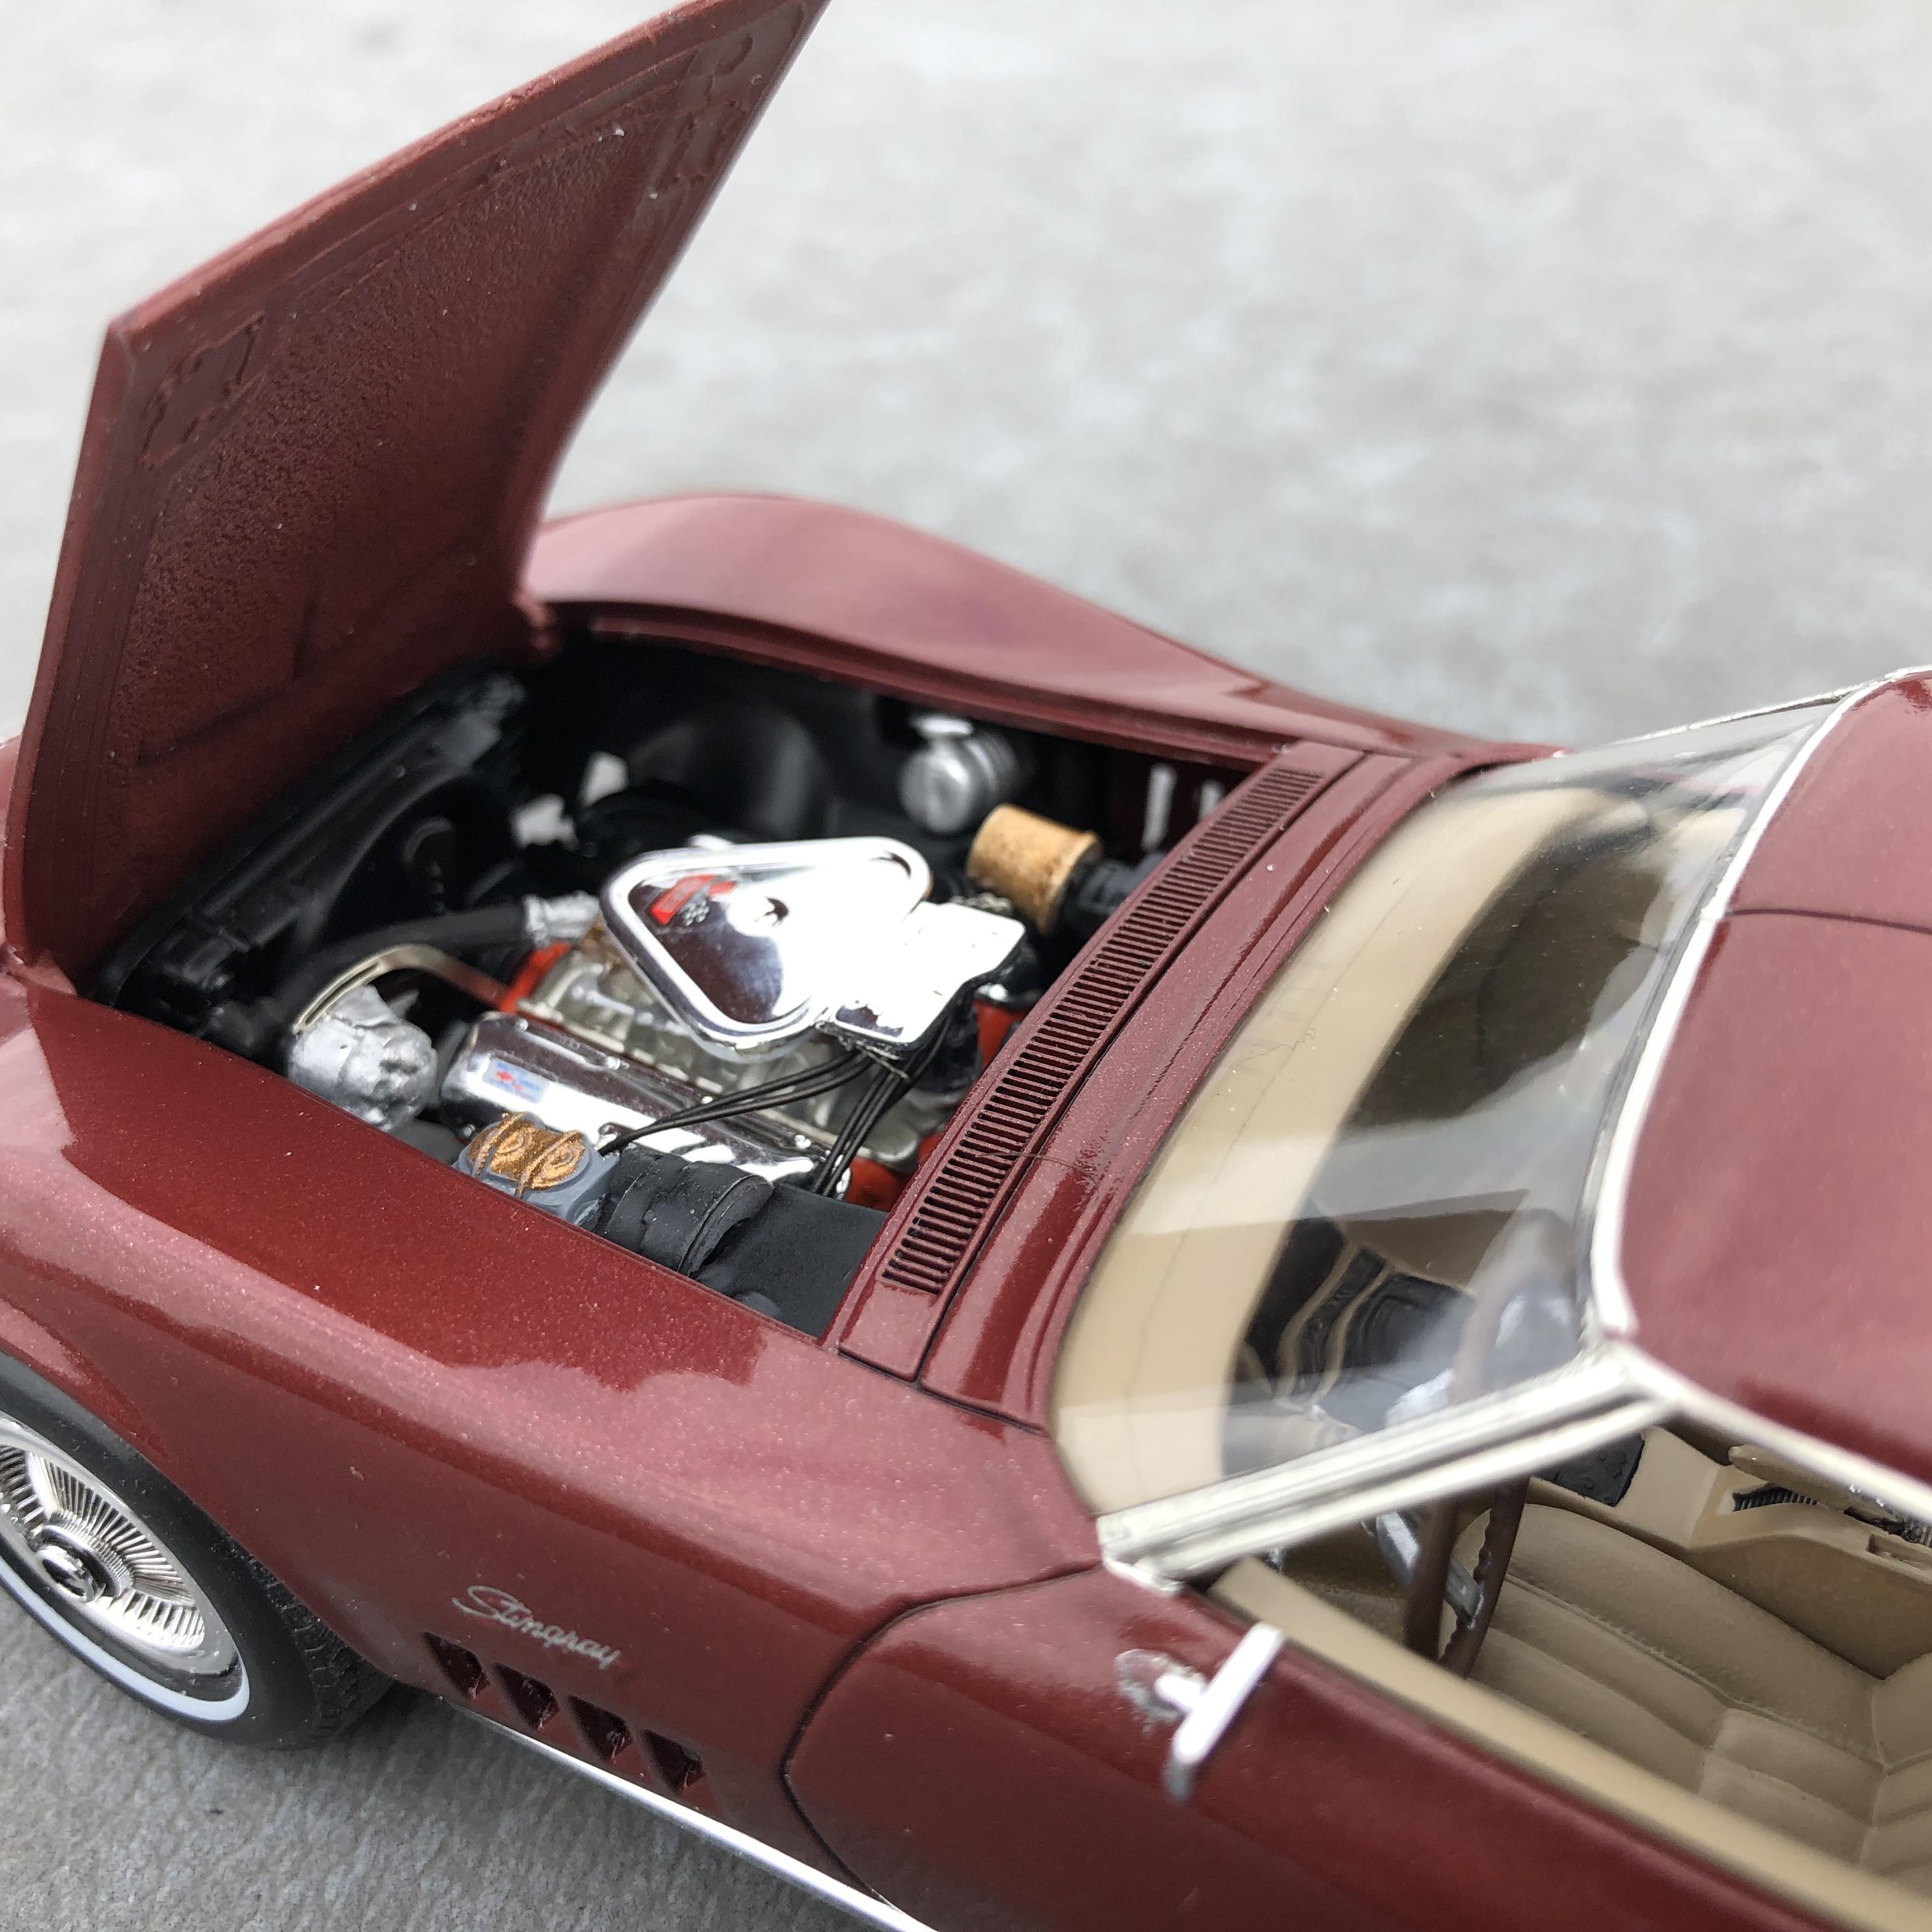
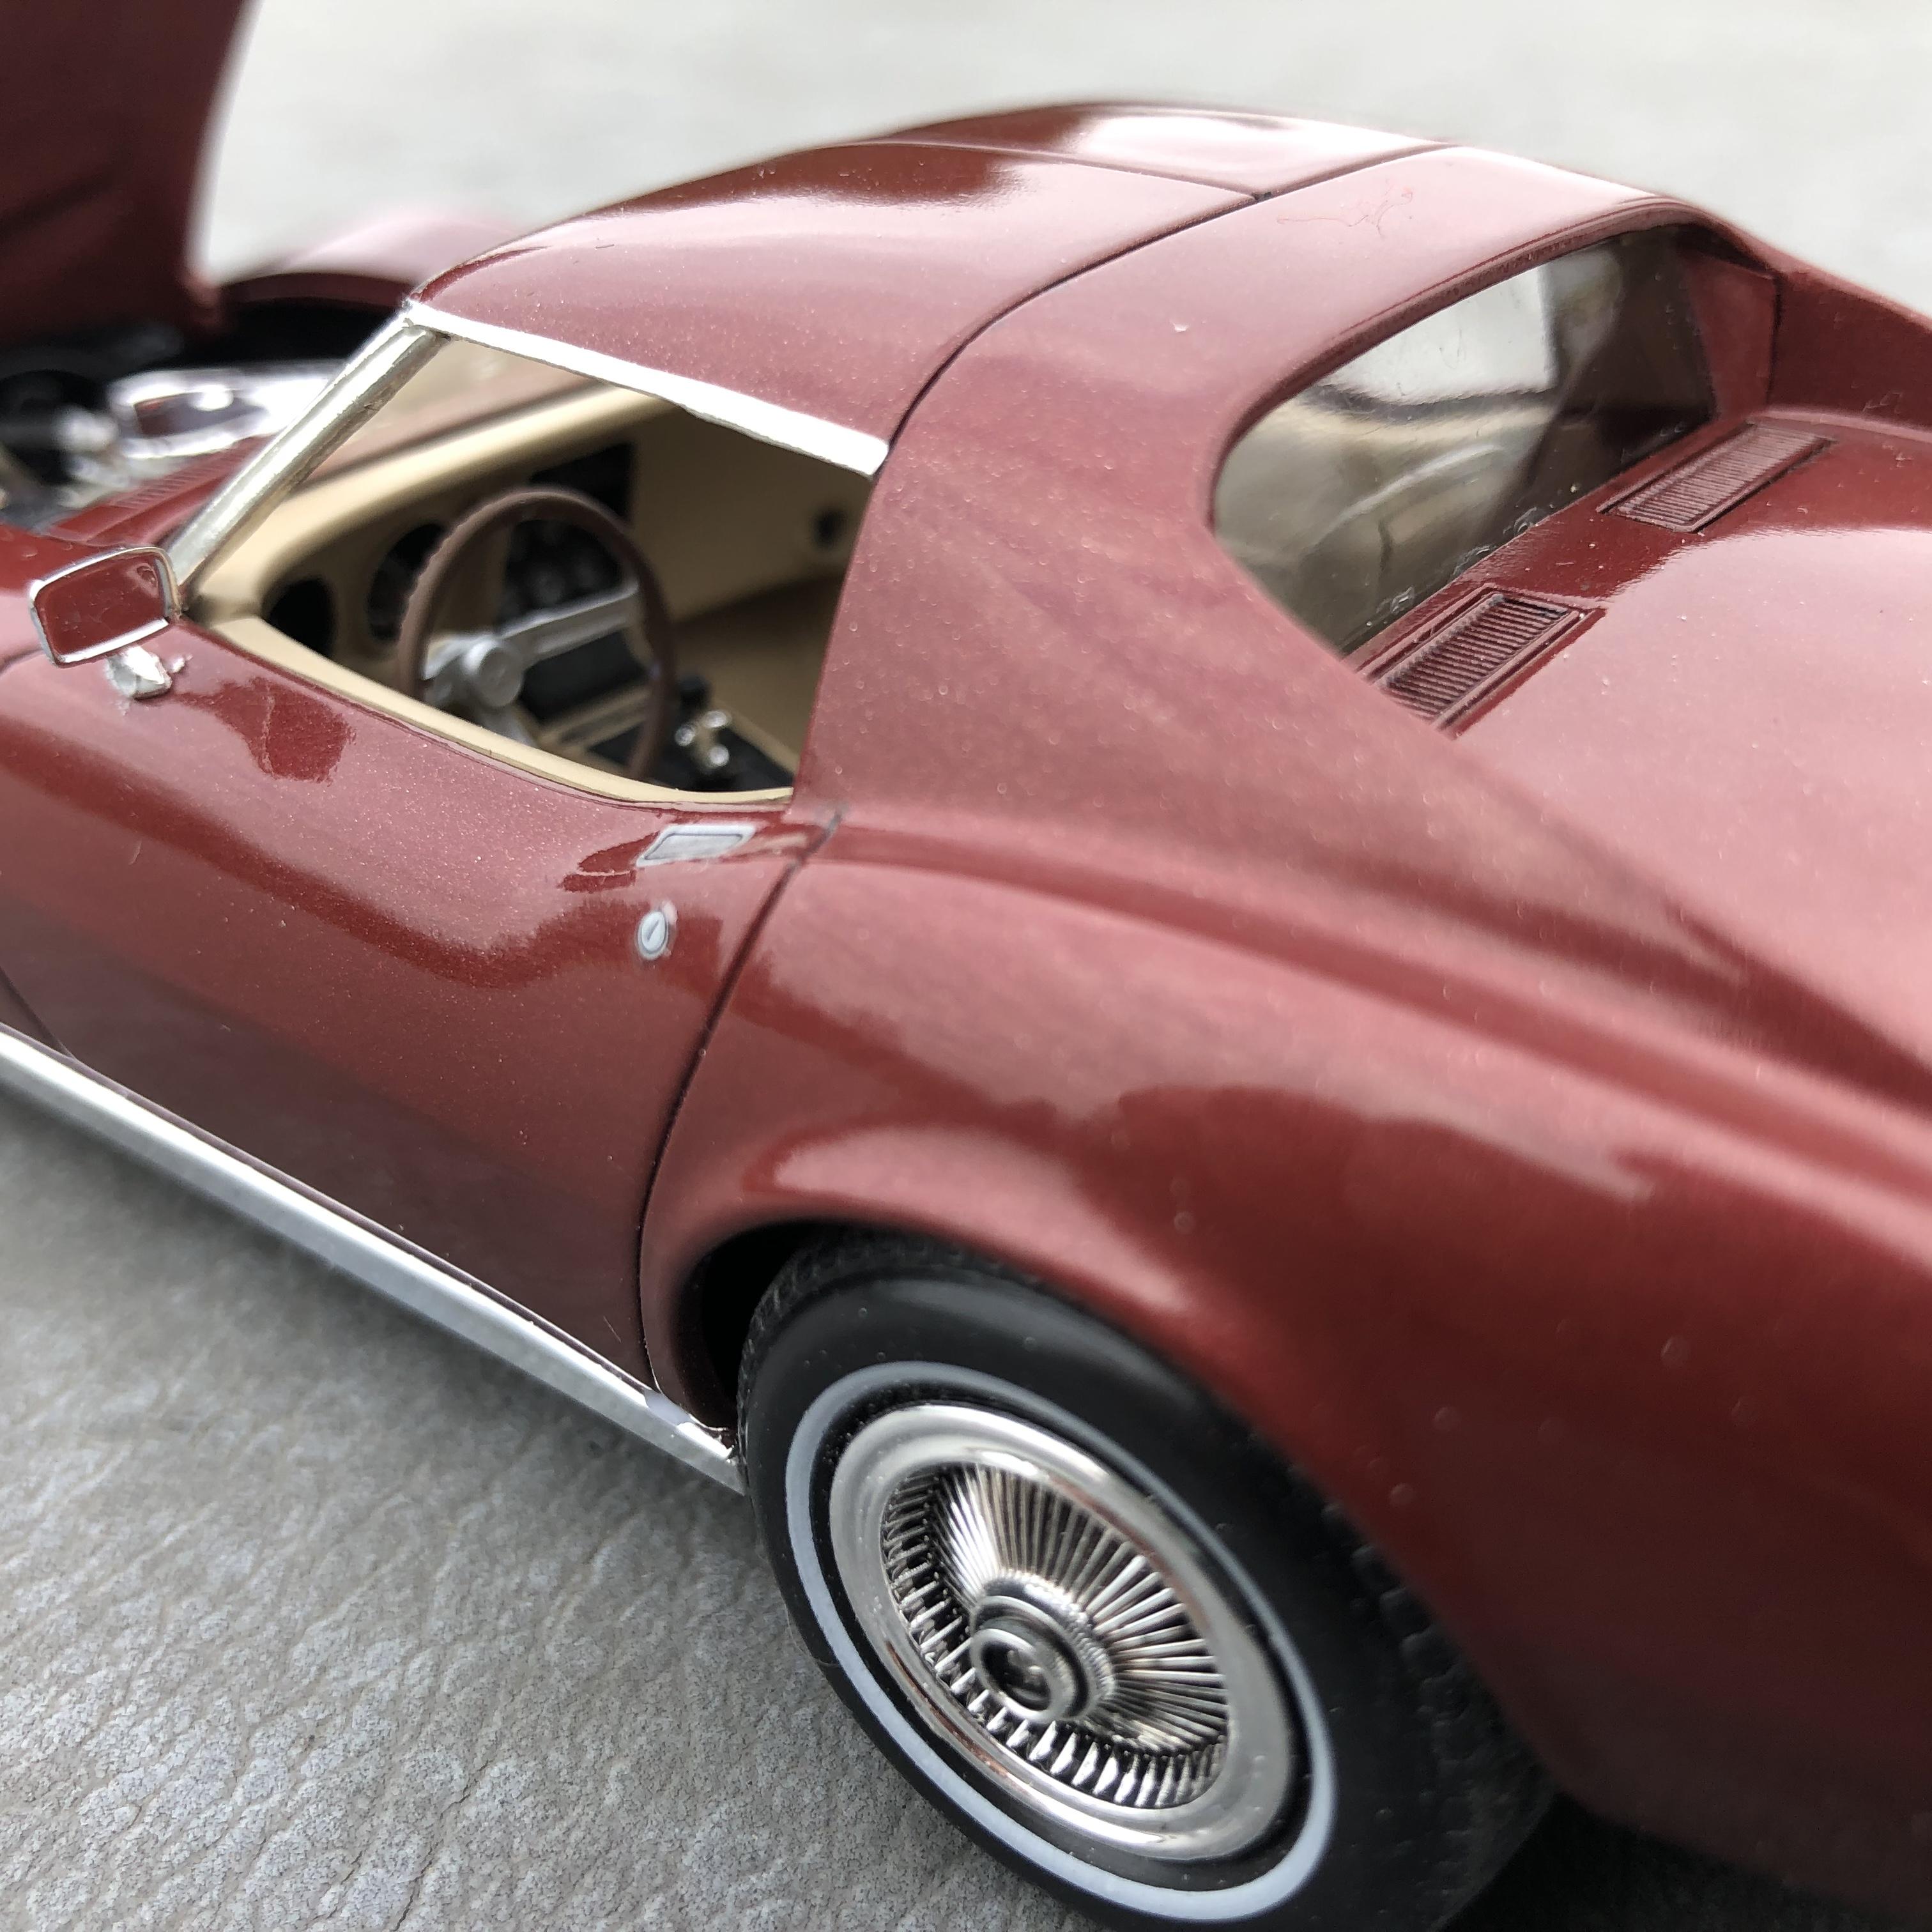
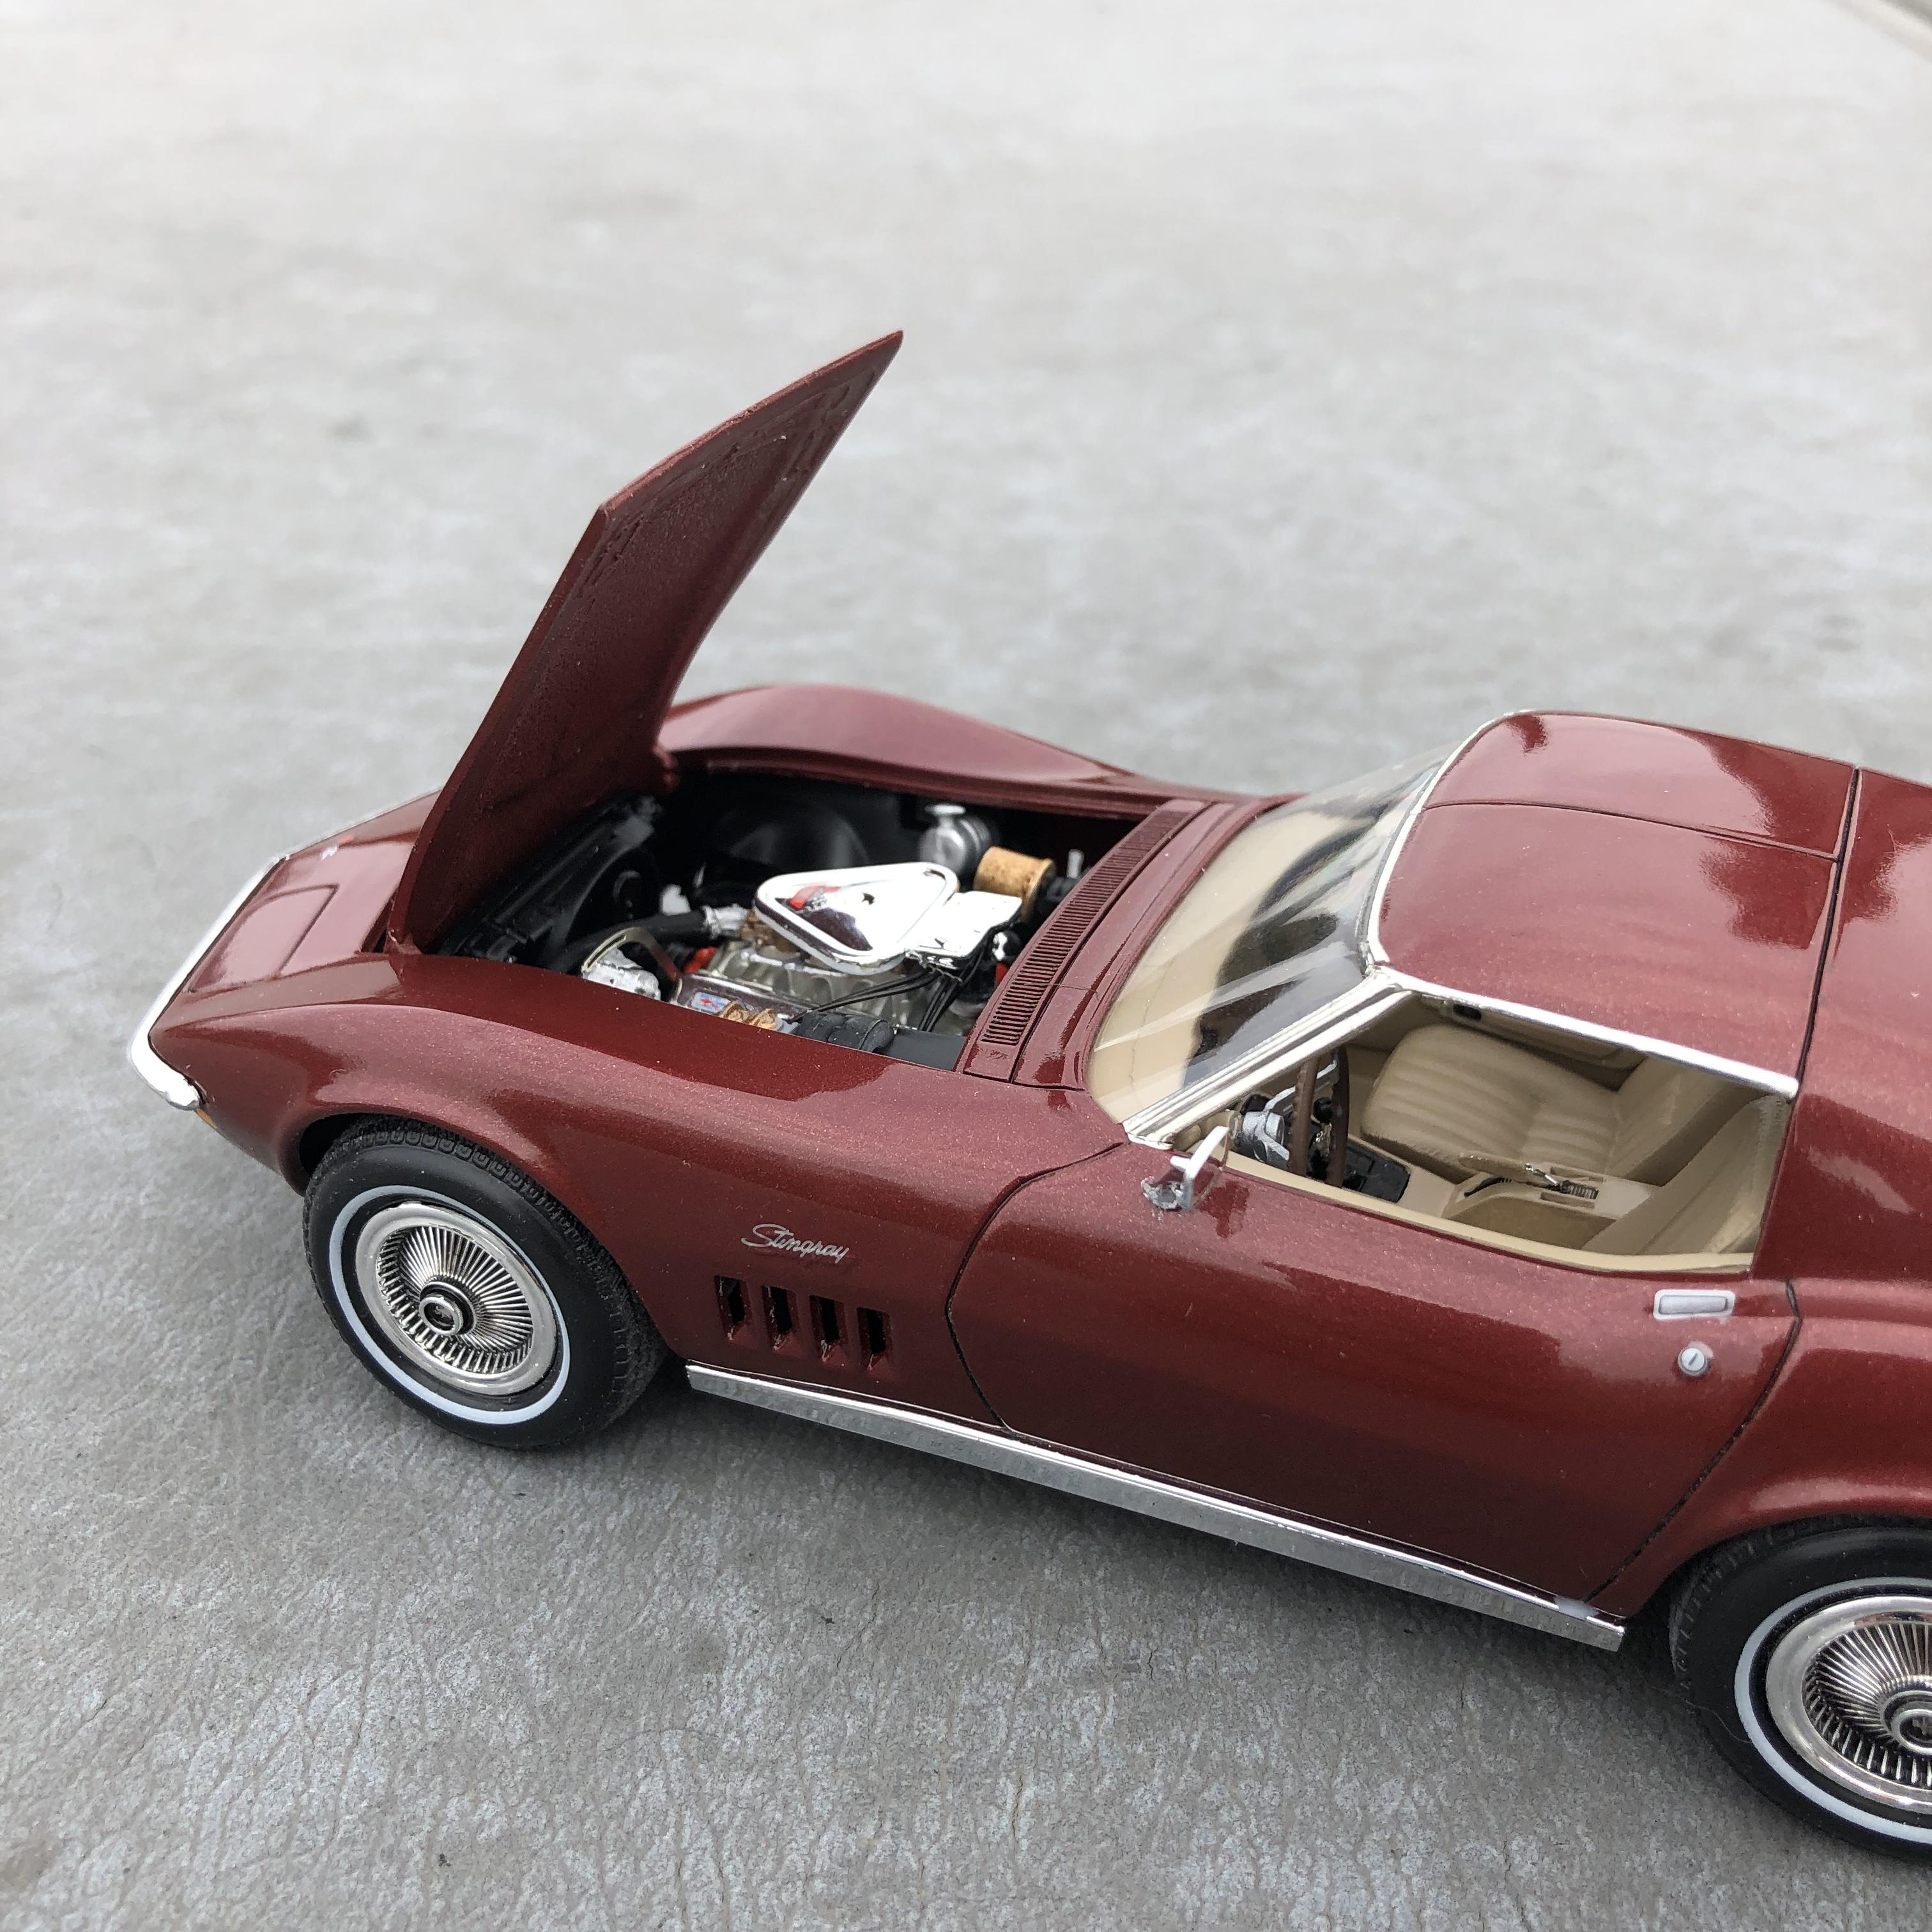
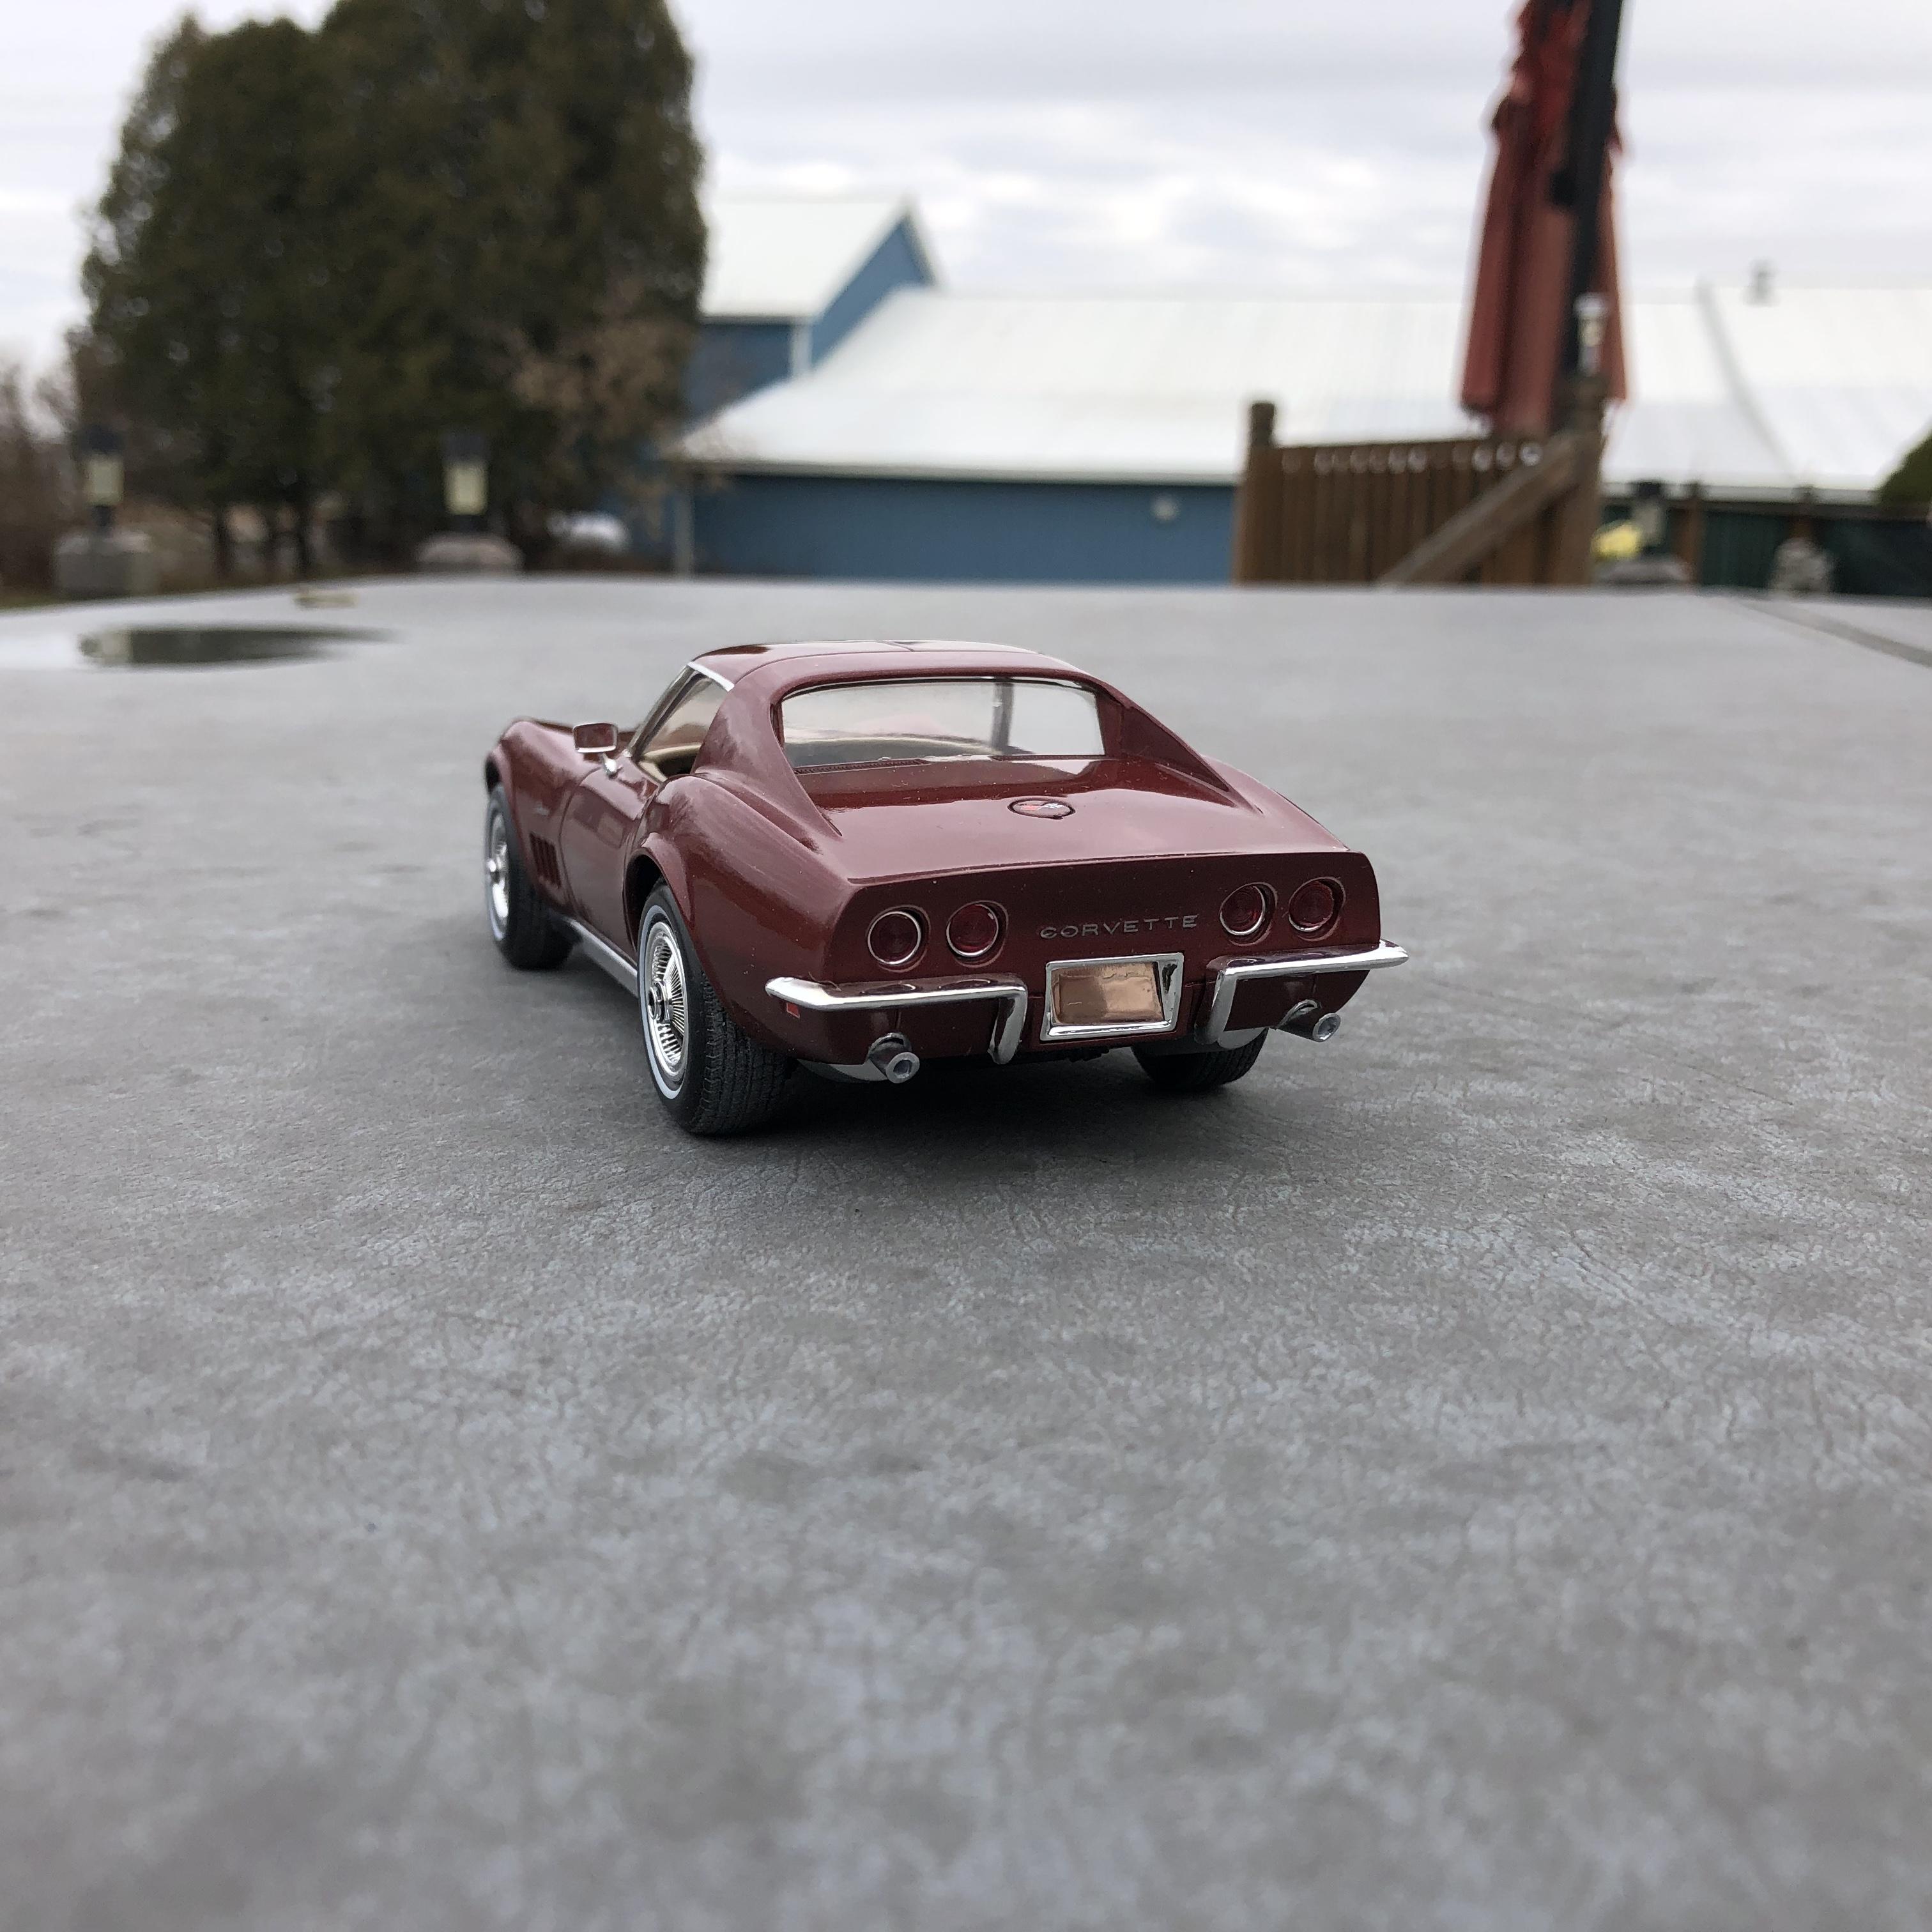
Finally had some daylight time to take a few pics. Finished in Marlboro maroon and tan interior. I used the wheels from the AMT 70 impala, everything else was in the kit. Built up nice , highly recommended. It is the yenko version kit, this kit has a way more complete decal sheet than prior issues. thanks for looking.
-
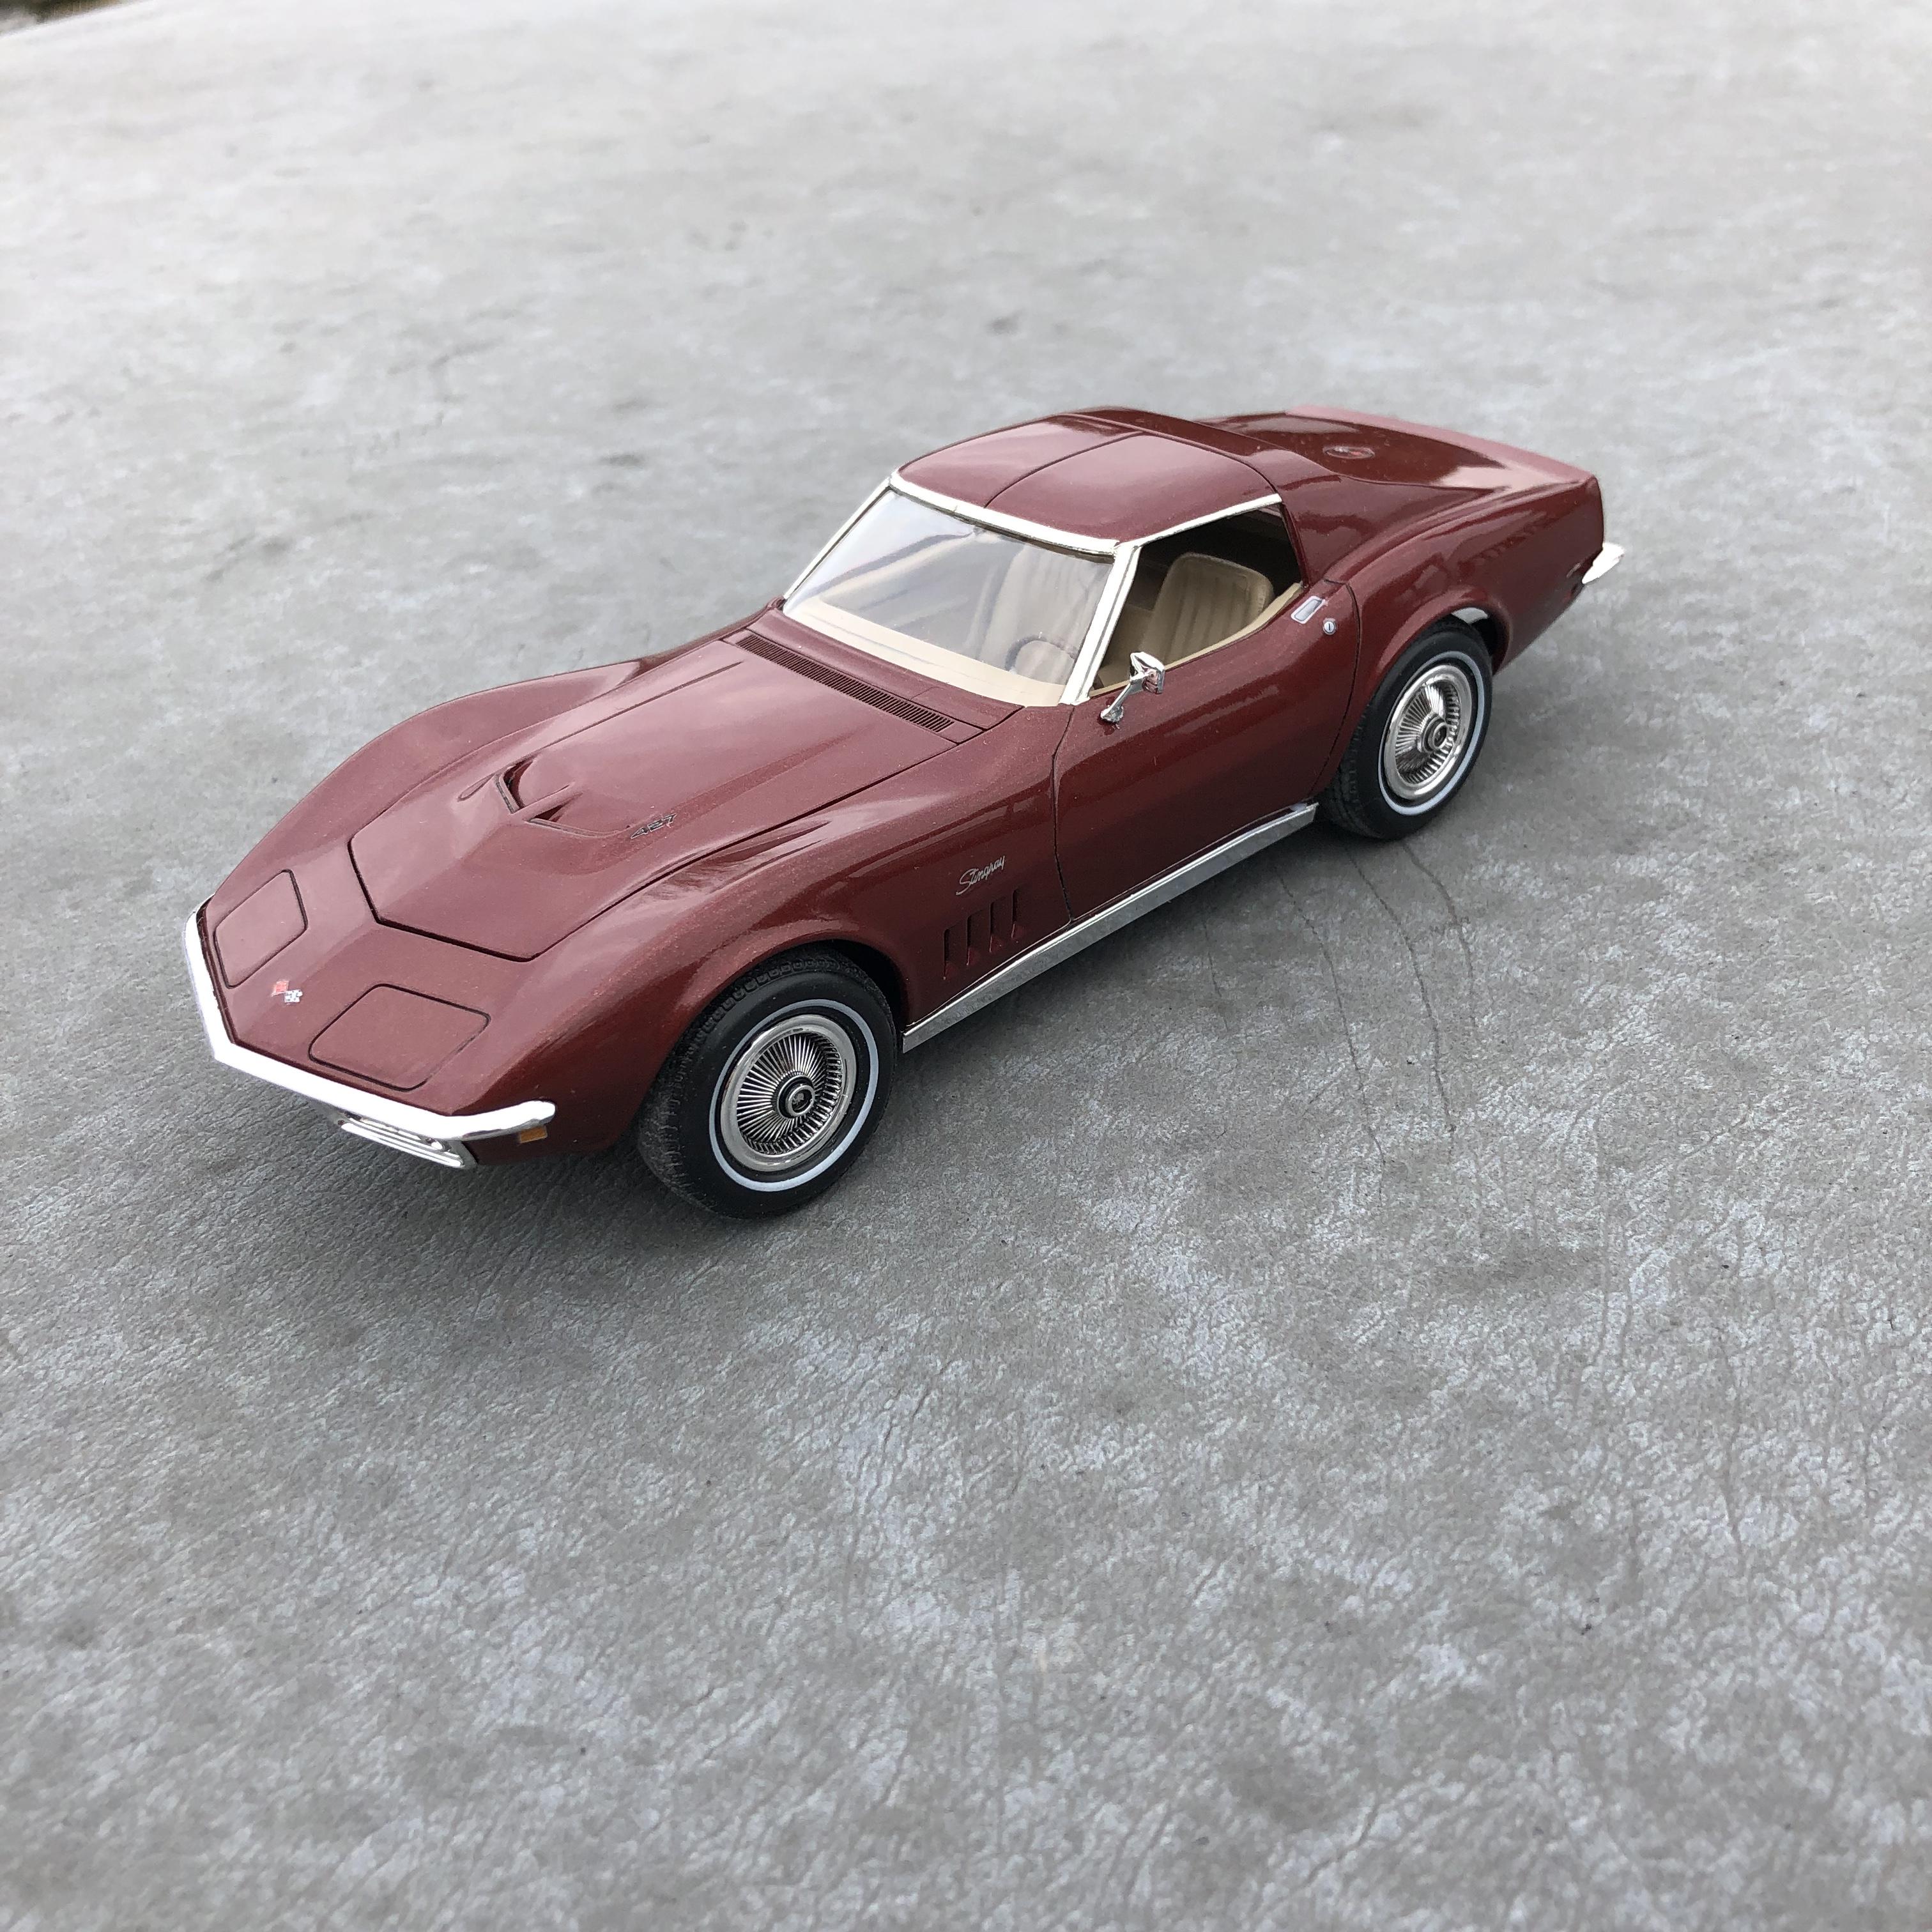
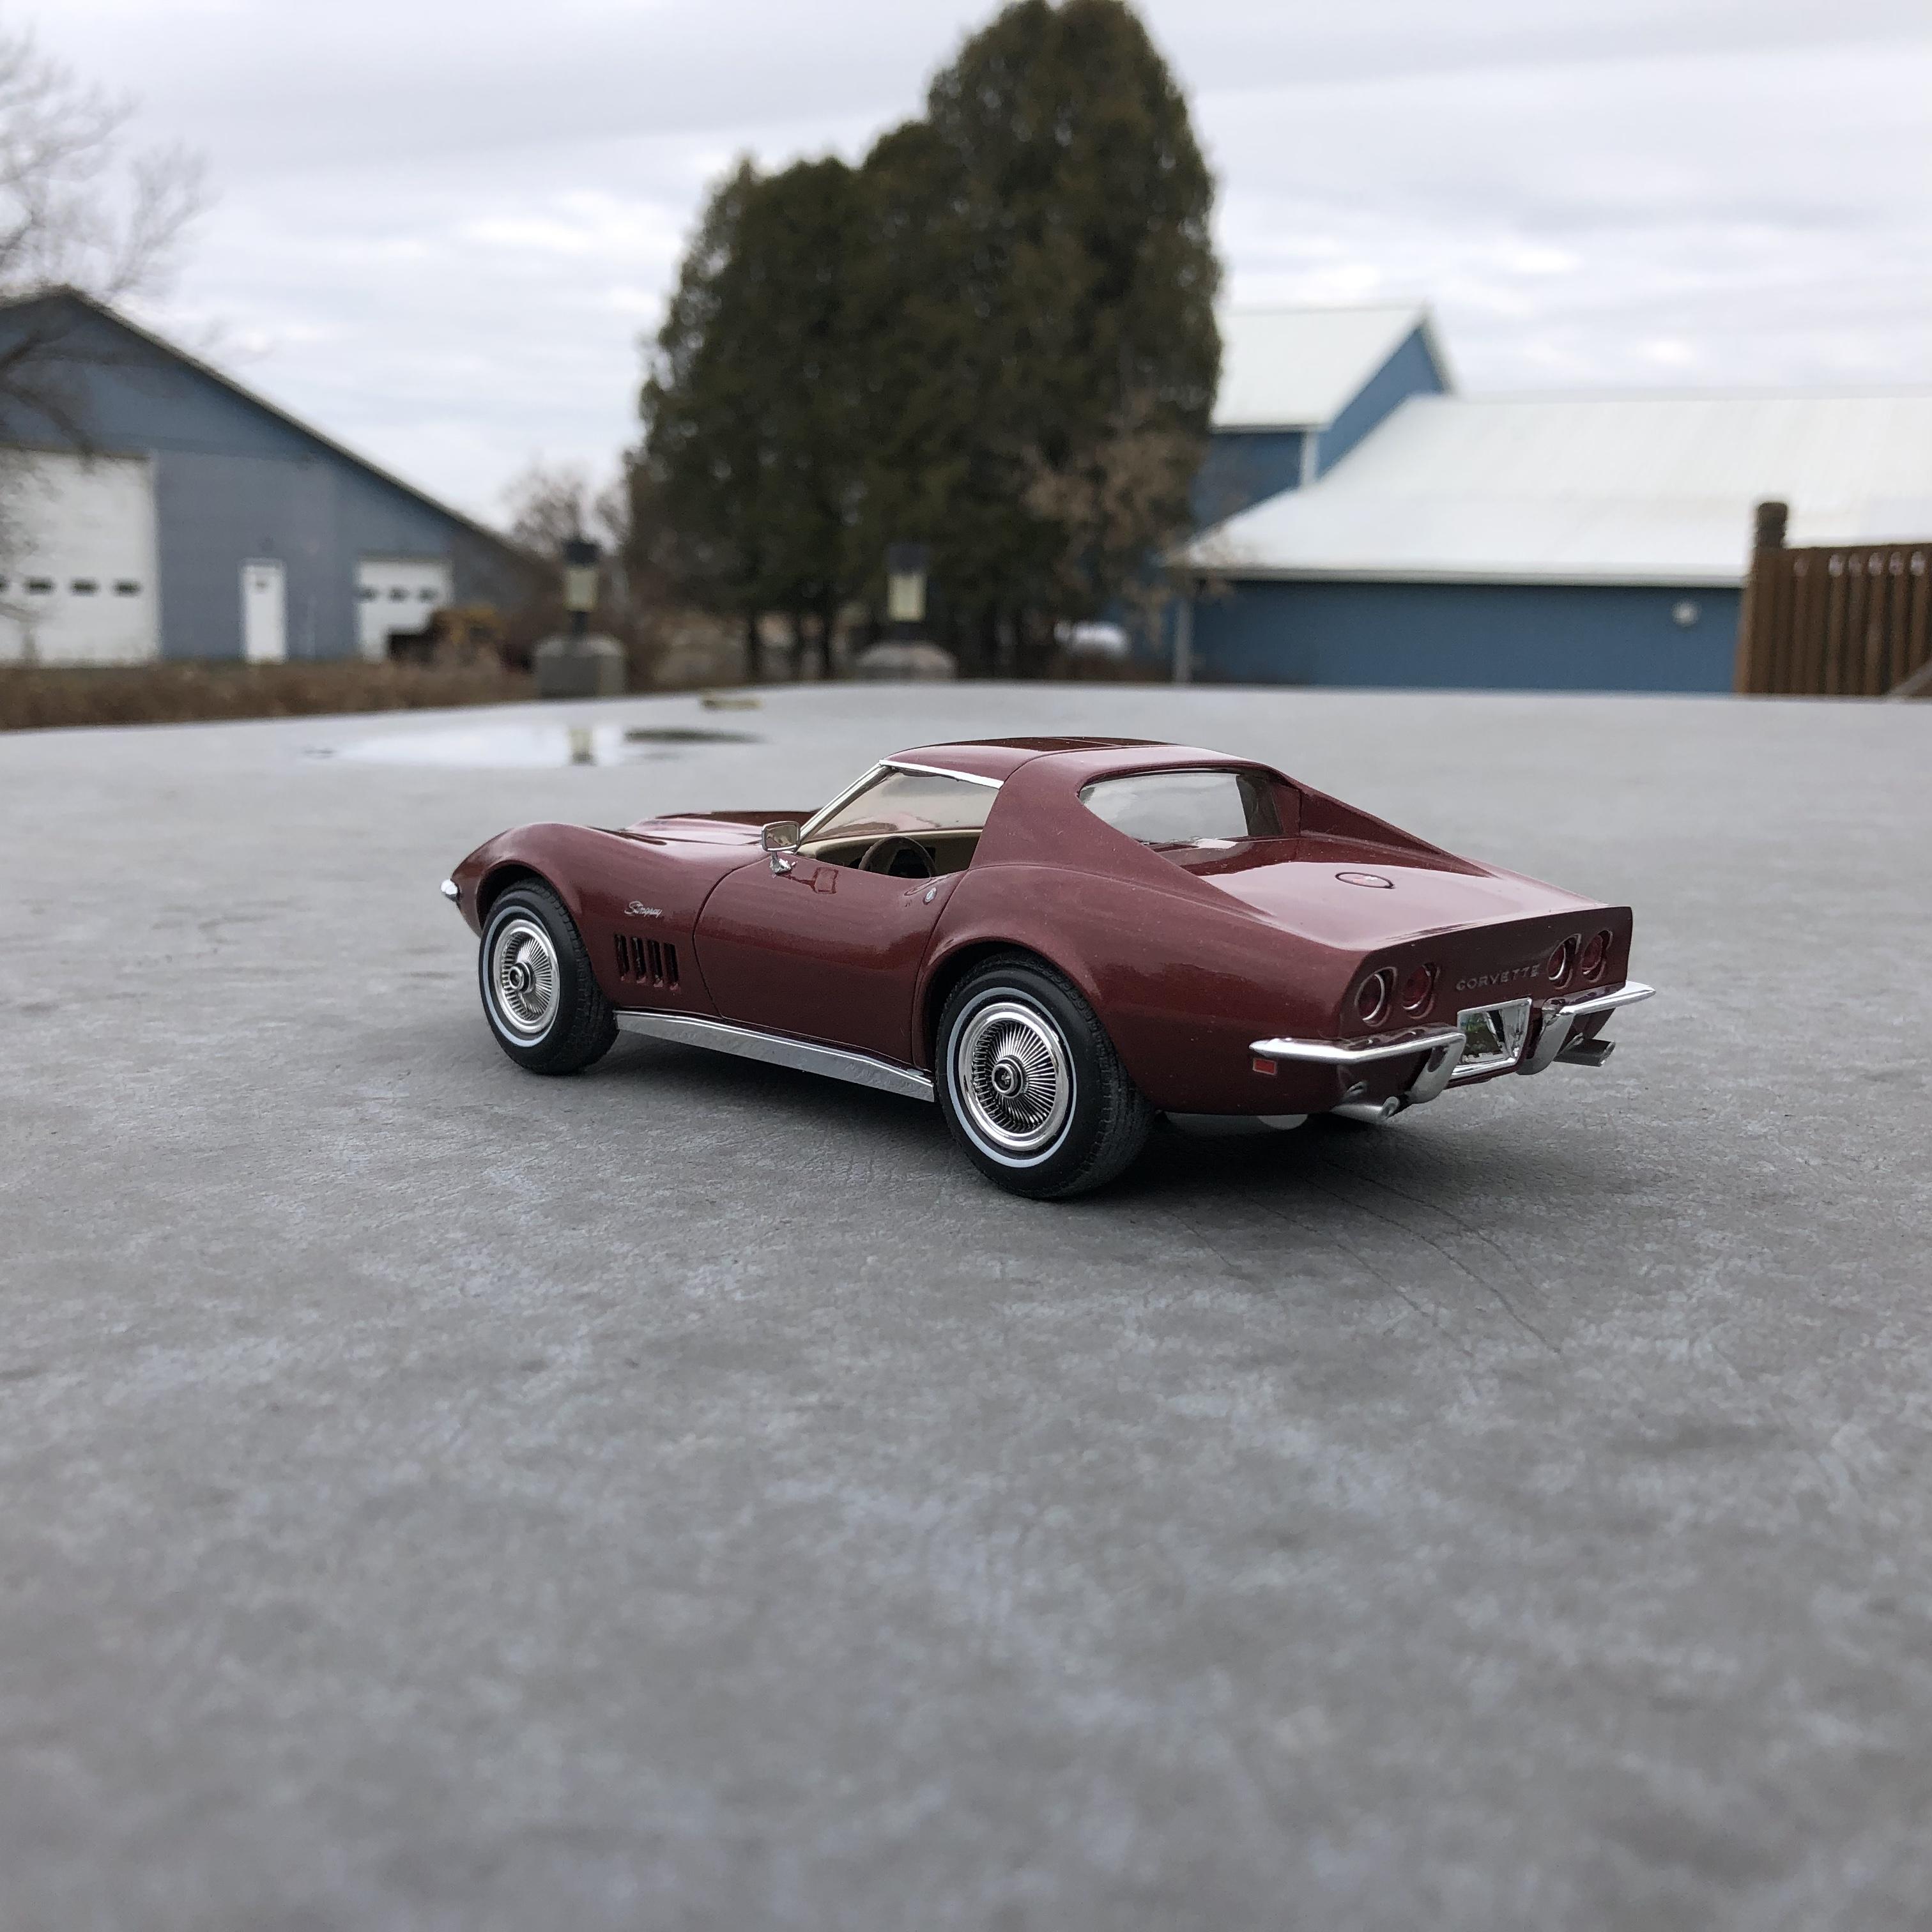
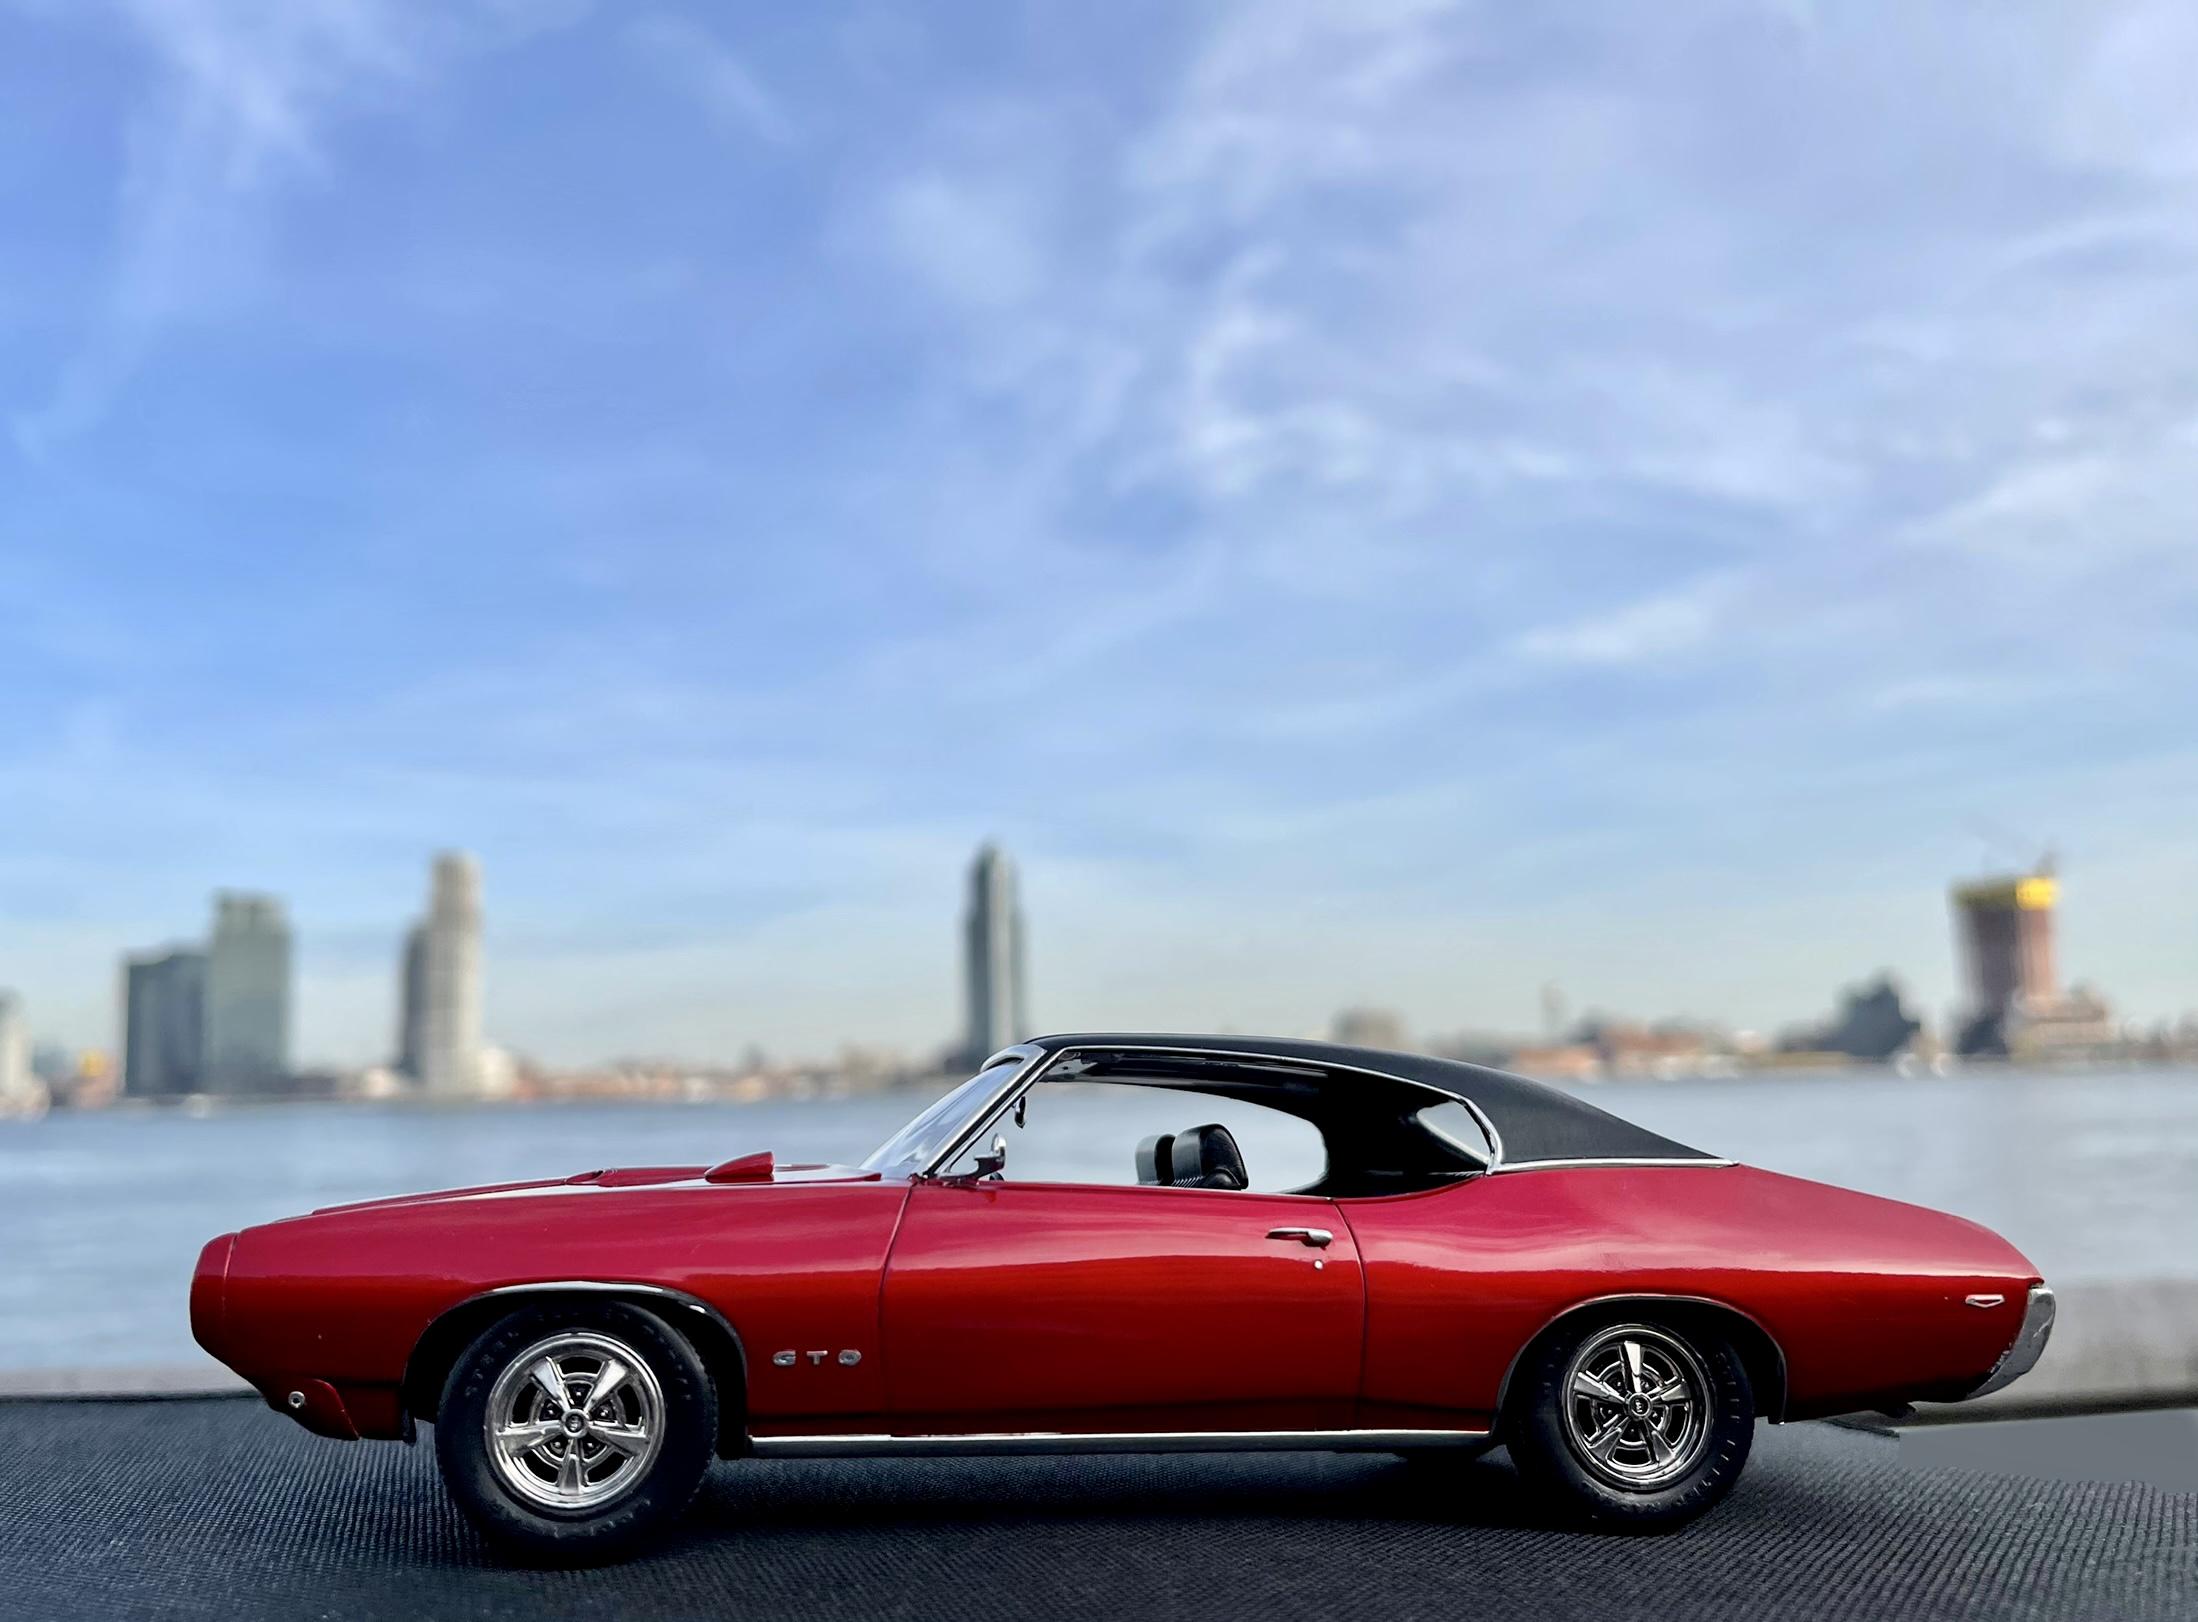
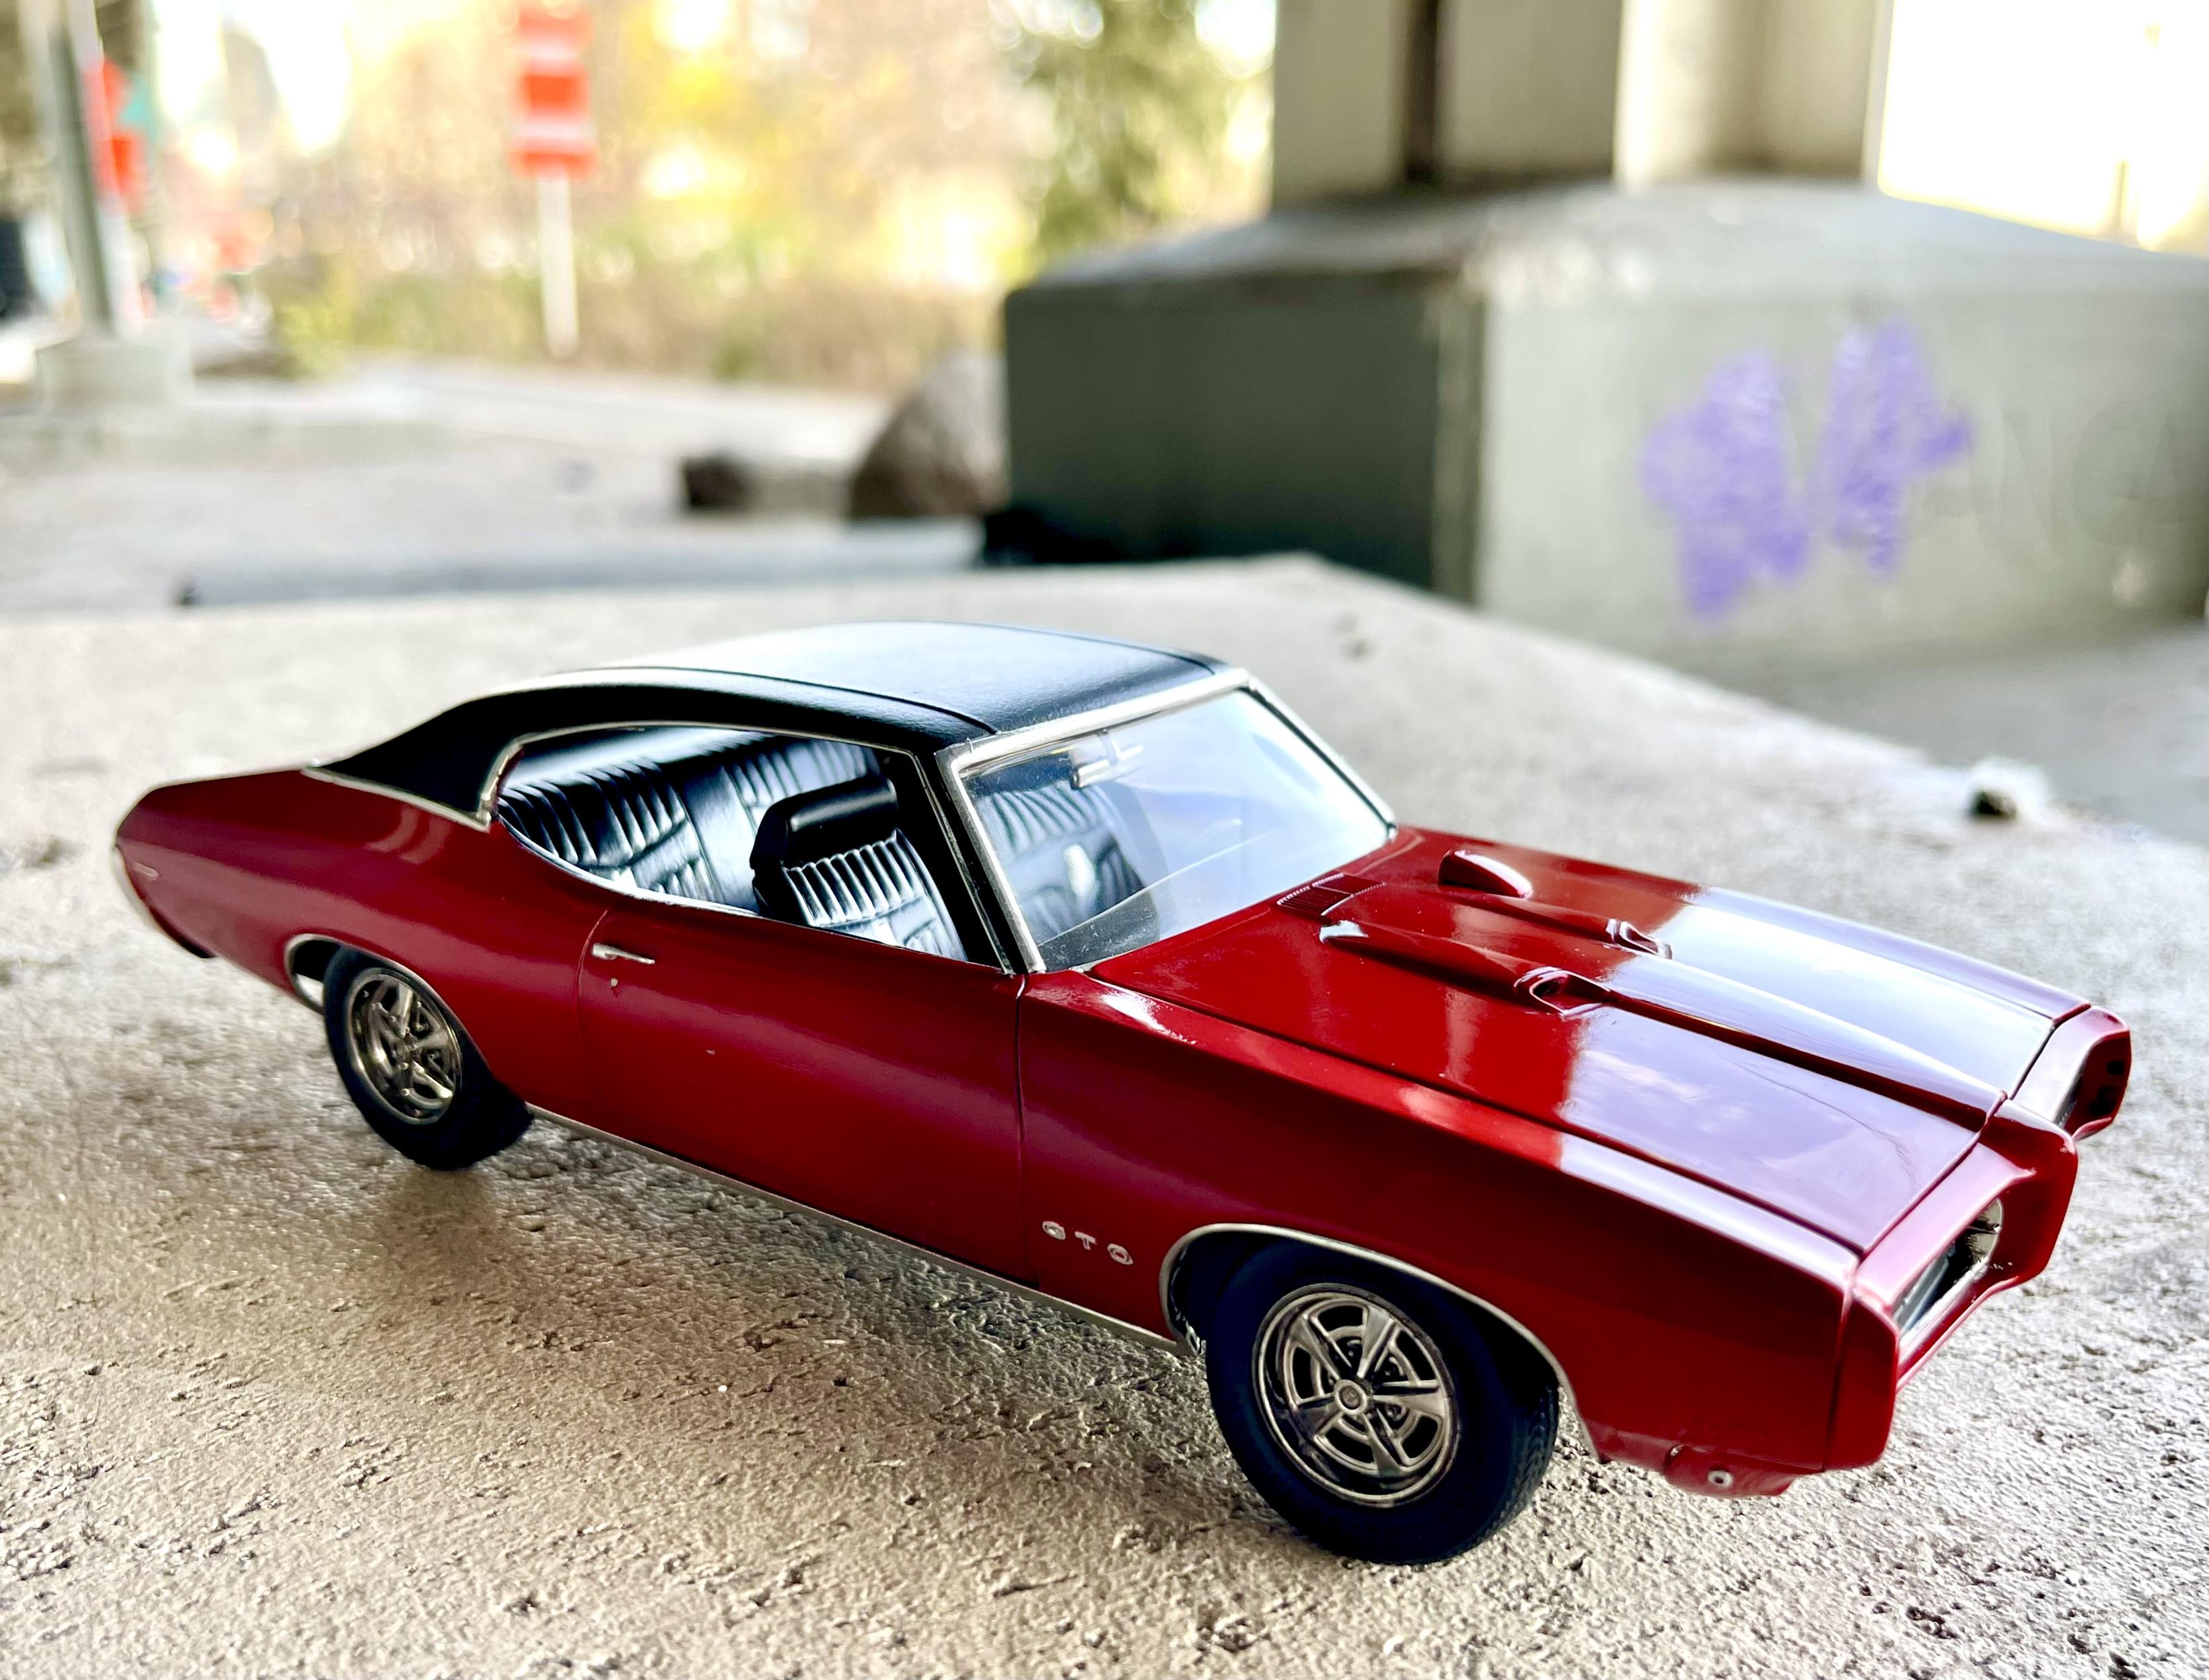
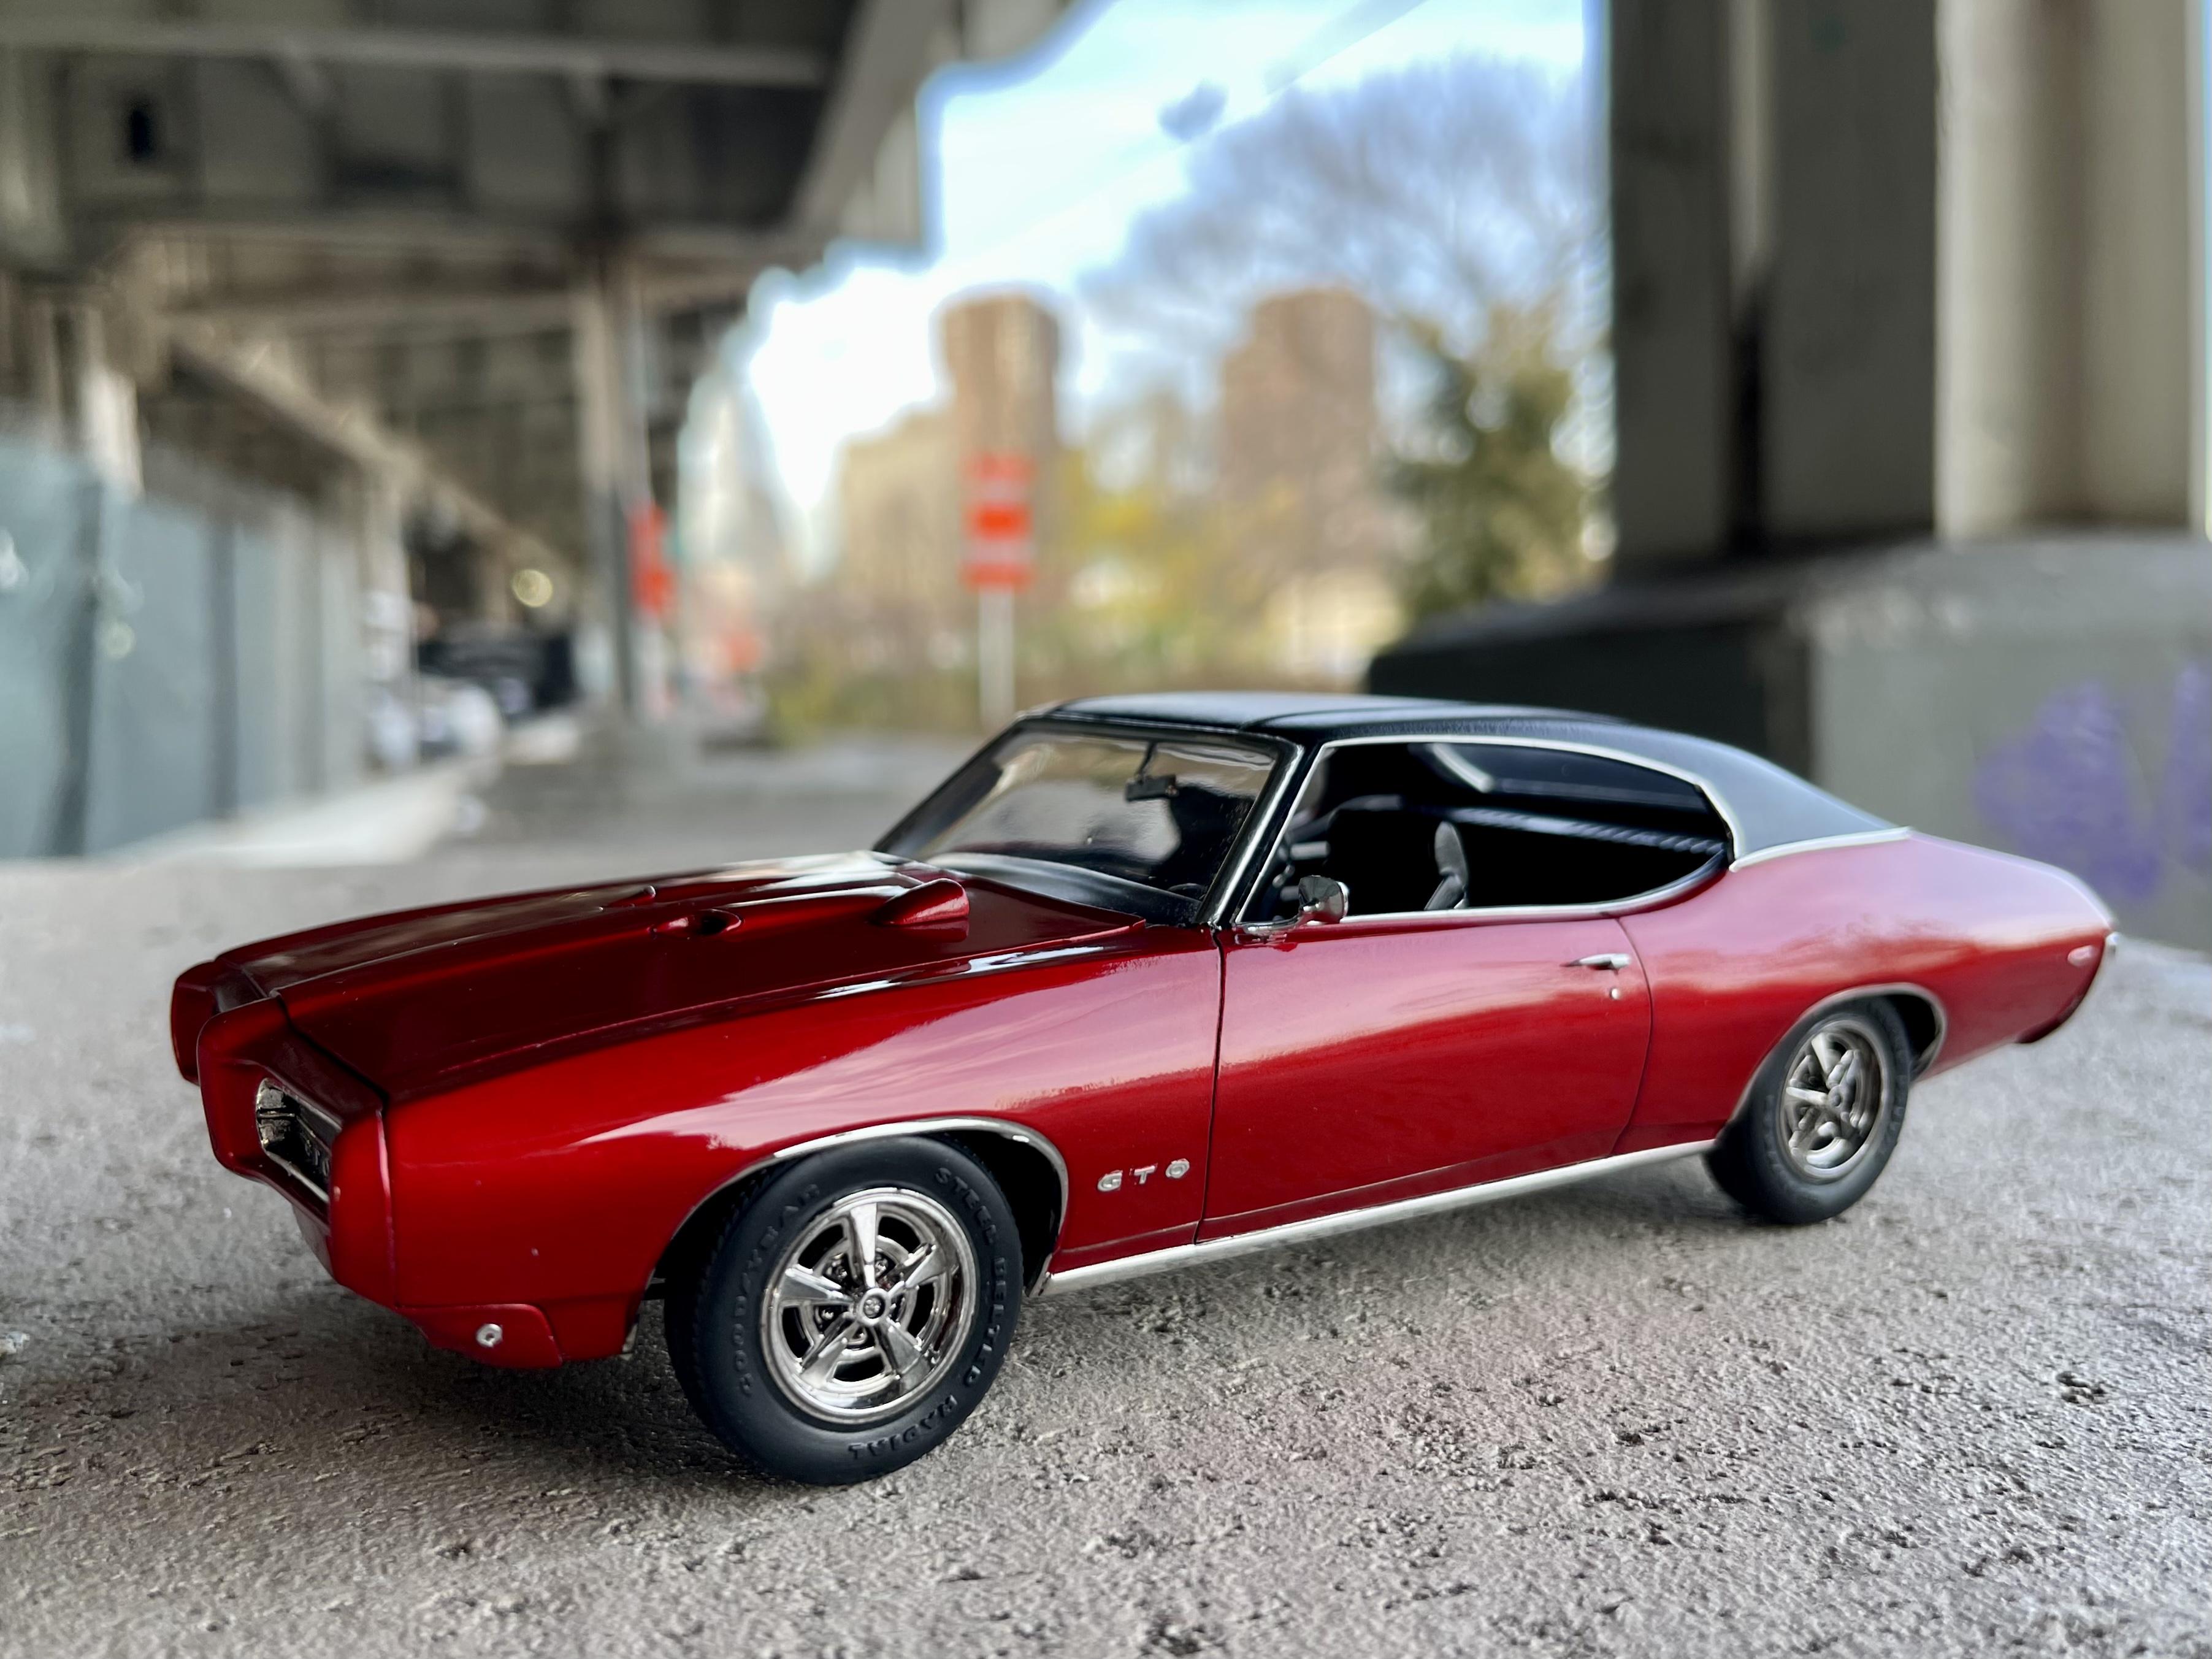
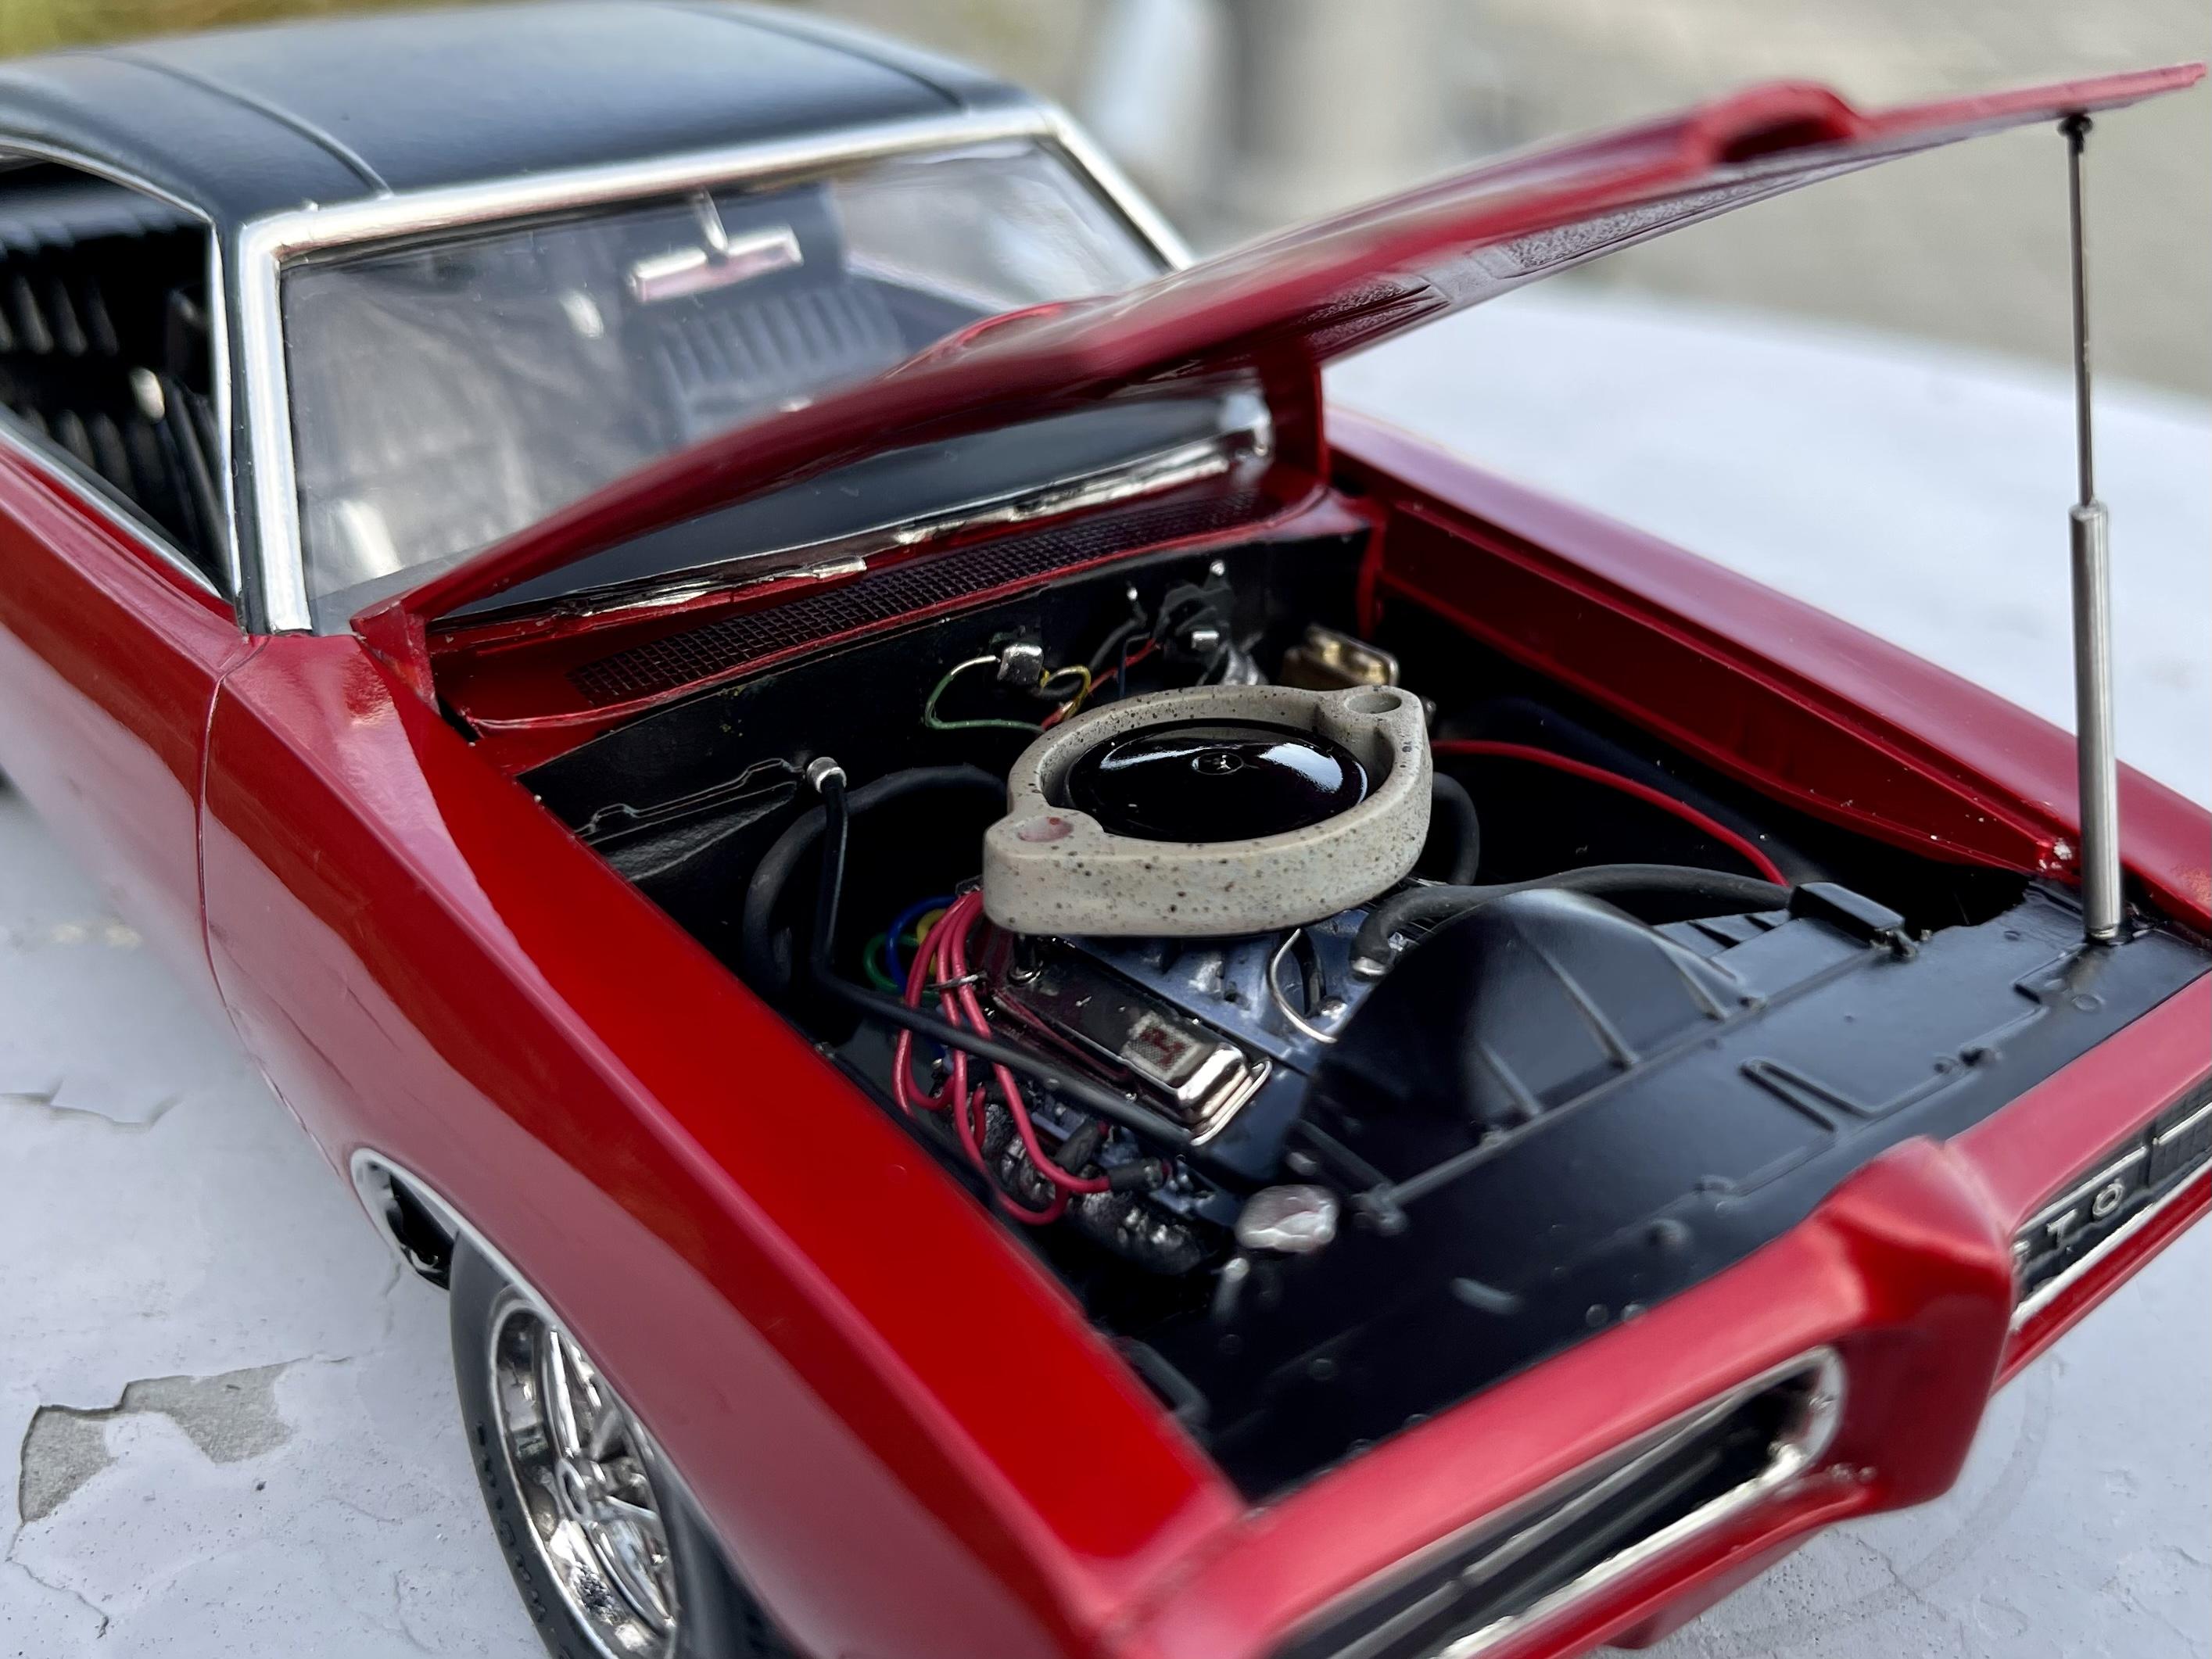
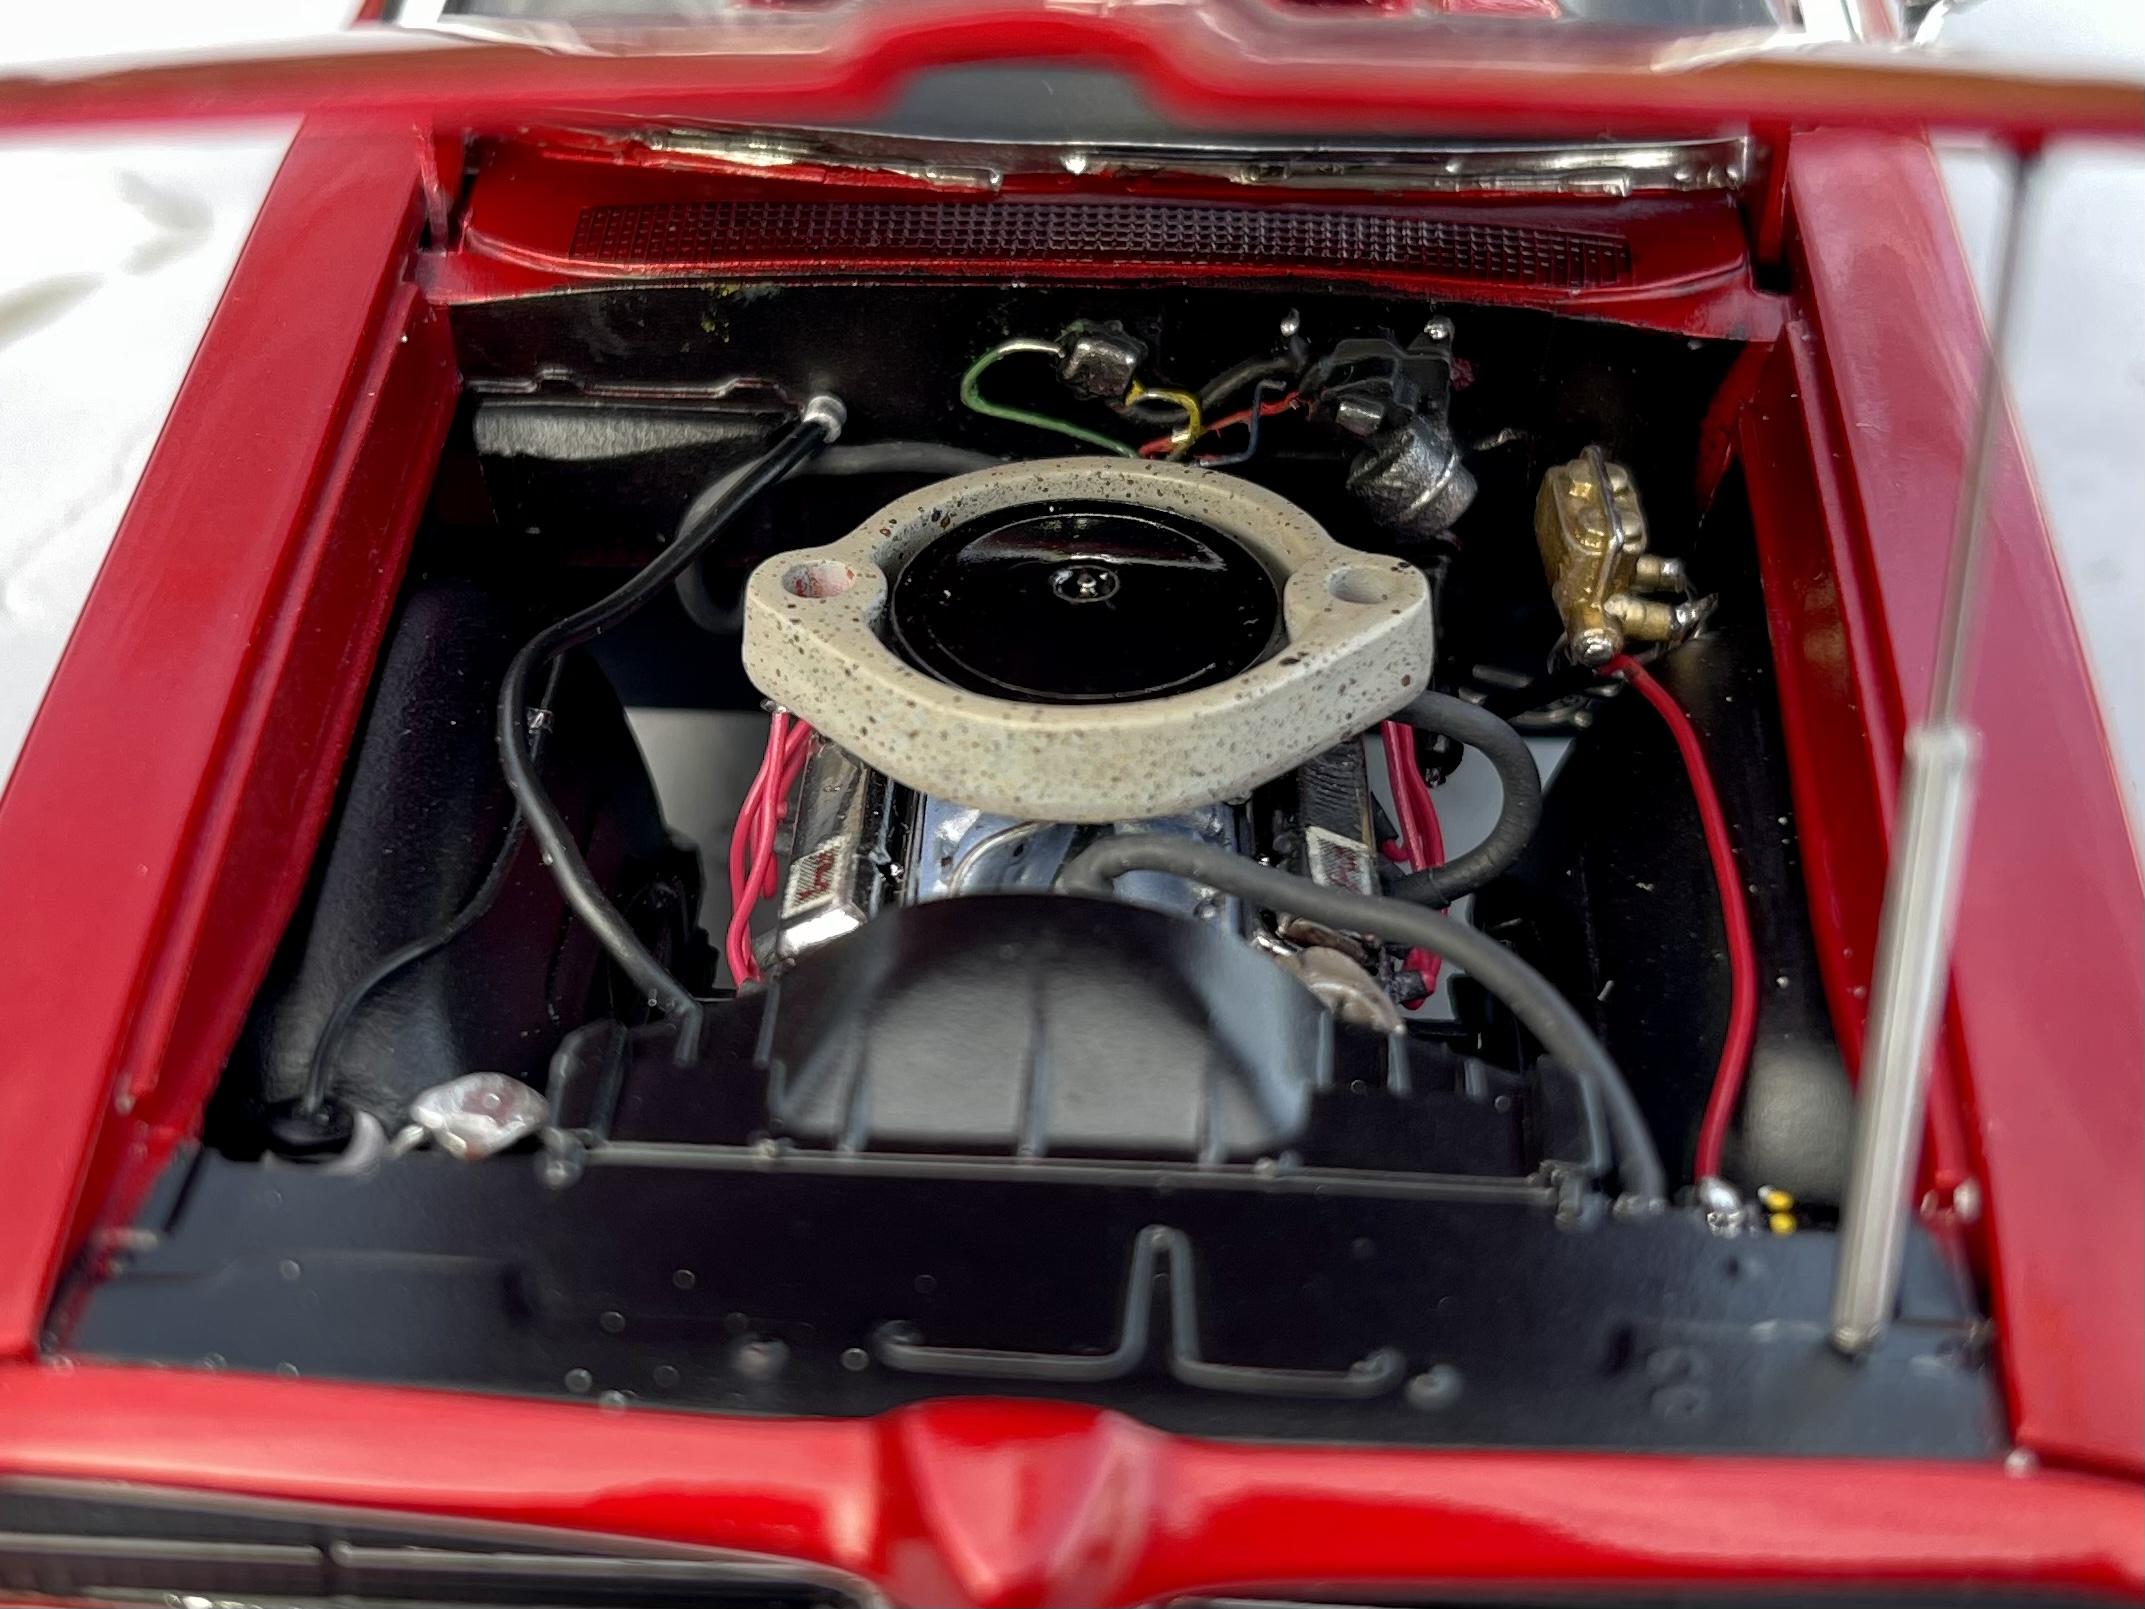
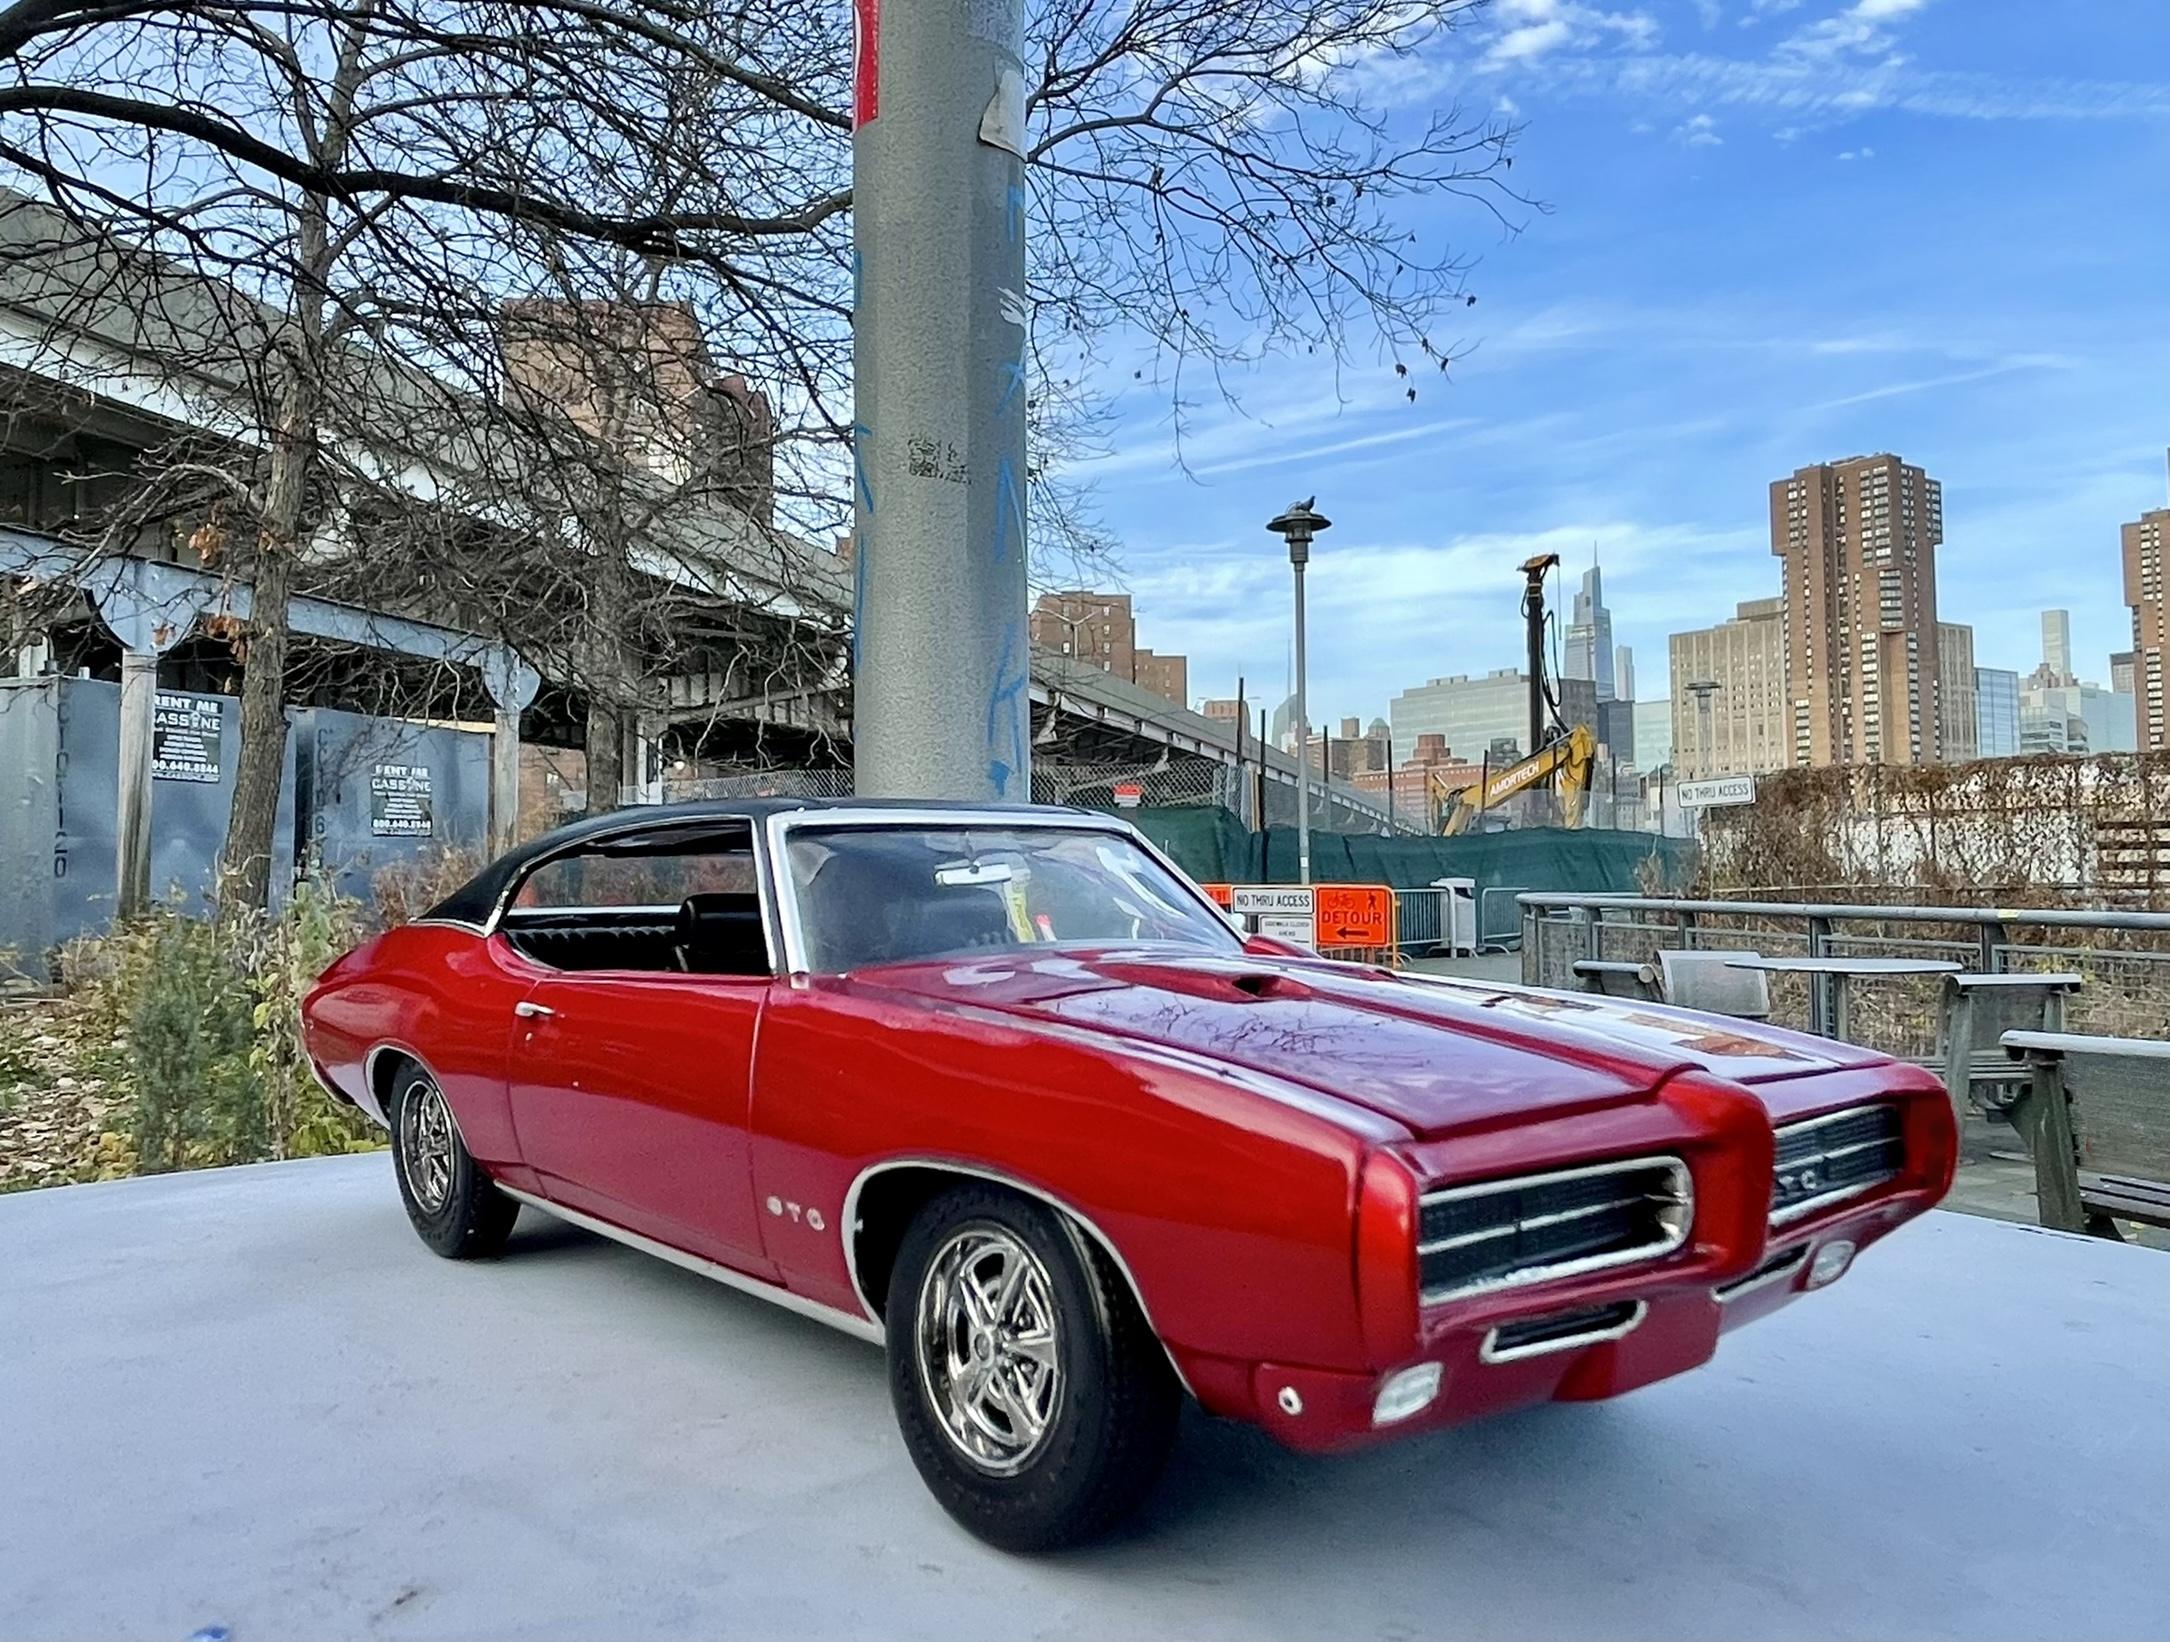
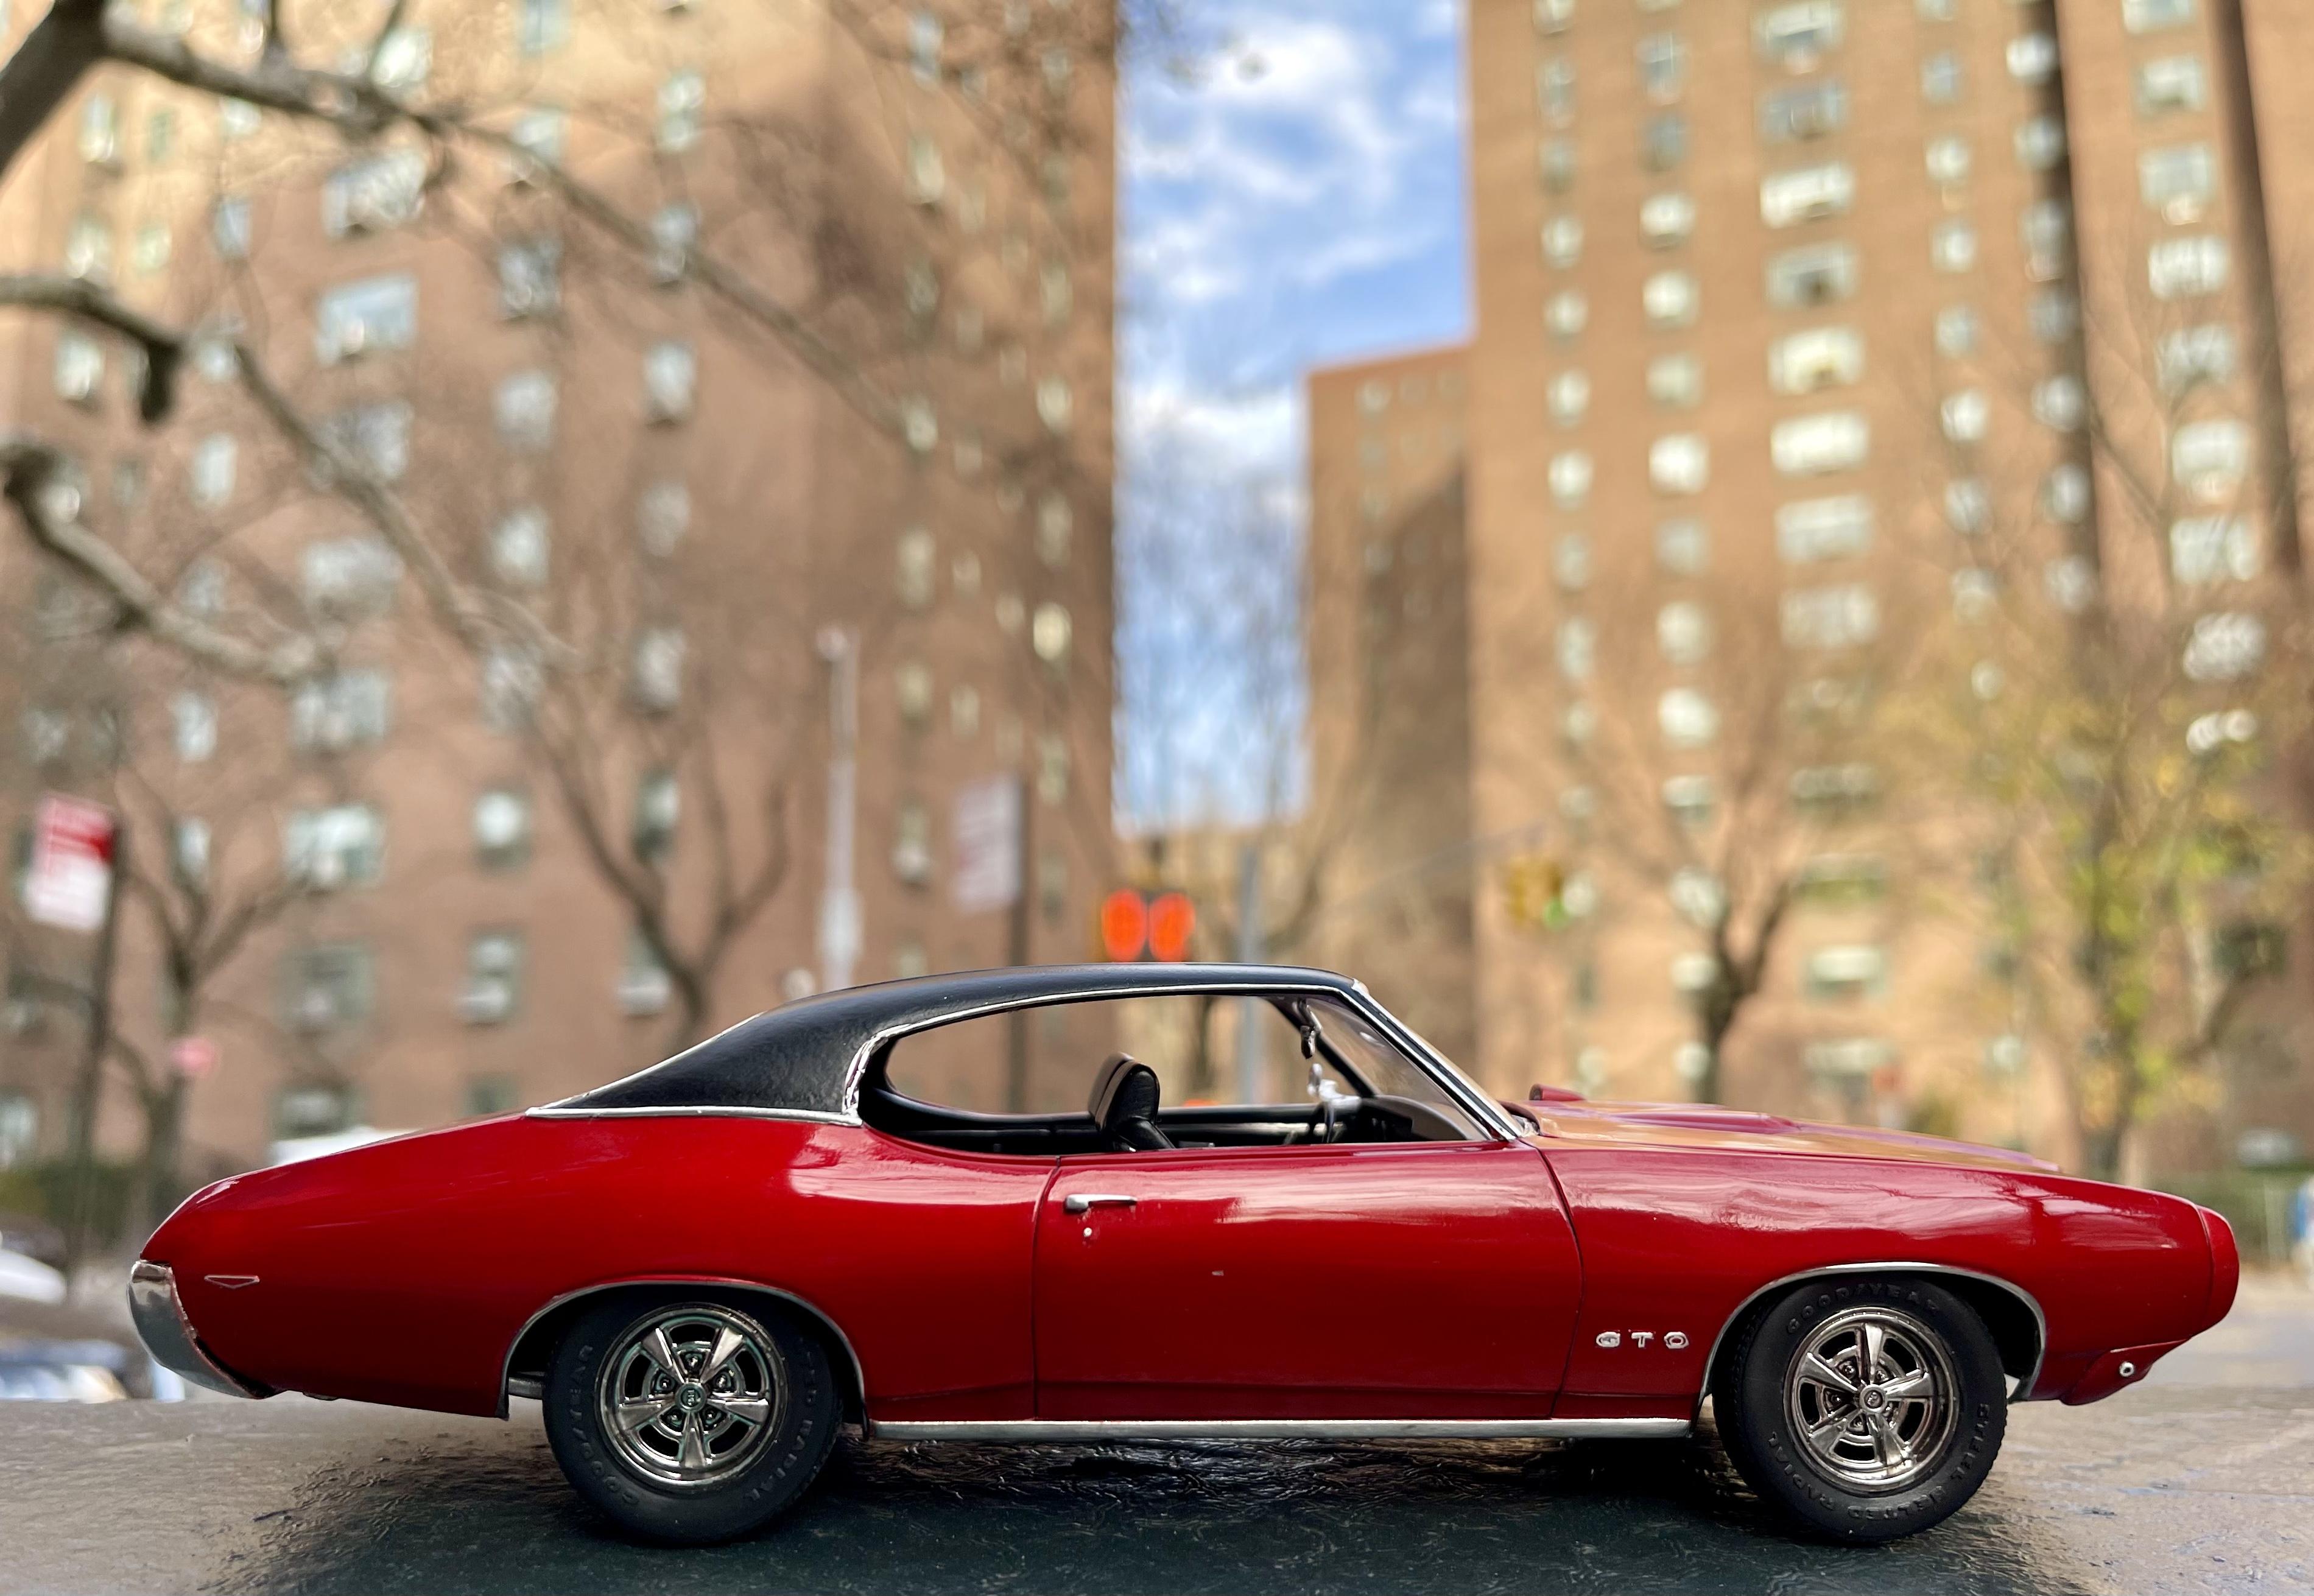
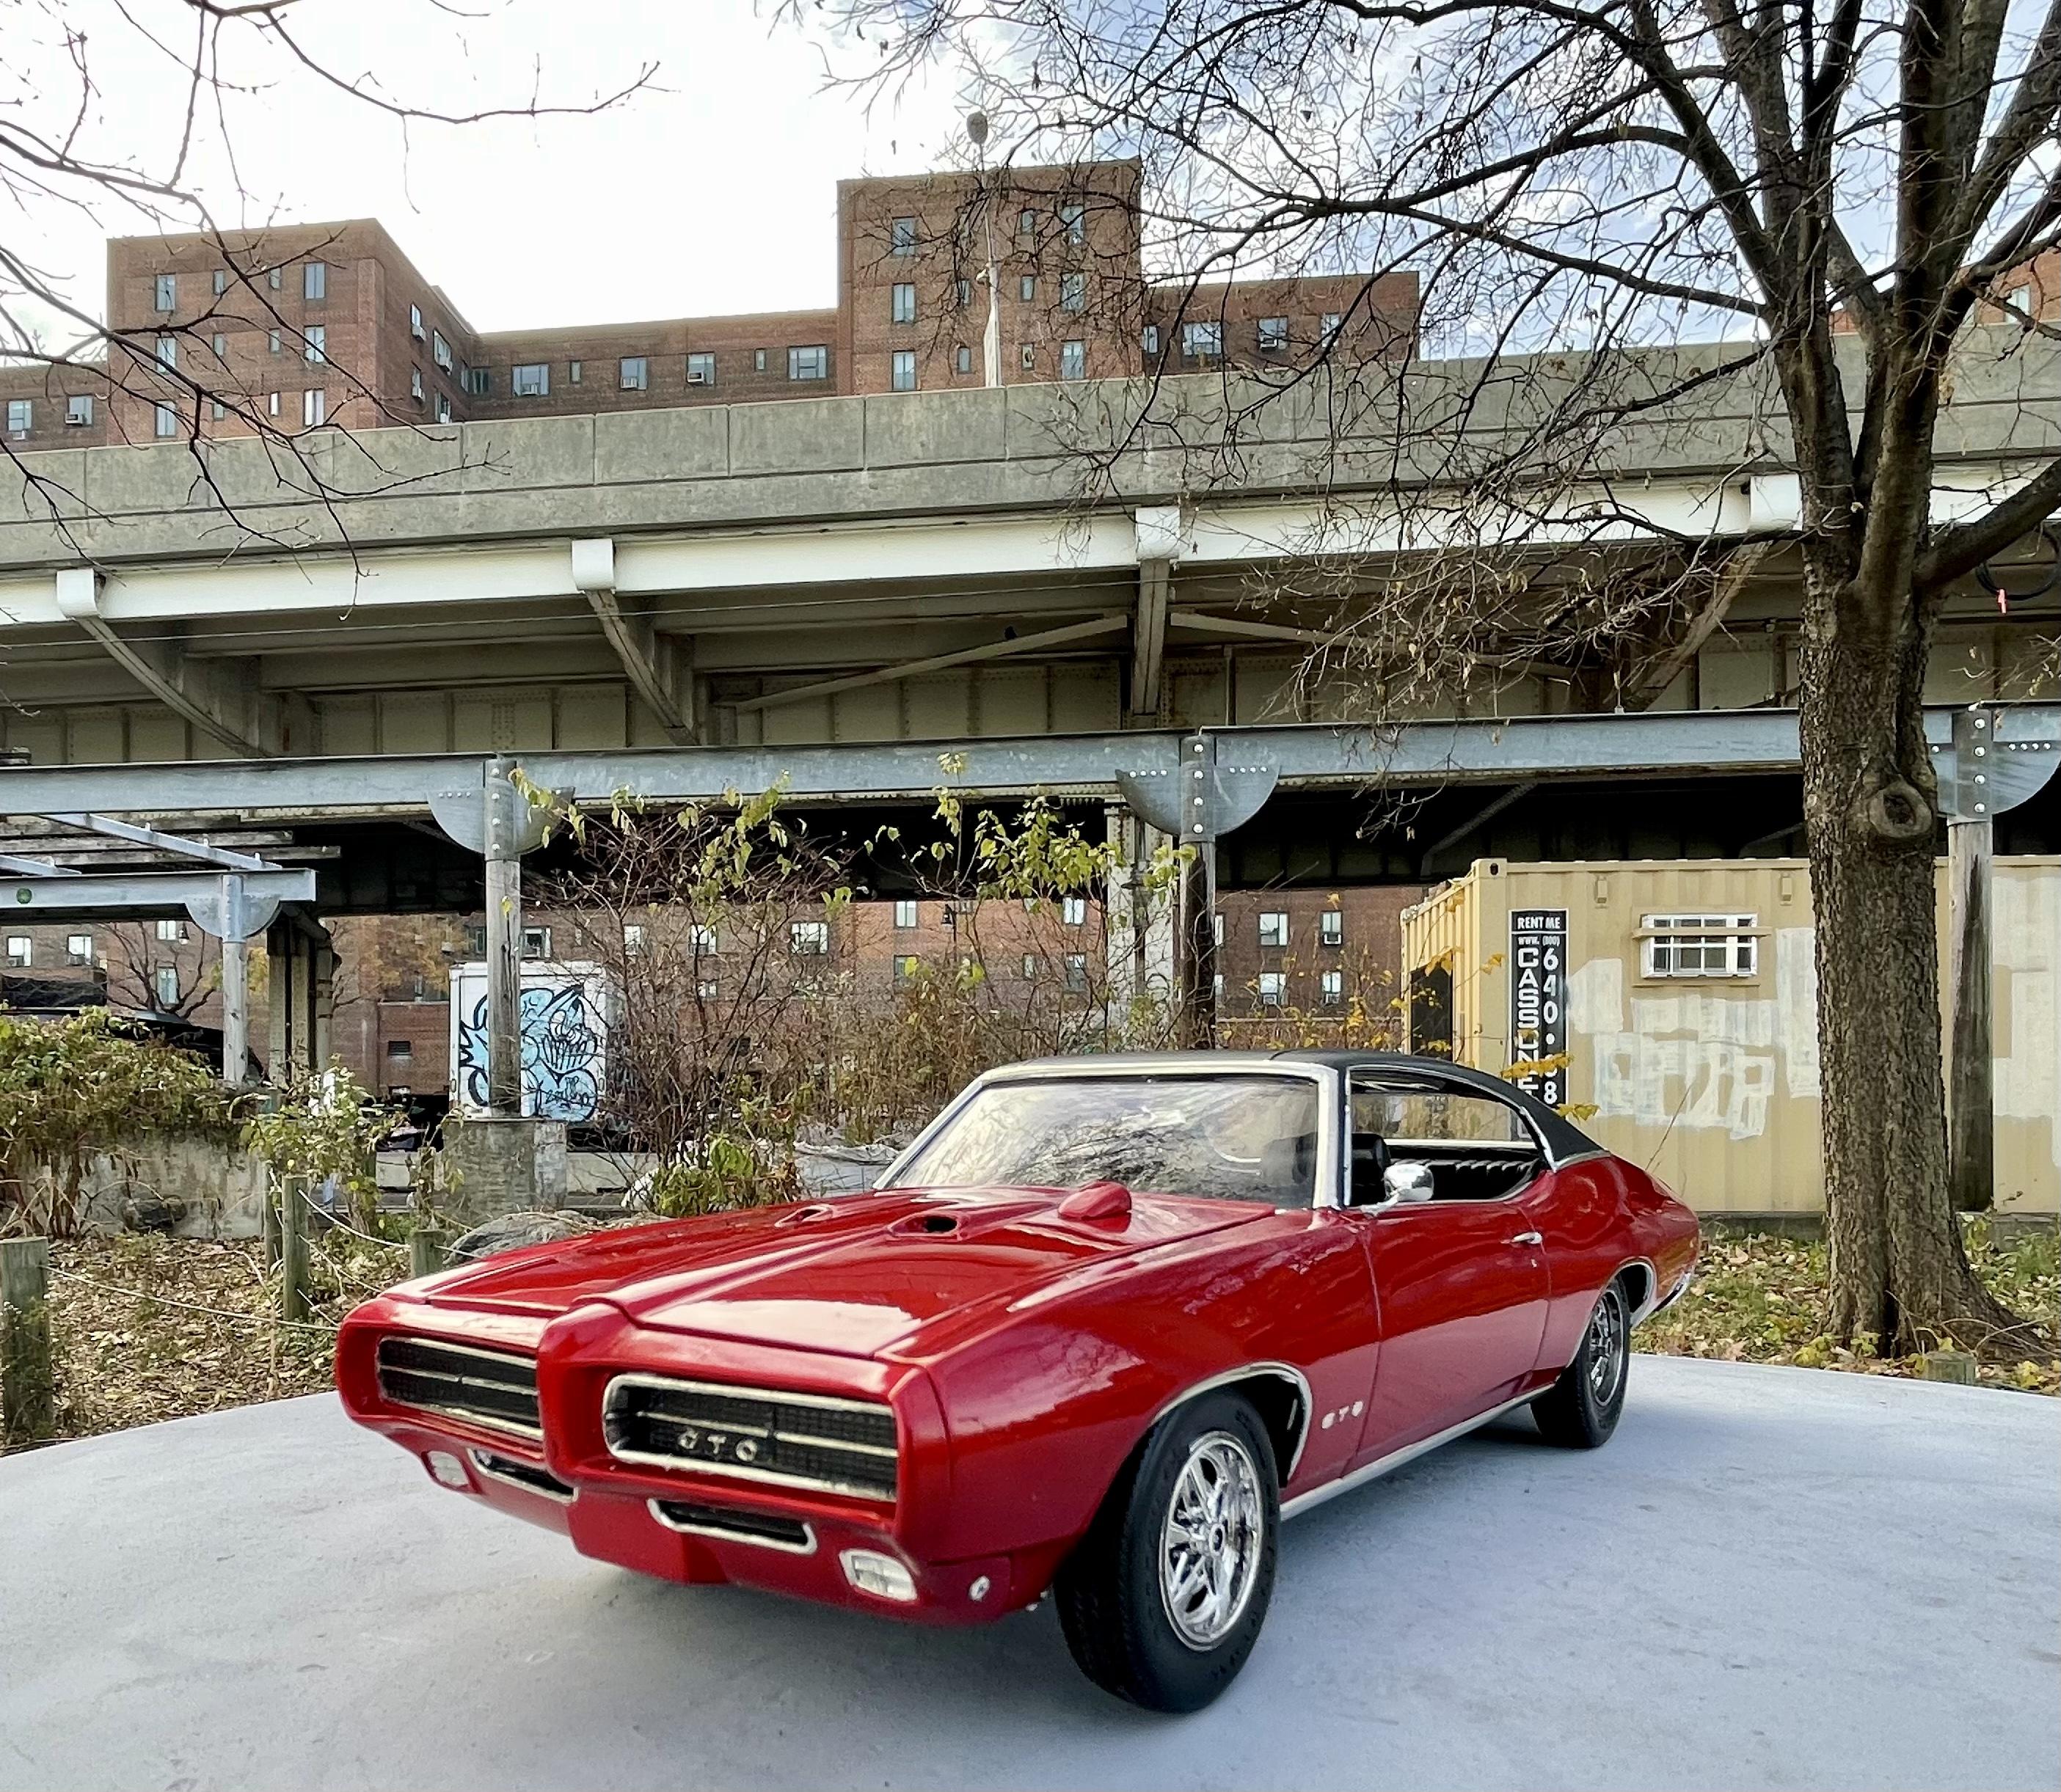
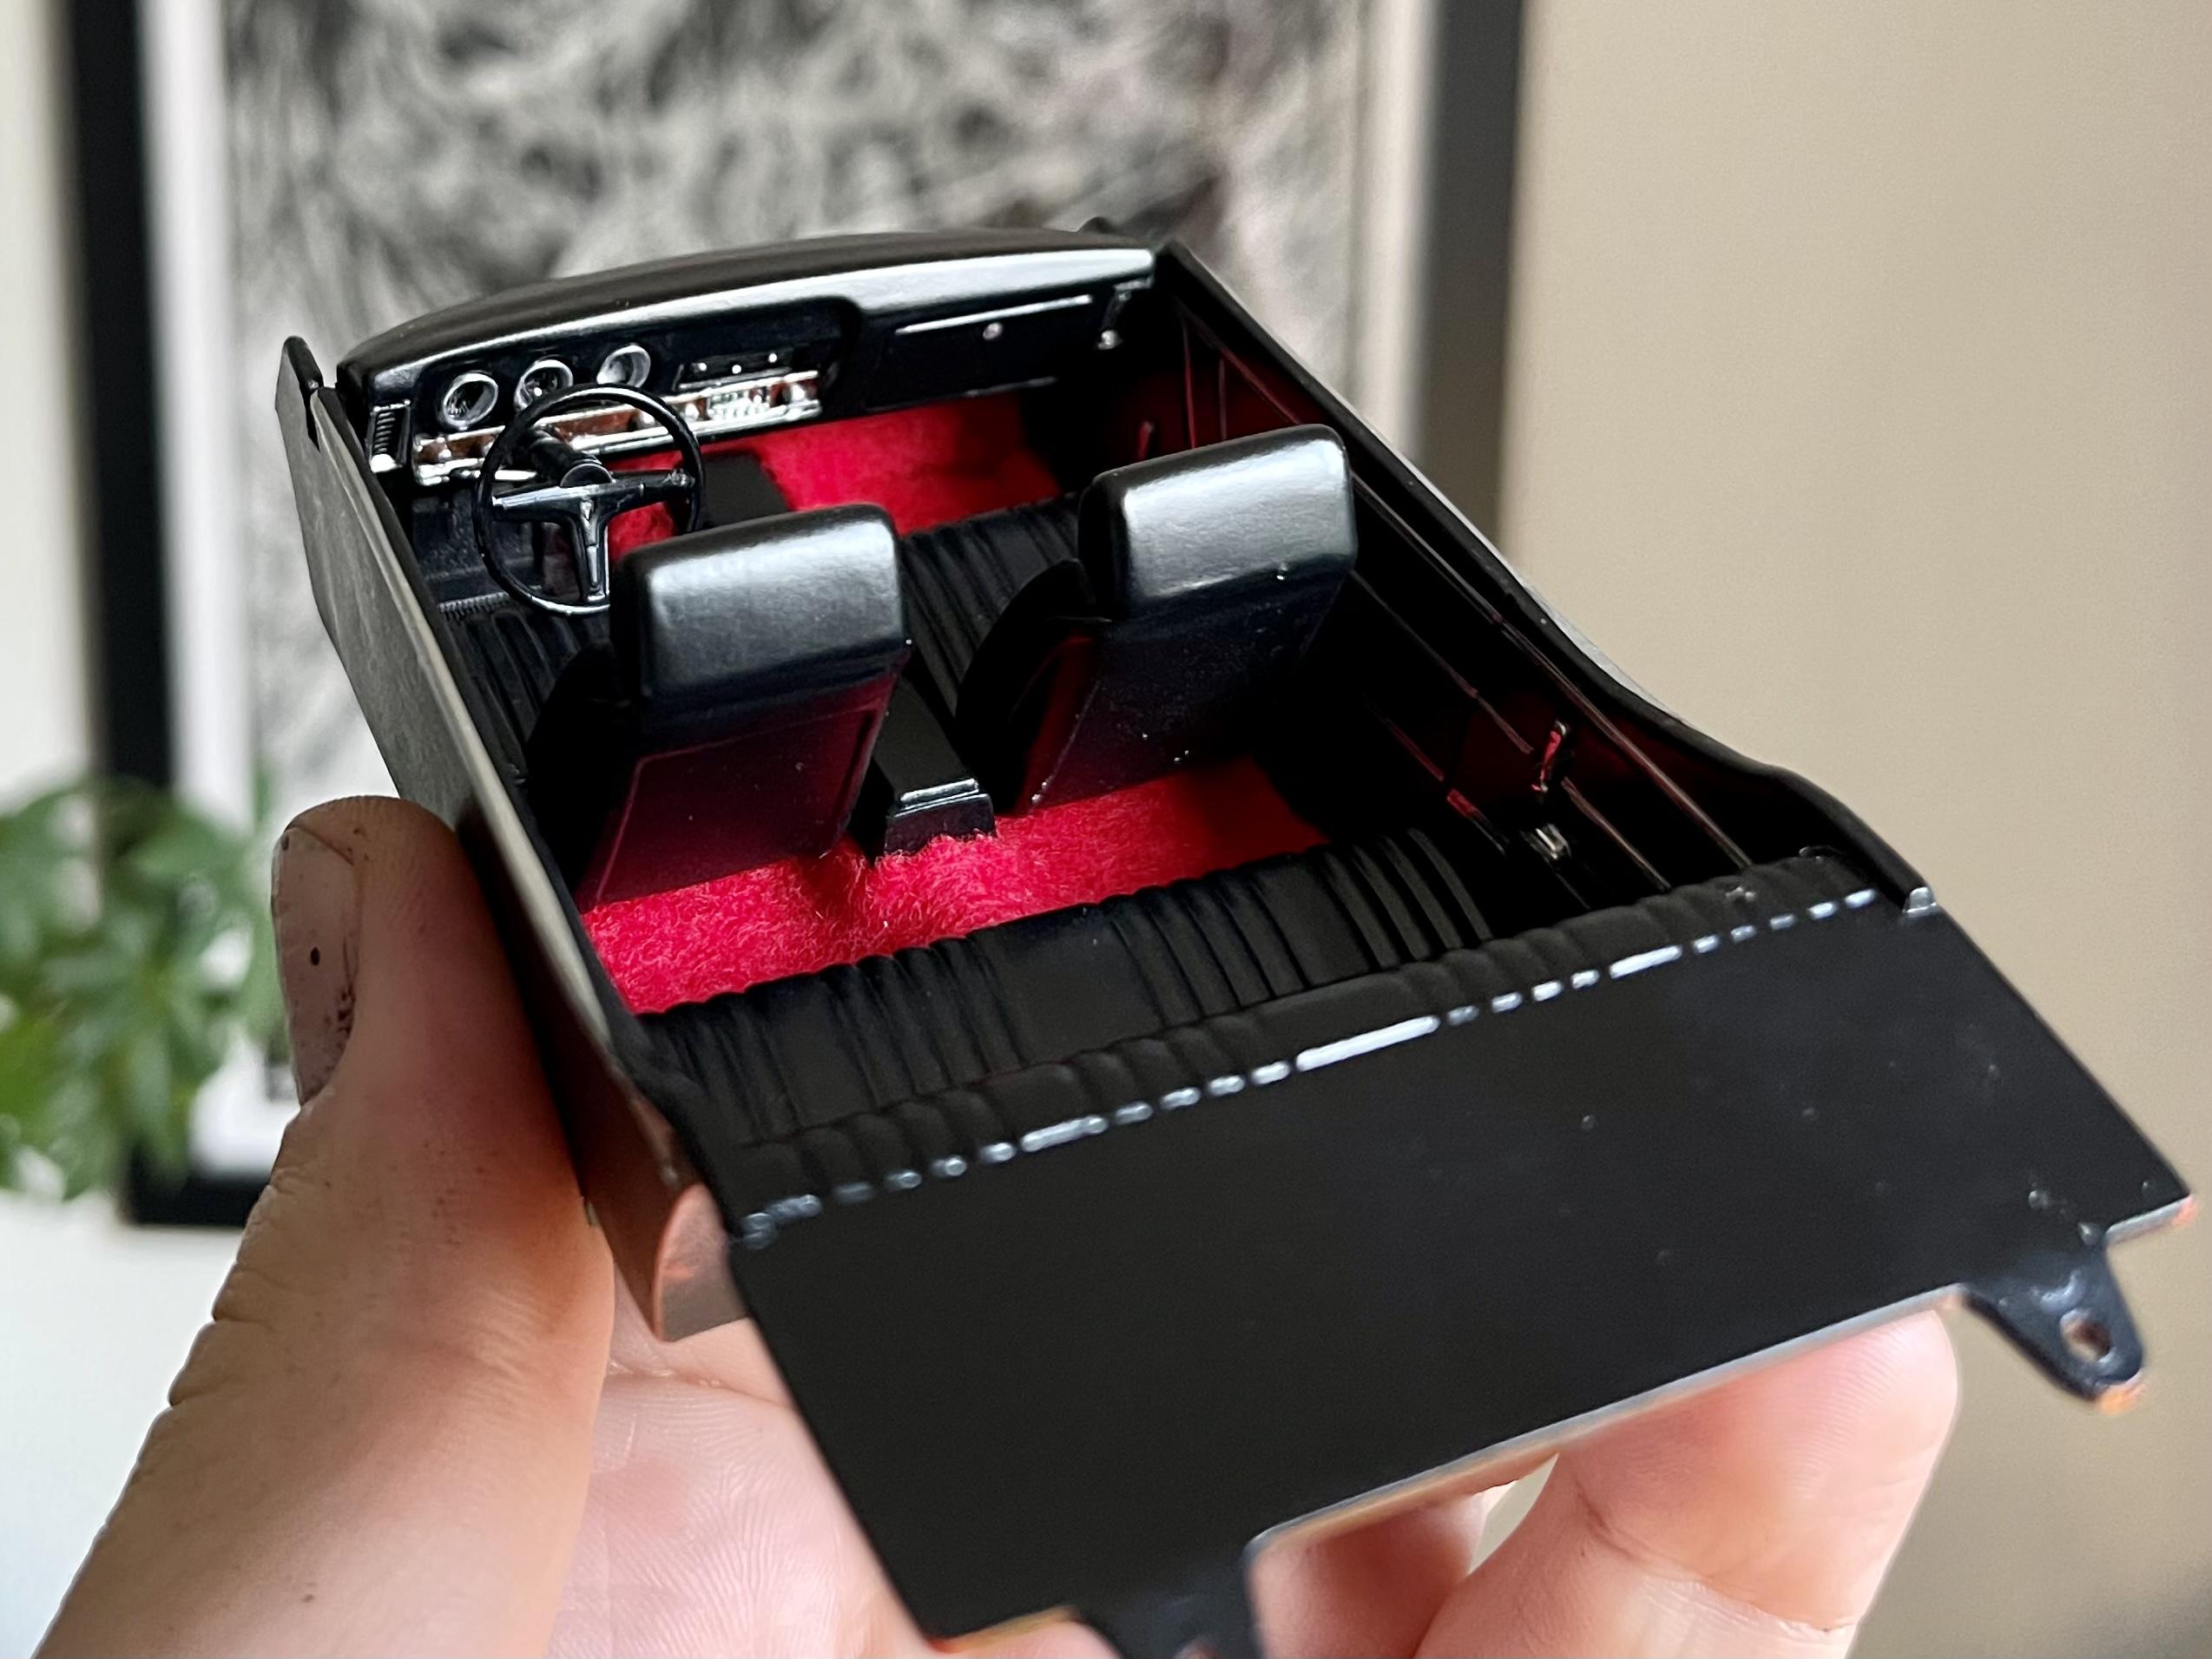
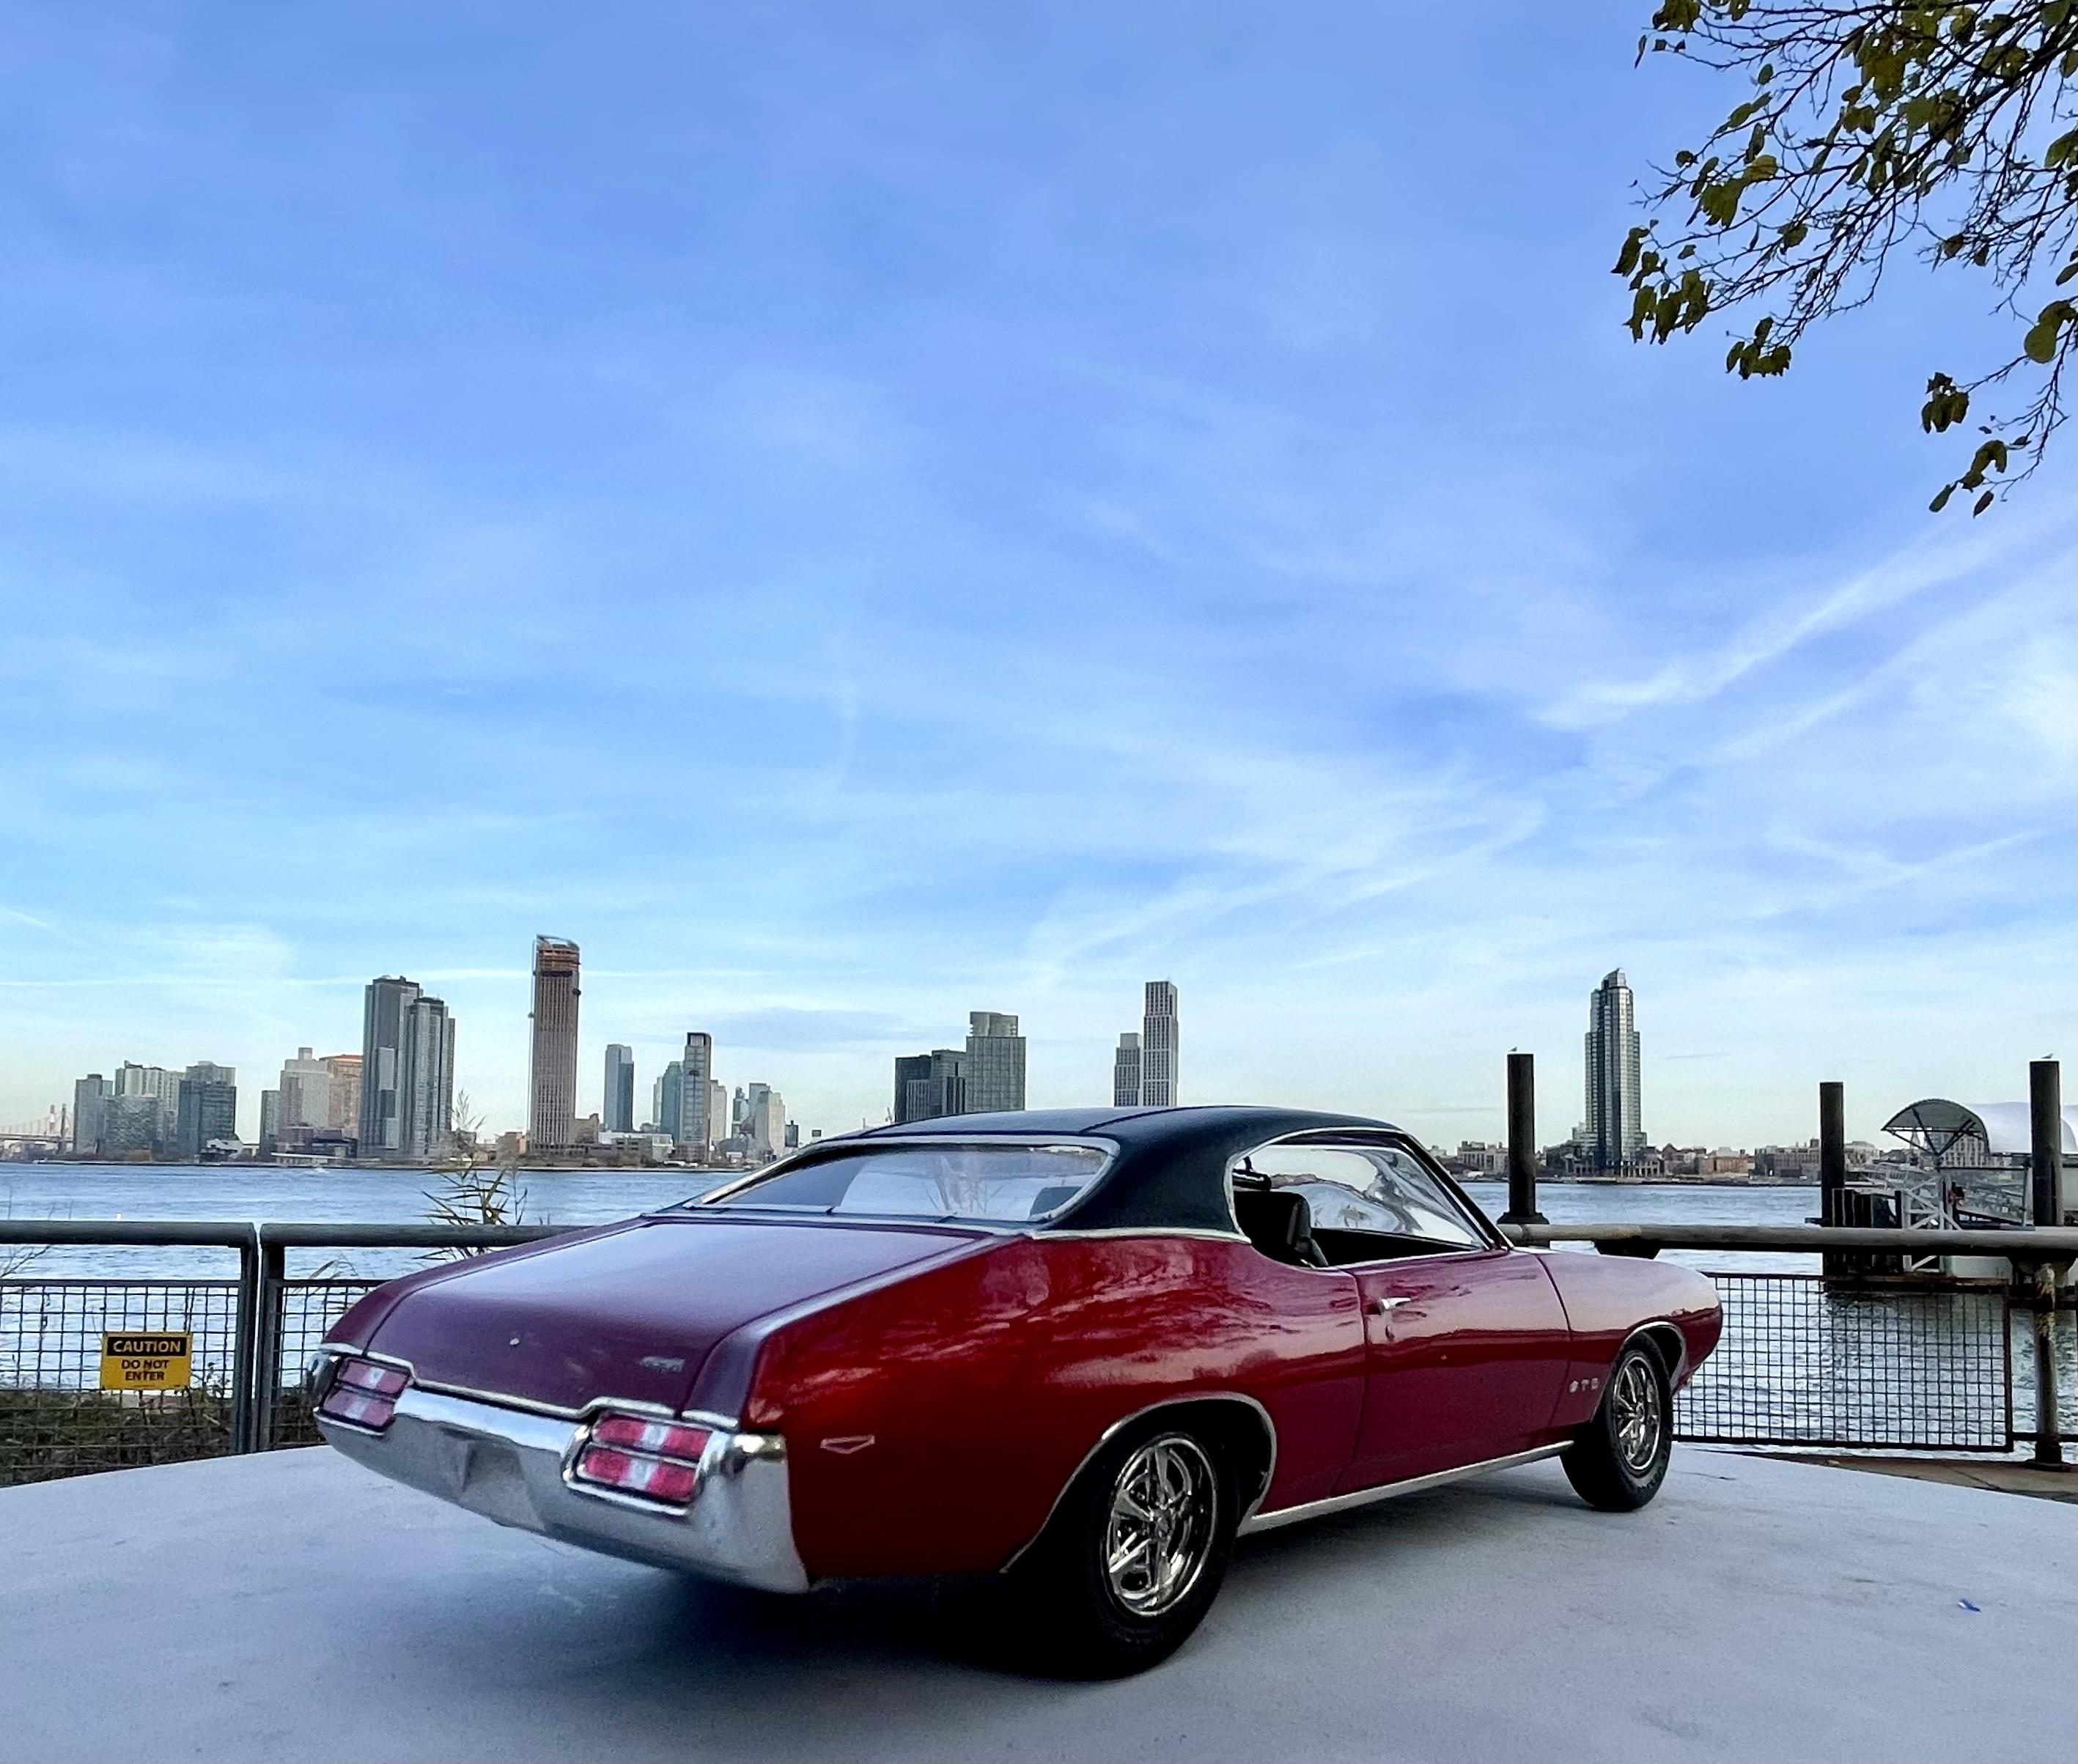
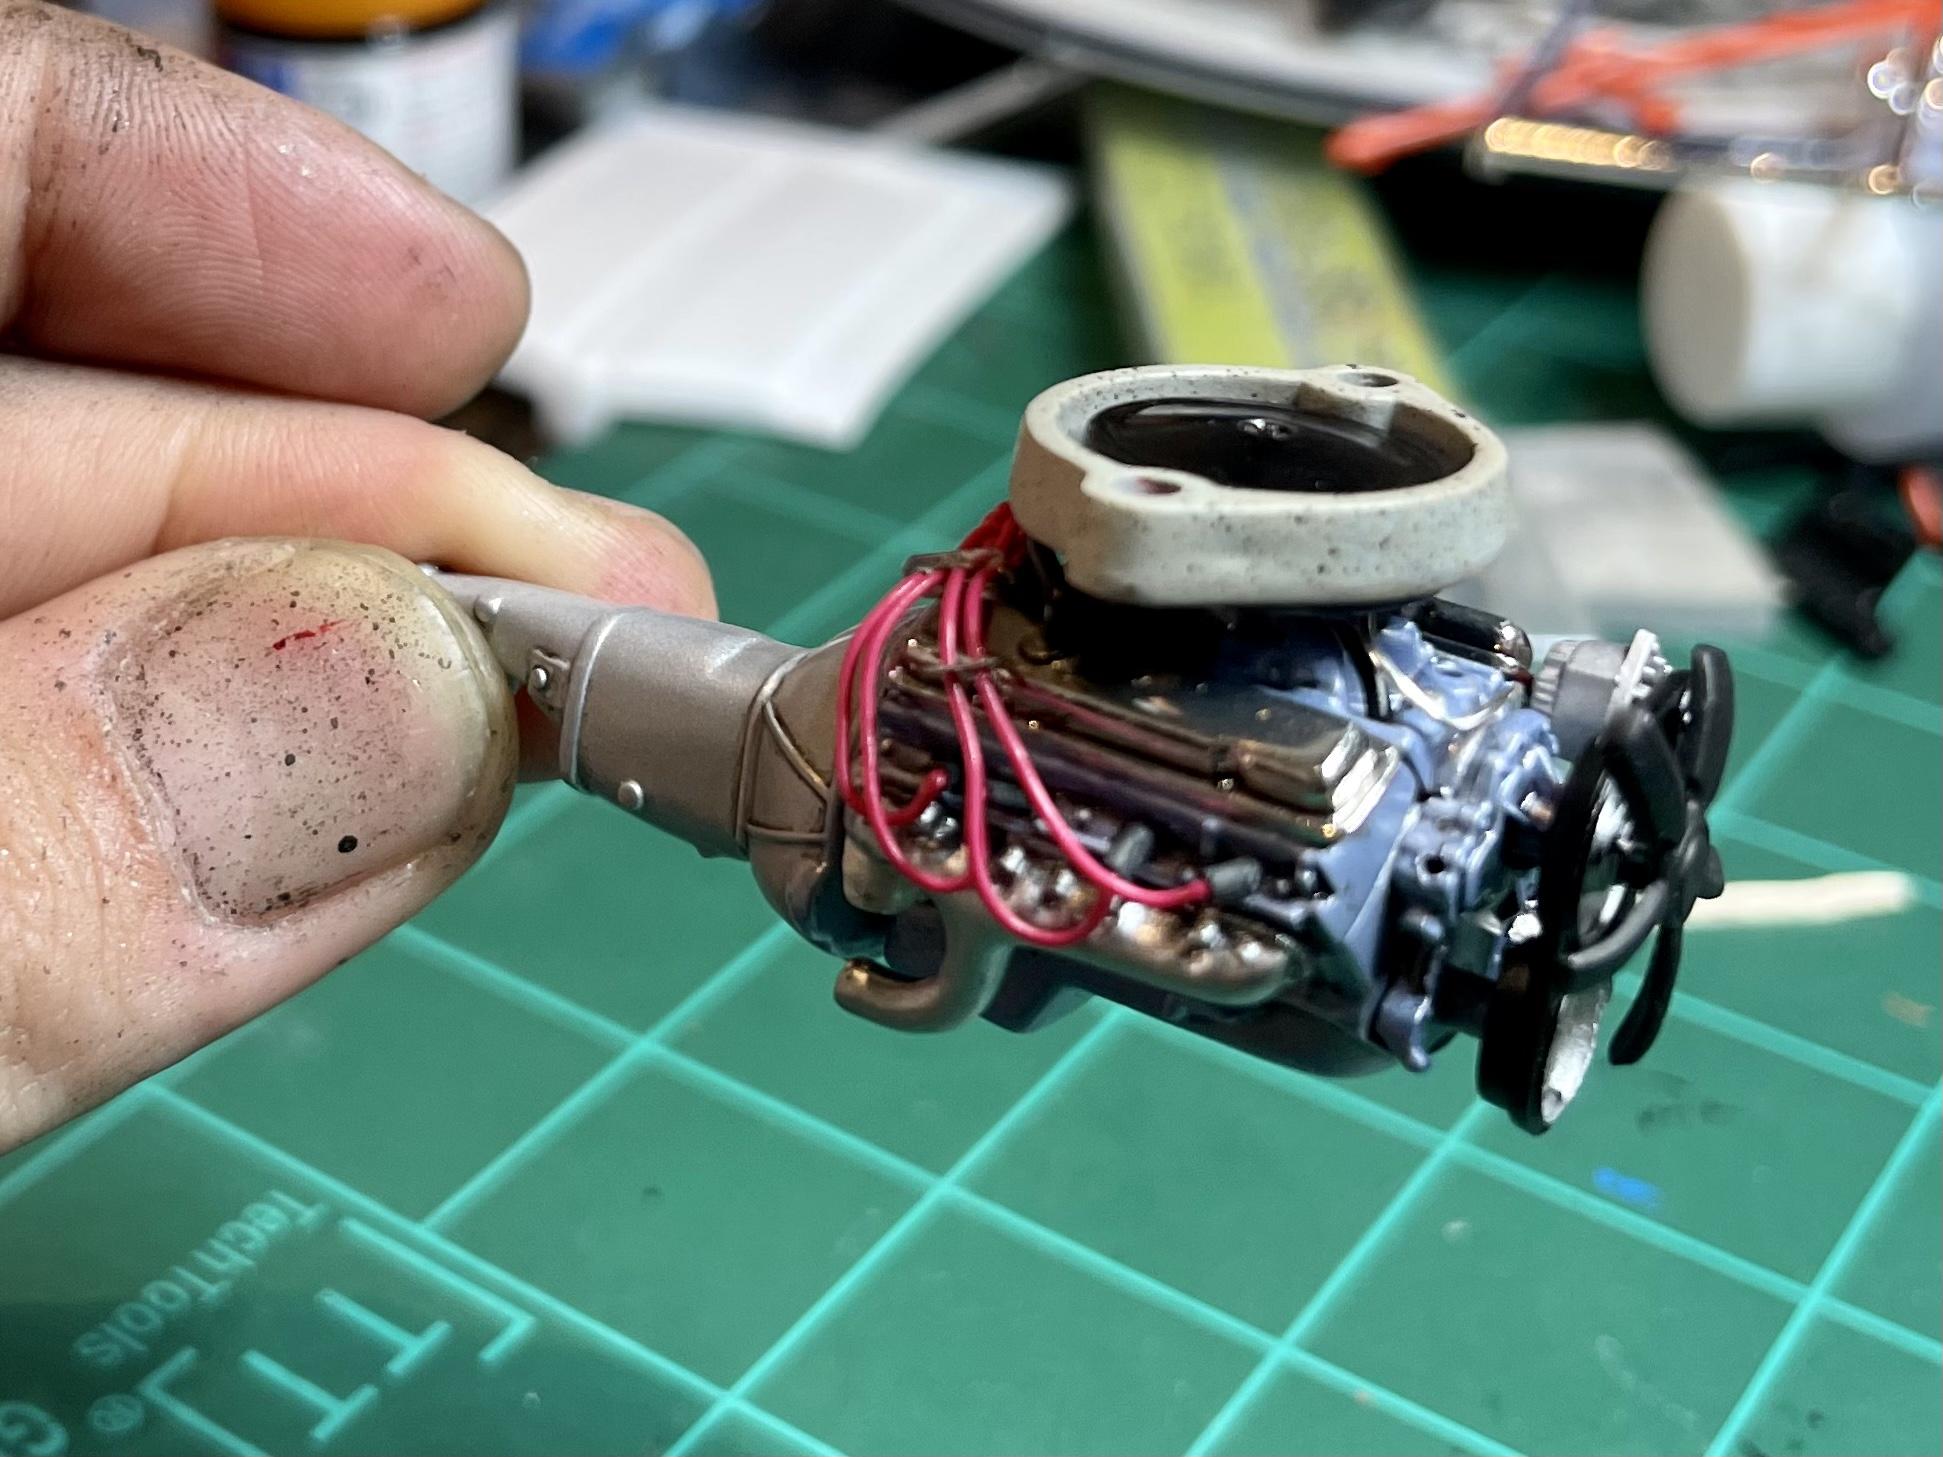
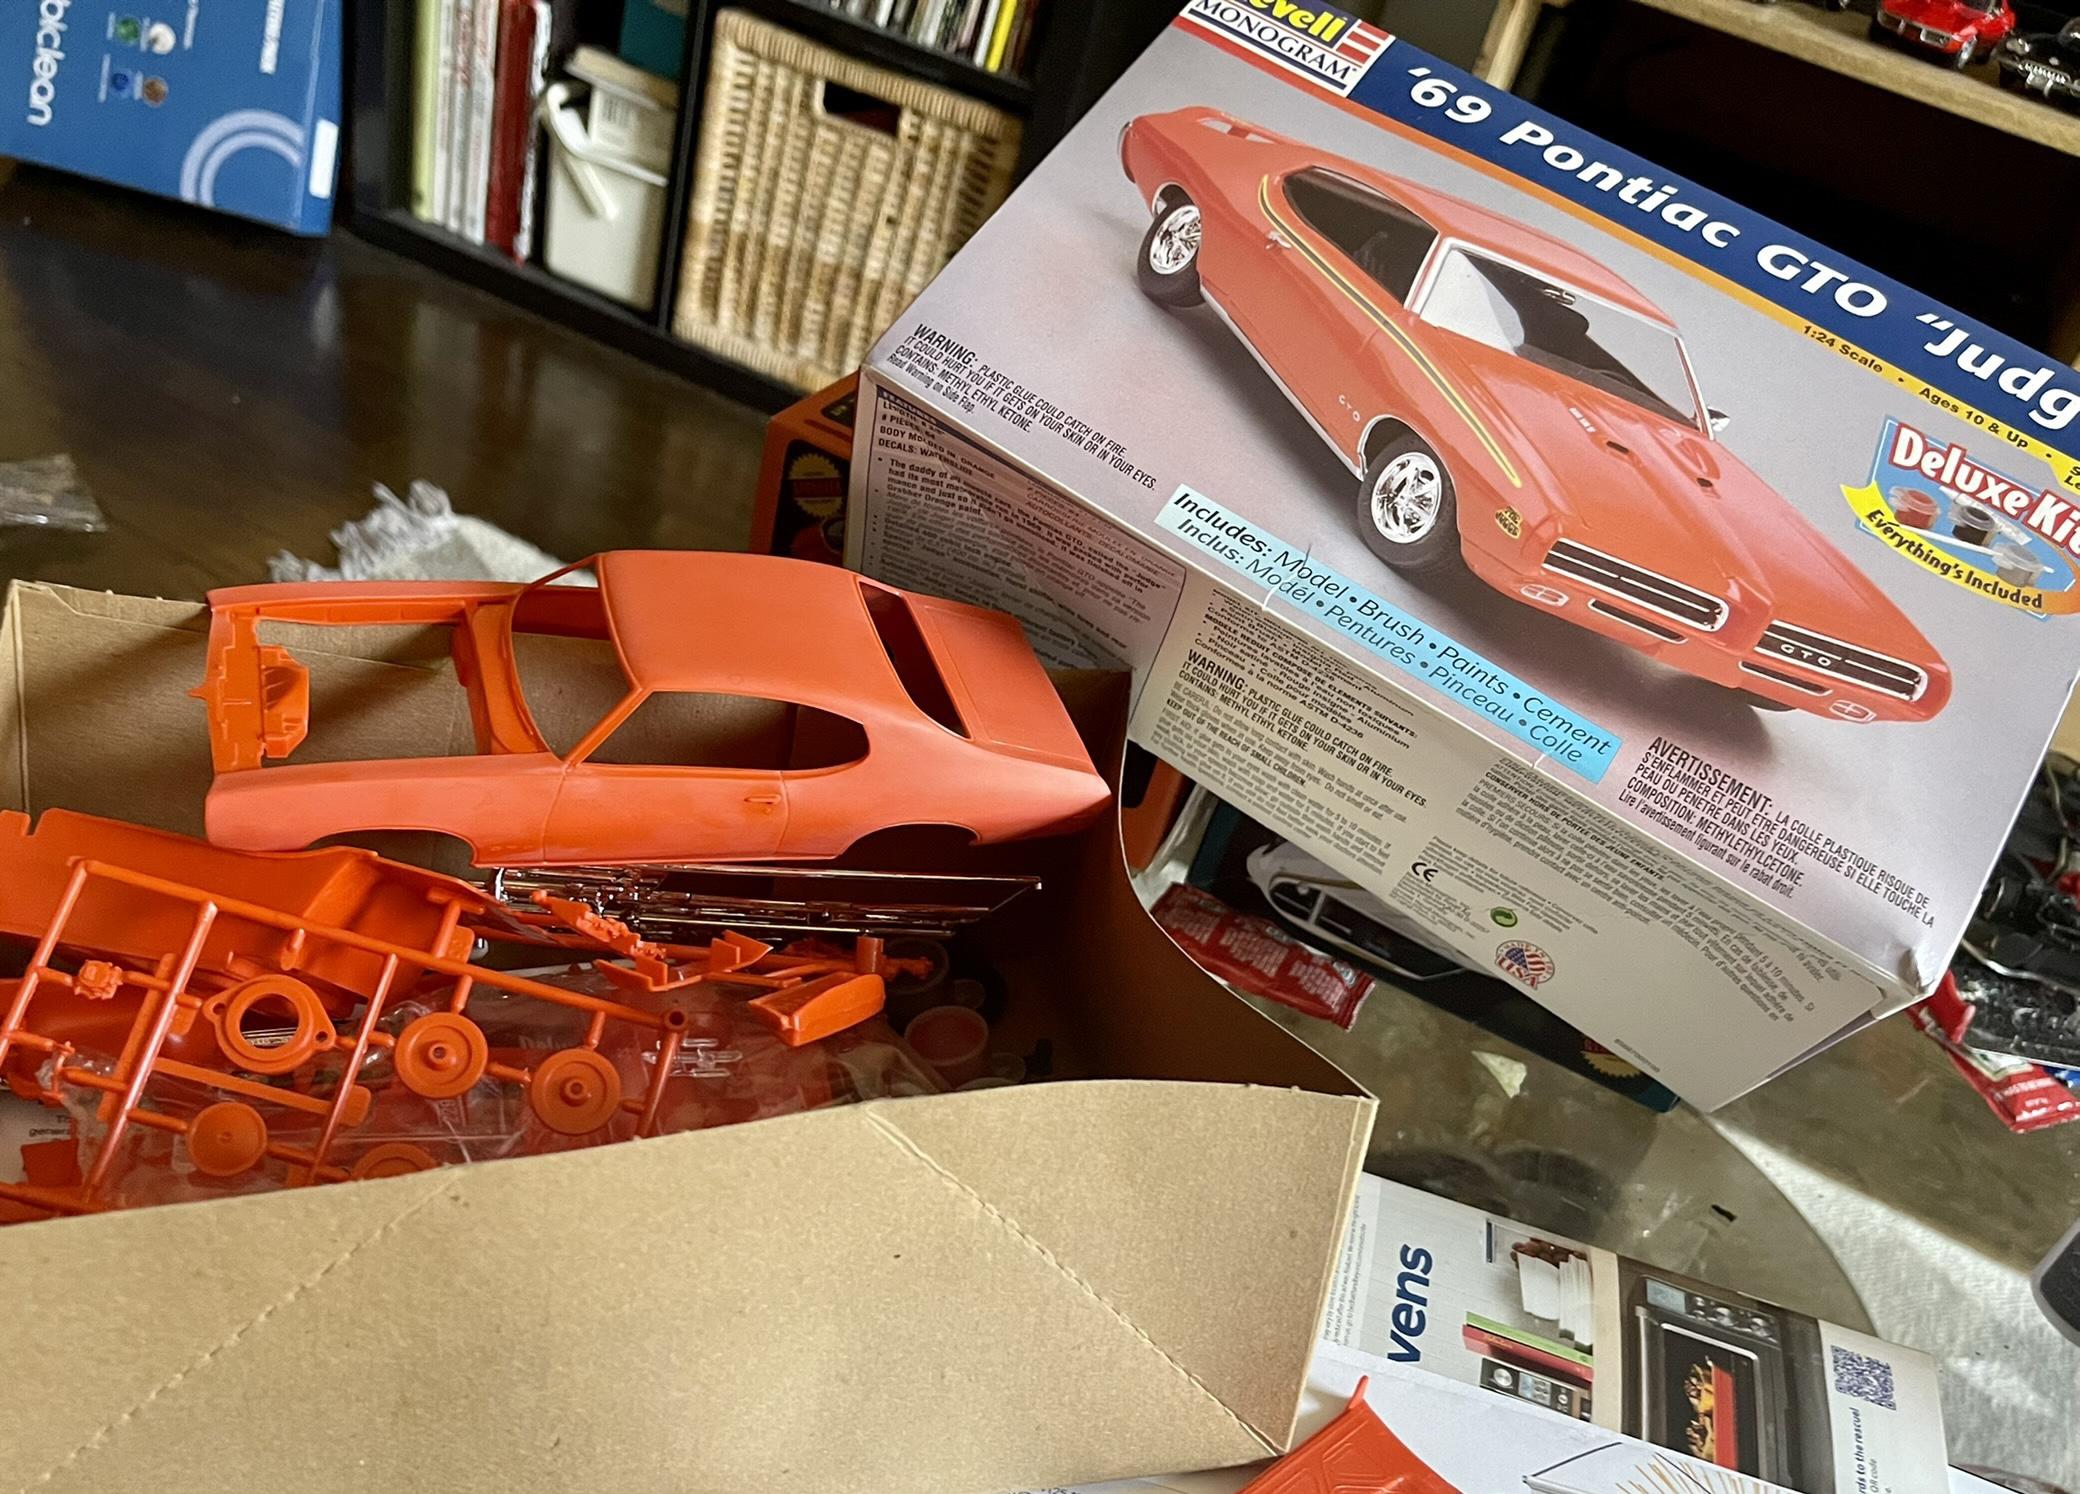
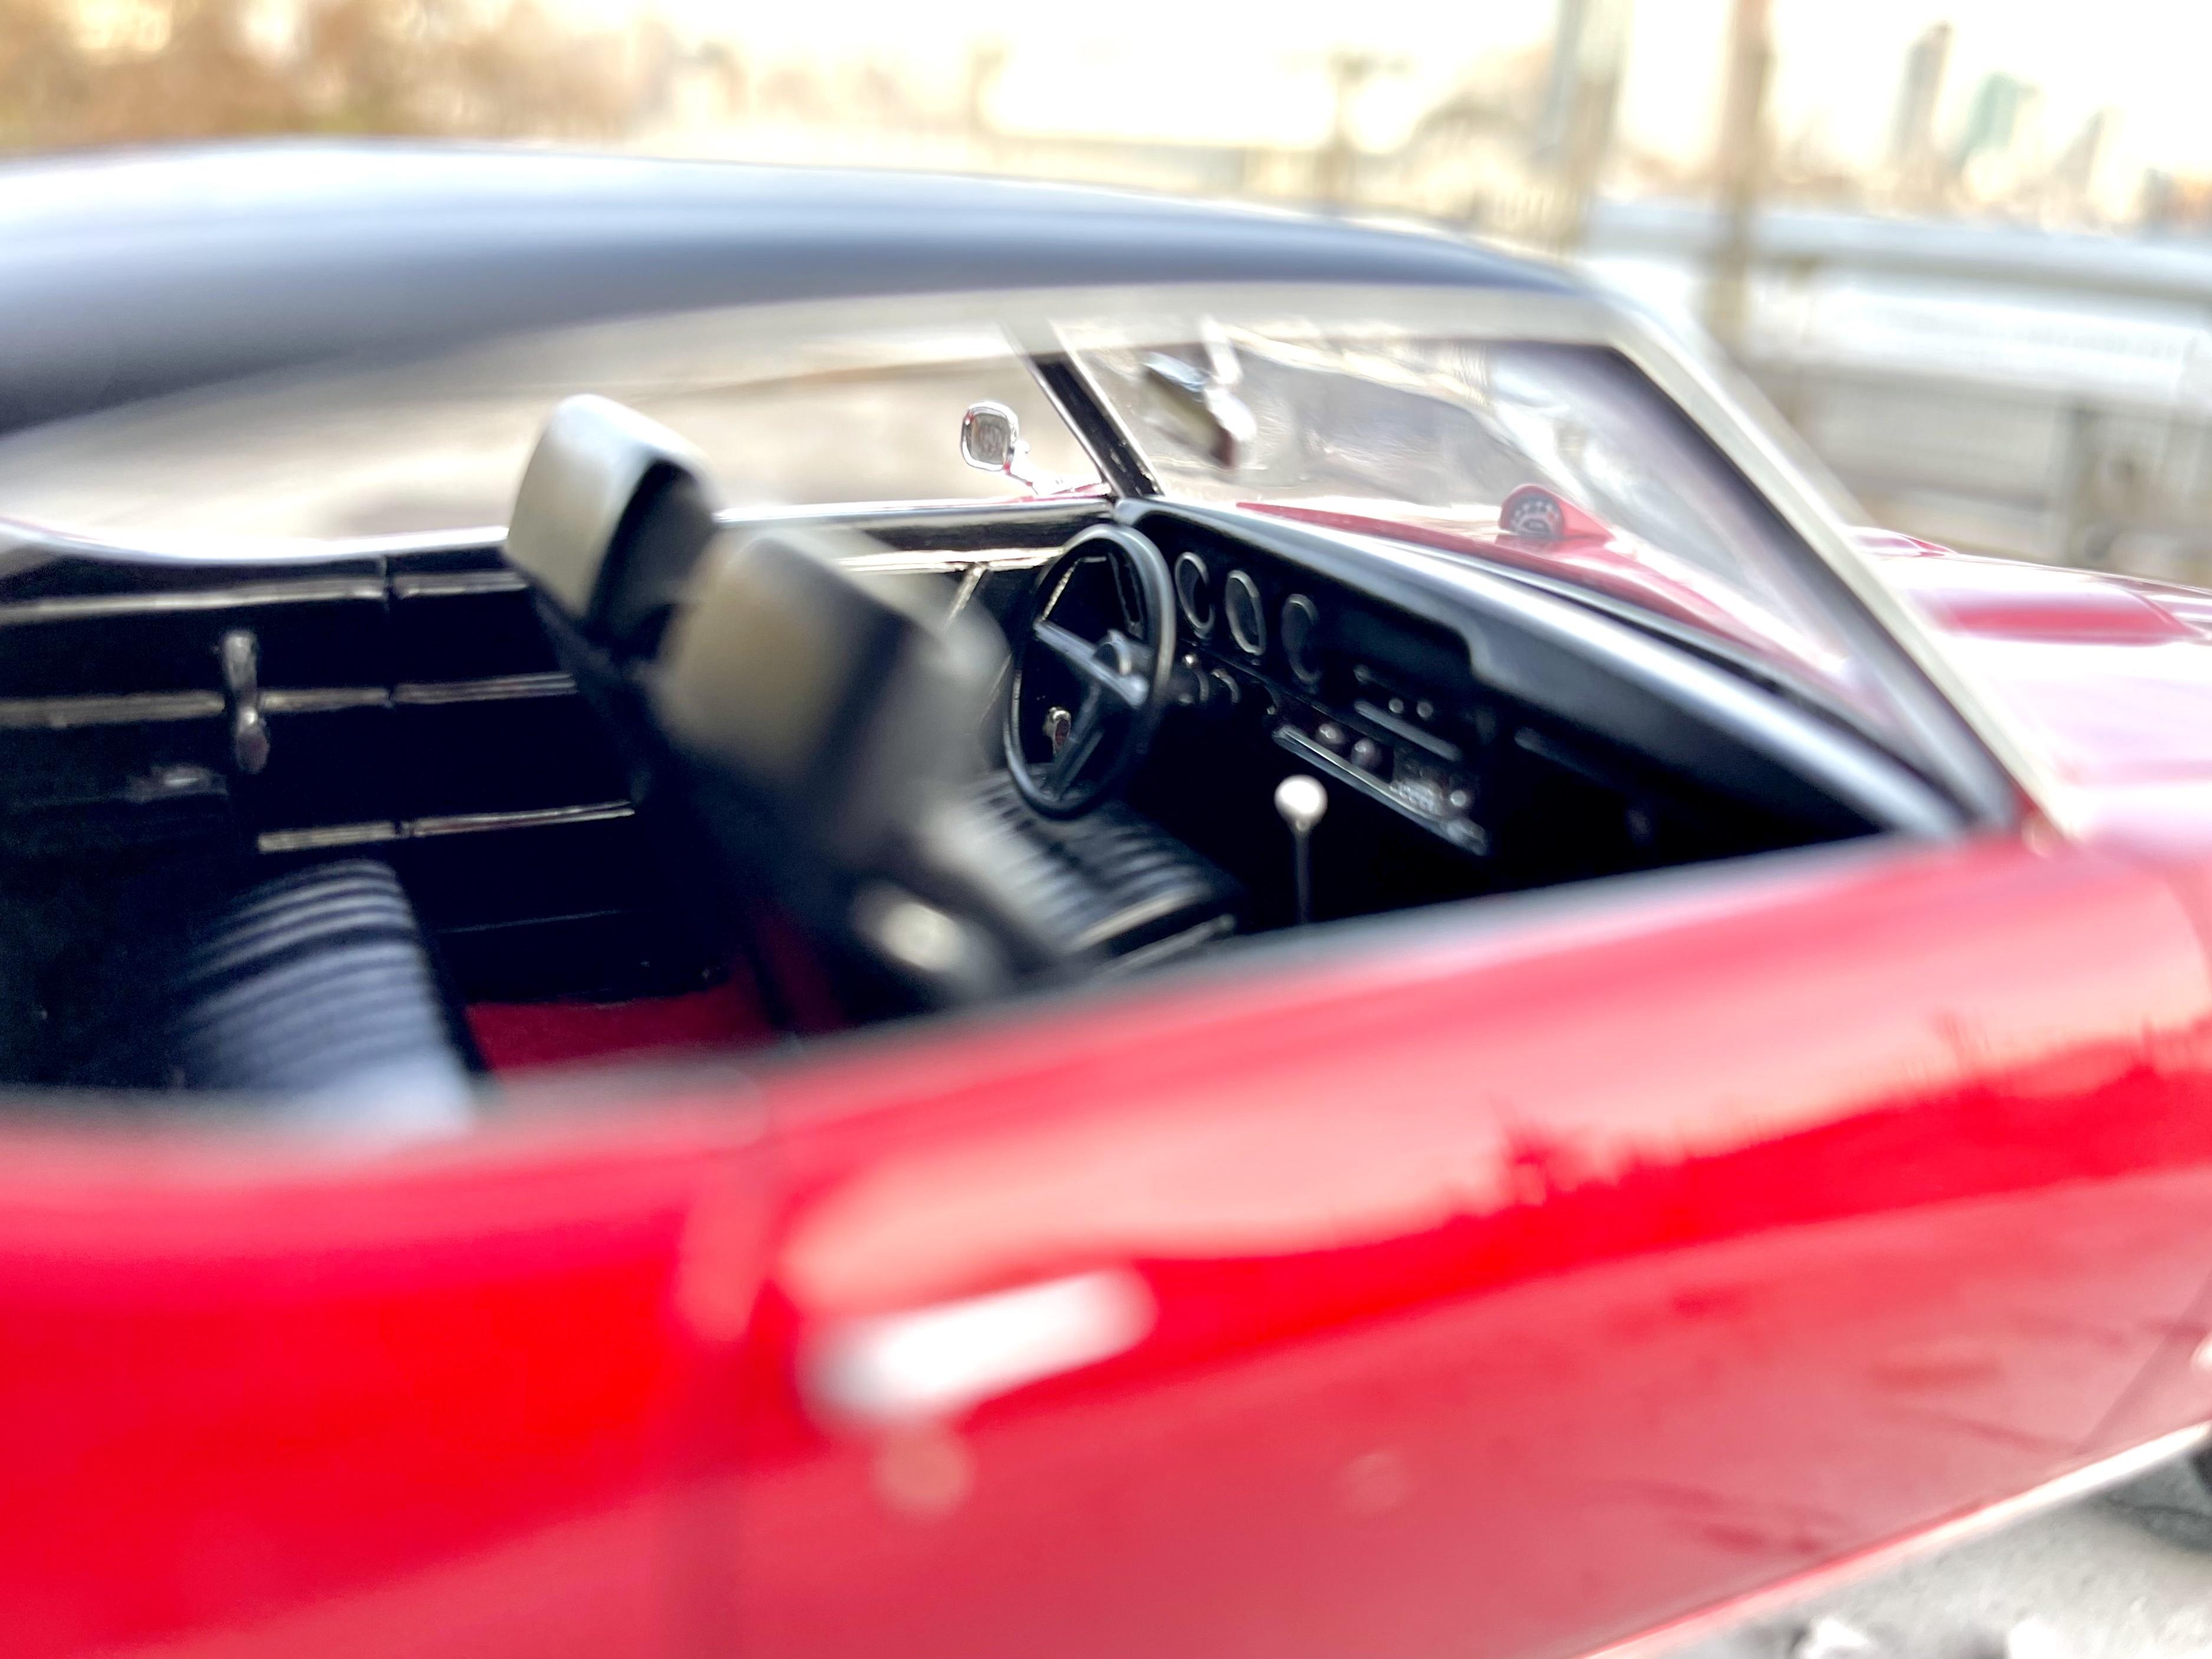
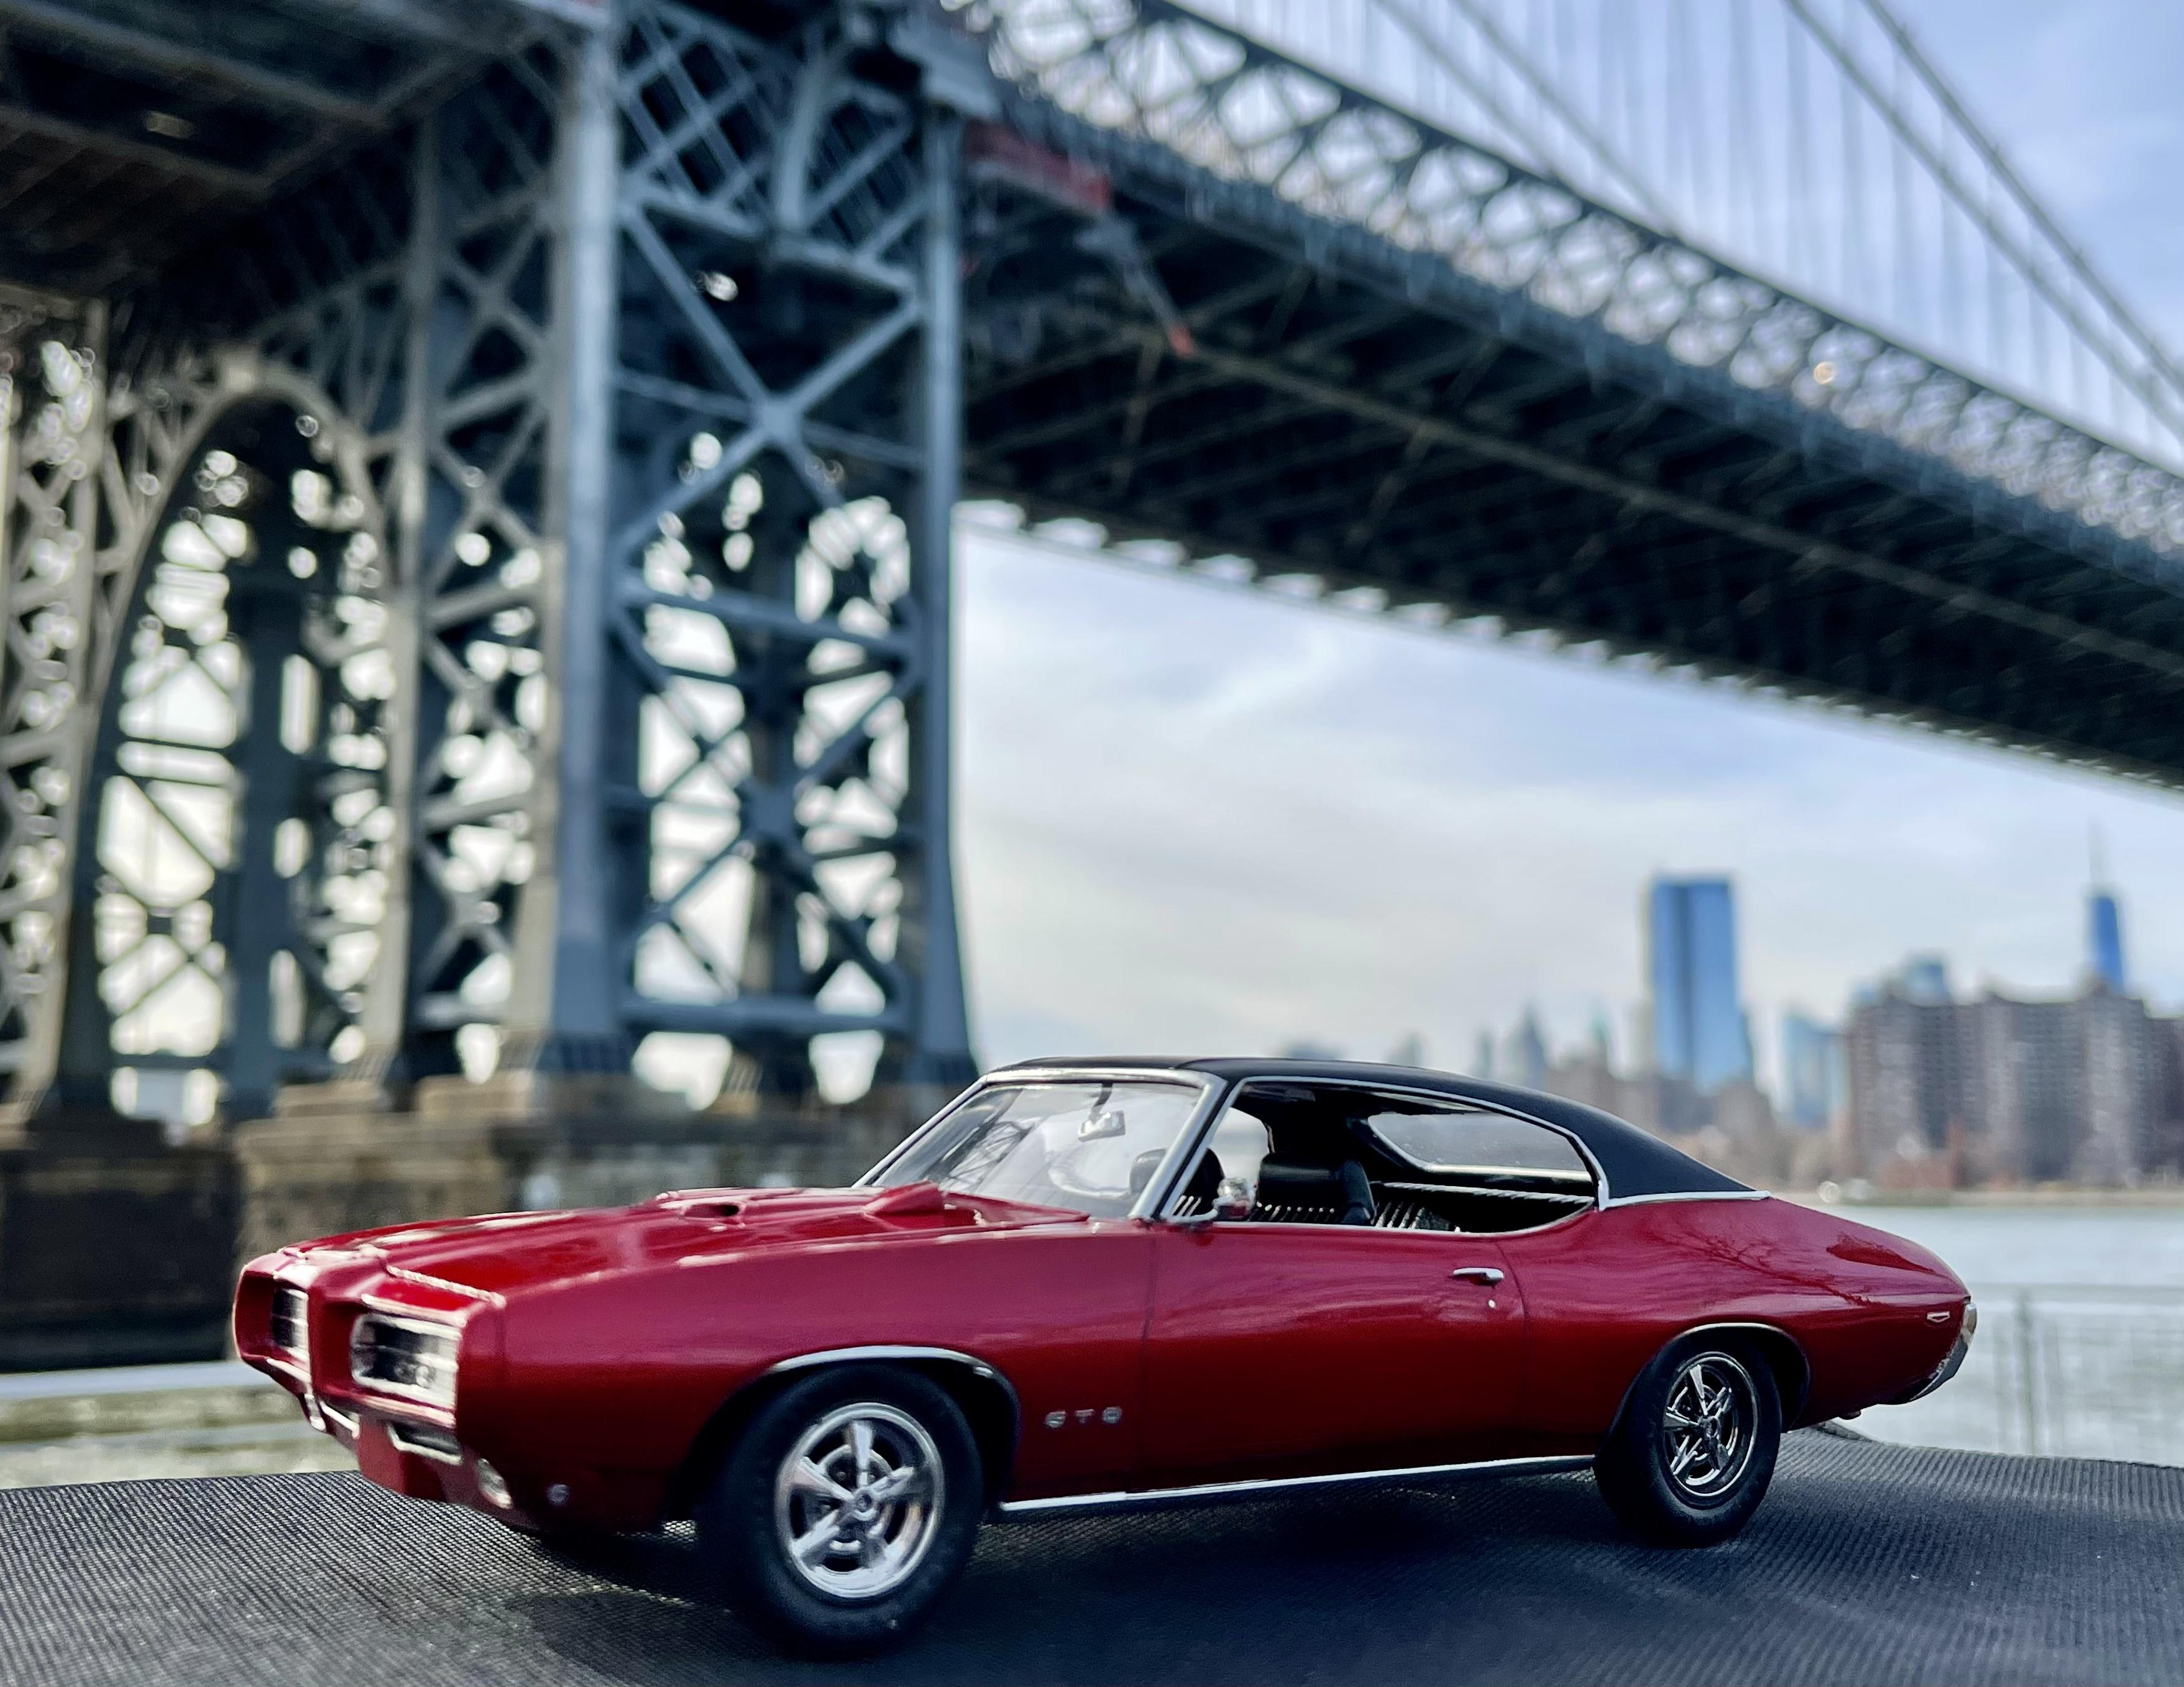
Just finished the ‘69 GTO by Revell/Monogram. I really had fun with this one. It took a lot of work to get the nose to line up flush with the body, but other than that there were no real issues. The kit was pretty basic so I had to make a few small tweaks/additions (engine bay, door handles, mirrors, tail lights, dash bezels, gauge faces, side reflectors, etc.) It was my first “candy” paint job and I really like how it added depth and realism to the little car - it almost changes color depending on the light. Tamiya spray cans - 2 coats grey primer, 3 light coats of clear red over two coats of gloss aluminum, wet sanded then cleared with ts-13 and polished out. Will definitely use that combo again. Gonna try it with clear blue next… Foiling the trim tested my patience more than usual but I eventually calmed down and got it done. Had no choice but to do the window and wheel trim with Hasegawa mirror finish since I simply could not get the bmf to stick (may redo it if/when bmf ever sorts out their product - it’s been brutal and almost ruined the build). Ok enough complaining 😜 I want to drive this car!!
-
Nice reissue. Lots of parts, can be built stock height if you wish, will require parts box wheels and tires for stock look.
-
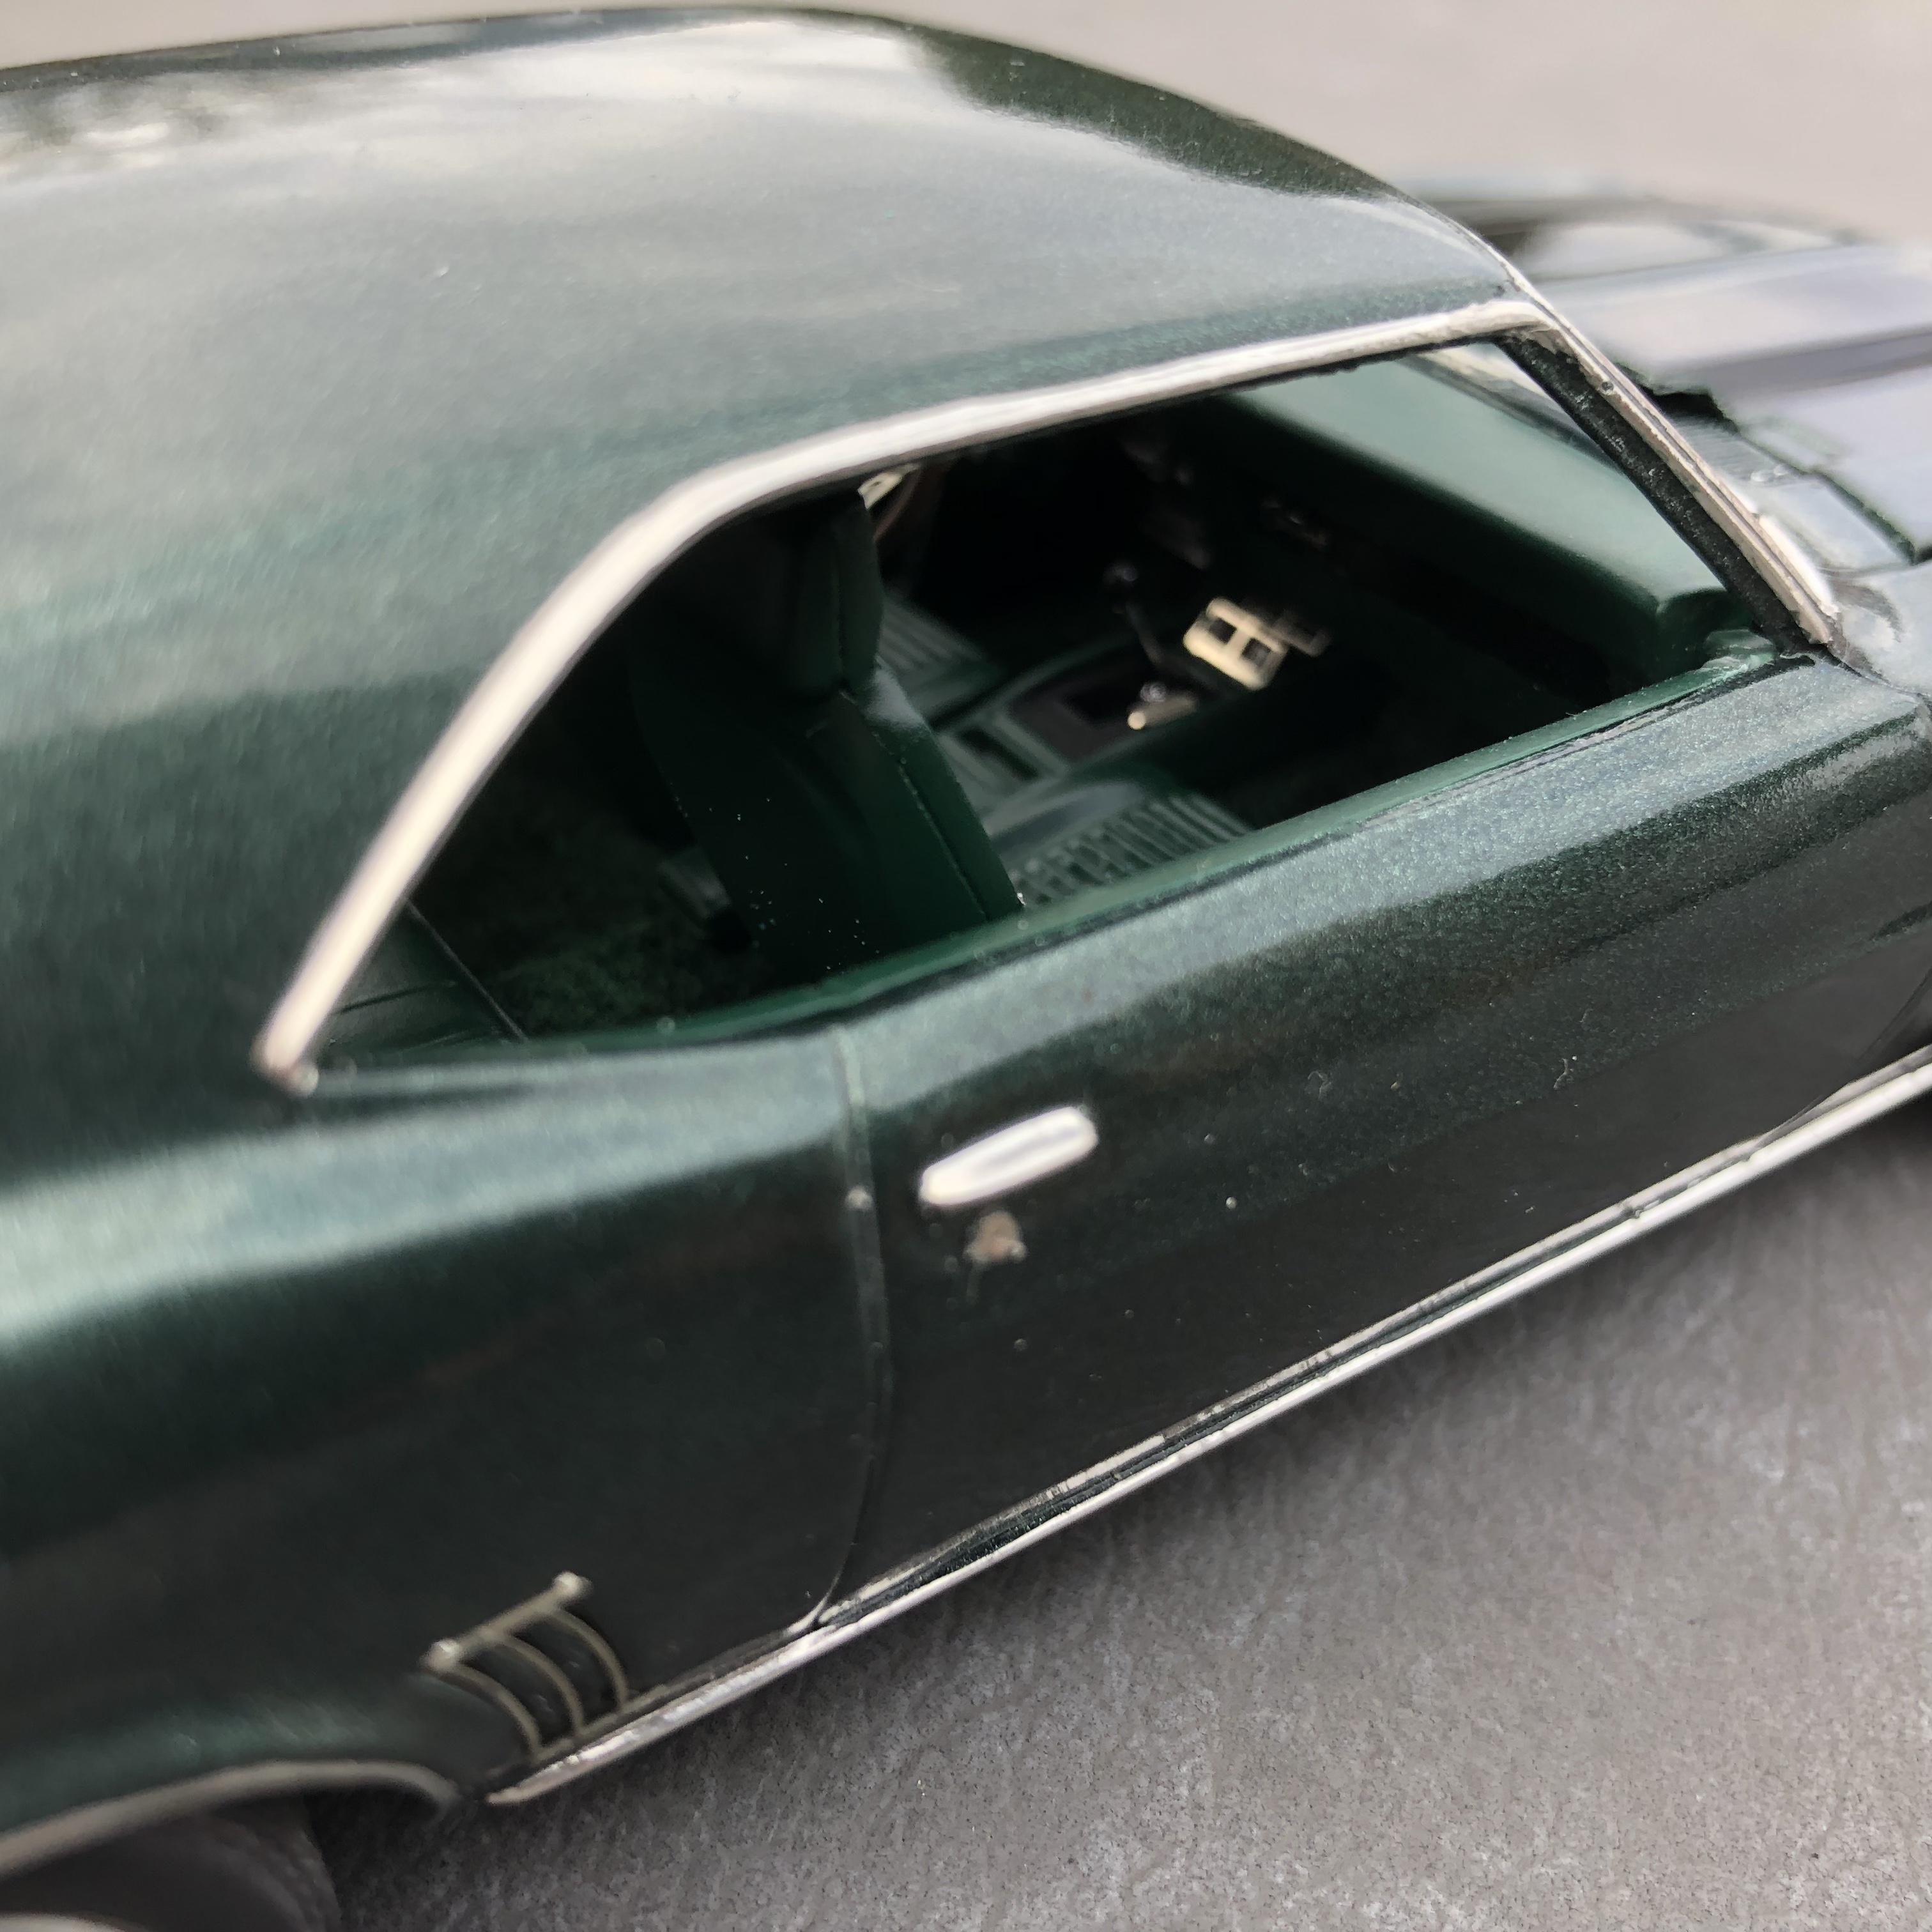
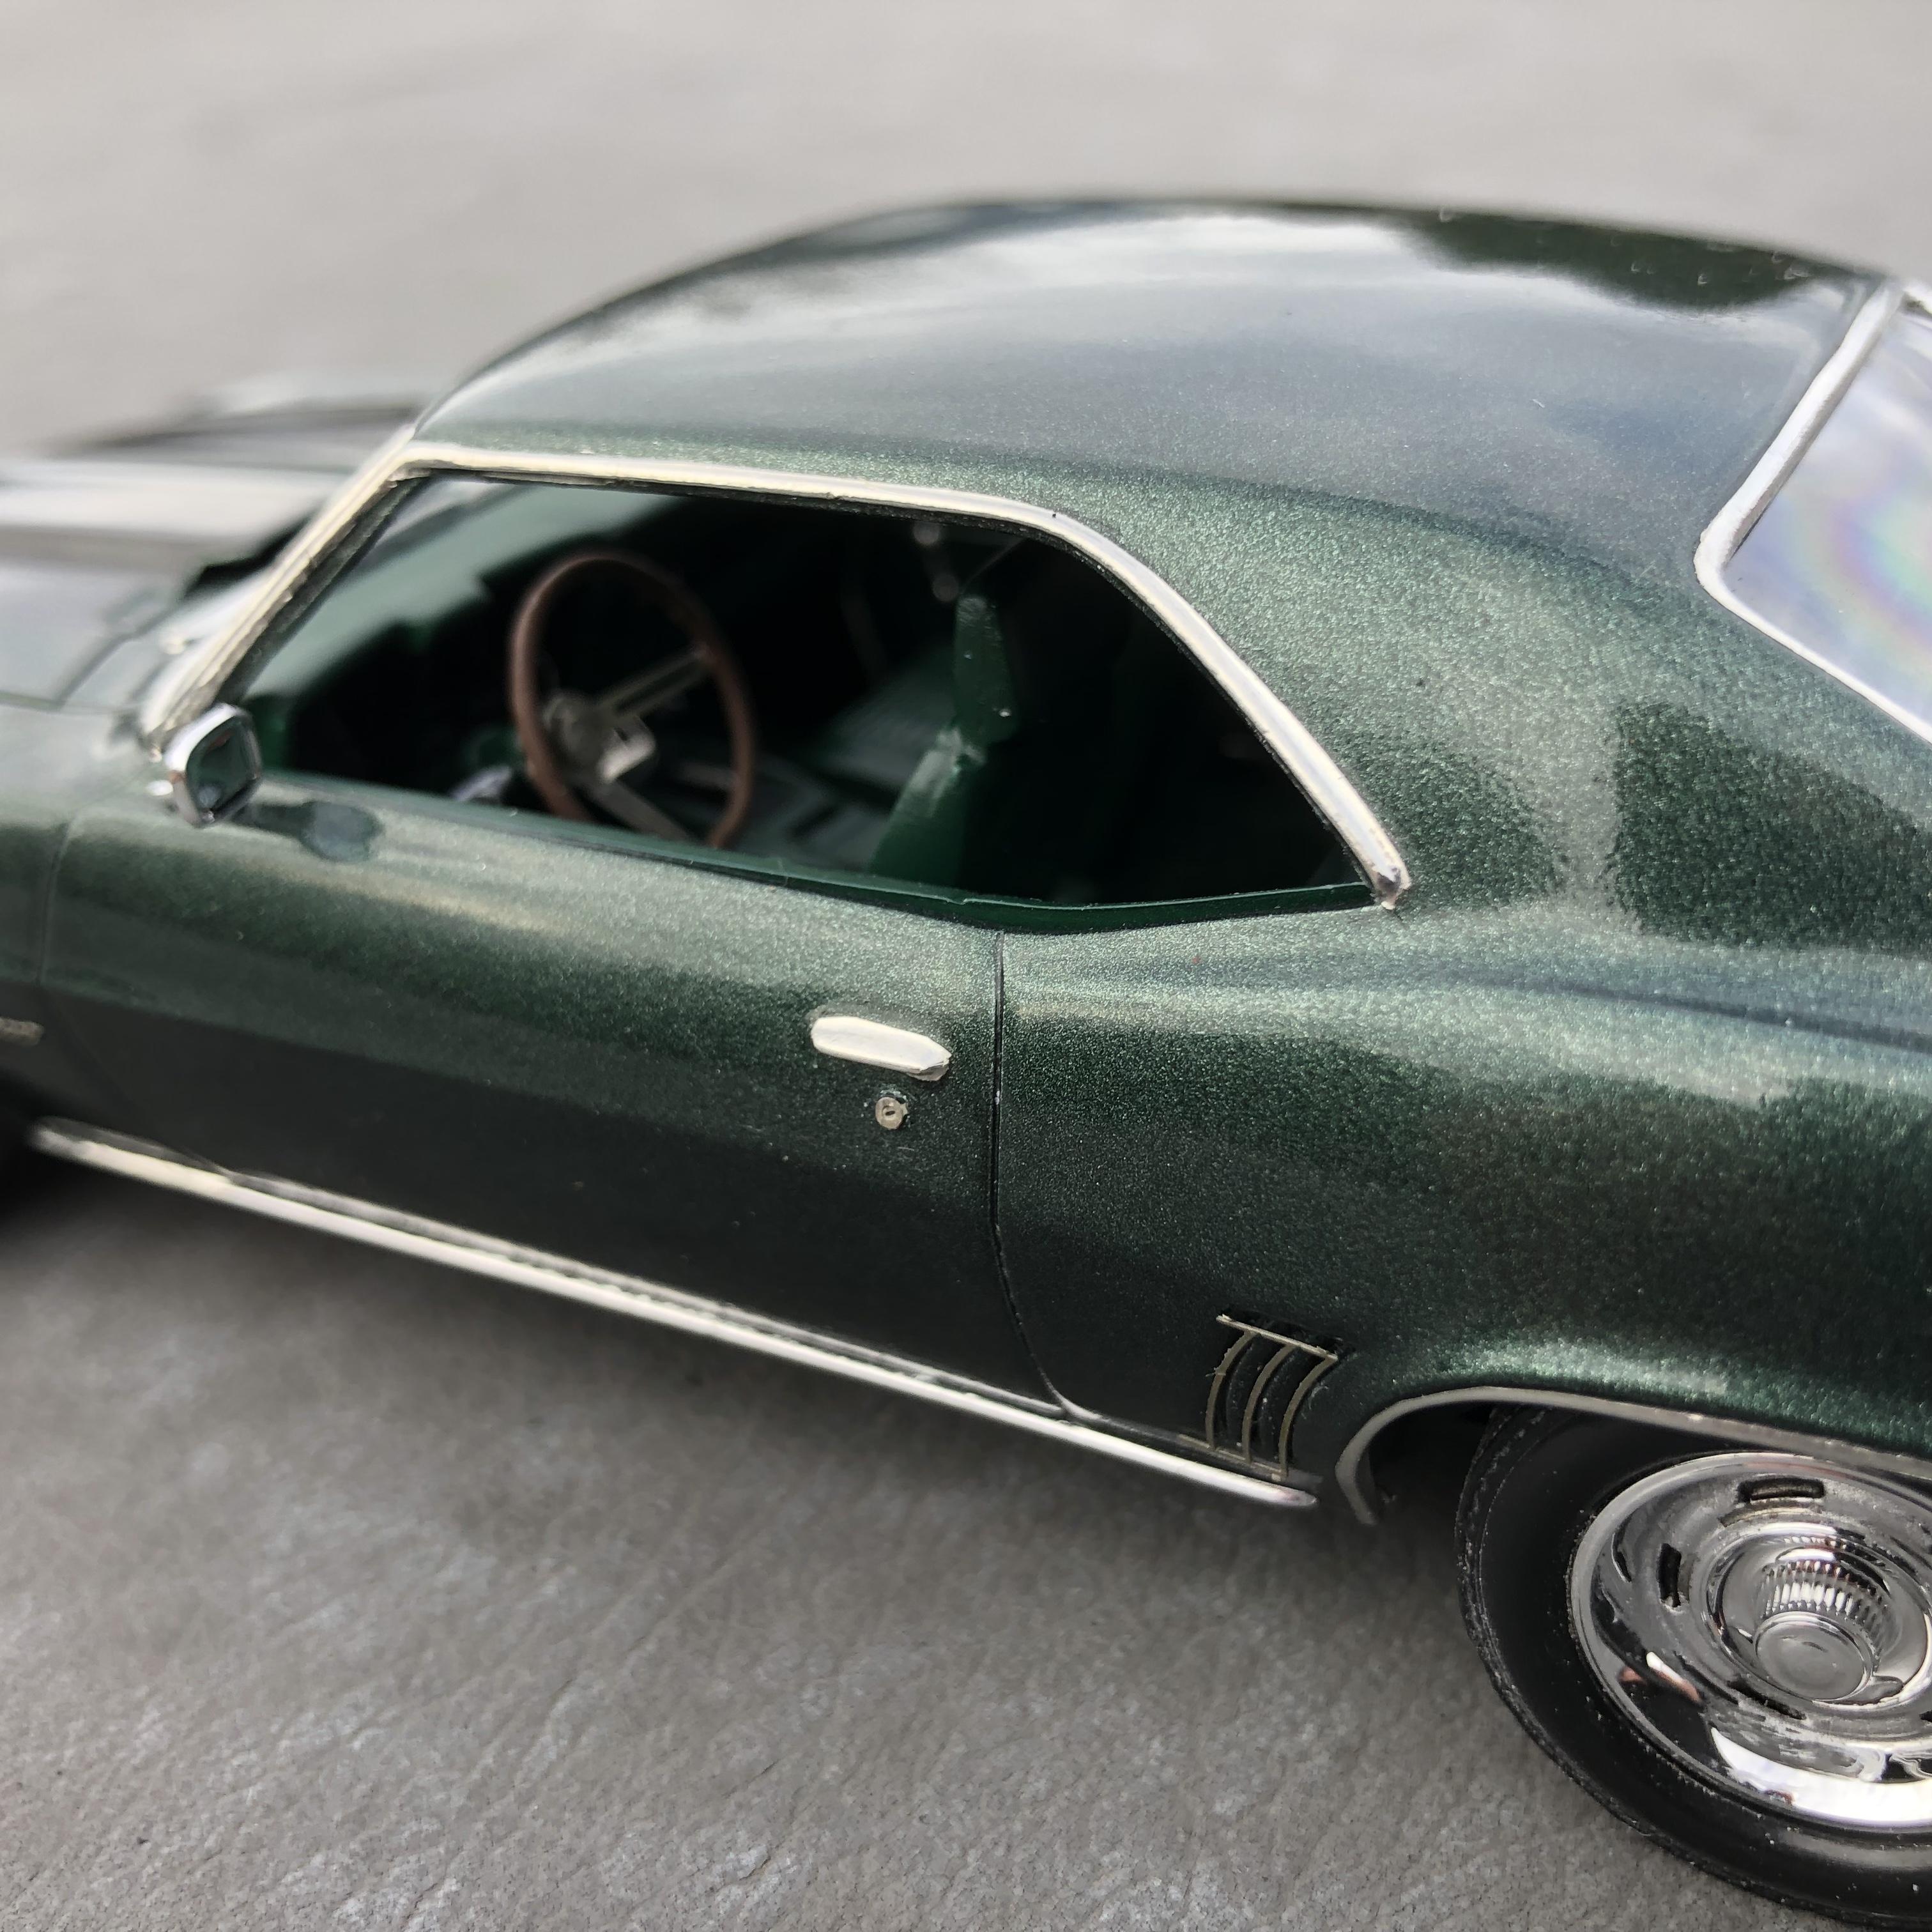
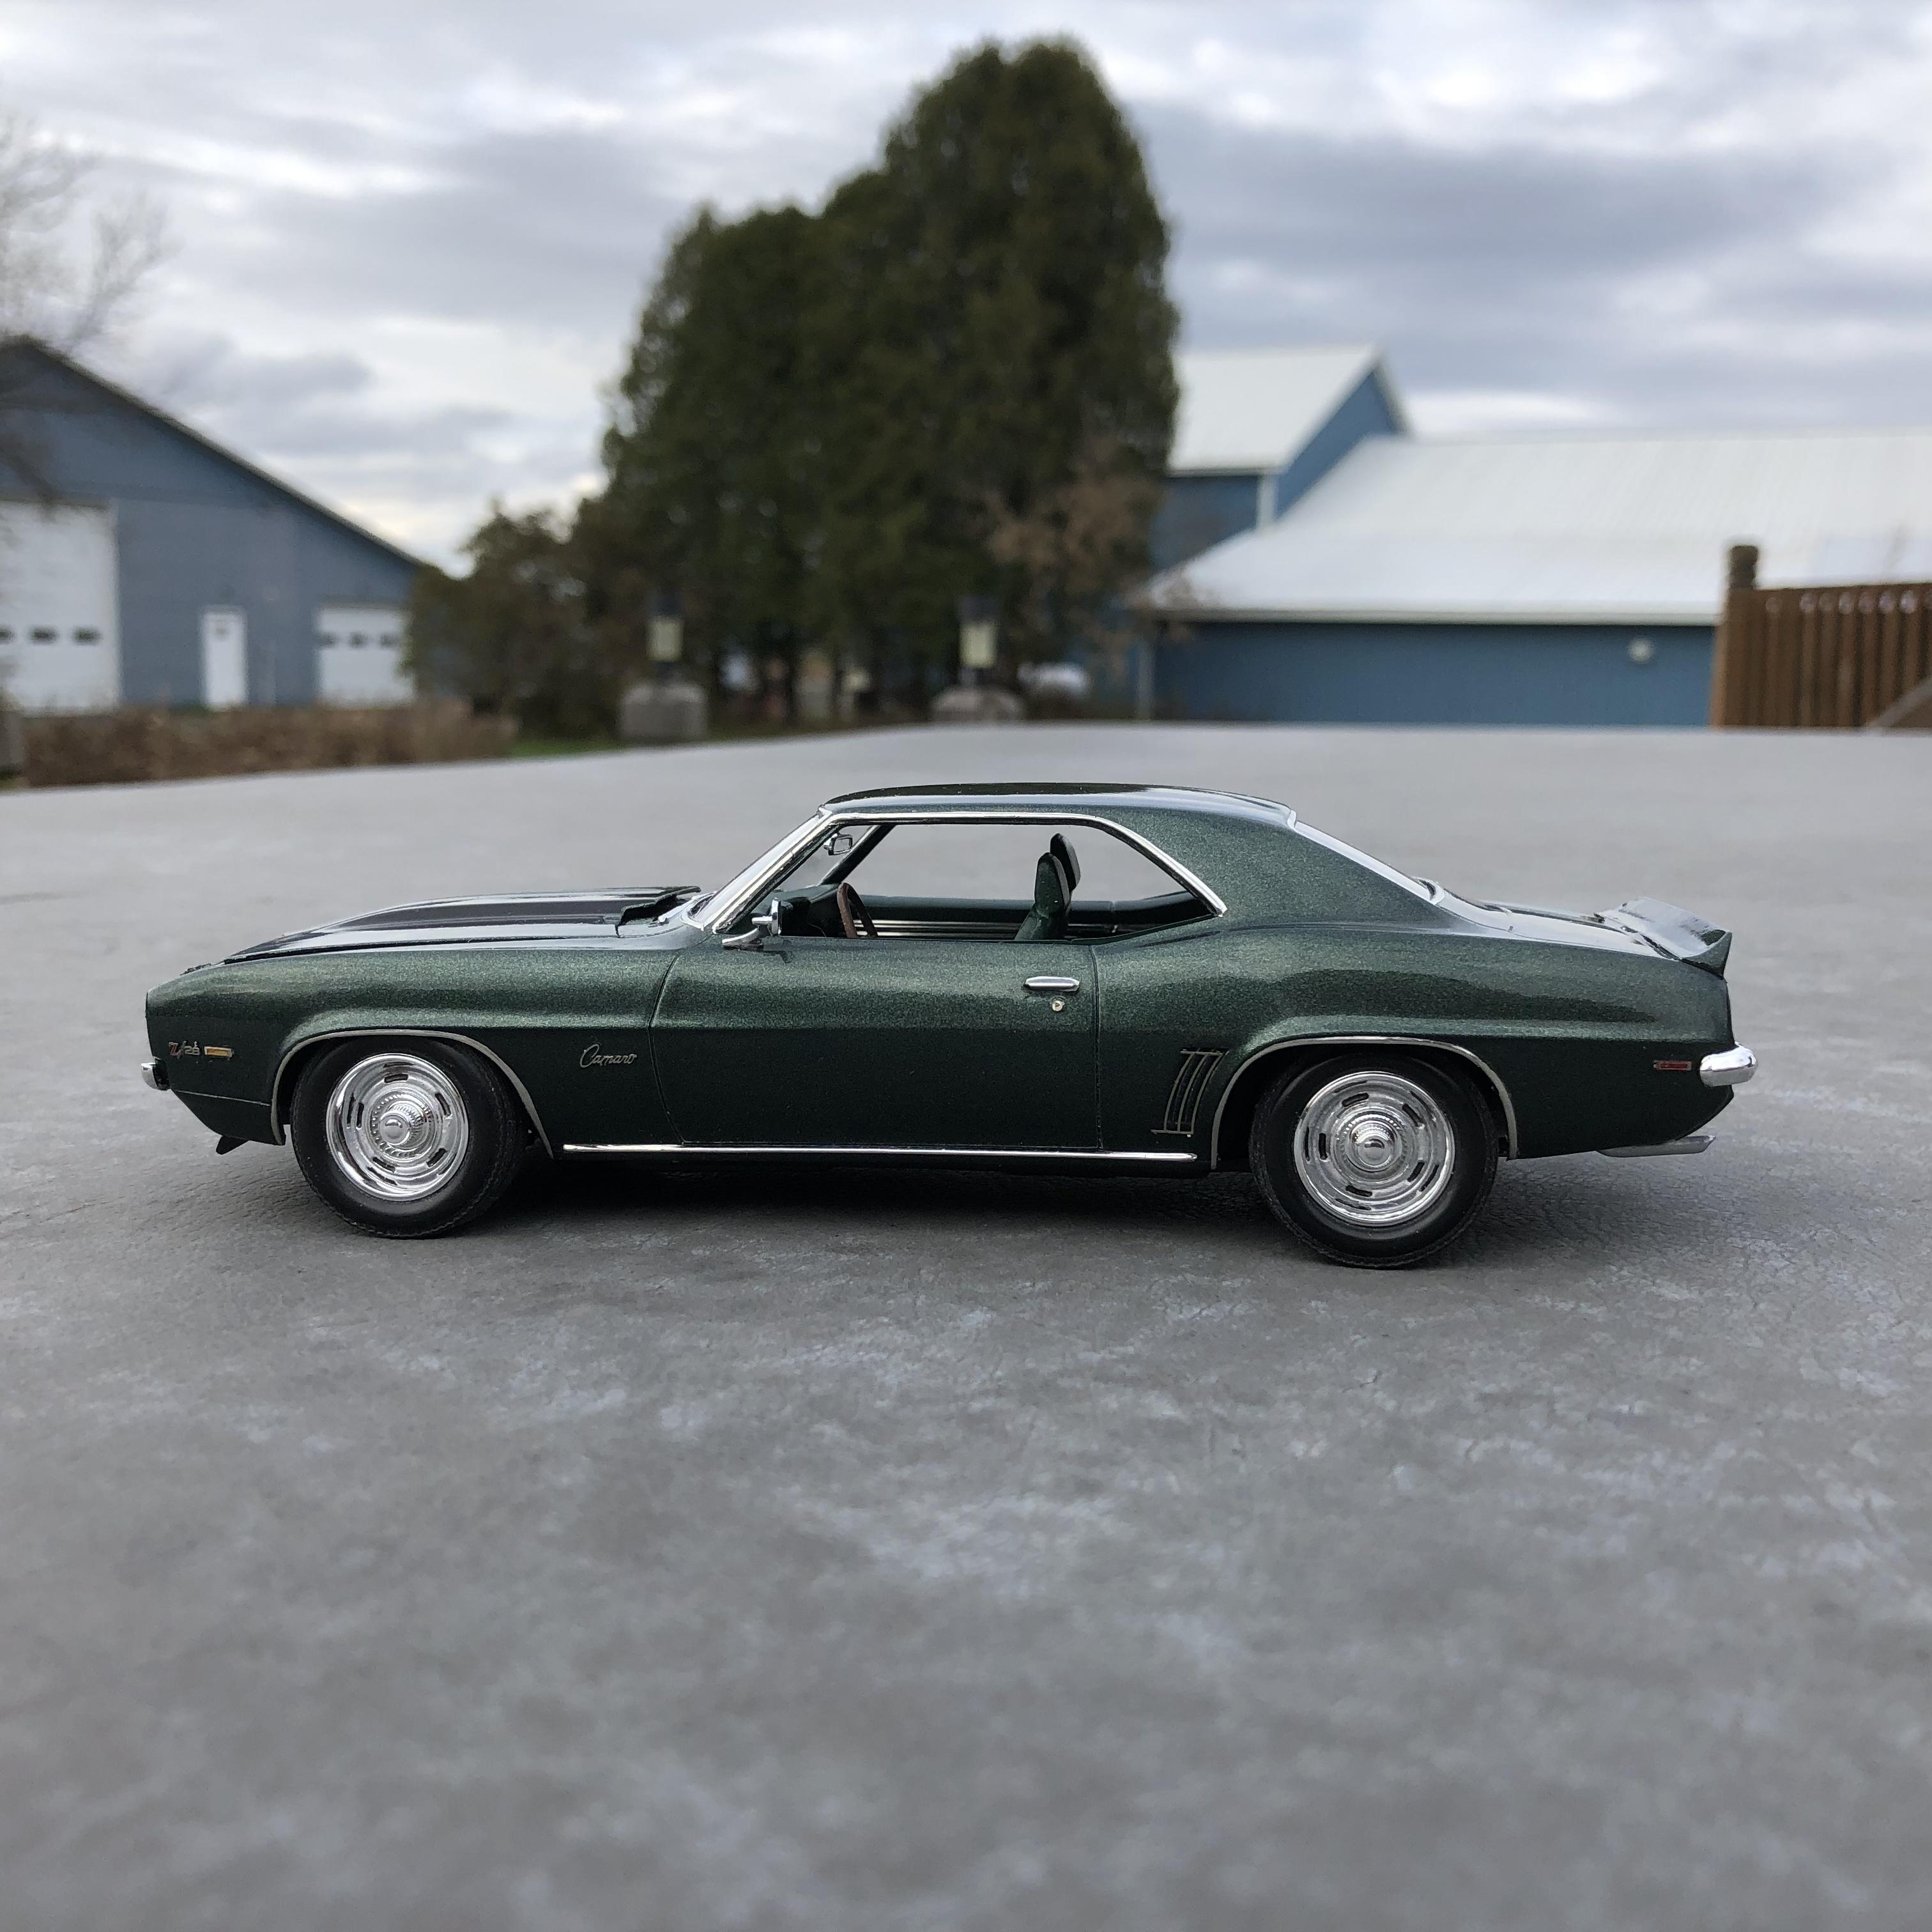
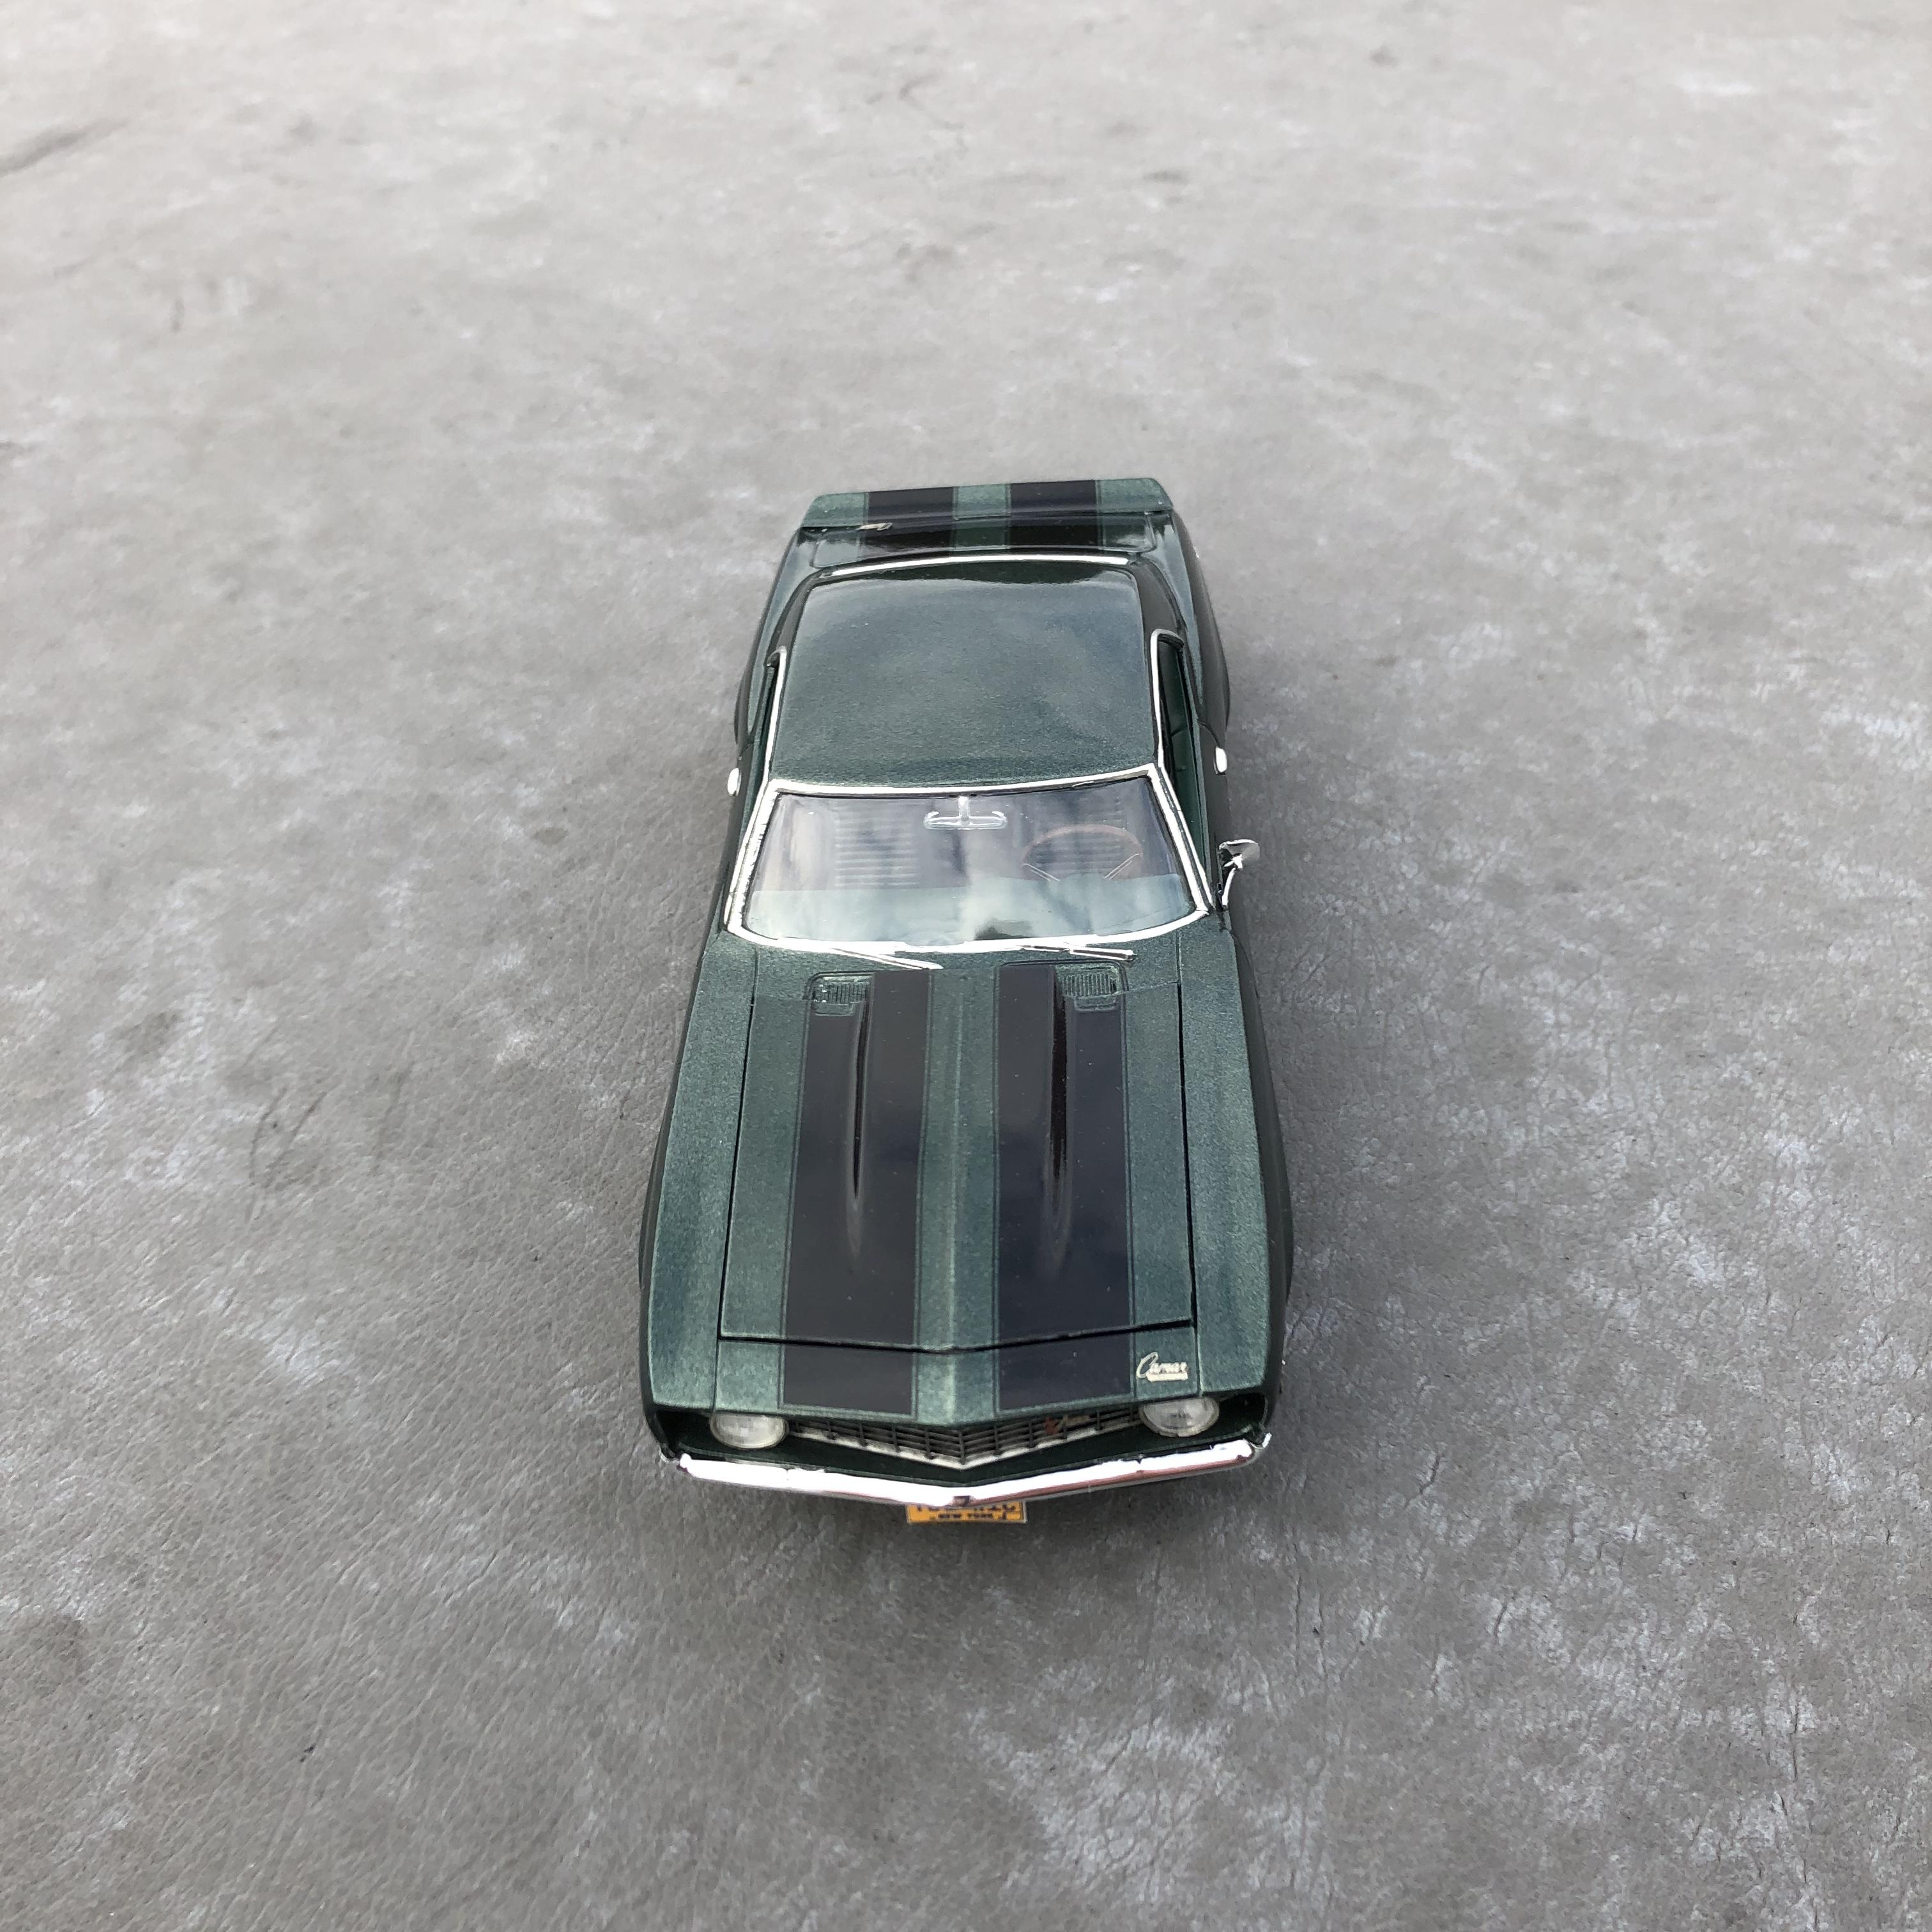
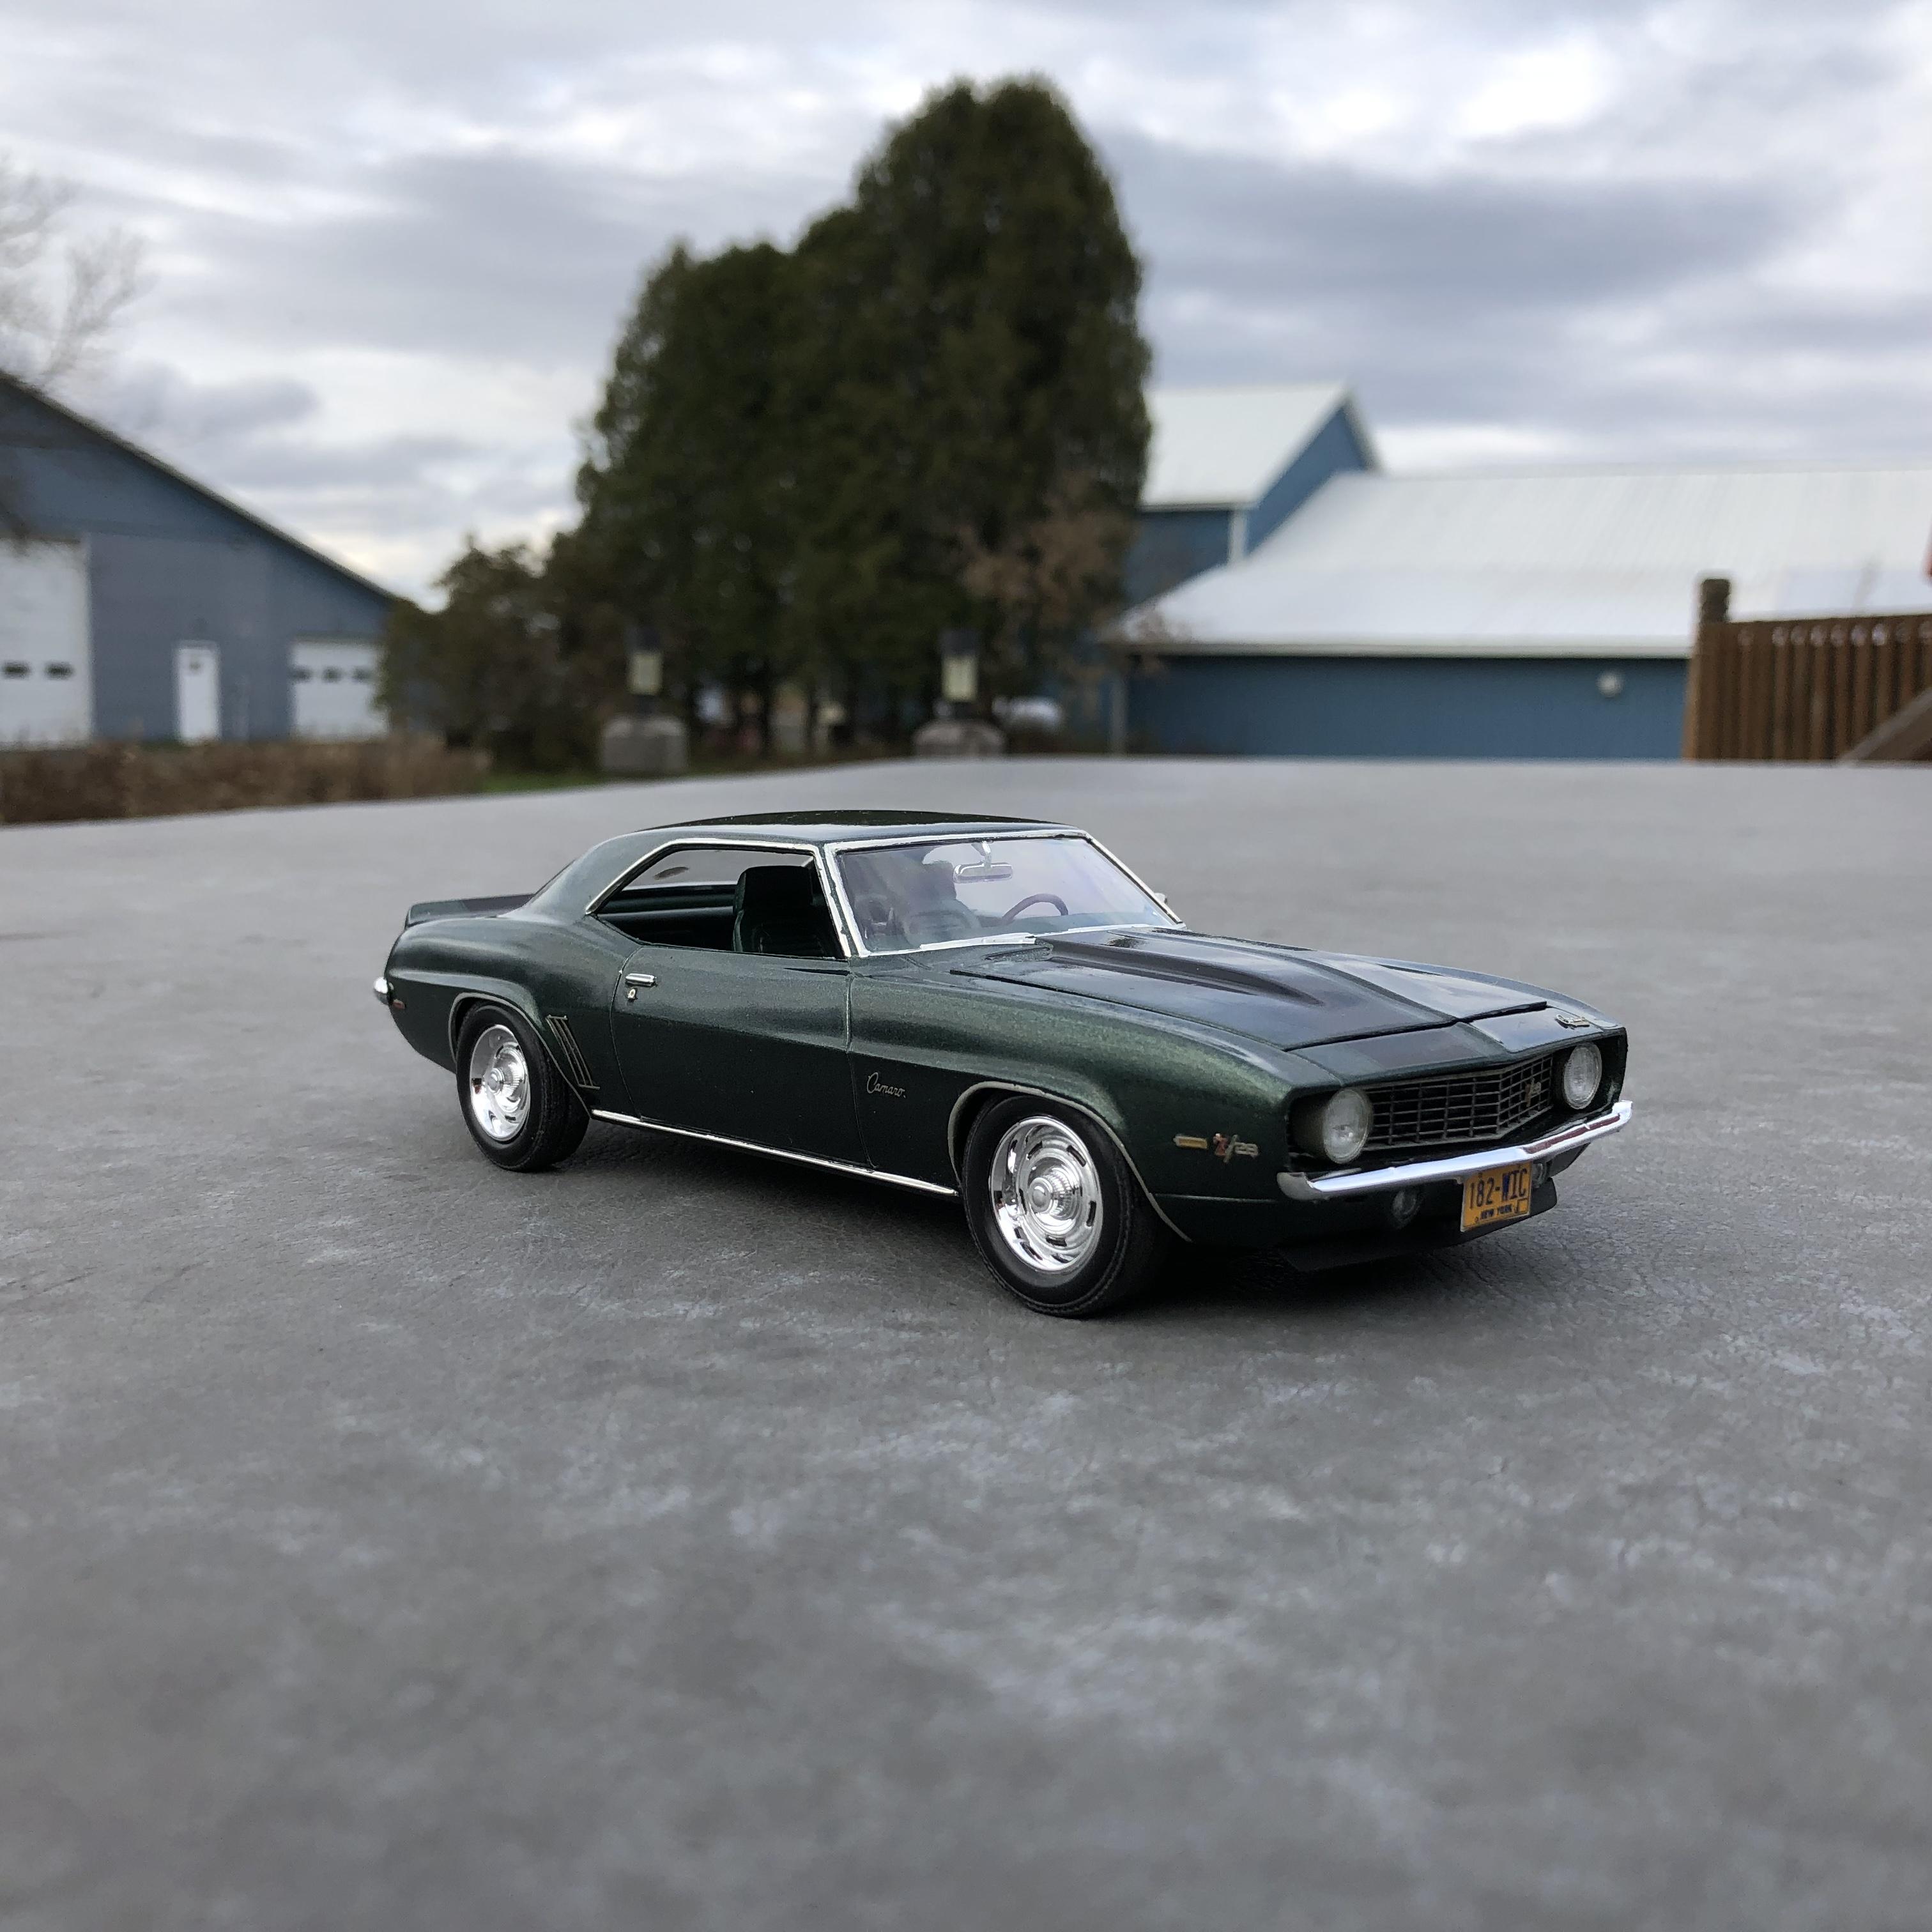
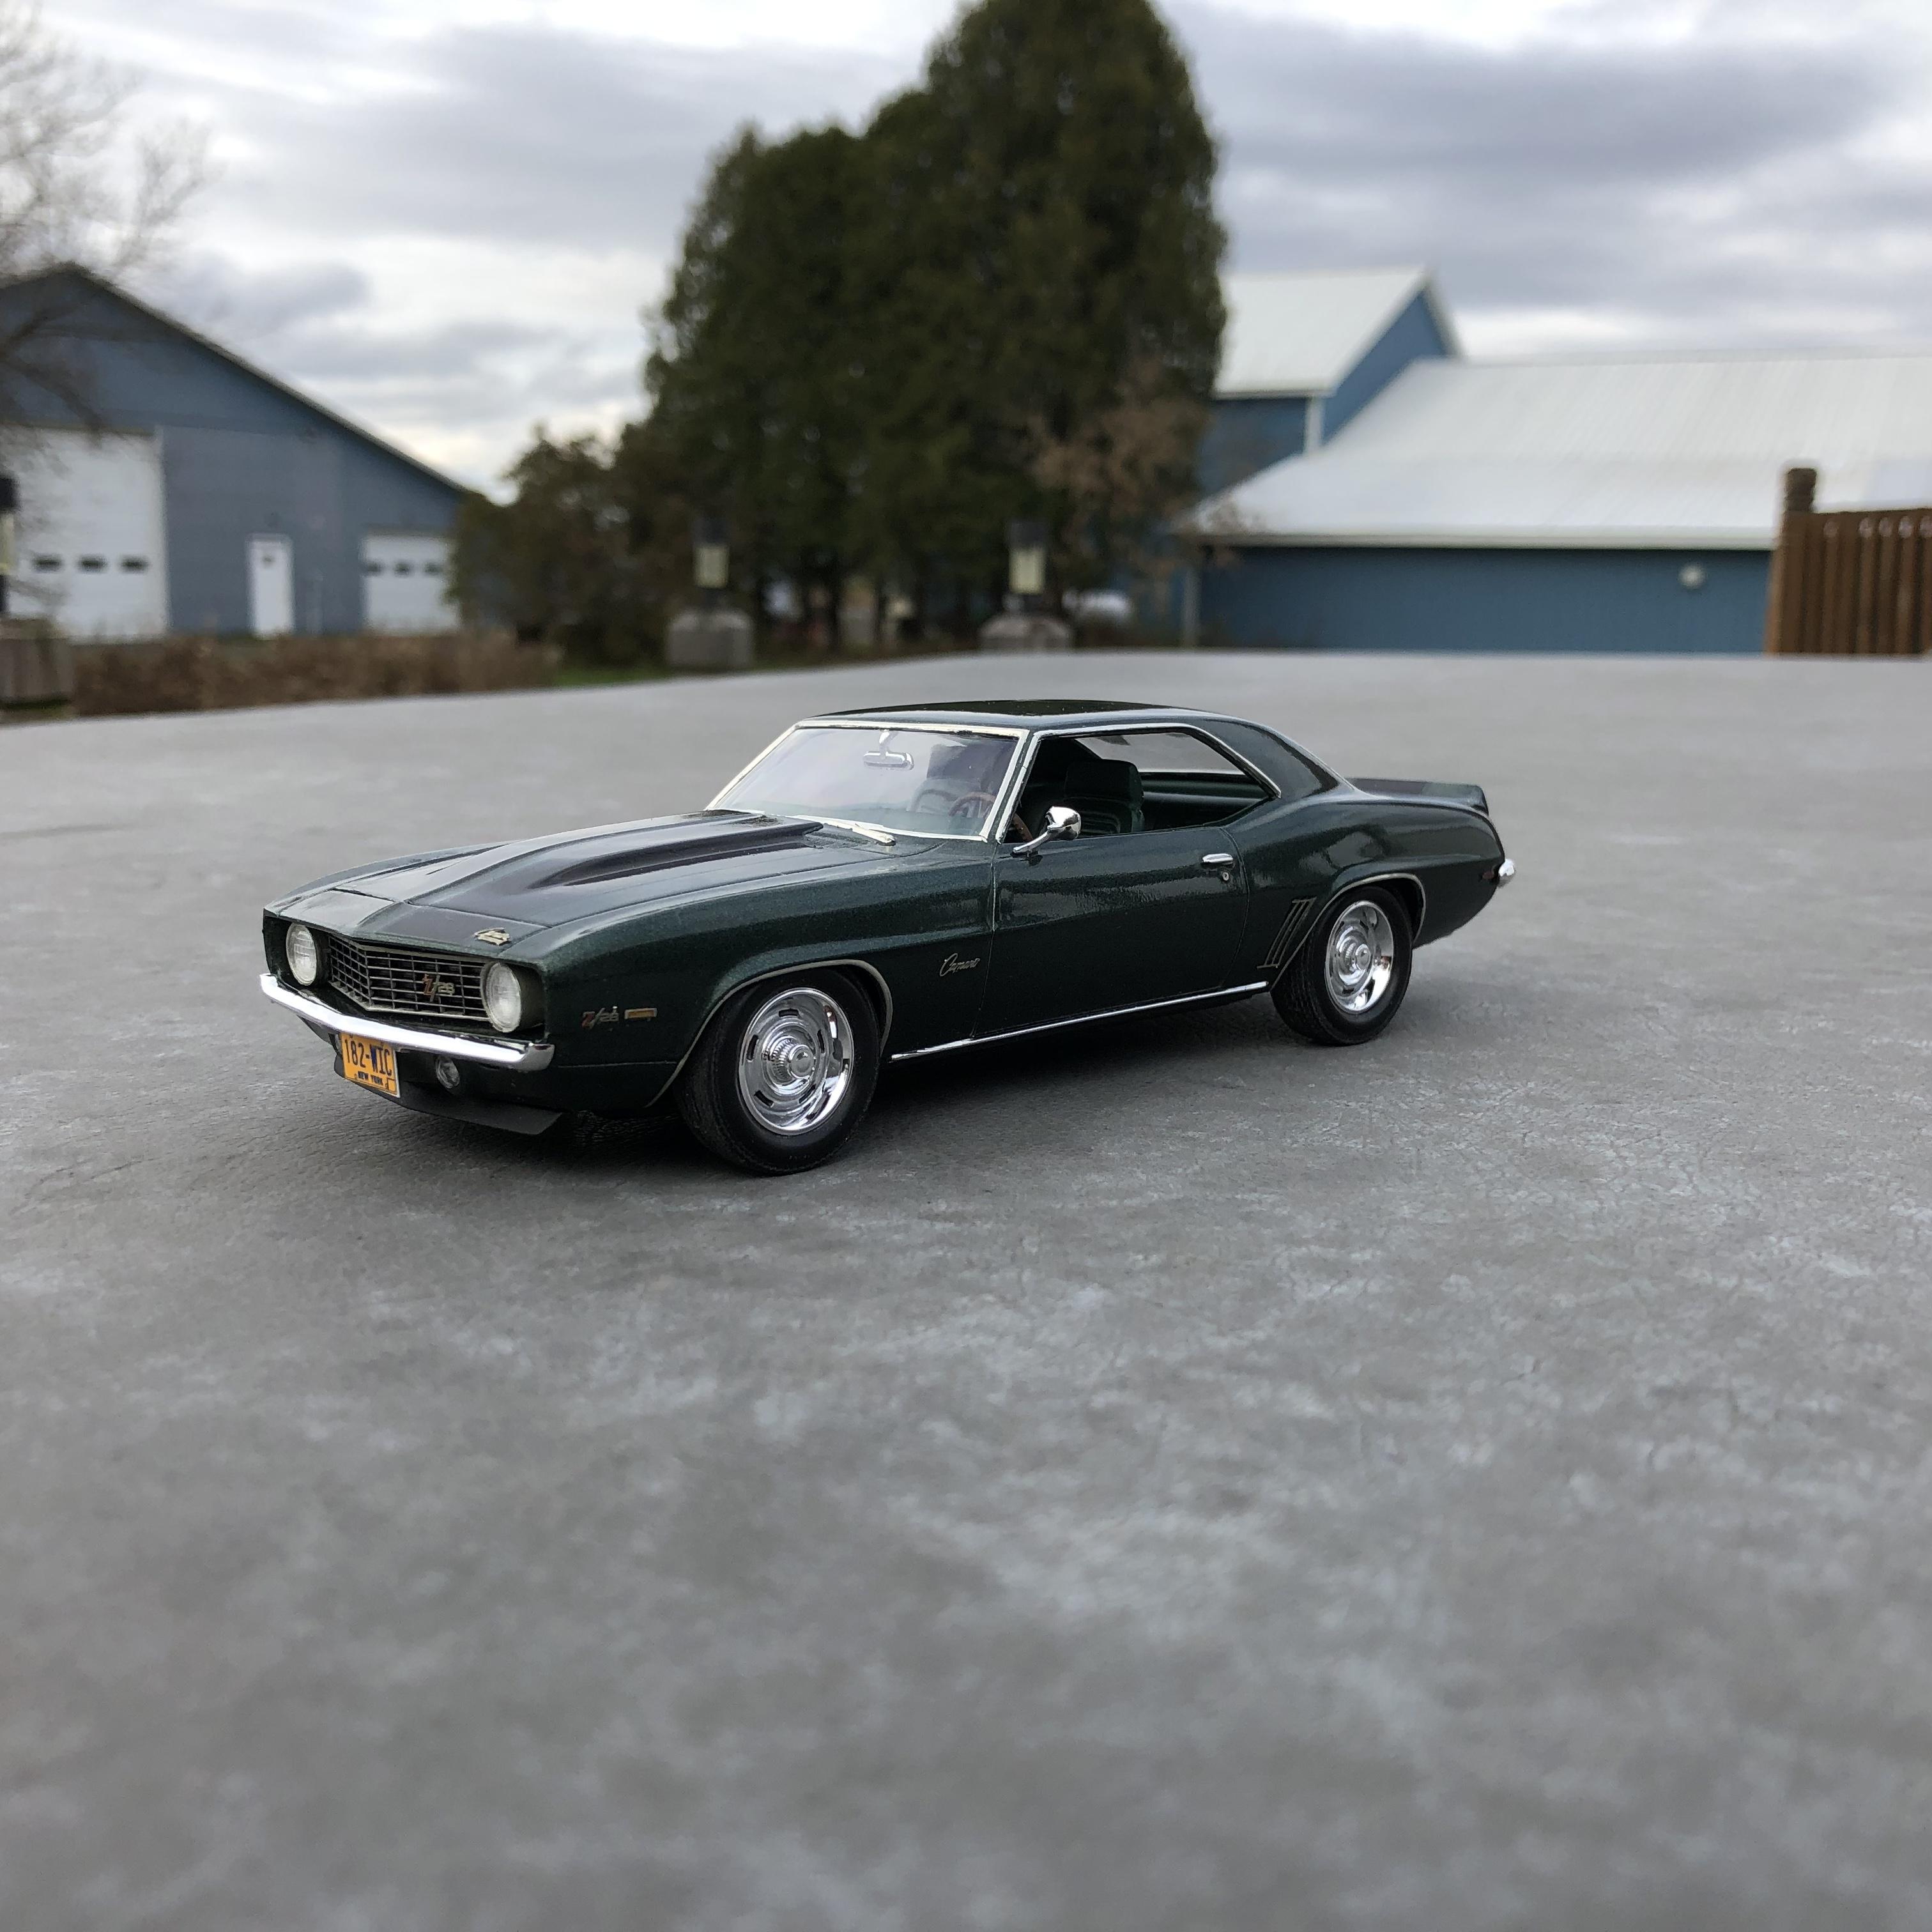
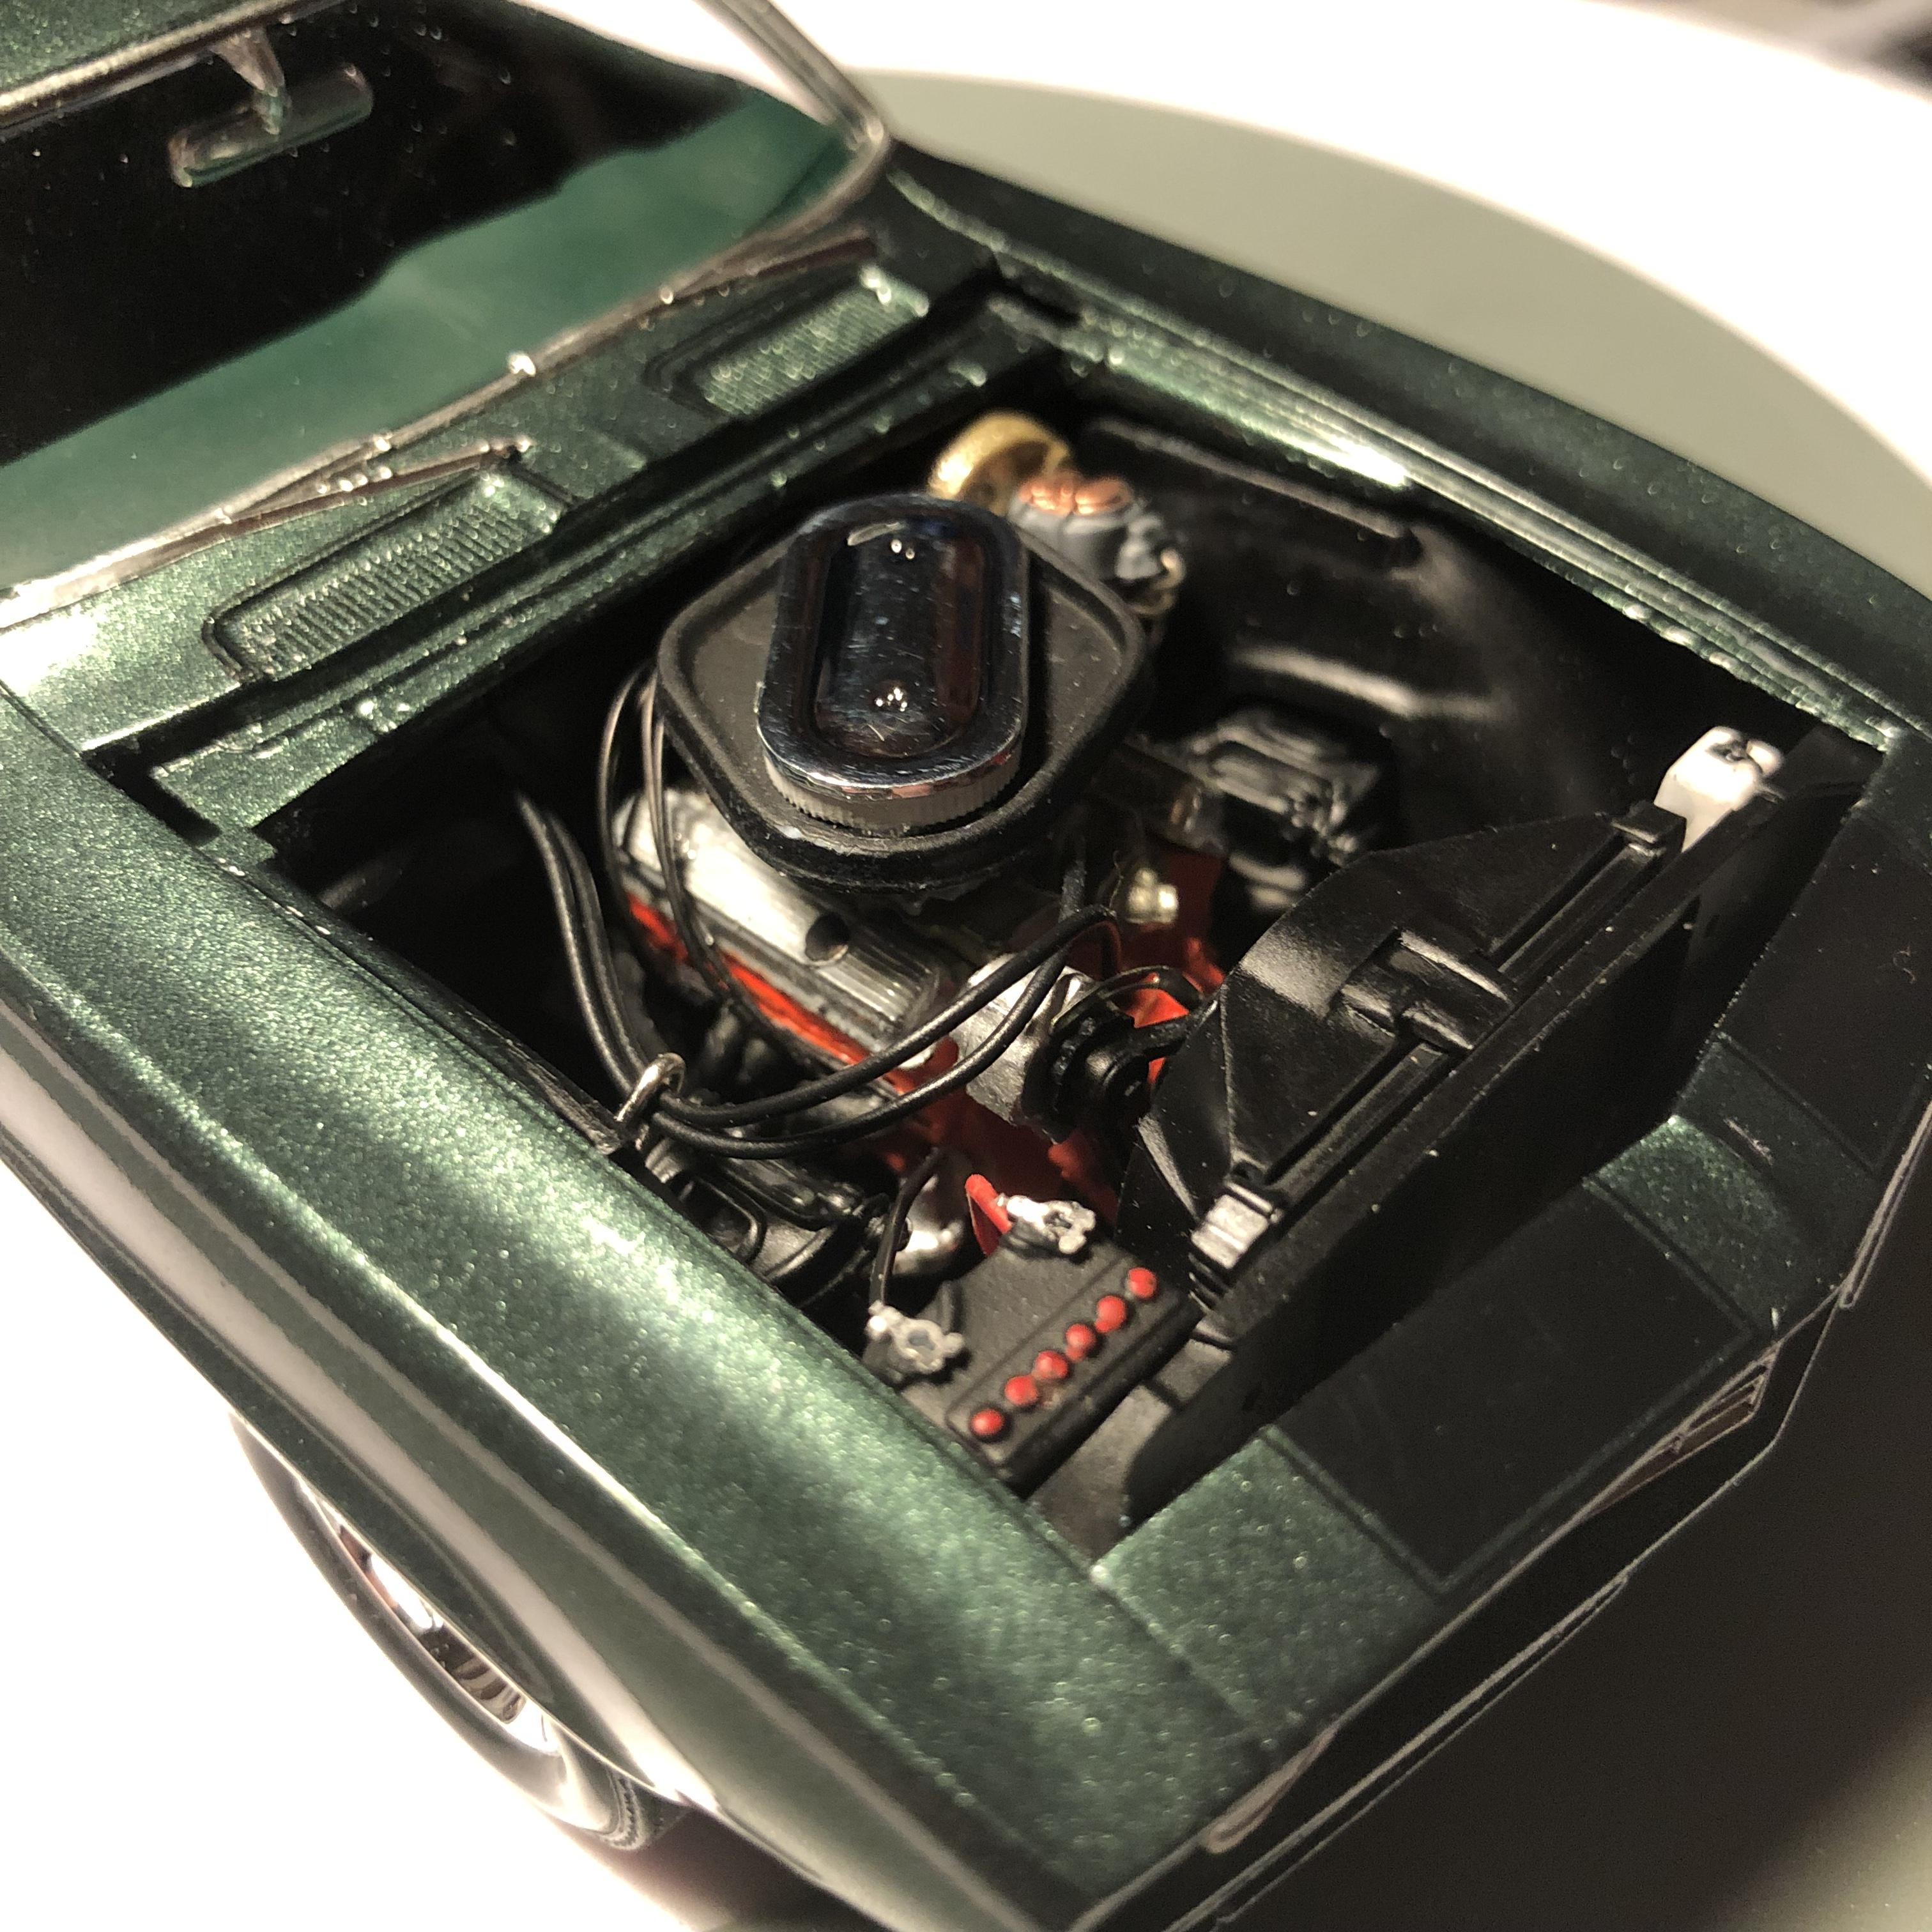
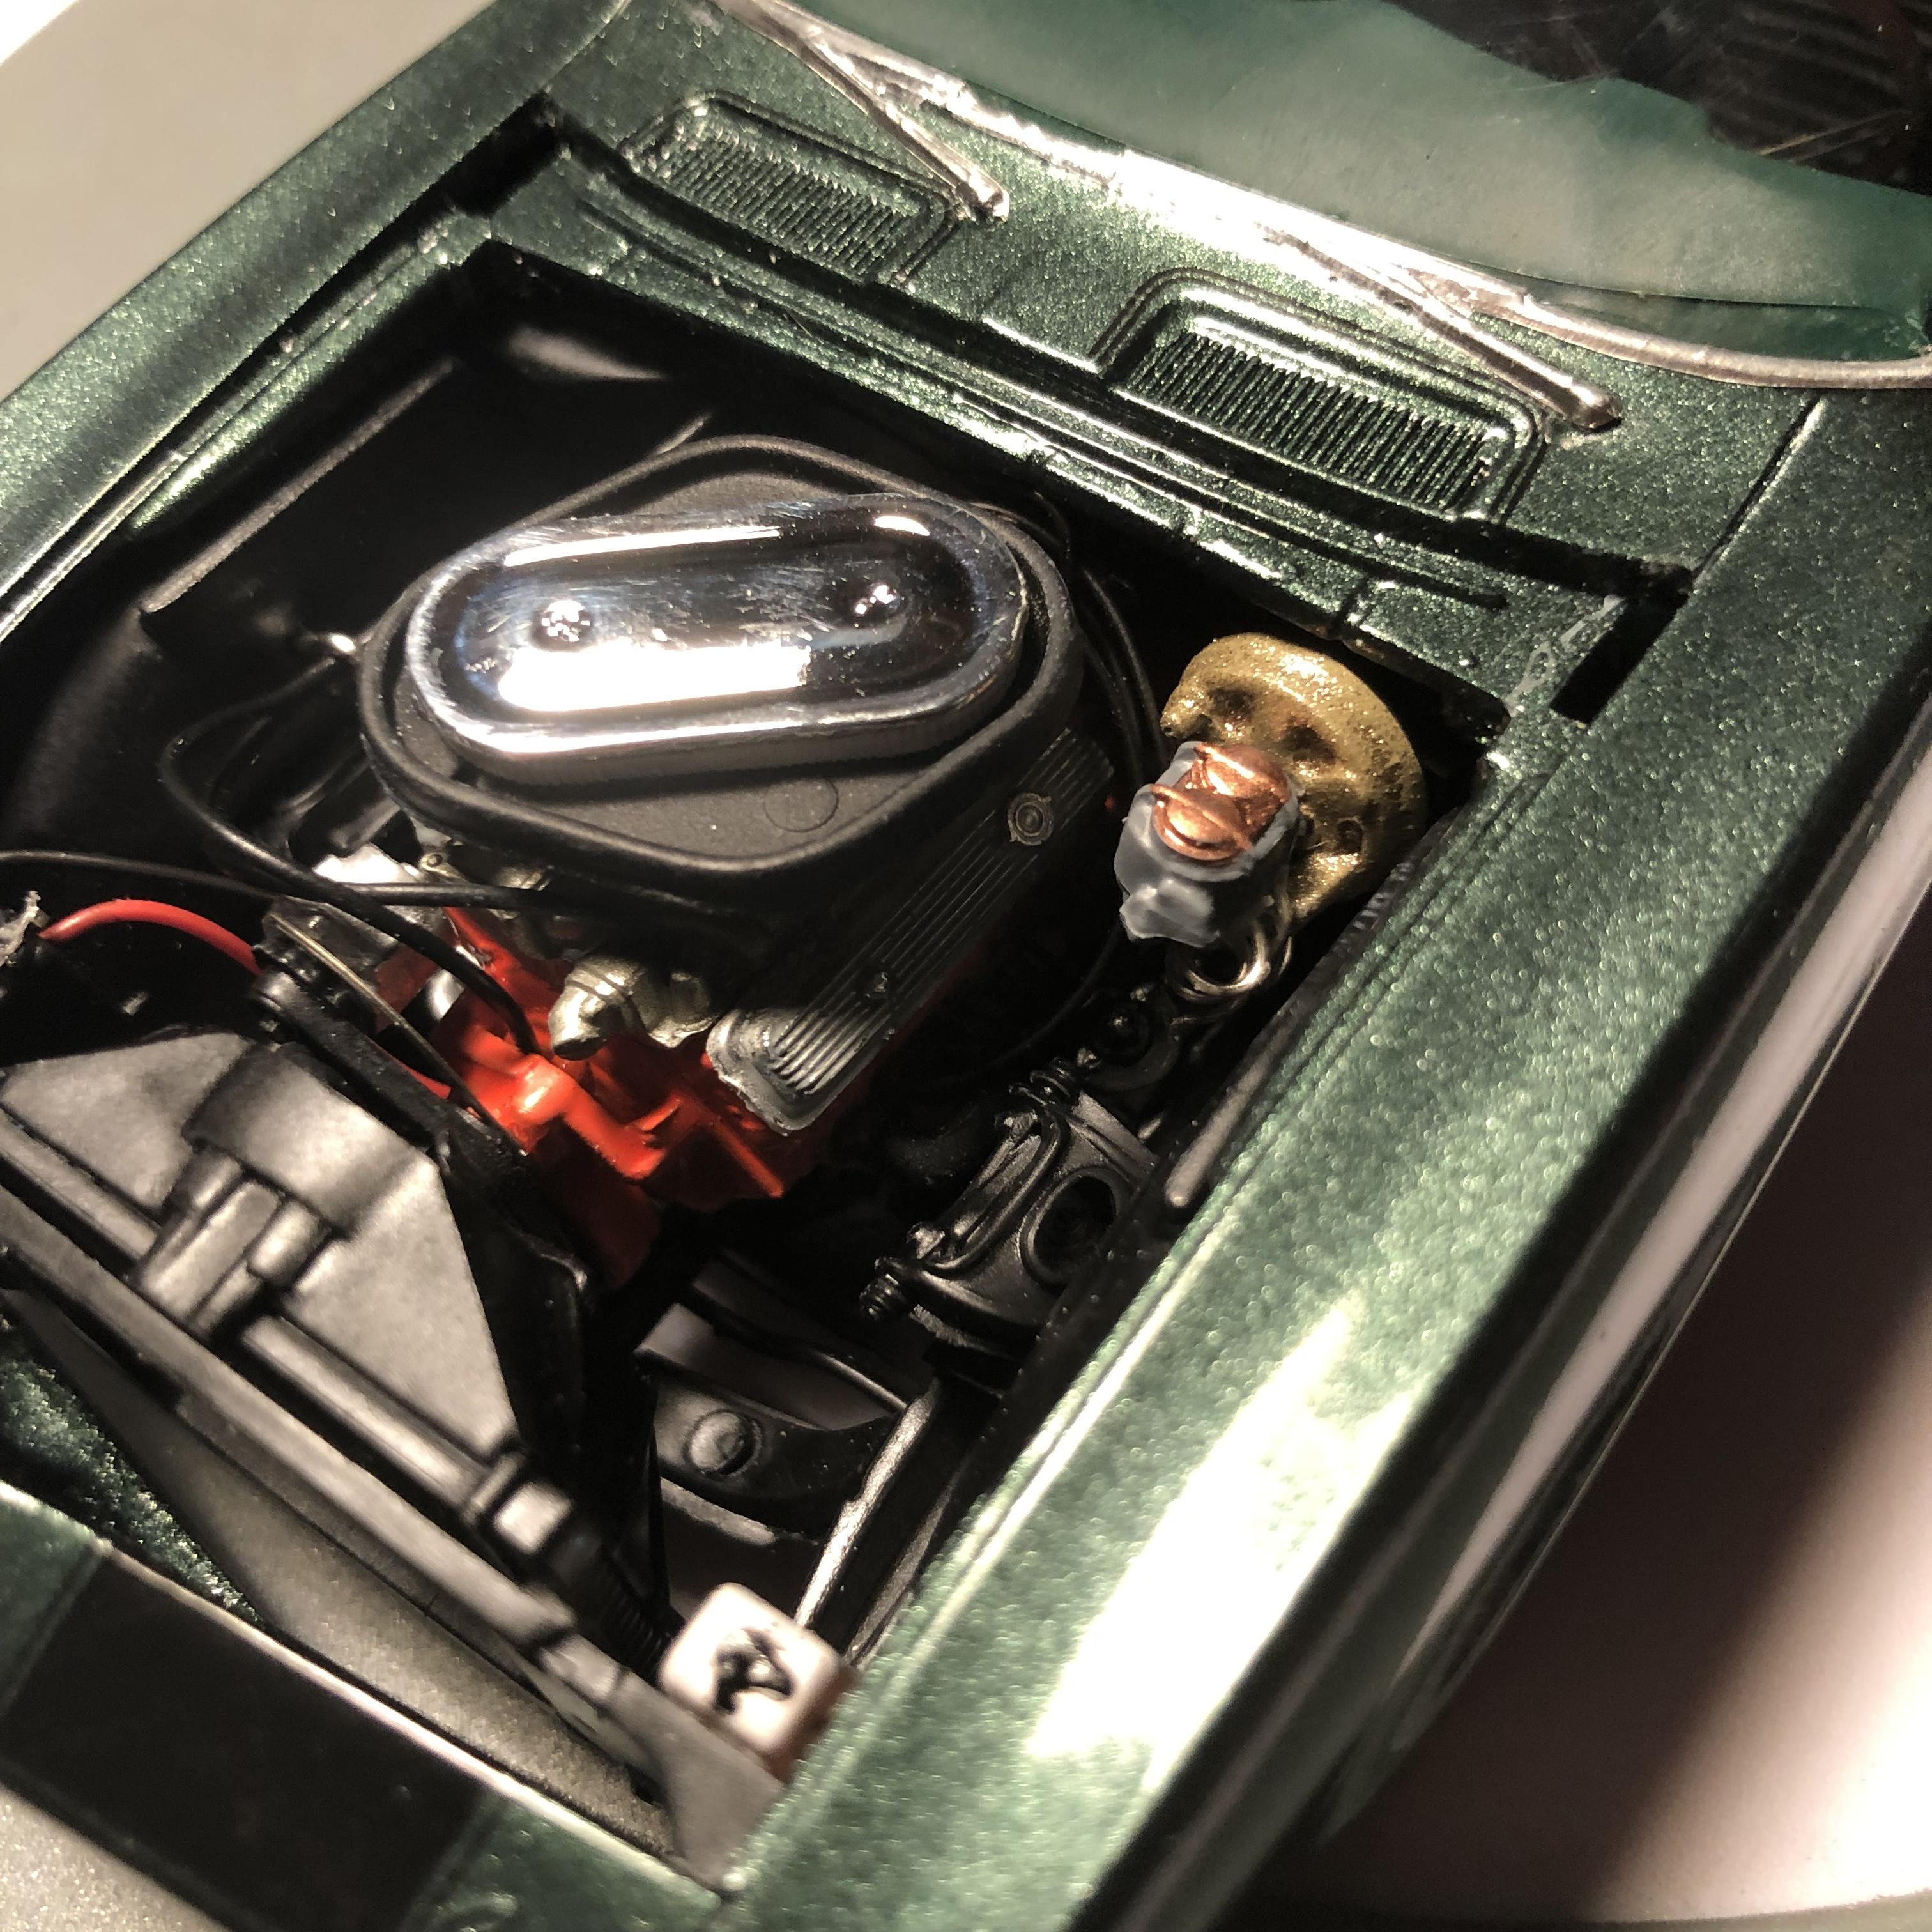
Thought I’d posted this, but guess I didn’t, lol. Finished in fathom green with a dark green interior. Used model car garage PE set and a MAD pre wired distributor. Another well engineered kit that goes together pretty nice. Thanks for looking.


.thumb.jpg.e0420fe52e683c60d19e843462316523.jpg)