Perspect Scale Modelworks
-
Posts
1,529 -
Joined
-
Last visited
Content Type
Profiles
Forums
Events
Gallery
Everything posted by Perspect Scale Modelworks
-

AMT vs Revell 69 Camaro
Perspect Scale Modelworks replied to Brutalform's topic in Model Building Questions and Answers
I see Corvair too. -
Rock it till the wheels fall off. Then put them back on and keep going.
-
Looks great
-
Individual Model Car - Ford Mondeo MK5
Perspect Scale Modelworks replied to PezzoPrint's topic in Model Cars
I find with 3d printing sand paper can be your friend. -
Nice trio
-
1950 Oldsmobile "Plum Daisy" (WIP pics on page 2)
Perspect Scale Modelworks replied to Jurva's topic in Model Cars
Really nice. Love that grill! -
That's sad but a very well done diorama especially for your first go at it. Nice job. Imagine what it would cost to restore it ?
-
Not a fan of the mustang SUV but you did a good job.
-
Really mean looking. Nice
-
Very cool. Can these be built stock?
-
You did an awesome job on this. The interior details are outstanding. I'm just glad this concept didn't make it to production ?
-
These are the Fireballs. Very detailed. They include lug nuts, valve stems, center cap decals, and masks for painting. The beauty ring is not as deep as the Scale Equipment's. I can't remember what I used for chrome on the rings

-
That's a really cool Vette. Kindig It designs are usually pretty sweet. It'd be nice to see Revell or Round2 to do a partnership with him.
-
Very interesting. Can we see pictures of the results?
-
Go with the Fireball's and use Alclad, Molotow, or BMF.
-
1949 Cadillac Series 62 Club Coupe "sedanette"
Perspect Scale Modelworks replied to Jeffcad's topic in Model Cars
Beautiful. -
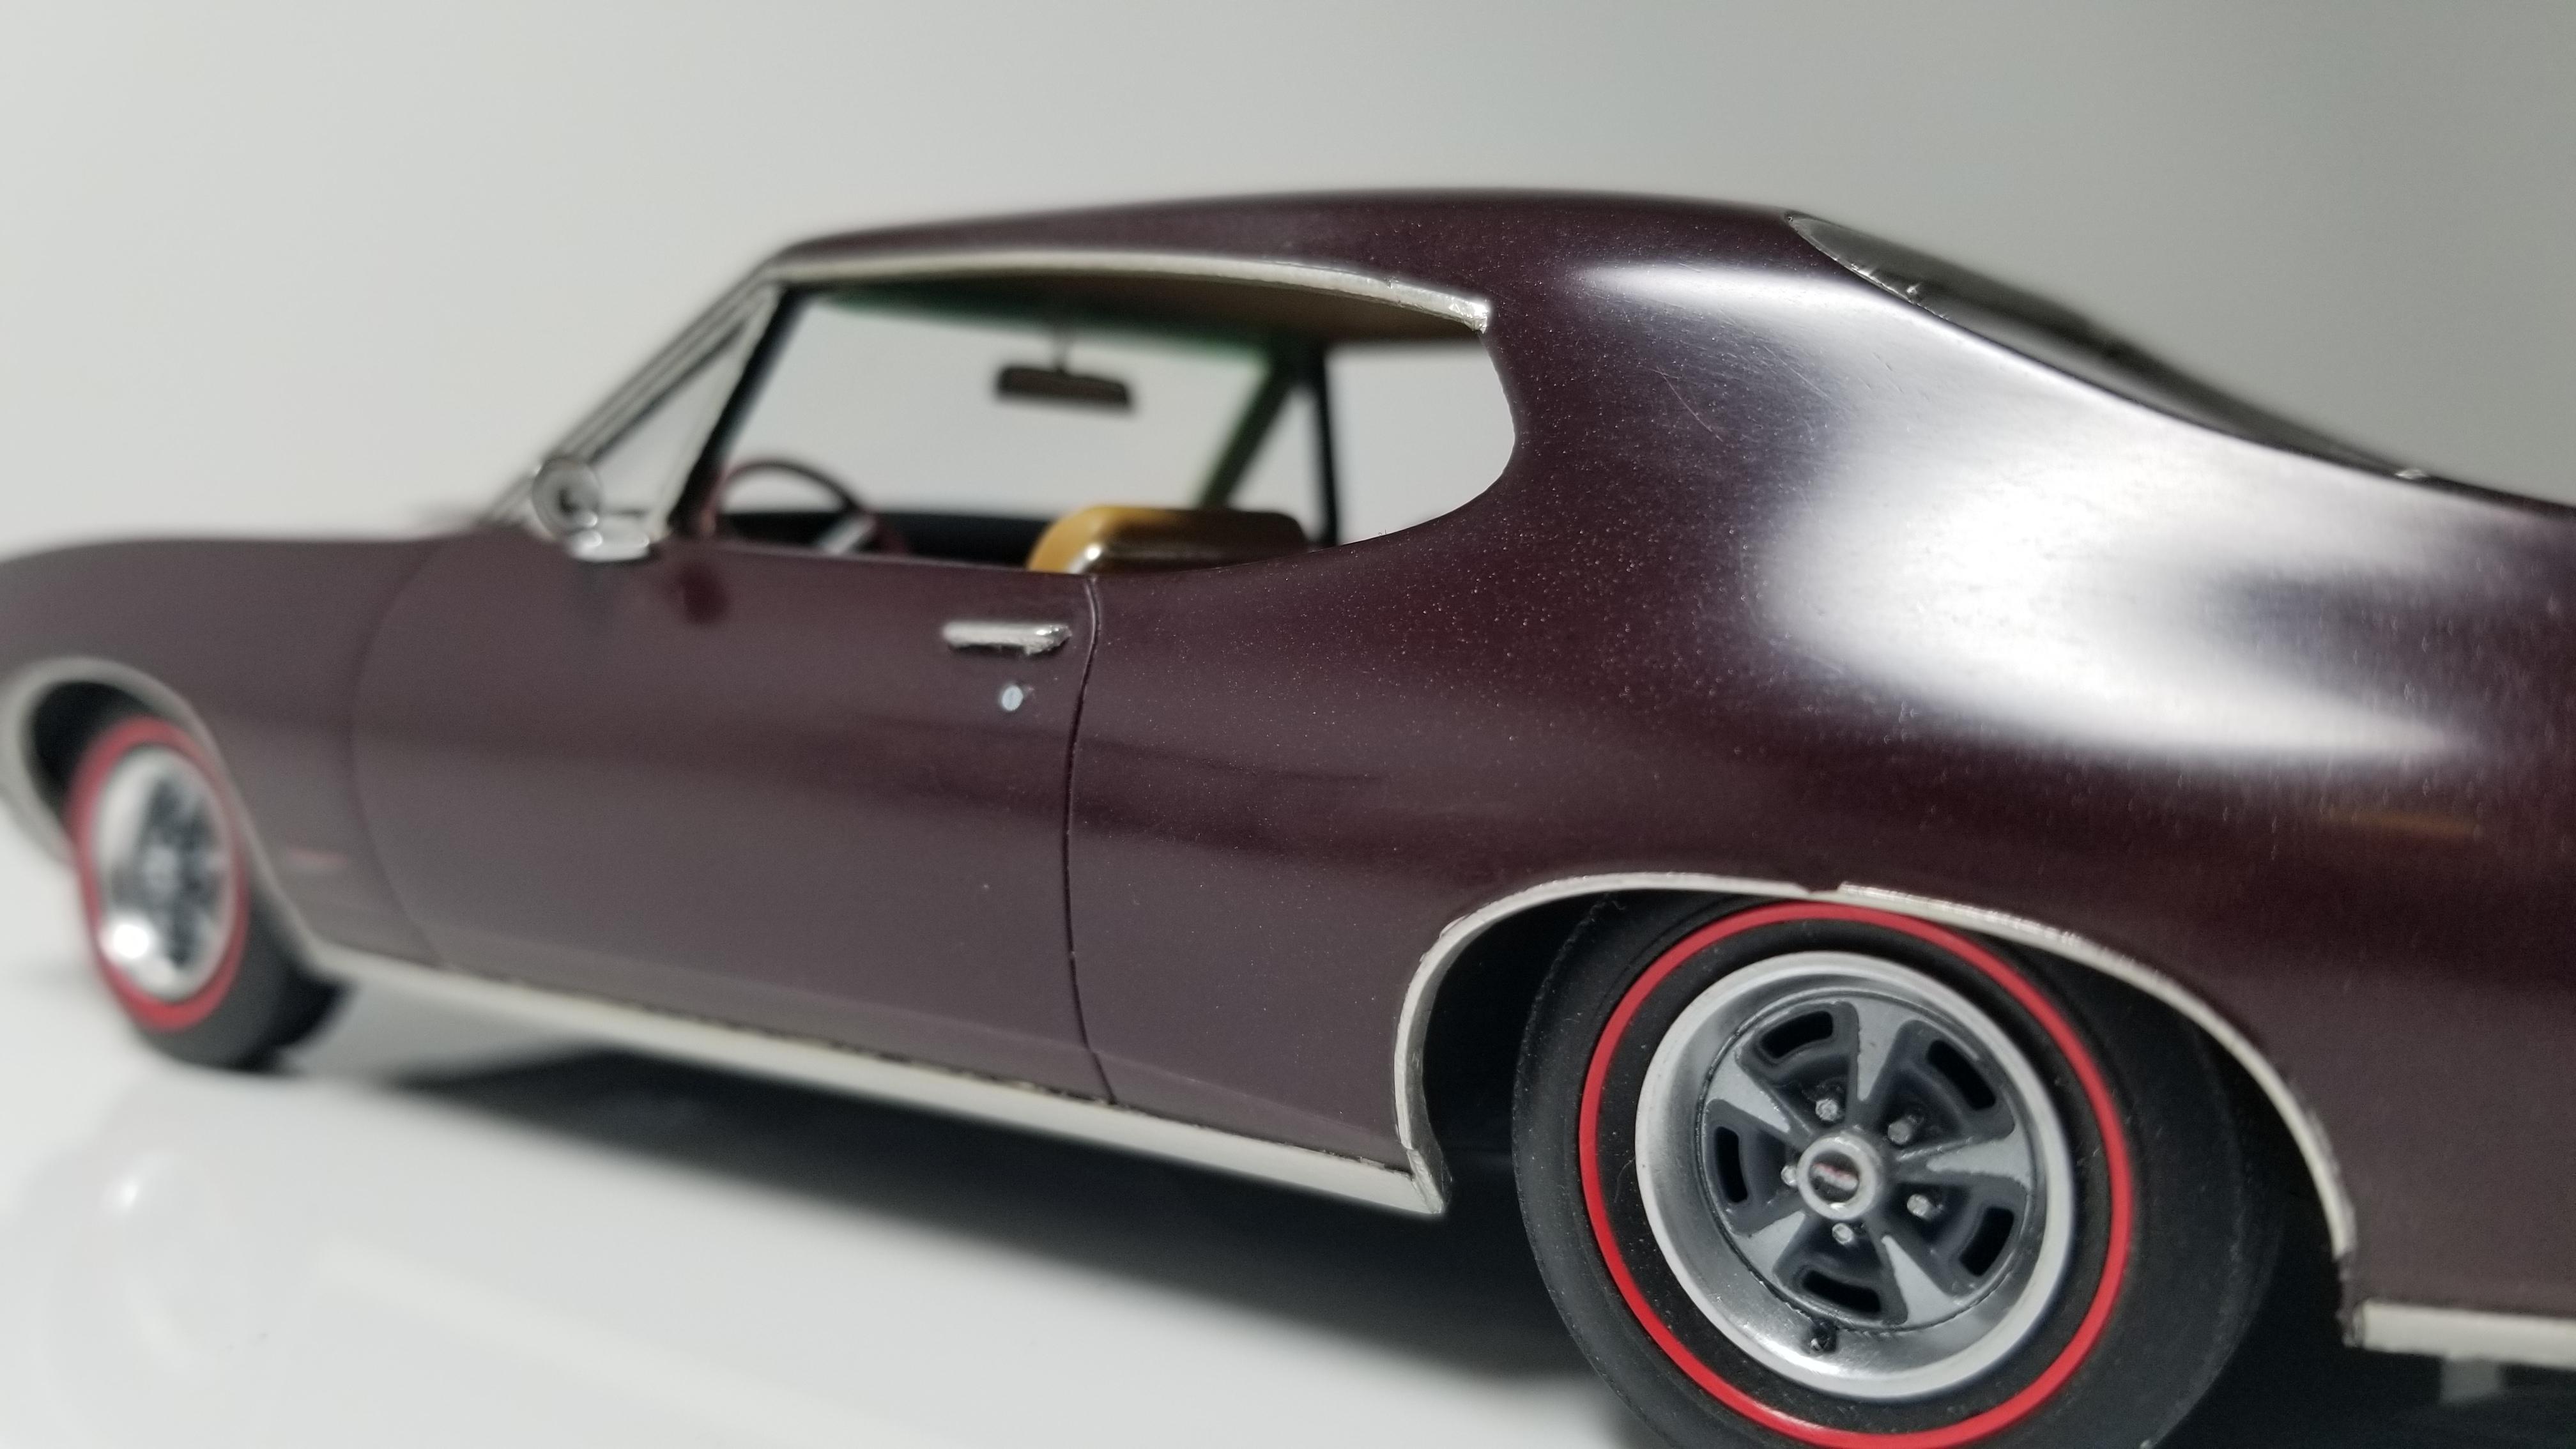
'73 Oldsmobile Cutlass Supreme
Perspect Scale Modelworks replied to Perspect Scale Modelworks's topic in Model Cars
Go for it. 3d printing is a game changer. One of the benefits is if you screw up, break or loose a part there's no need to buy another kit or search for a replacement, just print another one. Also, as long as I have the file I can build the kit as many times as I like and have a stash of unbuilt kits without out having hundreds of kit boxes. There is a learning curve but once you get the hang of it it's pretty cool. 3d printing still seams to be in it's infancy and can only get better and easier to use. I see the day when most households will have a 3d printer just like we have paper printers now. Thanks! -
'73 Oldsmobile Cutlass Supreme
Perspect Scale Modelworks replied to Perspect Scale Modelworks's topic in Model Cars
I purchased the file on Cults3d and printed it on my Anycubic. Thanks! -
Nice. Well worth the effort.
-
Tamiya VW Karmann Ghia 'Outlaw'
Perspect Scale Modelworks replied to StokeModels's topic in Model Cars
Fantastic all around -
Speaking of Bare Metal Foil
Perspect Scale Modelworks replied to slownlow's topic in Model Building Questions and Answers
And shipping is pretty quick. -
'73 Oldsmobile Cutlass Supreme
Perspect Scale Modelworks replied to Perspect Scale Modelworks's topic in Model Cars
I tried that at first but I didn't like how it looked. A bit different than my previous tests. I went with BMF instead. Thanks -
'73 Oldsmobile Cutlass Supreme
Perspect Scale Modelworks replied to Perspect Scale Modelworks's topic in Model Cars
Thanks Garry. I agree. There are so many options for full kits, bodies, and parts it's amazing. Of course some designers are better than others. -
'73 Oldsmobile Cutlass Supreme
Perspect Scale Modelworks replied to Perspect Scale Modelworks's topic in Model Cars
Thanks Keith. Yes, the file includes the interior, a basic chassis, engine bay, fuel tank, suspension, wheels, and tires. There is no engine or drive train but plenty of room to add your own with the option of printing a separate hood. Thanks again