NOBLNG
-
Posts
10,236 -
Joined
-
Last visited
Content Type
Profiles
Forums
Events
Gallery
Everything posted by NOBLNG
-
It doesn’t look like you did. I think that would have destroyed the upper hinge? All your pillars seem to line up nicely! Nice sectioning job too! Any finished pics of it Mike?
-
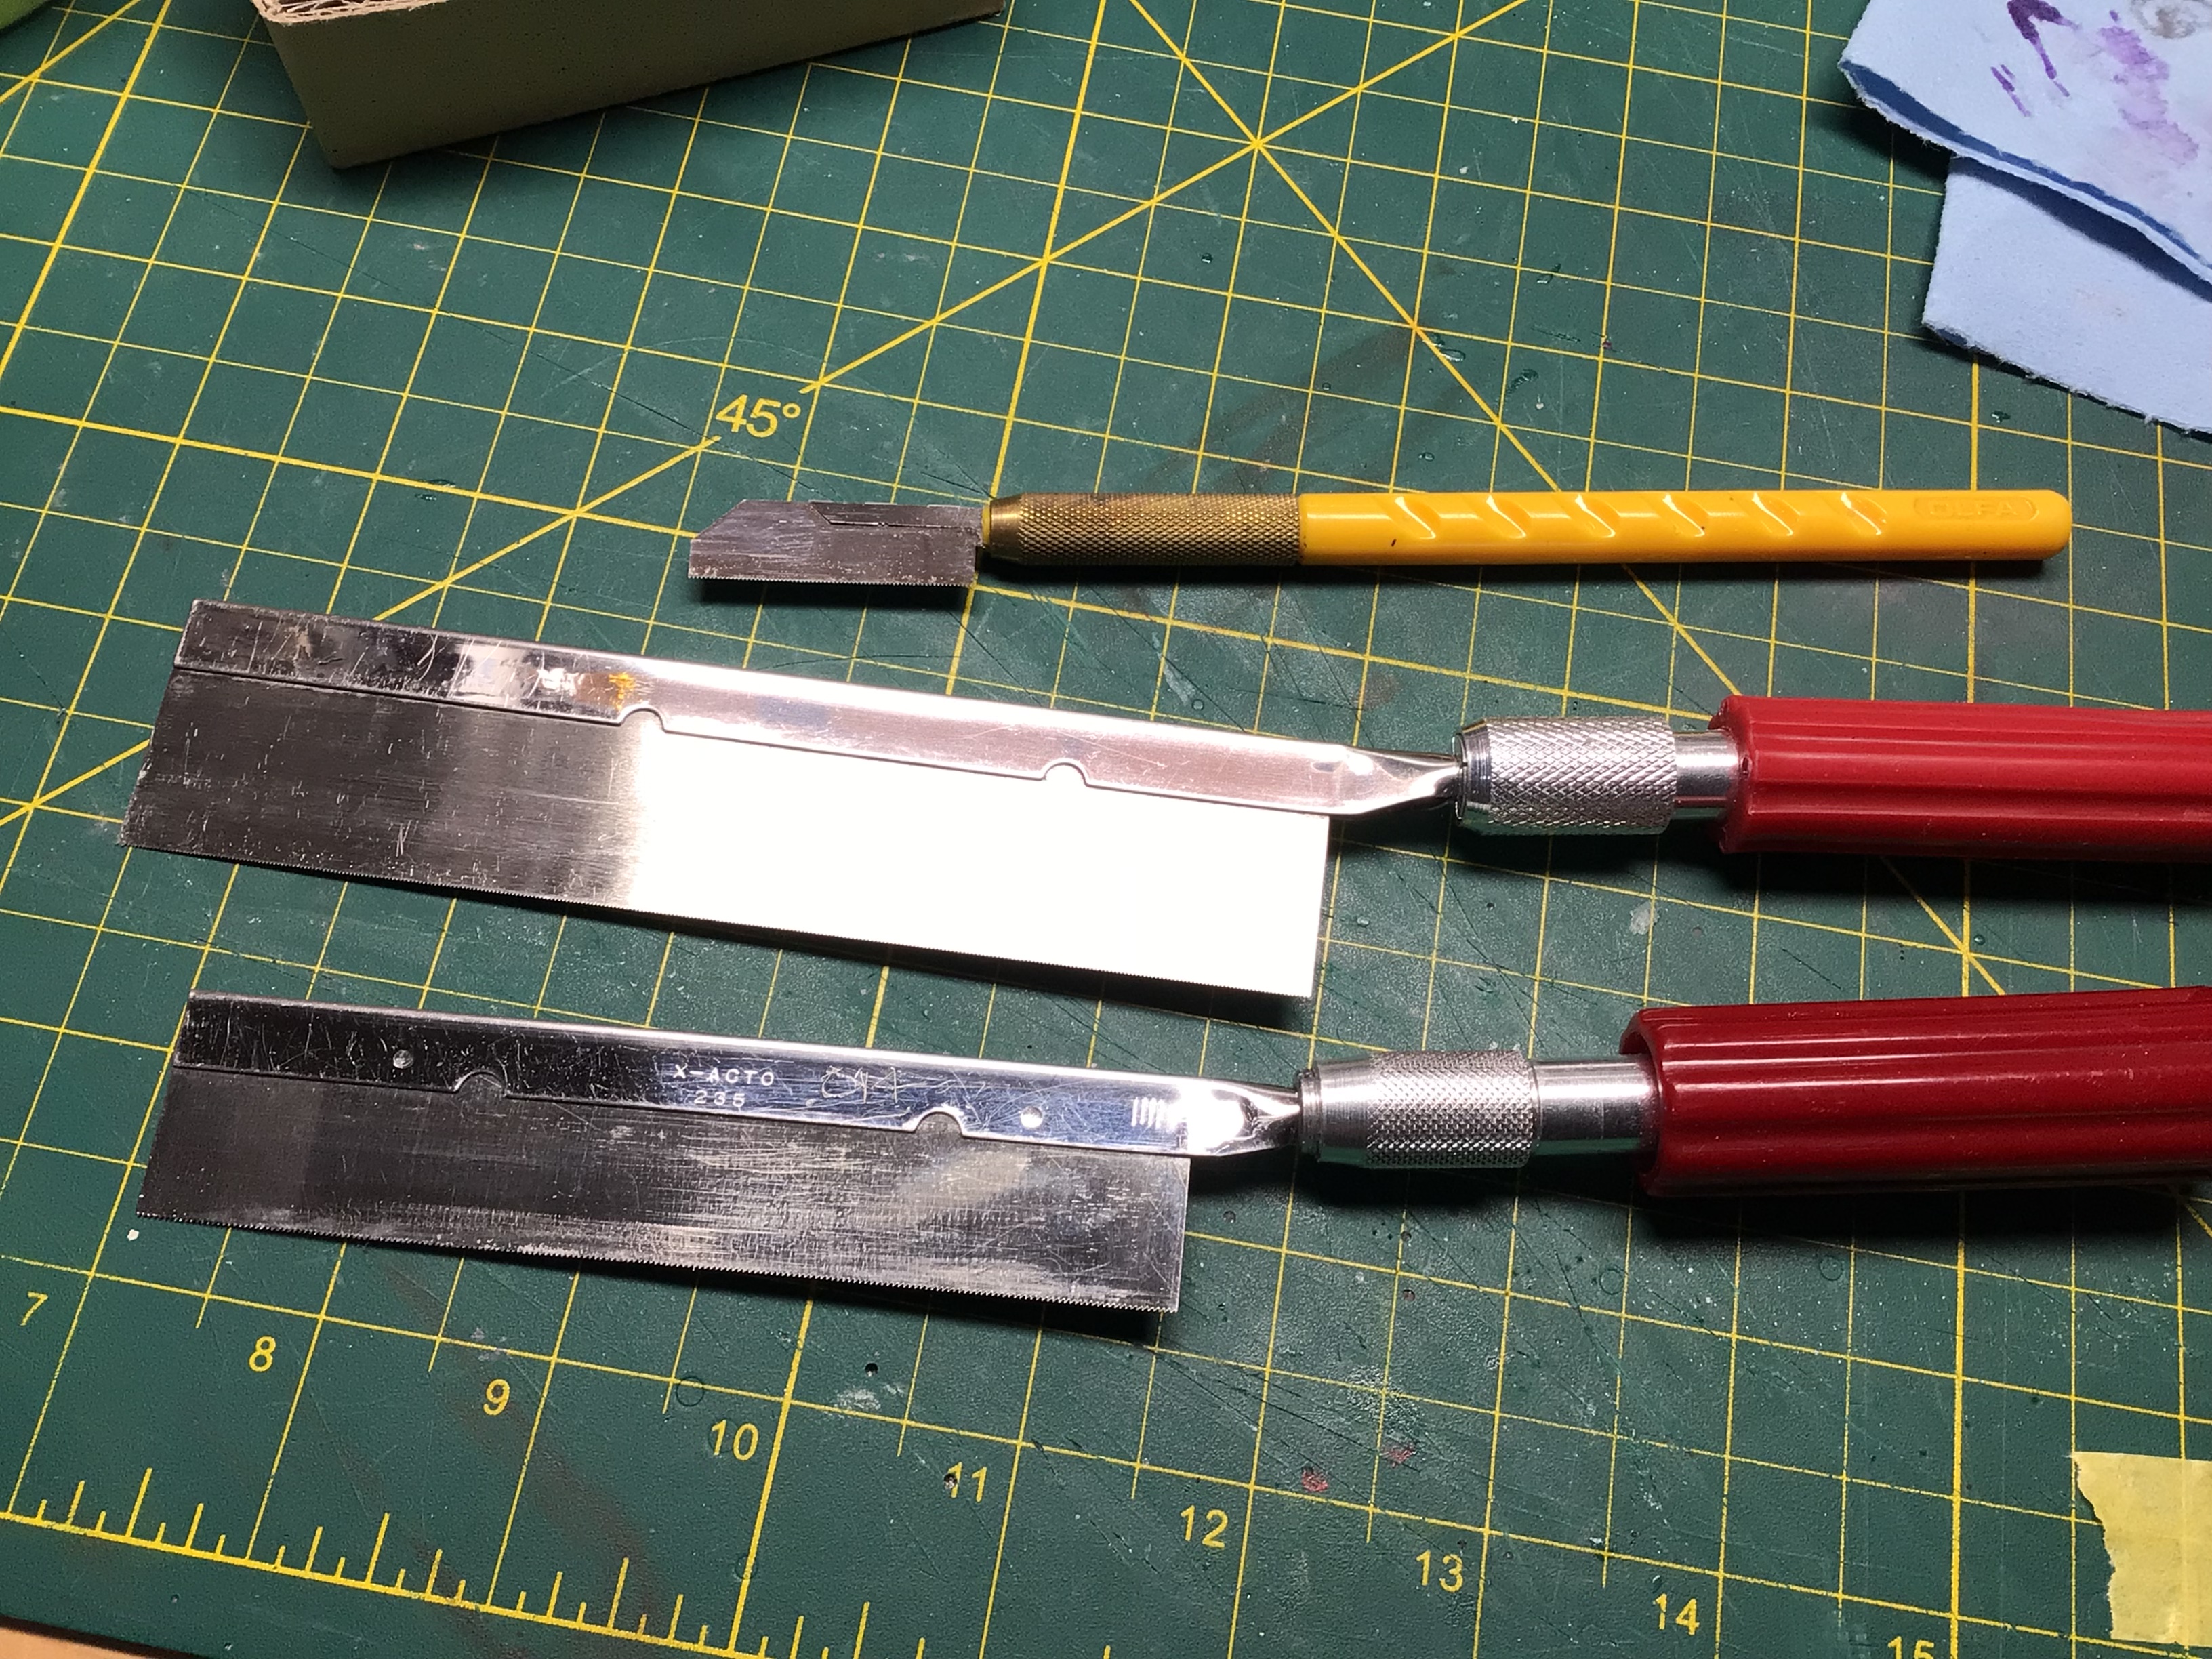
 Looks good! Way finer than the hacksaw would do. The width of the blade aids in making a straight cut.?
 -
Looks like a nice clean chop to me! ? I too suffer from a lack of a concrete plan for most of my builds. Looking forward to seeing the developments.?
-
This sounds like a good rule of thumb. I think my chop was 3” or 3-1/2”. I’m not a big fan of the “hammered” look…I mostly want to get rid of the greenhouse look. Thx.
-
Excellent work all around. It looks much sleeker than original. Those pins for dash knobs is a terrific idea…consider it stolen!?
-
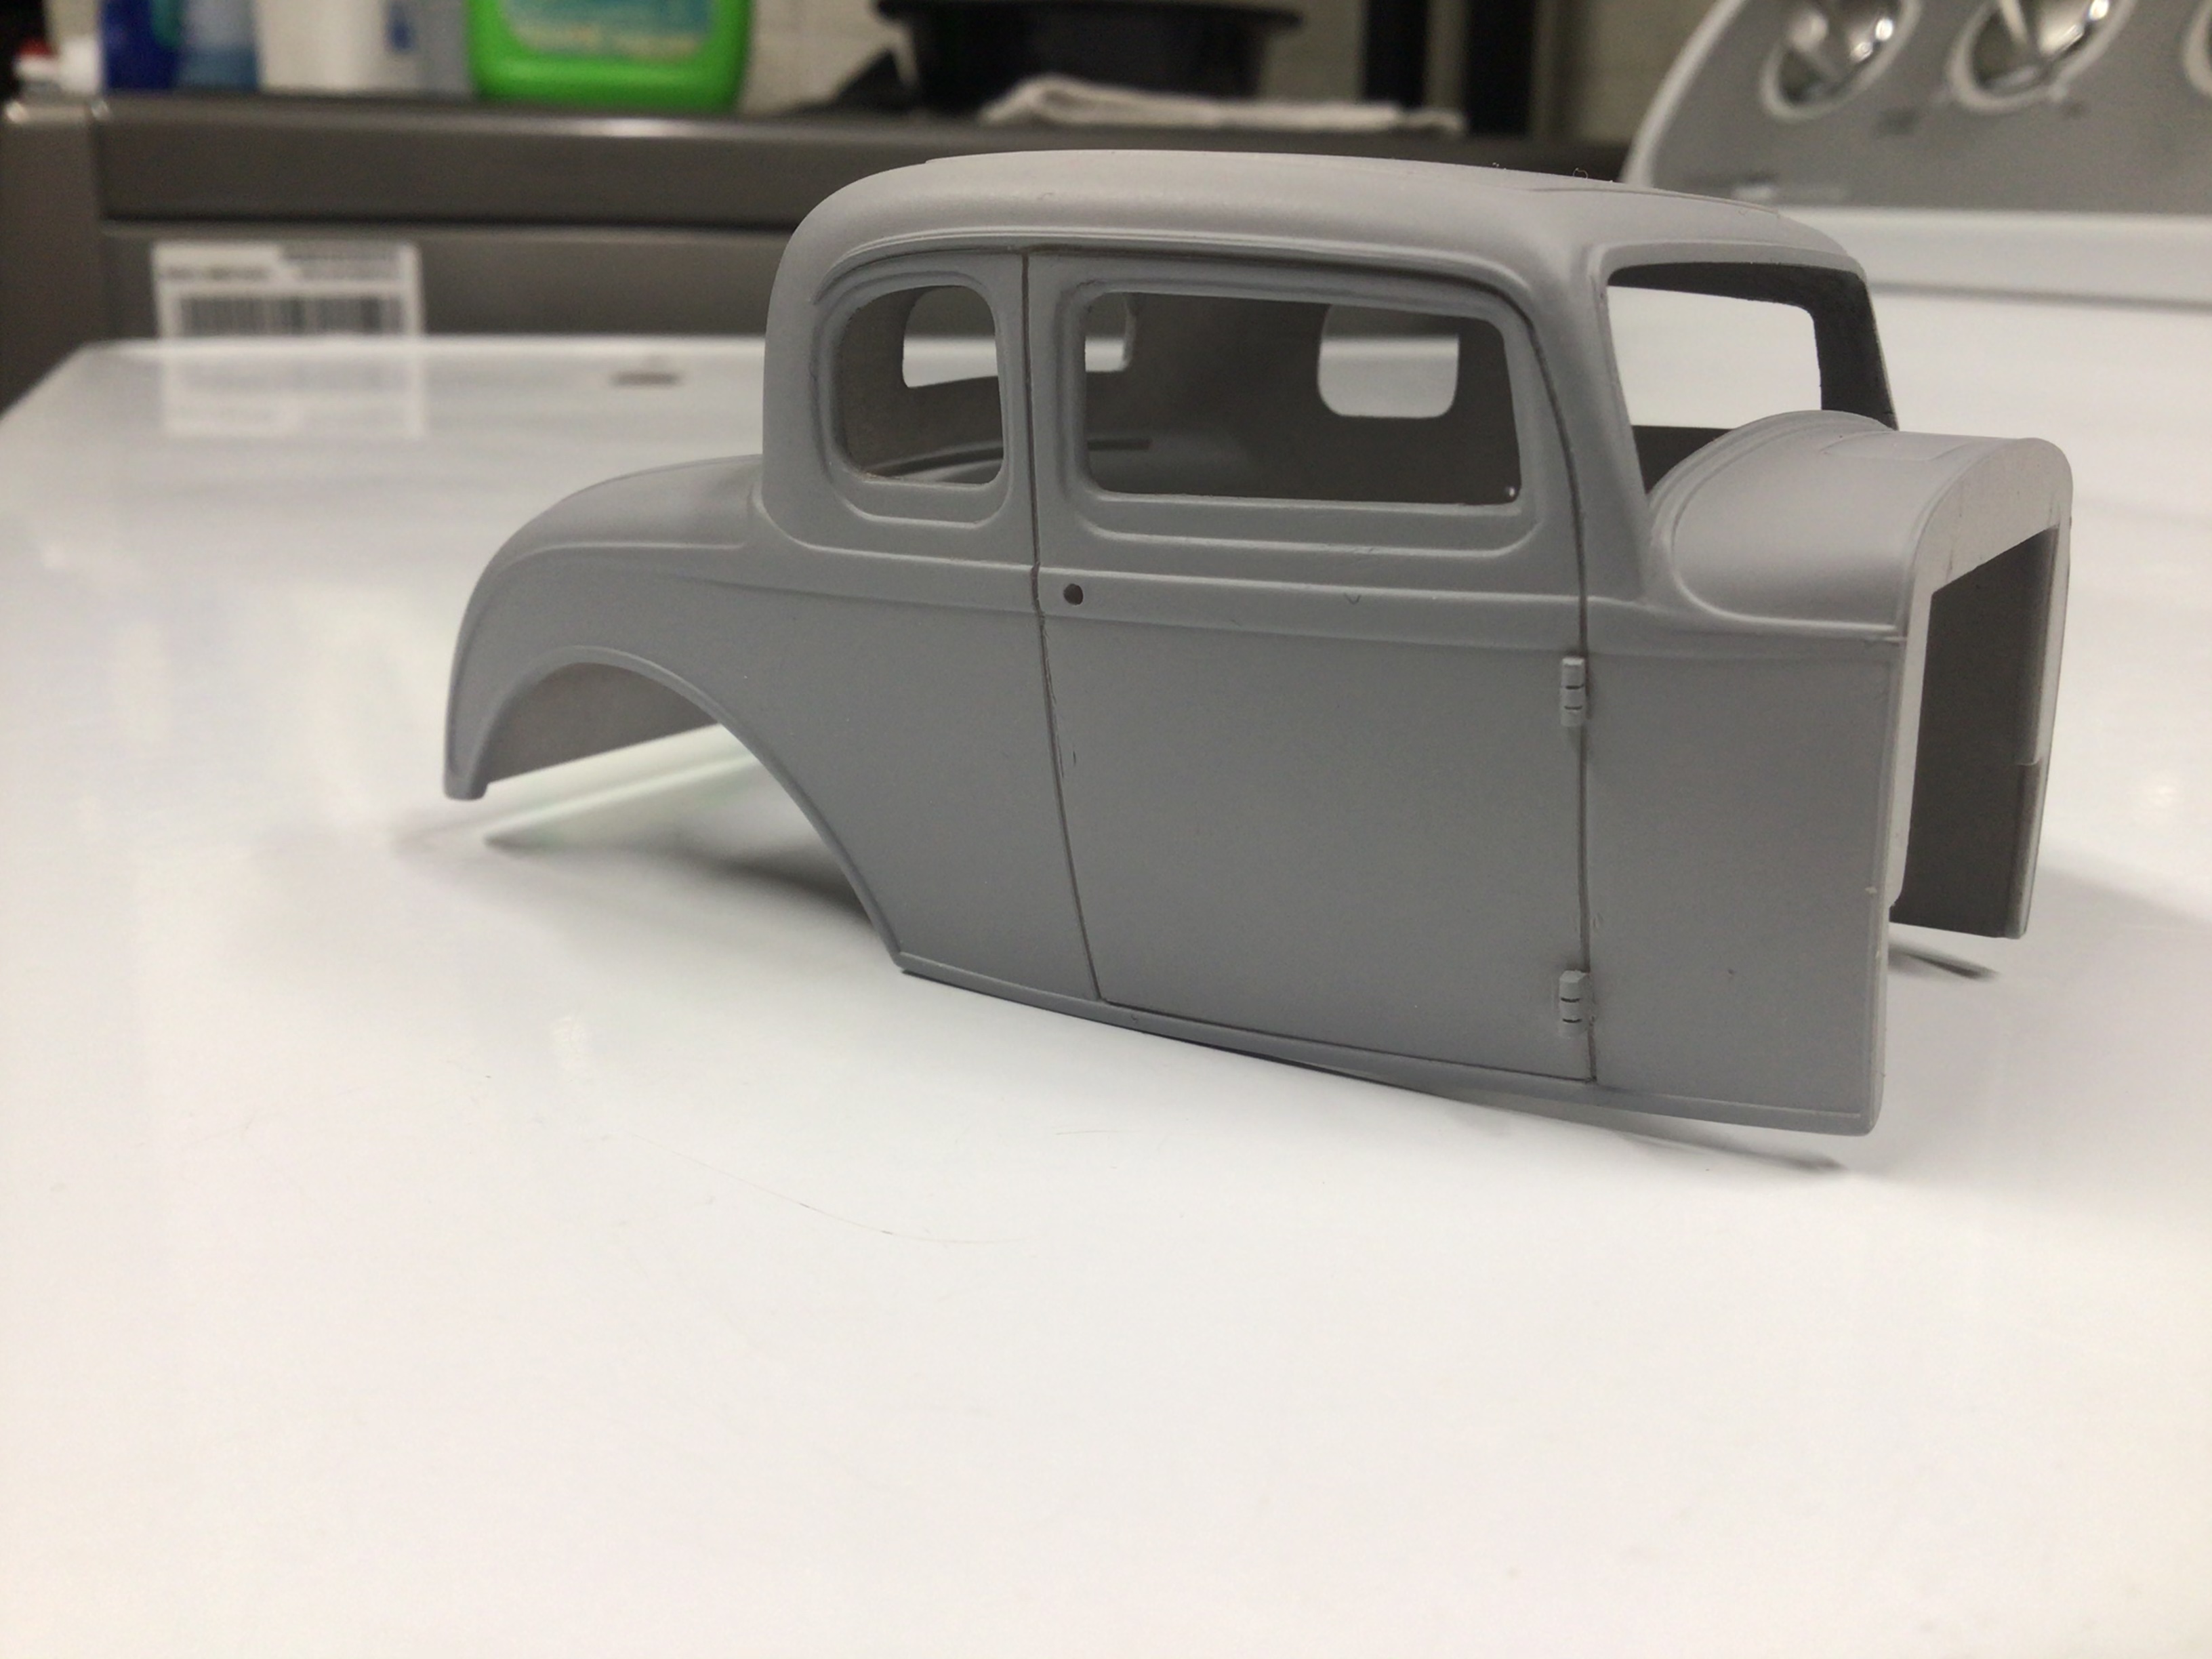
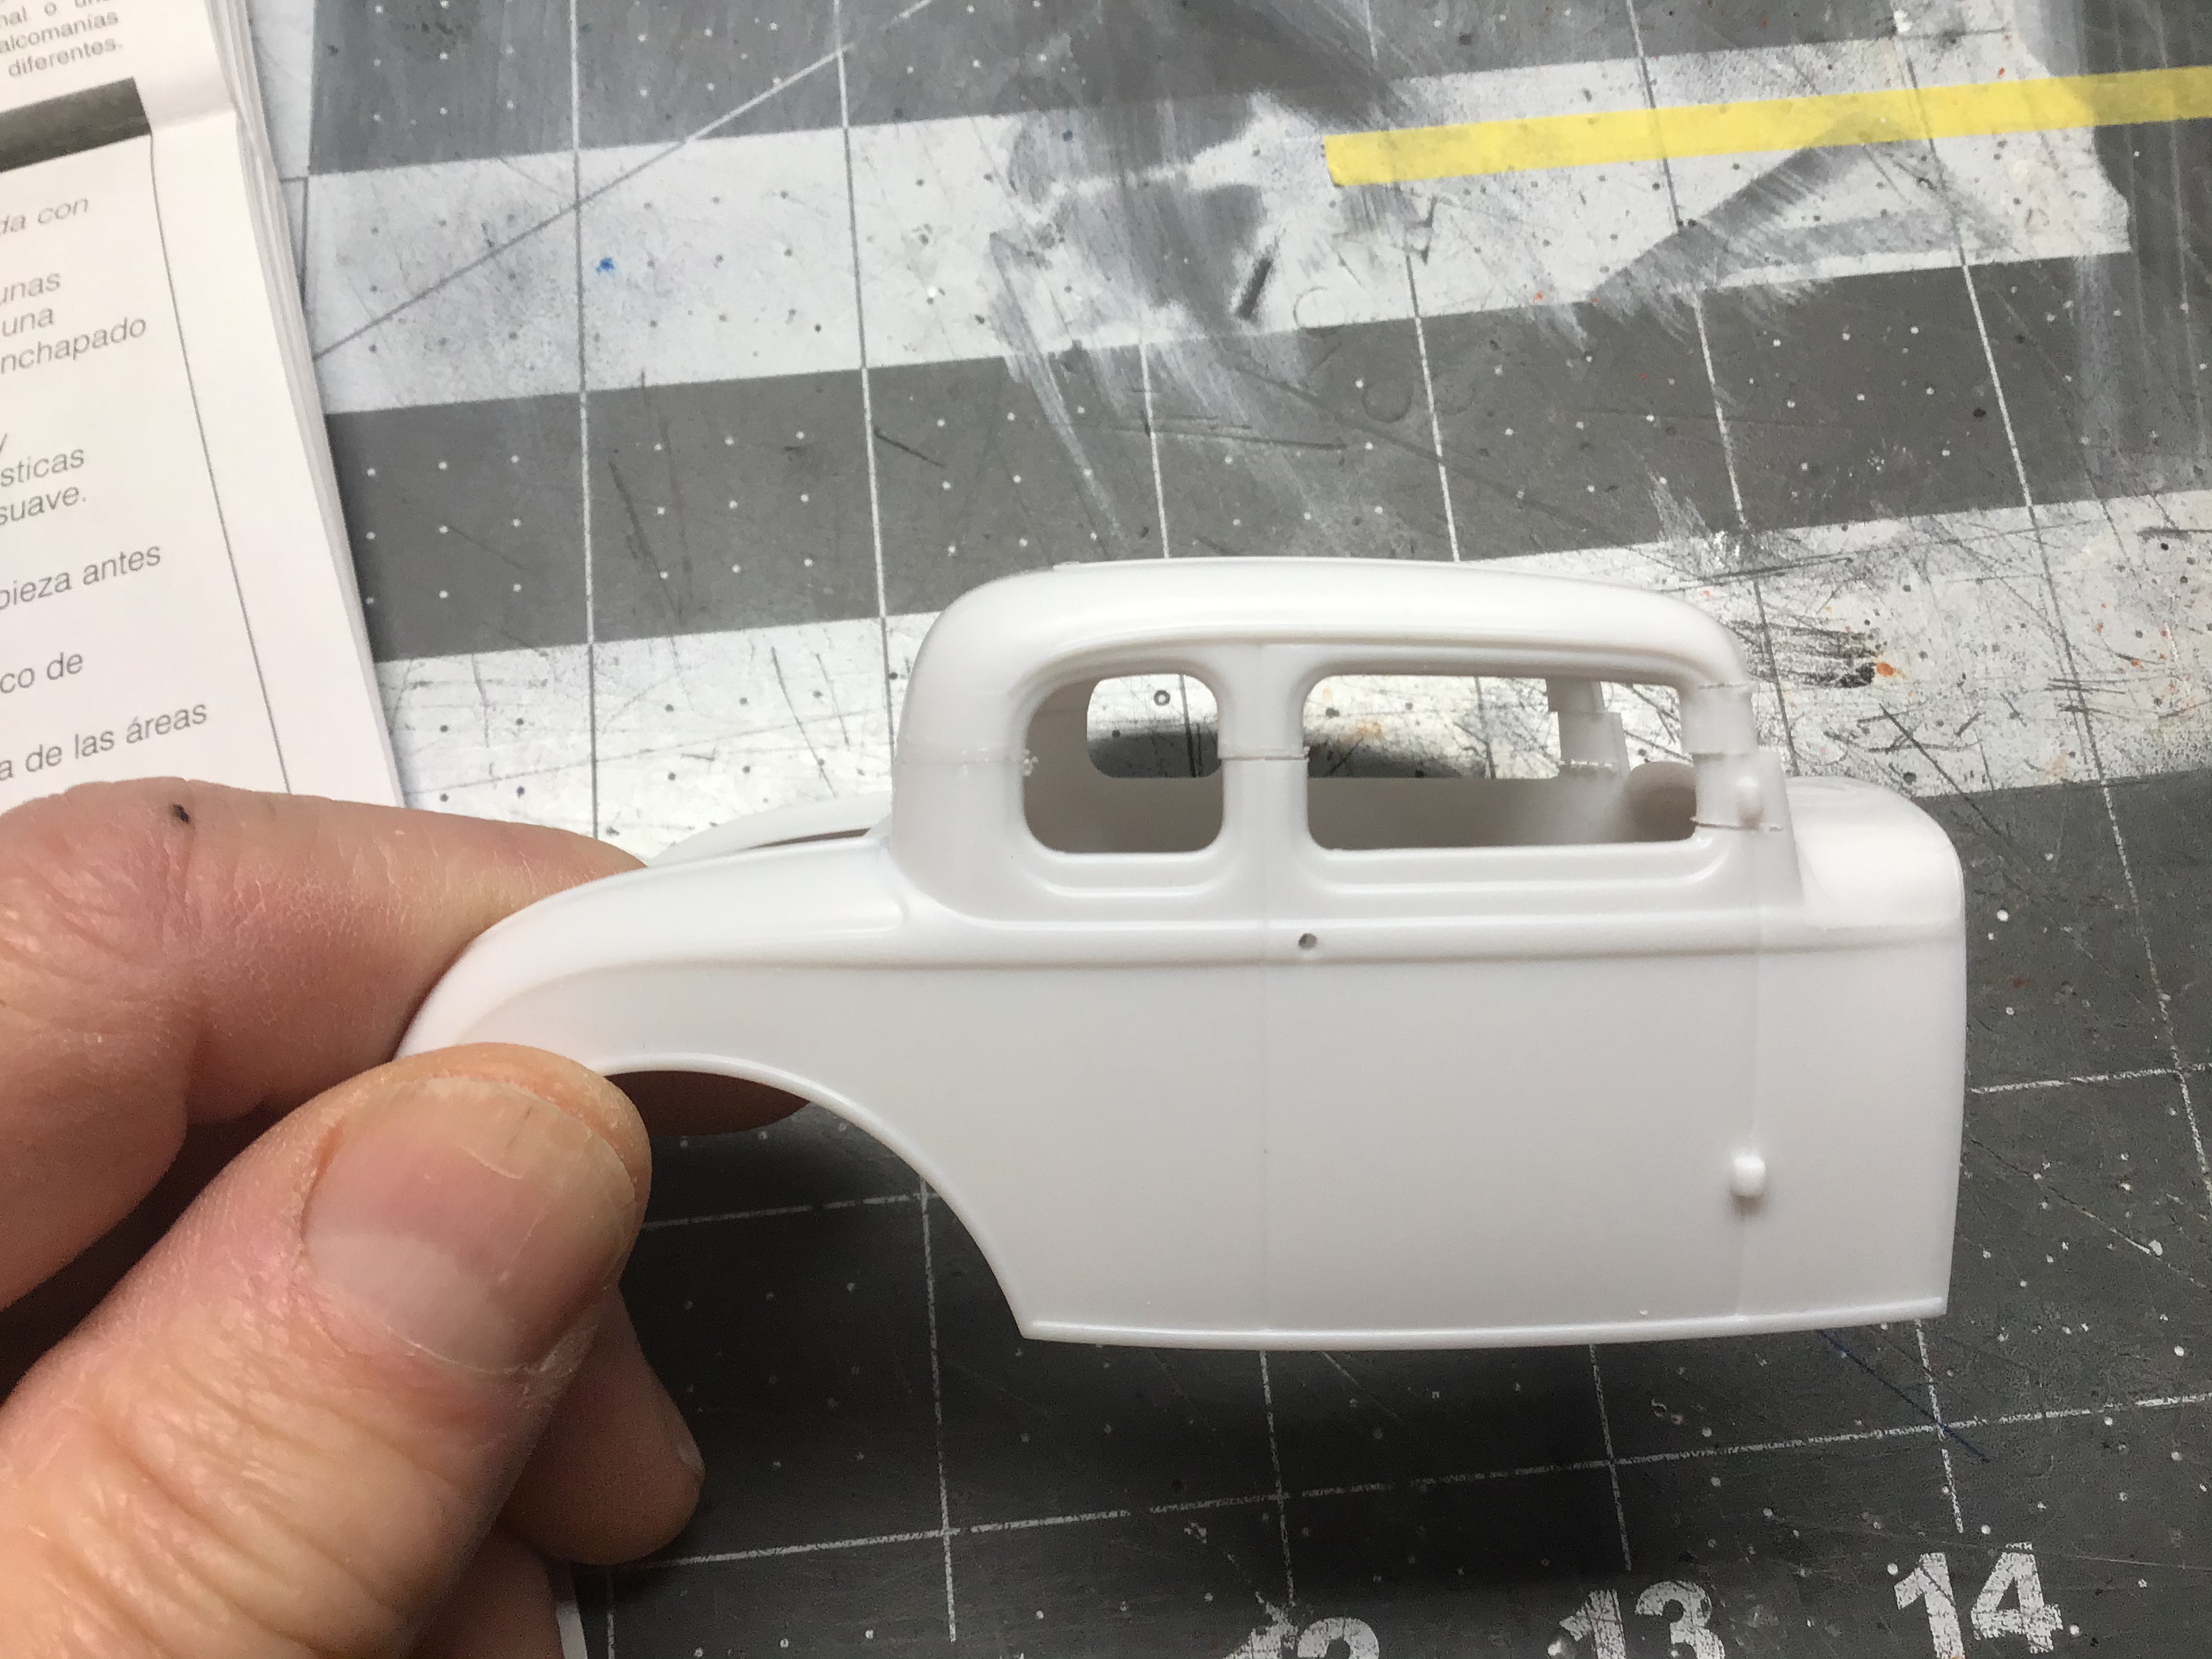
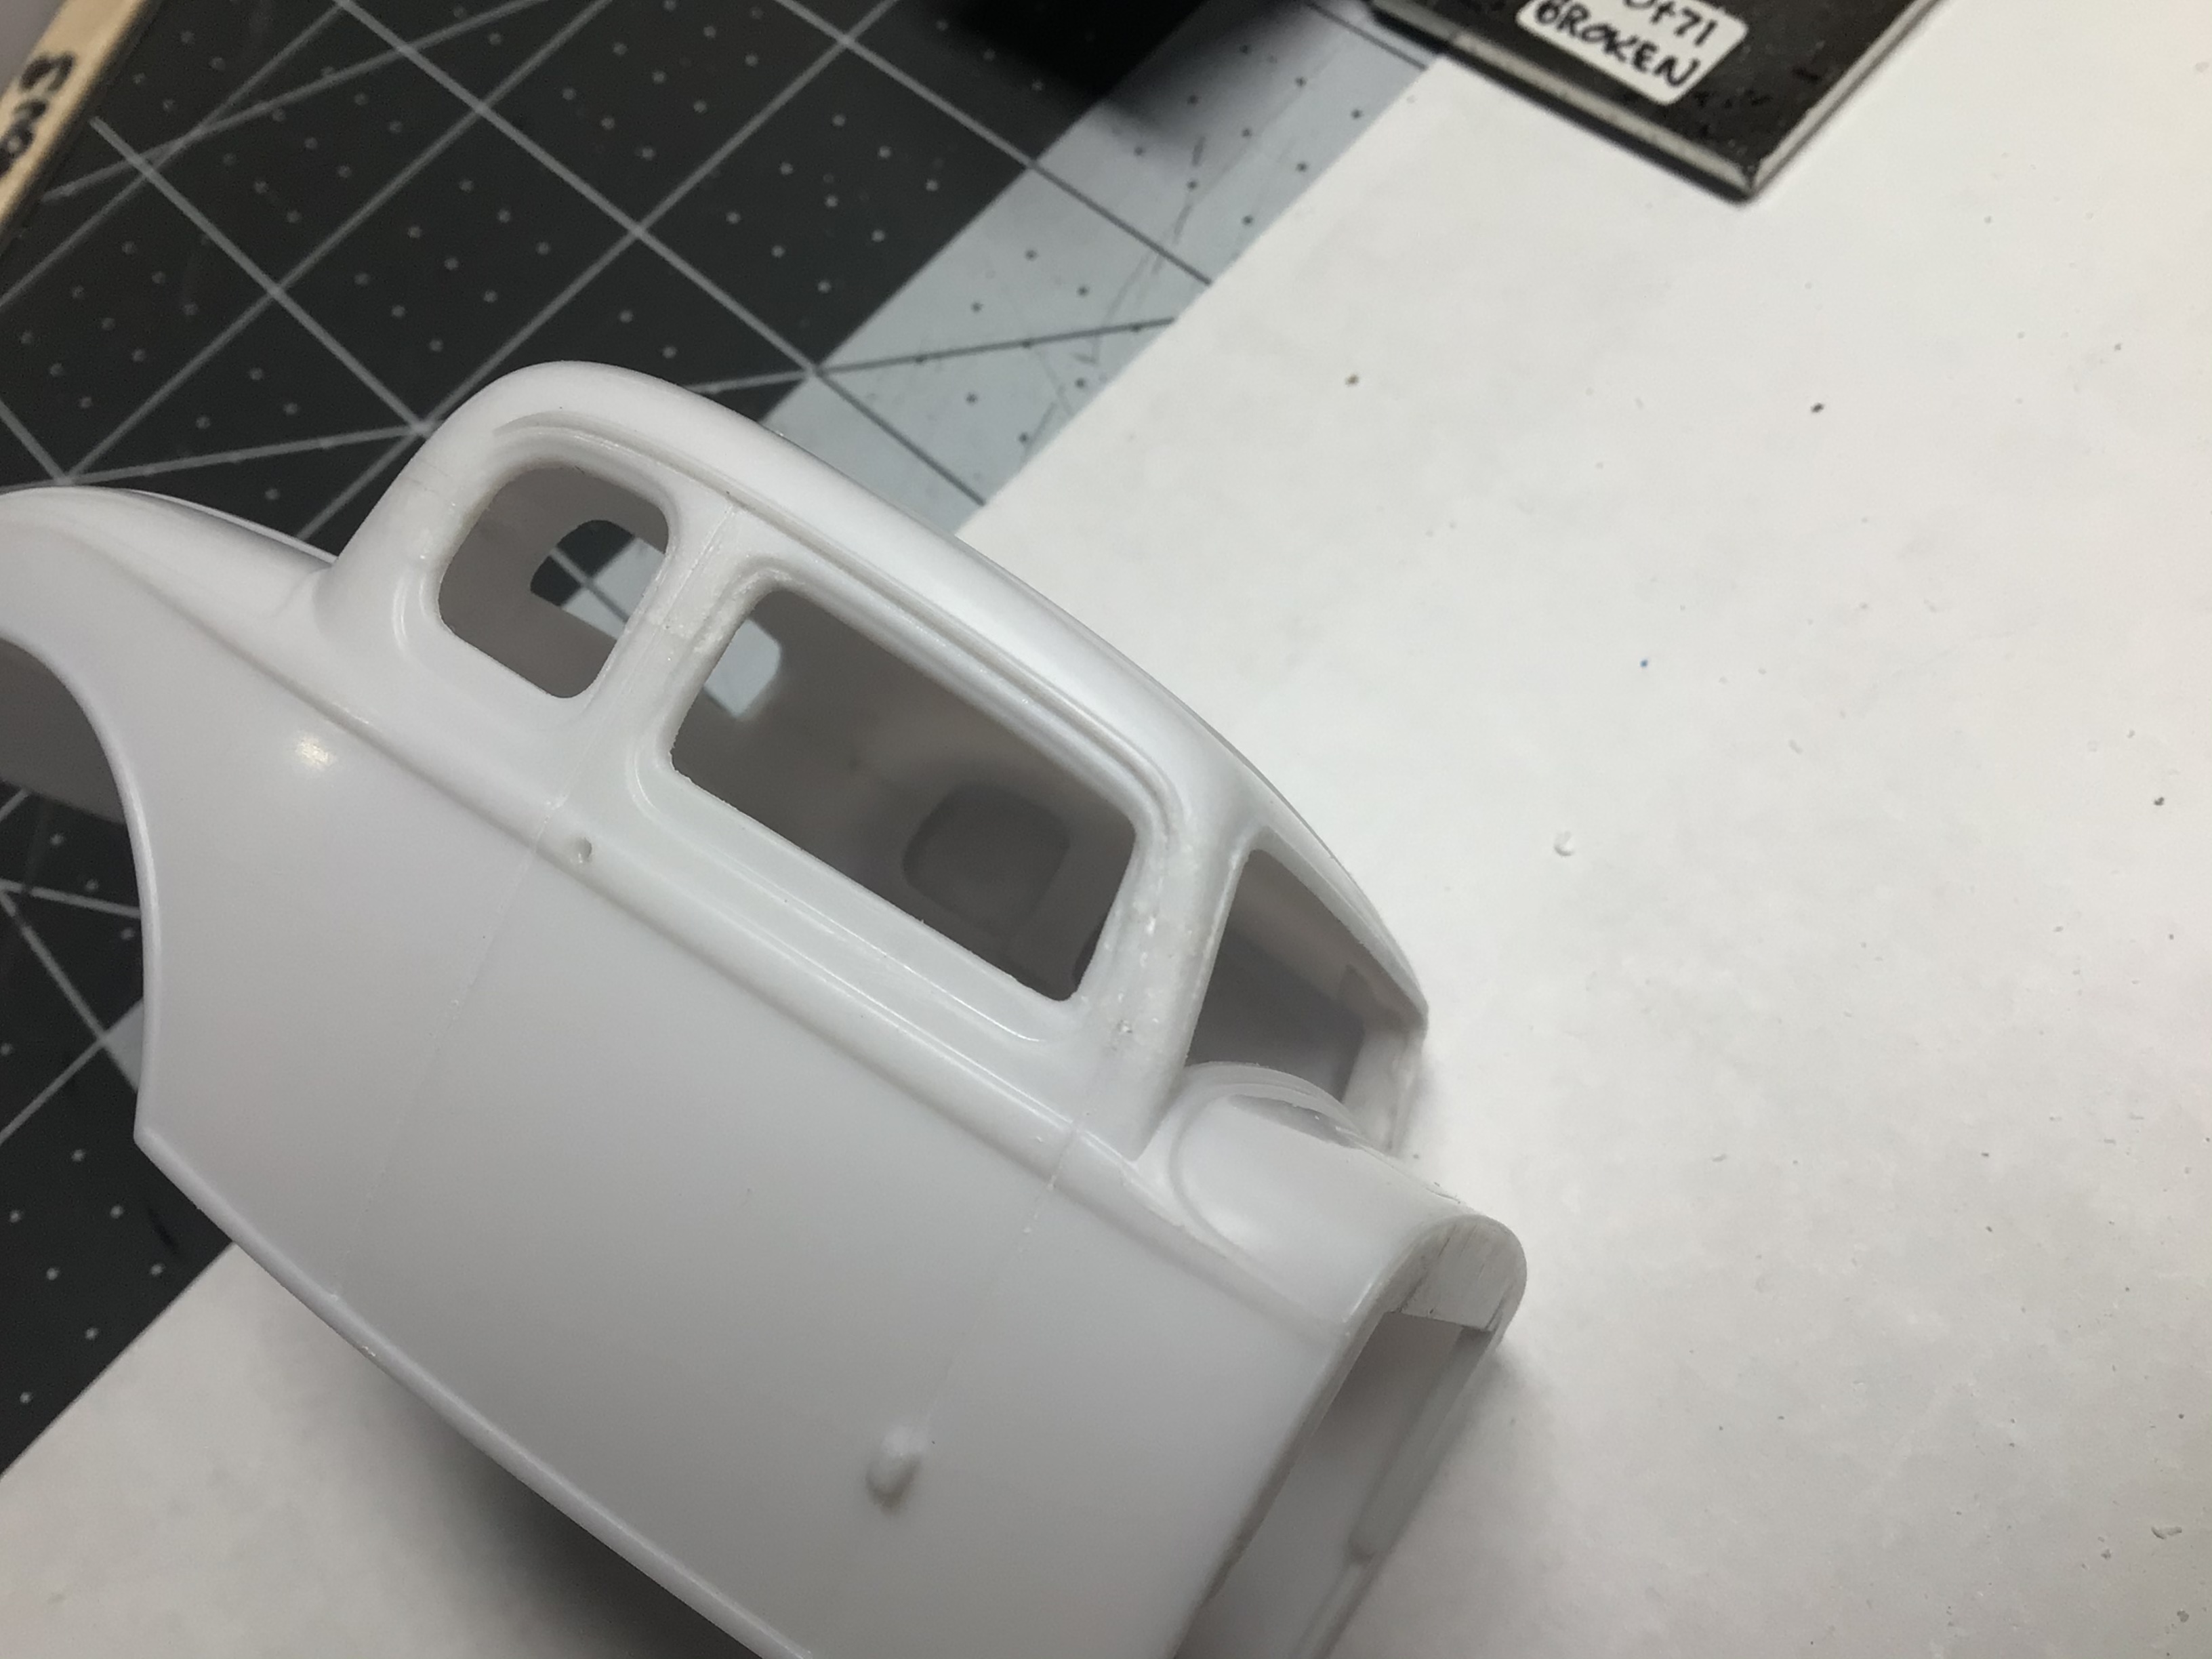
Thanks. This was my first ever chop and I aligned the rear section because I figured it would take a lot more filler to blend than the center post would. Next time I think I will cut just under the drip rail and move the top half of the B pillar back into alignment. Thanks, I am happy with the results, but I did slather on a bunch of sprue glue to blend and reshape the A pillar. My next chop will likely be the AMT ‘32 Vicky. I figure with careful cutting and filing the removed piece should fit back in snuggly with very little filler required.

-
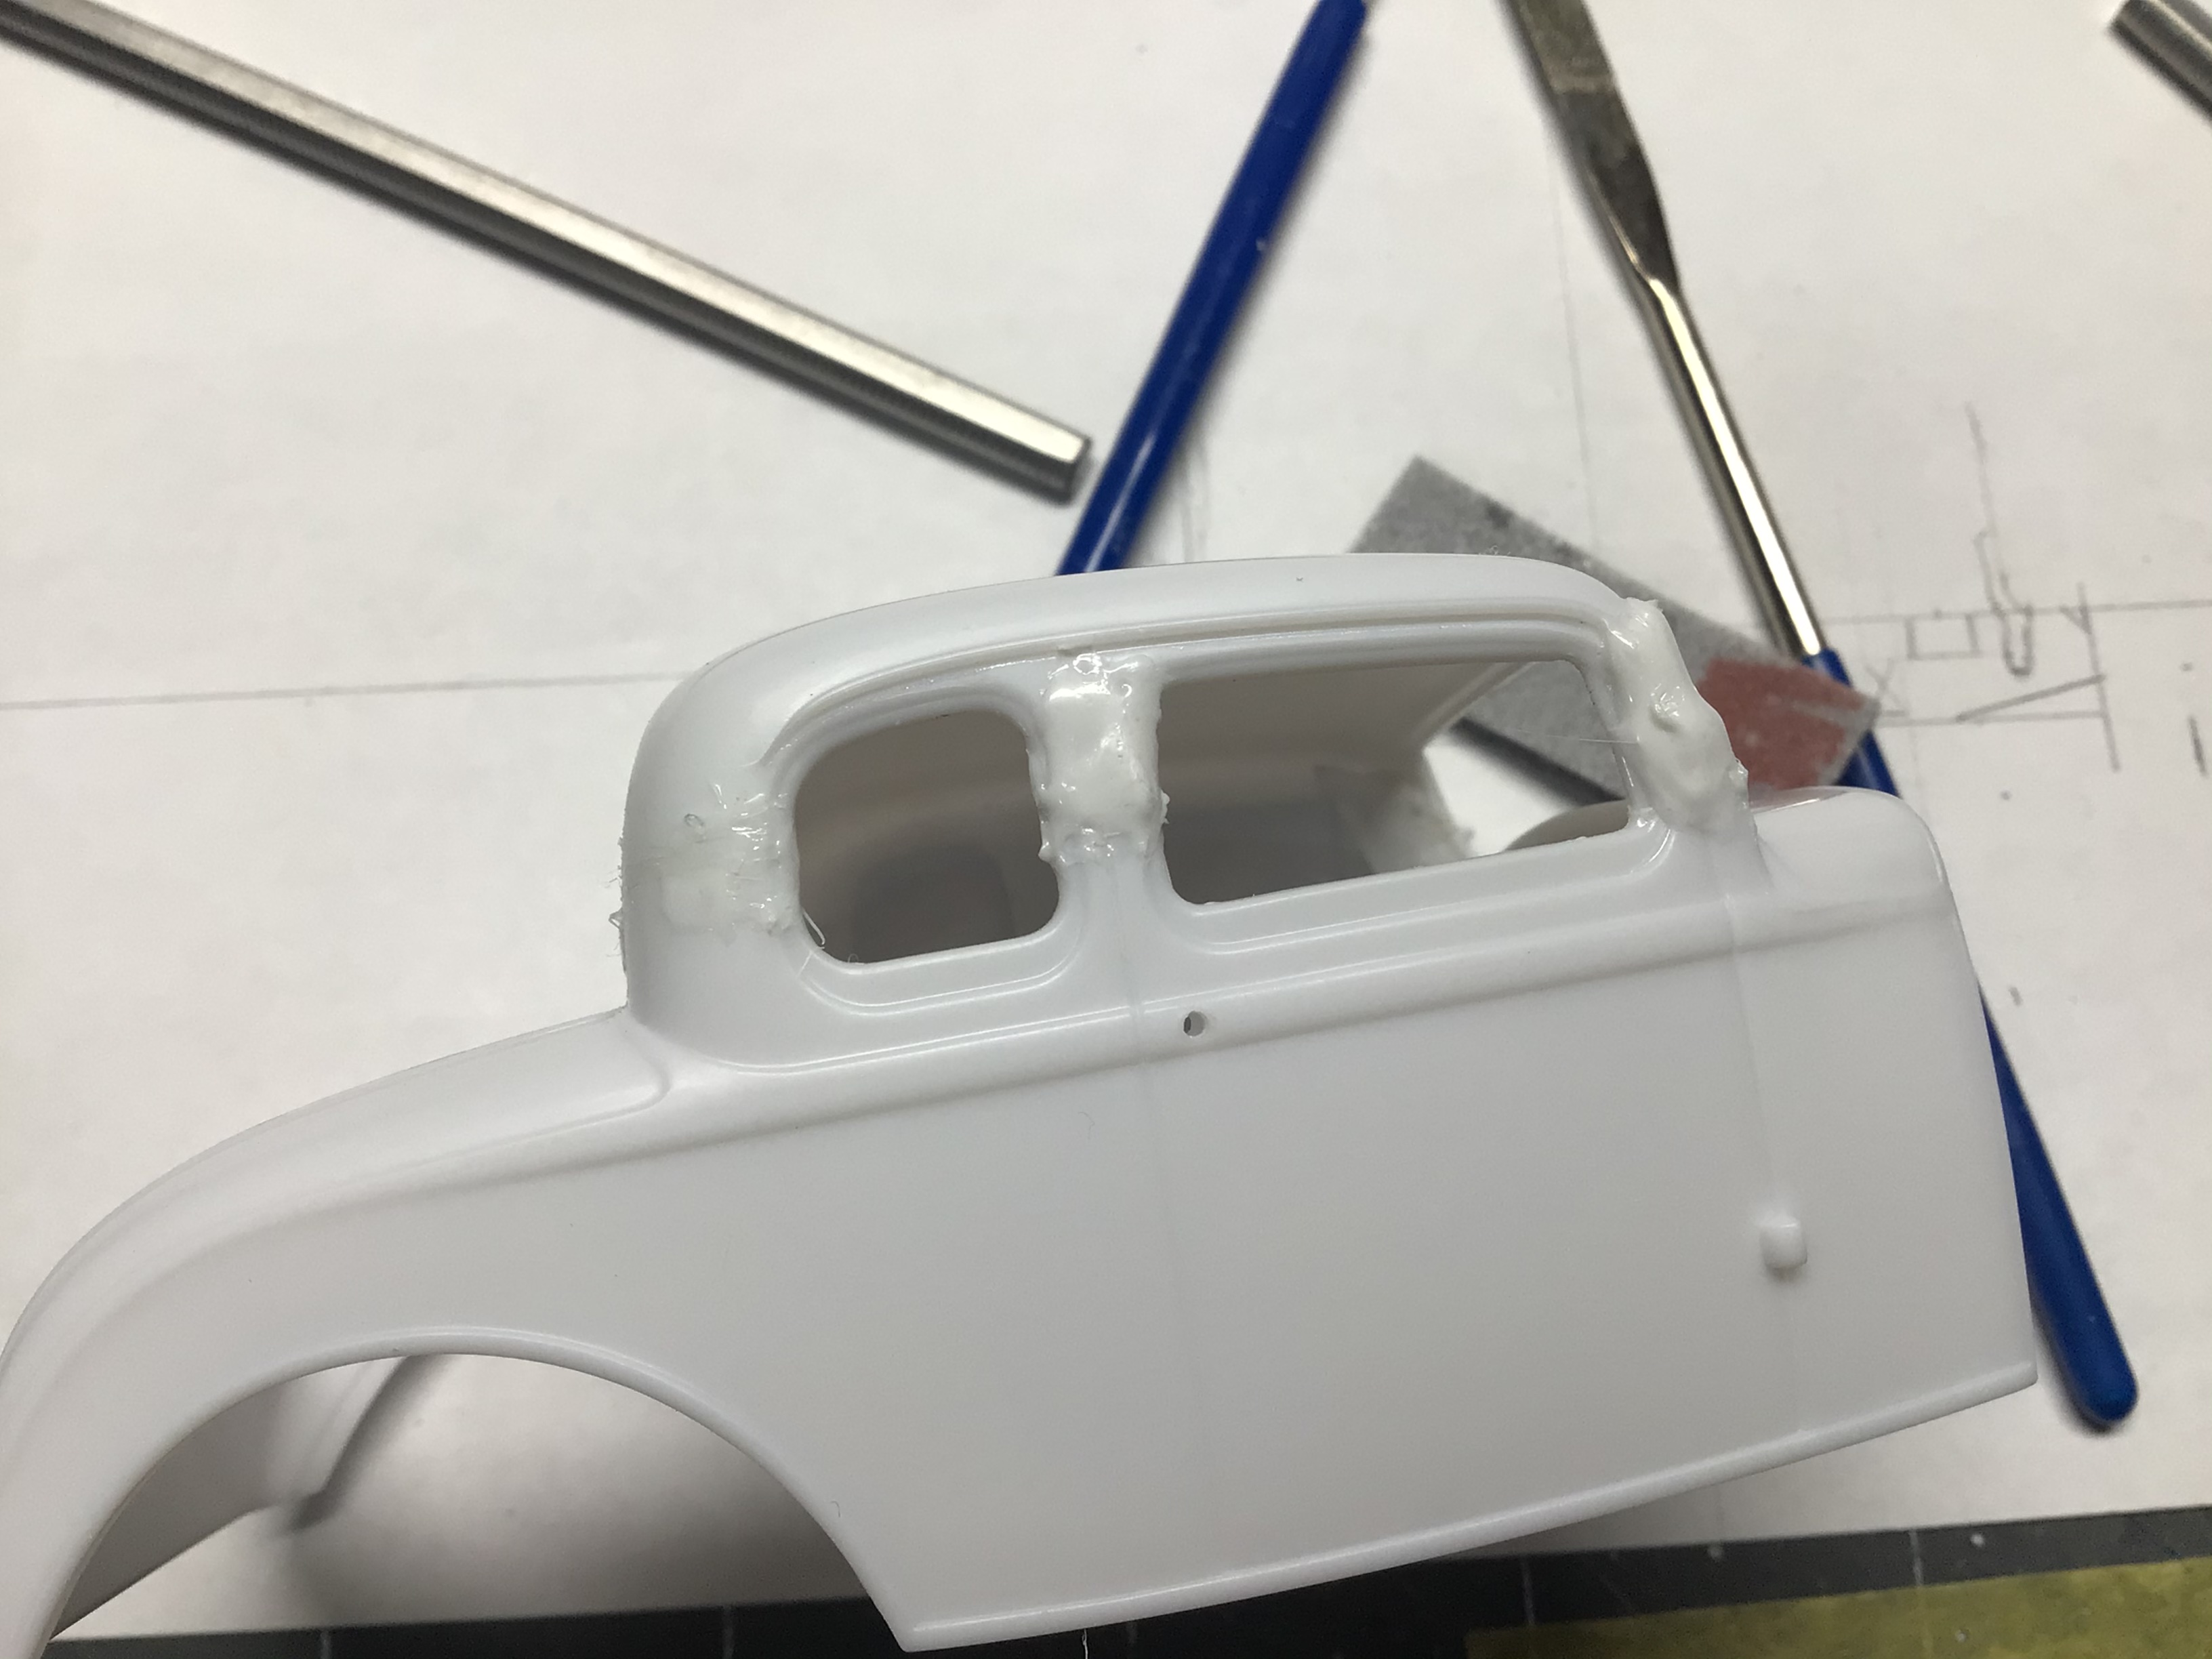
When I chopped this ‘32 you can see how I tackled the A pillar. I have seen other chops with a section removed from the mid point as well. The problem I had was the huge mis-alignment that required leaning the top section foward and the lower section back to re-align them….which makes three cuts. I was not about to lengthen the roof! ? I figure on my next one, I will cut out the entire A pillar and then shorten and file the two ends to match the cut angles on the body and roof. Has anyone done it this way, or have a better idea yet?
-
Yeah, or how does the spider not get electrocuted while making that connection?
-
Nice detailing Dave. The dash an interior look great!?
-
What if monster truck
NOBLNG replied to majel's topic in Model Trucks: Pickups, Vans, SUVs, Light Commercial
Nice pair of Monster trucks you’ve built!? -
Very nice clean looking build! I like it!?
-
Sorry Hot Wheels......not seeing the point of this
NOBLNG replied to HomerS's topic in The Off-Topic Lounge
This just once again proves in my mind that a LOT of people have WAY too much money! ? If someone has a spare $69 million laying around to purchase something like that…..??? -
Can one of you post a pic of it with a recognizable paint bottle mounted in it? I imagine the bottle is mounted on it’s side and the thing oscillates? Thx!
-
You did a beautiful job on this T-bird for your Wife Dave! Thanks for taking the time to restore this thread.?
-
Hacksaws are designed to cut metal but will hack just about anything apart.? That one looks like a particularly cheap example. You could use one if that is all you had, but if you have to purchase one…I wouldn’t! These will do a far finer job and a very worthwhile investment if you plan on doing more custom modifications in the future.
-
Wow! Very fine work on all of these! Nice to see these scratch built projects. Kudos for thinking outside the box!?
-
Nicely done! ?
-
AMT ‘89 Chevy /drag boat Combo GSeeds
NOBLNG replied to gseeds's topic in Model Trucks: Pickups, Vans, SUVs, Light Commercial
Nice pair! Beautiful work on the paint!? -
65 Chevy Stepside
NOBLNG replied to bluestringer's topic in Model Trucks: Pickups, Vans, SUVs, Light Commercial
Looks pretty good to me!? I too fairly recently got back into the hobby. I just try to improve slightly or try something new on each one. -
Revell 1957 Cadillac 4 door made into a convertible.
NOBLNG replied to carbuilder1950's topic in Model Cars
Well you certainly have a way with Bling David! This turned out beautifully!? -
65 Chevy Stepside
NOBLNG replied to bluestringer's topic in WIP: Model Trucks: Pickups, Vans, SUVs, Light Commercial
Nice job! That color looks great on it!? -
Awesome! Love the wiring harness idea!?
-
Oops, the Aurora kit the OP is referring to is 1/16th scale apparently.? Edit: An electronics supply house should have slightly heavier gauge wire also.
-
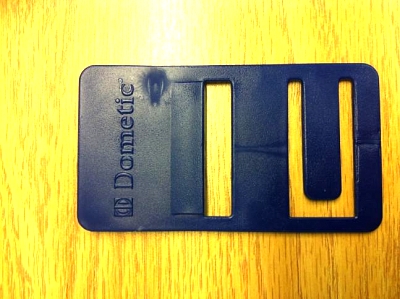
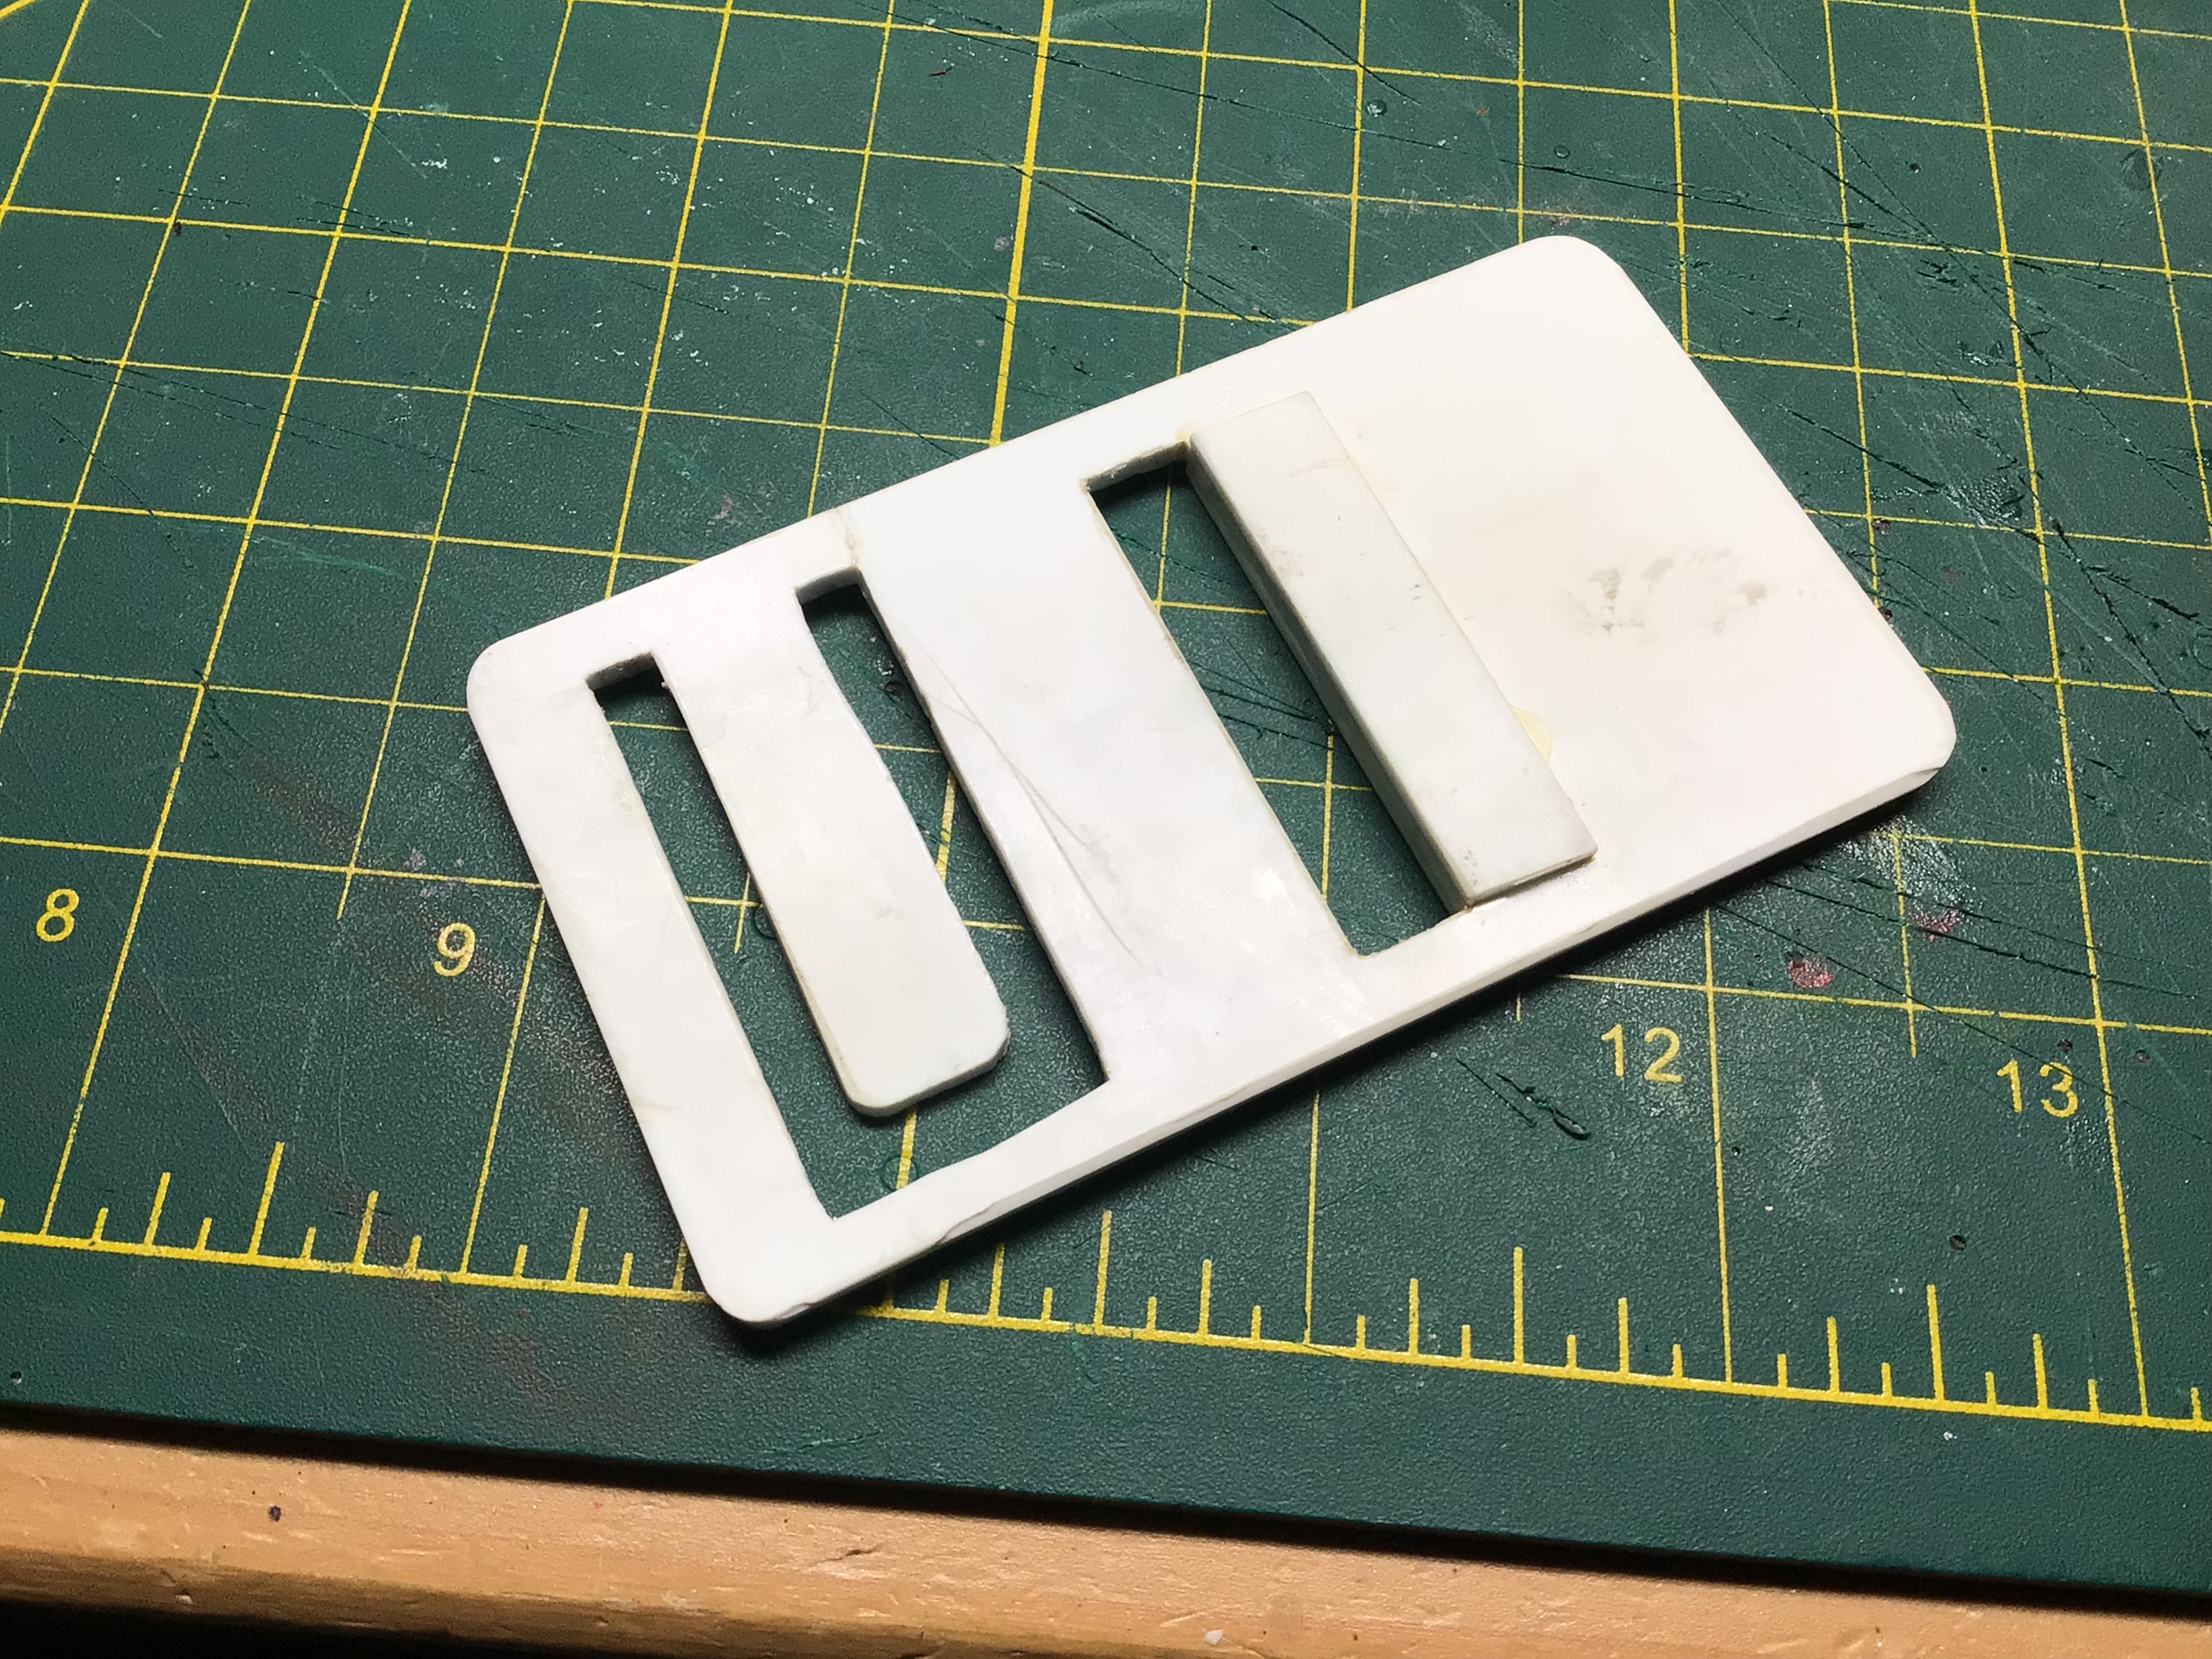
I made this clip for holding the RV fridge door open while in storage. I lost one a couple of years ago.
-
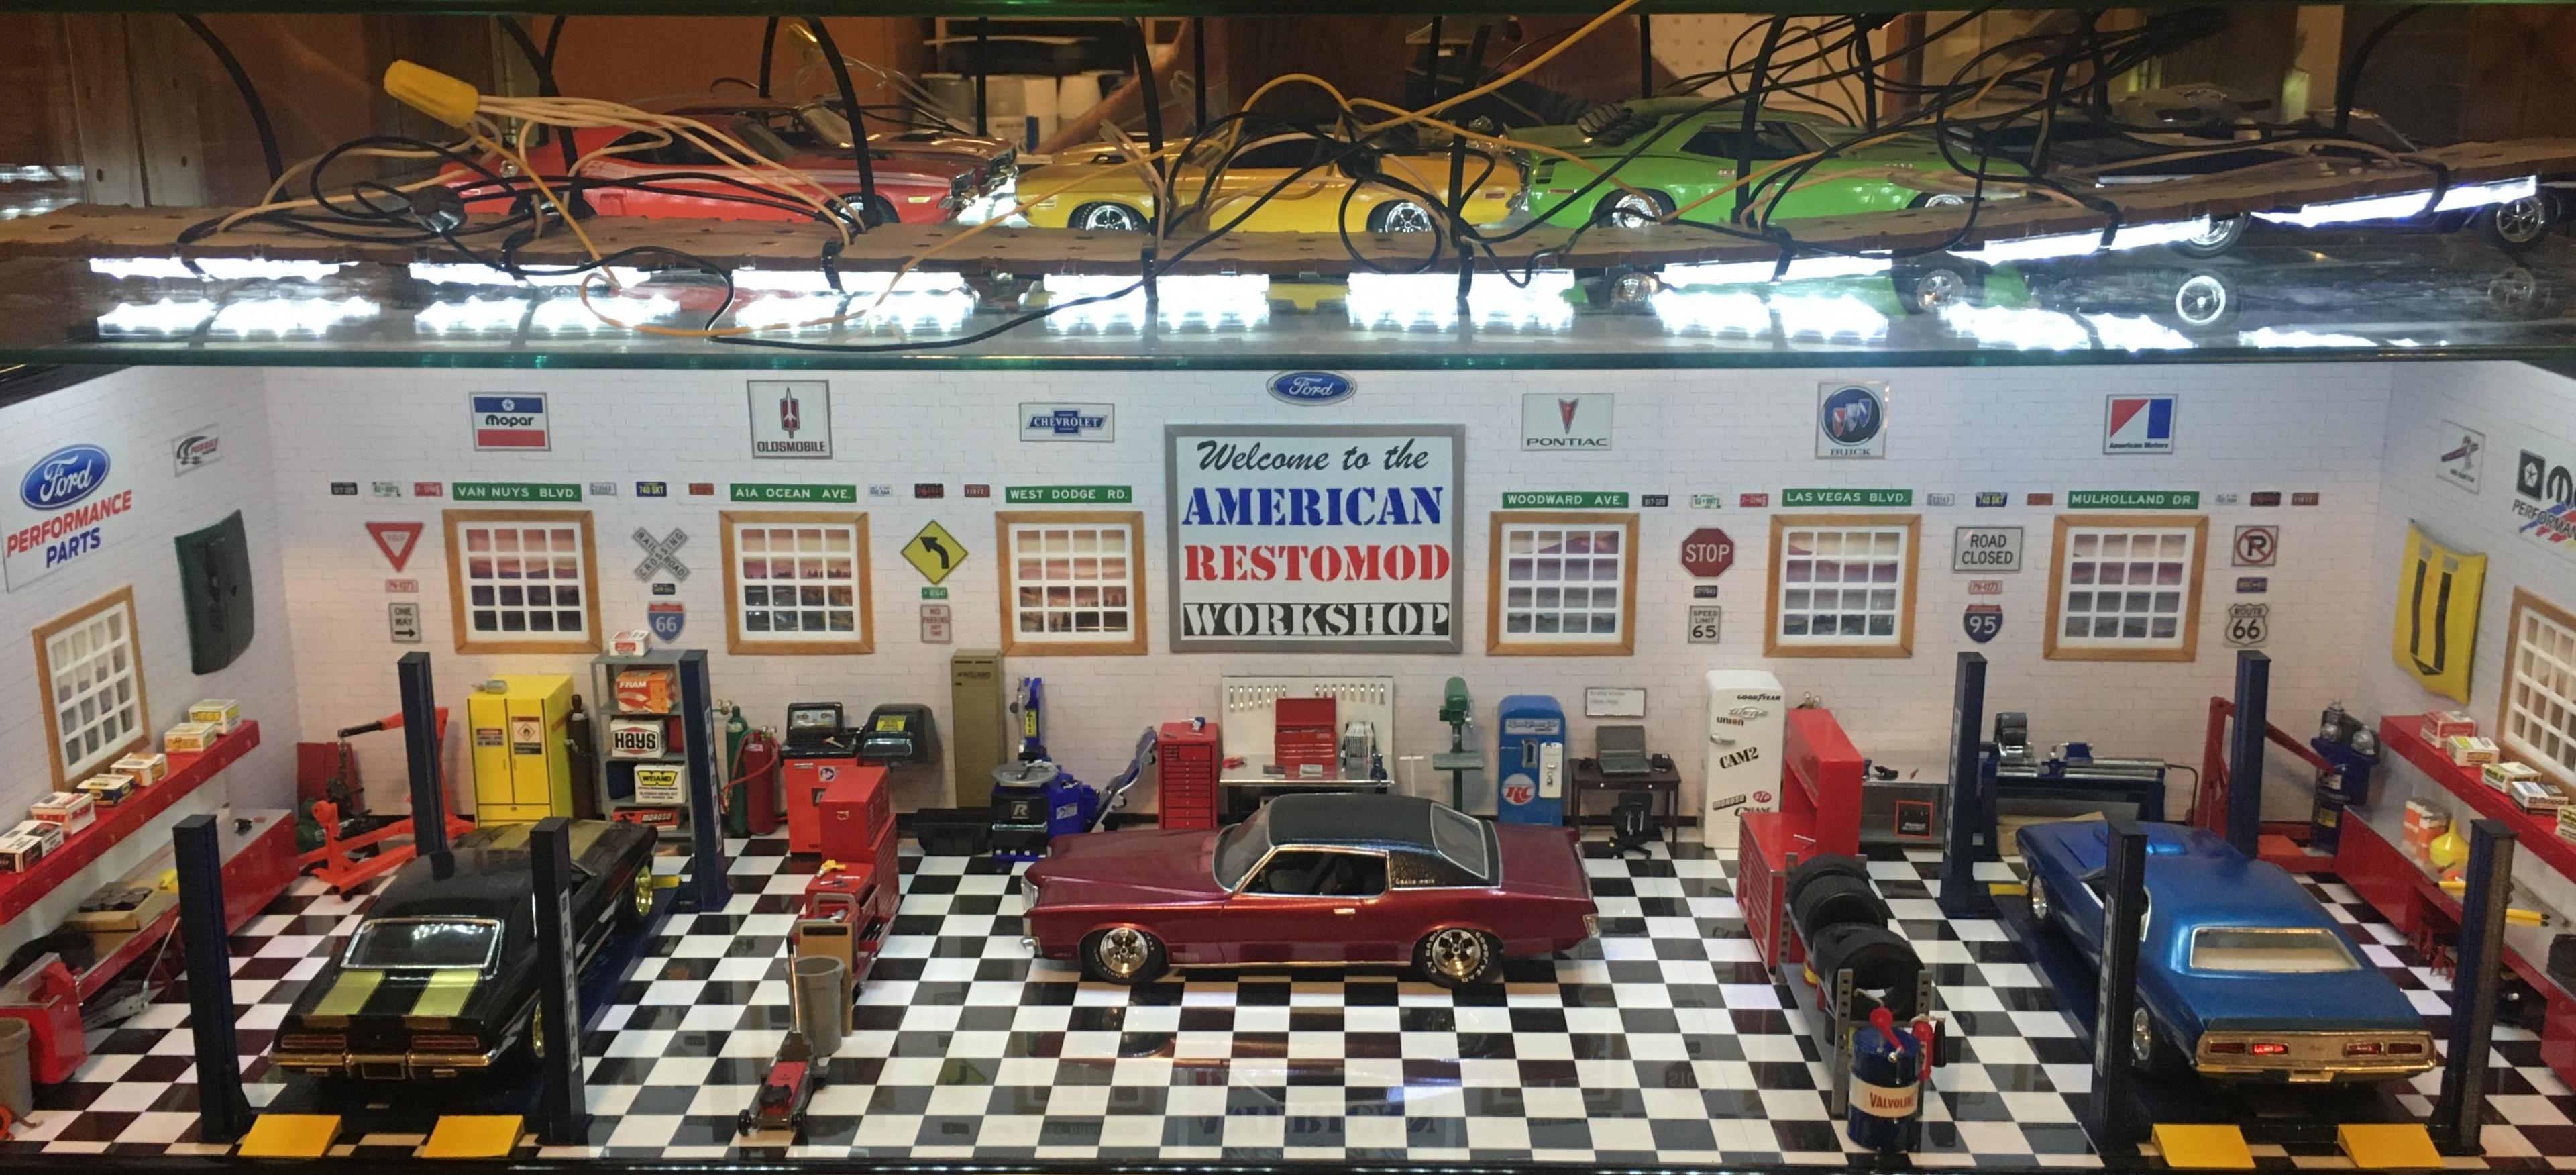
Maybe you need to add a welder and a tube bender to this very impressive shop of yours Bill?