Brutalform
-
Posts
2,832 -
Joined
-
Last visited
Content Type
Profiles
Forums
Events
Gallery
Everything posted by Brutalform
-
AMT Peterbilt Wrecker Bed Question
Brutalform replied to OldTrucker's topic in Model Building Questions and Answers
Here is a link to a members build that might help you in your modifying the wrecker bed. Excellent build with good info here for anyone wanting to make the wrecker look correct. http://www.modelcarsmag.com/forums/topic/103348-amt-peterbilt-359-california-hauler-wrecker/ -
Don Nicholson's 1965 Comet Cyclone
Brutalform replied to ModelcarJR's topic in WIP: Drag Racing Models
Looking fantastic so far. The engine detail is perfect. The improvements on the interior really work well. These Moebius shifter handles look like they would be larger than a softball in scale. The Tamiya Bright Red you plan on using always seems more like an “orange” shade to me. Maybe it might look more red with a darker primer under it? -
worst commercials - i have to mute the tv
Brutalform replied to youpey's topic in The Off-Topic Lounge
The My Pillow Guy commercial is the worst. I won’t mute it, I’ll just flip the channel until its over with. I can’t stomach that commercial, or that guy. -
Thanks Keith. Just a regular old “fine” point Sharpie? I usually use a black Sharpie on my Thunderbolts inner side trim, but it’s the huge chisel type Sharpie. Then I just foil around it. Sometimes the Sharpie never covers well, leaving streaks. I dunno, maybe I need to buy some new Sharpies? I like the way yours came out. Definitely gonna give this method a try. A real time saver, I’m sure. BTW, Keith, do you plan on building any more Thunderbolts?
-
One question... how did you do all of the chrome trim in the car?
-
Stellar looking TBolt. The deepening of the panel lines paid off handsomely. One of the nicest build of a TBolt.
-
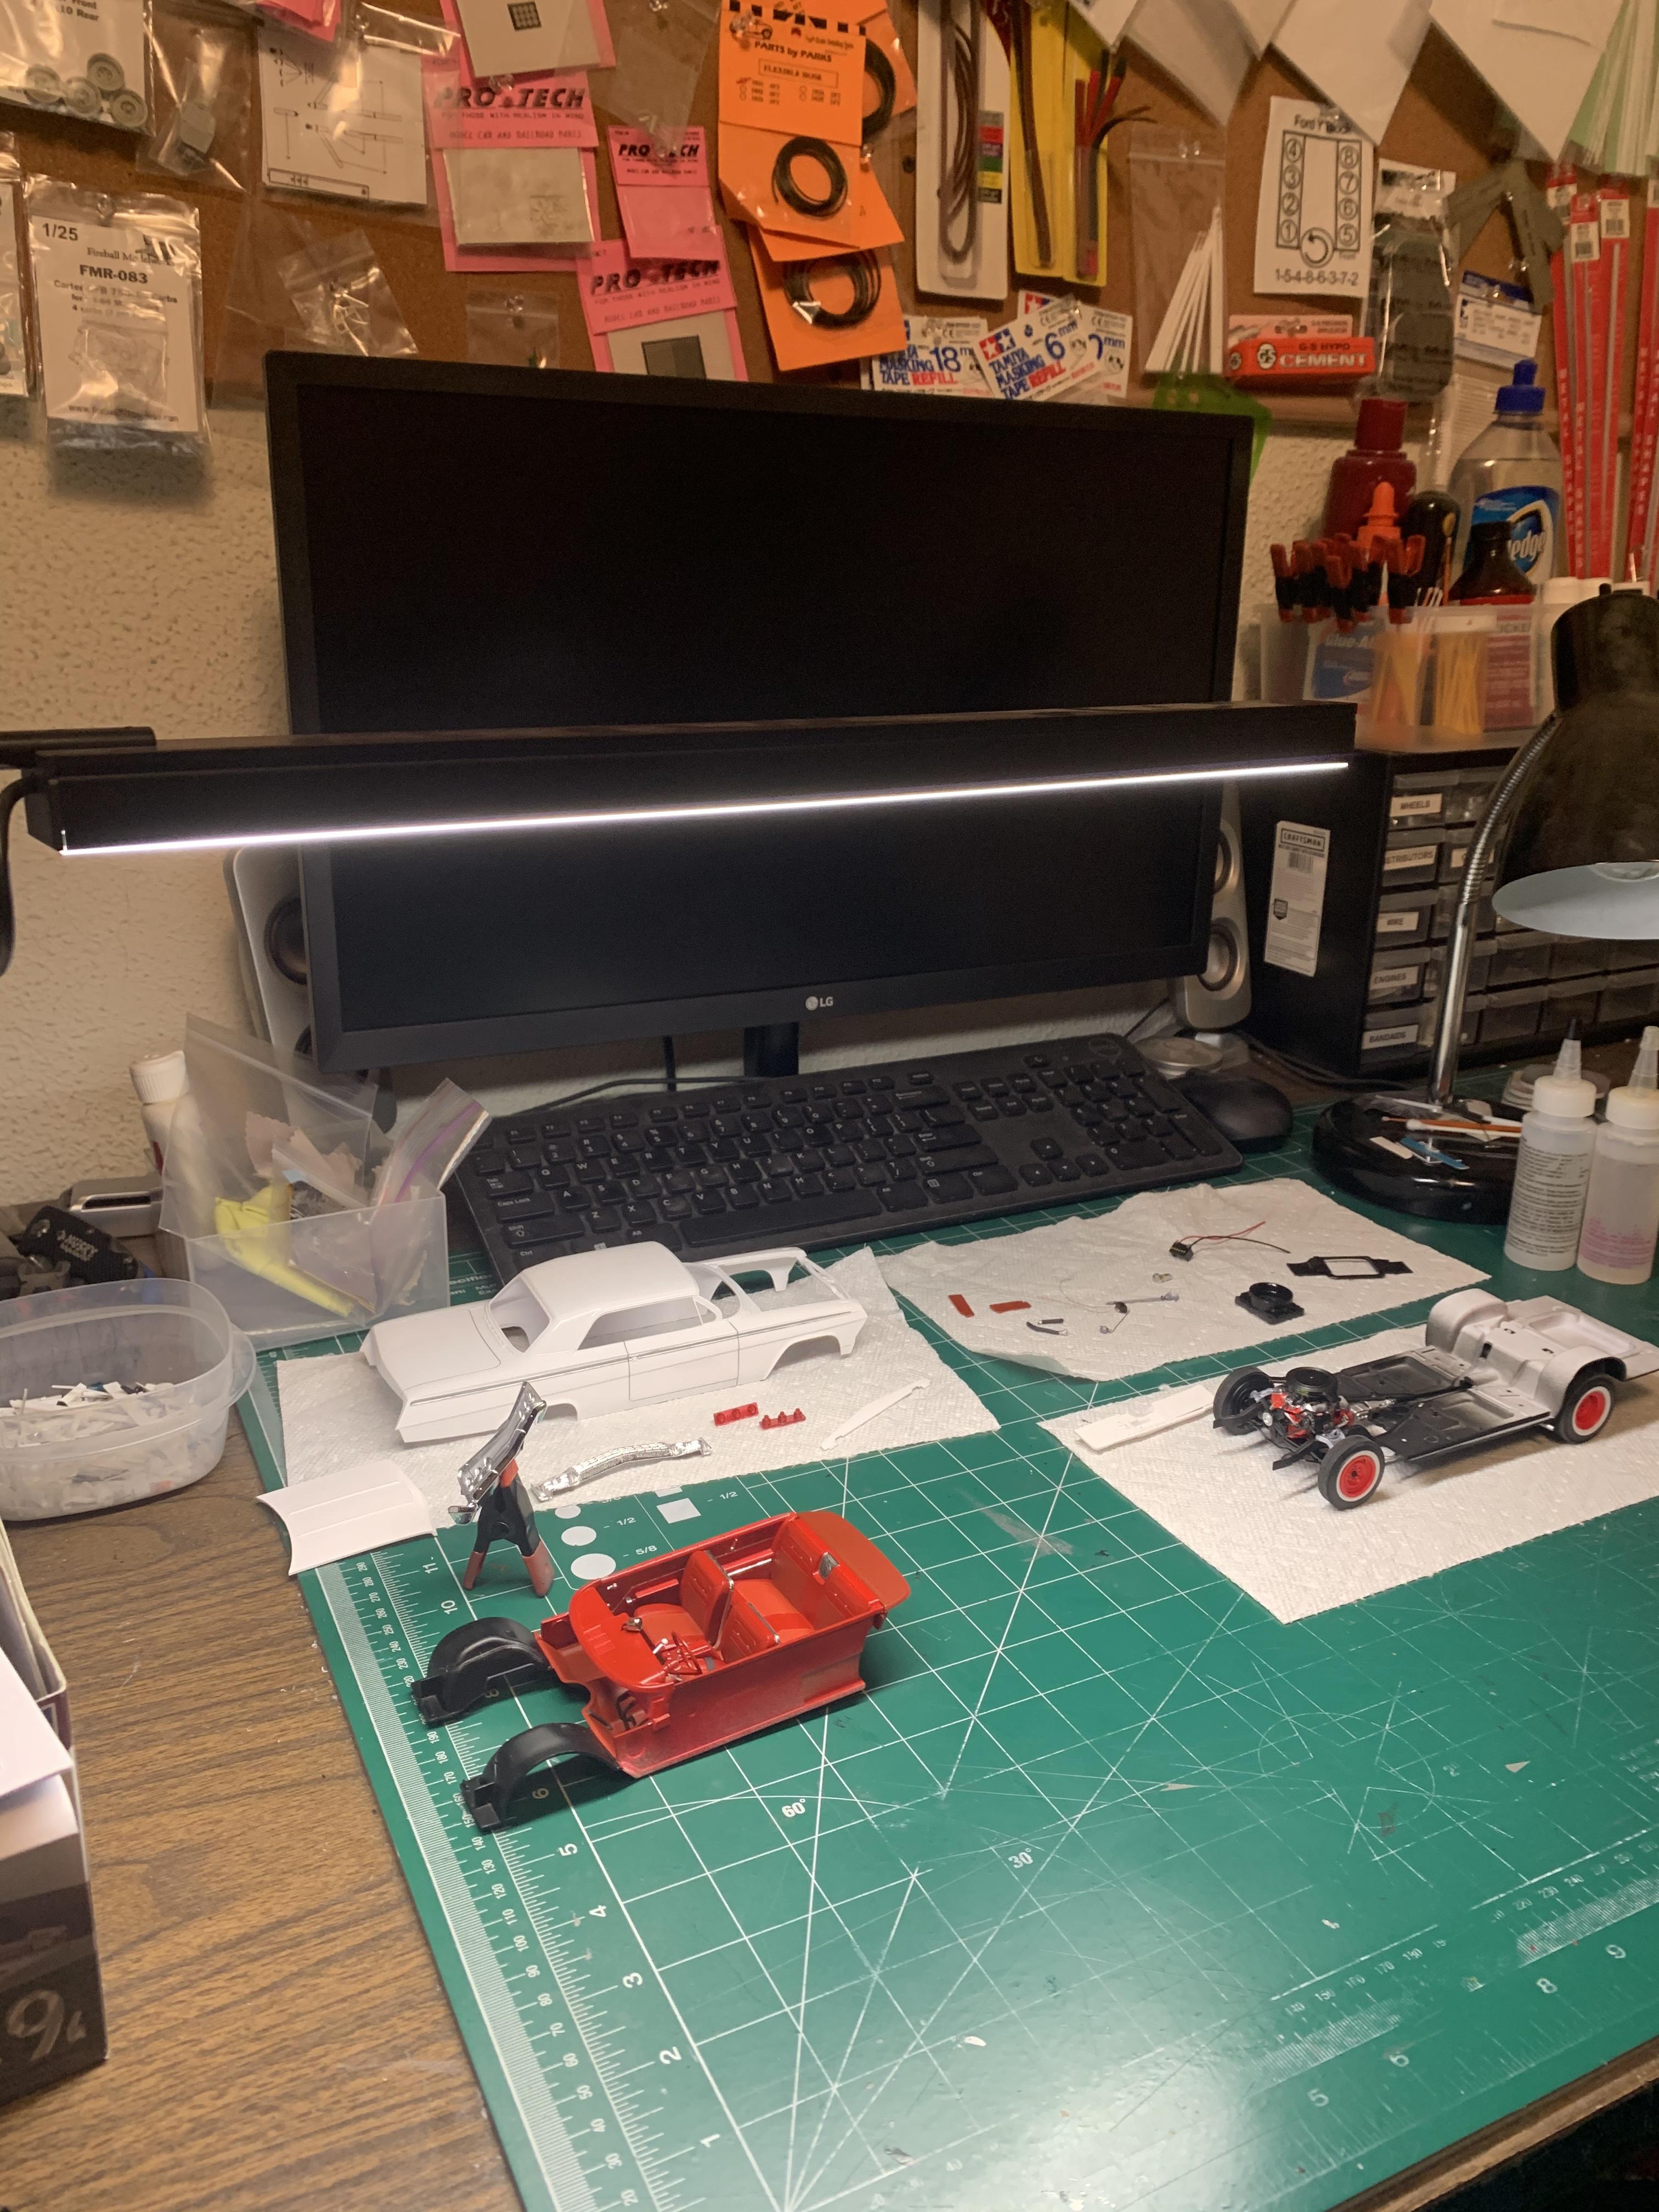
I found this light on Amazon. I just love it. The light head swivels, has different shades of light, and really covers a lot of the bench. I think I paid like $40 if I remember correctly.

-
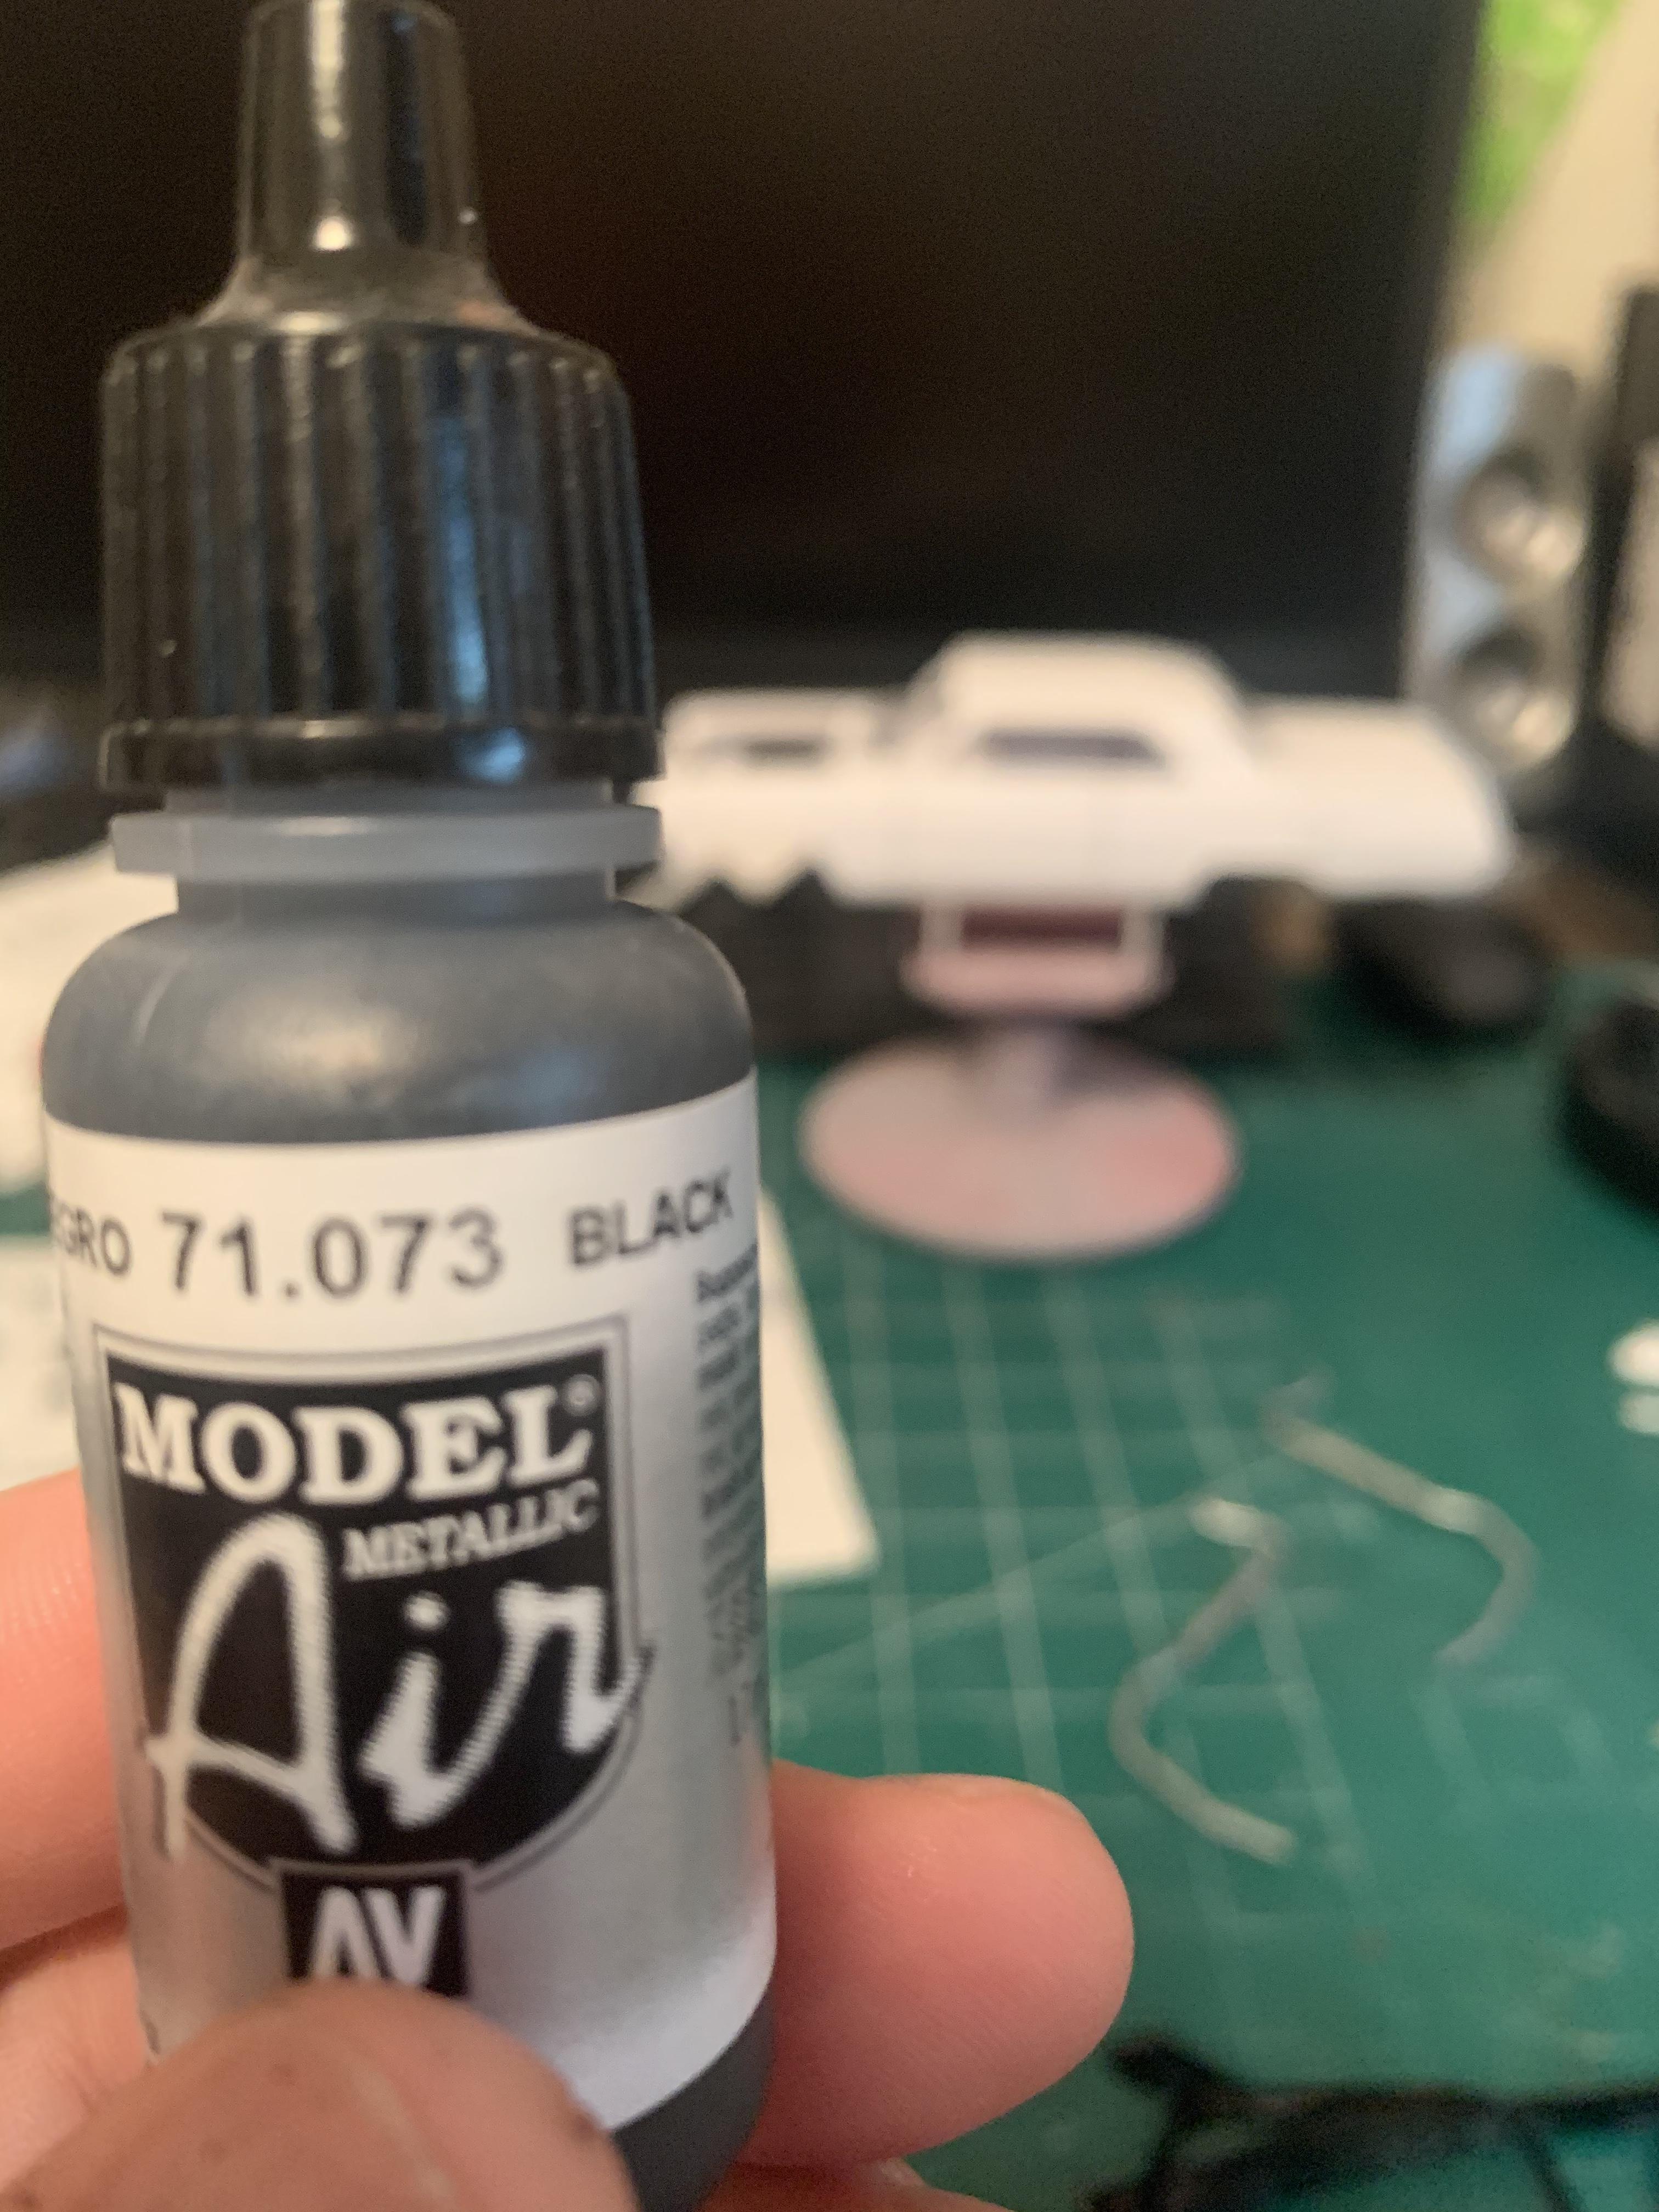
I use the Vallejo Air all the time. Just shake well, and it’s thinner than the Model Color counterpart to use in an airbrush so you won’t have to add water. For the Model Color bottles, I add just enough water with a eye dropper to get the correct consistency I need. Also be aware that there is a black metallic available. It’s printed small on the label. I bought the metallic by mistake. I don’t even bother with the Tamiya jar paints anymore as the Vallejo will leave brush strokes, but no where near as difficult to level as the Tamiya paint.
-
Pre-wired distributor
Brutalform replied to bluestringer's topic in Model Building Questions and Answers
I hear ya. I almost always do the correct firing order on my builds, but I remember MSD (or some ignition company), actually sold a distributor cap that actually allowed all of your wires to be routed nice and neatly. Four on one side, and four on the other side of the cap. There was also a crab style cap that also allowed you to re route wires. -
You might want to post this in the “Wanted” section in order to have a better chance of finding one.
-
News Flash... Elvis Presley died. Seriously though, as long as there is no politics, and/or religion, I don’t see what the problem is? I scroll through these boards almost daily, and if I see something that doesn’t interest me, I move on to the next topic. That could be the reason that the Off Topic section is at the very bottom.
-
Someone must have bought it. I tried to add it to the cart, but, It’s not there now. Thanks anyway.
-
Having a difficult time locating one of these 64 Impala kits. Performing a search on eBay often. I have built a couple of the AMT kits, but this one looks really nice.
-
Fantastic S/S Nova build. Everything looks in order. Really nice paintwork.
-
AMT 62 Bel Air grills.
Brutalform replied to Brutalform's topic in Model Building Questions and Answers
Thanks for clearing this up for me everyone. Much appreciated. -
AMT 62 Bel Air grills.
Brutalform replied to Brutalform's topic in Model Building Questions and Answers
Thanks Ken. So basically the Dyno Don car is the only one with a correct looking grill? I do have a couple of these grills, but they look exactly alike. I did build the Dyno Don car a while back, but sold it, and now I can’t compare the two. I’m pretty sure the two I do have are from the first two S/S kits though. I wonder if the Impala convertible kits are also the corrected grill? -
The Official EBay Discussion Thread
Brutalform replied to iamsuperdan's topic in General Automotive Talk (Trucks and Cars)
“What you see is what you get” Yea... it’s sounds so cocky...for a seller. -
Fantastic job on this old Mopar. Perfect in every way. Nice to see a slant six in there.
-
This engine looks amazing. The smallest details are perfect, Steve. Can’t wait to see this completed. BTW, what kind of magnifying visor are you using? I have one with just one flip lens.
-
What a beautiful muscle car build Gene. Perfect.
-
Moebius 65 A/FX Plymouth Satellite
Brutalform replied to cobraman's topic in WIP: Drag Racing Models
Nice start Ray. I started this kit, but a friend wanted to buy my project. Not a HUGE AWB fan, so I sold it to him. I have three more I’ll eventually start sometime. I’ll be following yours. -
The Official EBay Discussion Thread
Brutalform replied to iamsuperdan's topic in General Automotive Talk (Trucks and Cars)
I’d kindly ask the seller, or any seller for that matter, for more pics. If they can’t comply with a simple question, I’ll pass. I saw this auction yesterday and I saw it as a 70. I just kept scrolling. I always watch what I bid on very carefully, because anyone can slip a newer issue body, or other parts, into a vintage box, and sell it. Old styrene is way better than the junk they mold kits in today. And if I’m bidding on a vintage kit, I have this crazy way of thinking, that I should get what I’m paying for. -
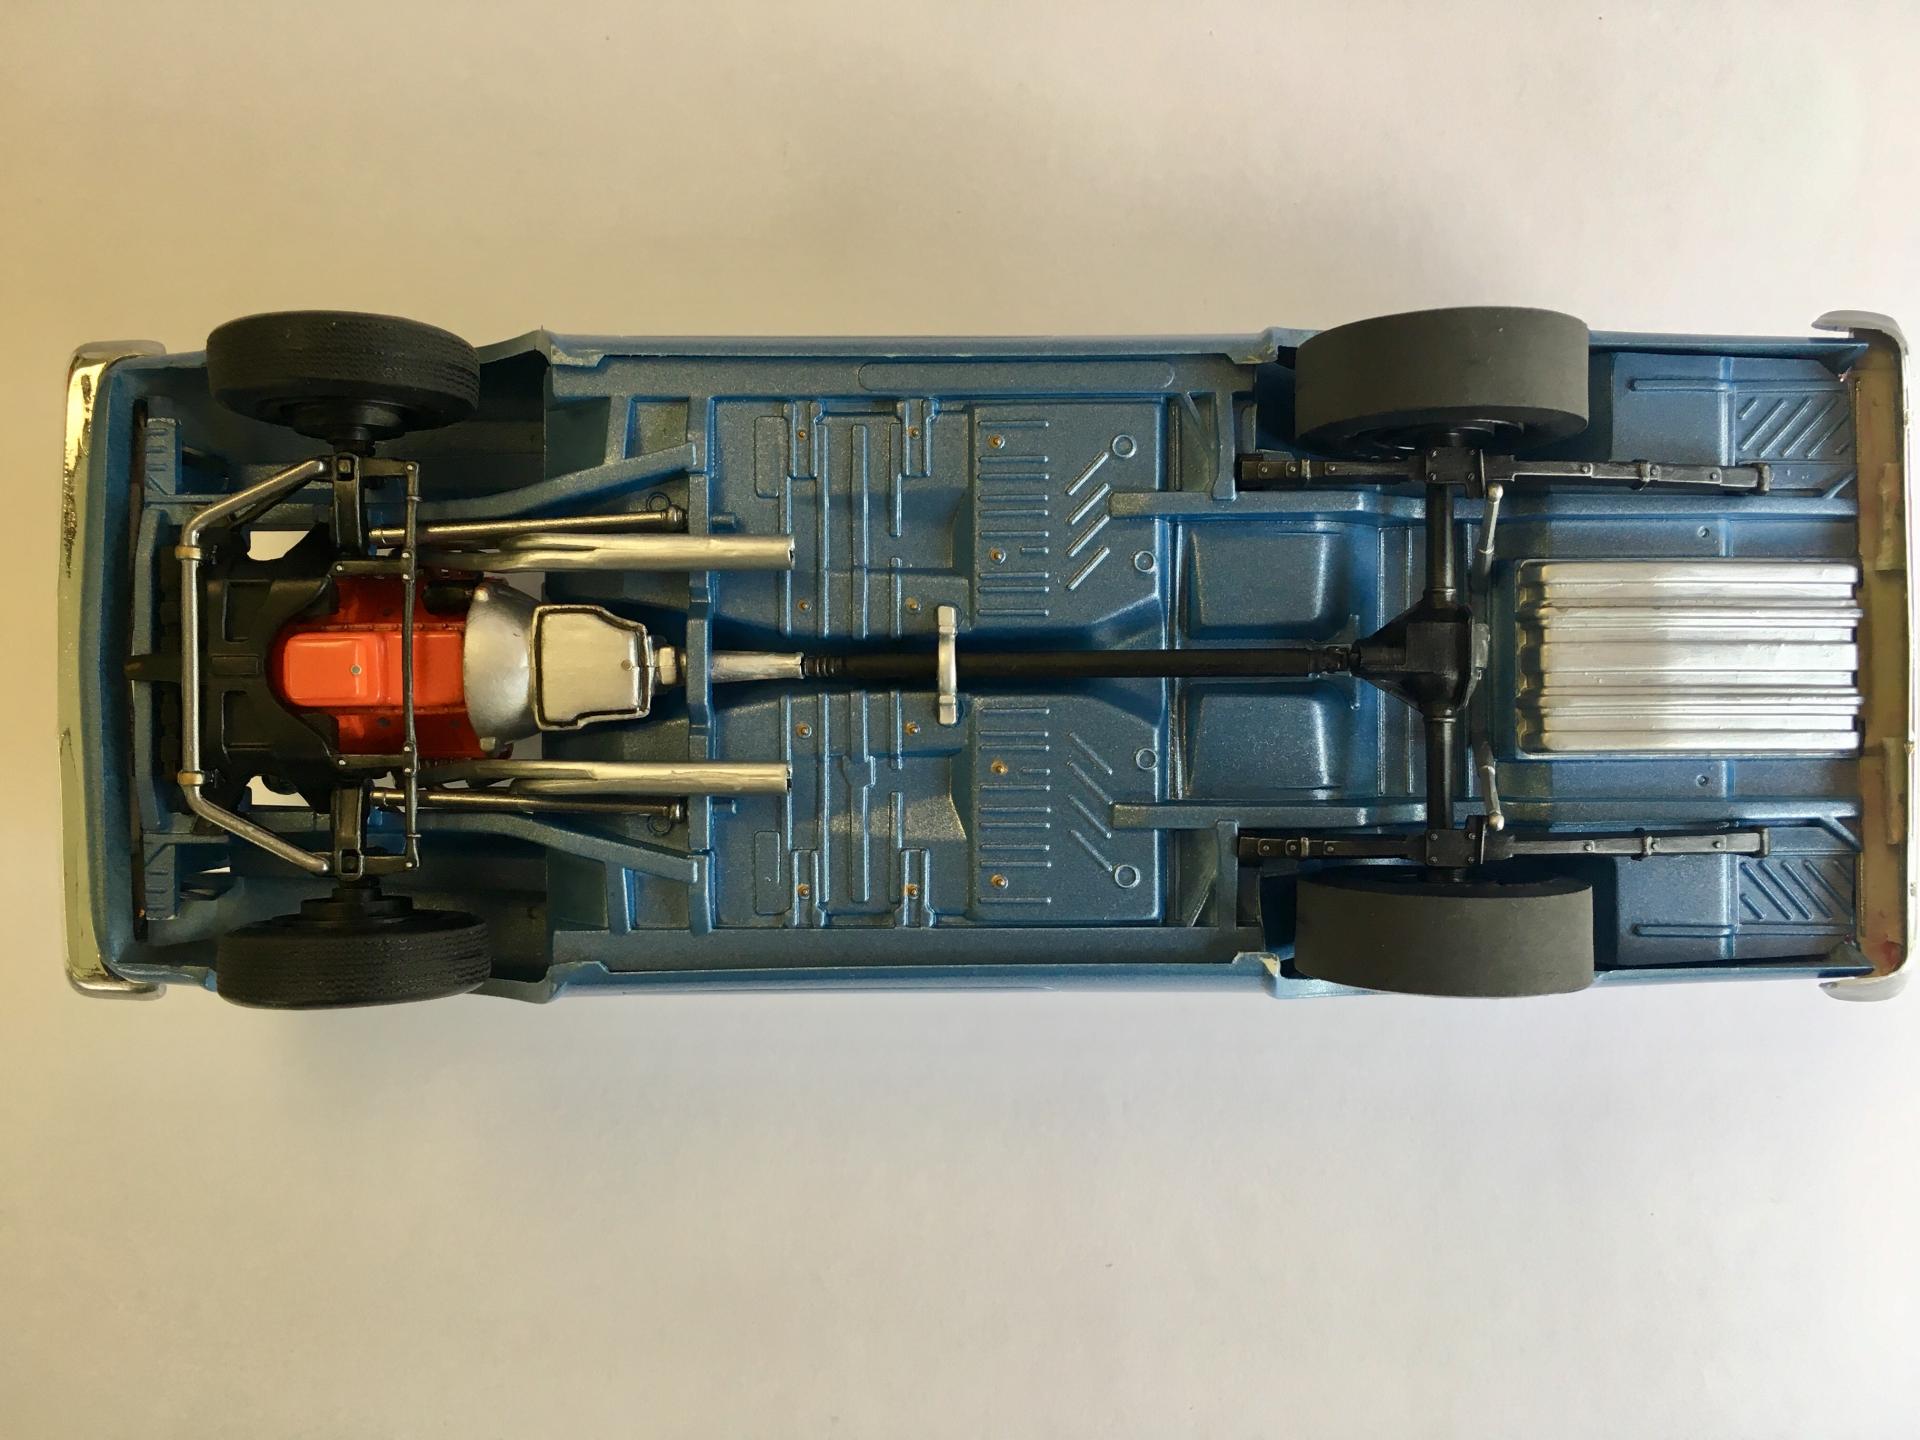
Dry brushing is a really nice technique to use when detailing suspension parts, and engine parts. It doesn’t give that “brand new” show car look, but it looks realistic for a driven car, IMO. The rear springs, and other suspension components were dry brushed with silver enamel over semi gloss black on this 63 Plymouth Fury.
-
Ive read that the AMT 62 Dyno Don car has the "corrected" grill, as compared to the previous two S/S Bel Airs. Does anyone have both grills that they could please post a pic of them showing the difference? It would be much appreciated, as I only have grills from the two previous Bel Airs.
-
I know she dated Robin Crosby of Ratt. And he had AIDS and eventually died from a heroin overdose. I’ve read she had DUIs and was busted for cocaine in the past. Not saying that’s her cause of death, but that lifestyle will eventually catch up to you.