Kit Basher
-
Posts
2,431 -
Joined
-
Last visited
Content Type
Profiles
Forums
Events
Gallery
Everything posted by Kit Basher
-
Unimog
Kit Basher replied to Kit Basher's topic in Model Trucks: Pickups, Vans, SUVs, Light Commercial
Thanks, Jonathan! -
Unimog
Kit Basher replied to Kit Basher's topic in WIP: Model Trucks: Pickups, Vans, SUVs, Light Commercial
That's an amusing picture, bouncing it like a basketball! After your comment, I was thinking about adding a load of gravel, but your steel plate idea is interesting too. -
Unimog
Kit Basher replied to Kit Basher's topic in Model Trucks: Pickups, Vans, SUVs, Light Commercial
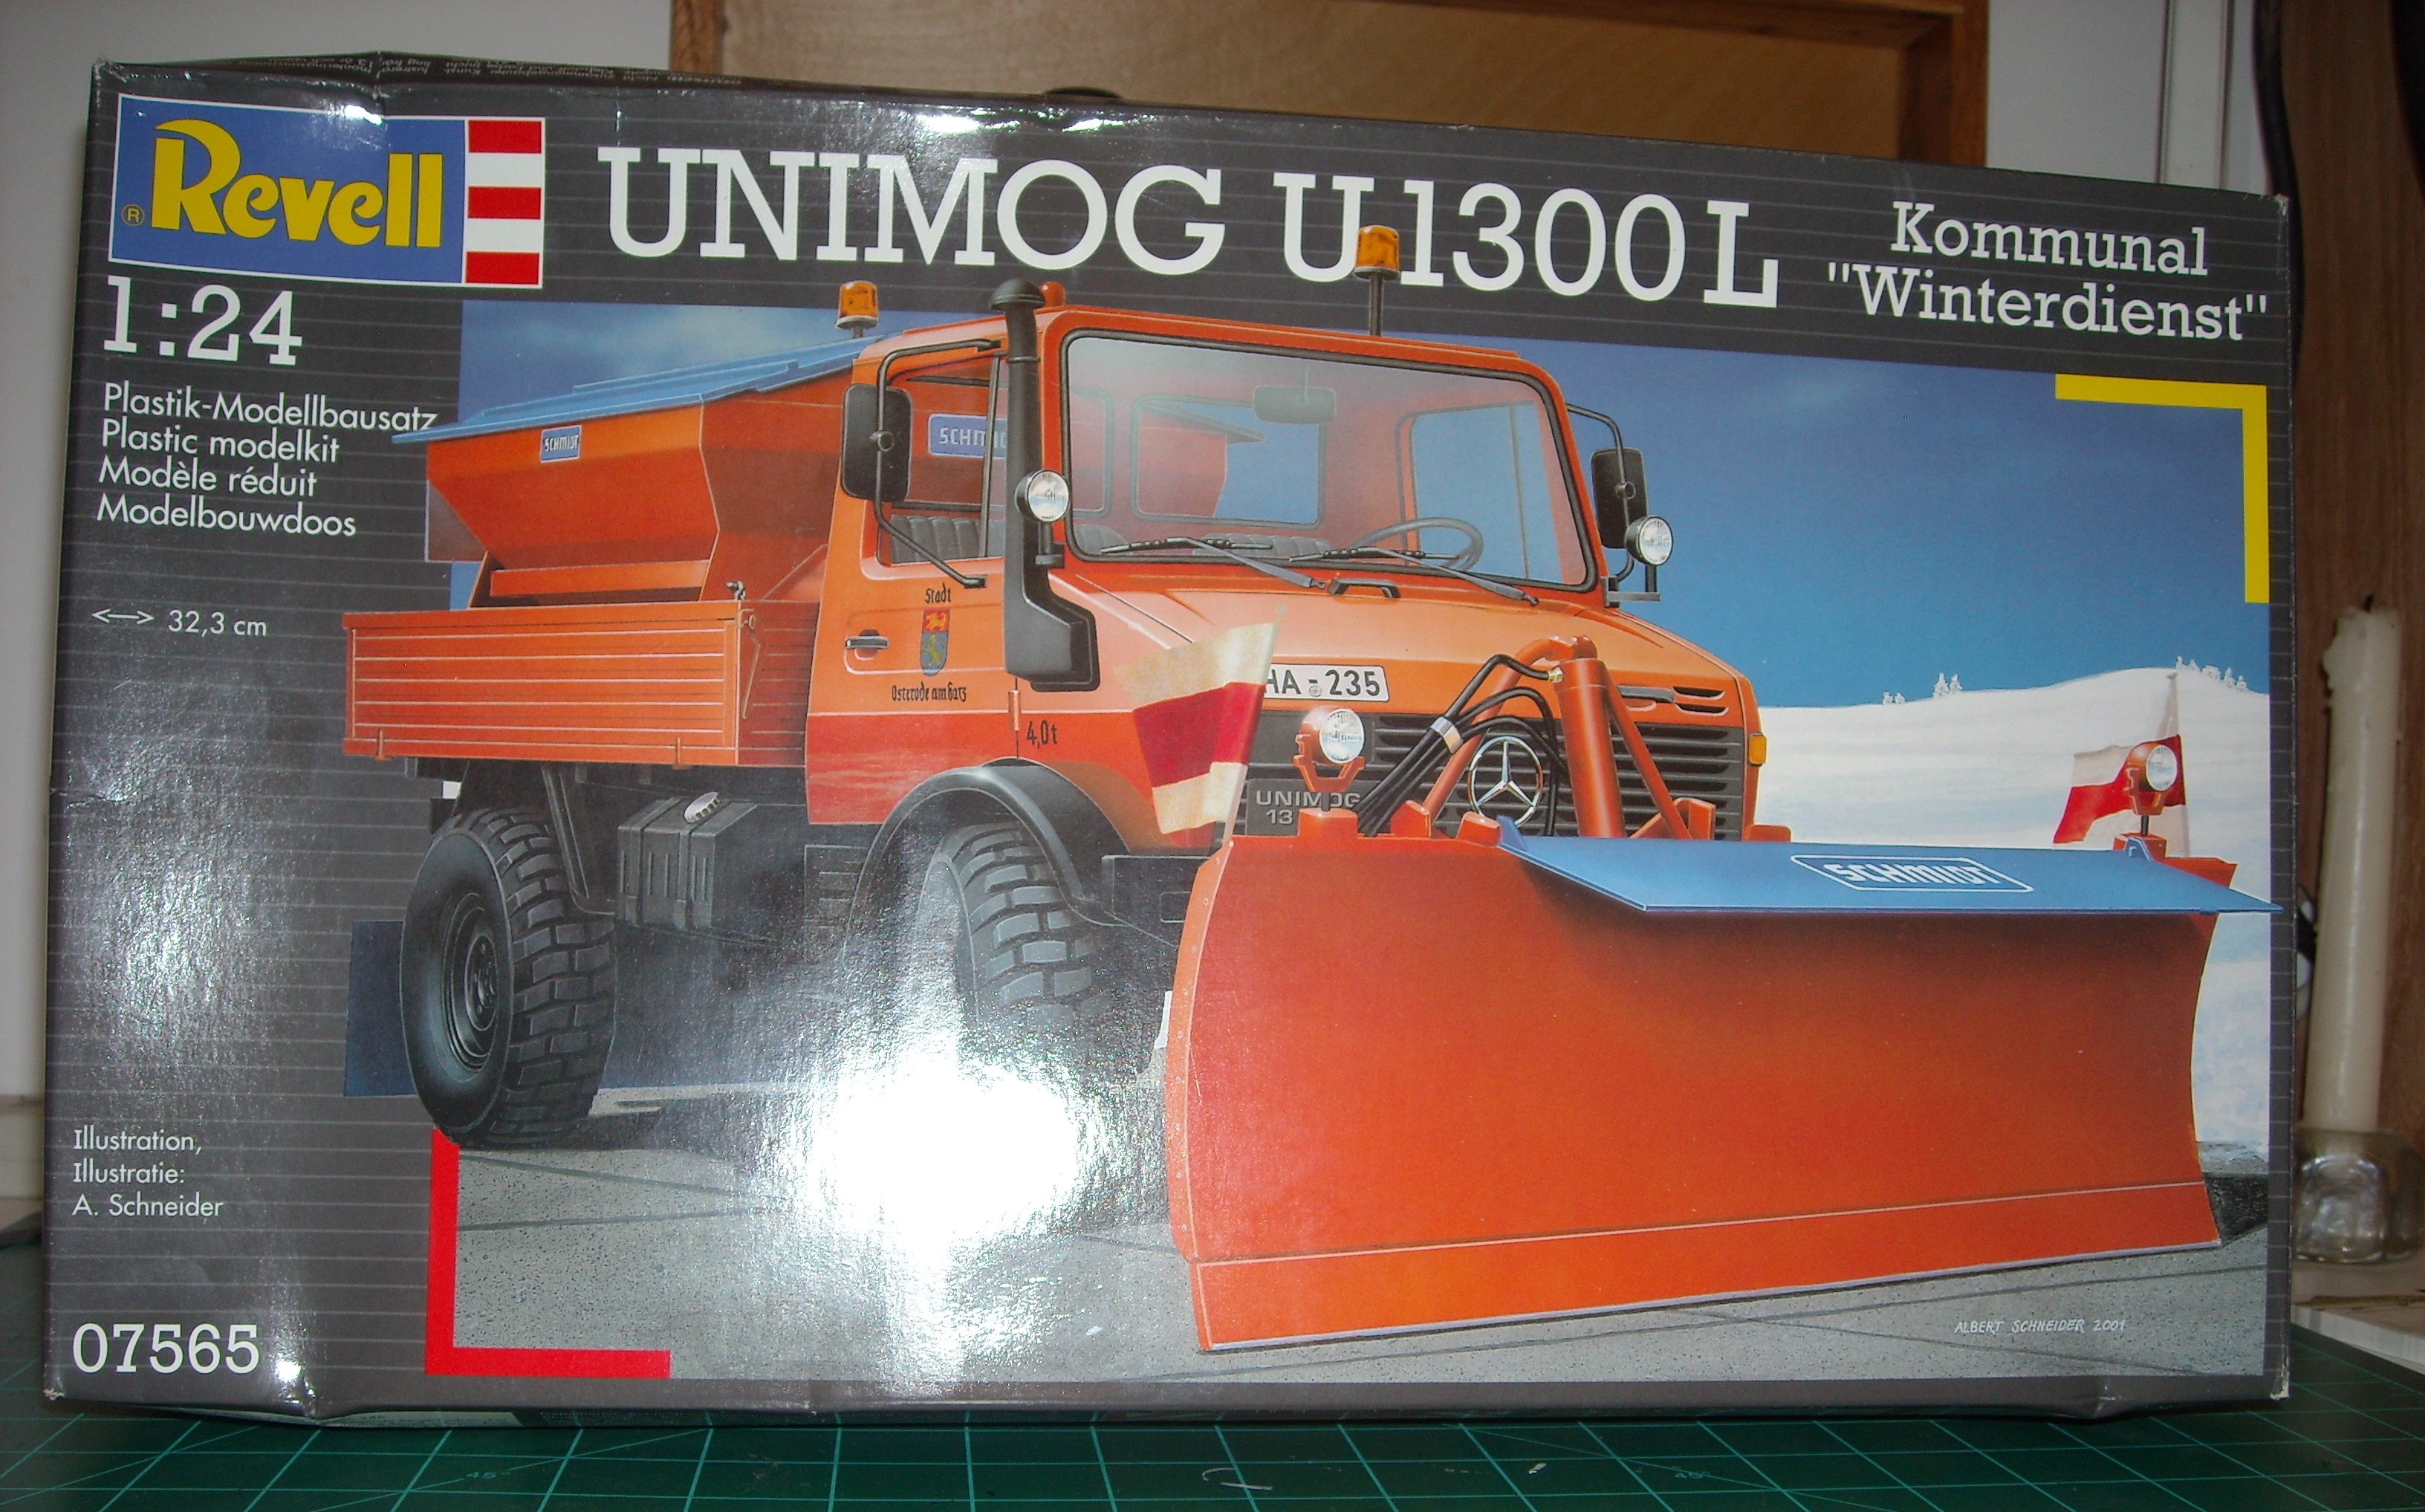
Thanks Dan! This kit can be built without the plow and salt spreader. Then you would have a plow and spreader for some other vehicle. There are a couple of strange things about this kit. It has a nice engine, but no fan or radiator. There is also no "glass" for the back window. The hood doesn't open, so I didn't worry about the radiator. A piece of clear from a blister pack made a back window. -
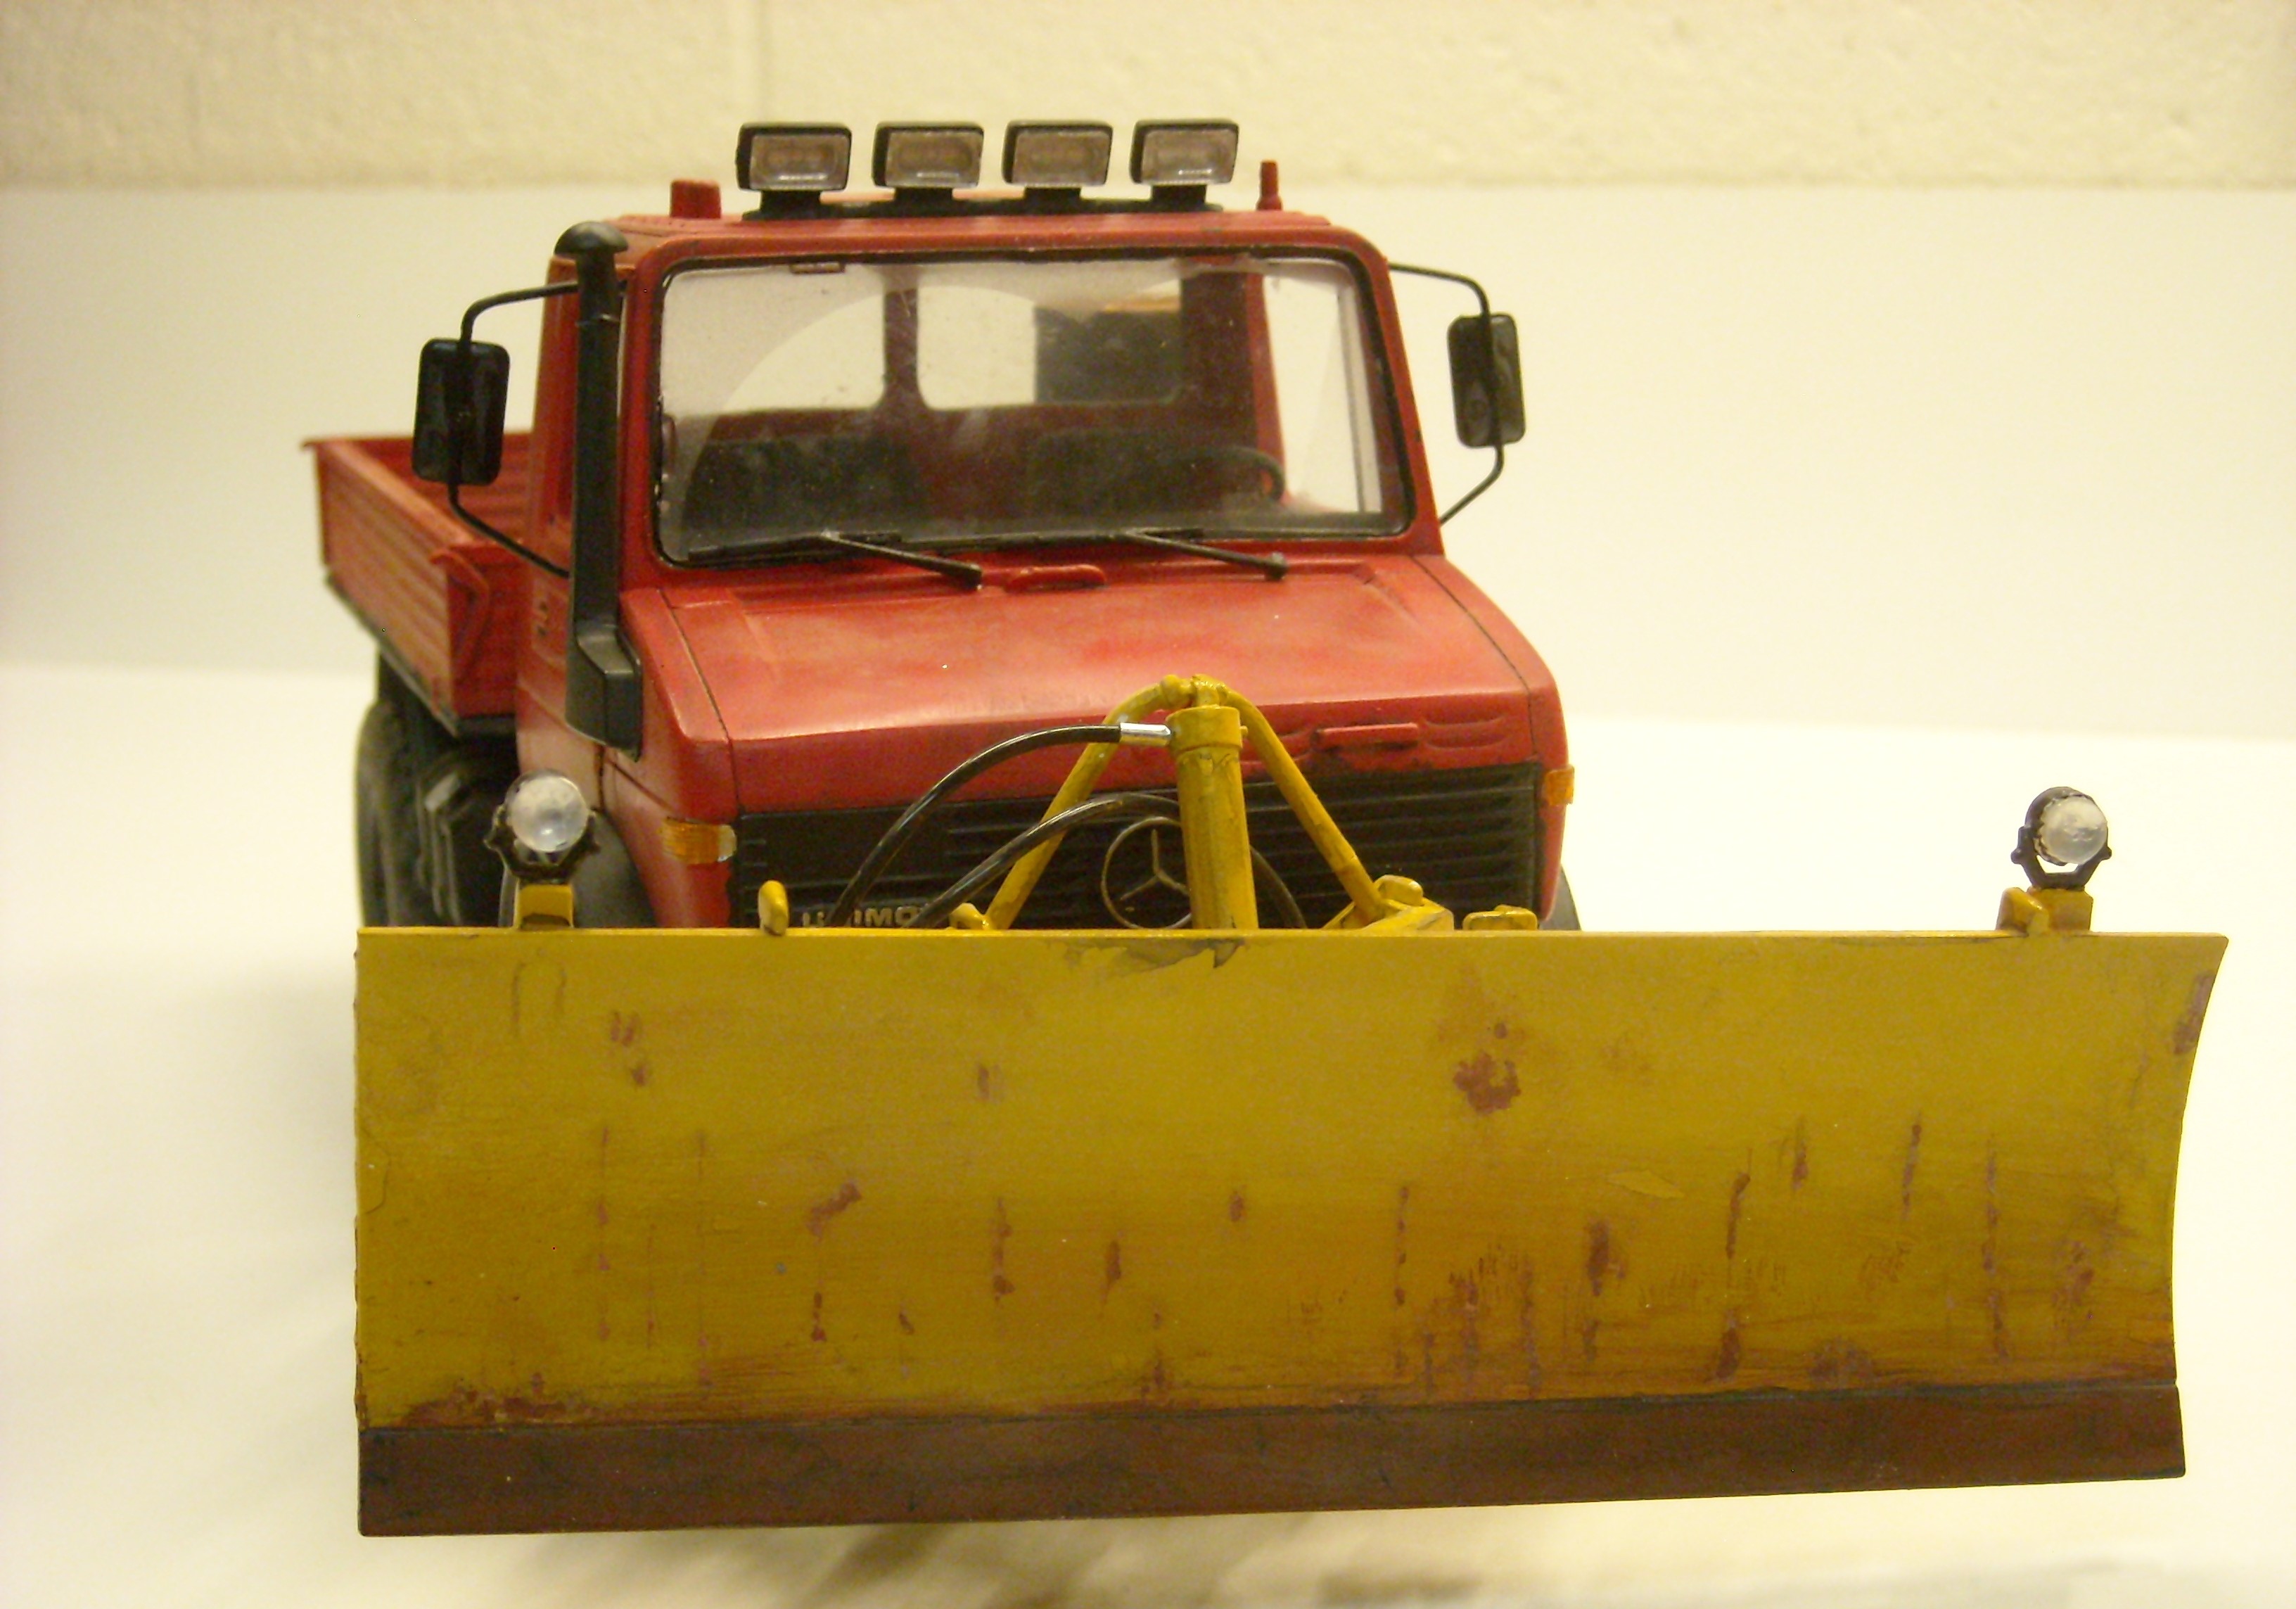
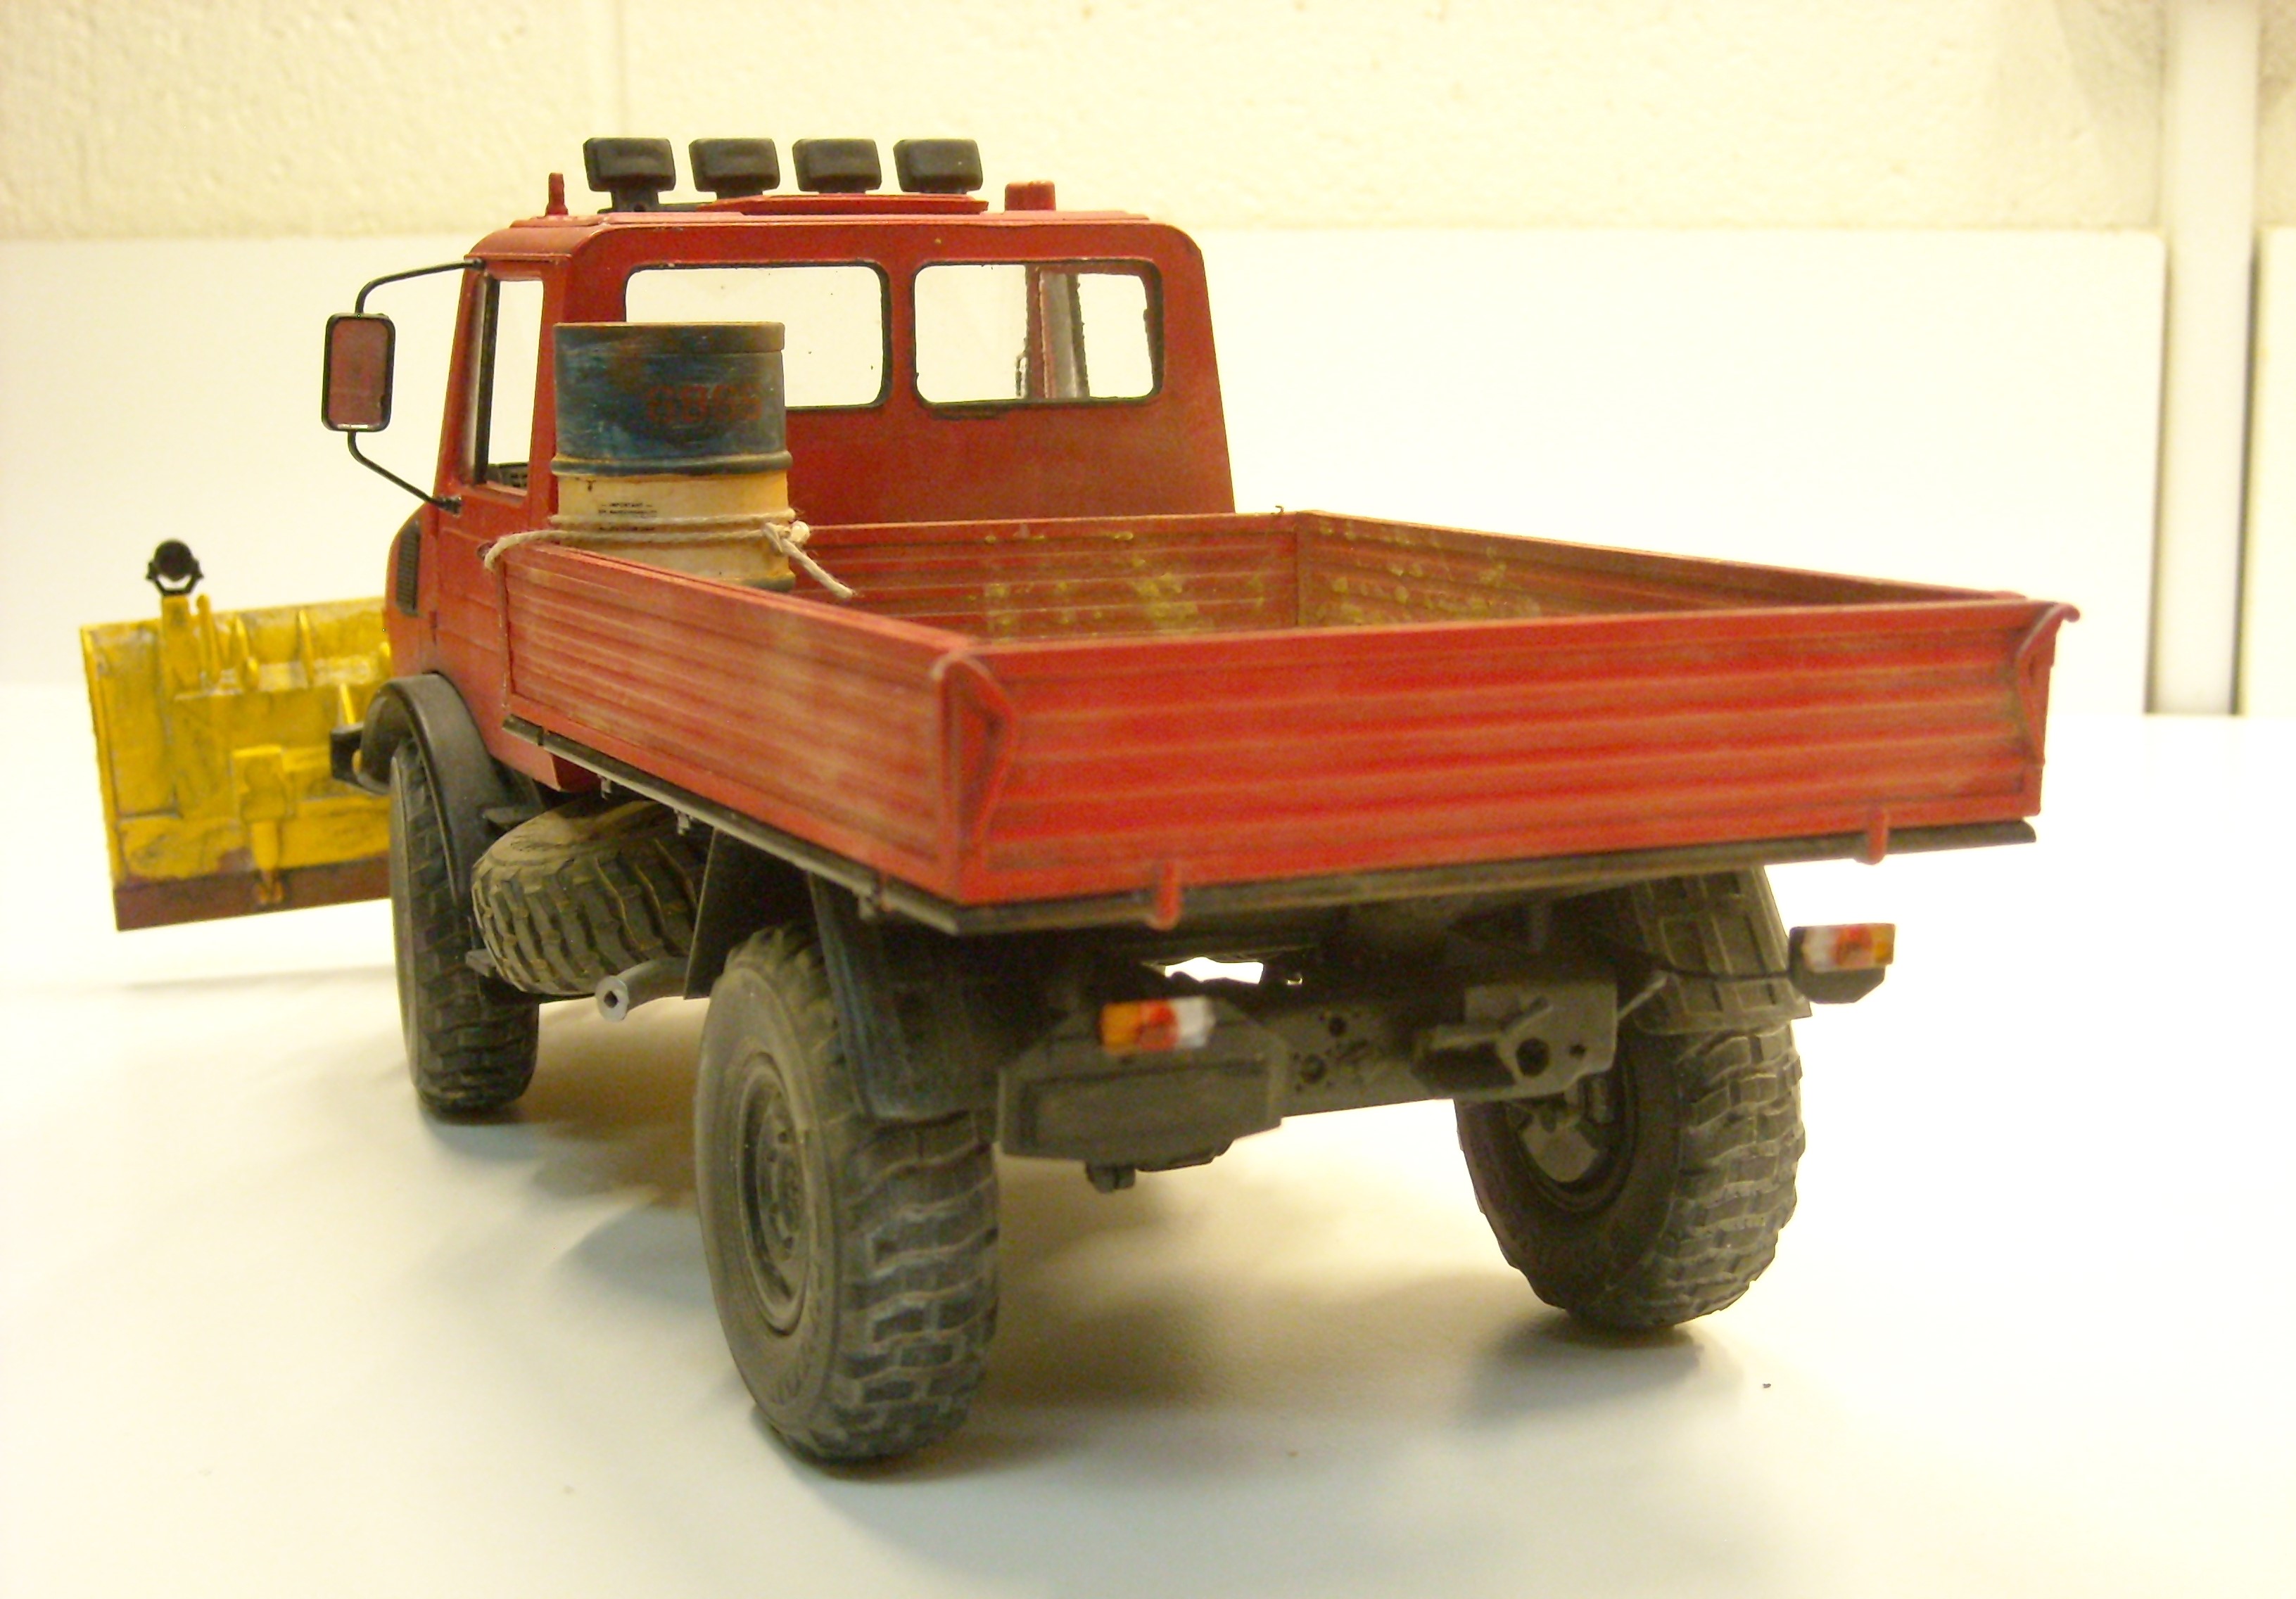
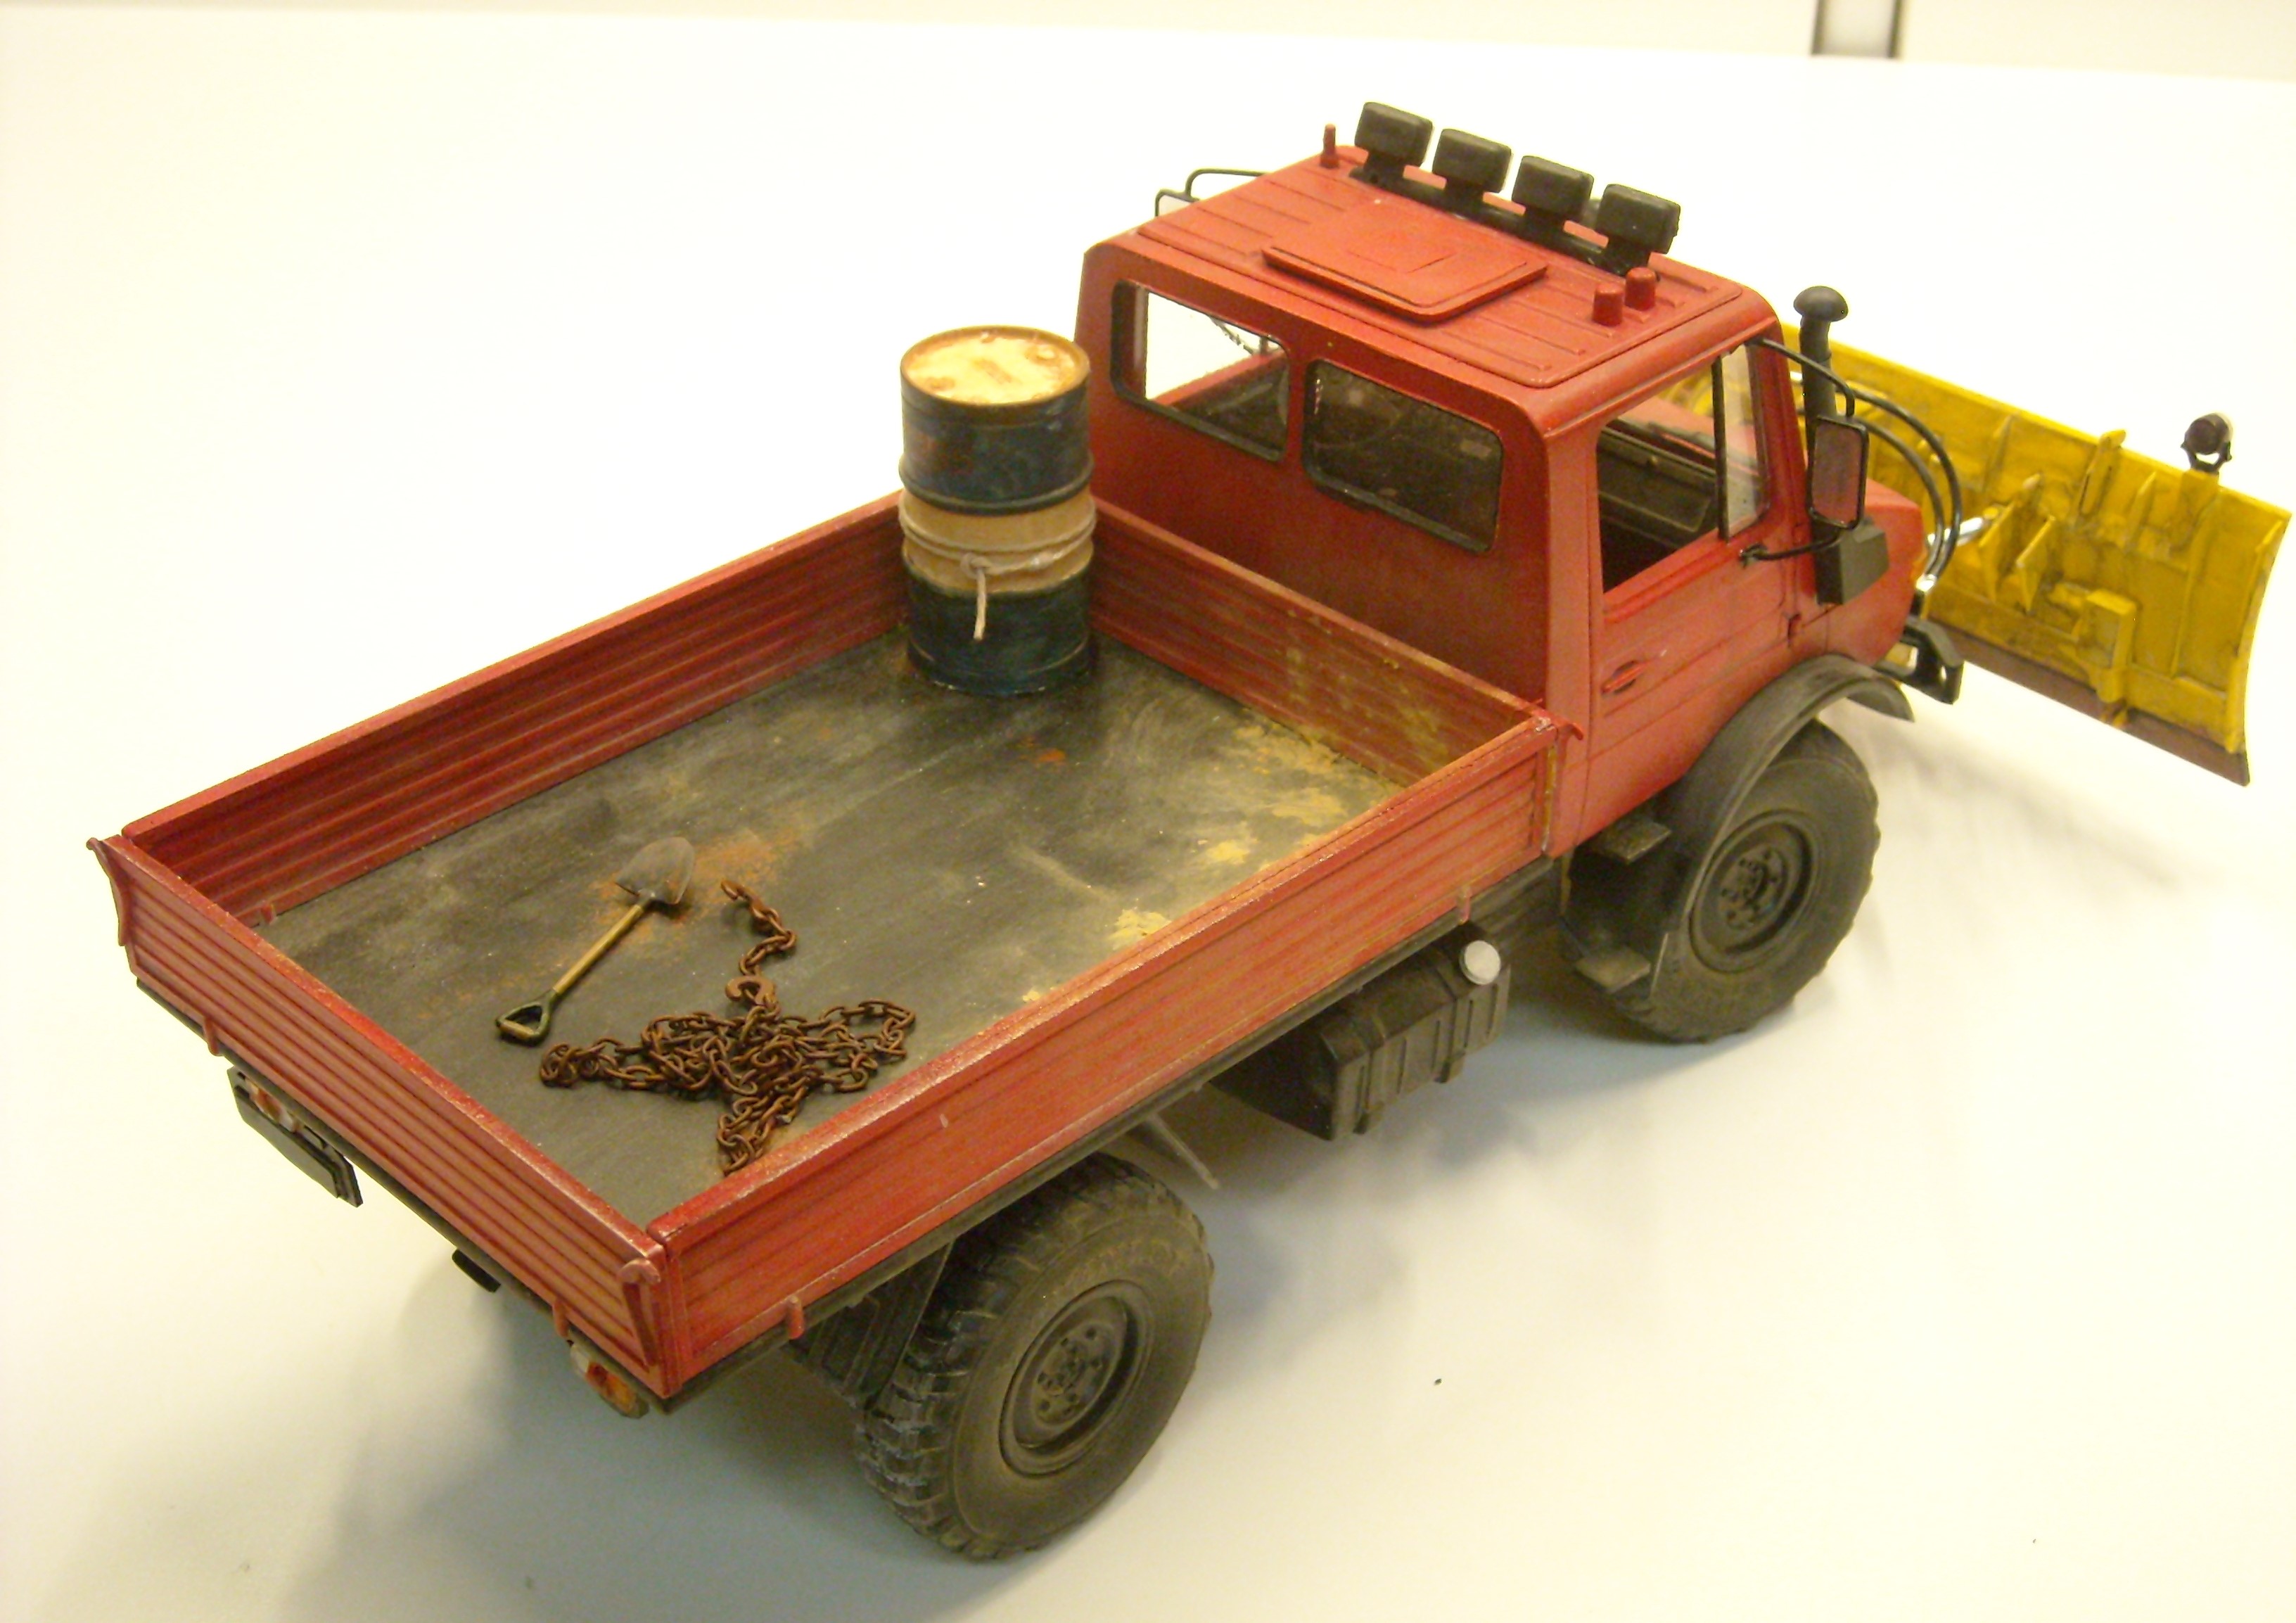
This kit: I wasn't crazy about the salt spreader, so I put some "junk in the trunk". Here's the interior: And what it looks like without the plow.

-
Unimog
Kit Basher replied to Kit Basher's topic in WIP: Model Trucks: Pickups, Vans, SUVs, Light Commercial
Thanks Mike, I bet they were really front heavy with that plow on there. I'll ponder on how to add some ballast. I finally figured out Fotki, so I put up a thread in Under Glass. -
Unimog
Kit Basher replied to Kit Basher's topic in WIP: Model Trucks: Pickups, Vans, SUVs, Light Commercial
I'm using this thread as a test to figure out how to work Fotki. I will post an "Under Glass" thread when I get it working. -
First Car in Space: a Tesla Roadster
Kit Basher replied to Ace-Garageguy's topic in General Automotive Talk (Trucks and Cars)
Somebody mentioned that the sound system in the Tesla is playing a continuous loop of David Bowie's "Space Oddity"'. Of course, nobody can hear it. "Ground control to Major Tom....." -
12 years ago??That's crazy
Kit Basher replied to NYLIBUD's topic in General Automotive Talk (Trucks and Cars)
I'm a relative newbie at 2011, but I've enjoyed every minute of it and learned a lot. This is a great place. -
Stumbled on these the other day, I've never bought or used any. Kinda pricey, and maybe a chore to assemble, but maybe it will work for you. https://www.ebay.com/sch/i.html?_from=R40&_trksid=p2045573.m570.l1313.TR0.TRC0.H0.Xphoto+etch+tie+down+straps.TRS0&_nkw=photo+etch+tie+down+straps&_sacat=0&_oac=1
-
I also use sandpaper and glass for sharpening. I use a spray craft adhesive. Be sure to get the "removable" or "temporary" kind. I use 3/8" plate glass, but laminated or tempered would be safer. For your purpose, 1/4" would probably be fine. Laminated is usually cheaper, and tempered has a longer lead time, as it must be cut and then tempered. Either way, get ground or polished edges for safety. Corian should be available from custom countertop makers. The sink cut-outs are basically scrap. The 3/4" thickness would be preferable, as the 1/2" sometimes warps. The 1/2" would be OK, if you can get a flat piece, and store it flat, it will probably stay flat. It can be cut and shaped with regular woodworking tools.
-
Small World...
Kit Basher replied to Lovefordgalaxie's topic in General Automotive Talk (Trucks and Cars)
Use it as an excuse to track down your old friend. Find him and tell him the story. Should make for an interesting conversation. -
Thinning testors enamel paint?
Kit Basher replied to Sweetganga's topic in General Automotive Talk (Trucks and Cars)
I don't know why my experience is different than some others, but I have never had a problem brushing enamels straight from the bottle. They do take some time to dry, a half hour or more, but they always dry completely. As they begin to thicken up with age, a little enamel thinner will bring them back. The most important thing is to make sure you stir them thoroughly every time before using. Both Tamiya and Testors acrylics also work well. Some colors may not cover as well as enamels. I suggest you experiment with different paints as you go along. I use both enamels and acrylics. -
That looks great! I bought the resin kit to build the truck in my avatar. The resin kit looks very nice. Thanks for creating this cab, I've been wanting to build this truck for a long time.
-
Here's a link to my build of the Opel, including Harry's comments. http://www.modelcarsmag.com/forums/topic/92241-opel-gt/ Unfortunately, all the photos are gone (Thanks, PB) Harry's suggestions are how to fix the tail lights, which are a mess if you compare them to a 1:1. HTH.
-
Dodge Viper ACR kits opionions
Kit Basher replied to aurfalien's topic in Model Building Questions and Answers
The Revell GTS is a pretty nice kit, except I could not get a good fit between the hood and the front fascia. The upside is that kit is plentiful and usually cheap. I bought three at Ollies for $8 a pop. If you want a roadster, the Revell SRT 10 went together nicely. -
Sharpening sprue cutters etc...
Kit Basher replied to aurfalien's topic in Model Building Questions and Answers
If your tools are not too dull, 400 and 1000 grit should work. 1000 is a little coarse for final honing of knives, but it should be OK for sprue cutters. You don't need them to be scalpel sharp. Keep in mind that if you take much off of the cutting edges, they may no longer meet. You may have to file the stop between the handles to get them closer together. -
Anyone else experiencing a delay when clicking on a post etc?
Kit Basher replied to Monty's topic in The Off-Topic Lounge
If you right click on the back arrow, you will see that a bunch of pages have loaded. You can go down that list and click on the page you want to go back to. Might be easier than closing and starting over. -
different diameter plug wires available?
Kit Basher replied to fiatboy's topic in Model Building Questions and Answers
http://www.micronmeters.com/c-46-insulated-wire.aspx -
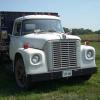
I am so excited! As you can see from my avatar, I have wanted to build one of these for years. We own a '71, and I've been thinking about building a cab. I took a bunch of pictures and measurements, but you've done a much better job than I could do. I wish I had seen this thread when you started, I could have provided any reference pictures you needed. I hope this does get cast, I will certainly buy one. The Scout engine looks good, I hope it is the right size for the cab. Thanks for doing this!
-
Medium CA works well. Instant bond, and pretty strong. Usually if a joint fails, it's the balsa, not the glue. For extra strength, I would use yellow carpenter's glue, like Titebond. Probably stronger than epoxy for wood, and no mixing necessary. Some clamping might be required, but that's true for the epoxy as well. If it needs to be really strong, some joinery is in order.
-
Fantastic, Cato! Your unwillingness to settle for anything less than your very best is an inspiration to us all. It has been a joy to watch you create this masterpiece. Thanks for sharing.
-
I did not crash at Indy, Hugh
-
I can't say about Tamiya, but it makes a big difference with Testors. Here is the same paint over six different primers.
-
Thanks for the replies, guys. I bought the Hasegawa kit. Now I just need to get around to building it!
-
Nacho Z's hobby room
Kit Basher replied to Nacho Z's topic in General Automotive Talk (Trucks and Cars)
Really nice, John, except you need more kits!