Search the Community
Showing results for tags 'amt'.
-
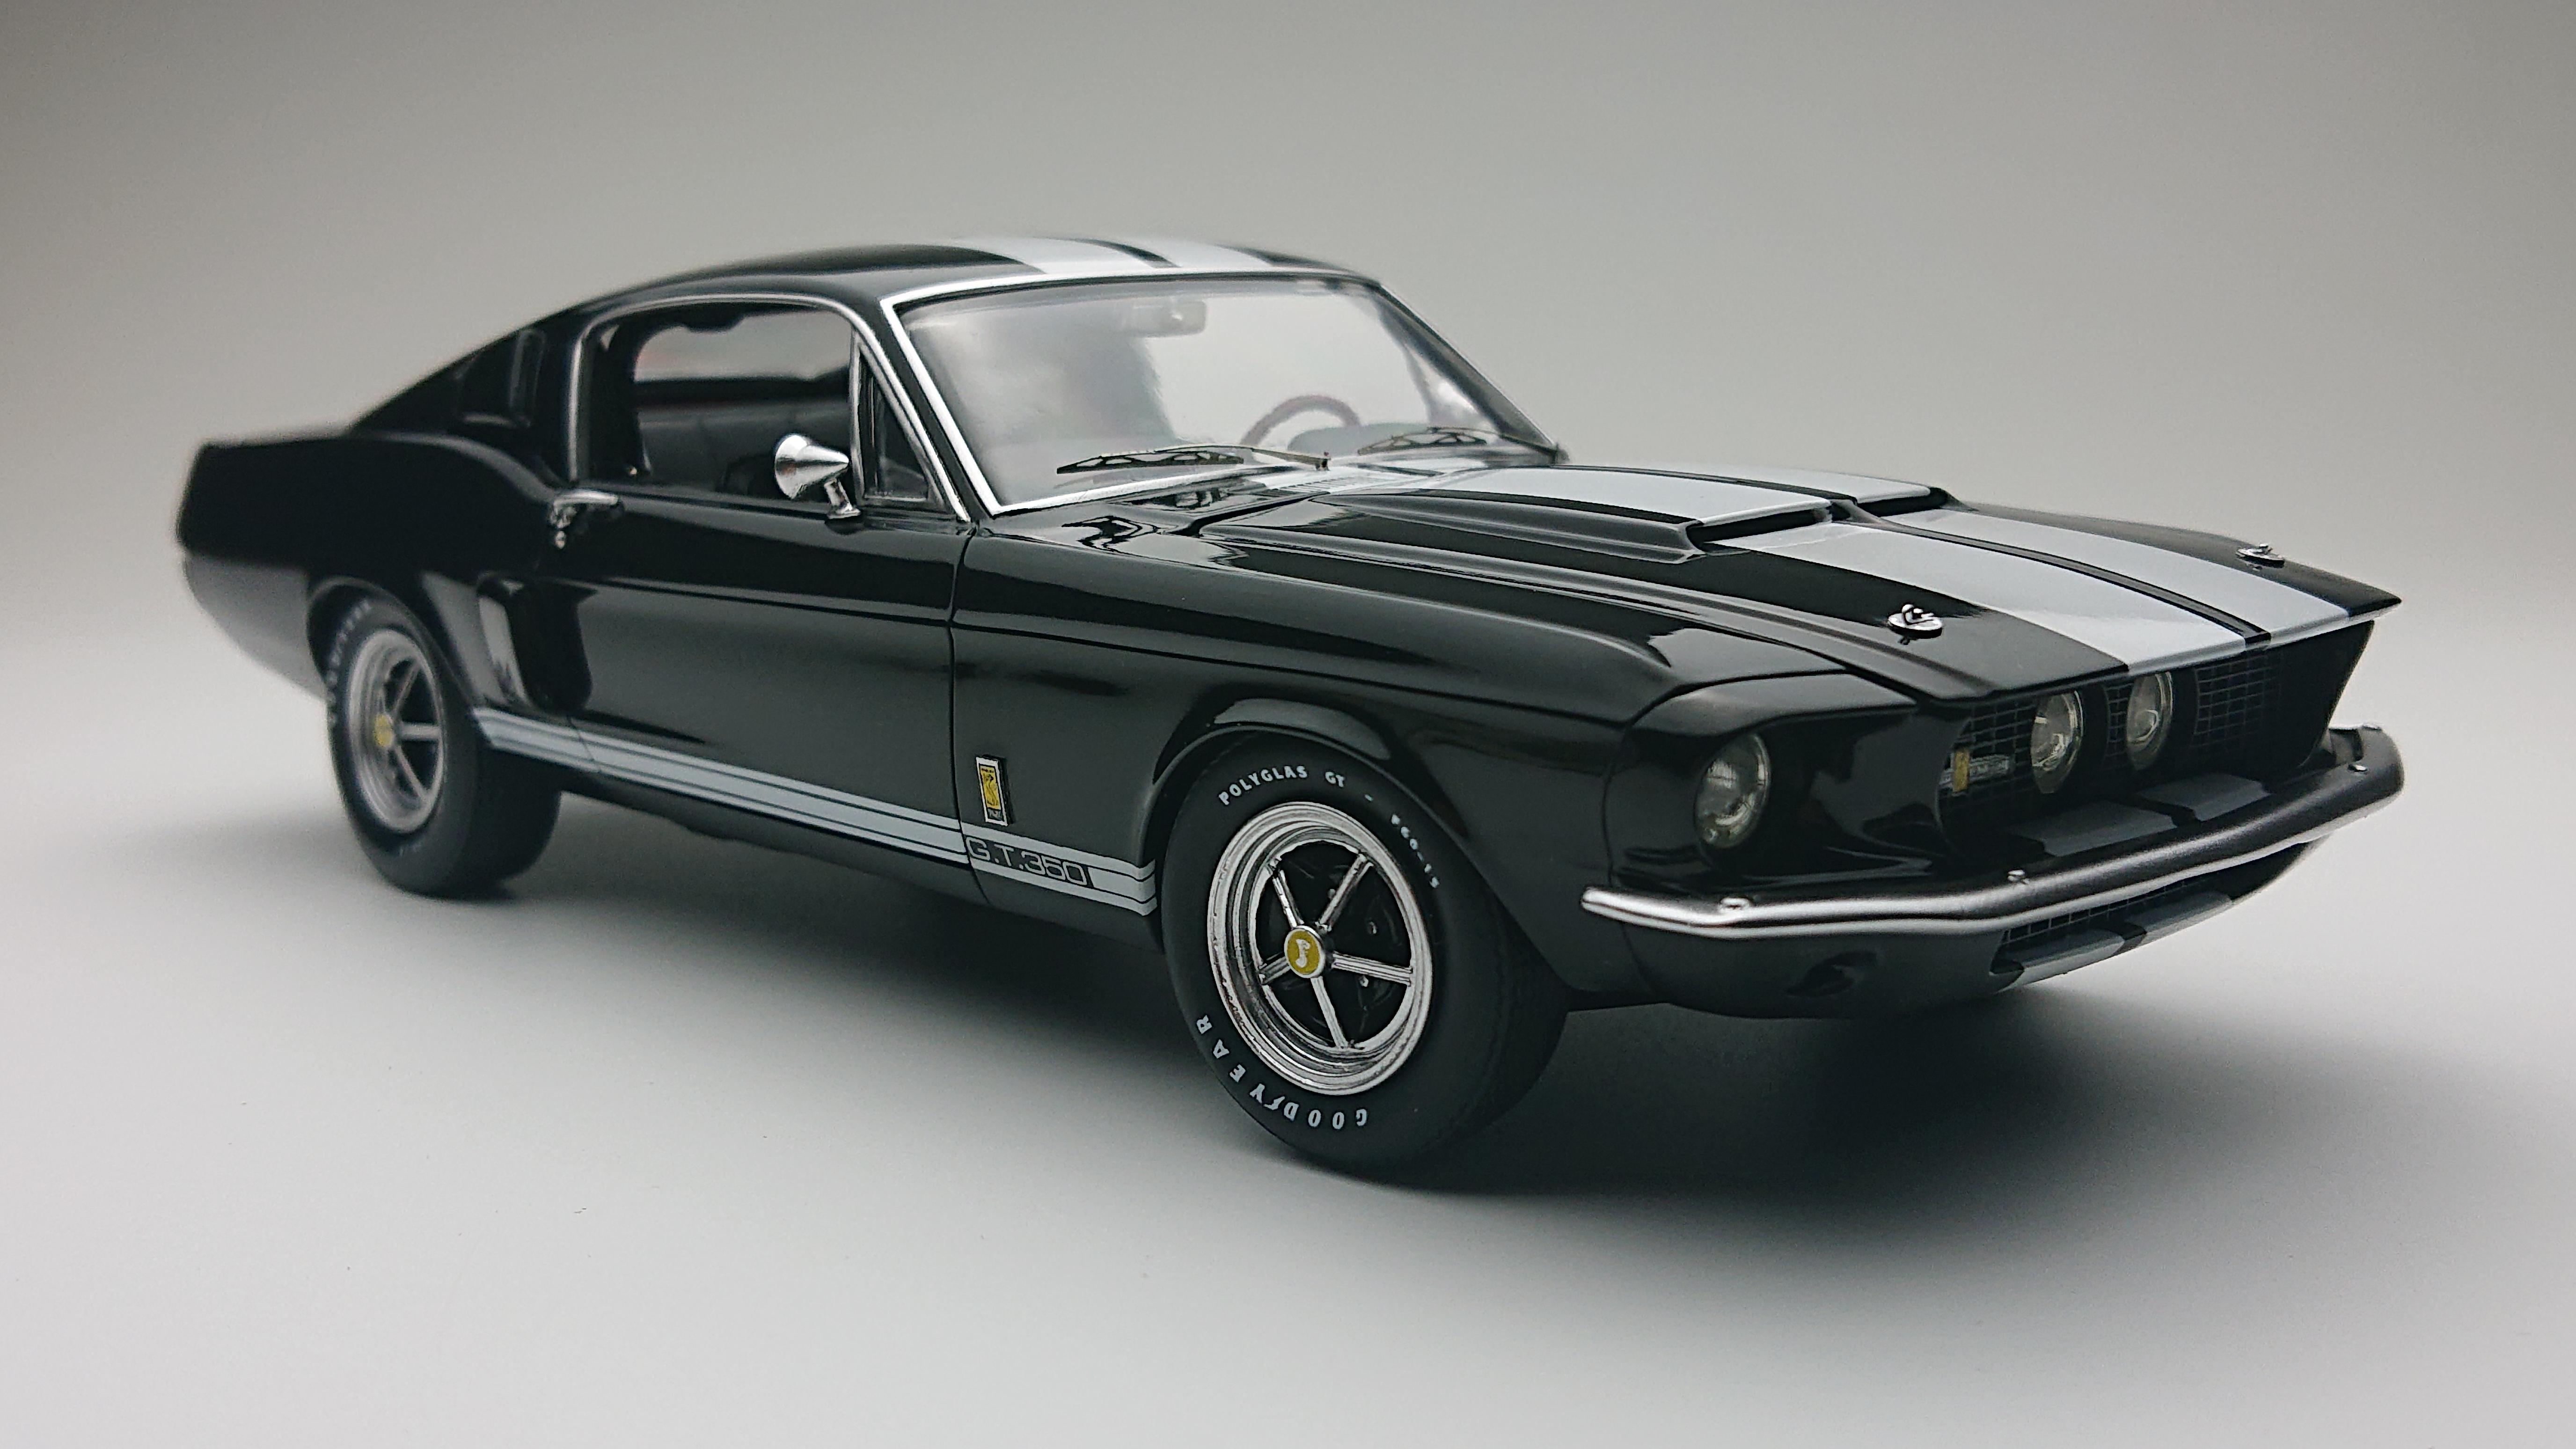
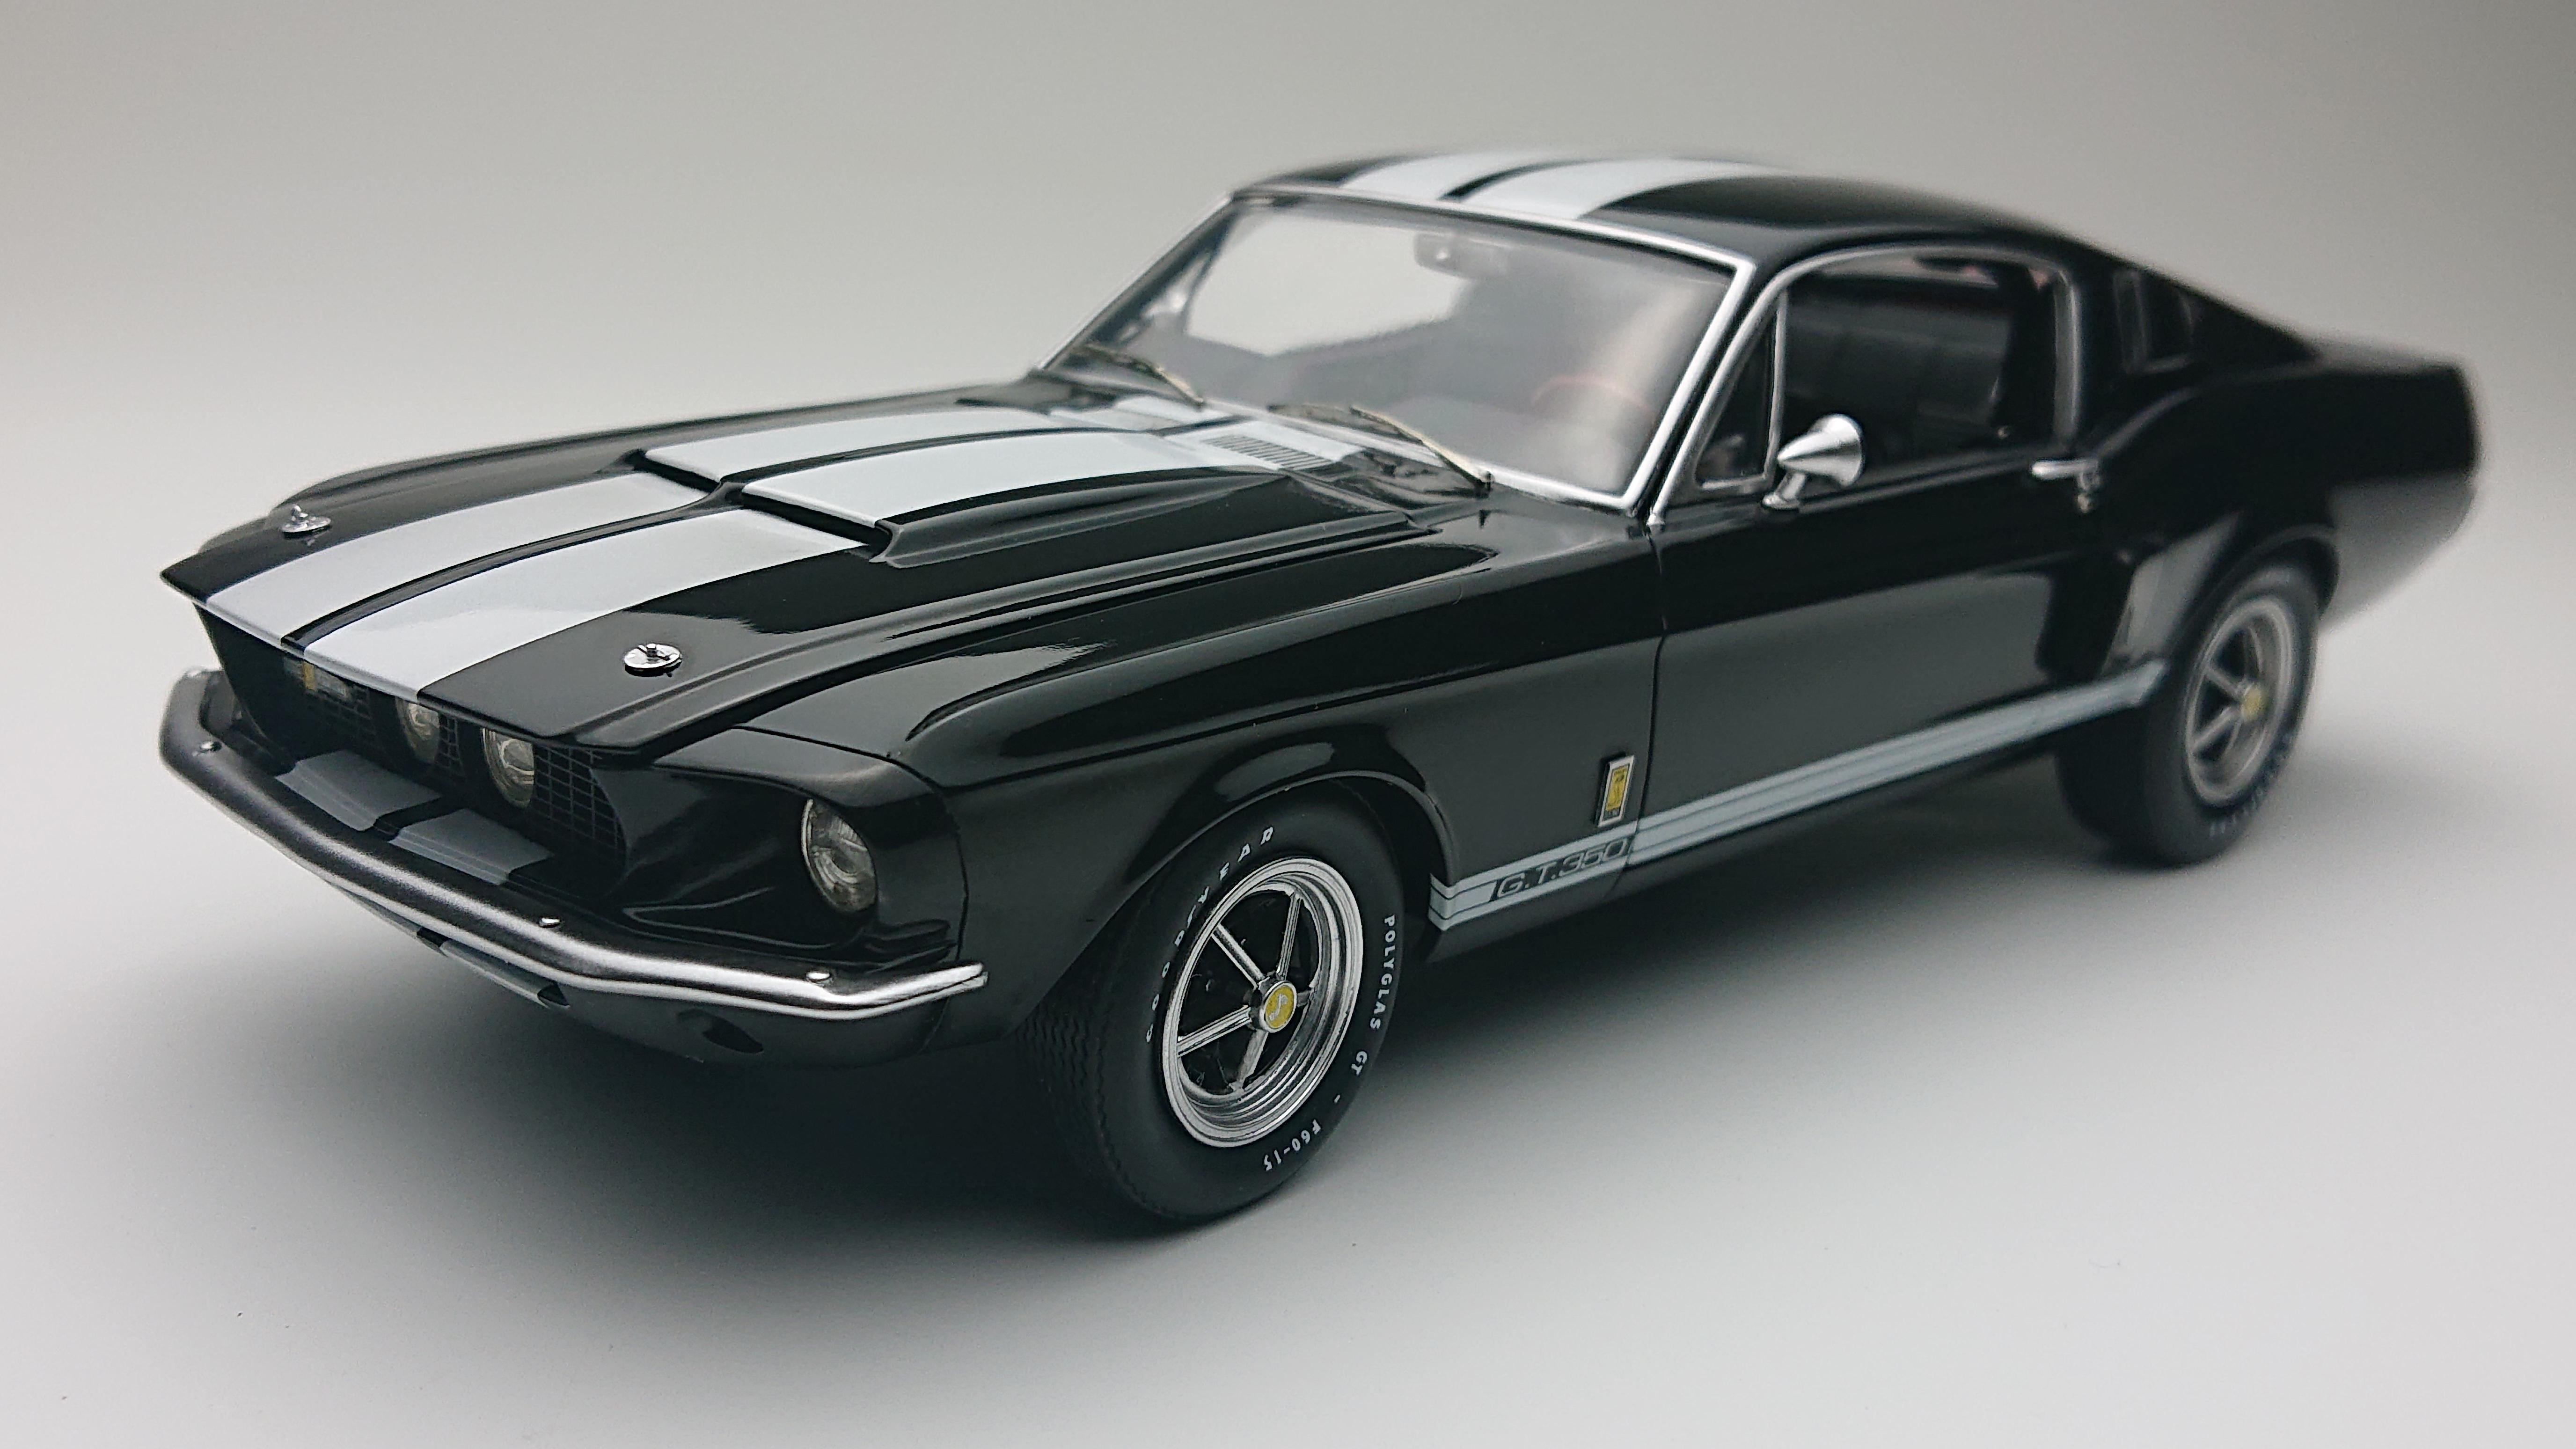
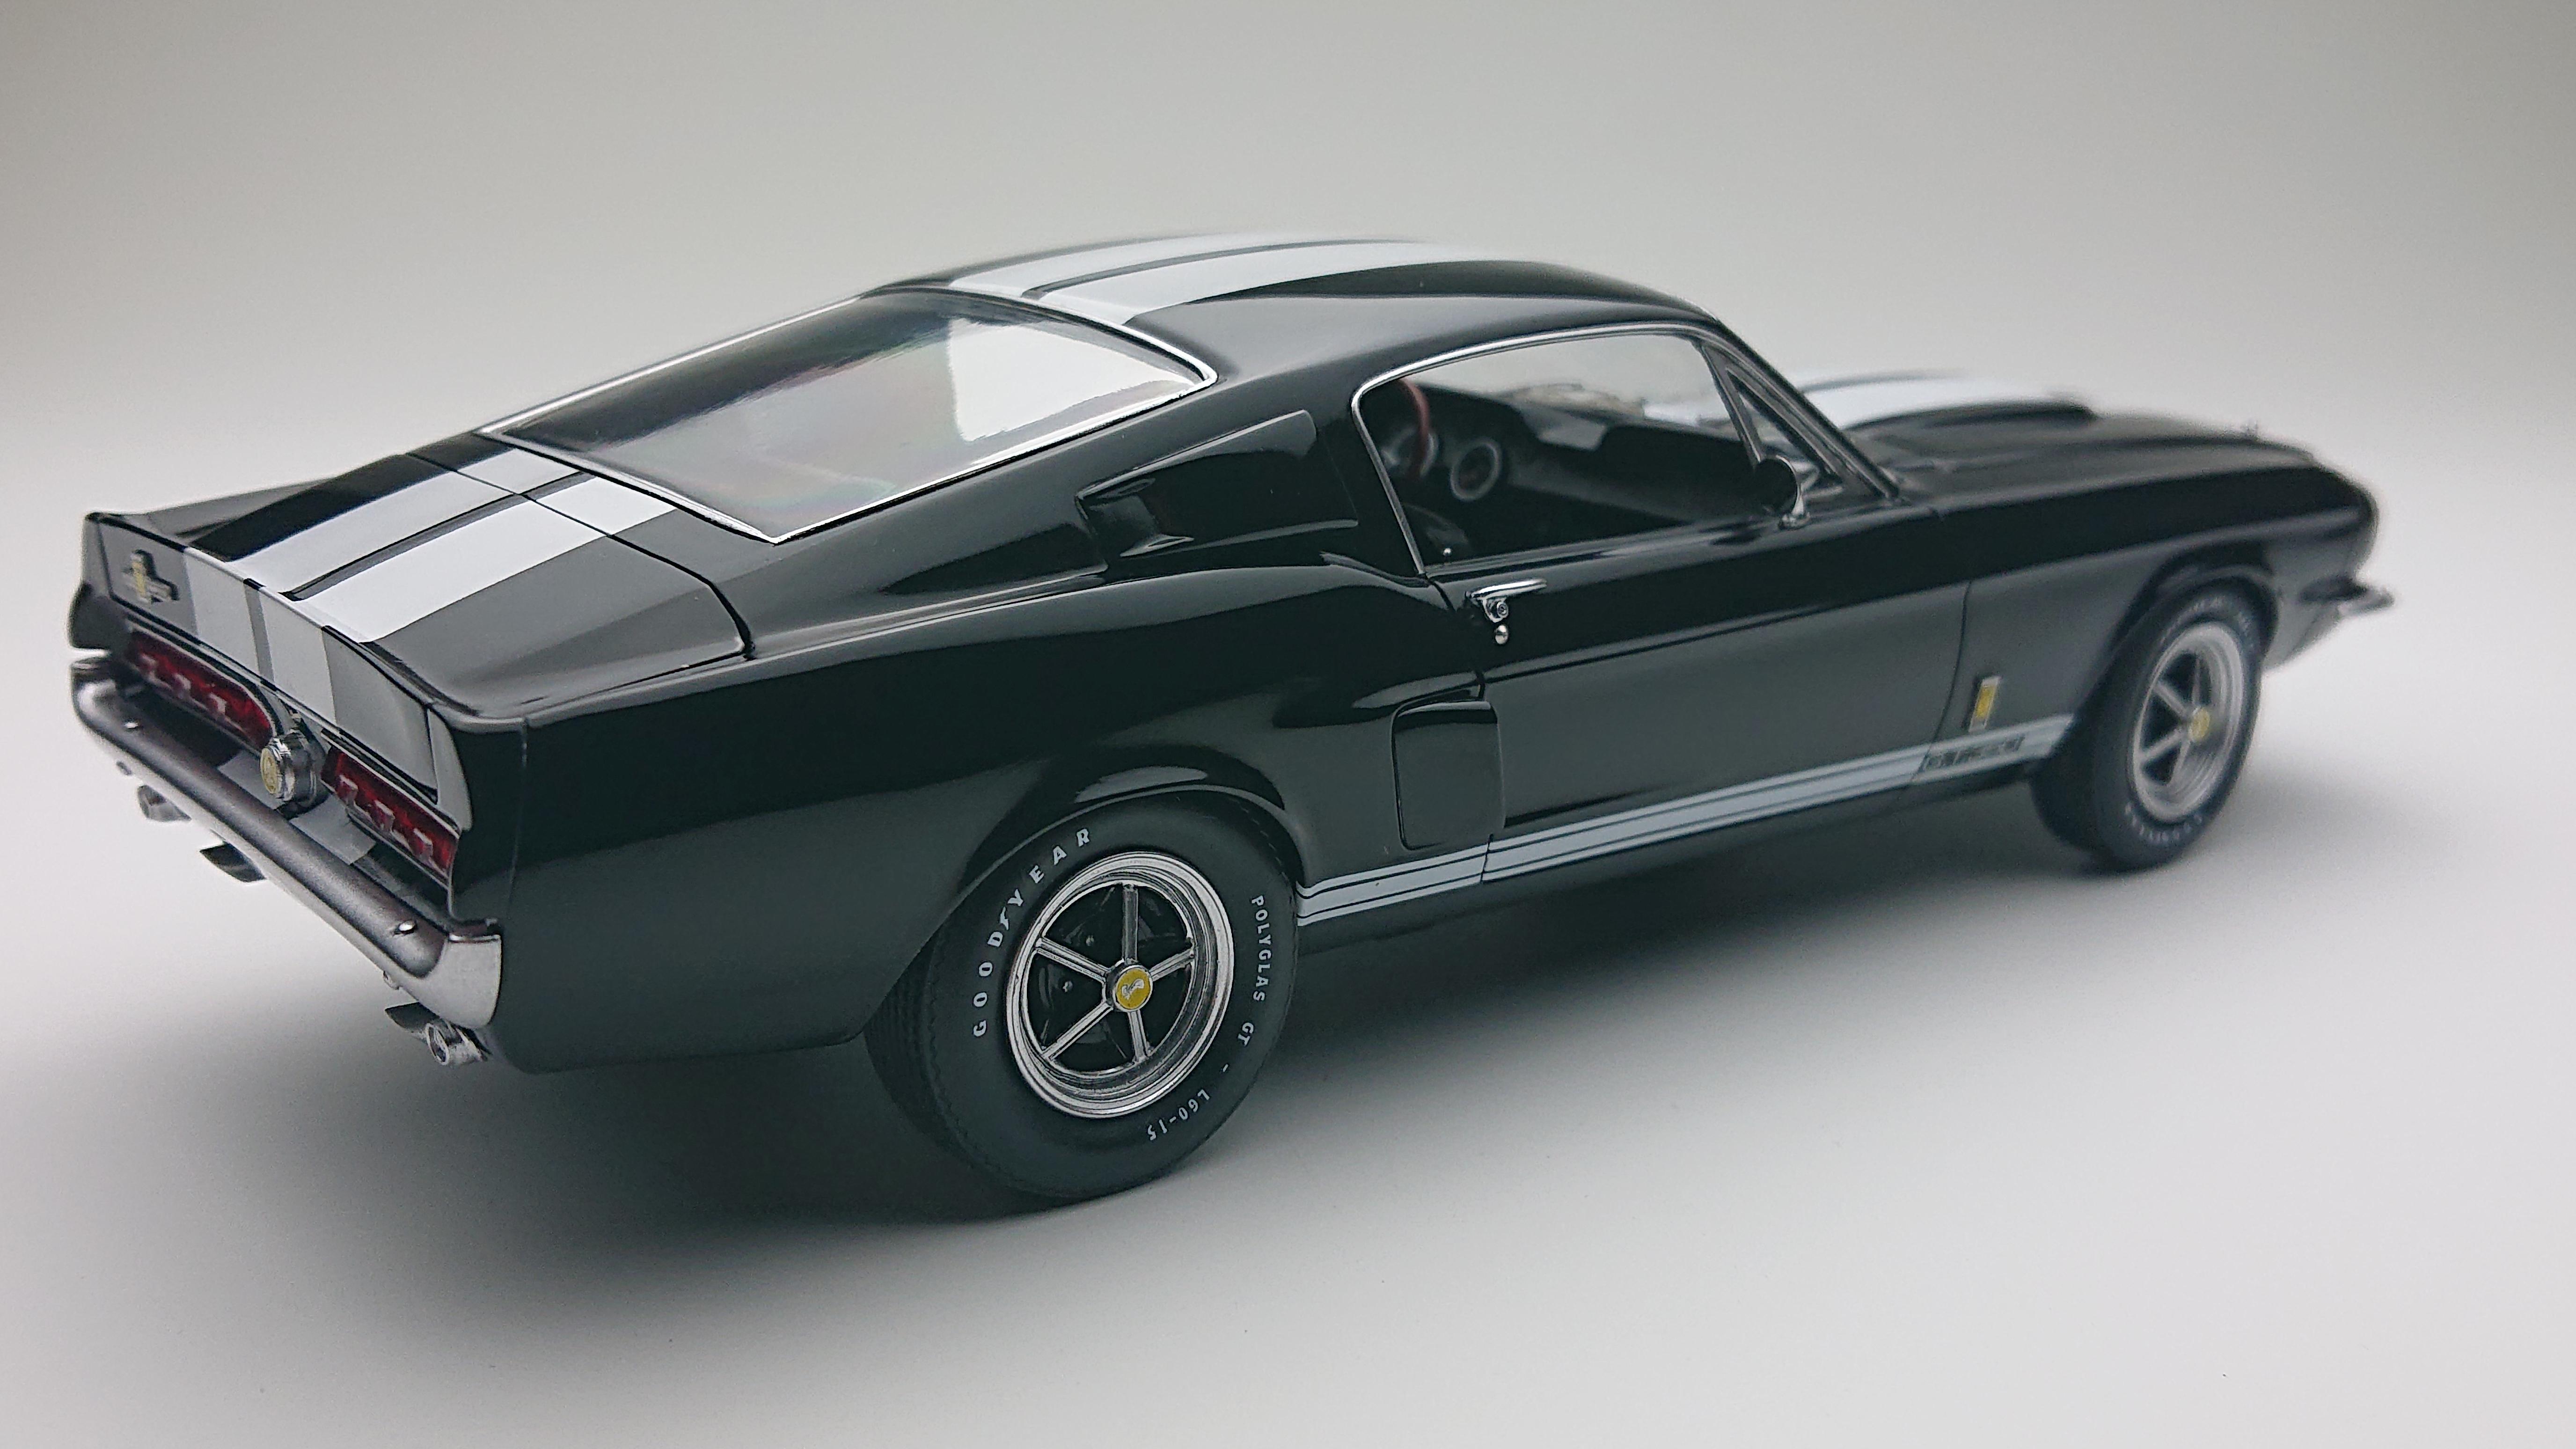
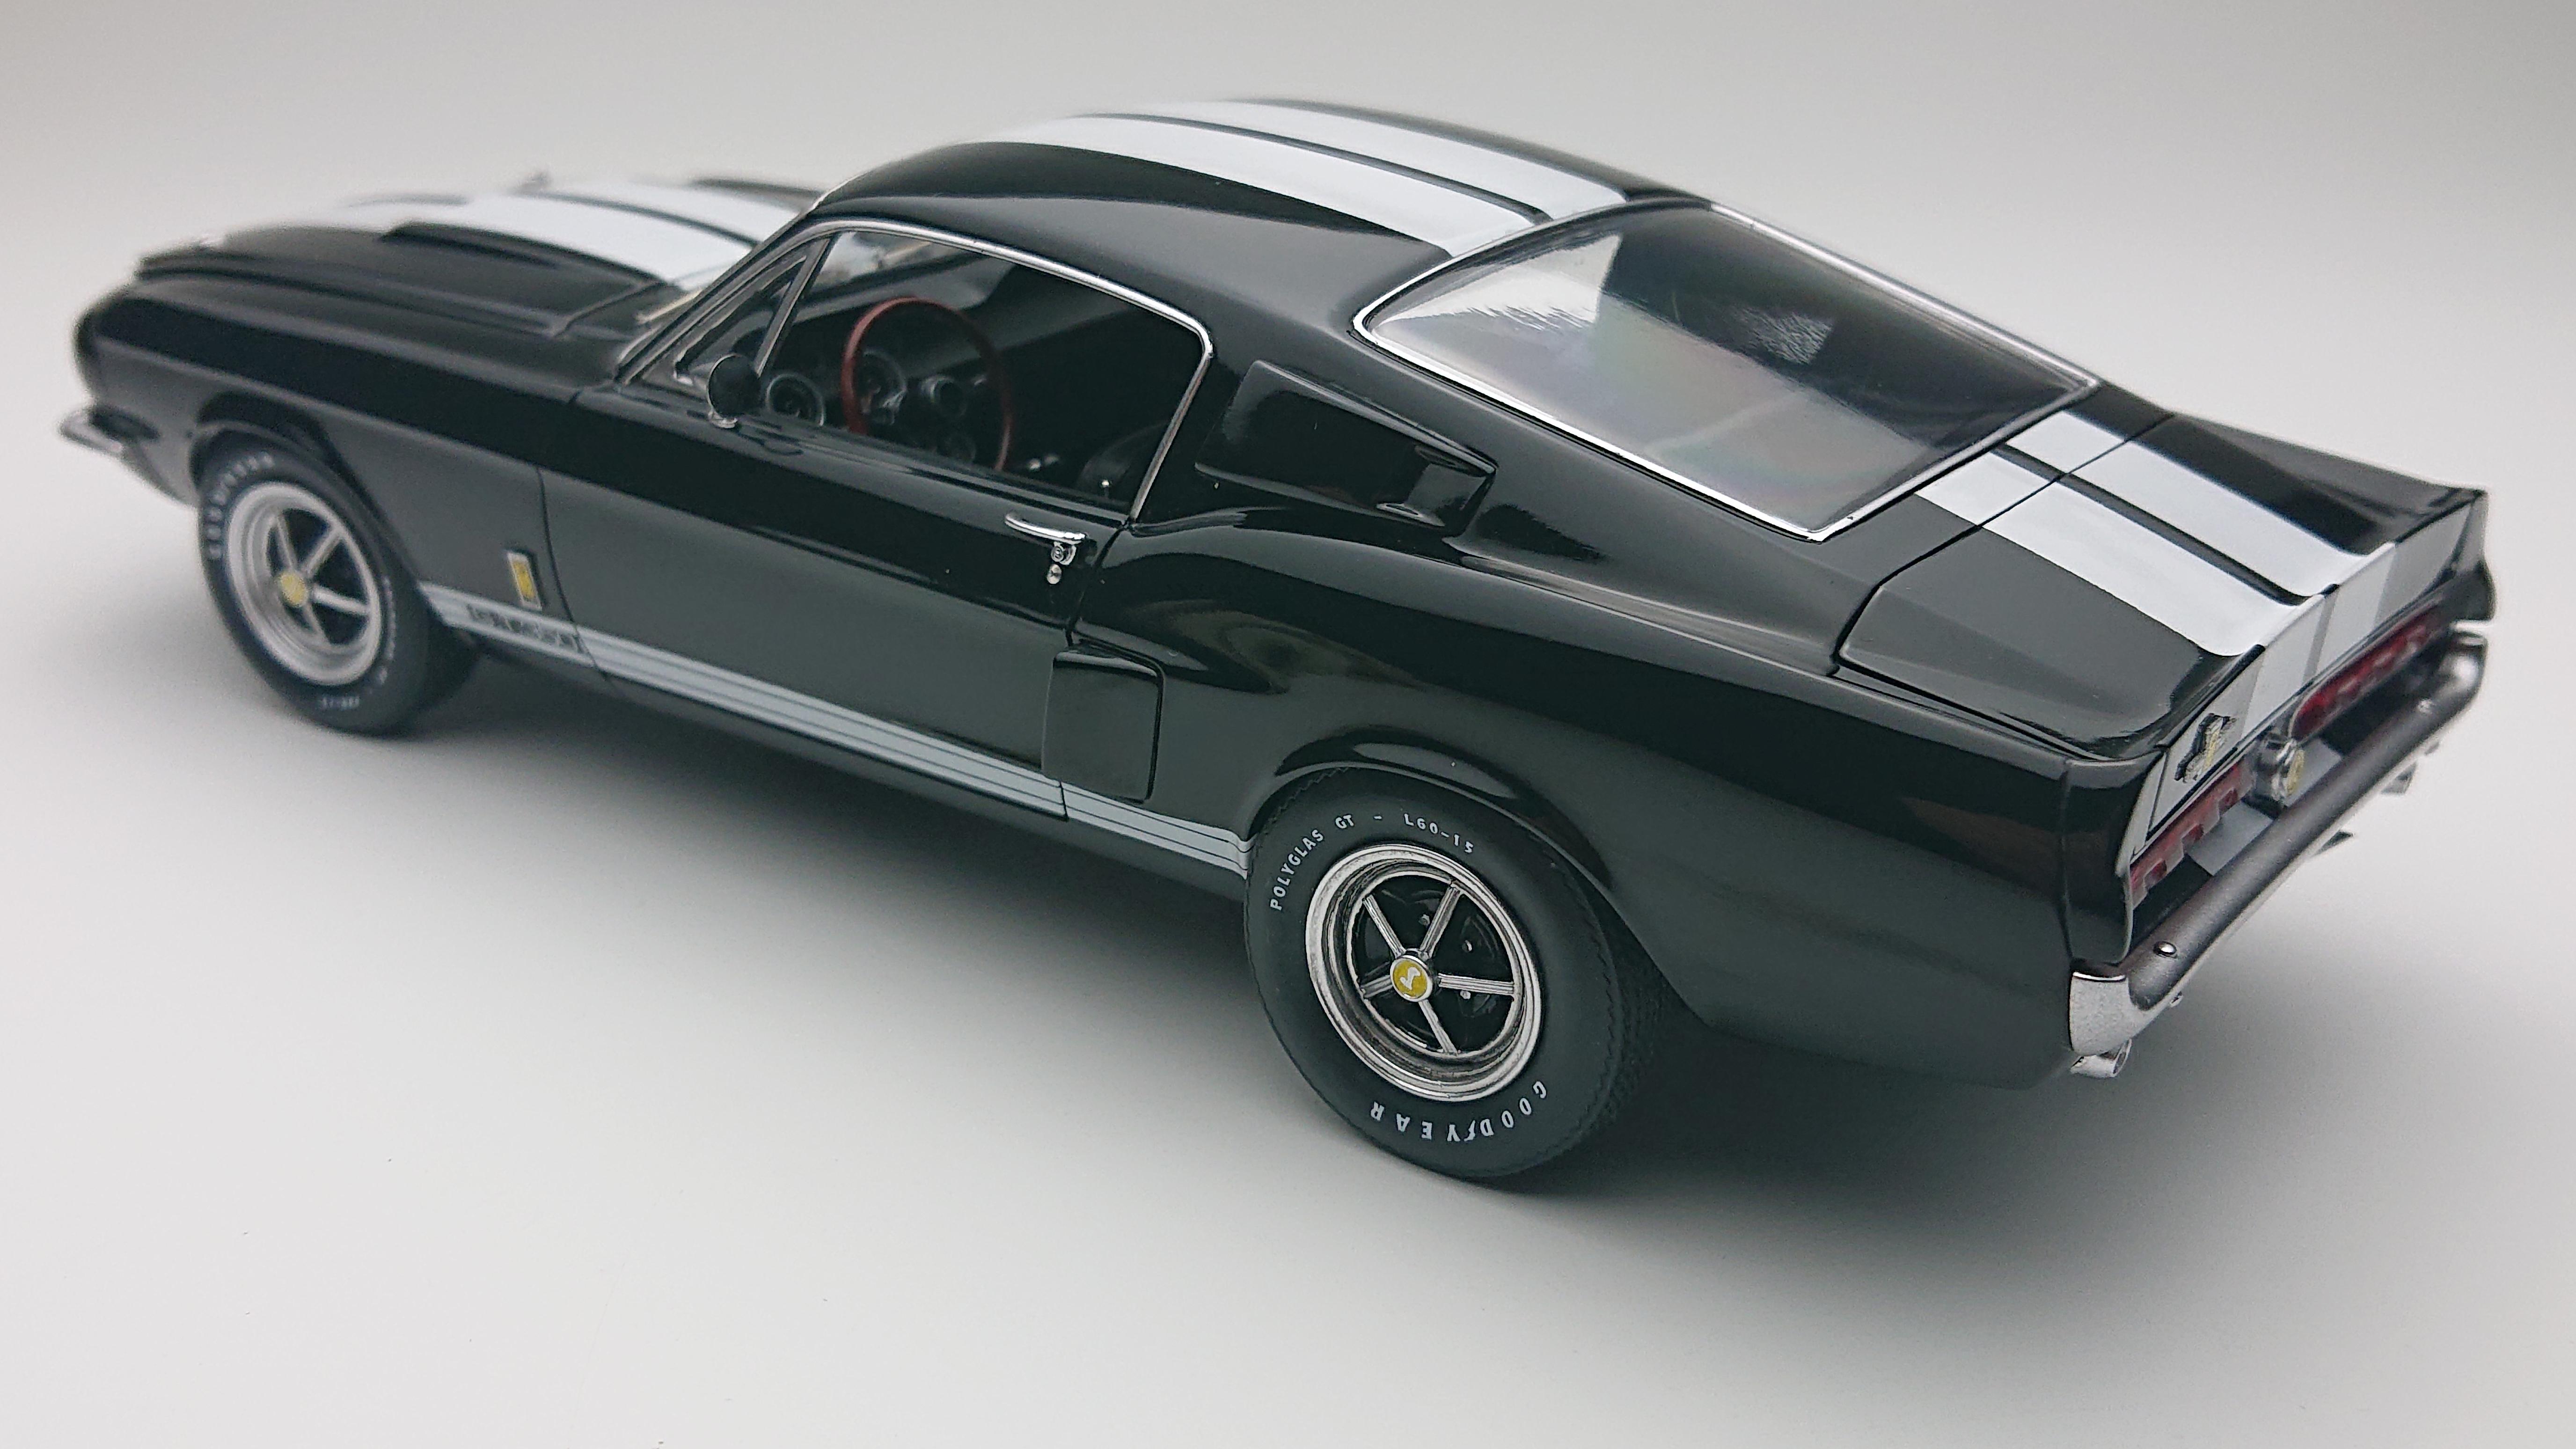
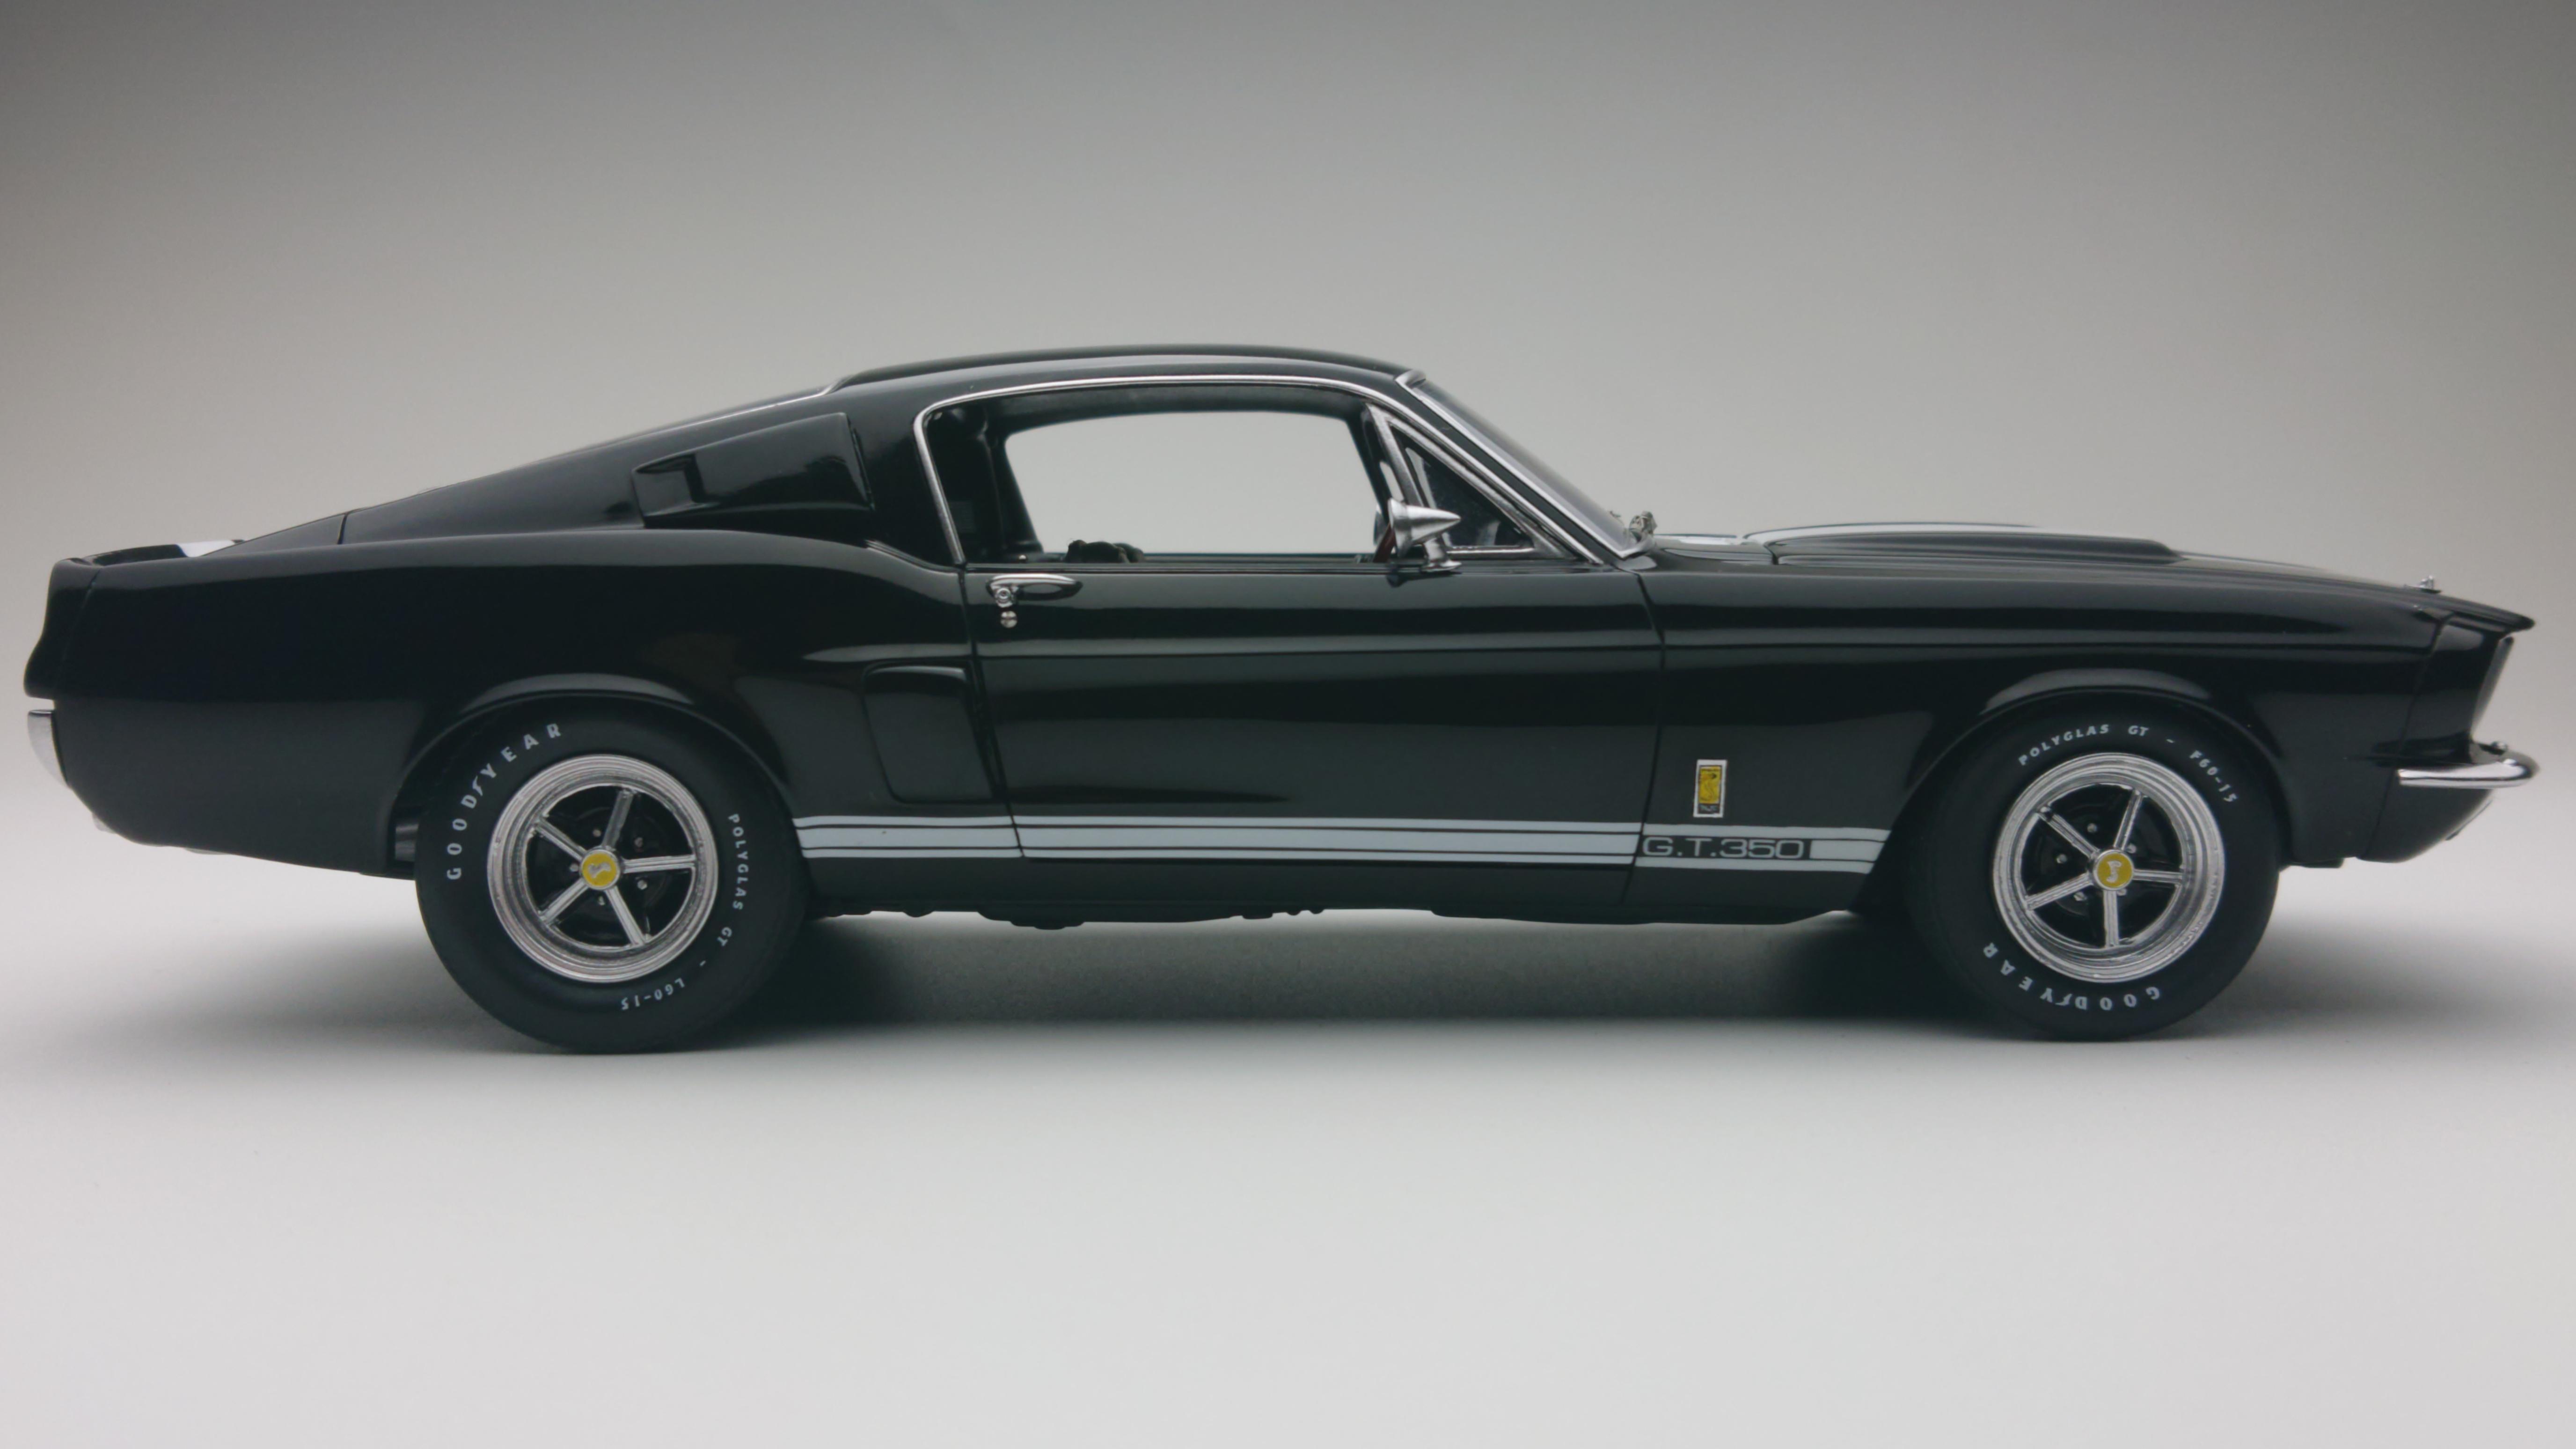
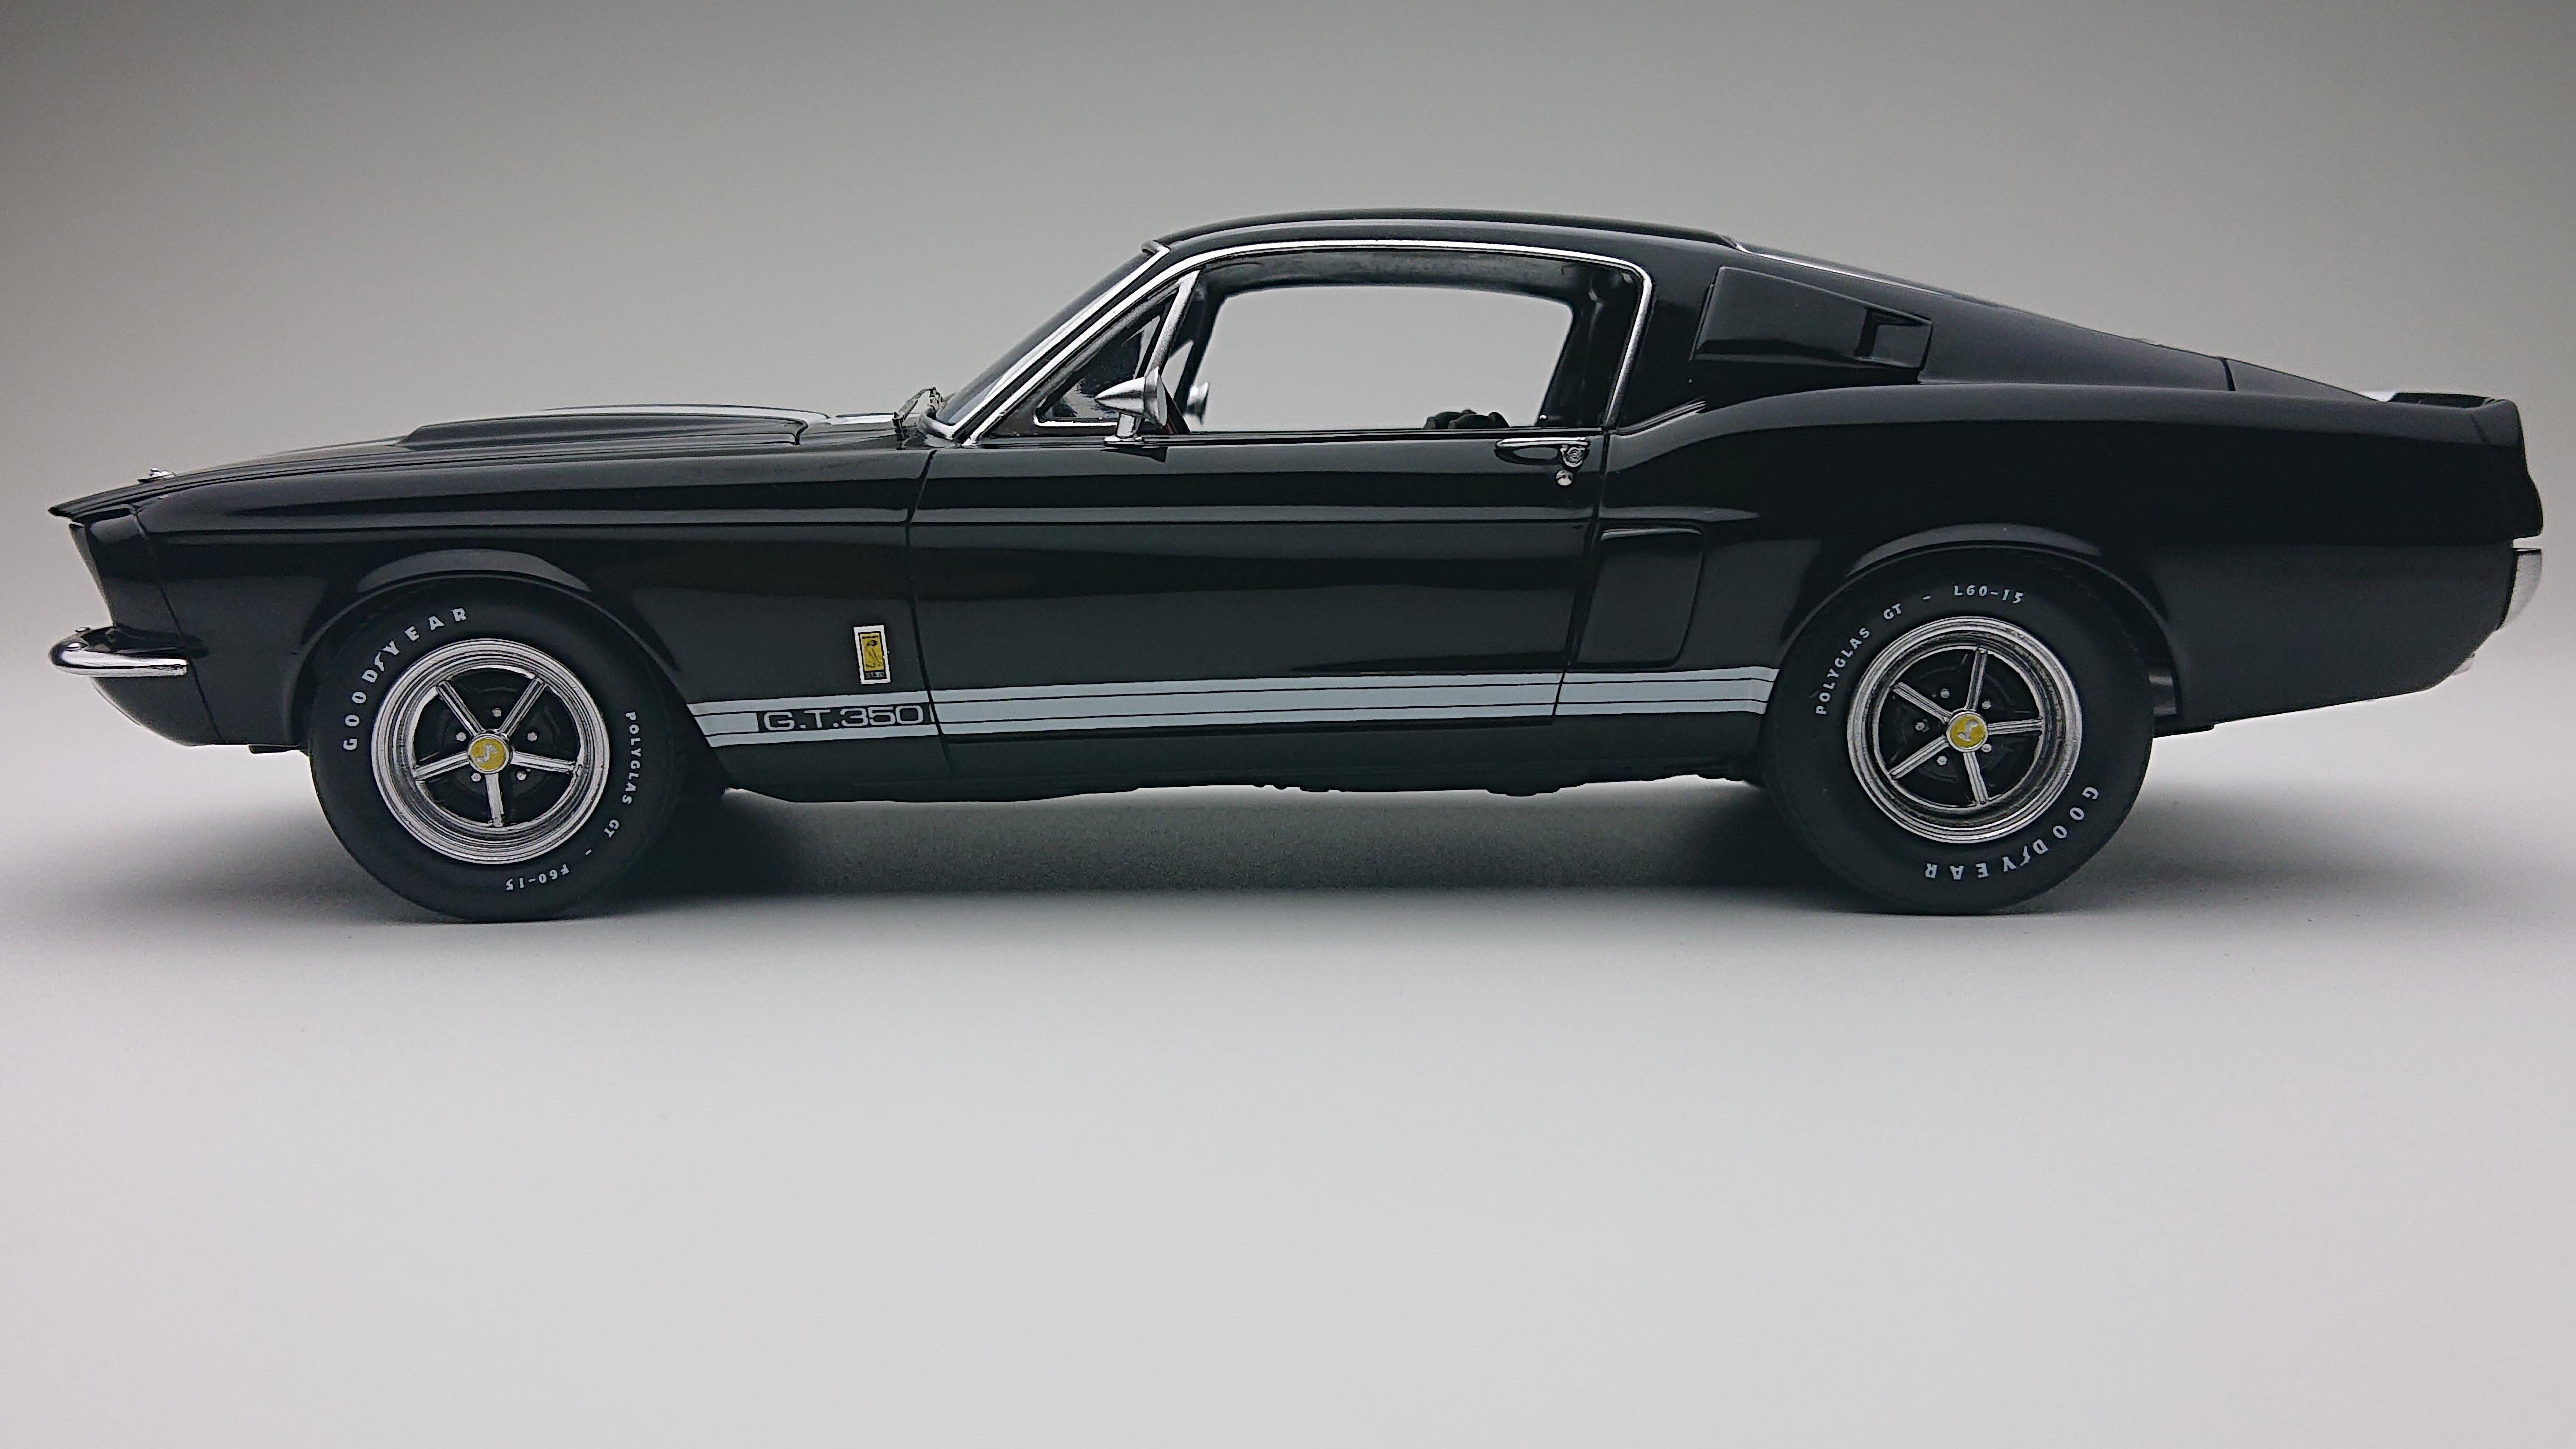
HI everyone!😄 this is my 1/25 AMT '67 shelby GT-350 this kit got some issues..I try to build it as good as I could.. not perfect...but I am happy with this result.. hope you guys like it!😄 and here is the video build if you are interested:😄

- 45 replies
-
- 10
-

-
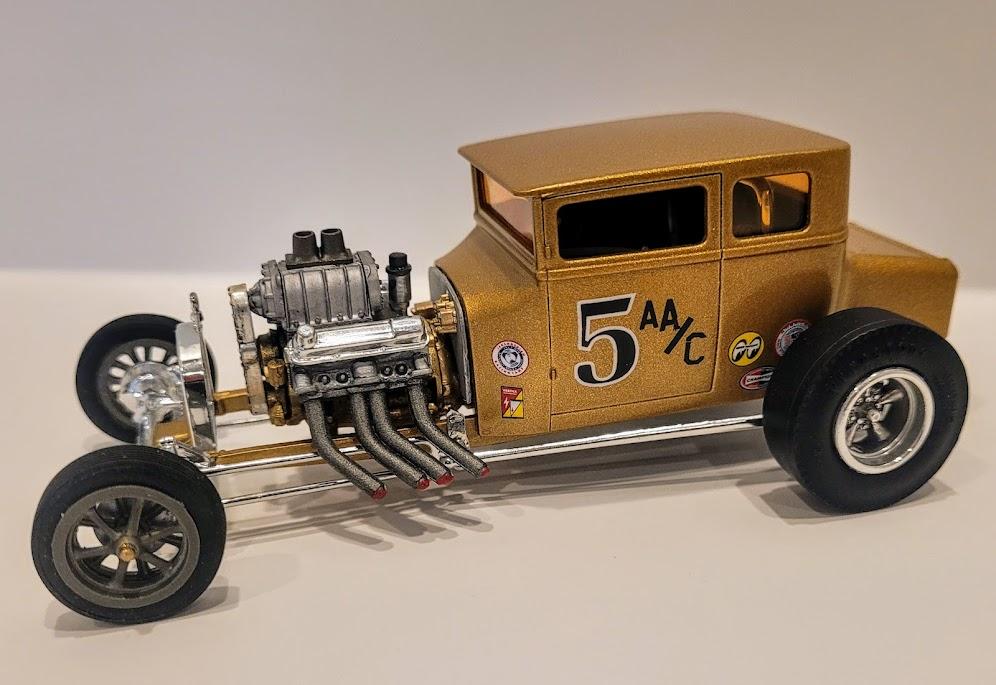
- shelby gt 350
- amt
- (and 1 more)
-
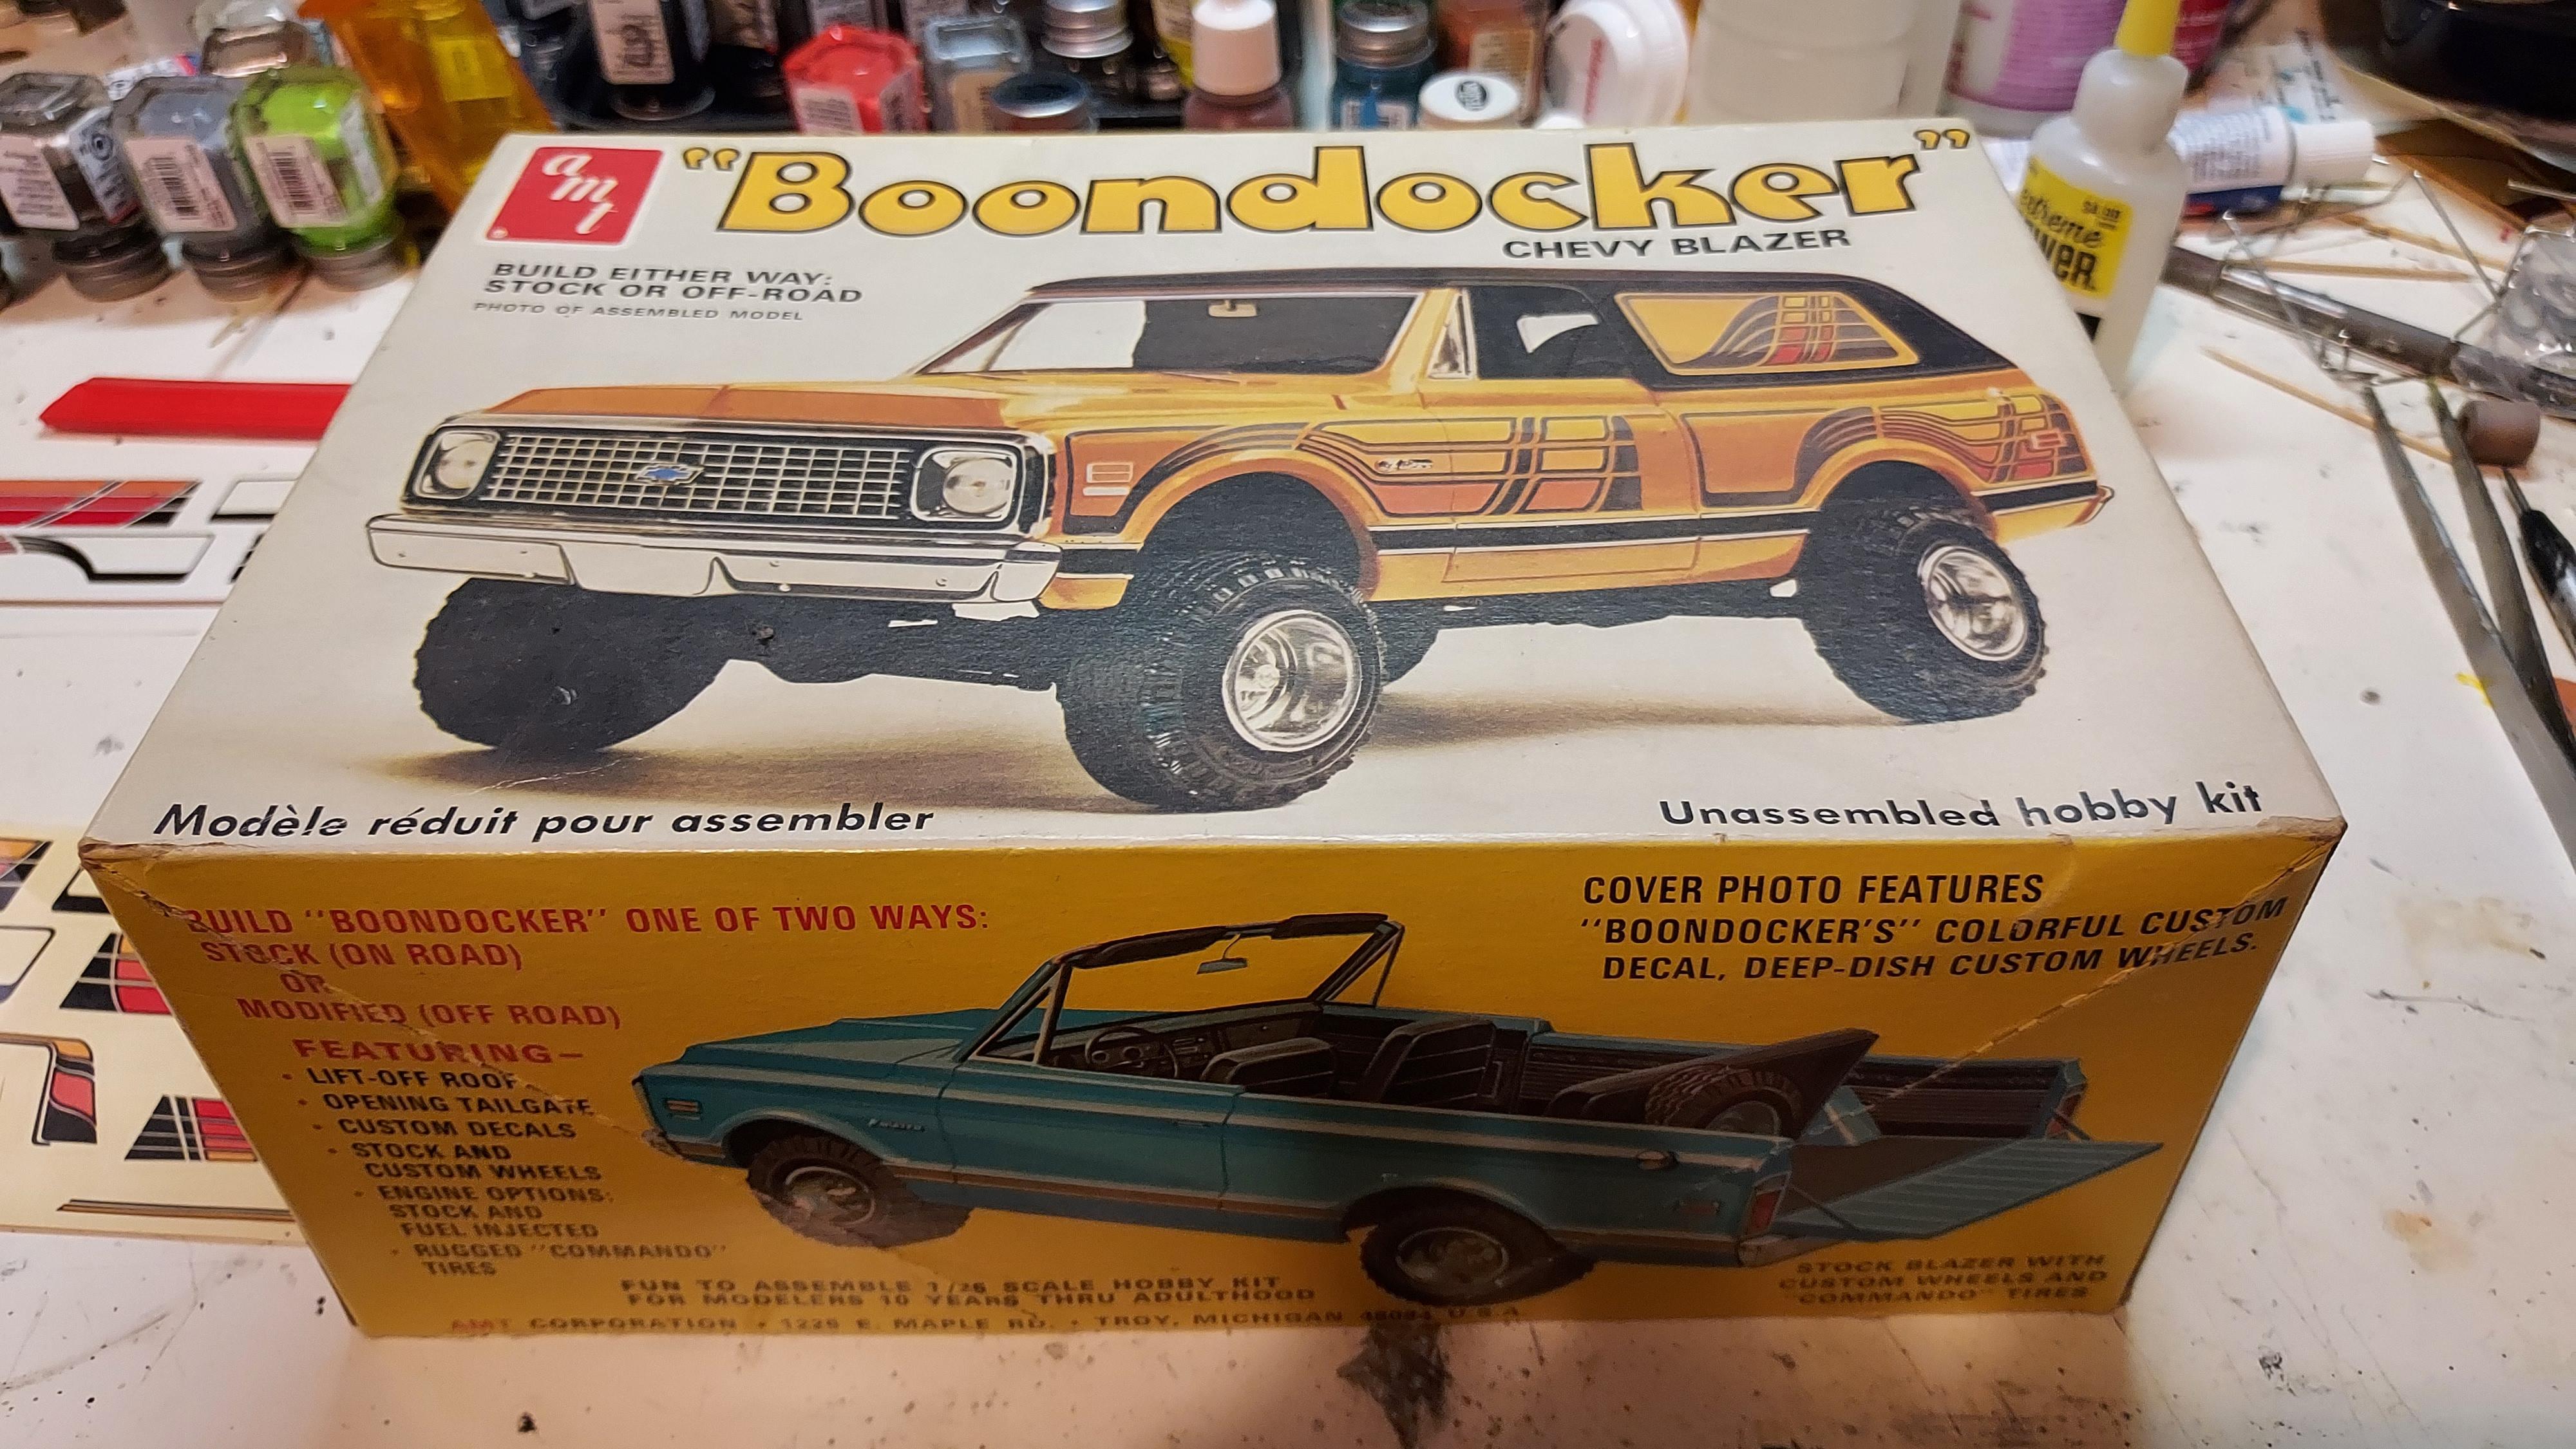
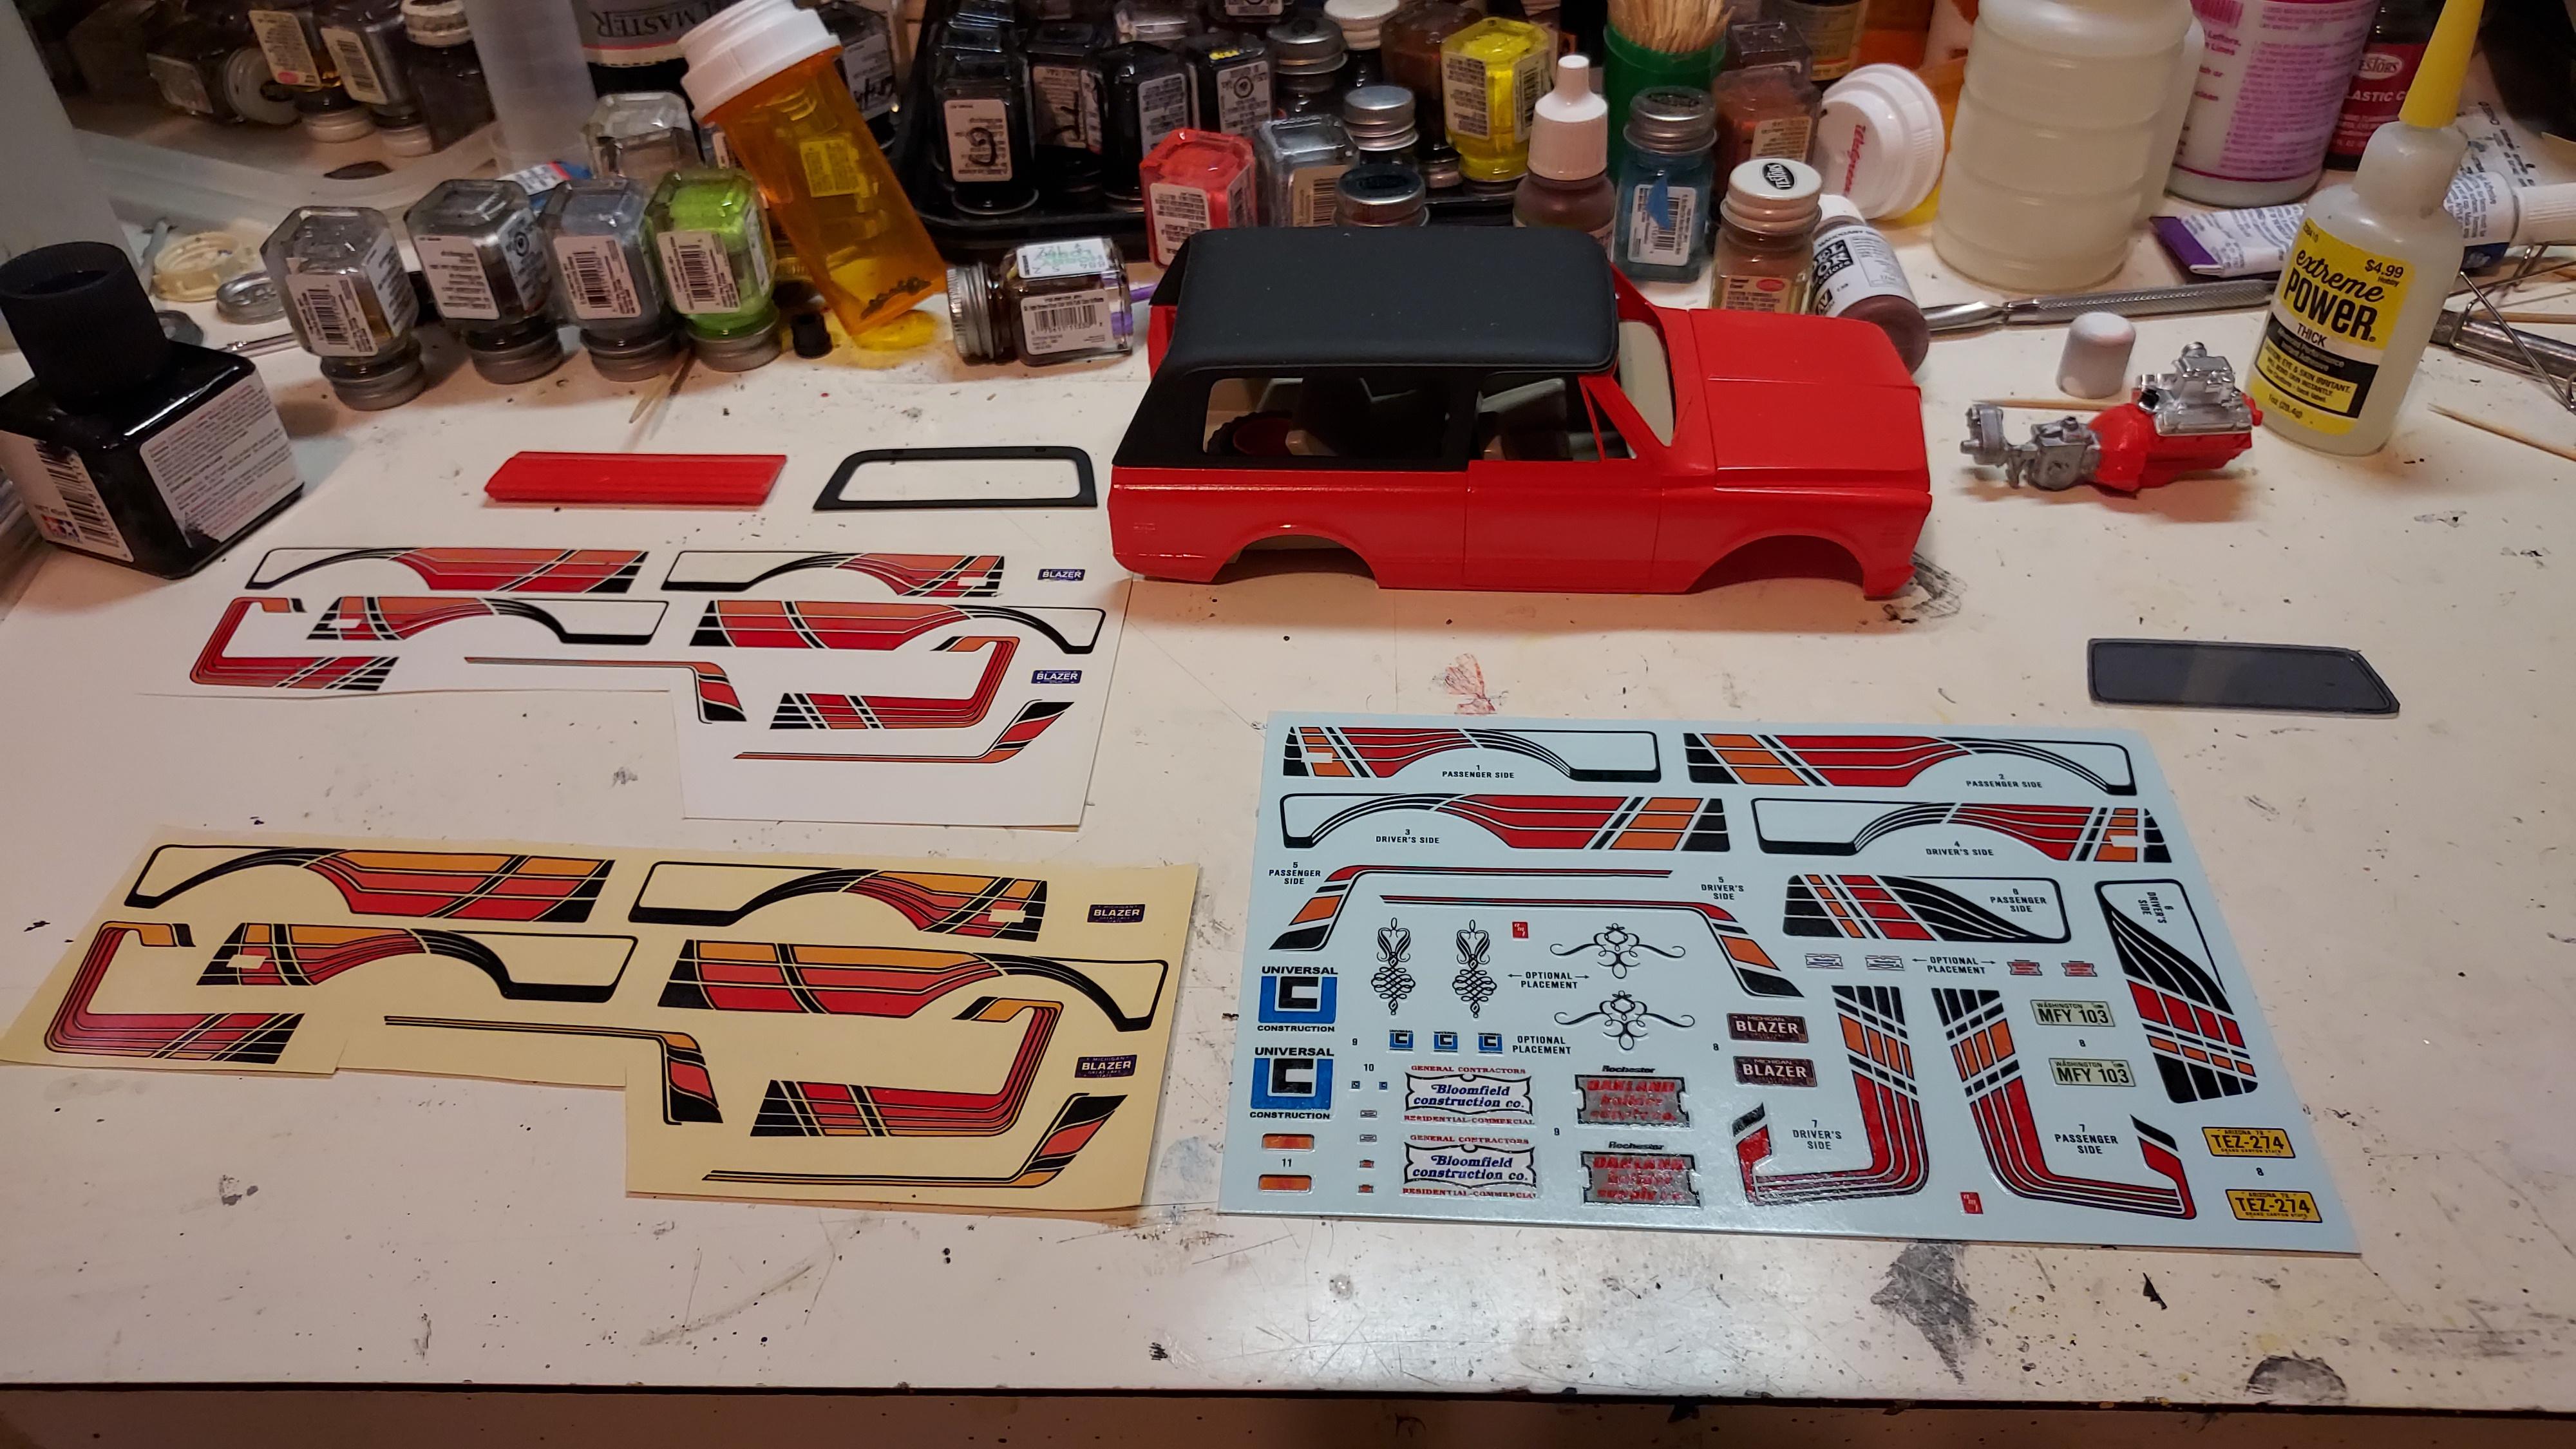
 Today I figured it was time to drag out of the archives, the original, vintage Boondocker Blazer I bought off of ebay years ago. I don't even remember how long ago I painted it but I'm pretty sure it was with high temp engine paint (hugger orange). Today I will attempt to do something I have been putting off for years now. The daunting decals. I have 3 sheets to choose from. Including the vintage originals. I think I'll go with the newer ones that a member of this board generously sent me. I'm very good at screwing these decals up. I've already done so with 3 of the side window ones. I don't know why these decals seemed so easy when I was a kid.
-
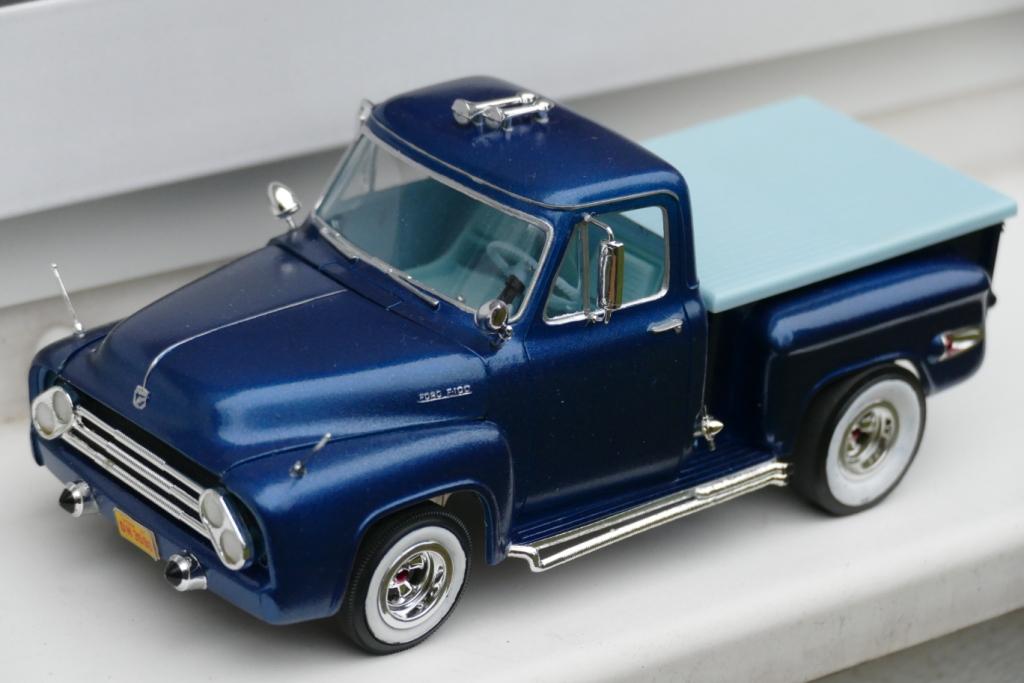
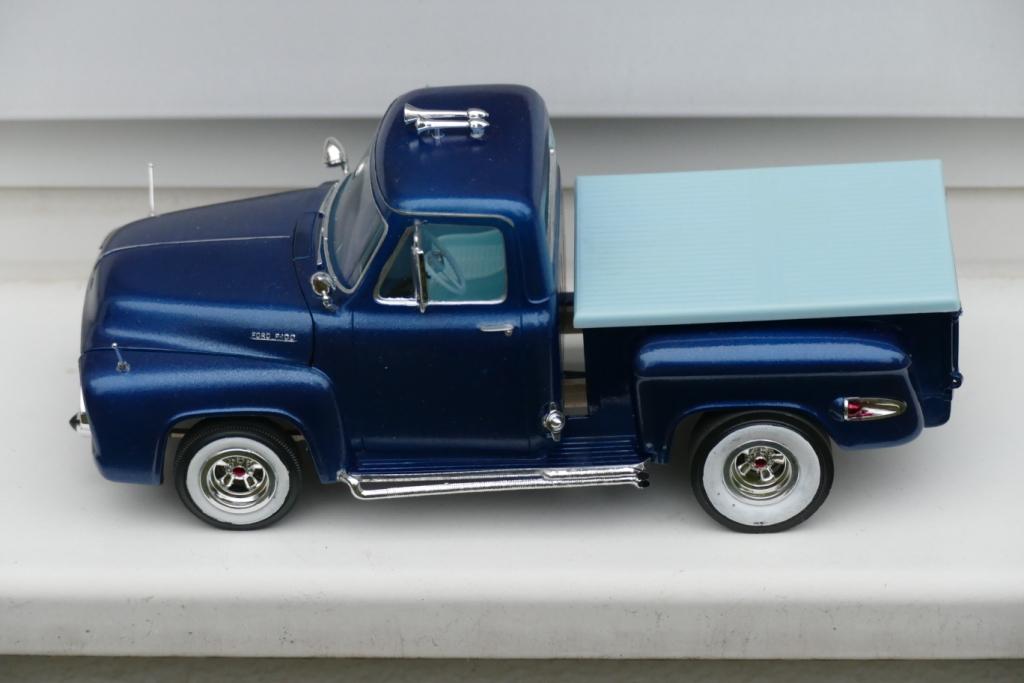
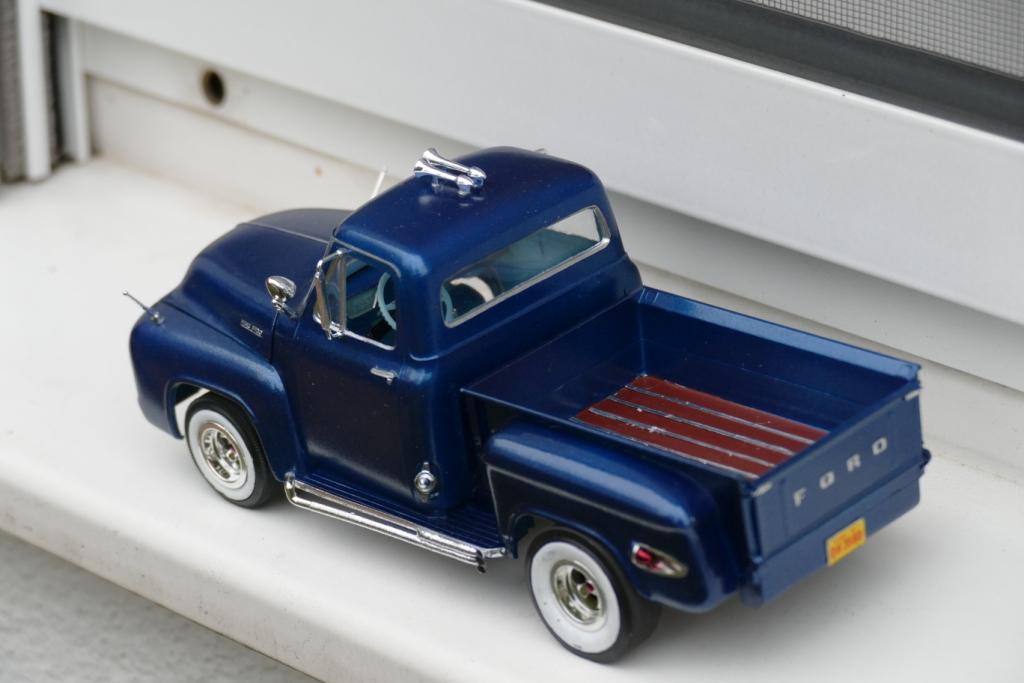
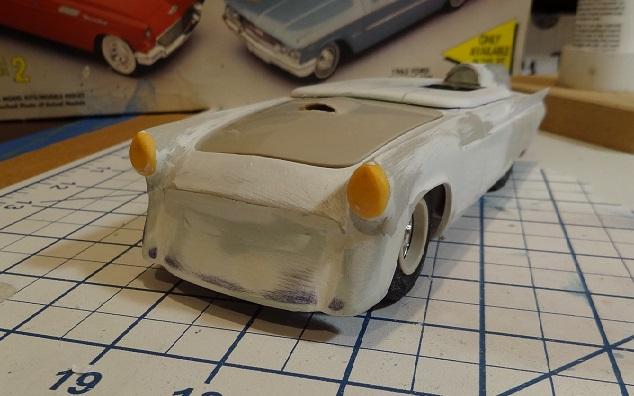
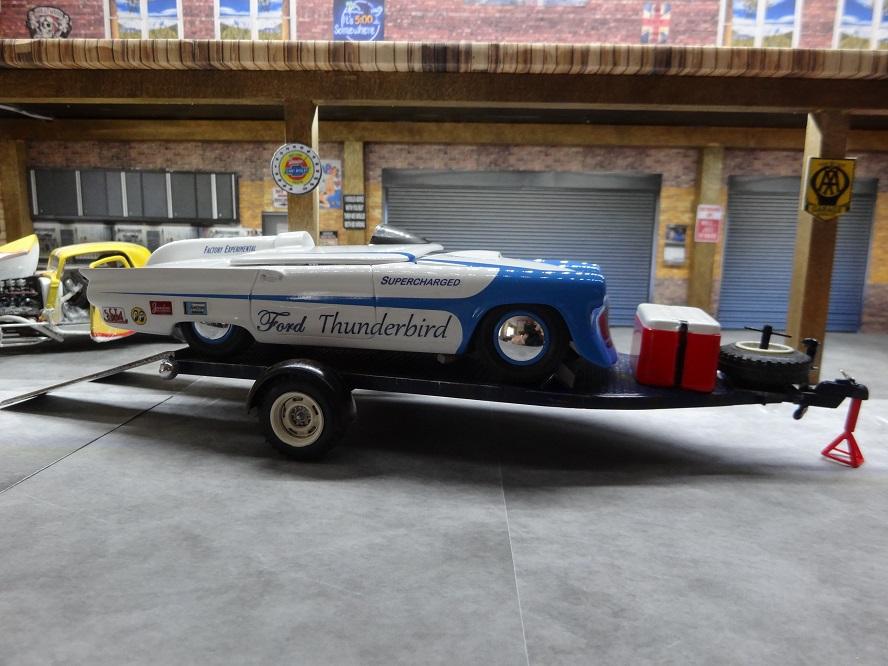
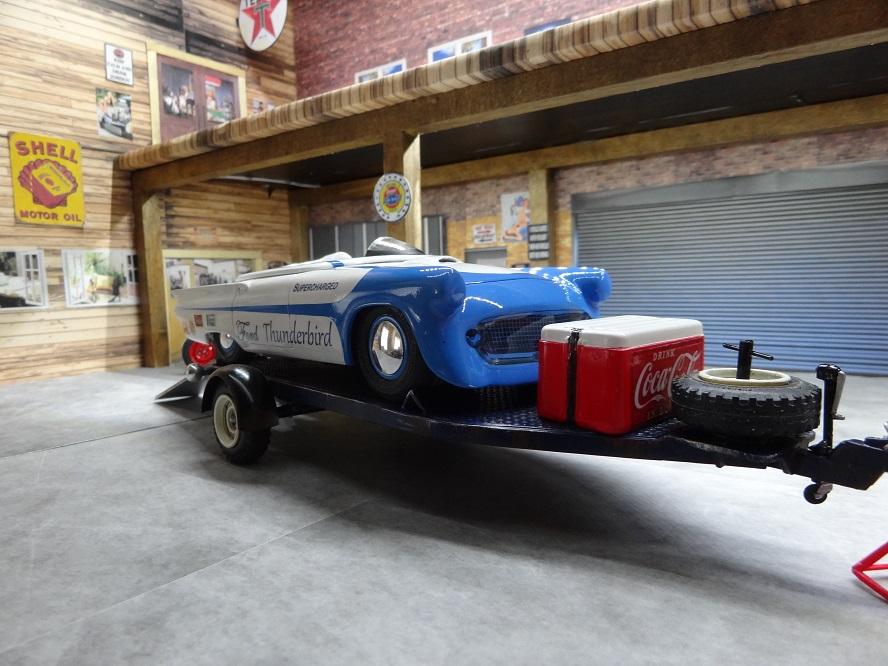
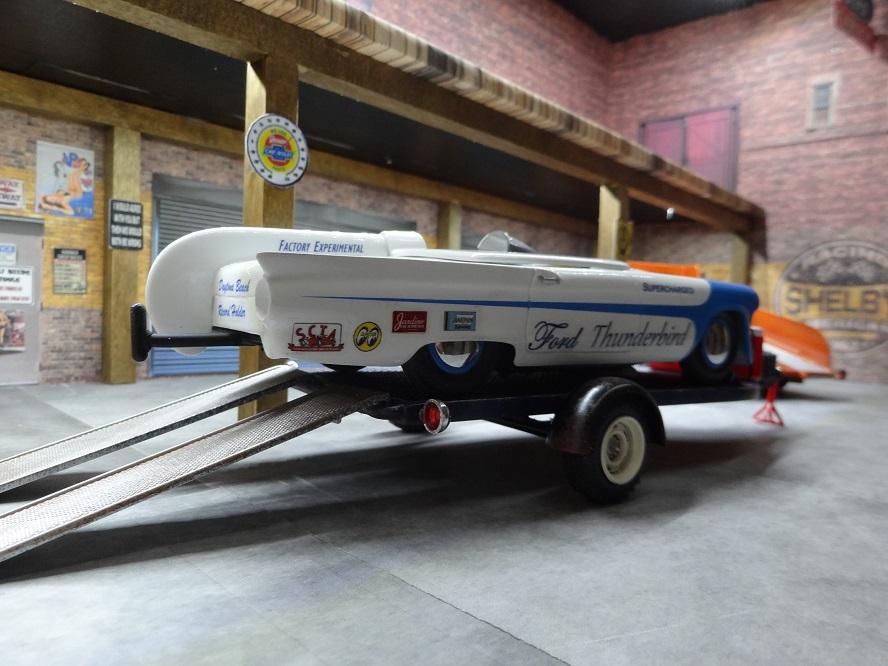
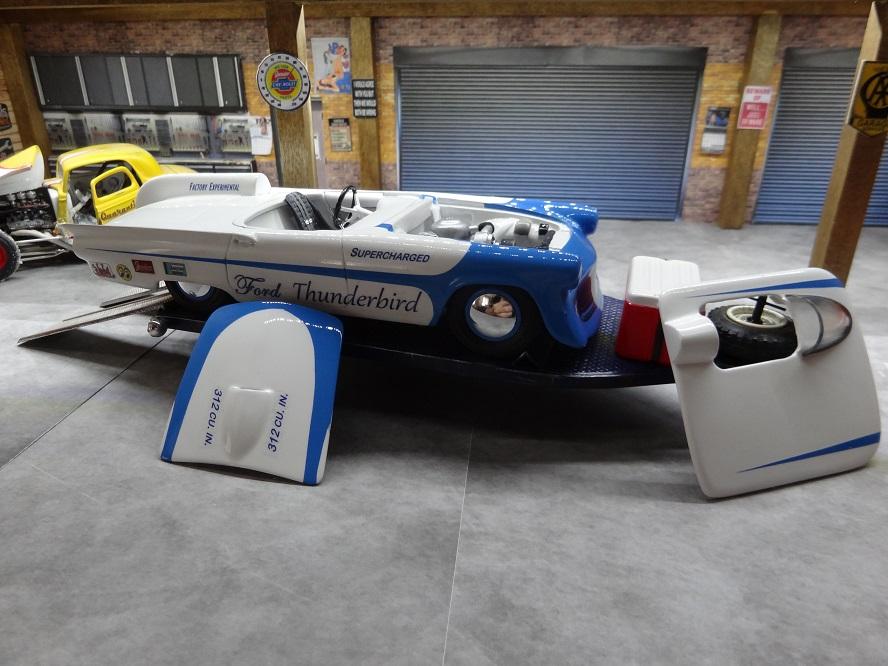
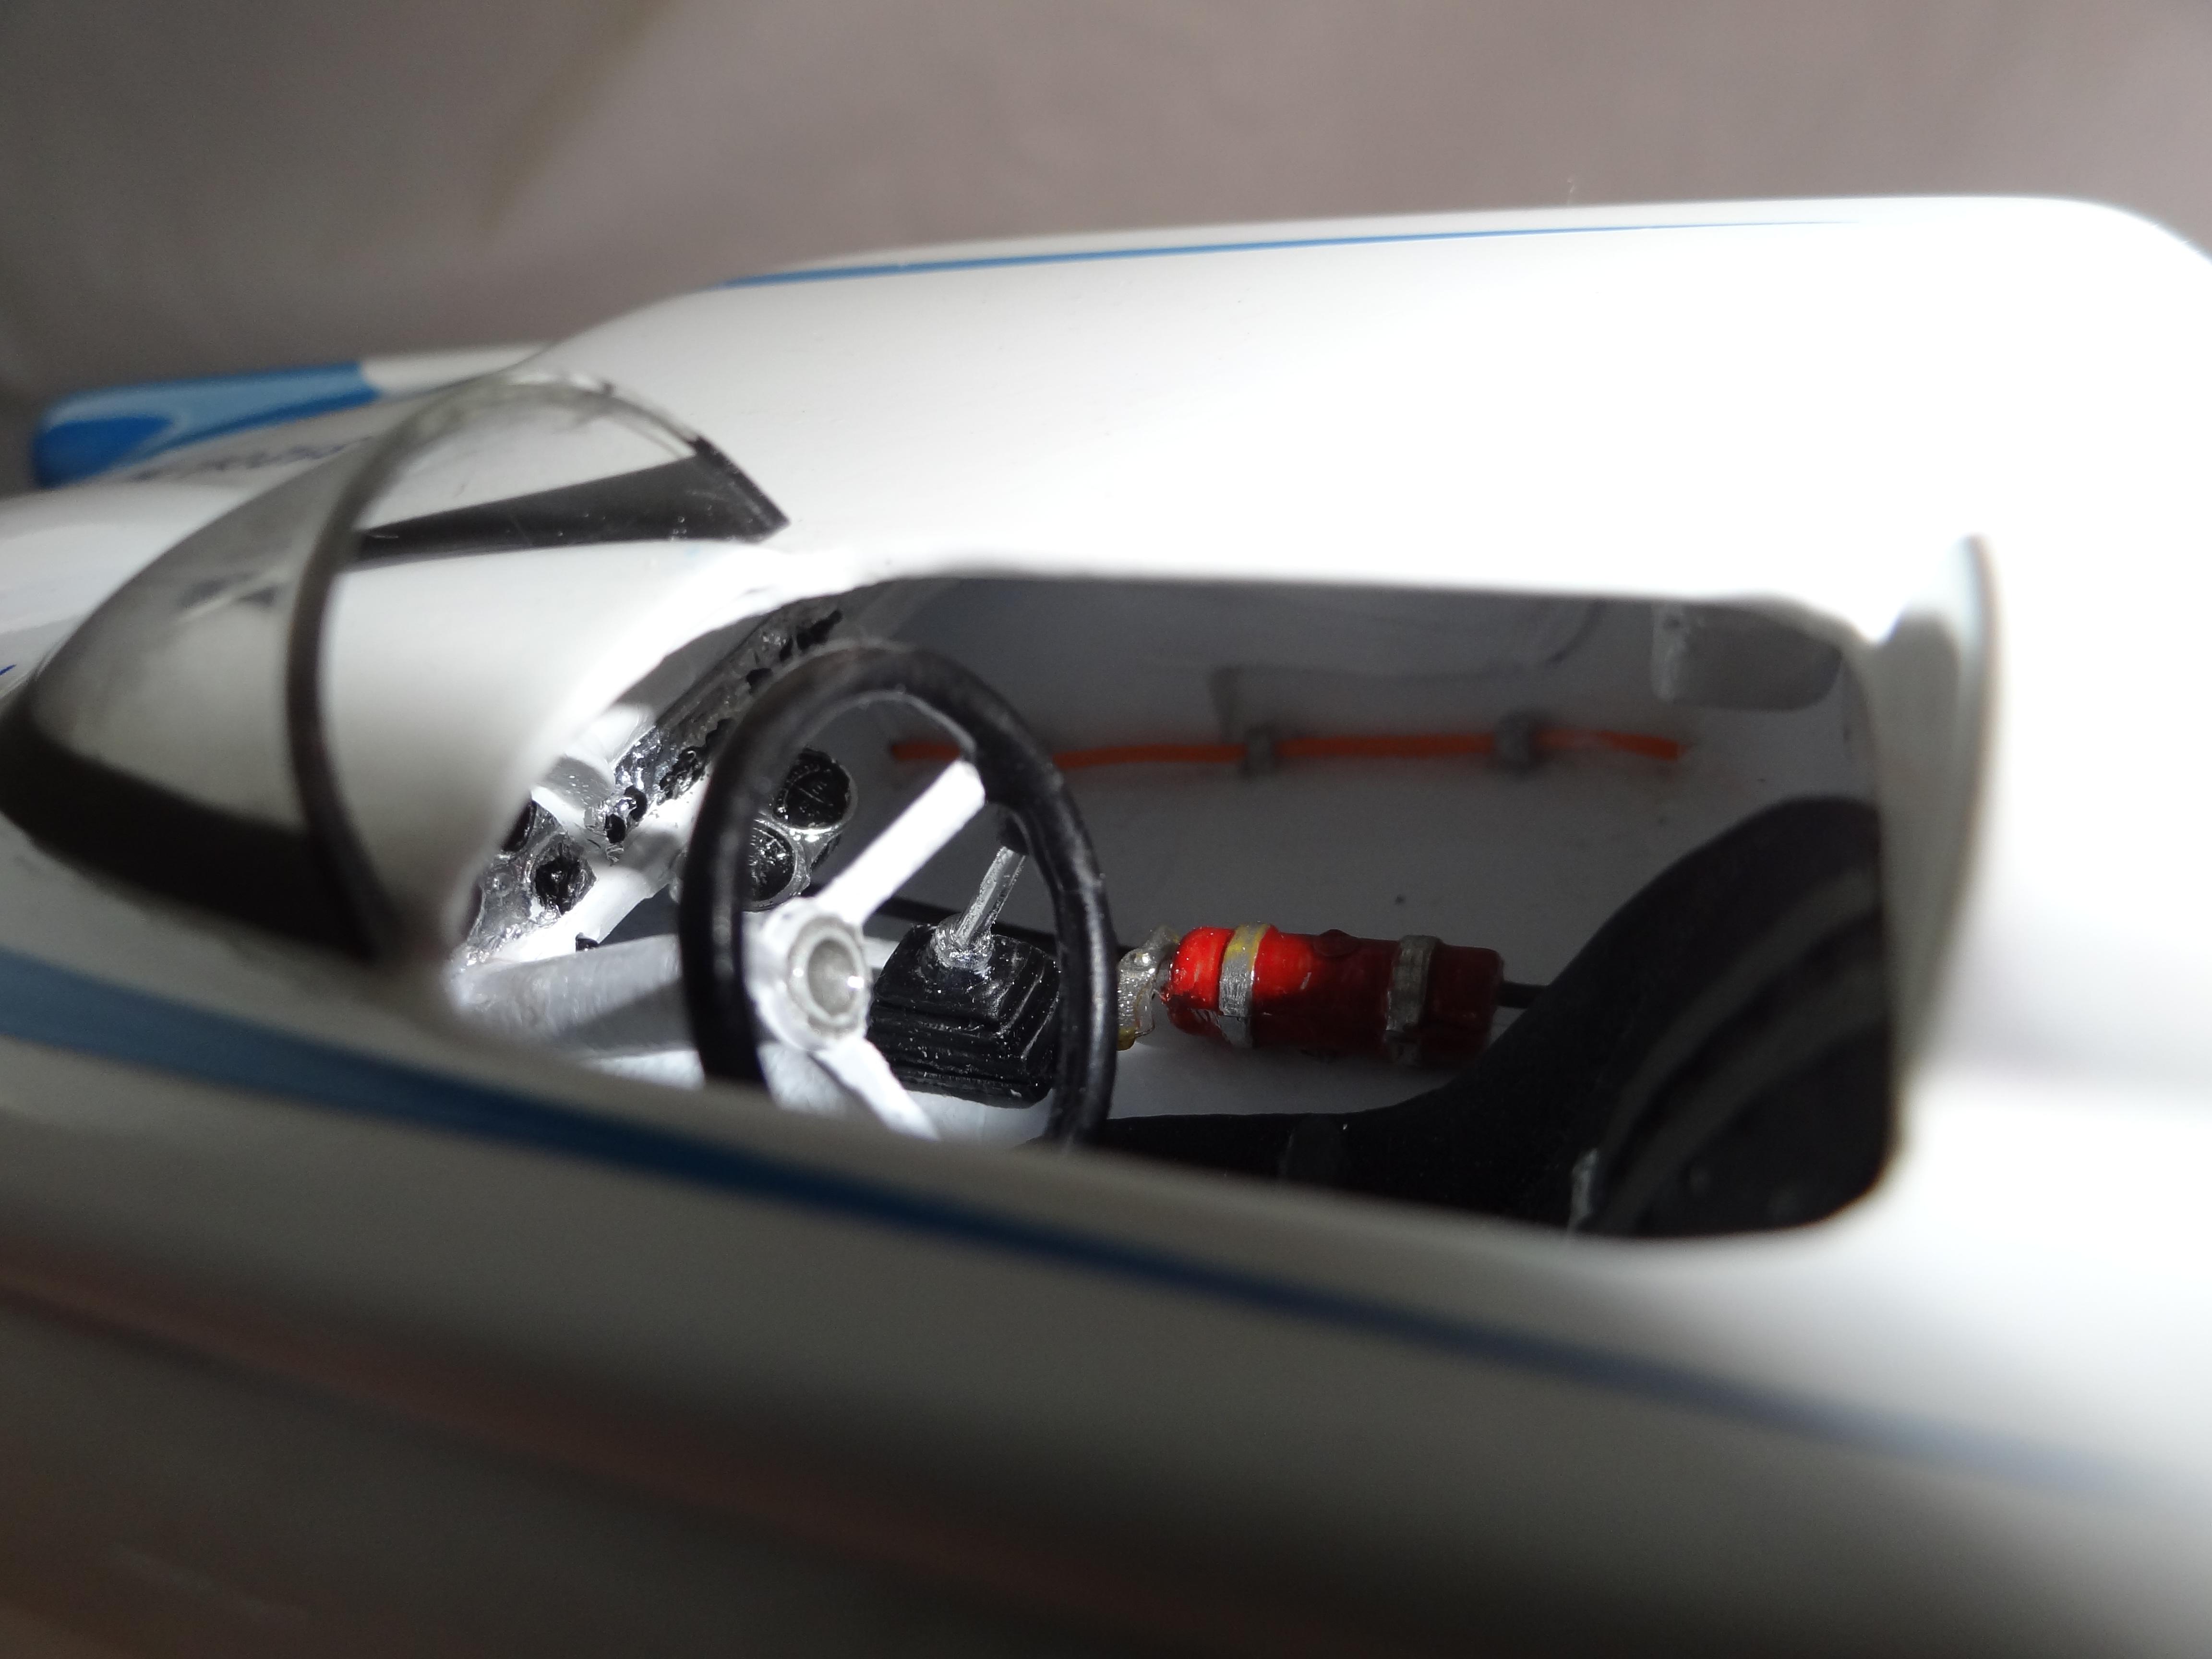
 Hi All. I just finished my version of a supercharged 1957 Ford Thunderbird Land Speed Racecar. My version is inspired by Ford's Battlebird and modified for land speed trails at places like Bonneville and Muroc. The model is based on the AMT/ERTL kit. I created the front end from the back end of a '34 Ford fenders and roll-pan and scratch-built the tonneau cover. I scratch-built the McCullough supercharger from left over misc parts. I kept it simple by not detailing the molded chassis and even still used the metal axles. By the way, the vintage-style trailer is a modified race-boat trailer from a Bronco combo-kit. I hope this inspires more kit bashing and customizing. Enjoy.
-
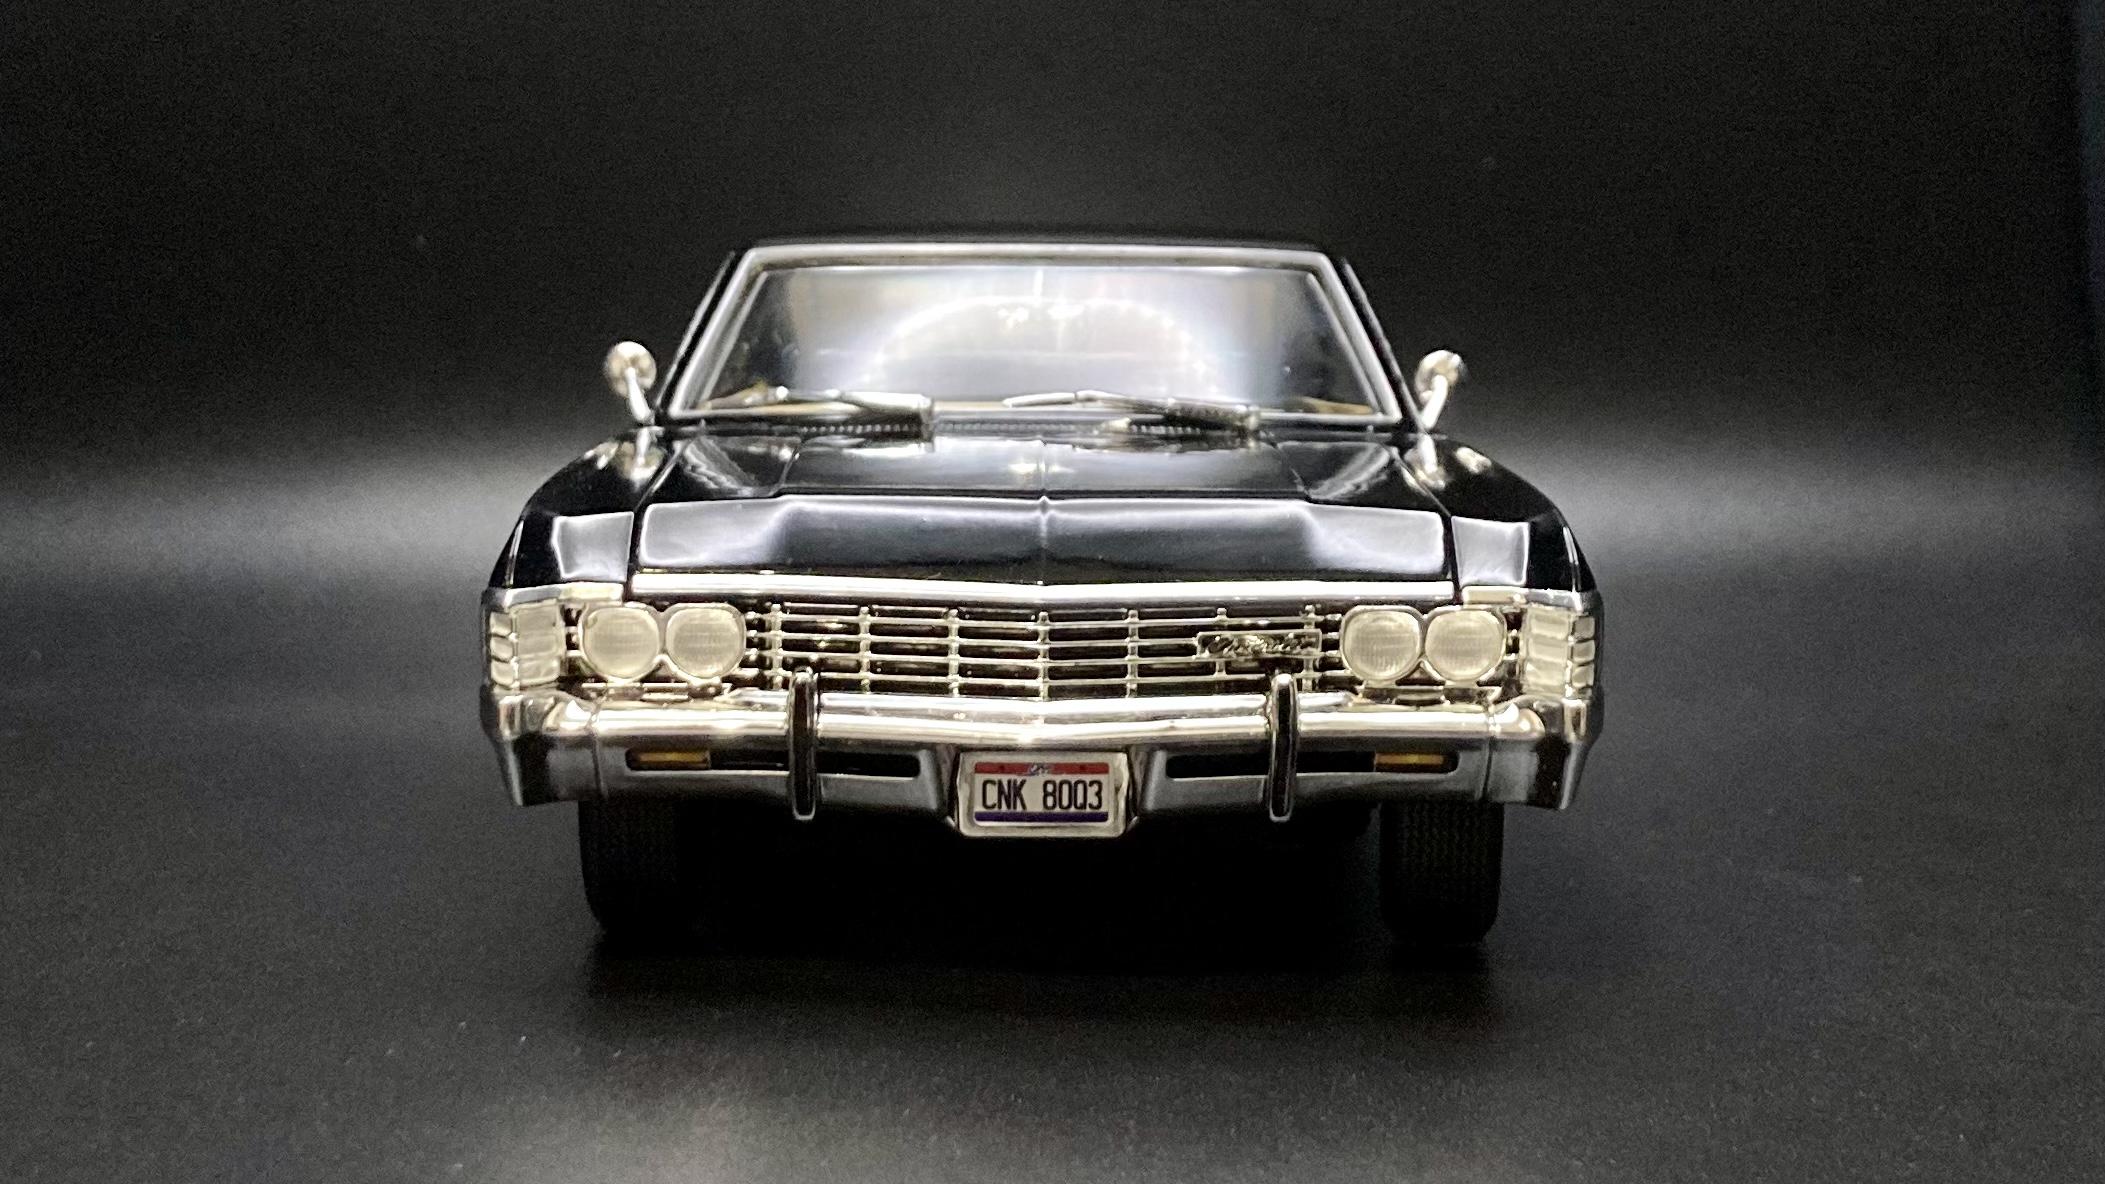
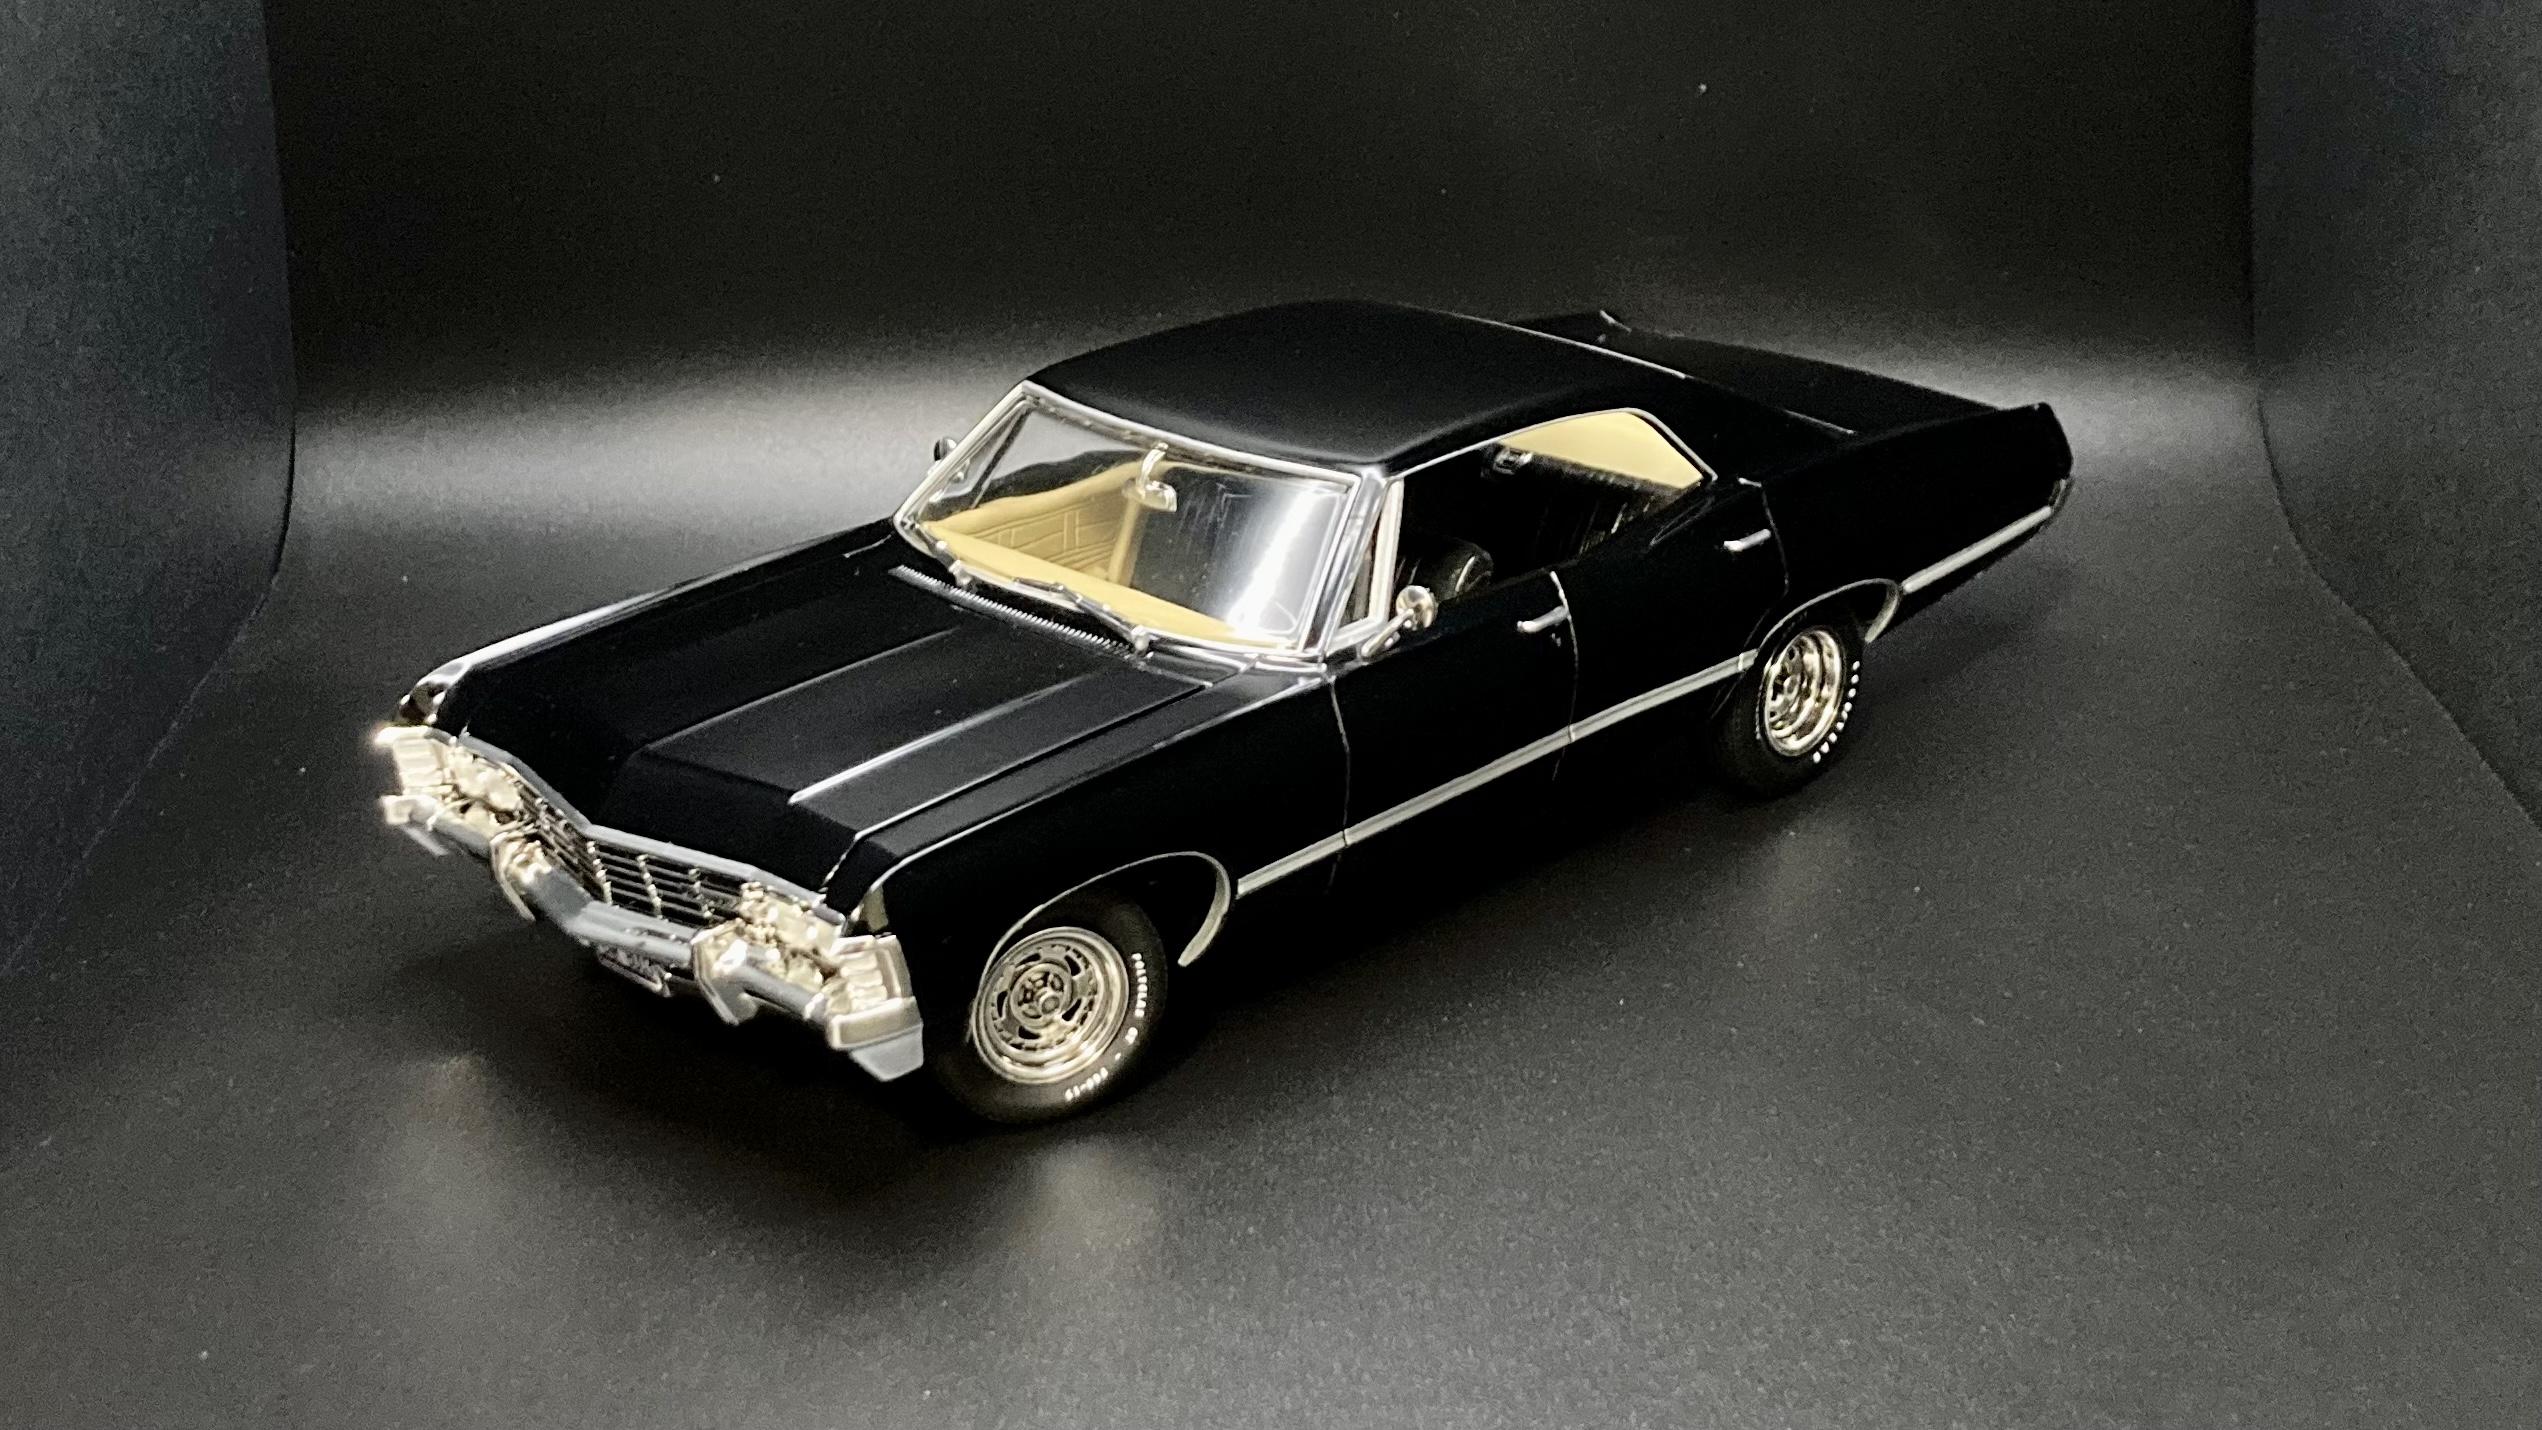
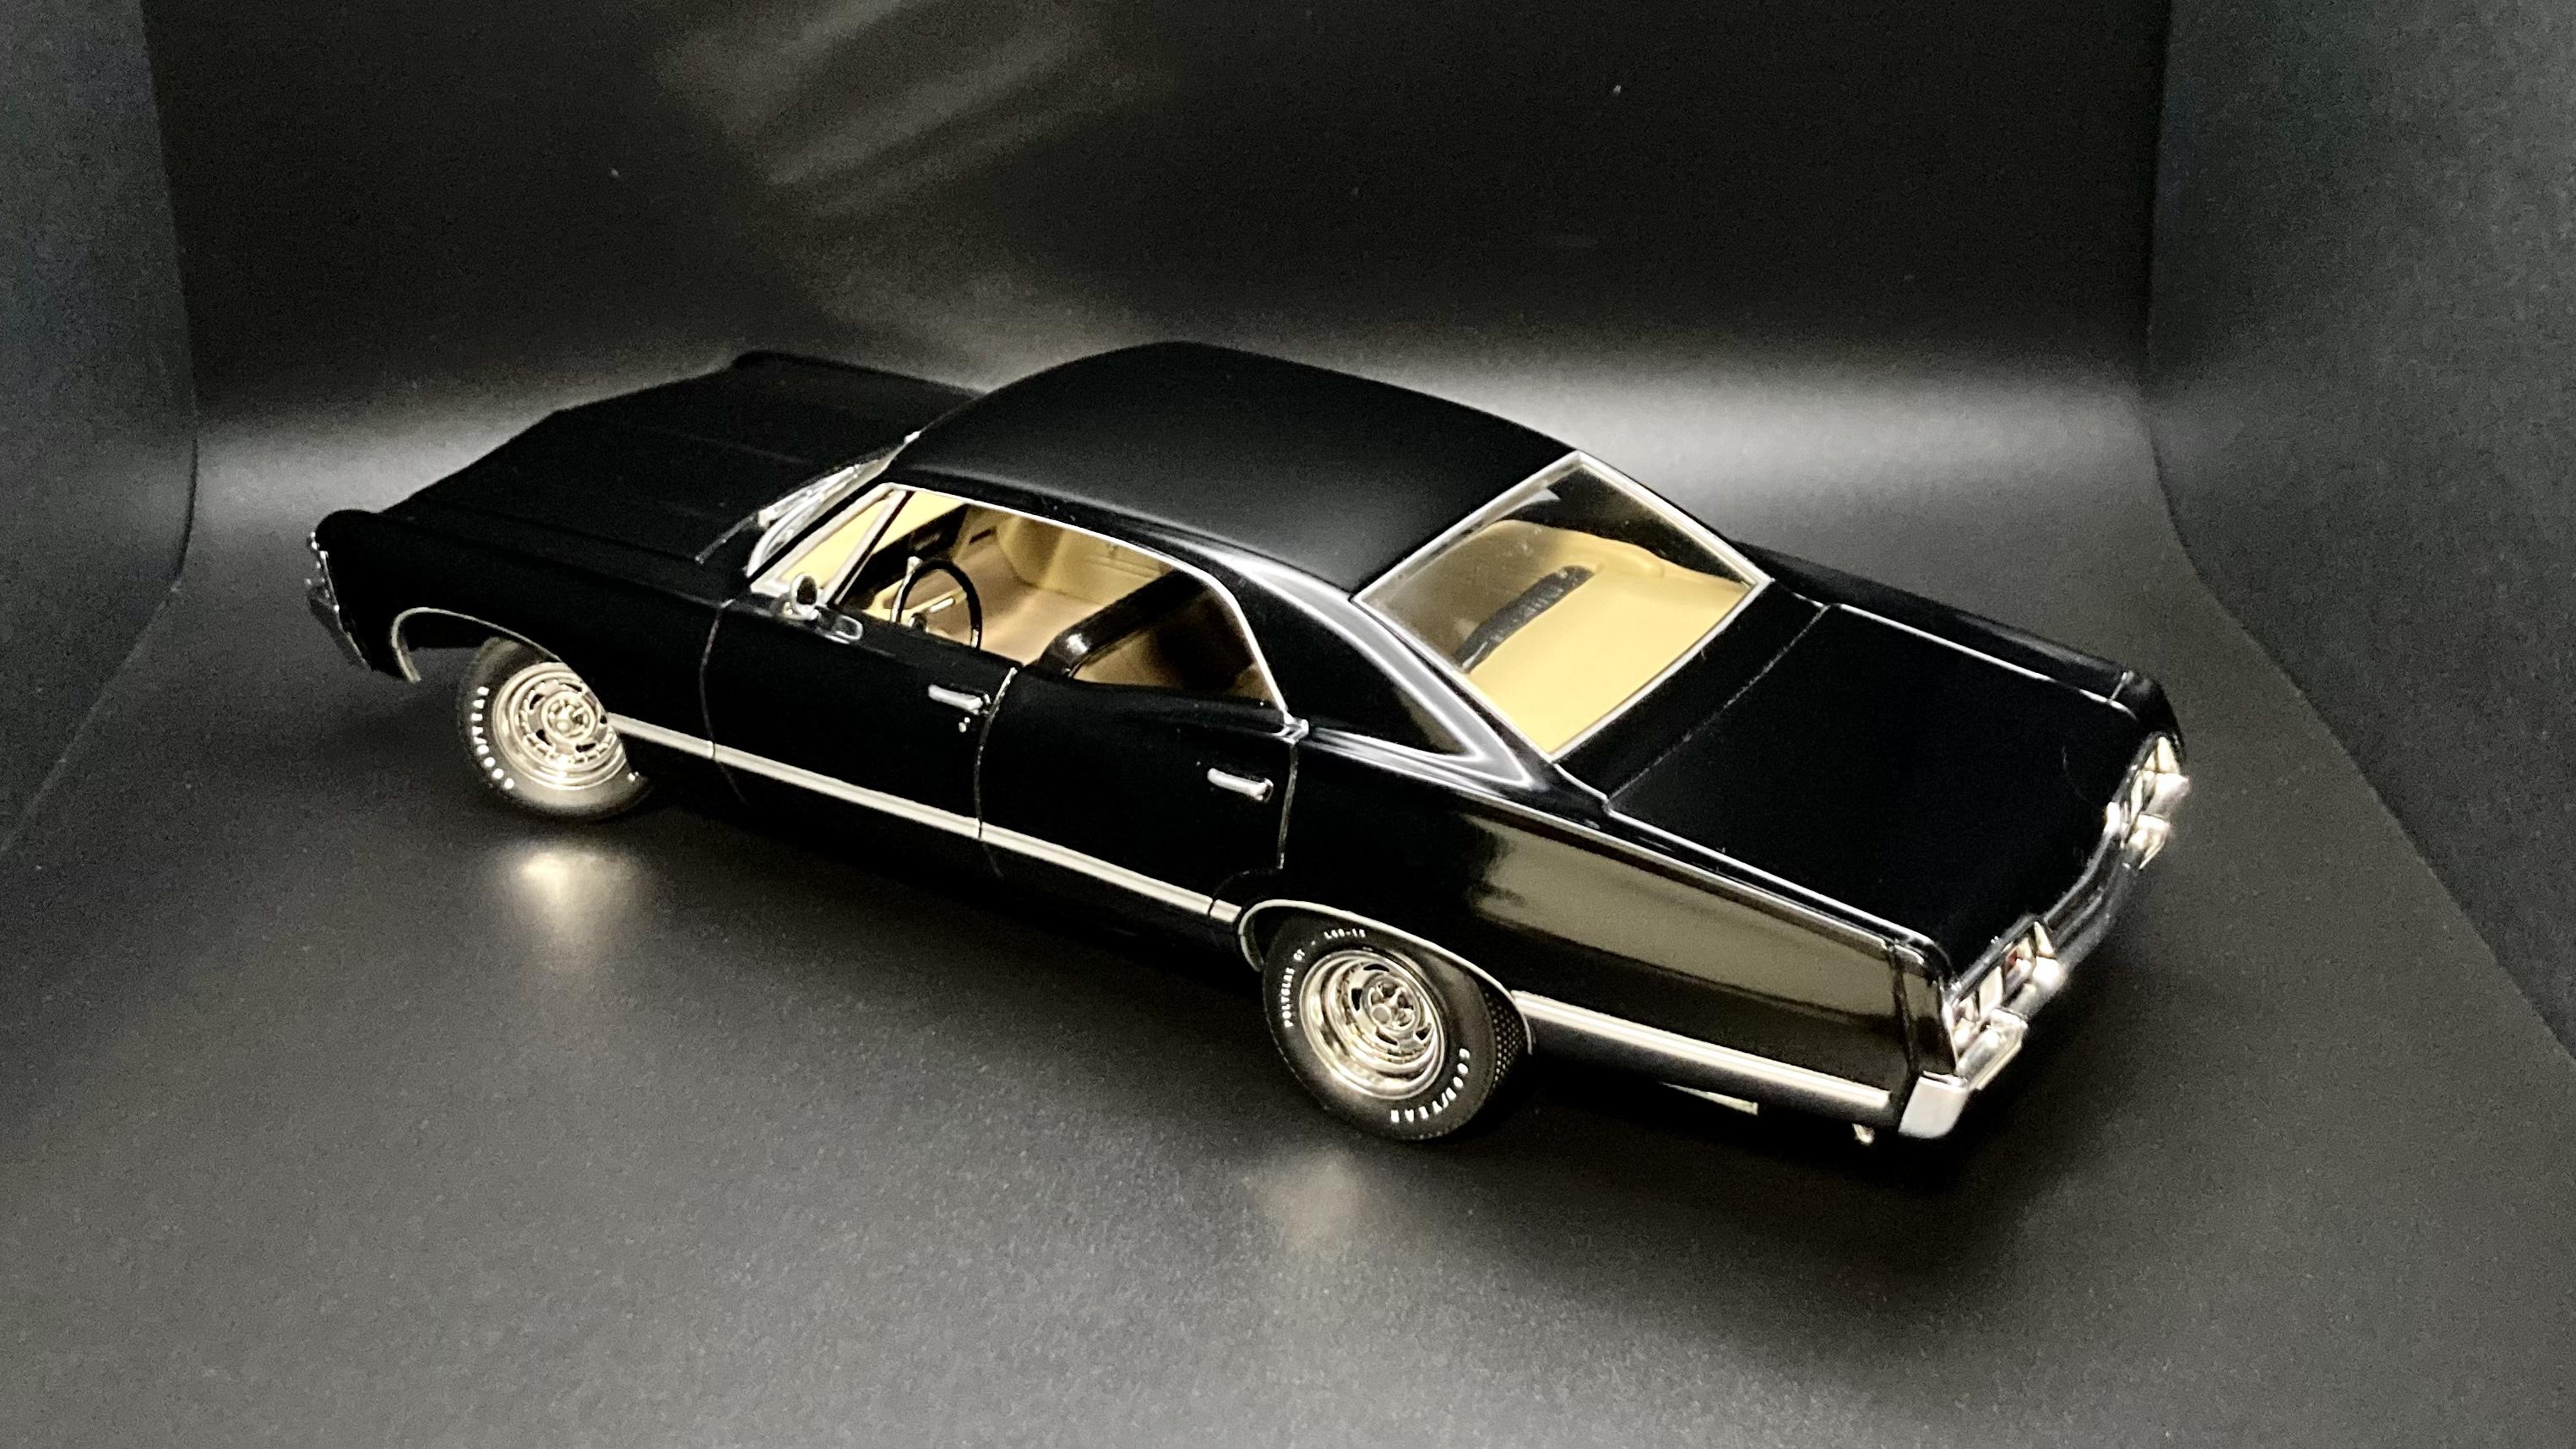
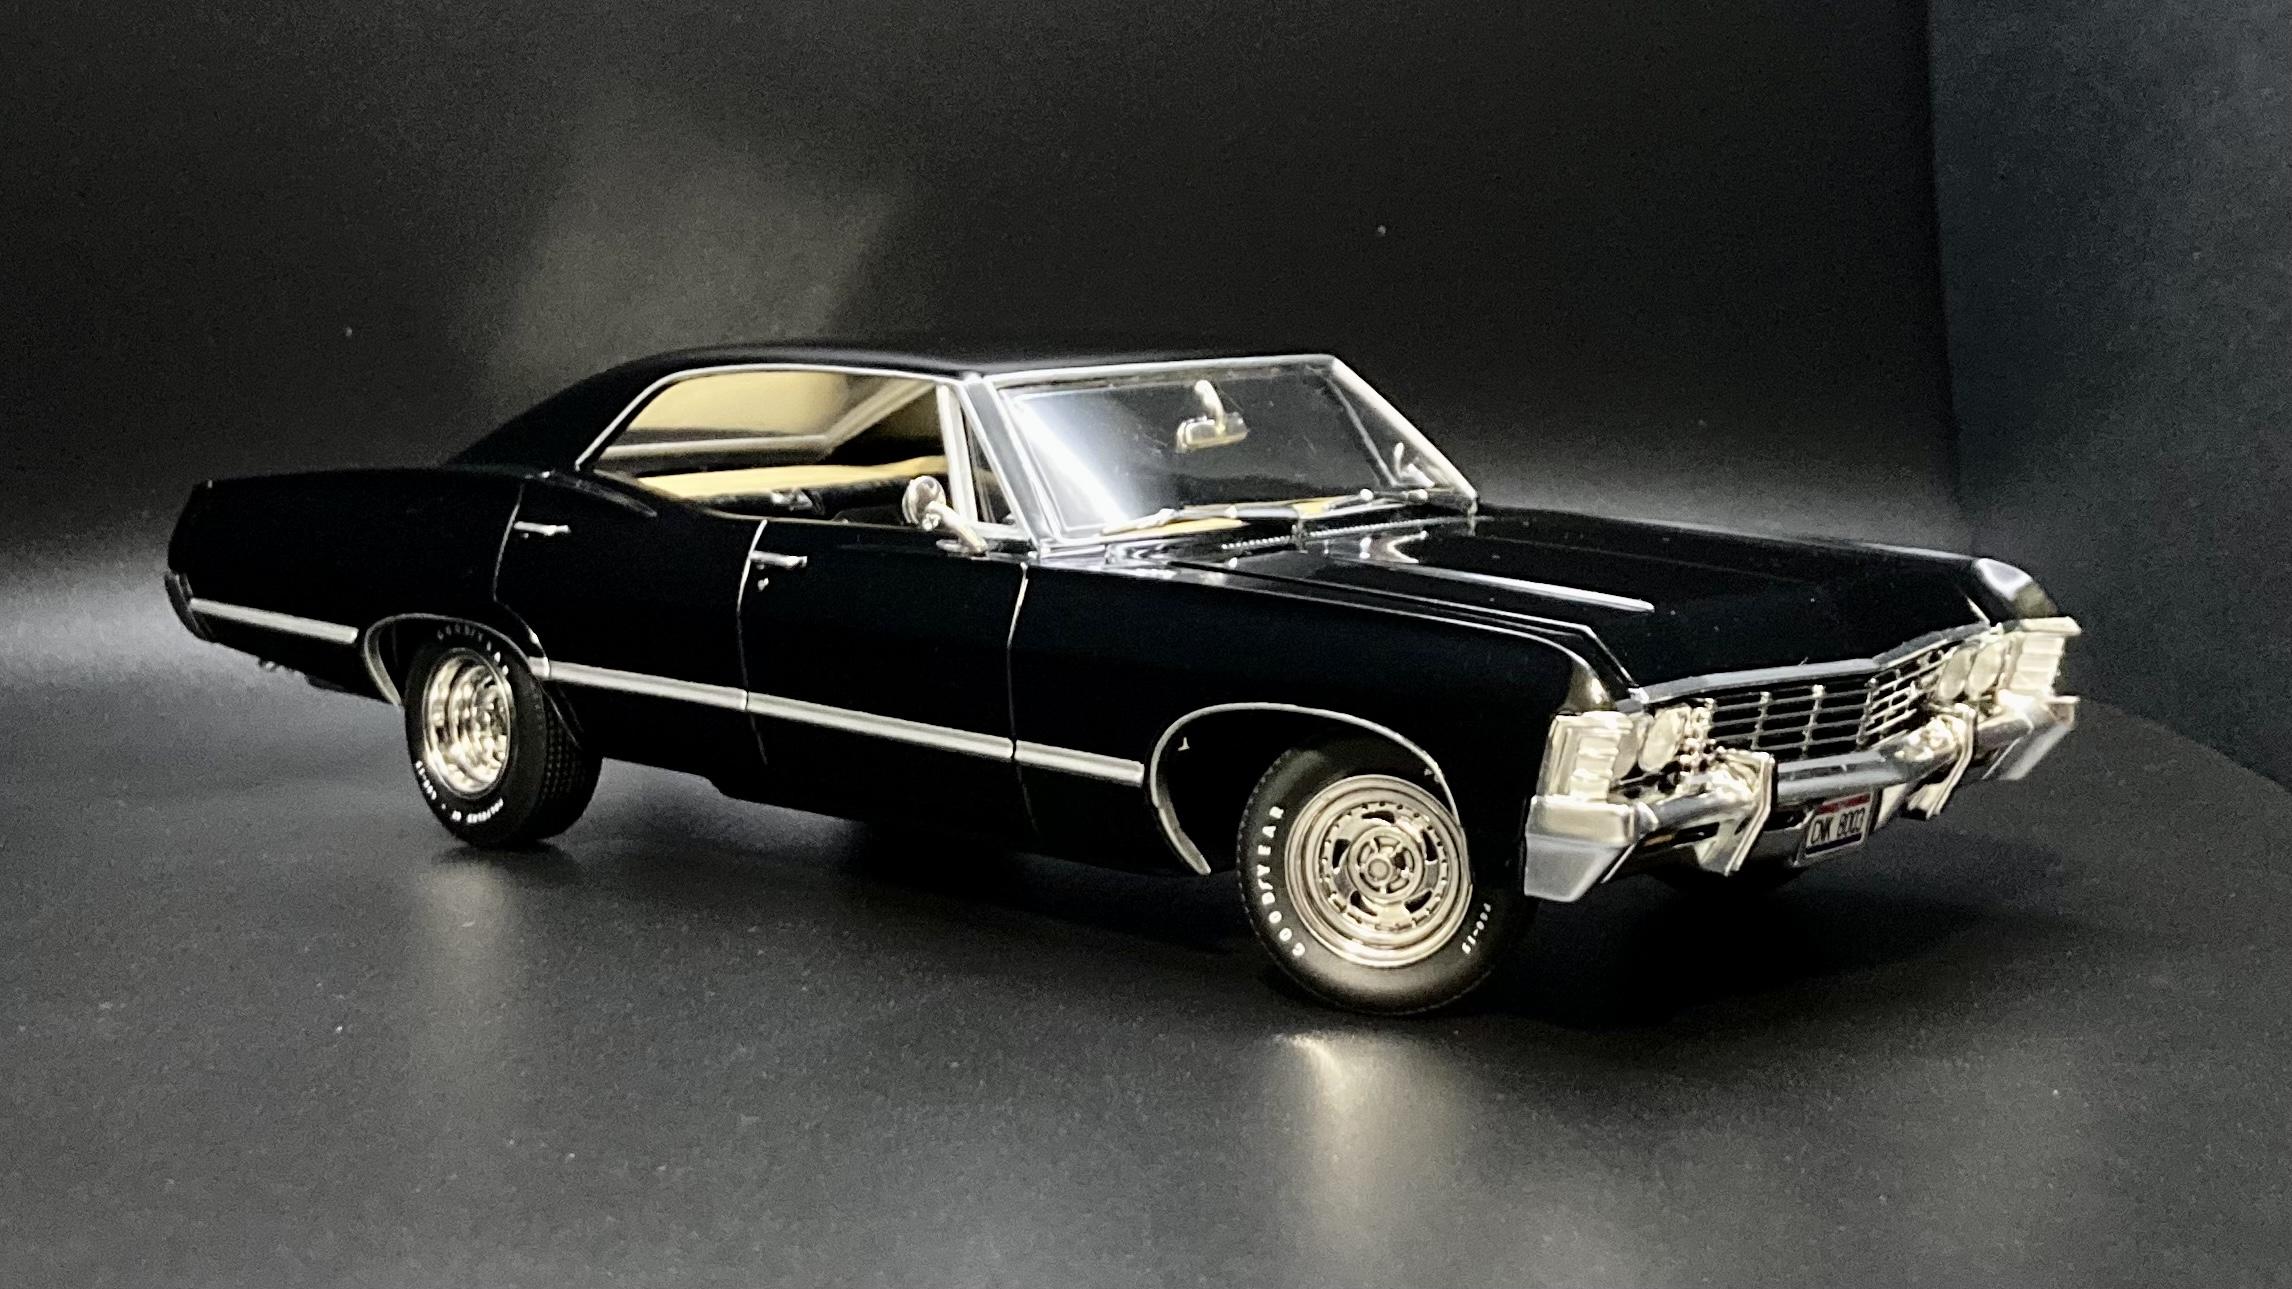
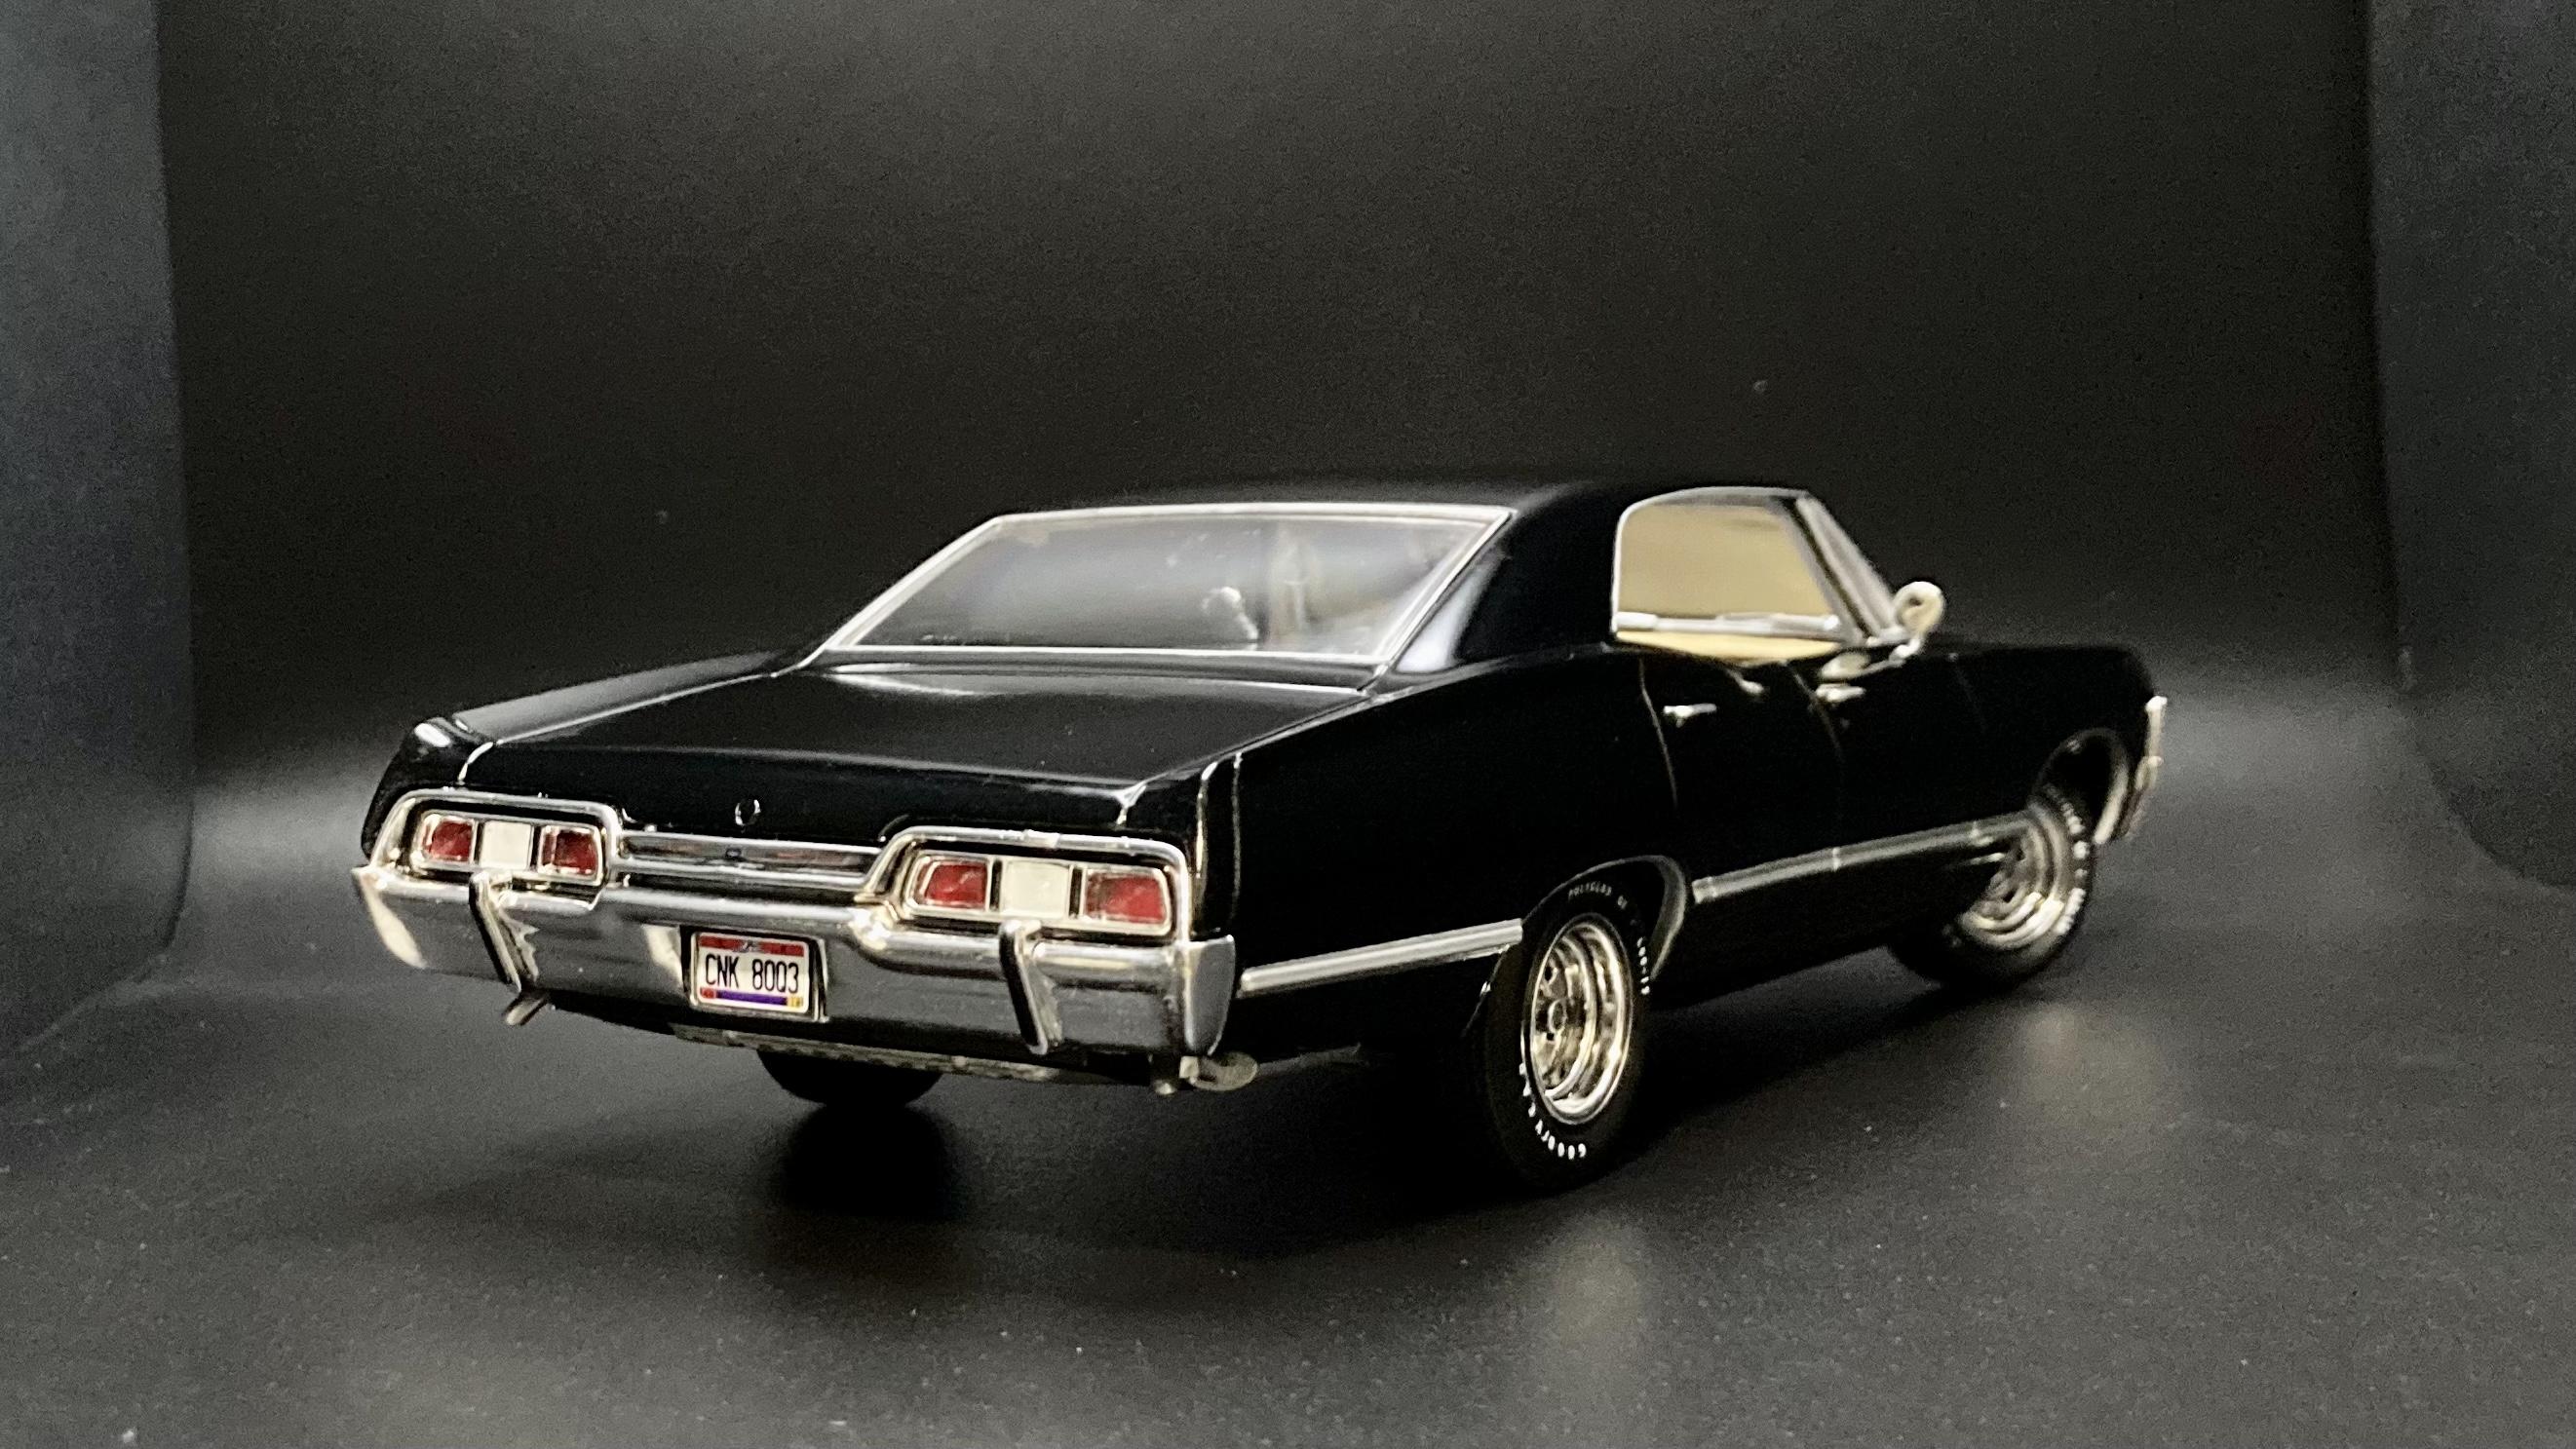
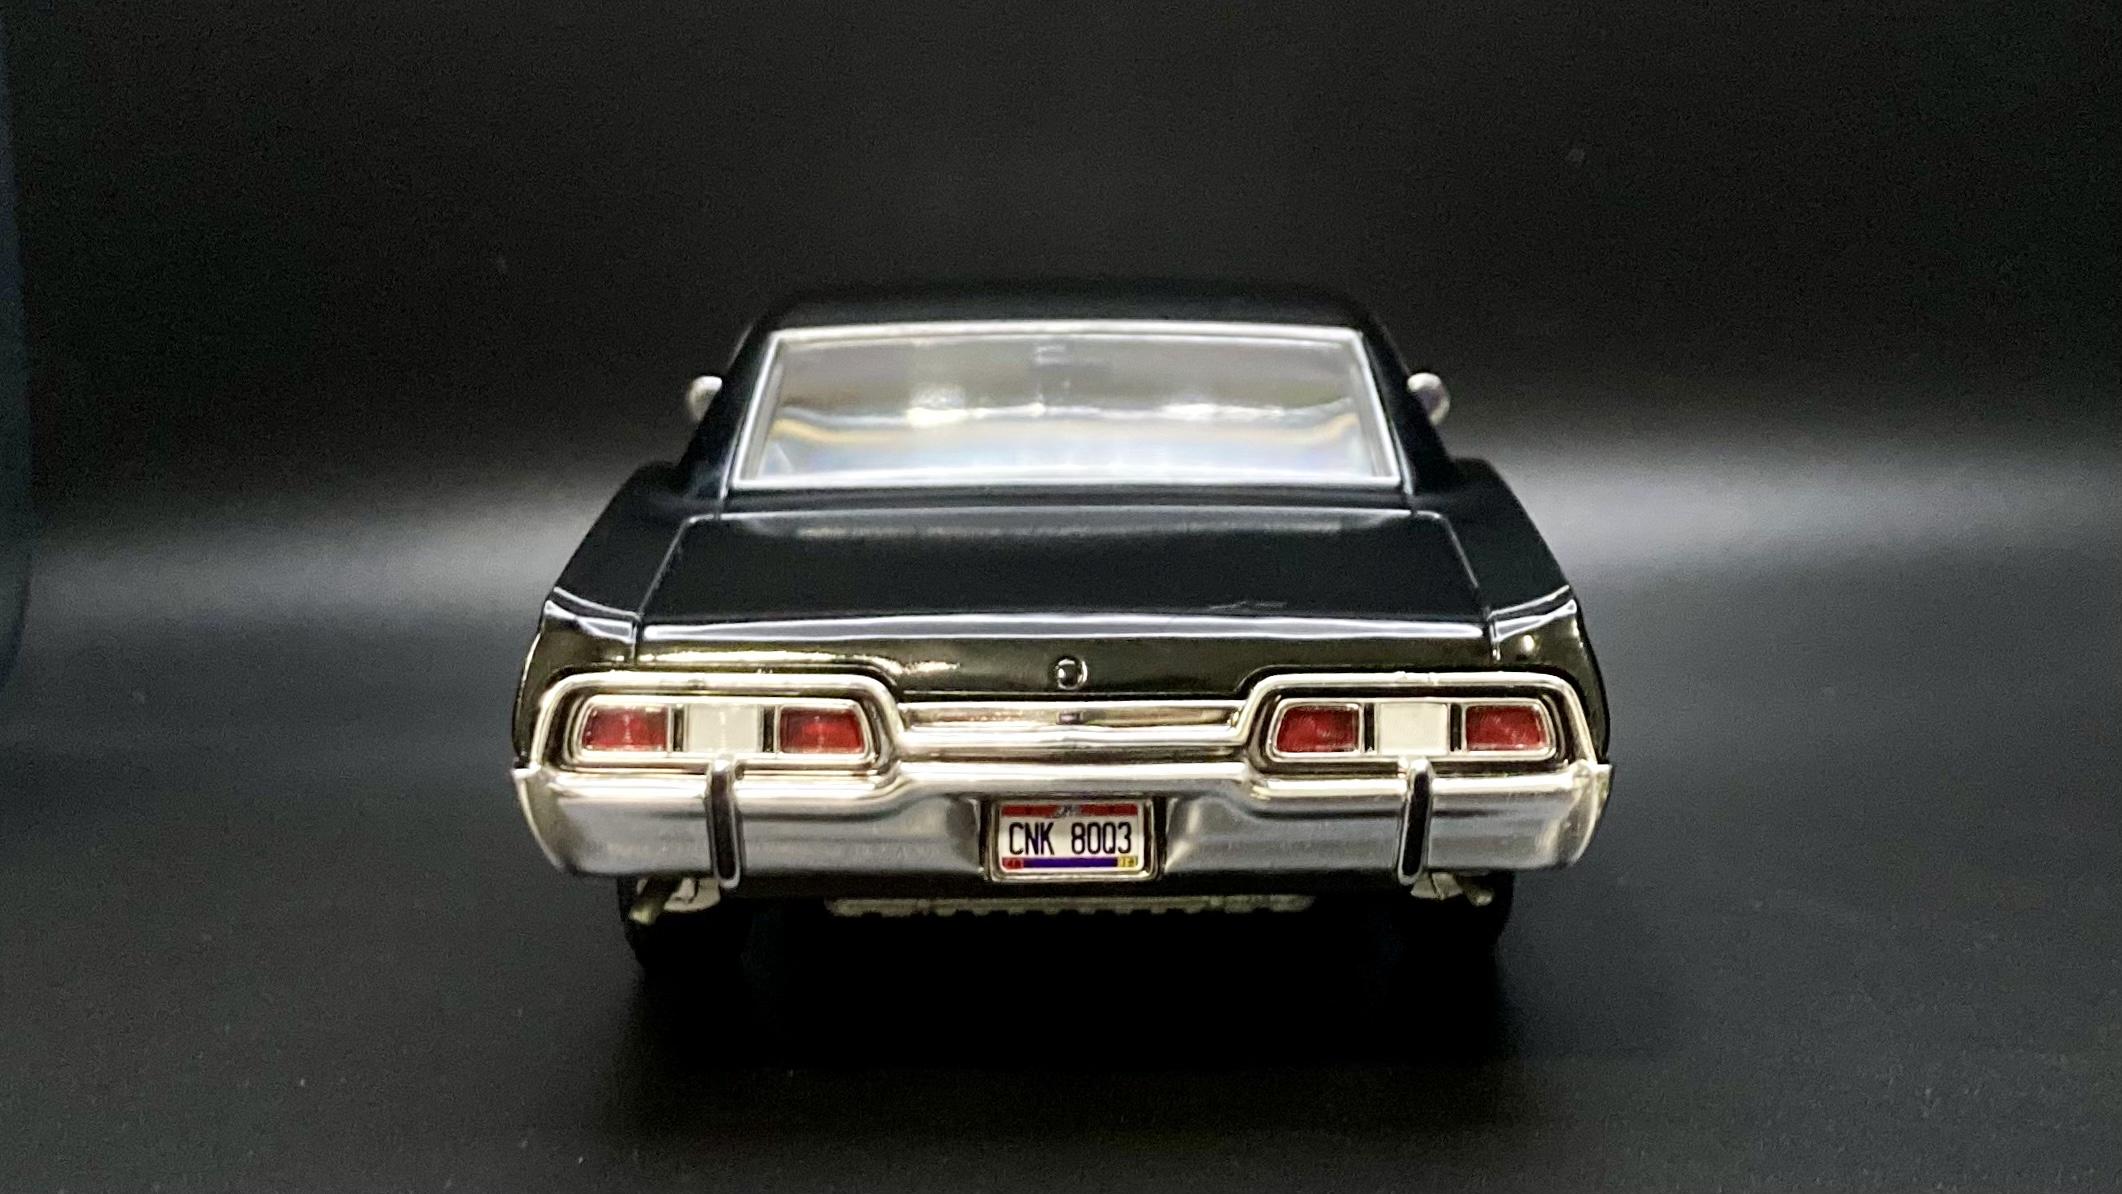
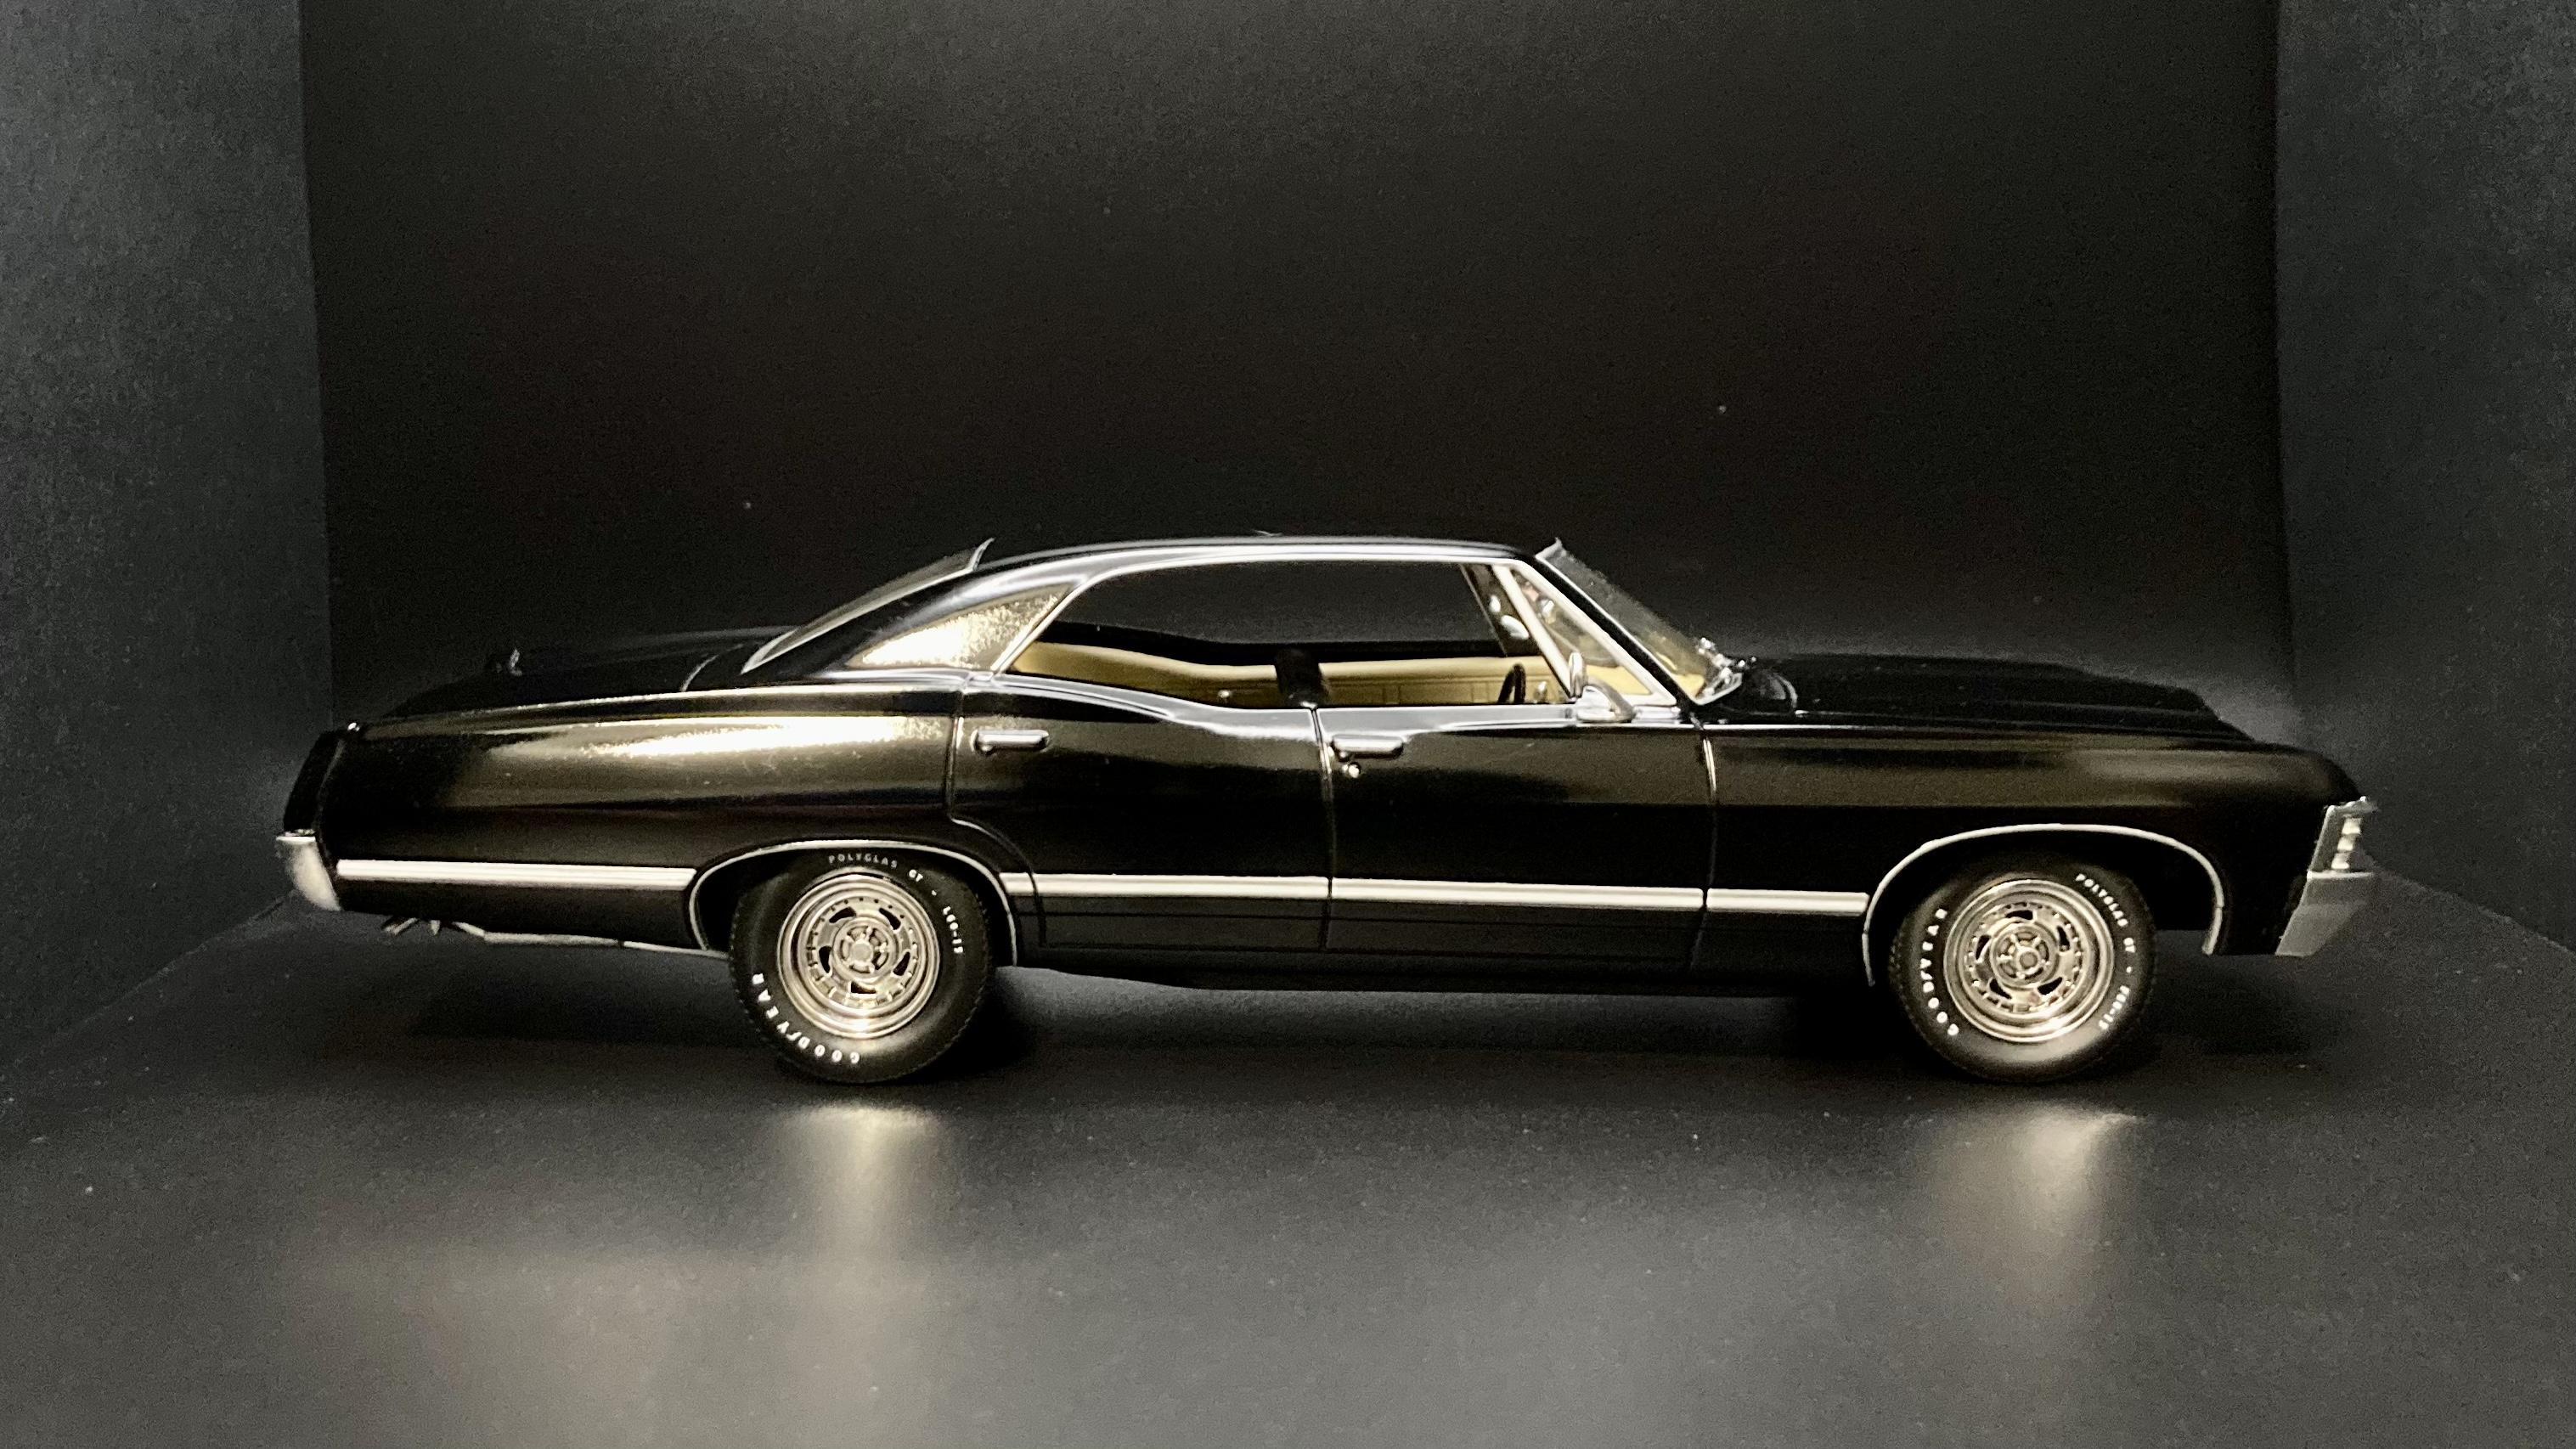
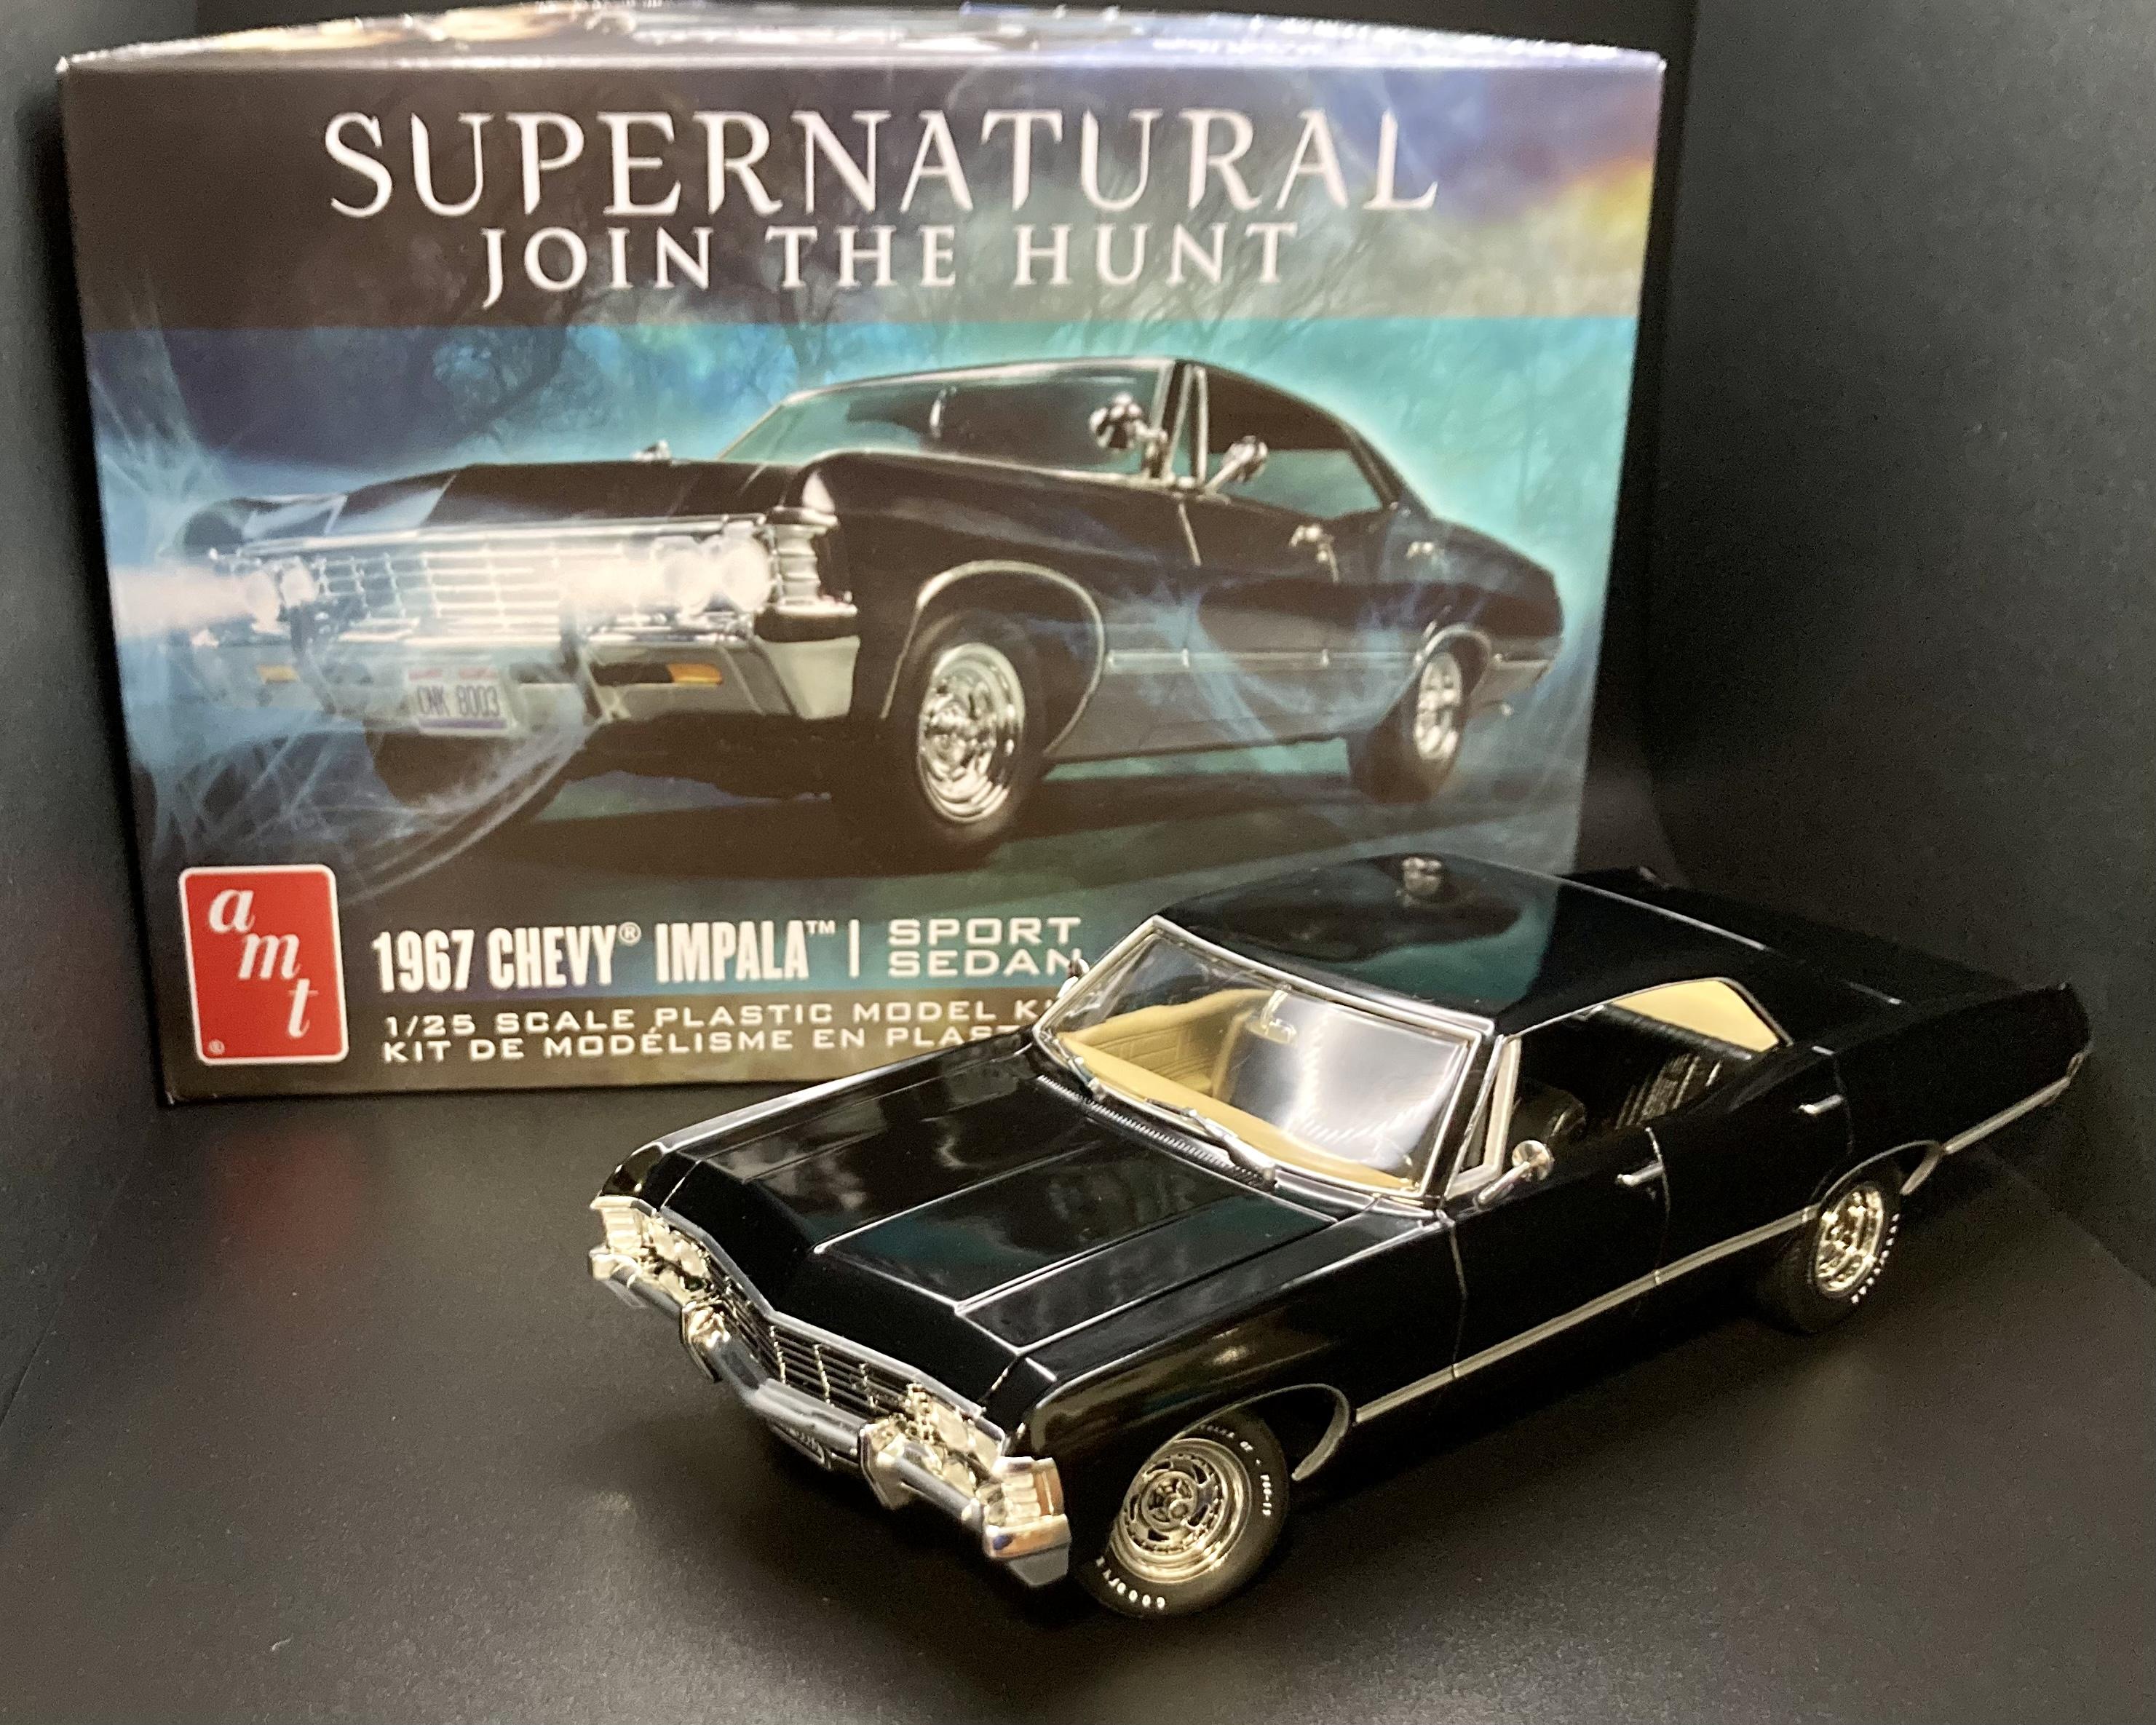
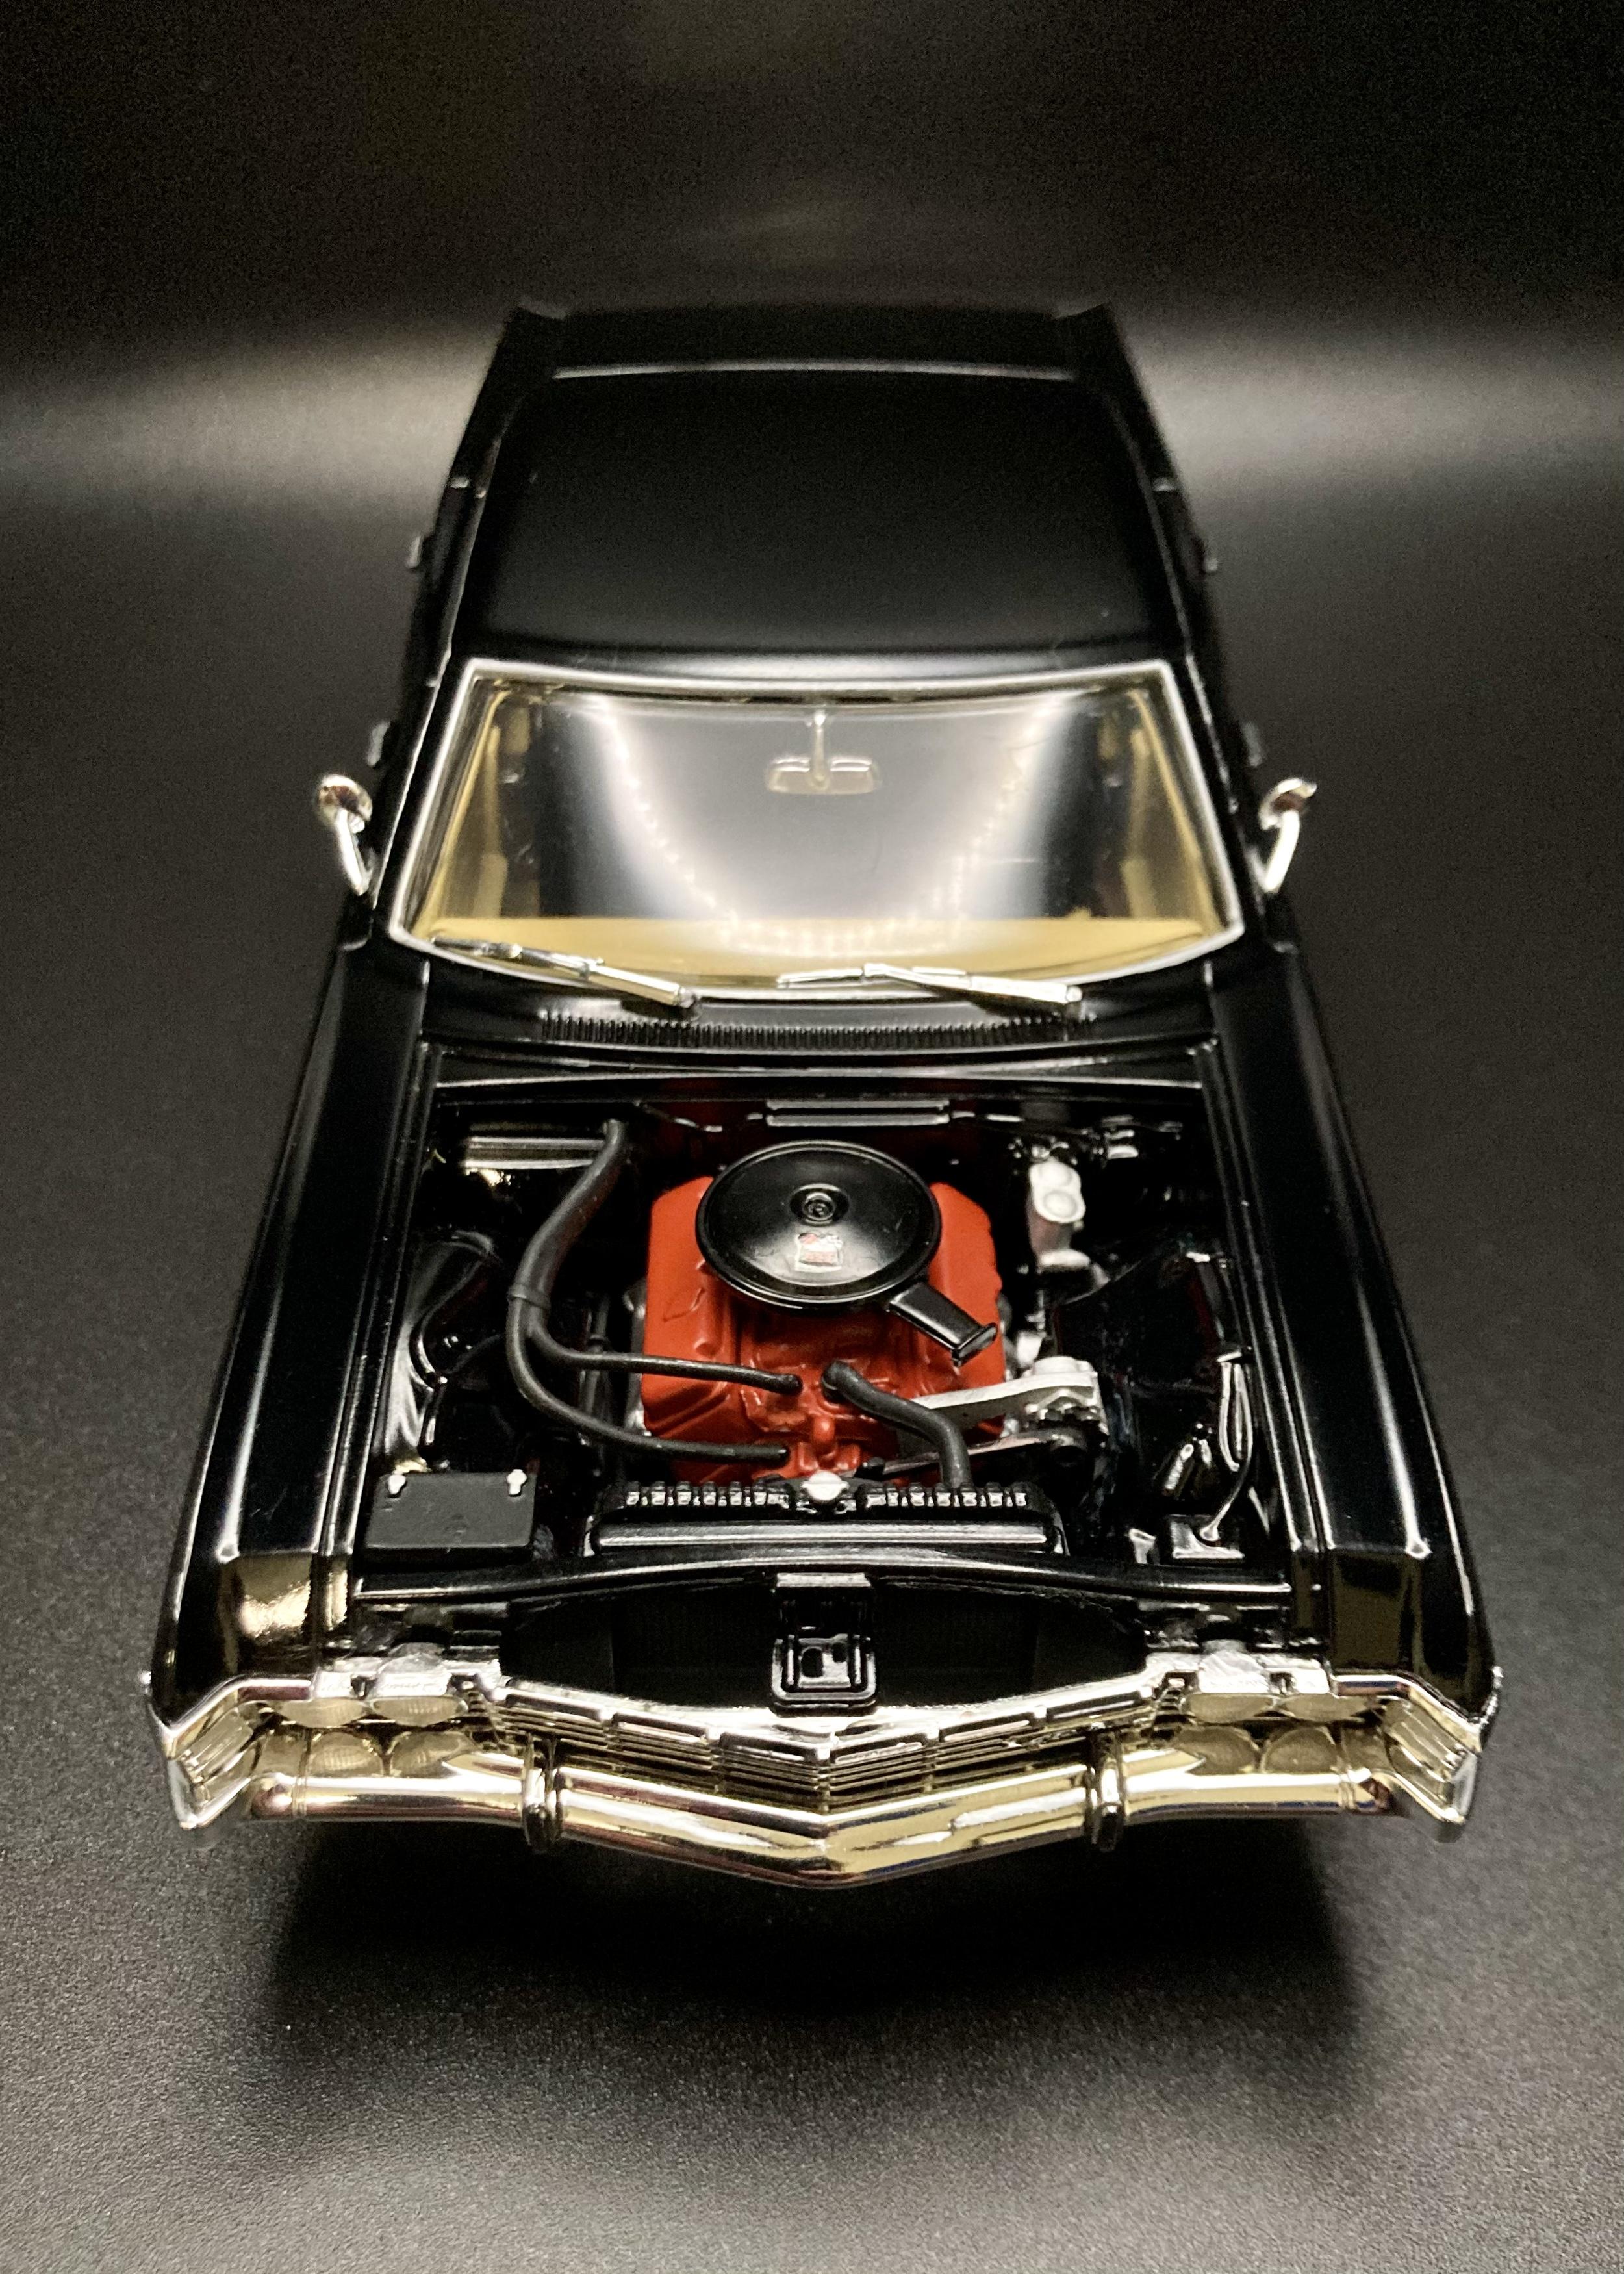
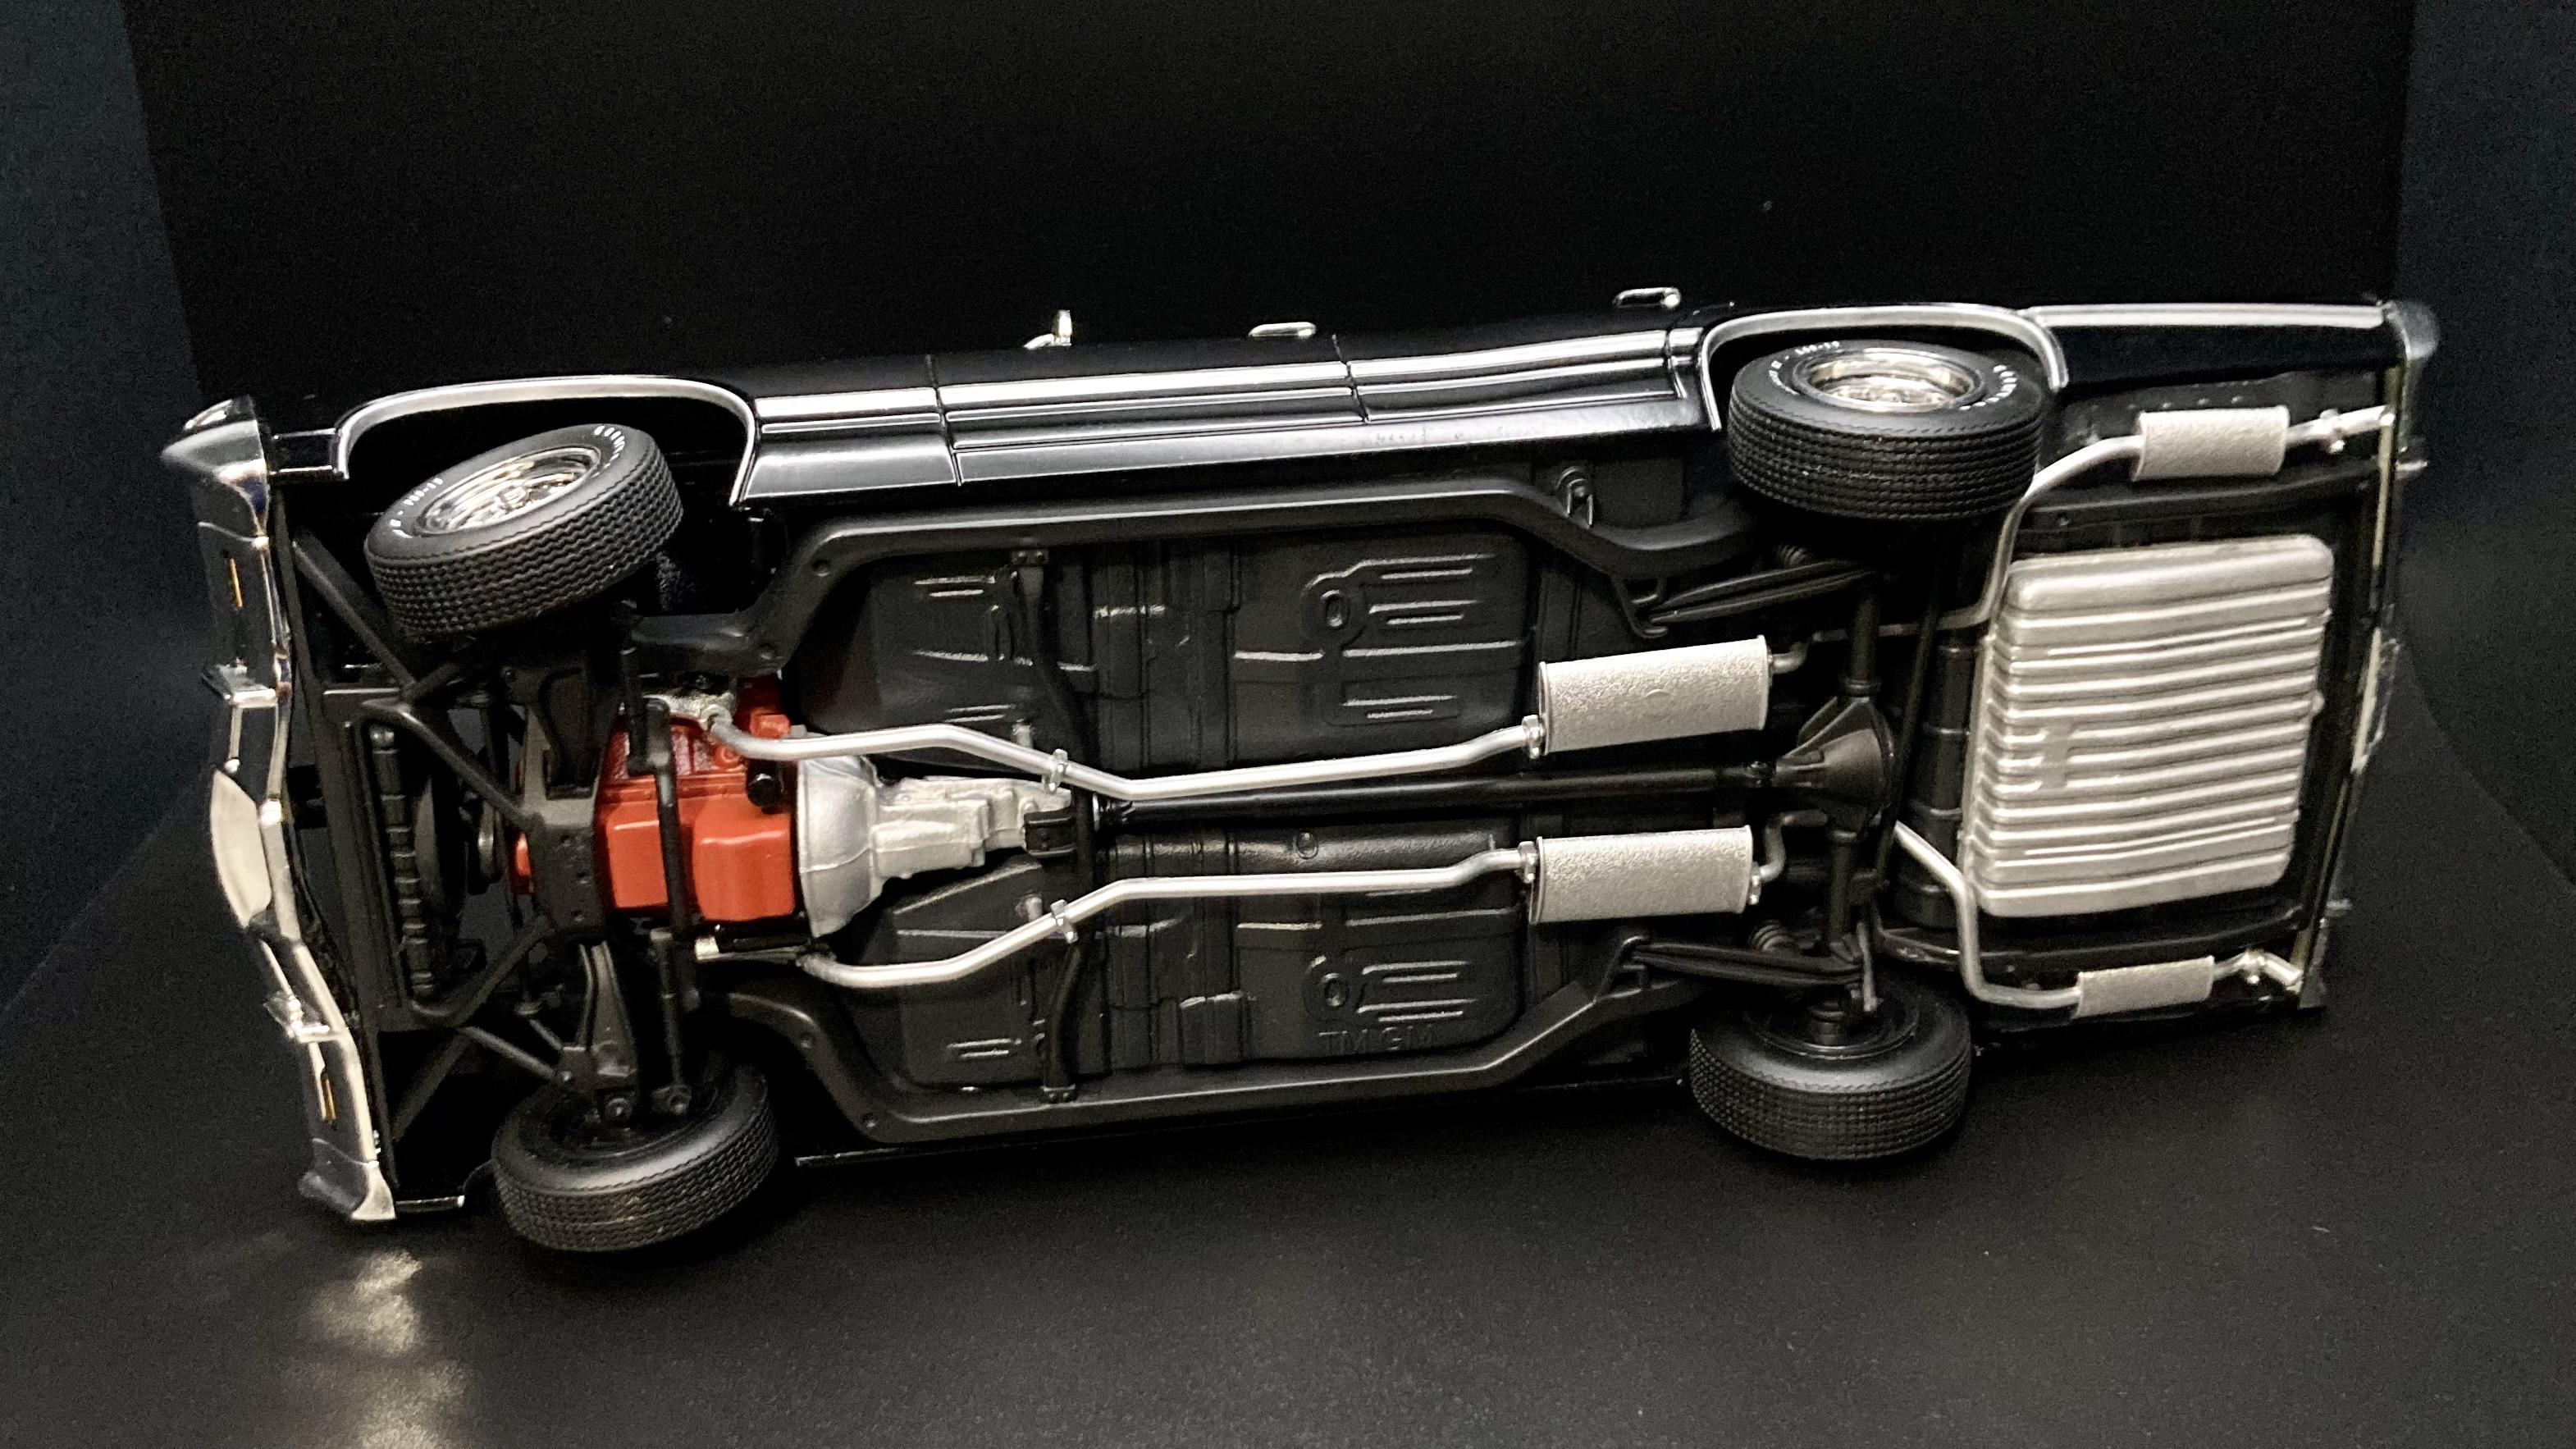
I’m finally finished with this Supernatural Impala build! After two botched paint jobs, fighting the ill-fitting body-to-chassis marriage, smudged Molotow at the last second, and never ending static/dust, it’s safe to say this model was equally as cursed as the Winchester boys from the show! It came together in the end, but there’s a fair amount of blemishes that don’t show in the pictures. Built box stock, except for the tires which came from the AMT ‘66 Mustang Coupe. The tires that came in this kit were very rough with flash and fit the rims poorly. The car from the show never actually had white letter tires, but I think they look pretty cool here. I modified the steering rack to make wheels pose-able by cutting the tabs off where the rack glues to the chassis, and simply not gluing the steering knuckles. I left off the A pillar spotlights just to get it finished but I might add them later. Overall my build looks good enough for my shelf so I’m happy with it. I’m glad to have a model of a pretty sweet and unusual (hero cars are RARELY four-doors!) TV car in my collection!
-
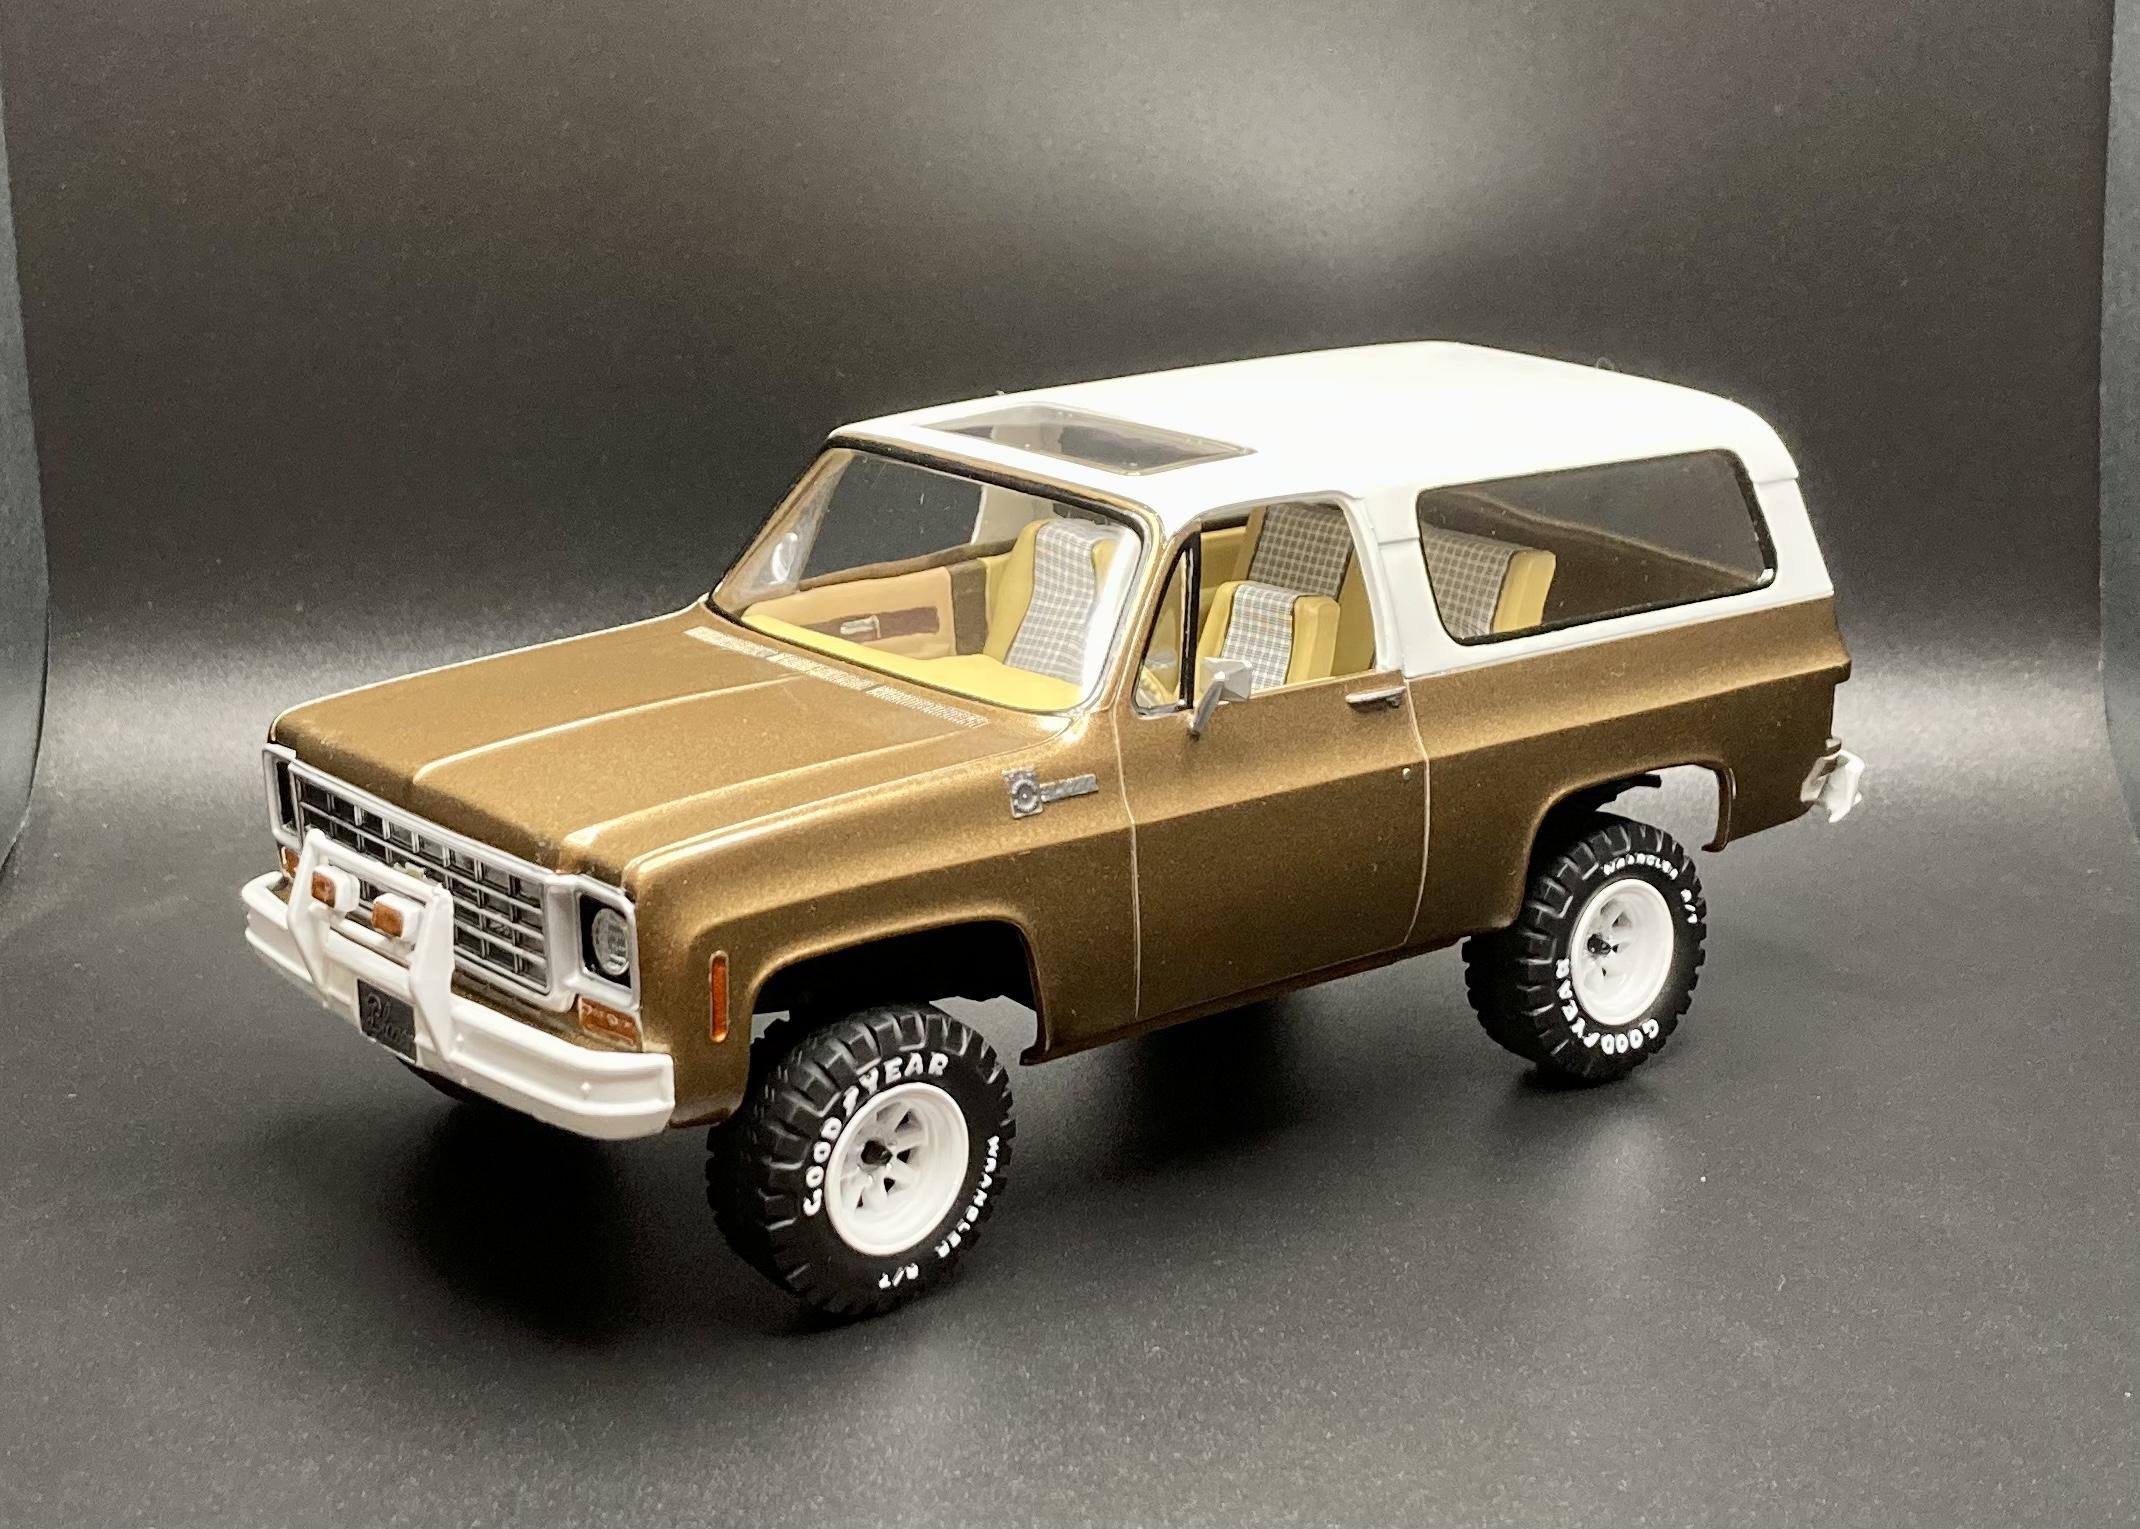
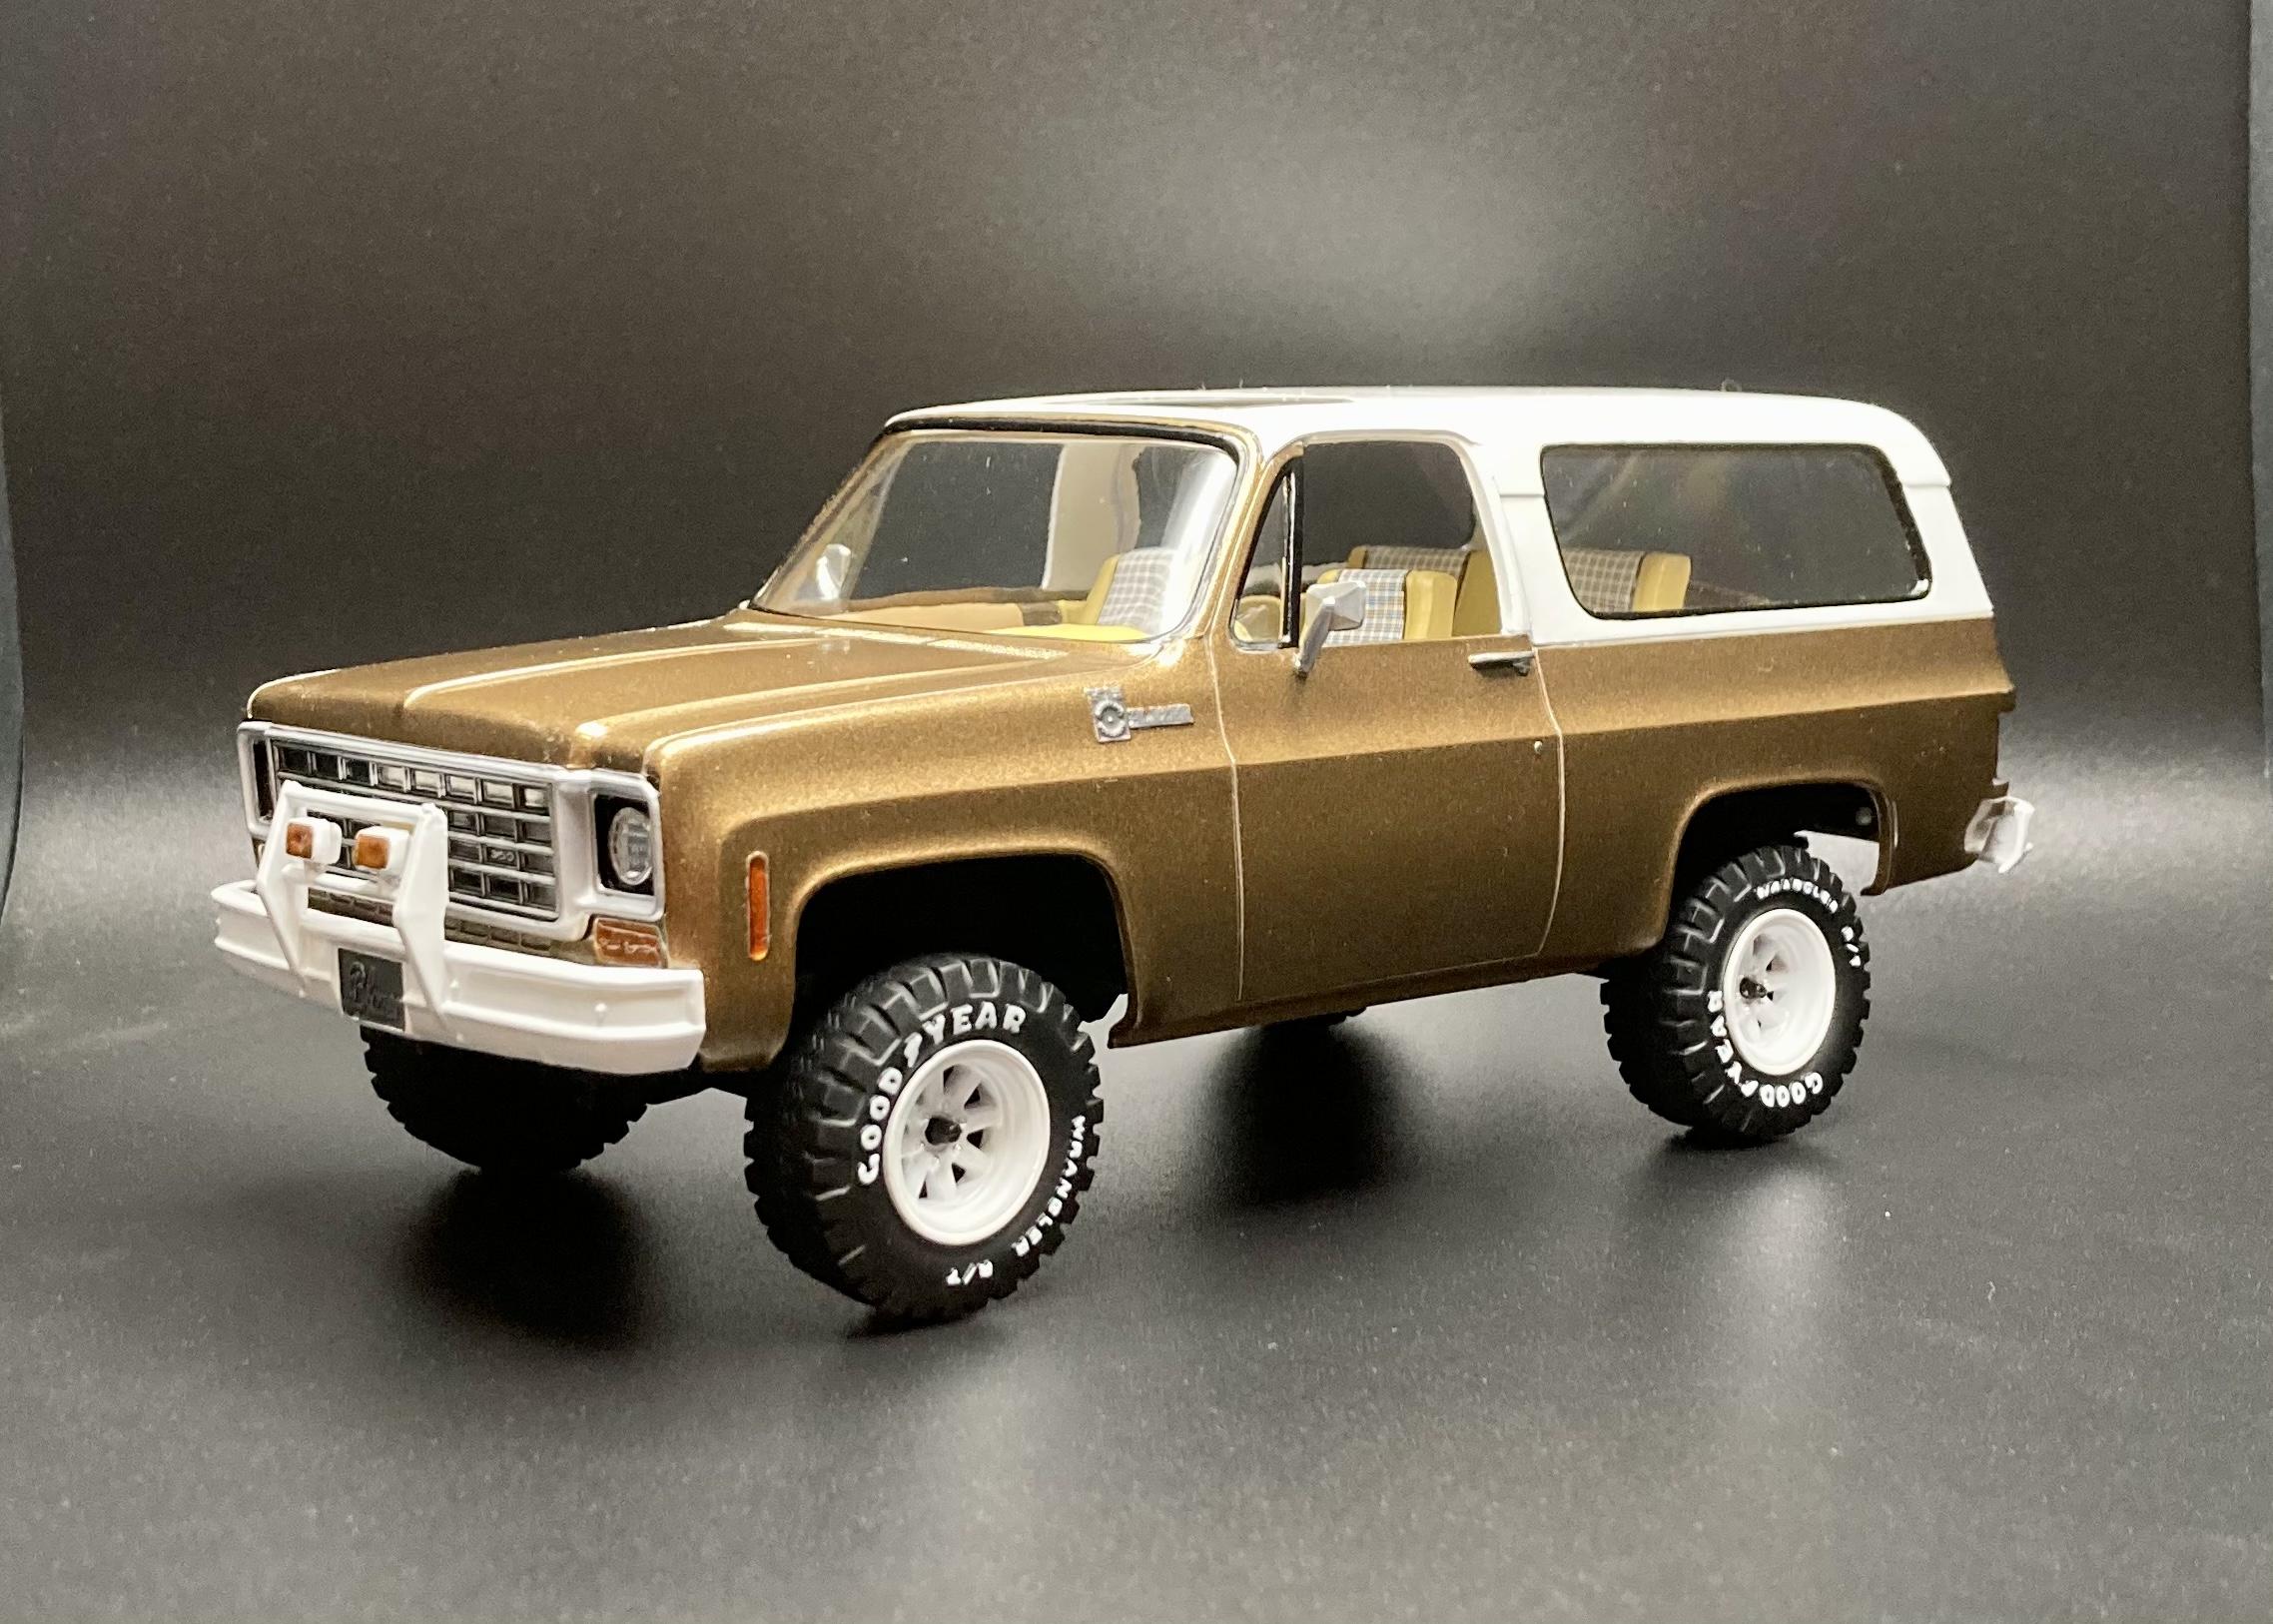
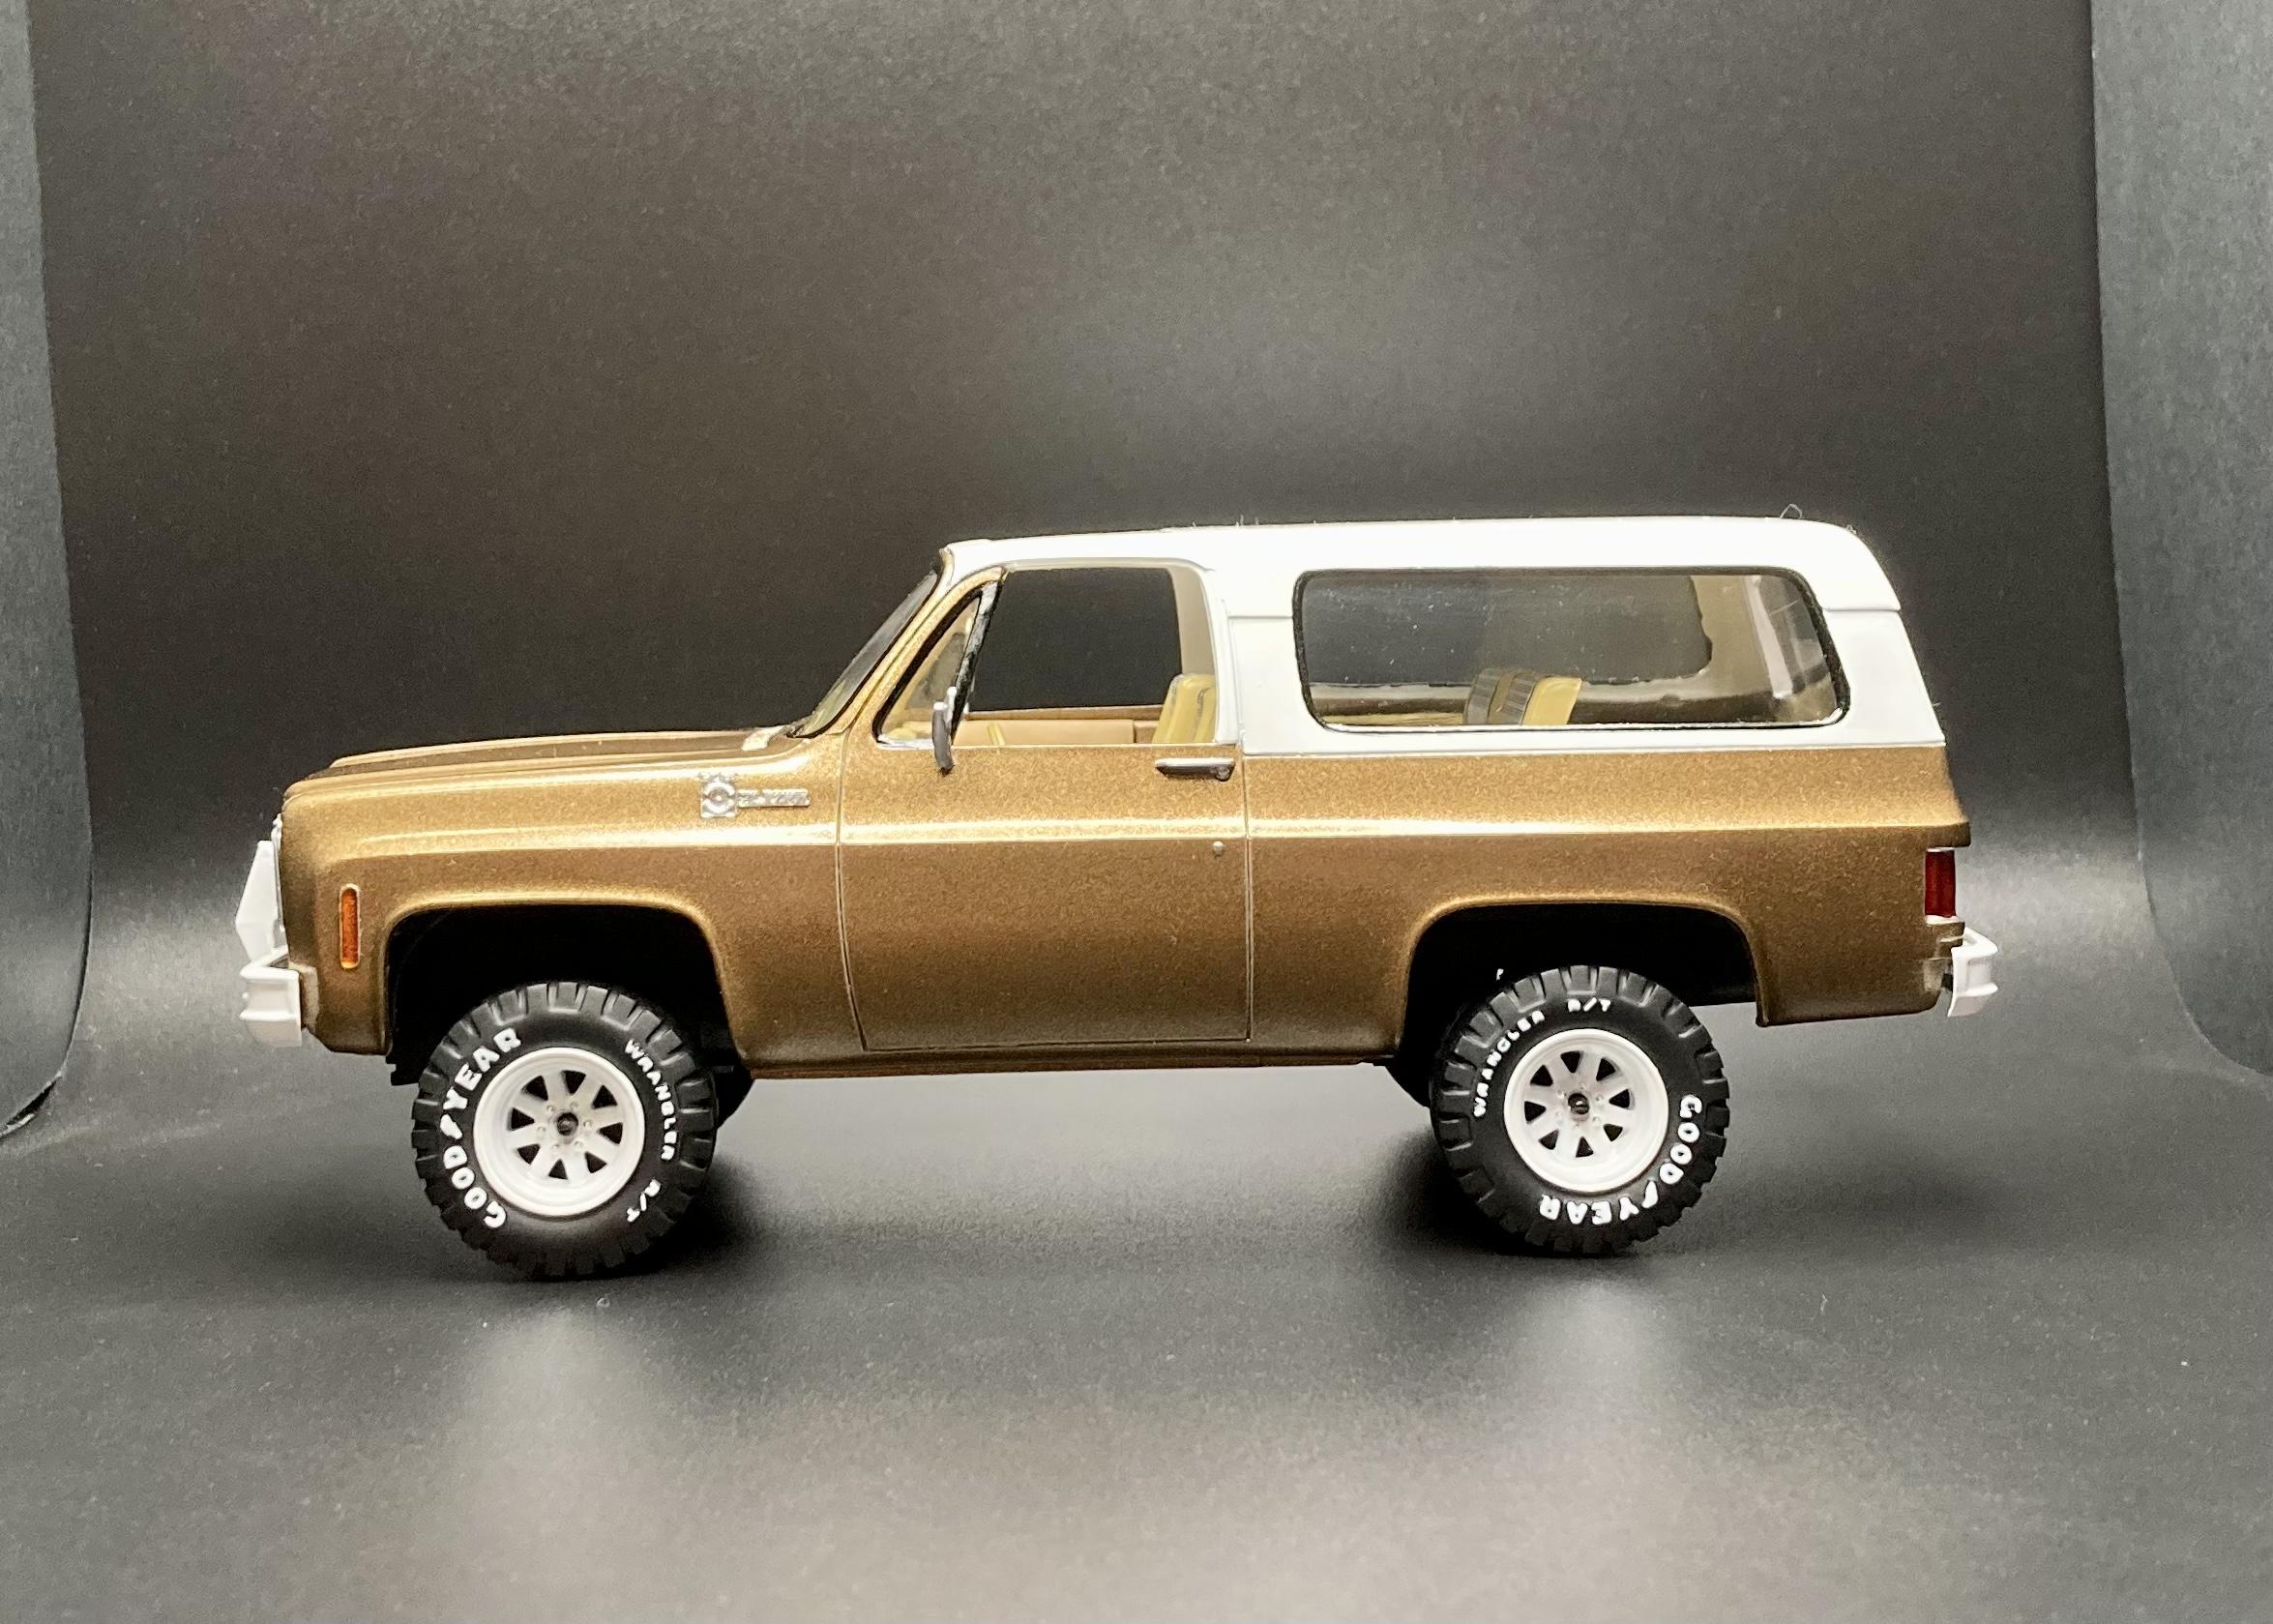
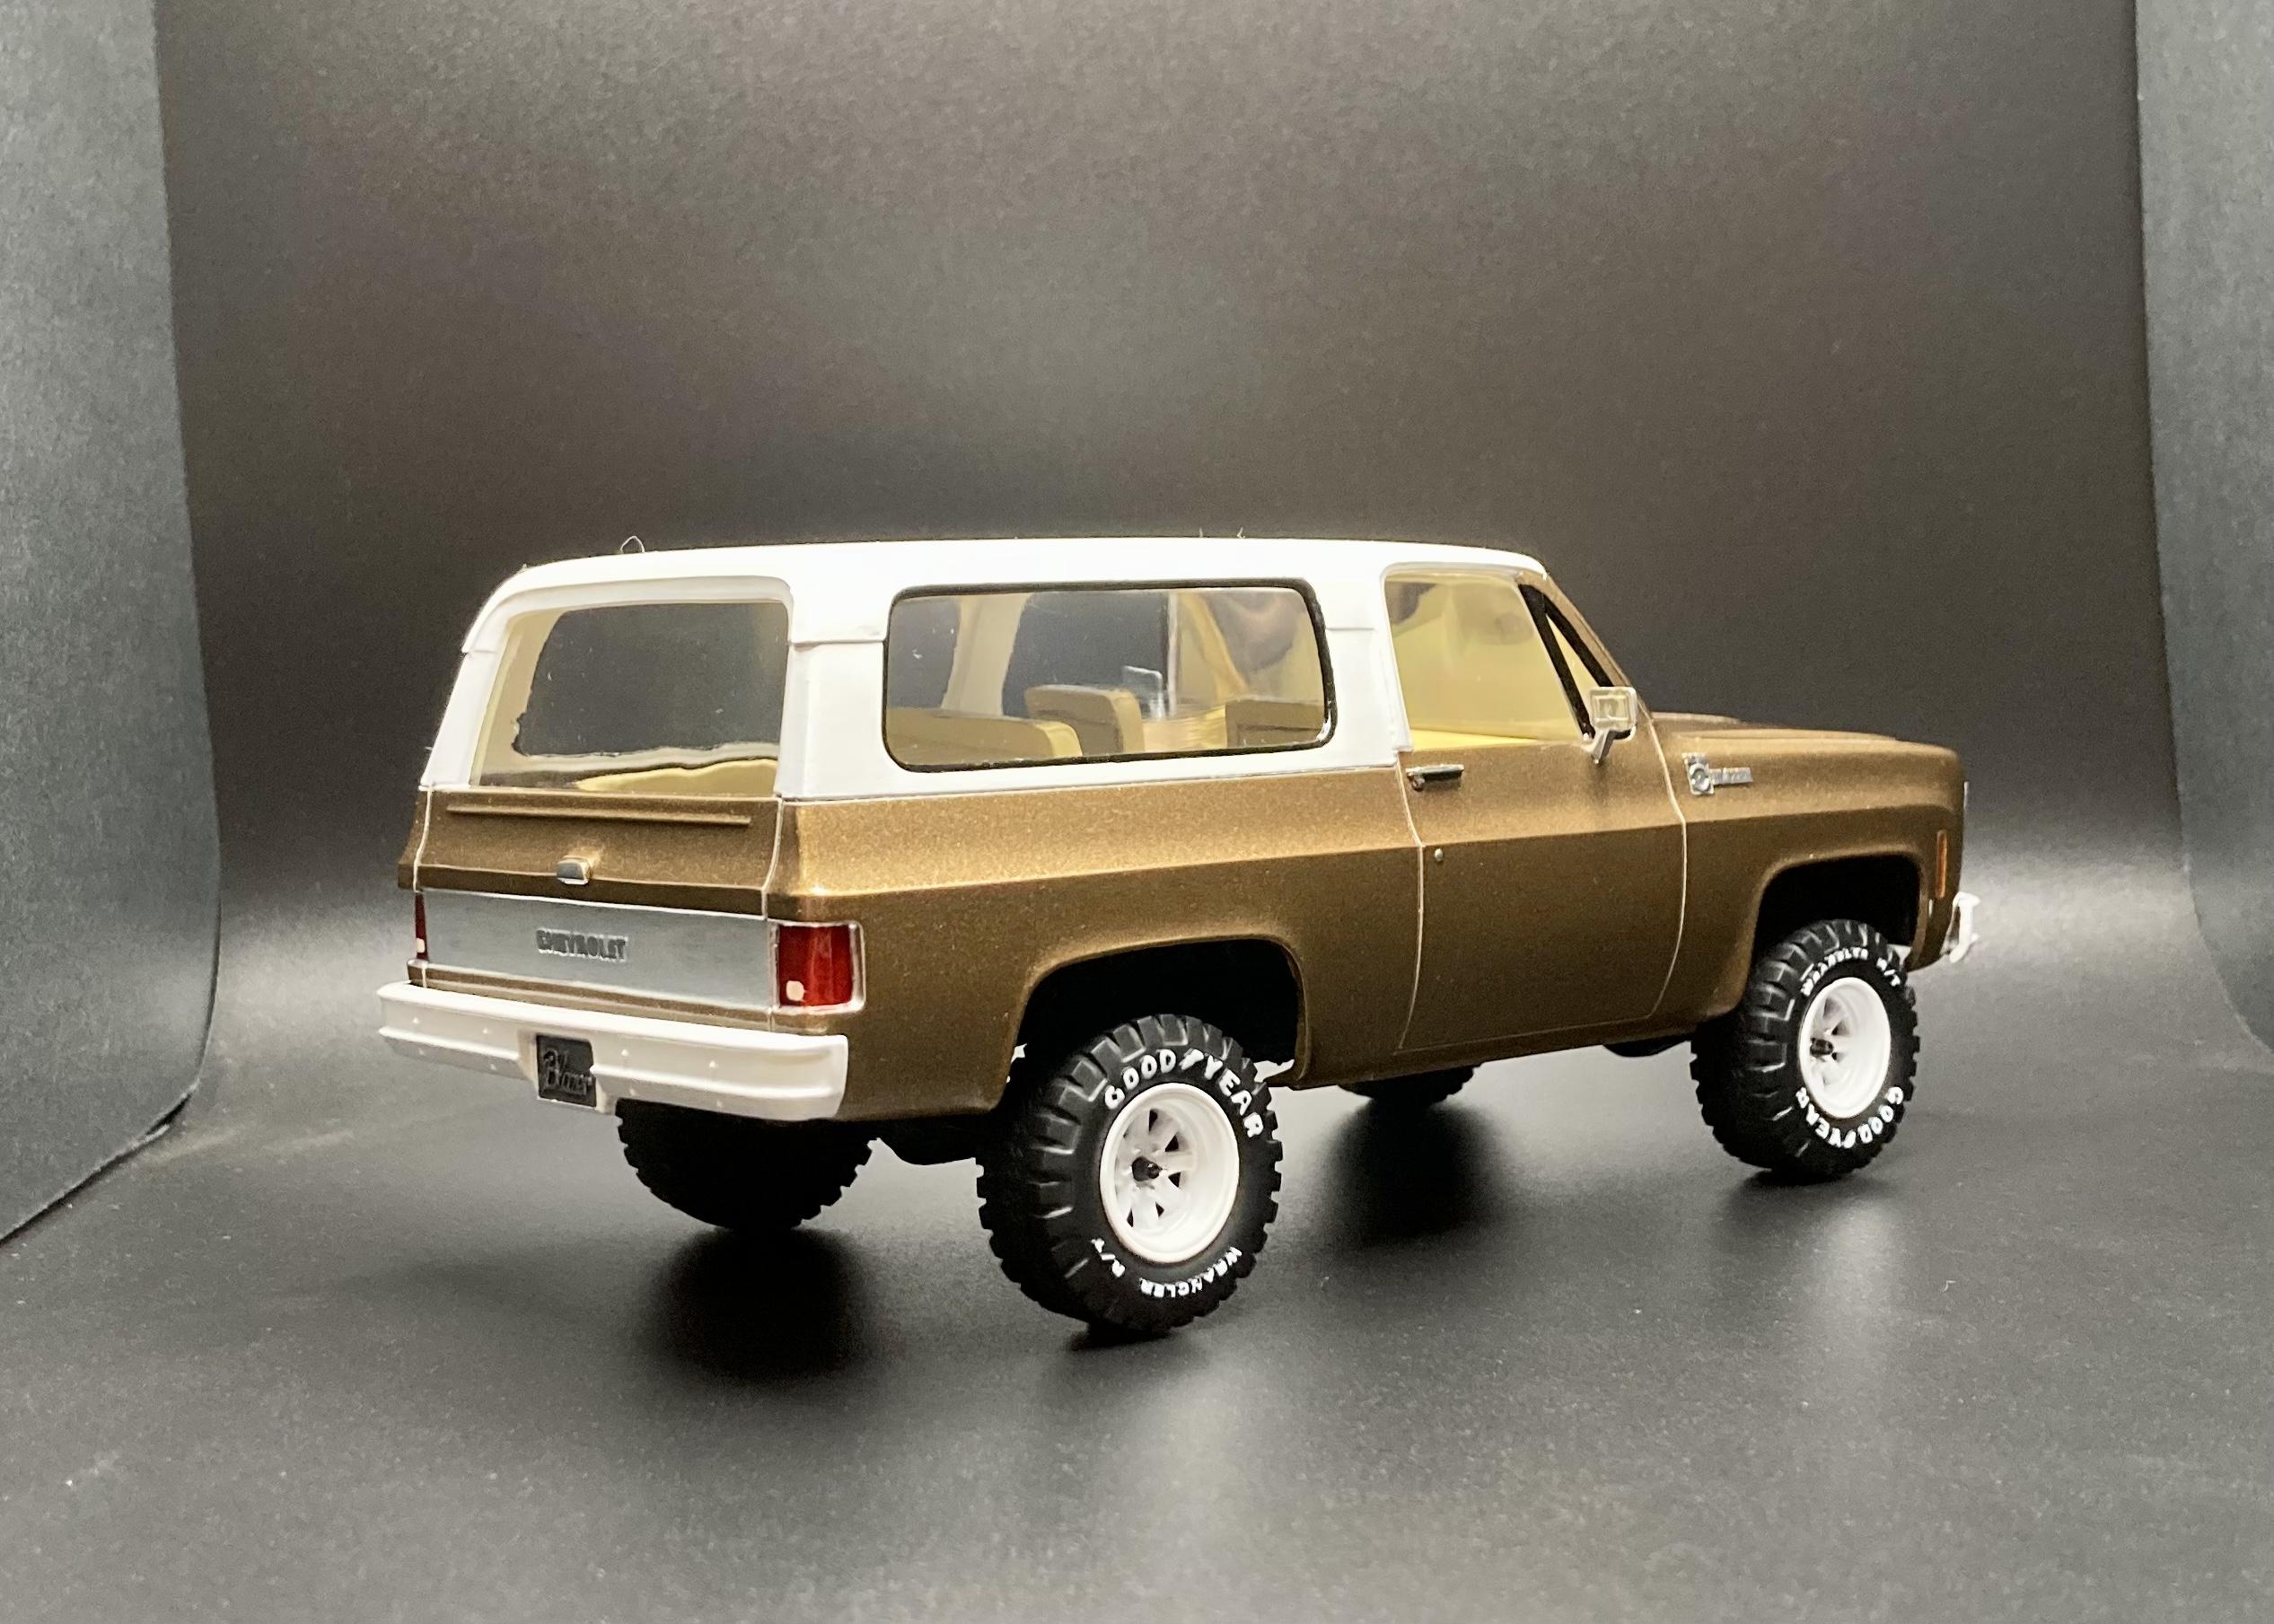
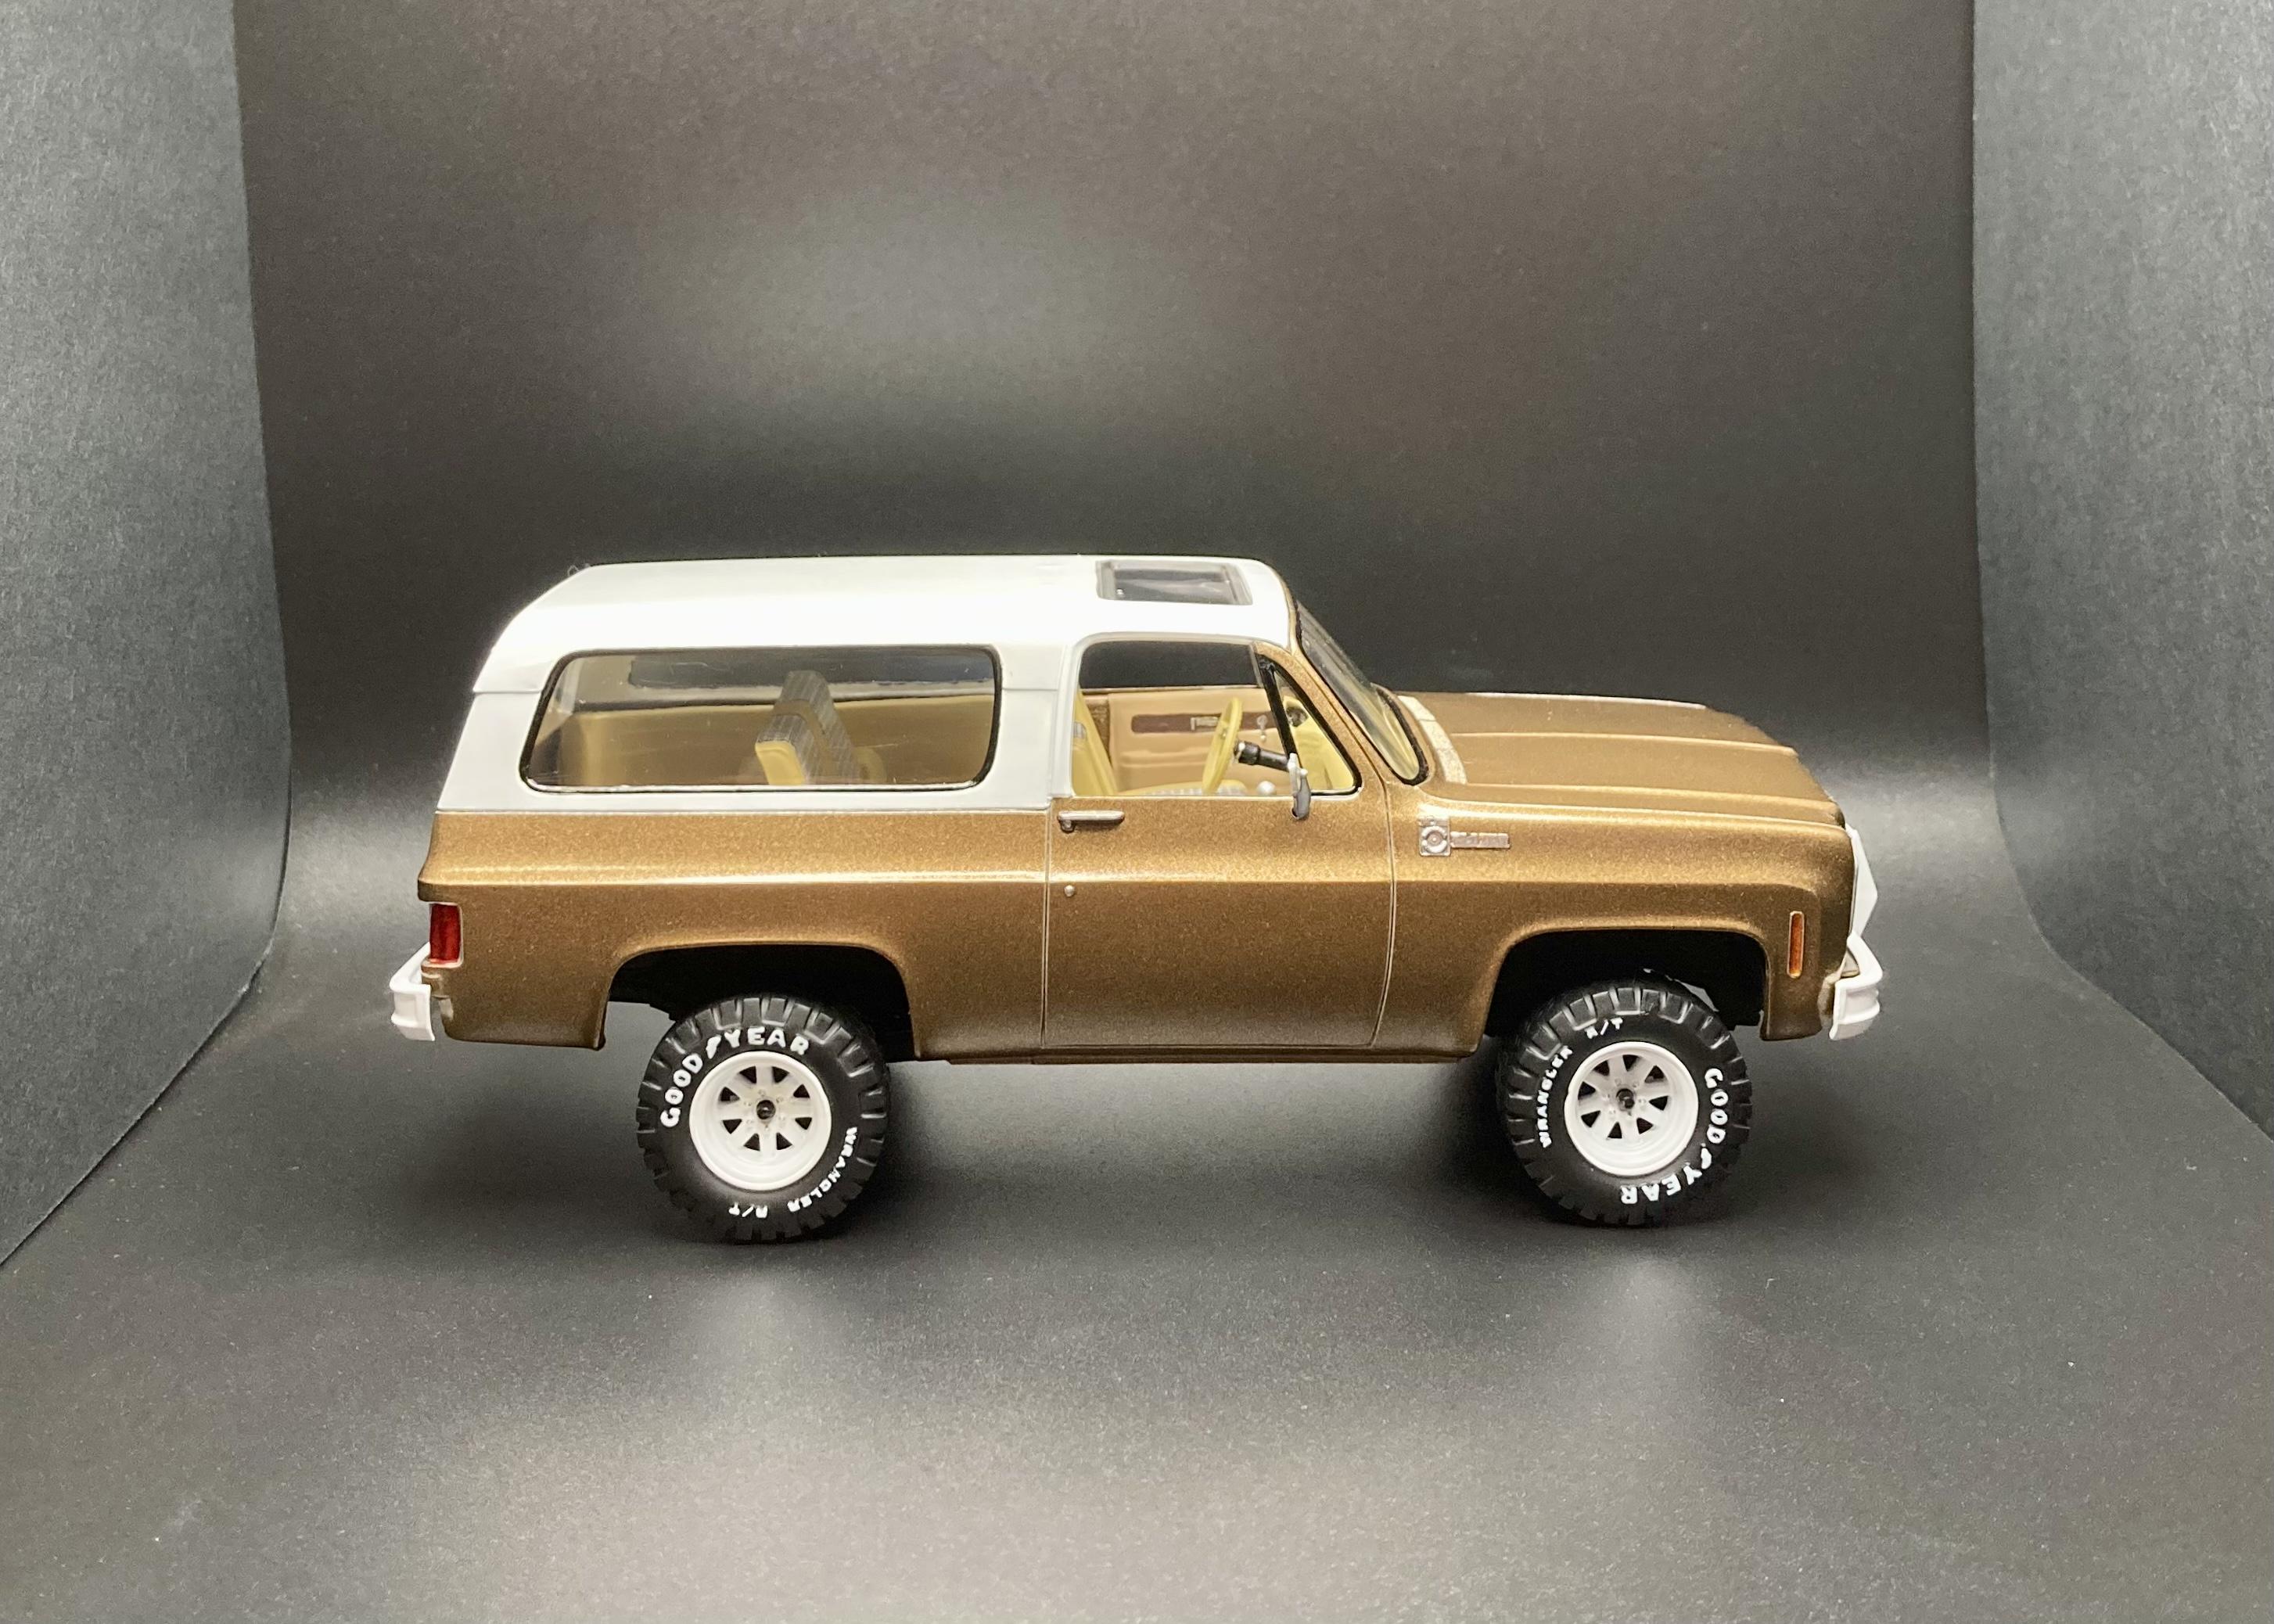
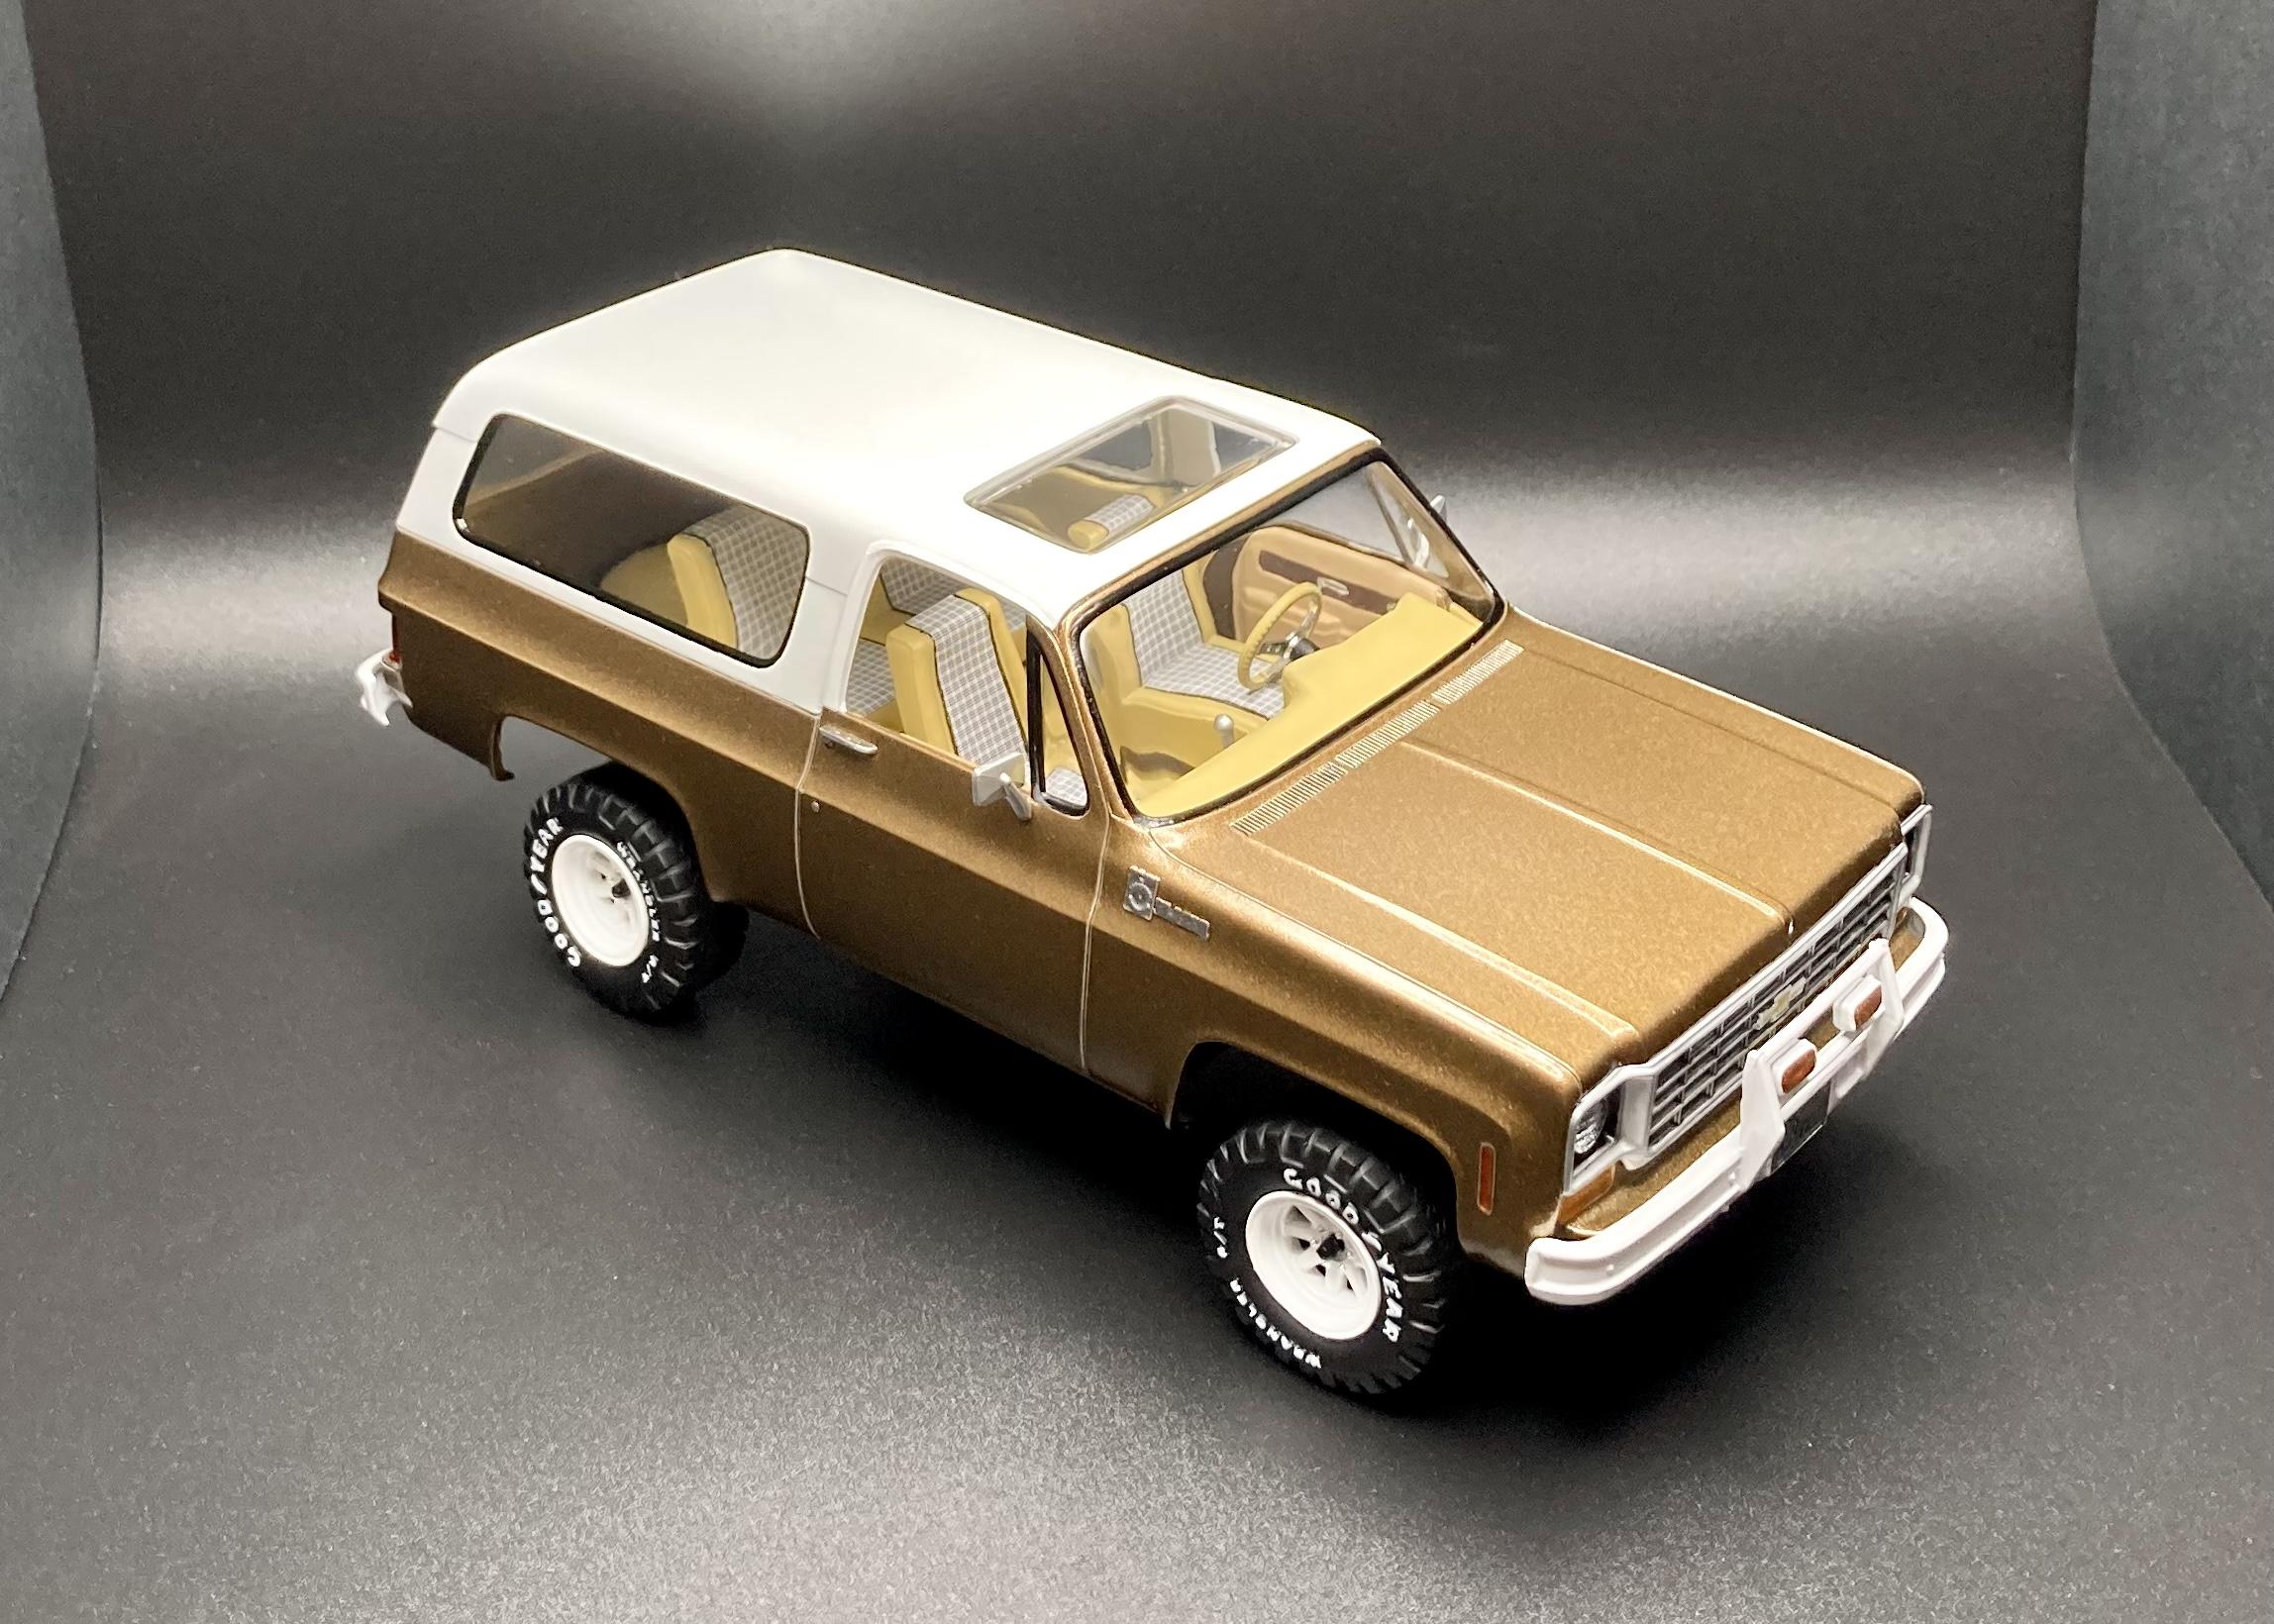
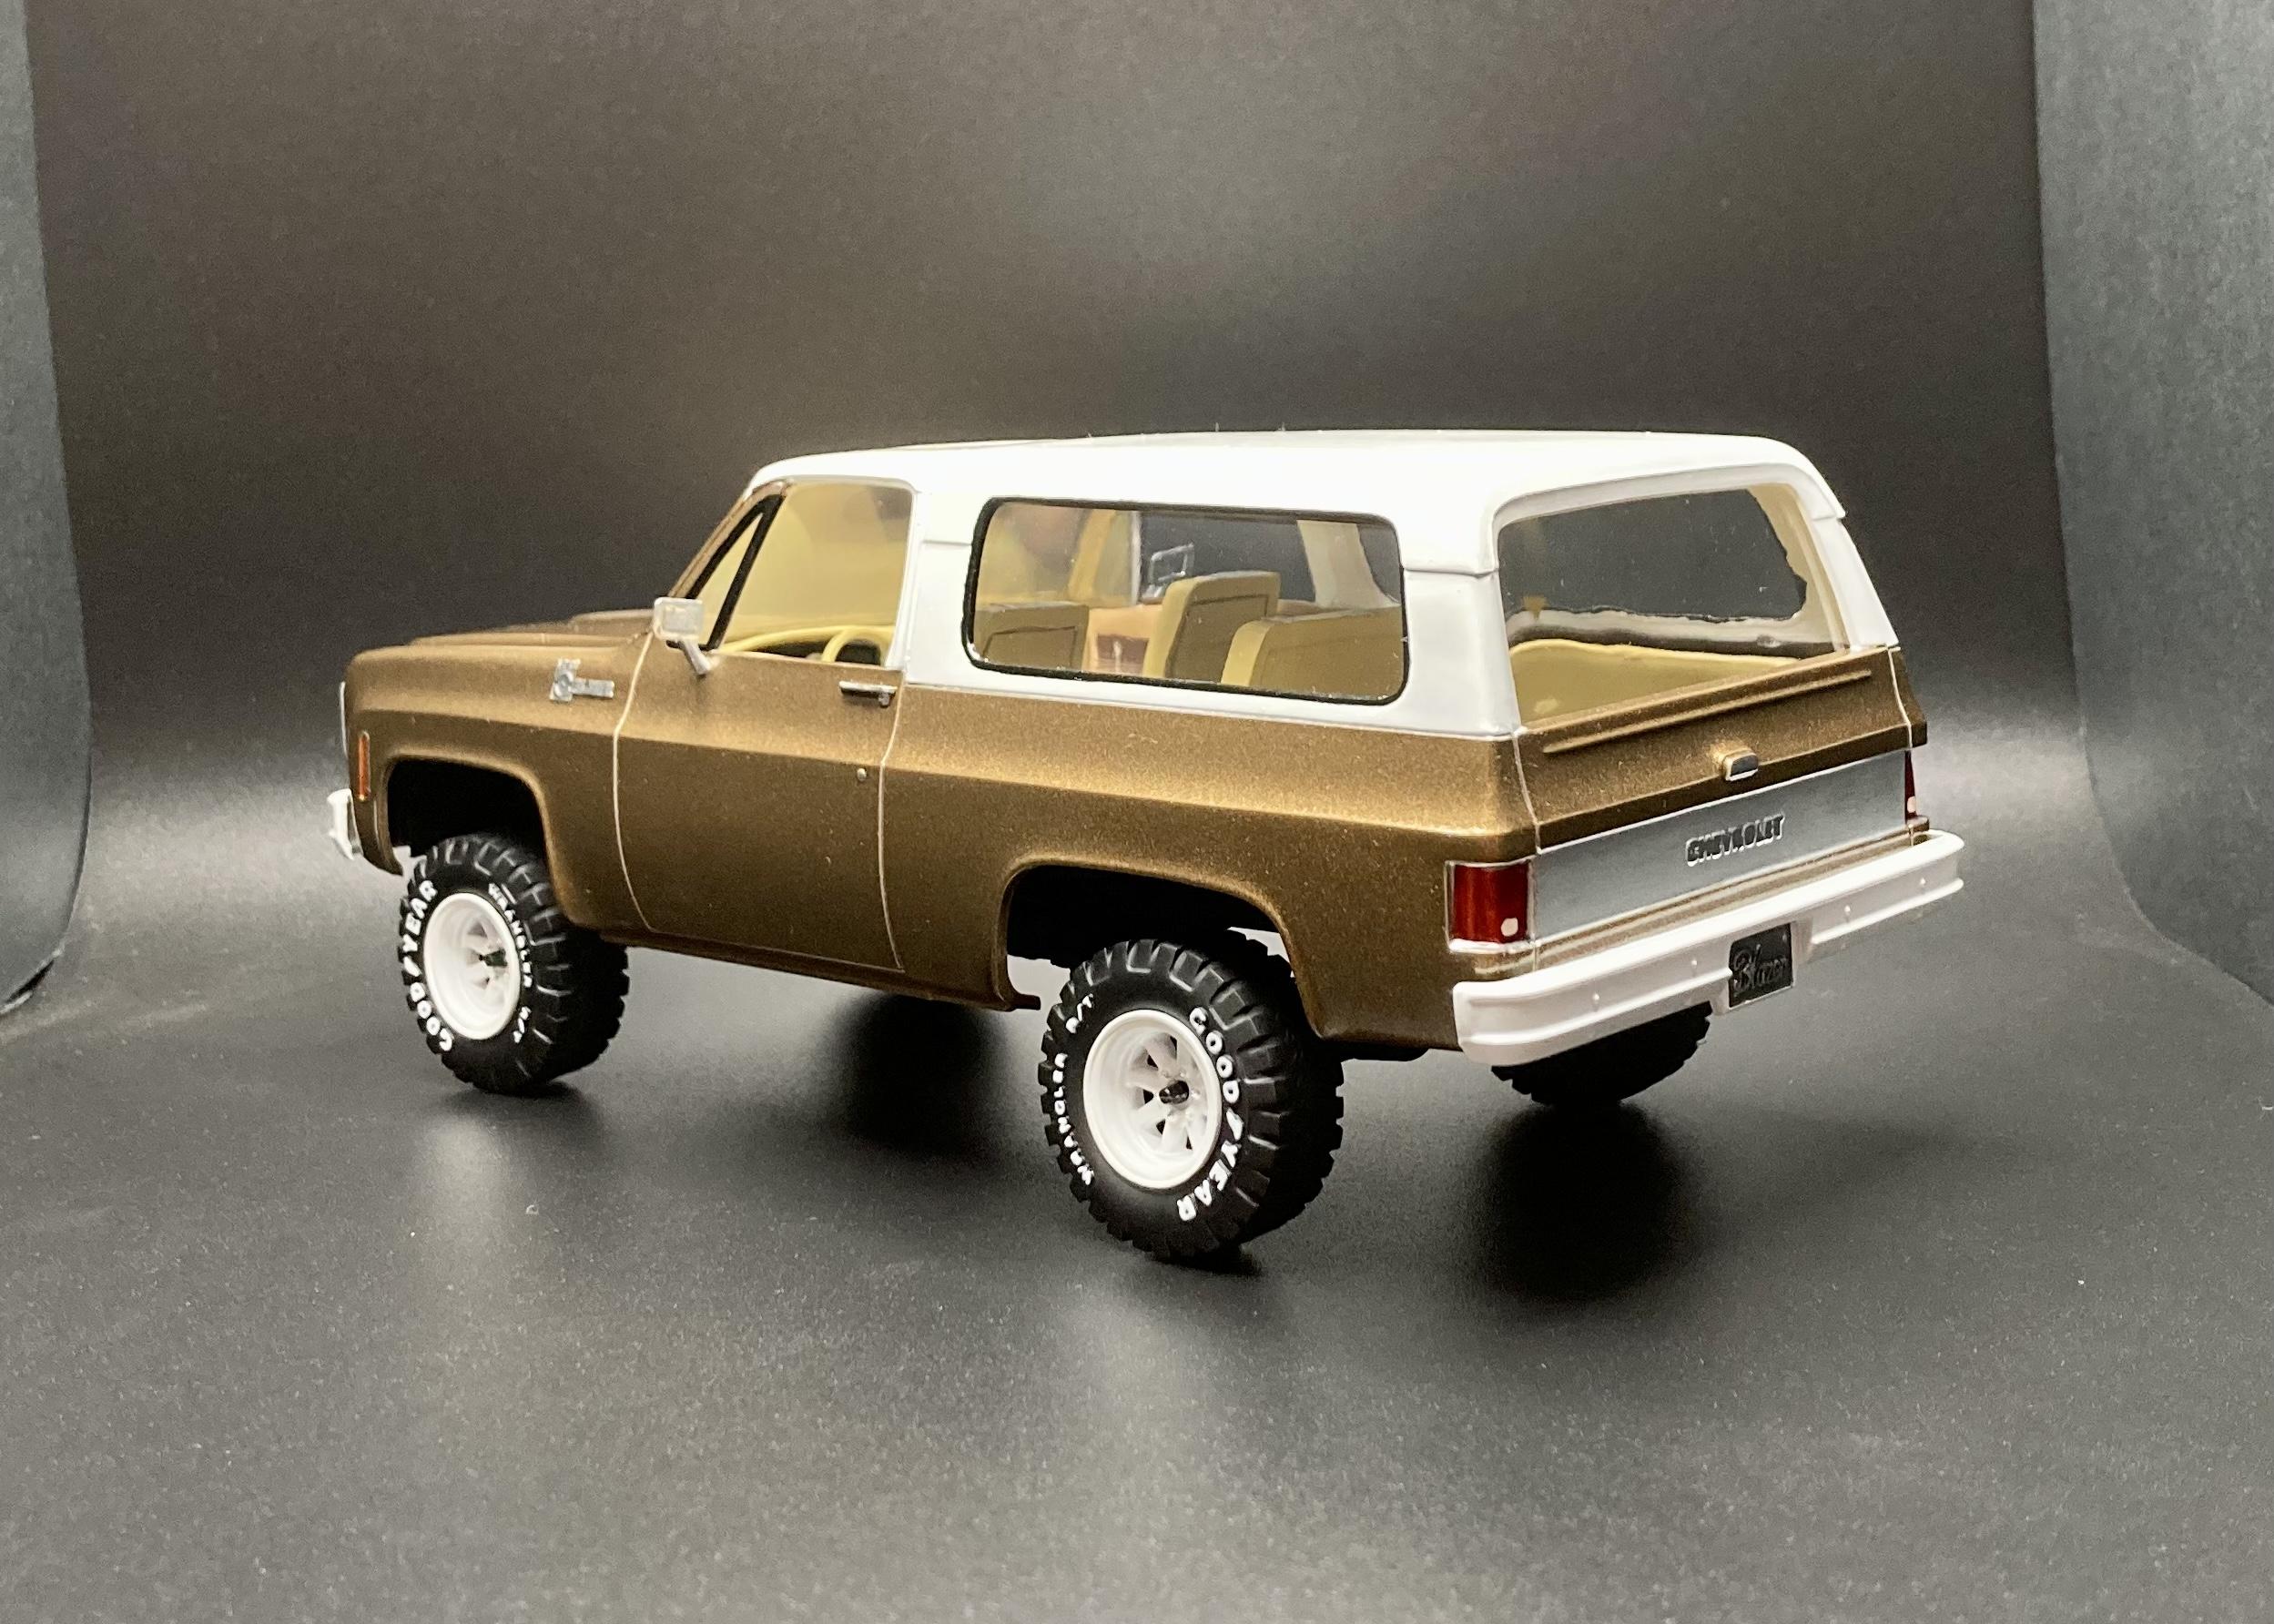
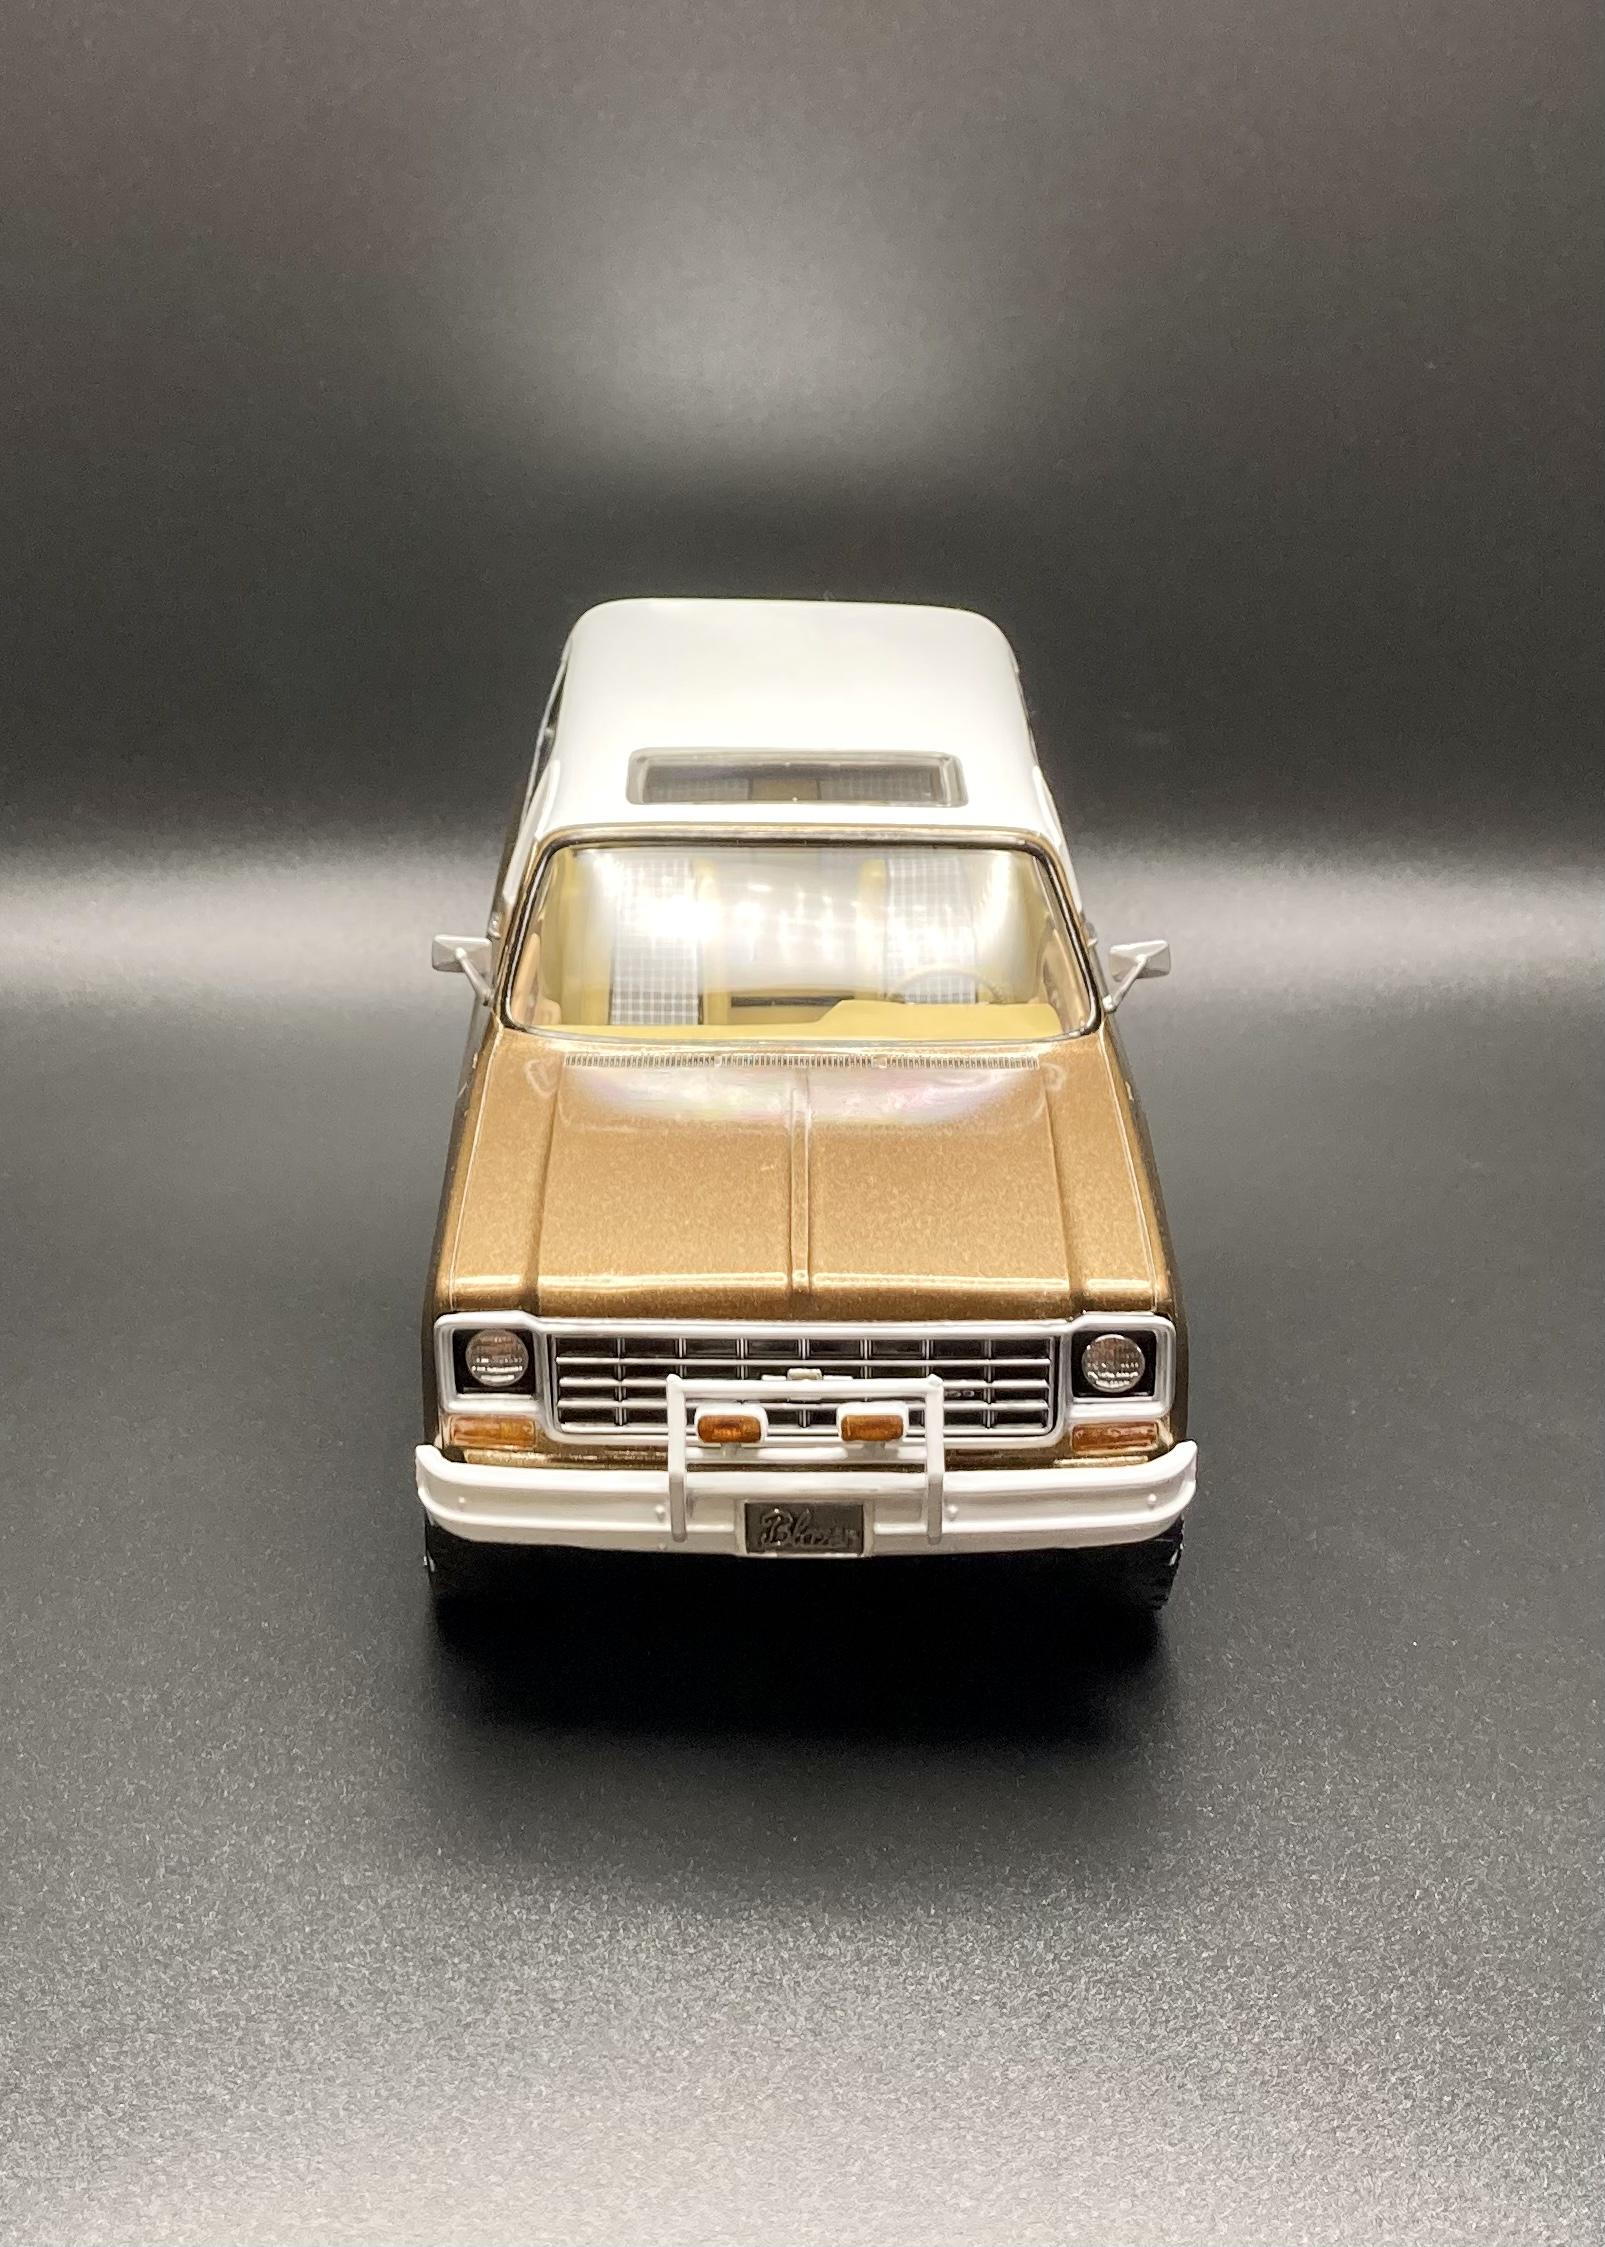
 Here’s the final results of my ‘75 Blazer snap kit rebuild! See my WIP for build details, but in short I built this kit as a teen 15 odd years ago. I hastily built it then so I decided to redo it to my current skill level and standards. I’m very pleased with how this one turned out!
-
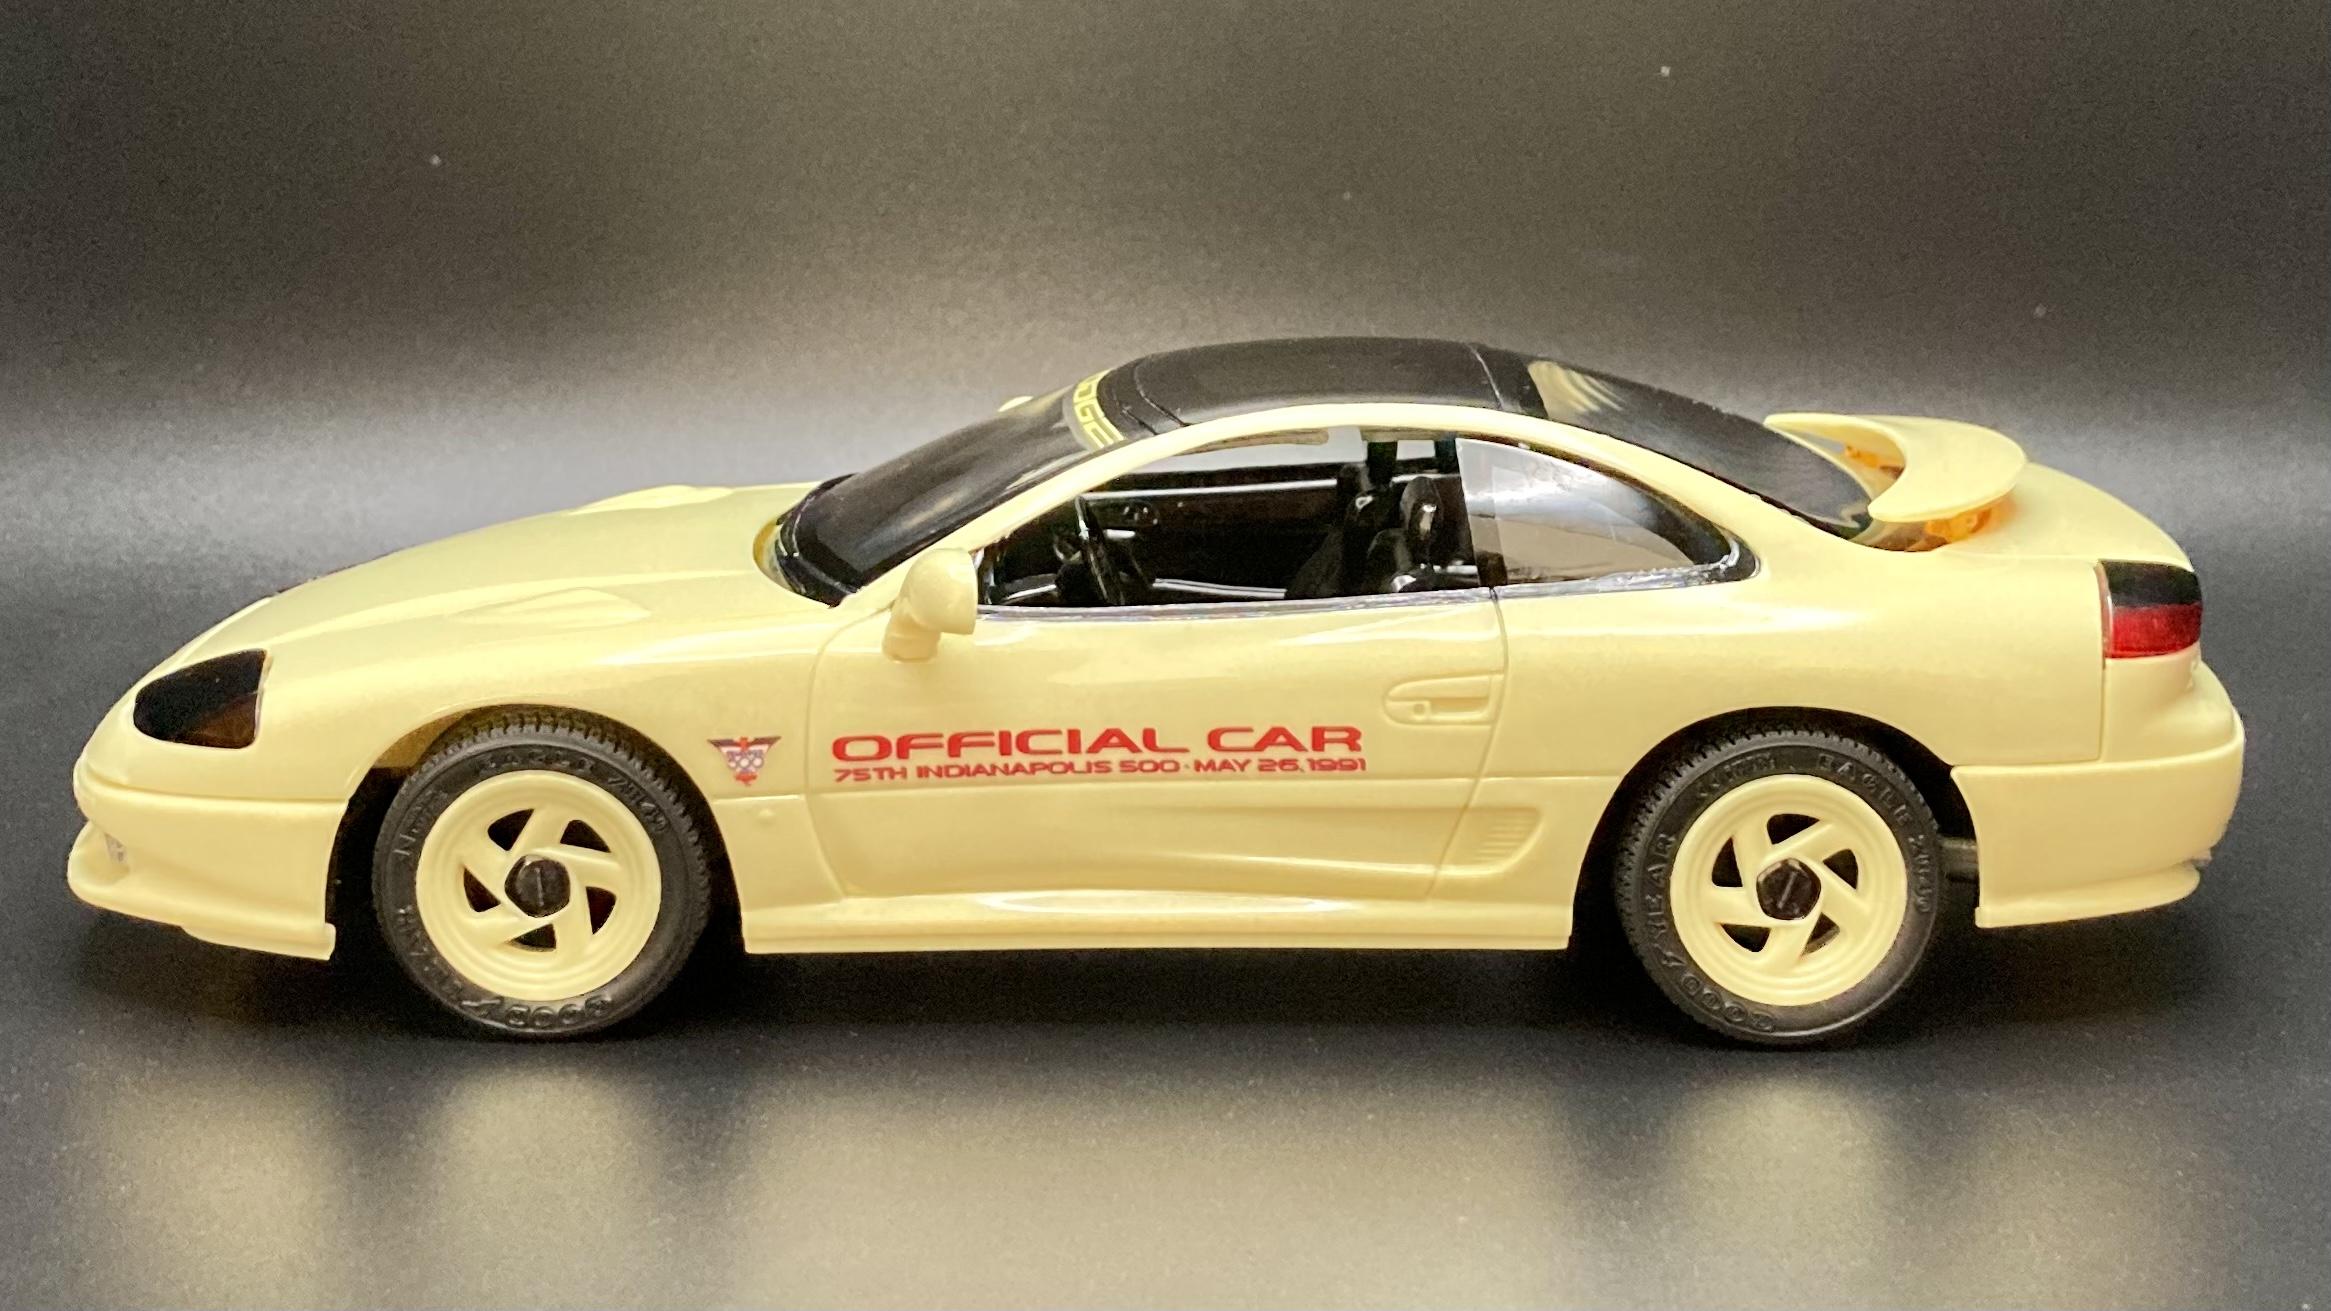
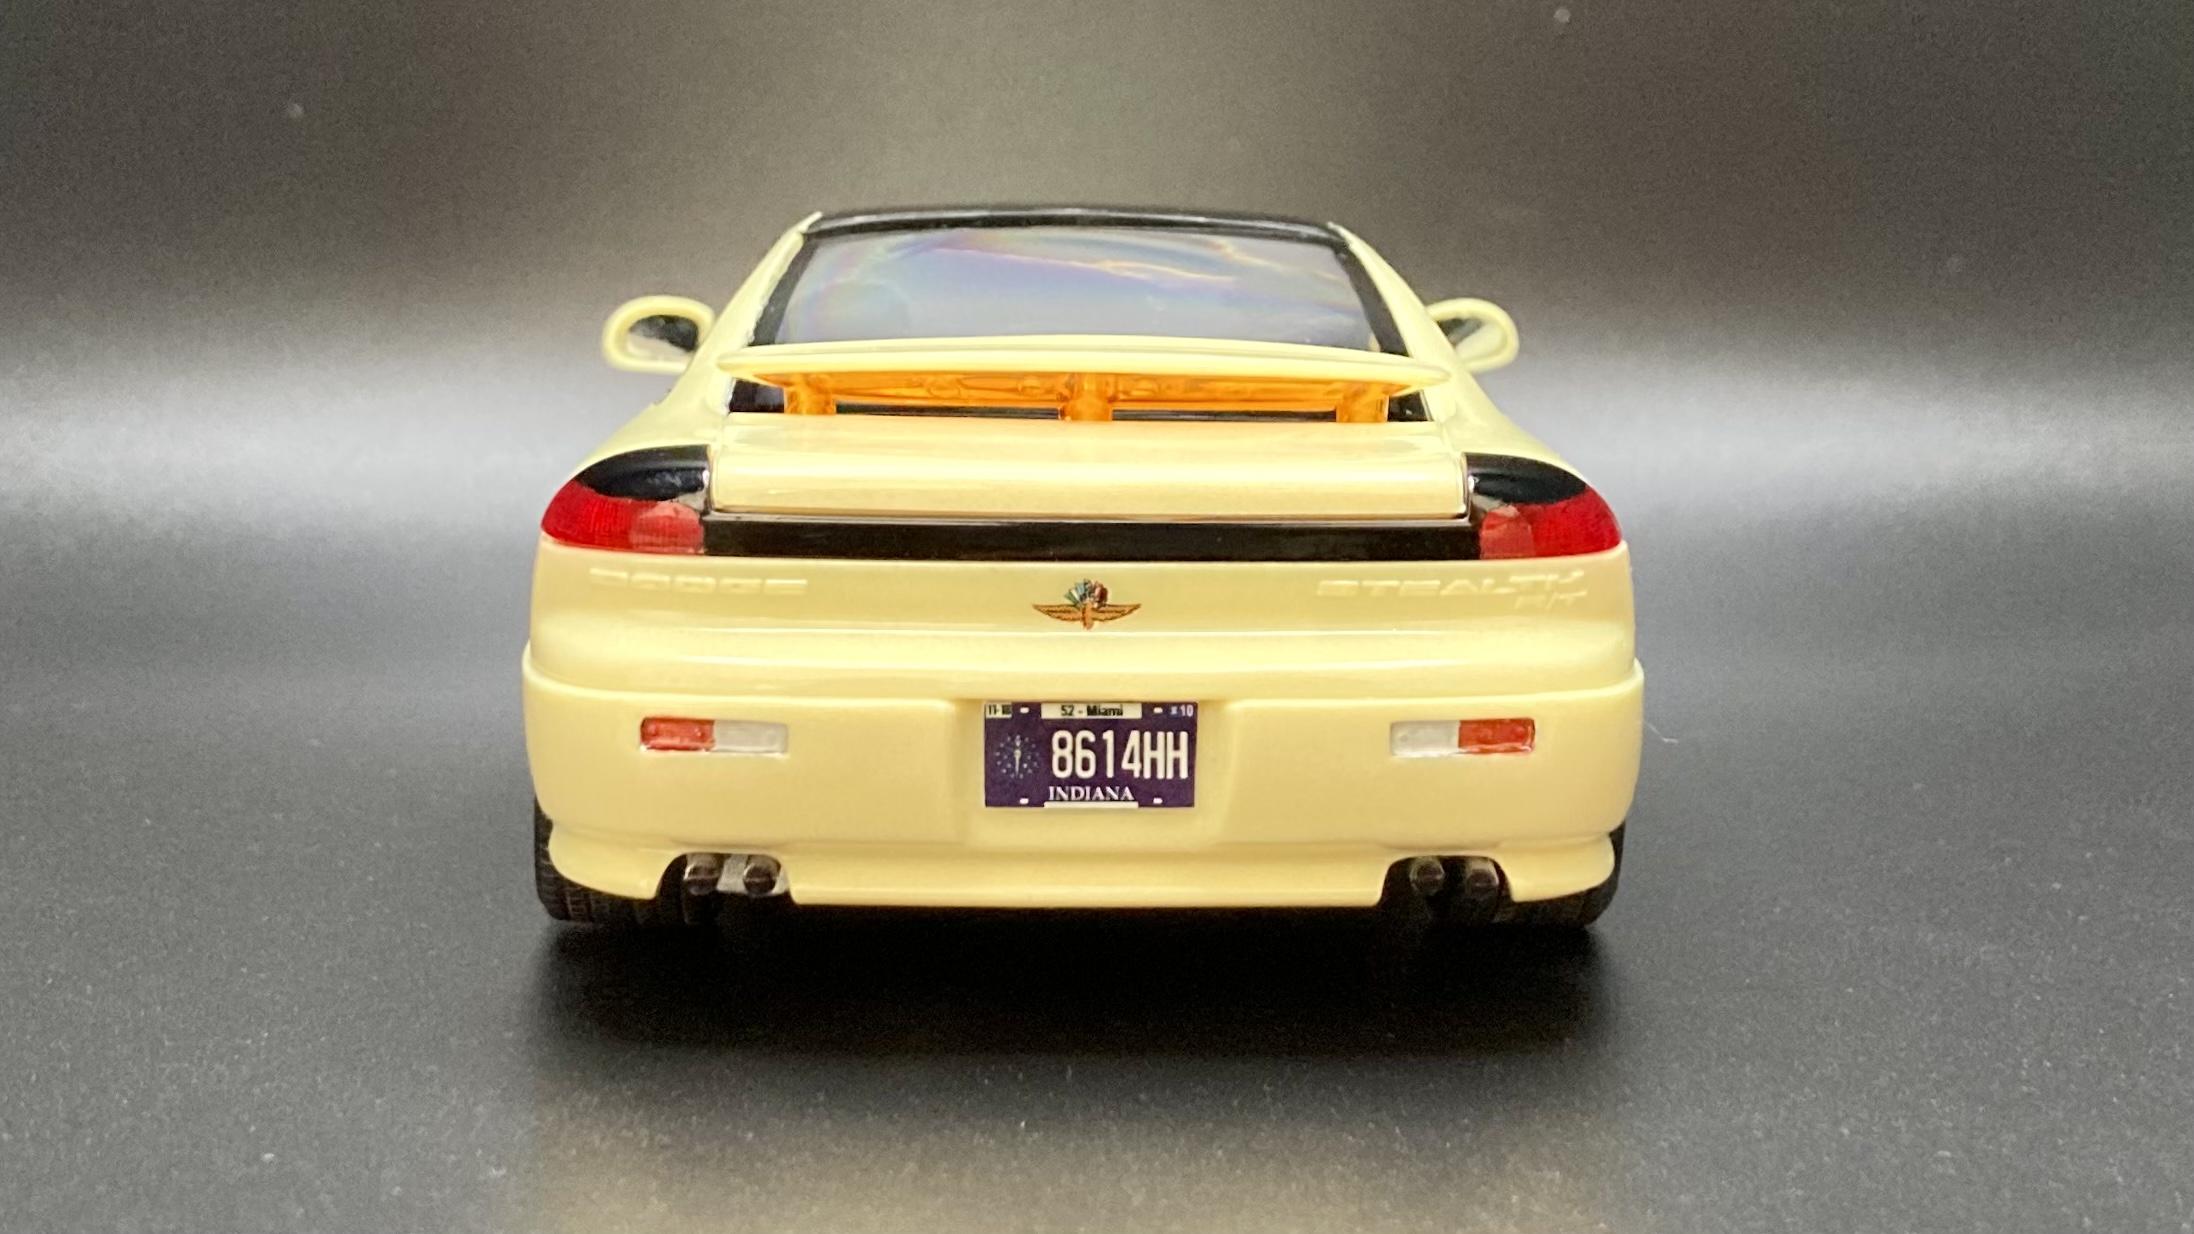
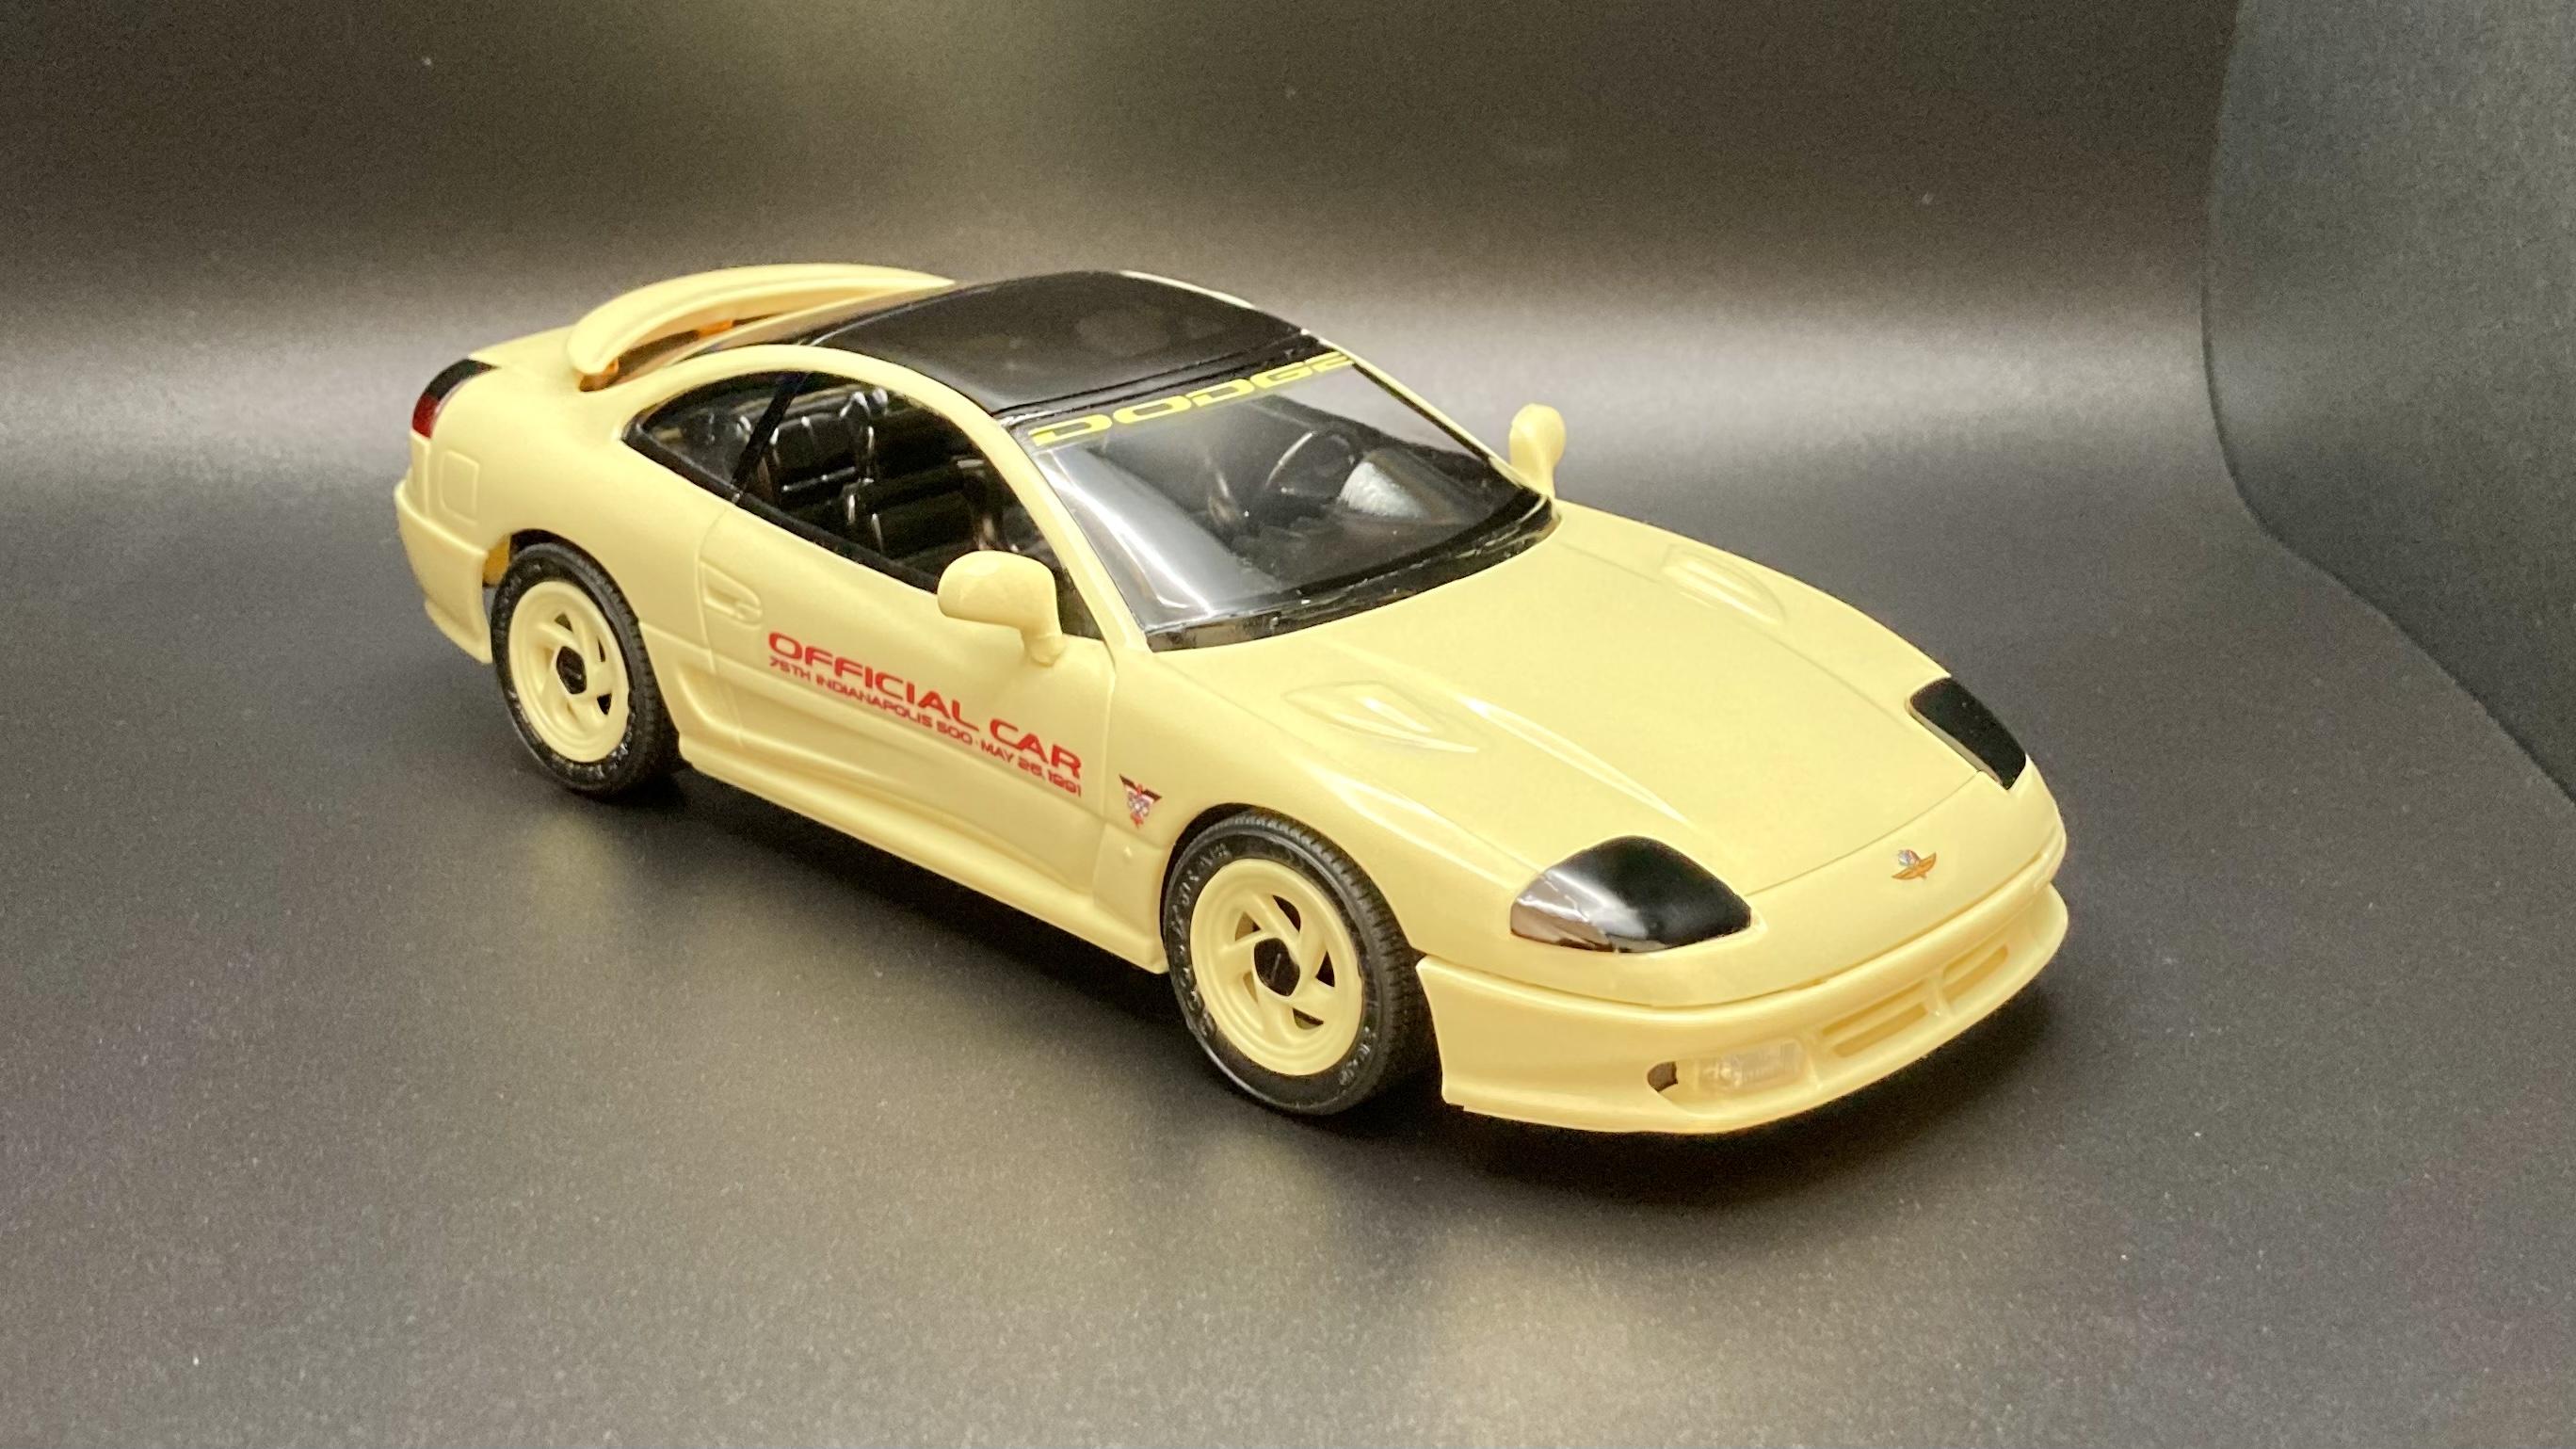
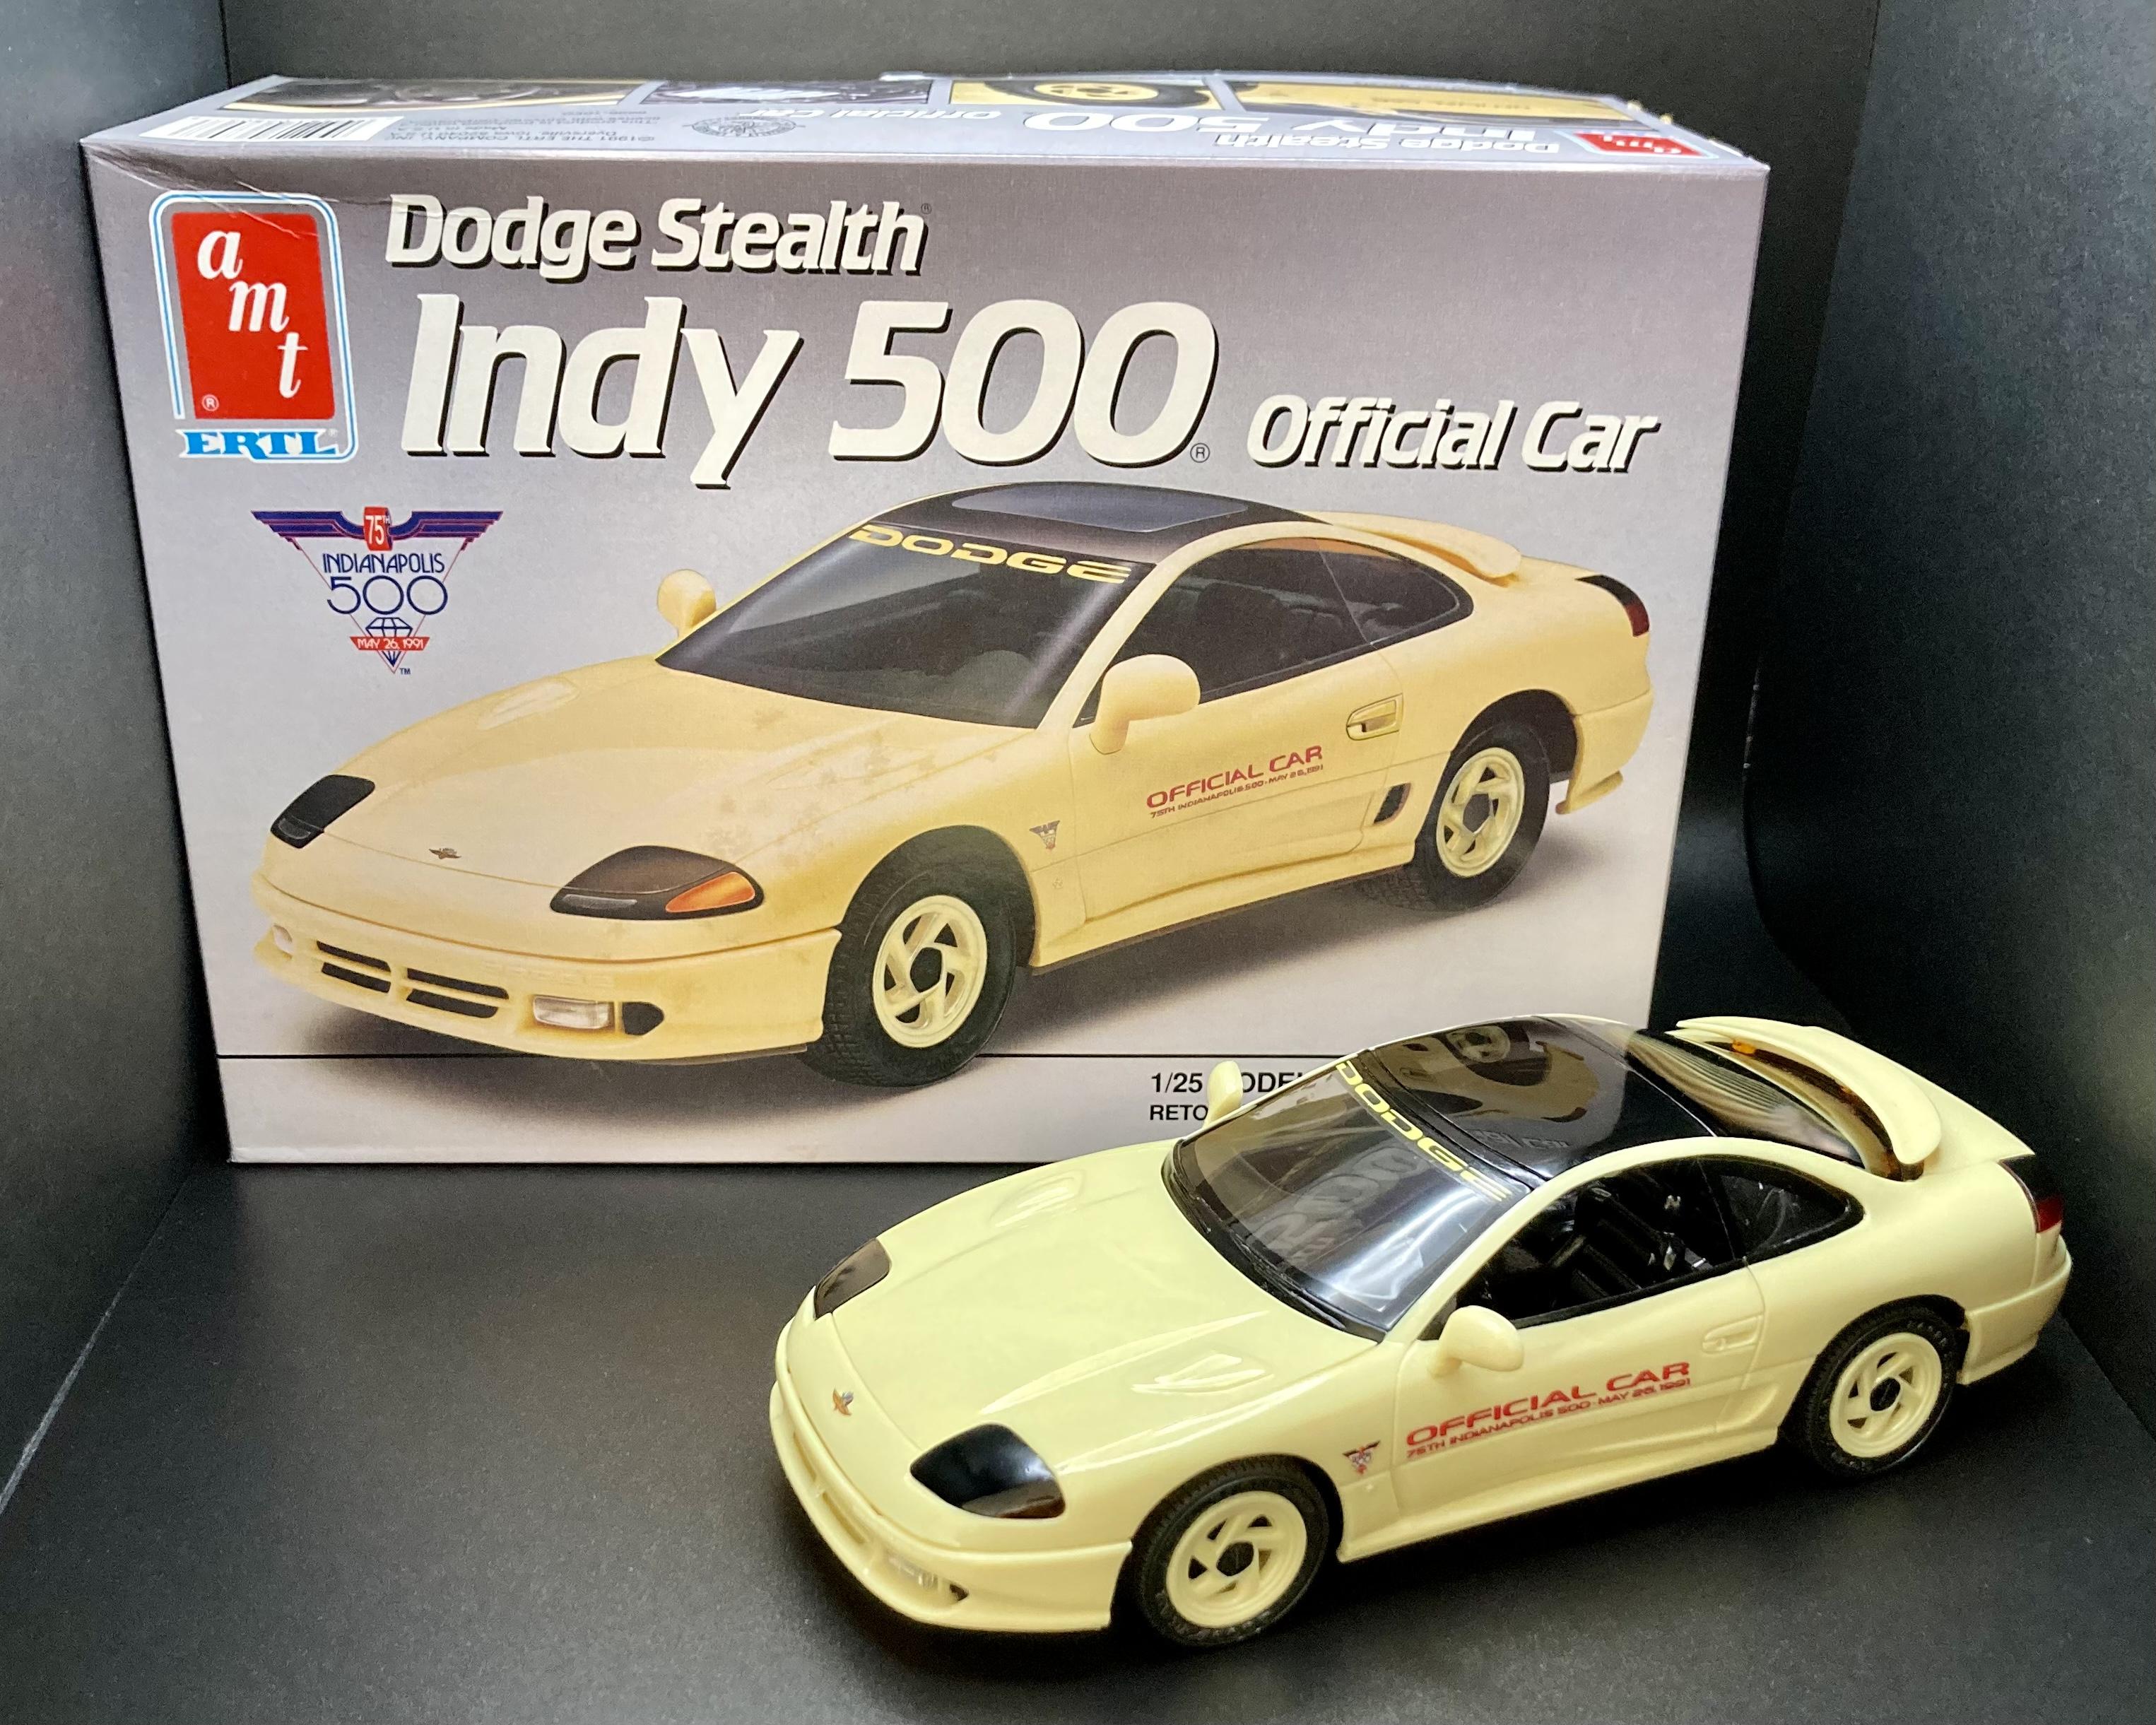
Here’s my build of AMT’s Indy 500 Dodge Stealth! This kit was molded in a pale metallic yellow to match the custom painted real “official” cars. Whenever I get a molded-in-color kit, I try to use the bare plastic body, polished with a coat or three of Pledge gloss, assuming there aren’t any flow lines in the cured plastic. This rarely happens with metallic plastic (or solid colors for that matter), but this particular kit looked perfect! Kit goes together pretty well, but the under hood hoses are a bit tedious. Despite being a glue kit, there are a lot of vestigial promo/snap kit features in the assembly which was kind of interesting. Overall a nice kit to build of a cool looking car, so I’m surprised they still sell so cheaply on eBay. I actually bought a two pack of this kit for $16!
-
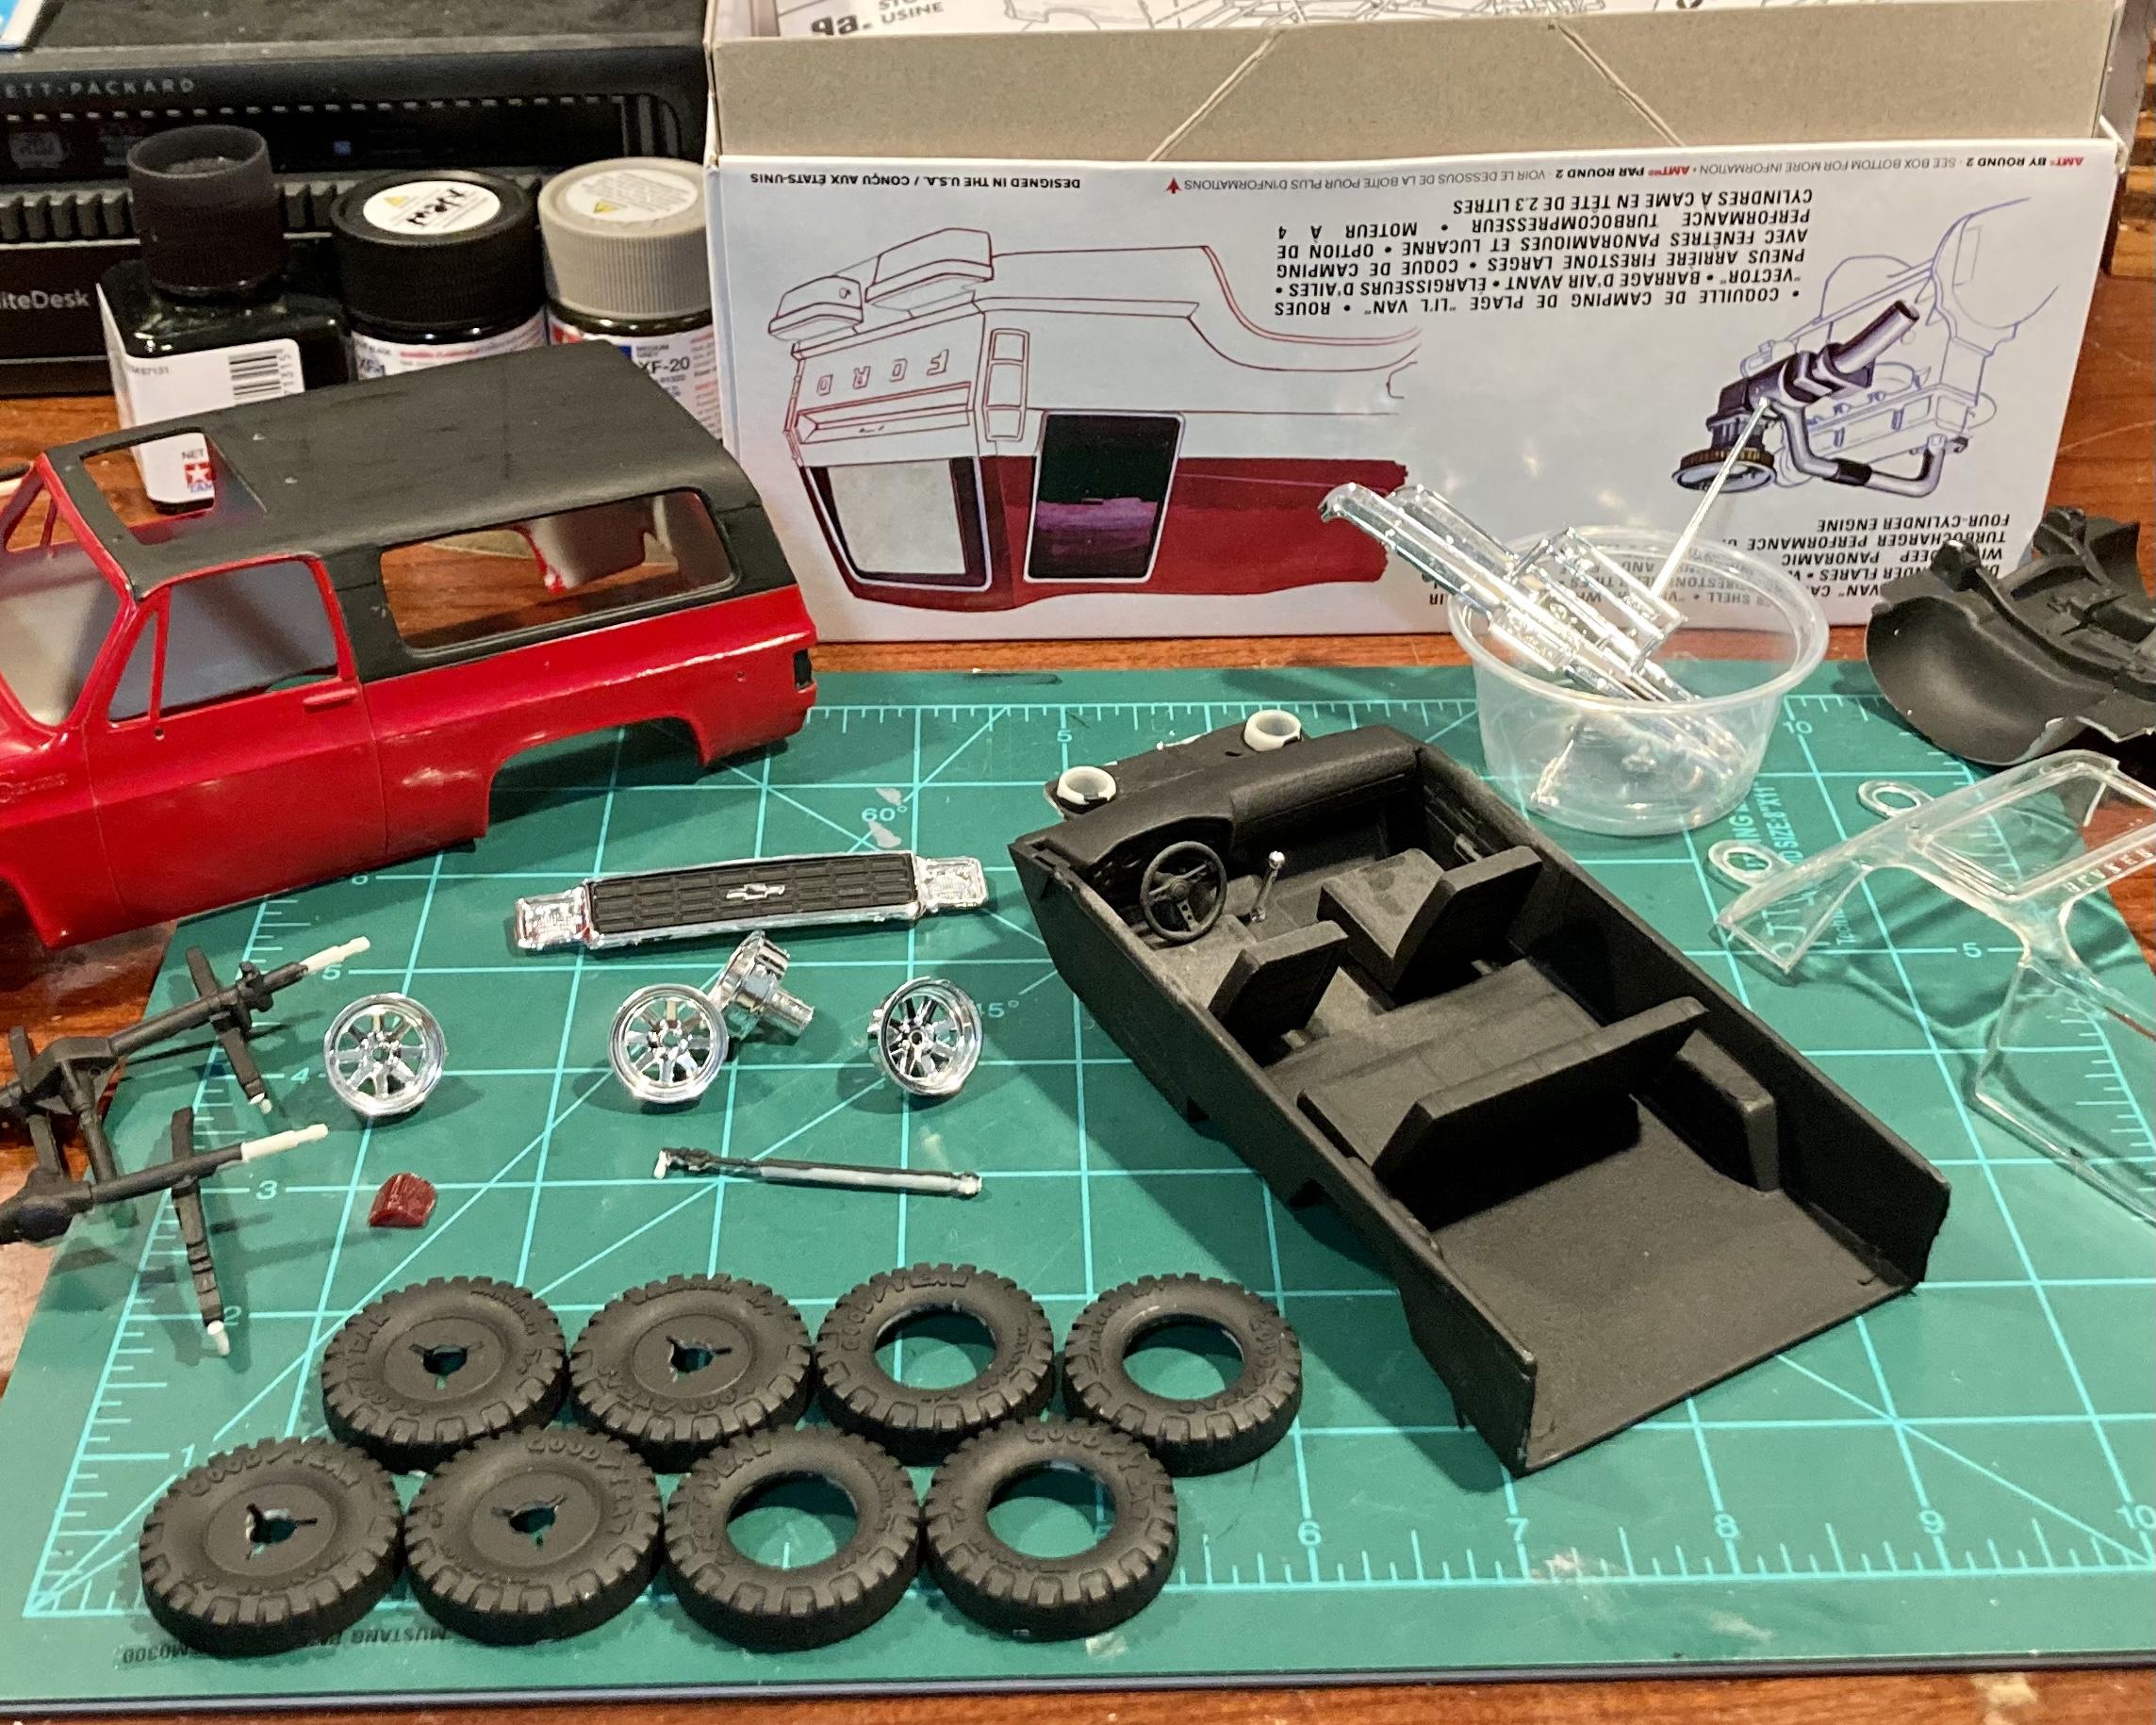
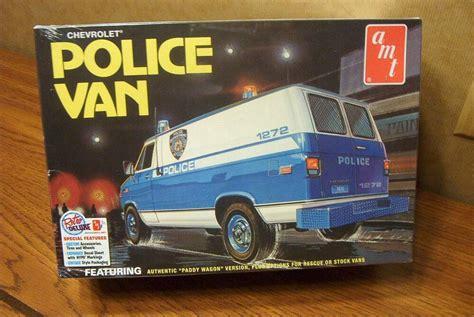
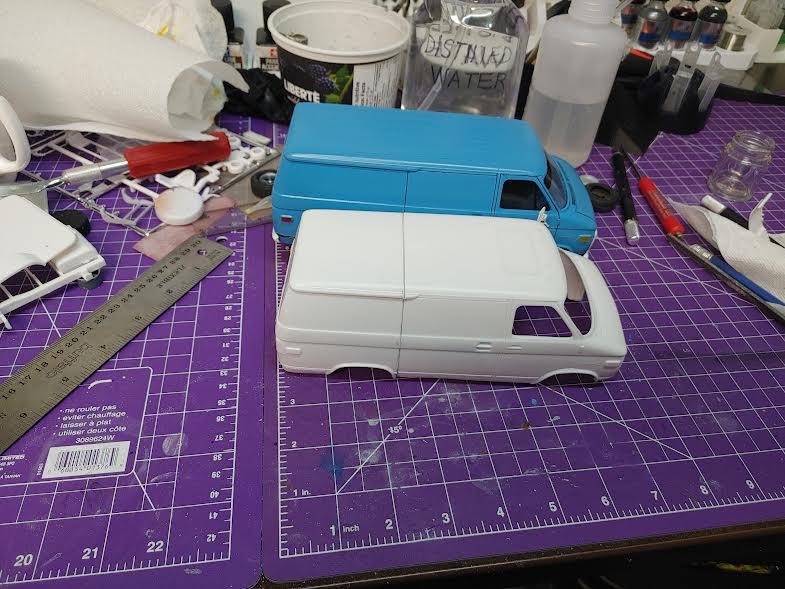
 I recently bought an AMT Rescue Van model, but built it as a (more or less) stock van. Building it brought back lots of memories of back when vans were "the big thing". My parents had a couple over the years, both cargo vans purchased from my Dad's employer, and the later one Dad and I worked on together. I wasn't old enough to have a license yet, but sure enjoyed the time spent with him as we bought a bench seat from the wreckers and installed it at home- measuring, drilling holes in the floor and all. So, I decided to build another van. This time I started with the AMT Police Van, which is more or less the same kit apart from a few accessories. I'd never customized a model other than a few minor details, so I figured why not try a custom van 70s style. Or at least start out in that direction and see where we end up. I started by cutting the body into pieces (gasp!) and removing a section from the middle to make "shorty" van.
-
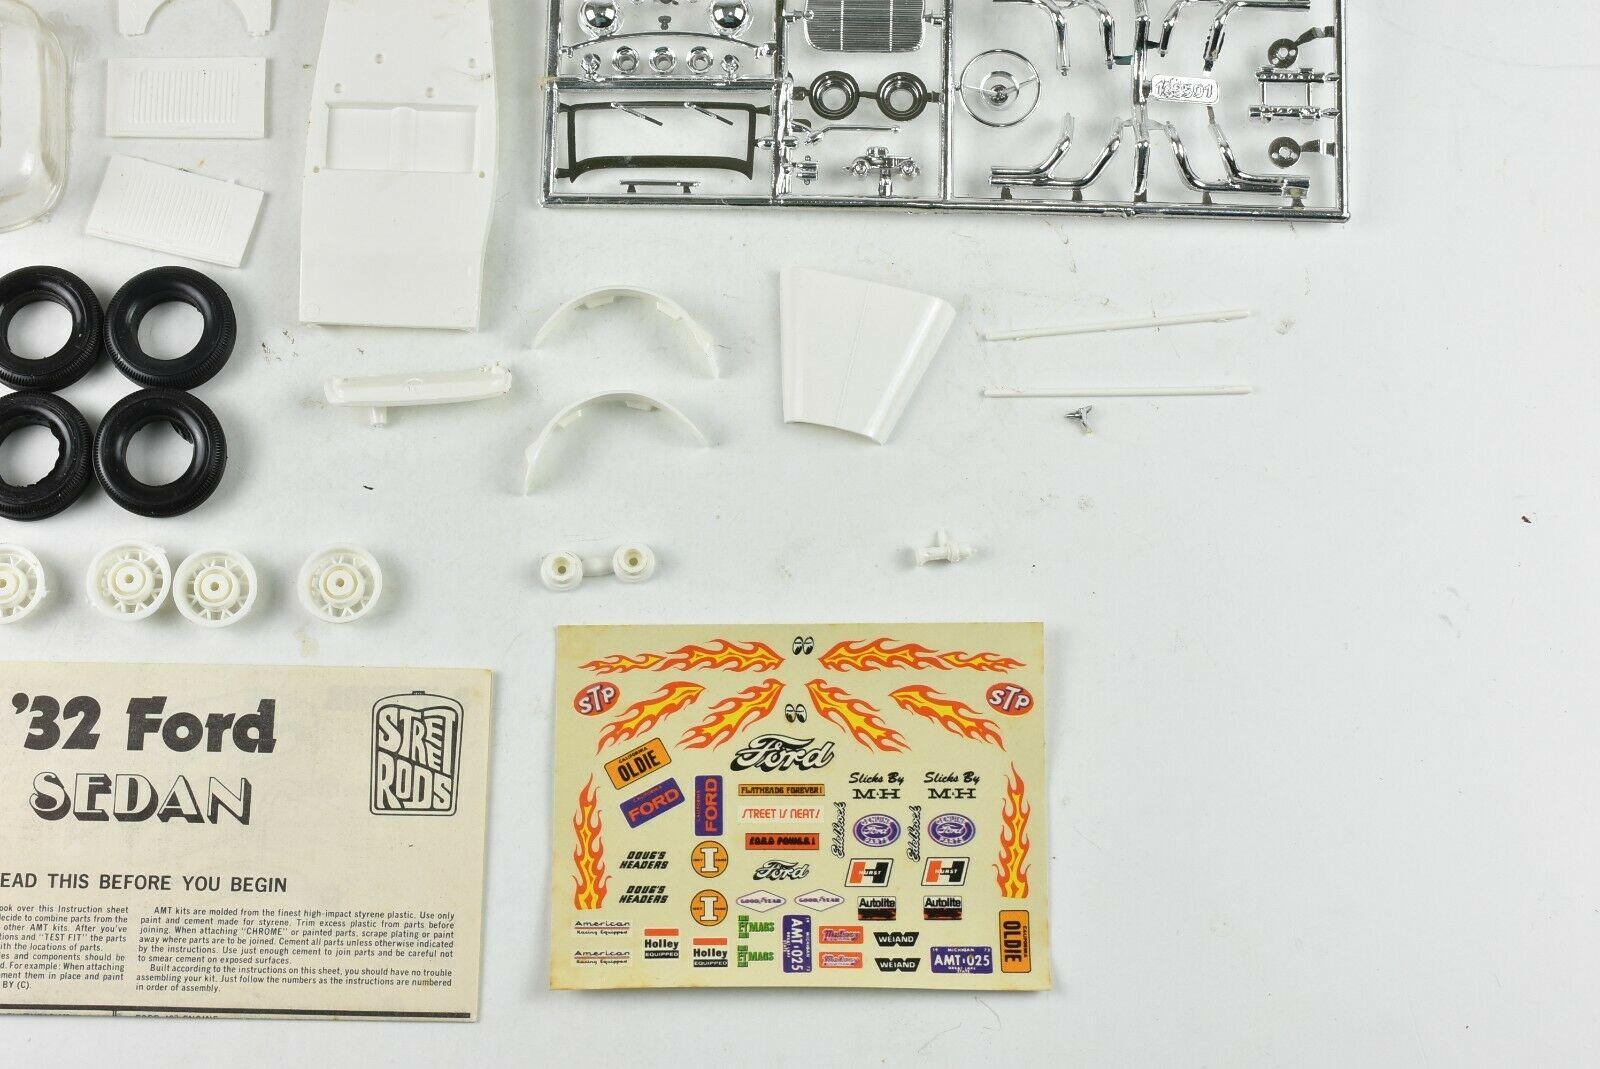
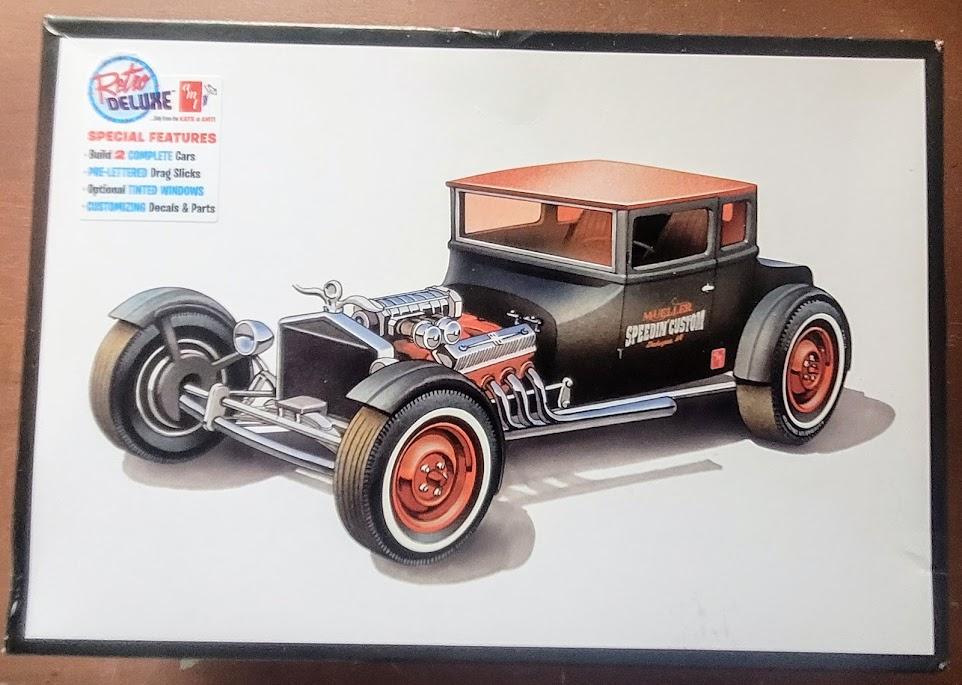
Is the 1/25 AMT '32 Ford Tudor Sedan kit lost forever? Granted, with the newer and better 1/25 Revell '32 Ford Tudor Sedan more easily available having the older AMT version back is hardly necessary, but it does offer some unique things, and even for the sake of nostalgia, I think it still holds some appeal. If anyone here has one of these, please take some pics and share with teh class. Pics from eBay listings, just to show the contents: AMT's generic Ford hot rod decal sheet:
-
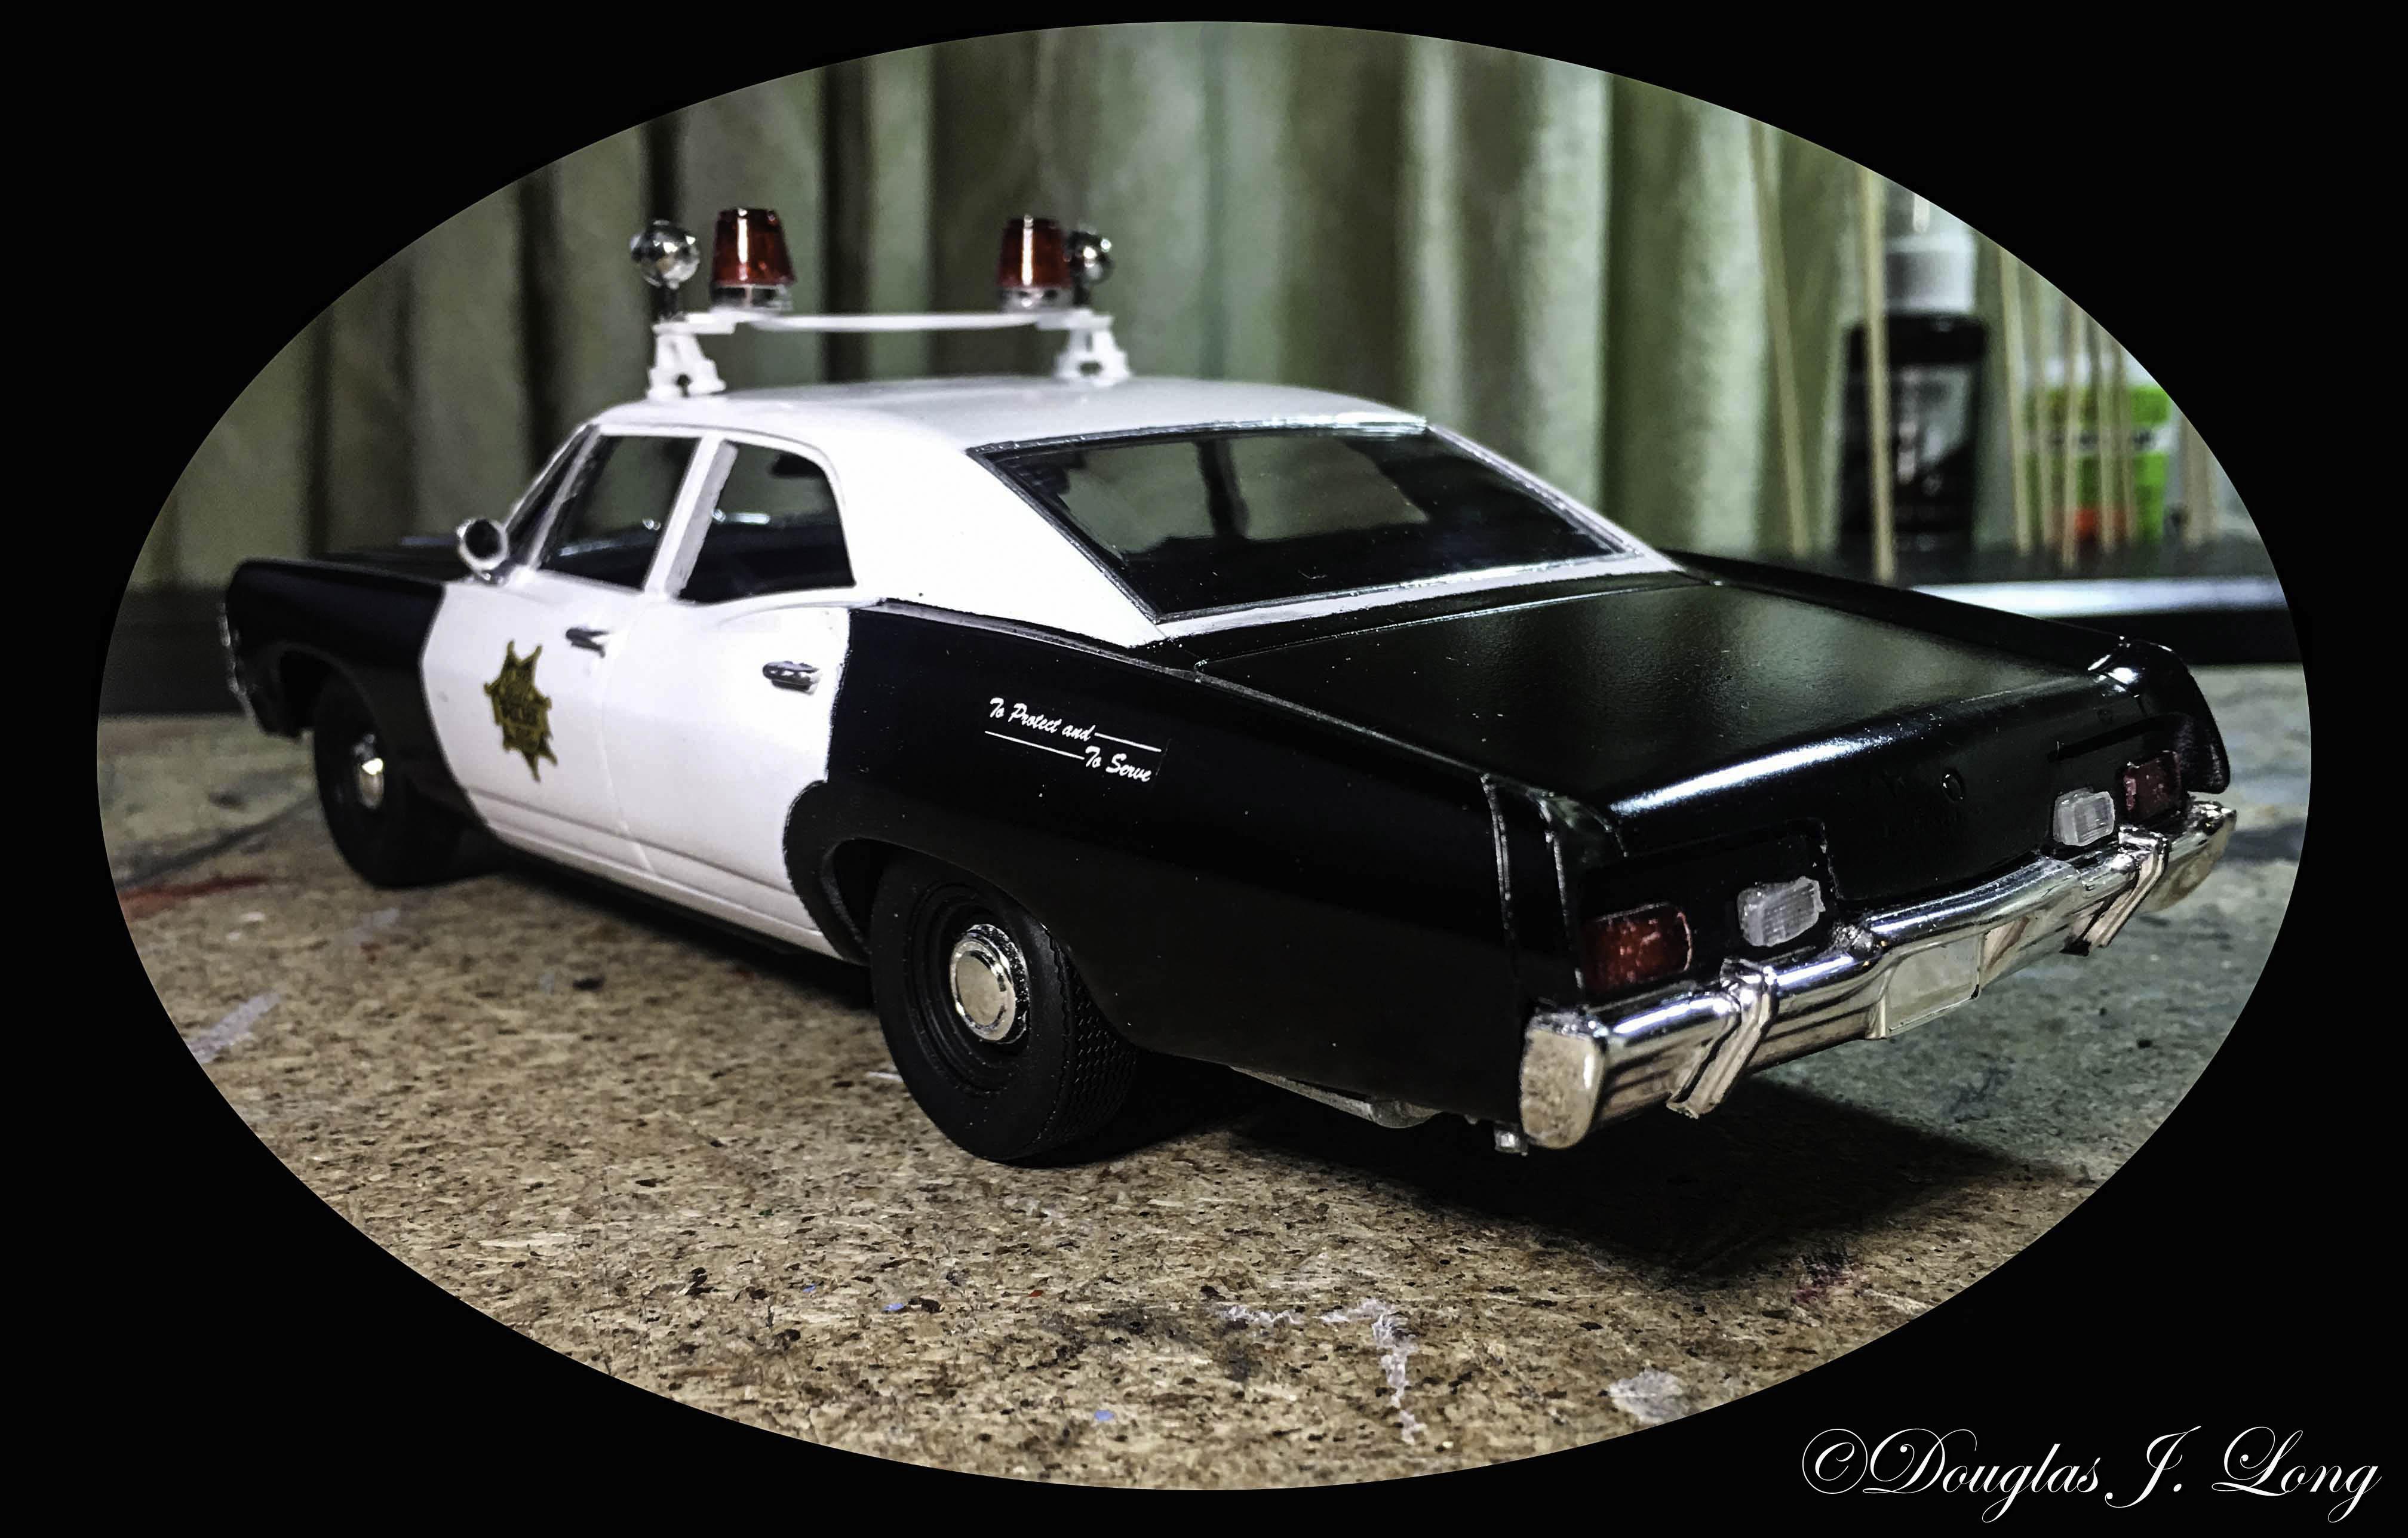
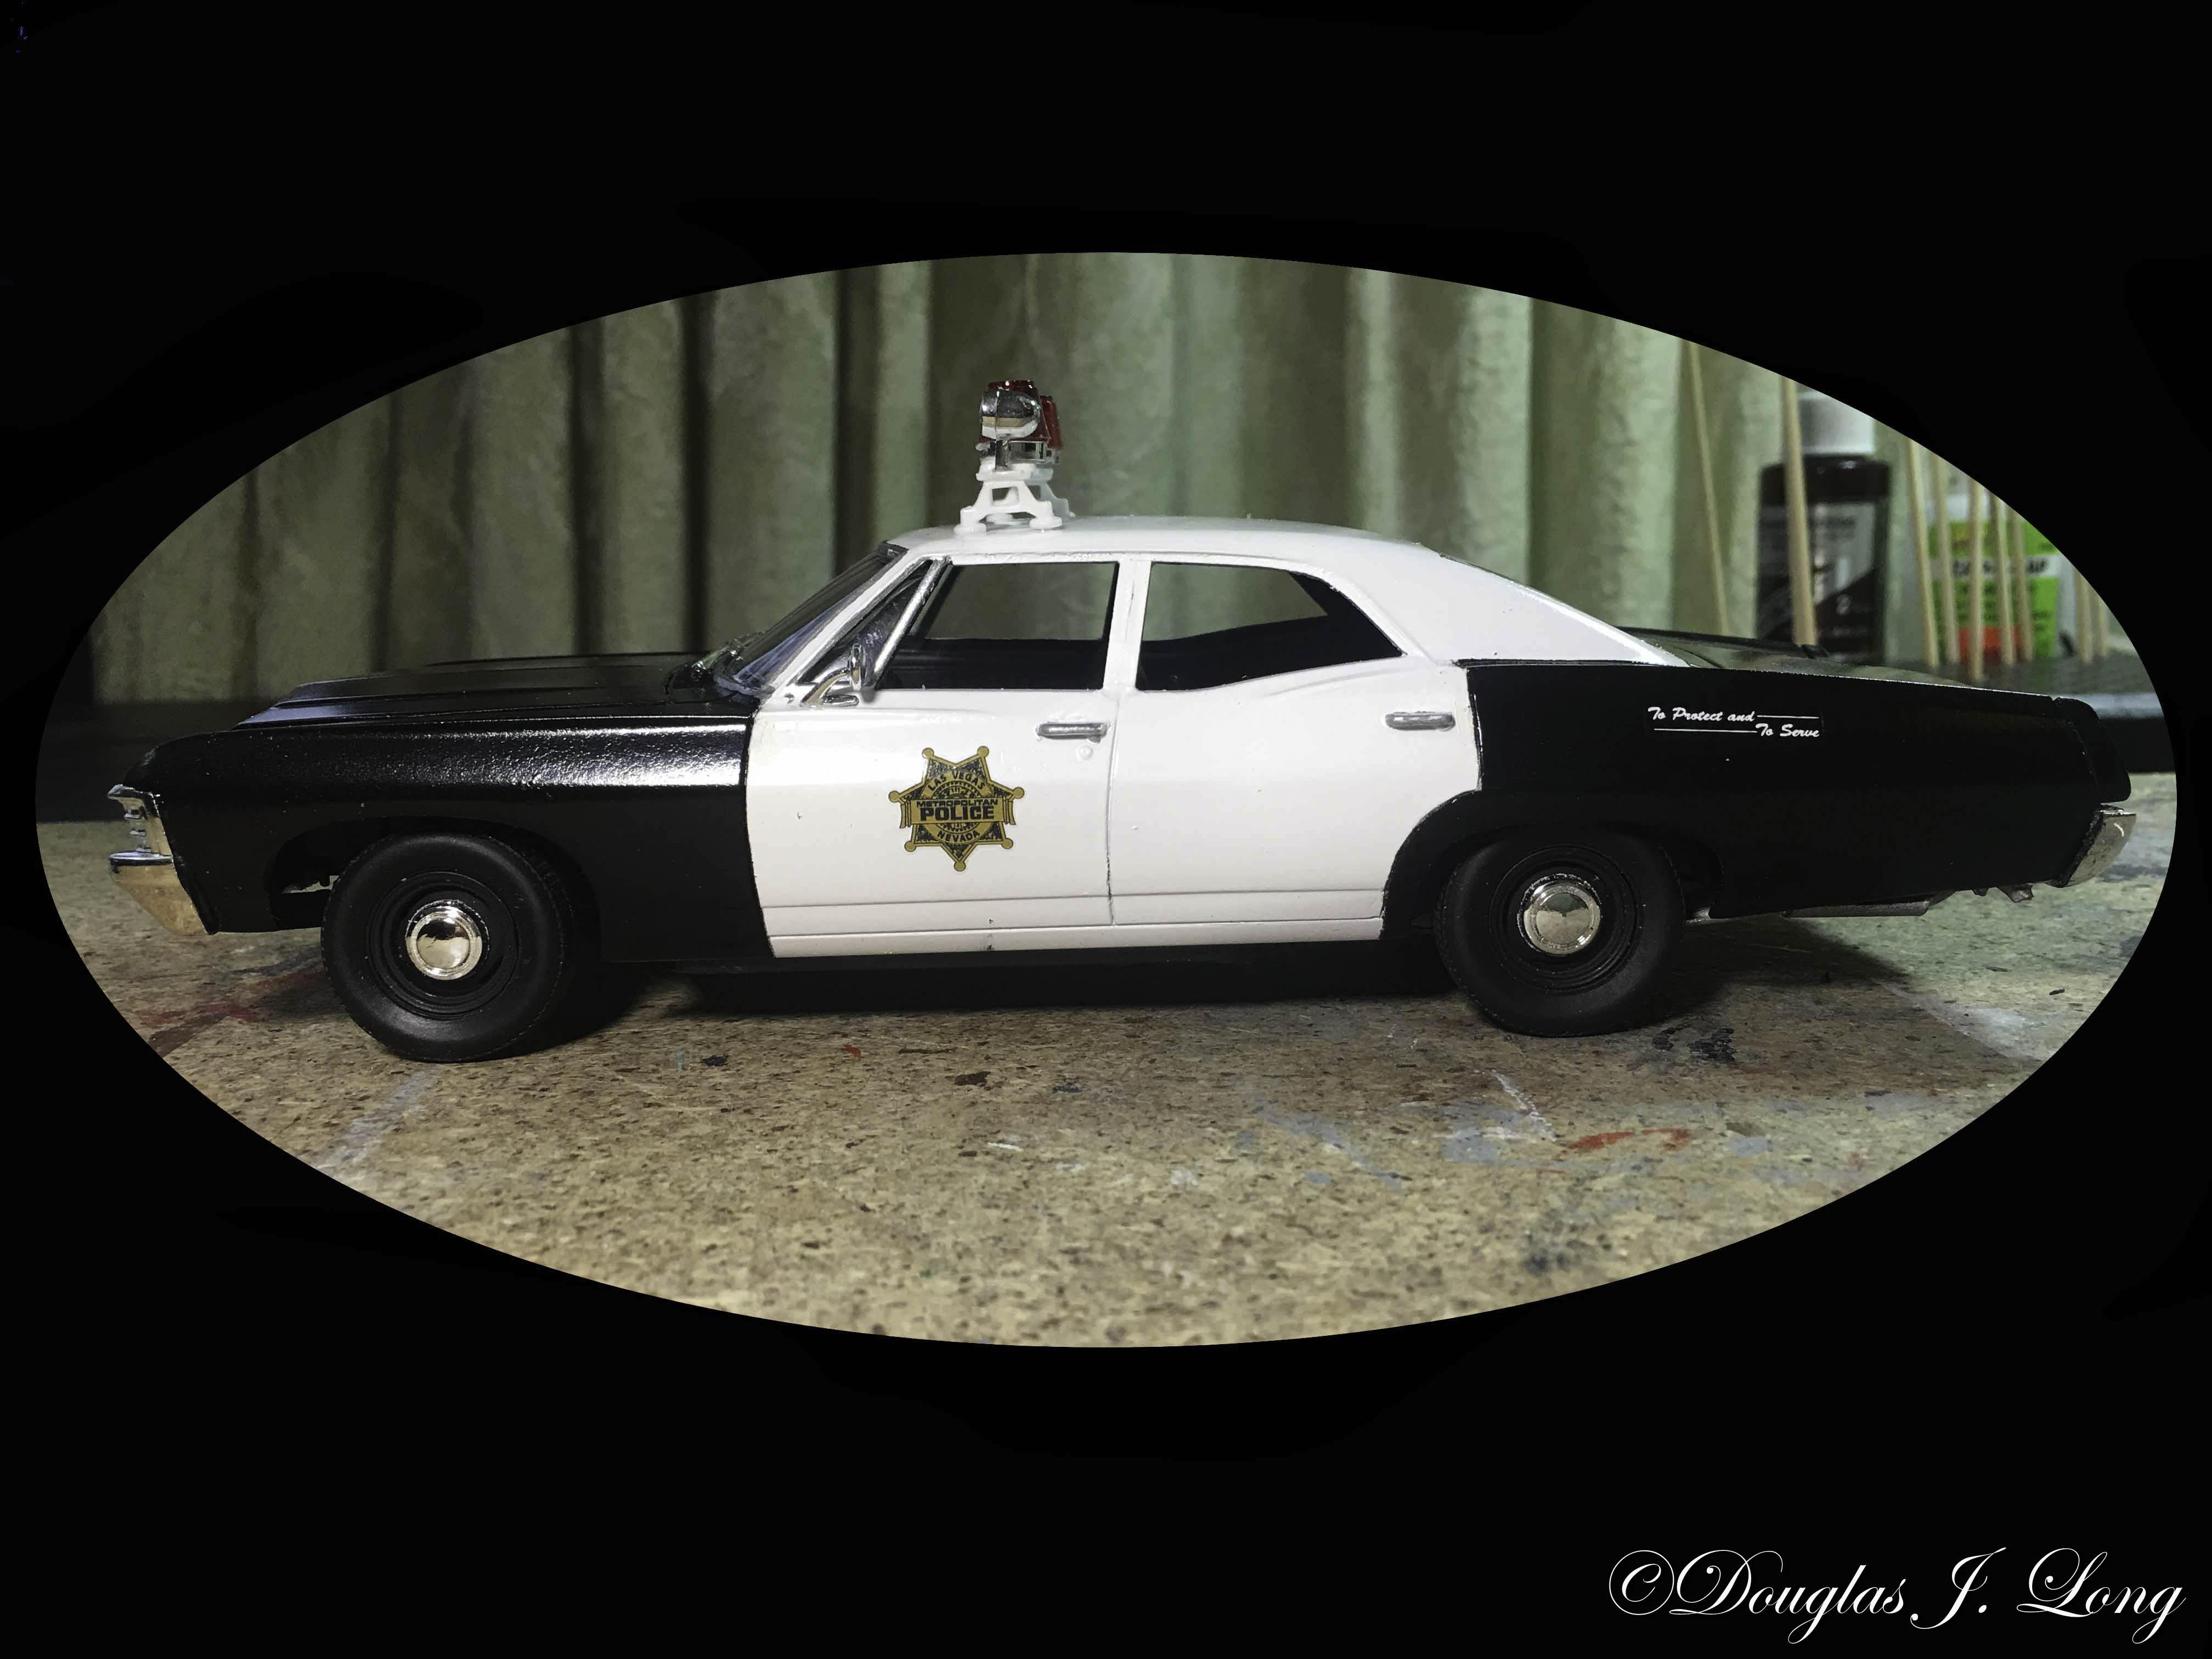
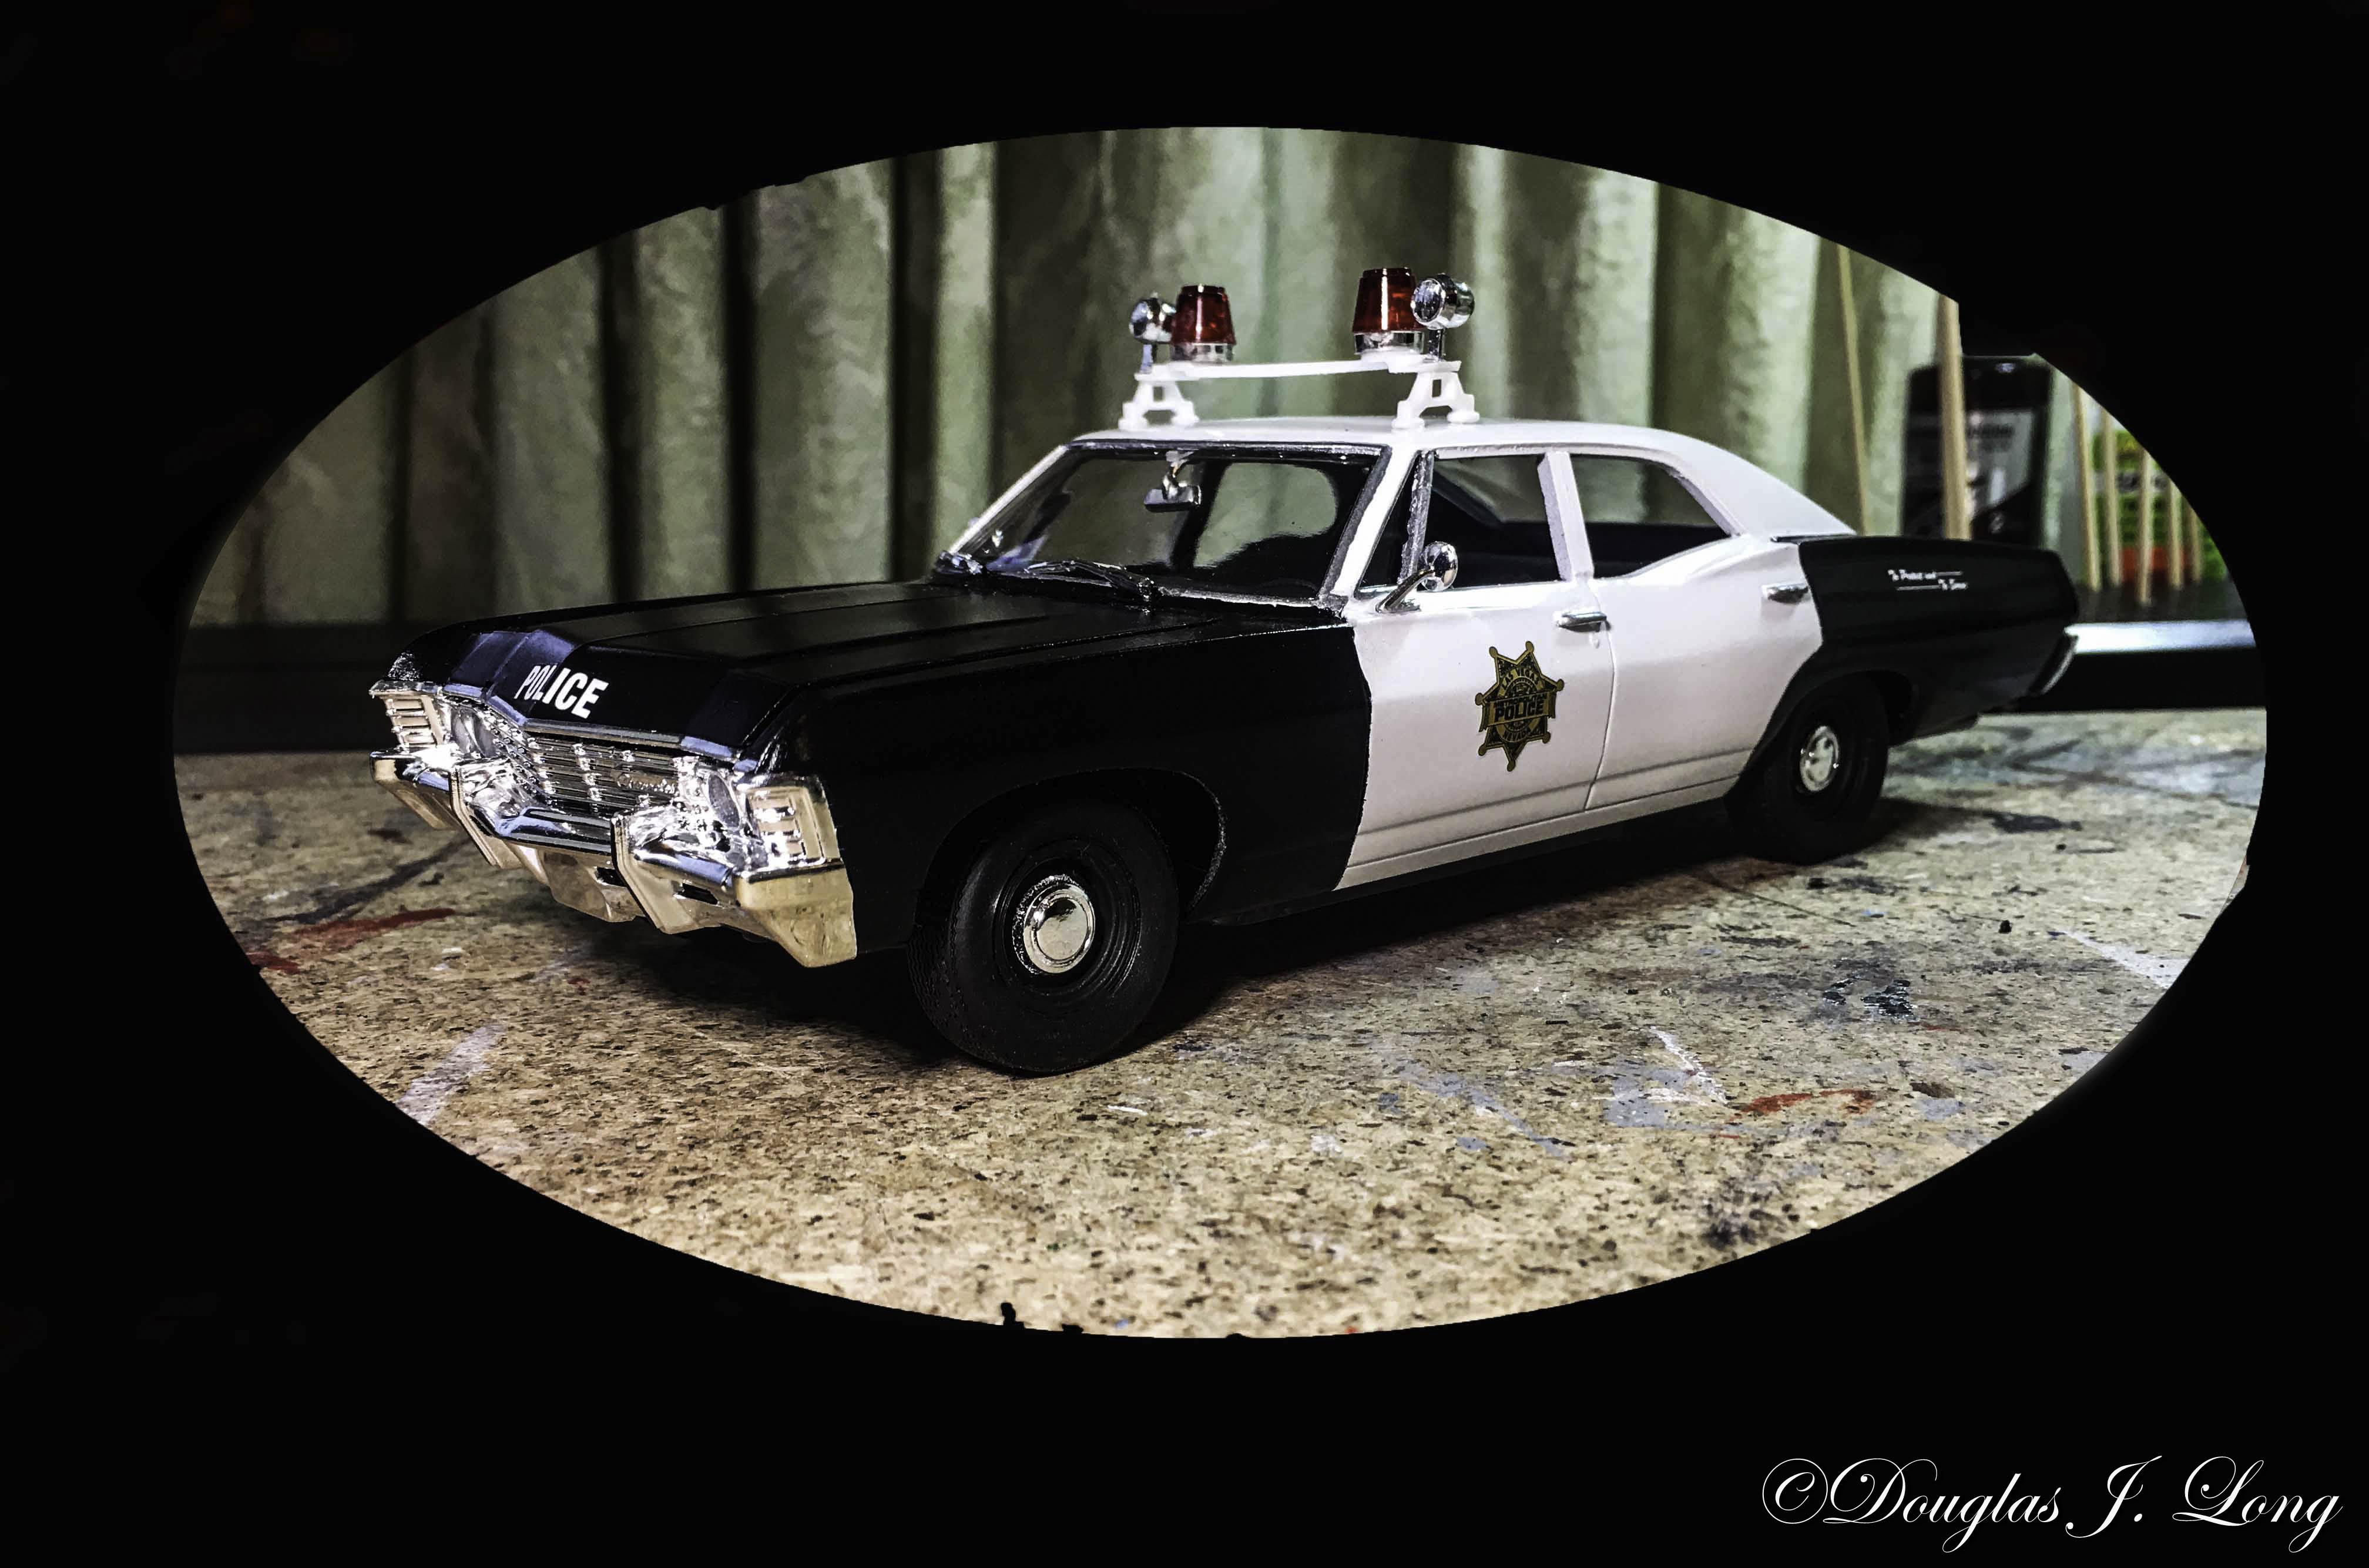
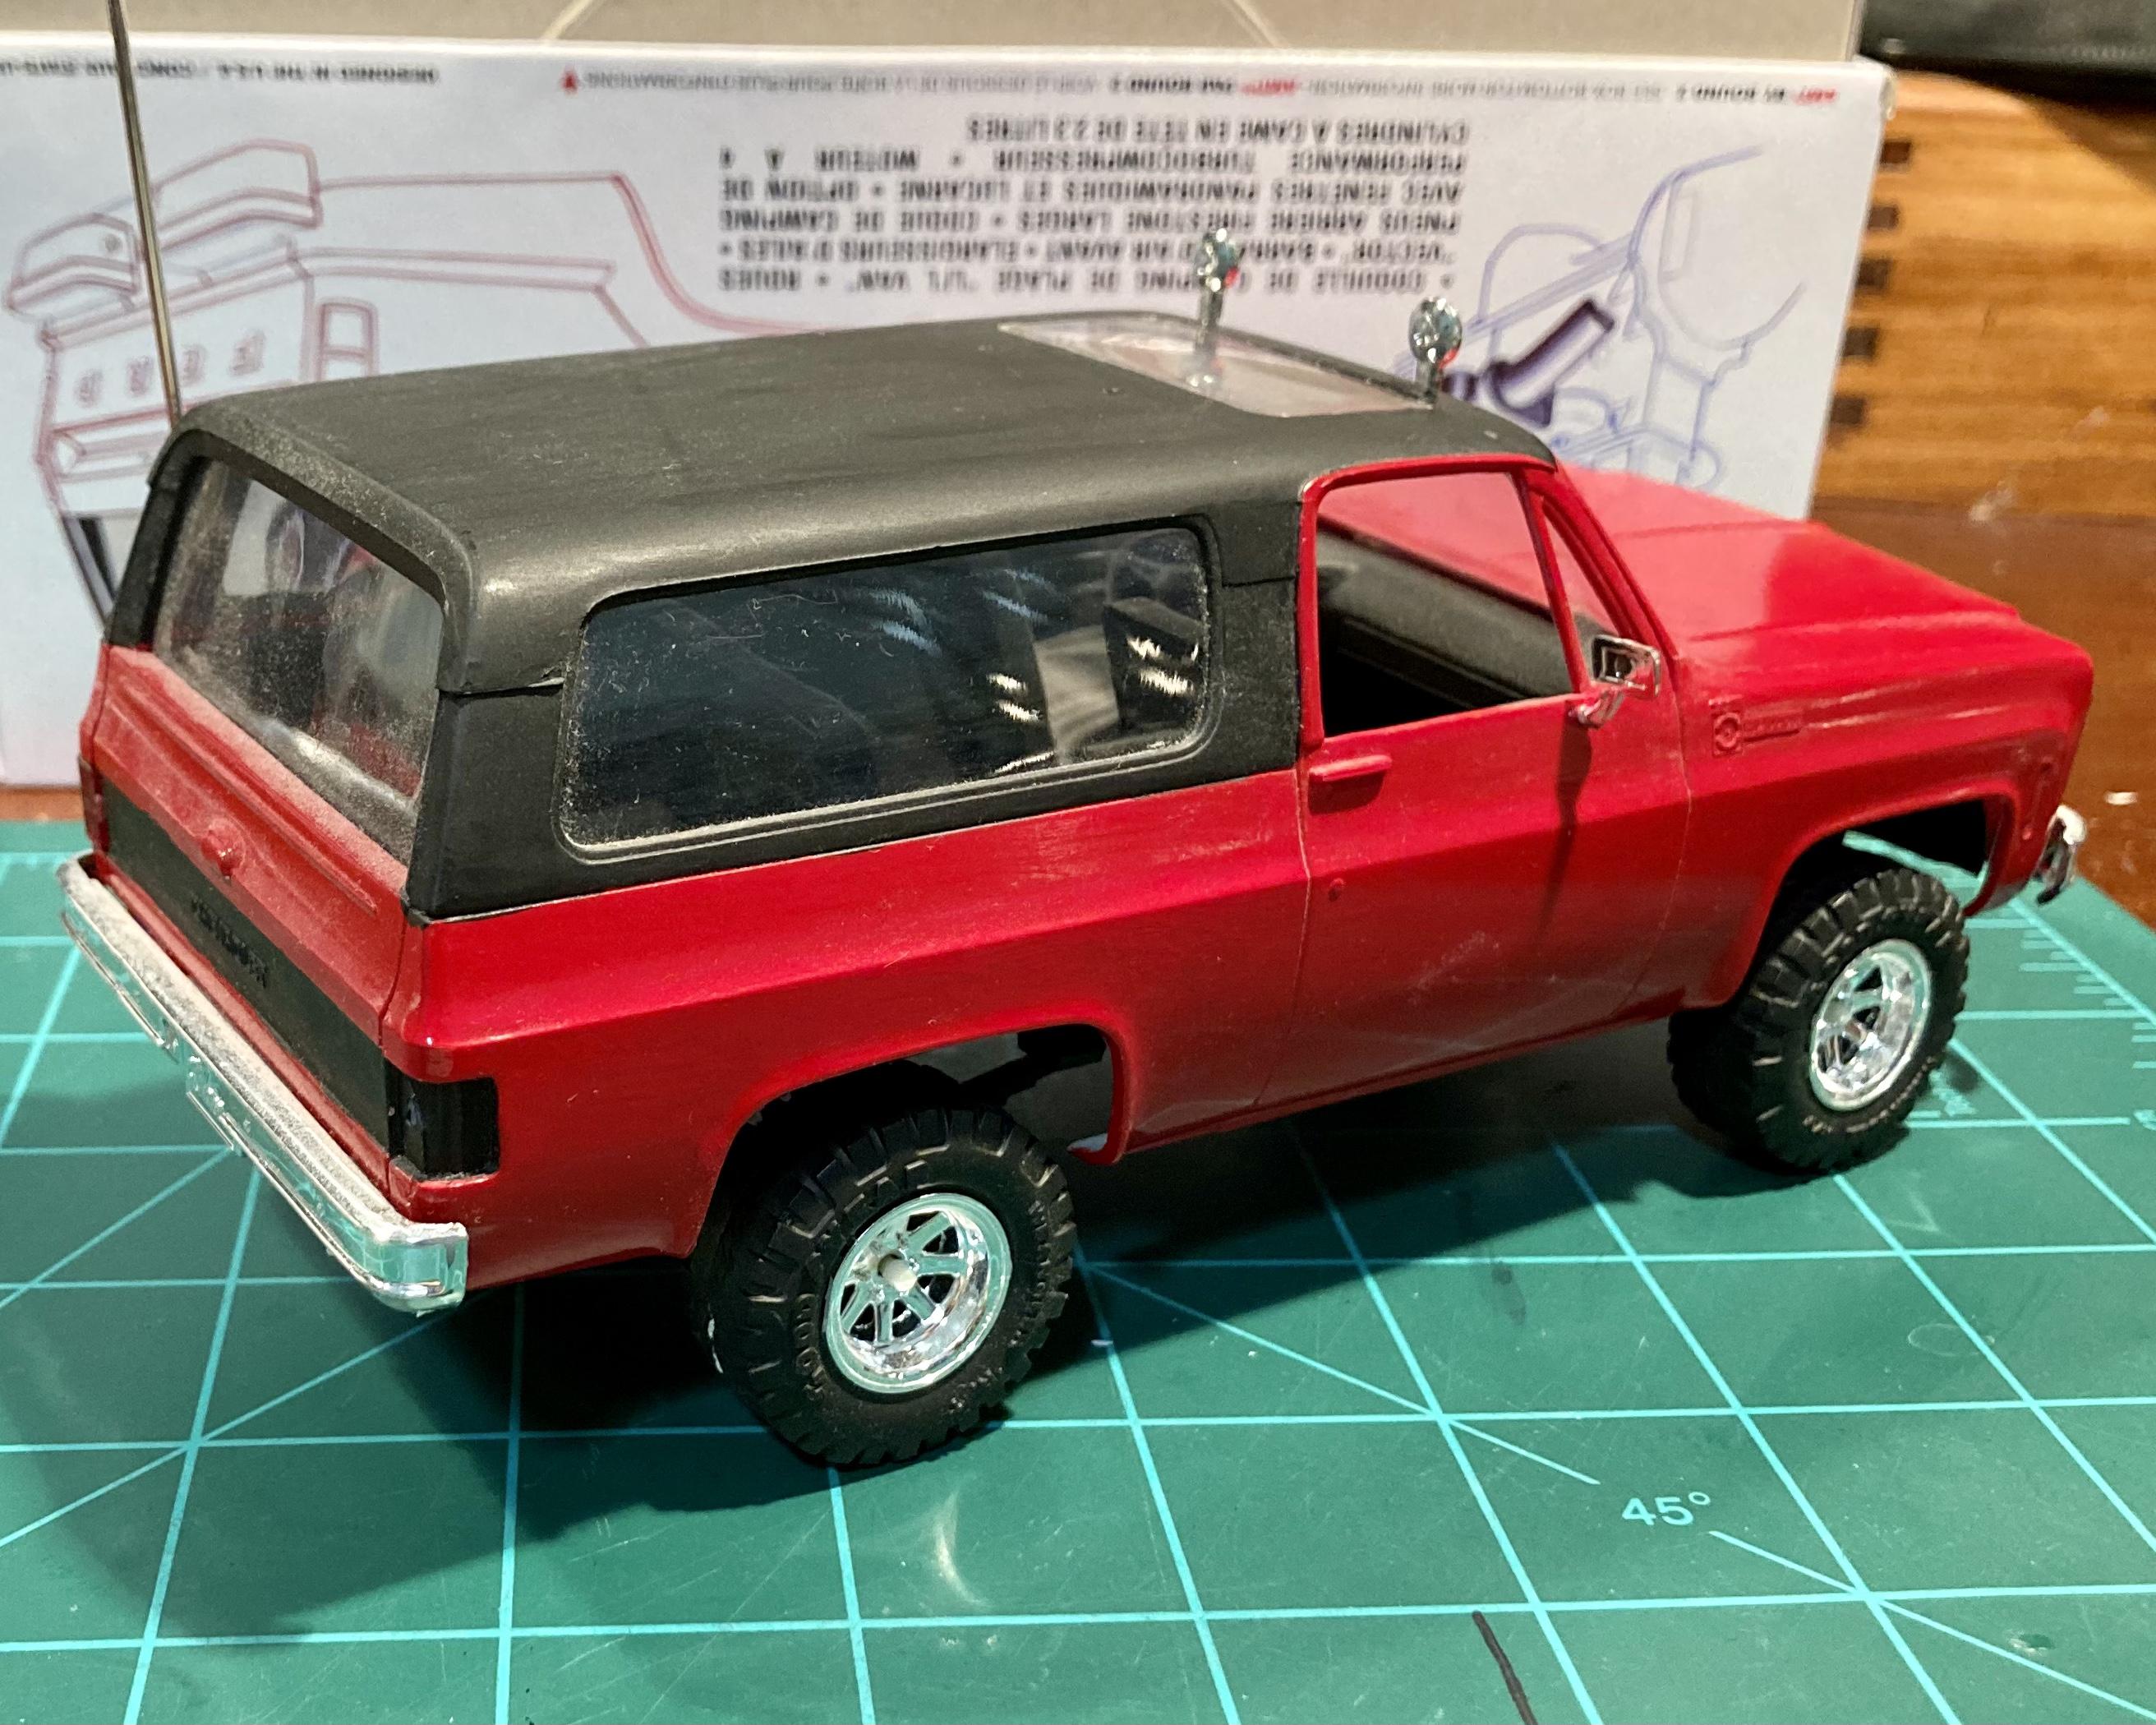
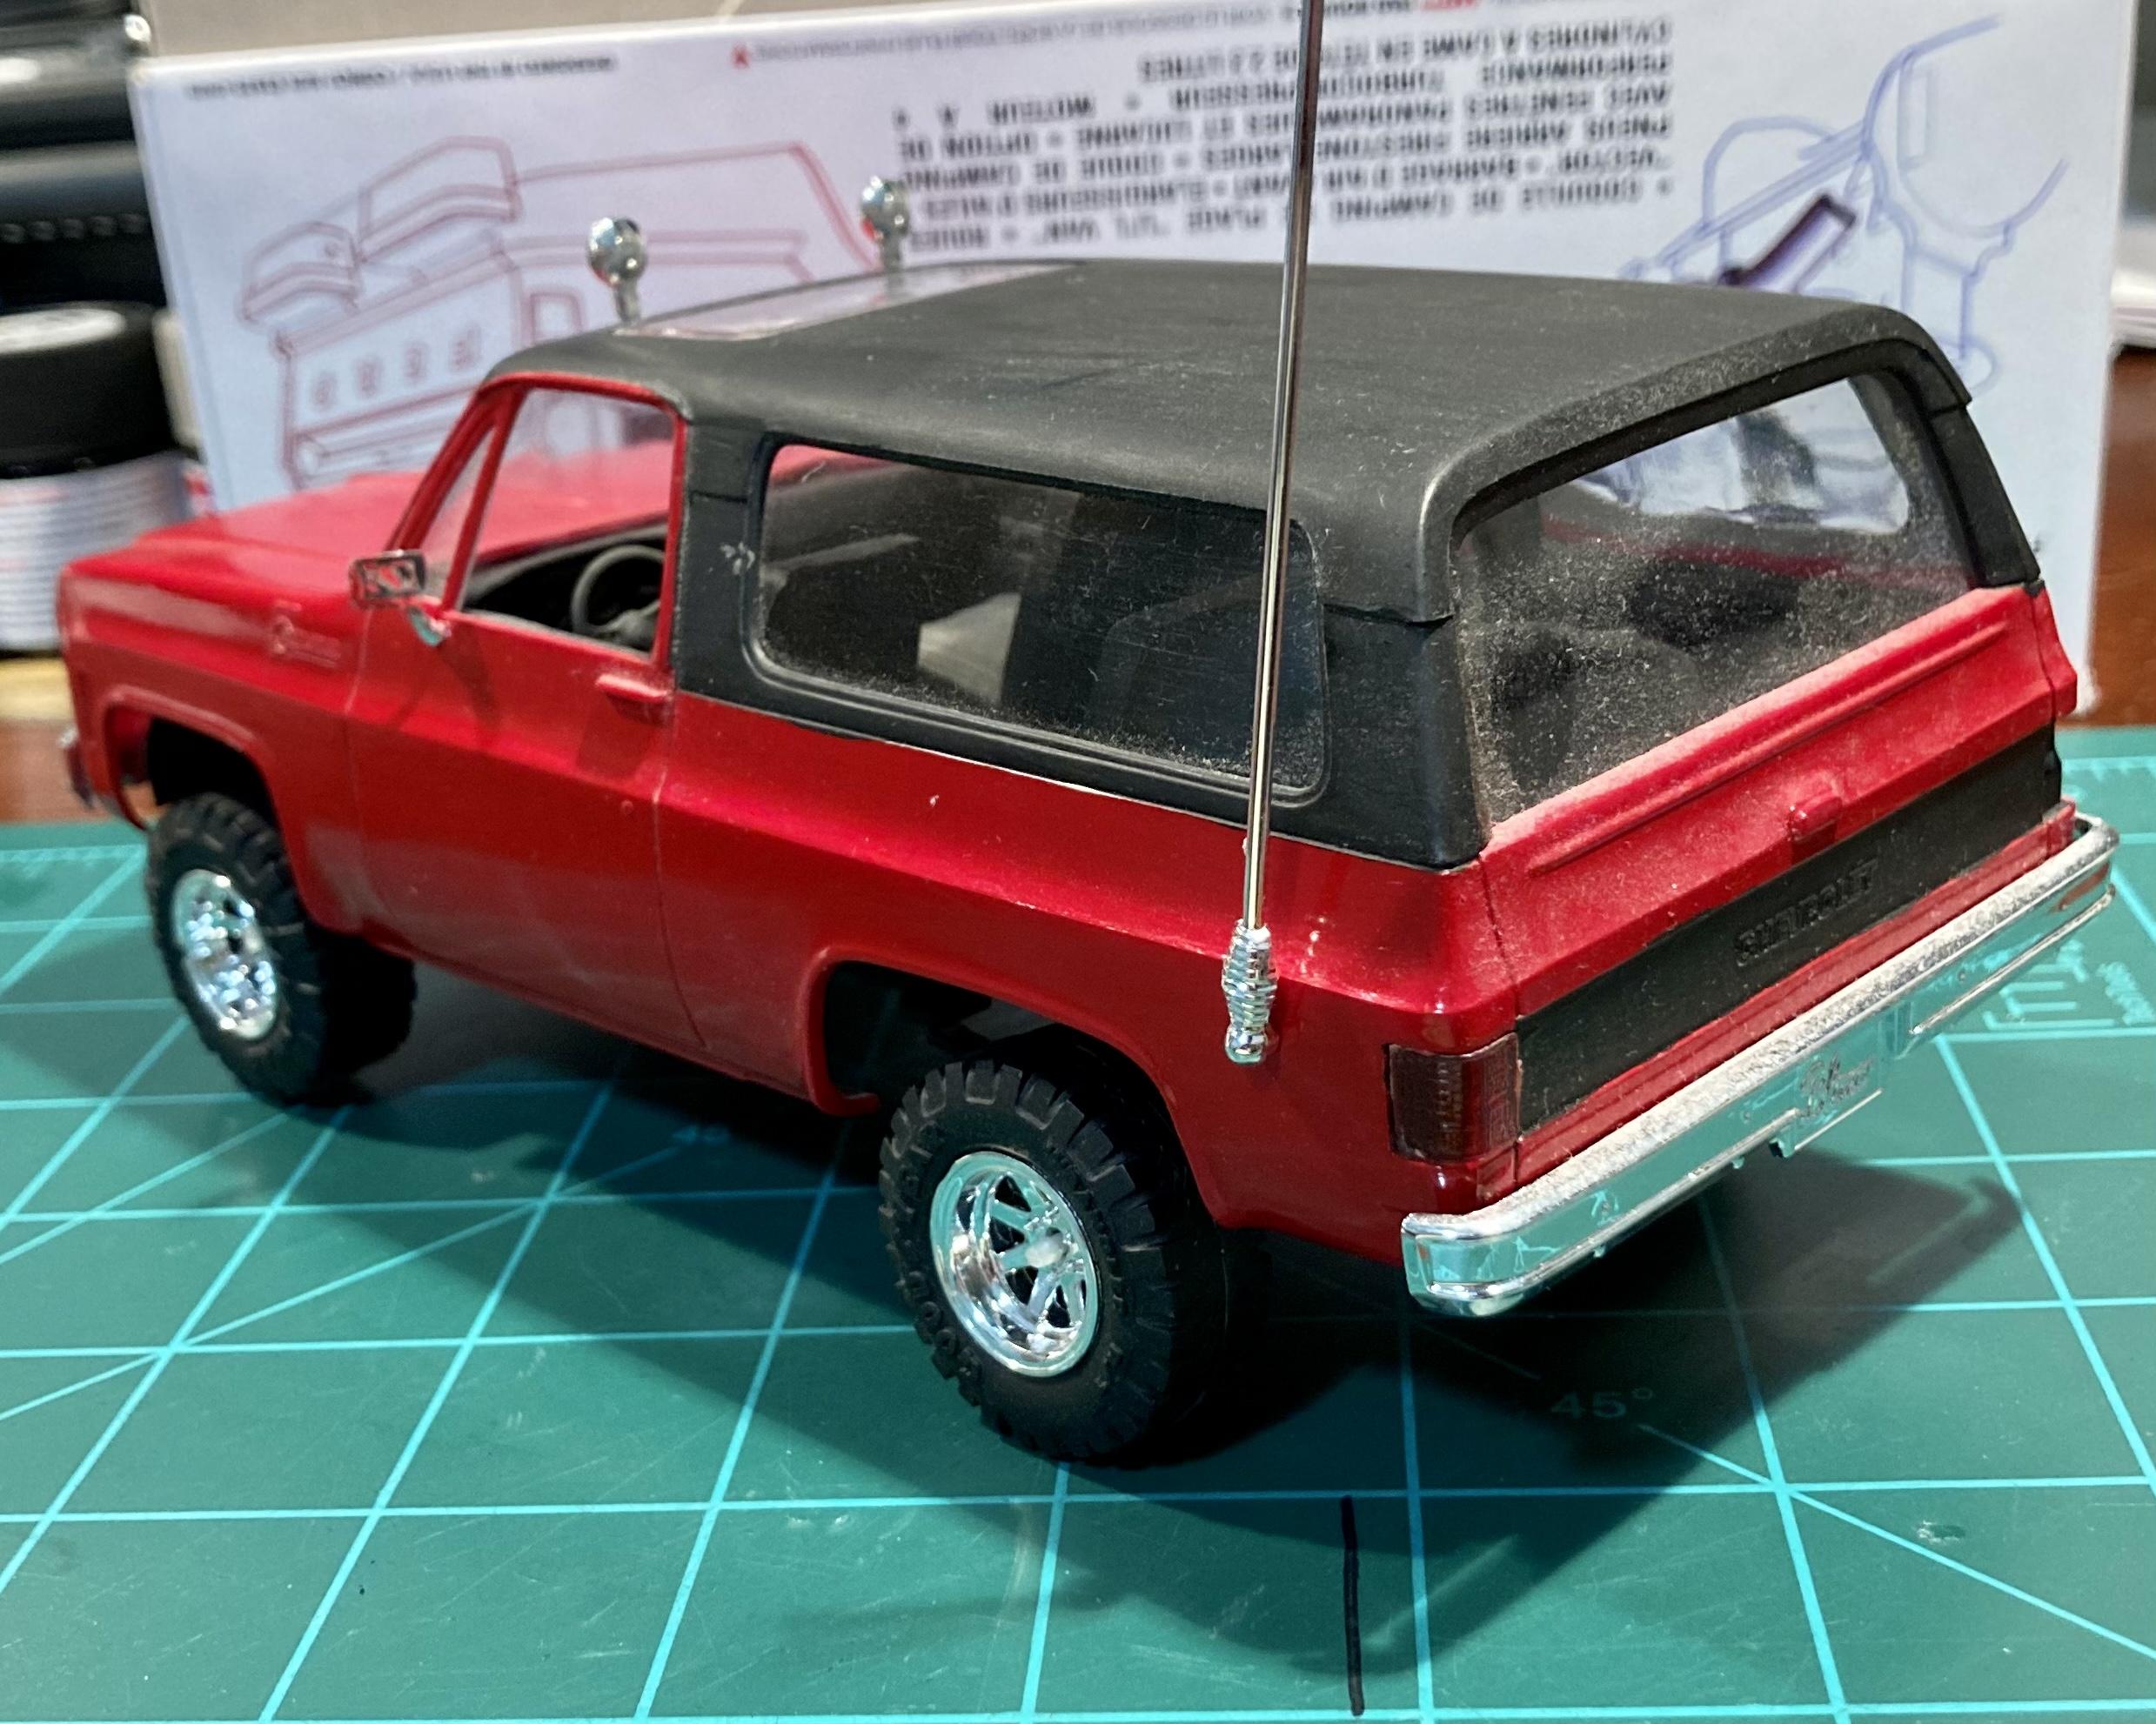
I made a couple of minor changes t the Supernatural 1967 Chevrolet Impala Supernatural kit. It is now a Biscayne police car. I probably don't have all the police items correct, as this is the first time that I've ever done a police car, and I'm out of my comfort zone. I did not include an areal as they have a tendency to get knocked off, or worse, broken. When I introduce it into a diorama sometime in the future, I'll then include the antenna(s). I really expect to see AMT produce a police car from the Supernatural kit as the interest for the kit wanes. For those of you who are considering this transformation, I have some information to add. The rear center of the trunk has to be reworked. Impalas had a trim piece on the lower edge of the trunk. The Biscaynes do not. This trim is molded on with the rear bumper. You will need to carefully cut that from the bumper, sand it smooth, and add it to the bottom of the center trunk lid. The tail lights are also different. Once again, turn to the rear bumper. Carefully file the upper trim from above the lights, leaving the backing intact. After the trim is removed, sand the detail from the light area. I used parts bins lights for it, which suffice quite well, since I'm just going for a shelf model. To reach a higher level of authenticity, I would suggest that you plan ahead and acquire slightly larger lights, and include the trim surrounds for them. The seats have to be addressed. Straight from the kit, the seats don't match each other. I resolved this by sanding both seats semi-smooth. I then added .010 strips for the detail. I did not alter the trim on the doors, as it would not be noticeable through the small window openings. If you're using the beige color that some departments used, you may want to give the door panels consideration. The 1965 Chevelle wagon comes with surf boards and a rack to carry them on. I used the uprights for the racks to build the sides for the light bar. The cross piece was in one of my miscellaneous parts drawers. It was a piece that says remove on it, and probably was from the hood opening section of a long built model. This one was perfect as it had to round areas on either side that matched the emergency strobe lights. Those strobe lights came from the red lens trees for big rig trucks.
-
 2 old builts from the mid 80's (pictures taken in 2020,beforse selling them off): The notorious F-100/1956 (Revell kit) is from the 1983 "Street Demons" series and could not be built stock - I discarded the ugly 2-piece plastic wheels and replaced them with Monogram's 56 T-Bird units. The interior is also customized - this kit gave me hard times: fitment was very bad, especially in the windshield/firewall/hood and the interior footwell/floor area - horrible (noticeable gaps everywhere) ! Decals are from amt's Pete Wrecker, color is car laquer sprayed from the can: The other one is amt's famous 1953 F-100 kit: I wanted it to look like a typical (?) late 50's custom so I used as many of those ugly custom parts (which were included in the kit) as I could stand; auto laquer from the spray-can, whitewalls are brushed with Humbrol matt white enamel - trim Humbrol silver, bare metal foil for the rails in the bed - this was the final result:
-
 Well ive got to be honest and say im not a 100% happy with this build. But I guess you lose track of a build when you started it 10 years ago and try to pick up where you stalled out. Had a lot of fit issues and trouble when doing final assembly. Glad I made it through to have another stalled build completed and on the shelf so I can move on to something else. Those of you who are observant will see some of the issues and things im not happy with. I've learnt expectations can not always be satisfied with every build. So im not going to whinge or complain in detail, just move on and accept it is what it is. A decent clean build that looks good on the shelf. Okay now we got that disclaimer out the way onto the pics. LOL! The kit I started with. First mocked it up and set the stance back in 2012. Other details in the WIP As per usual the same colours I always use. TS-14 black and TS-49 bright red. Wheels are Pegasus #1109's. Removed the mold lines on the bumpers and redone with Alclad chrome. Nothing fancy here, could say its a curbside plus an engine. Have held onto this number plate for years saving it for just the right build. Had clearance issue's with the oob air cleaner, so had to use one from my spare parts and painted Alclad chrome. No idea what it is from. Coil from spare parts also. Made a hard lid for the bed out 1mm sheet styrene and scribed around the edge to create the trim.
 -
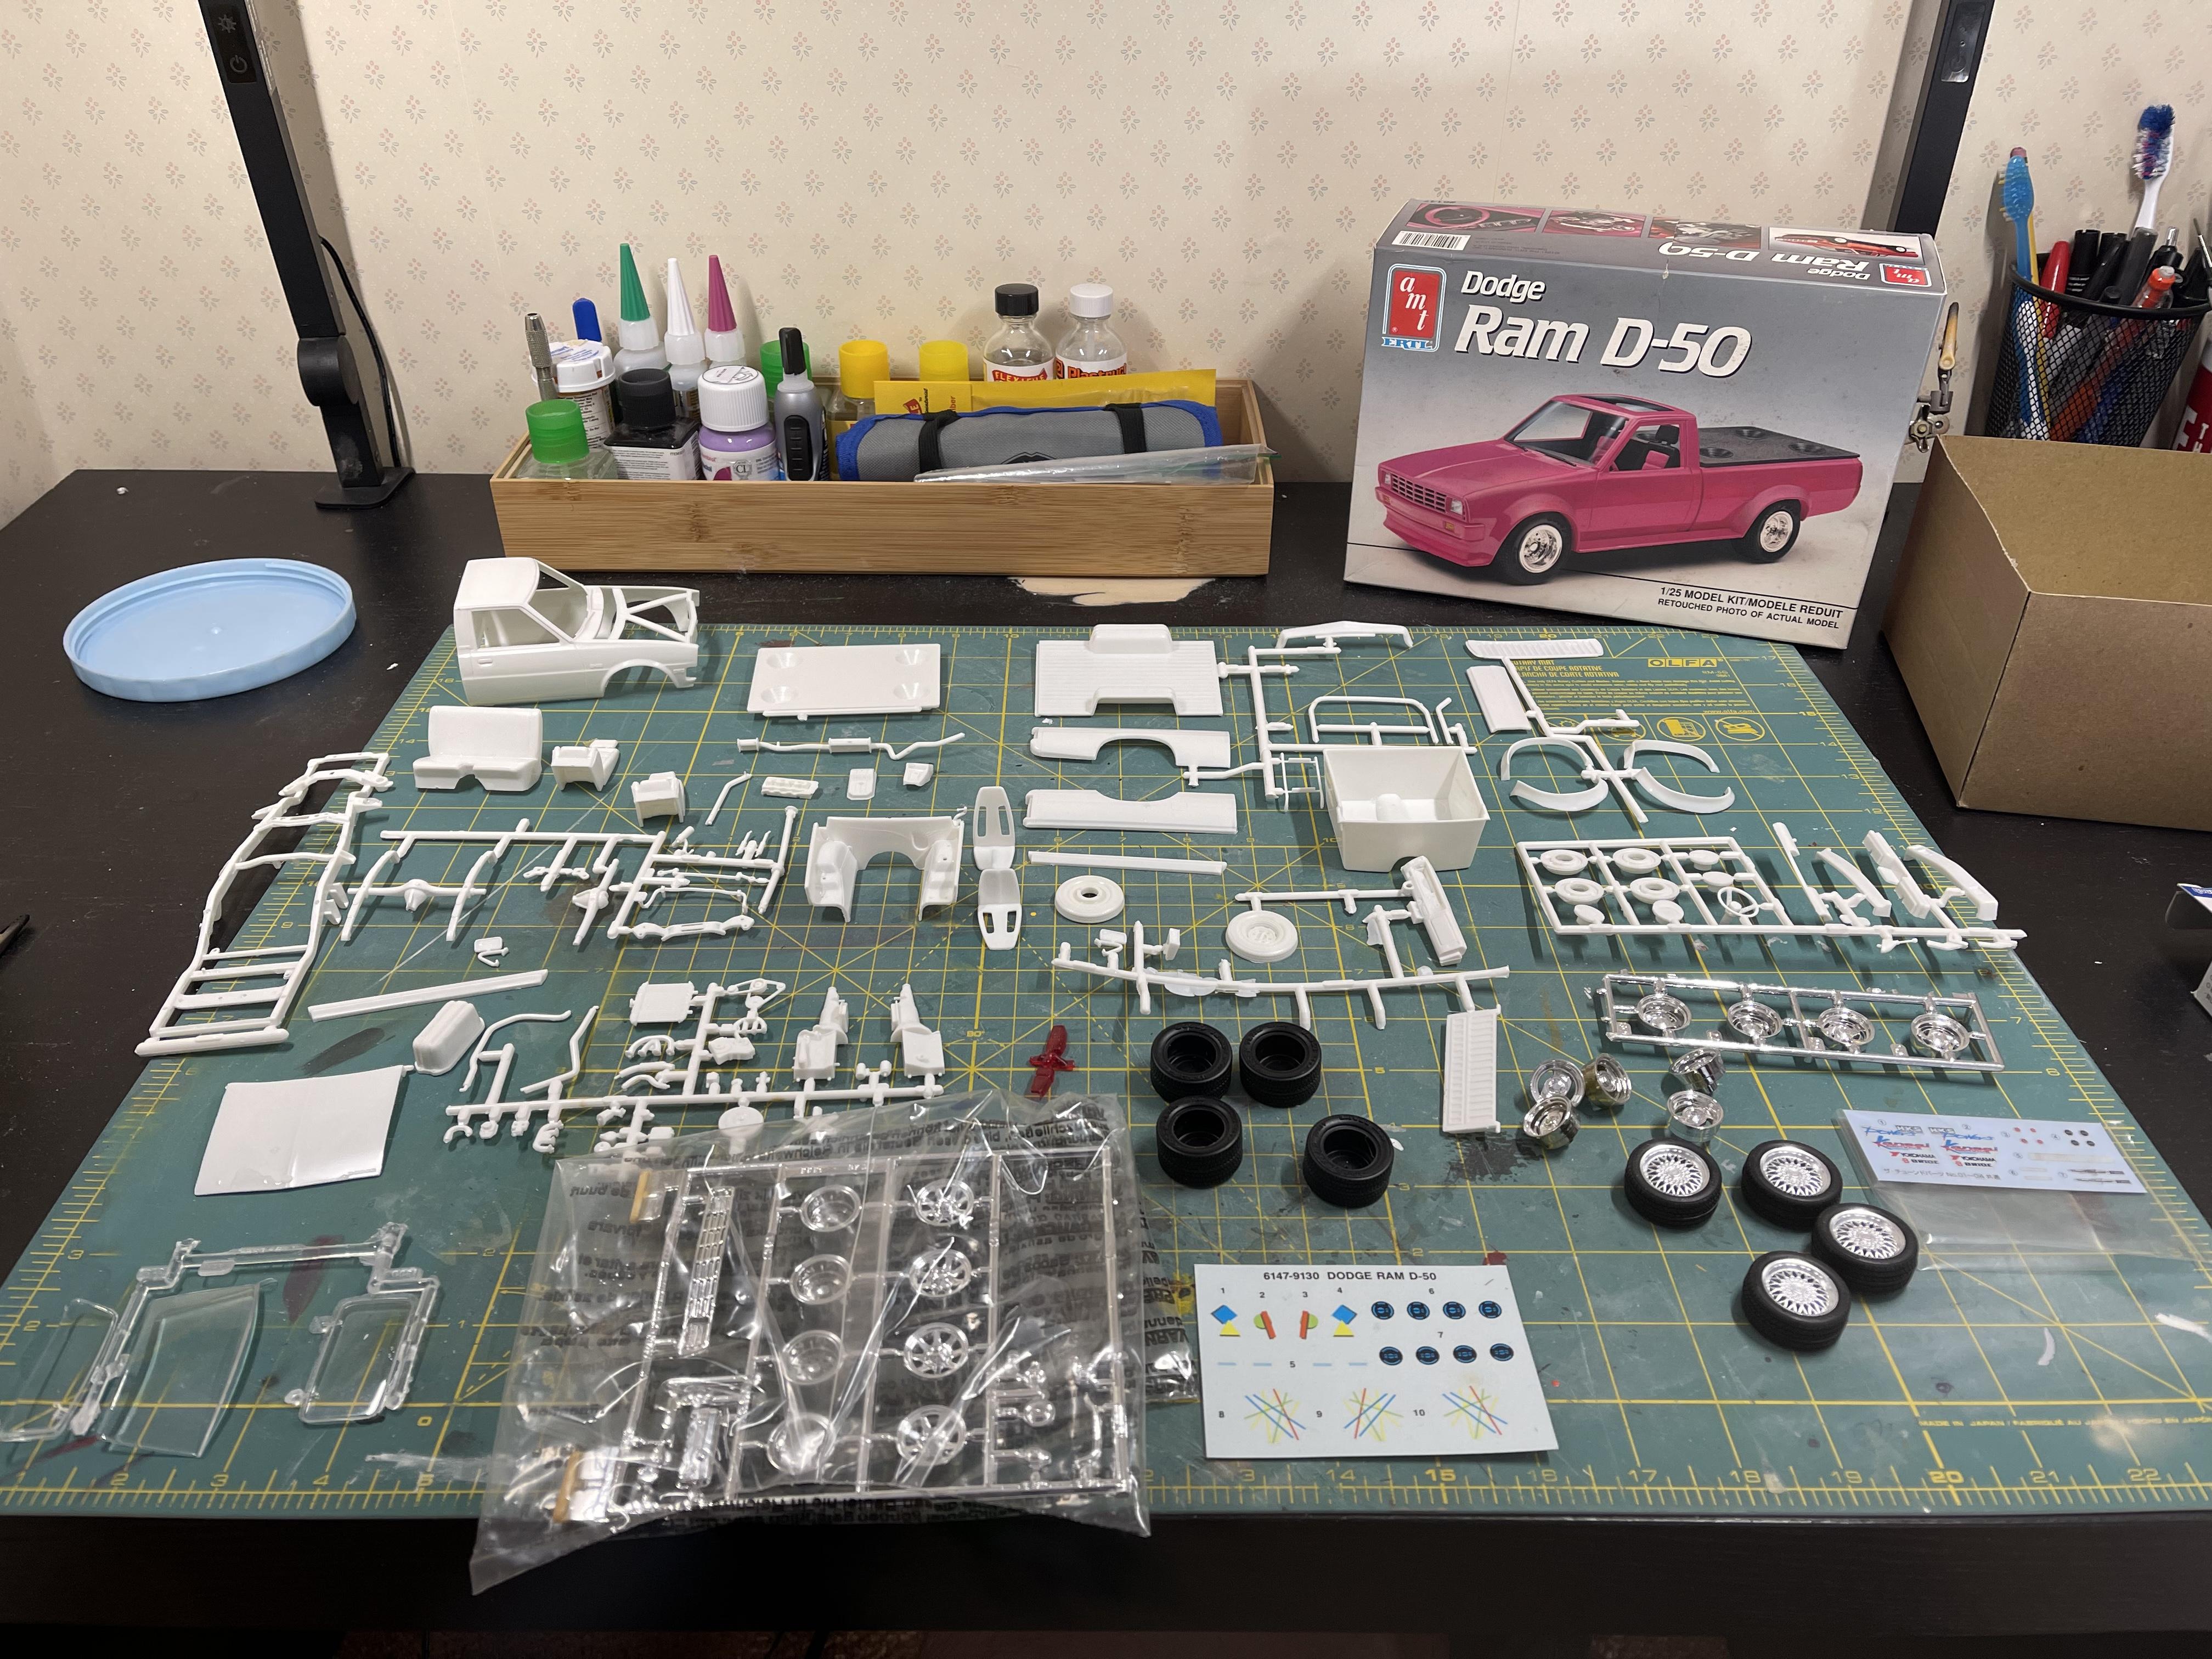
 This will be my kit and goal to complete in February. The AMT/ERTL Dodge D-50. I’ll be building the box art version of the kit, since it’s the reason I got it in the first place. Surprised by the parts count in this kit and I’m excited to build it. Should have some progress tomorrow! I haven’t decided on wheels/tires. The kit wheels are not what I think should go on a mini truck. The tires are also a bit large in my opinion. I might put on the Aoshima BBS wheels from my stash.
-
This is the current release of the AMT 1937 Chevrolet Coupe which is being distributed through Stevens International. I found my example at my LHS, and was drawn in by the nostalgic box art. I'll give some in-box information on the kit. Kit The kit consists of 10 sprues (1 clear, 2 Chrome, and 7 white plastic) which are packed among 7 bags. Another bag contains 2 sets of tires, a metal axle, and transparent red piece. The glass is packed separately in a bubble wrap pouch. The clear sprue contains headlights, and a clear custom hood. The parts are packed, and one will need a lot of luck getting them back in once taken out. This is a 3 in 1 kit, and contains loads of extra parts including Cragar wheels, extra grill, bumpers, and other parts for the parts box. Also, there are two complete engines with this kit; a stovebolt 6 cylinder, and a 427 V8. Body Inspection of the body showed that little cleanup is needed compared to other AMT kits. The fenders are separate, and dry fitting showed promising fit. On the body, there are noticeable mold lines that run the C pillar from the drip molding to the fender. Also, there is a hole on the passenger side just in front of the rear fender that will need filled if the custom gas filler cap is not used. So far, the kit looks good. I will add an update after I build the kit.
-
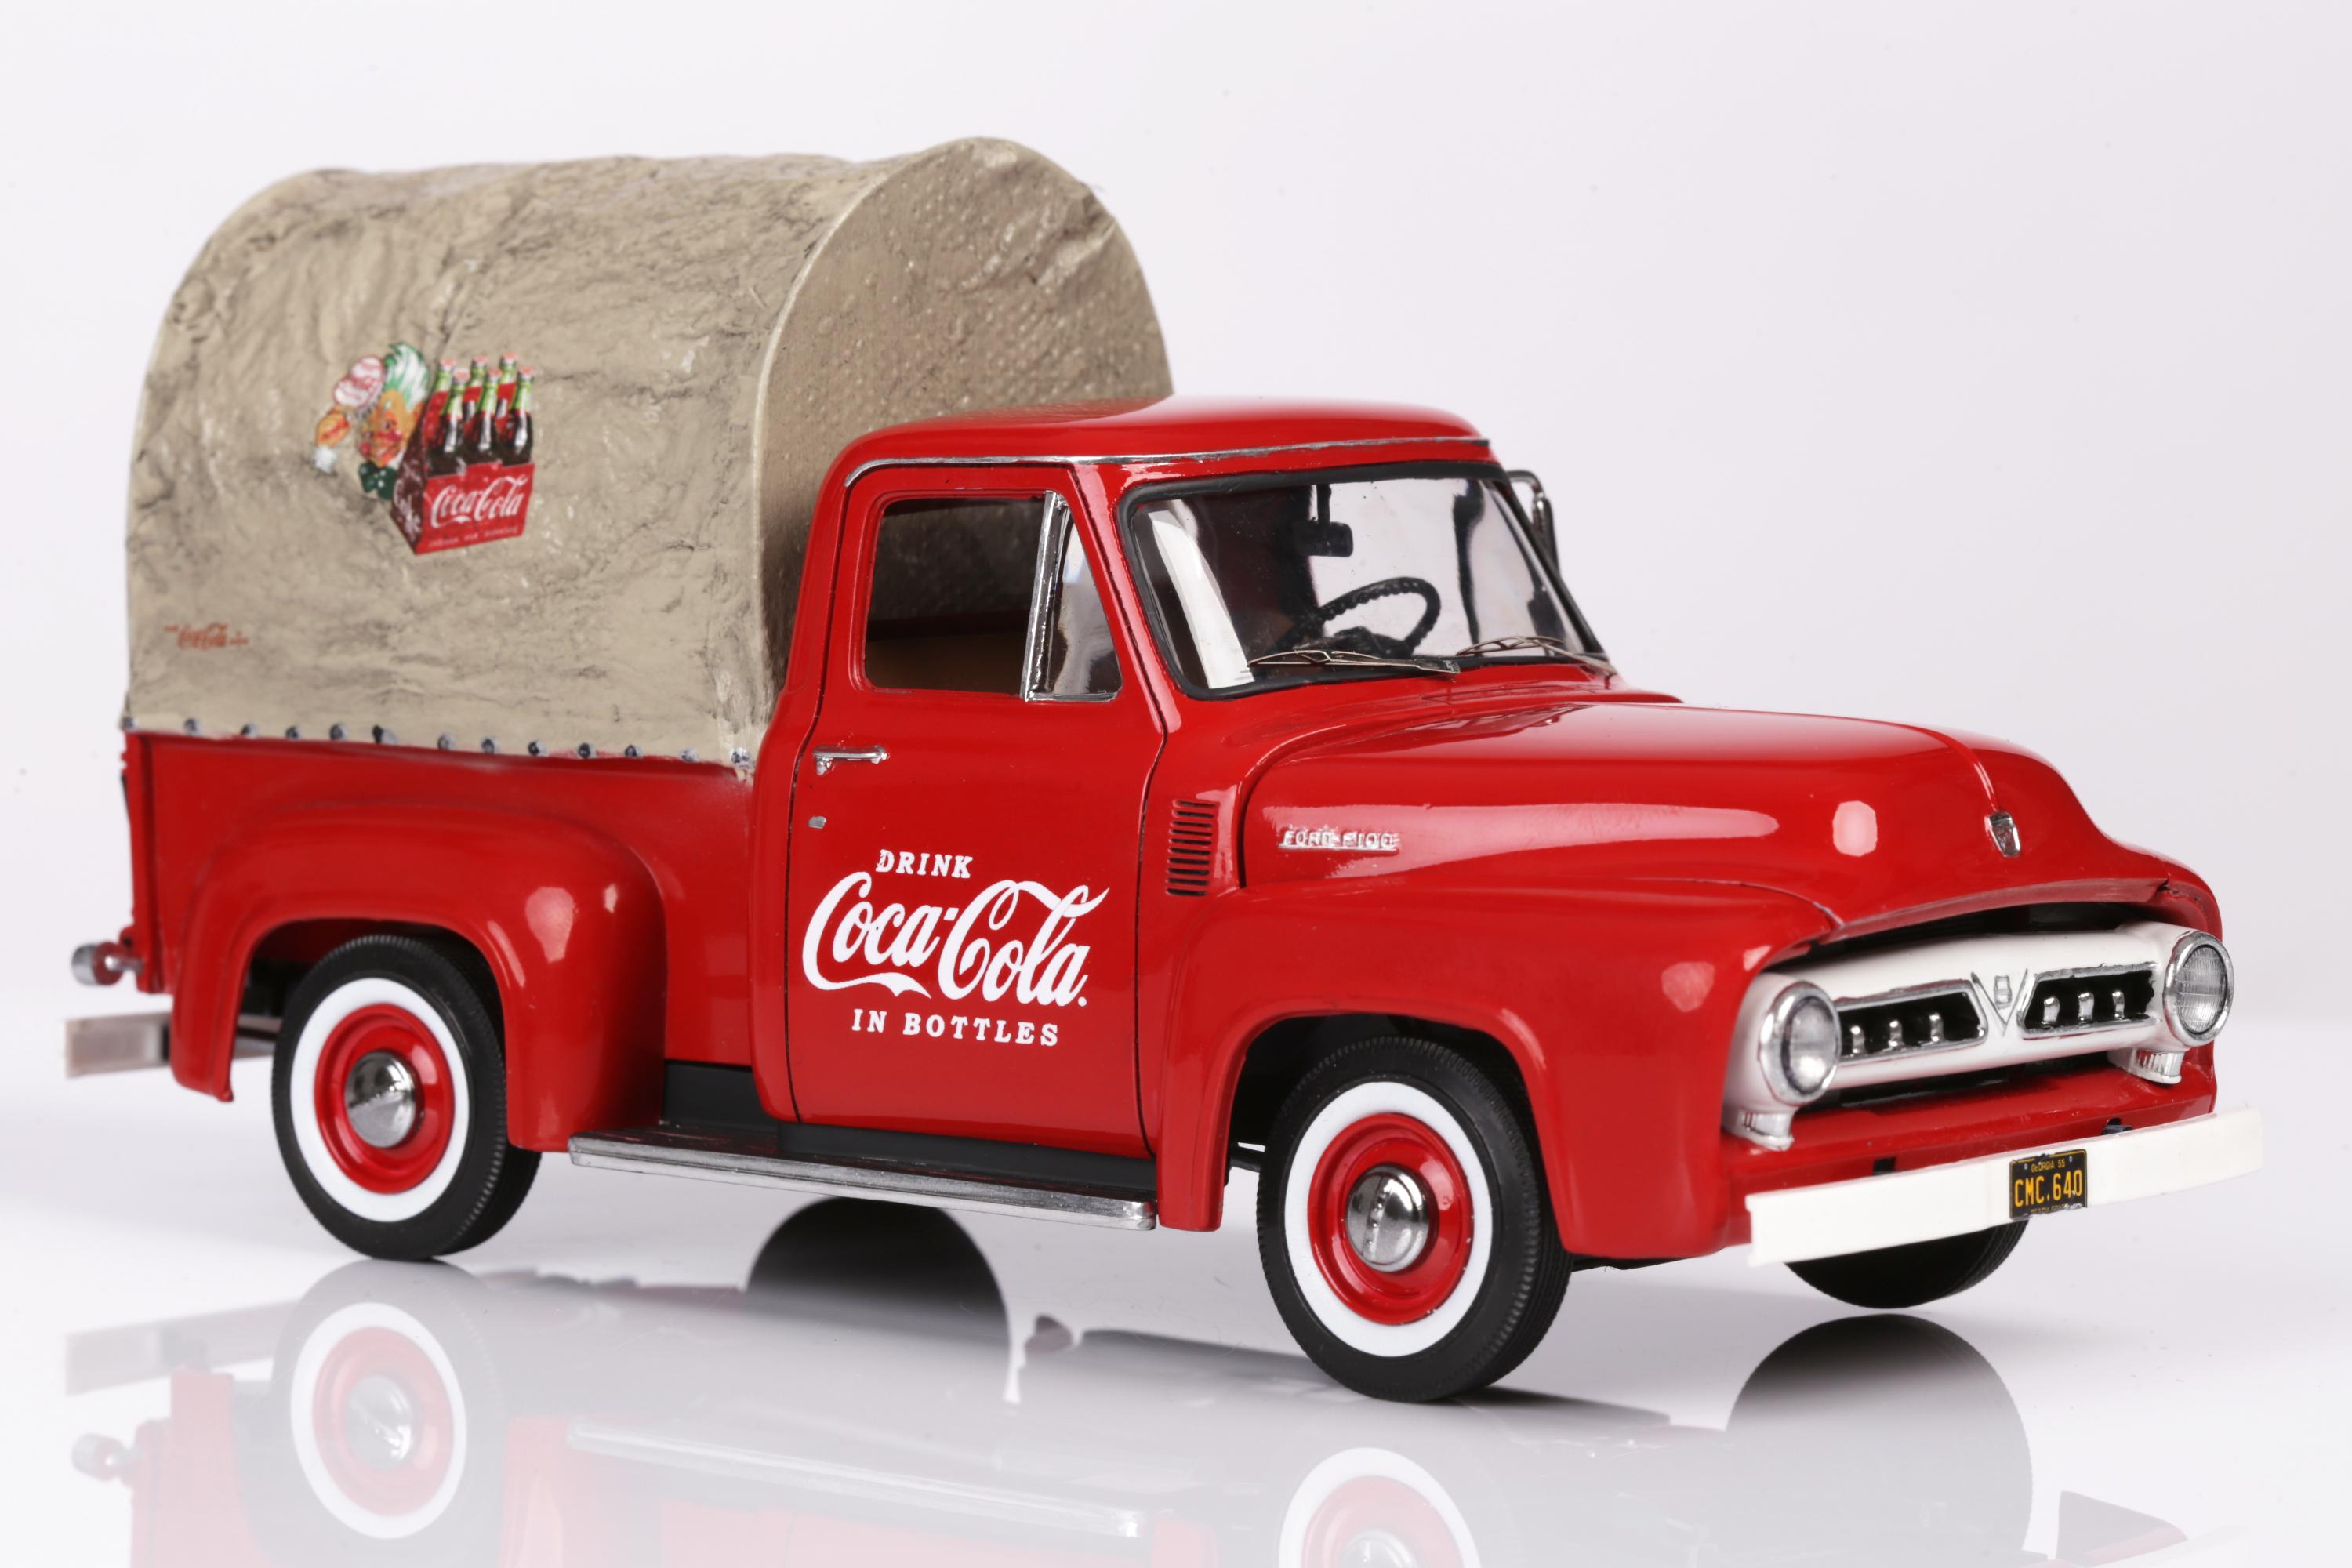
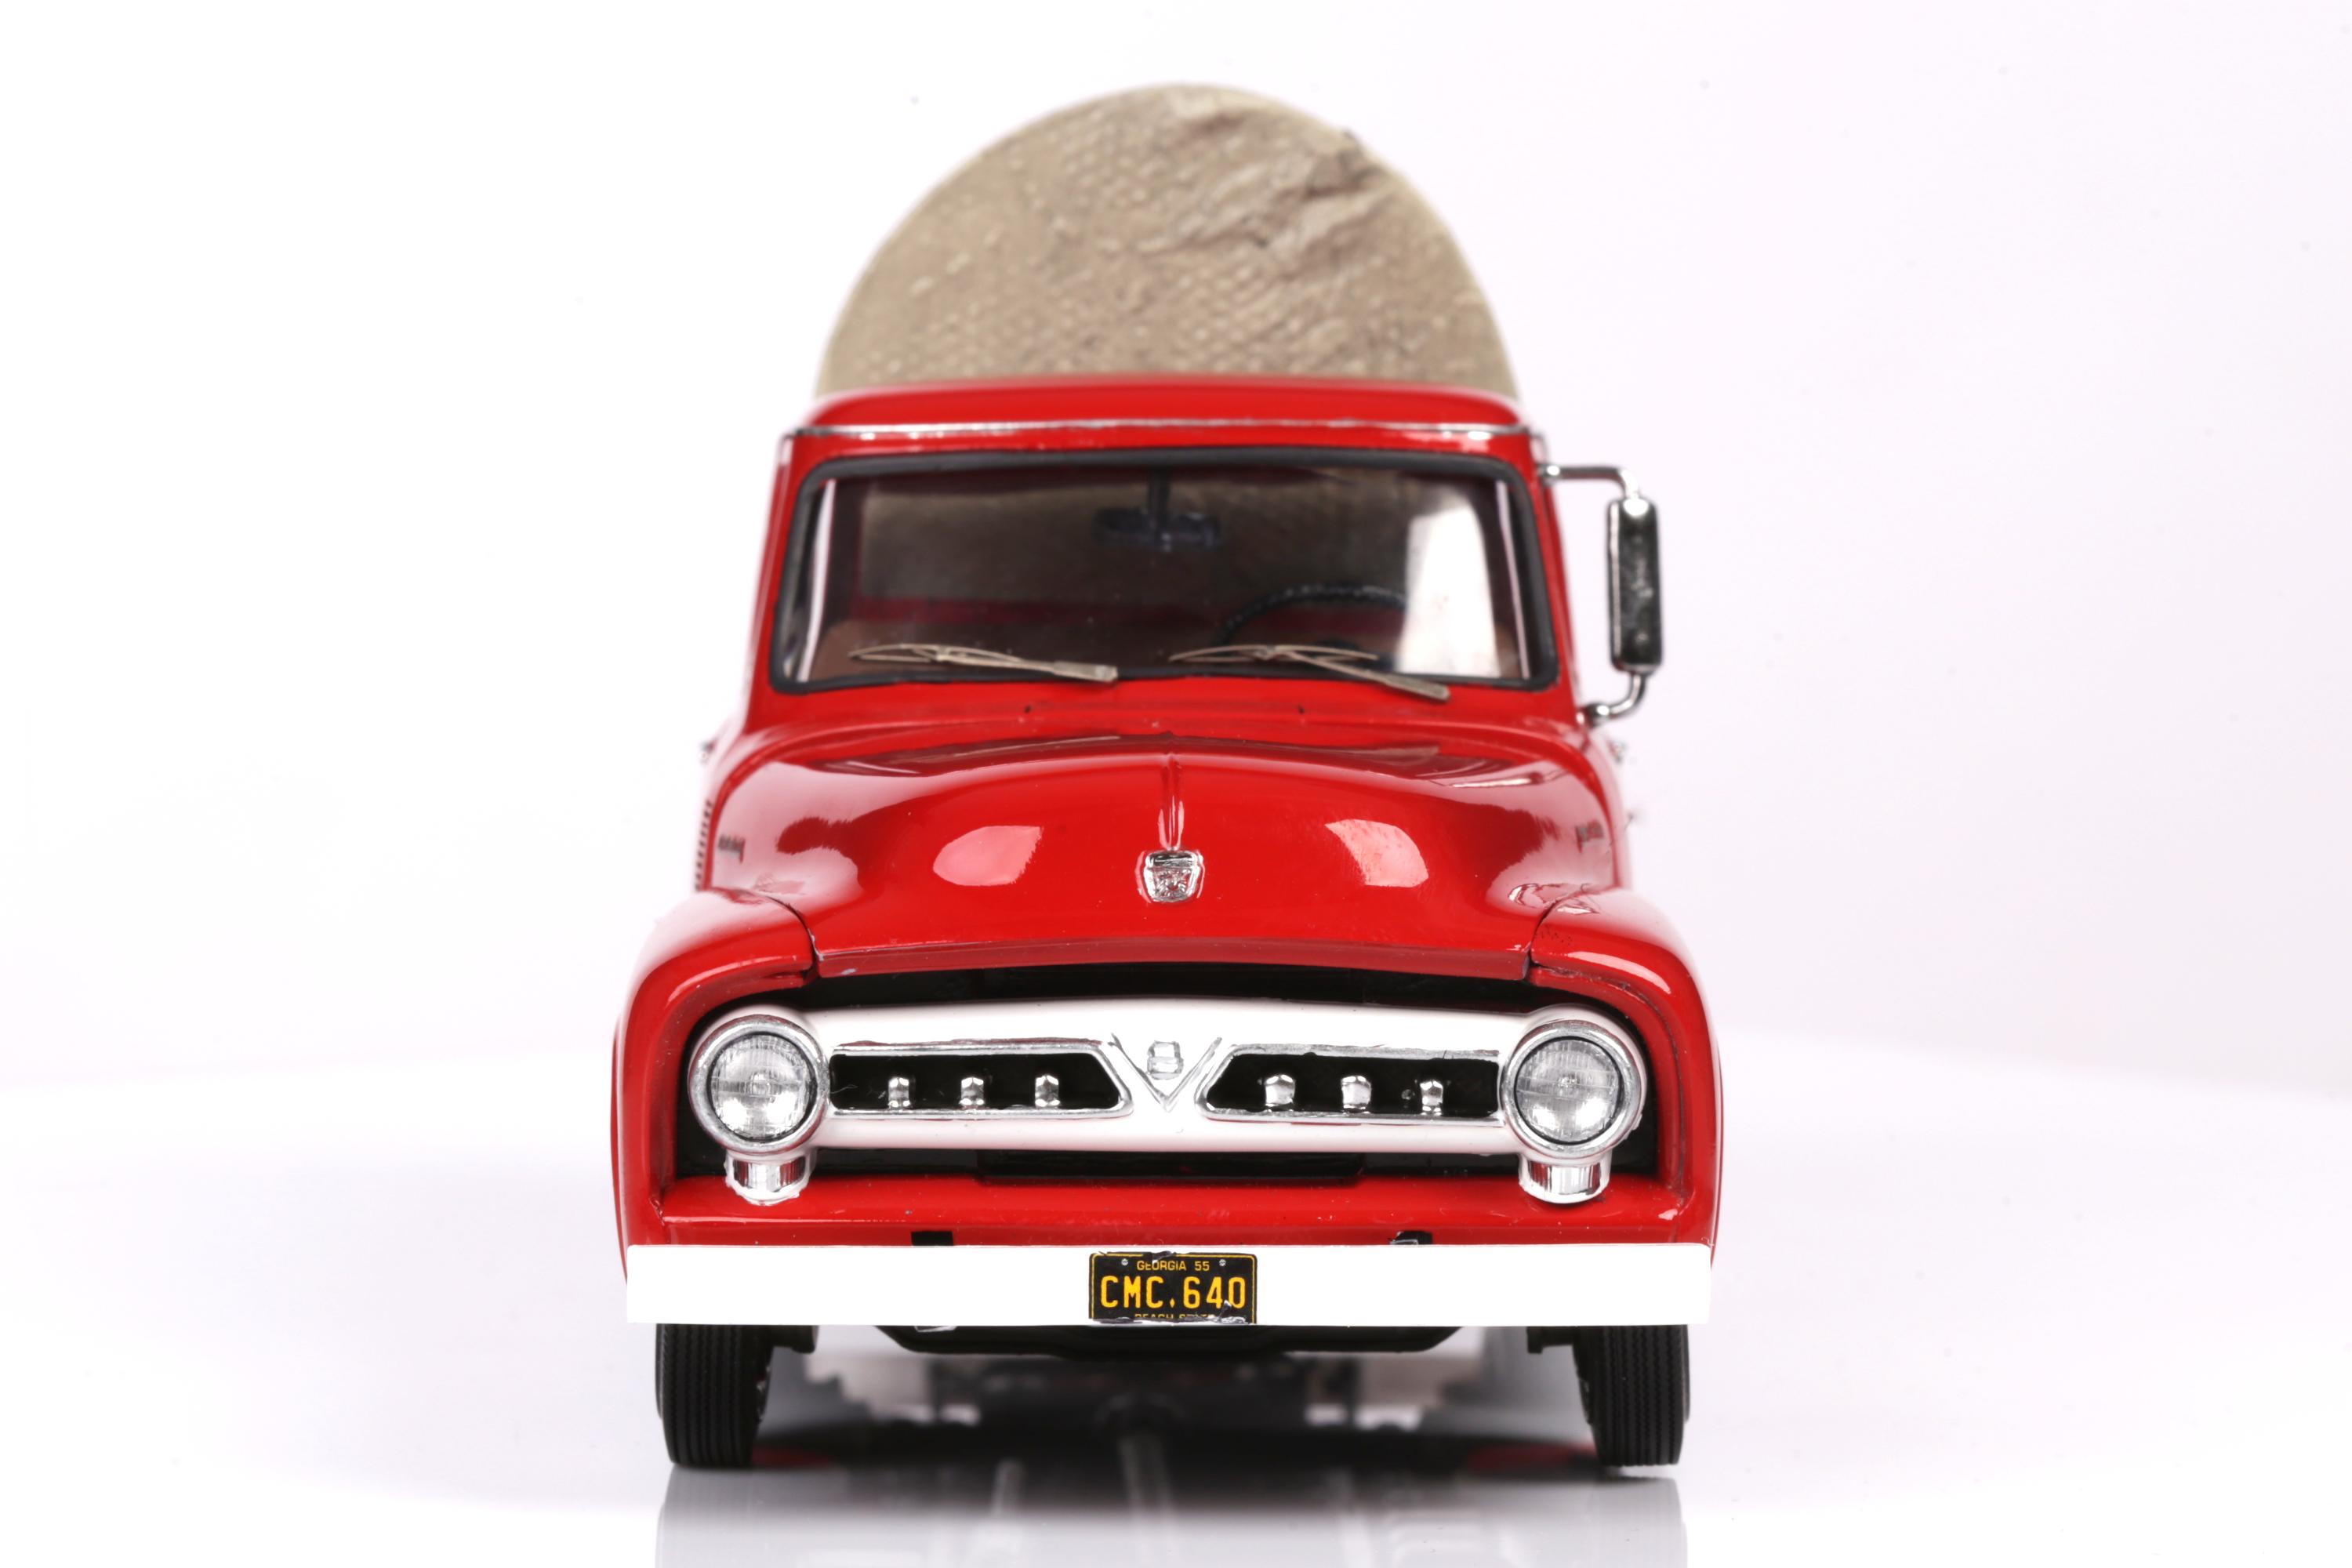
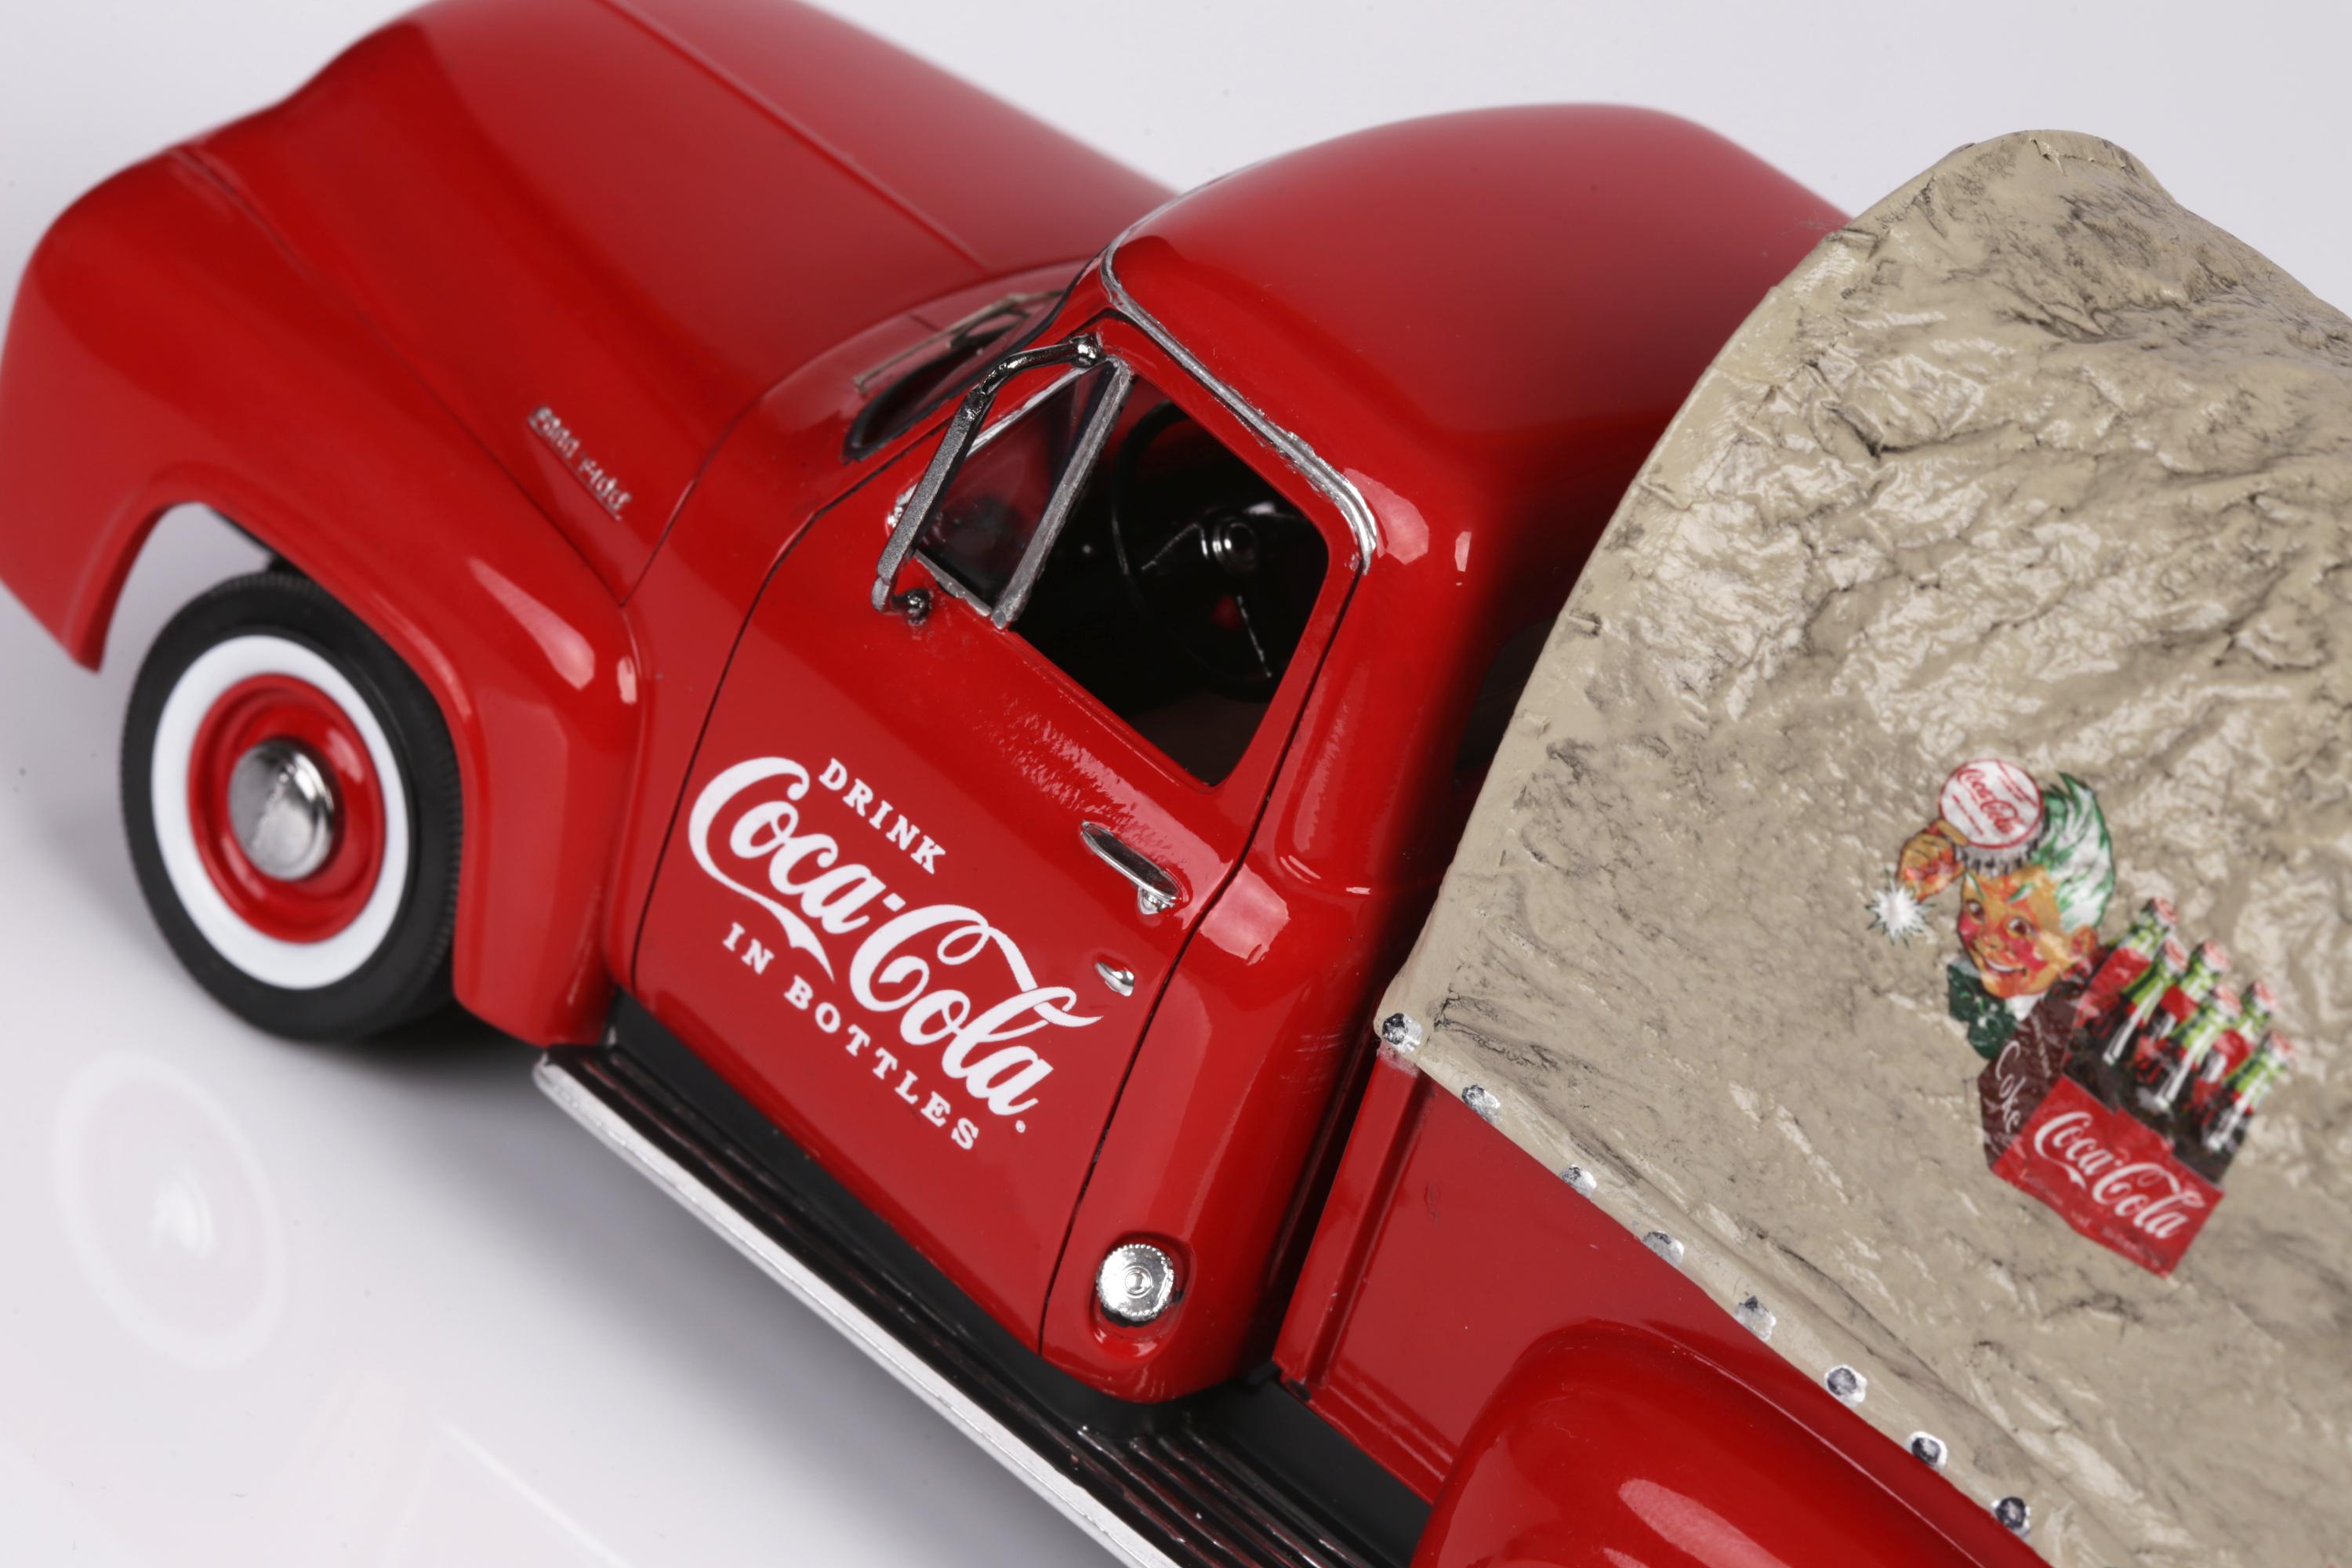
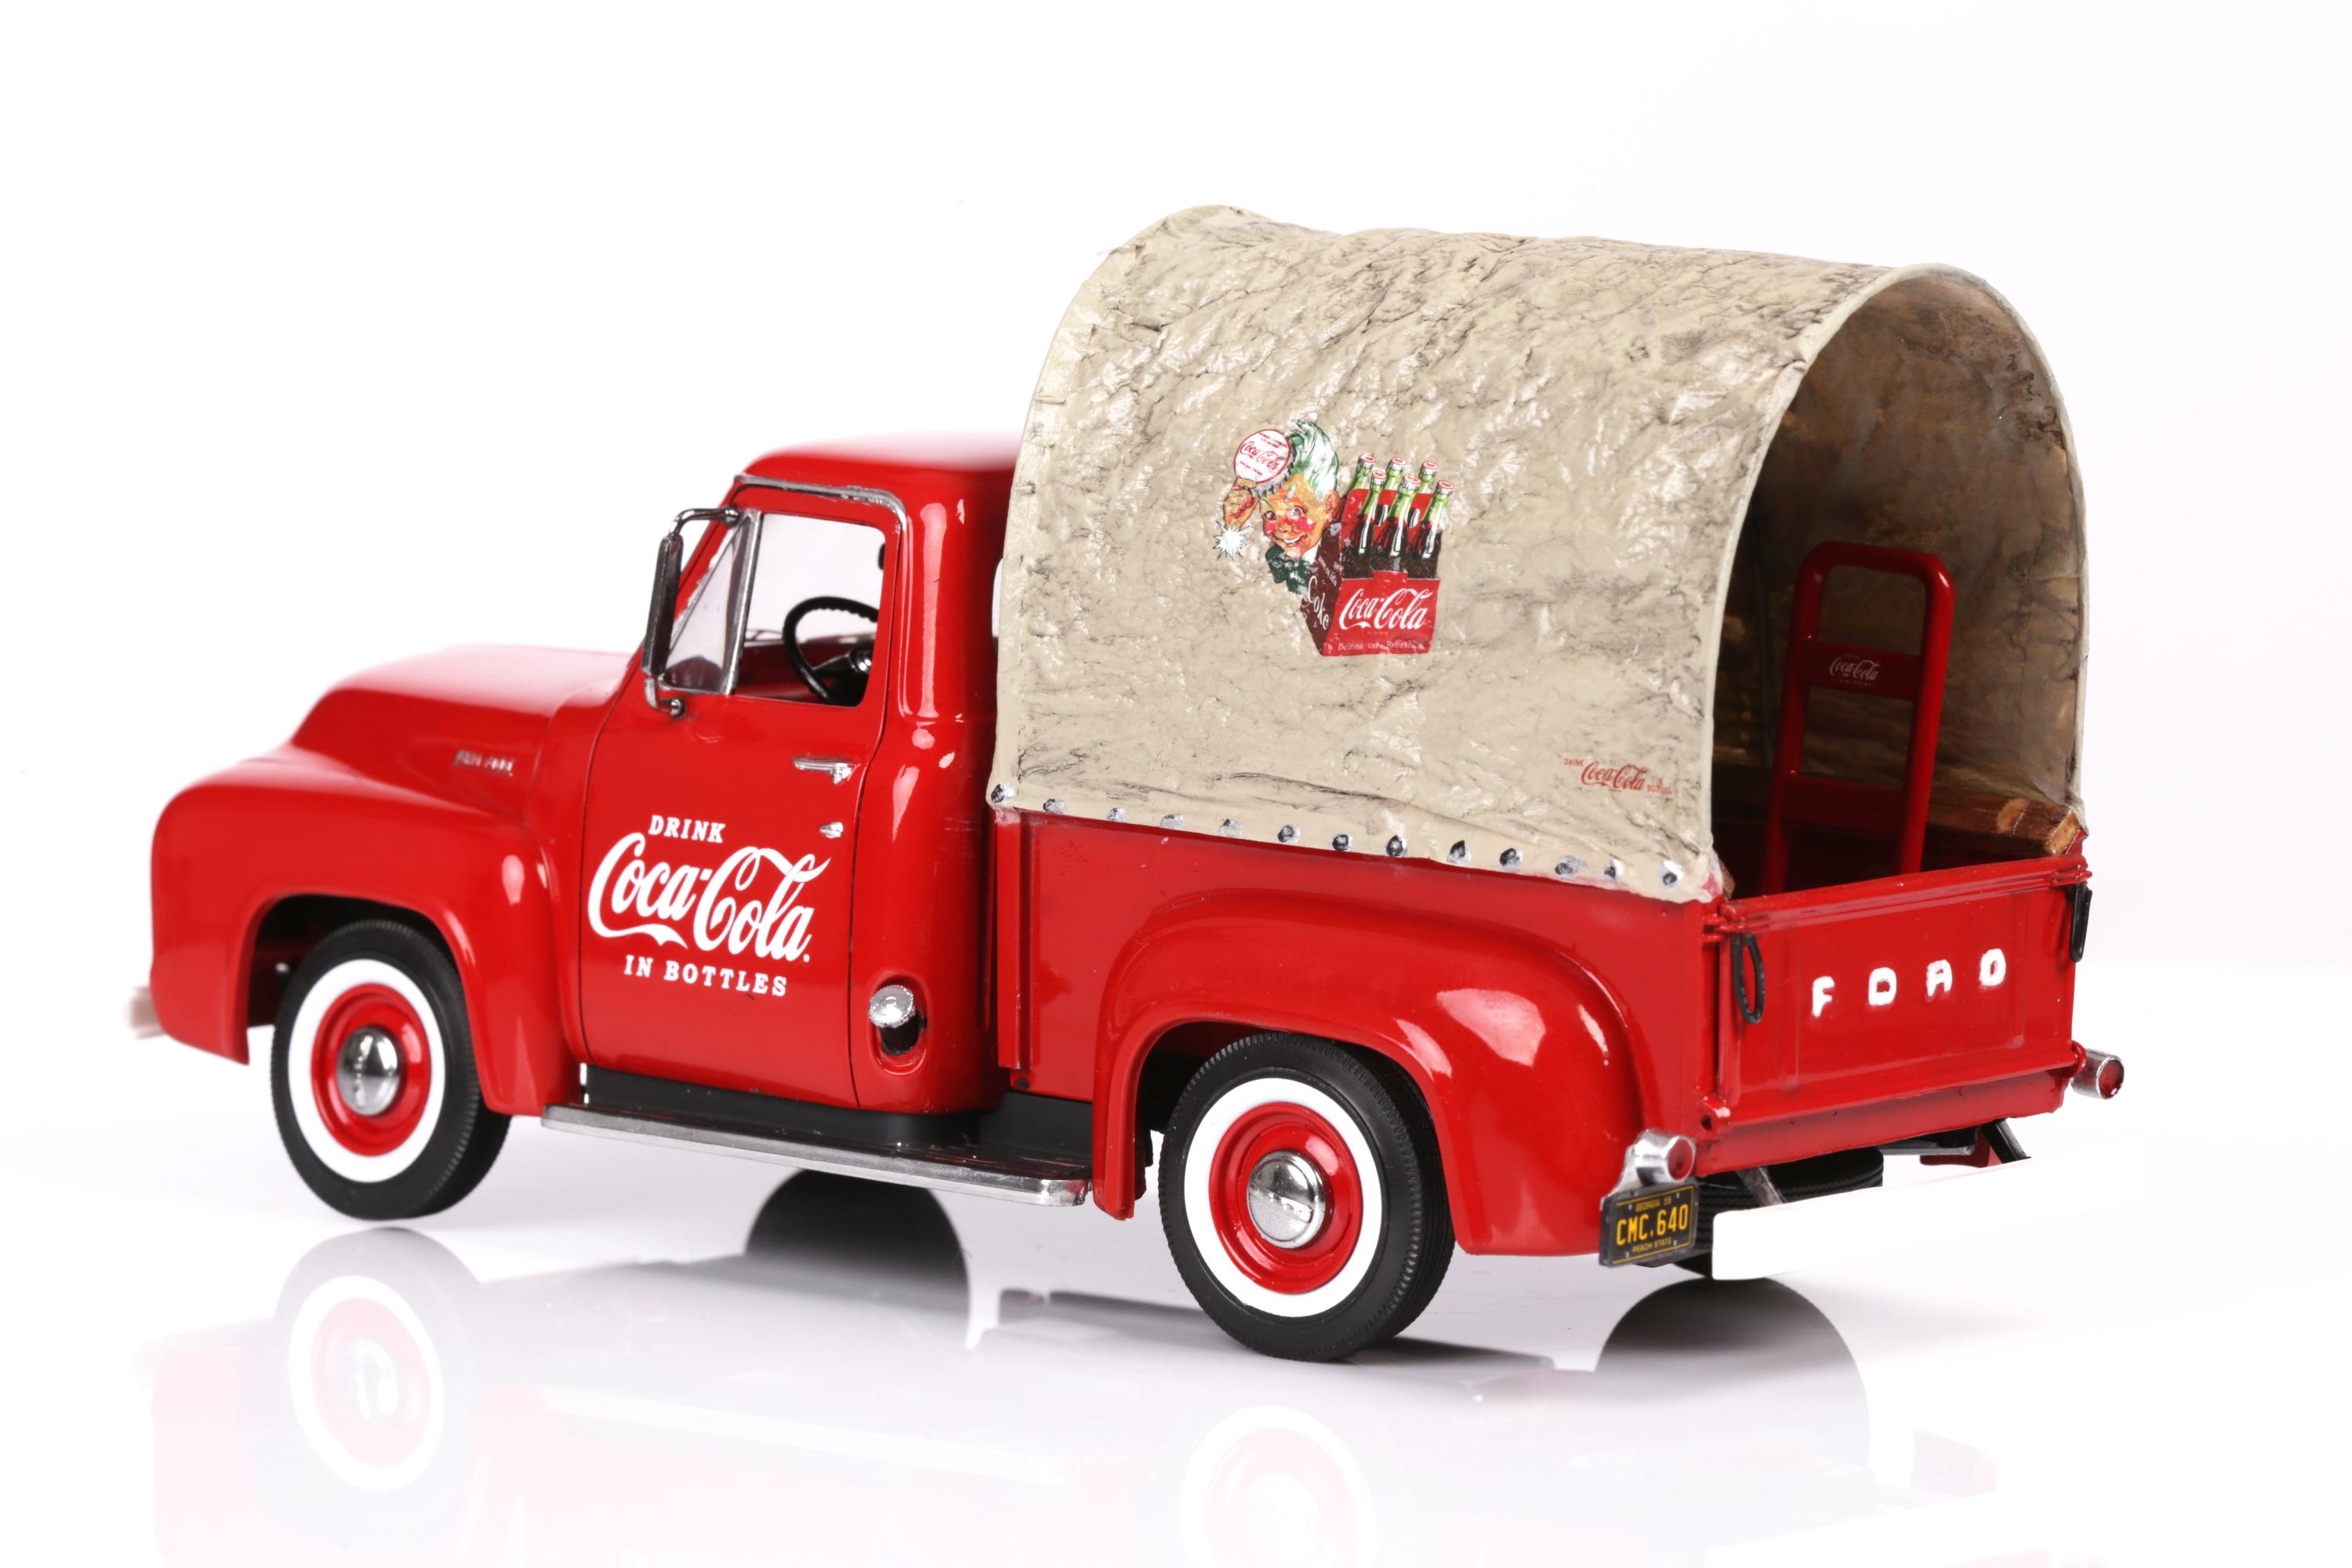
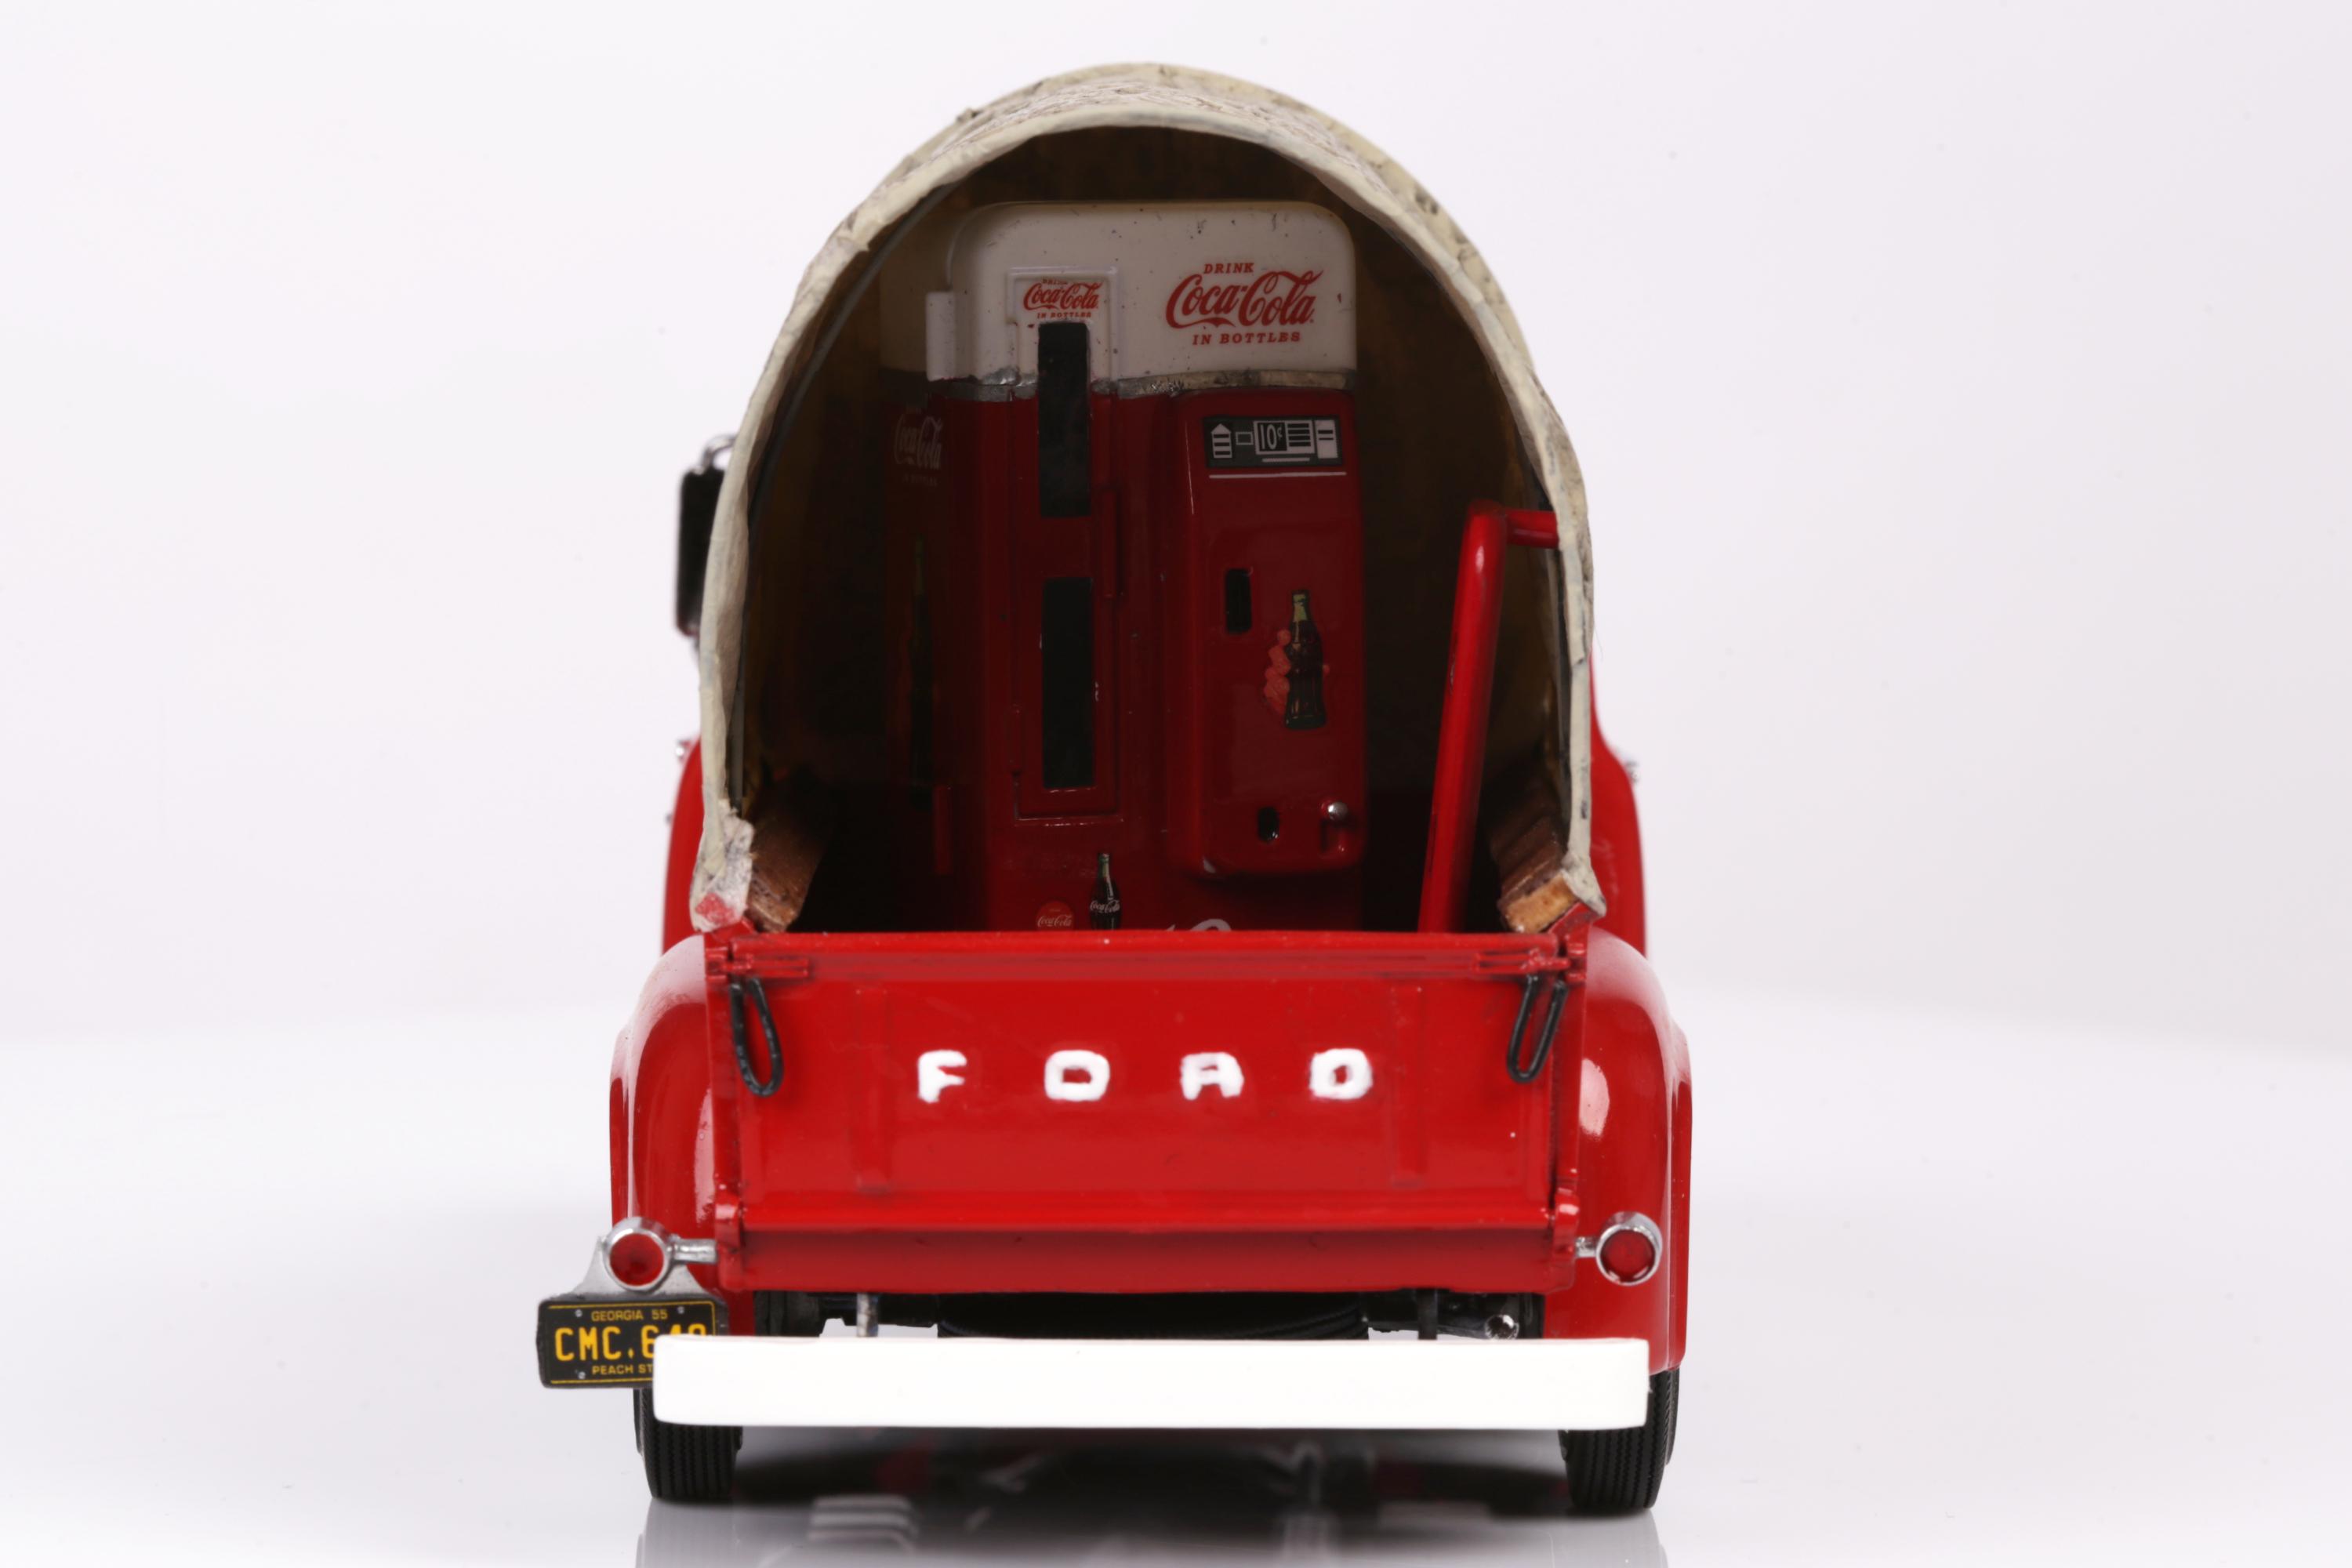
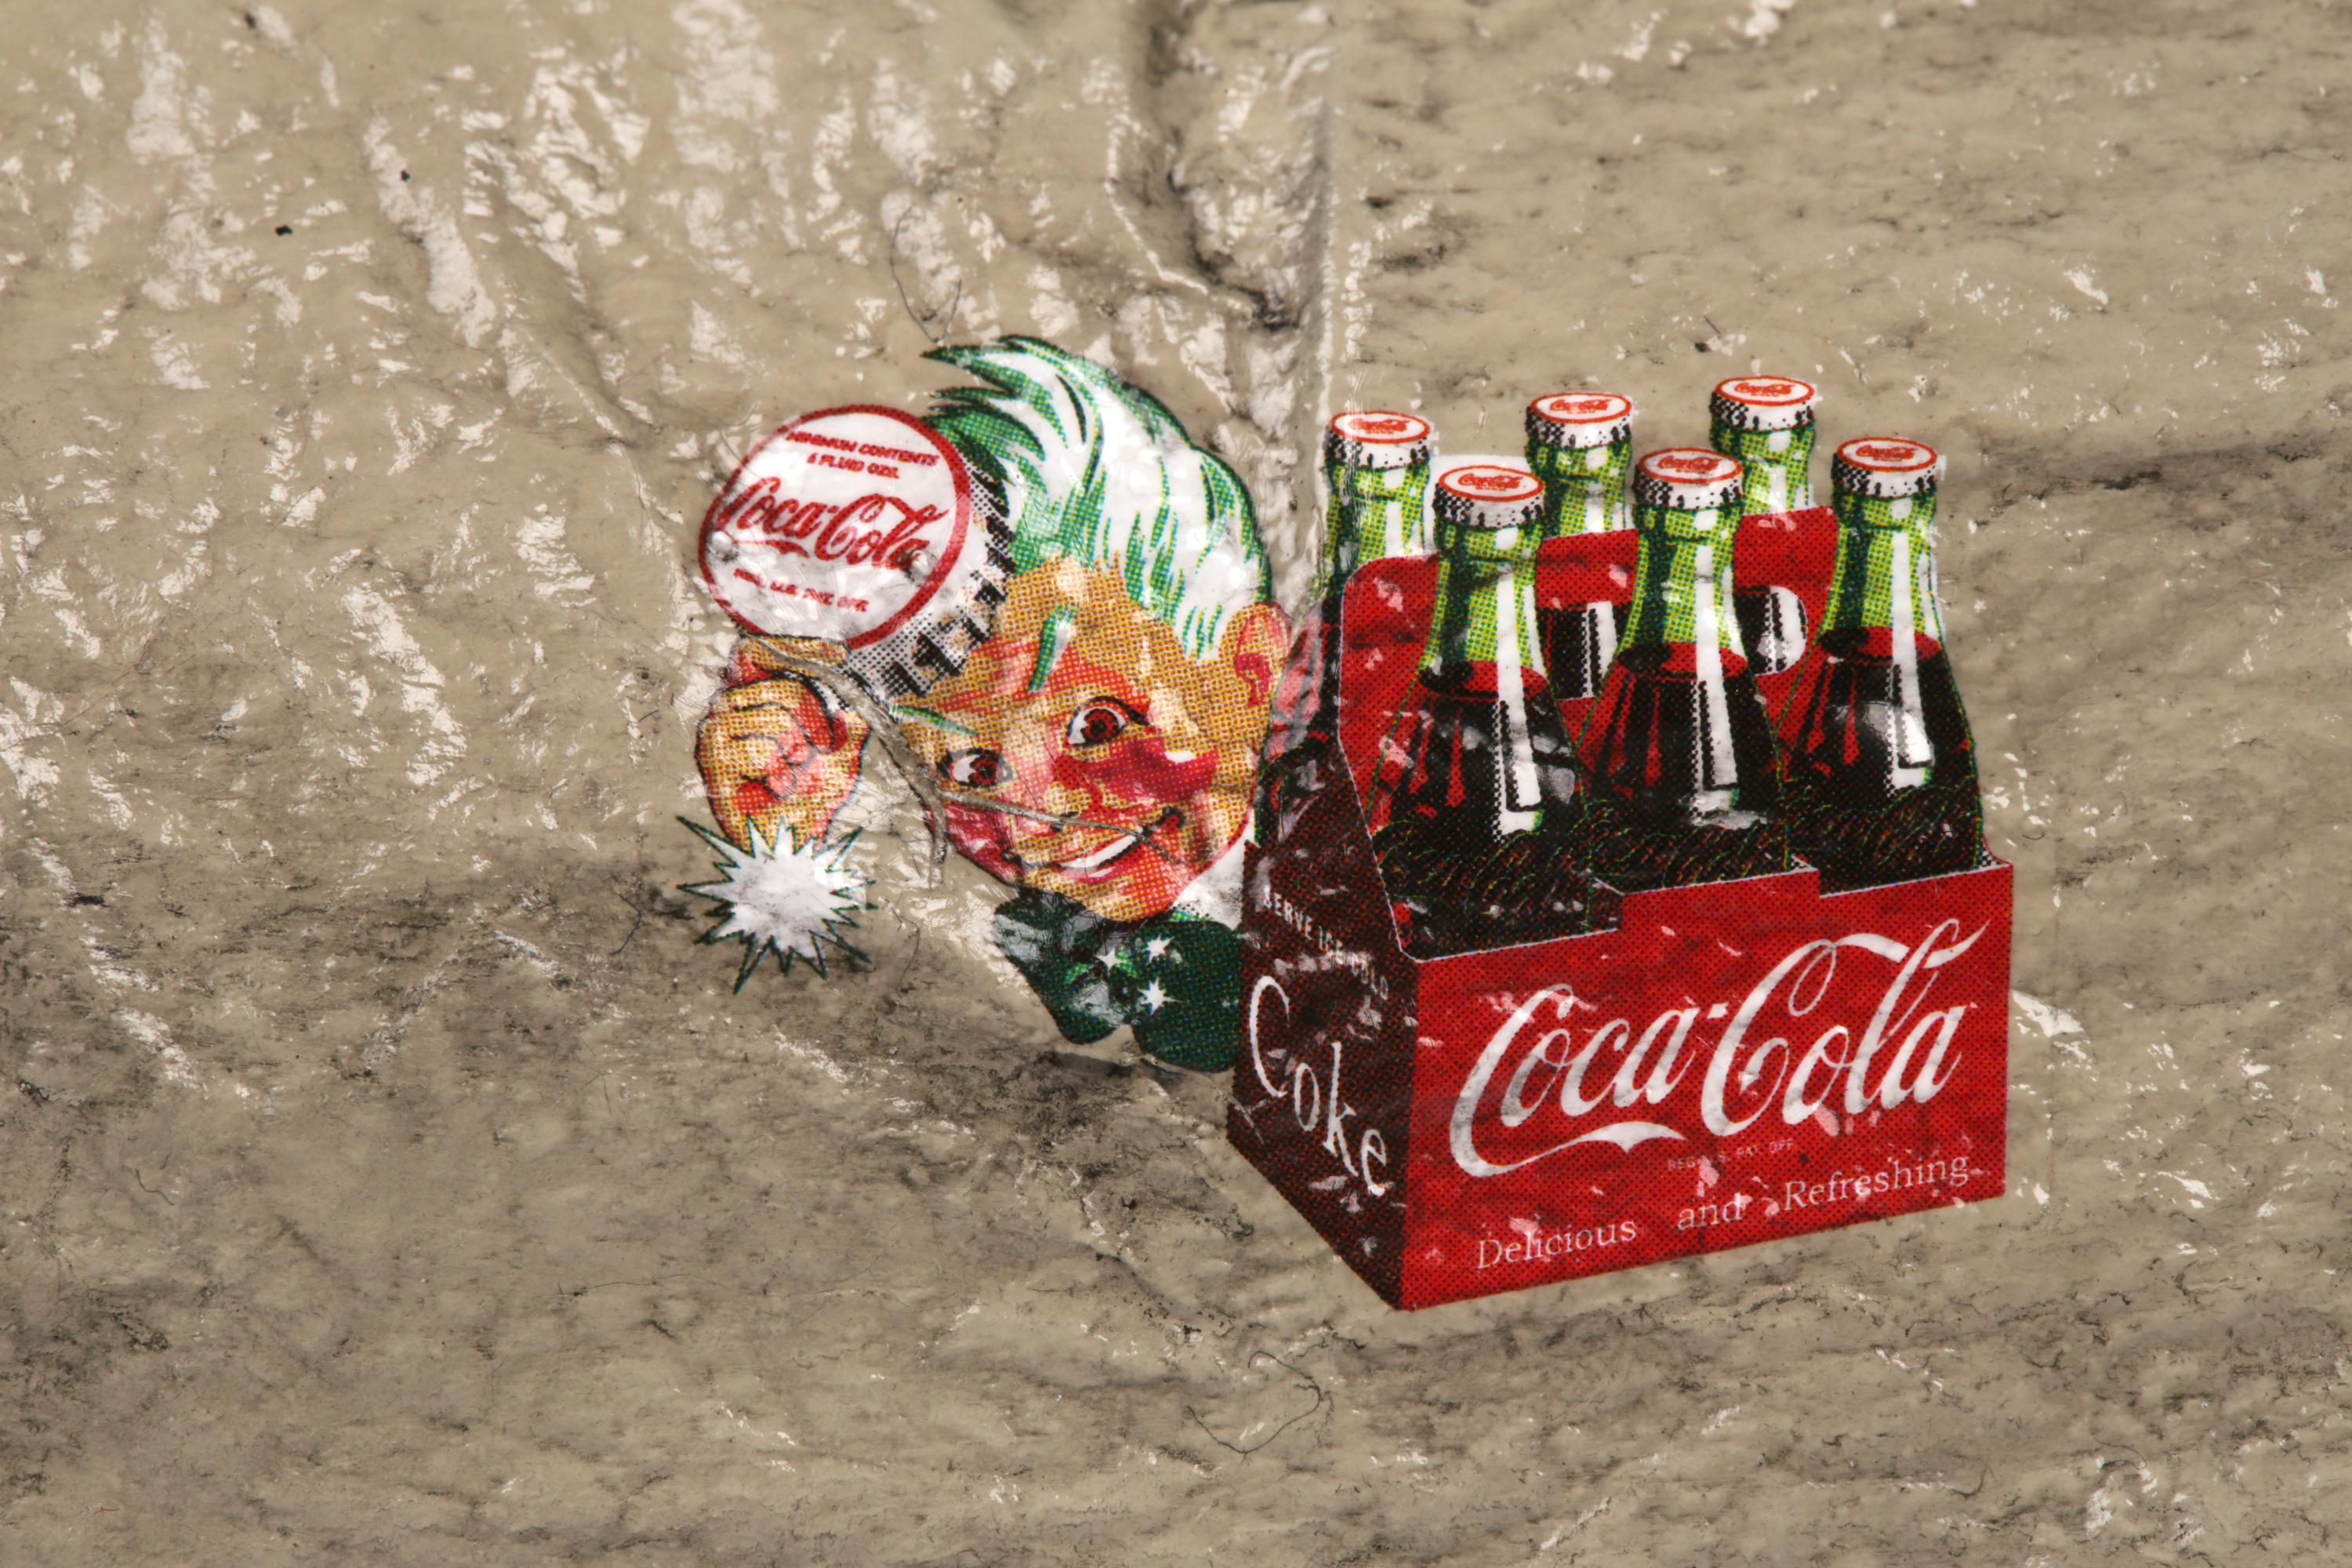
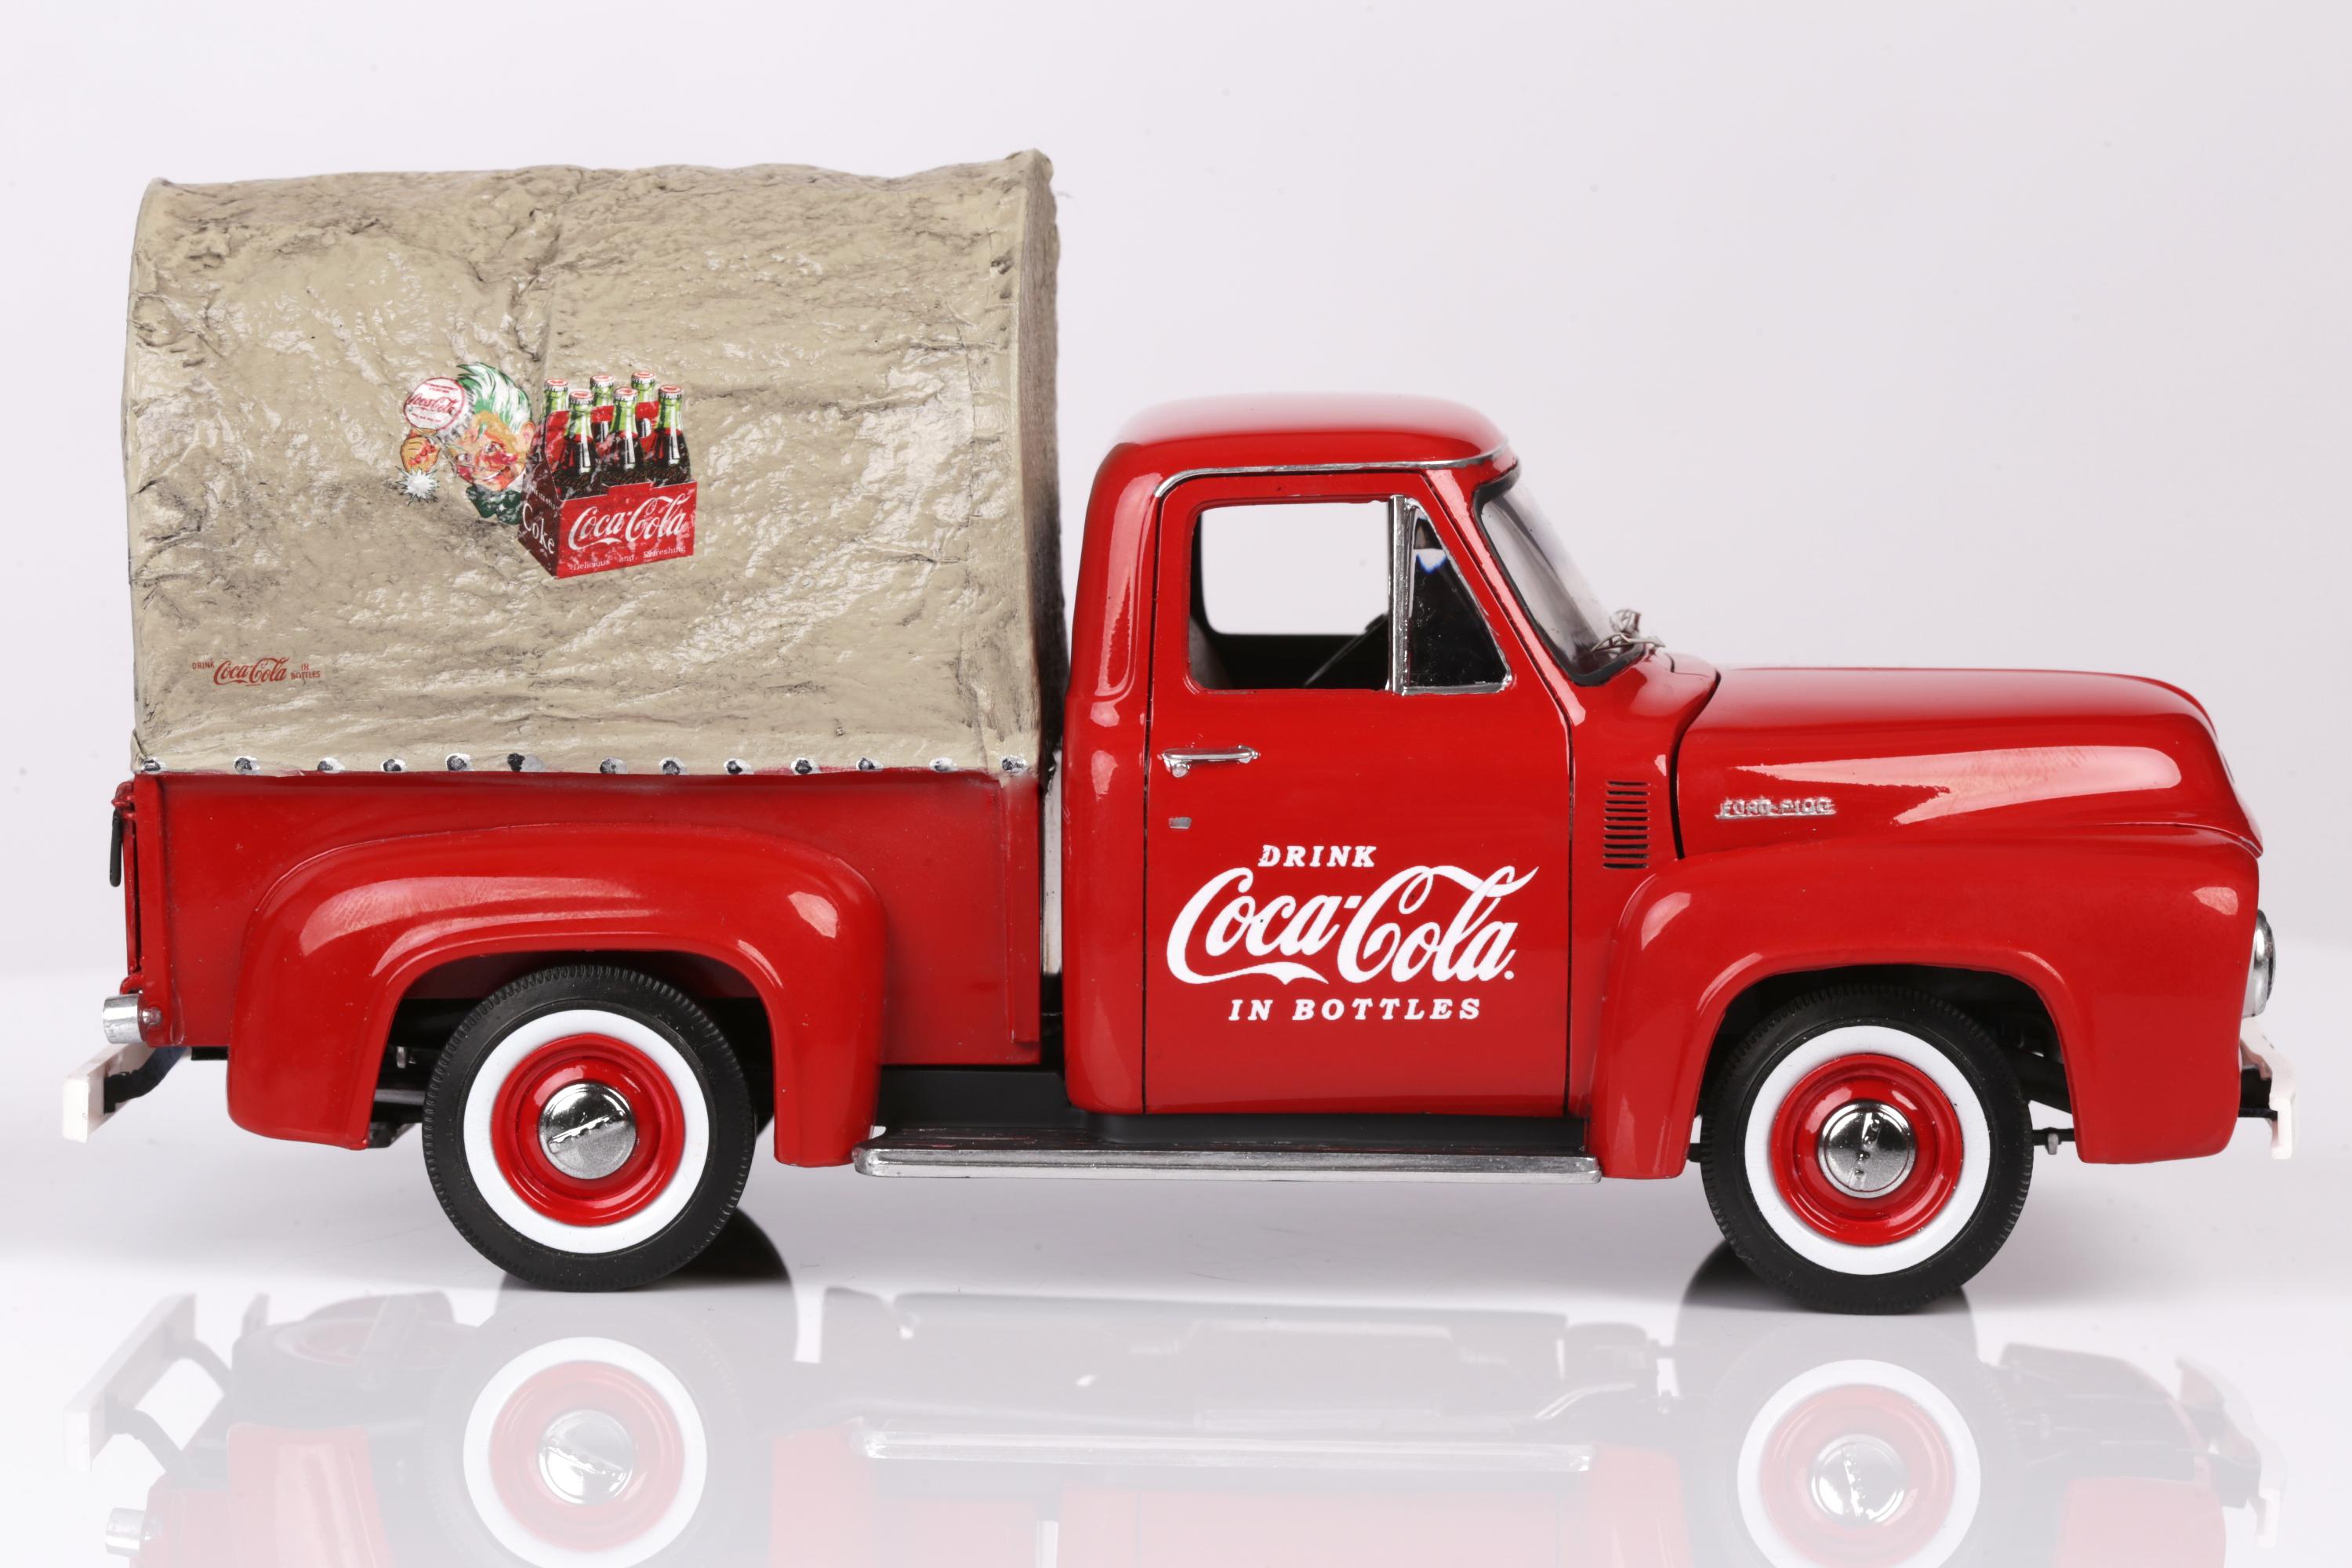
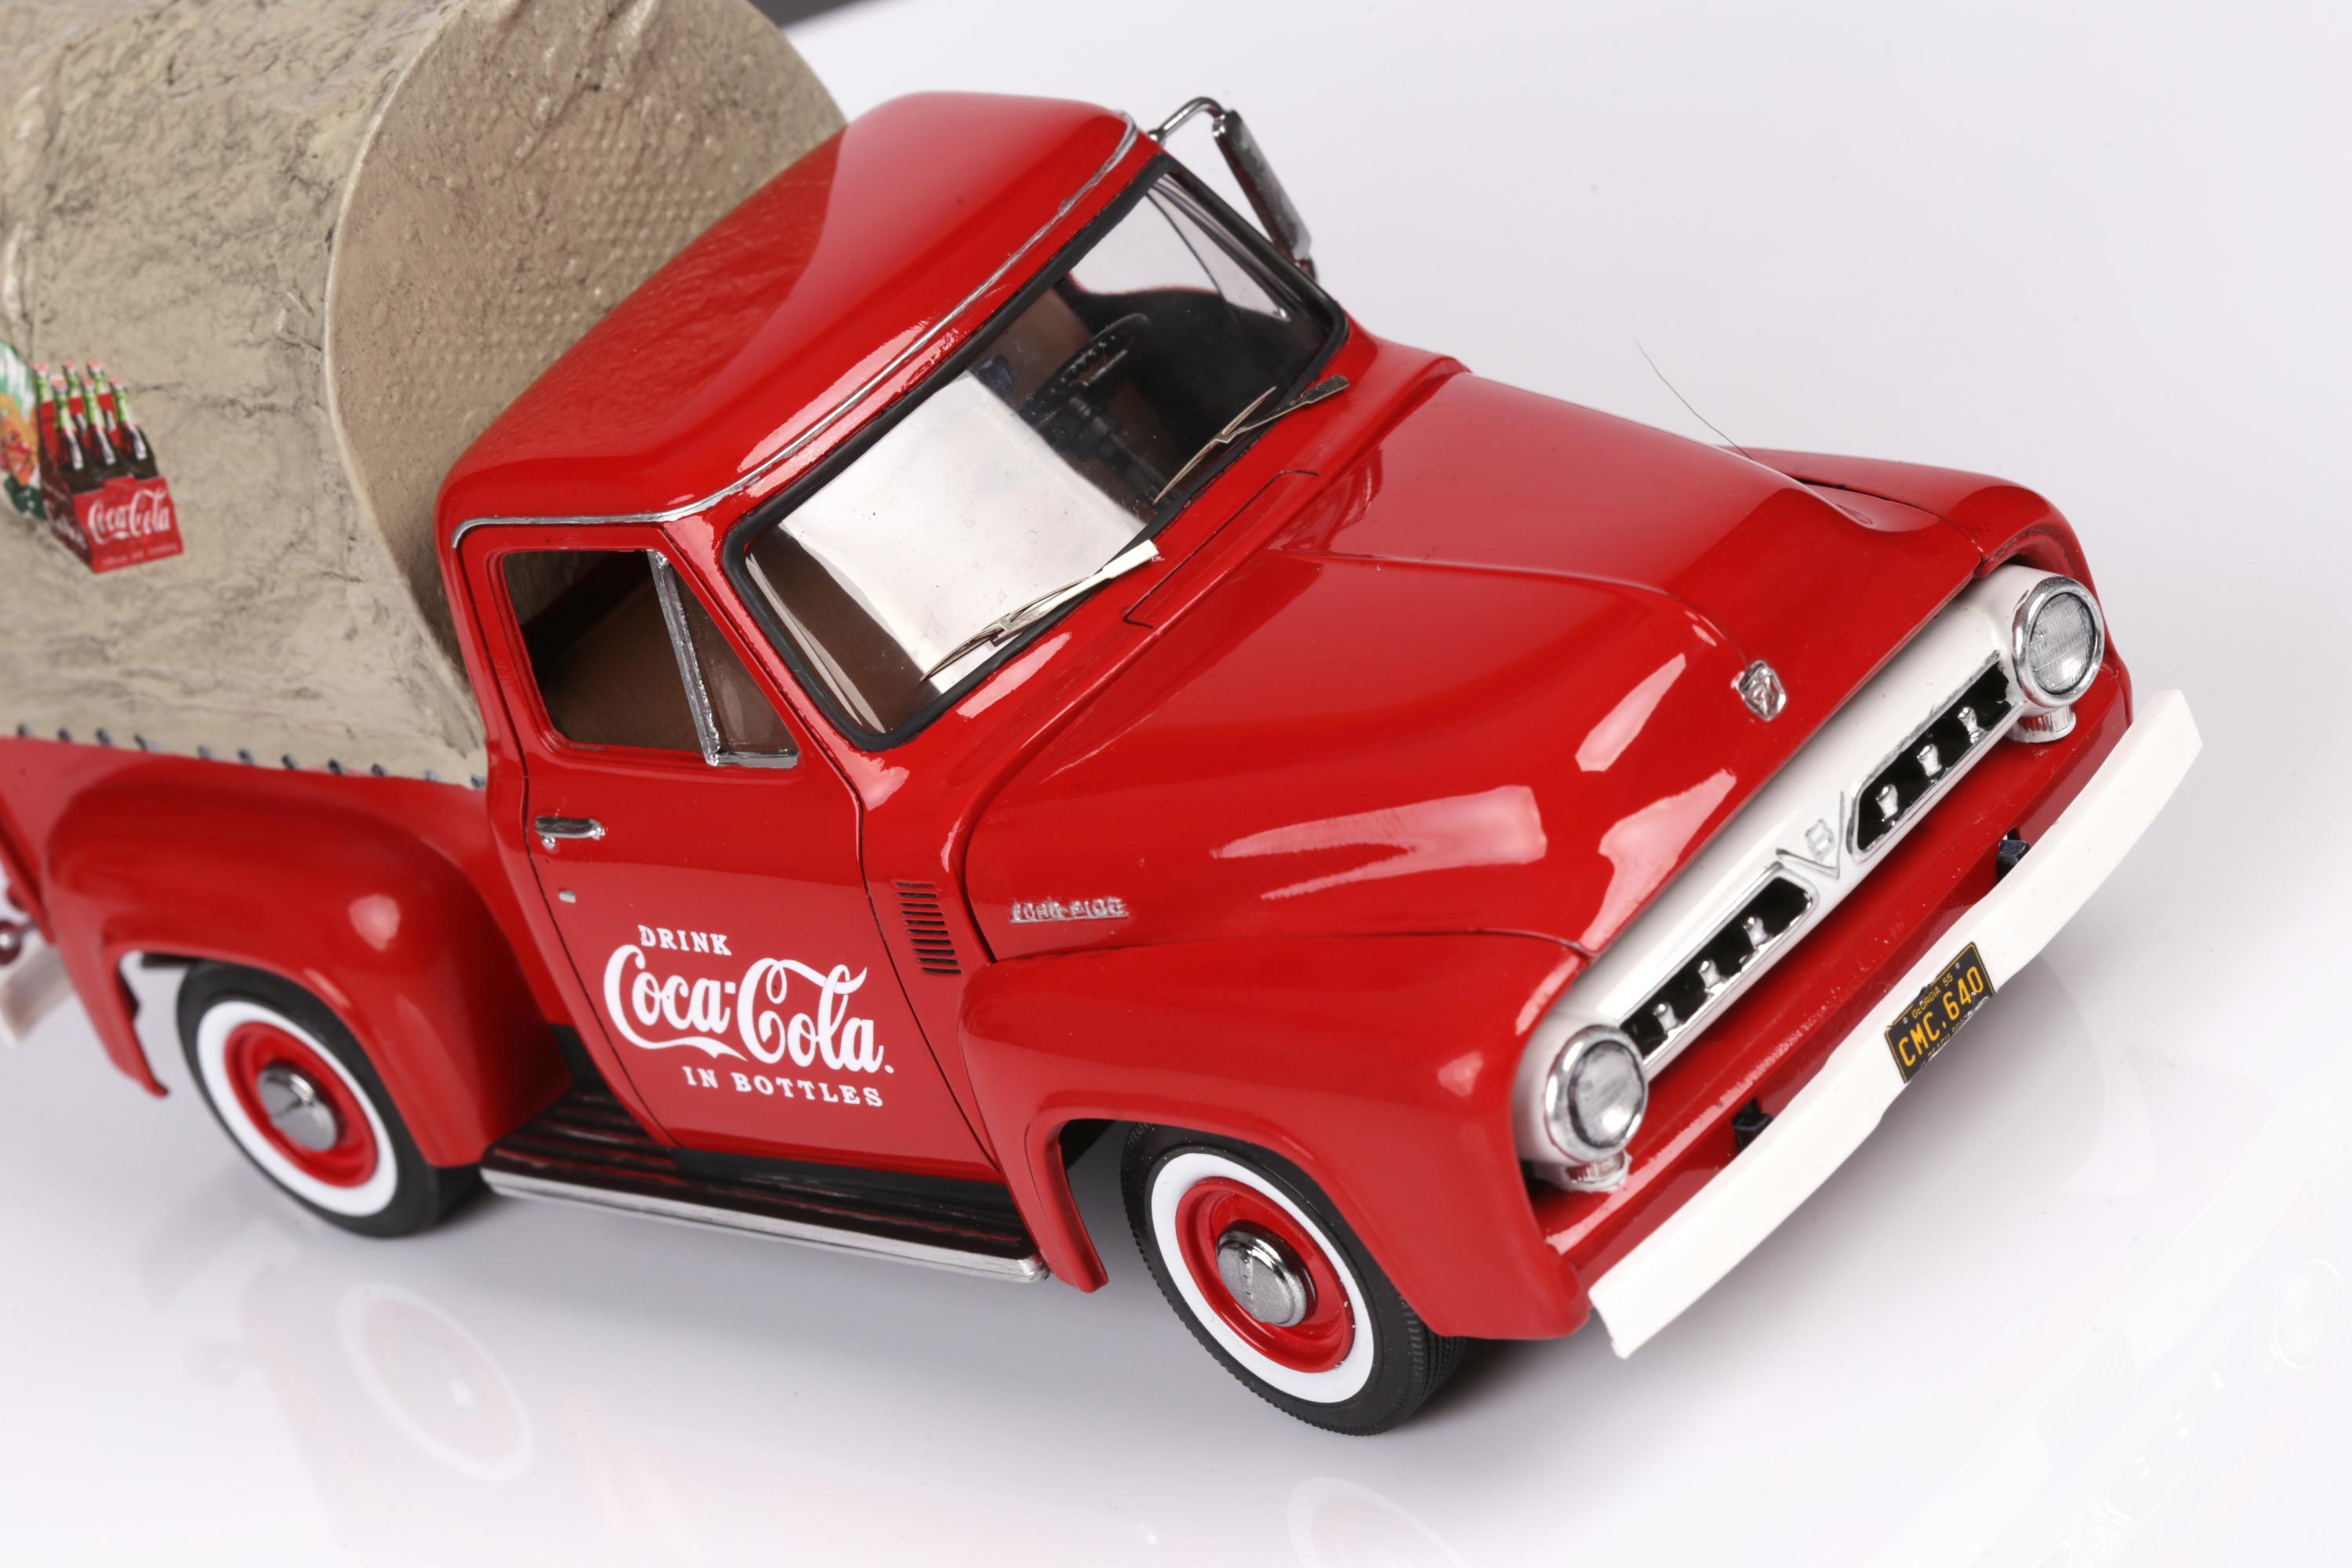
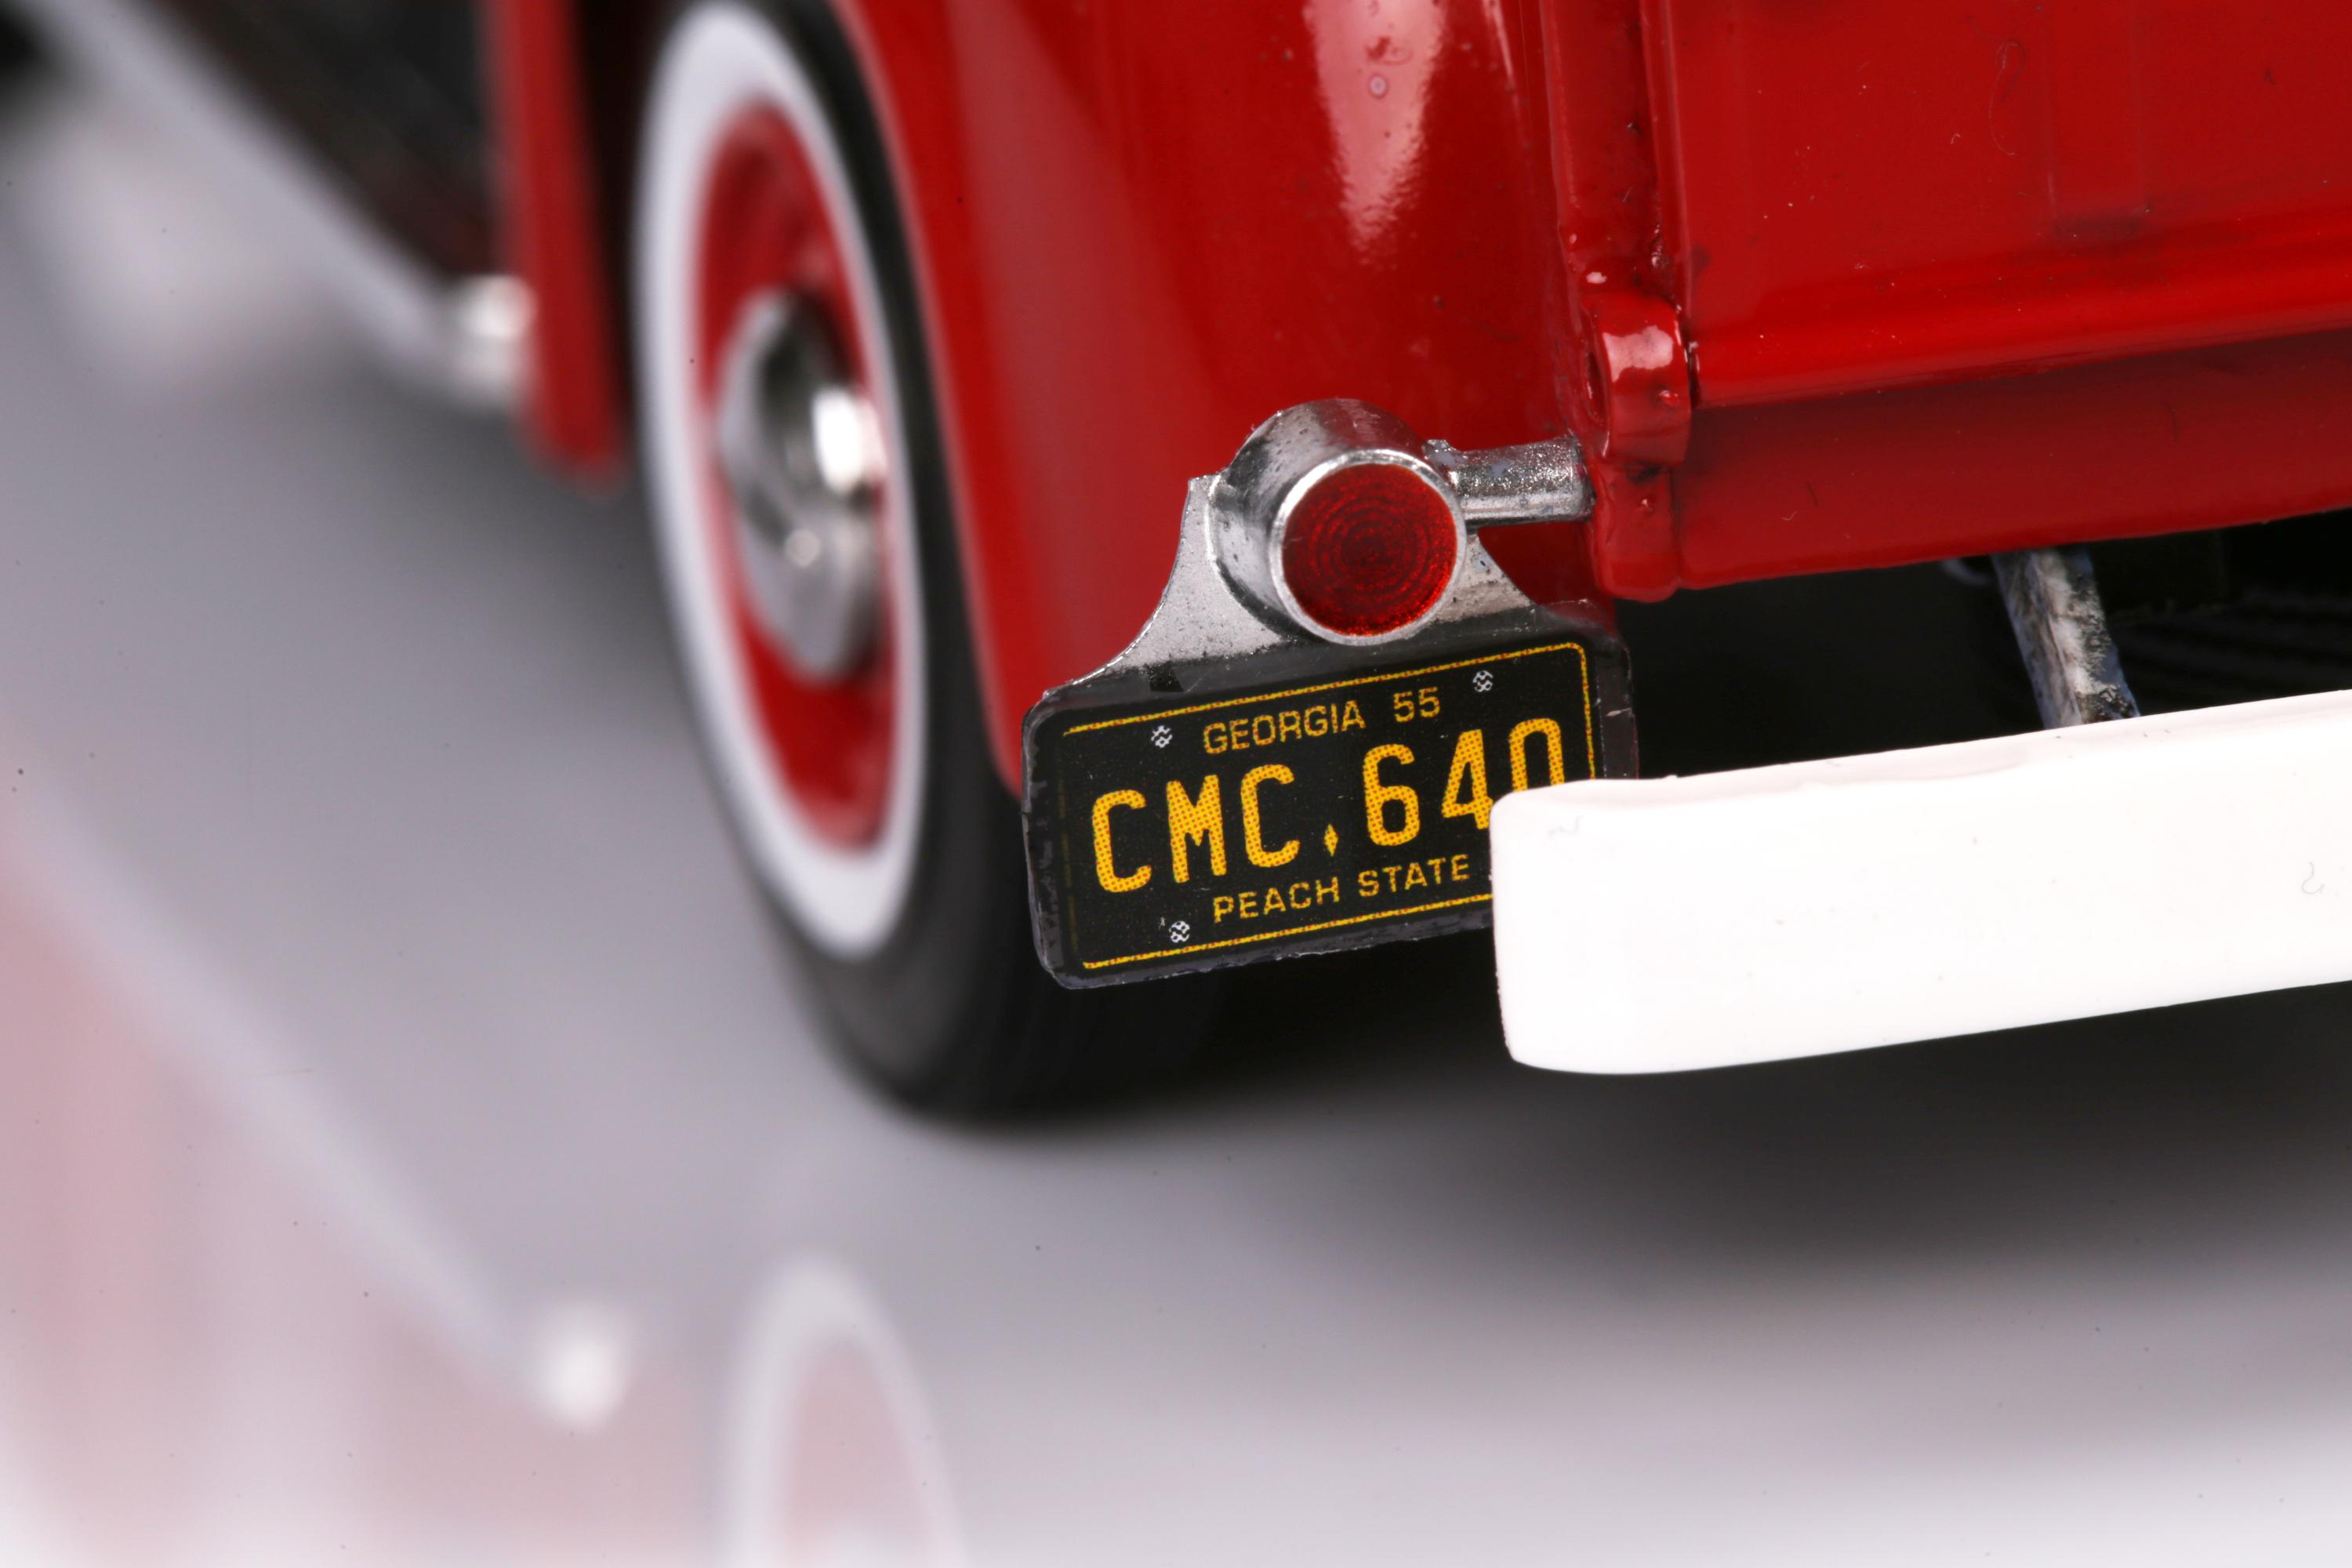
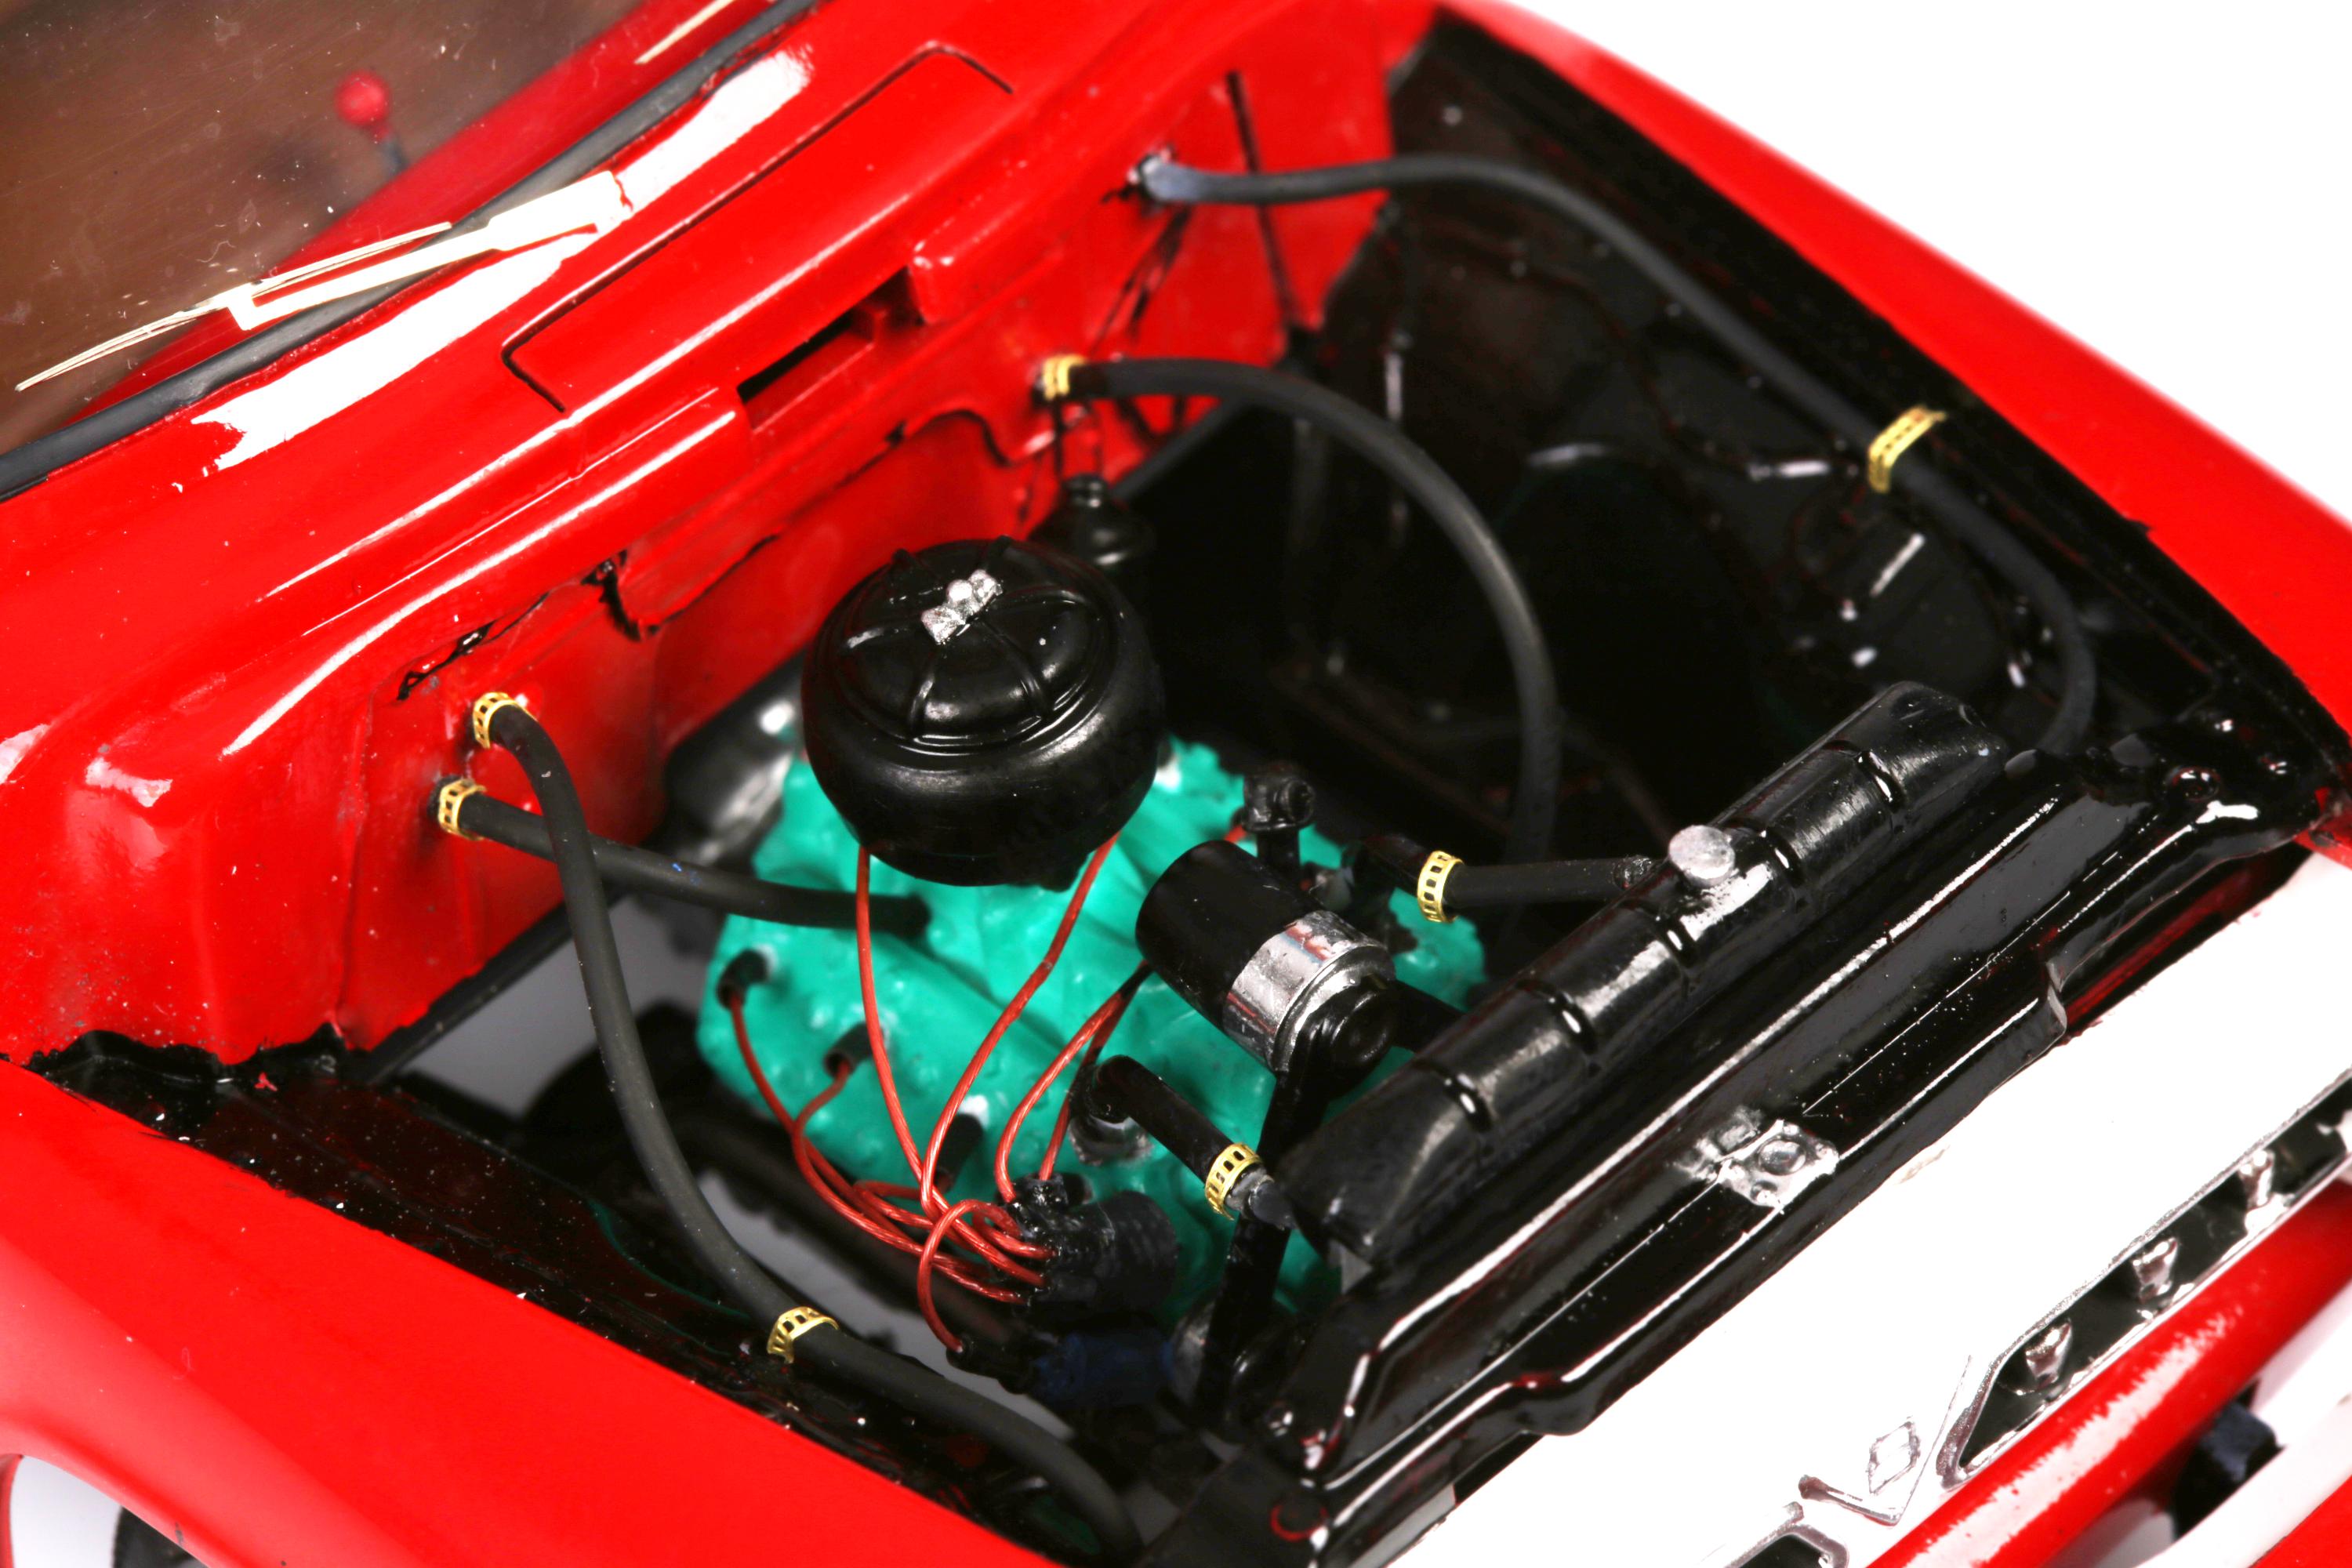
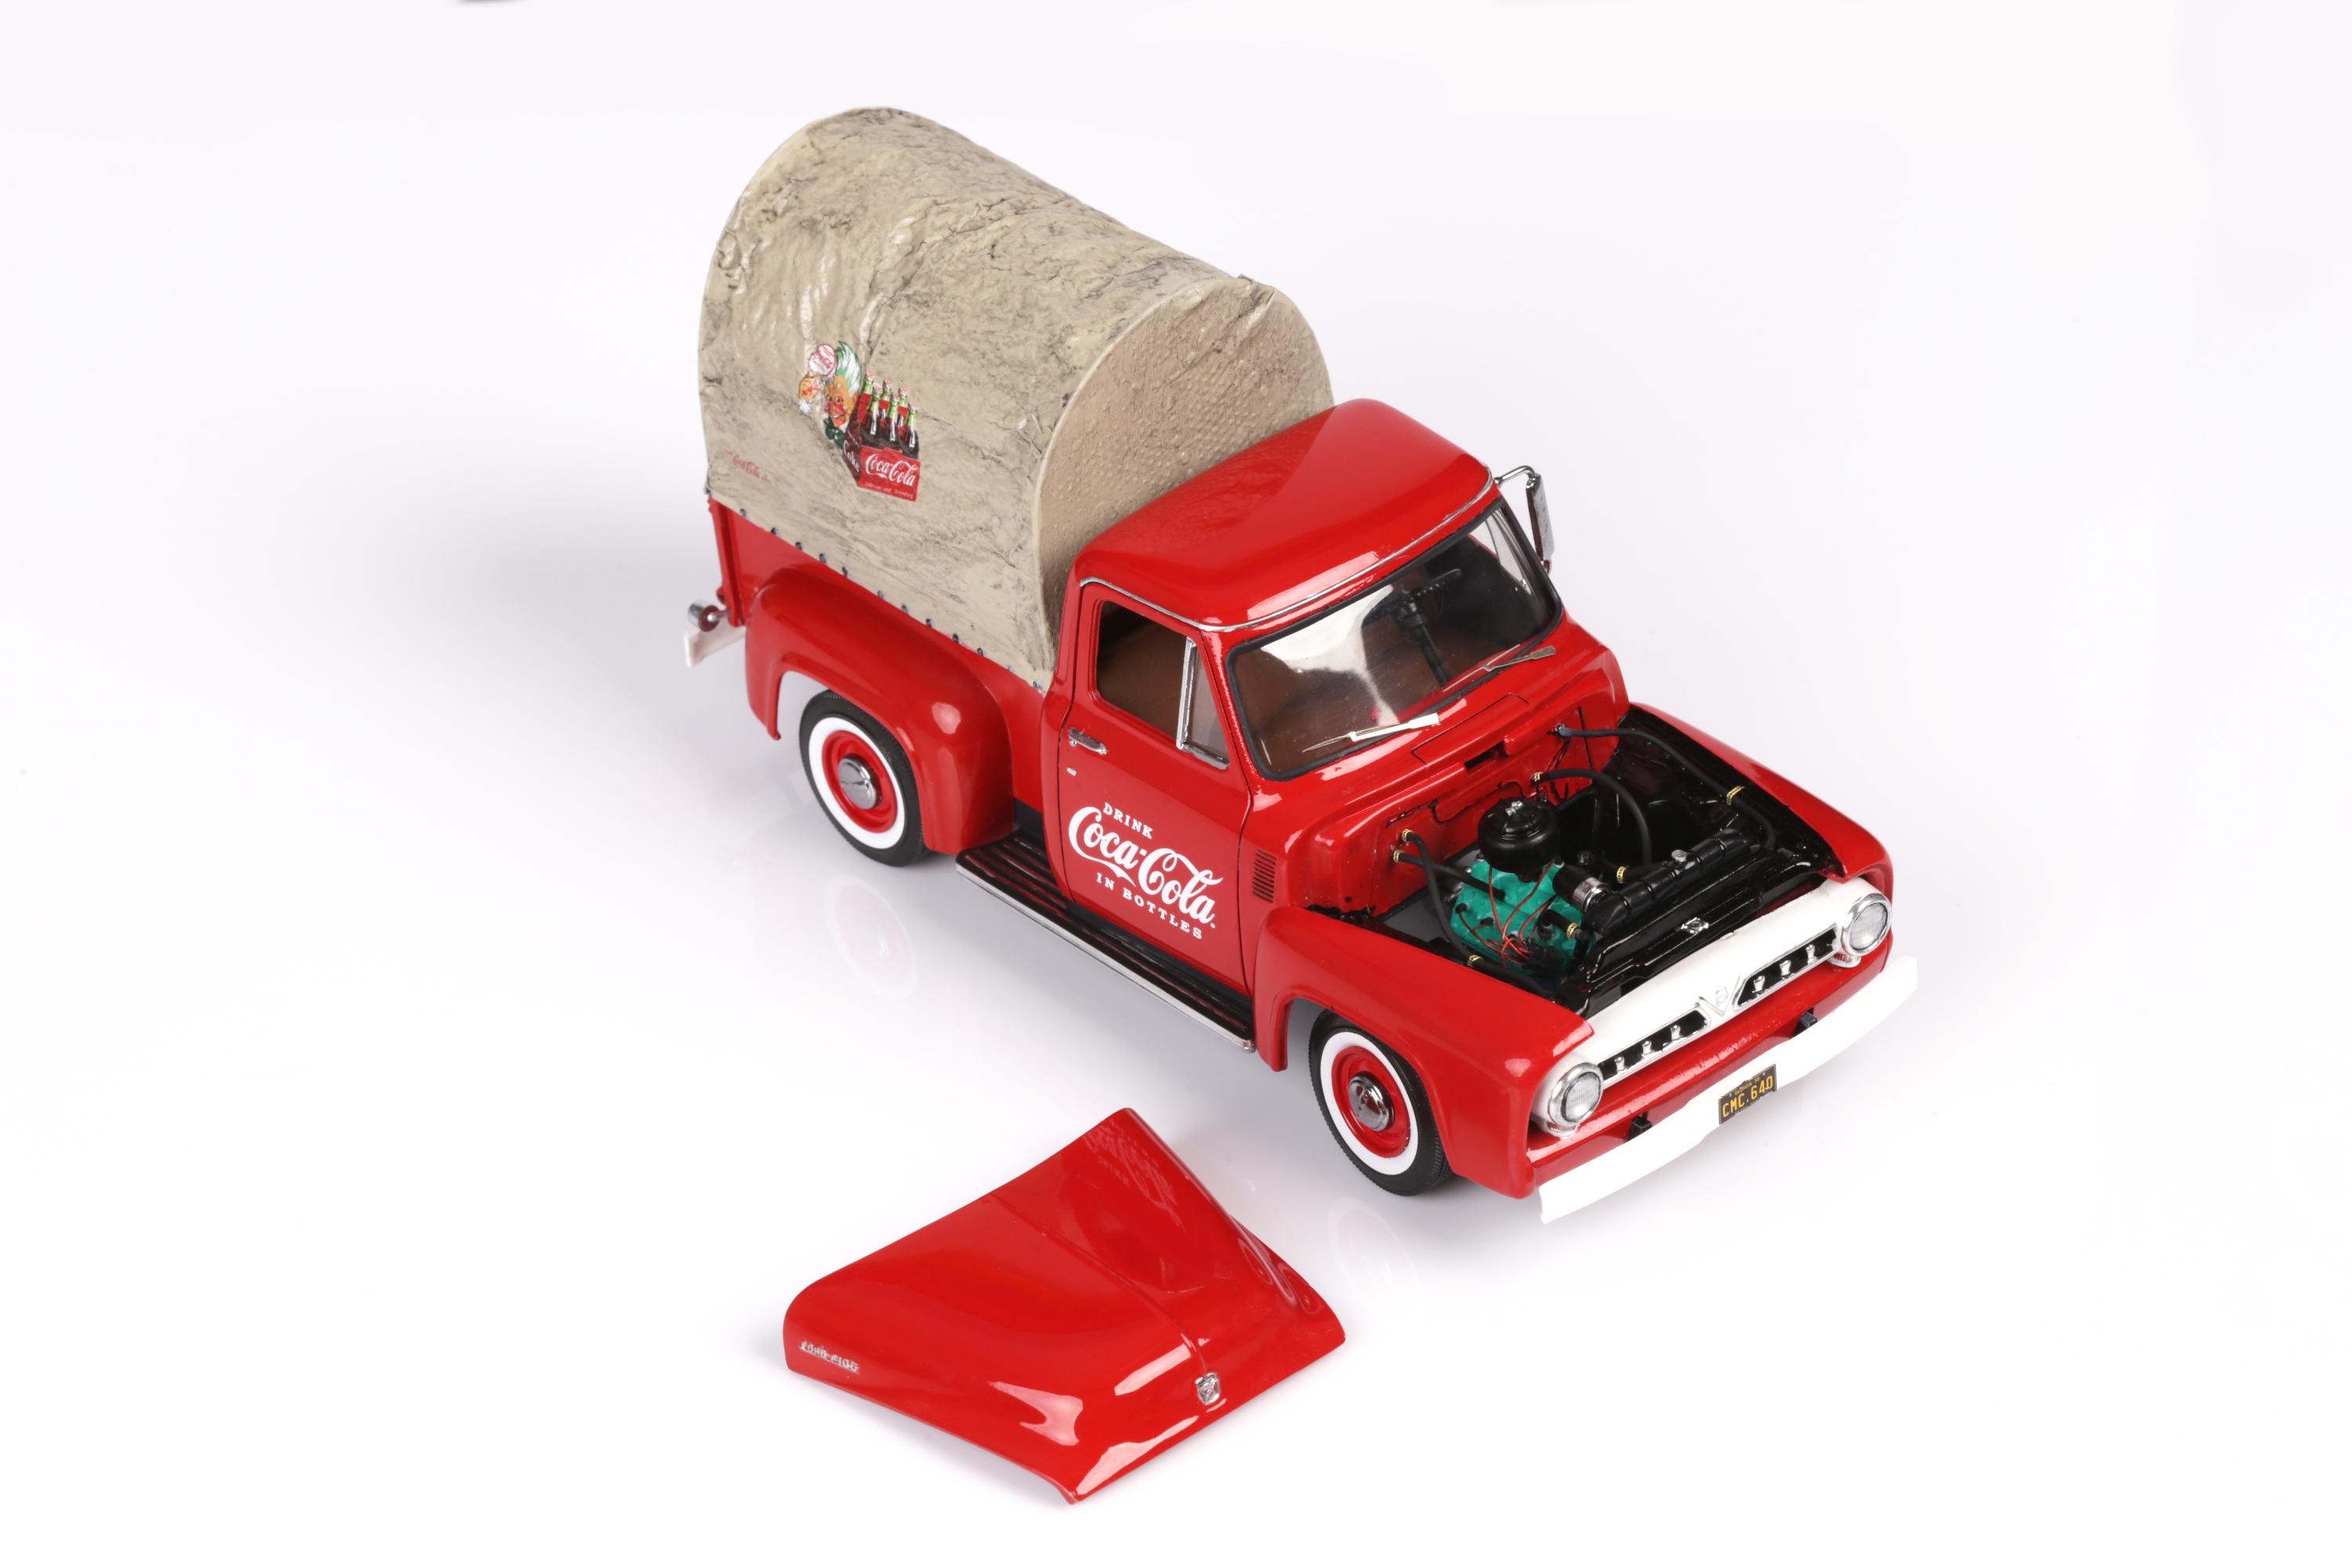
 New project done. The instruction manual from AMT is written by cavemen...really 😄 Quite a lot of work to put this sh%t together. But I'm happy with the effect. Tarpaulin - handmade from thin protective paper from decals. Color - Coca-Cola Bright Red from Creative Colors Chrome - Alclad and Molotow Video from build: https://www.youtube.com/watch?v=qNU-Jw9i8nQ (i`m talking in Polish language - nothing important )
-
When I first seen this kit when it was re-released recently, my thought's straight away were what a great candidate for a ute conversion. So sourced a couple kits from Model Round Up, then thought about it for a week as to how to approach things and how I was going to build it. First things first pick some wheels. After deciding the wheel's, they were fitted to some new 2mm brass axles. Then the ride height was roughed in. Still need to tweak the front and level things out a bit. Just how I like them, Low! Worked out how I was going to cut and re work the roof.
-
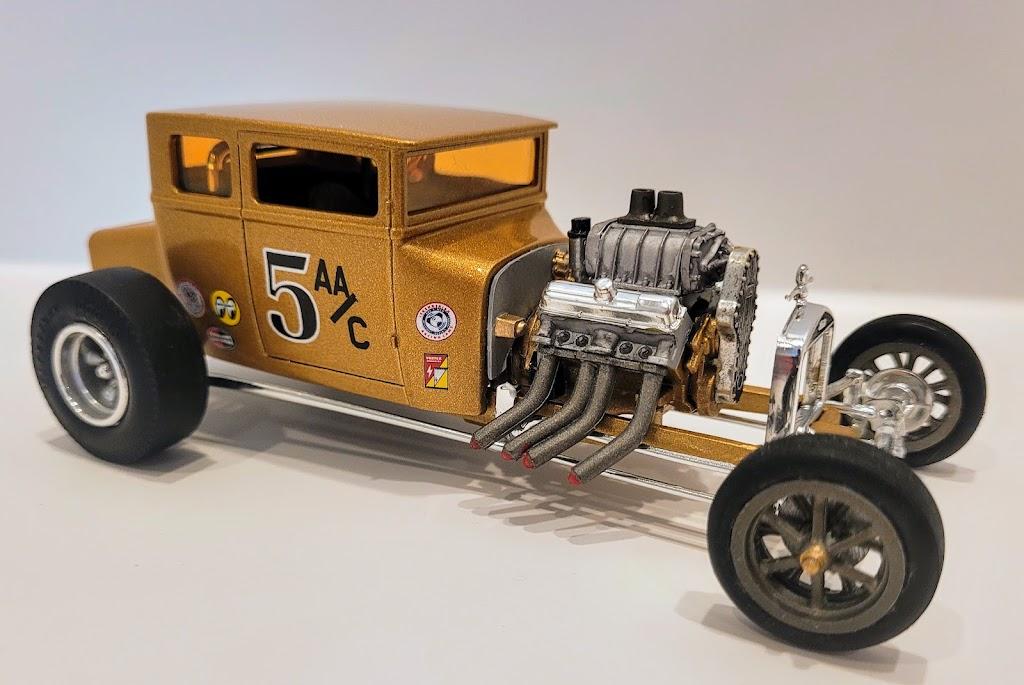
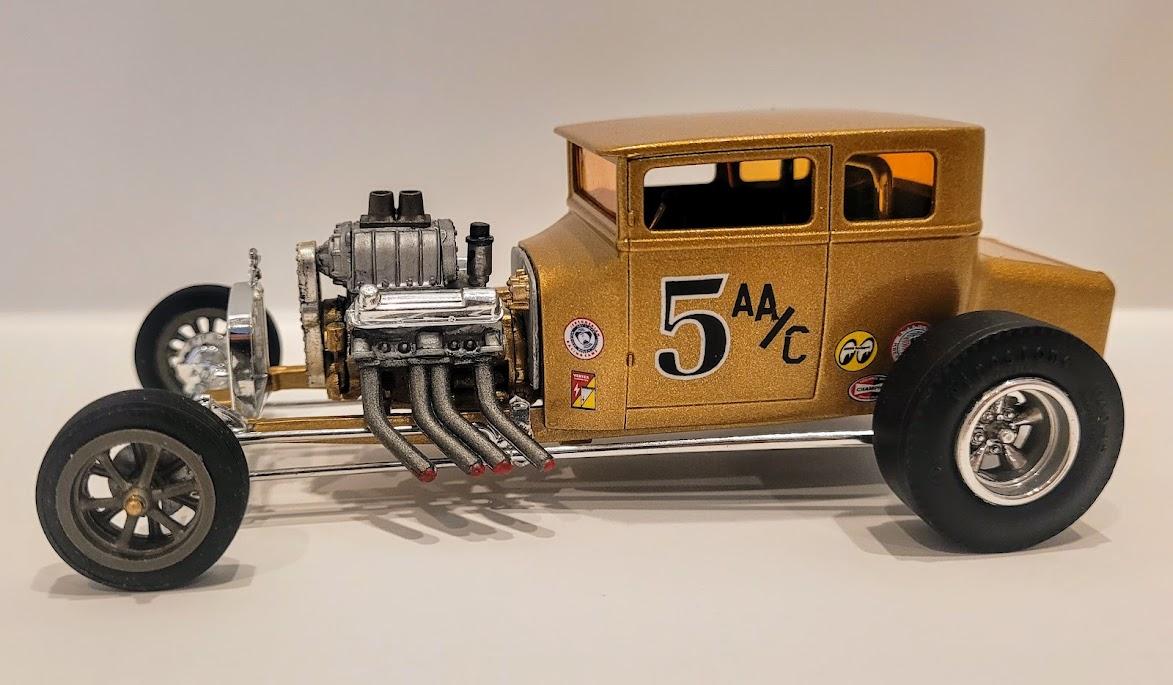
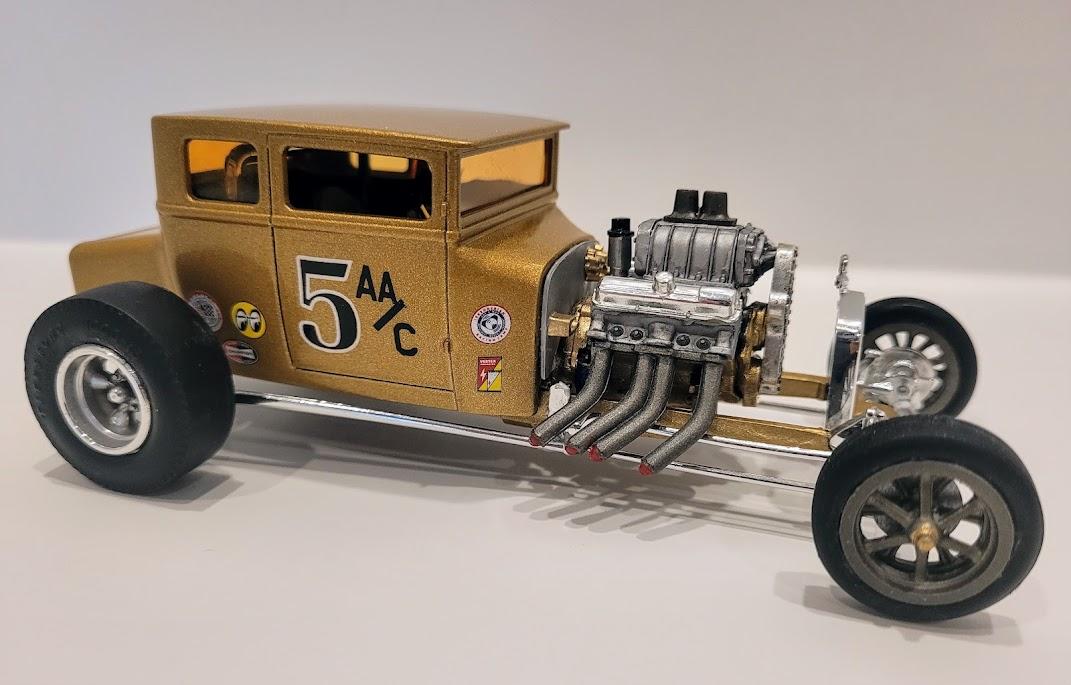
I built this over my Christmas vacation time, finishing it up this morning. The original plan was to get both cars in the 2 in 1 kit finished, building a hot rod coupe and stock roadster pickup straight from the box. After looking everything over, I decided to go this way with the coupe, I will modify the stock roadster into a 60's era street rod with an Olds V8 from the AMT '40 Sedan. More on that as it progresses, but it will be built similarly, without wiring, etc.
-
In my limited experience, I’ve had nothing but trouble with AMT/MPC kits. While I liked blaming the kits for the poor final product, the truth was I just wasn’t good enough to handle the challenges they posed. This one was a different animal though. It lacked a bit of detail, but overall the kit was exceptional. The interior needed some attention but it gave me a chance to try some new tricks…I scratch built the armrests, door handles, gauge bezels, indicator lever, stick shift, rear view and side mirrors, sun visors, dome light and window cranks, etc. I also scratched some new air filter hoses because the ones in the kit were a bit skimpy compared to all the reference photos I saw. I added trim and foil to the seats, doors, and dash, and wired/detailed the engine and engine bay. I also used some photo etch badges from MCG, rims and engine bits from a 68 charger kit, gauge decals from an old mustang, and dog dish hubcaps from Parts by Parks. The chrome trim is hasegawa mirror finish, because my BMF is completely useless at this point. The paint is all tamiya cans - black, pure red, gloss clear. And that’s all she wrote! This was probably my favorite build to date 🤙🏽
- 36 replies
-
- 5
-
-

-
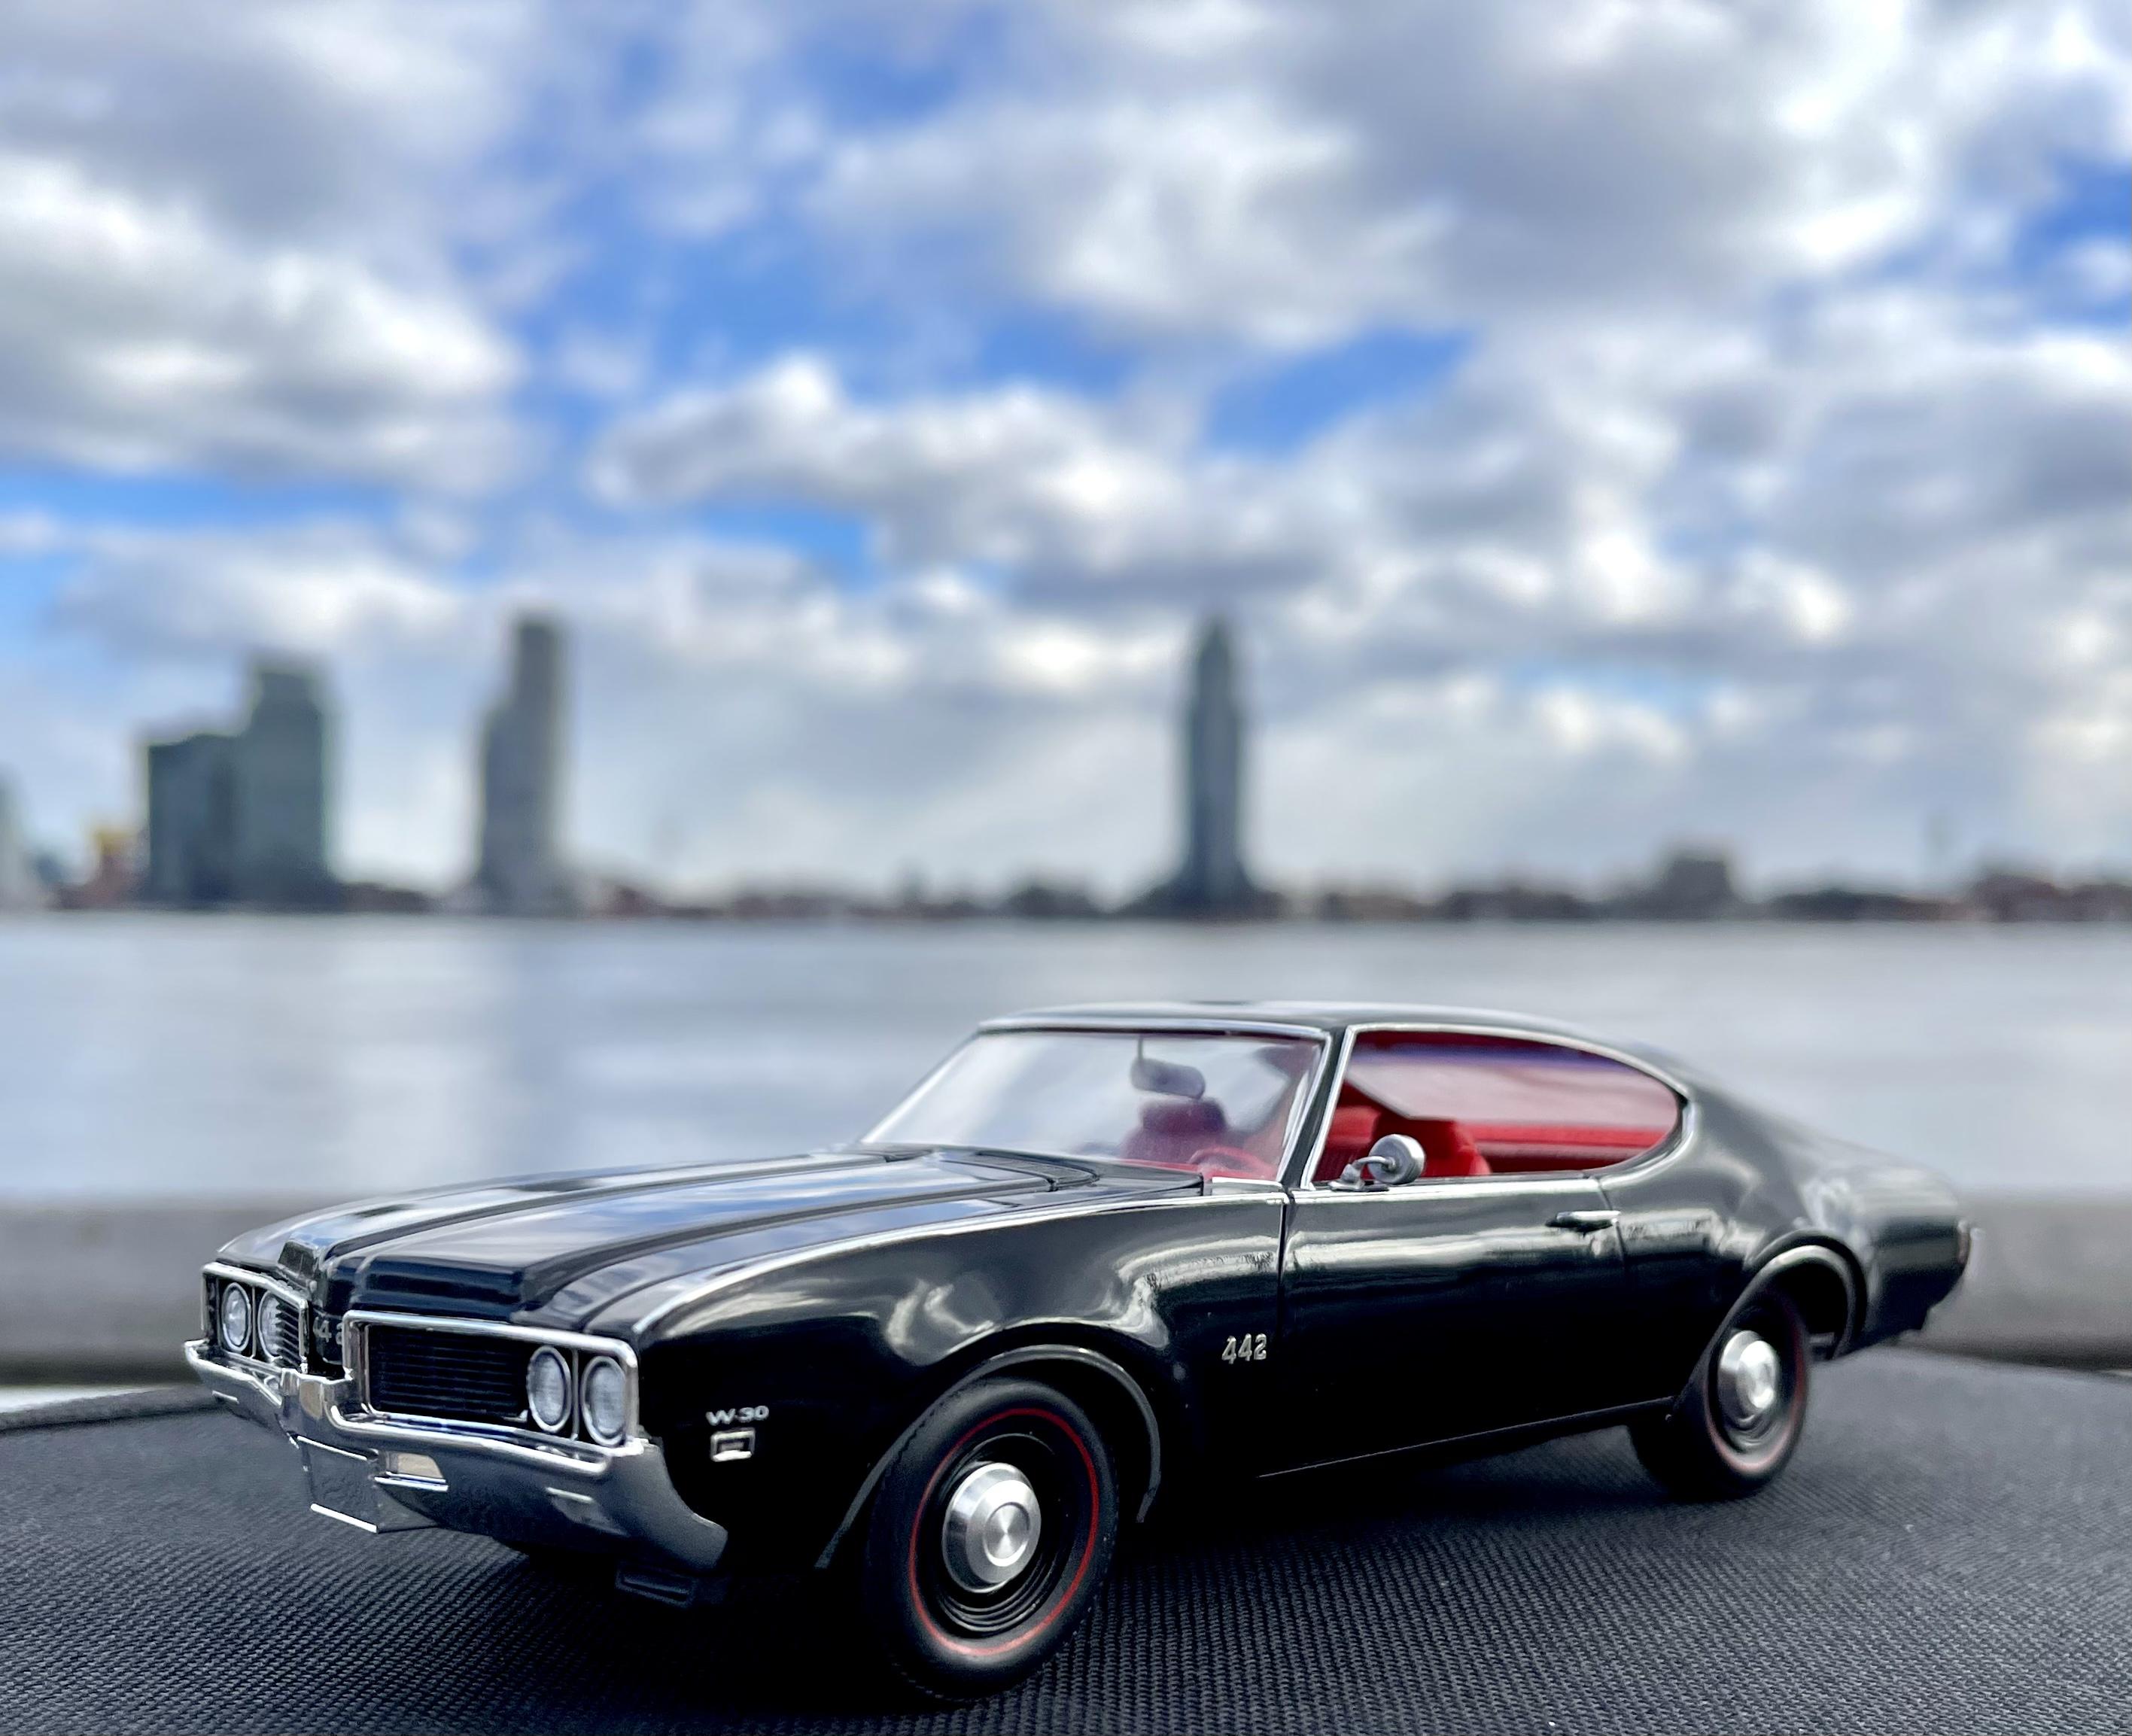
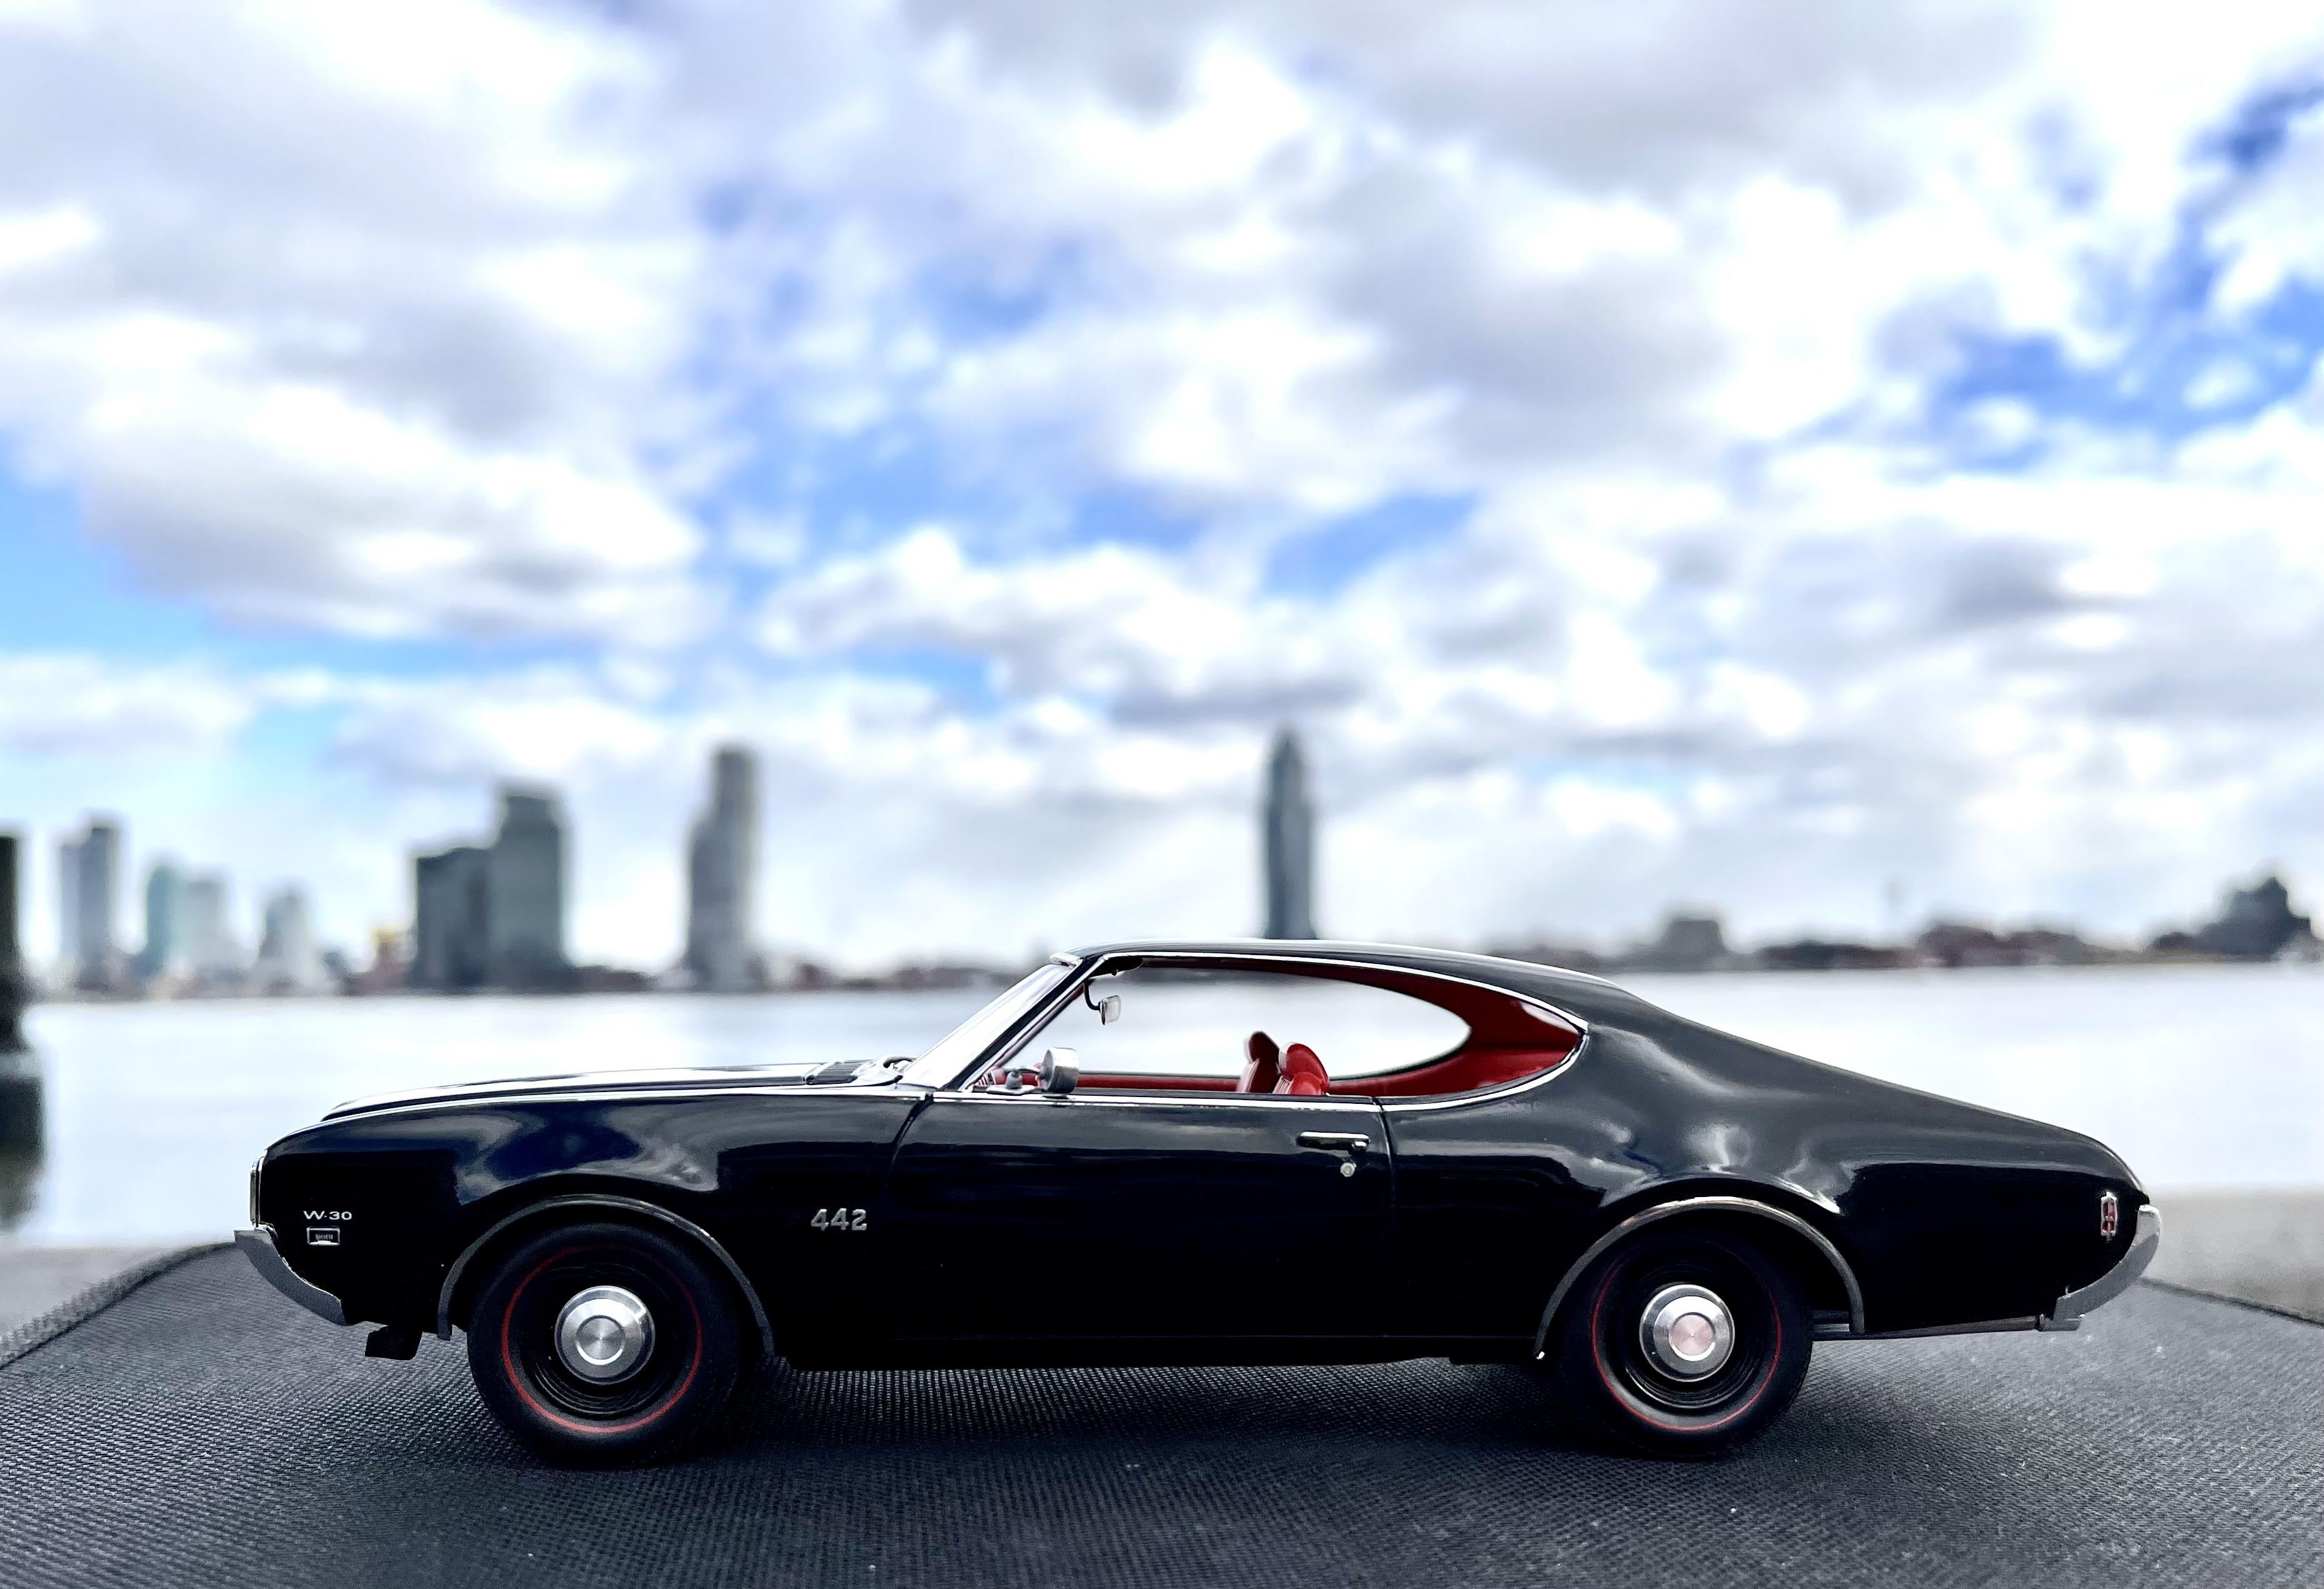
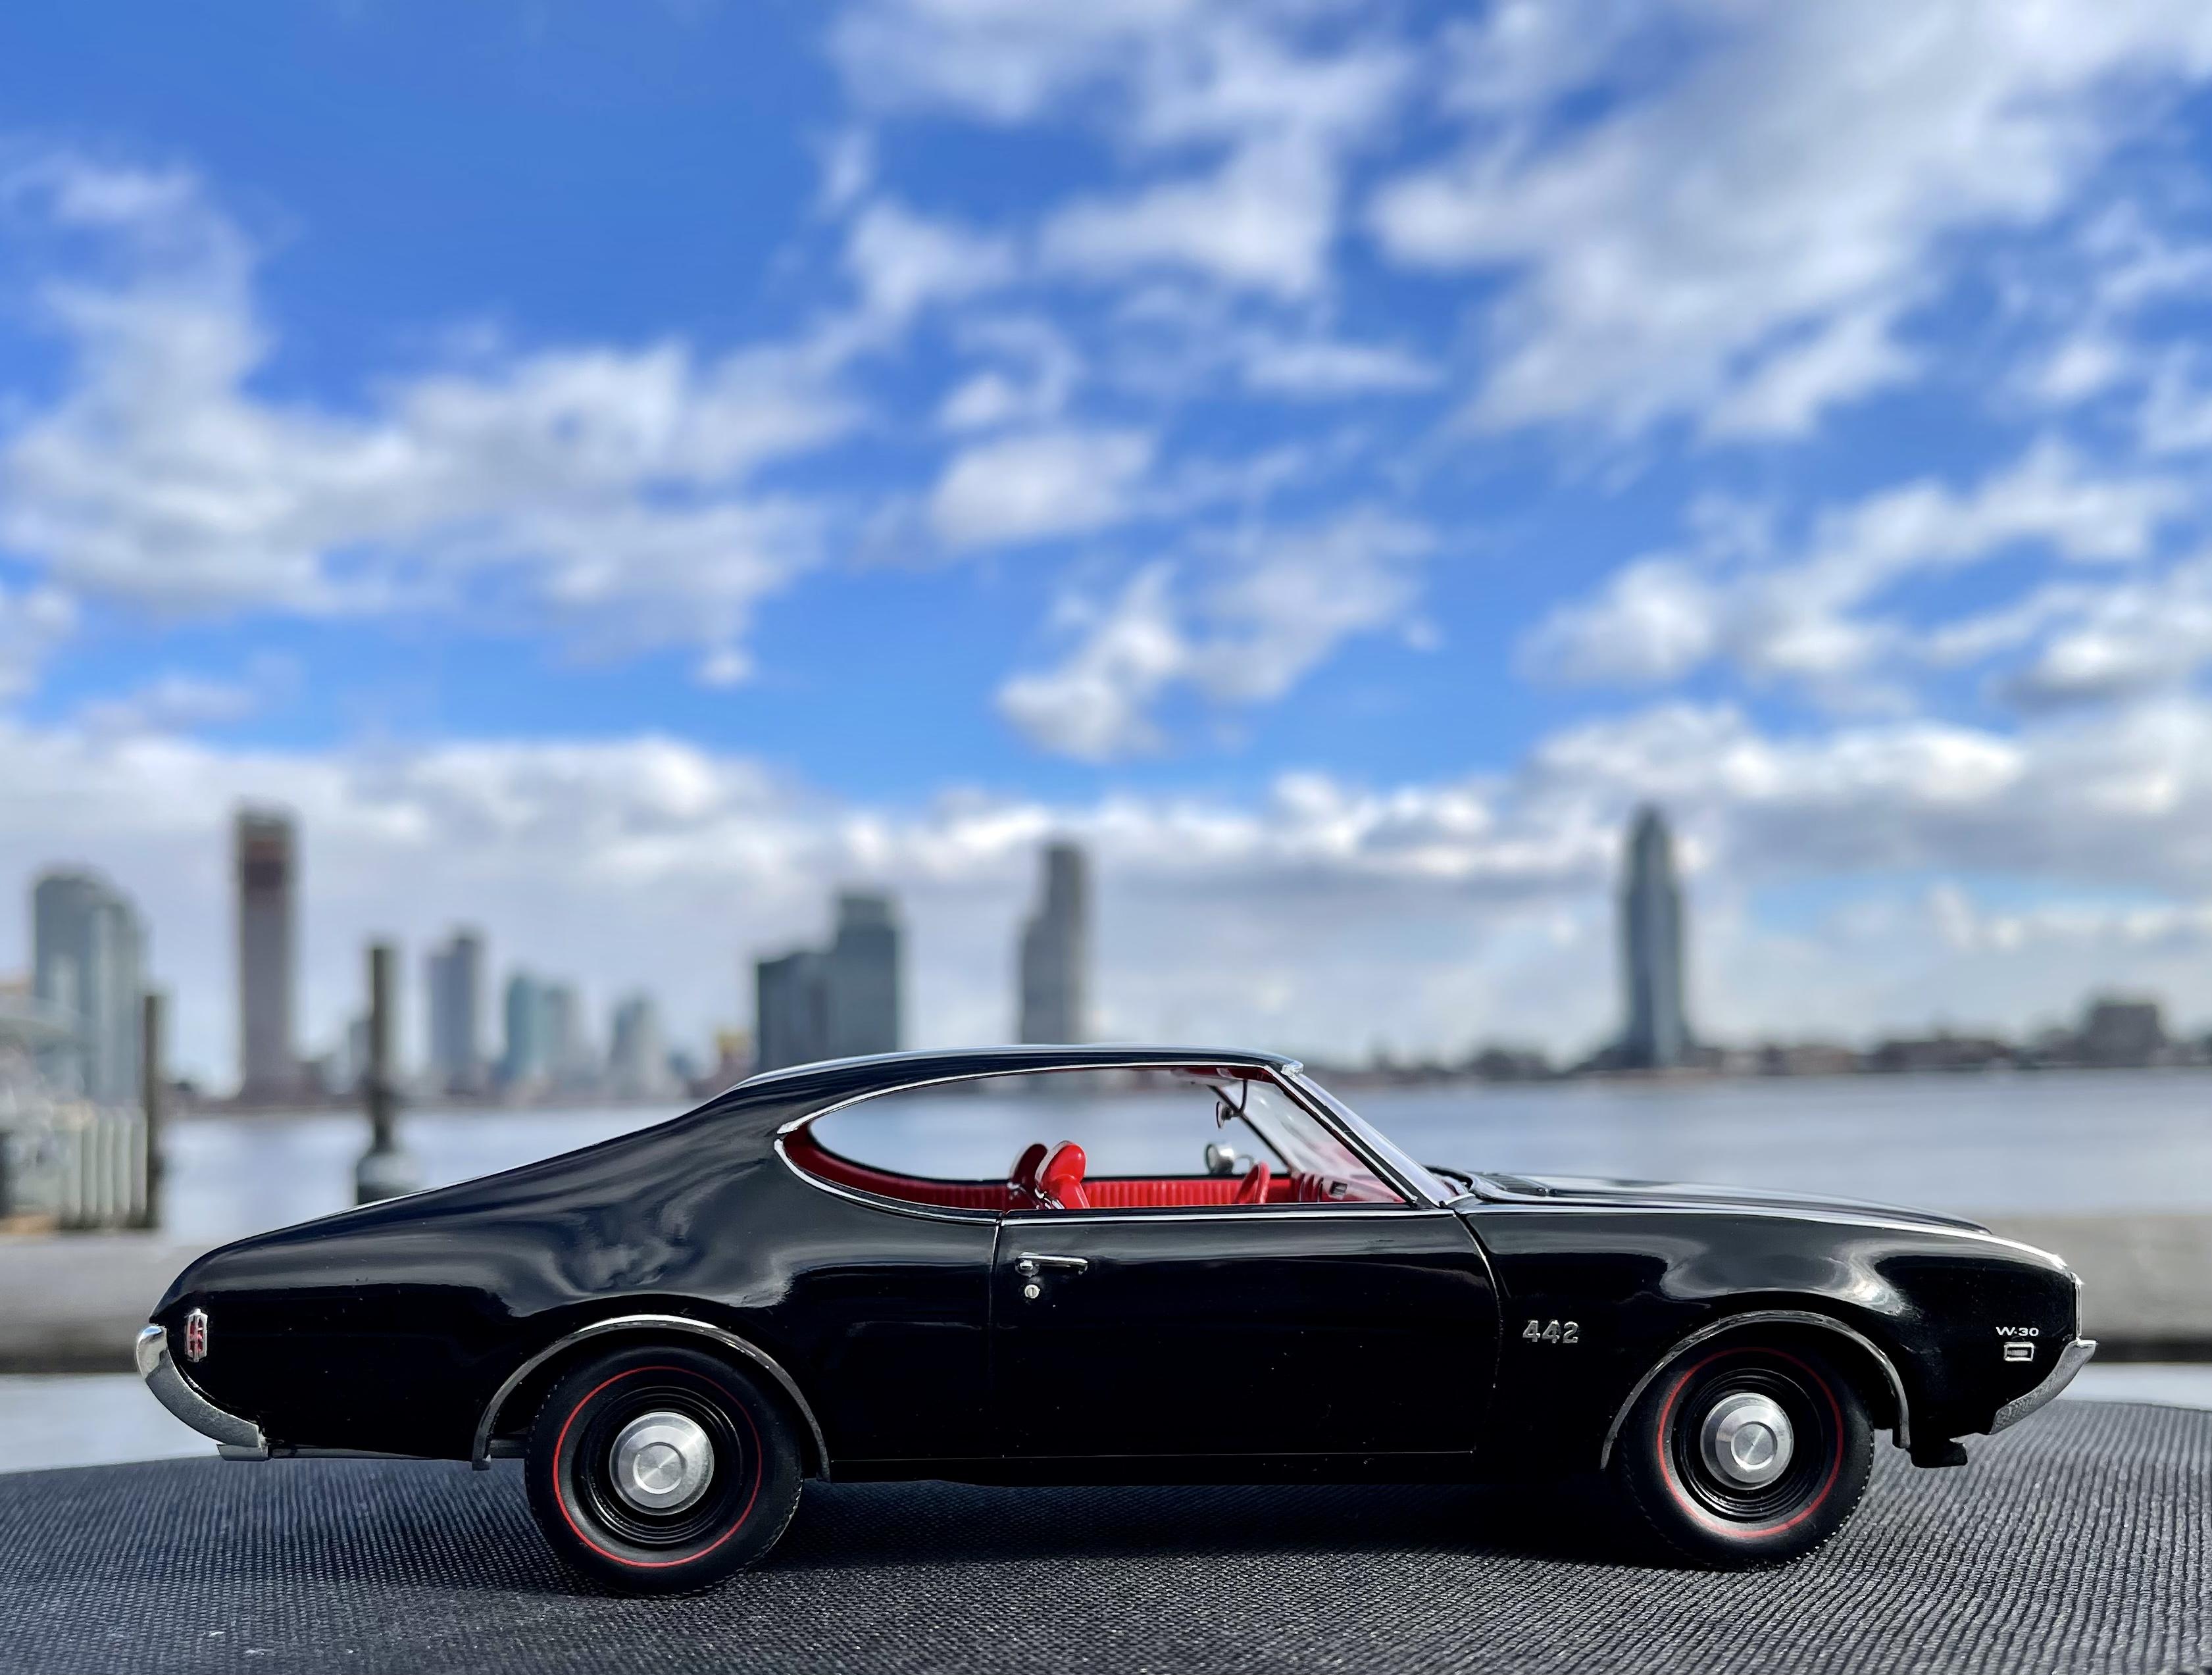
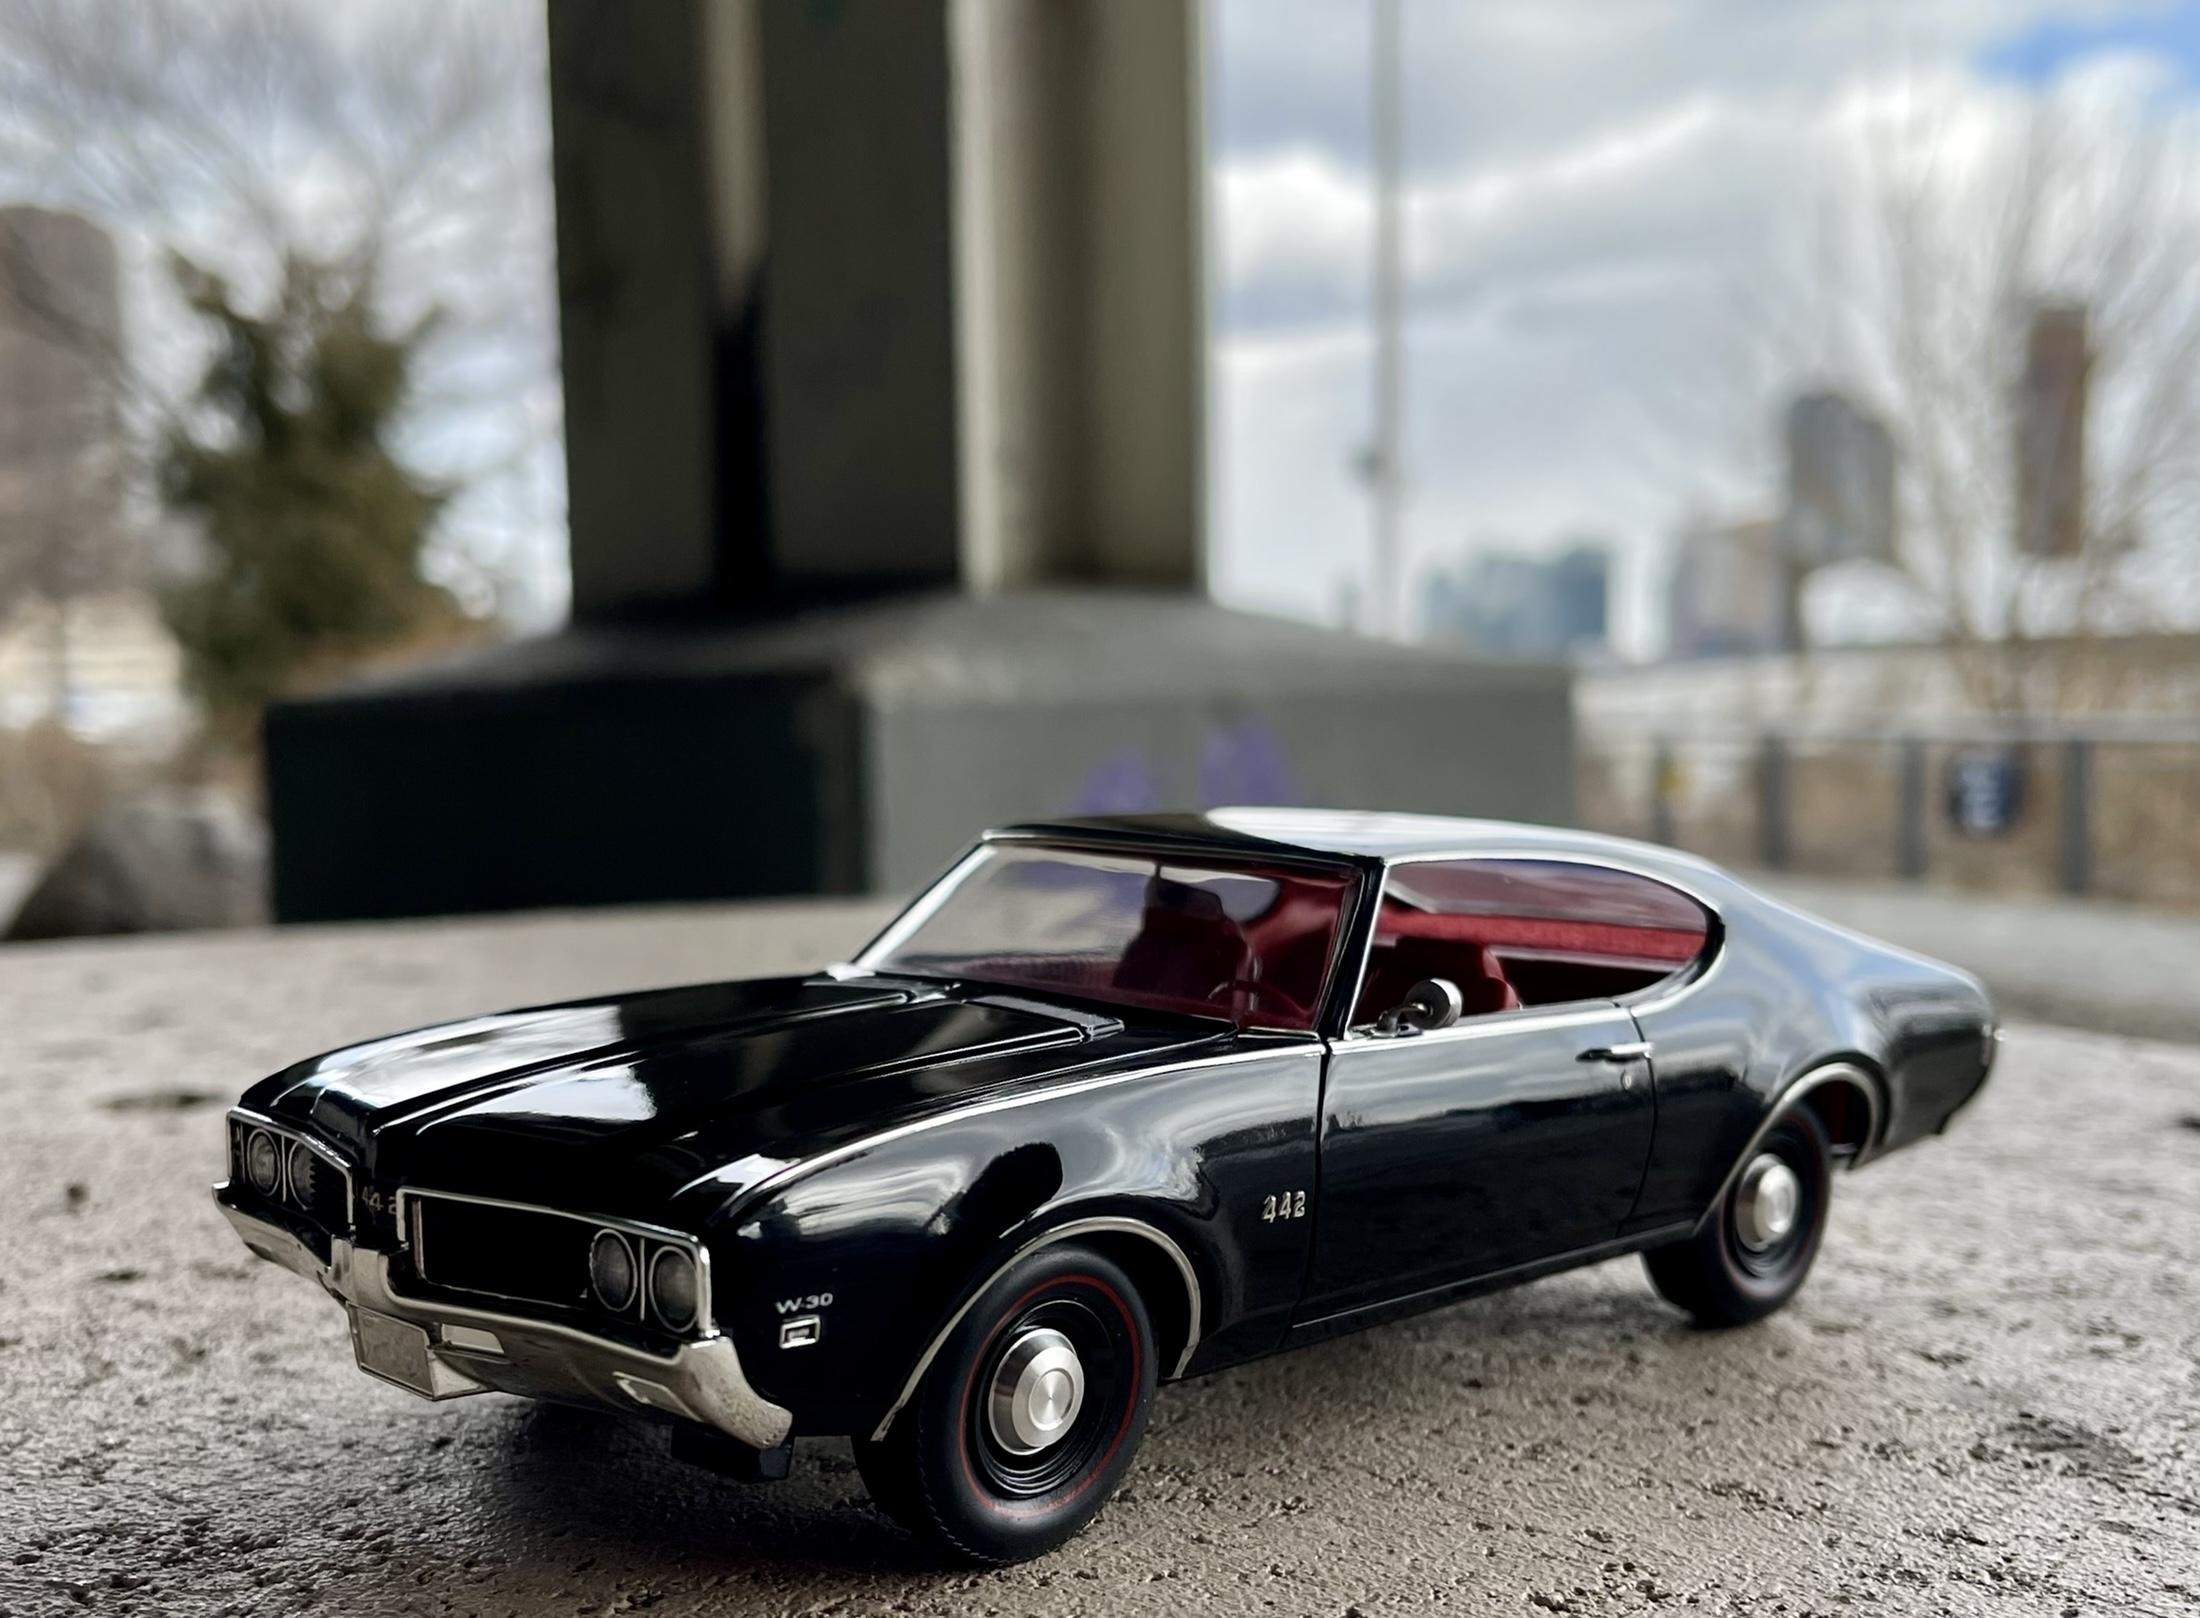
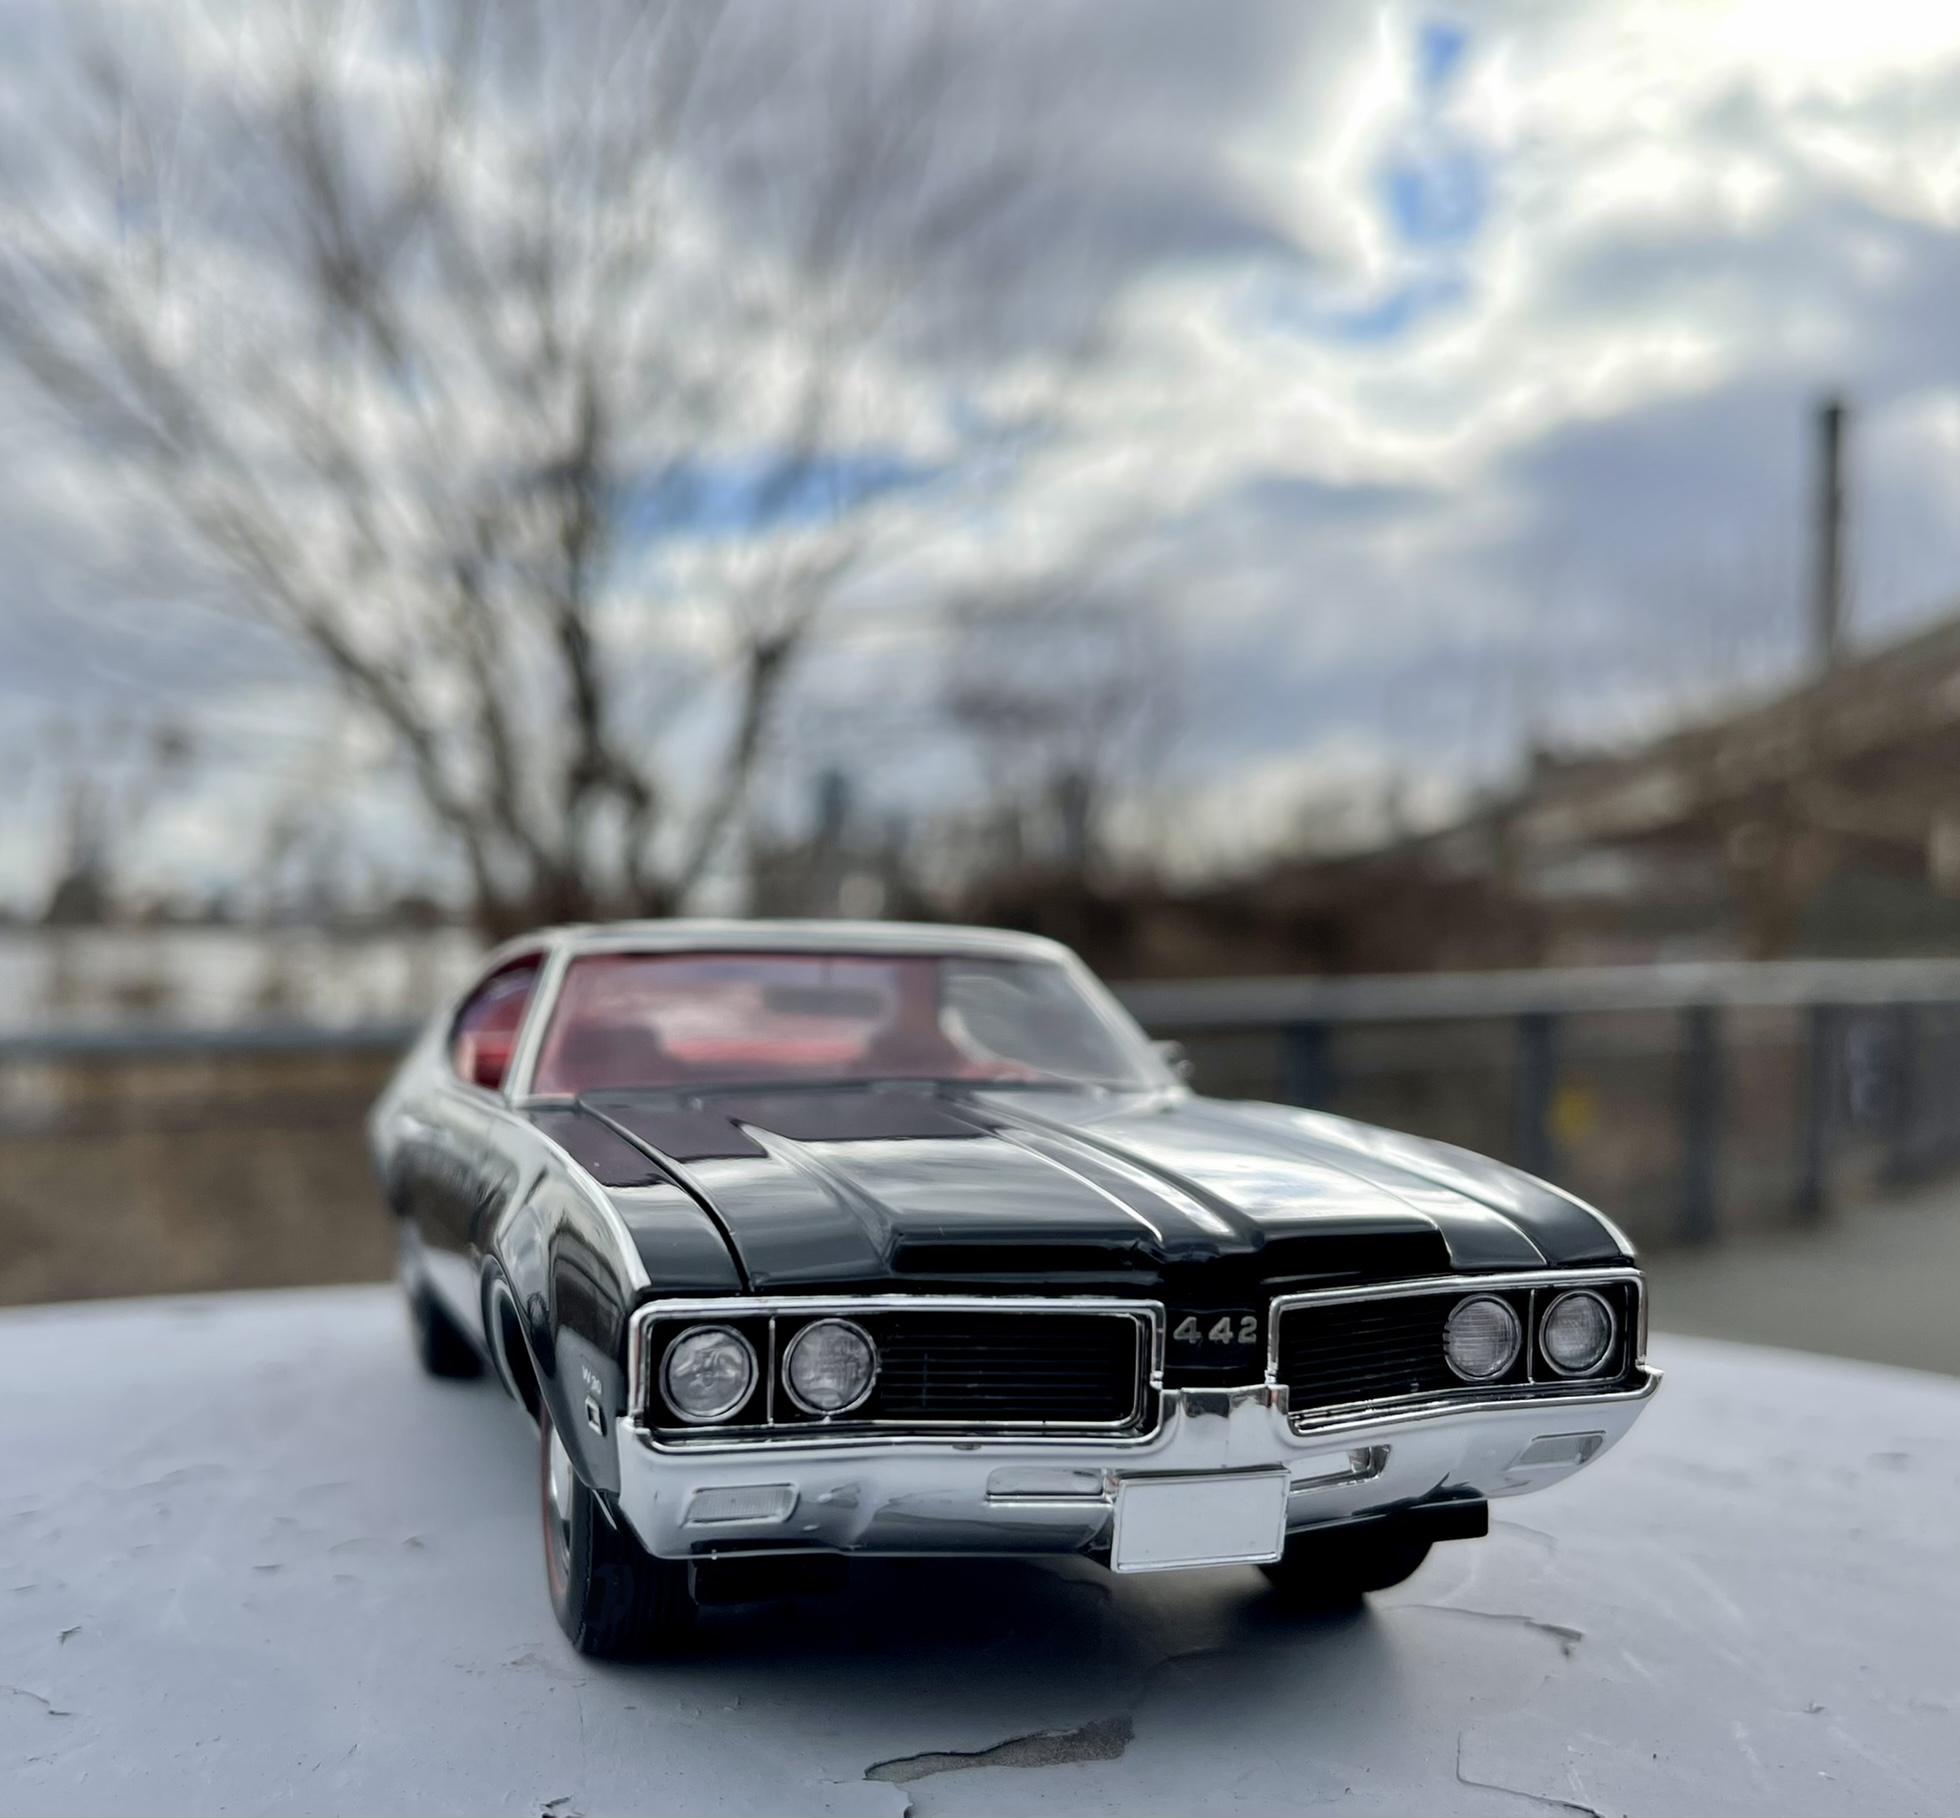
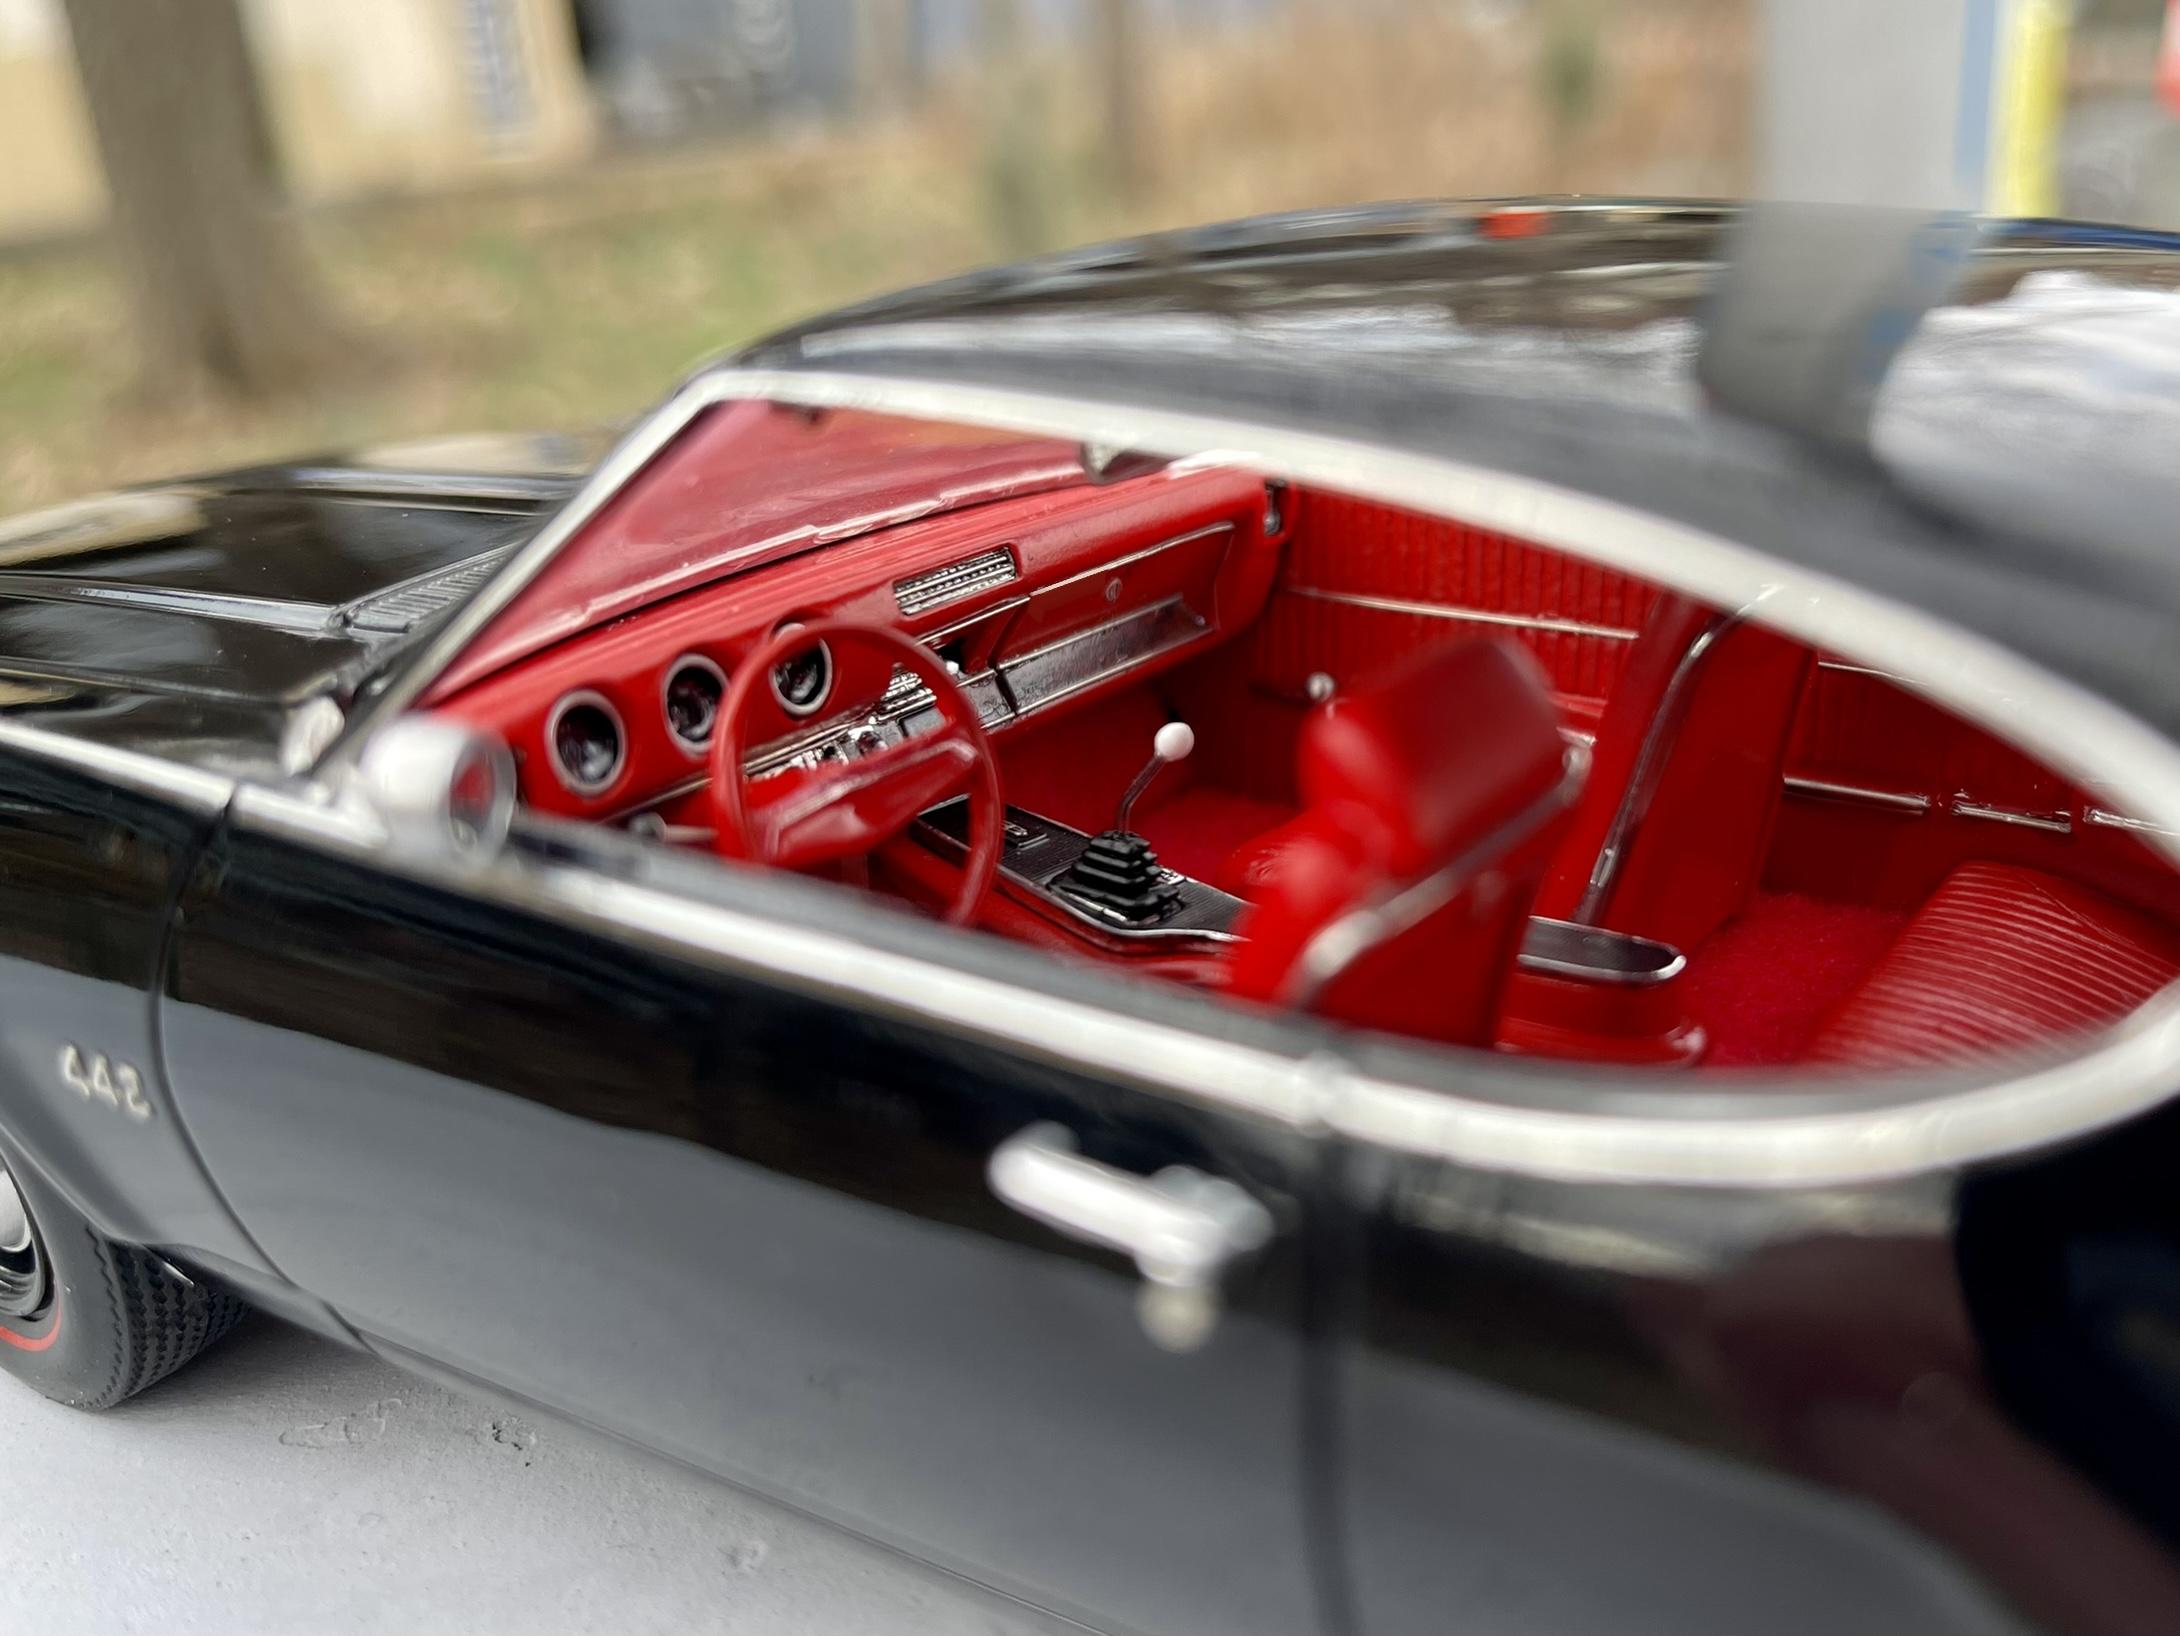
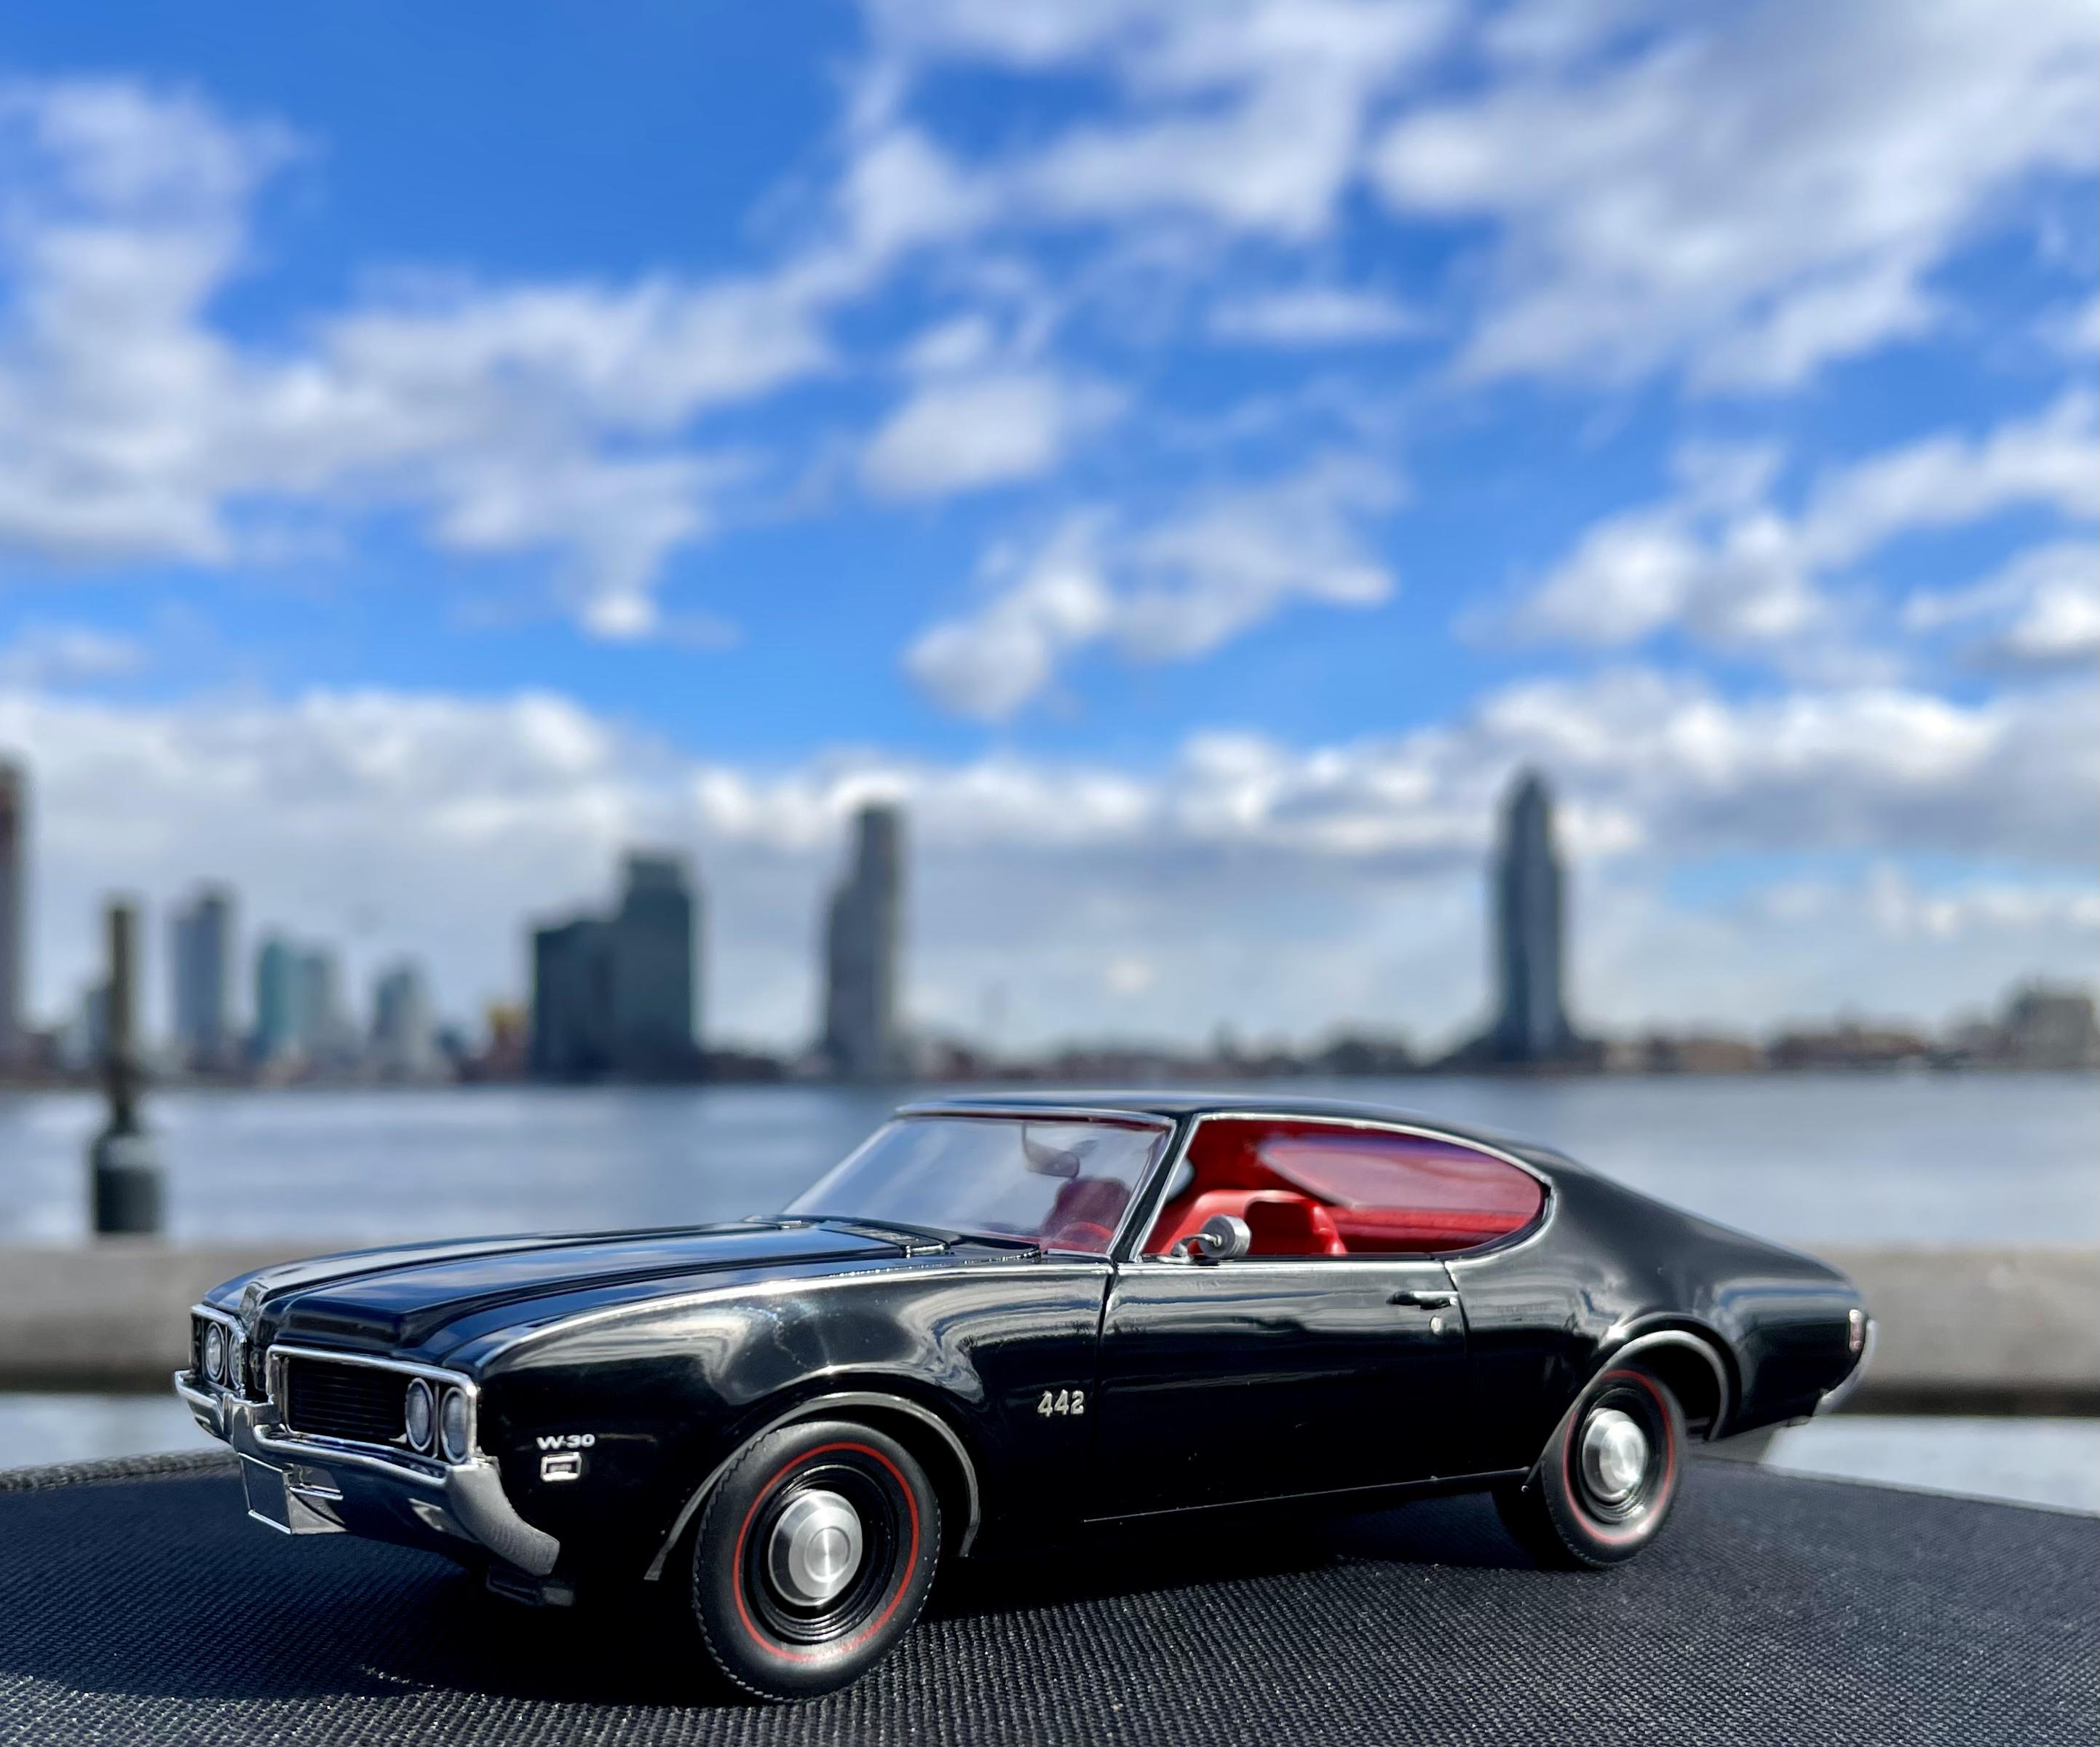
- oldsmobile
- 442
- (and 1 more)
-
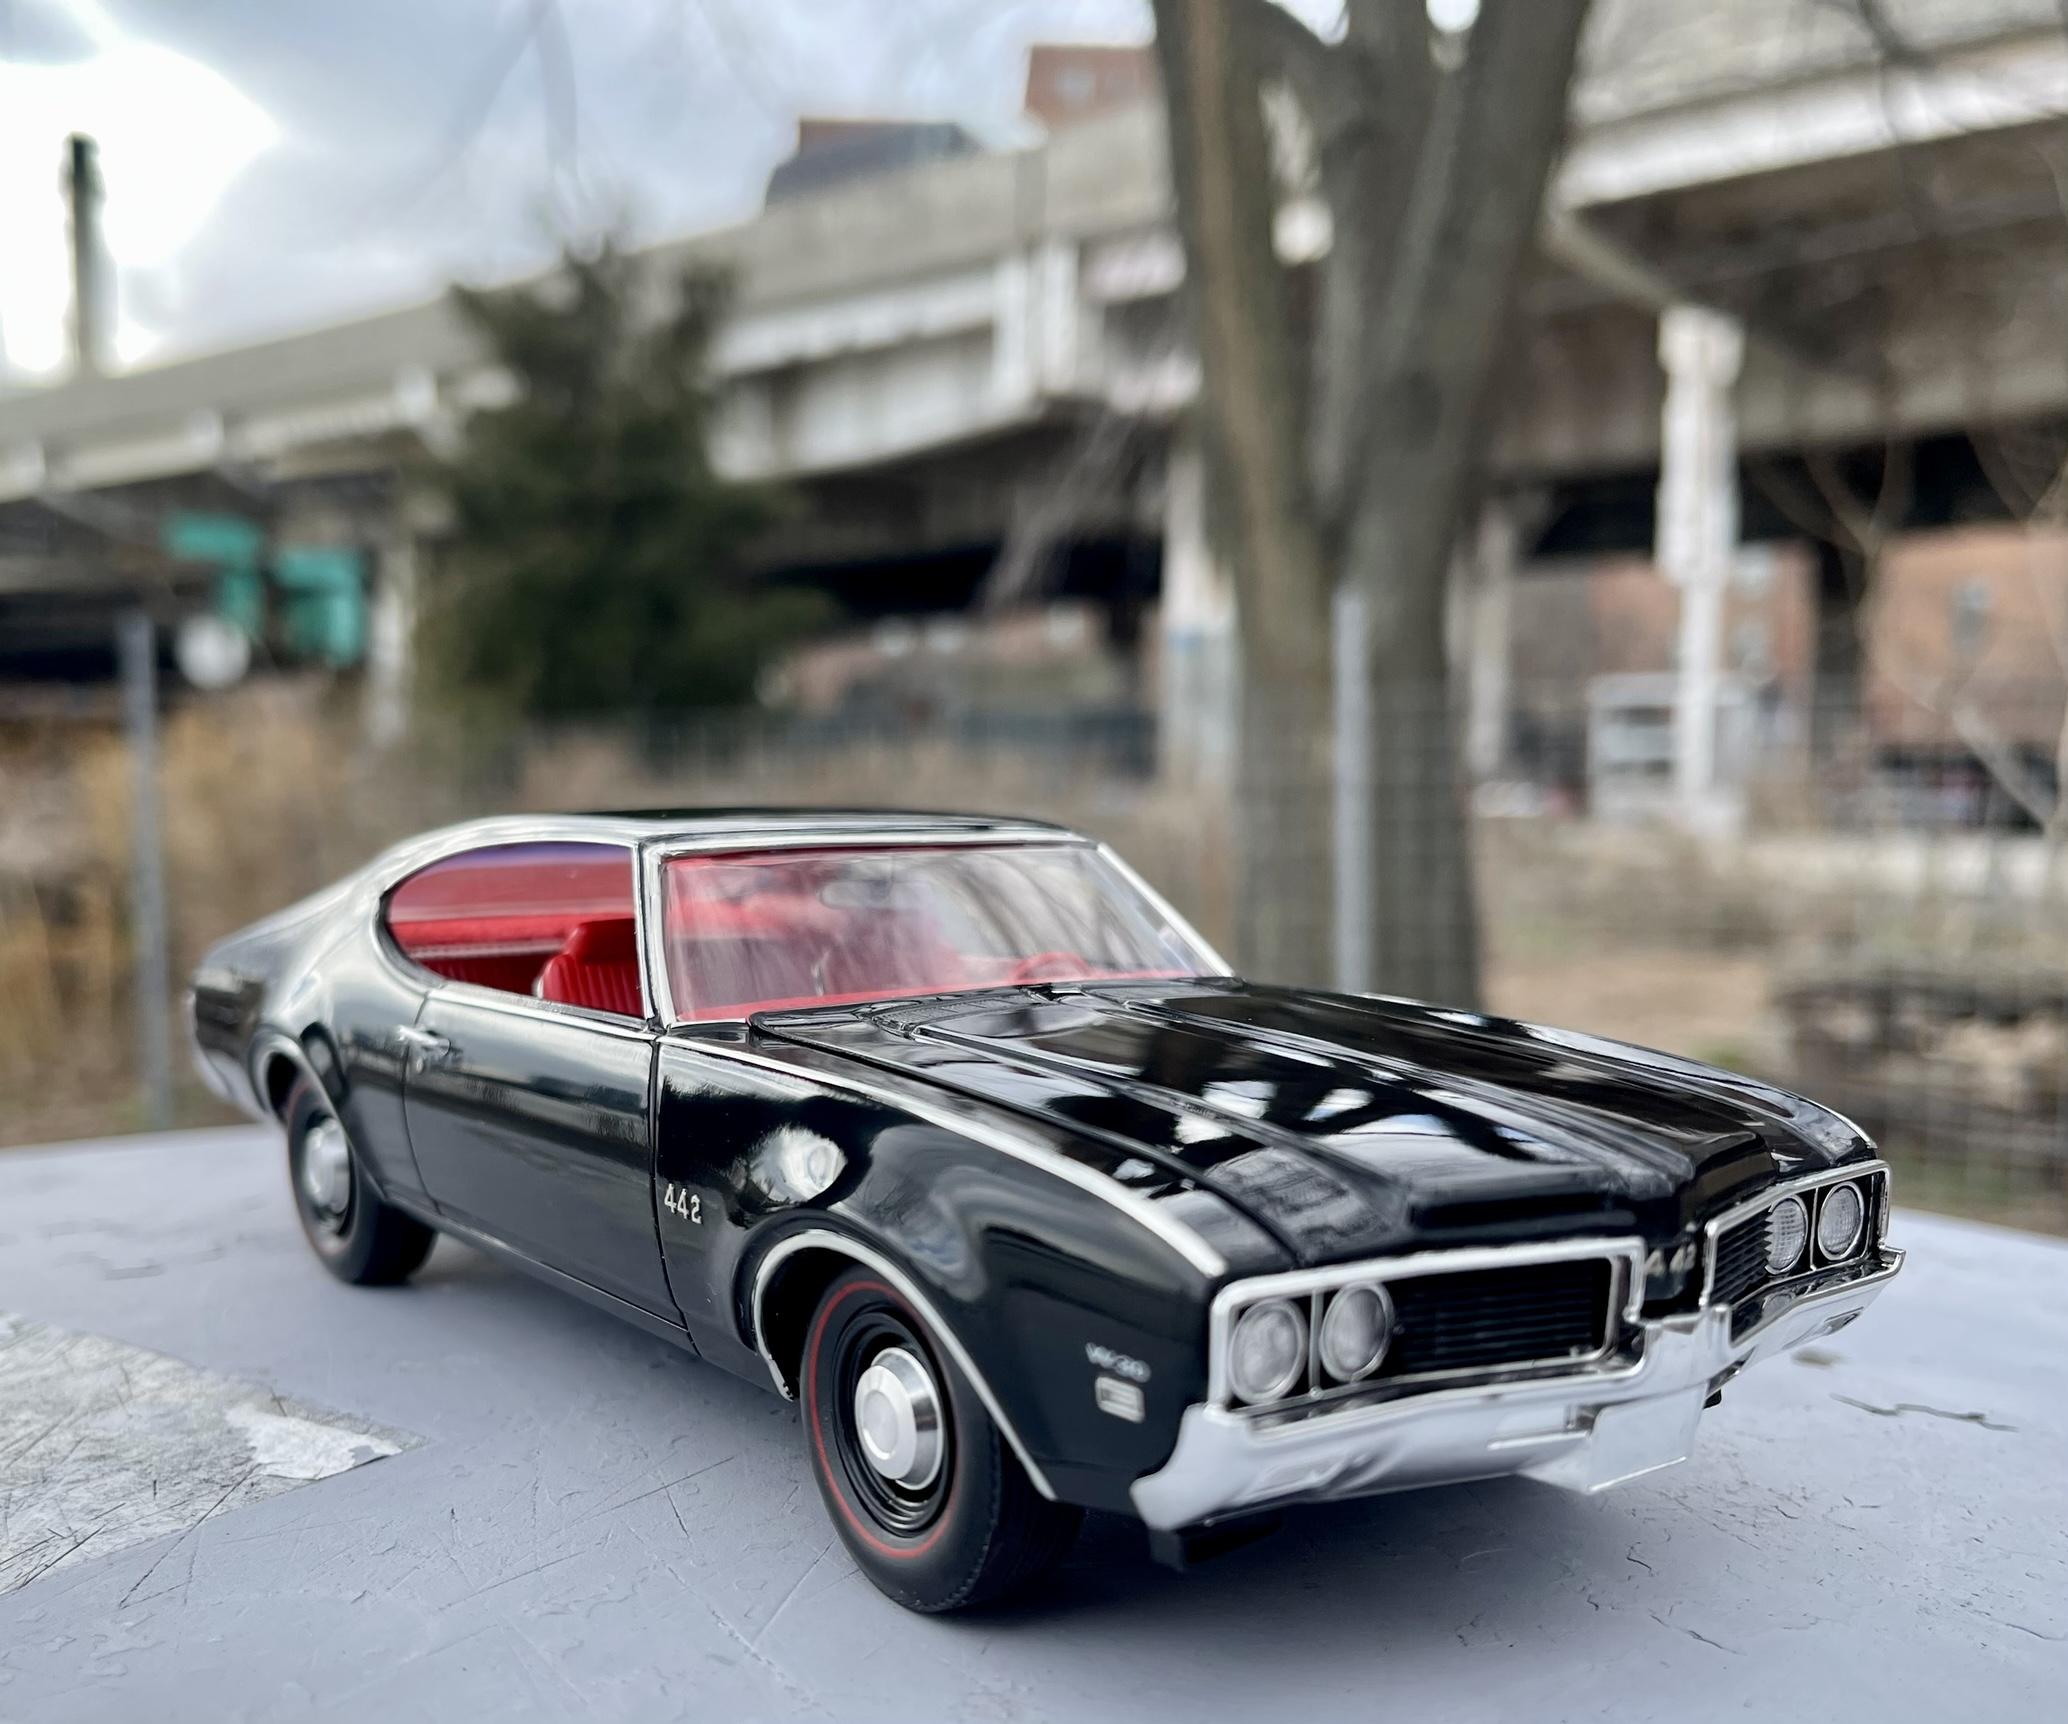
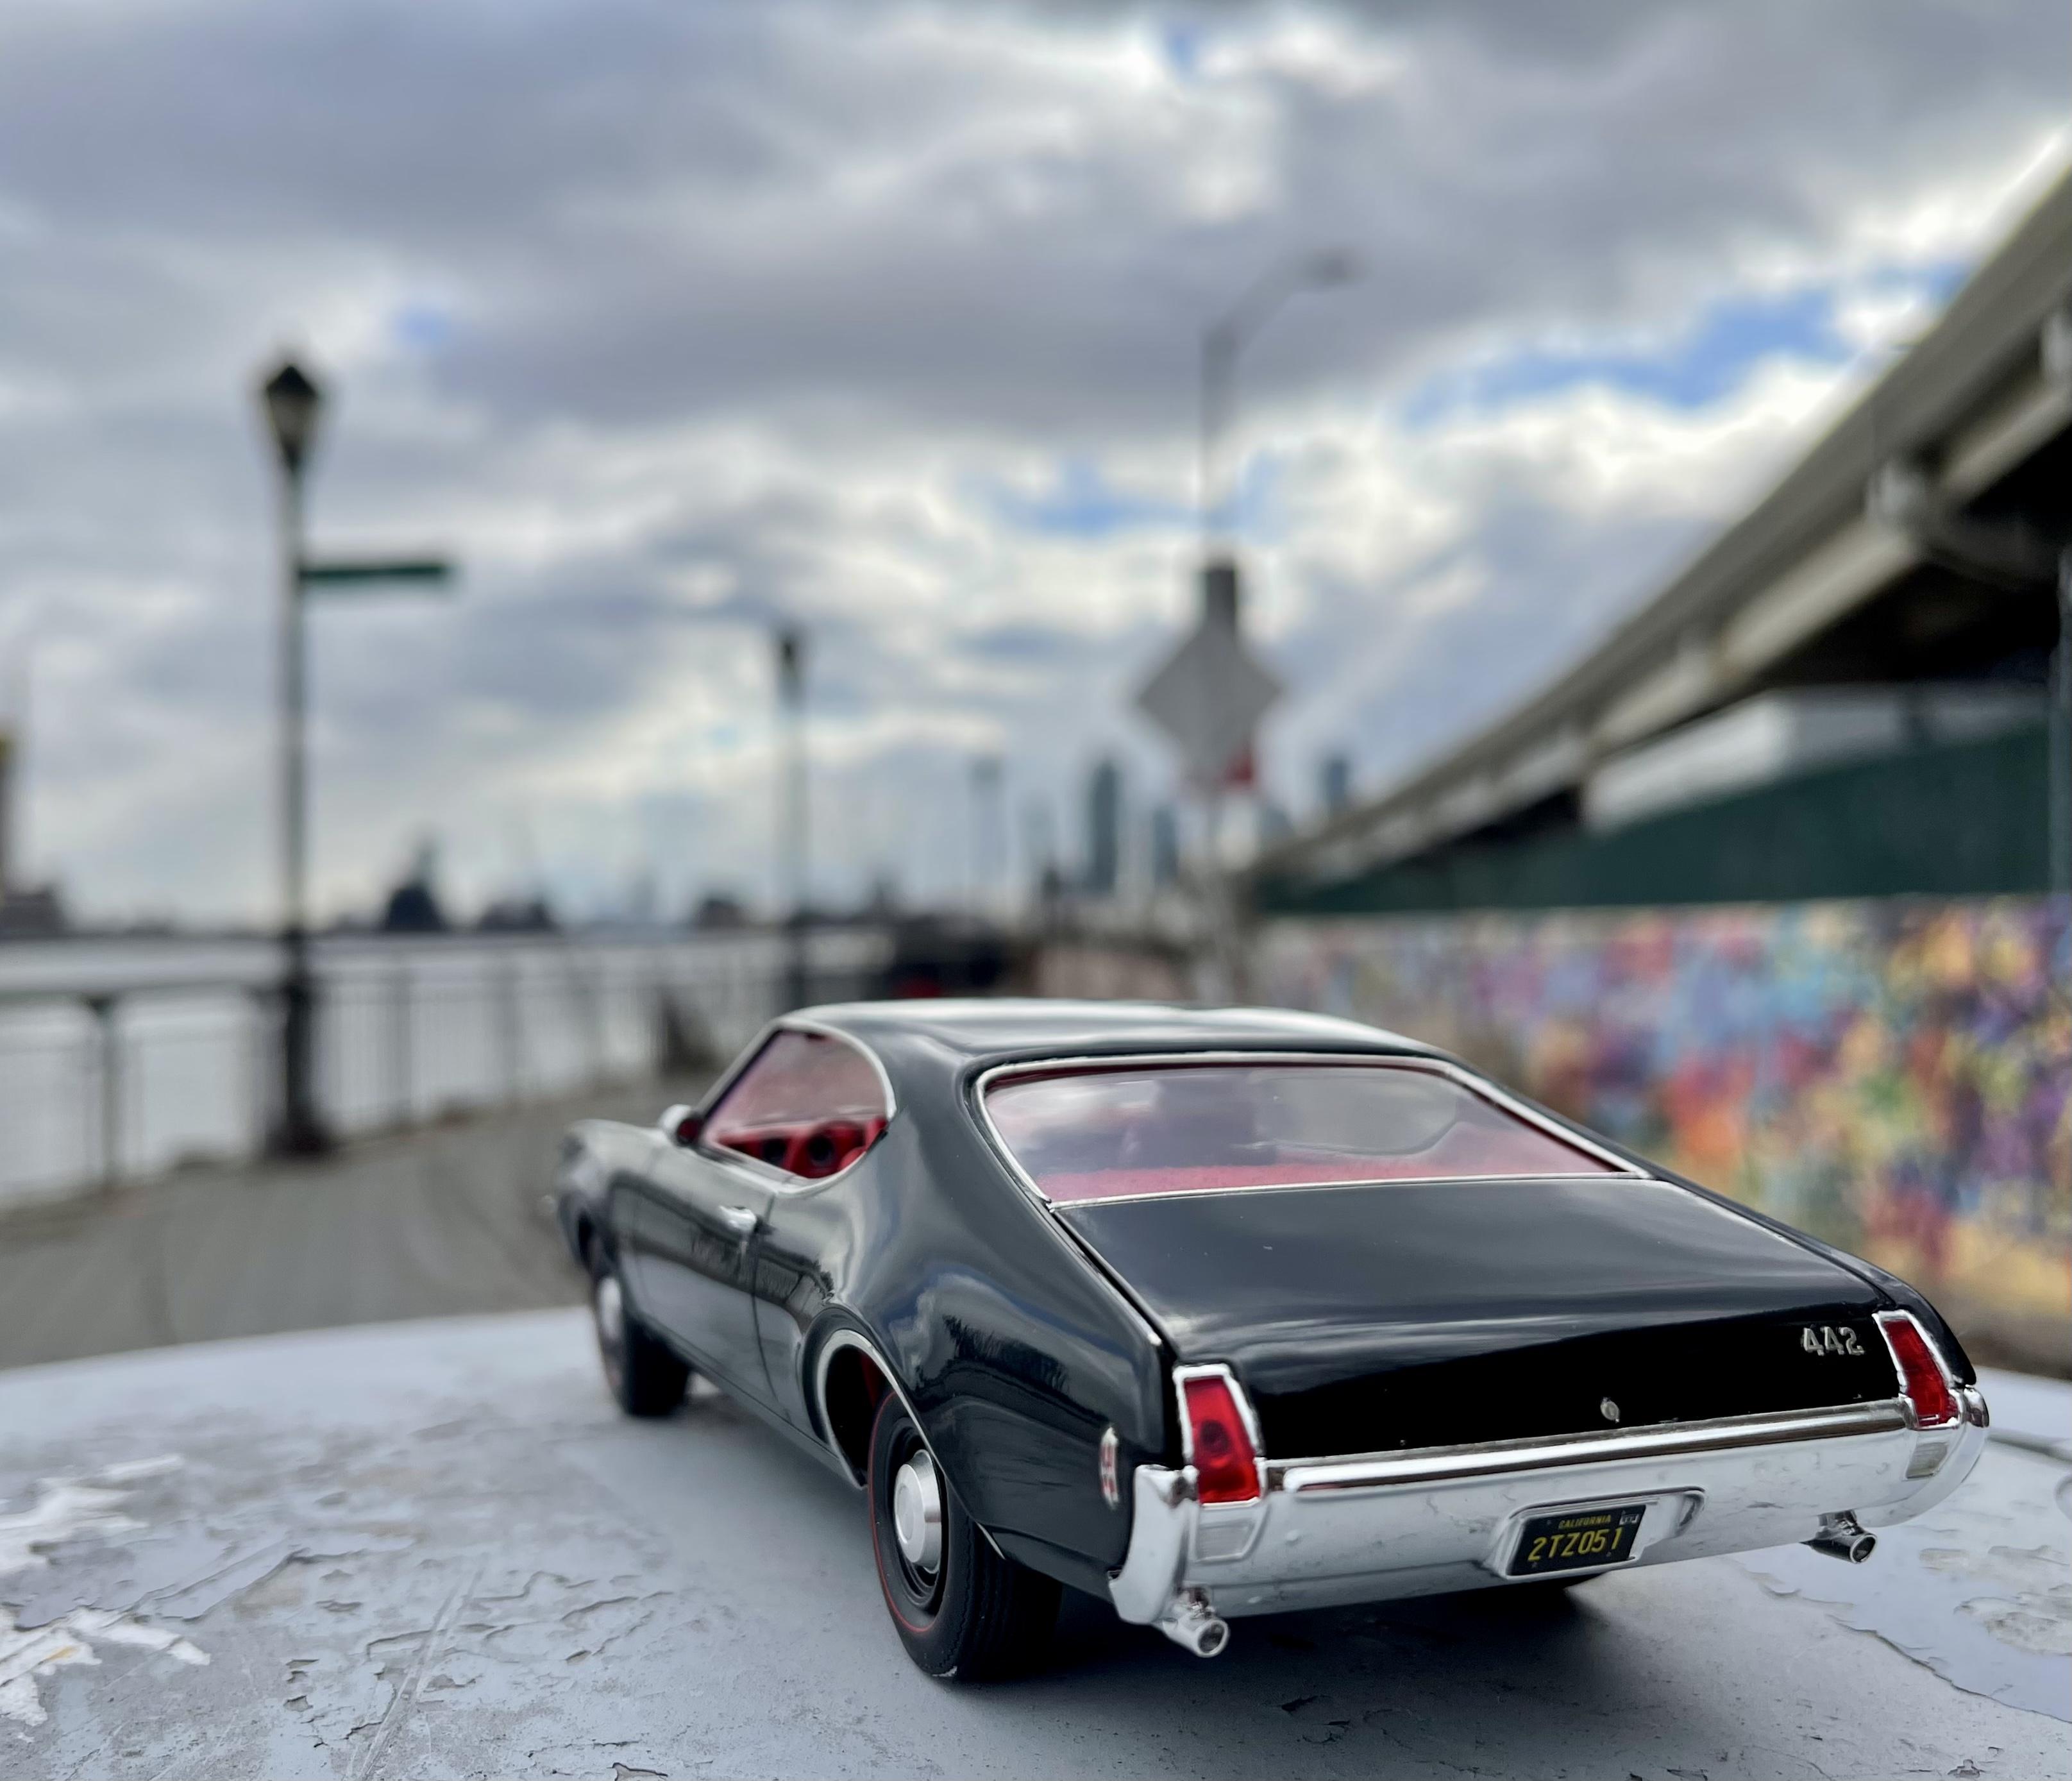
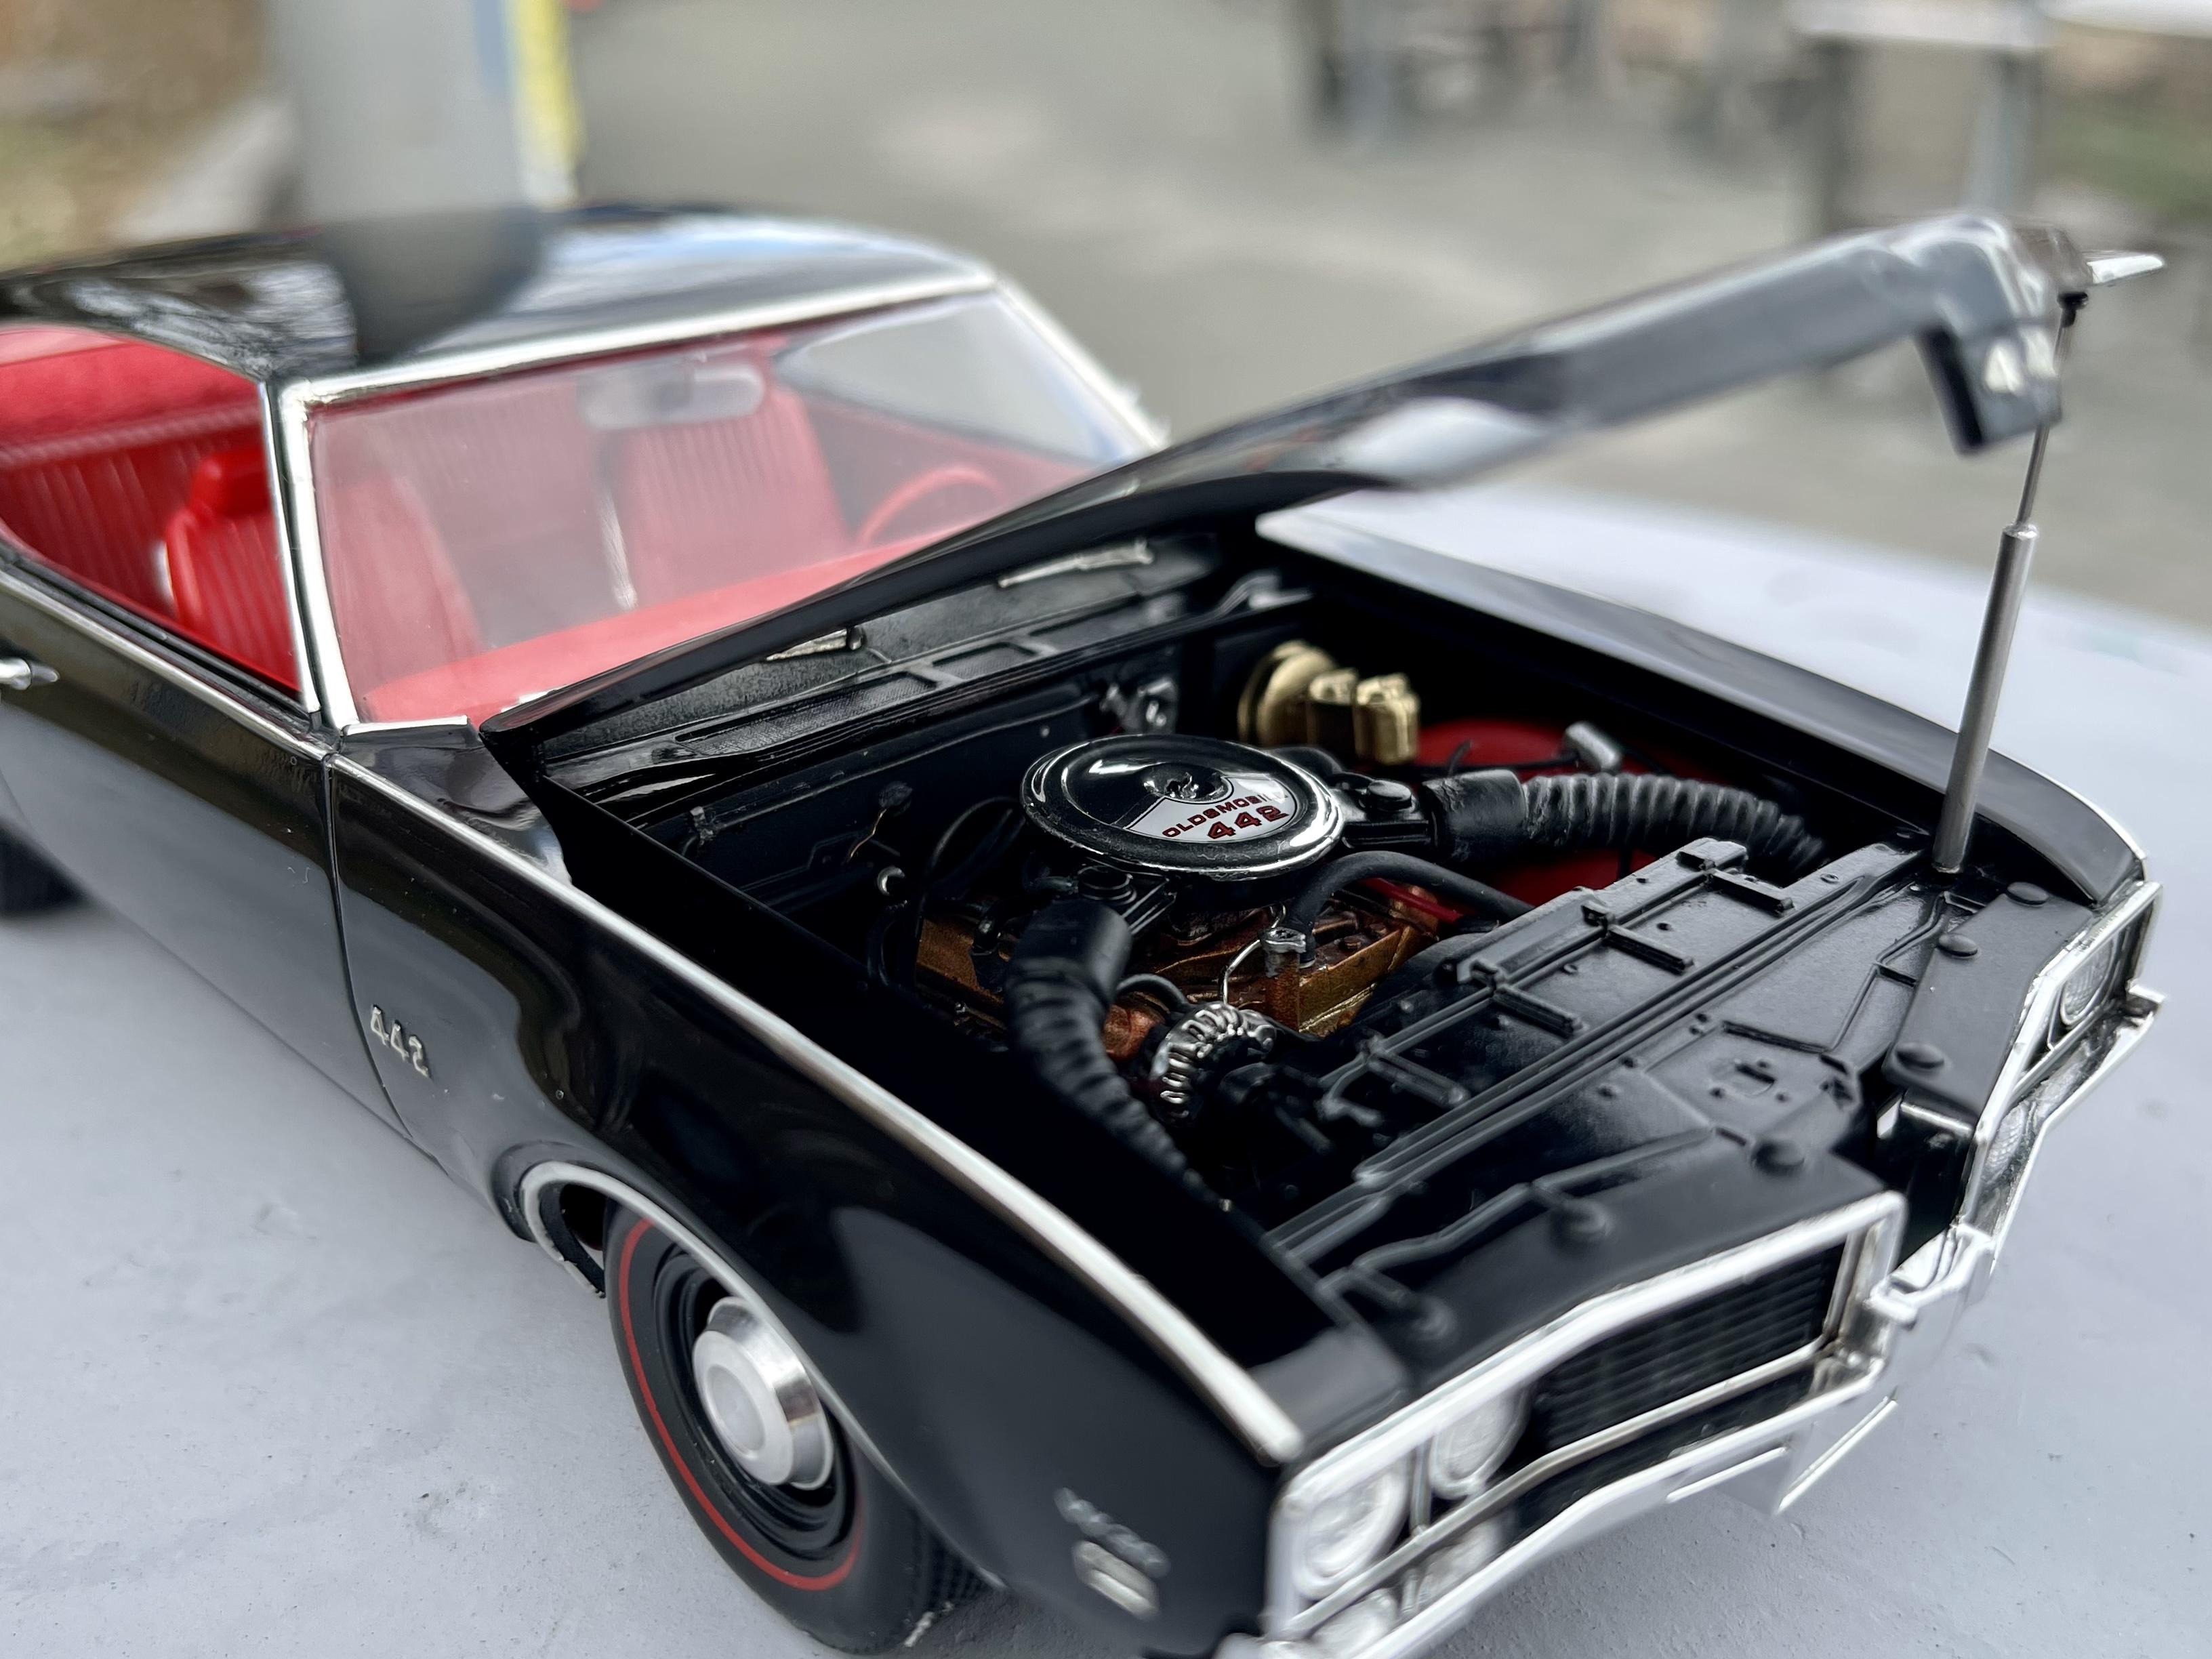
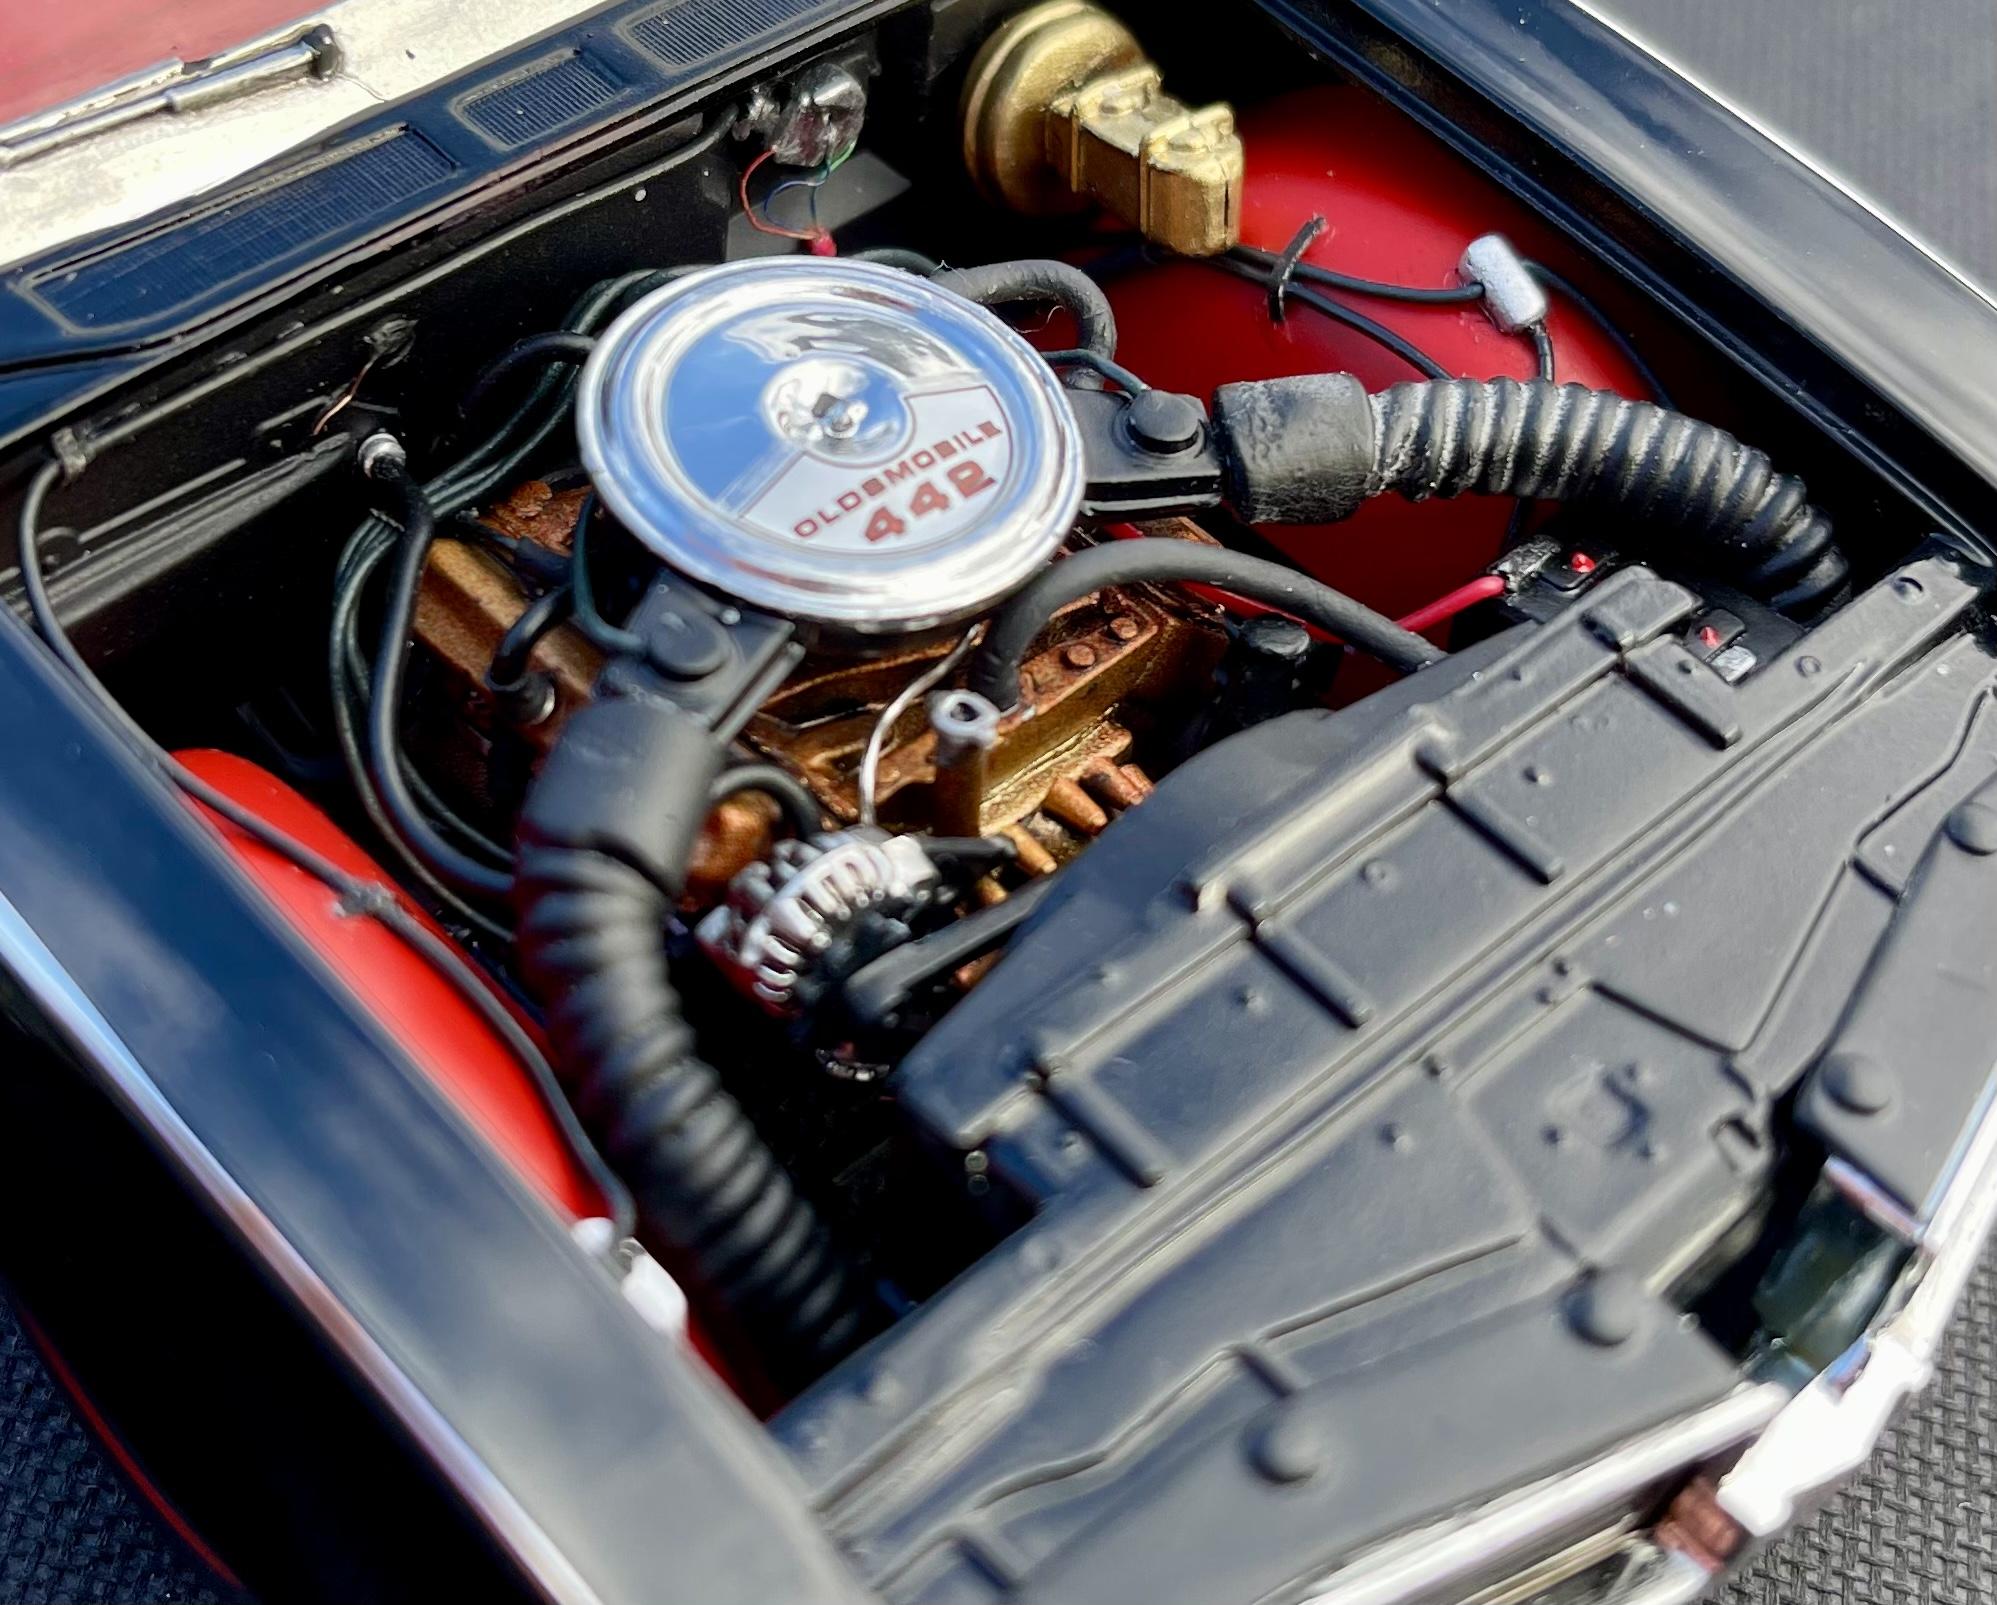
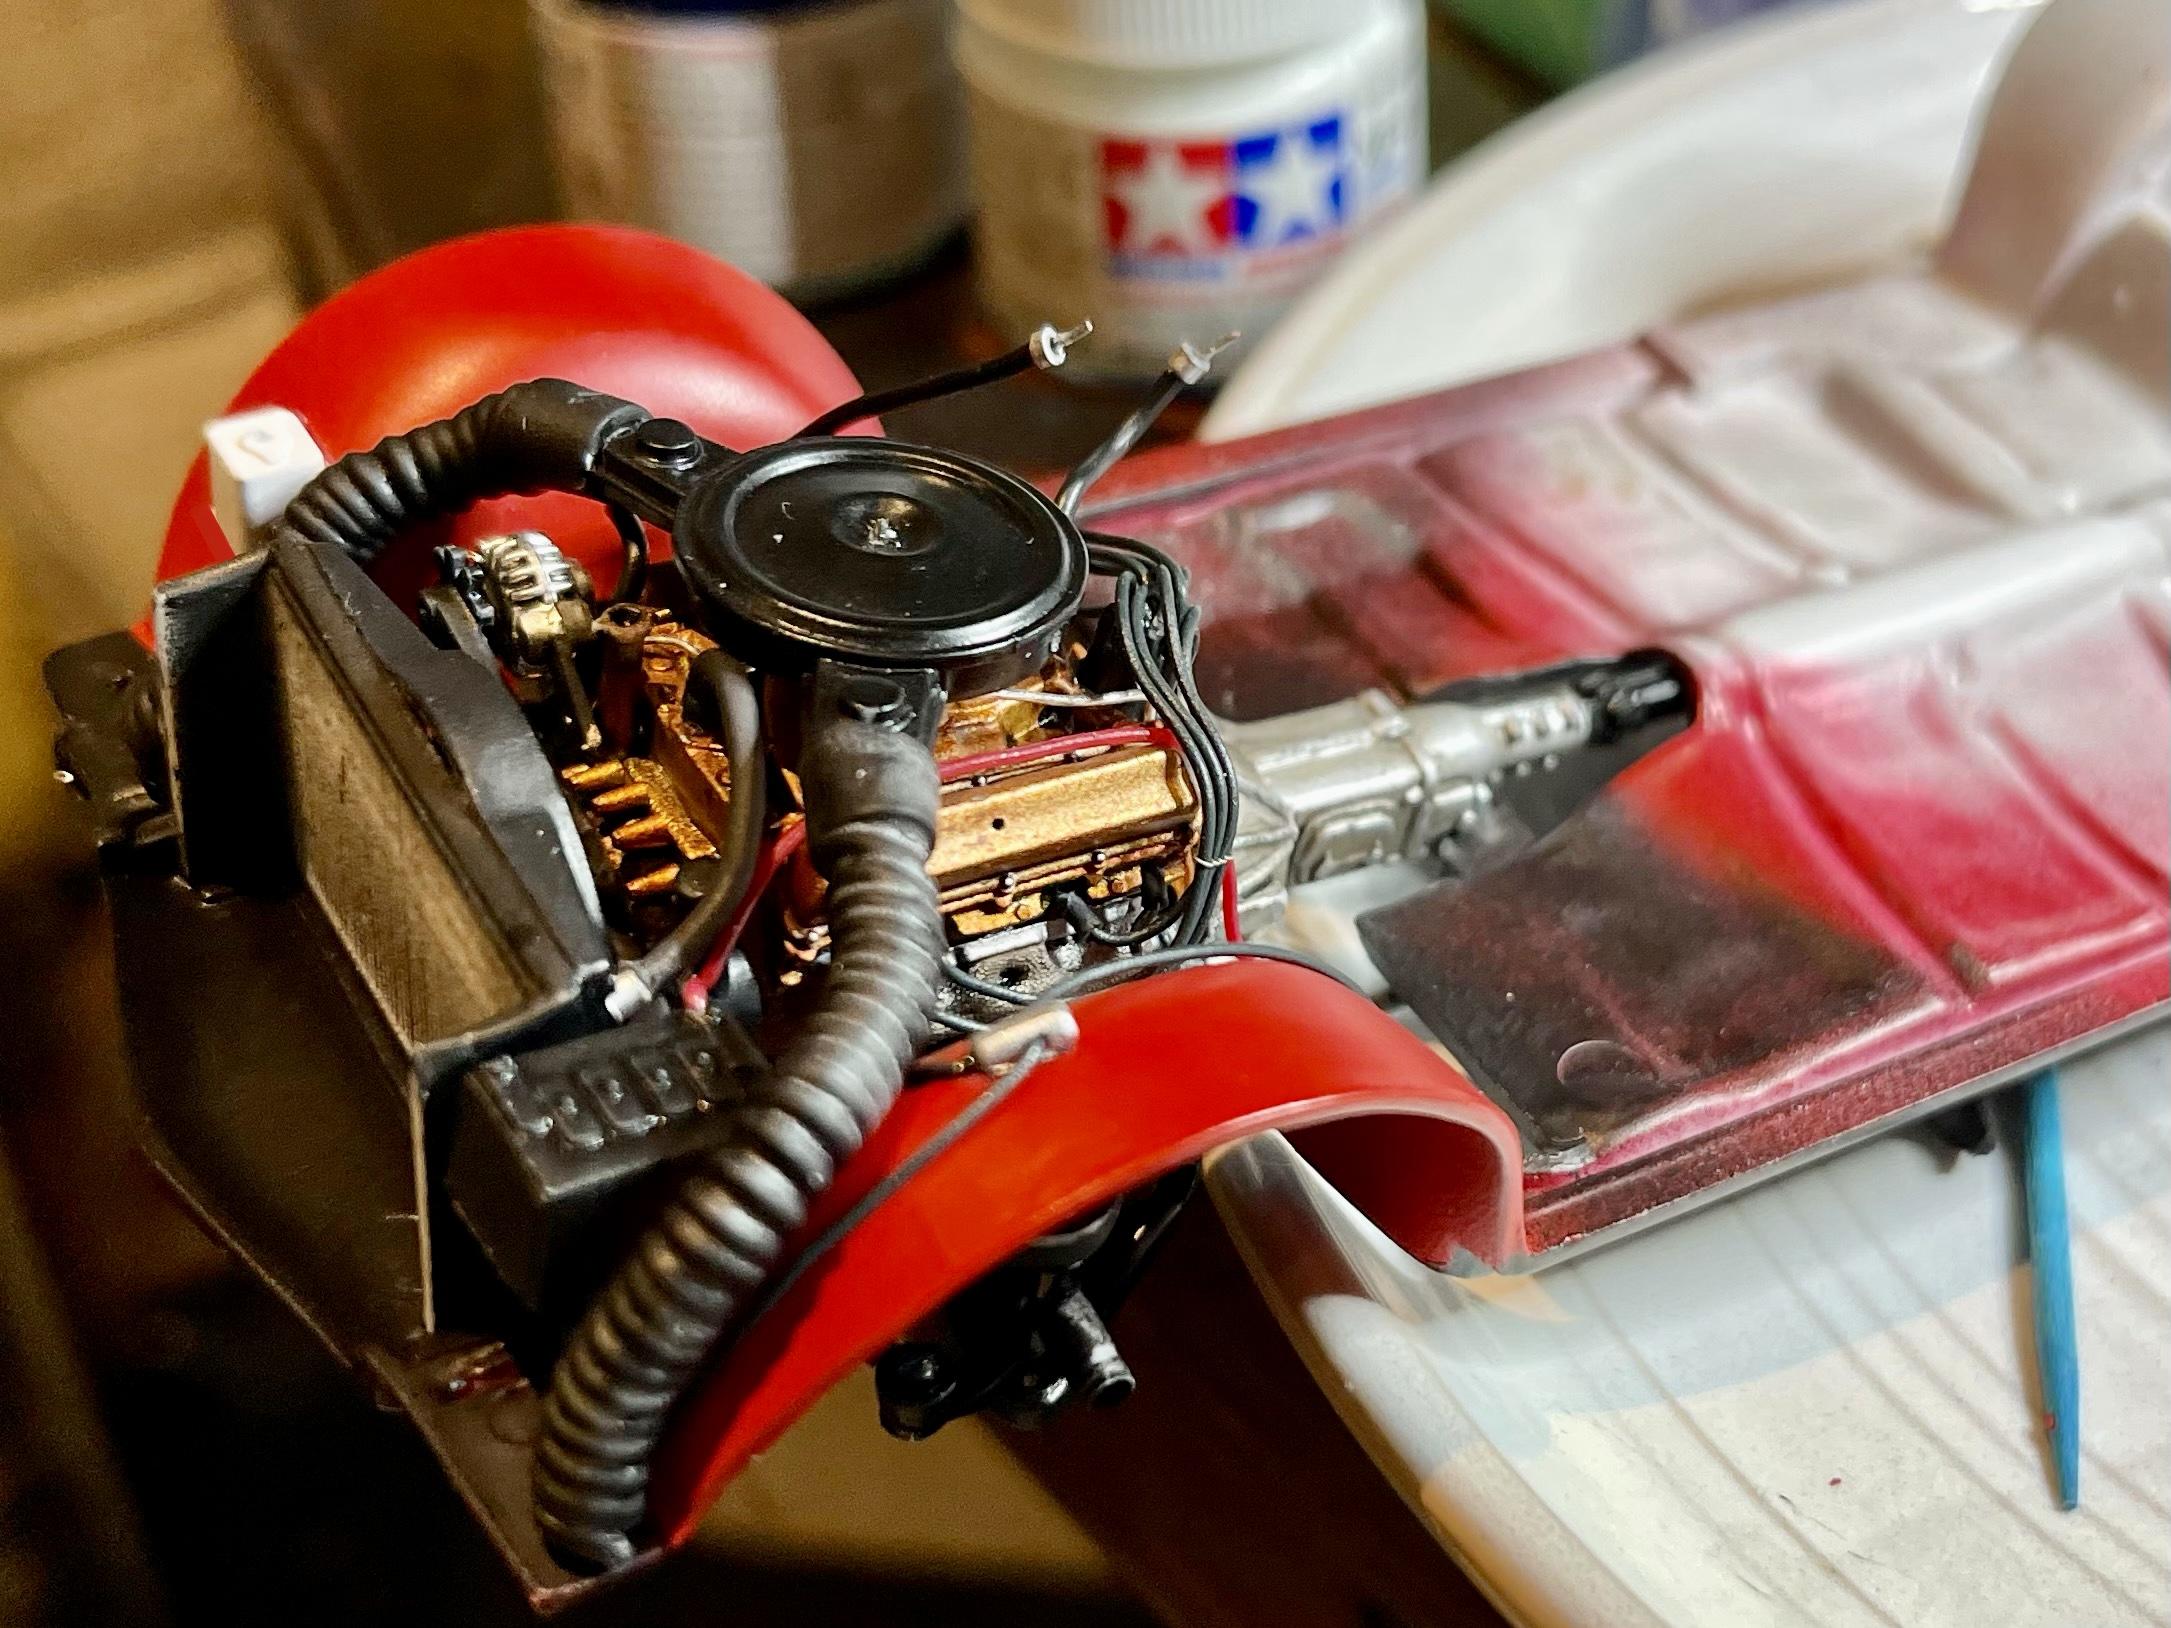
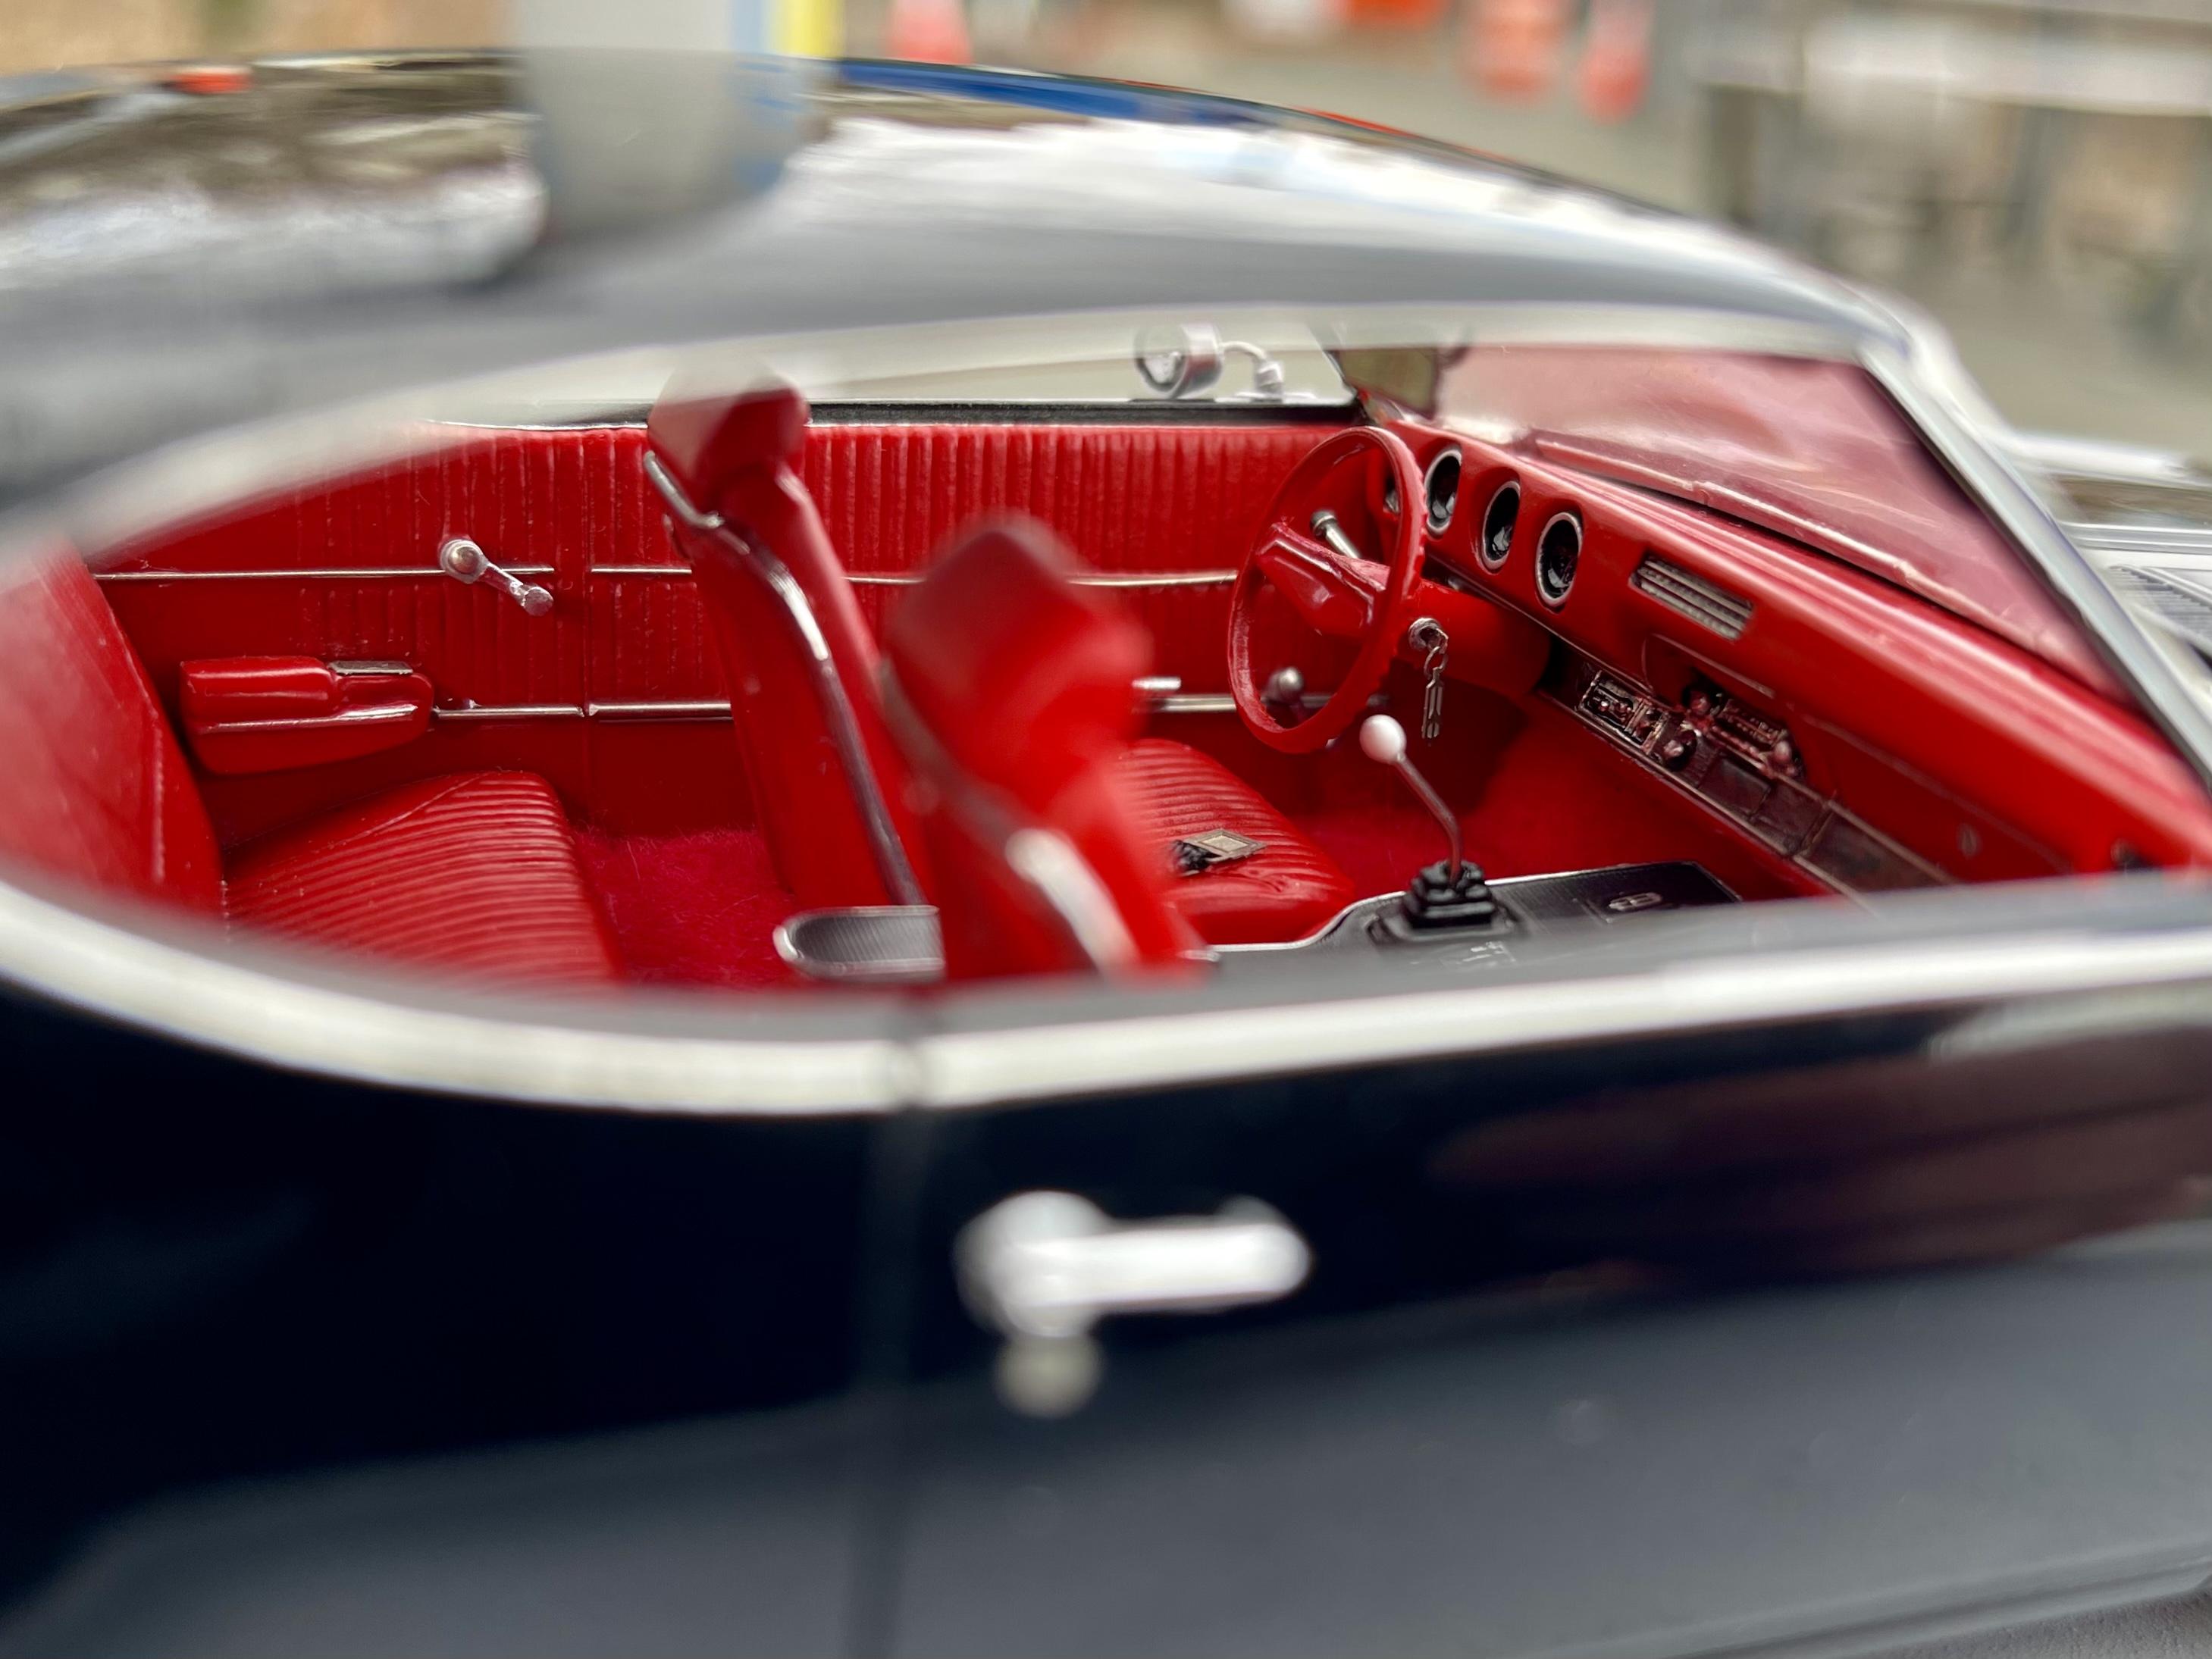
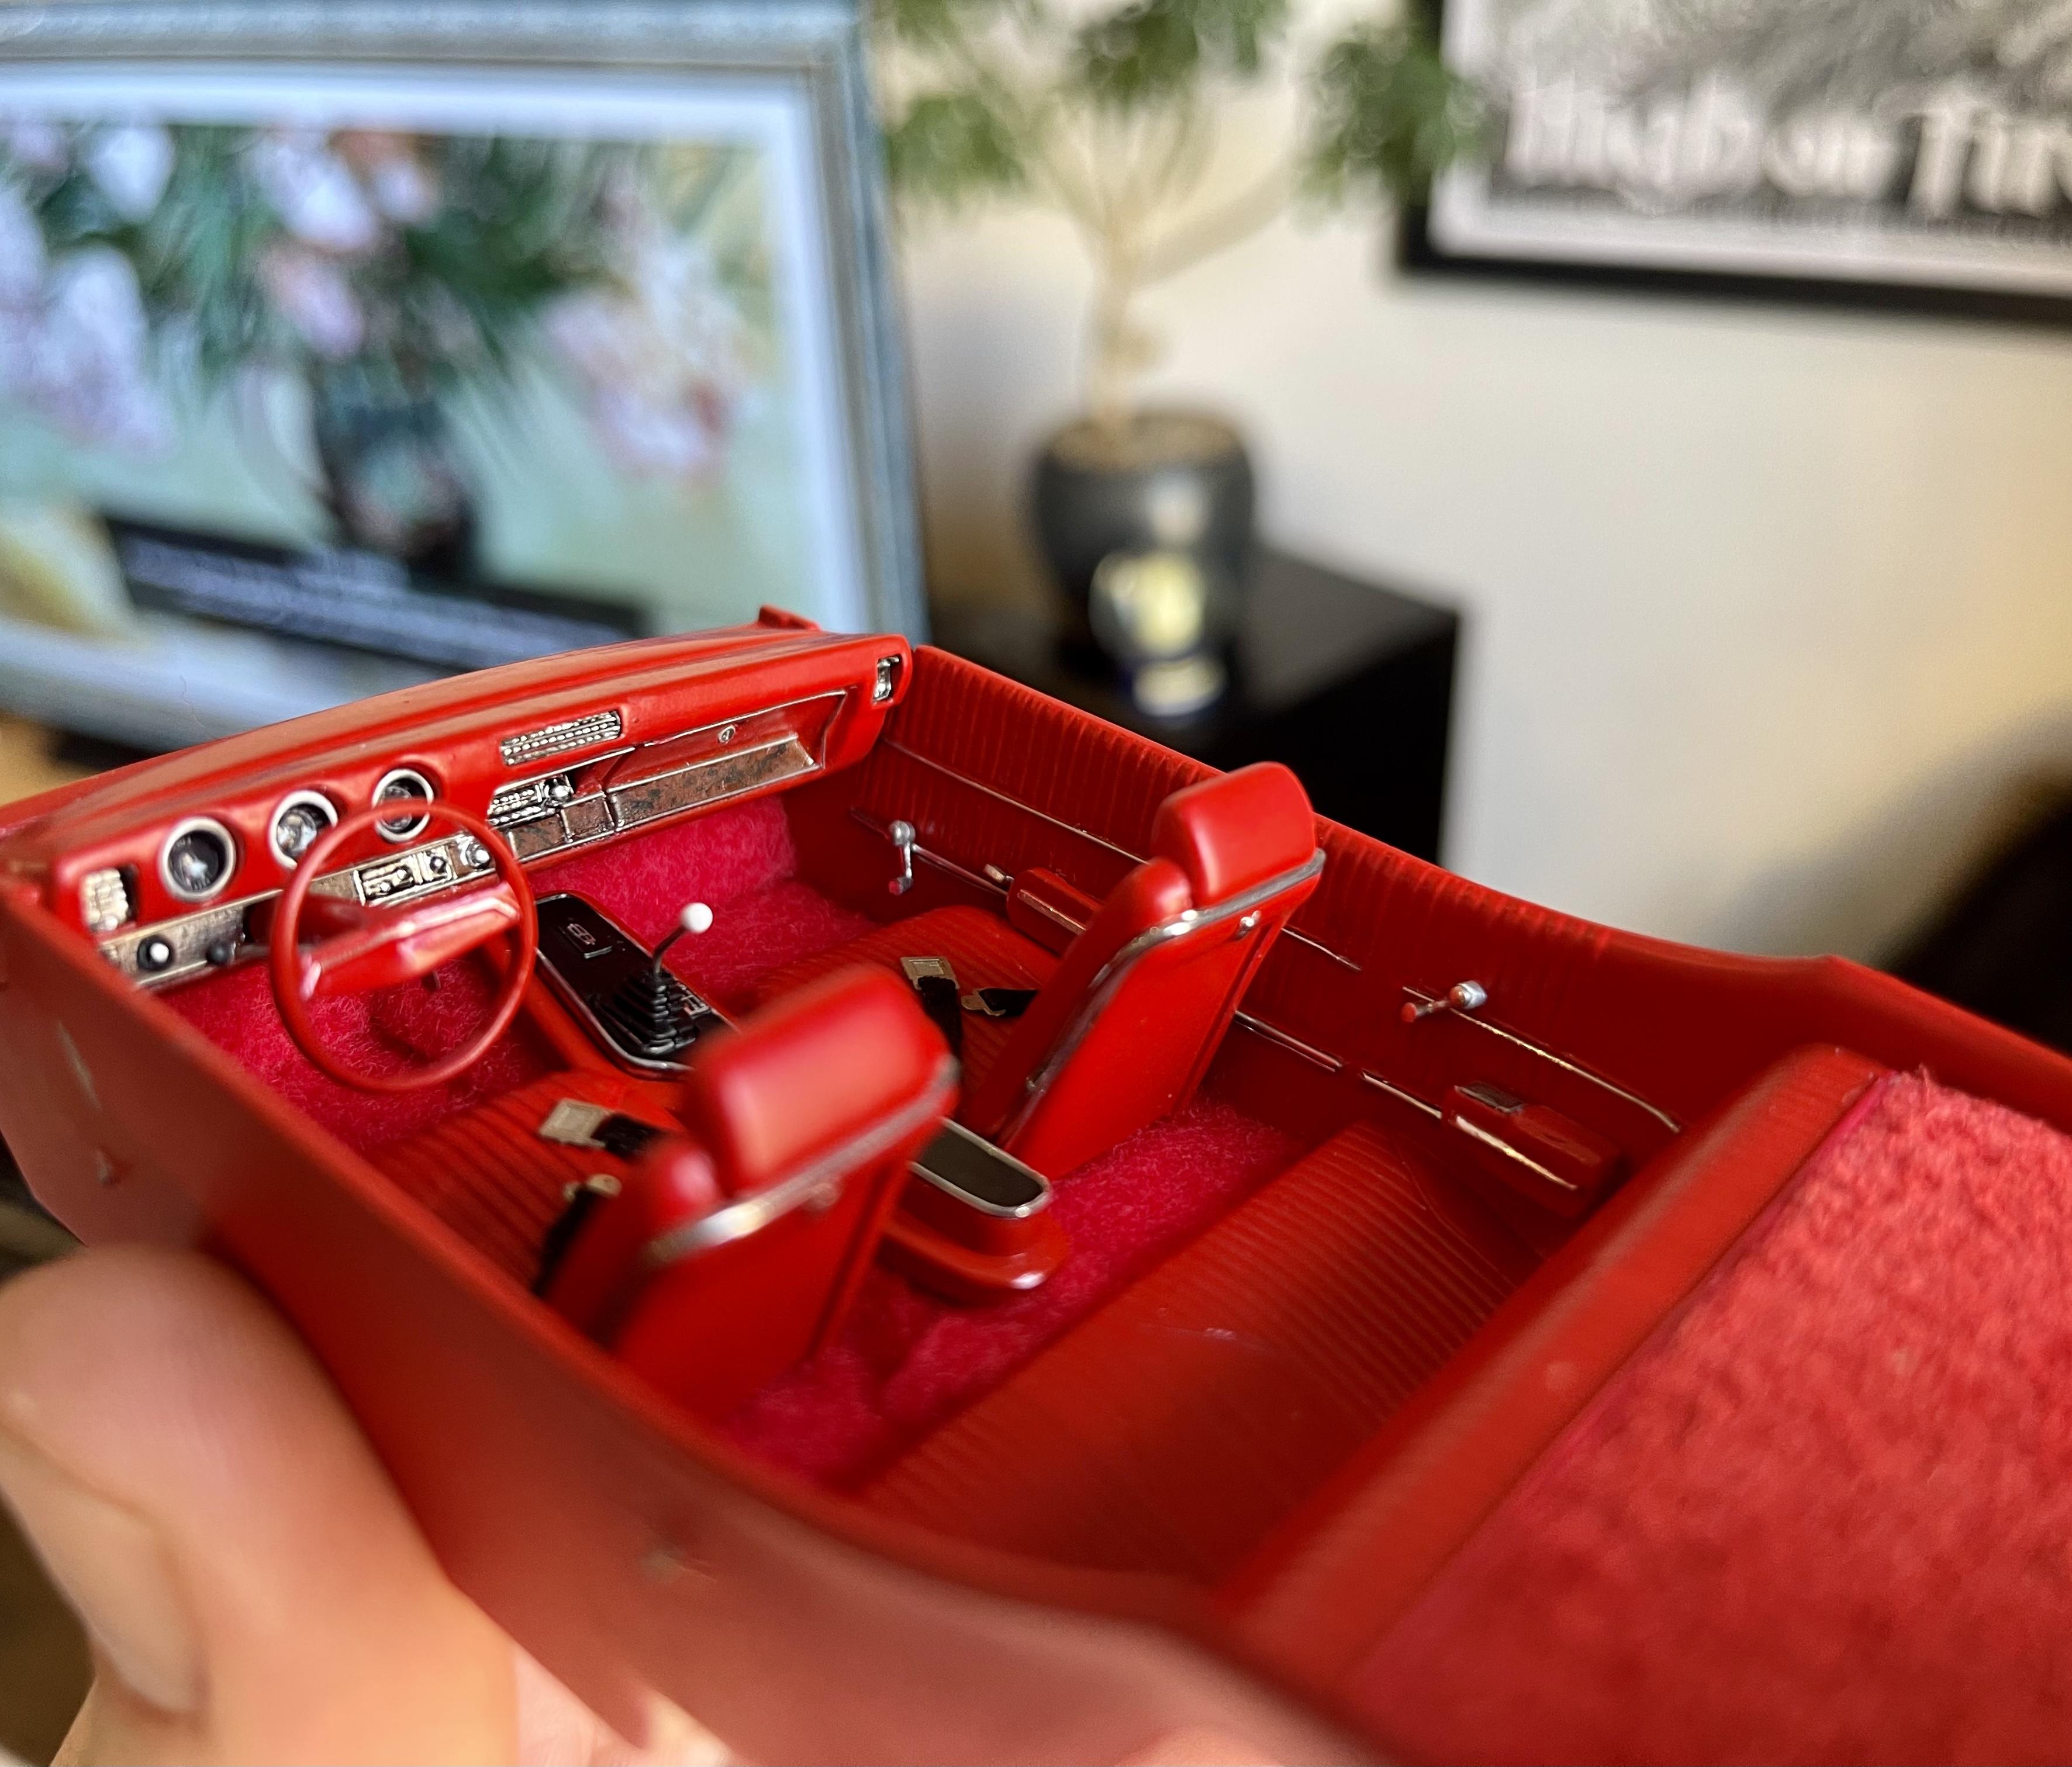
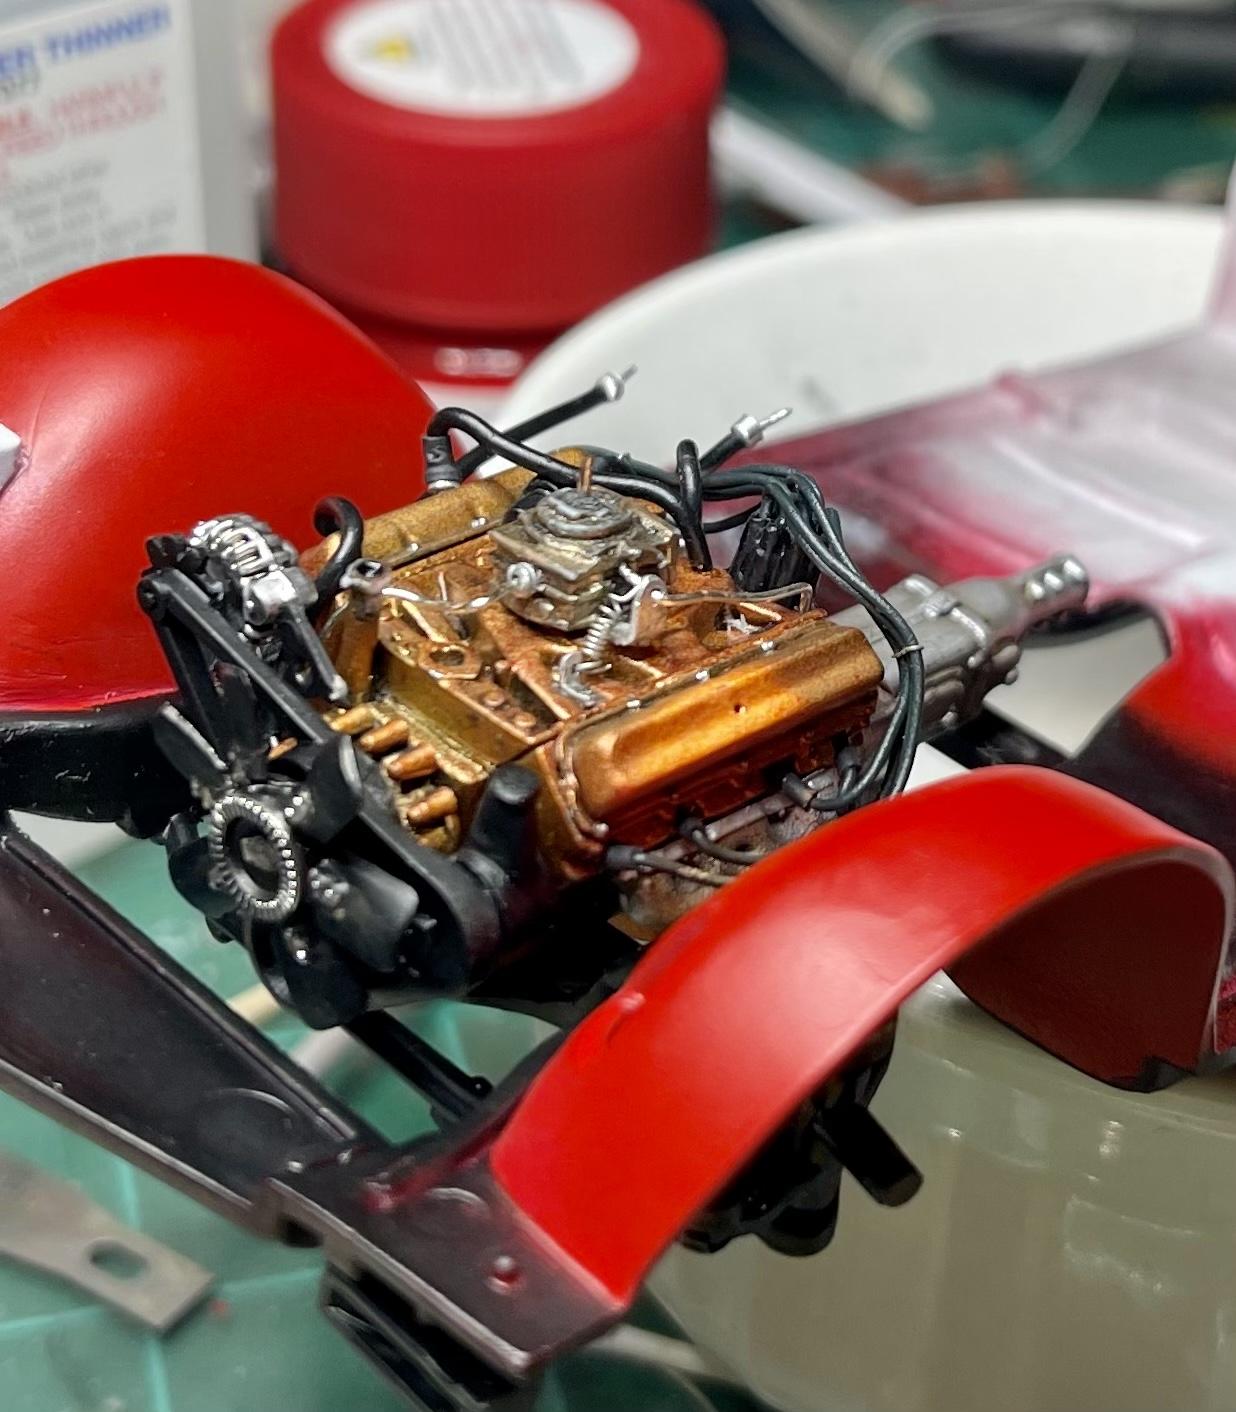
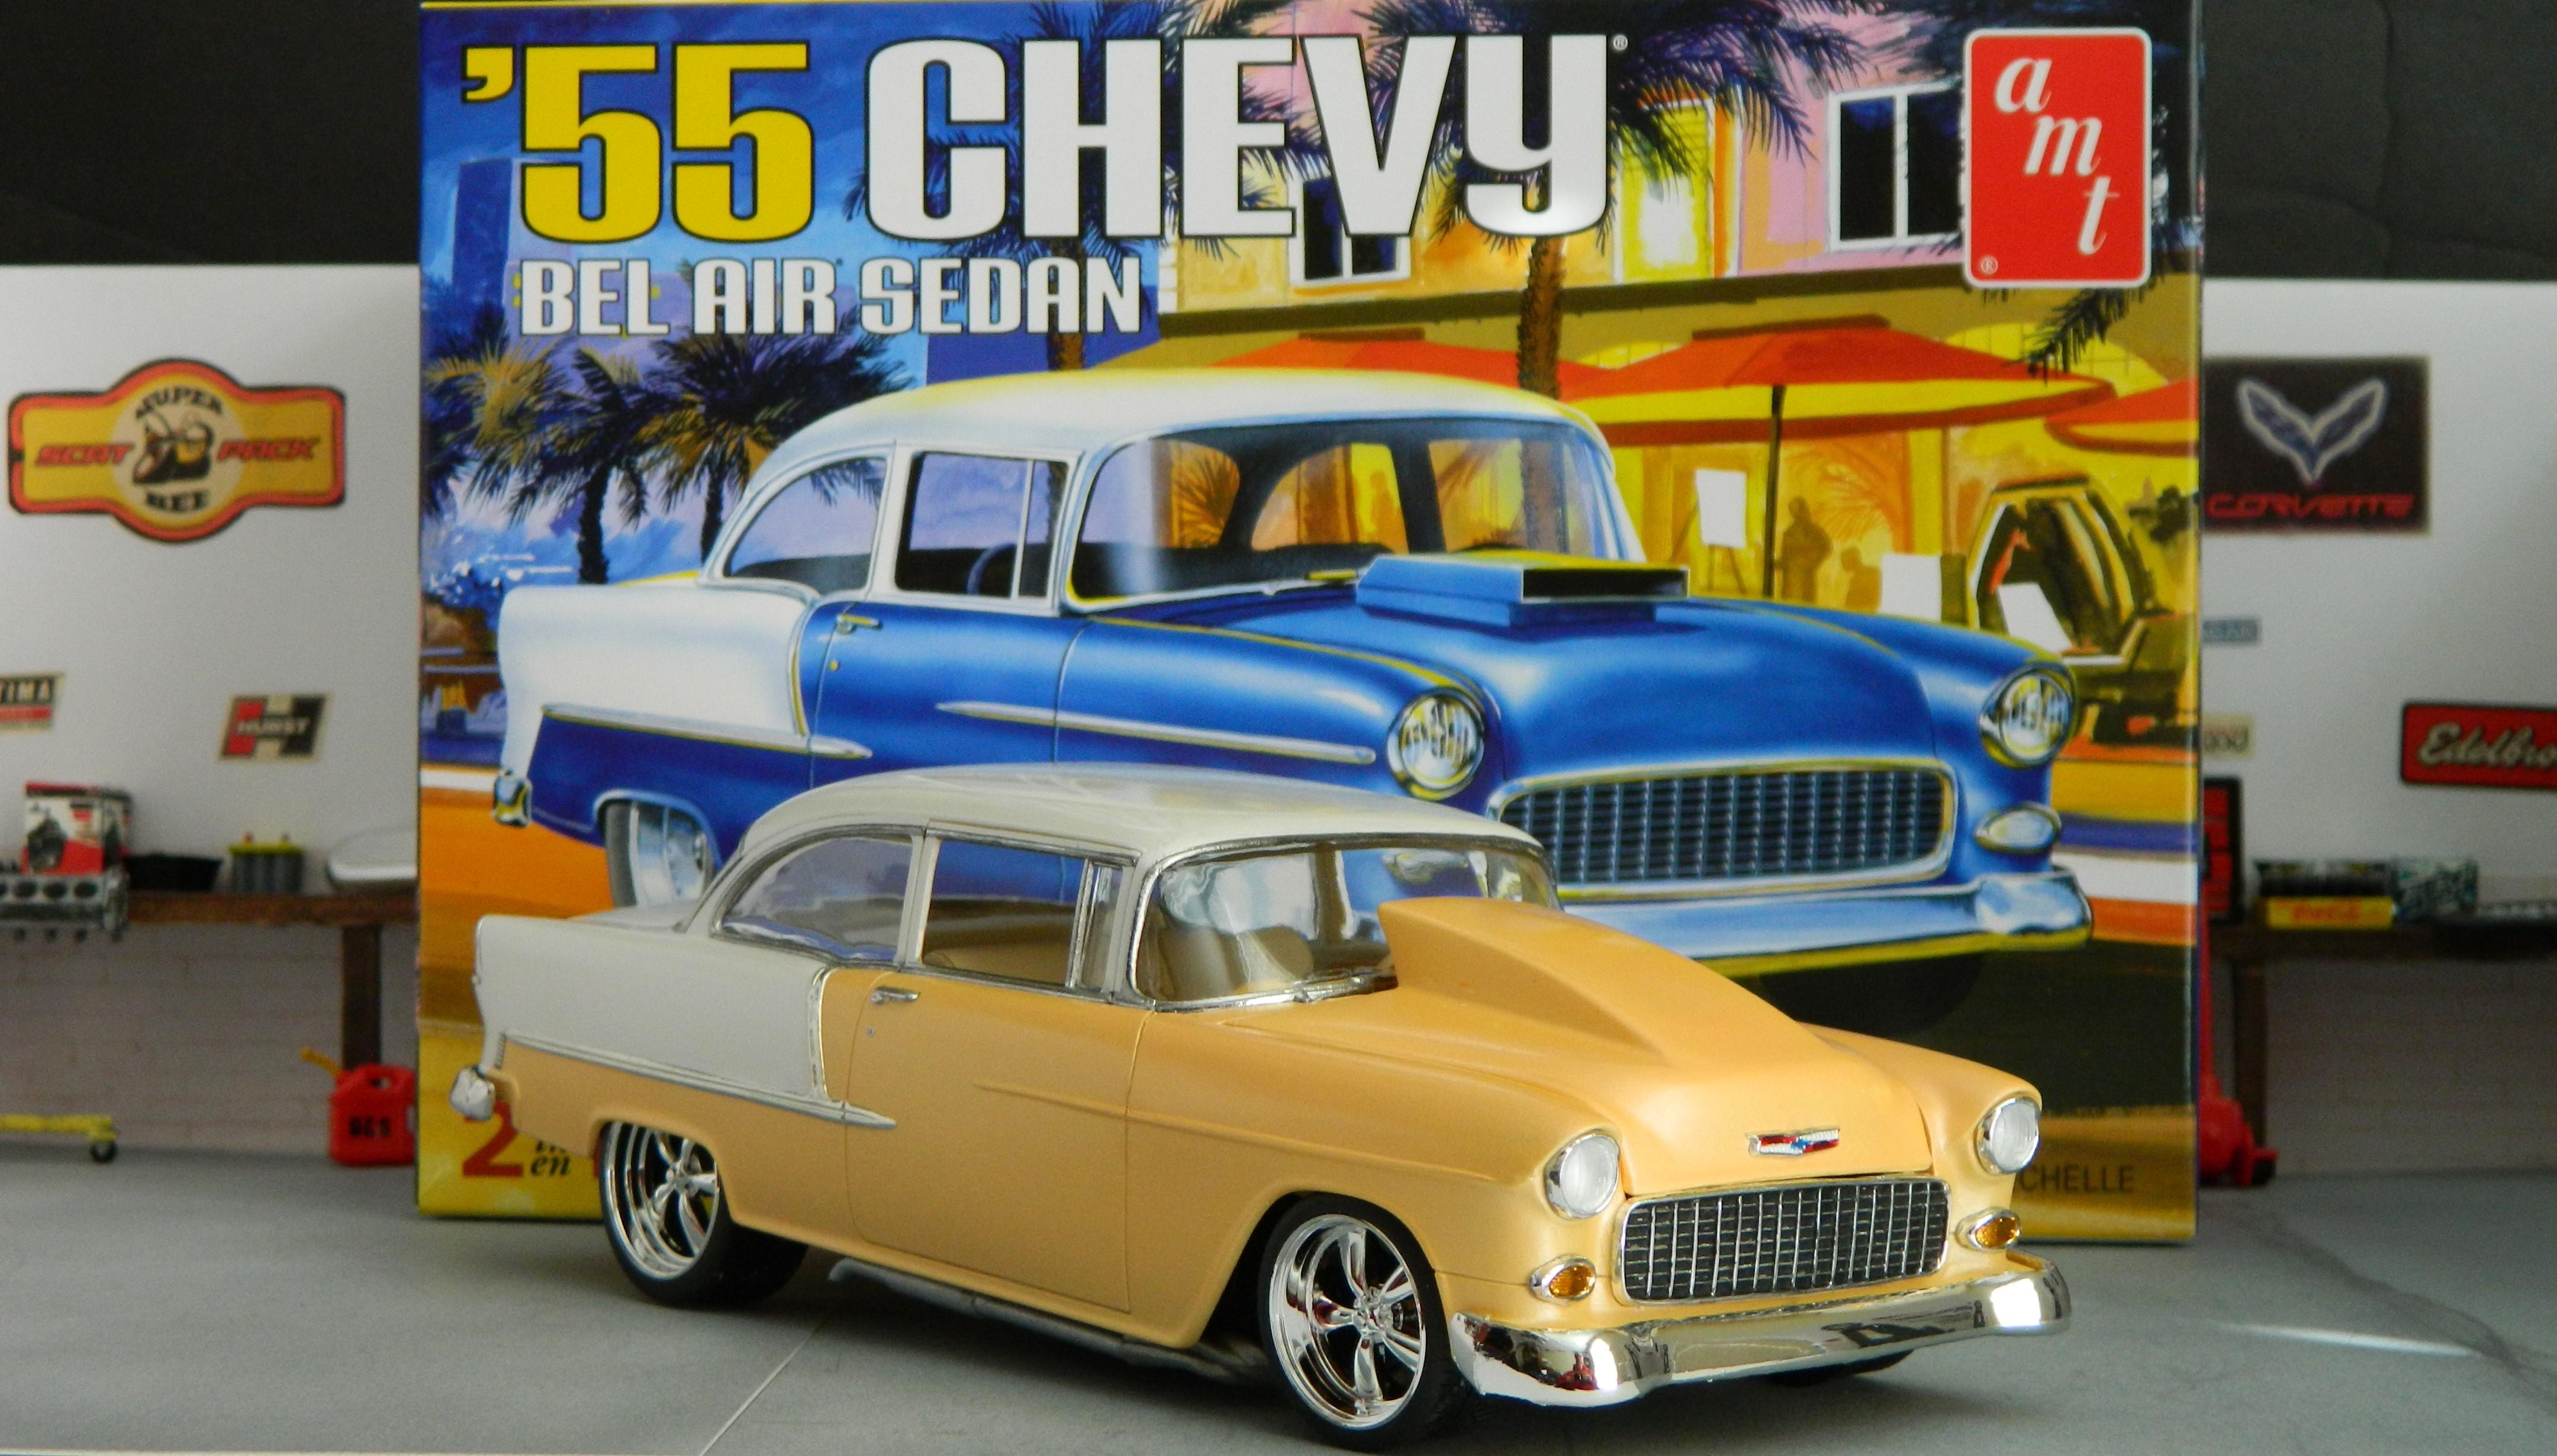
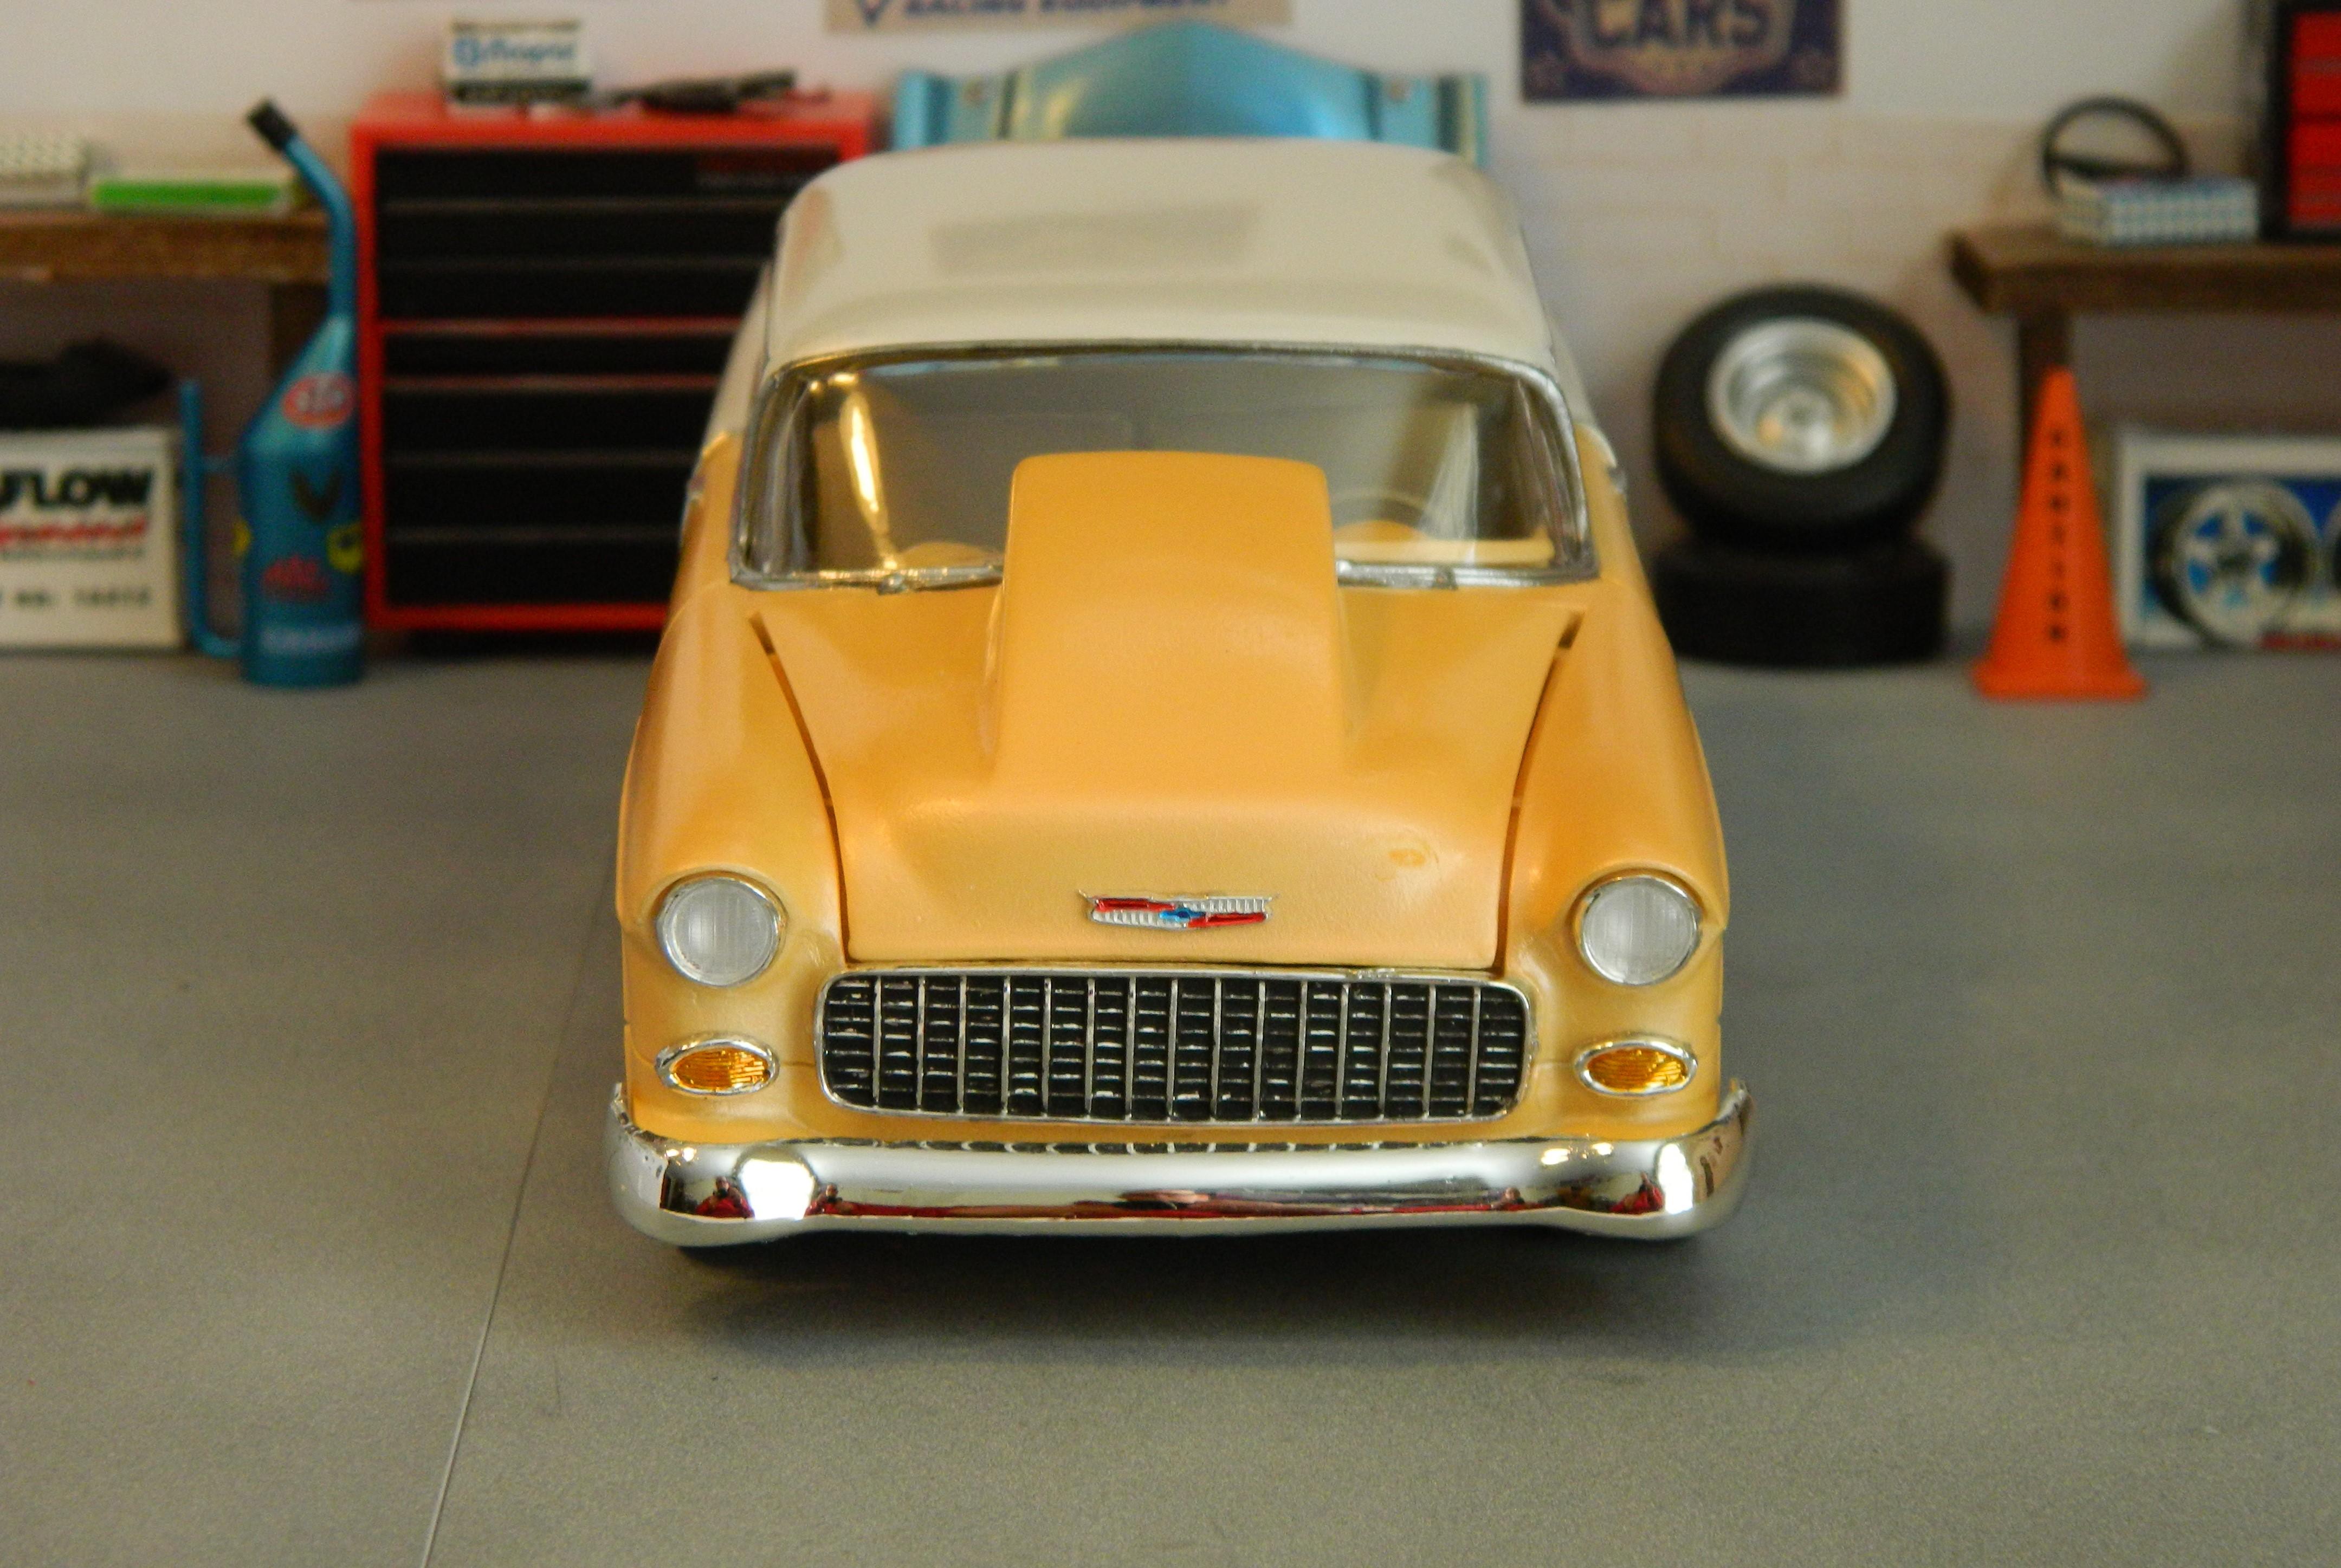
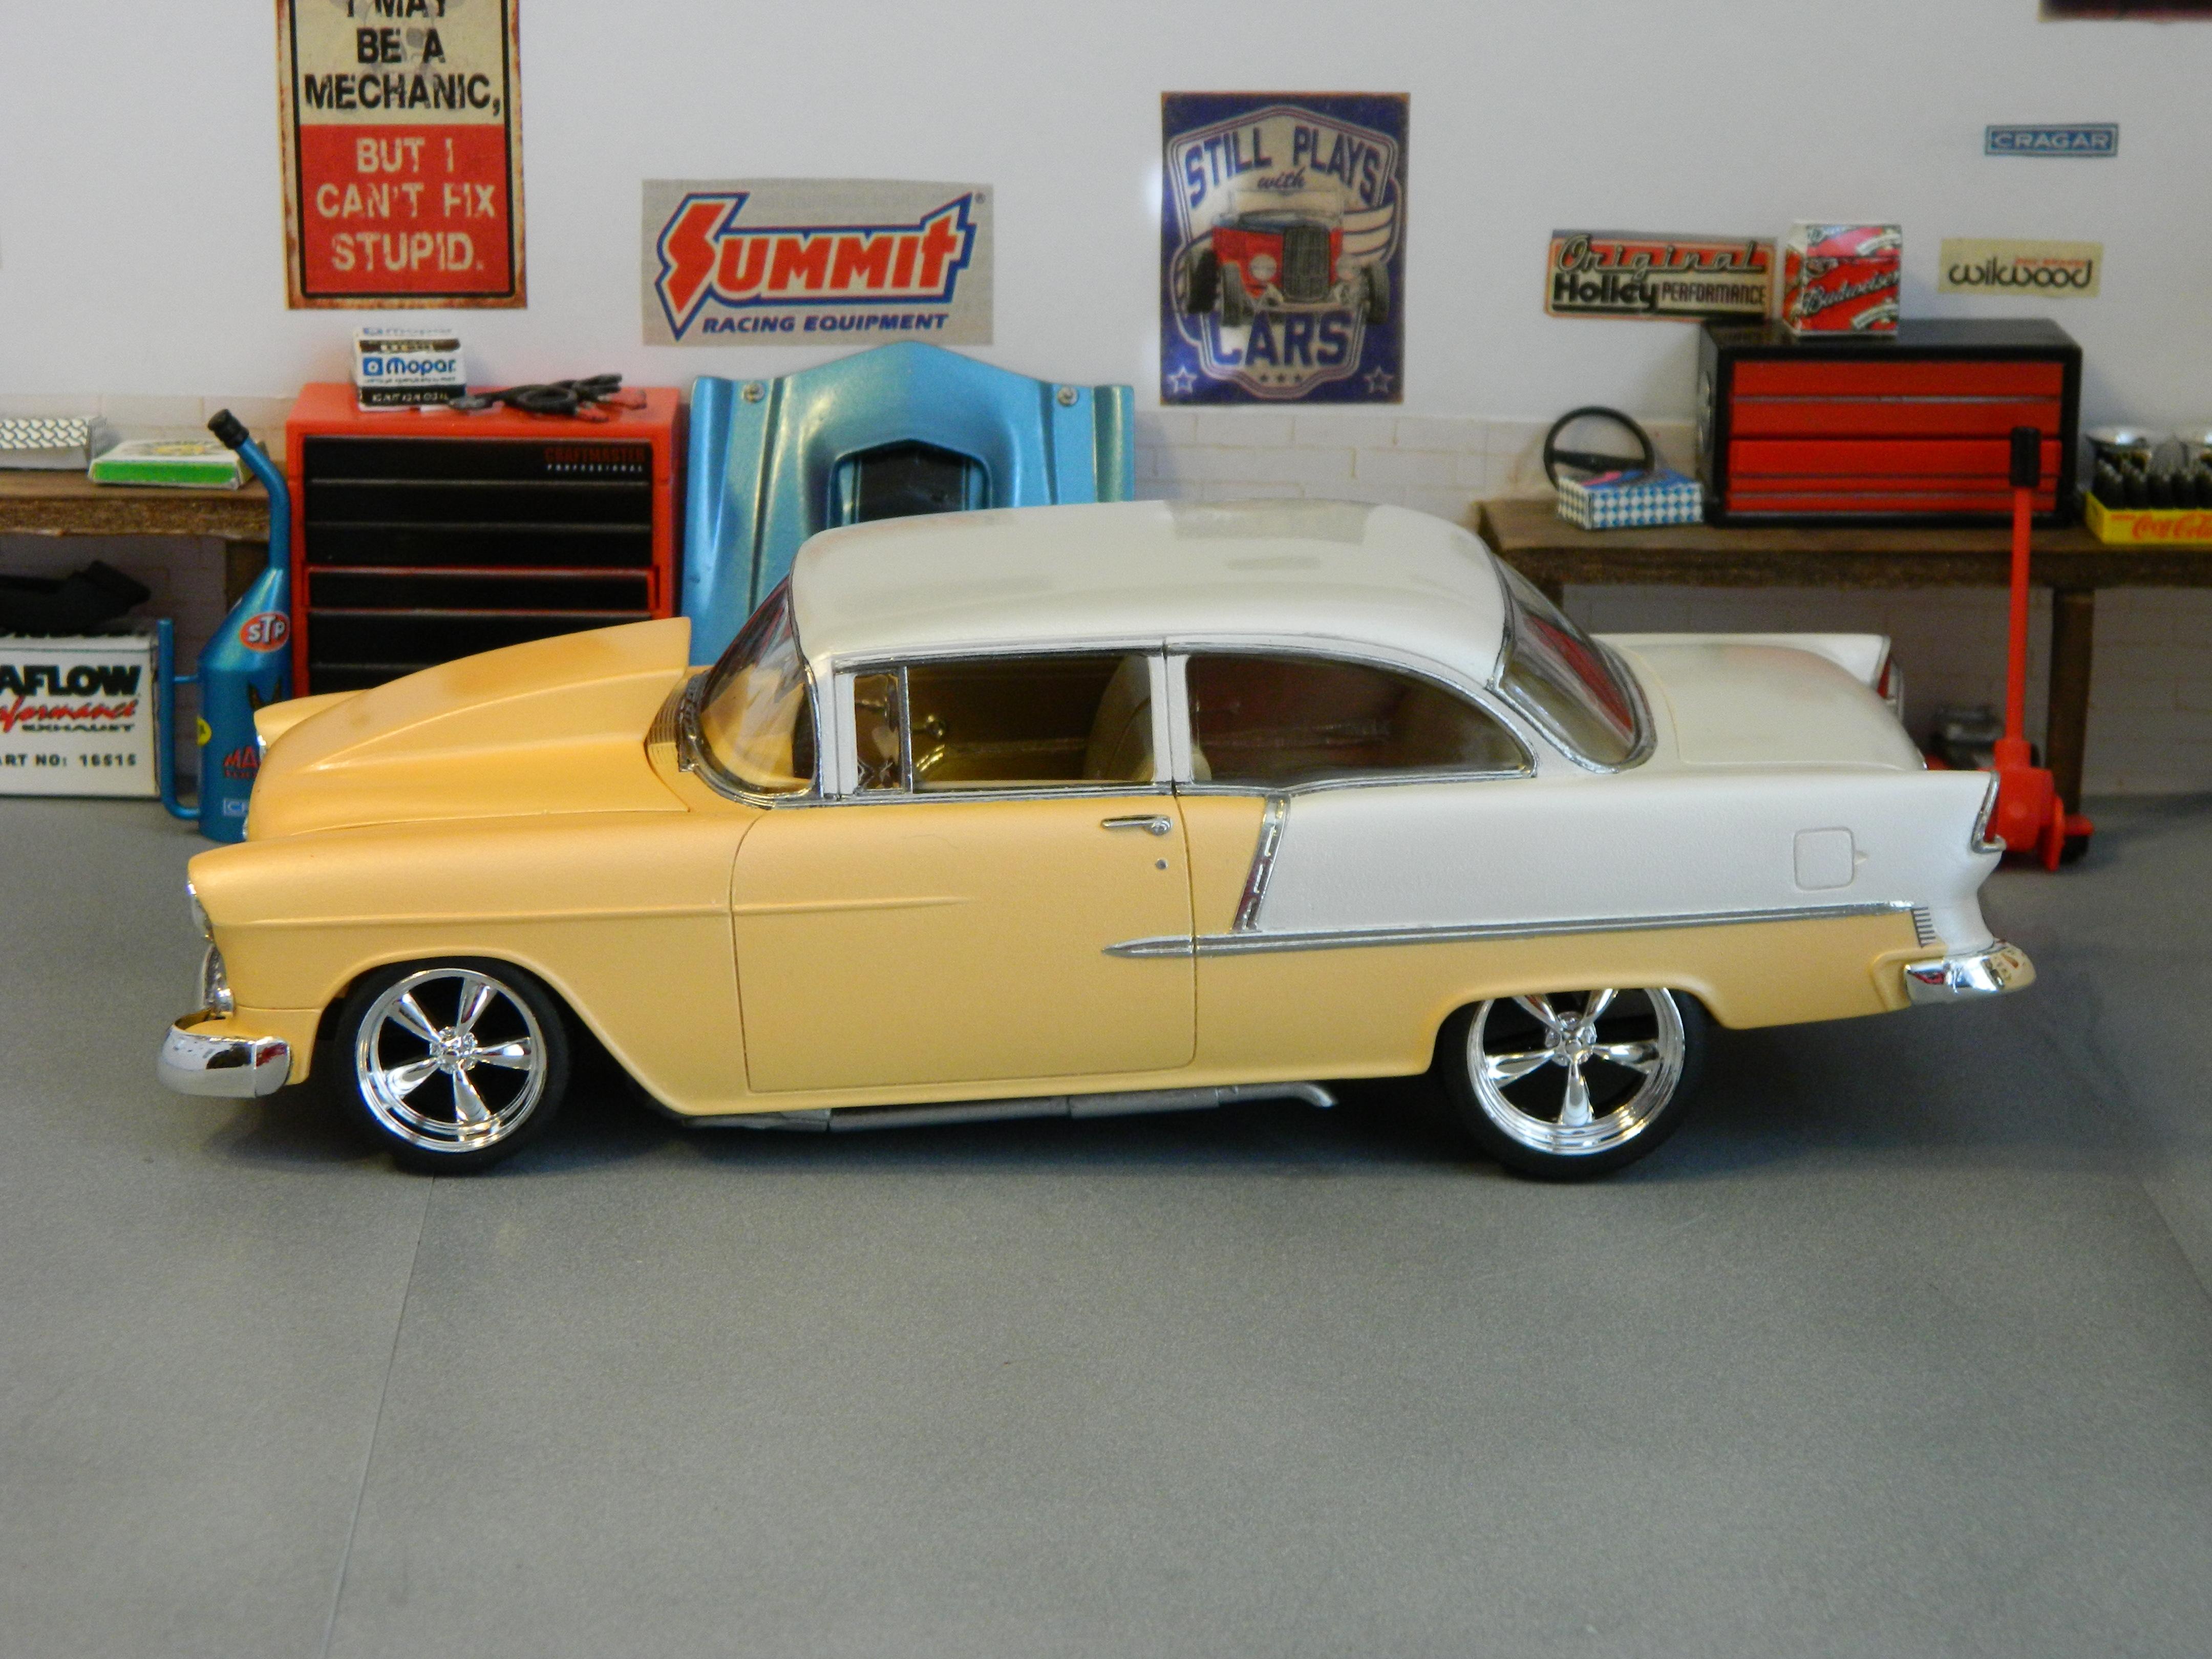
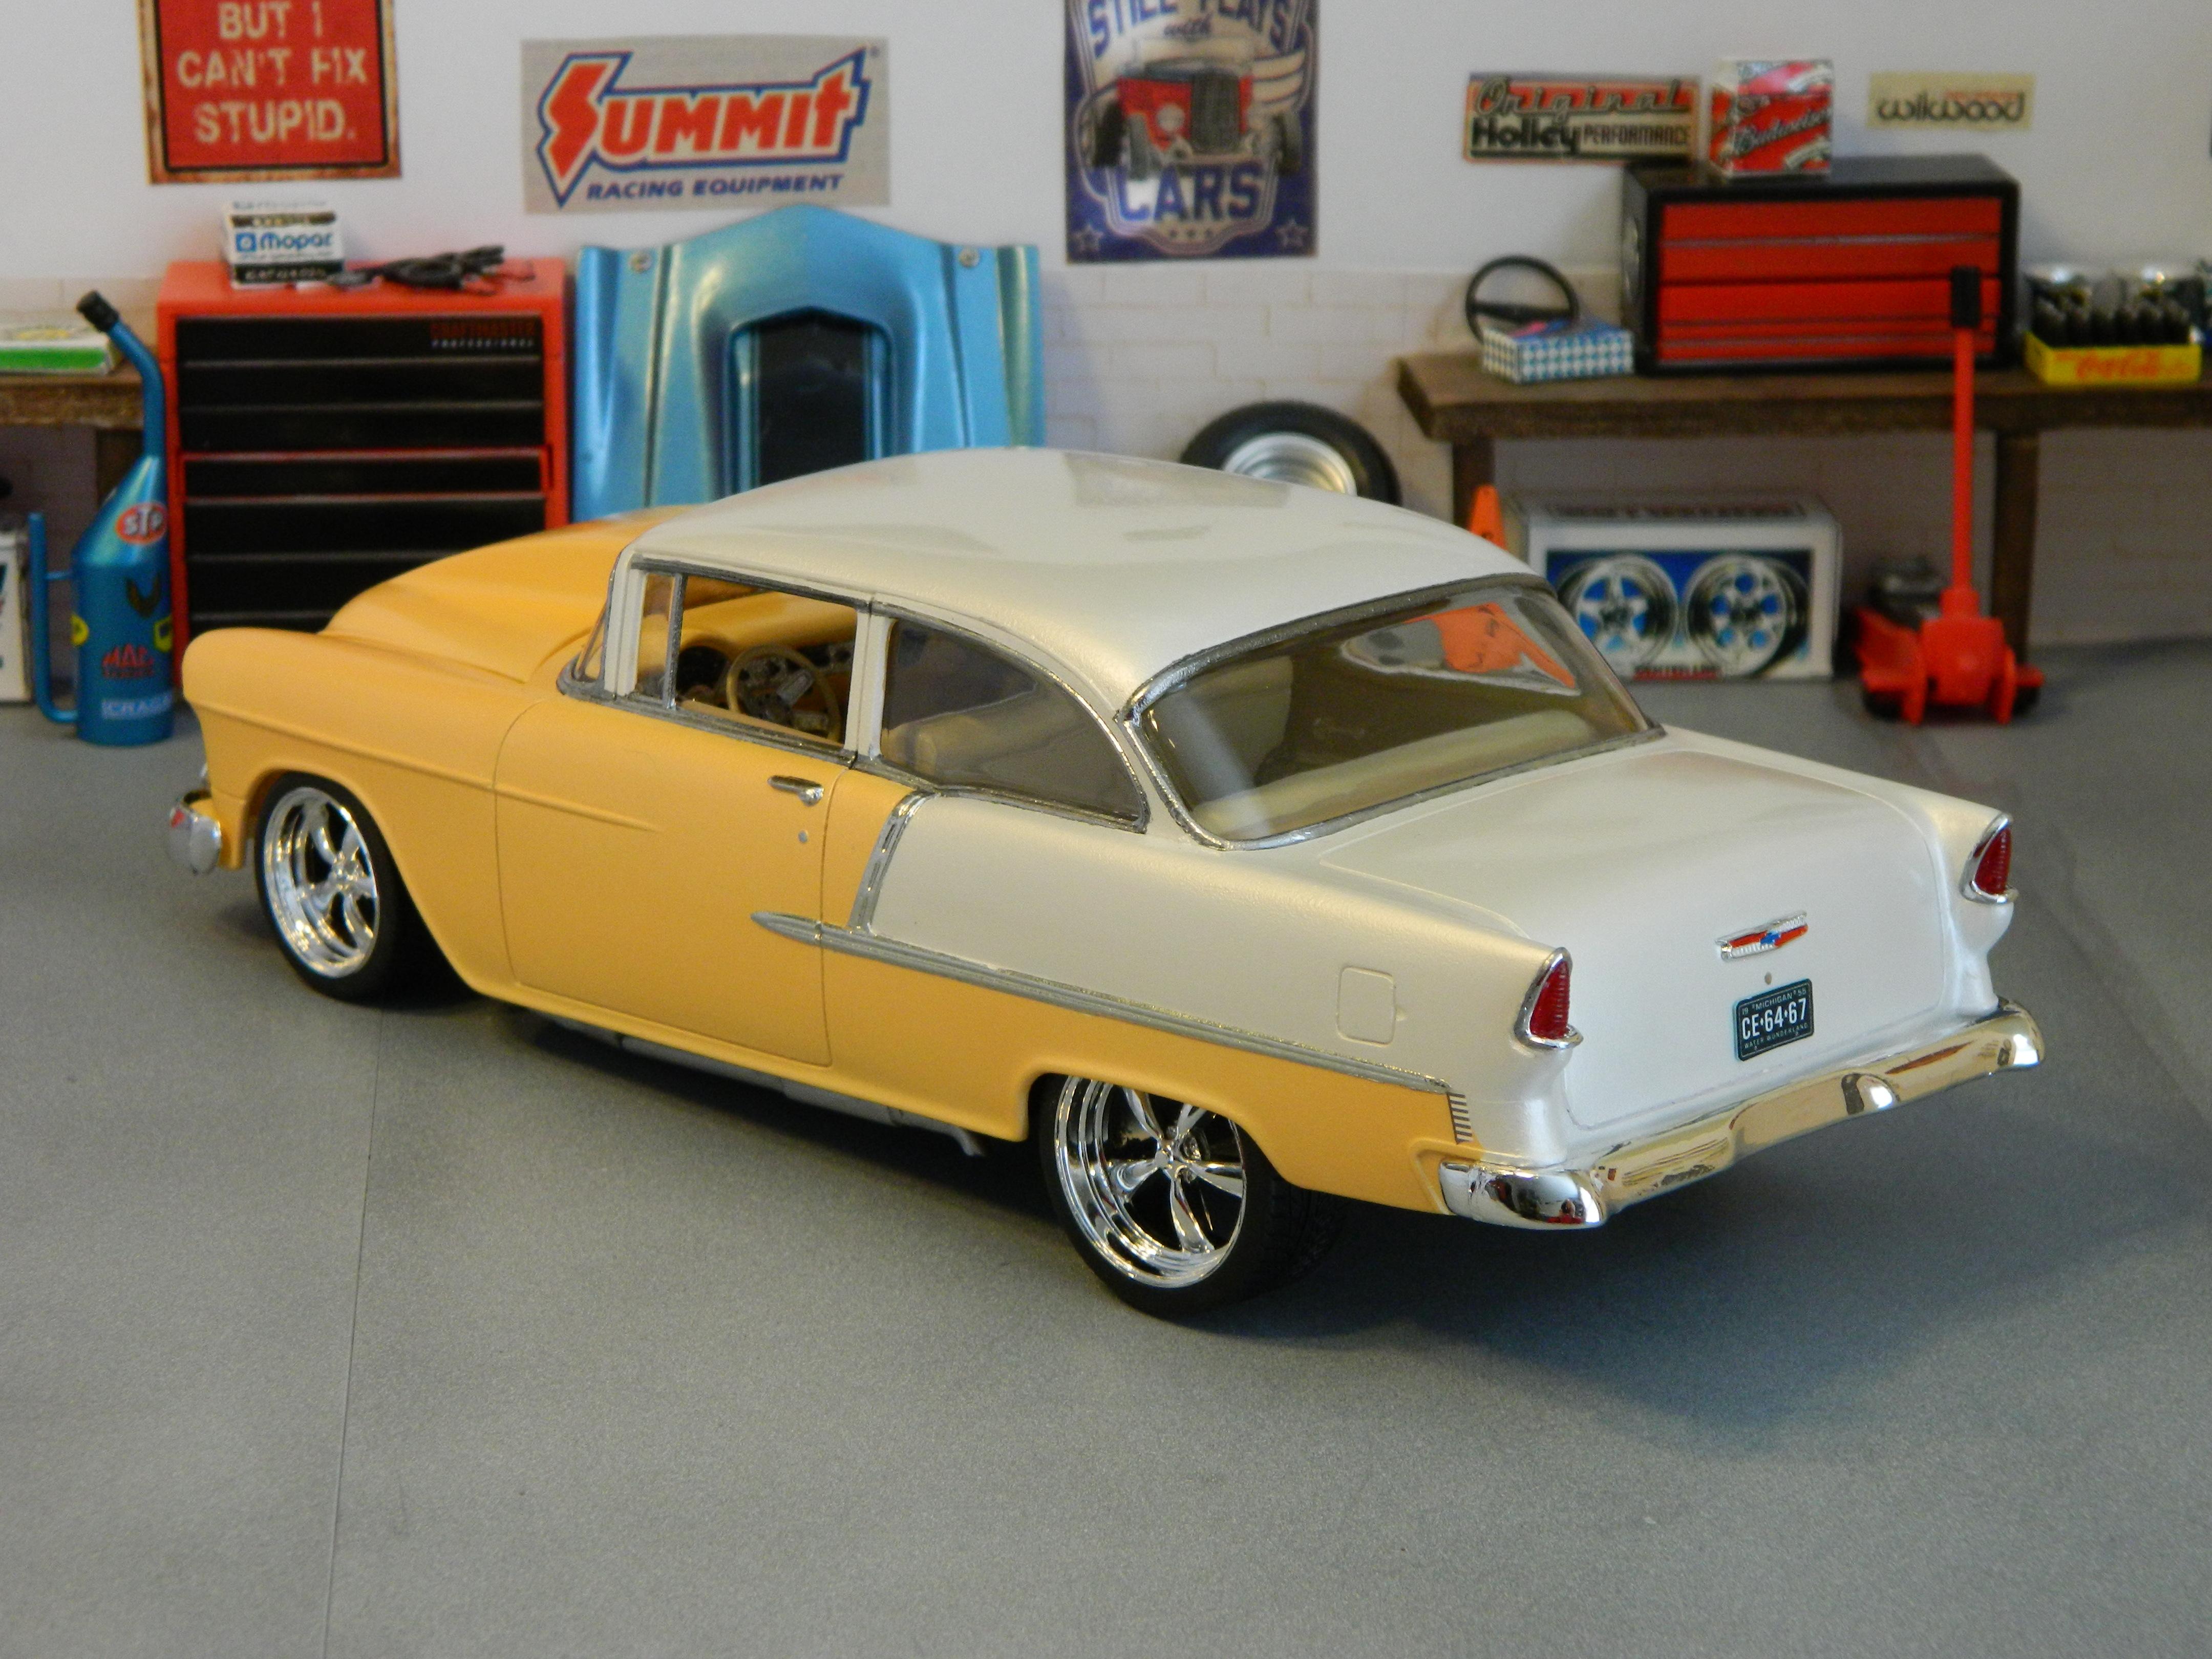
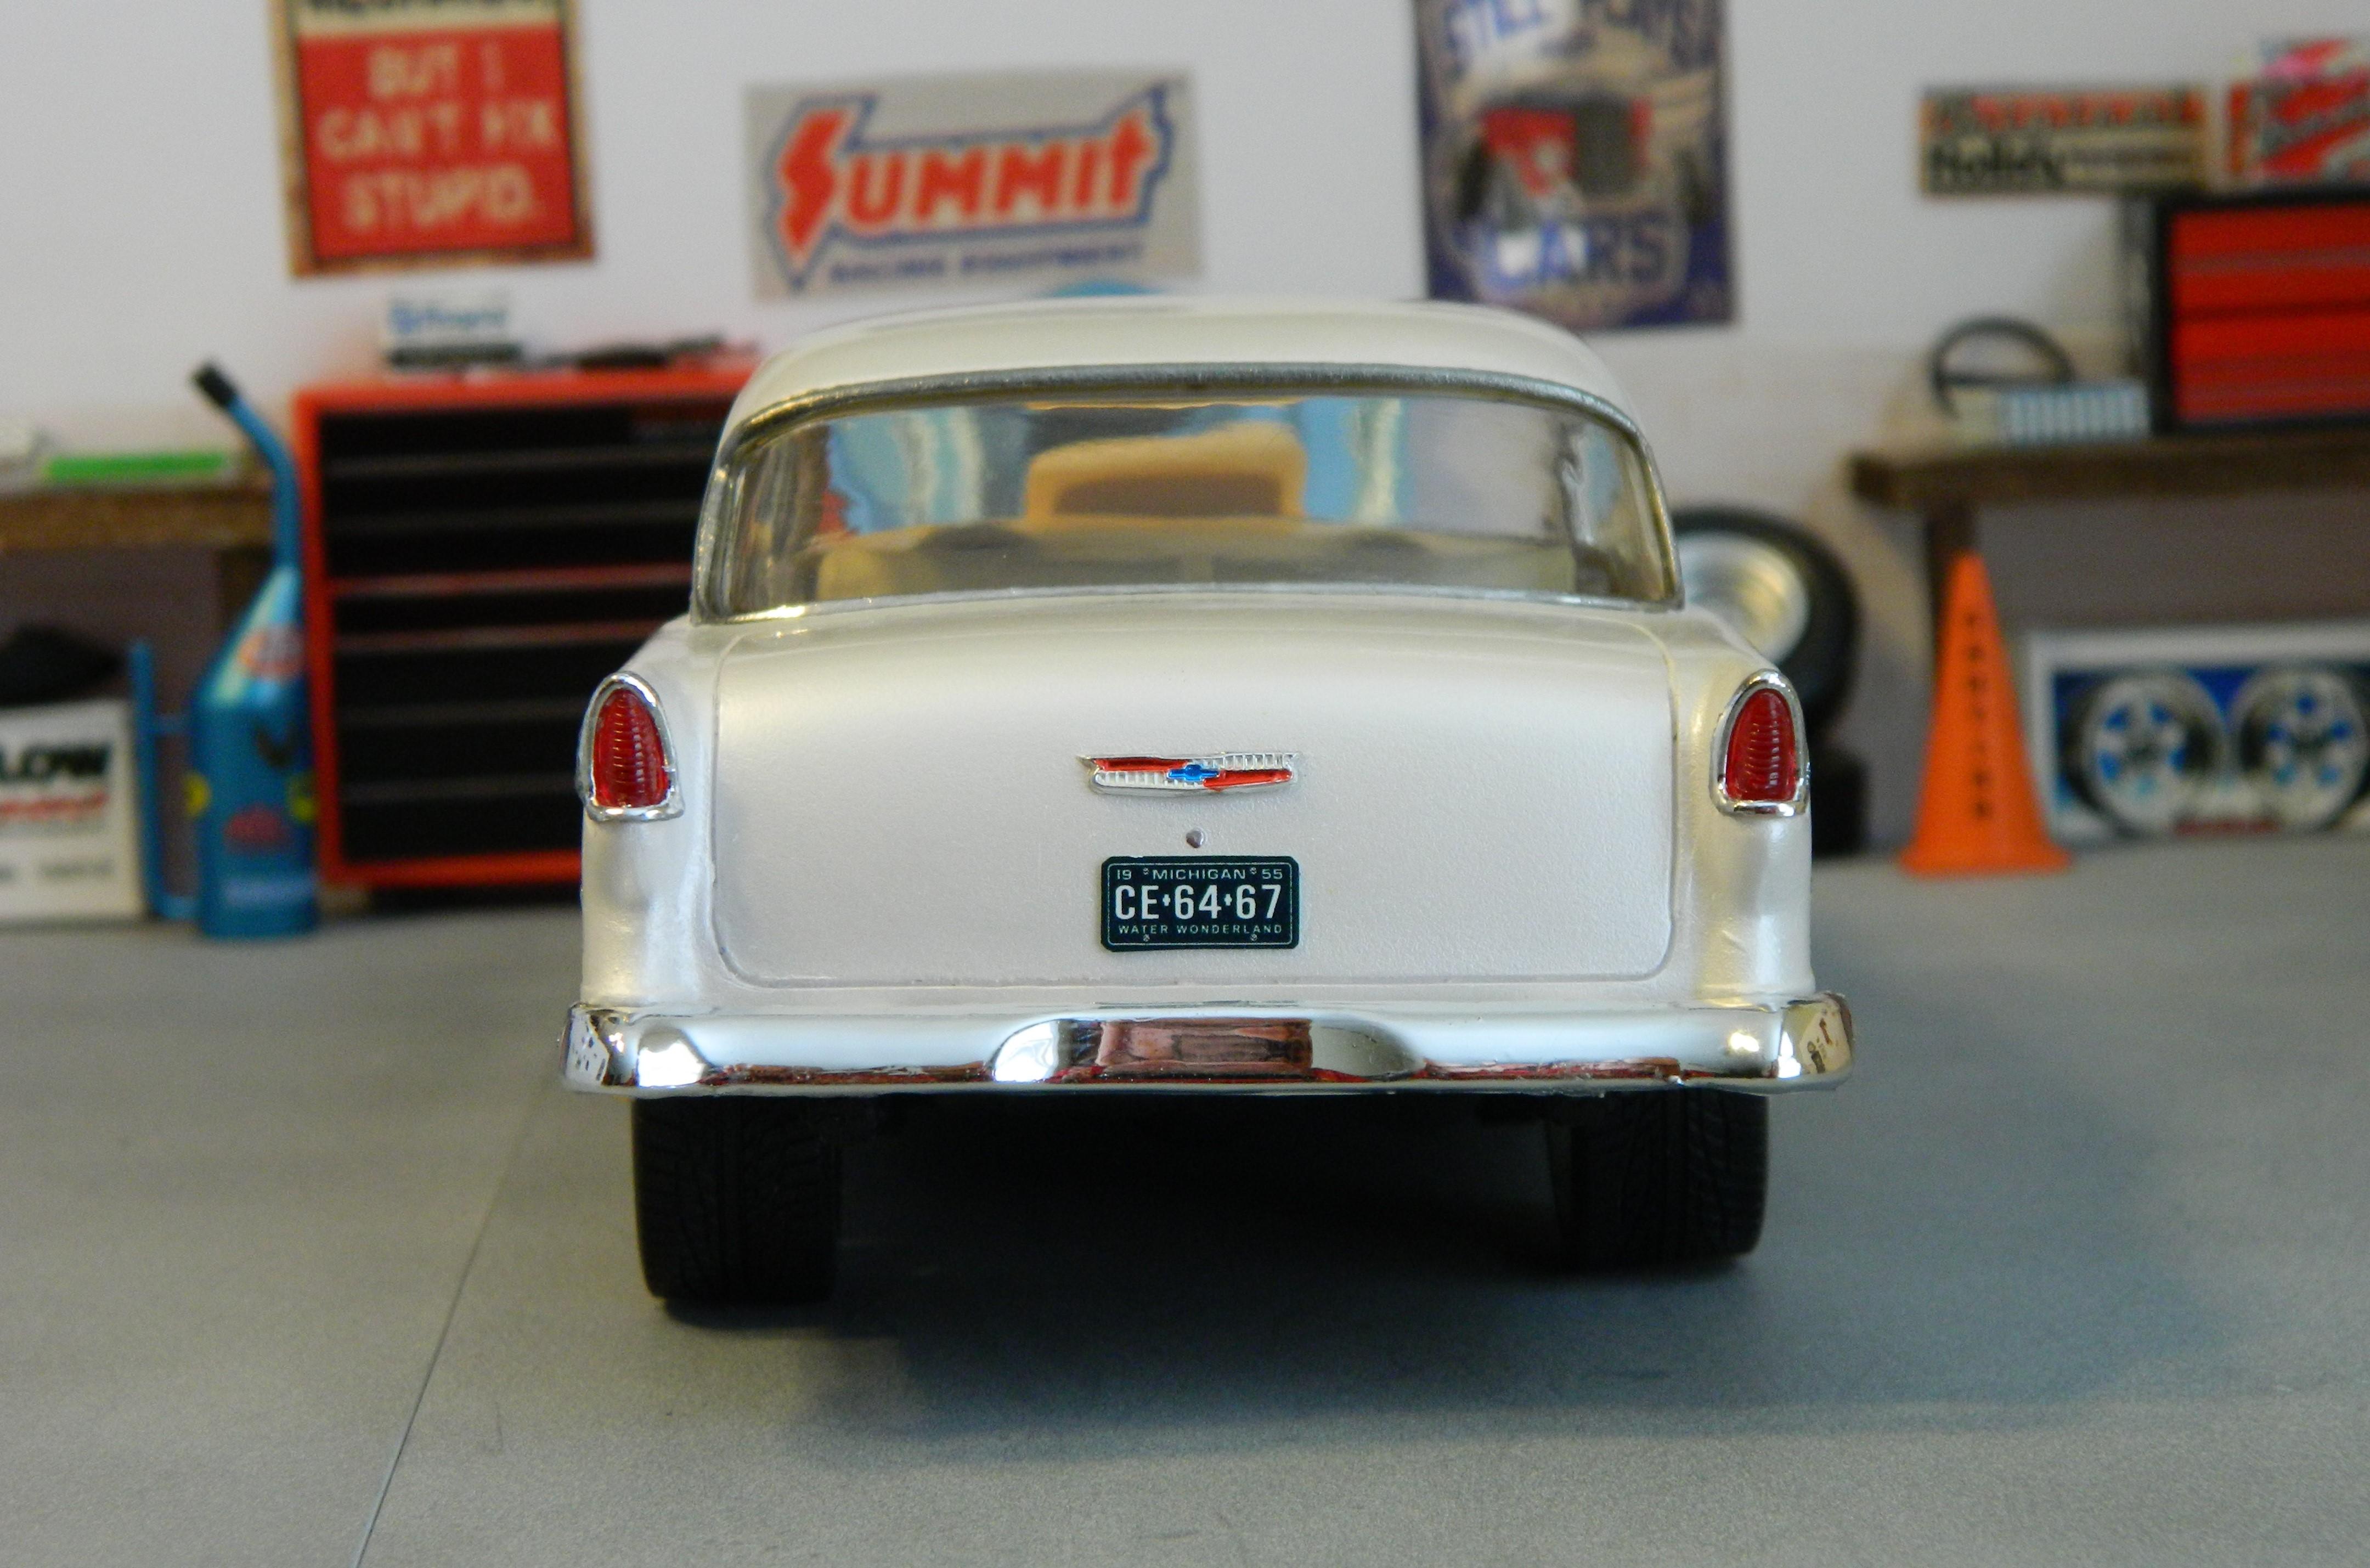
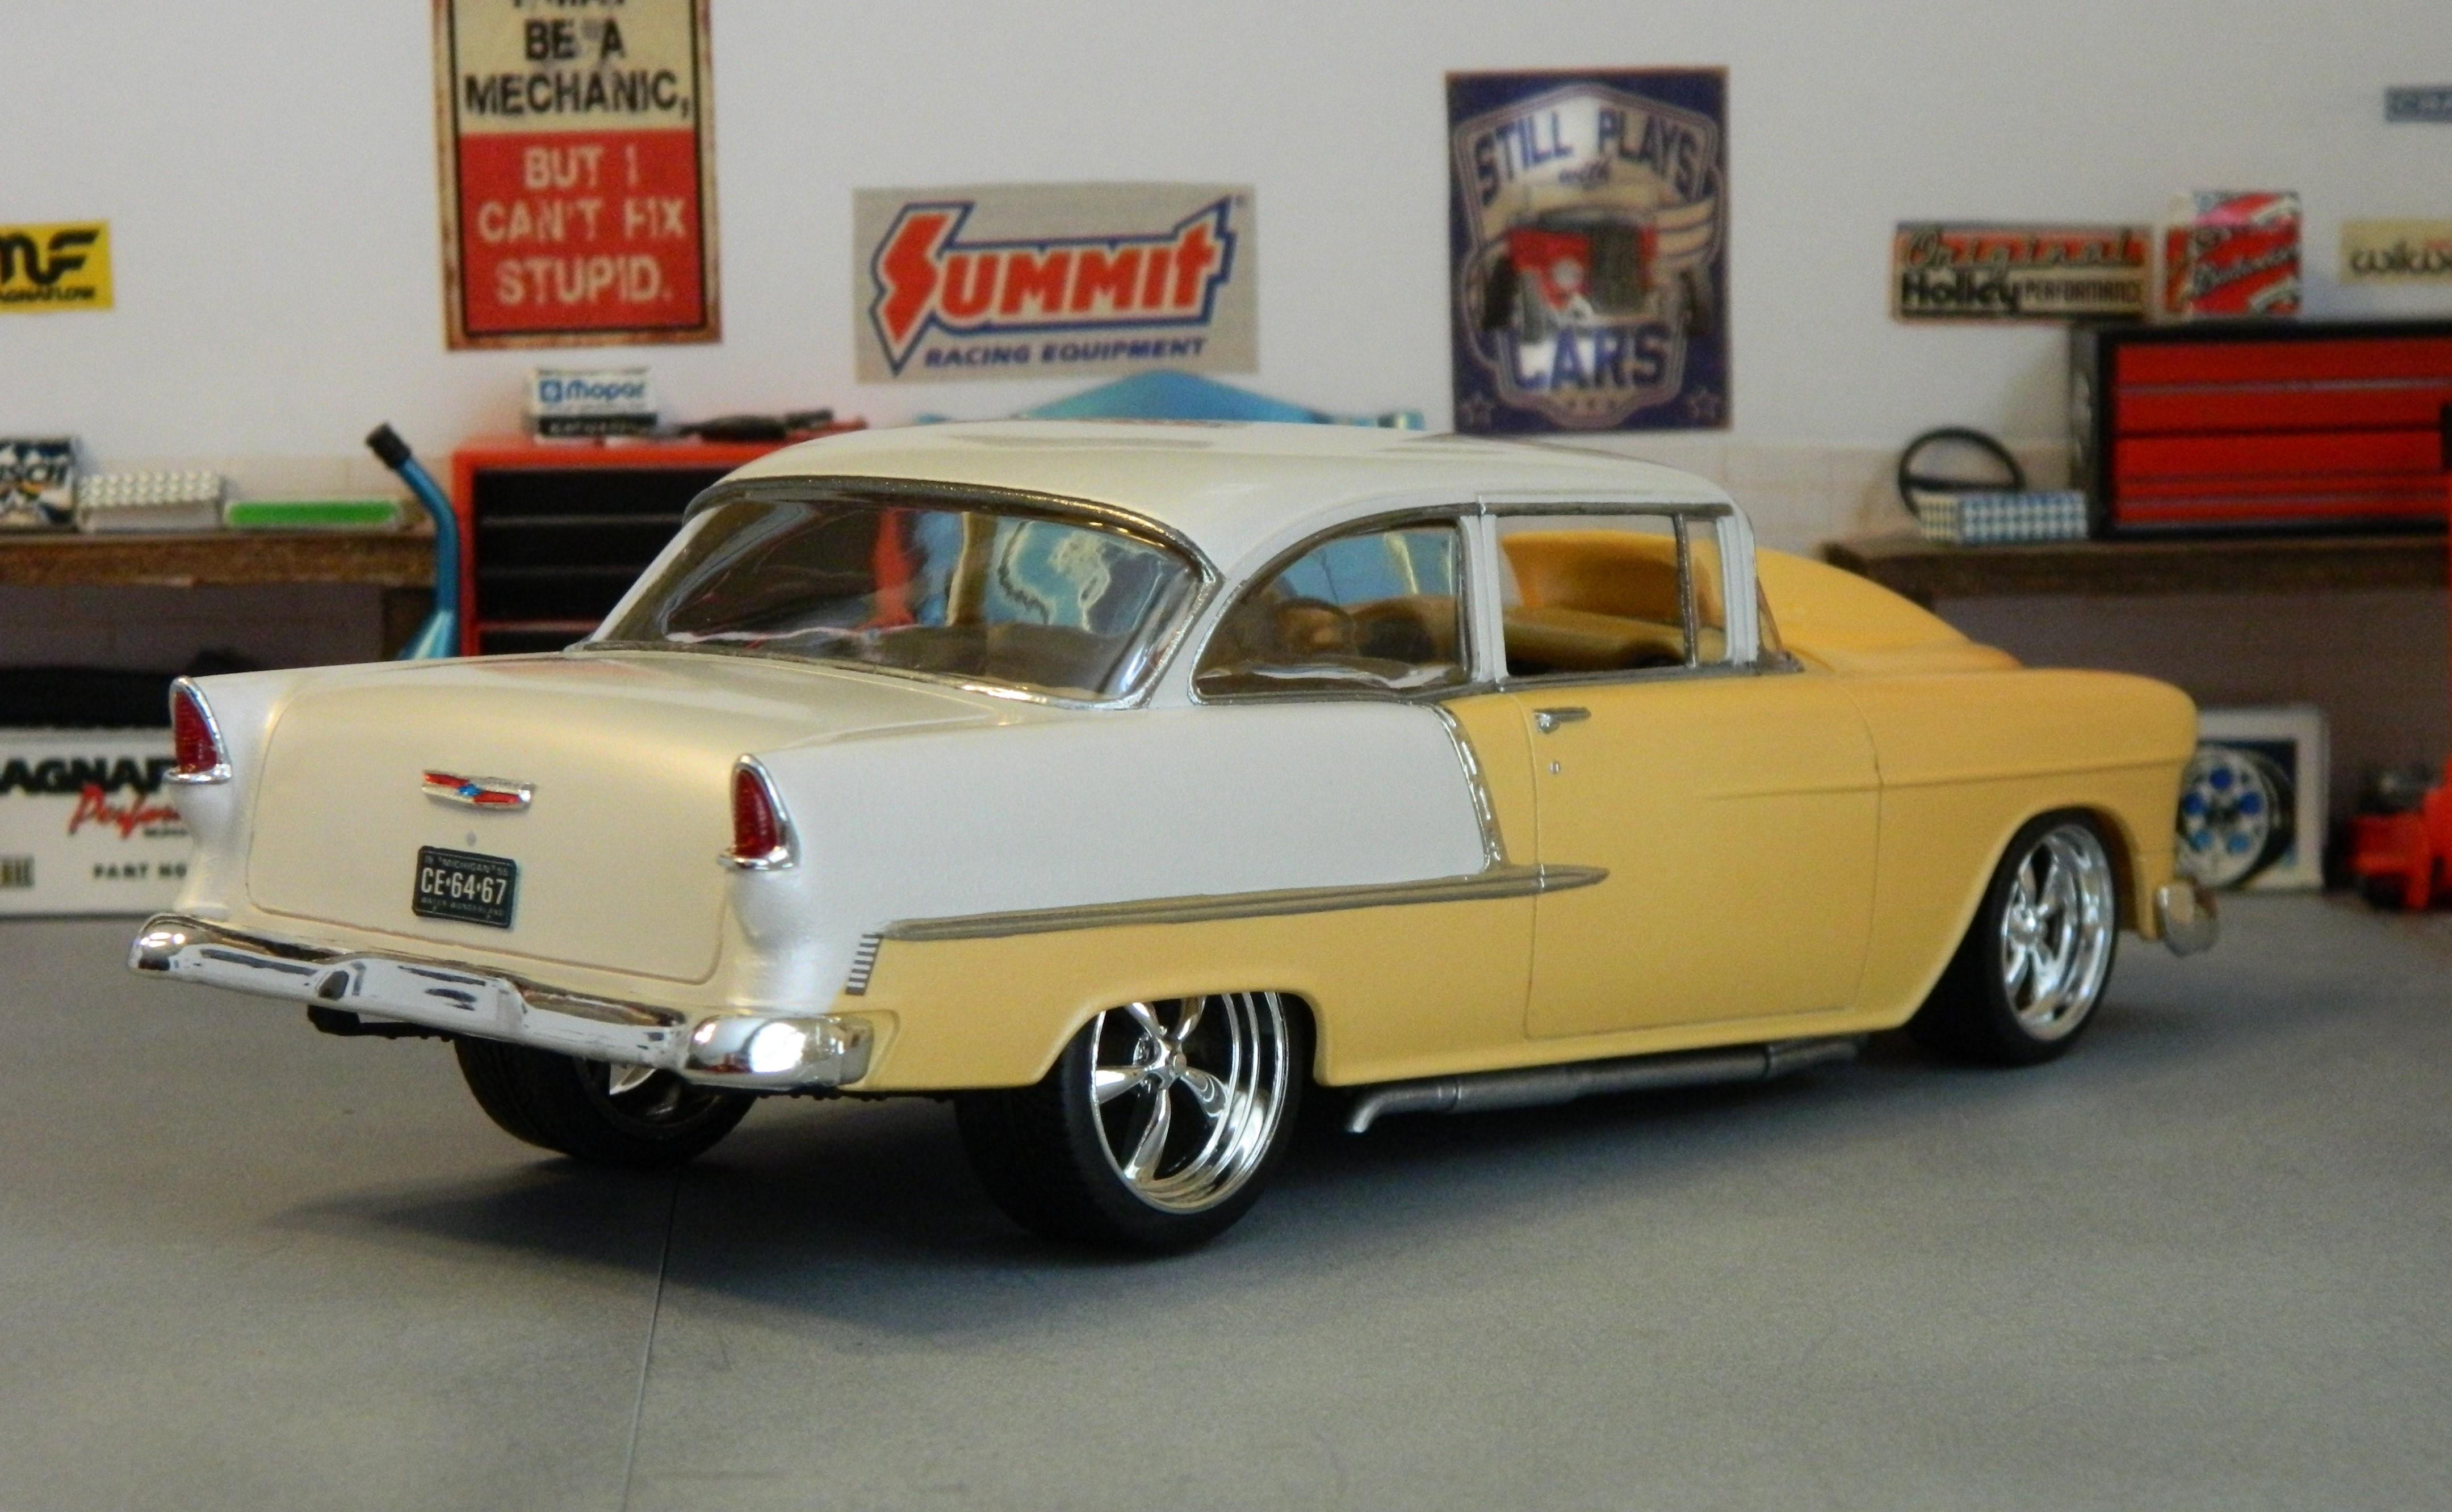
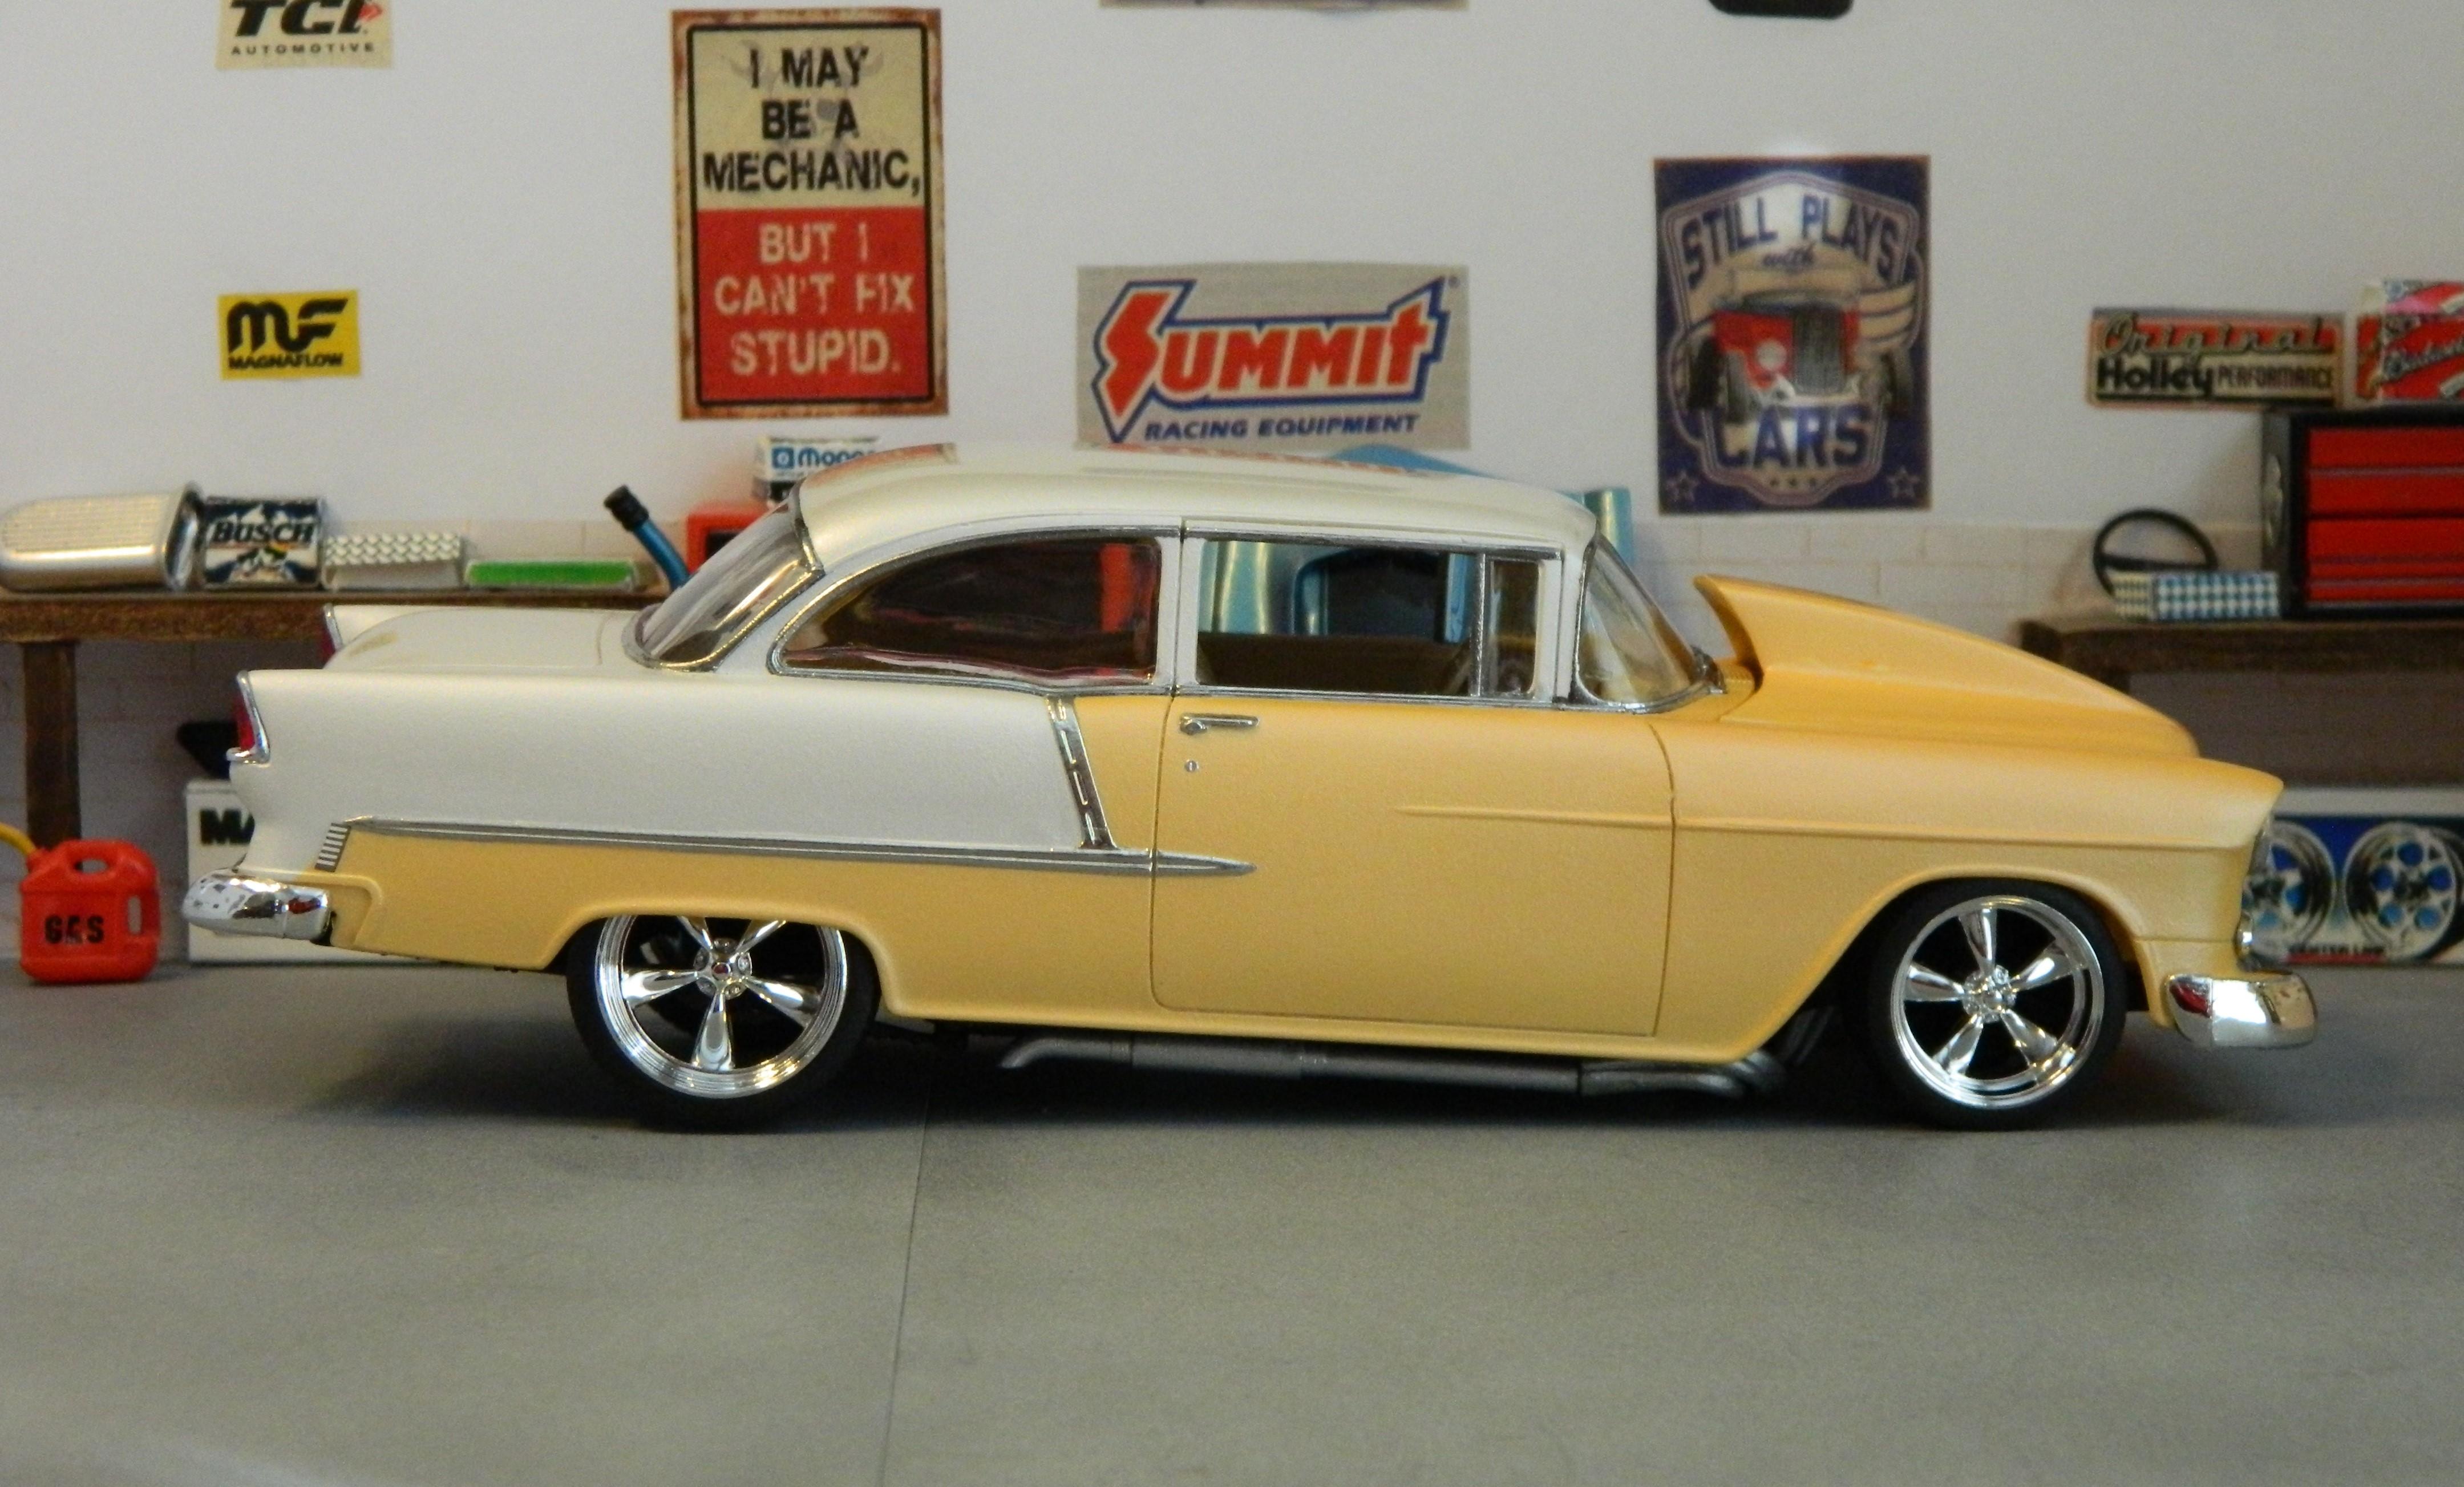
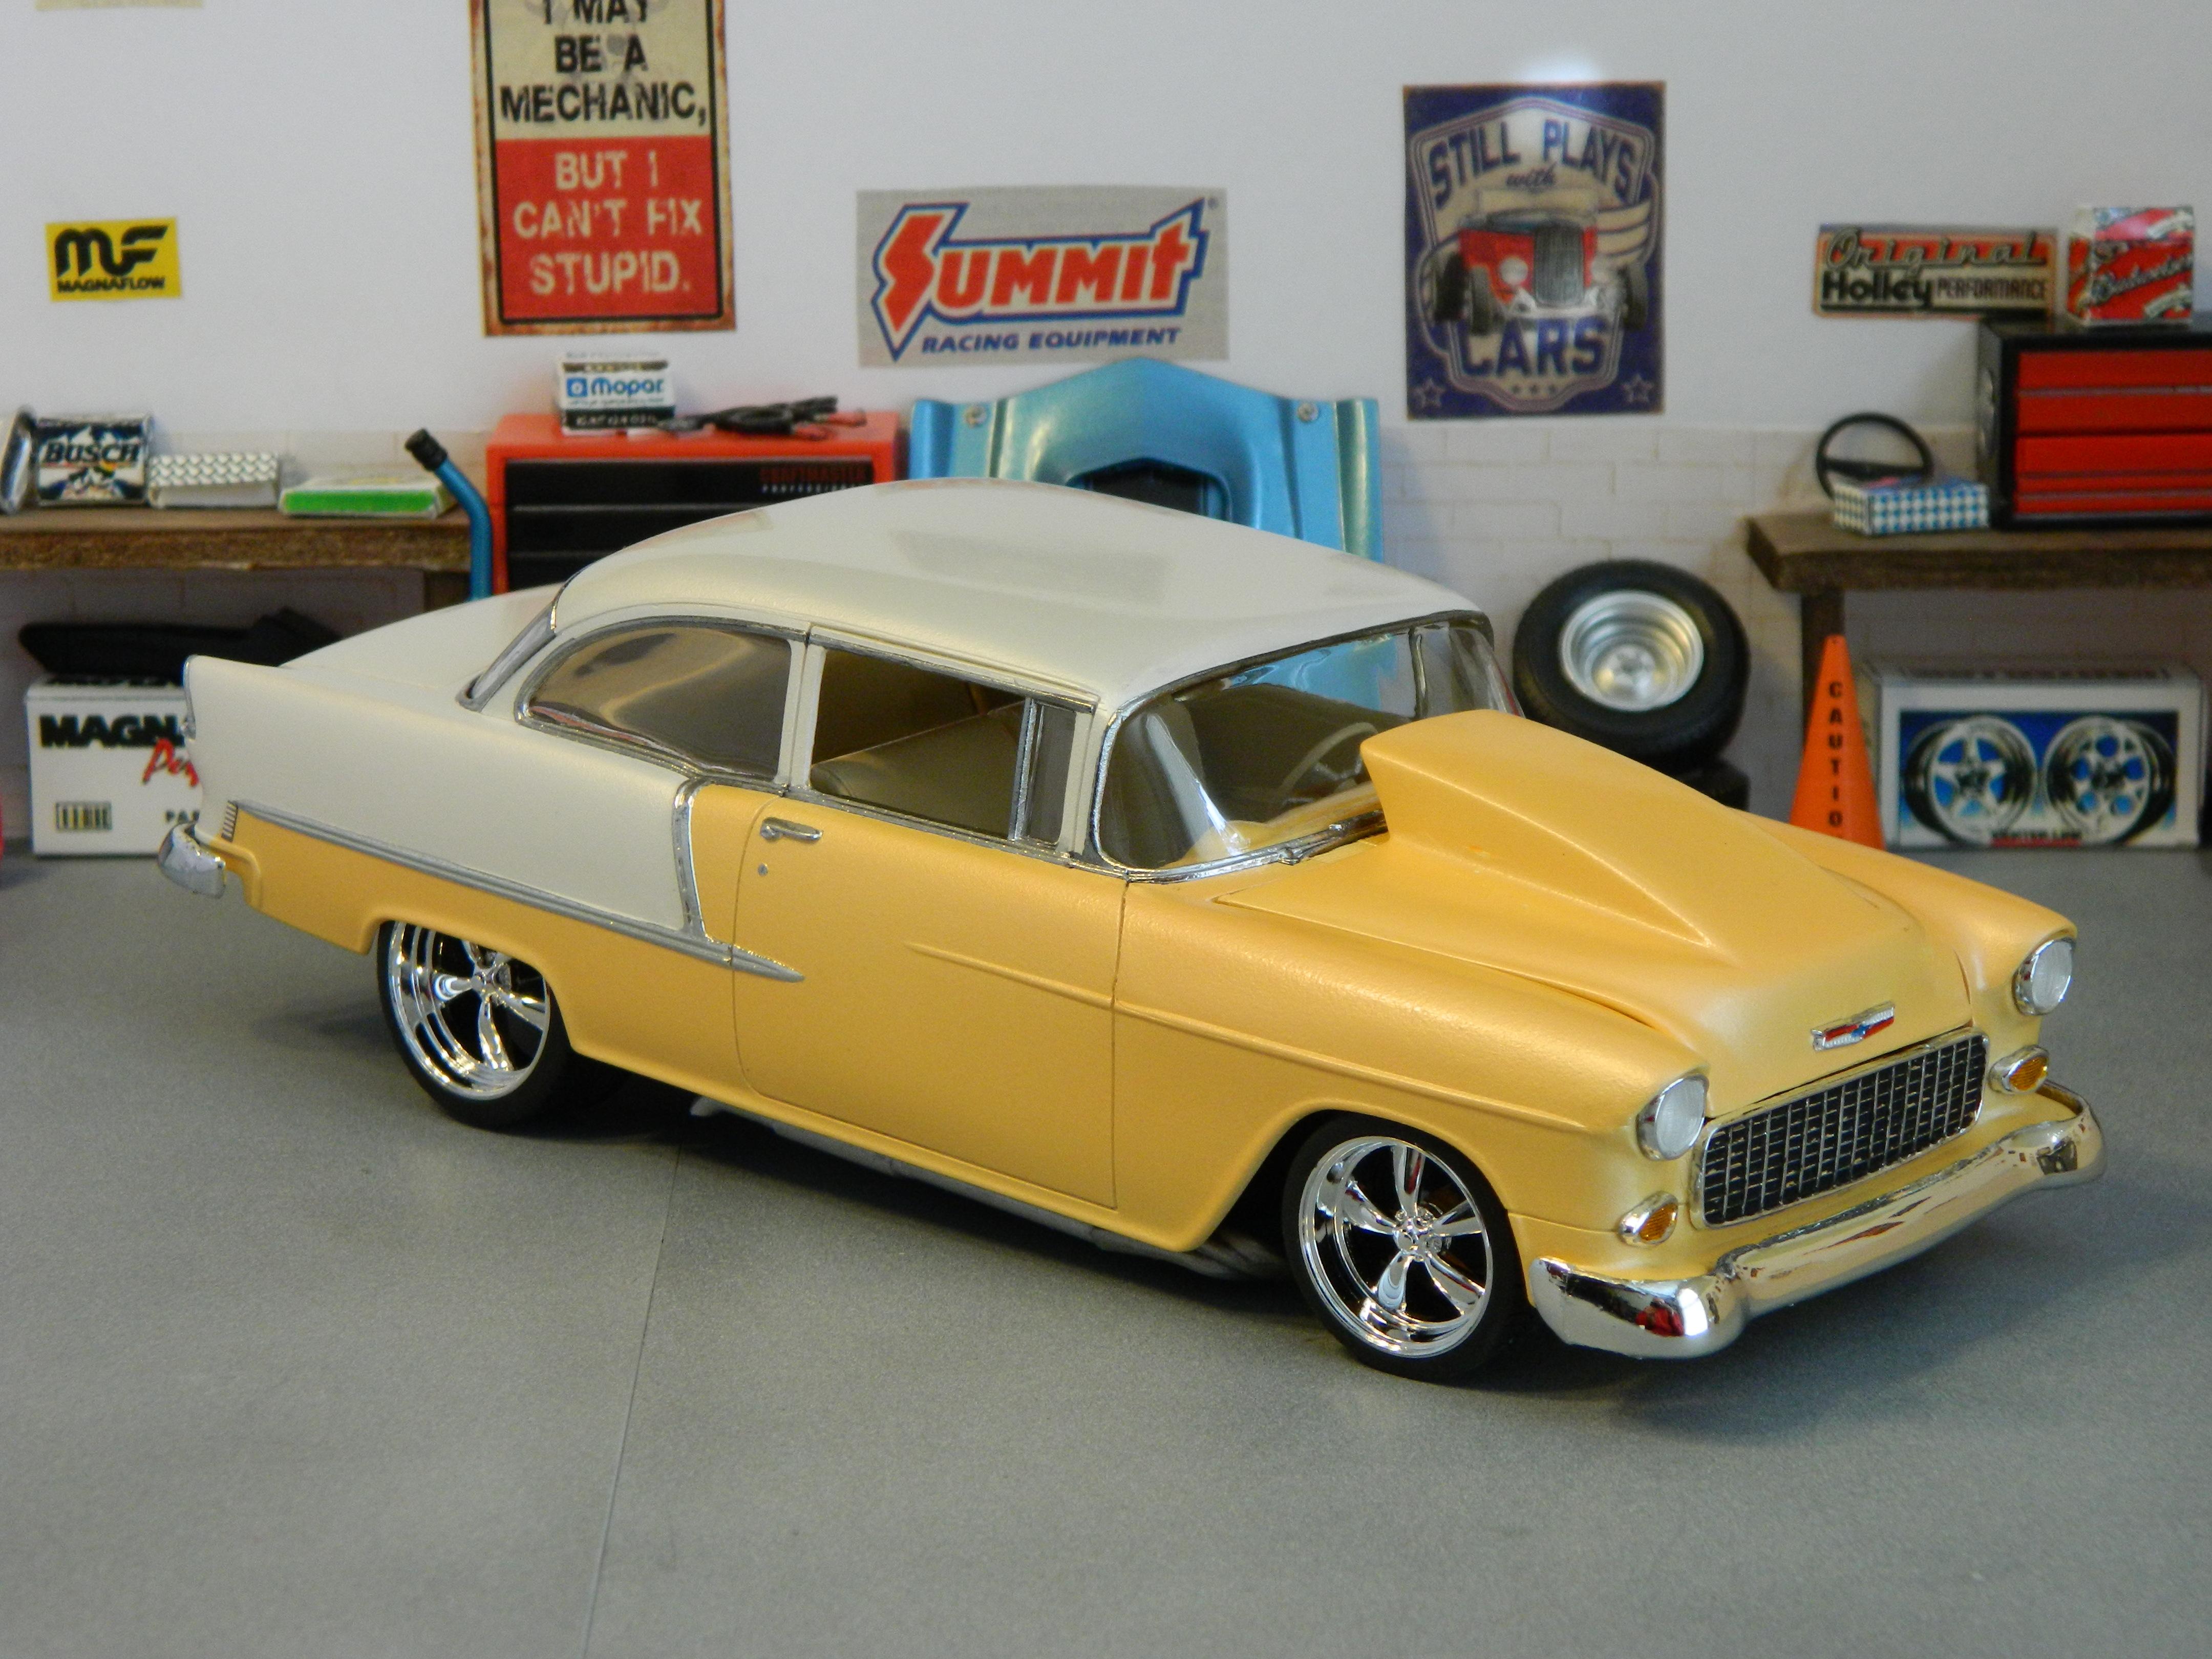
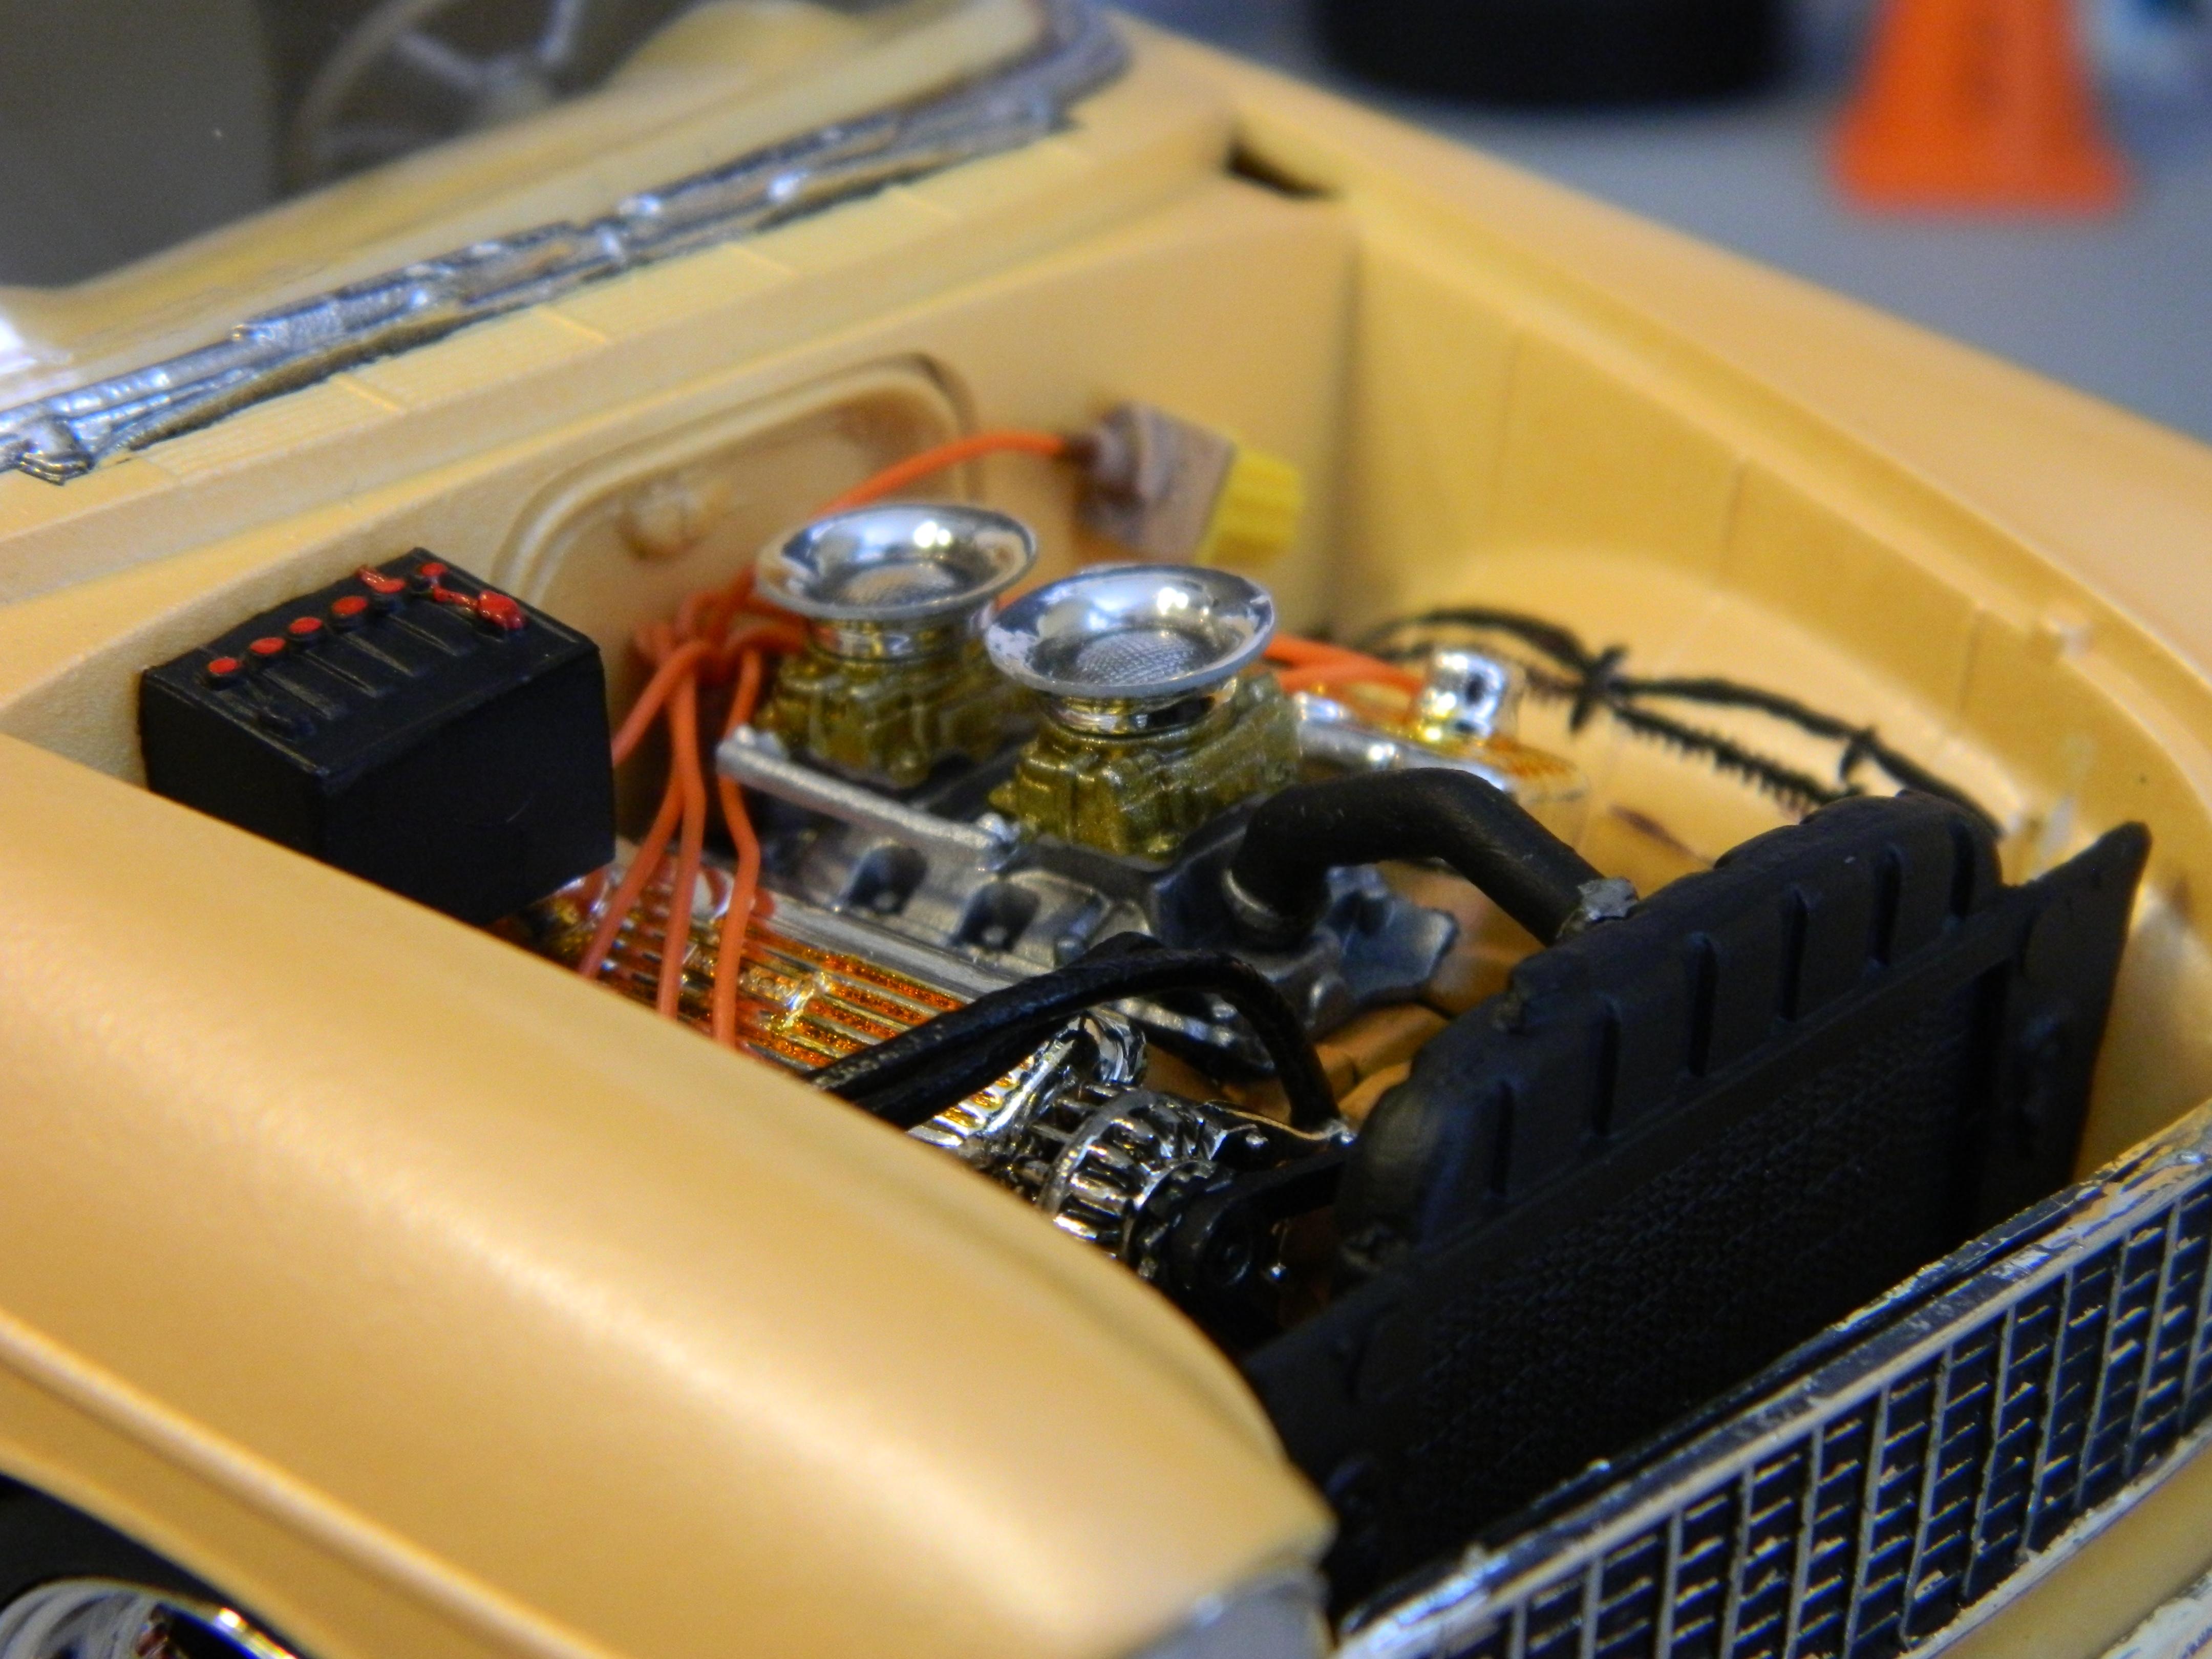
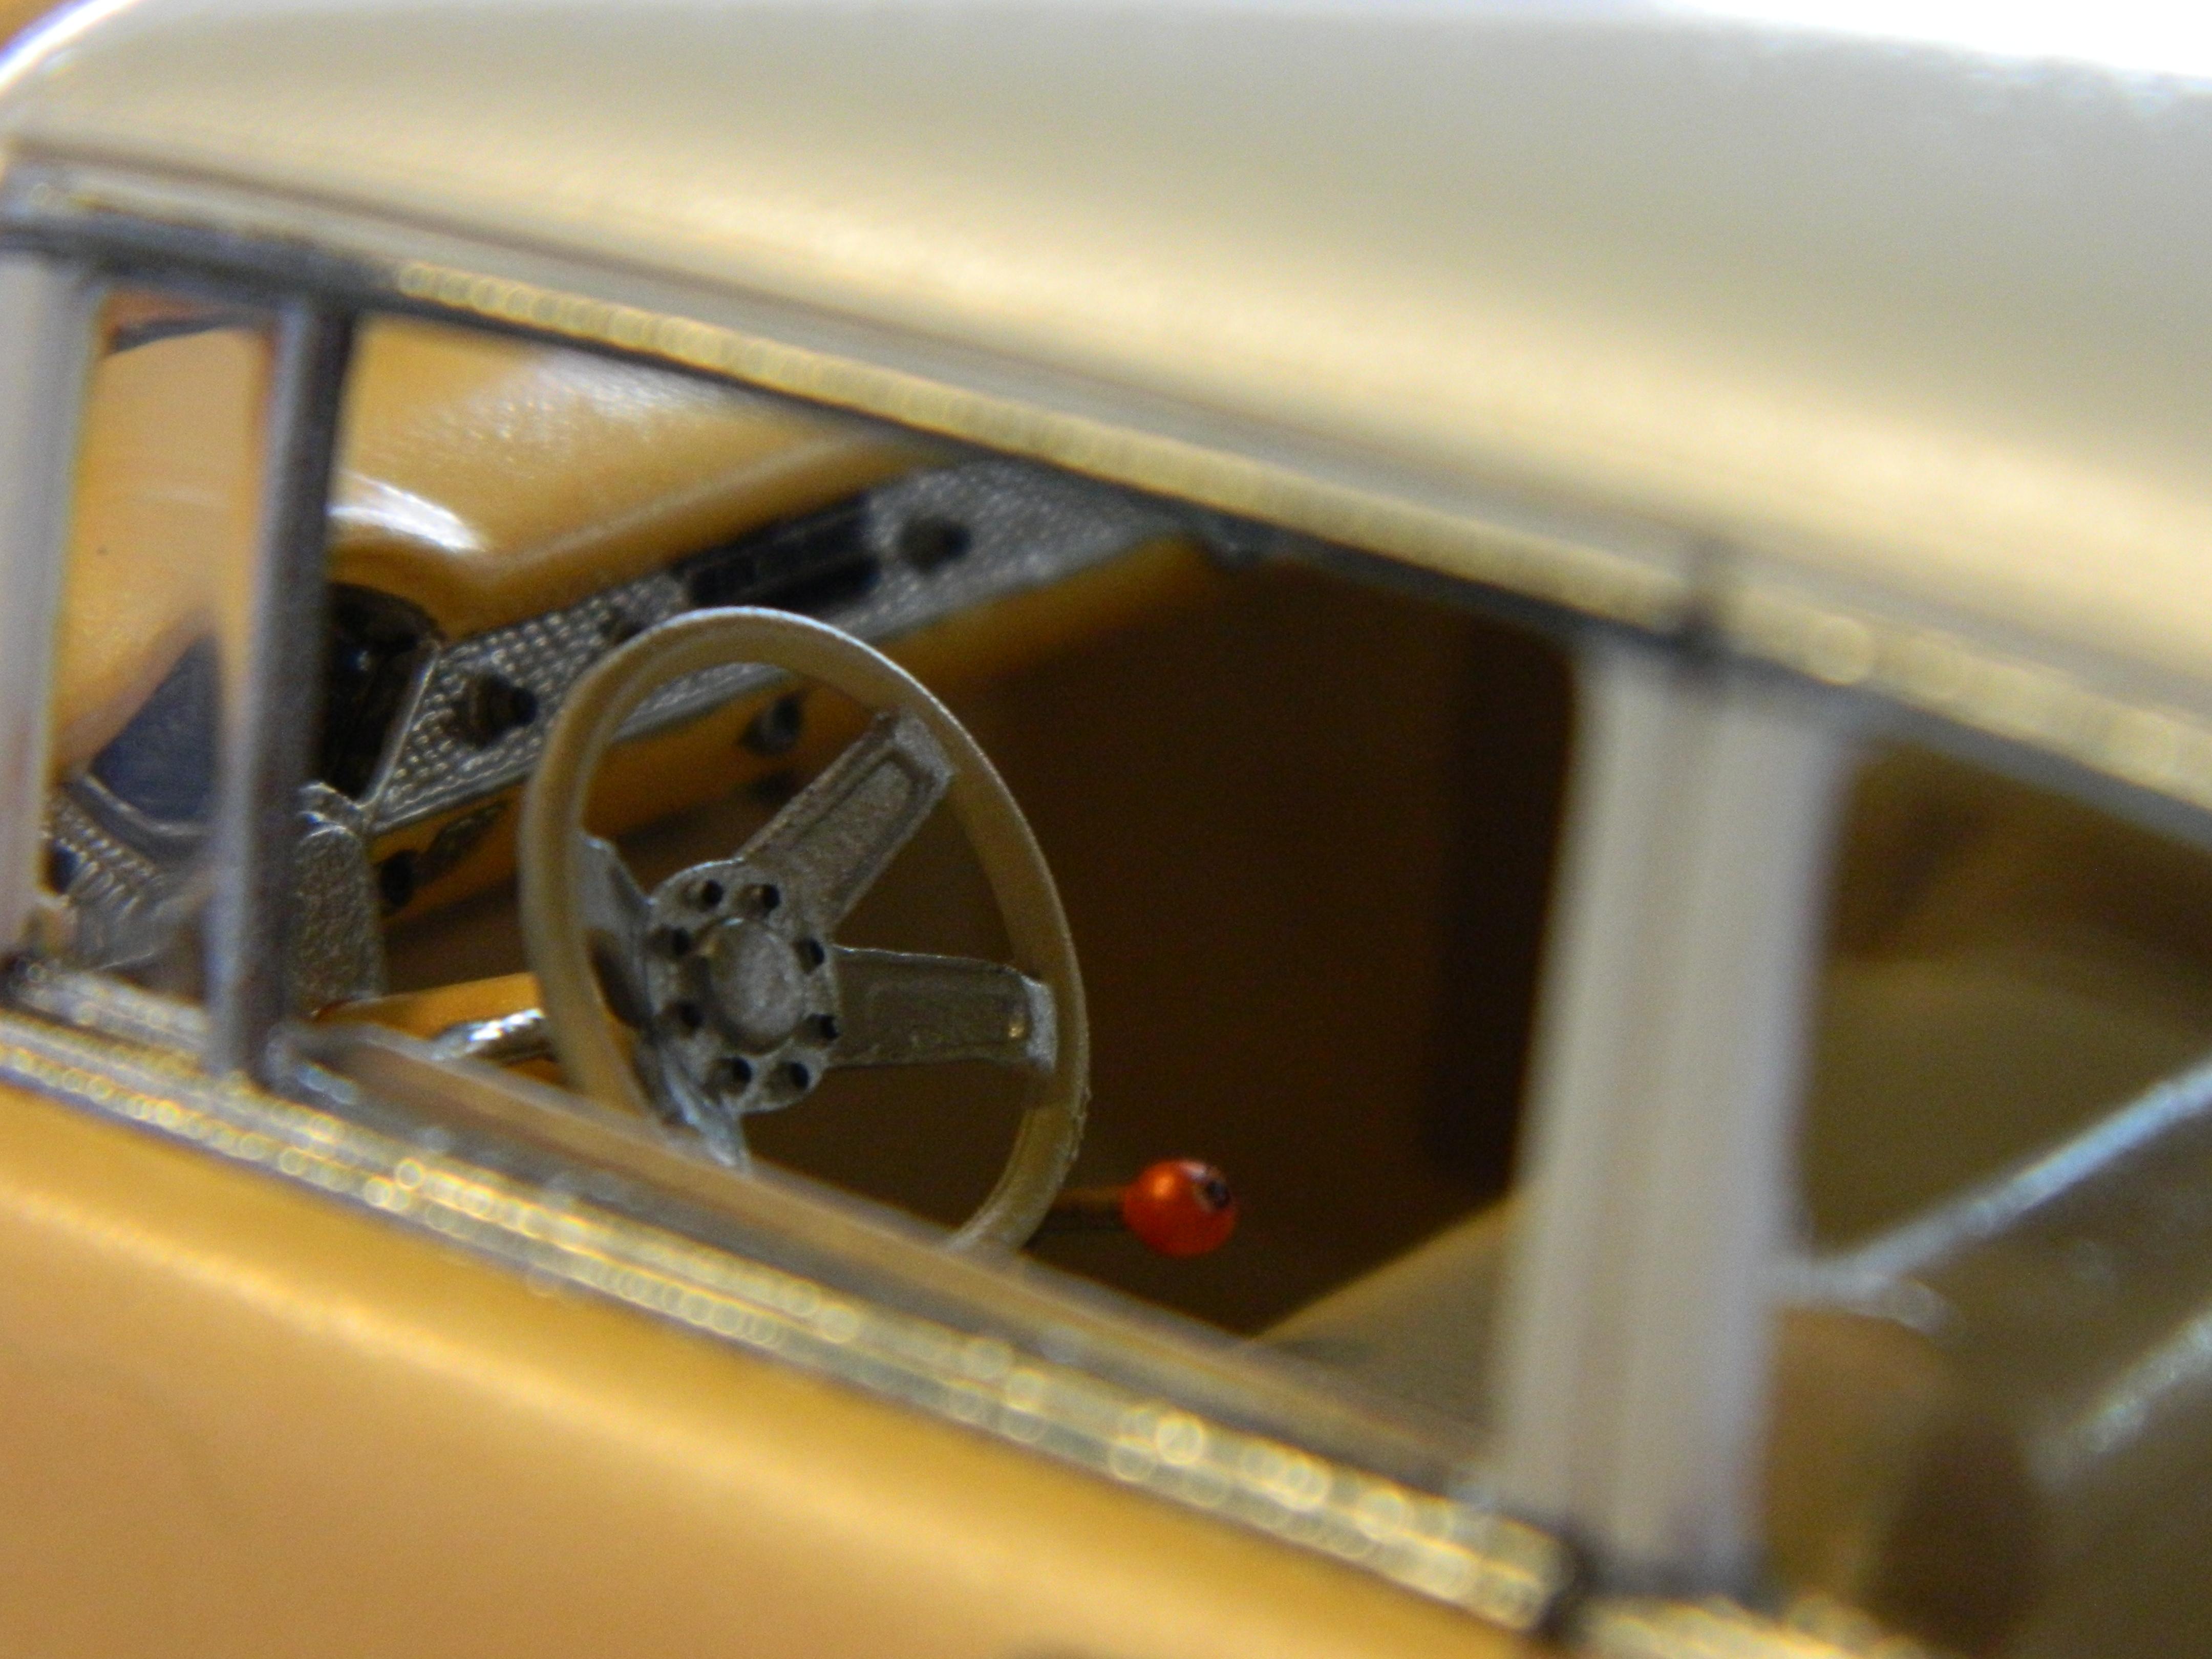
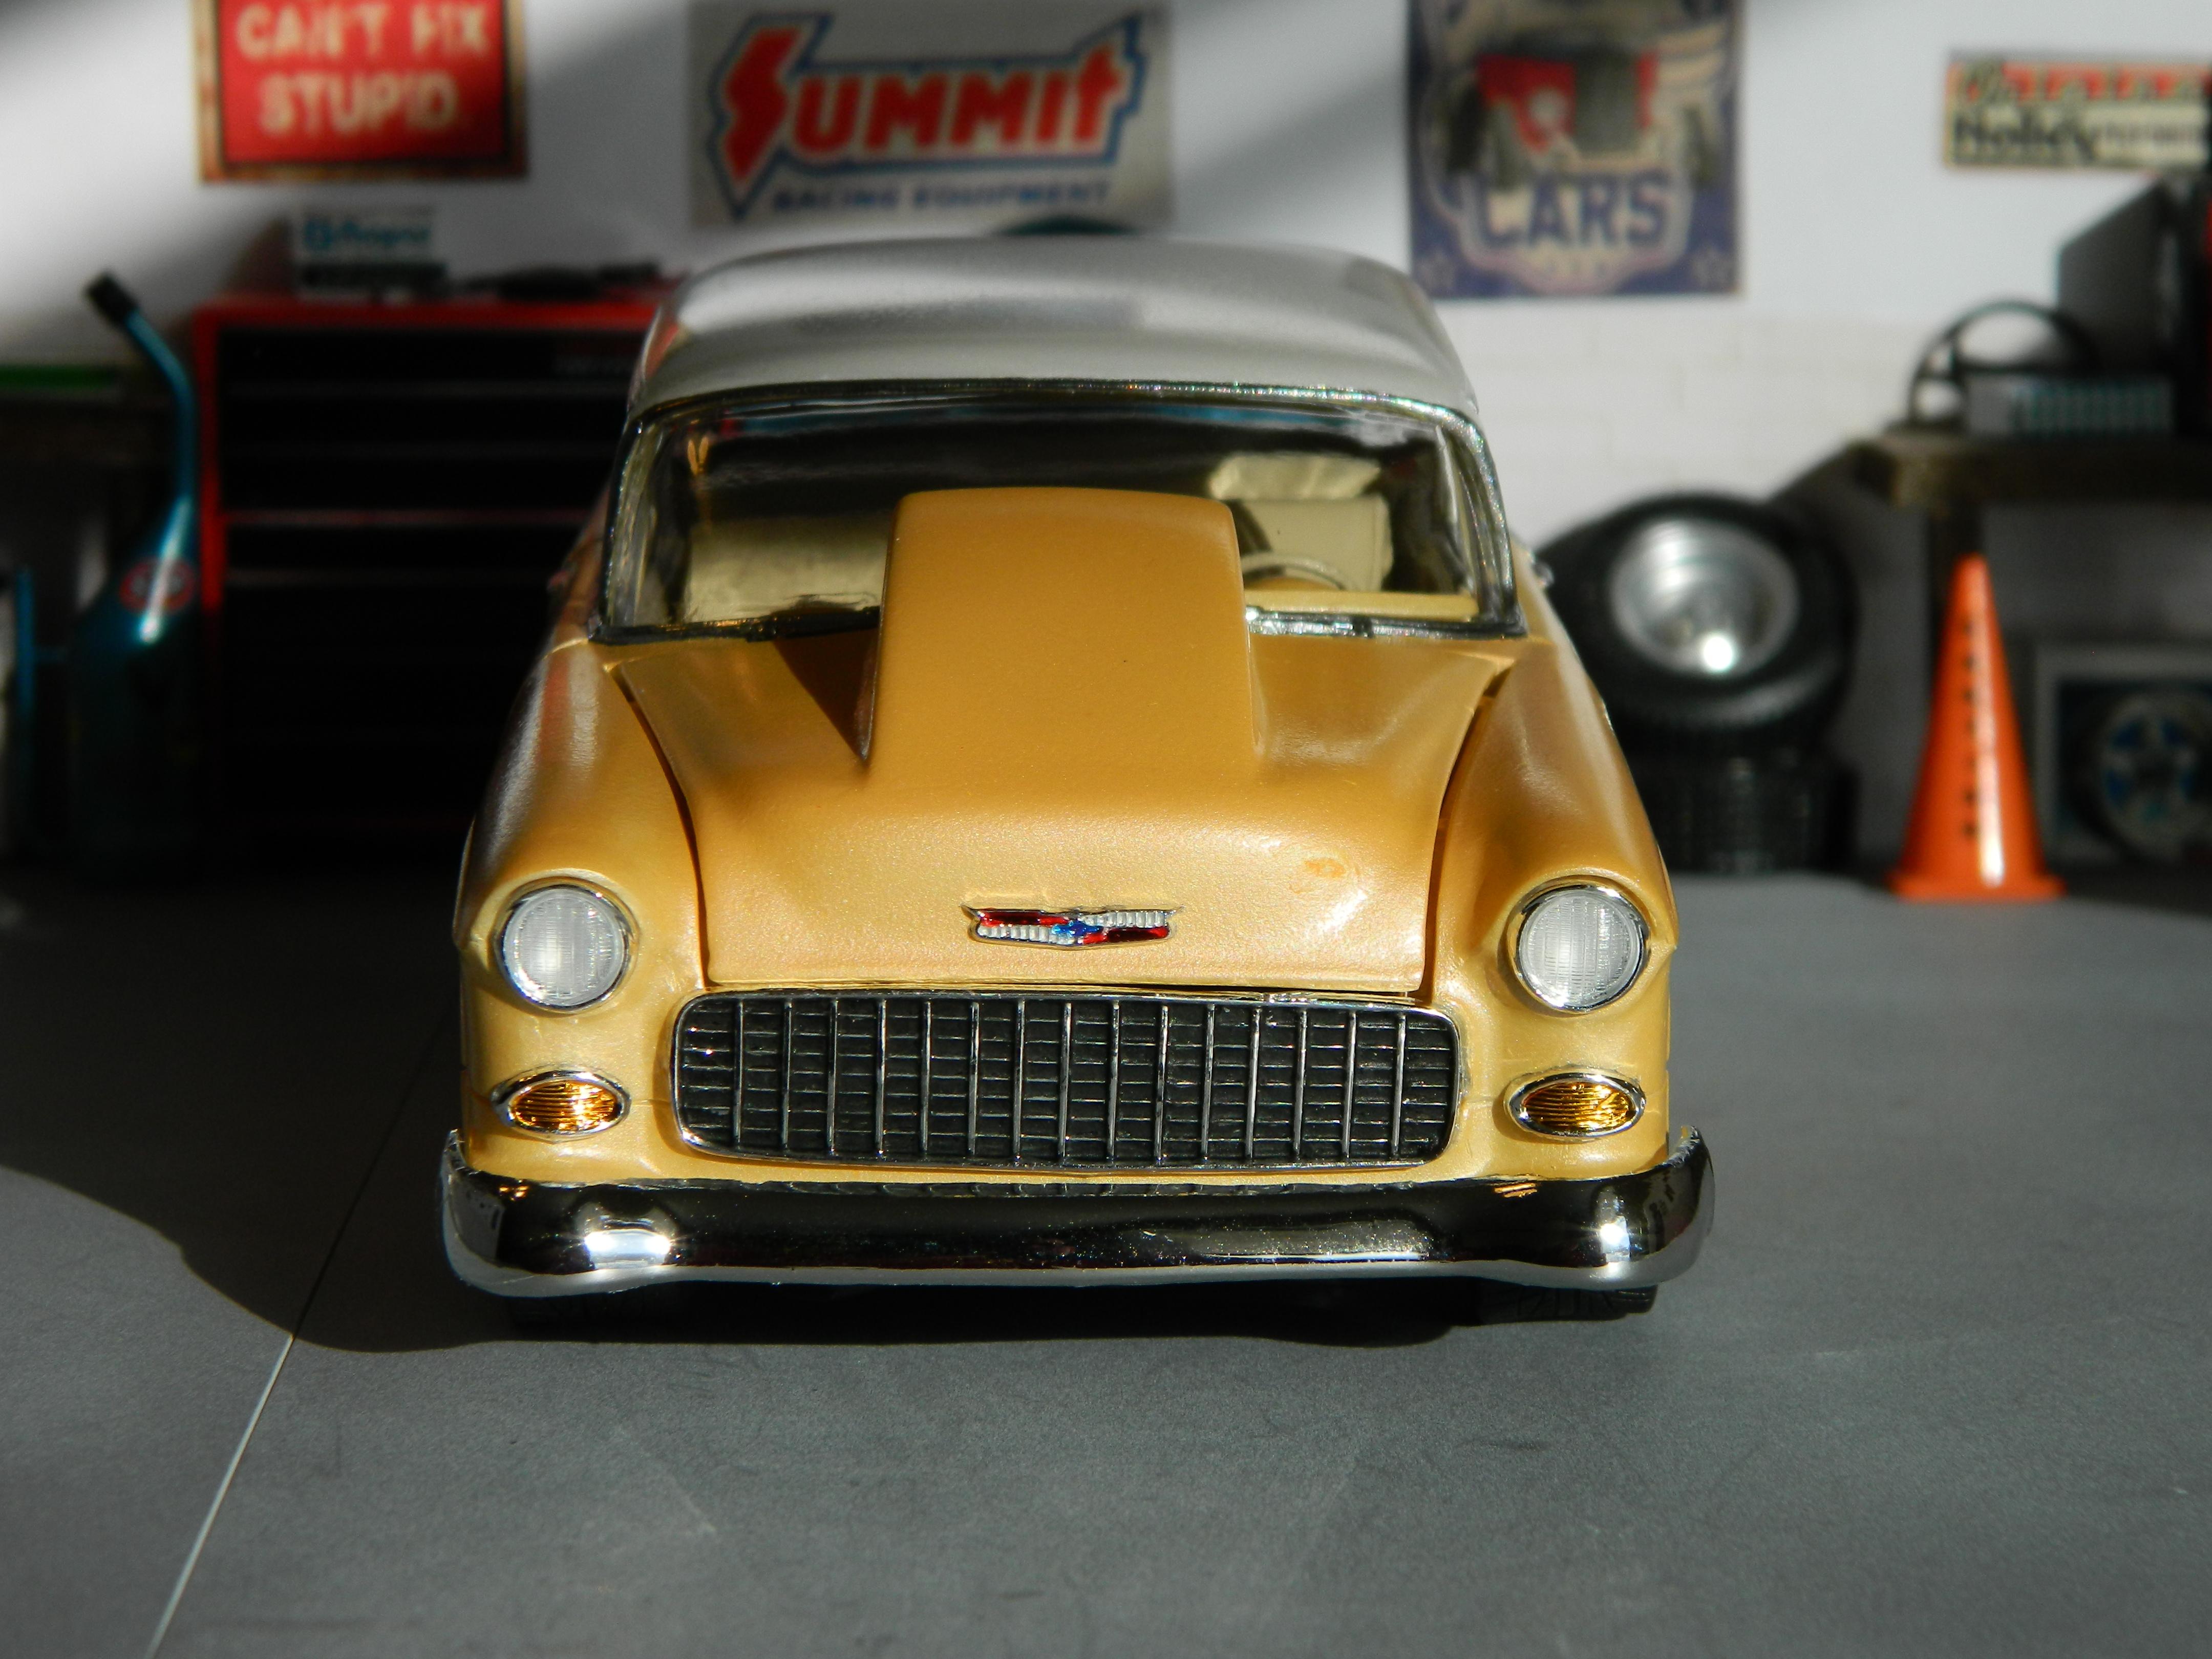
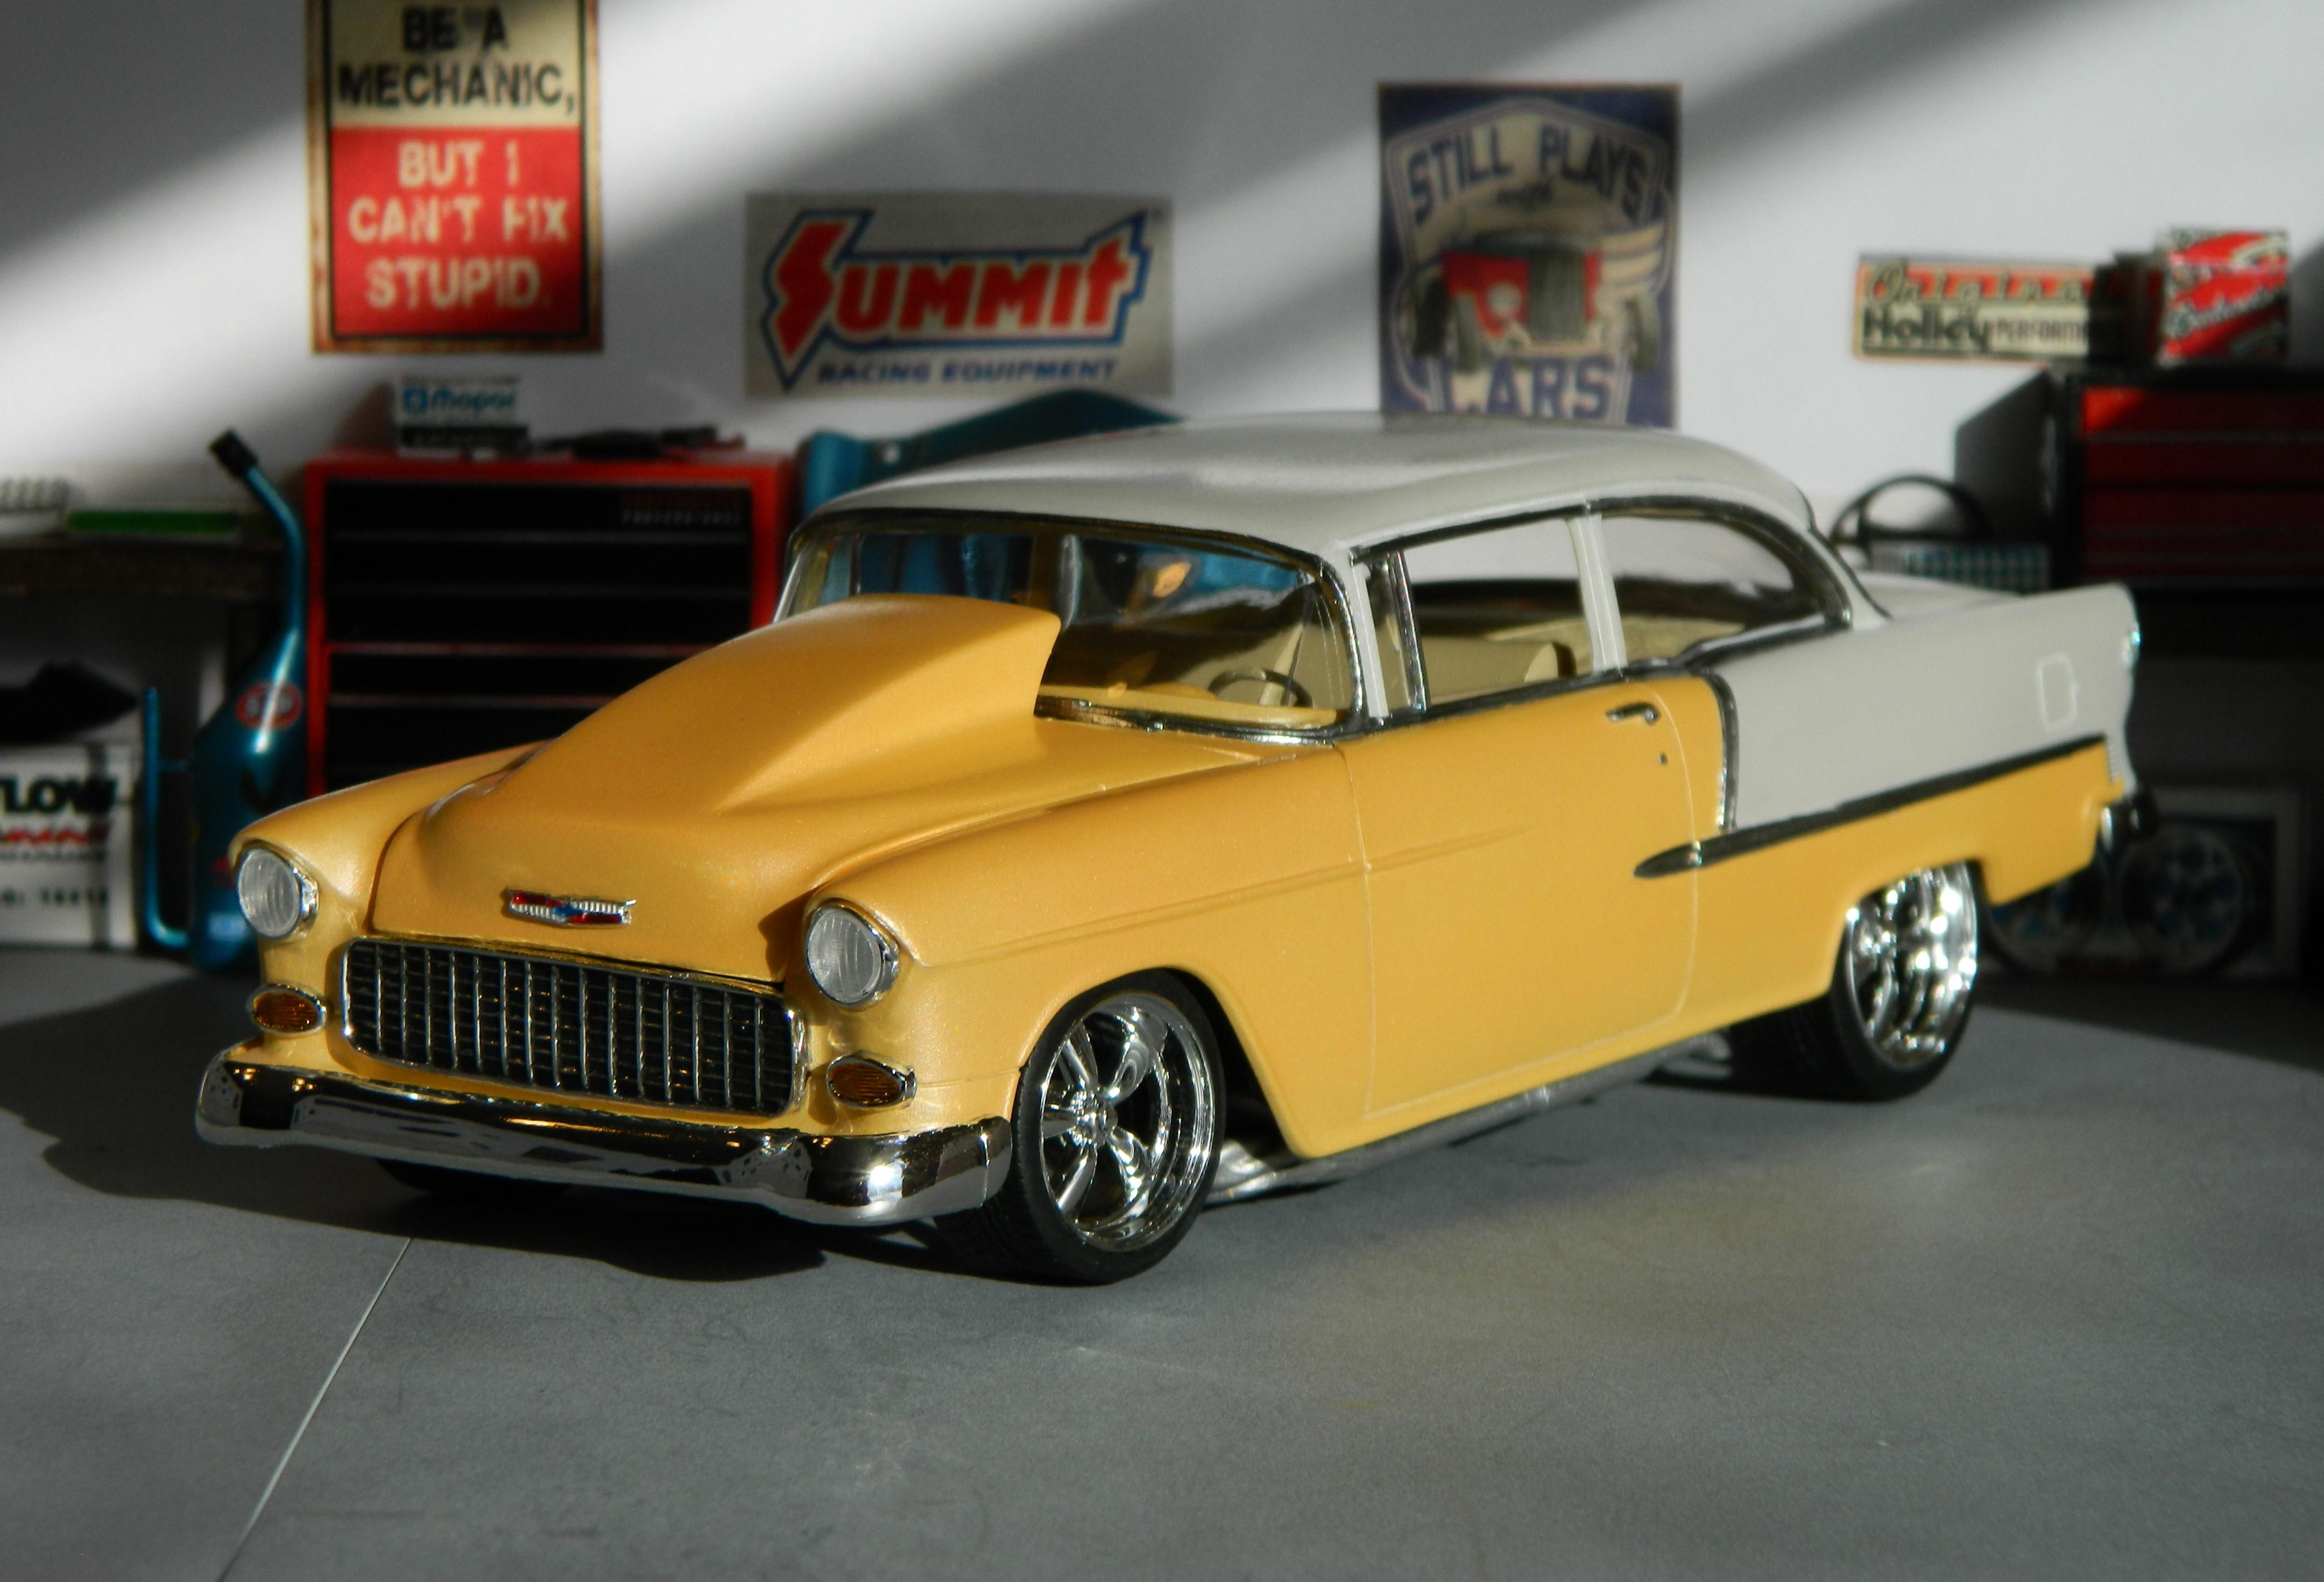
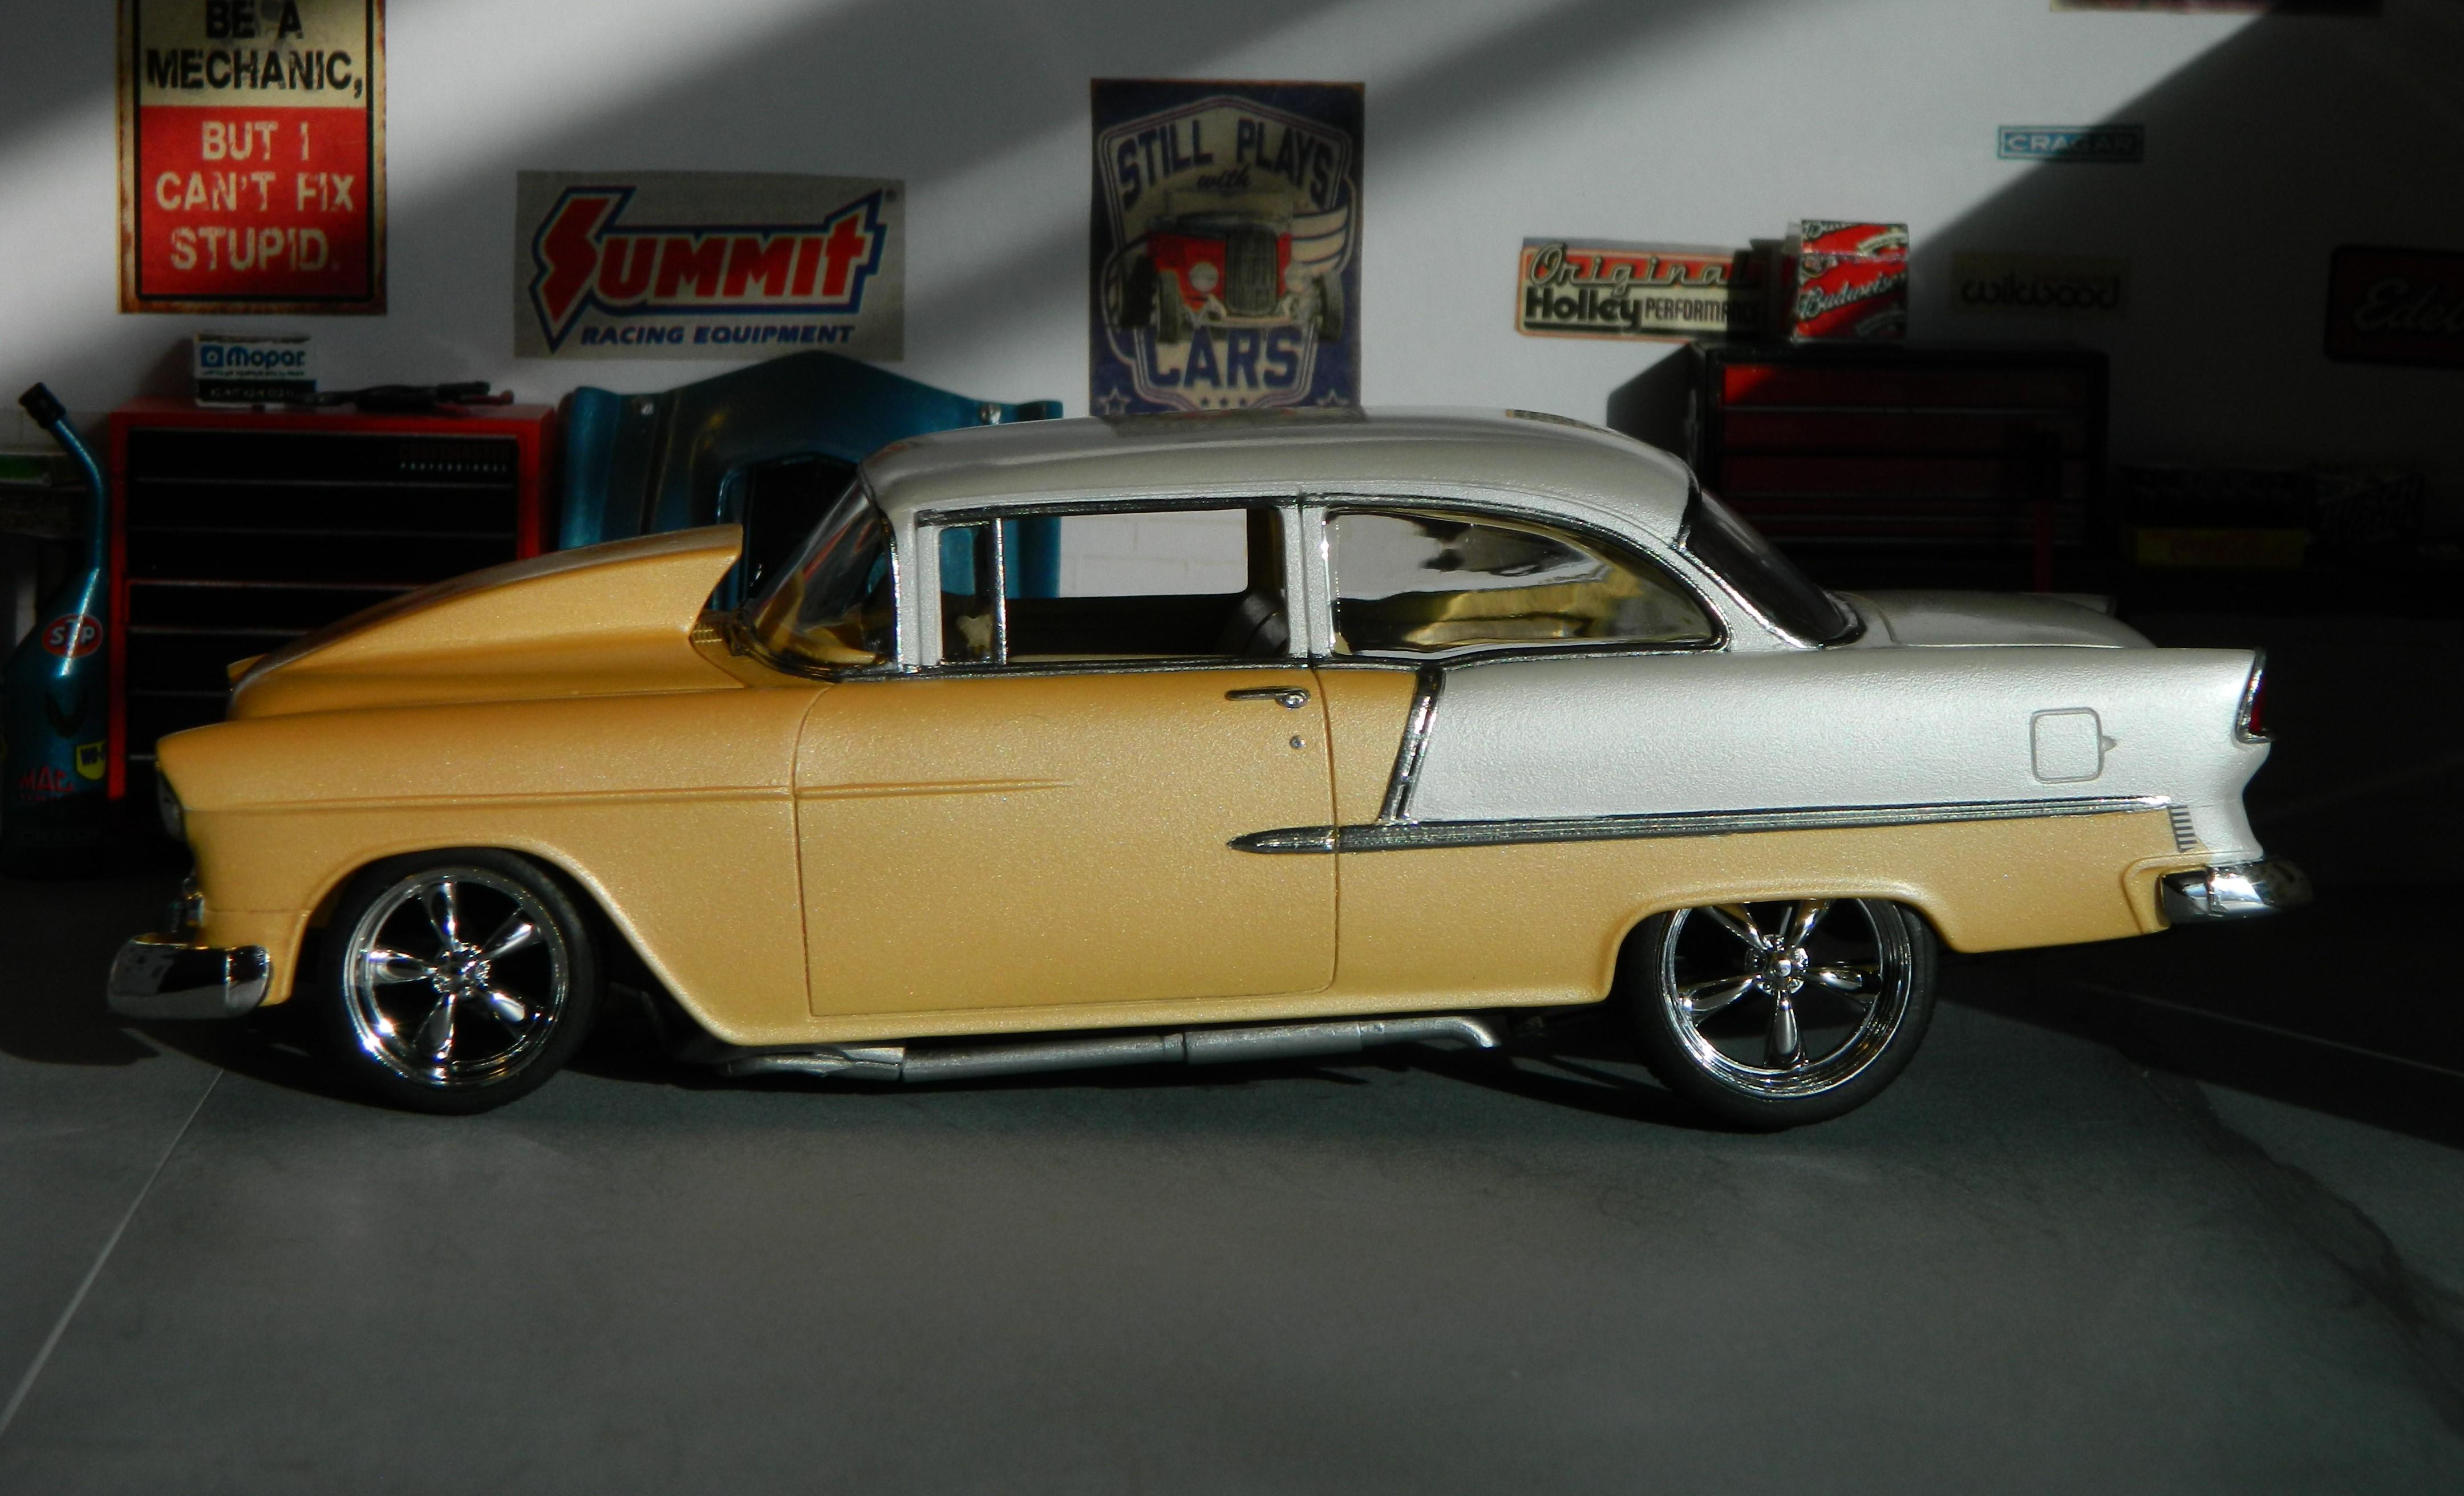
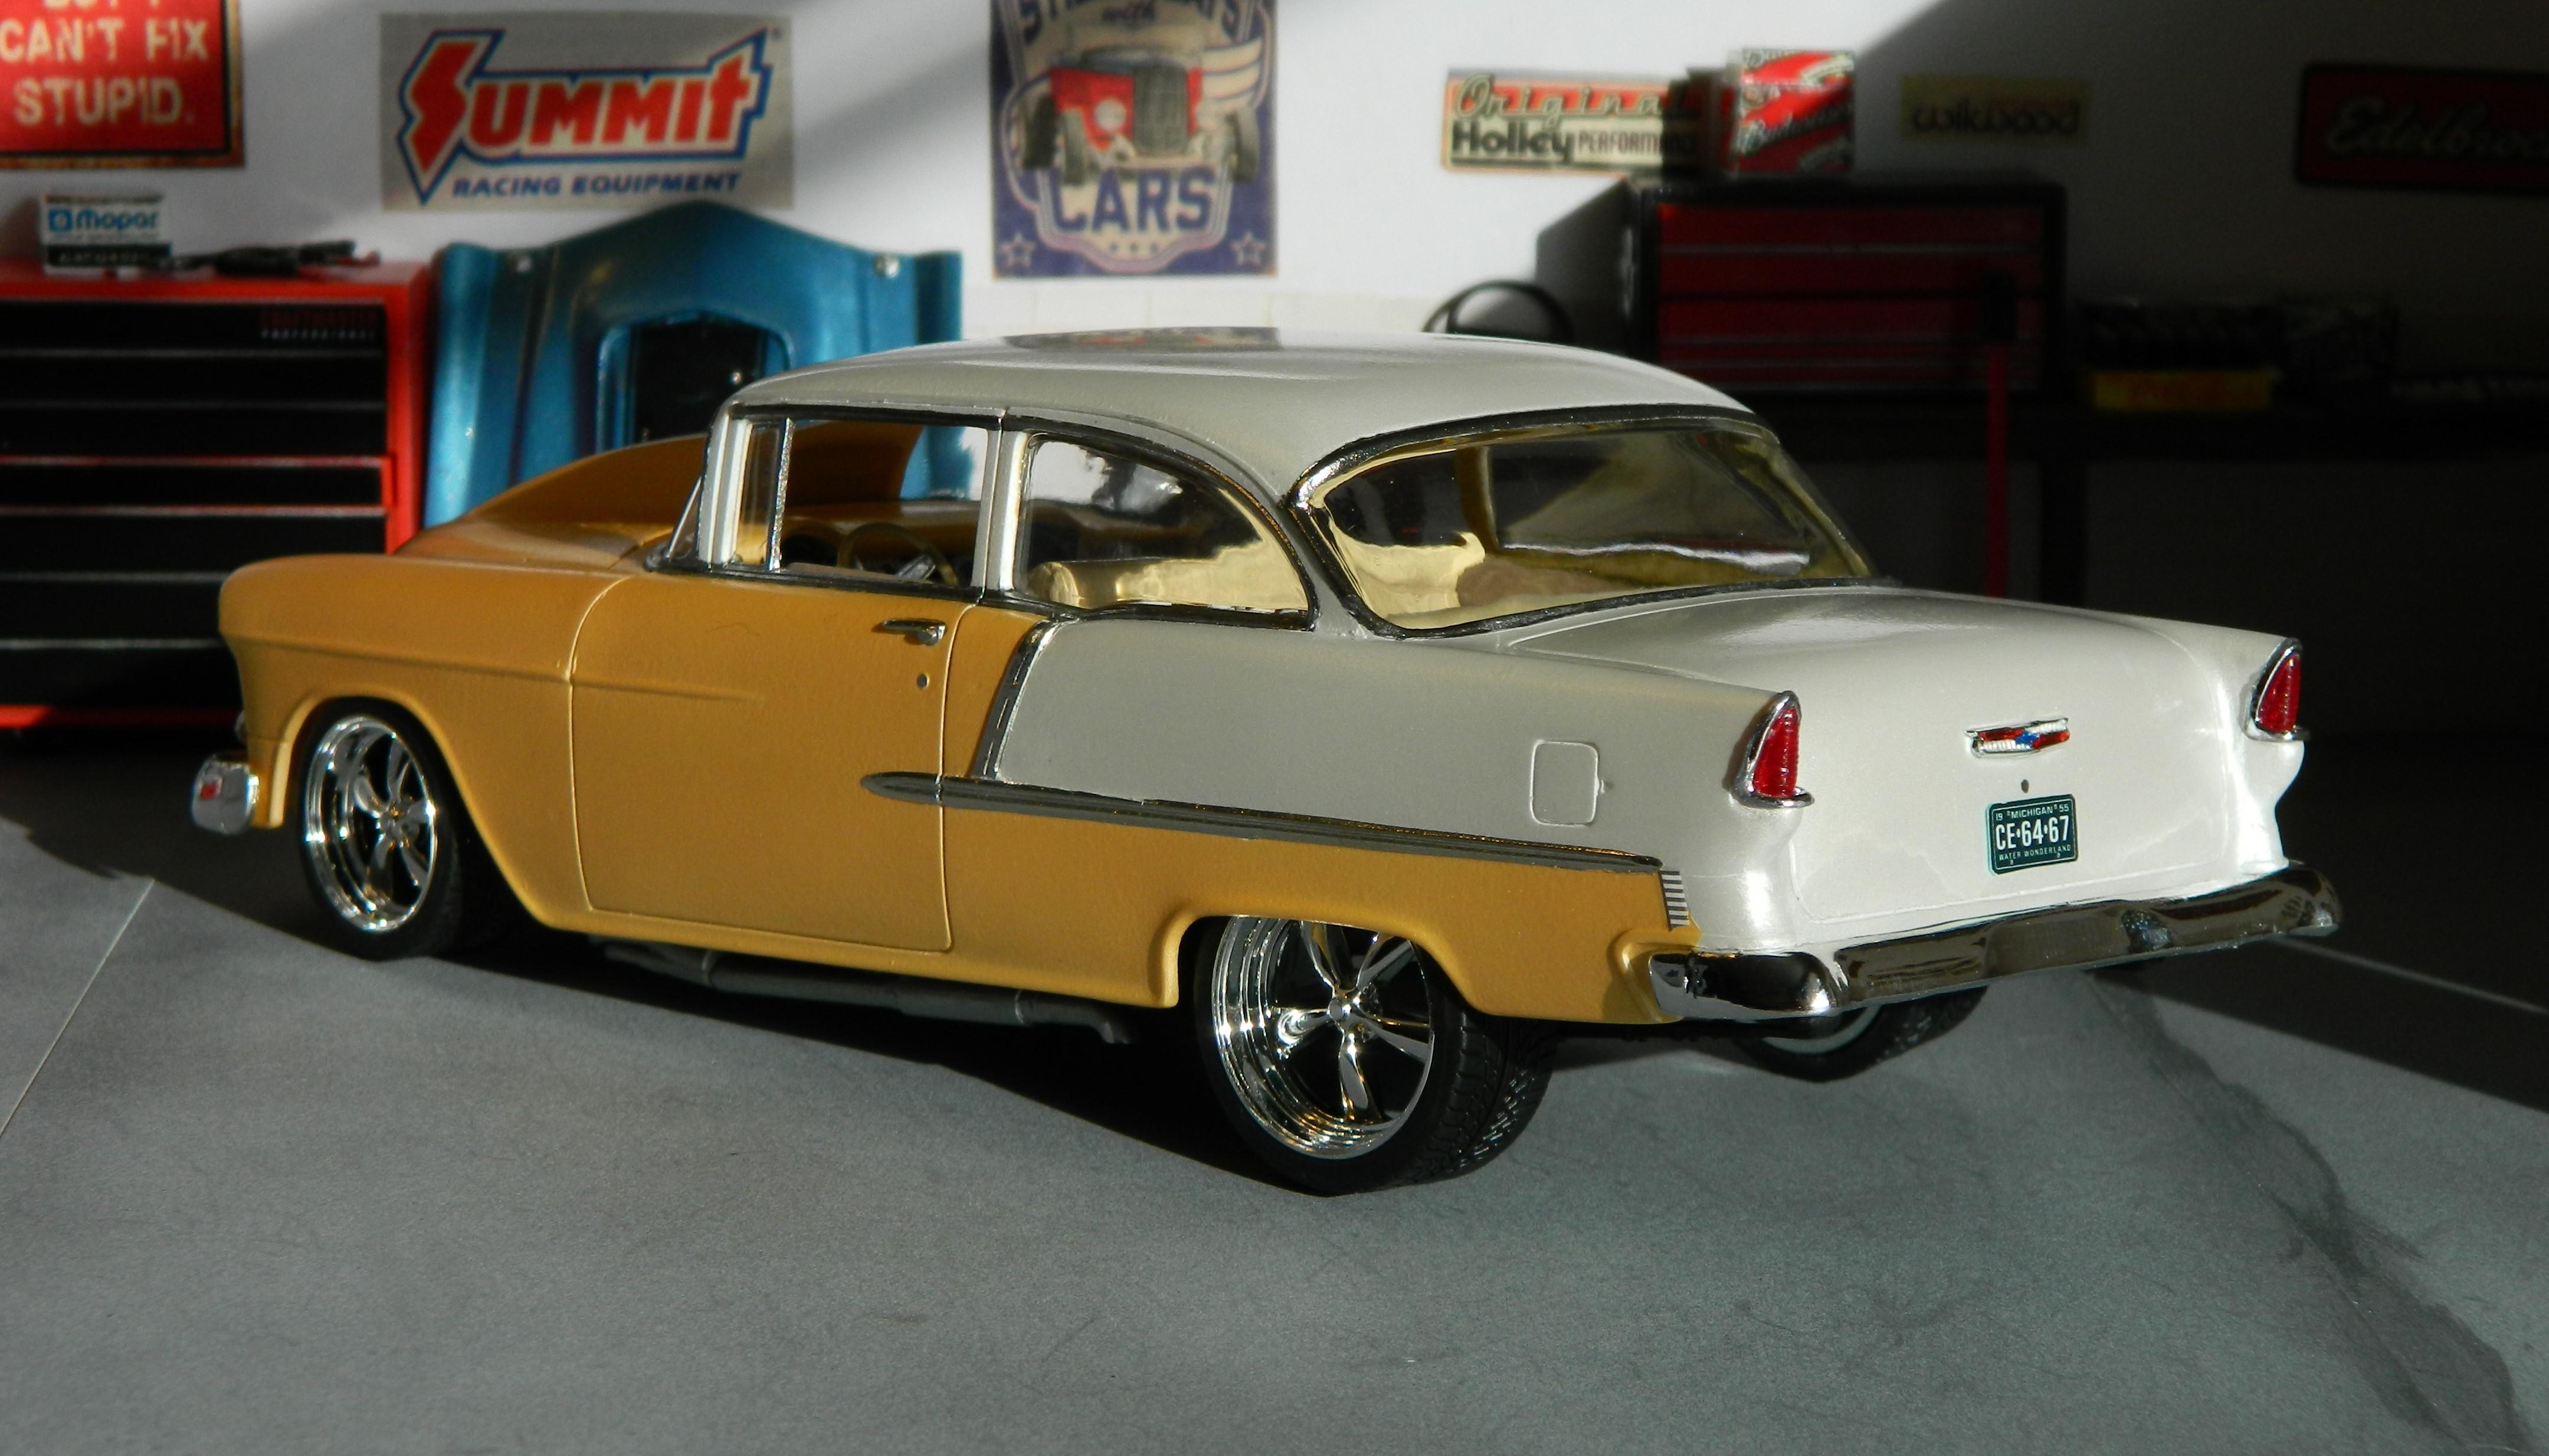
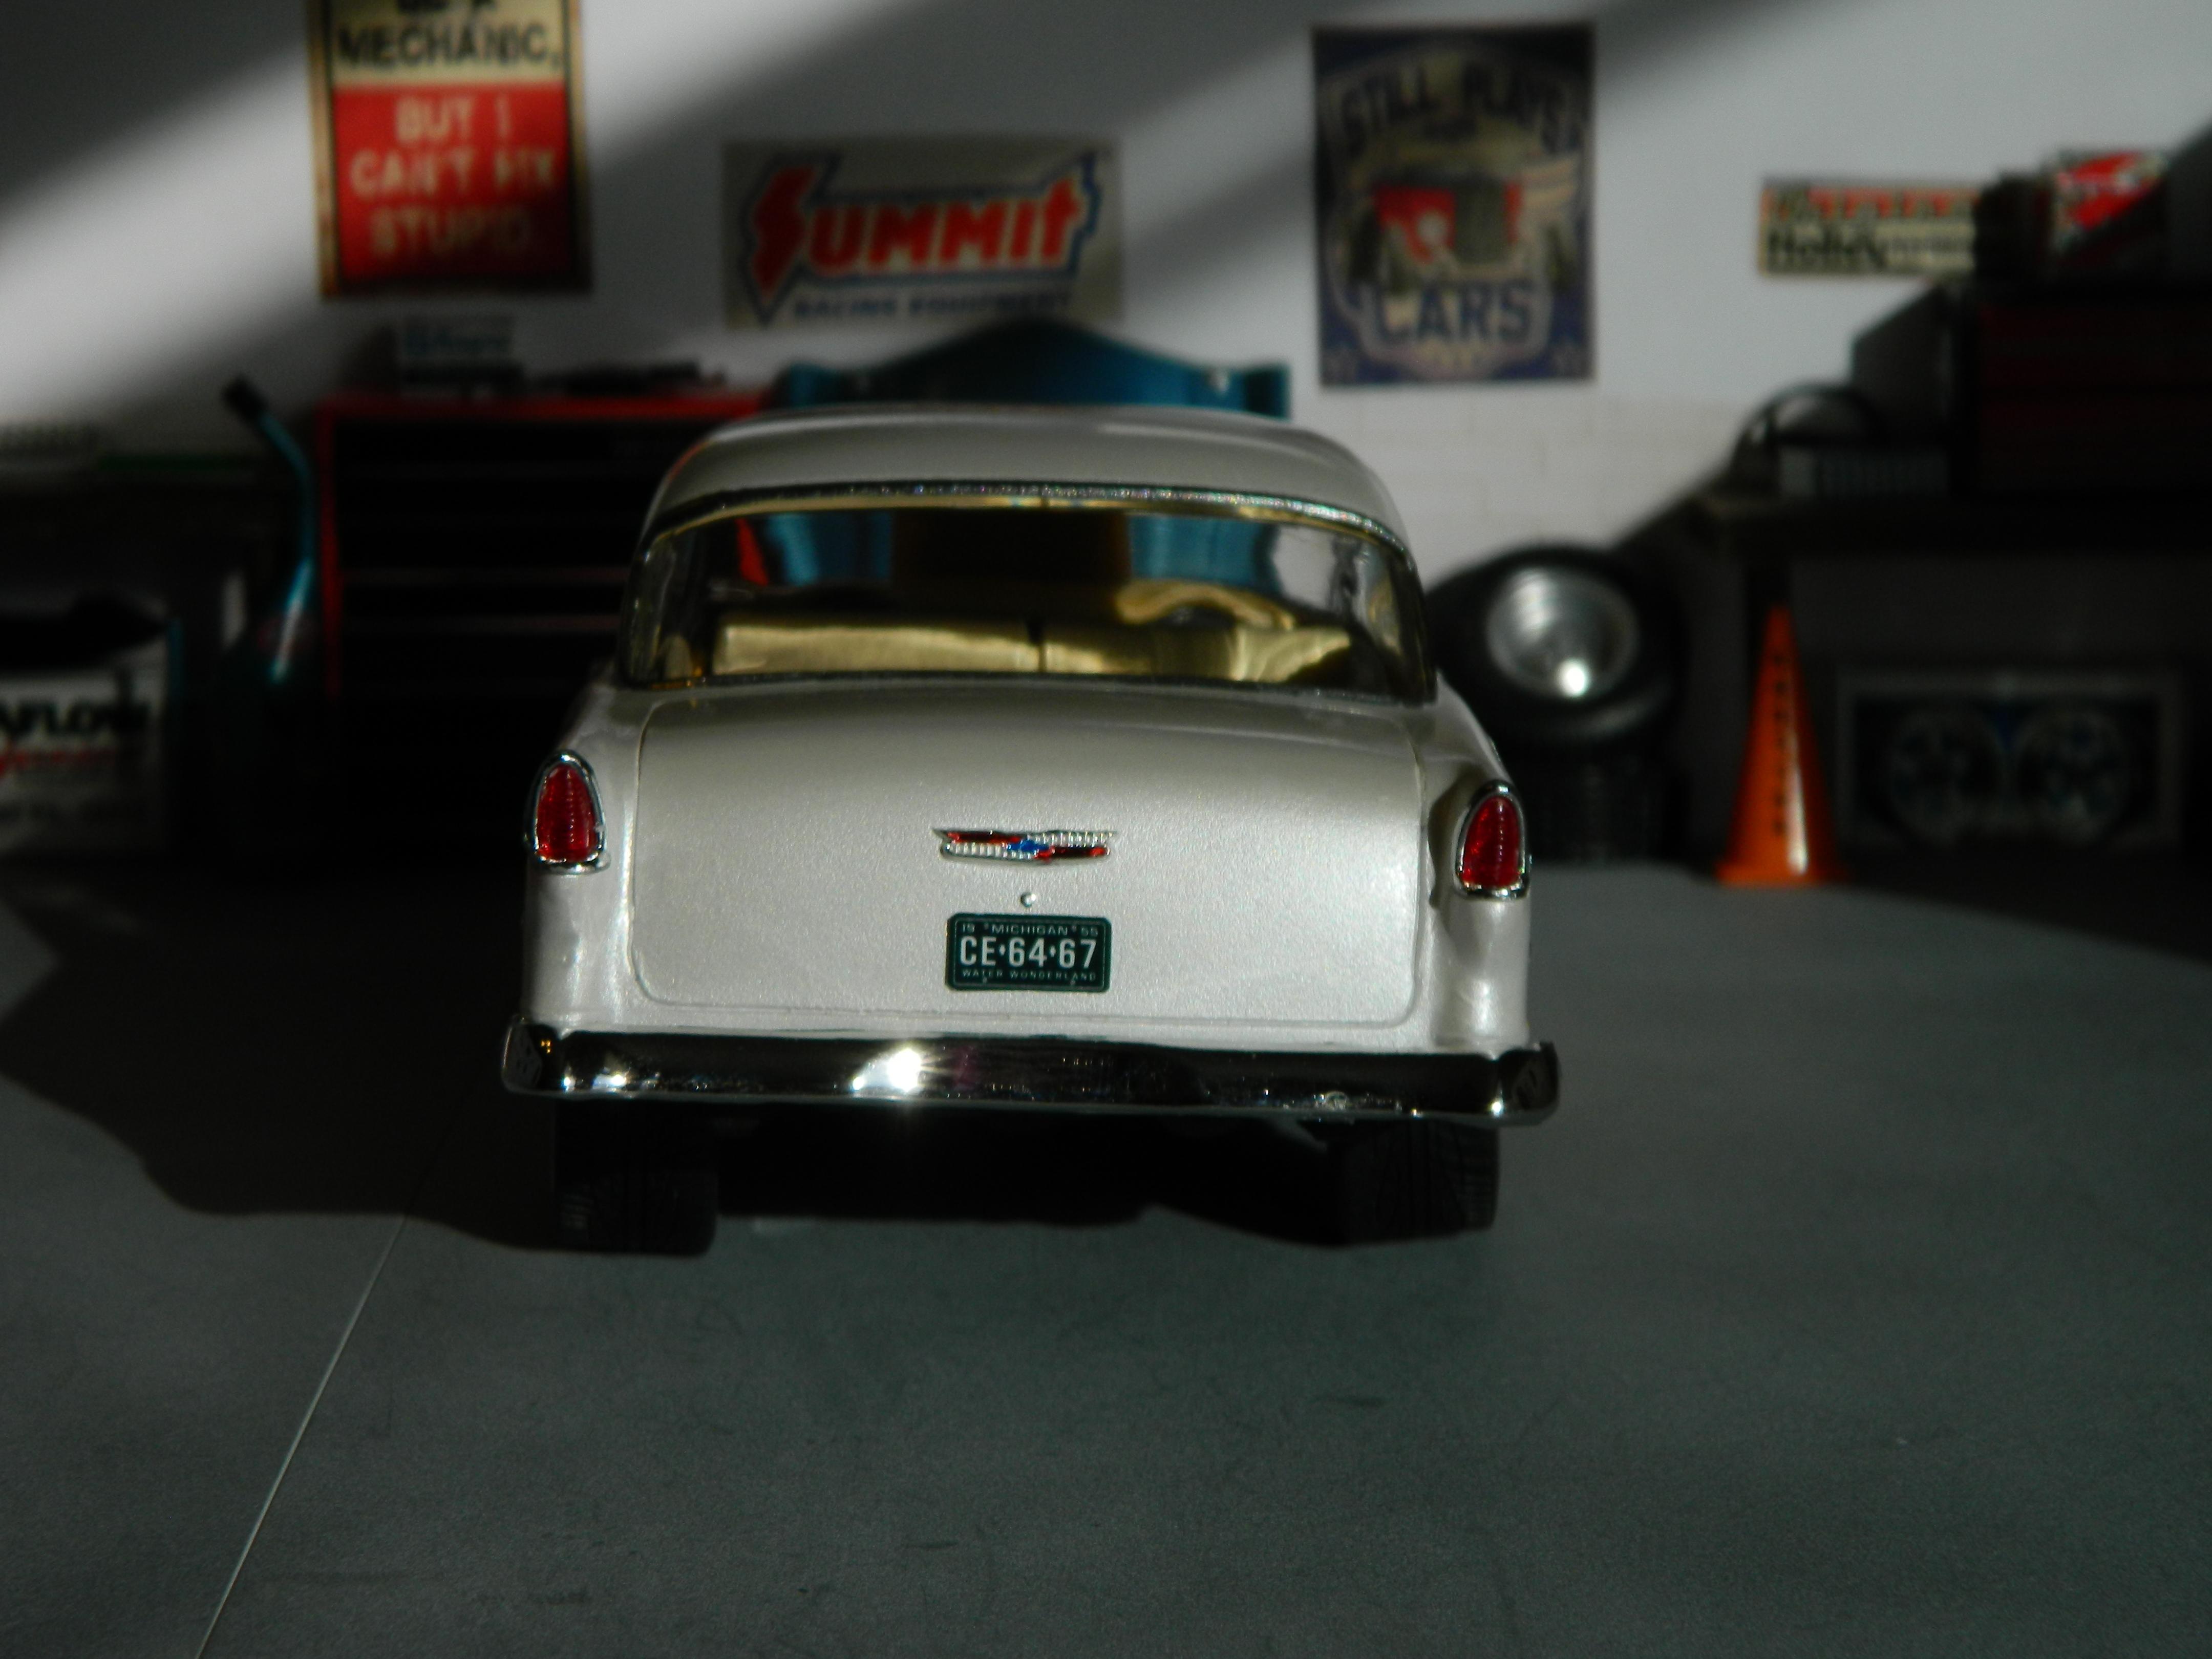
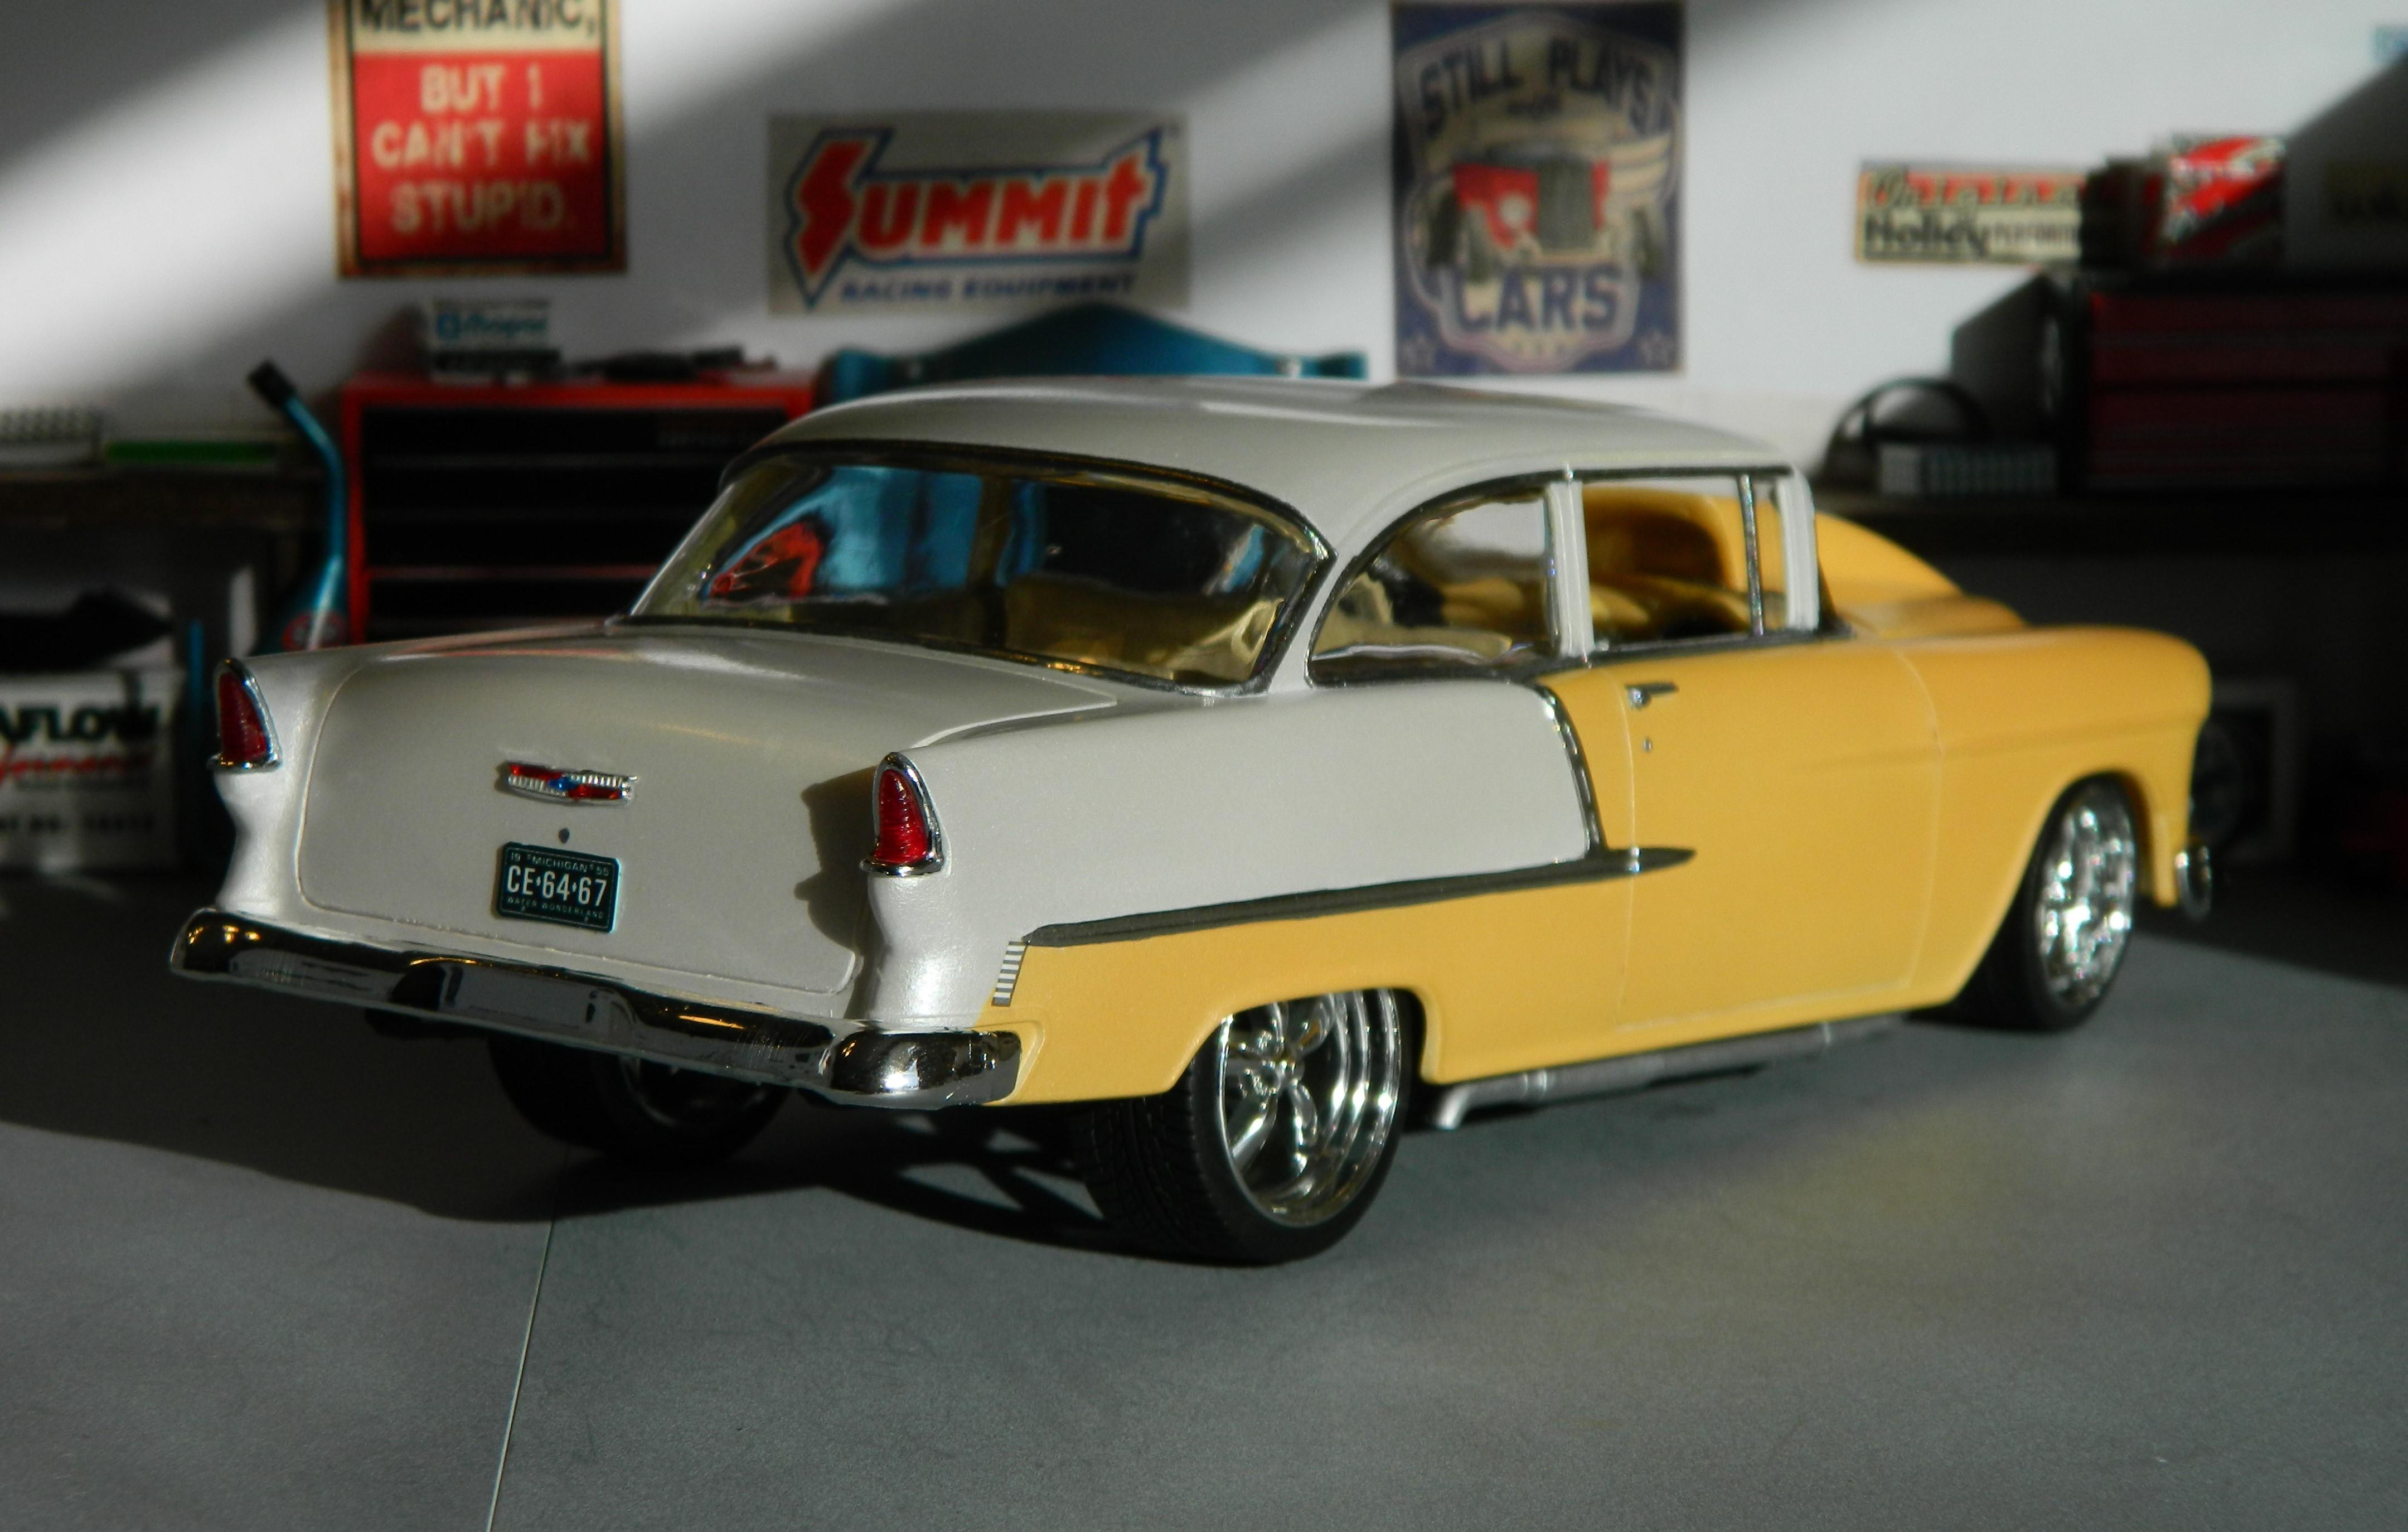
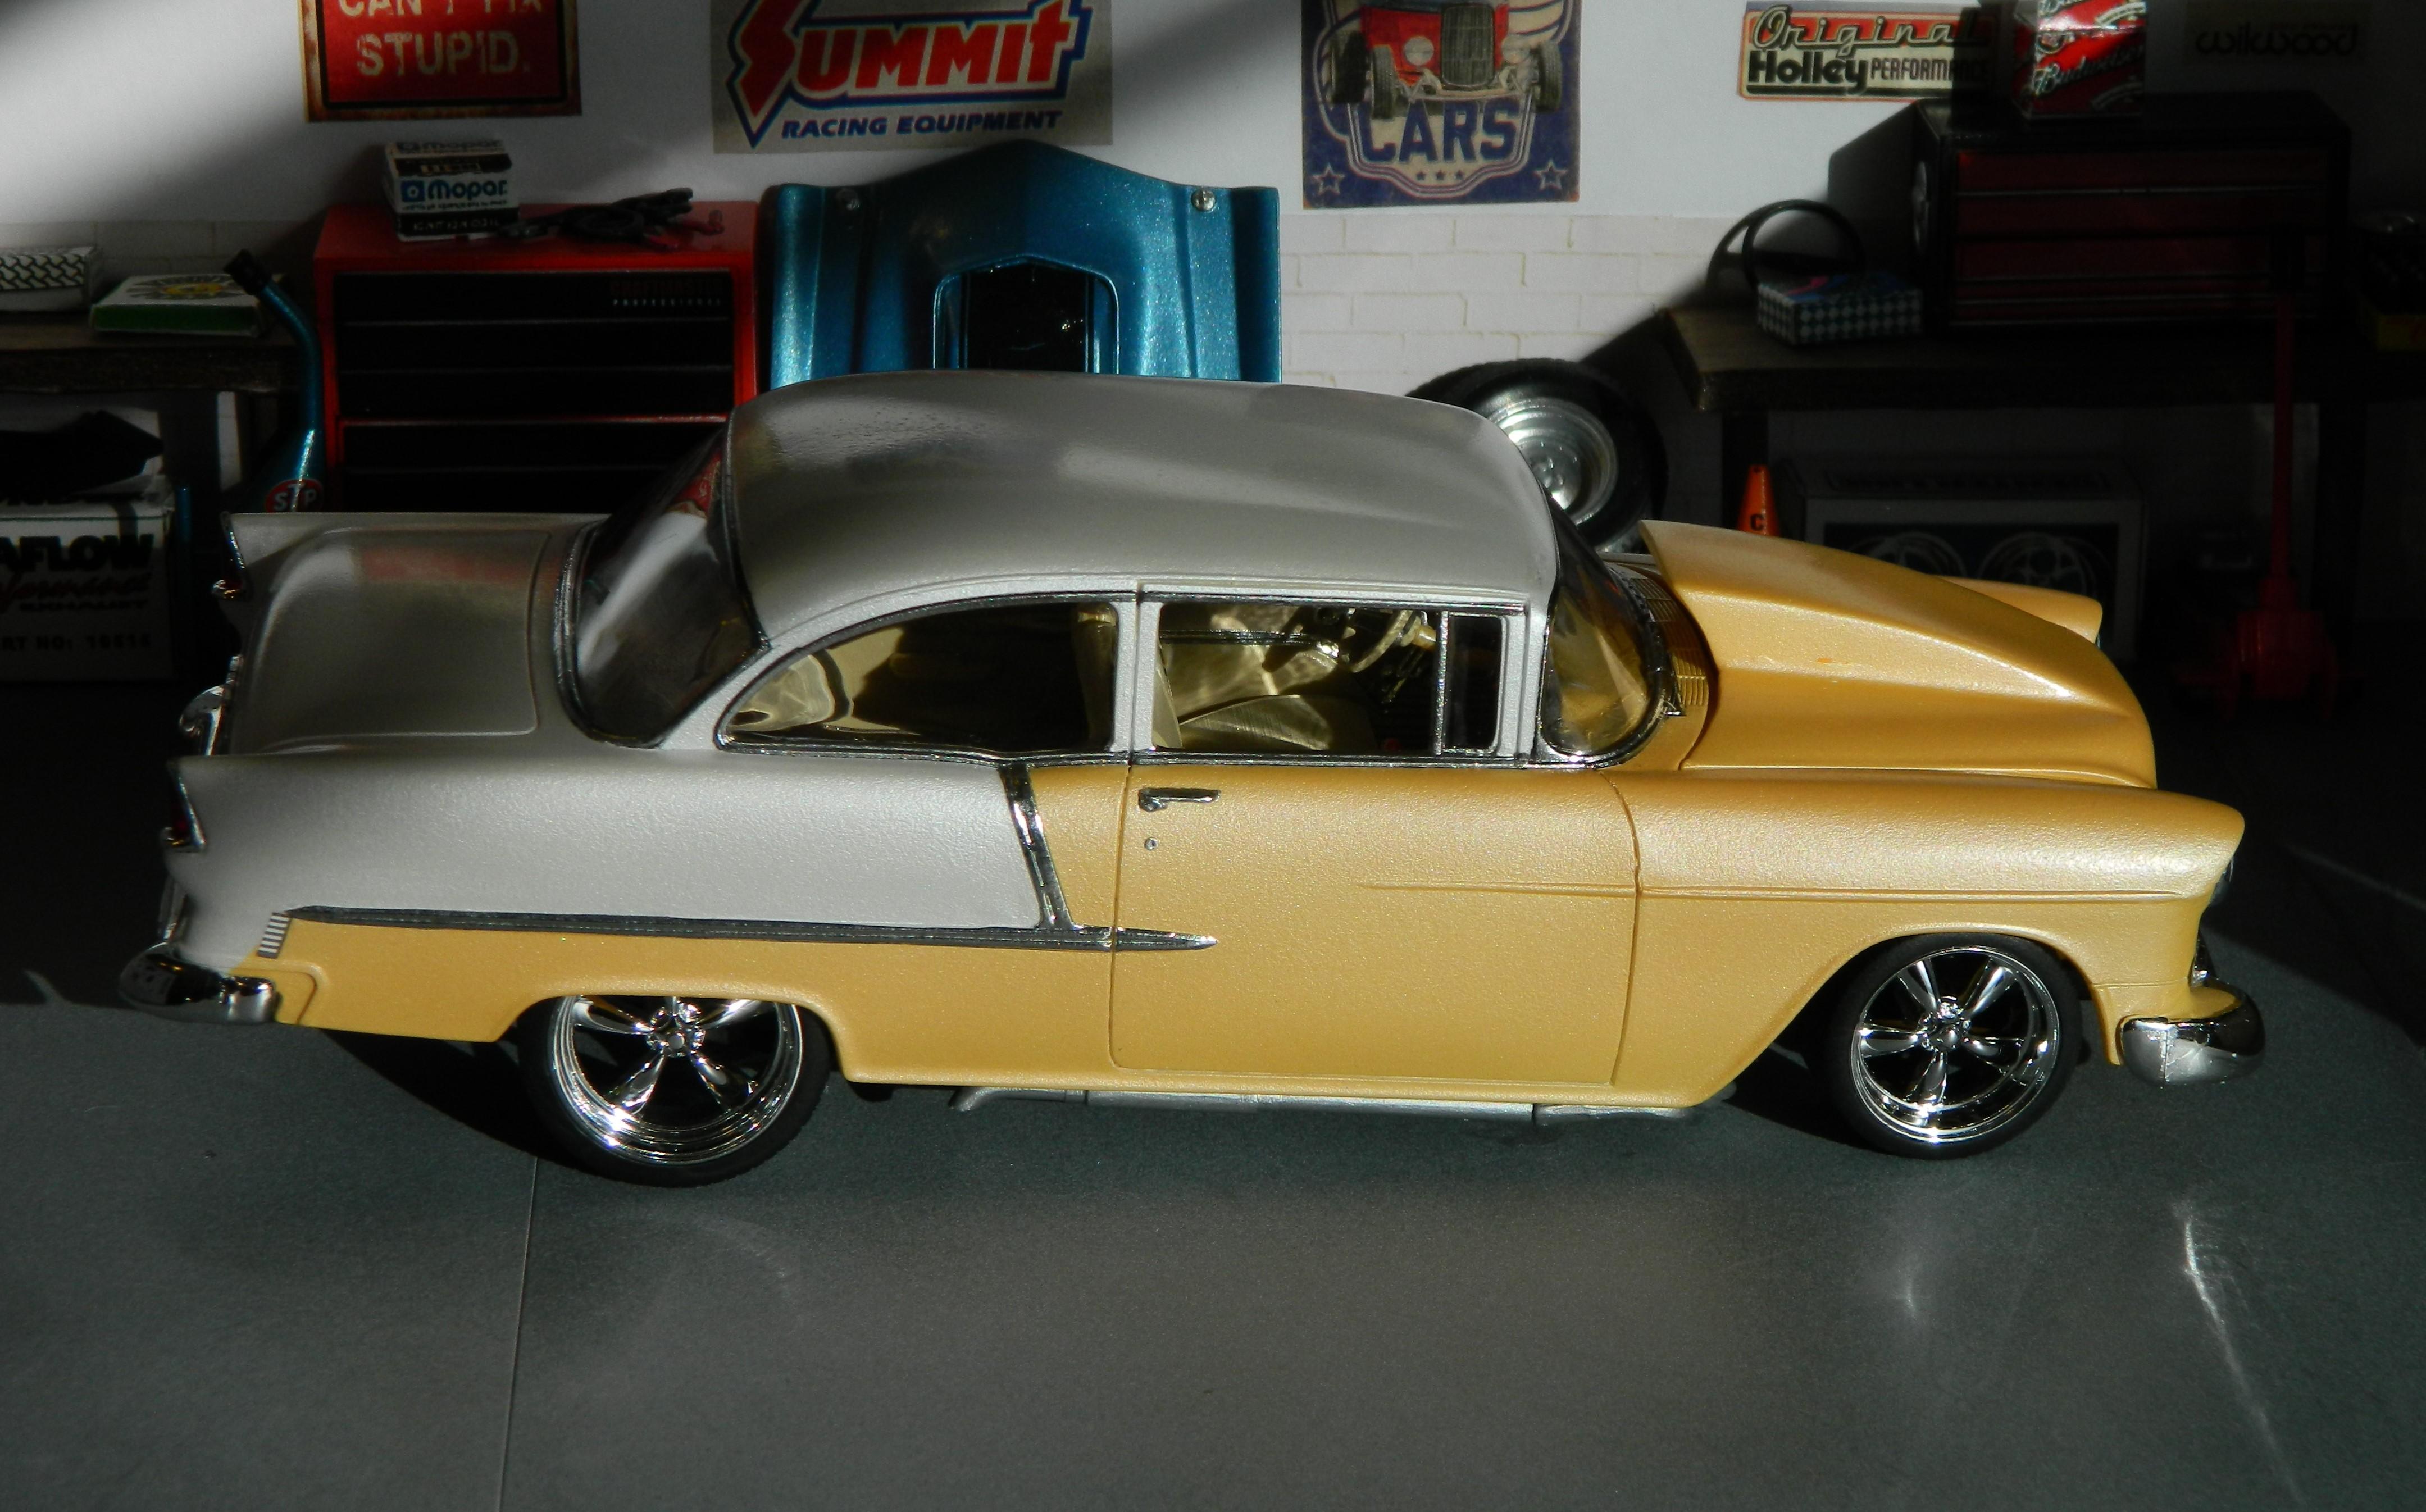
I finished the AMT 1955 Chevy Bel Air over the weekend. Although I am pretty happy with how it turned out, I feel like I coulda/shoulda been more patient and took more time with it to really knock it out of the park. I took some shortcuts with the engine swap and exhaust, front suspension mods, and rear suspension mods. It ended up with a little more rake to it than I'd like, and I also missed some details like disc brake rotors. Anyways, the color is Metallic White with a custom mix of craft paints for the Light Orange. I cleared it with Decoart Duraclear Gloss Varnish, wet-sanded and polished with Novus #2. The interior is a custom mix of craft paints for both tones, and I even made an attempt at a 5-ball shifter. Most of the engine is from the AMT Baldwin-Motion Camaro kit, with some parts box pieces to top it off. The wheels are Pegasus Chrome T's 19" and 23", the hood from Lex's Scale Modeling, and the coil from MAD Modeling. The trim is a combination of Green Stuff World Chrome airbrushed around the windows, and I used BMF for the side trim. All-in-all a fun project that I hope I learned some lessons from. I thought the second set of pics looked pretty cool with the way the sun came in through the window. Thanks for looking!!
-
Finished up another one of my stalled WIP builds. Decided to go triple black with this one. Not quite as good as the 62 I built years back. But im really happy how this one looks.. Usual Tamiya TS-14 Black, but this one is polished and waxed. Interior is Mr Hobby Finishing Surfacer 1500 black and Tamiya XF-1 flat black. Pegasus #1109 wheels, painted Tamiya X-1 black Got a bit slack and couldnt be bothered doing much paint work on the undercarriage, if it had a separate X-frame would have chromed that and all the suspension and running gear components. So went the easy way and left all 1500 surfacer black.
-
Thought it was time to start up "another" project, I introduce the "49 3W coupe. No real plans as of now, just trying to get the body mods done before I continue.. Thanks fer lookin.
-
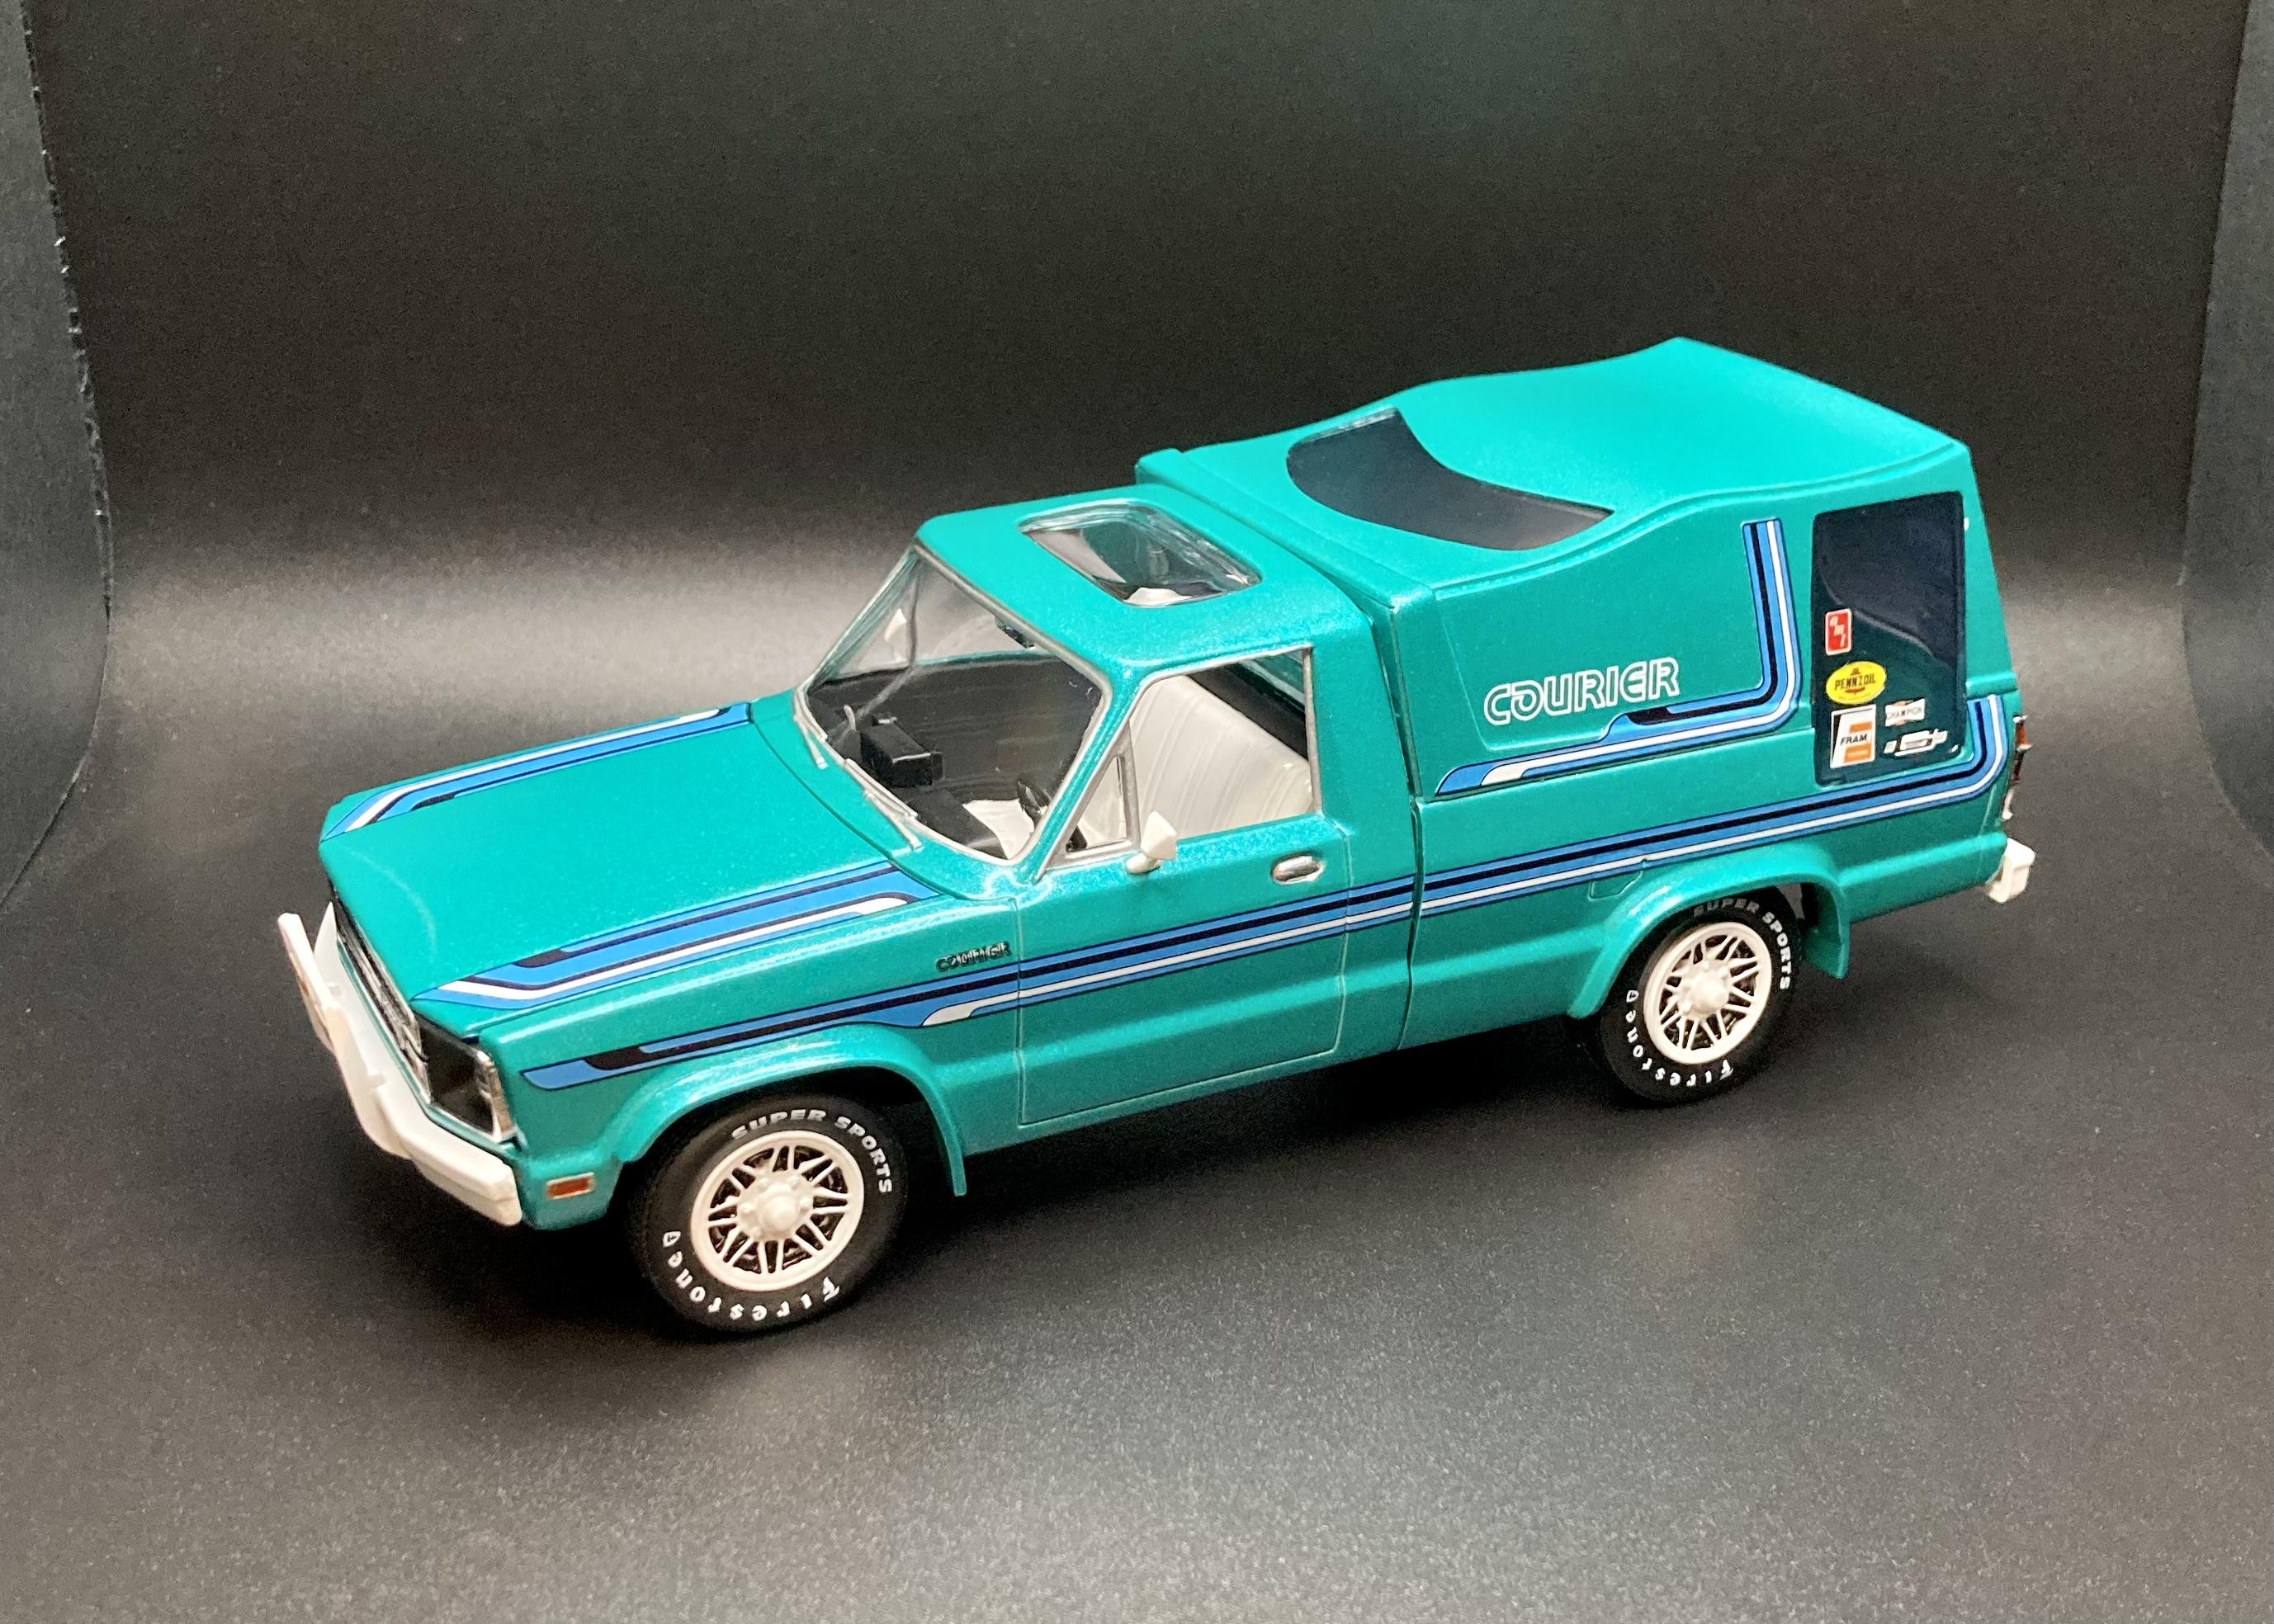
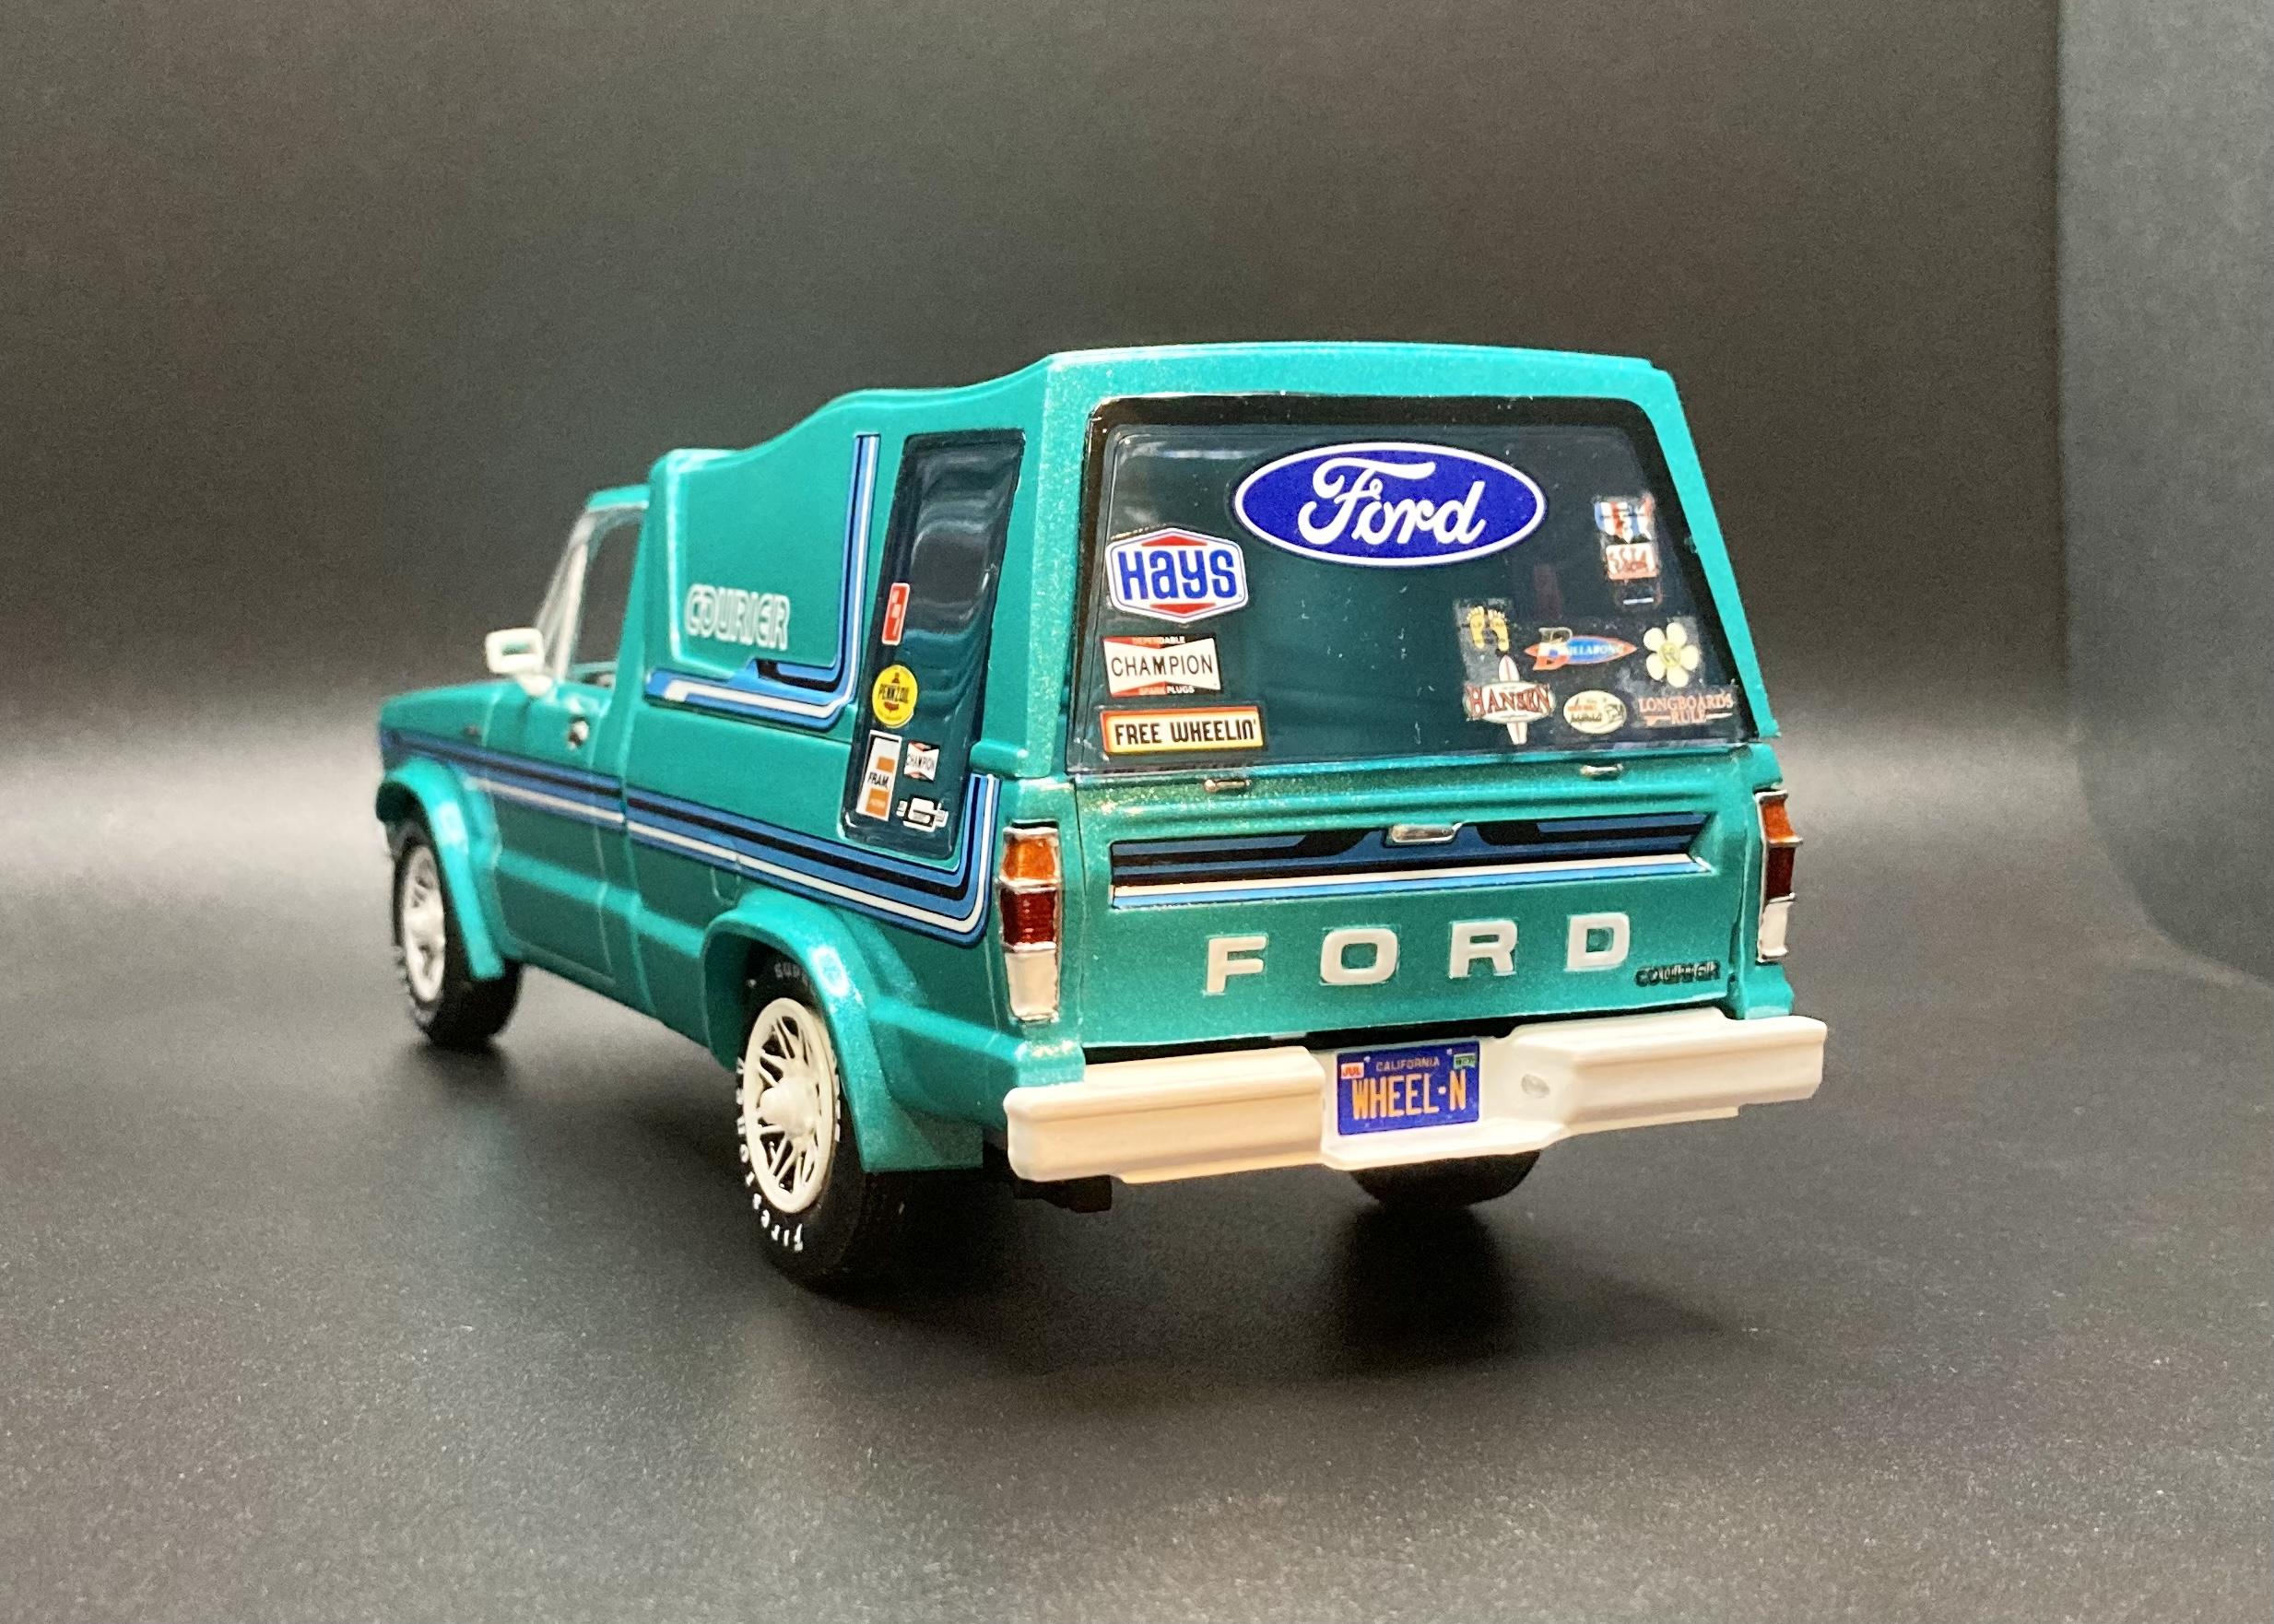
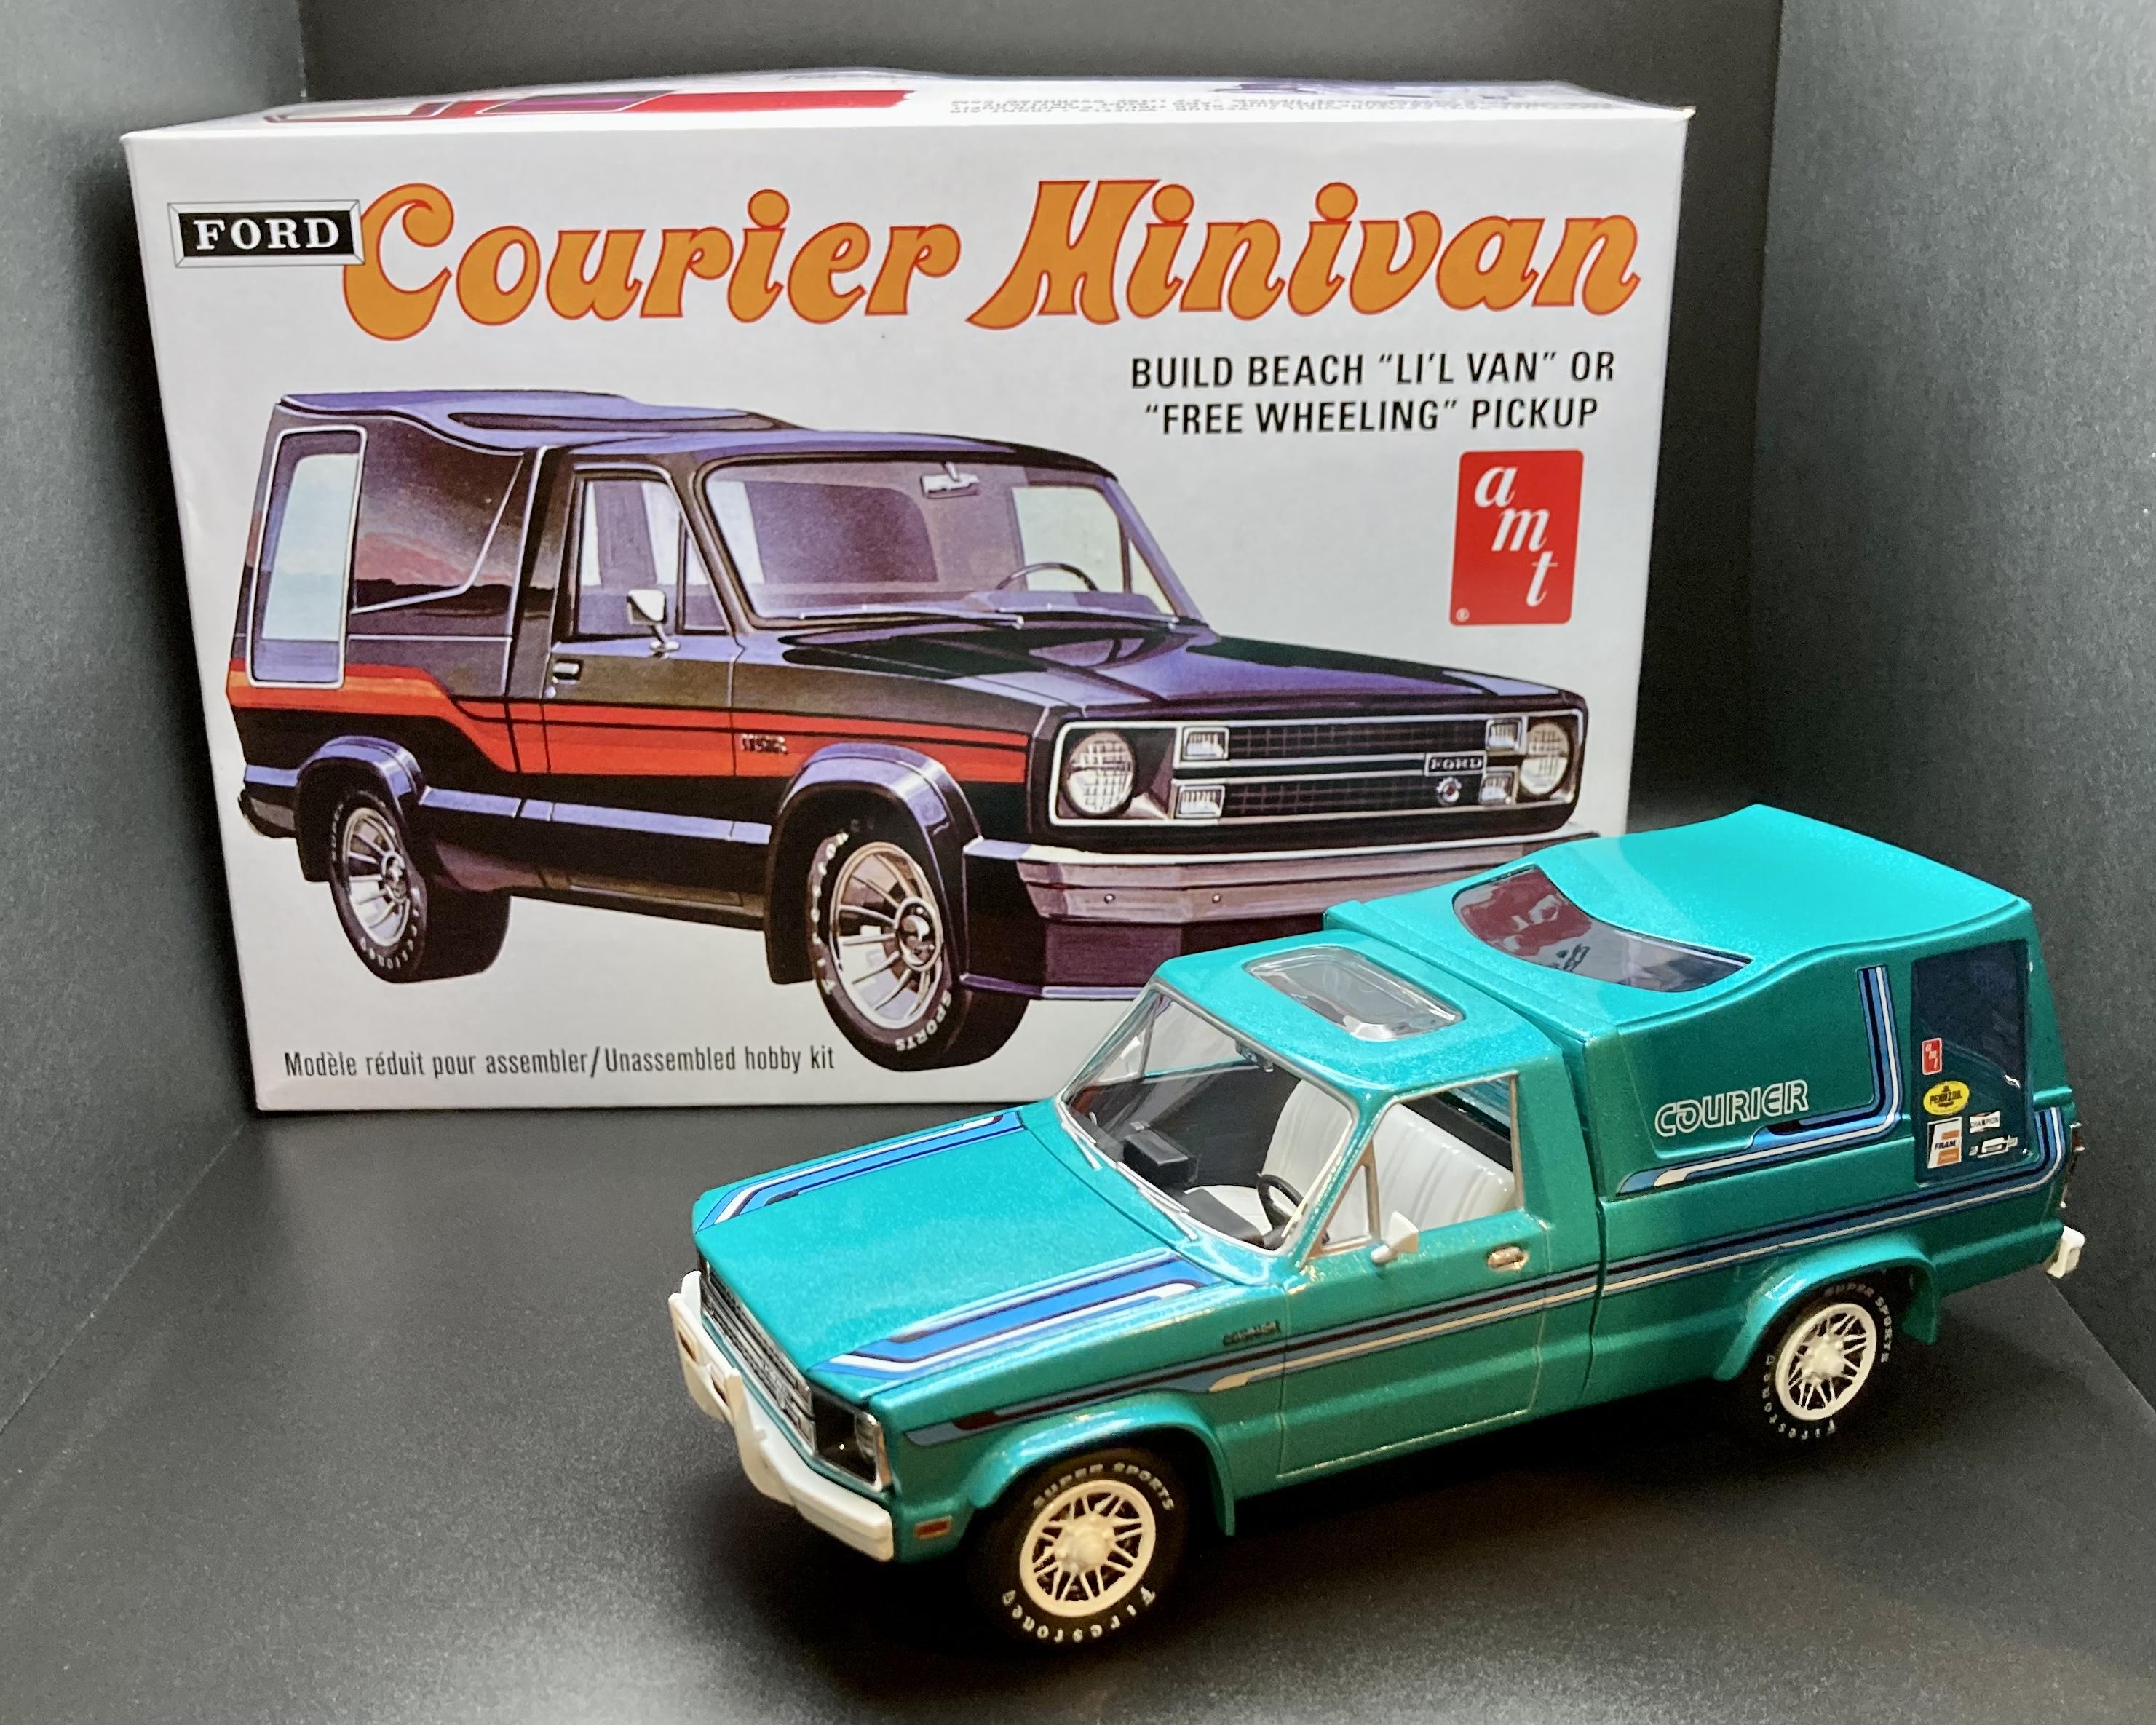
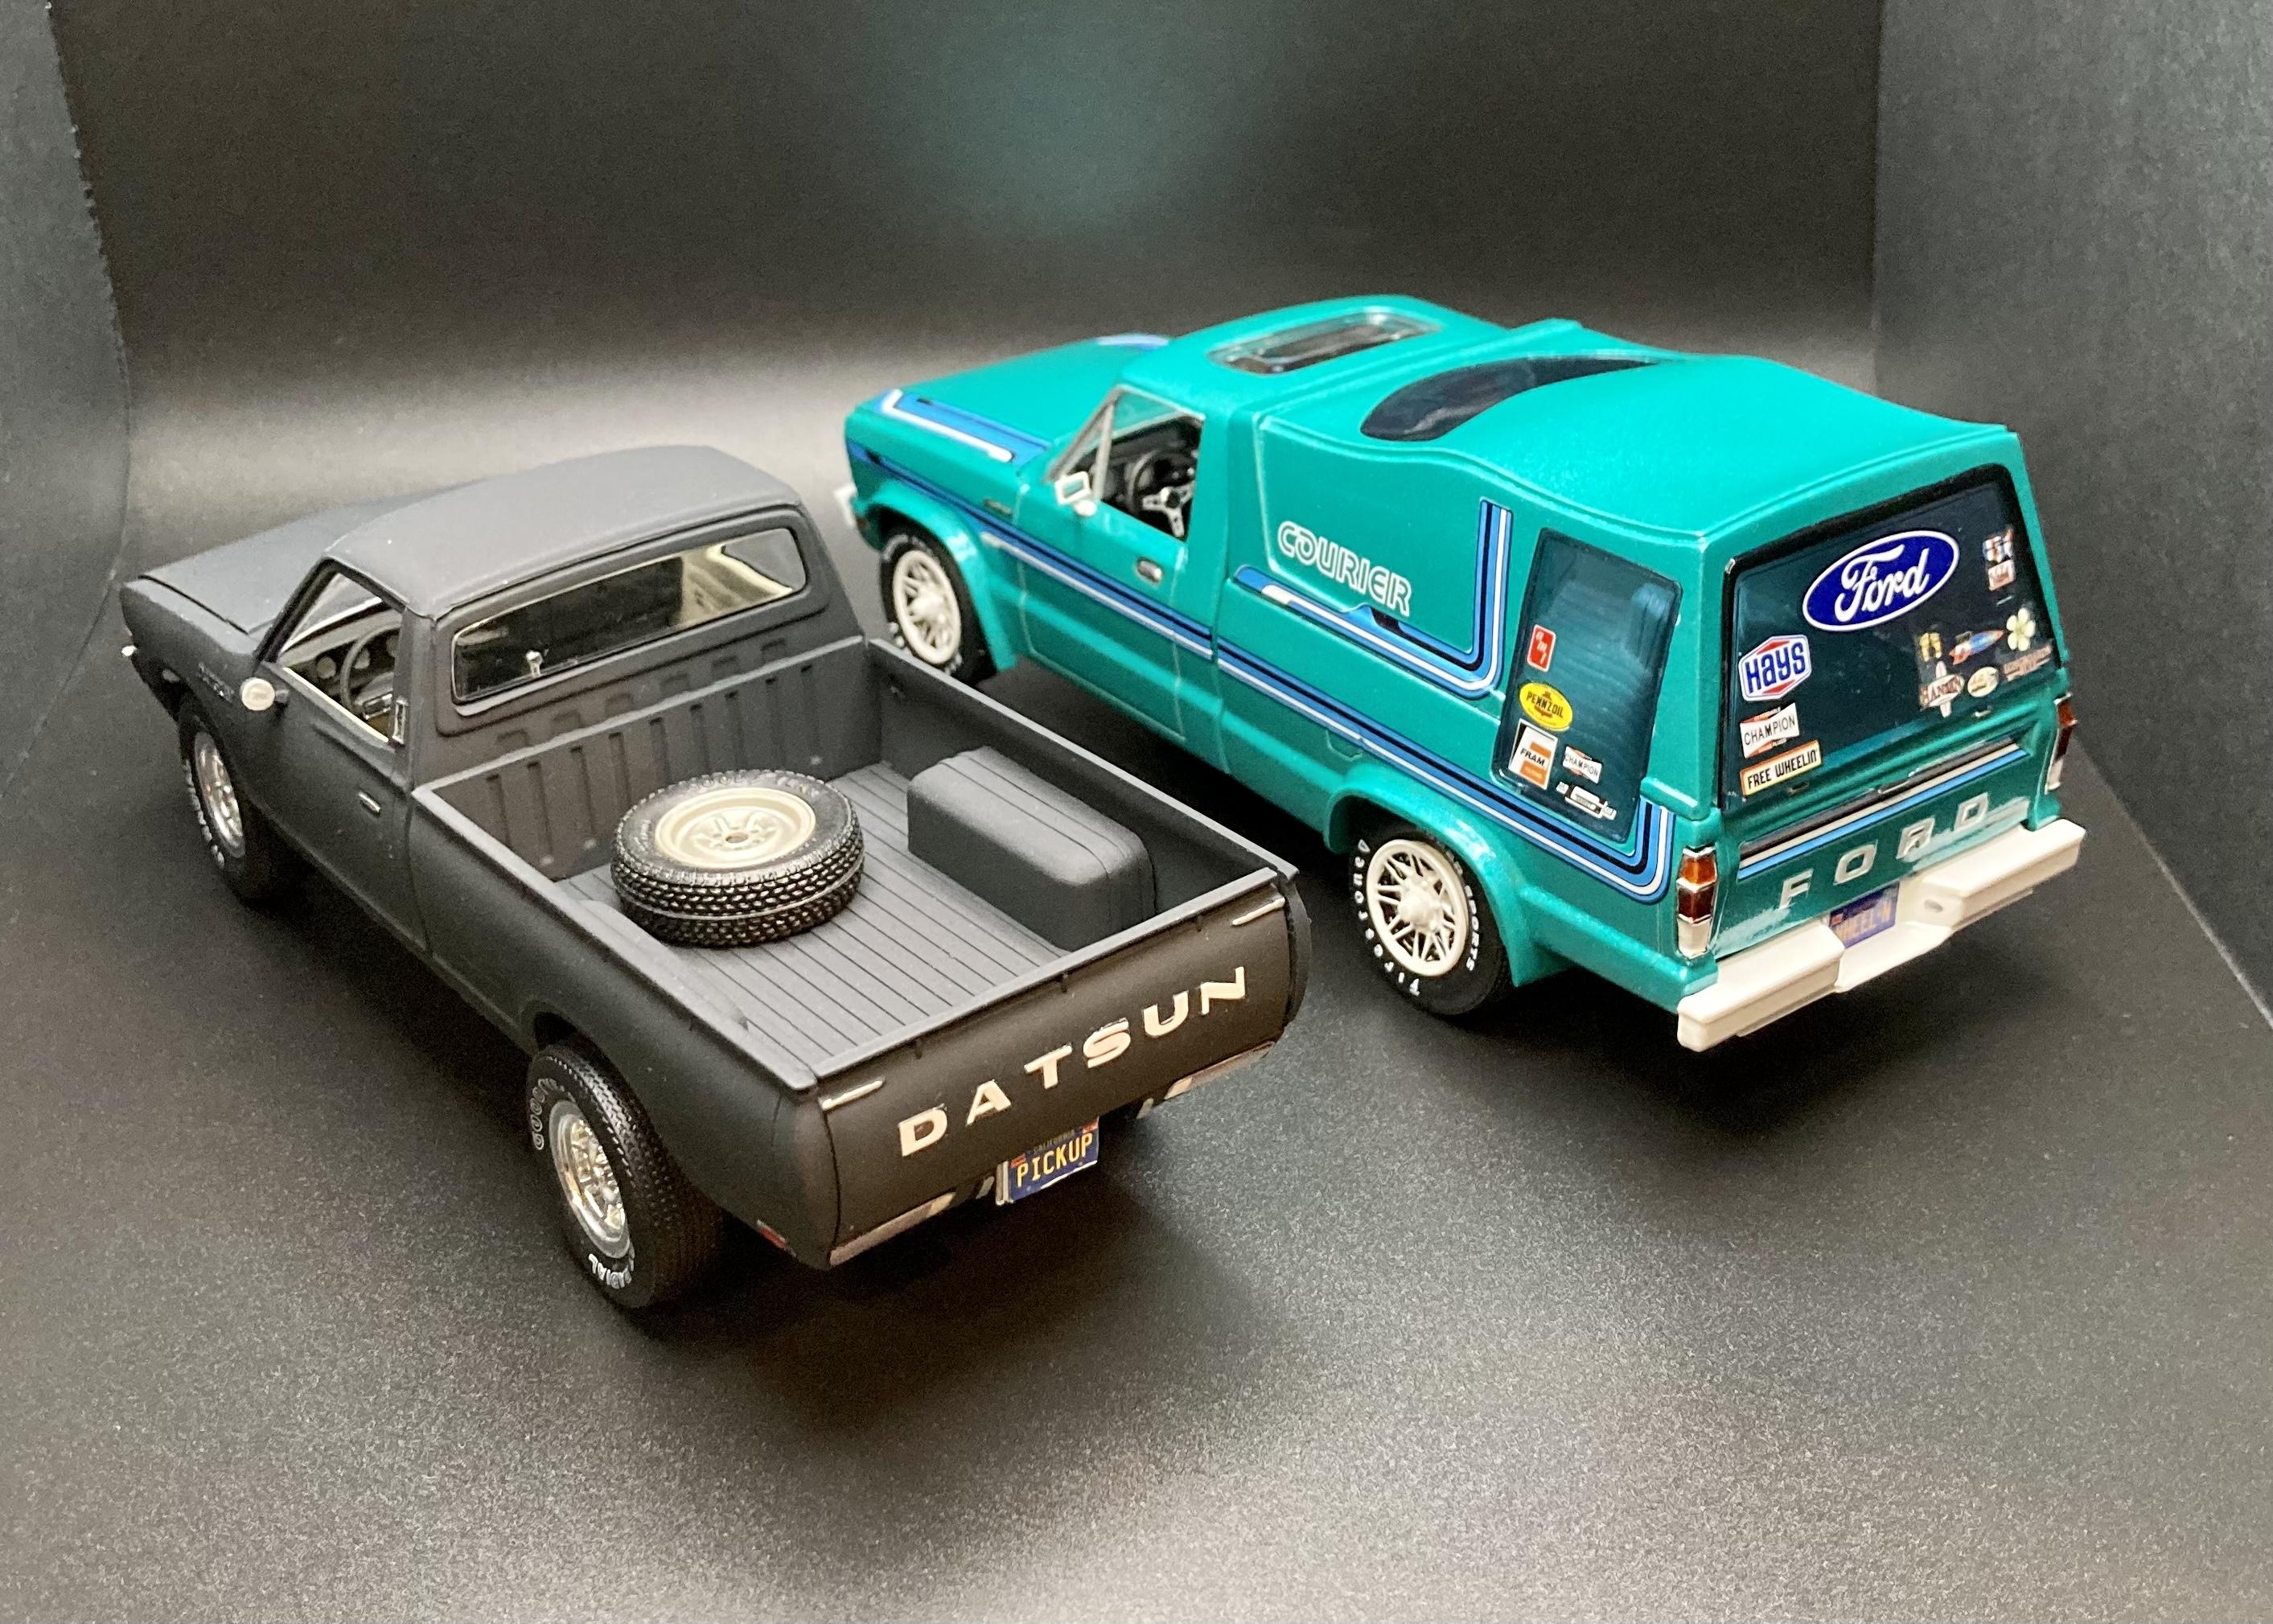
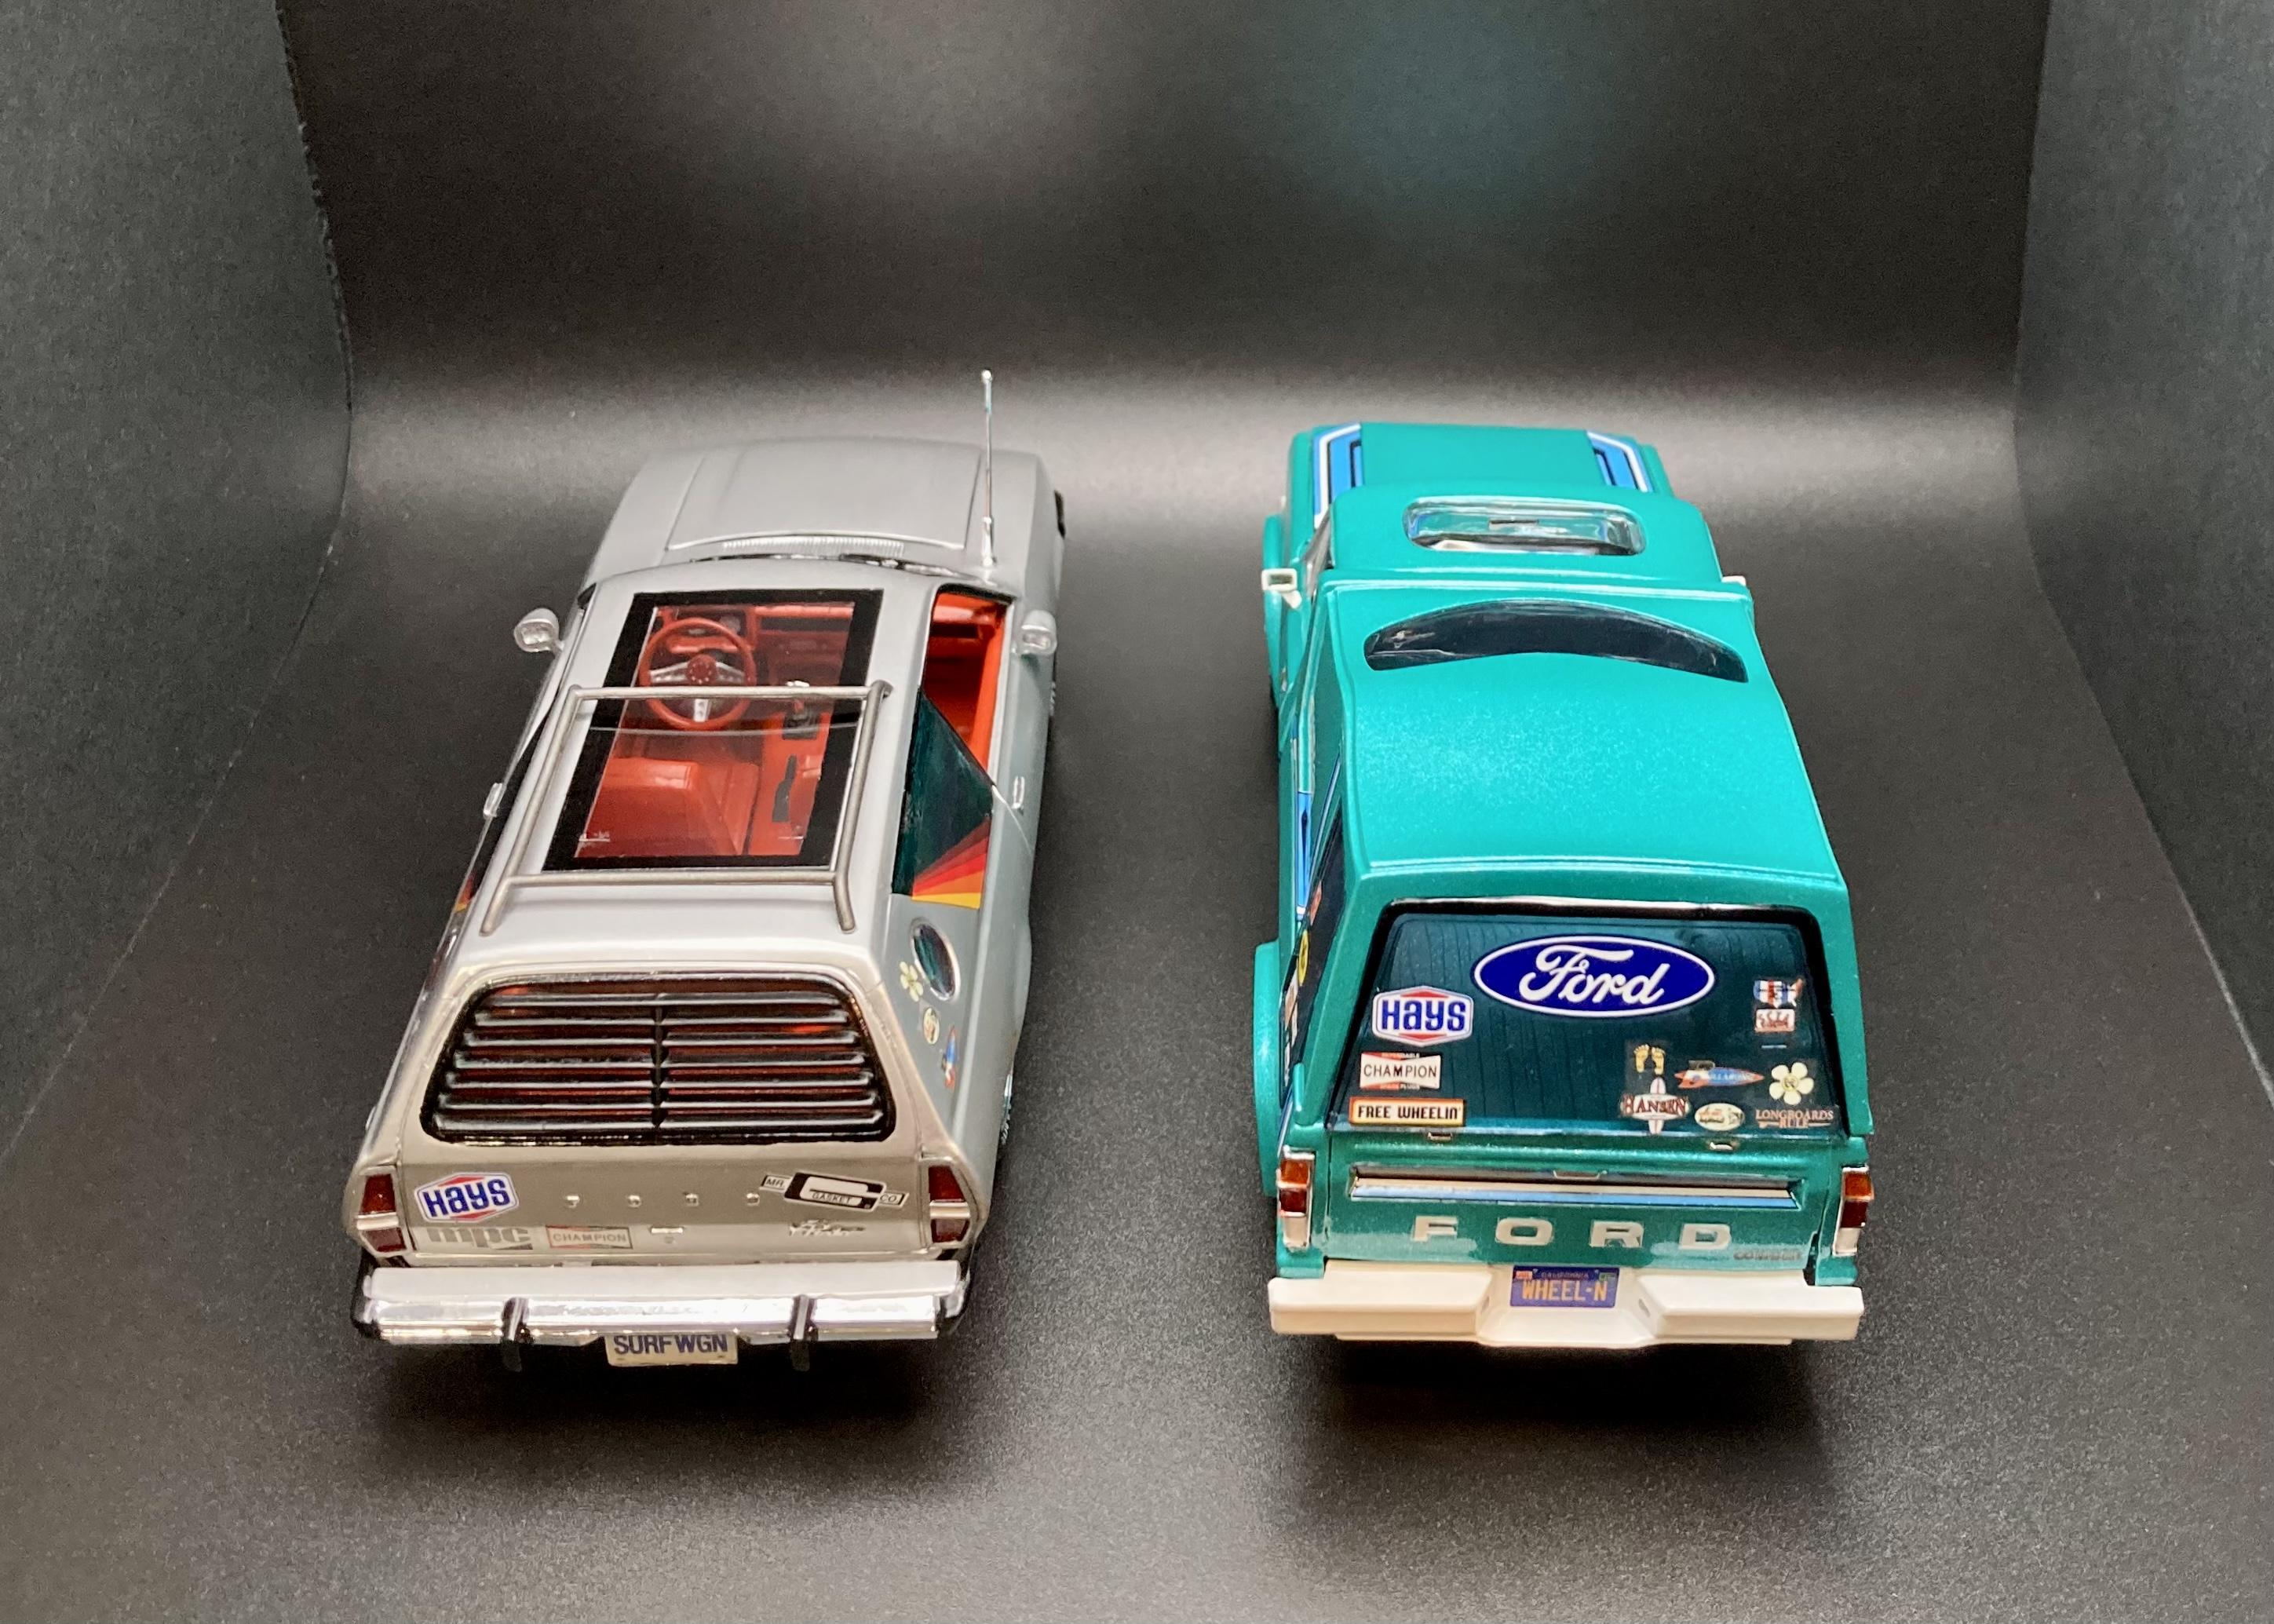
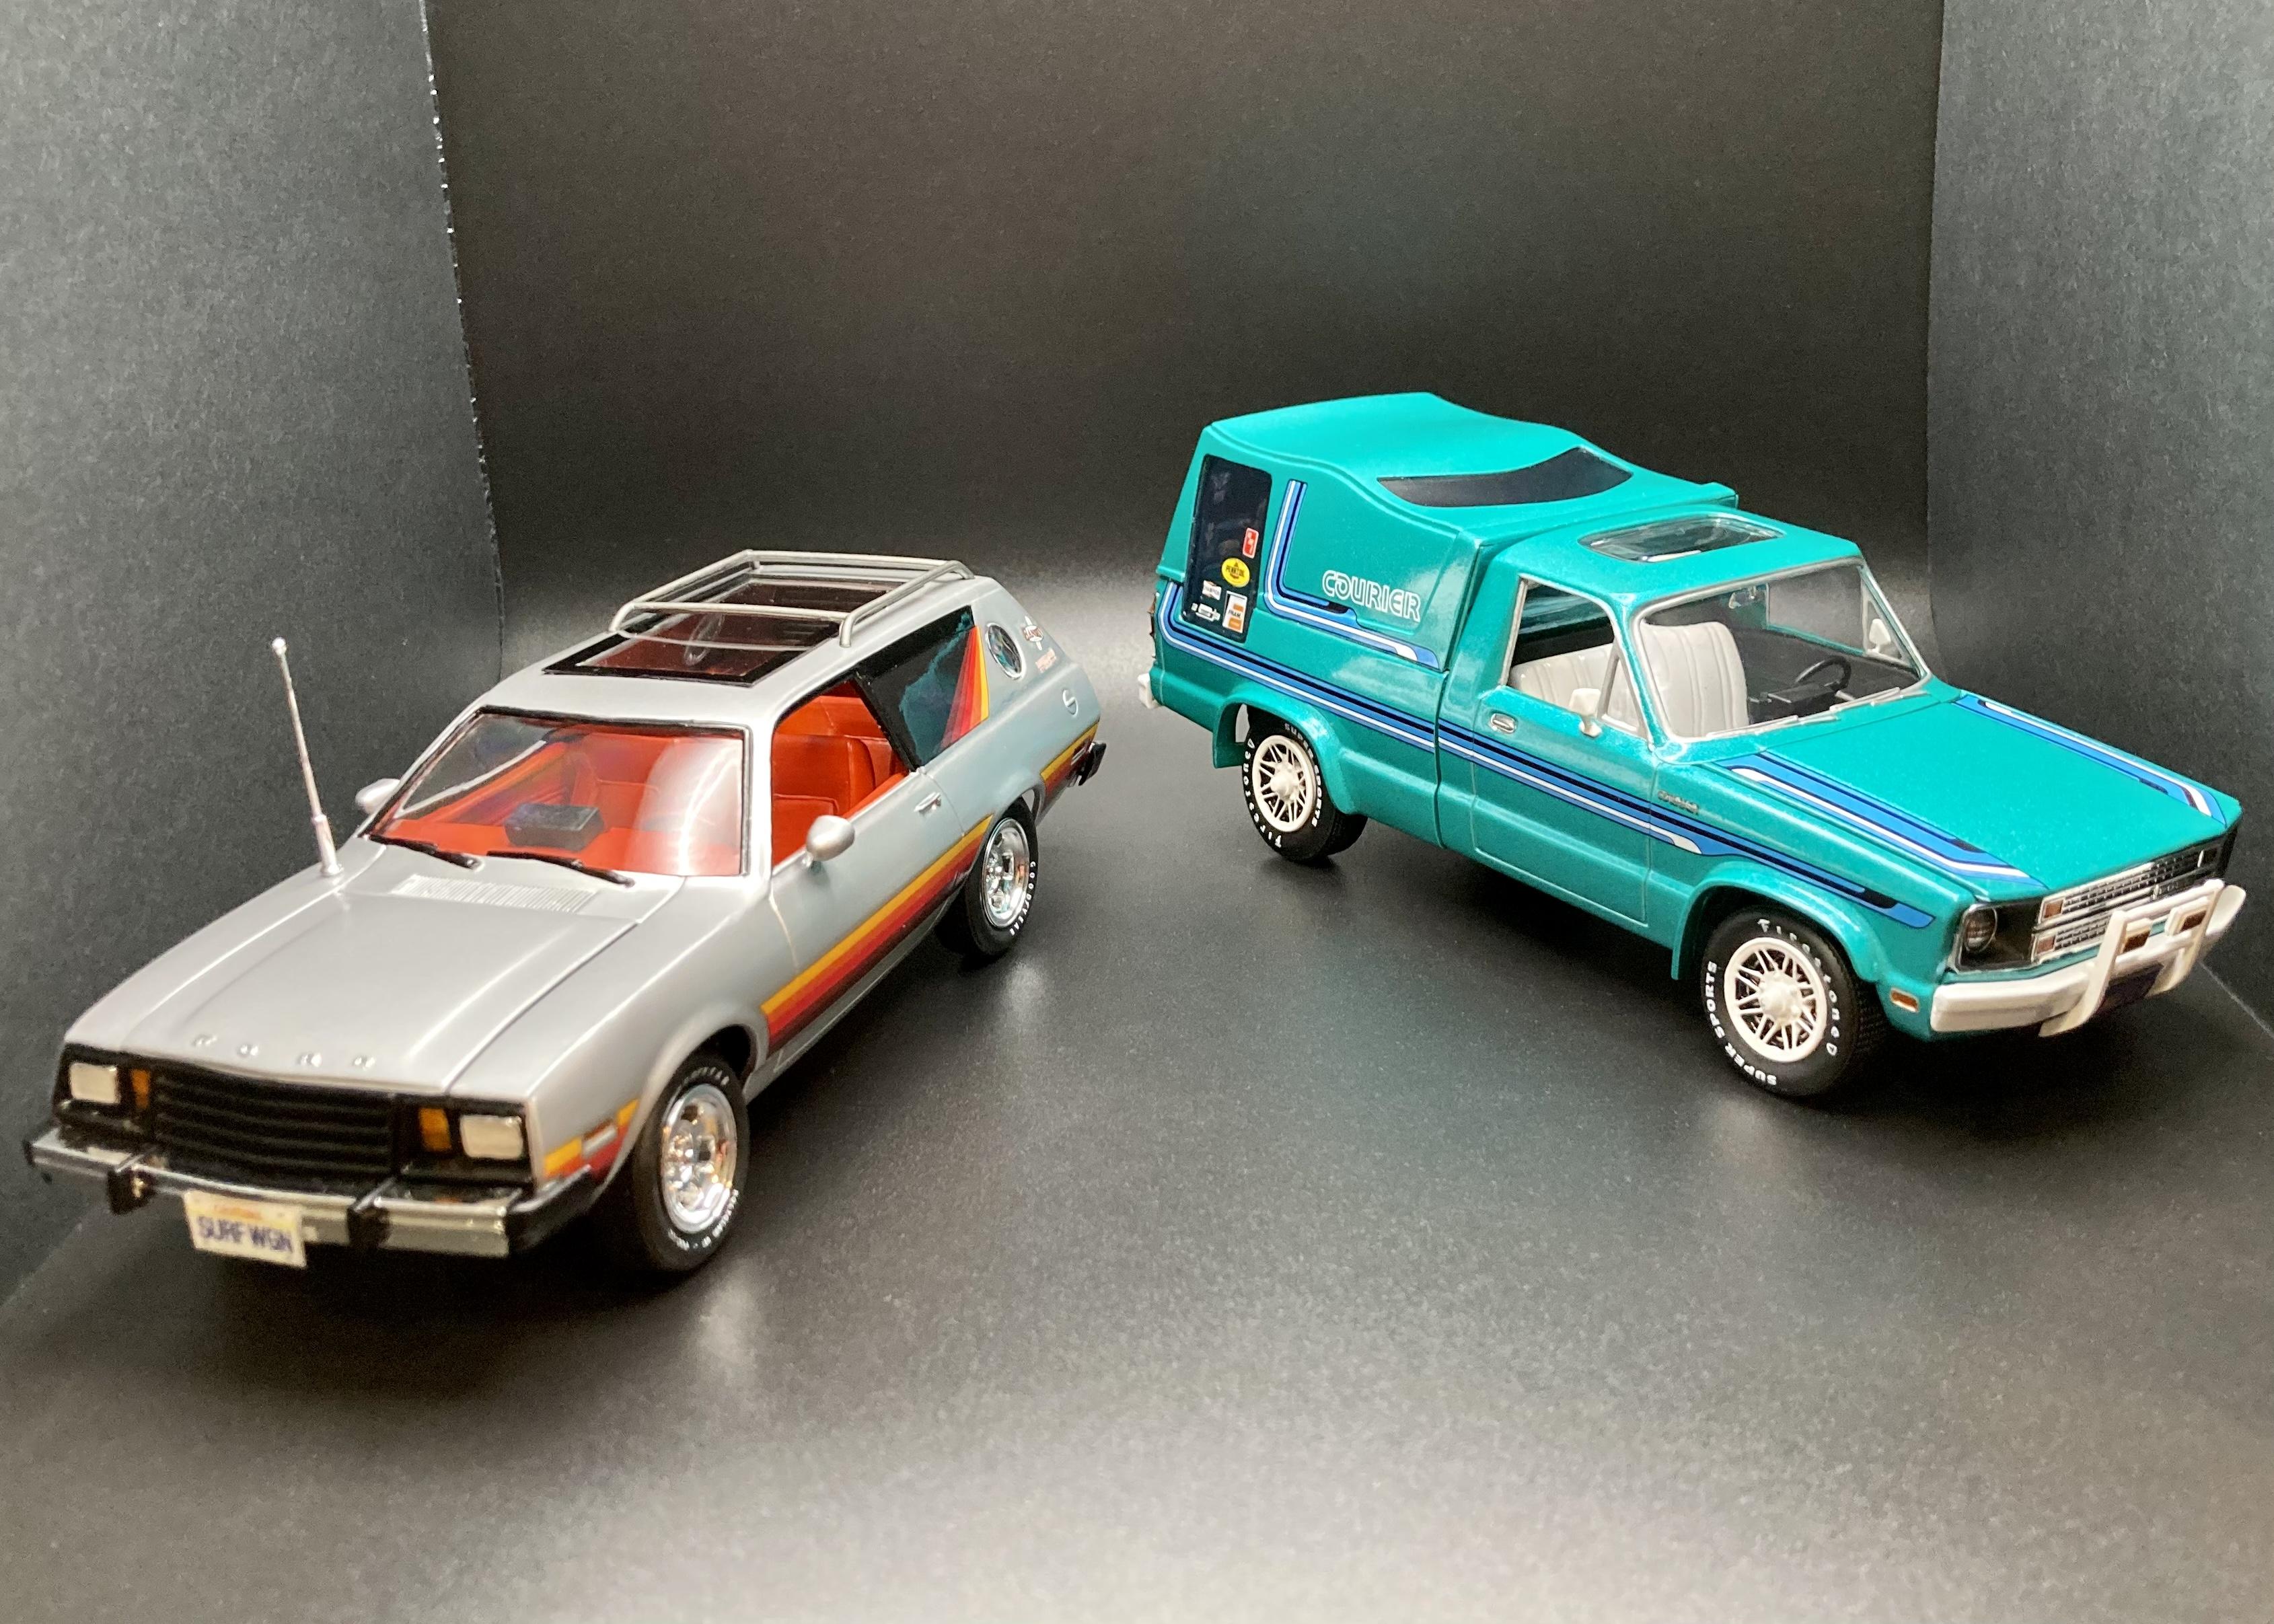
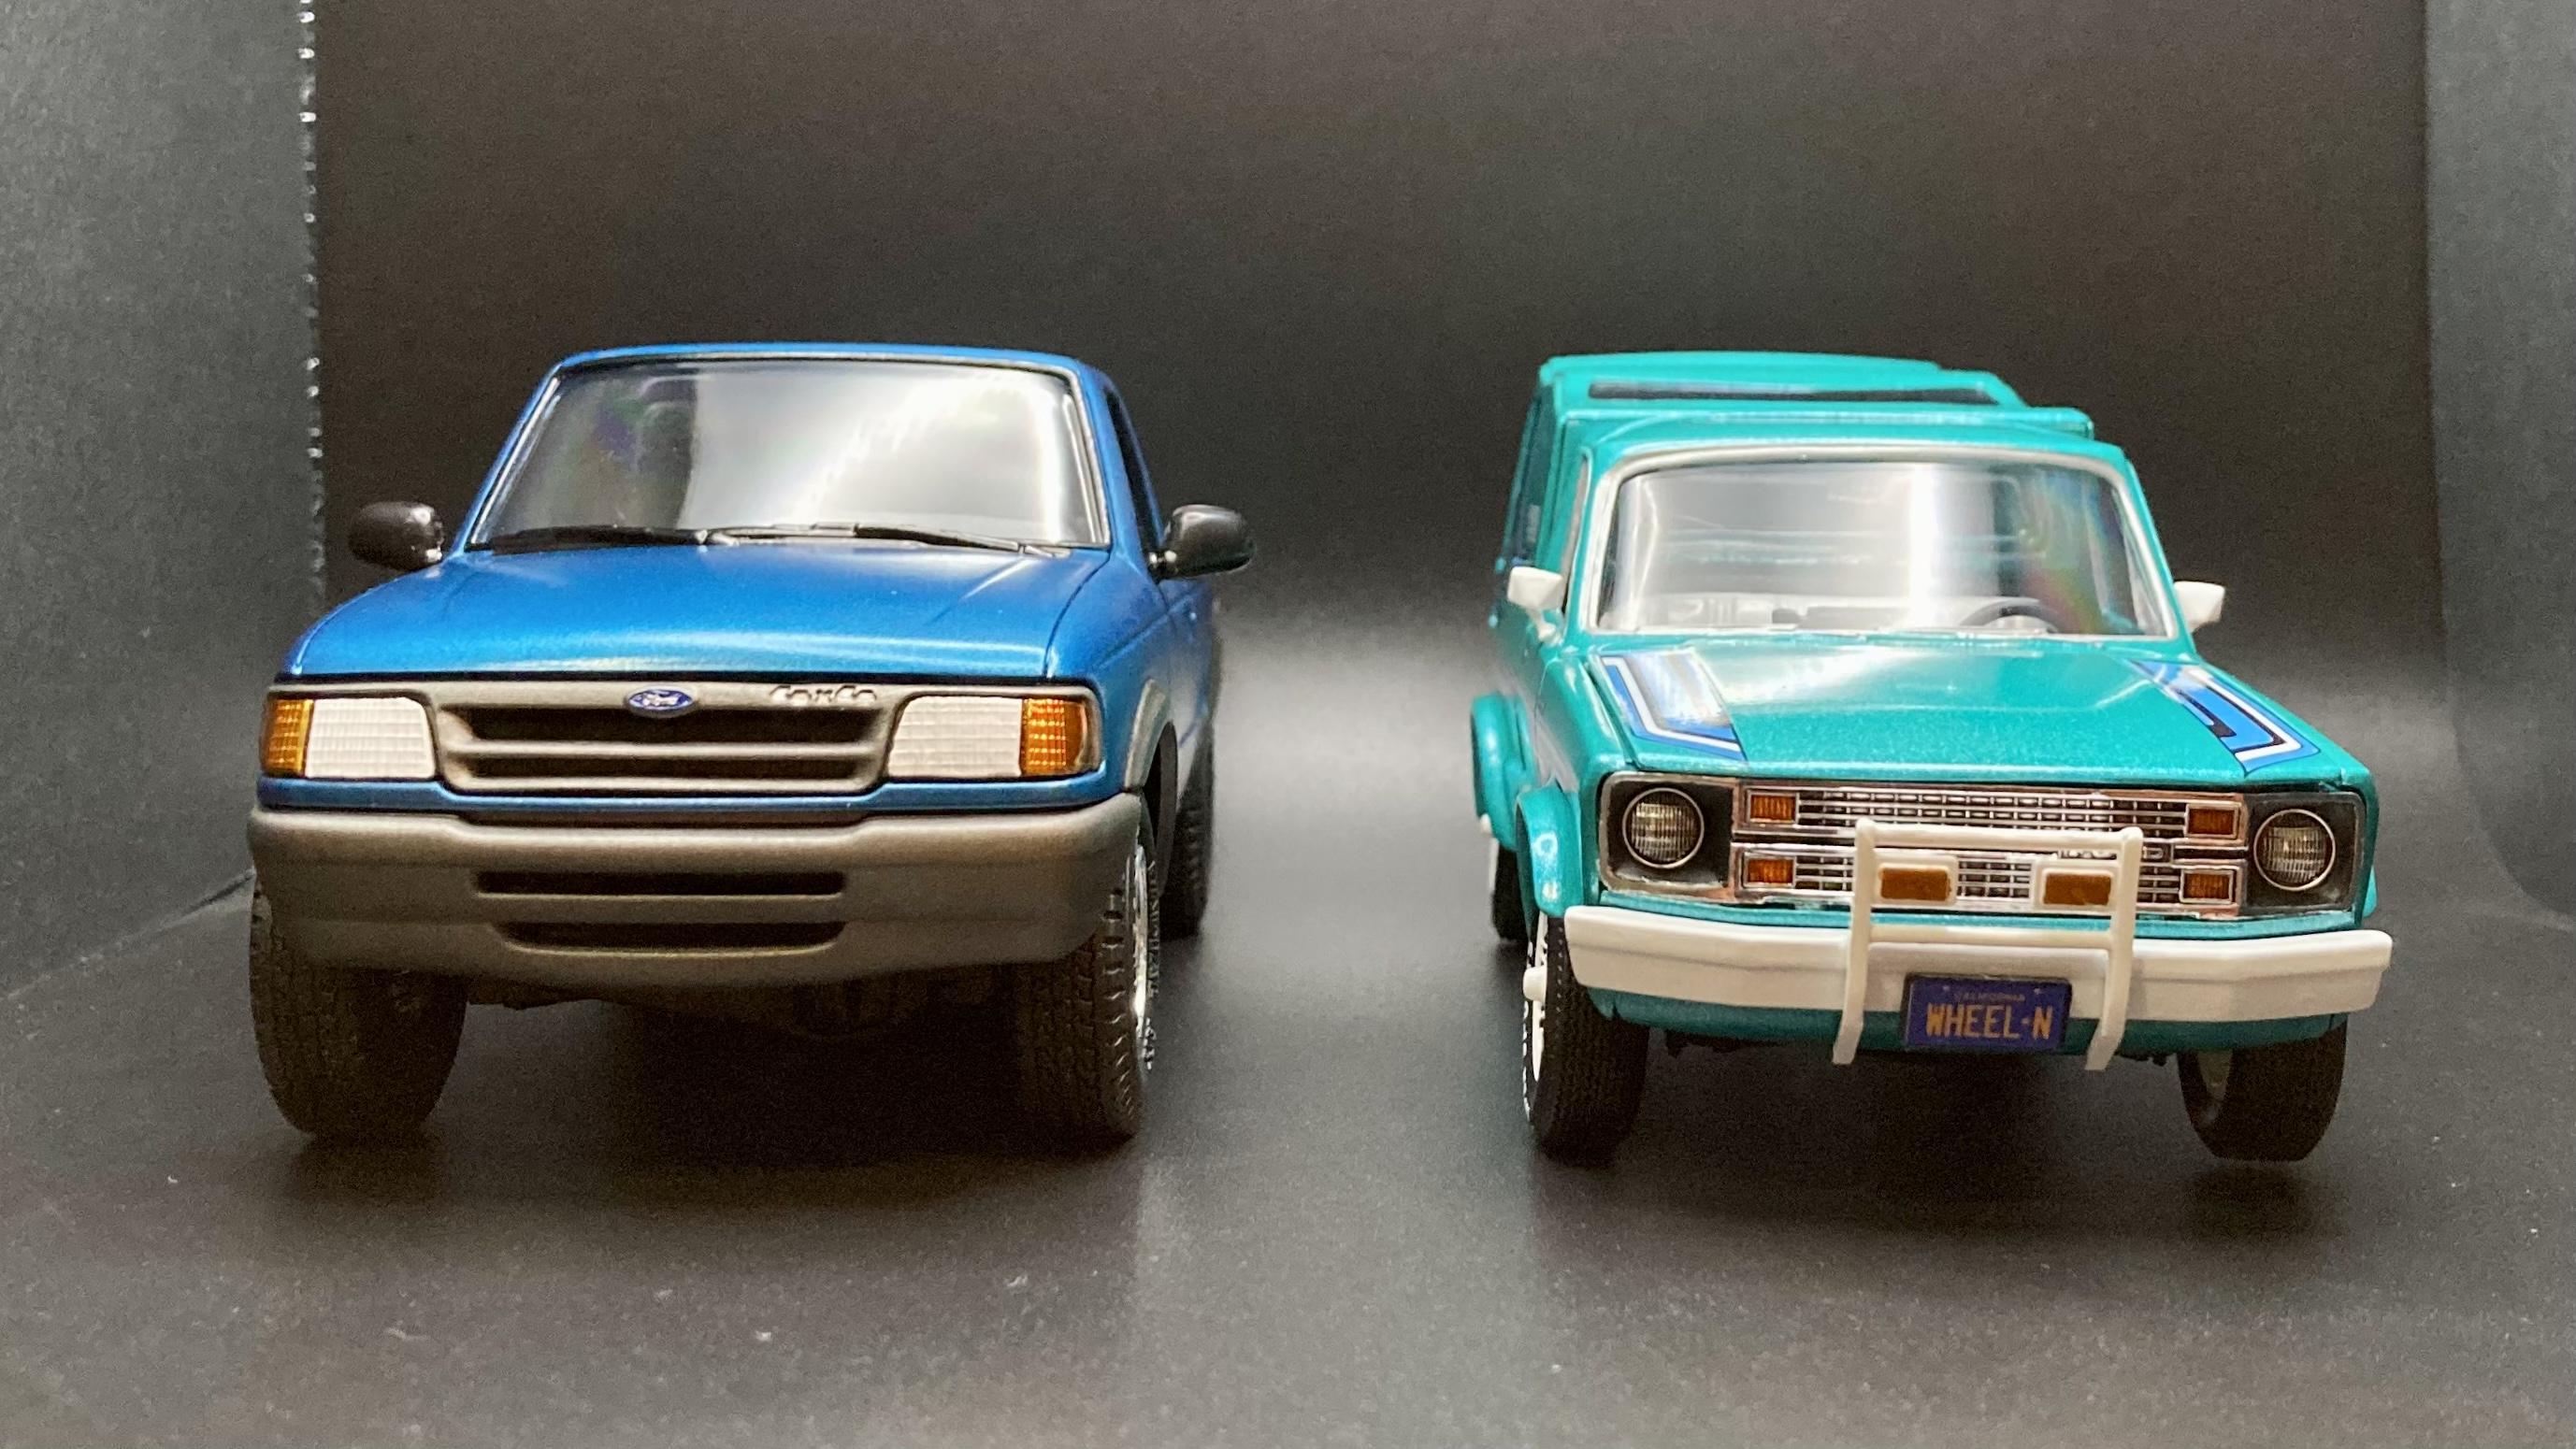
I just finished this one before the end of the year! ‘78 Courier “Minivan” by AMT. I struggled with the body paint finish on this one and ended up stripping it twice. Still some issues but it looks good on camera at least, and I can call it done 😂. There’s some final fitment issues with this kit, but considering the age of the molds and the multi-piece body, engine bay and front end, it comes out ok. If you have the patience I’m sure you can get this thing square. The body is Testors Extreme Lacquer Turquoise, with primer black interior and Tamiya TS-26 Pure White on the seat, wheels and bumpers. This kit comes with tons of custom and stock part options and three sets of stripe decals. I chose the custom camper shell/bed and the front fender flares, but I left off the goofy snow plow-like custom front air-dam so I had to trim the front flares to go with the stock fascia. All of the options make for a fun kit to design however you want! Thanks for looking!
-
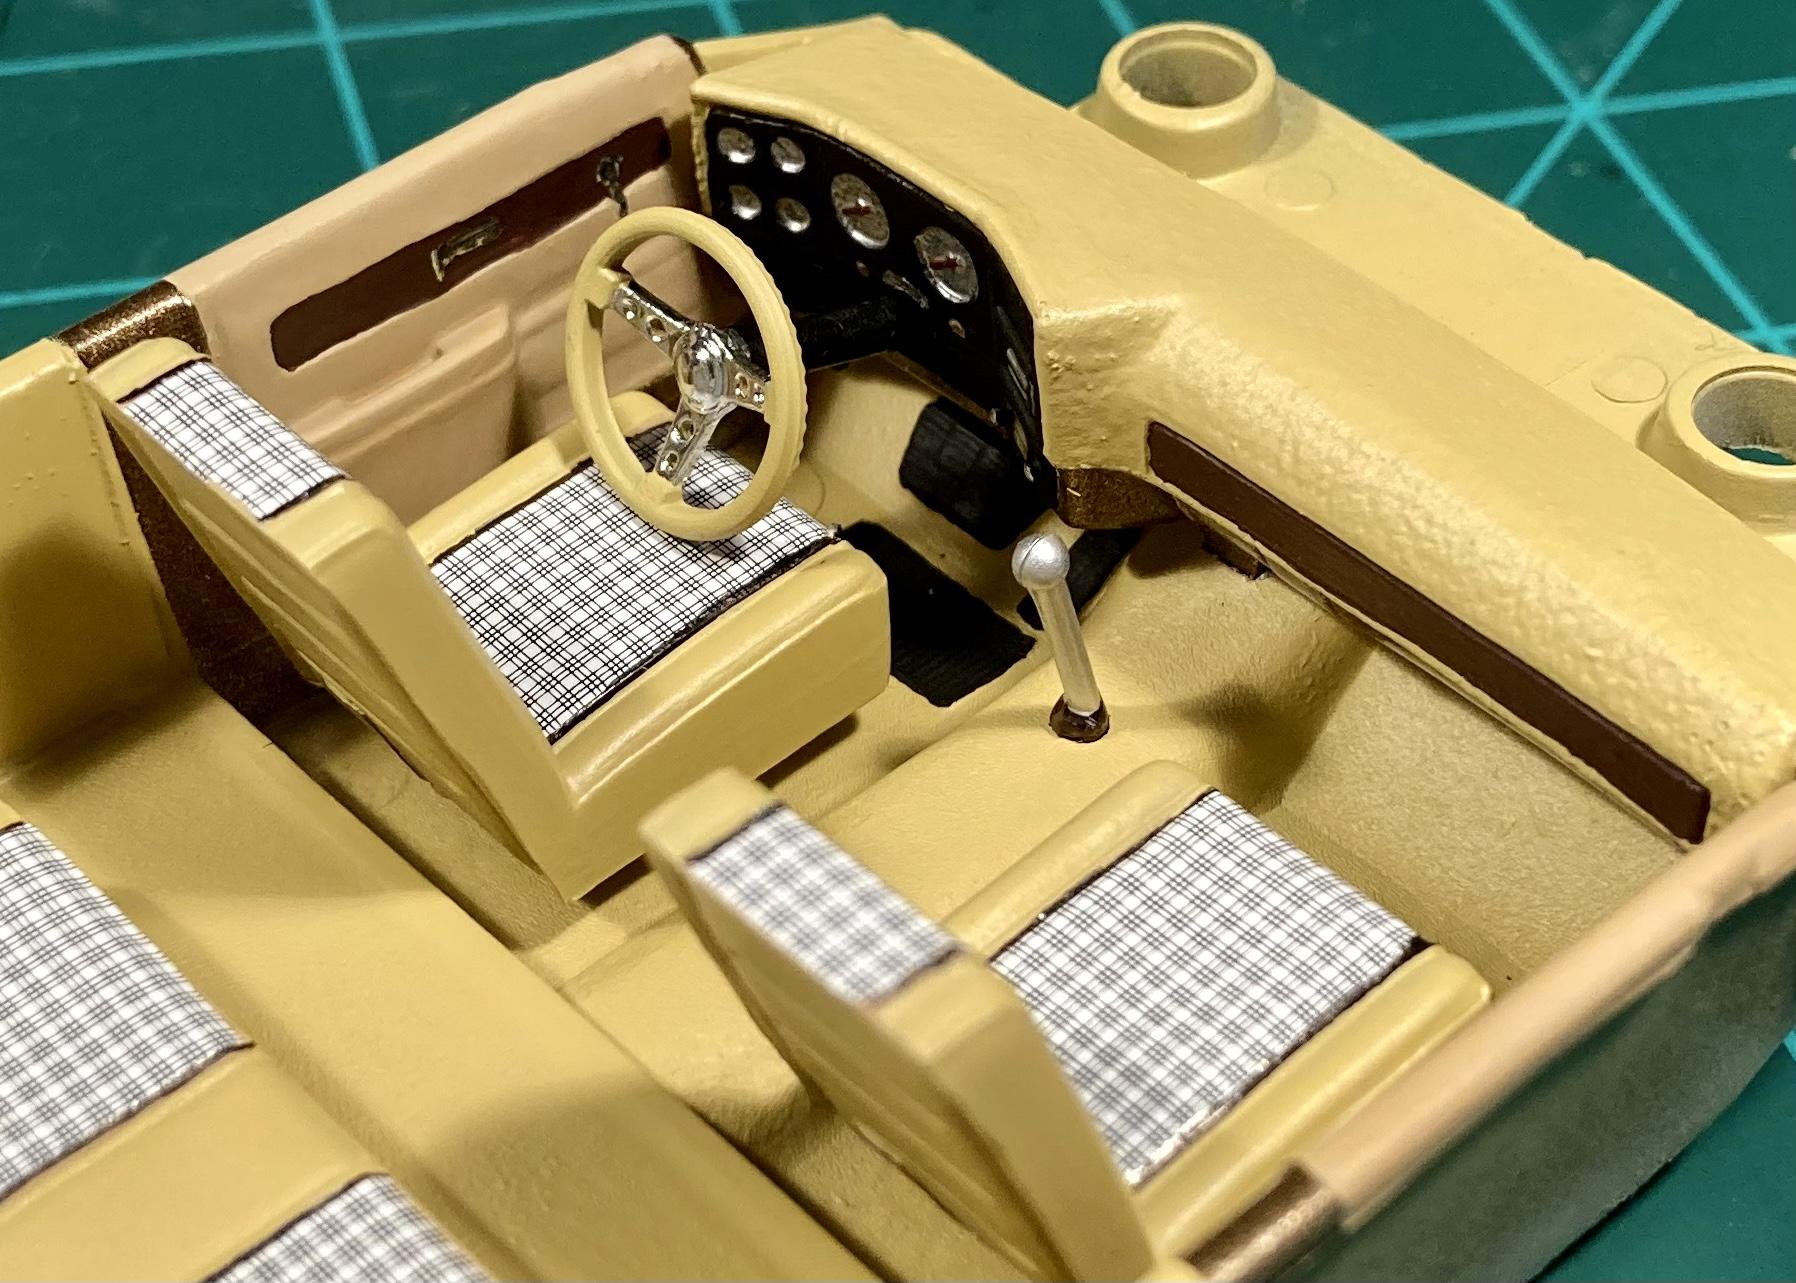
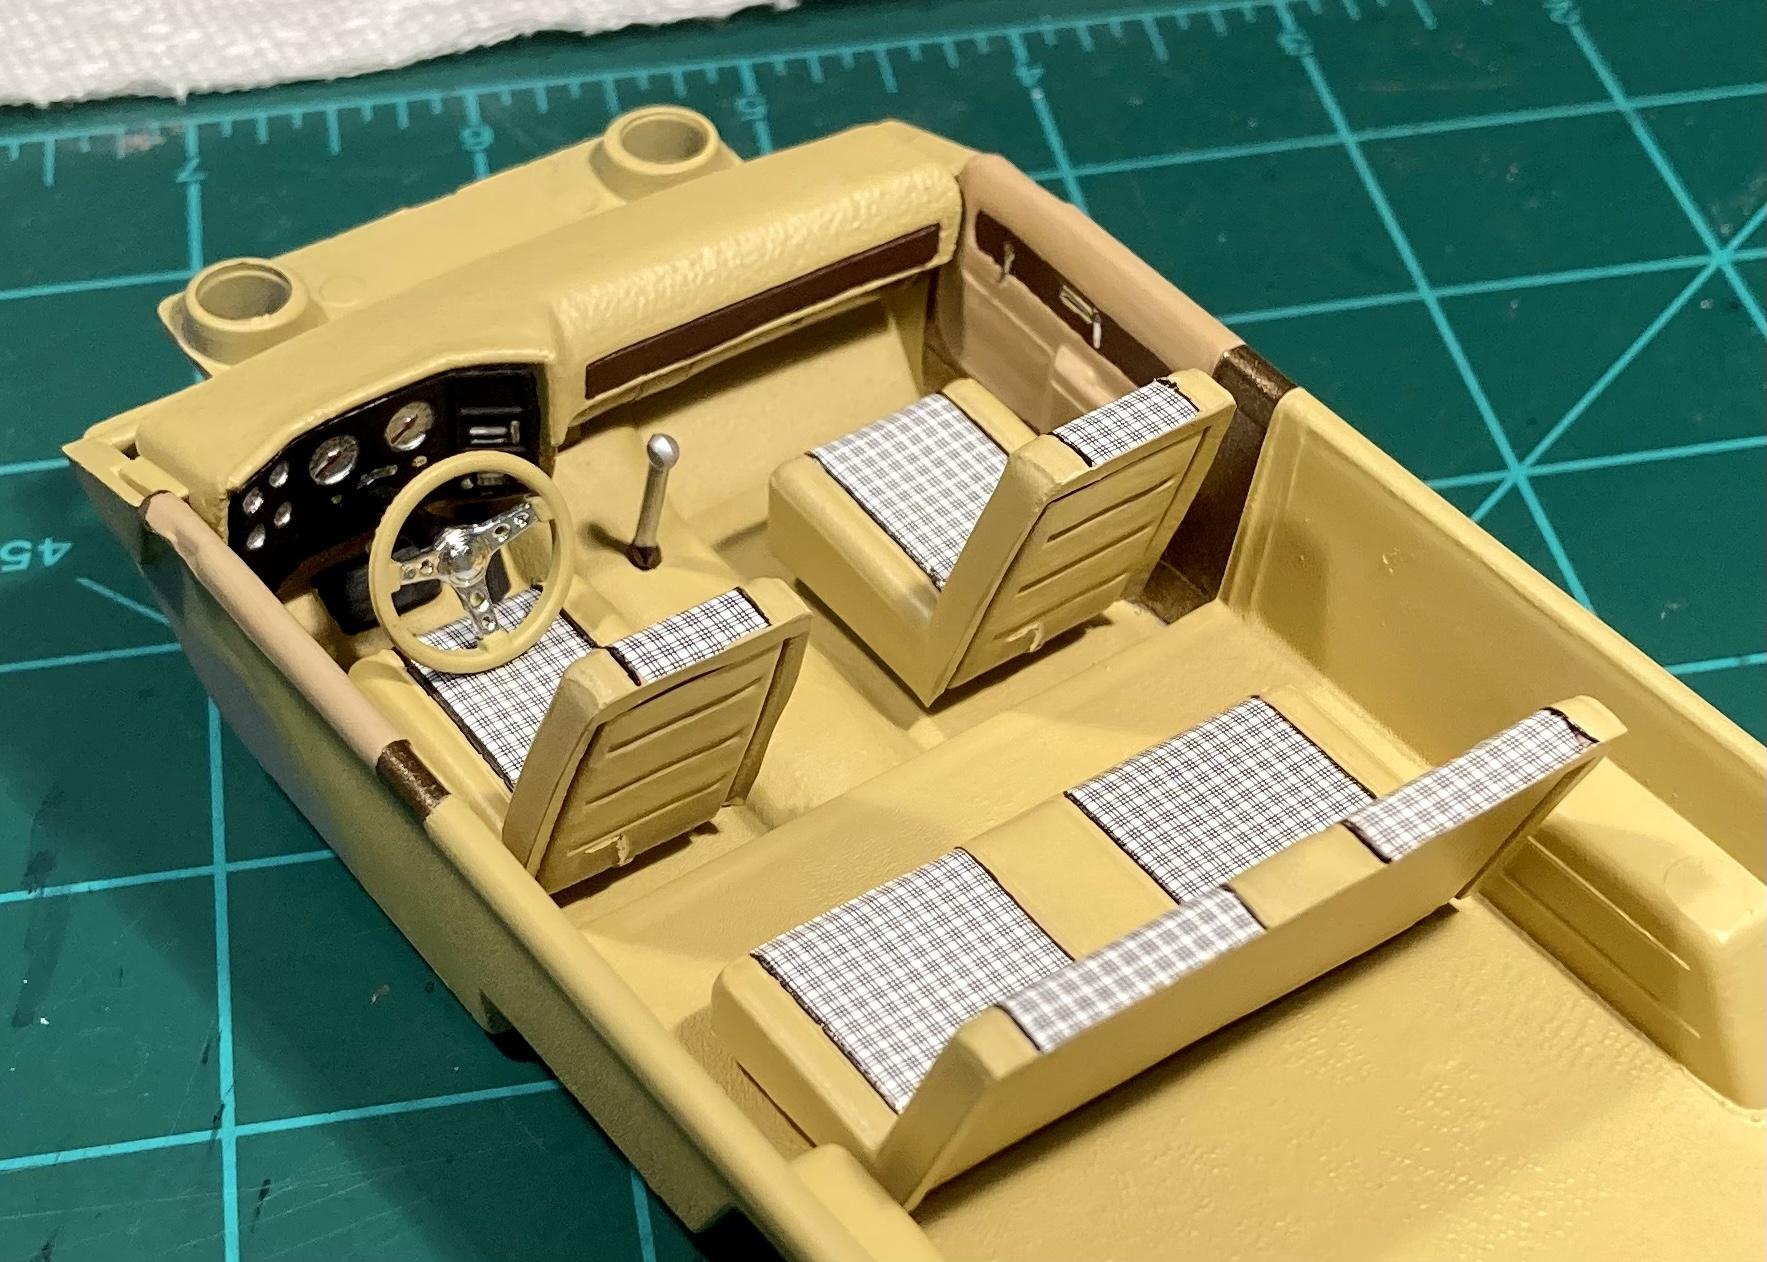
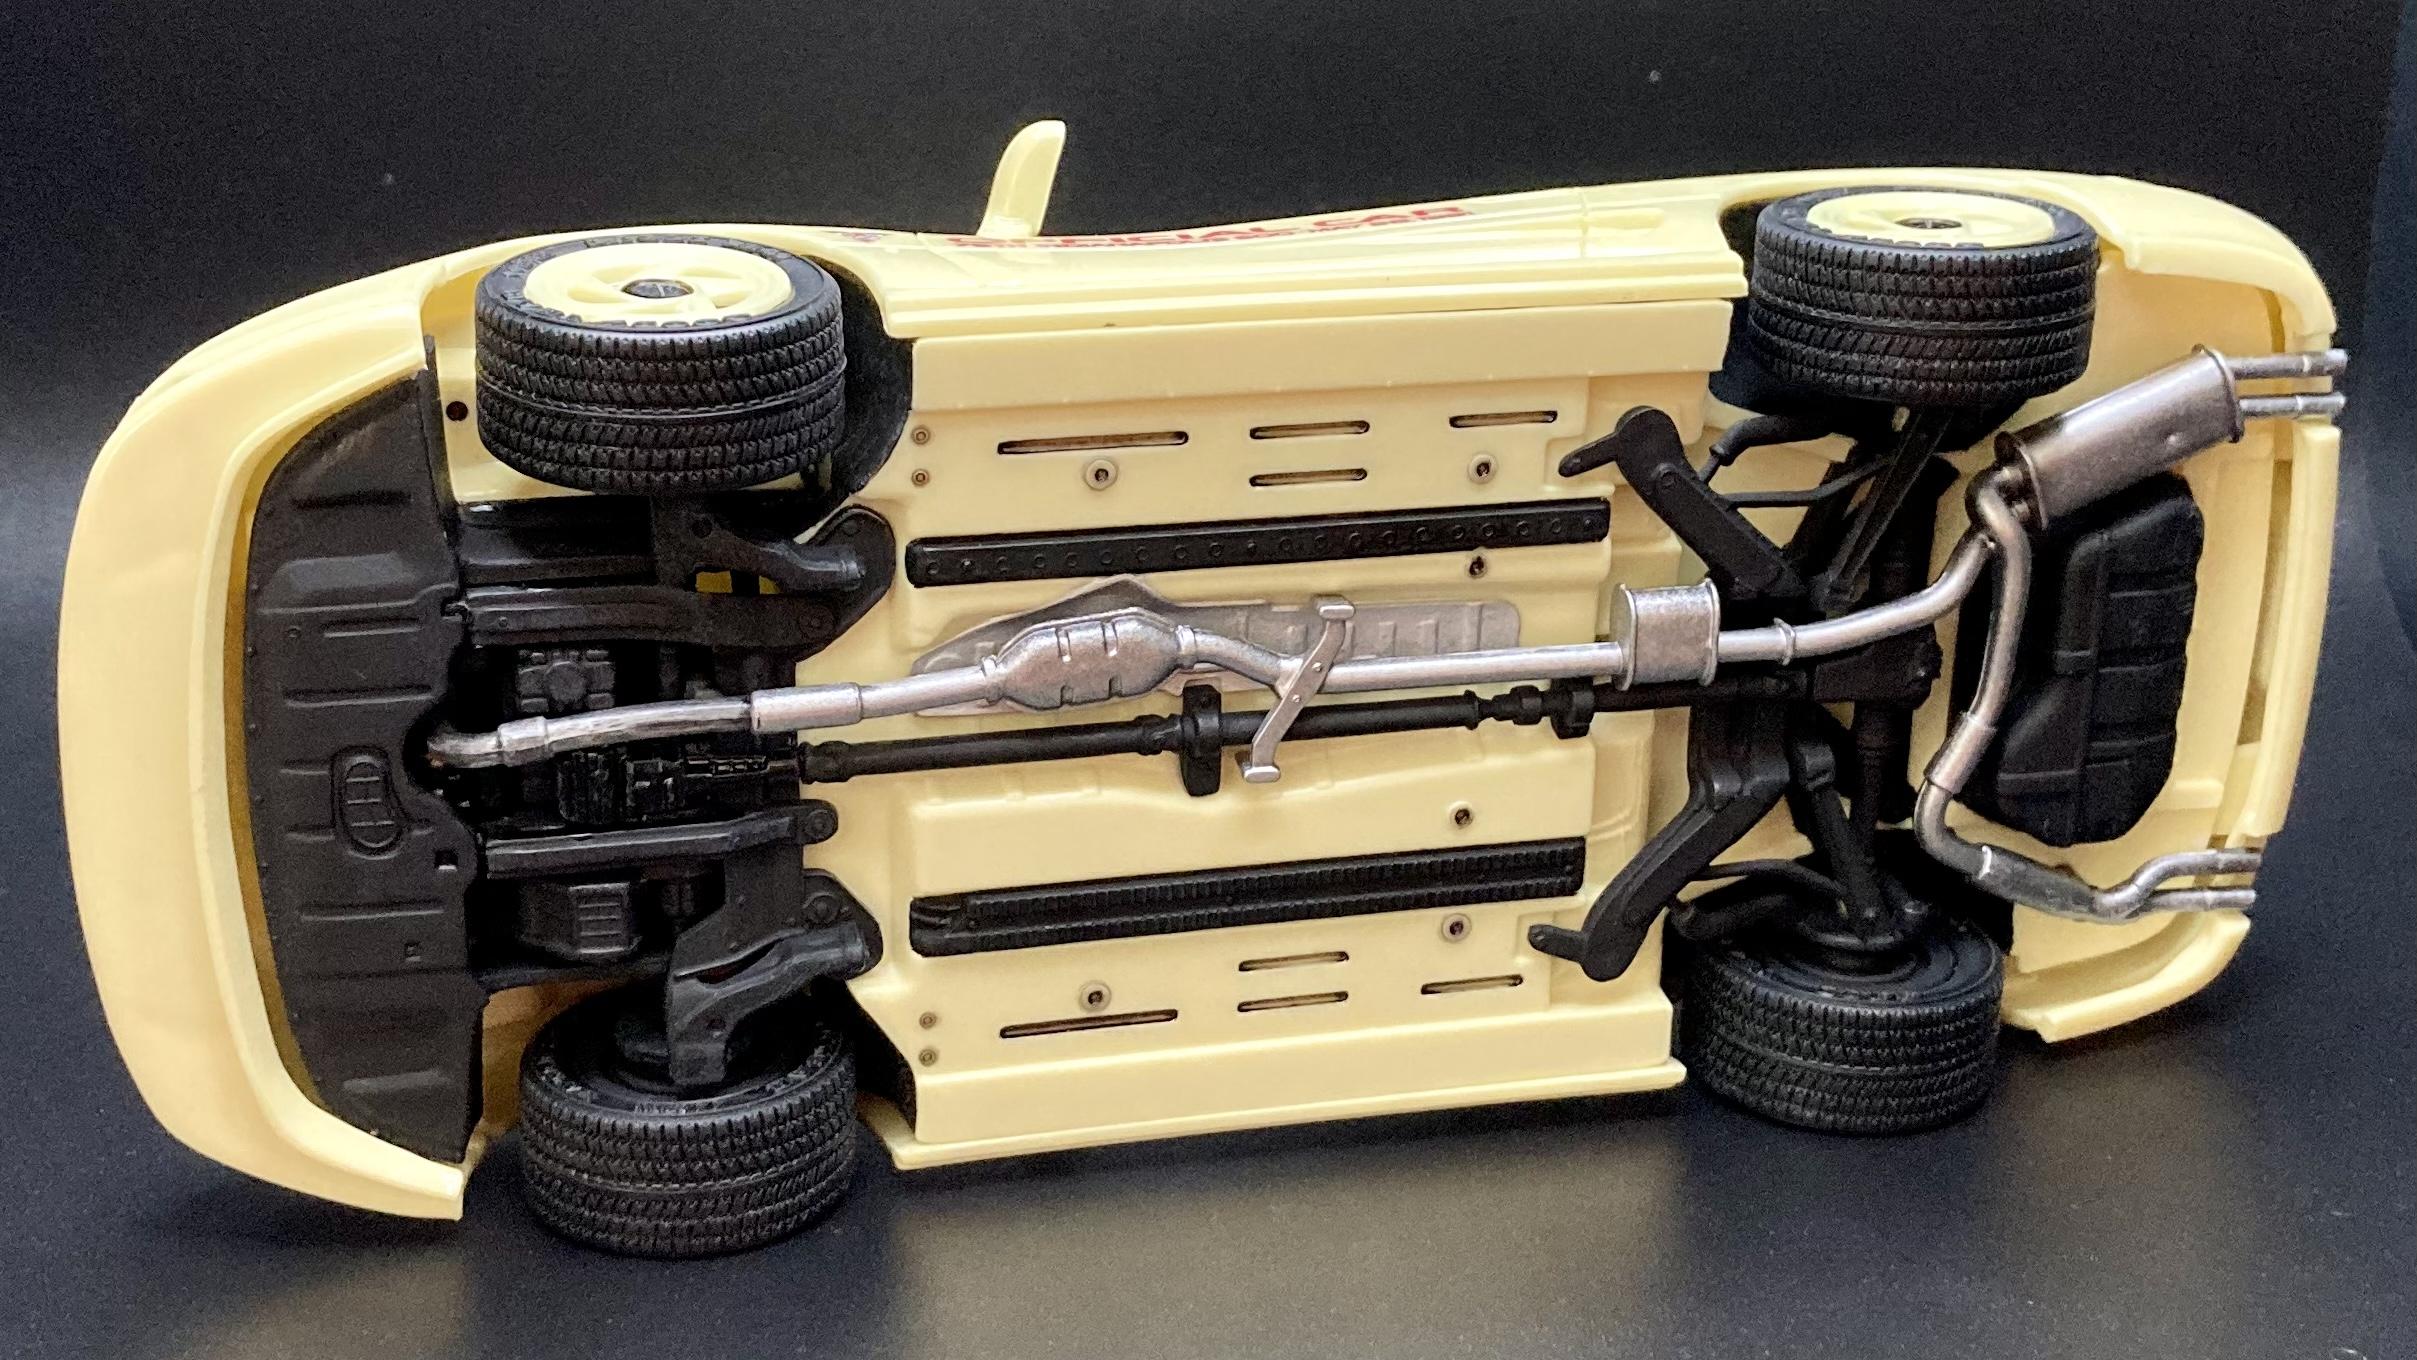
This is my first restoration or rebuild project I’ve done, so I thought I might as well make it my first WIP documented build too! A little background: I was an avid model car builder back in my tween-teen years (early to mid/late ‘00s) but I gave it up once I hit college and started my career. About a year ago now I picked modeling back up as a pandemic hobby and I’ve been fully hooked! This AMT snap kit was one of the last kits I built as a kid. It must have been the 2007 re-issue because I only bought kits off the shelf from Walmart and HL back then, before I had a credit card to destroy on eBay. 😂 Today, I have a growing collection of classic 70s-90s SUV kits, so I decided to rebuild this one to go with them. Since it’s a snap kit, it’s a great candidate for rebuilding, plus these kits are kind of rare and expensive now.Back then, I was exclusively brush painting my builds with Testors enamels. I never used primer, I always used model cement and CA to glue painted, clear and chrome parts (with expected terrible results) and just did basic hand painted details. I’ve definitely come a long way today thanks to YouTube tutorials and model sites like this one! The body paint on my original build was surprisingly smooth and glossy for brush painting, but it definitely looks sloppy compared to my current adult builds. I apparently hastily “twisted” all of these parts from the sprue trees instead of using a knife so I’ll have to clean them up and probably putty the worst spots. So far, I have disassembled everything and the parts are soaking in Super Clean. I broke a few mounting pegs from the suspension and the driveshaft broke from the differential, nothing some model cement can’t fix. Unfortunately, the passenger side taillight lens is missing so I’ll have to come up with a fix for it. Thanks for reading, and I’ll try to keep updates coming regularly!
-
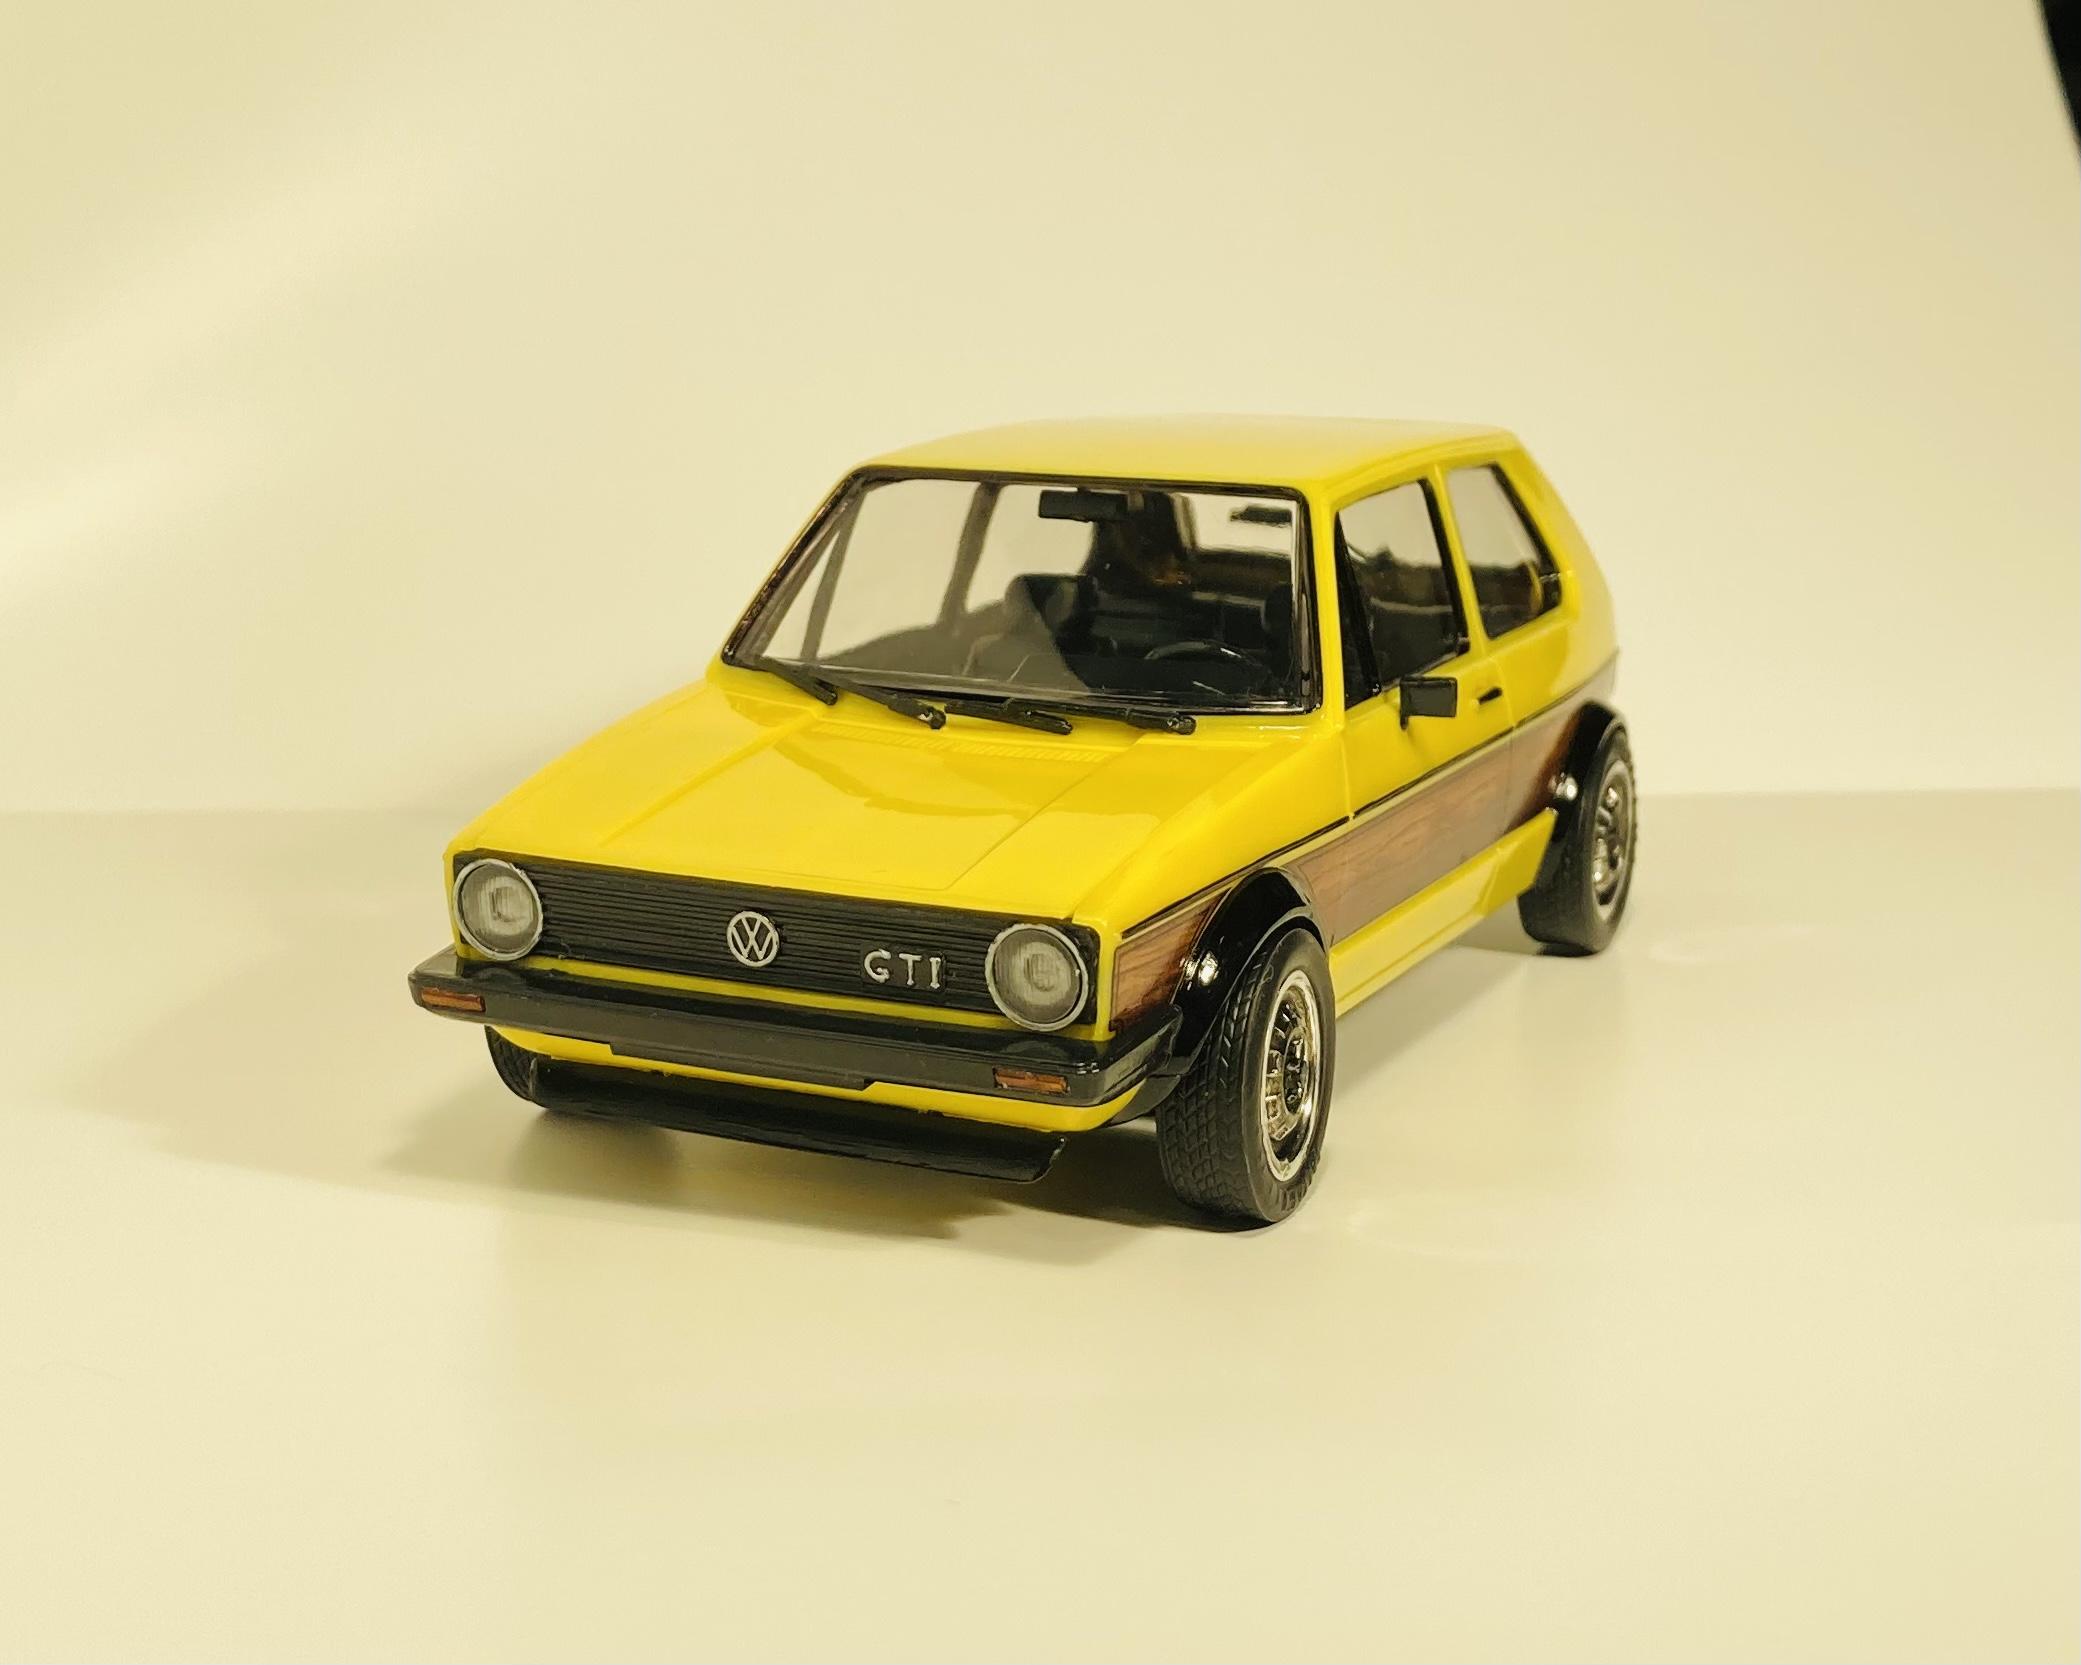
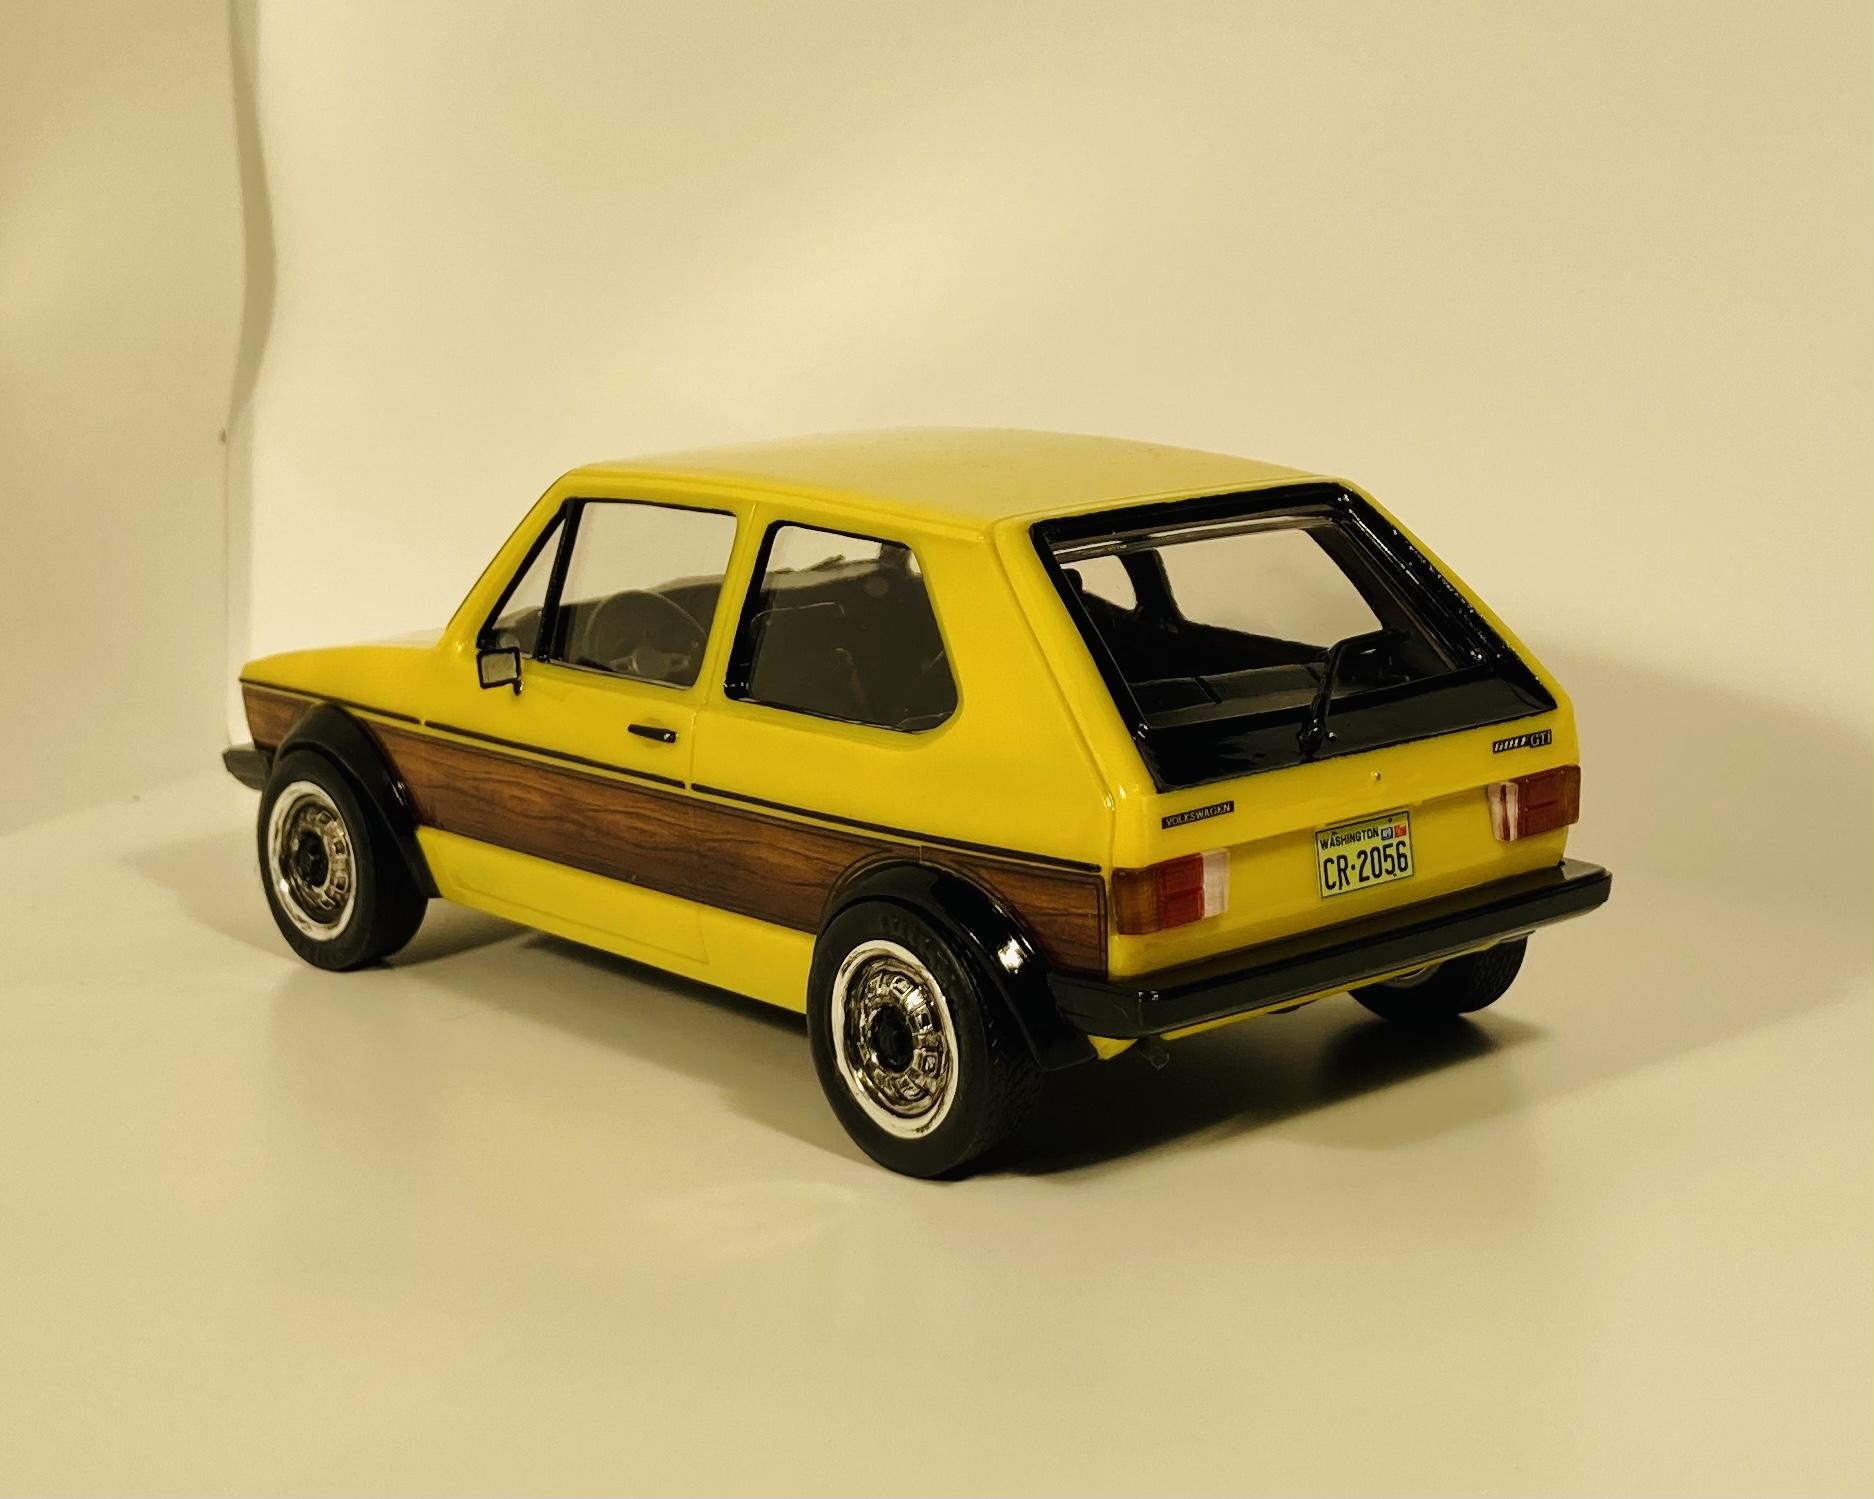
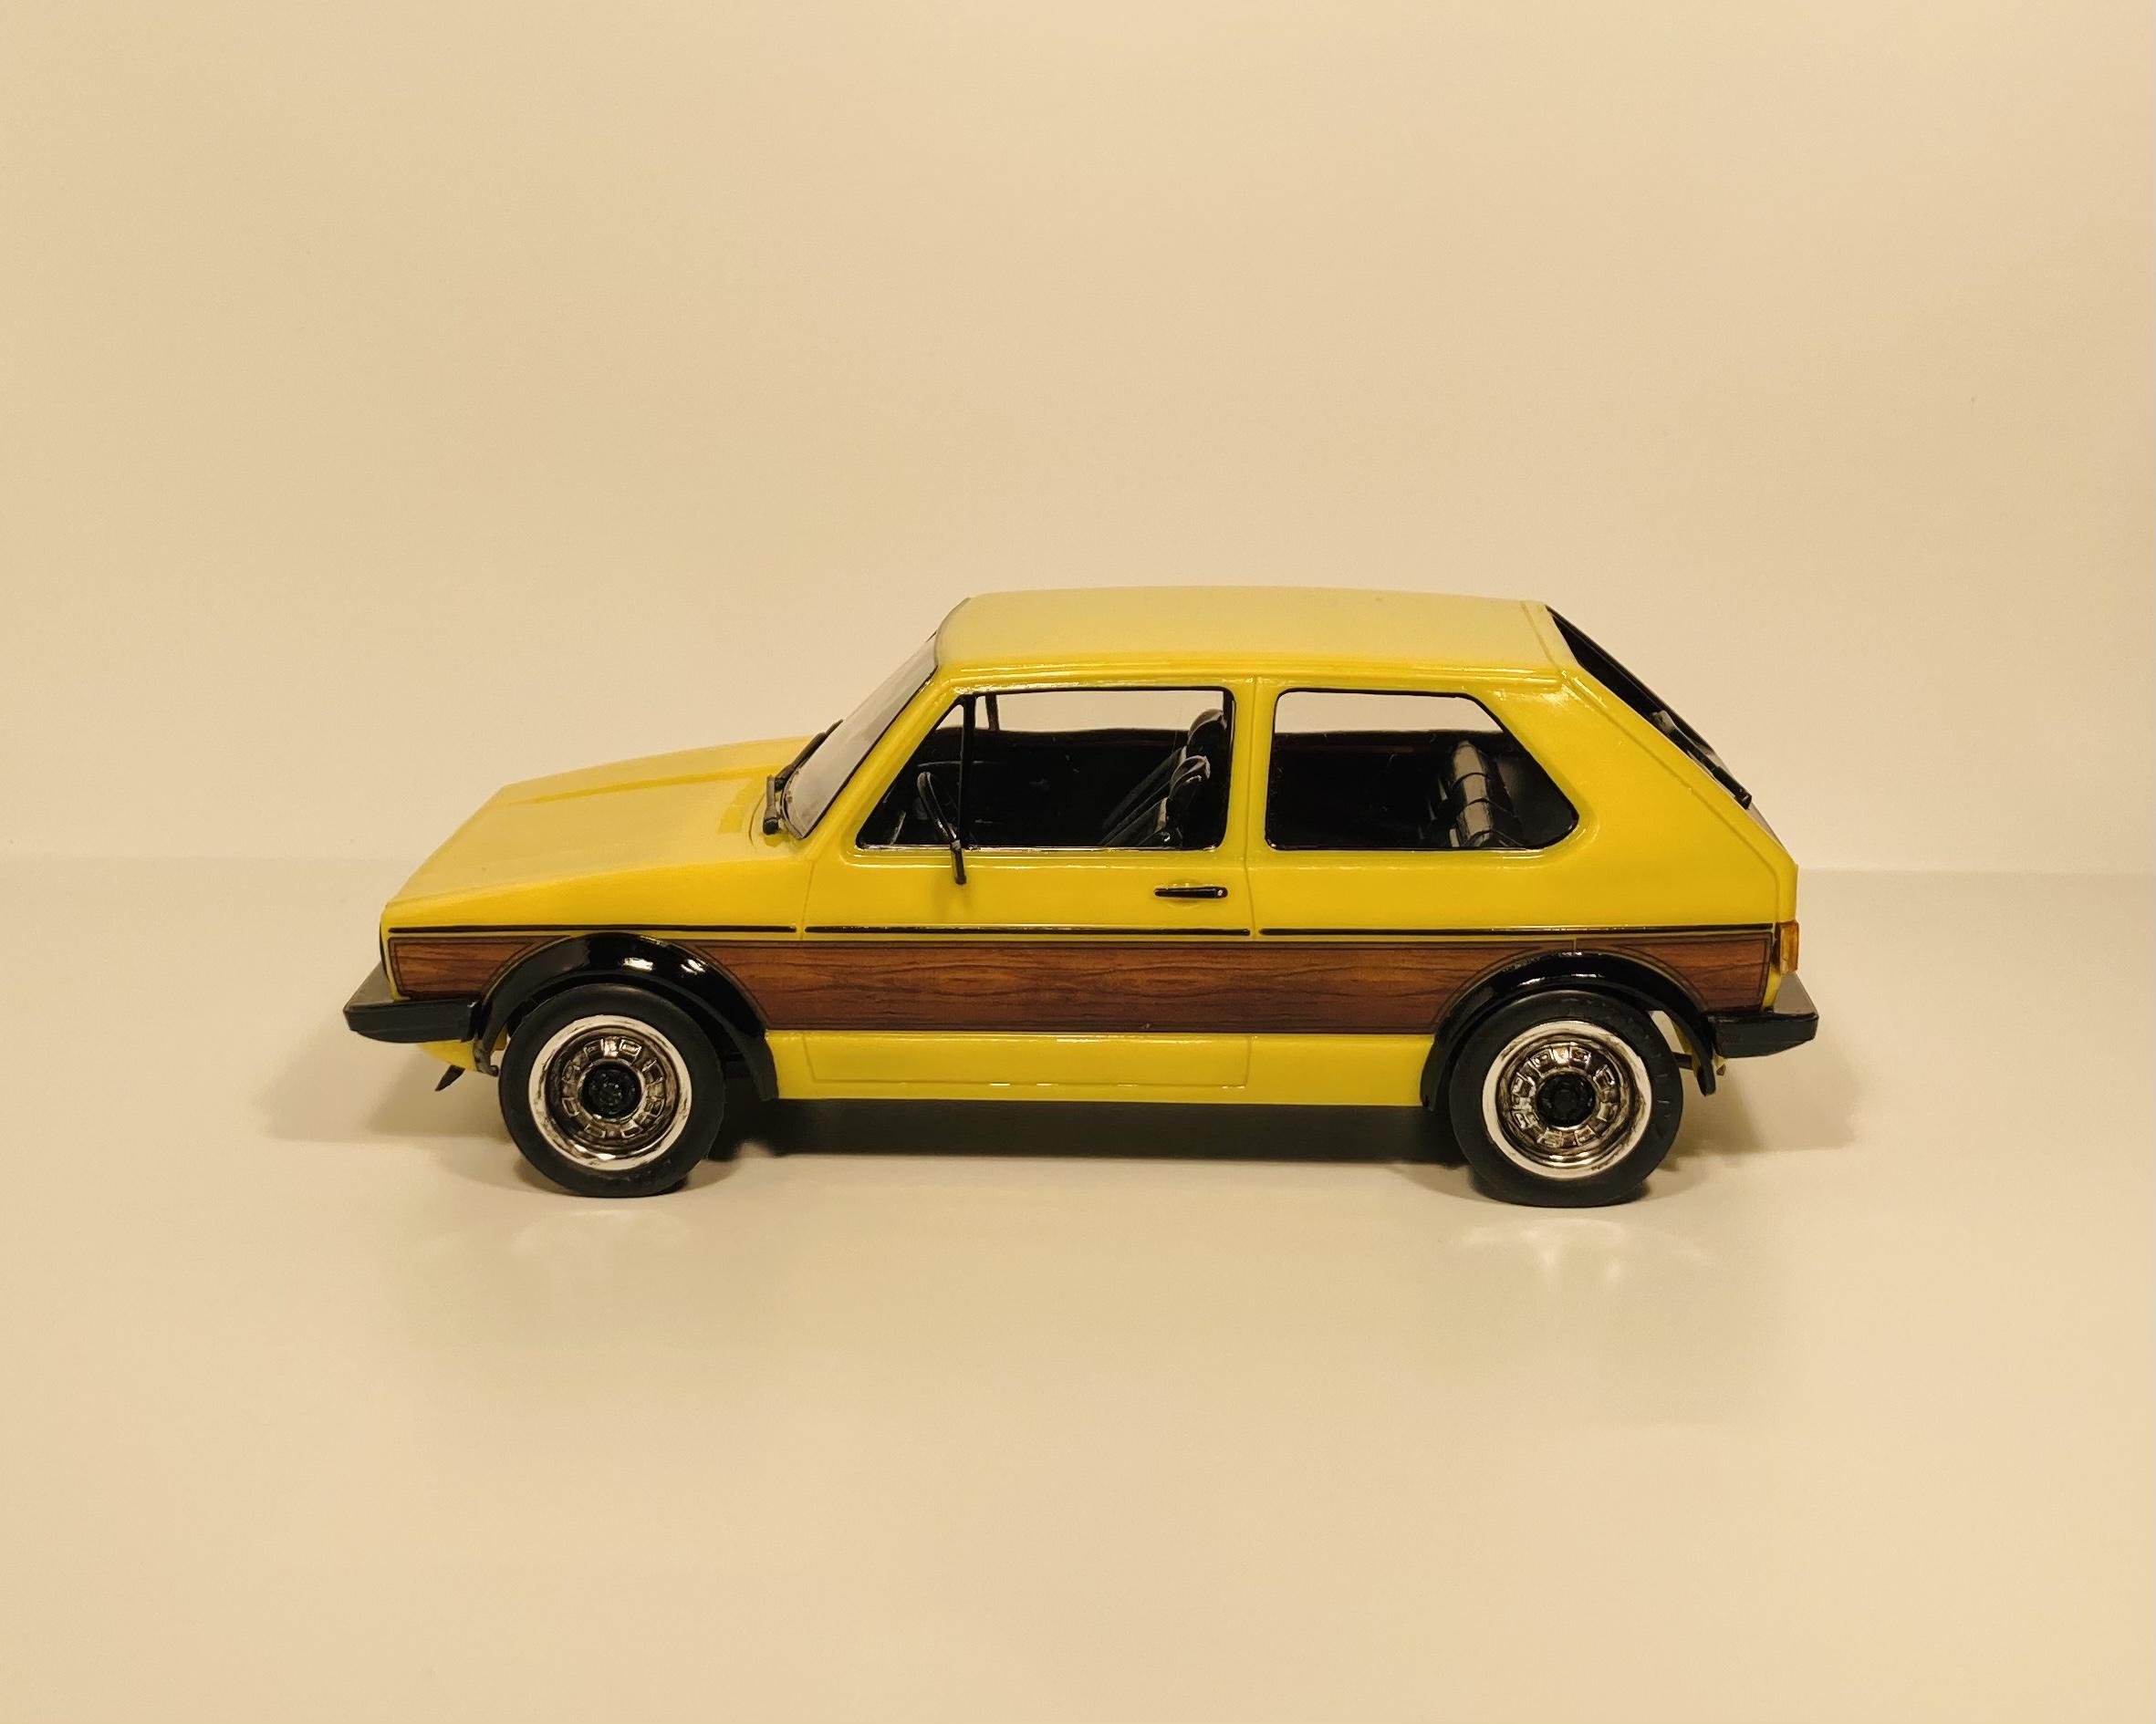
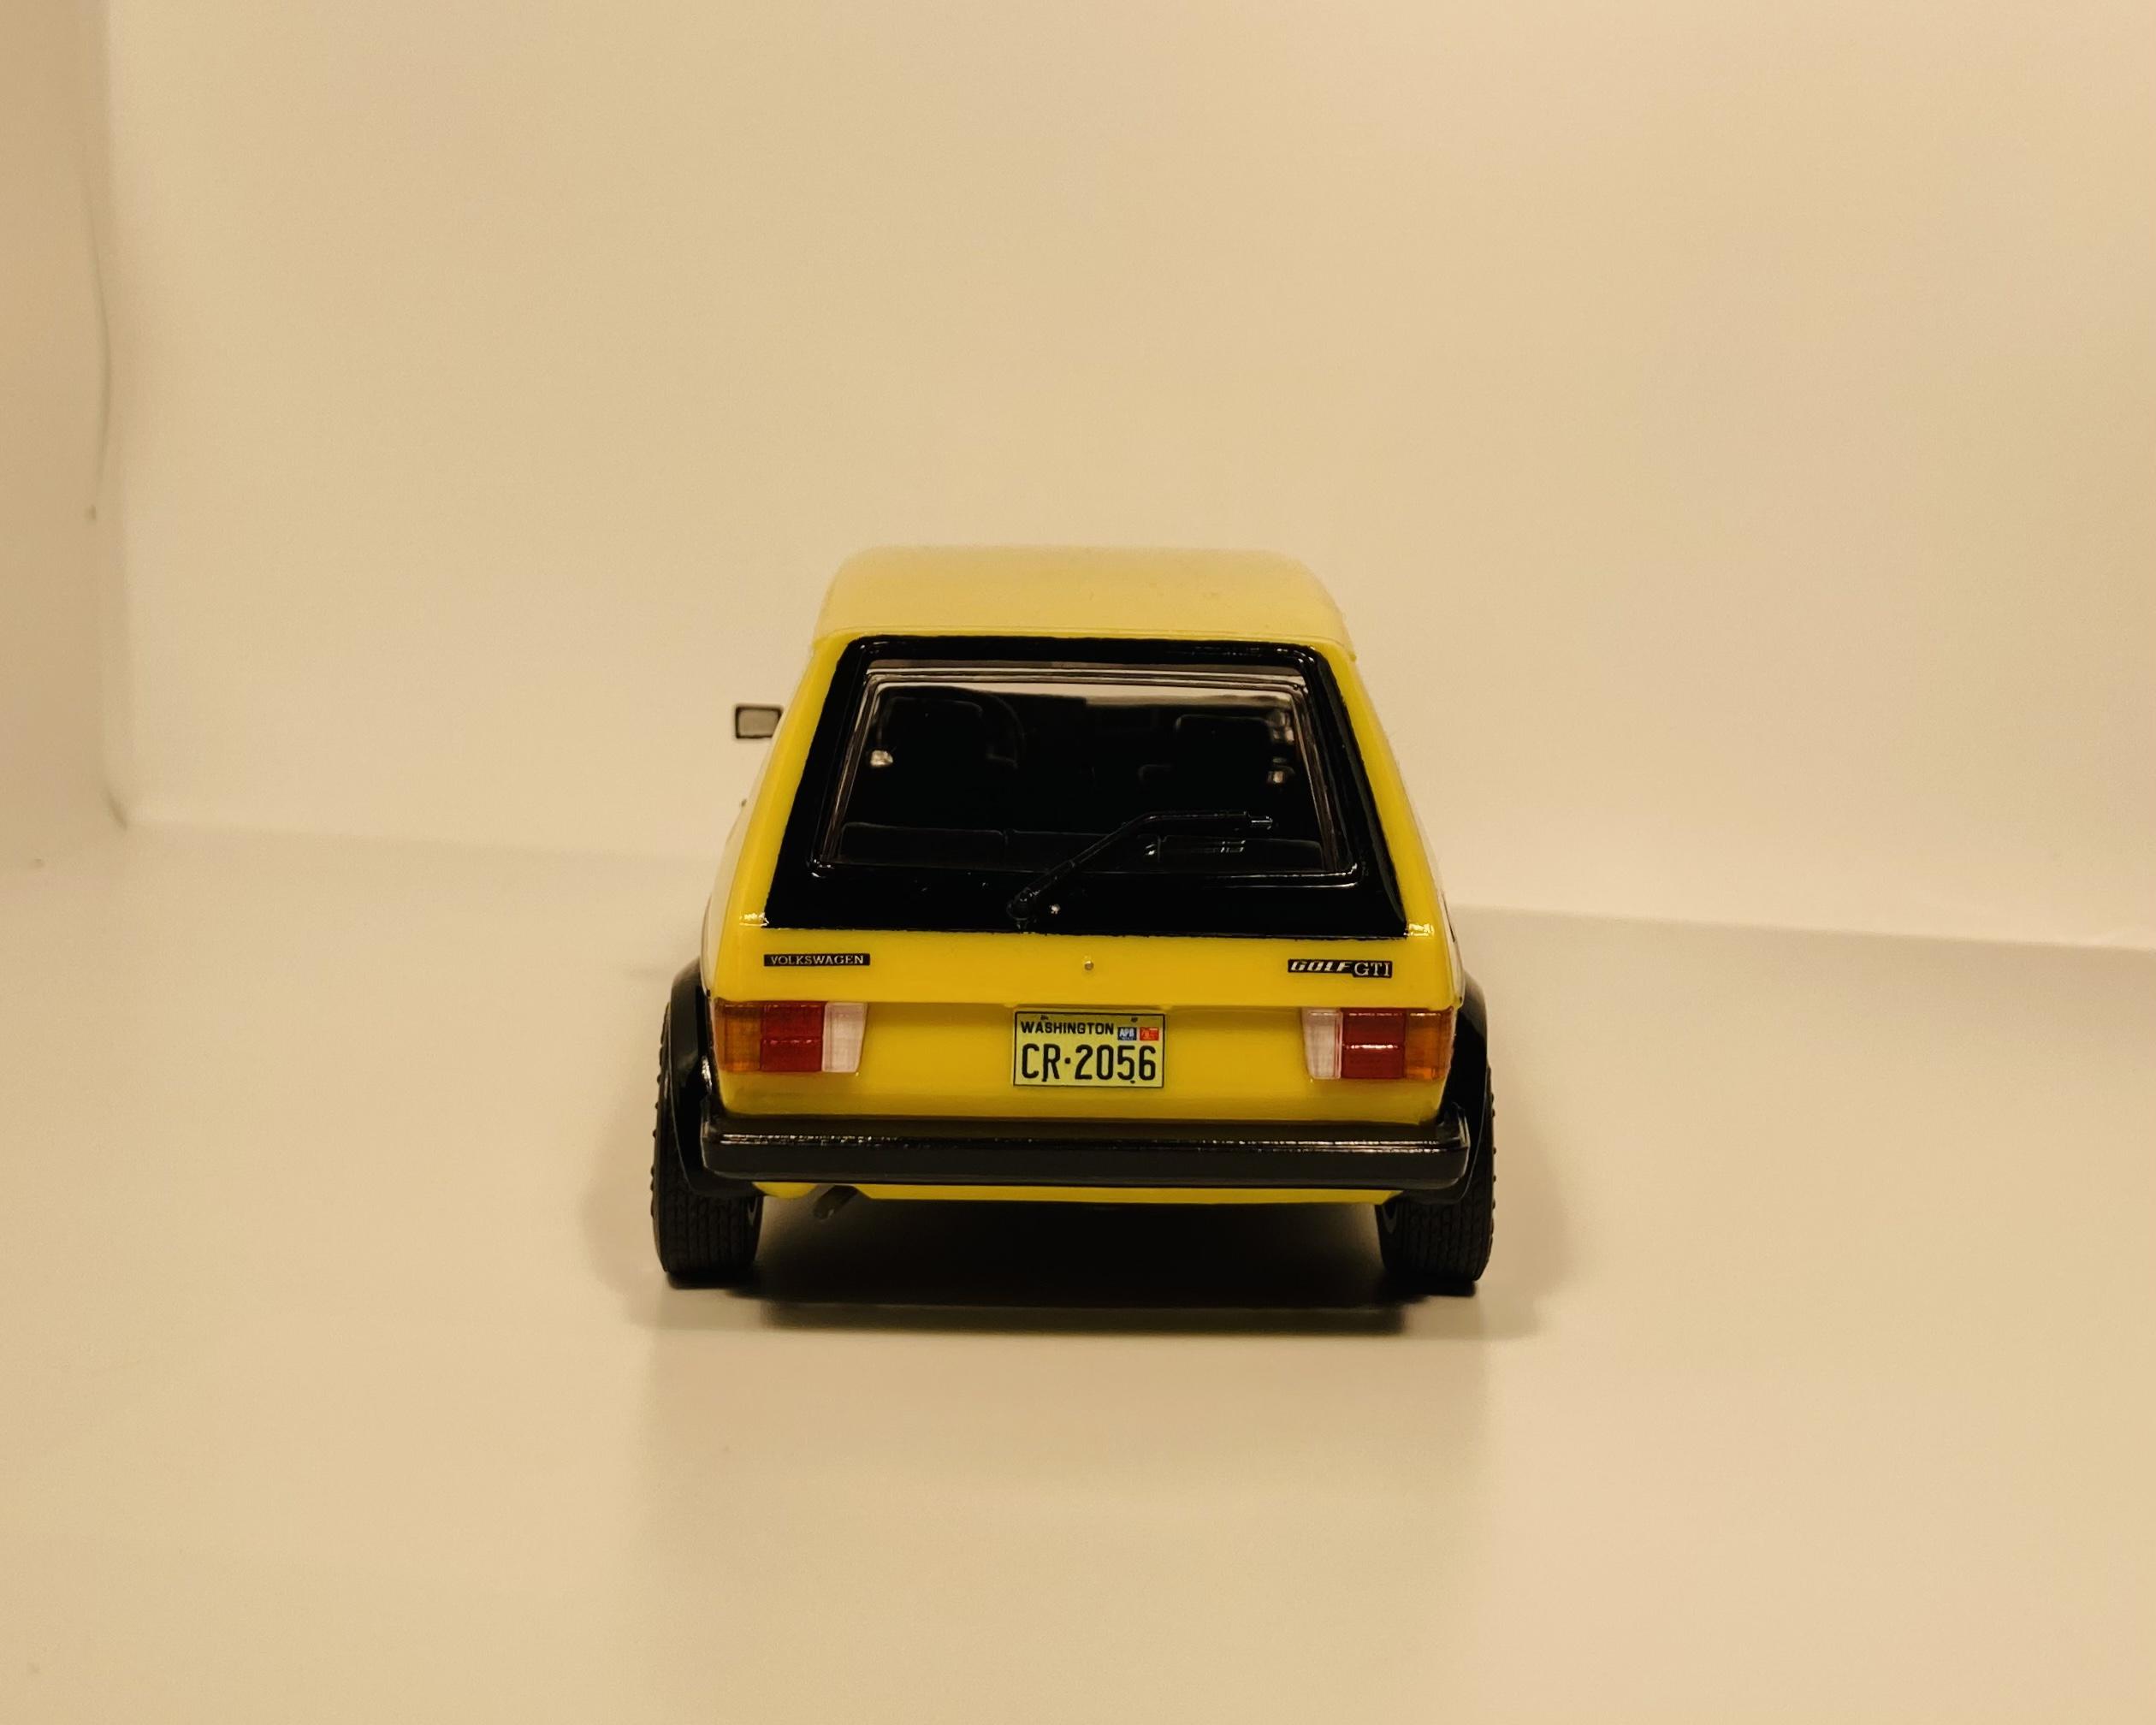
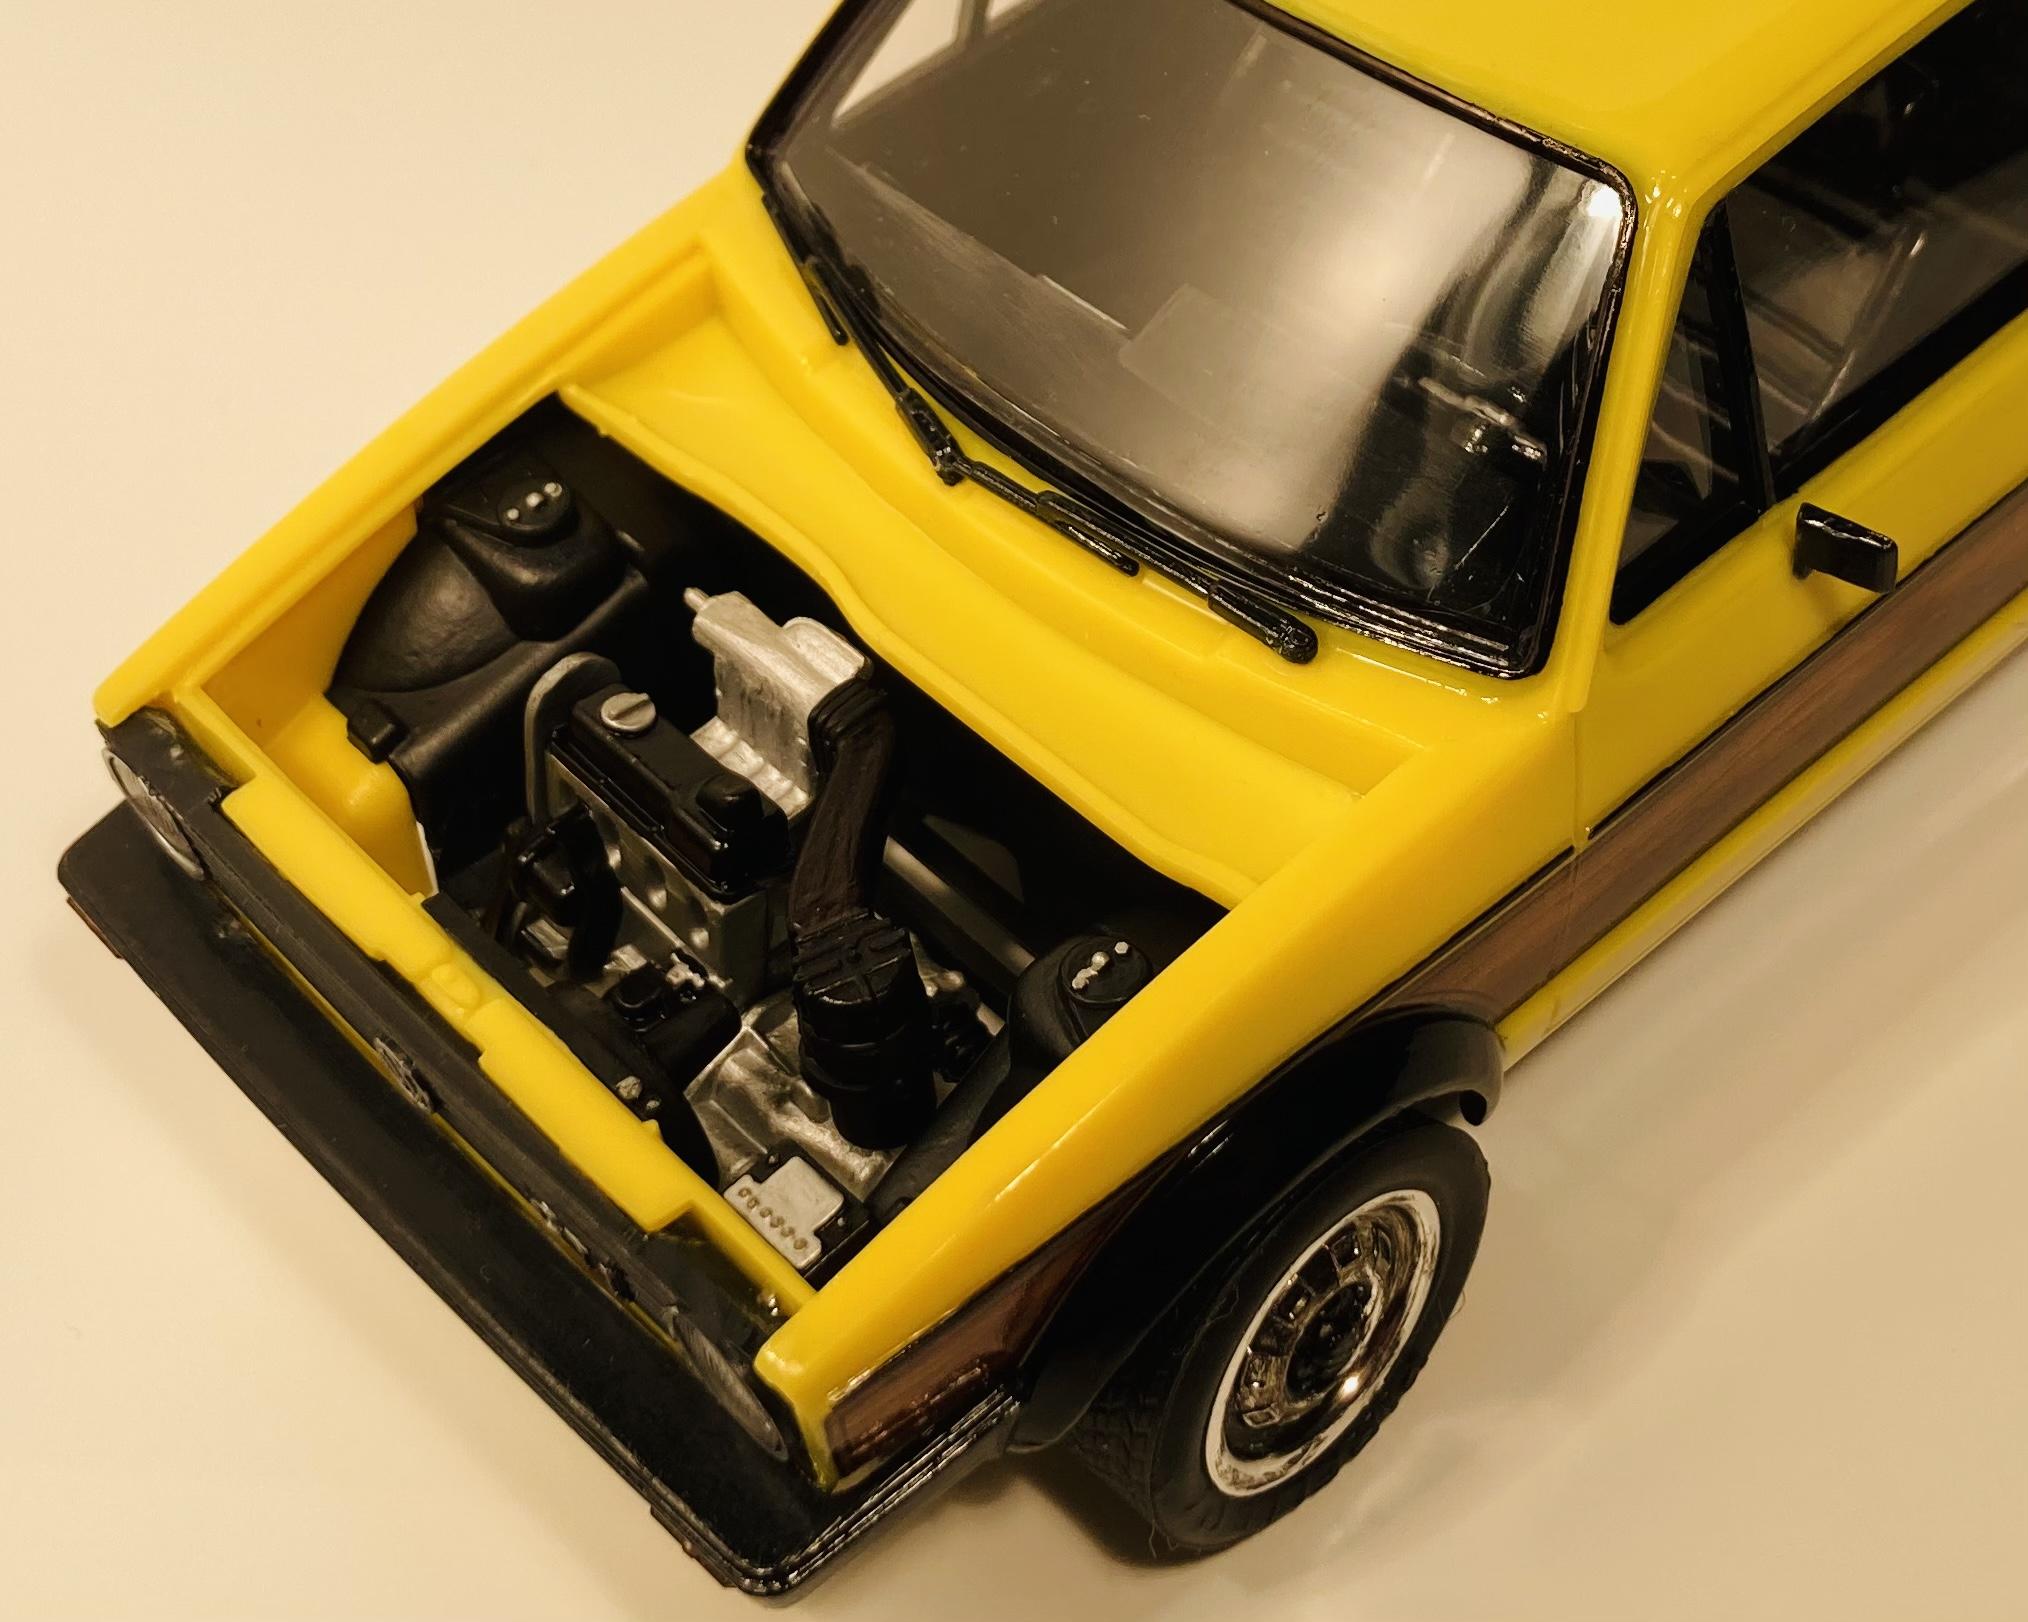
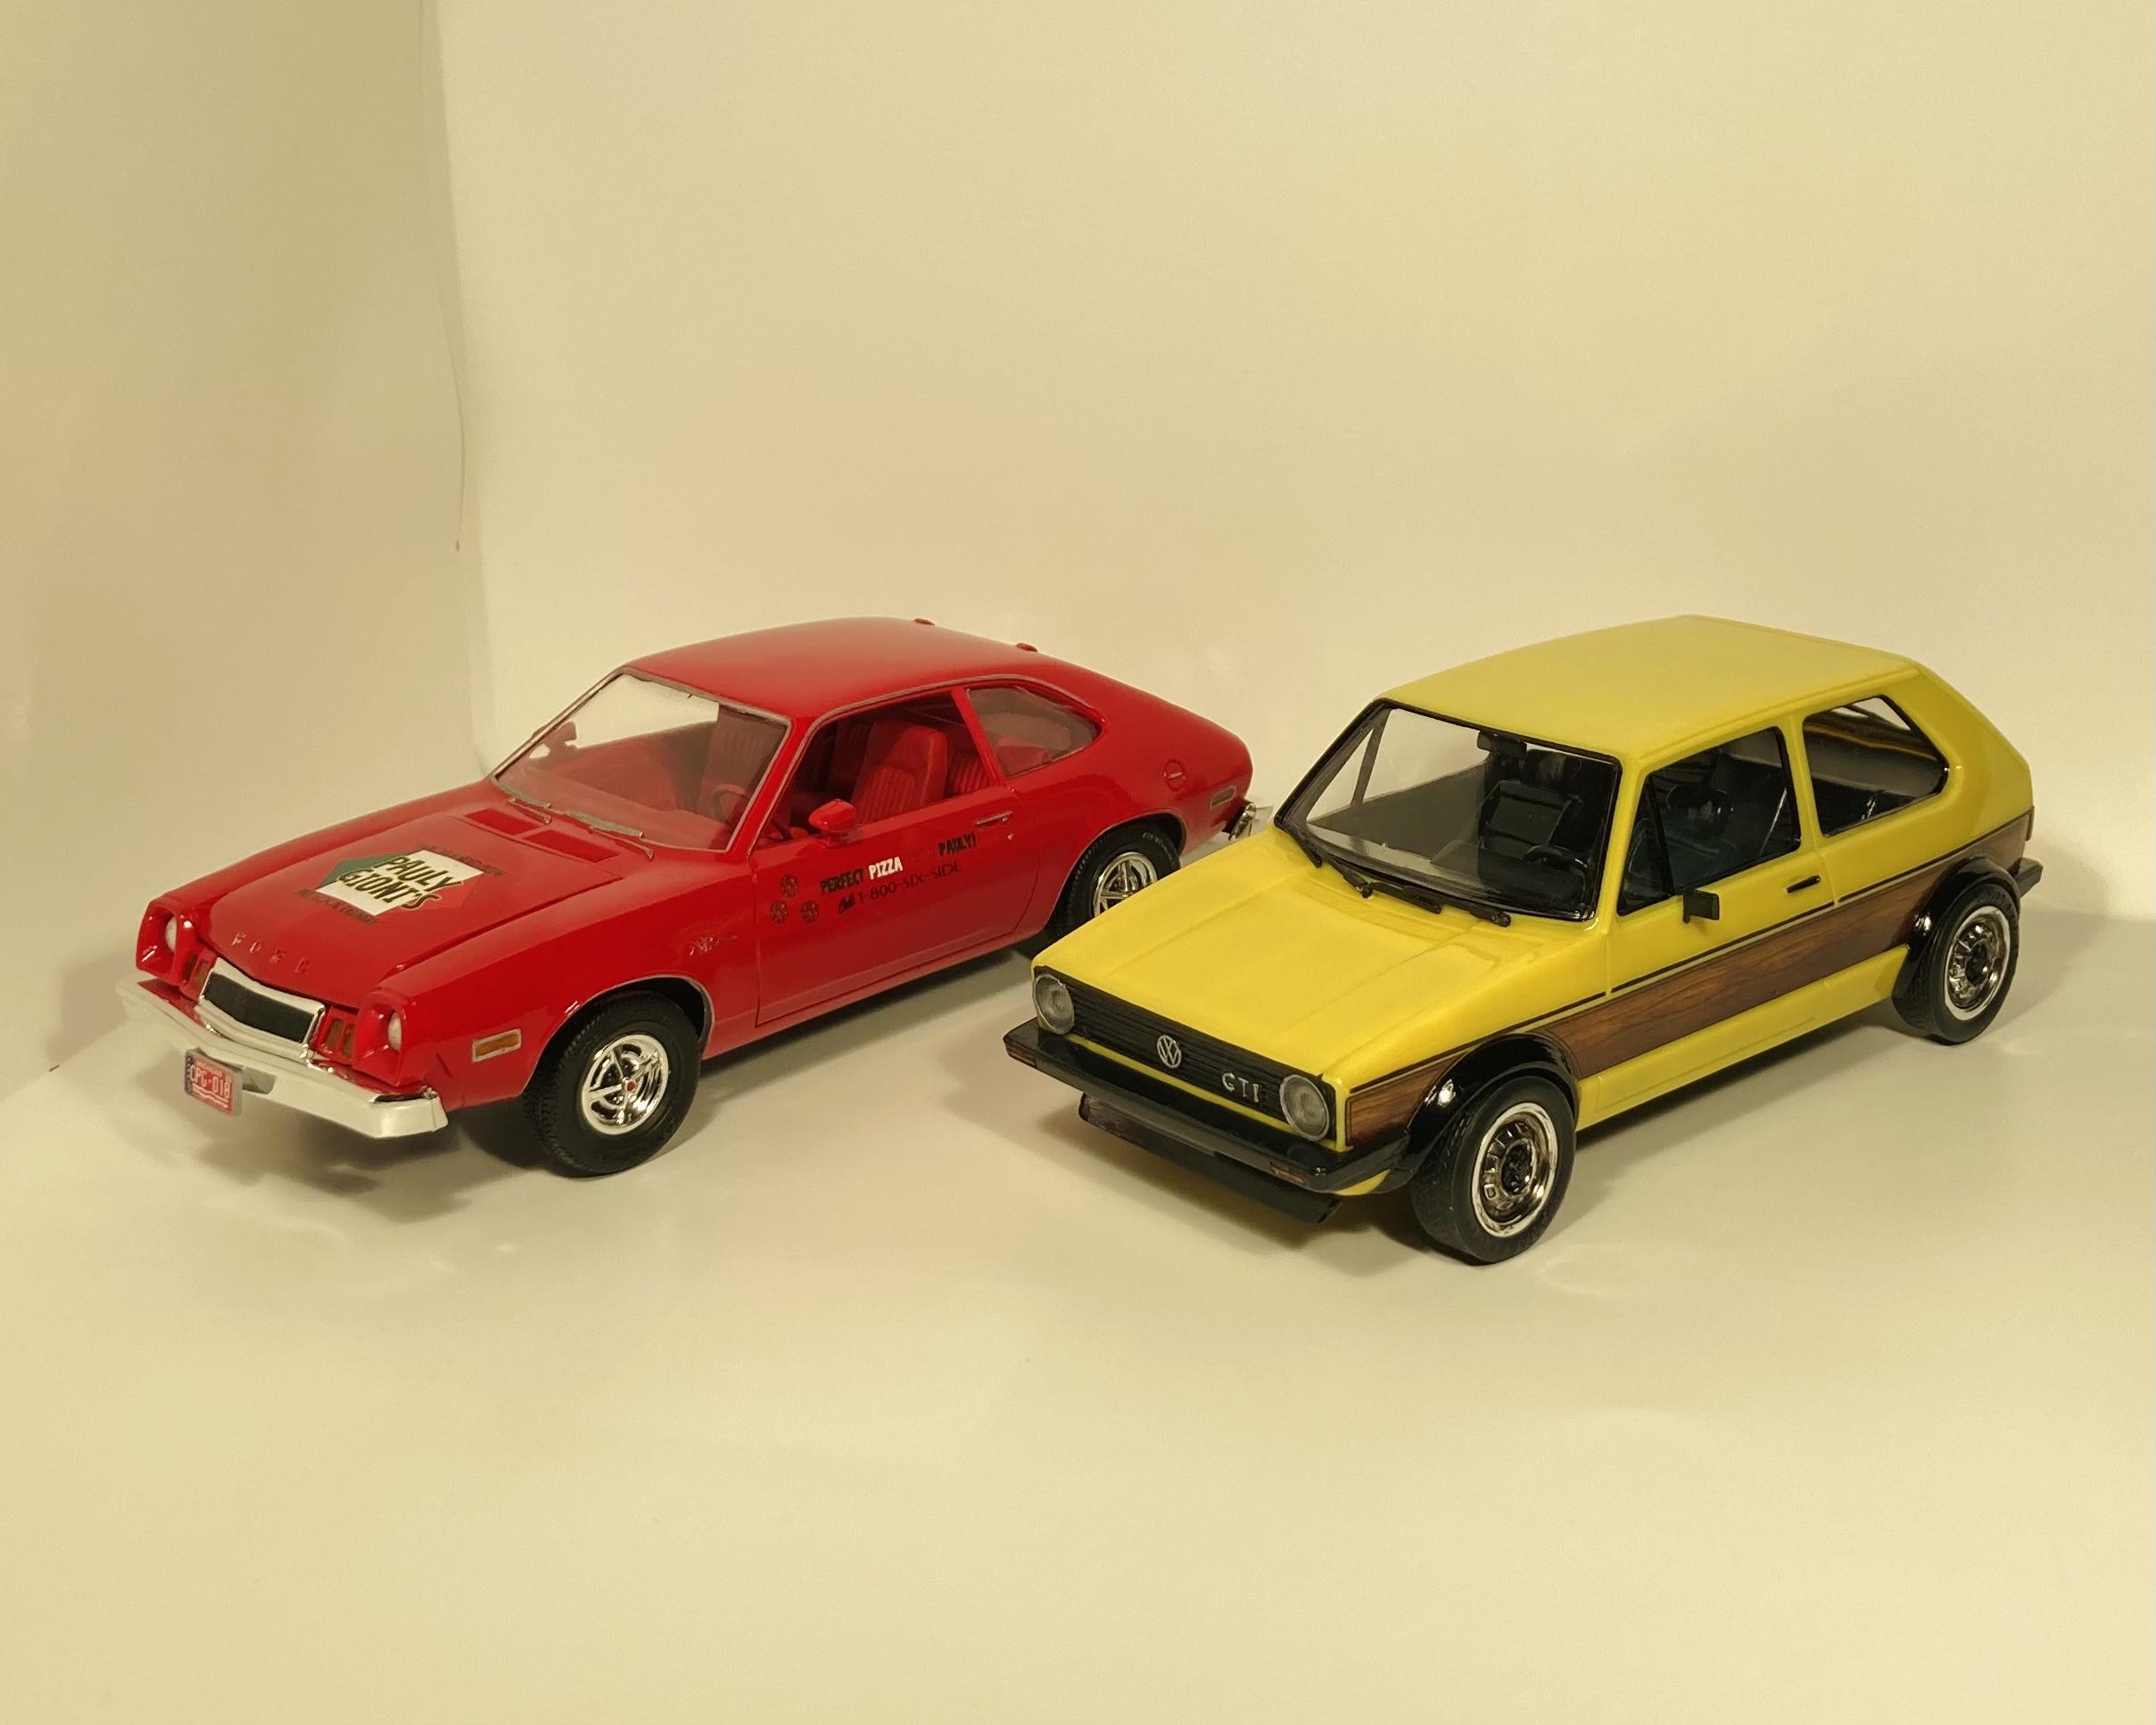
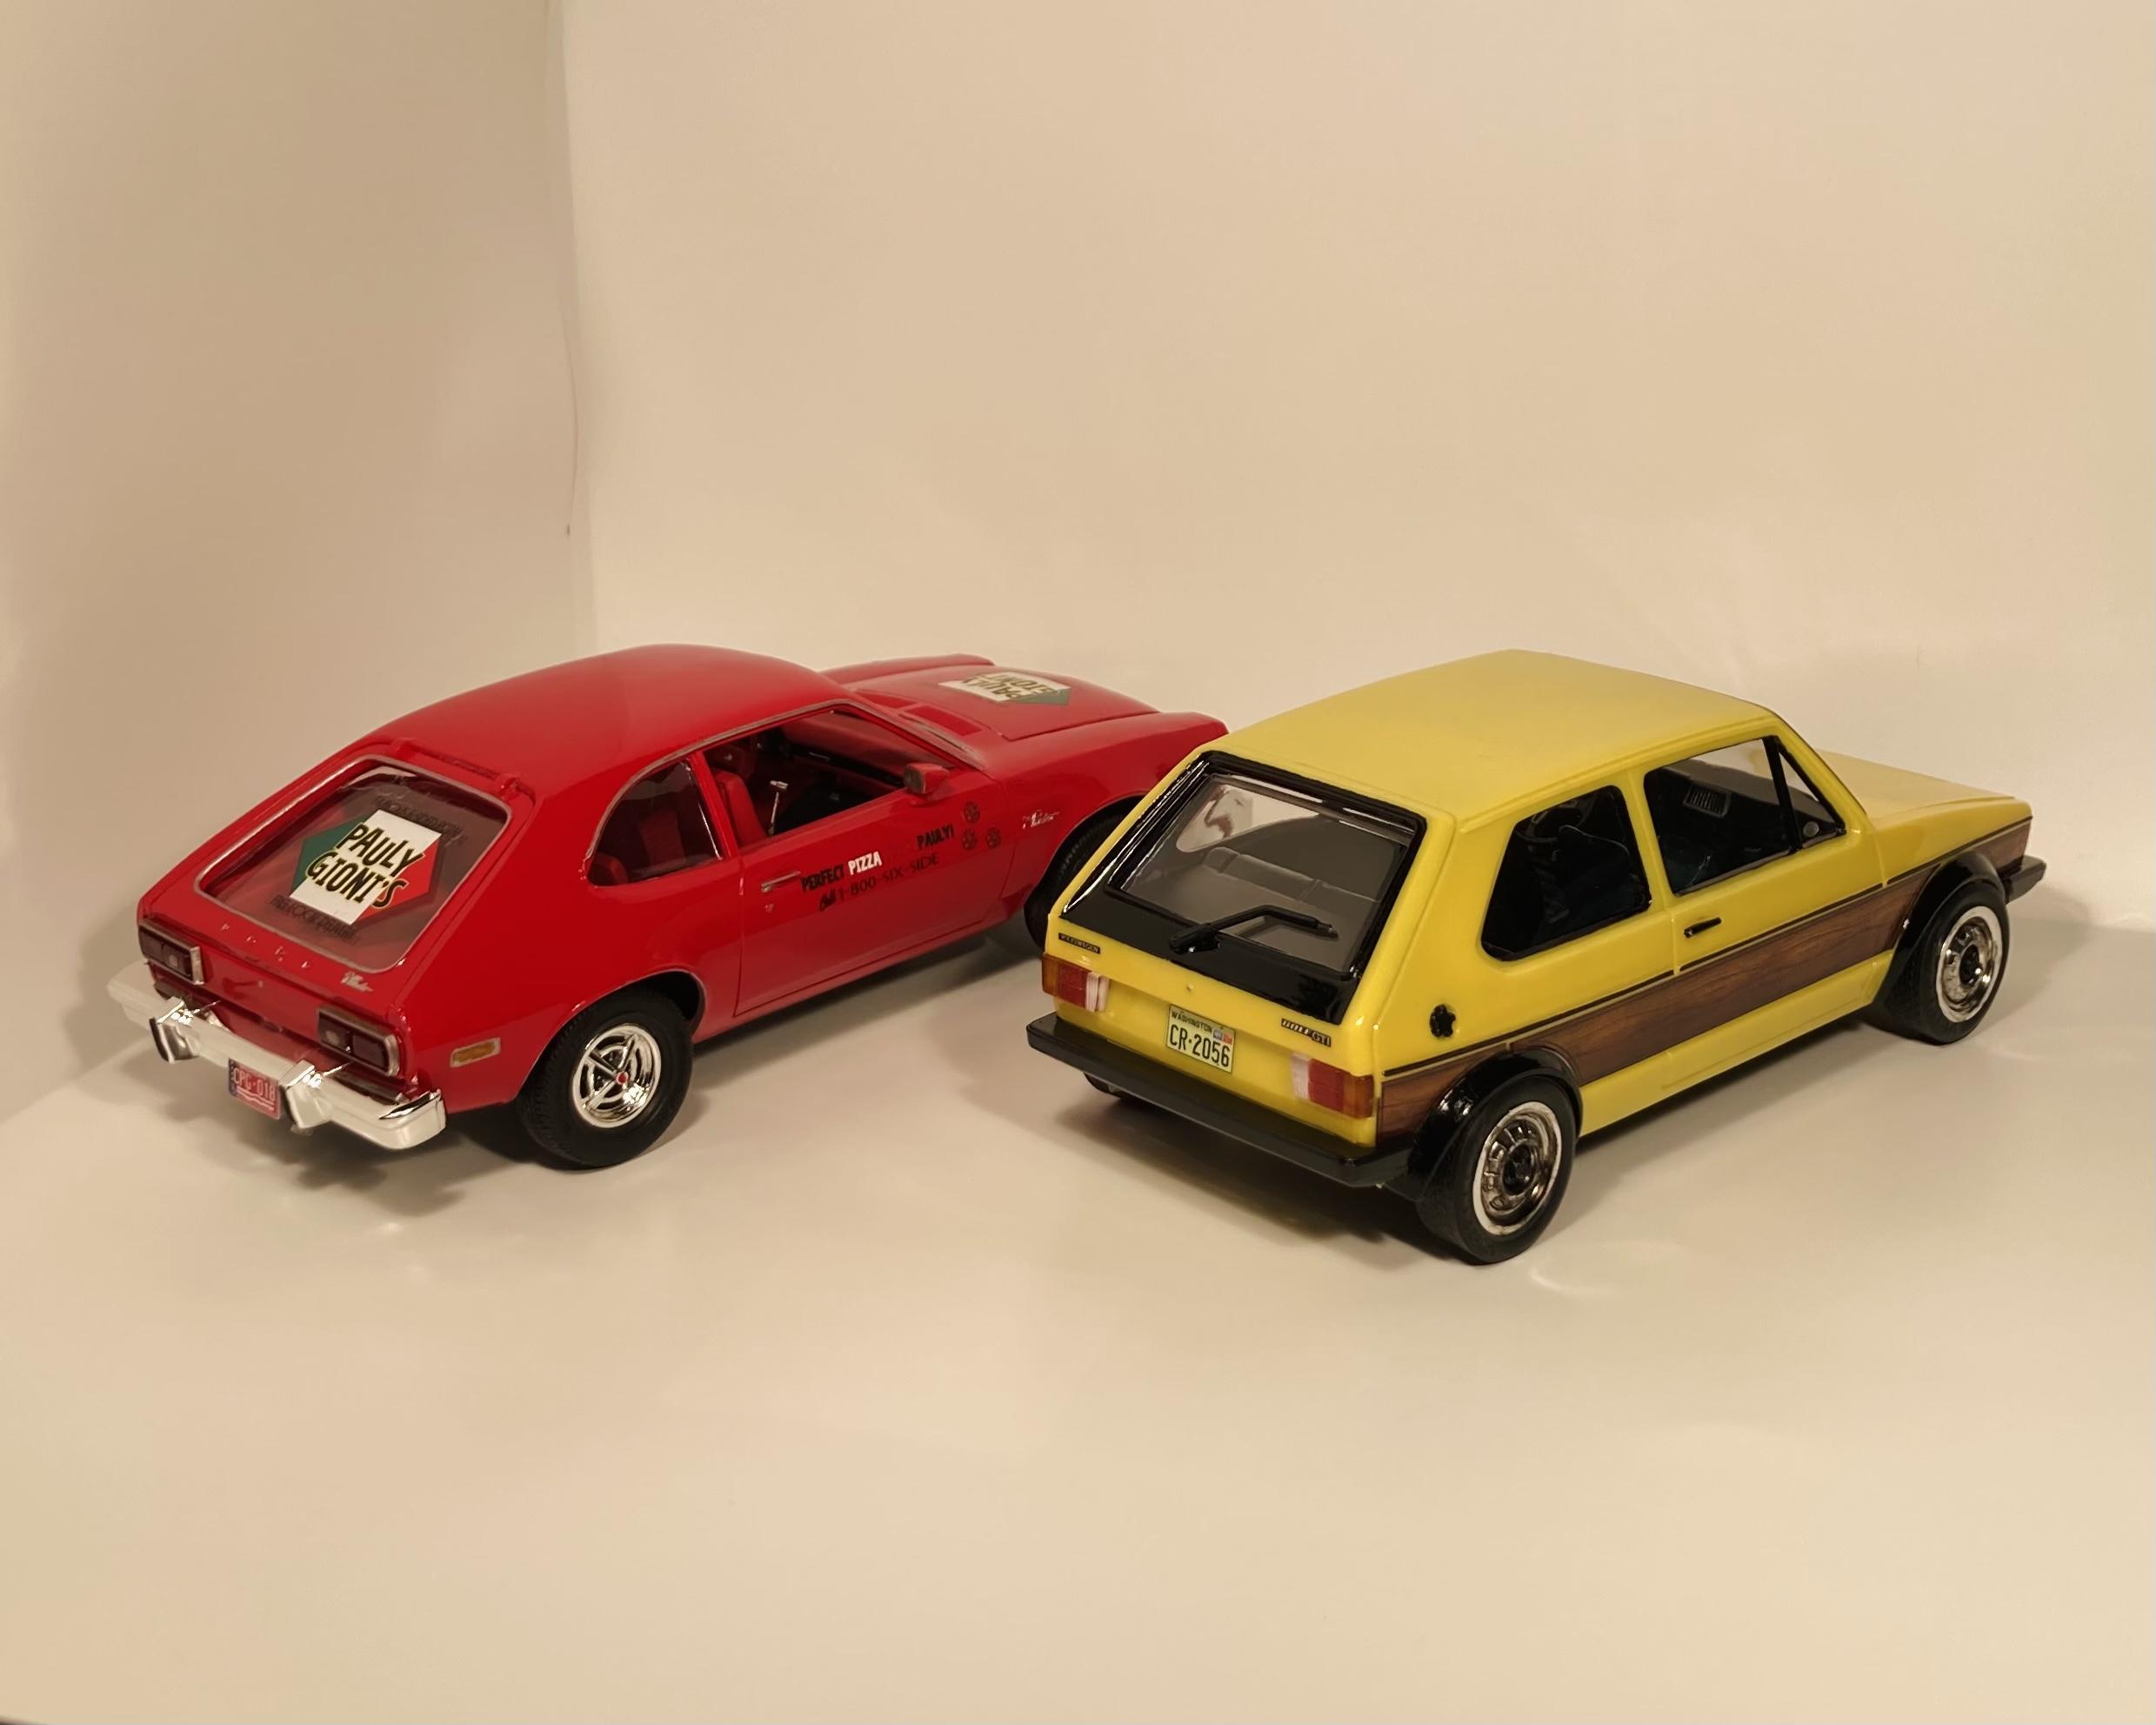
Here’s my build of the recently released AMT ‘78 VW GTI. Since this kit is molded in three colors (and since it’s too cold out to safely spray paint) I decided to see how far I could take it with just some Future and hand detail paint. It came out ok, definitely not an award winner 😂. The yellow plastic is thin and slightly translucent so the color isn’t consistent. If I did it again I’d try some yellow craft paint inside the body shell first. Part fit and detail isn’t great but considering the age of the mold it’s acceptable. It’s WAY better than AMT’s ‘77 Pinto. I don’t think anyone in their right mind would have stuck fake wood on a 1:1 GTI, even in the ‘70s, but it’s a fun look for a model! Anyways this was an enjoyable quick build overall.
-
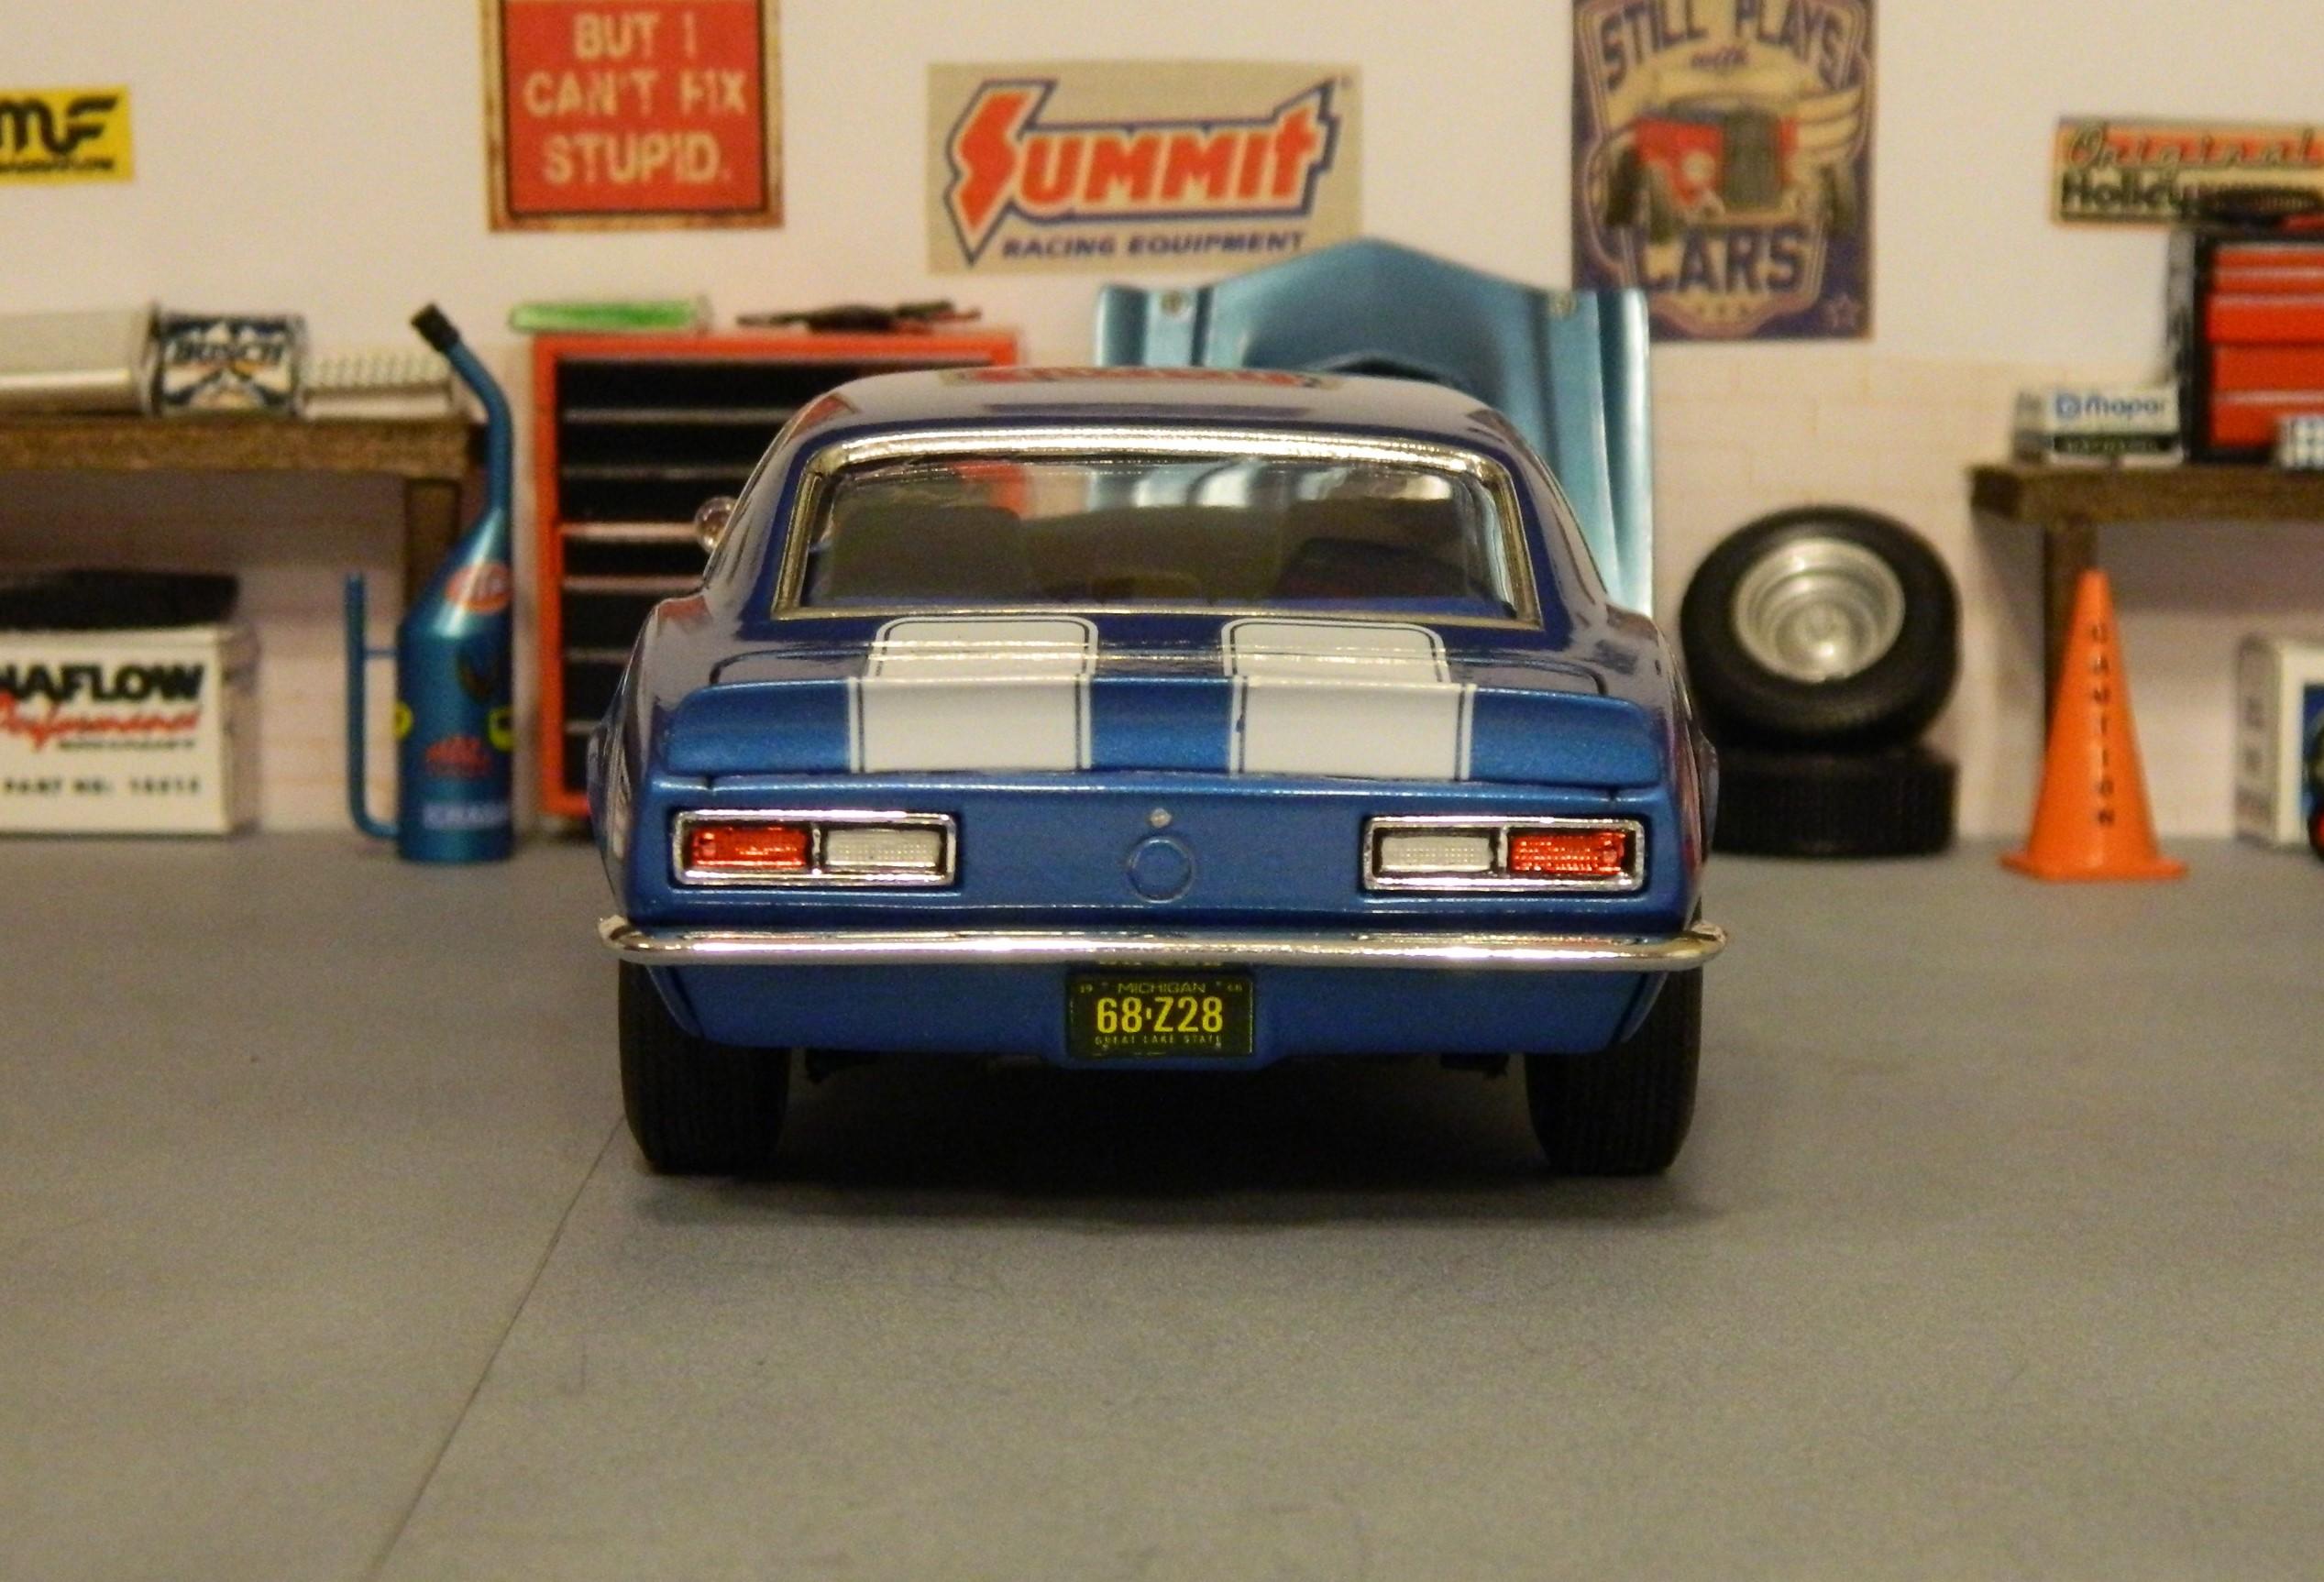
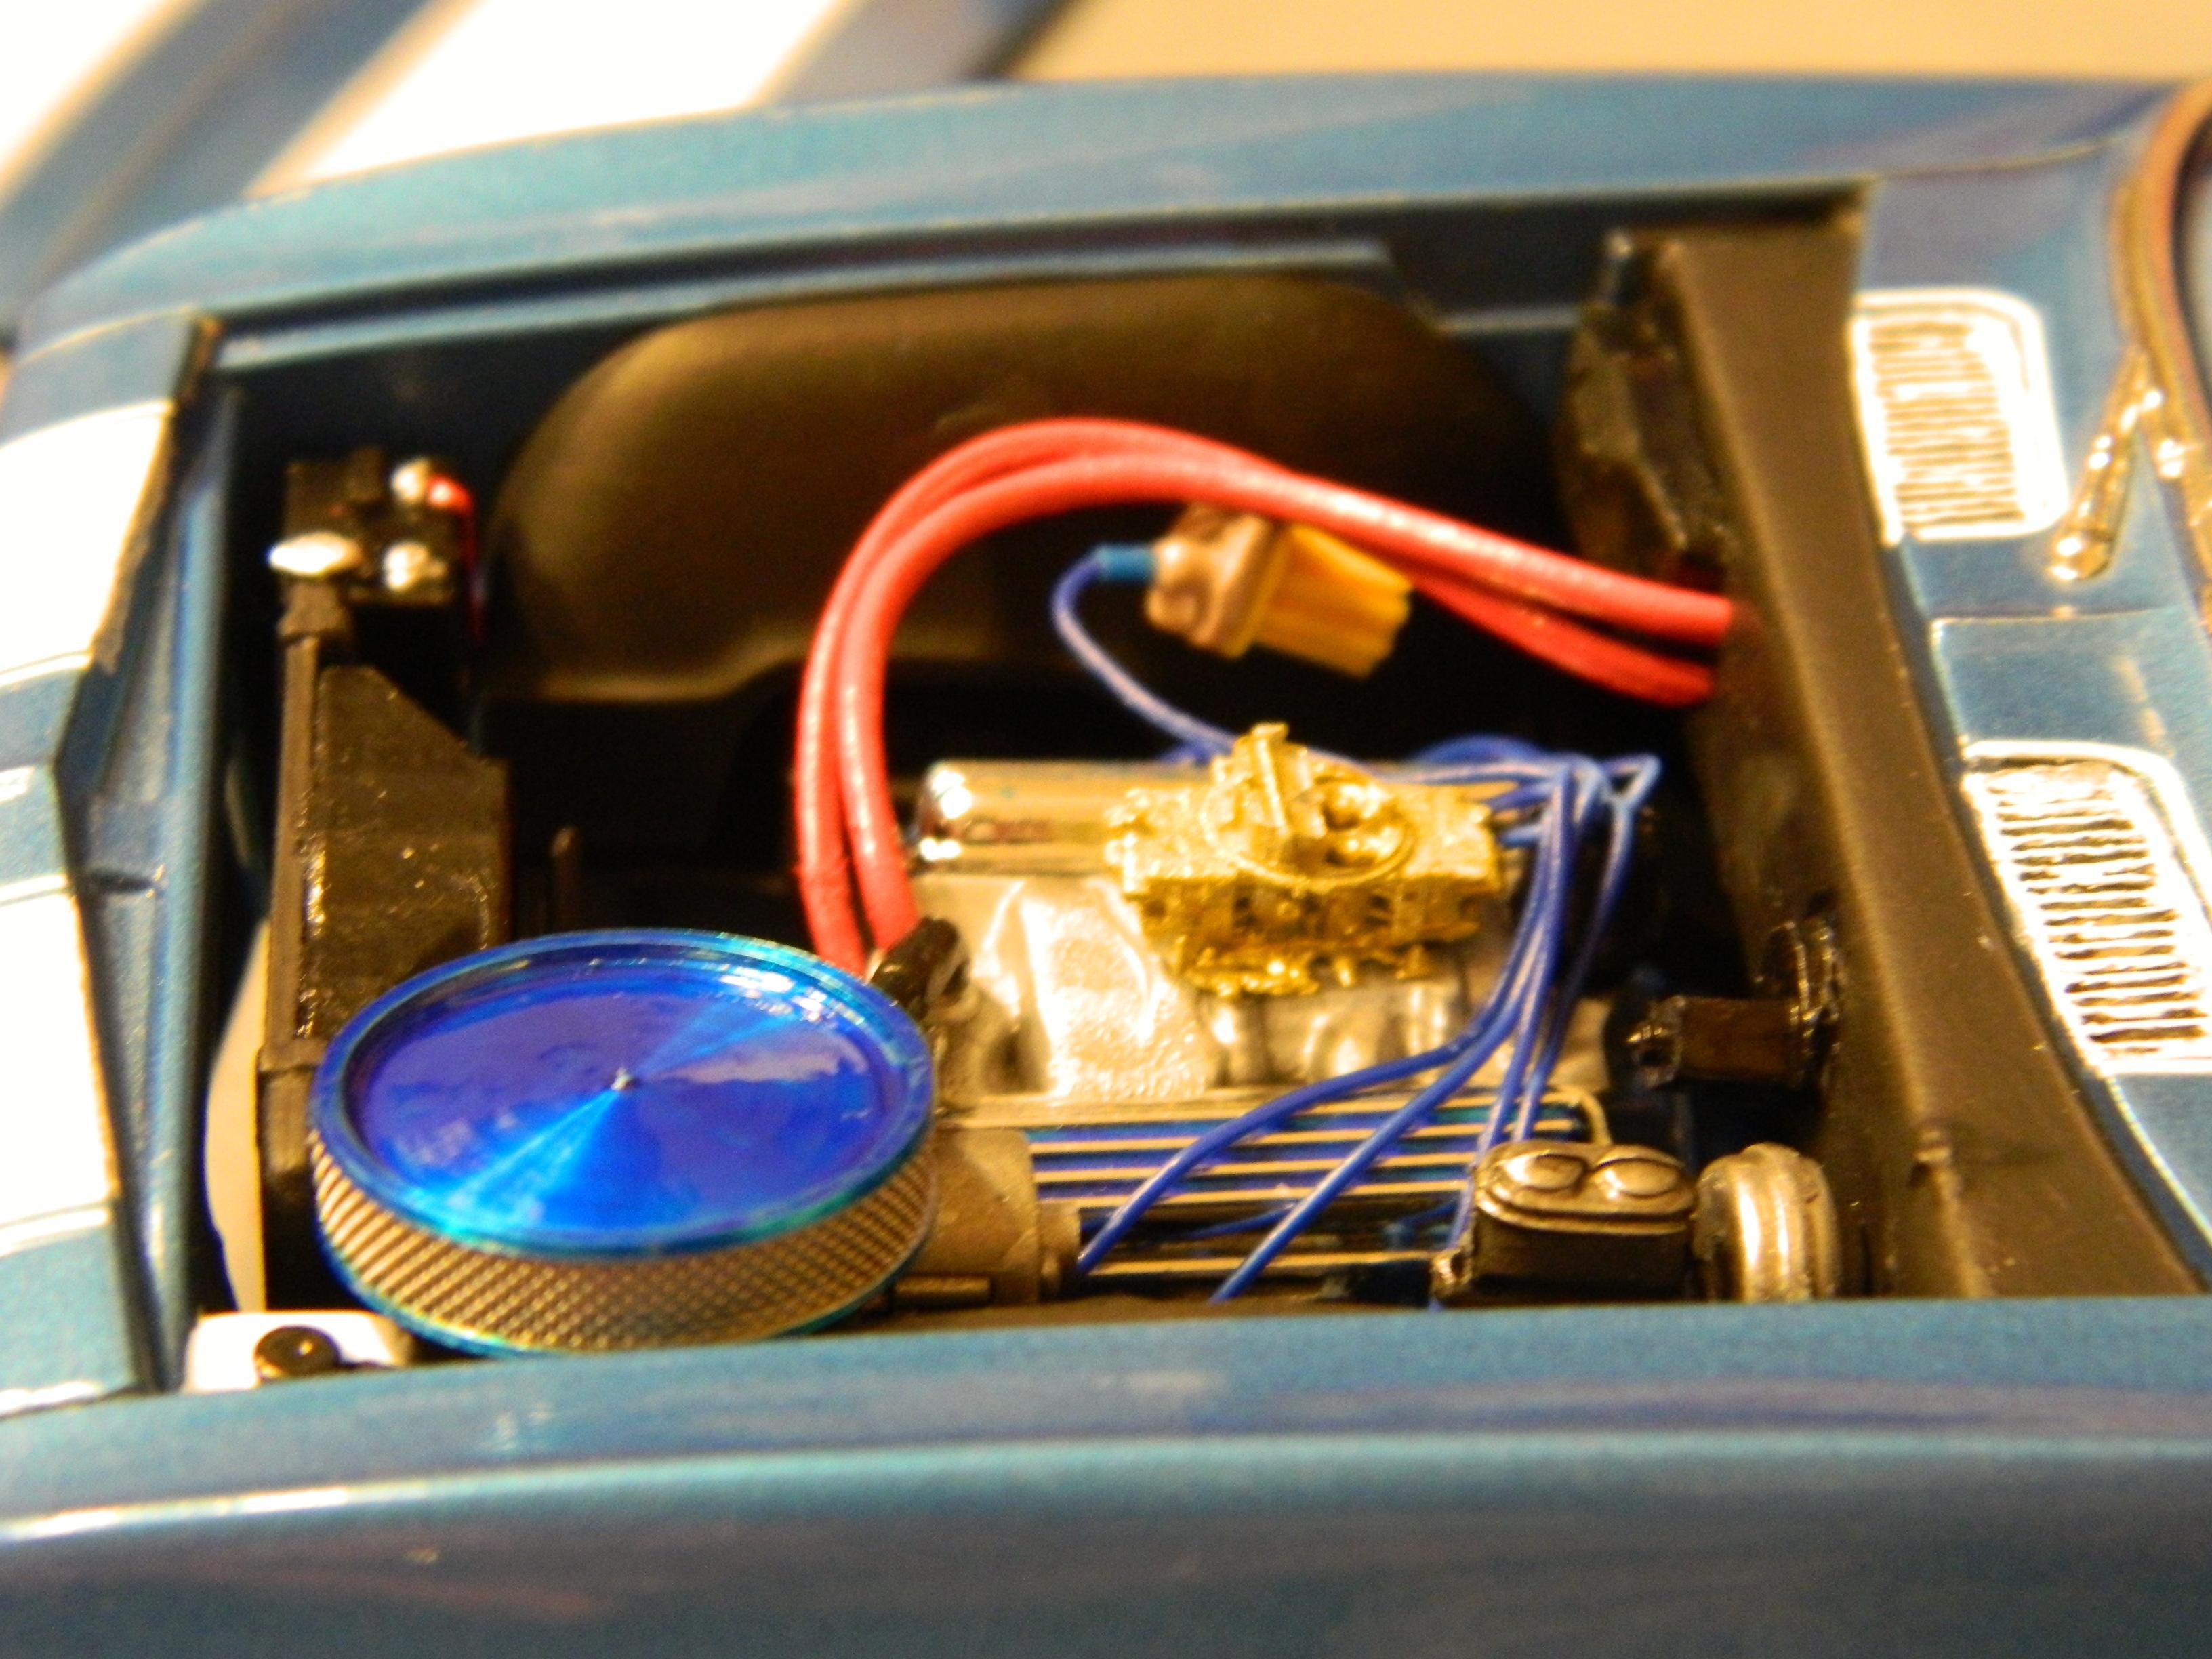
Here's the AMT 1968 Camaro Z28 that I finished over the weekend. It's painted in Model Master Nassau Blue Metallic, and cleared with Model Master Clear Gloss. I gave it the usual wet-sand, polish, and wax treatment. The interior is two different mixtures of craft paints, one for the seats, door panels and dashboard, and the other for the carpet area and rear shelf. The wheels are from MAD Modeling, and were airbrushed with Molotow Chrome from a refill pen, and the spokes were painted with Anita's Galvanized Tin. The air cleaner is a machined unit from Off The Sprue, the carburetor is from Fireball Modelworks. The trim was done with Bare Metal Foil, and I added valve stems, ignition wires, and heater hoses for extra detail. This was a typical older mold from AMT with a not-so detailed one piece interior tub, but it did go together really well and was a really fun build, so a definite thumbs-up from me. Thanks for looking!
-
Been working on this AMT Chevelle, got some paint on it, ain't perfect but I think I can work with it. I'll let it cure for a few days then rub it down with some Future.


.thumb.jpg.e0420fe52e683c60d19e843462316523.jpg)