
hedotwo
-
Posts
1,551 -
Joined
-
Last visited
Content Type
Profiles
Forums
Events
Gallery
Everything posted by hedotwo
-
Molotow Chrome thru airbrush
hedotwo replied to 1st 700 Quad's topic in Model Building Questions and Answers
I airbrush Molotow (from the 30ml refill) on bumpers, grilles, wheel covers. I don't spray emblems or areas masked like window trim, but use a combination of foil and/or a Molotow pen. A fine brush to apply the molotow works nicely. As was said, you need to apply fairly heavy to get a good shine so masking tape might not work so well. Good side of spraying heavy is that it will self level nicely. I won't go back to Alclad or Spaz Stix for the things I now airbrush with Molotow as in my opinion the Molotow has a much better shine. Oh, and no need for an undercoat... just need to ensure a smooth surface. My opinion.... -
Welcome Phil!
-
Great job on the Stang David!
-
Another great build Steve!
-
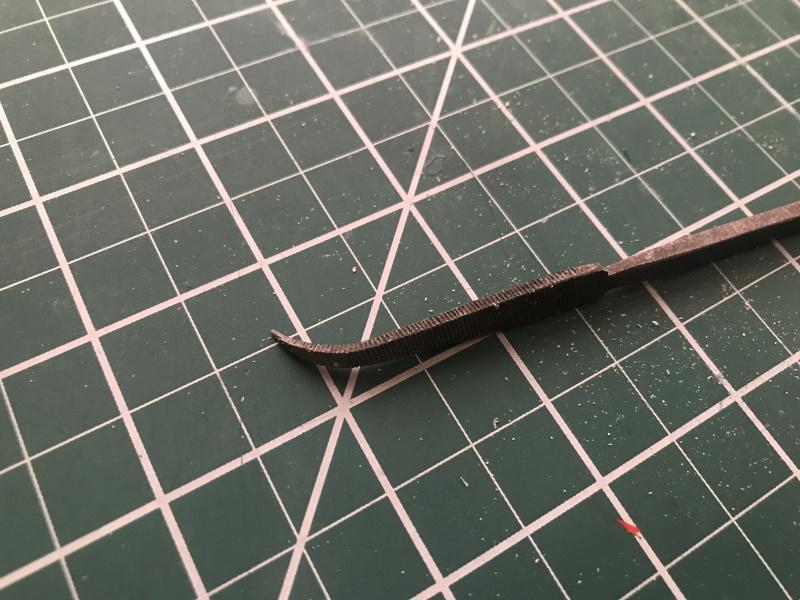
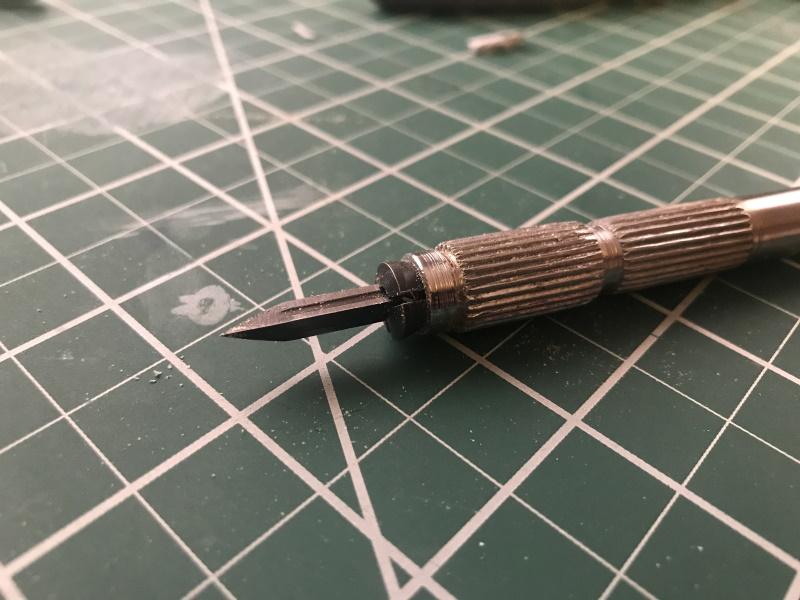
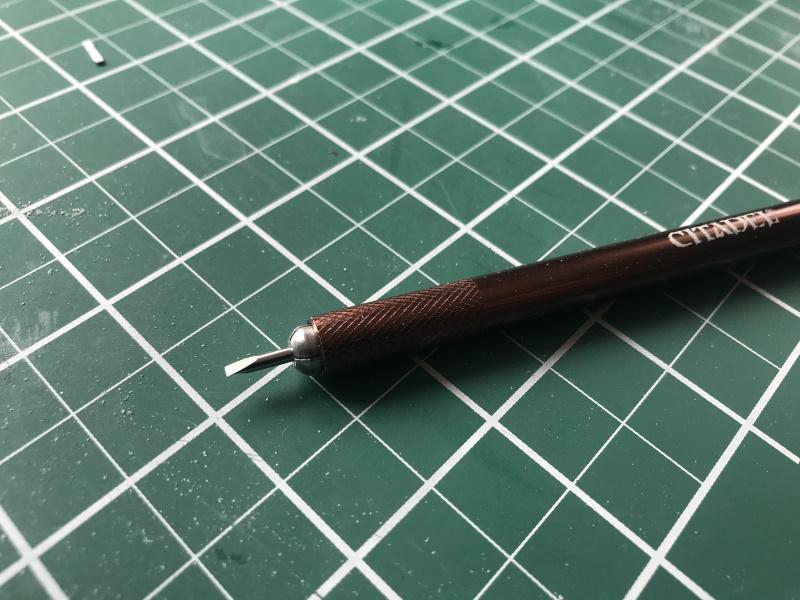
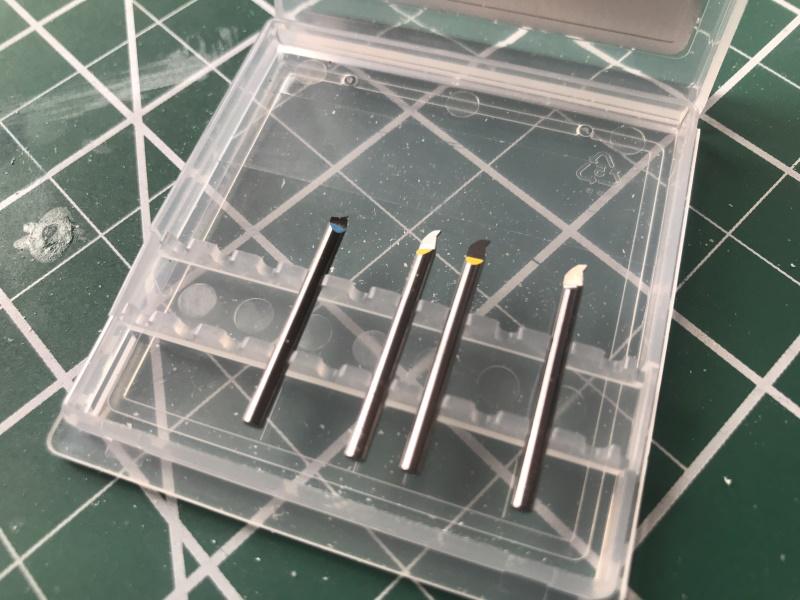
I'm an admitted toolaholic and have lots of favorites. I think alot of what you find your favorite has to do with what type of builds you do. I primarily restore stuff so I rely on tools for disassembly and body work. First is a good set of riffler files. I have a few different sets of different cut depth. This one is from a rougher cut set but it works when you have lots of quick shaping to do. I love rifflers because you can use them in tighter spots, although I also have an assortment of conventional files. Not to mention a huge assortment of sanding stuff... paper, foam, sticks, etc. Next is my scraper. This is likely my most used tool. Don't ask the brand because I've forgotten. The hardened three sided scrapers does alot of things well and you can lean on it a bit without worrying about the blade. The fine point gets into the smallest spaces. Last are my Tamiya engraving tools that are great for cleanly cutting new lines or deepening existing. They come in different widths and I use primarily the .3mm and .5mm. I have the .1mm but it's so thin I'm afraid to use it much for fear of breaking it. I have an assortment of scribers and each have a use. These are pricey but I'm glad I have them for certain things. My go to scriber for general use is the Trumpeter. The tool inserted in the photo below is the Tamiya straight edge.

-
Welcome Mark!
-
Looks like the bird has good bones. I'd do the improvements you mentioned but I'm no fan of that yellow either. Maybe the Ford Desert Gold from that year would look good. Plus, it'd be kind of unique.
-
Congratulations "doorsovdoon"!!
hedotwo replied to StevenGuthmiller's topic in General Automotive Talk (Trucks and Cars)
Congrats! Loved seeing a "local" featured! -
Great idea for an old 'Soto and great build Al! ?
-
Detail - What is enough?
hedotwo replied to prostreeter69's topic in Model Building Questions and Answers
x2 ? -
Clean build. Good job John!
-
I’ve had no issues with Duplicolor clear over Tamiya acrylics. Obviously Tamiya’s clear works well too and I’ve just bought a can of the Rustoleum clear but just haven’t had a chance to test it. Sounds like it works good and you can’t beat the price.
-
Welcome Amin!
-
Great paint! Welcome!
-
As a rule I’m not a fan of big hoops but these look great on the Imp. Great build!
-
Will follow closely. These are the kind of projects I love watching and doing!
-
Rare Kits... prices.
hedotwo replied to Brutalform's topic in General Automotive Talk (Trucks and Cars)
I may have misunderstood which isn't surprising ? -
Rare Kits... prices.
hedotwo replied to Brutalform's topic in General Automotive Talk (Trucks and Cars)
Unfortunately Paypal charges you 2.9% + .30 each time you use it instead of your credit card. My understanding anyway. -
Good to have you Mark!
-
Good for you not getting outbid. I've found the past couple of months prices on the bay have gone kinda nuts. Not just asking prices but sold prices.
-
Have to admit I'm a stock wheel cover guy, but I'd have to agree with the wide whites and either wires or chrome reverse. Not sure which direction you're headed, but the big boat Buick looks killer when lowered with wide whites and custom wheels.
-
Looks good to my eye! Sometimes we're our worst critic
-
Great clean build Dave! Love the shade of yellow also.
-
Congrats Rog! Beautiful!
-
Paint Stripper: Insights on Lacquer Removal
hedotwo replied to Lunajammer's topic in Tips, Tricks, and Tutorials
I have two tubs of Super Clean next to each other. The first is the "dirty" one that I start with when I have heavily painted stuff to strip. I leave it in this one for whatever it takes to get the worst of the paint off then put it in the second tub that is much cleaner. I've found that fresh Super Clean seems to strip better than older, more used fluid. I strip a fair amount of stuff and as a rule am pretty happy with Super Clean. I also use an ultrasonic machine with Super Clean for stubborn chassis, interior parts, etc. Things with lots of nooks and crannies. The machine seems to warm the fluid on it's own enough that I don't often use the heat settings. I agree about lacquers and alcohol. It's only when Super Clean fails that I use alcohol but have had luck with it.

.png.17c8a1eea66acd9b208af14208d52d11.png)
