NOBLNG
-
Posts
9,525 -
Joined
-
Last visited
Content Type
Profiles
Forums
Events
Gallery
Everything posted by NOBLNG
-
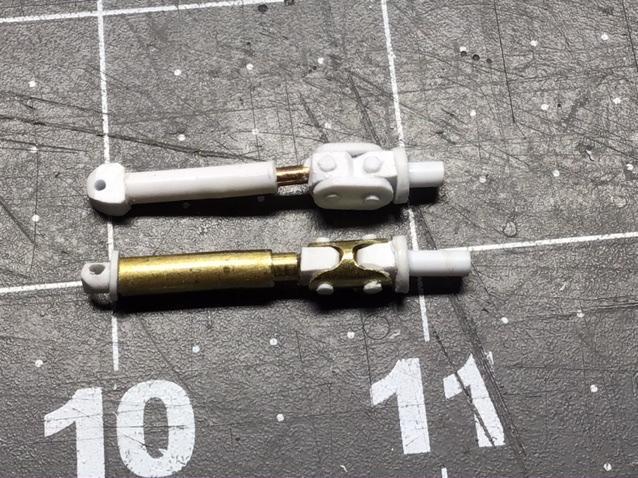
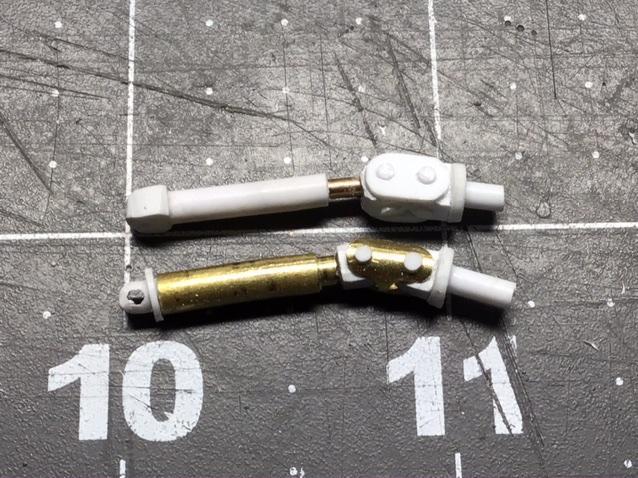
Thanks. This is my second time building a driveshaft. I built a double cardan style on my Jeepster that turned out fairly well...for a first try. Thanks to Dennis E. for clueing me in to the telescoping tubing sizes.? I am going to try this method again for the front shaft using the next size down for the main tube. We’ll see how it goes.

-
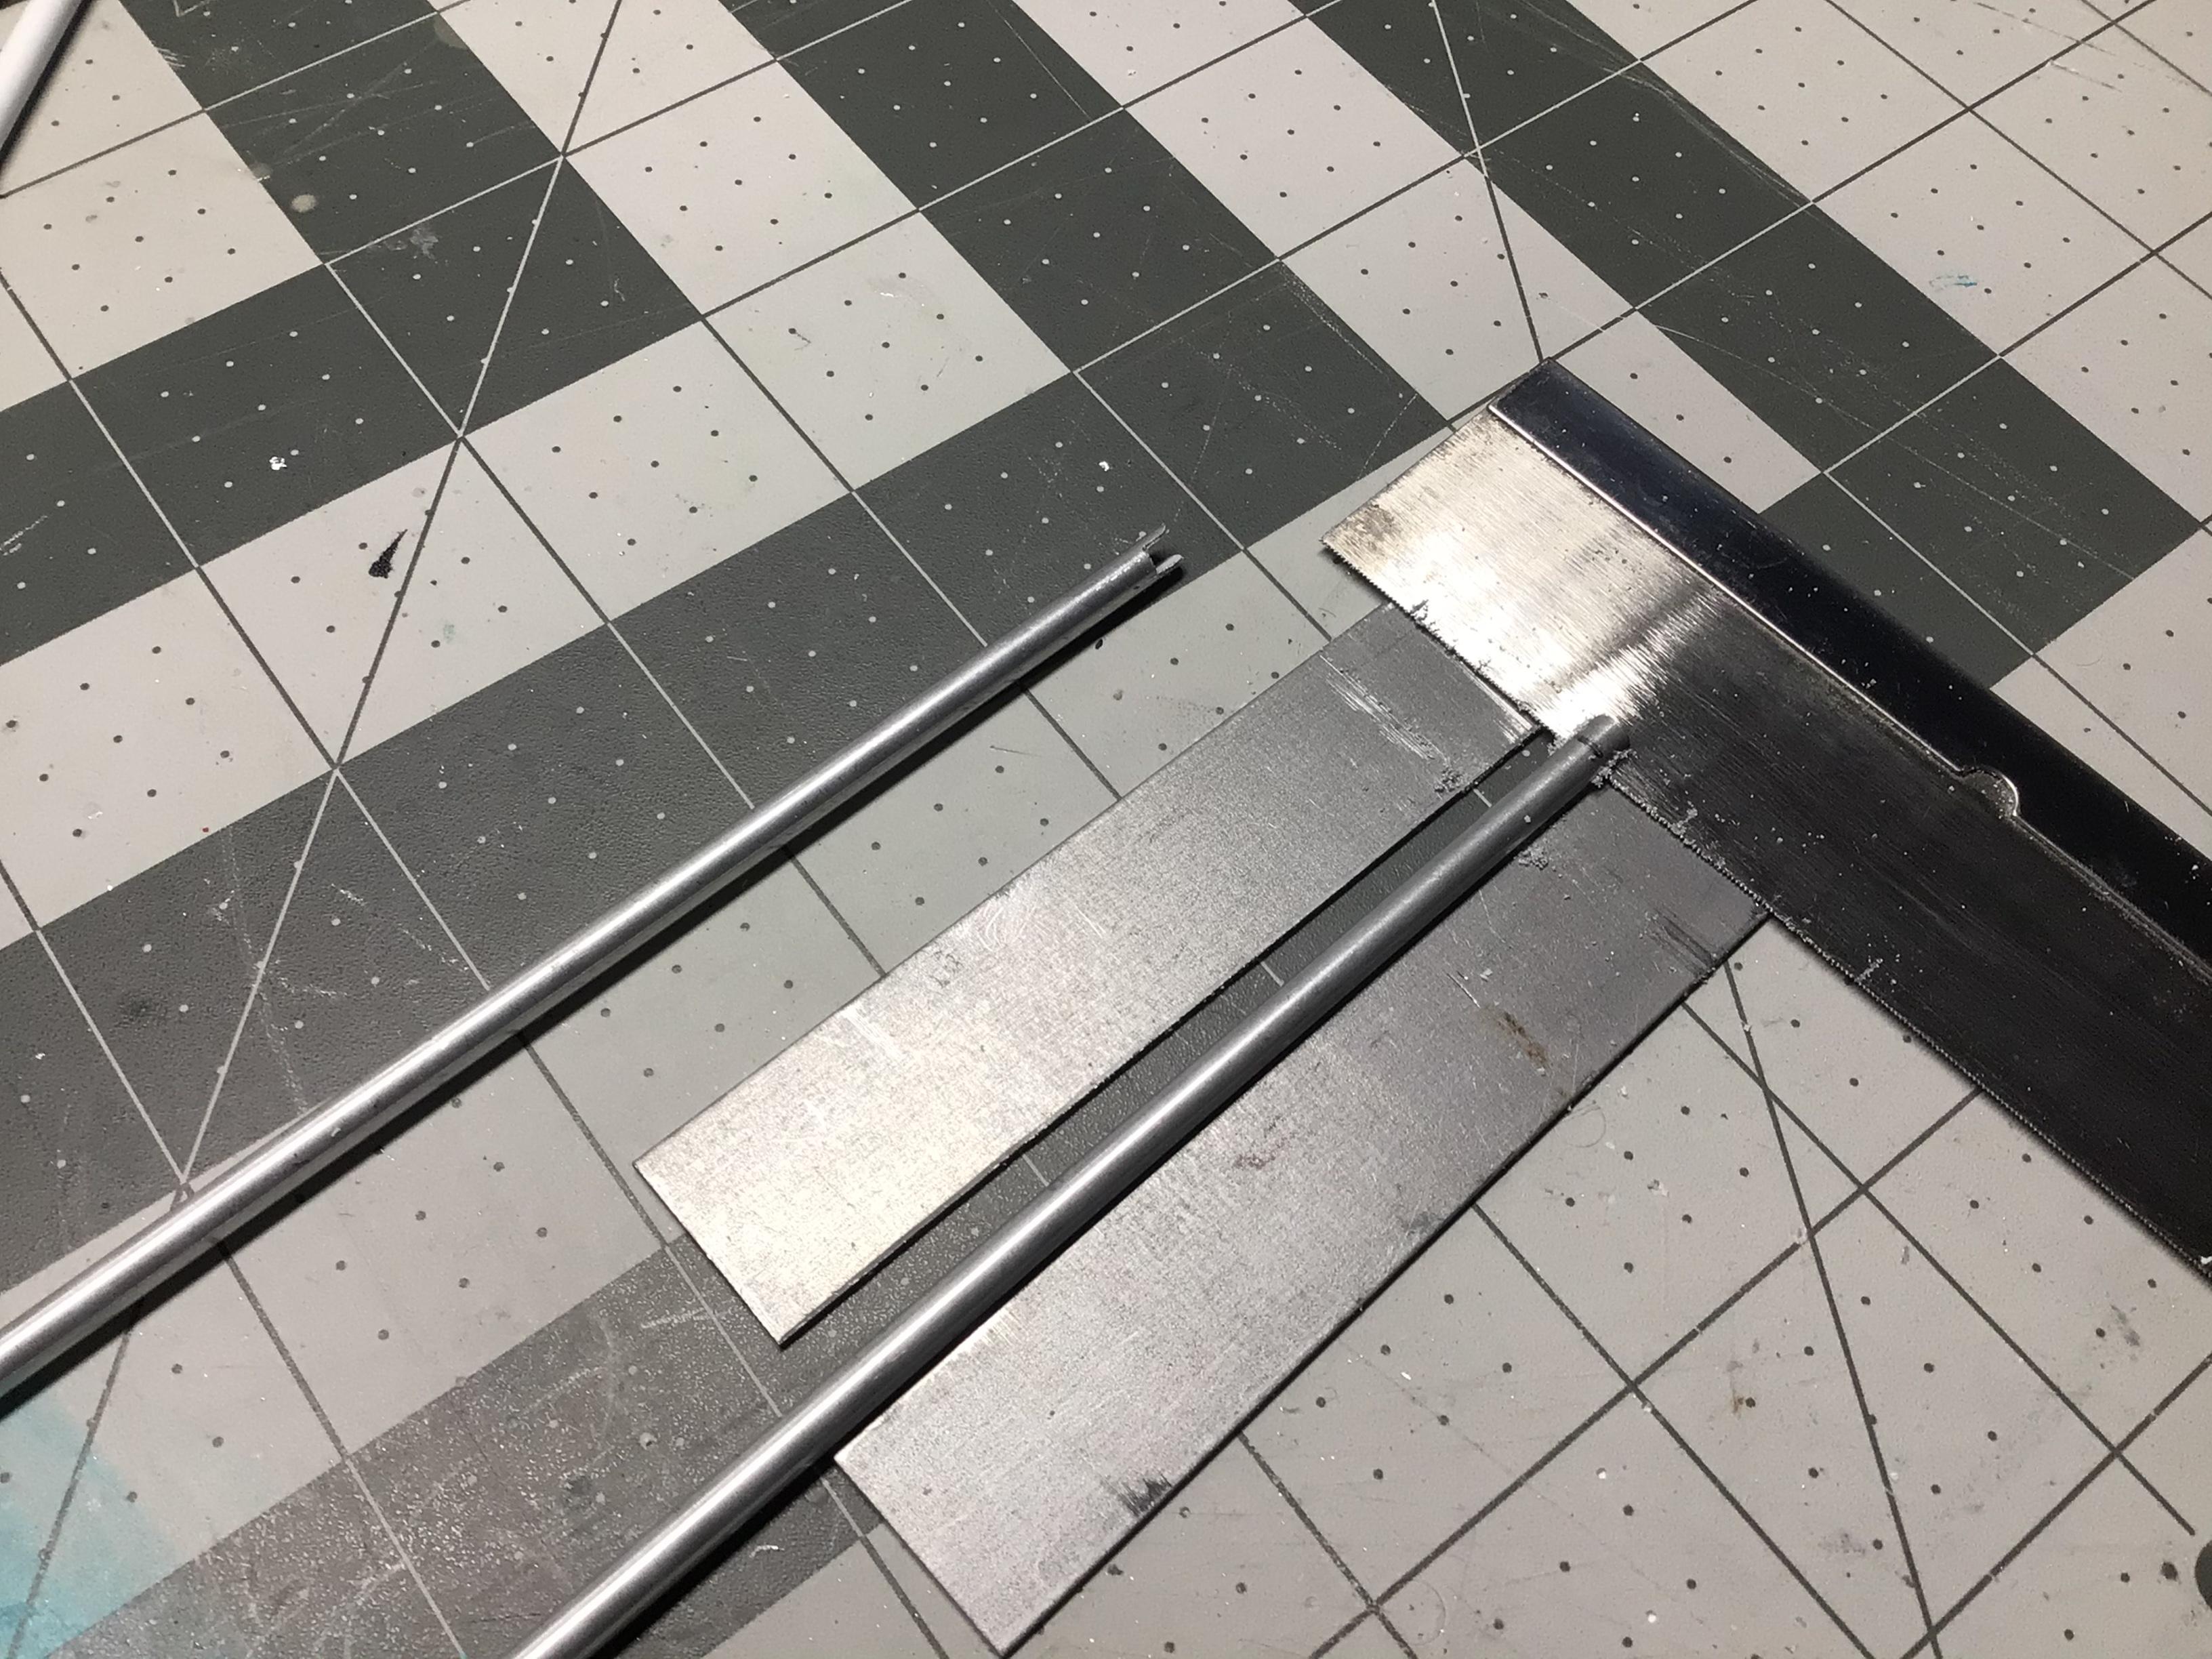
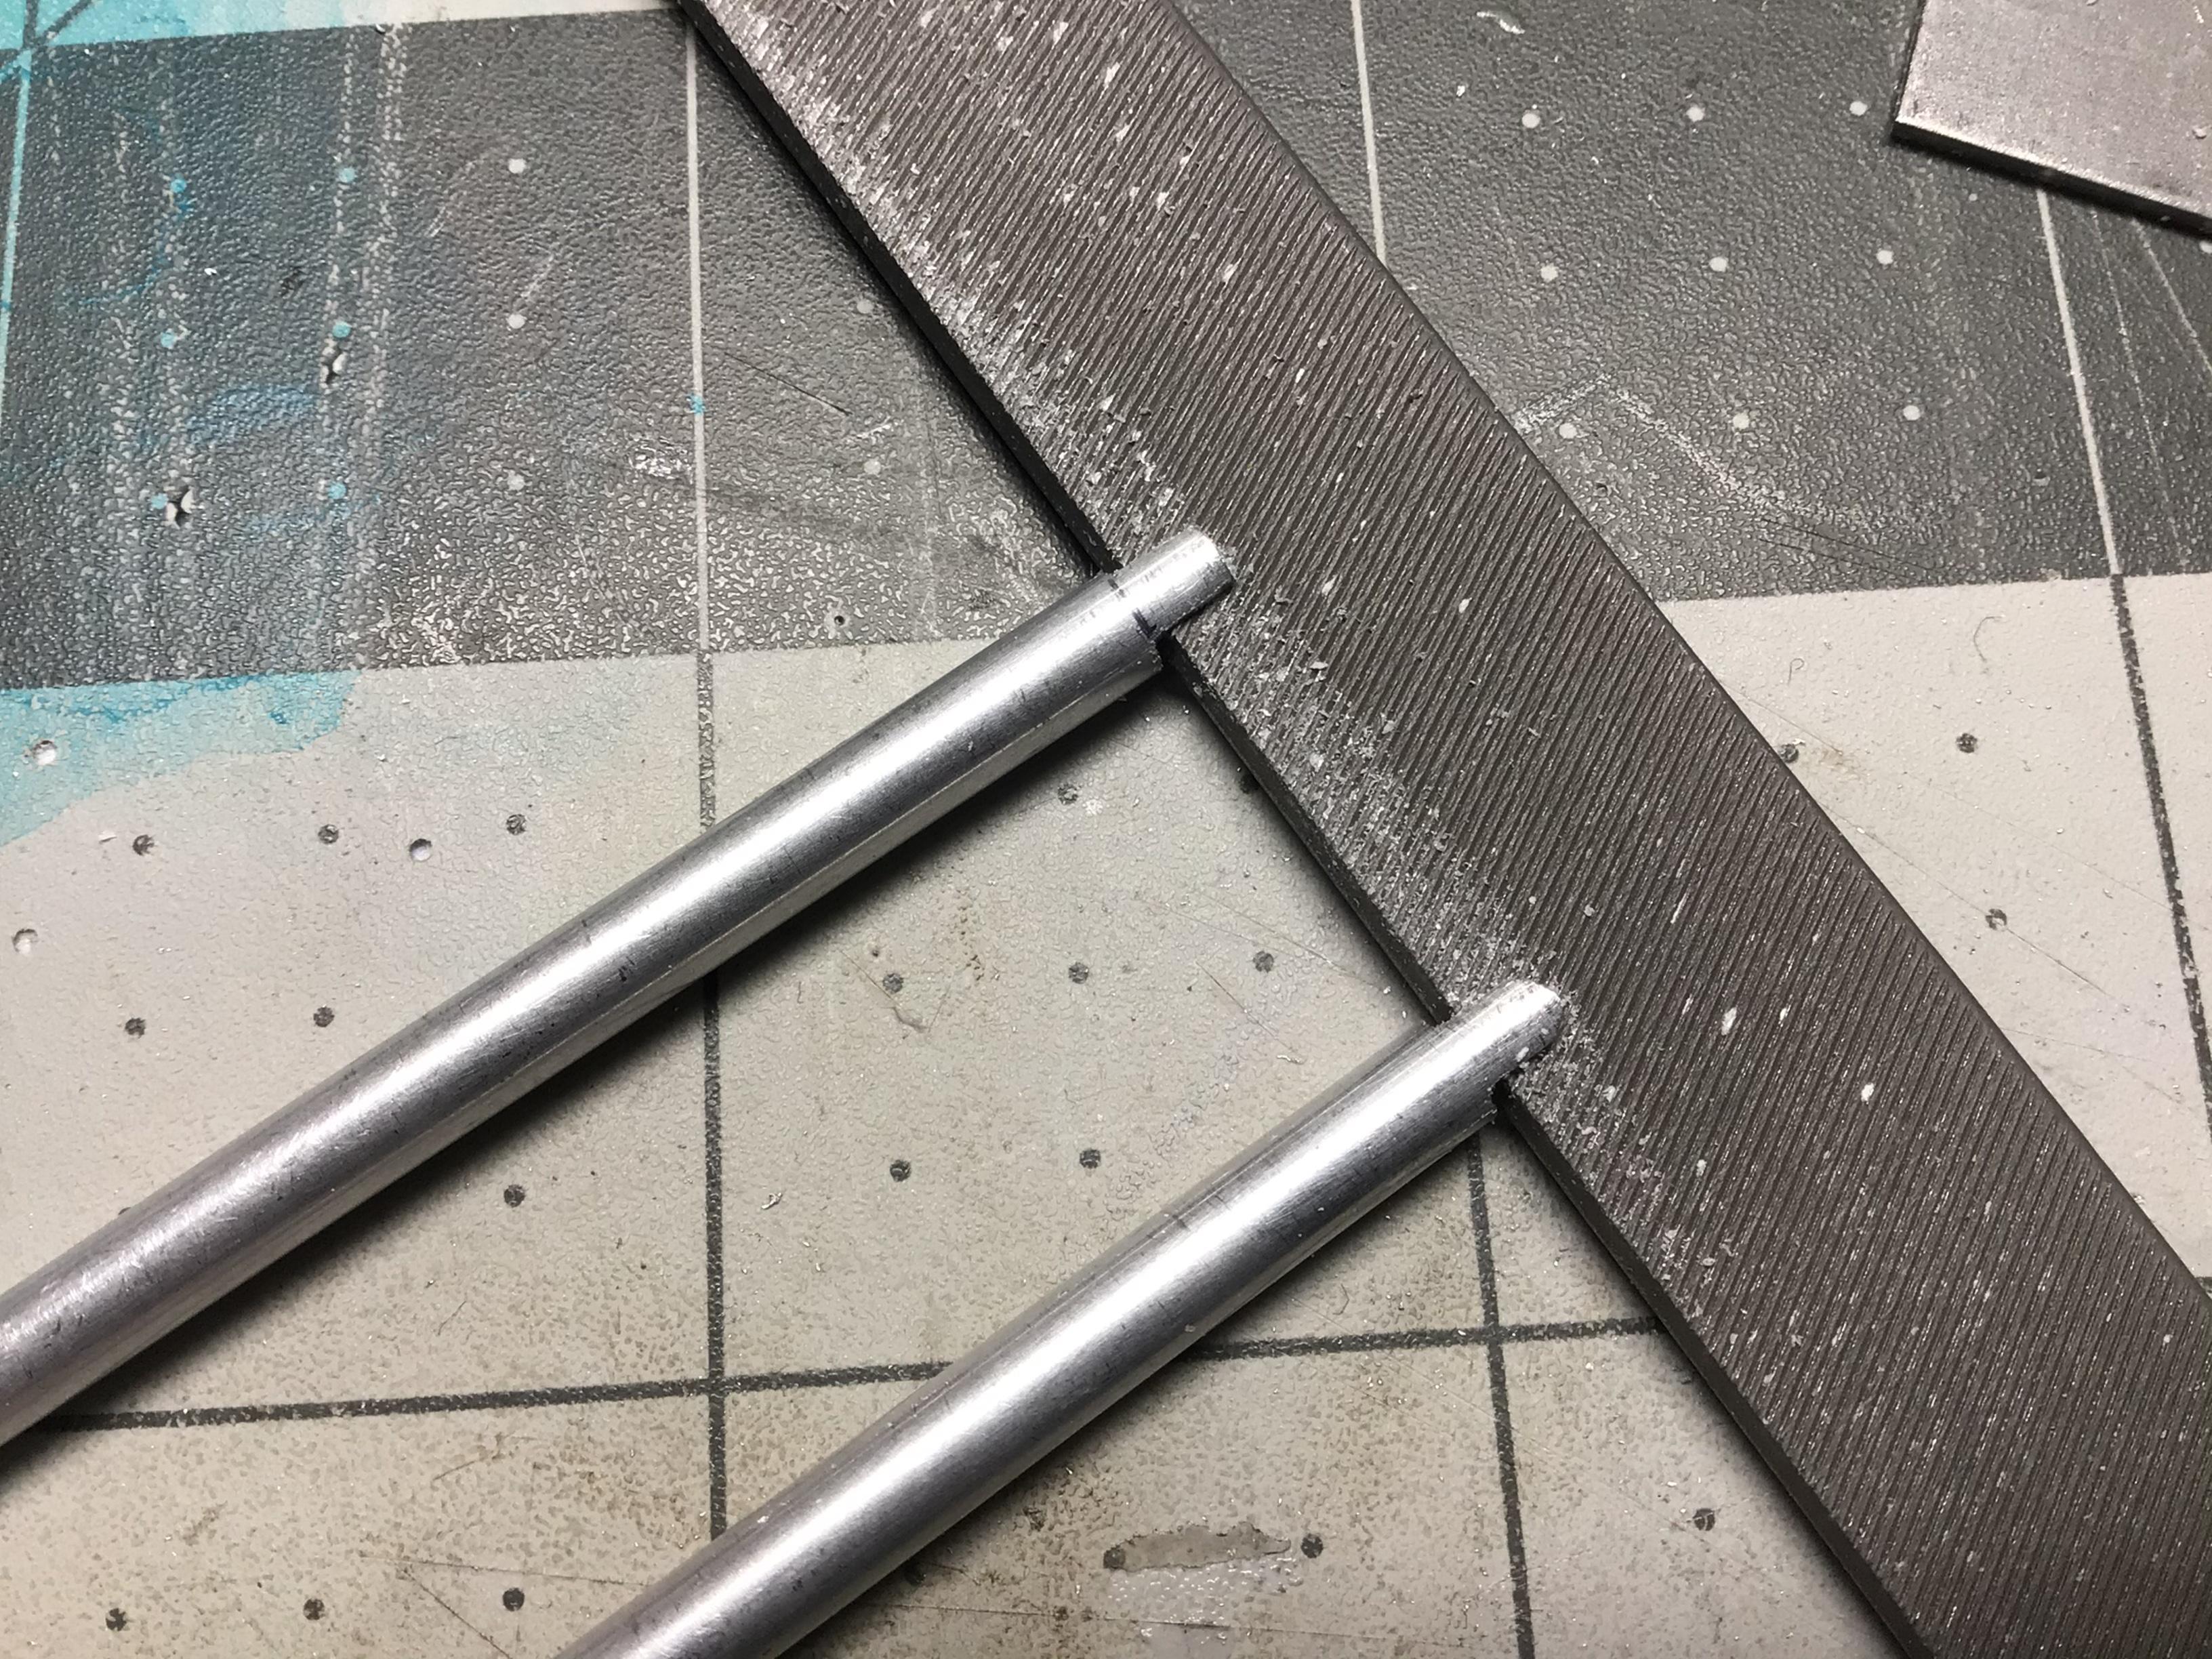
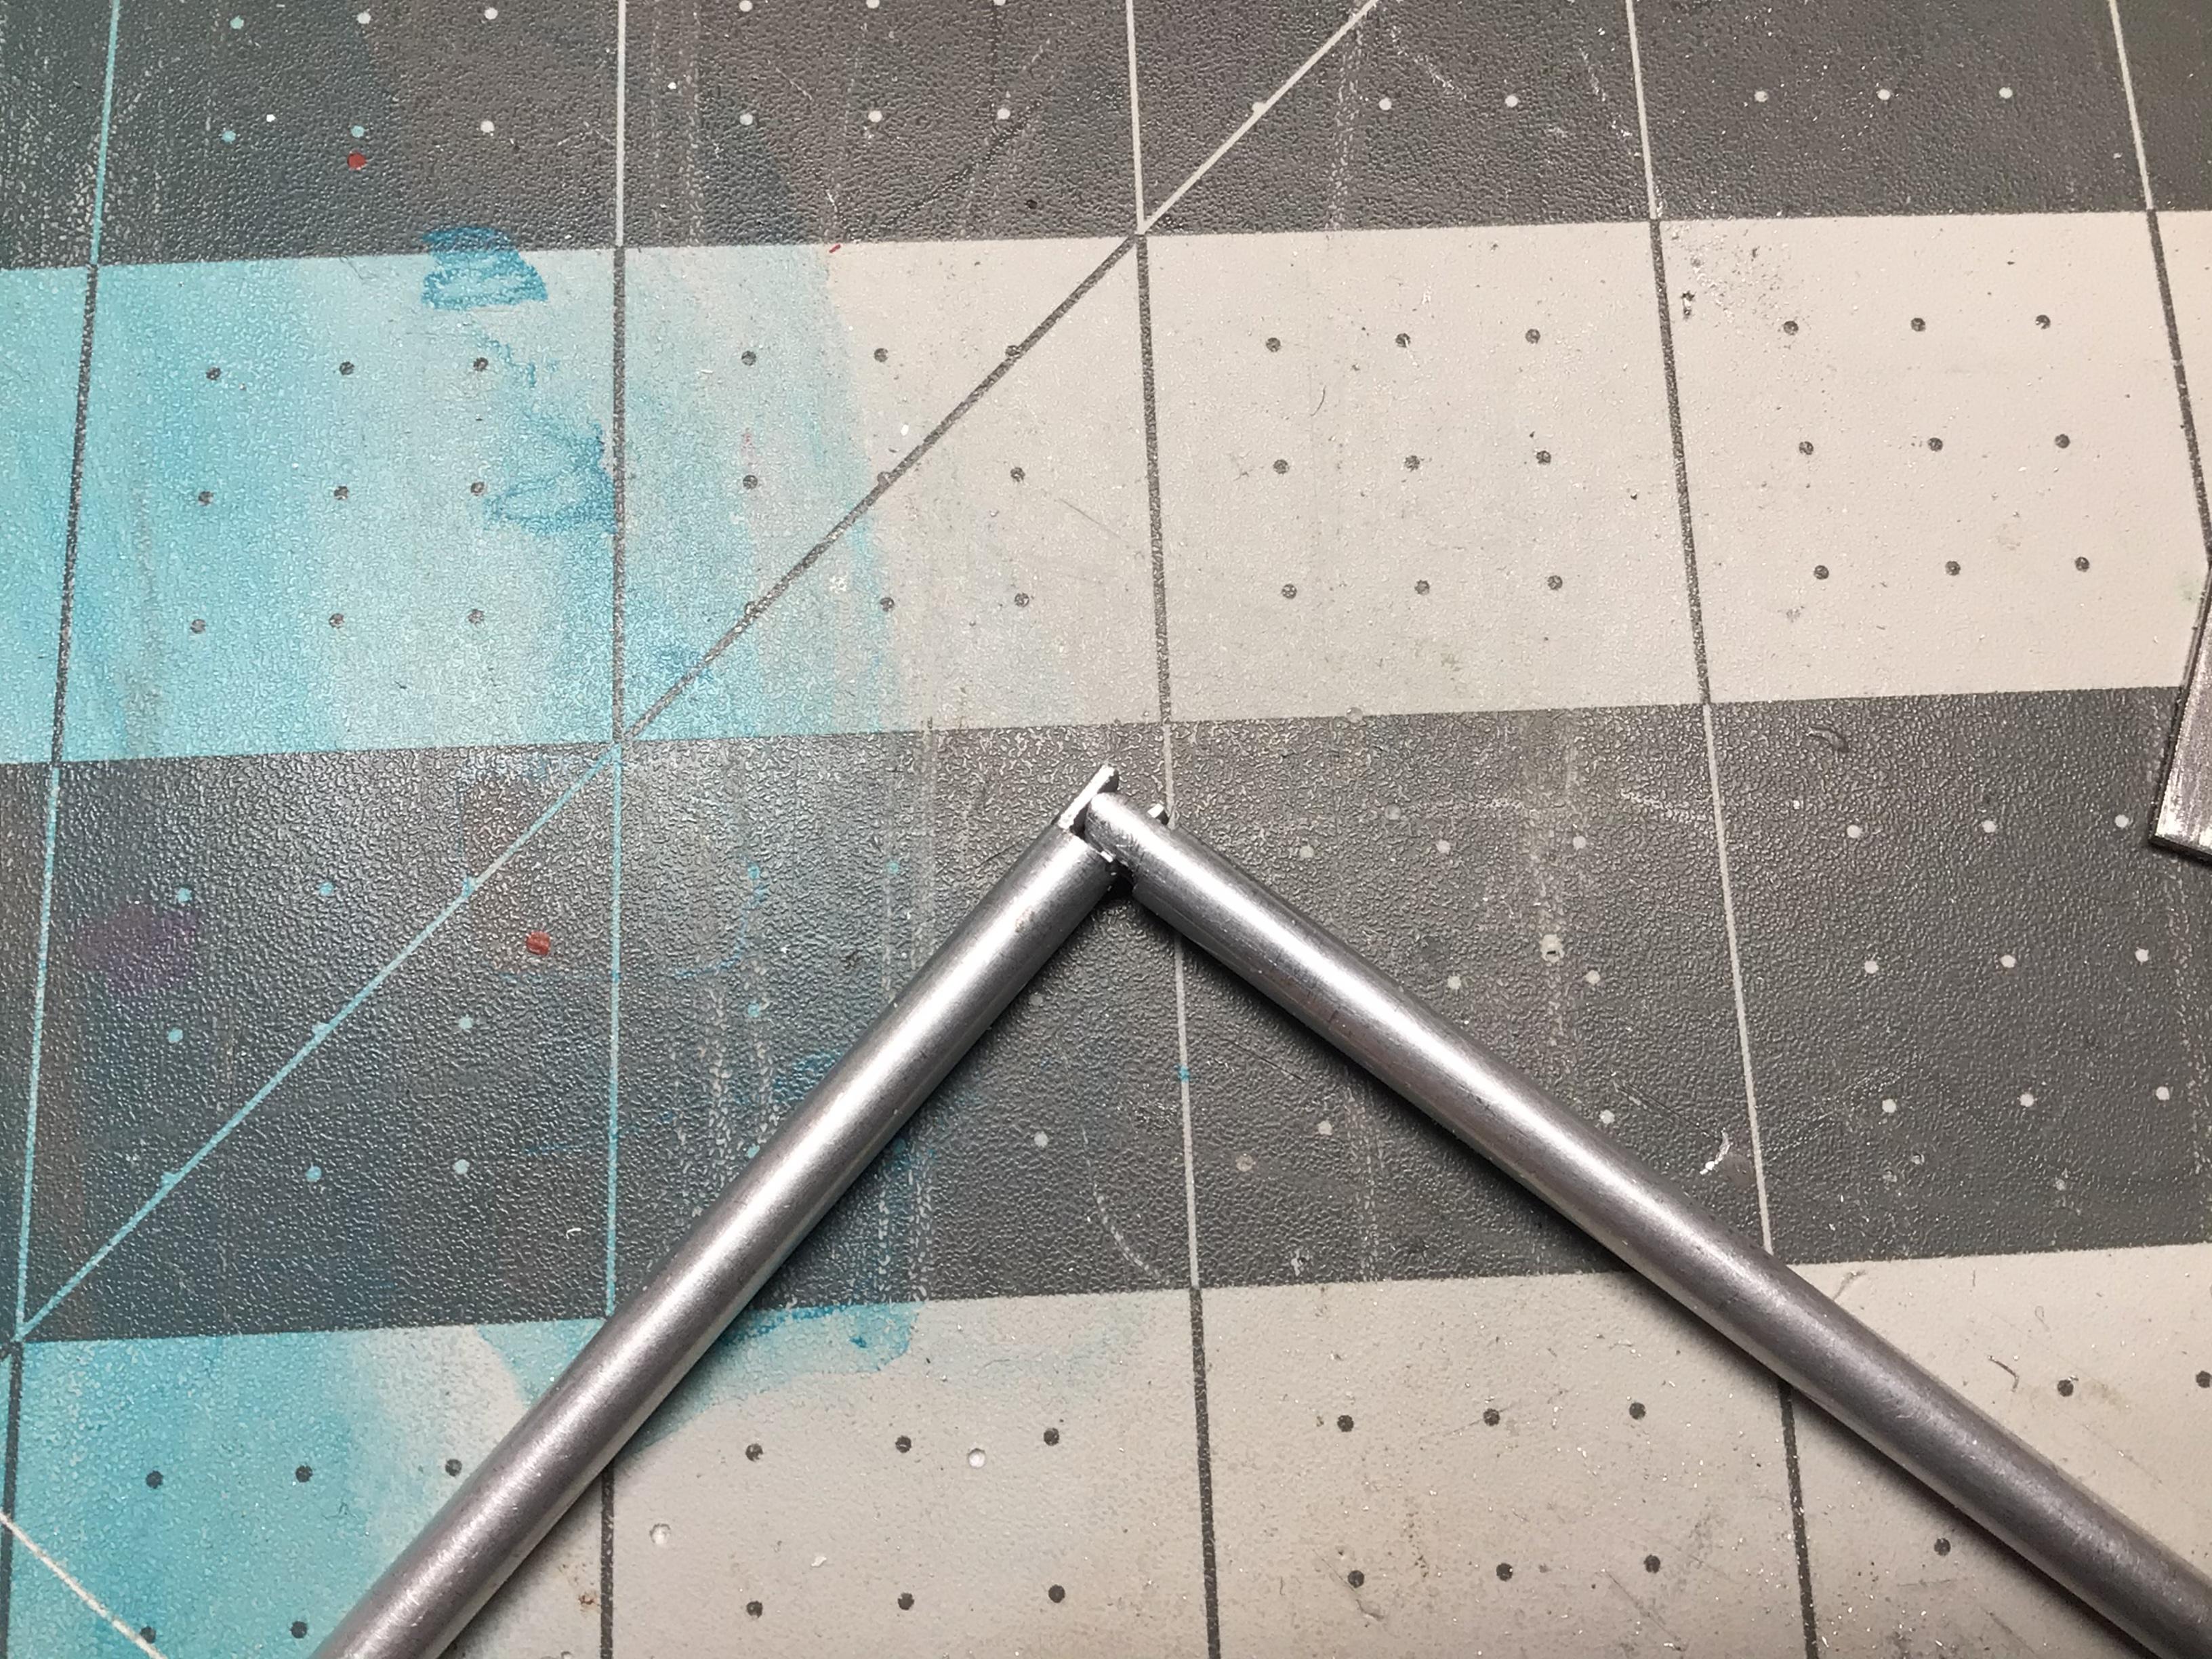
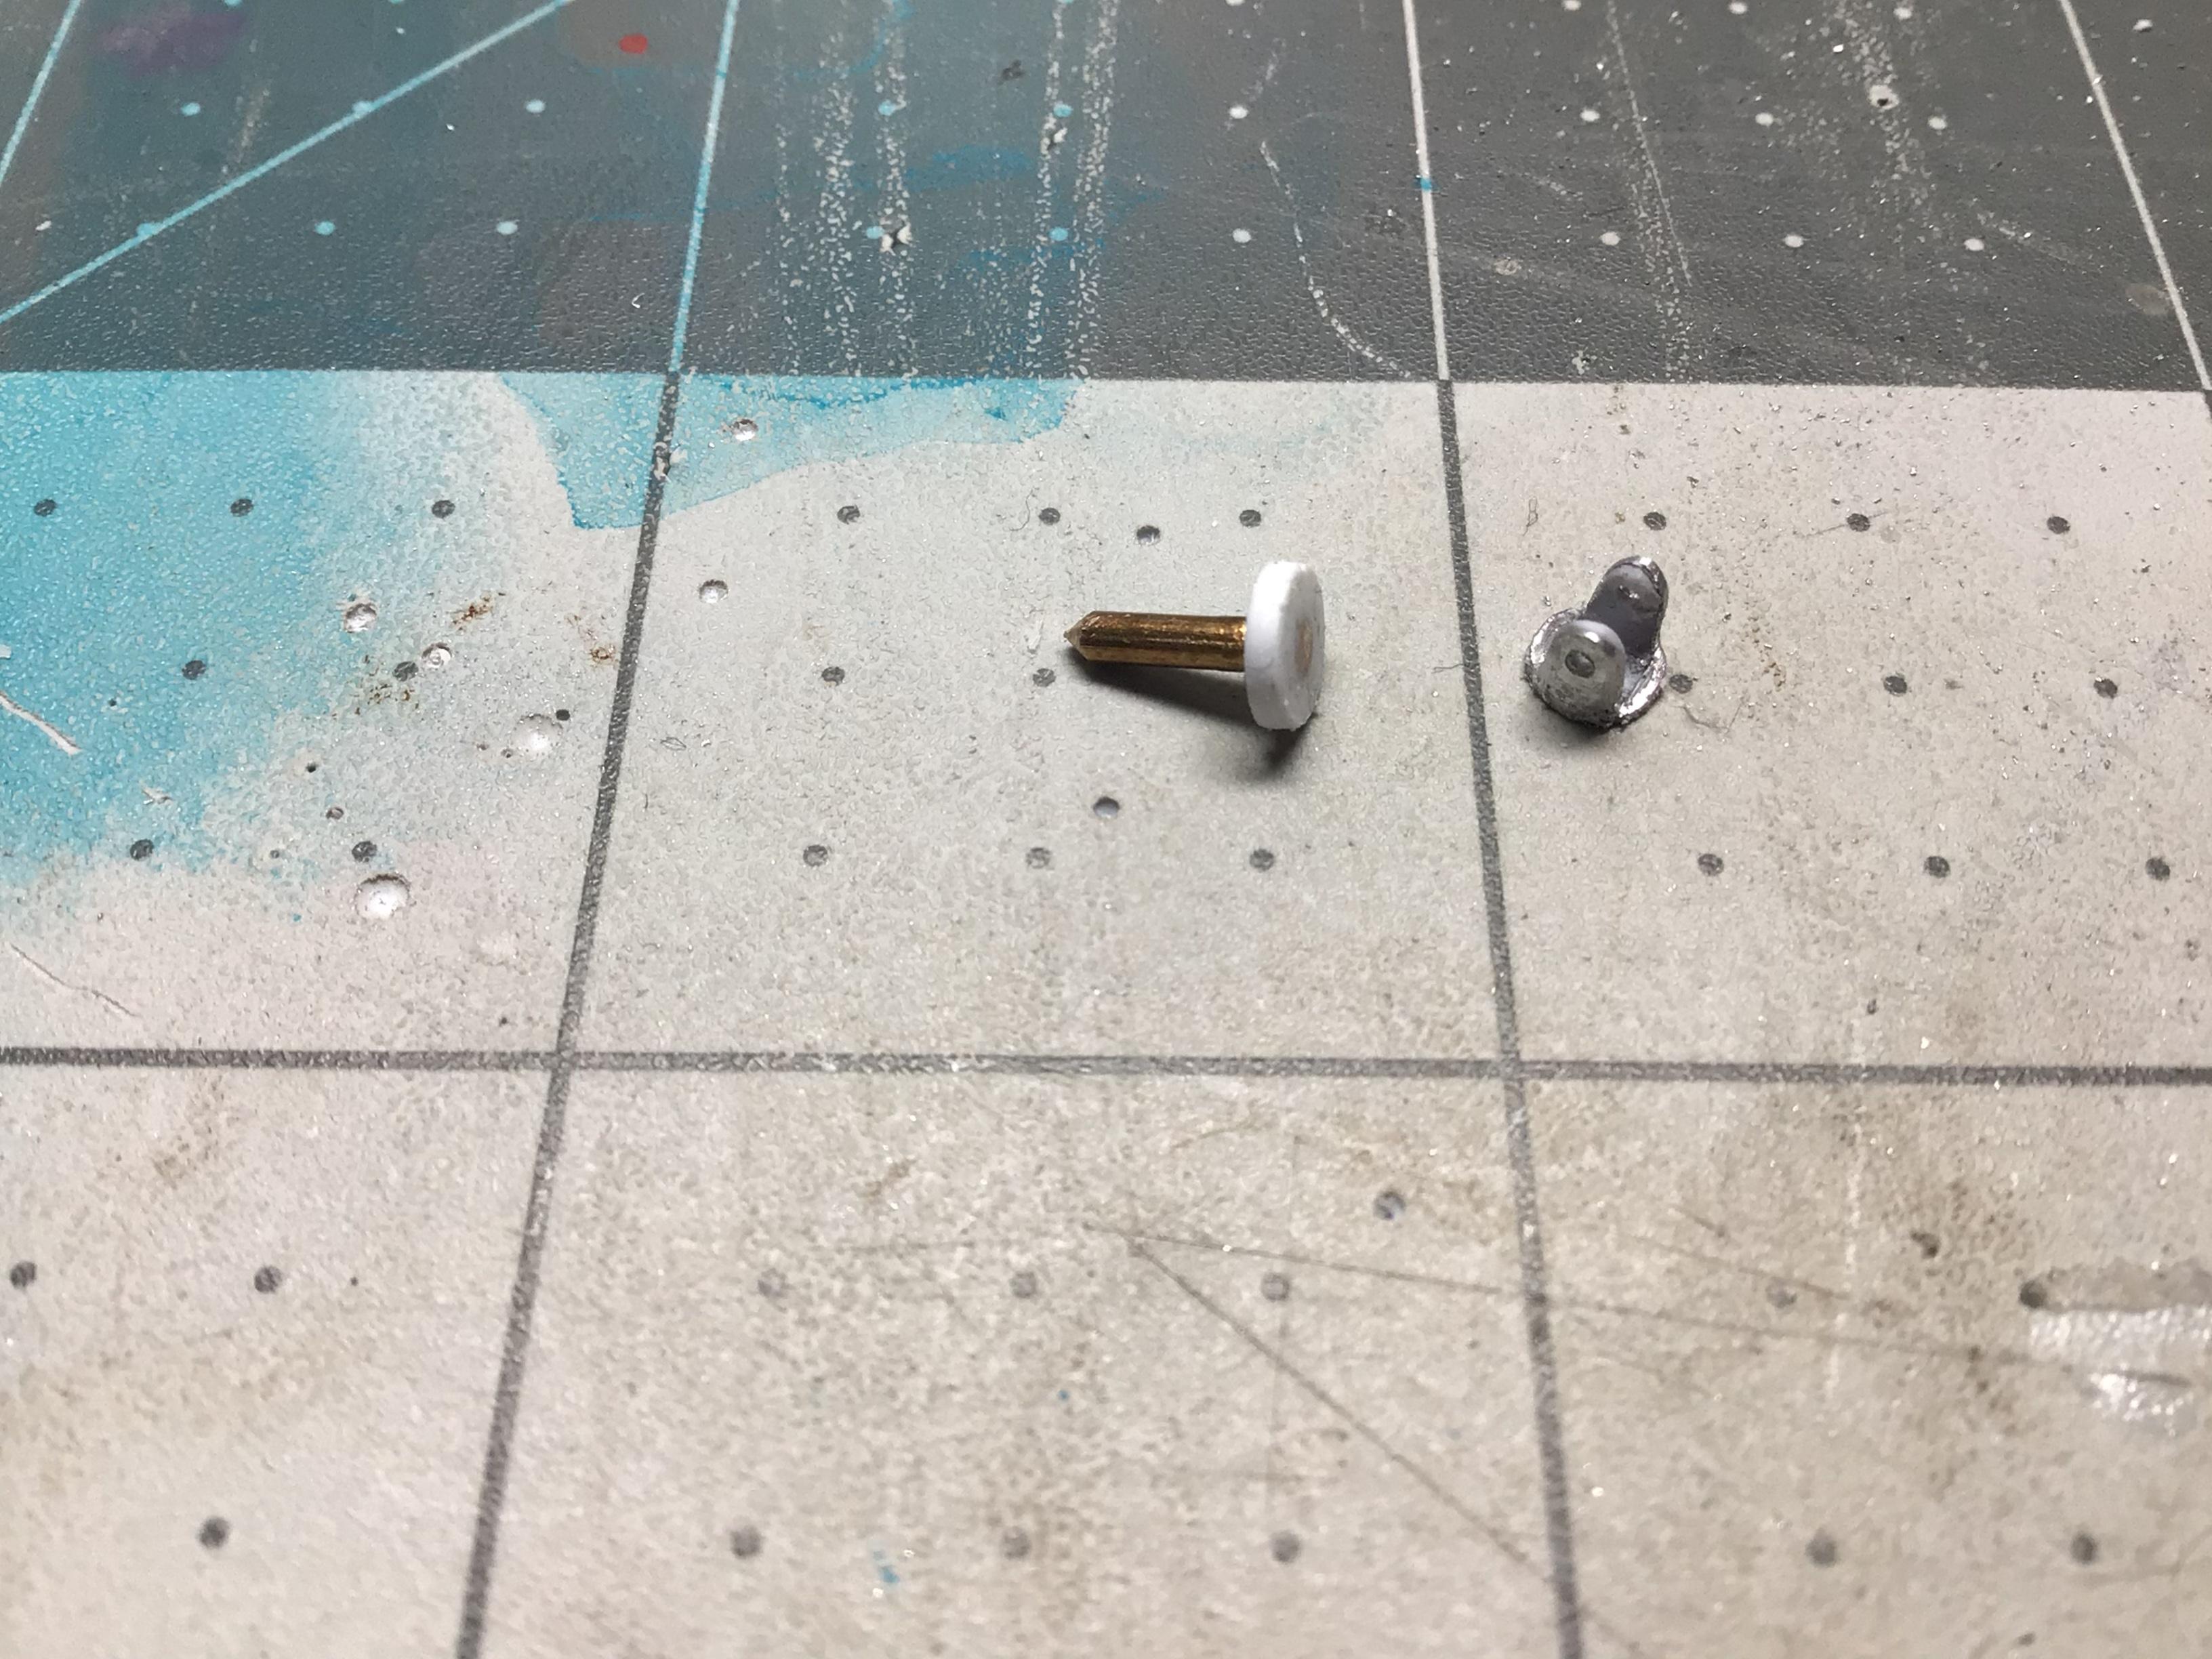
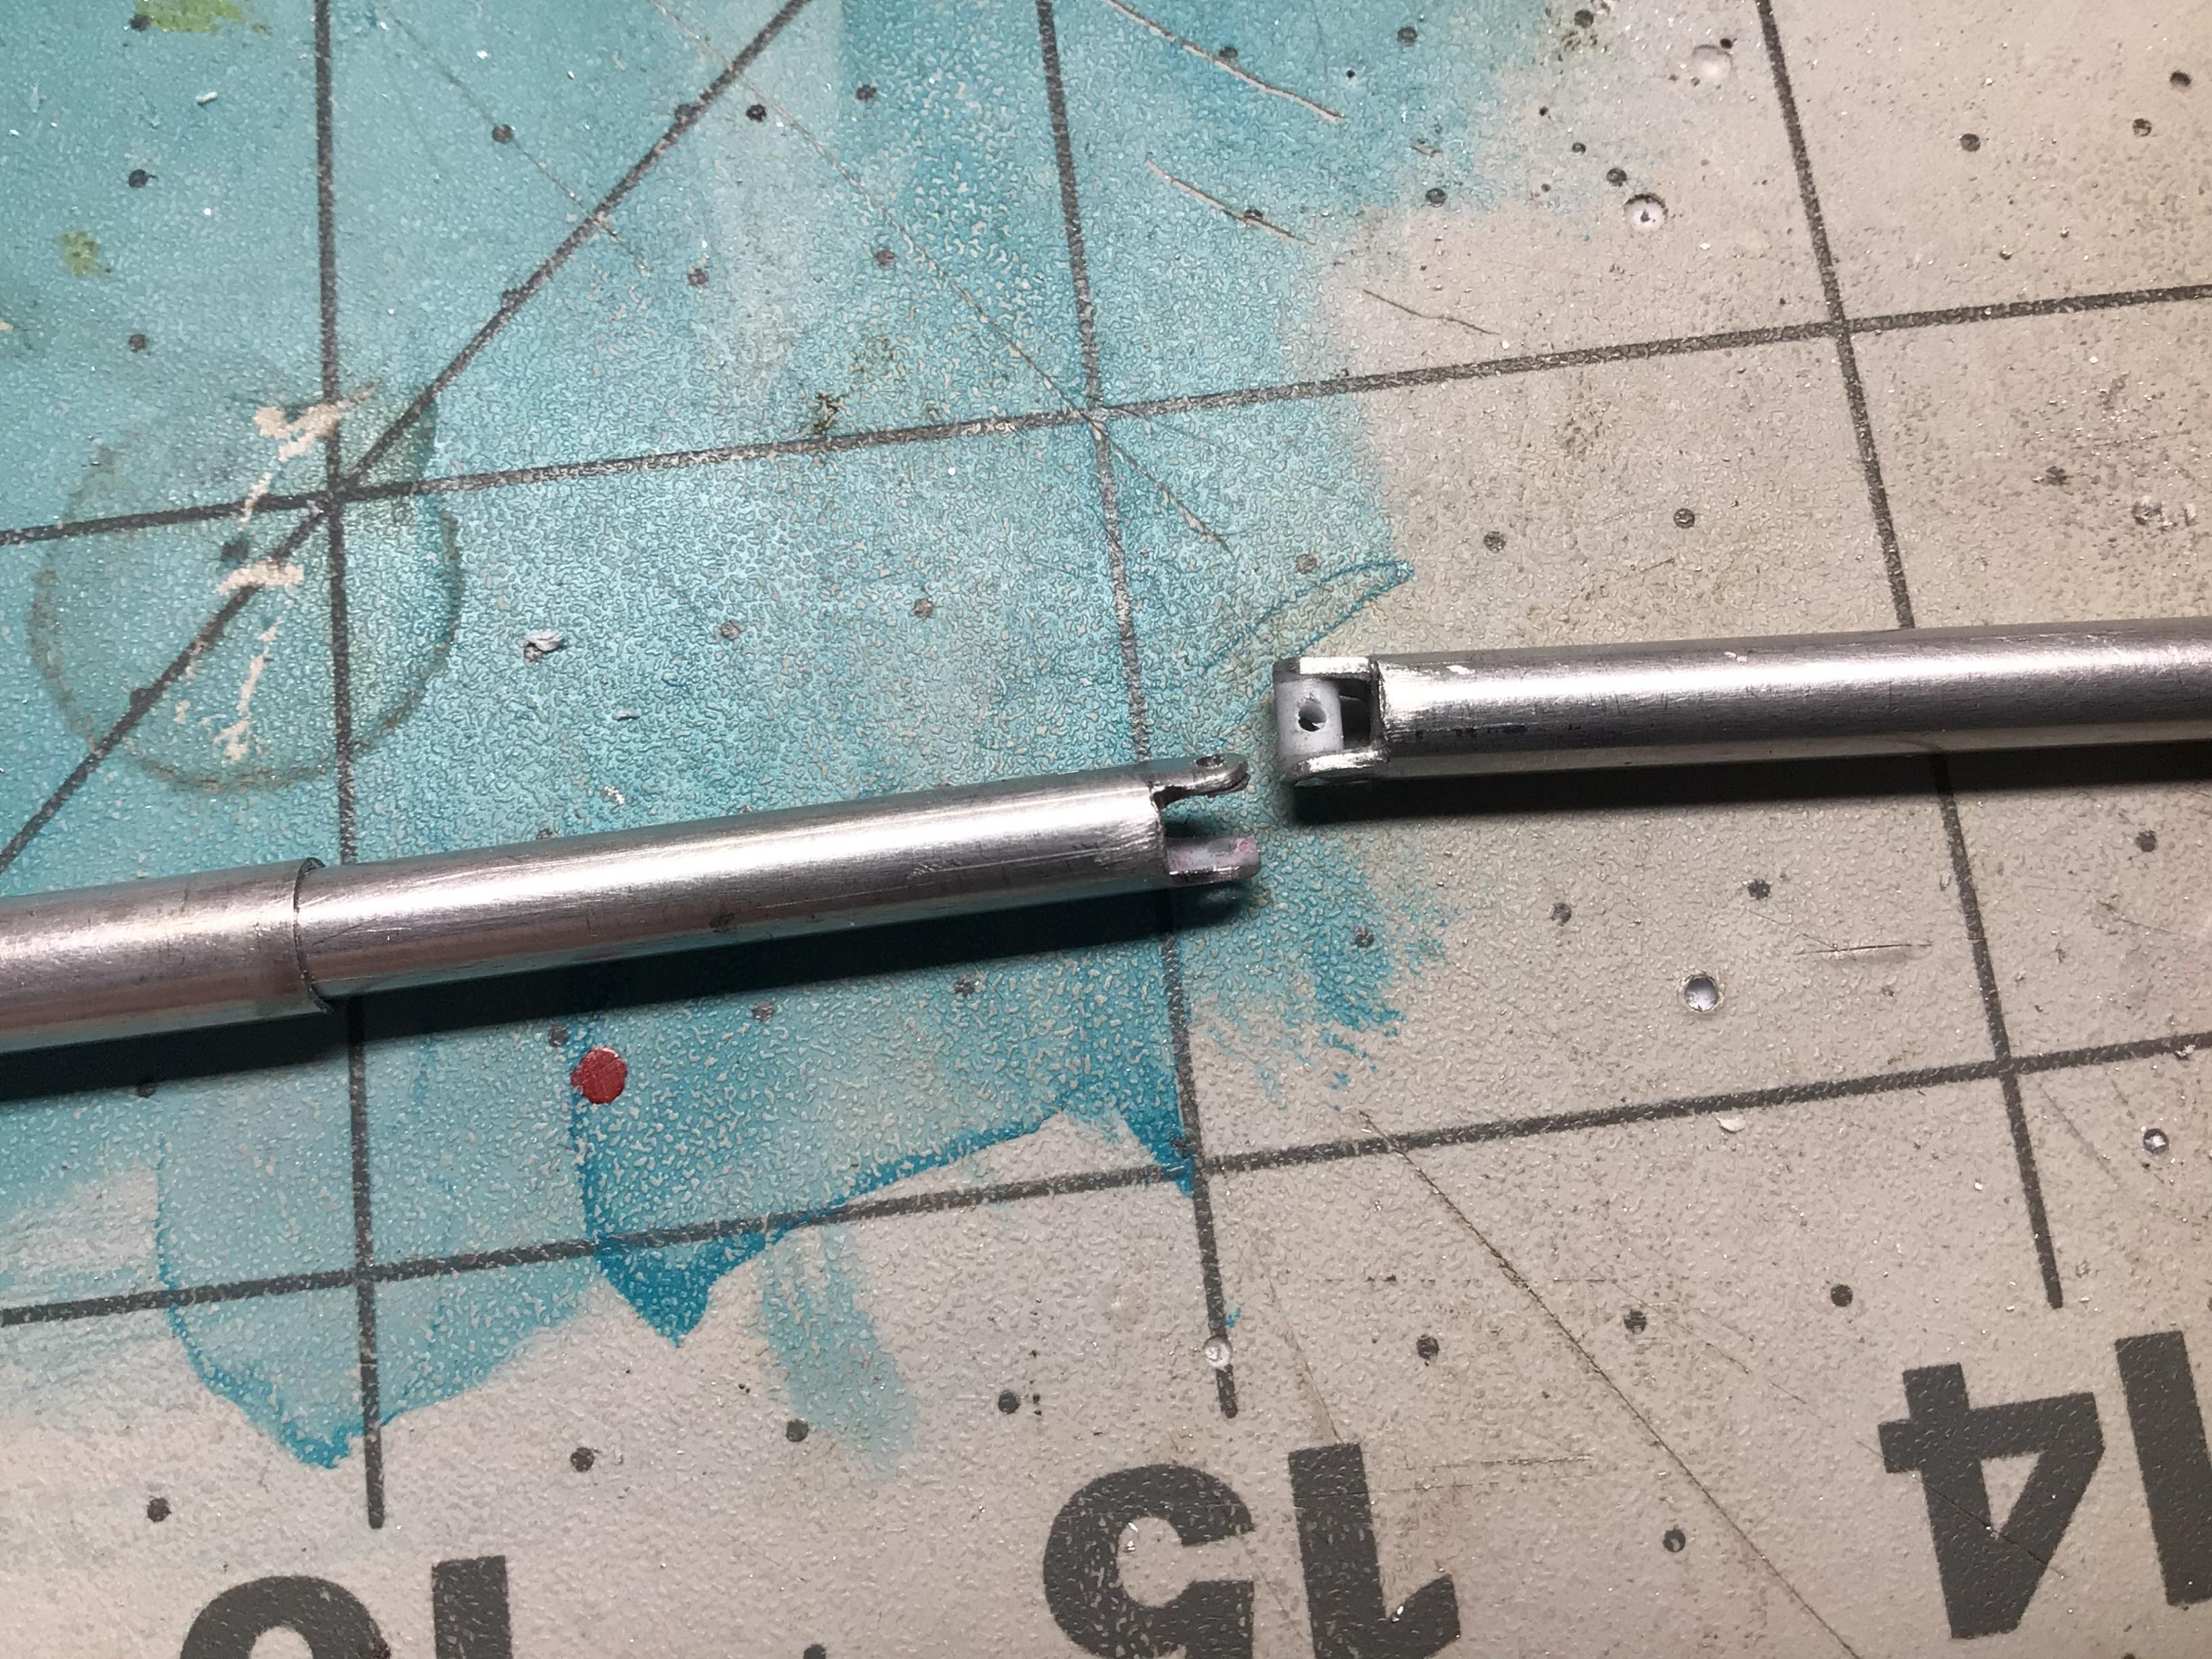
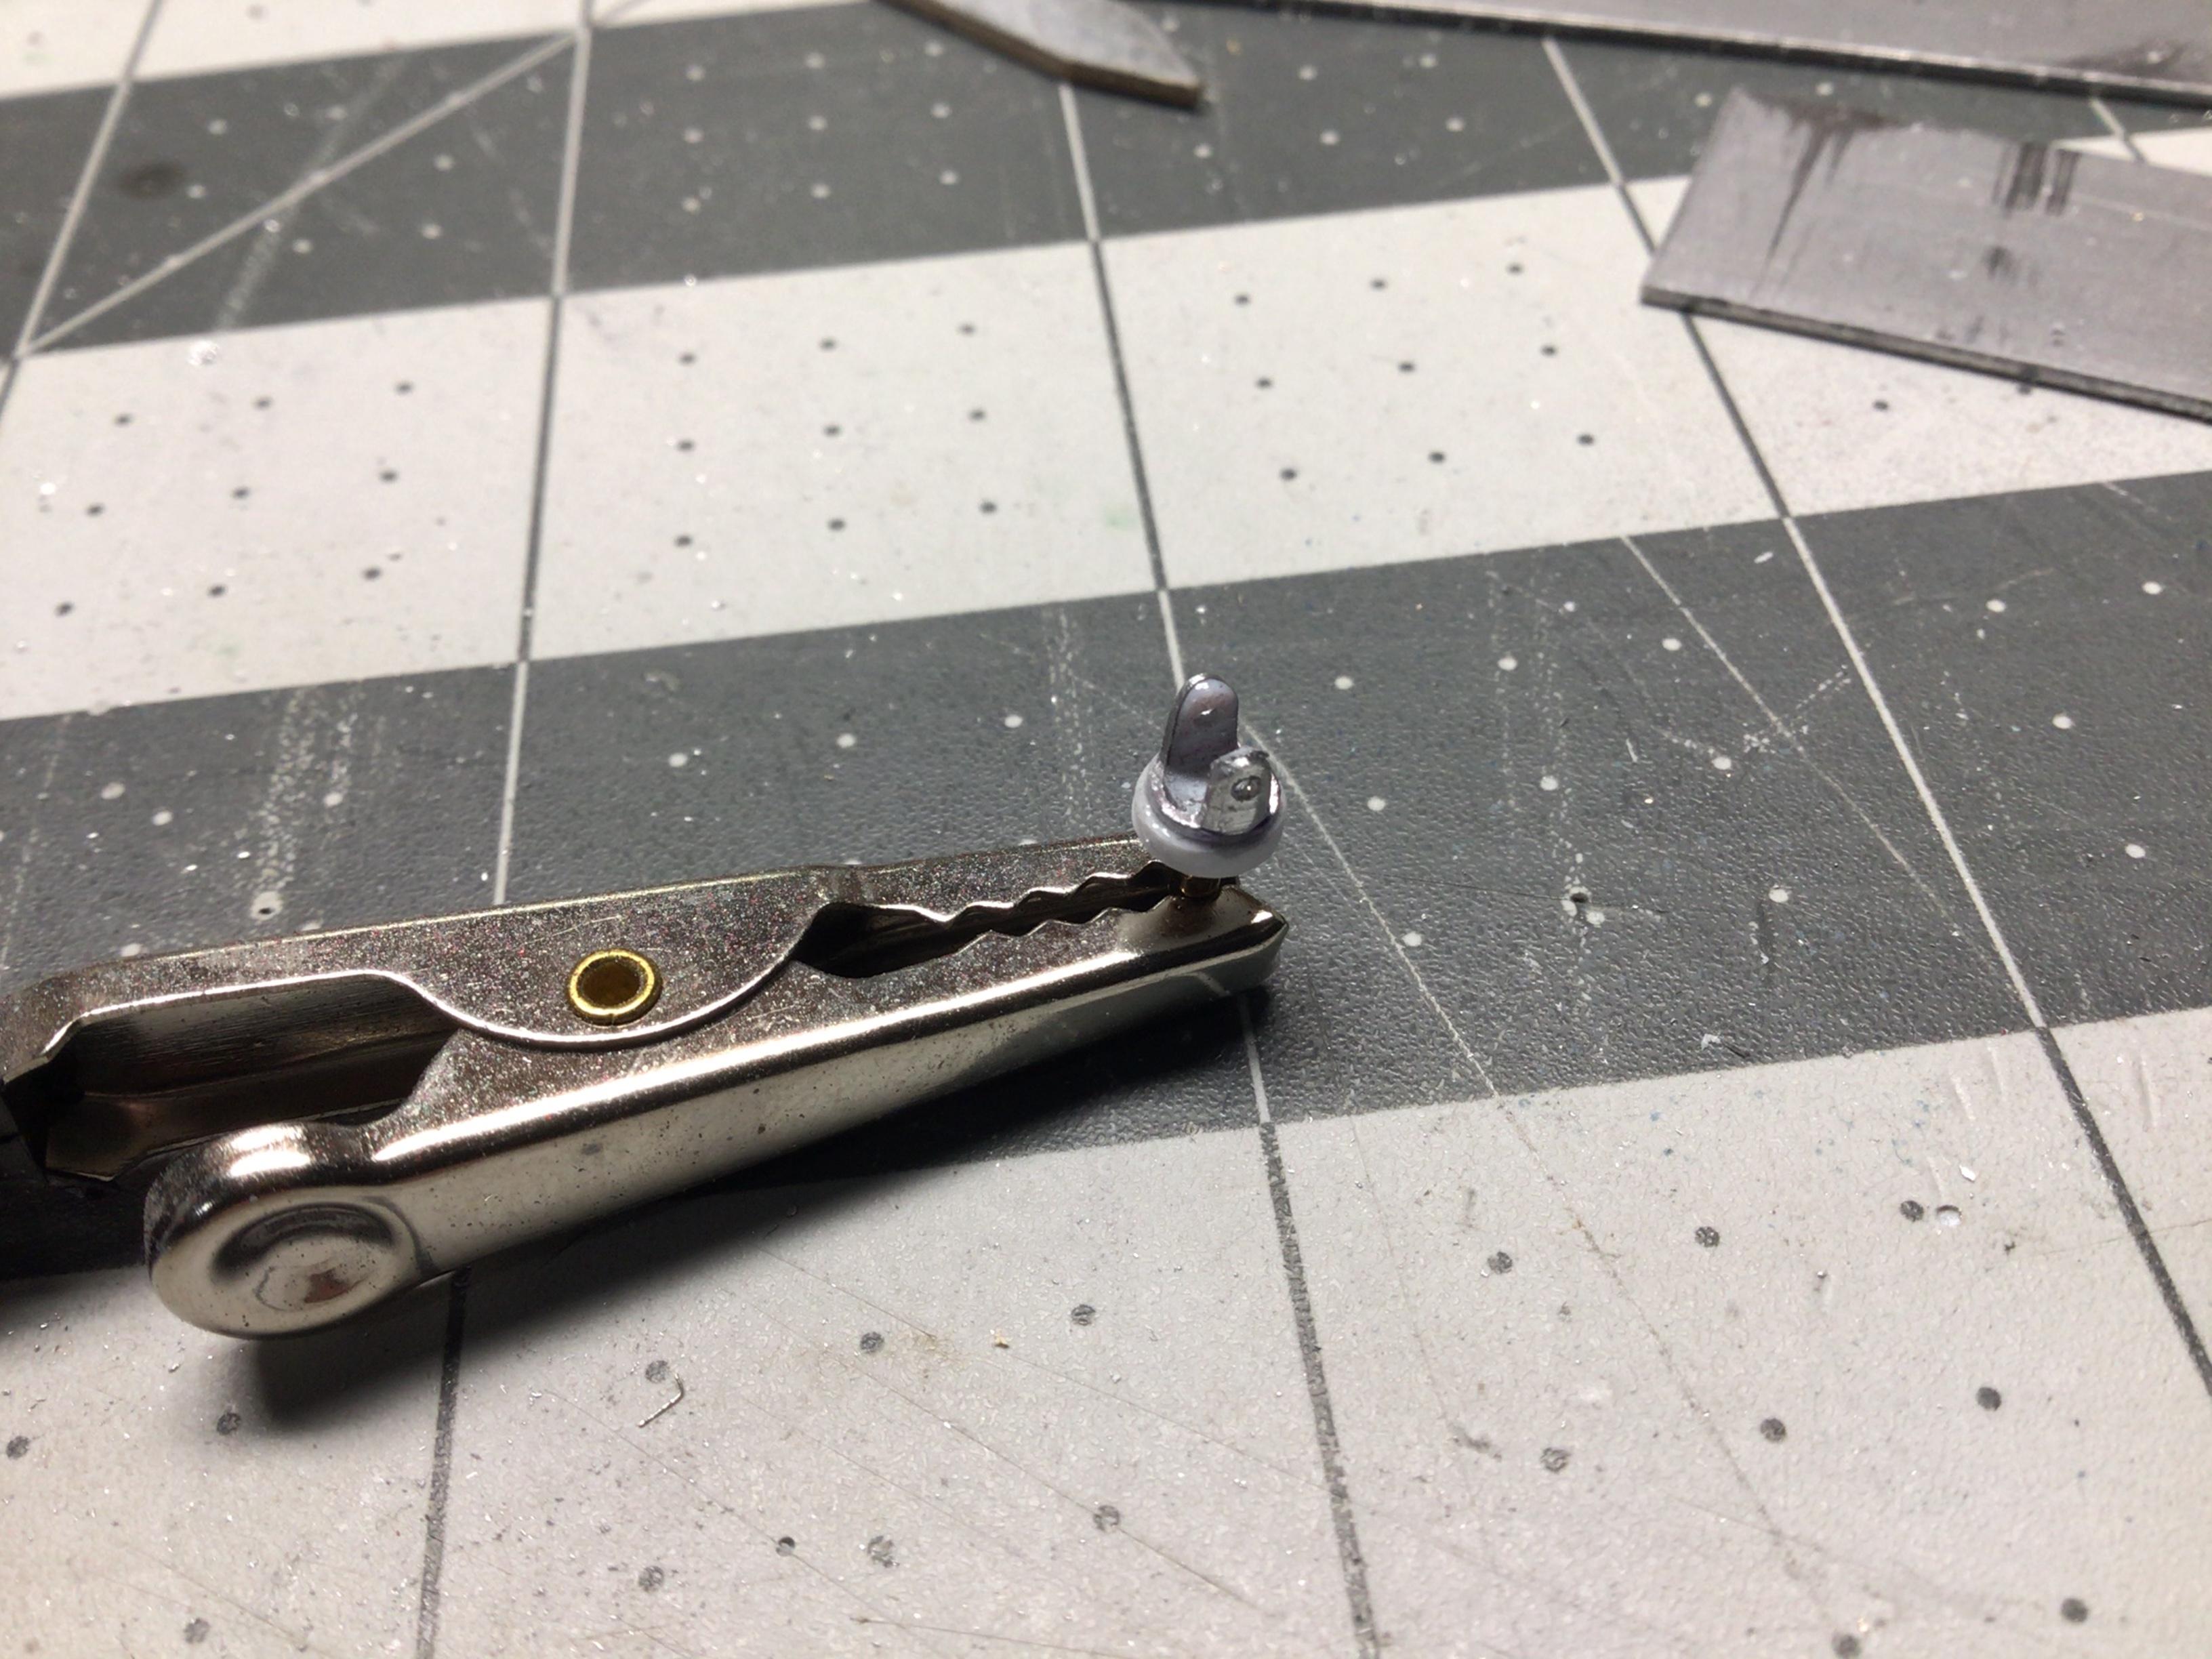
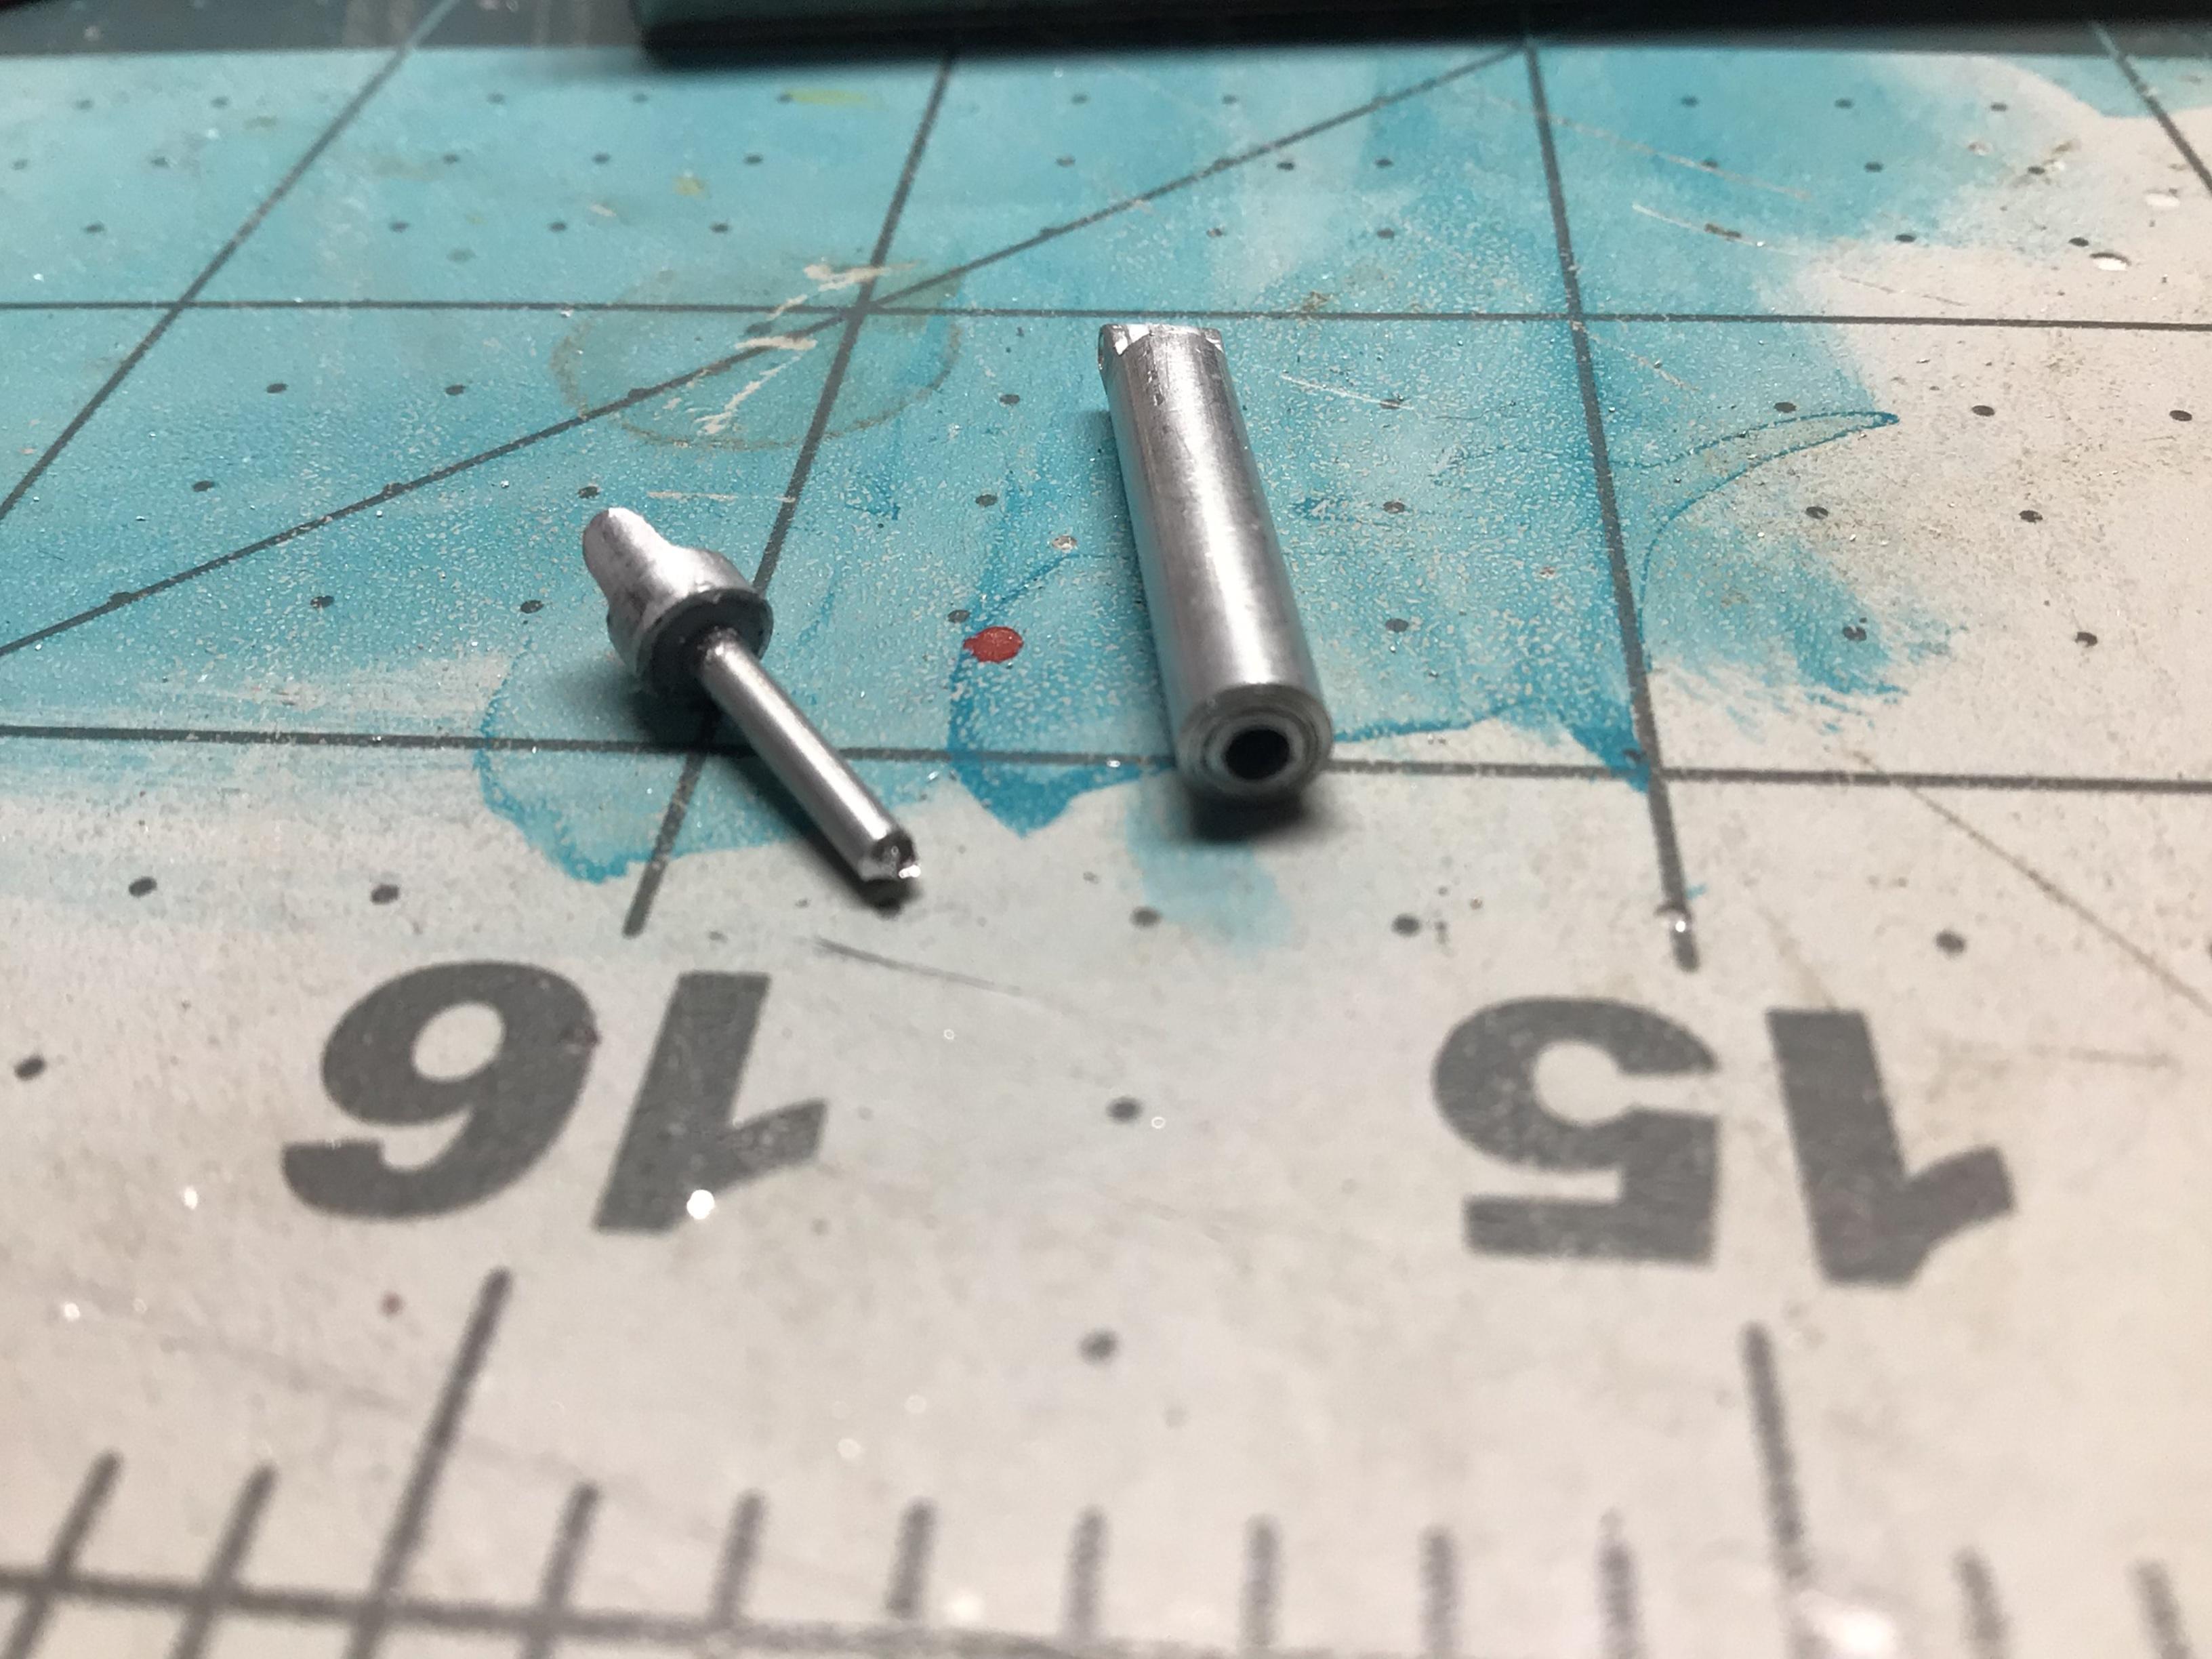
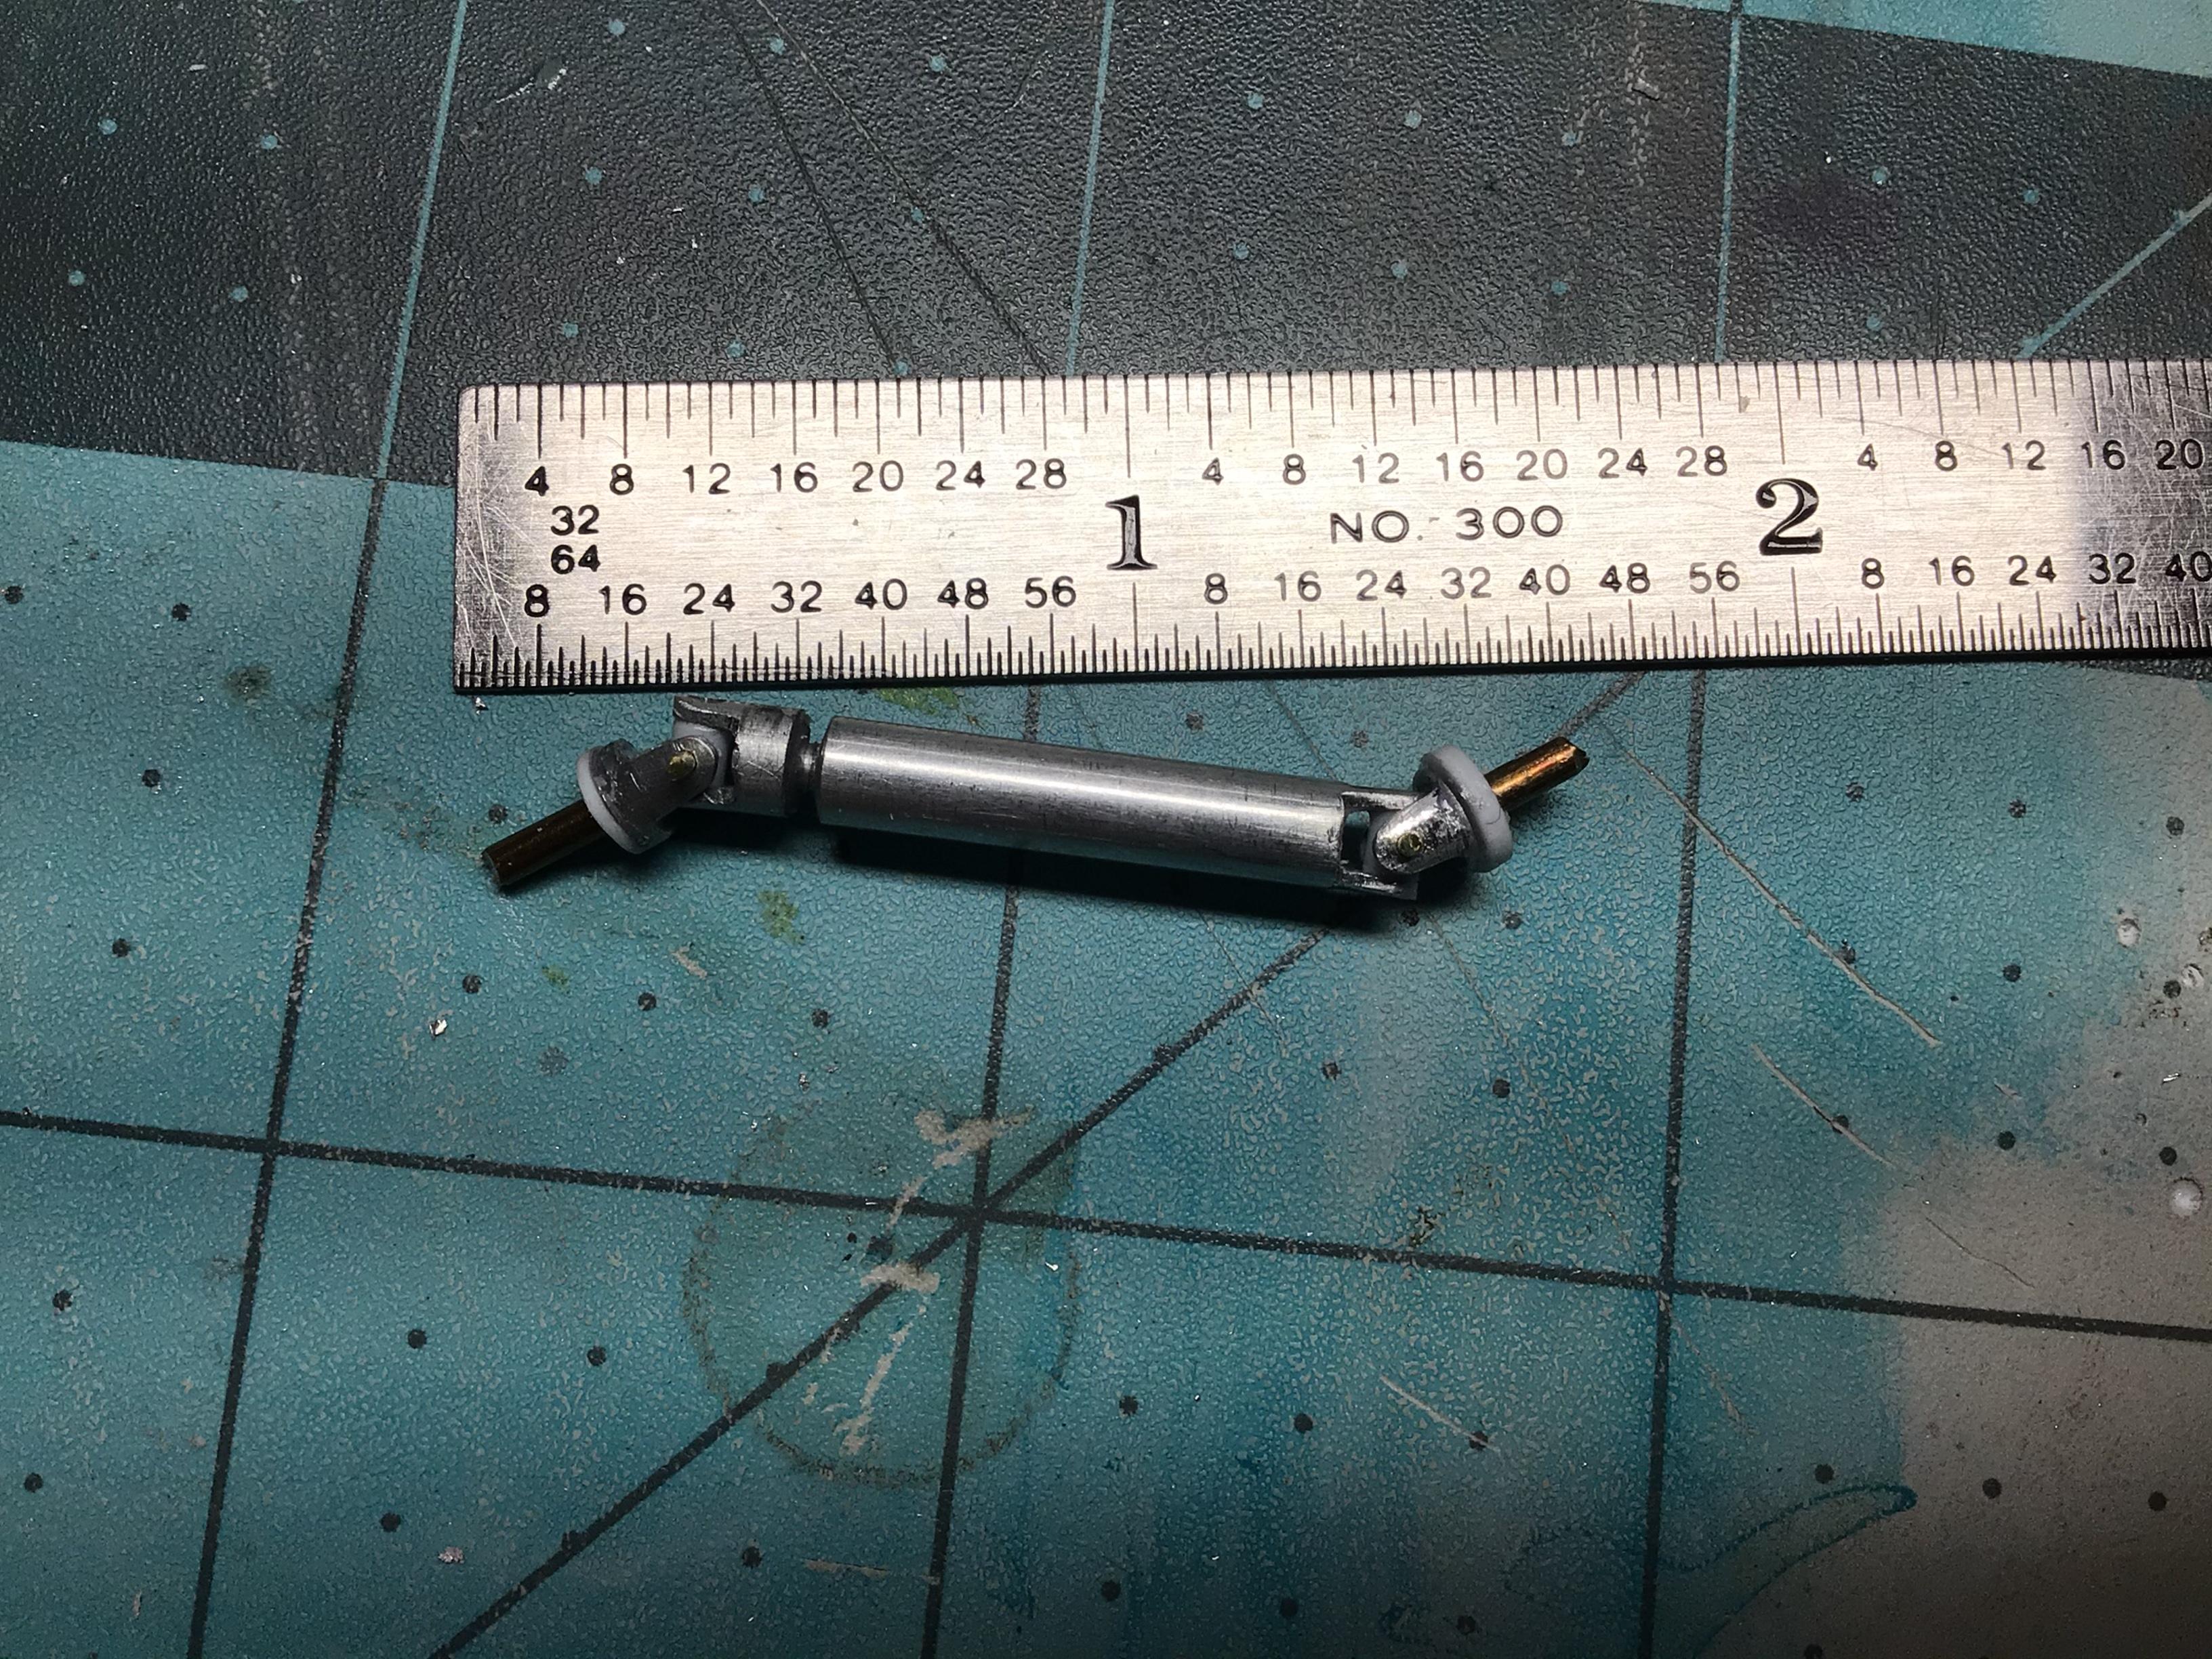
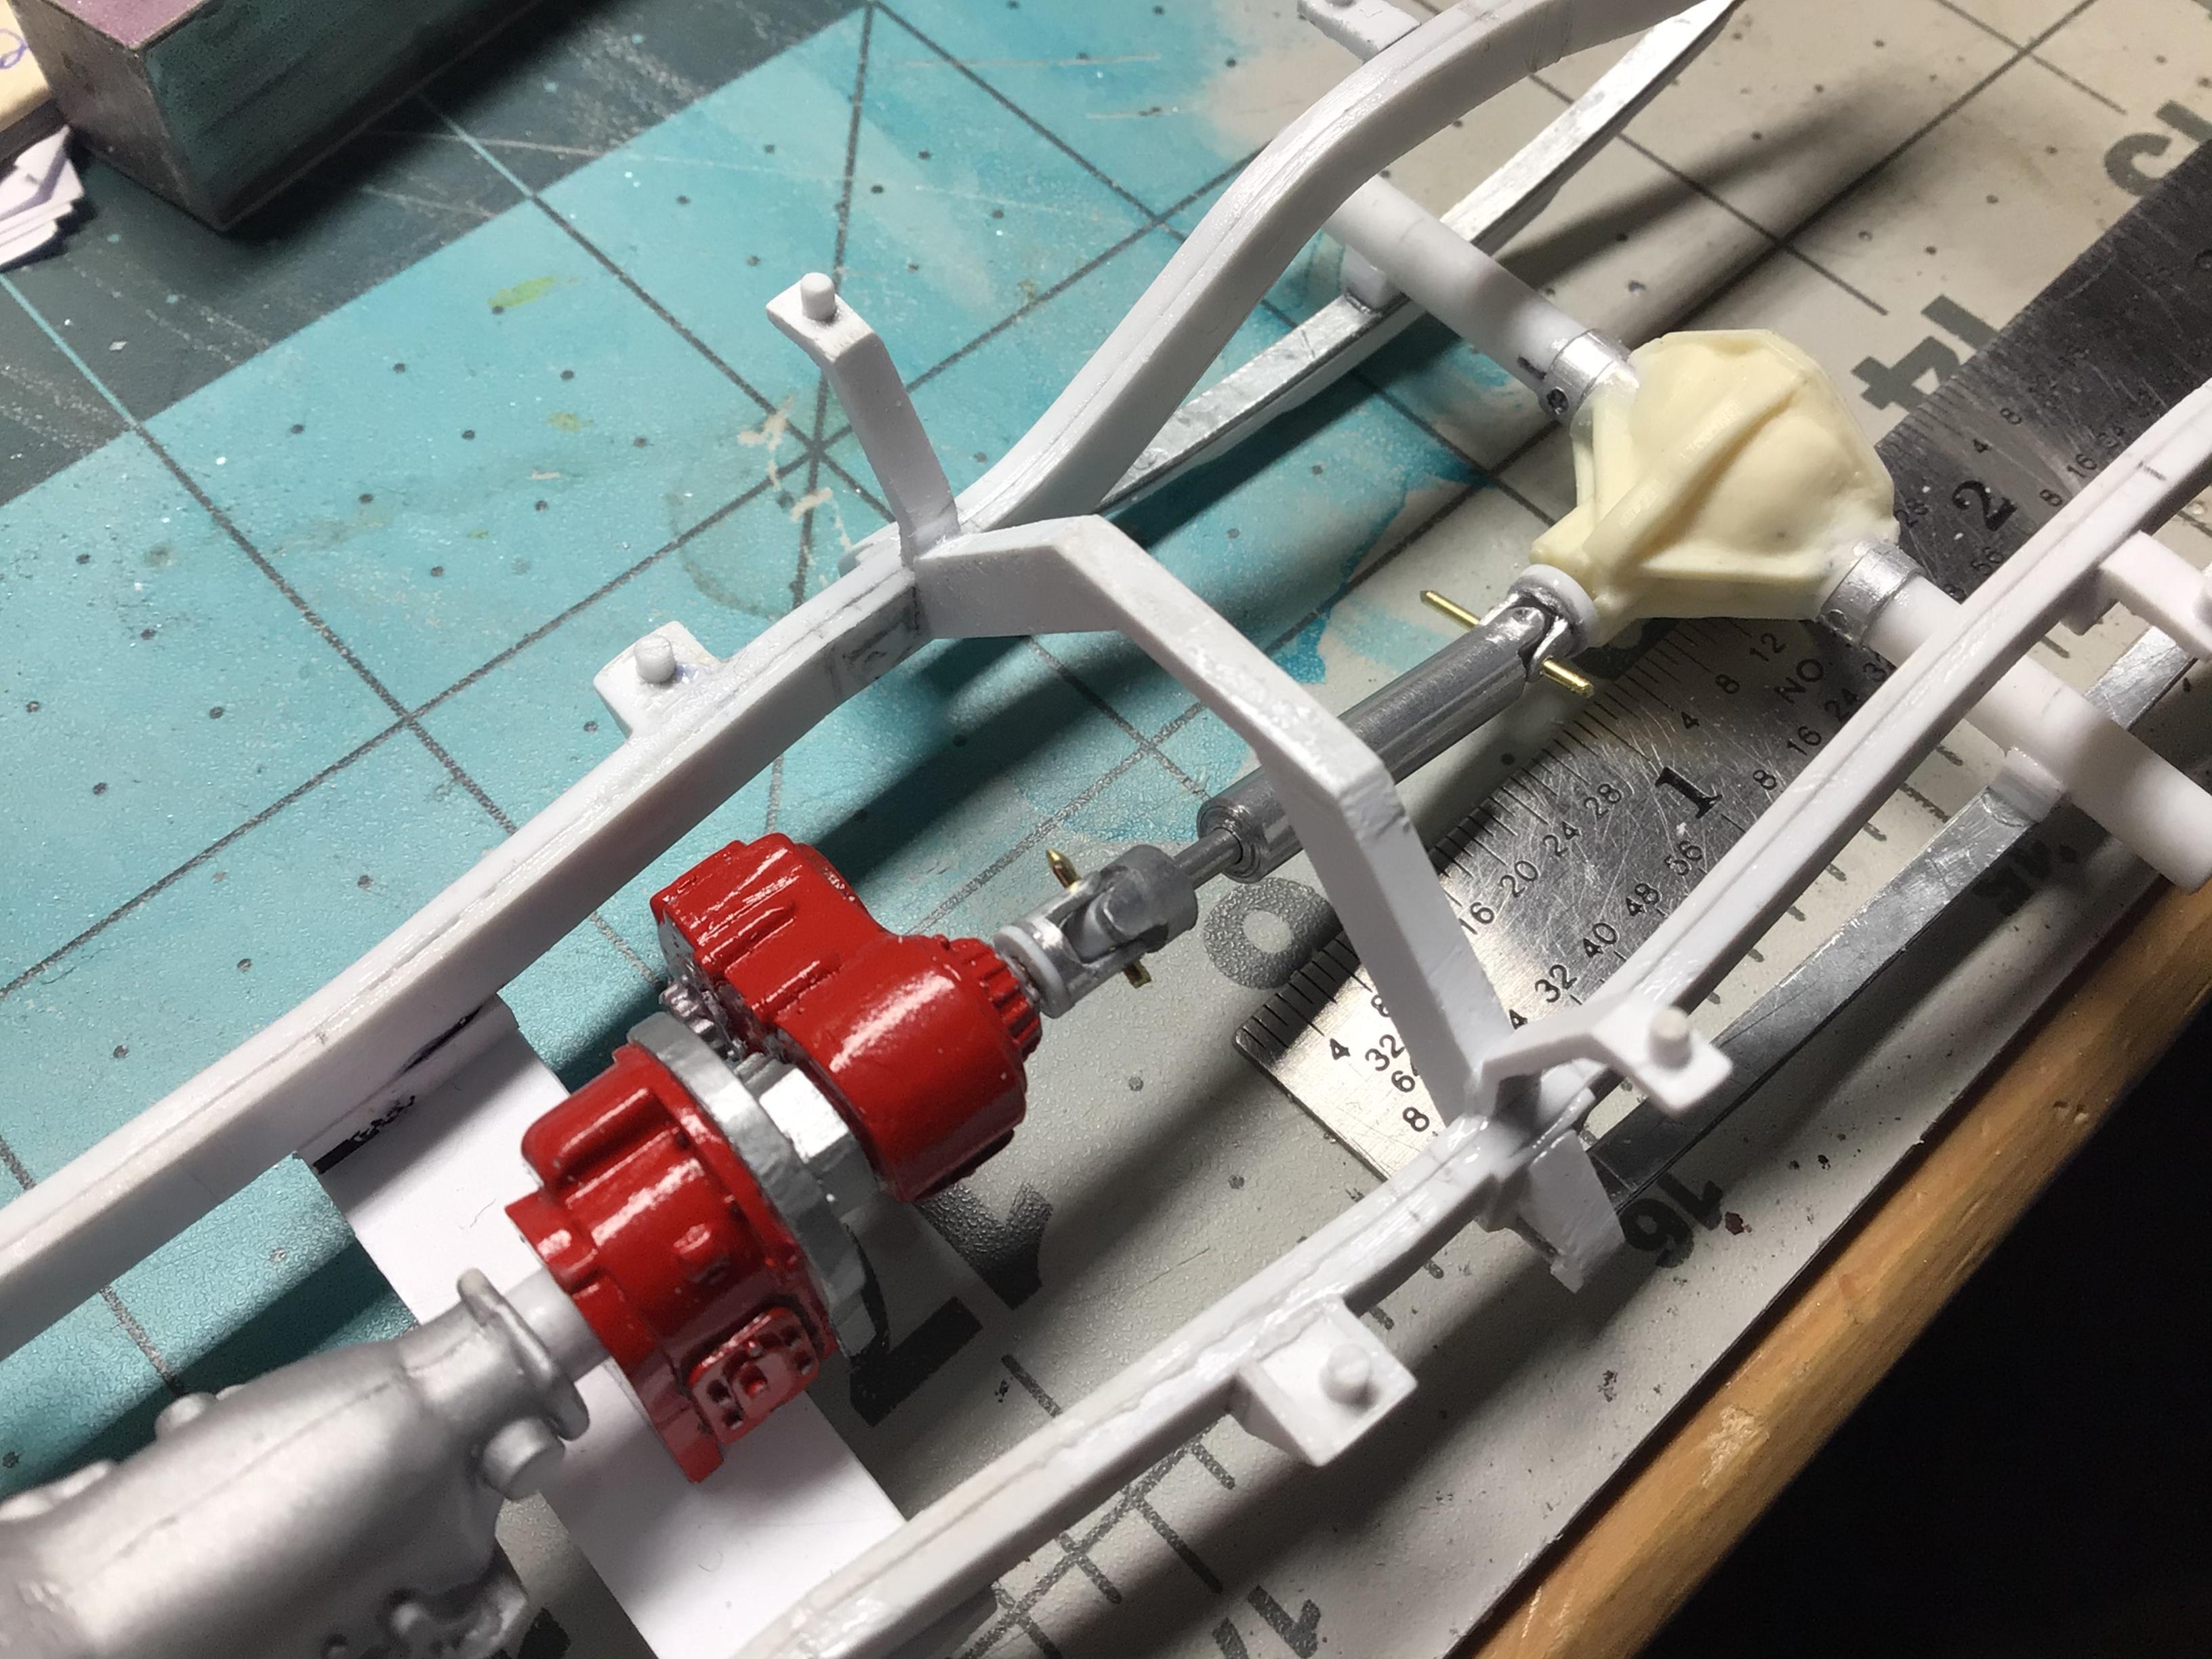
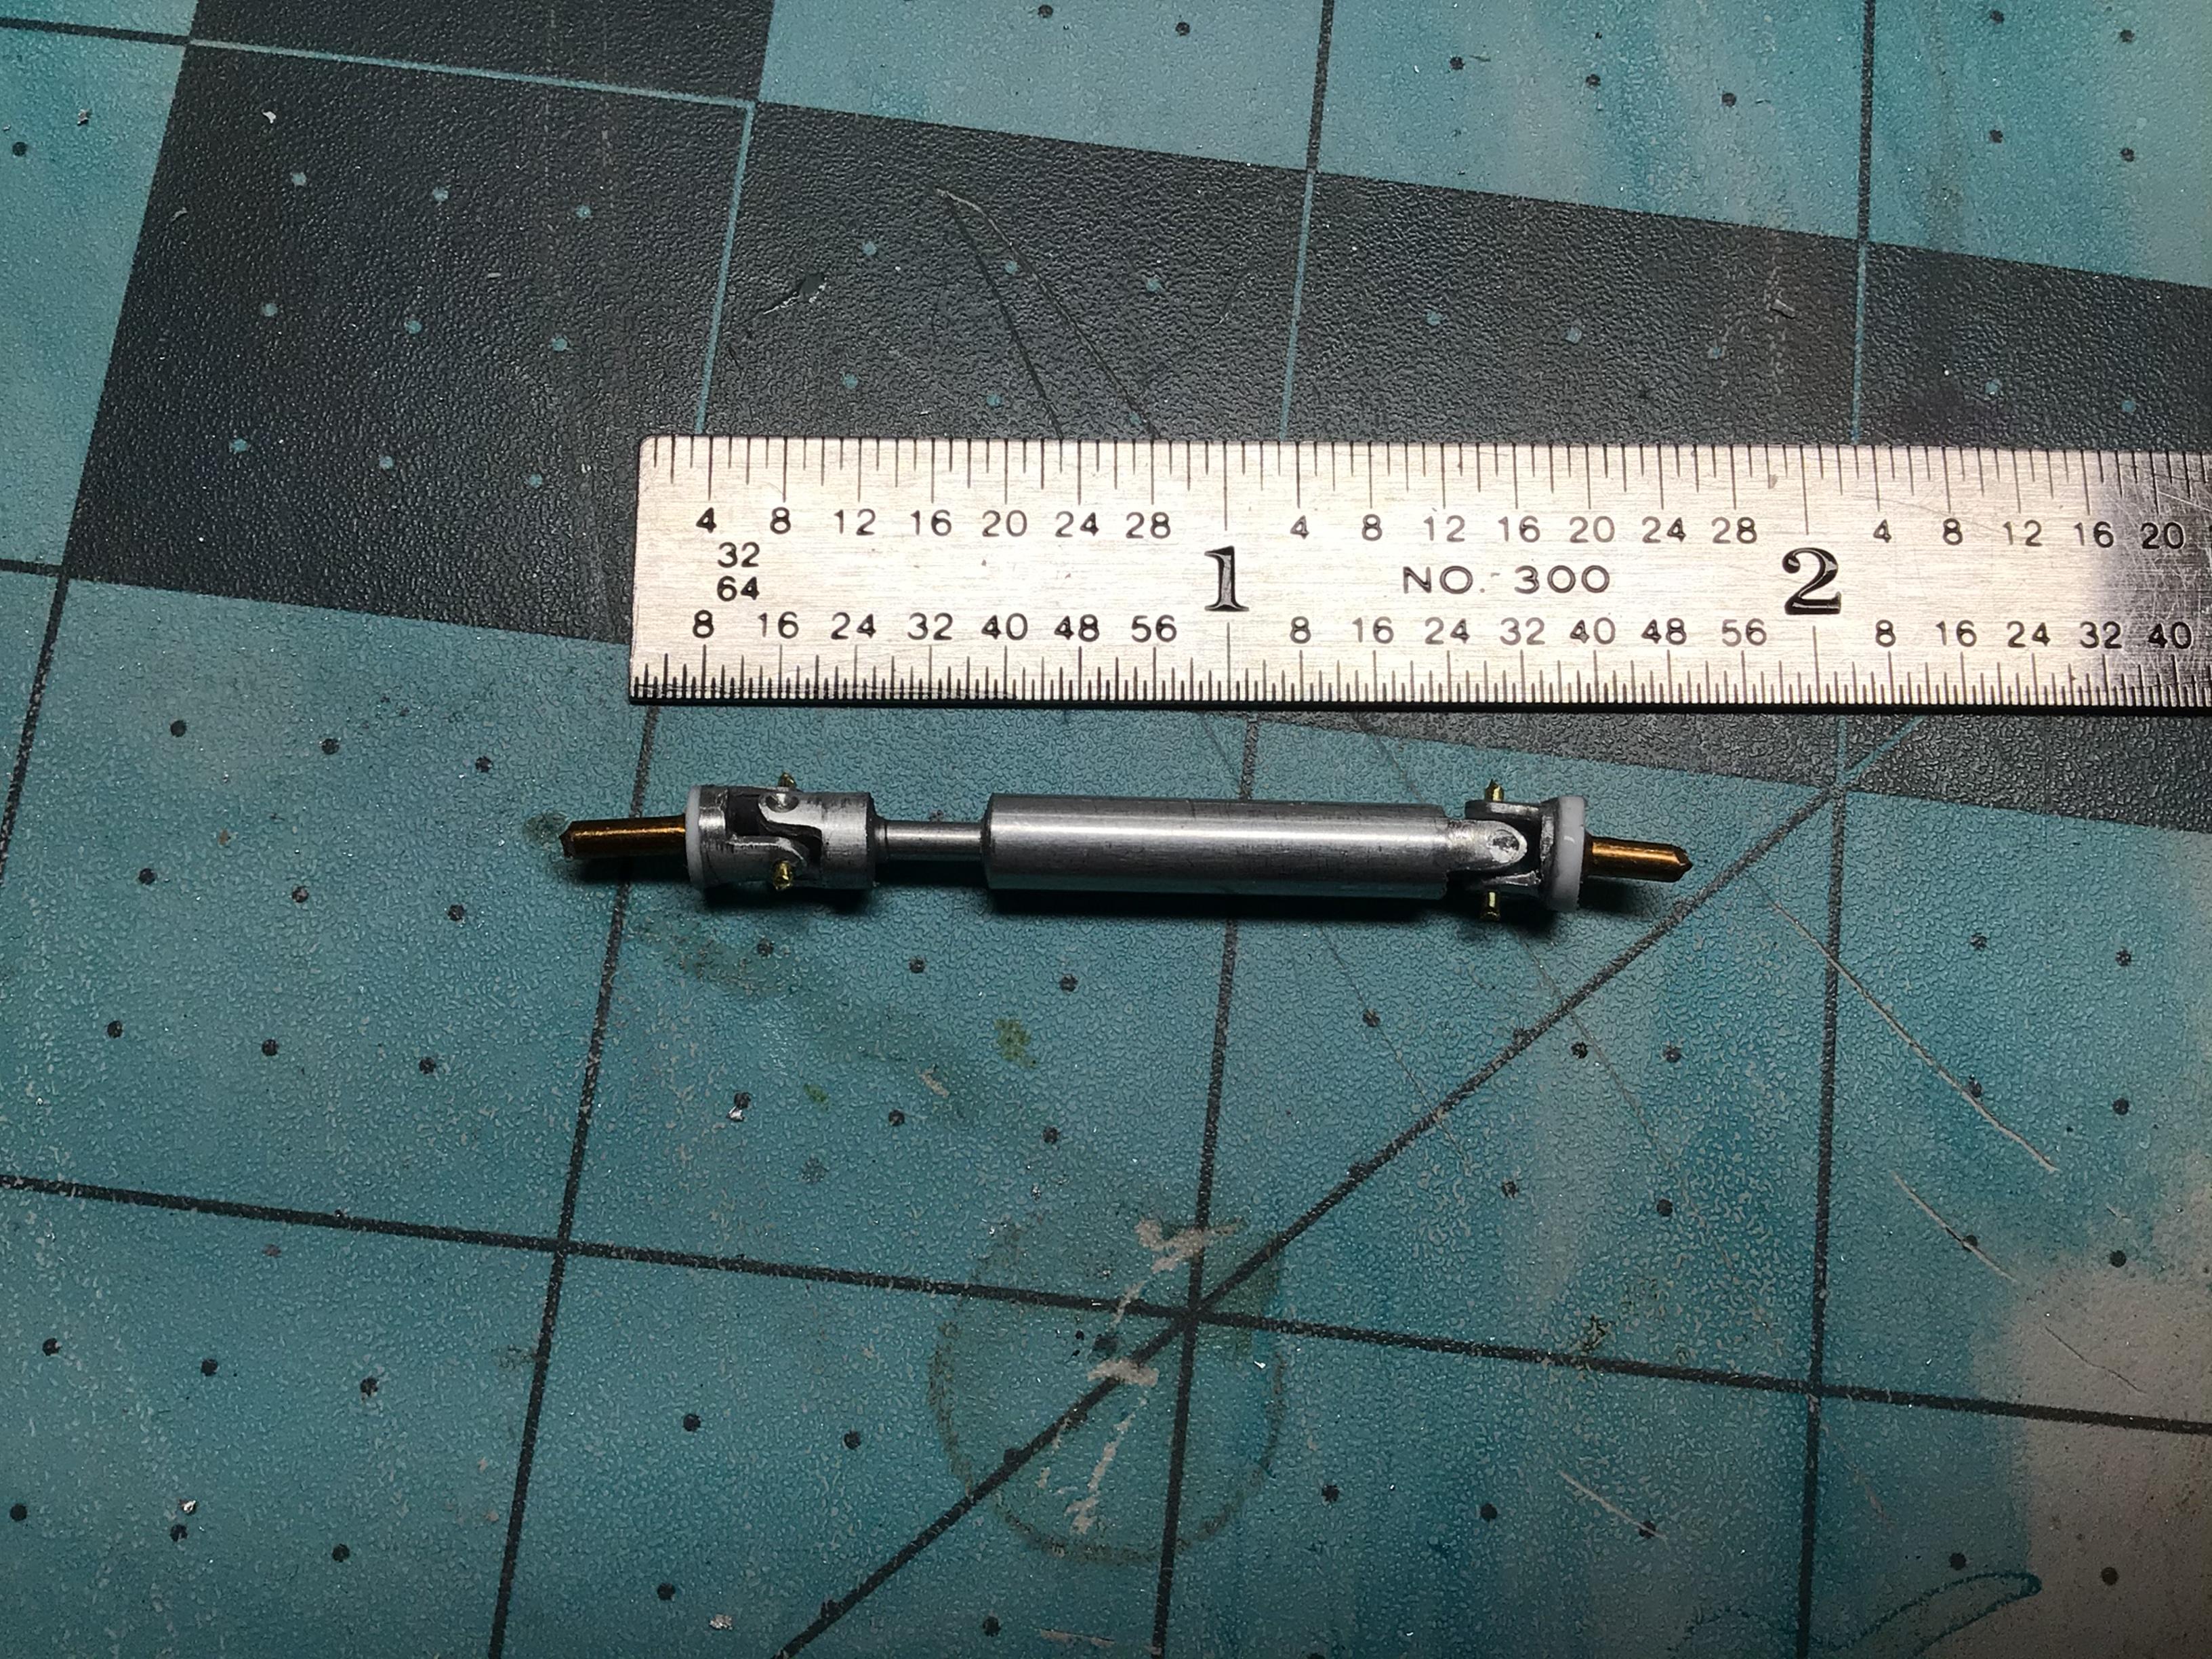
This is how I built a two piece telescopic driveshaft. It will articulate in one direction to allow for the transmission and differential being at different elevations. The main tube is 0.156” aluminum which scales out to 3.9” in 1/25th, or 3.75” in 1/24th. I plugged the main tube ends with 1/8” styrene and CA to approximately 1/4” deep. Then I made a slot about 1/8” deep and .090” wide. I have a small file that is that thickness, so that is what I used for a gauge. The “ears” now get filed to just under .090” wide so they will fit between the other ears. The tips of the ears can now be rounded off. The front and rear yokes get the ears drilled for a .032” brass pin. Two of the yokes can now be cut from the tube and a pin added that will slide into the transfer case and differential. I used a1/16” pin and drilled the T/C and diff to accept it. A piece of 1/16” aluminum rod is added to the third yoke to simulate a splined shaft. The ears on this yoke and the main shaft get a piece of .080” styrene rod glued between the ears and it gets cross drilled to accept the brass pin. The main driveshaft tube is cut to length and shimmed down with 1/8” and 3/32”aluminum tube and CA. Once the CA is dry, the “splined” yoke will telescope into the main shaft. The front and rear yokes can be connected with a brass pin. Once installed the pins can be trimmed and glued in place.
-

1966 Chevy Suburban - Revell
NOBLNG replied to MarcoTJ's topic in Model Trucks: Pickups, Vans, SUVs, Light Commercial
Nice! Exceptionally clean build. Very real.? -
Superb work, and great that you’ve kept those originals in such perfect condition.
-
'56 Ford mini pumper
NOBLNG replied to leafsprings's topic in WIP: Model Trucks: Pickups, Vans, SUVs, Light Commercial
Great idea! Looks like a fun project. -
I made a driveshaft.
-
I’ve always been a Wiss man myself...(retired sheet metal worker here).? I have cut my home made popsicle stick ones with a hobby knife, but it ain’t easy. Pruning shears would probably work well
-
Replacement 1/25 metal axles
NOBLNG replied to paulstang68's topic in Model Building Questions and Answers
Tig welding filler rod is available in 1/16”, 3/32”, and 1/8” diameter. Wire coat hangers are about 3/32”, but the actual size can vary greatly, so check more than one. -
What did you screw-up today??
NOBLNG replied to TransAmMike's topic in General Automotive Talk (Trucks and Cars)
Better yet...You need one of those heavy desktop tape dispensers with a roll of bandaids in it! ? Hey, maybe I should patent that idea?? -
That cleaned up REAL nice!?
-
Recommend Acrylic Clear to Airbrush
NOBLNG replied to TransAmMike's topic in Model Building Questions and Answers
You can decant the Rustoleum and spray it through your airbrush at what ever pressure works. There are various ways to decant it. I have some large plastic party straws that I just spray the paint through and let it drip into the cup or jar. Some say to let it sit for a while to degas, but I don’t. -
Very nice job! This is my favourite generation of Corvette..?
-
Wow, this is looking fantastic! I like all the little details. That side mirror looks real nifty.
-
Looking good! Love those headers and the optima battery.
-
Looks great to me!?
-
Nice job on those two. That was the best of the C&C movies too.
-
Green Jeep Finished!
NOBLNG replied to Tom Geiger's topic in Model Trucks: Pickups, Vans, SUVs, Light Commercial
Nice job Tom. You sure know how to make something out of nothing!?? -
Wow, Whoever is piloting that thing has had some practice! I know nothing about drones...do they have some sort of self-guiding collision avoidance capabilities? If that is strictly operator controlled then that person has some talent.
-
Yes, scratch building is amazingly addicting. I don’t have a lot of kits and I hate raiding them for parts...so I’ve been casting as many tidbits as I can.
-
Thanks for the compliment. As You know, some stuff is just not available or need heavy mods to be useful or accurate. I certainly don’t hold a candle to Charles’ talents. I’m just having fun learning off all you talented folks on here.?
-
What did you screw-up today??
NOBLNG replied to TransAmMike's topic in General Automotive Talk (Trucks and Cars)
I just rolled the tip of this pen sideways across the letters on these tires. I don’t know if the pen is available in white, but the silver colour is not too not conspicuous.
-
Nice job! Love the engine upgrade.?
-
Well thanks for stopping by to enlighten us all. Have a nice life.
-
61 Ranchero
NOBLNG replied to BIGTRUCK's topic in WIP: Model Trucks: Pickups, Vans, SUVs, Light Commercial
Loks like your plan is coming together nicely!? -
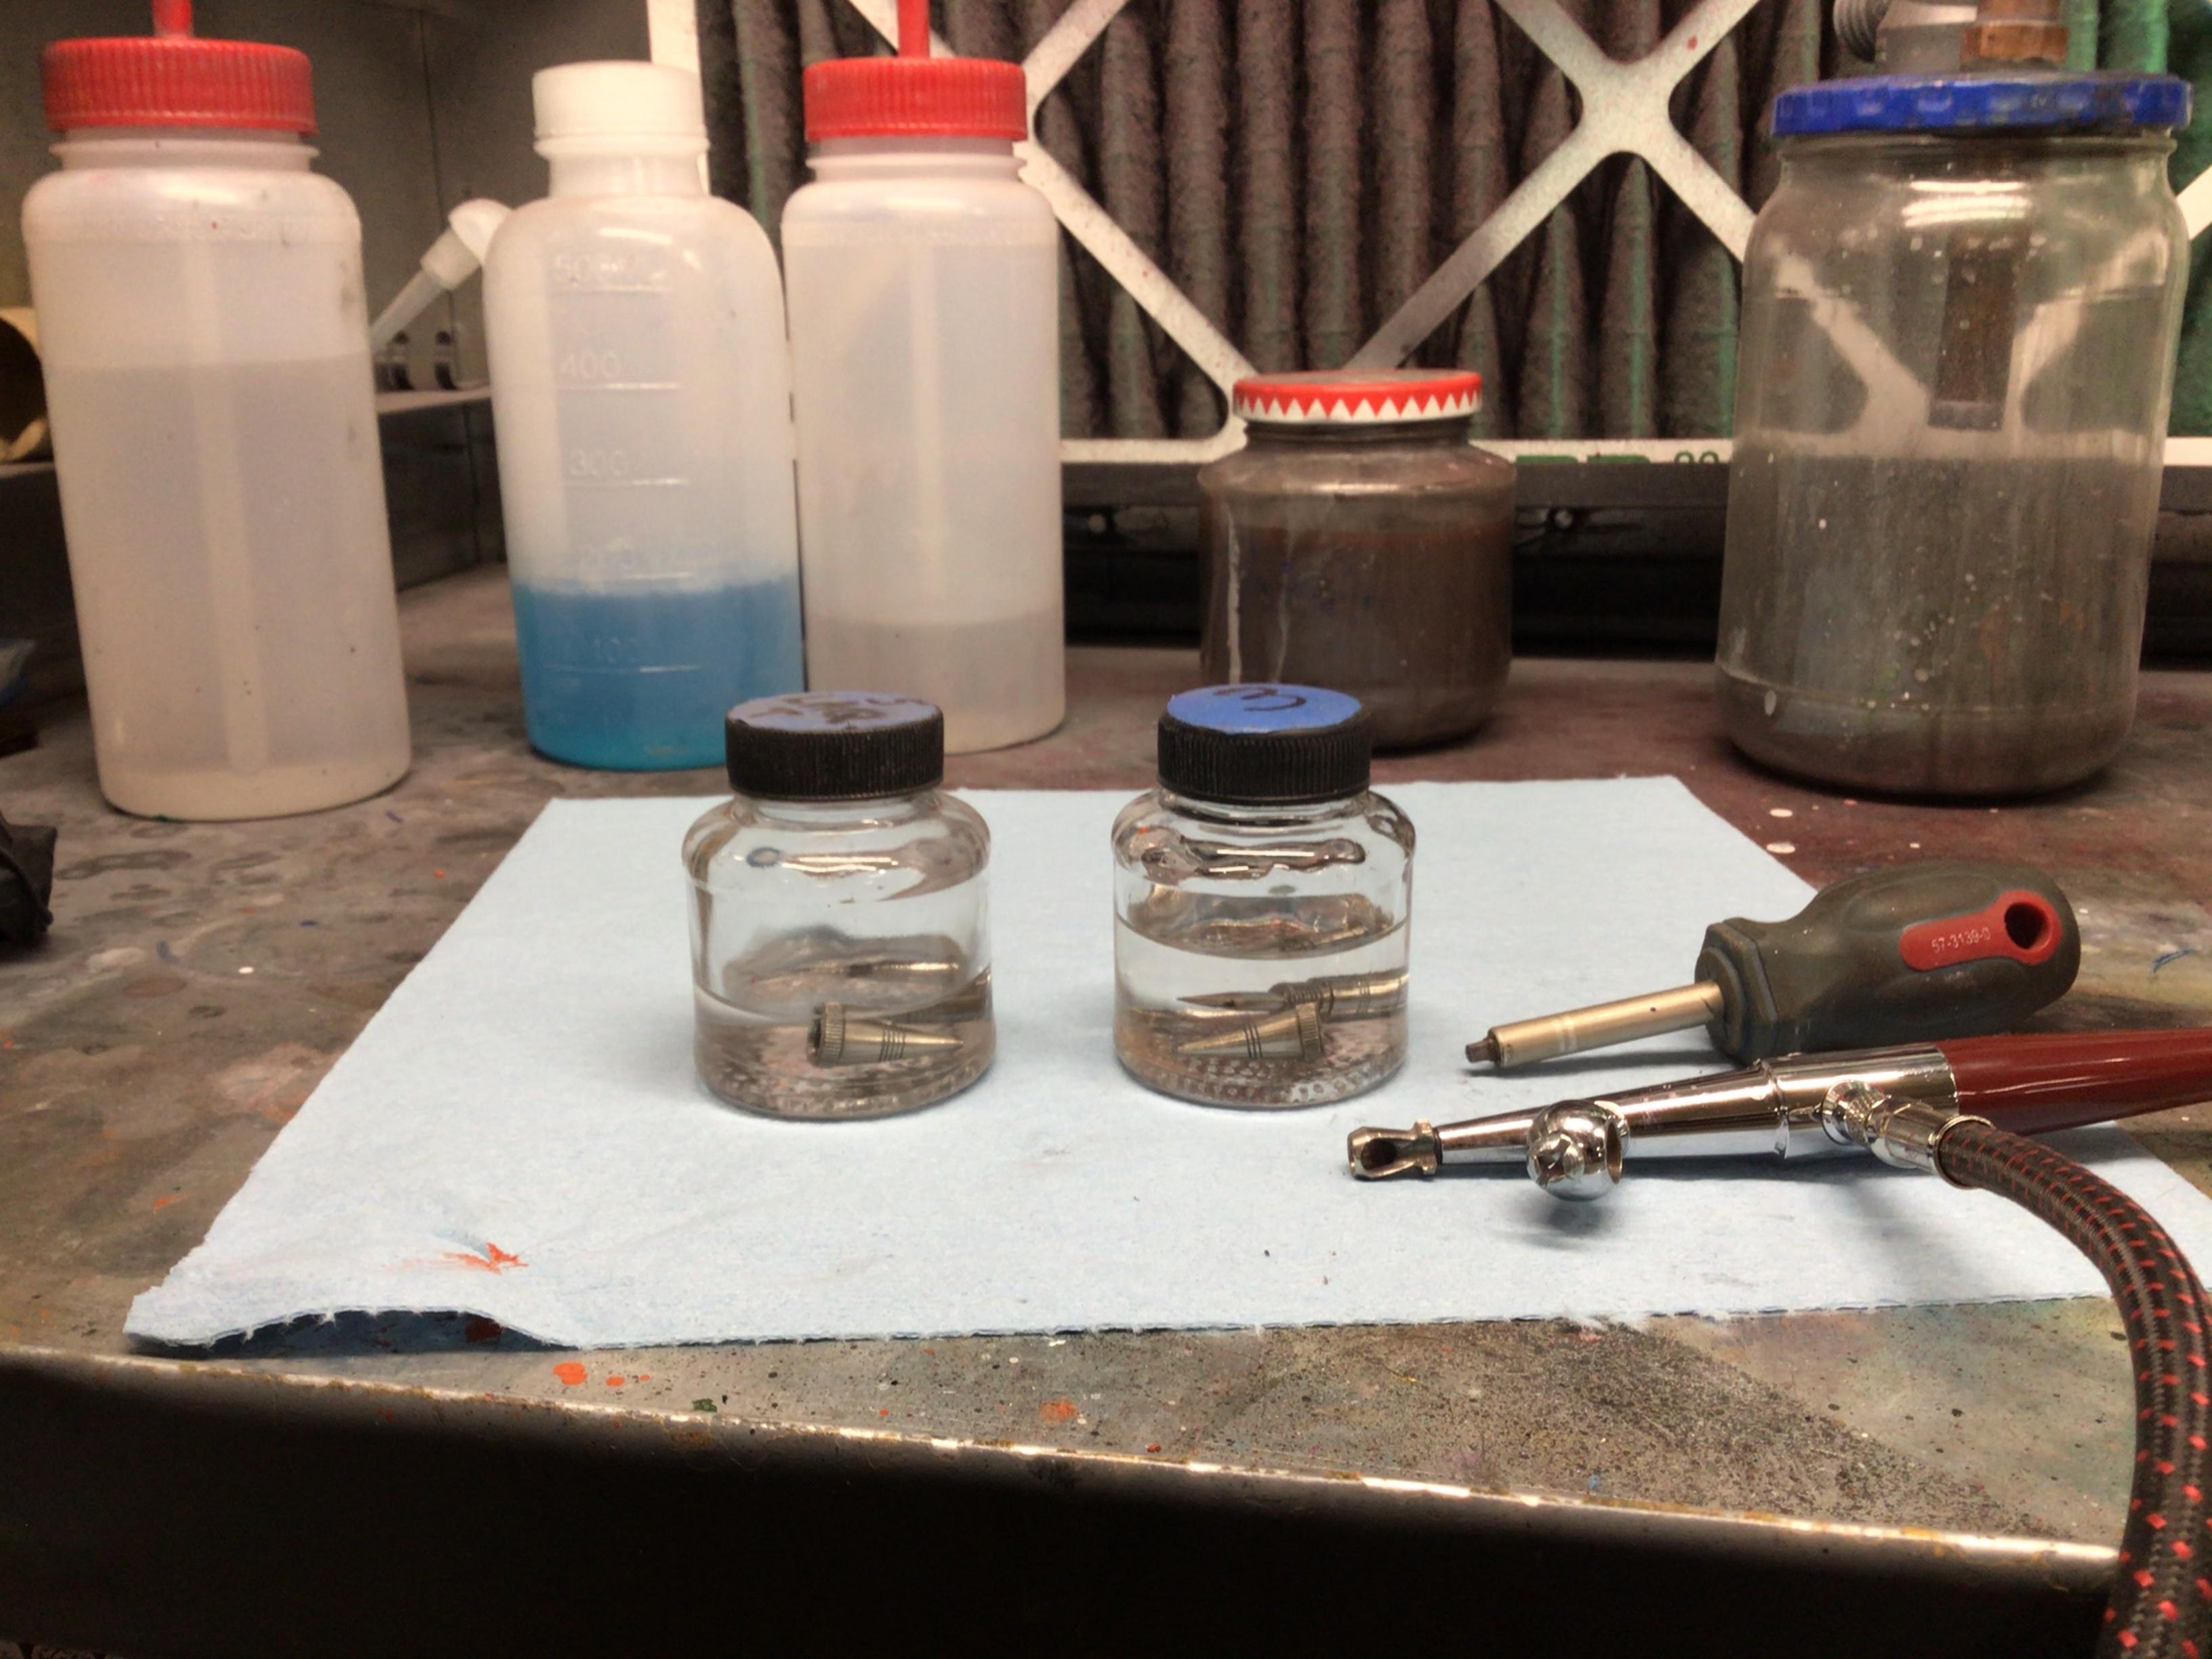
TIP FOR CLEANING PAASCHE AIRBRUSH
NOBLNG replied to DavidChampagne's topic in Tips, Tricks, and Tutorials
That is really my only complaint about the Paasche H. I replaced my set screw with a short robertson machine screw and keep a stubby screwdriver in my paint booth. I just flush the nozzle with the appropriate thinner from a squeeze bottle between colors. If I am done for a while I drop the needle and nozzle in a small jar of lacquer thinner till the next session.