
NOBLNG
-
Posts
10,231 -
Joined
-
Last visited
Content Type
Profiles
Forums
Events
Gallery
Everything posted by NOBLNG
-
Nice work on that trailer! It looks like you've done a beautiful job on that bug too.
-

round 2 66 nova problems
NOBLNG replied to bauercrew's topic in Model Building Questions and Answers
I too am interested to know which sealer you use. I imagine it would work to seal body filler also?? -
The guy did a pretty nice job on this! https://www.bikeforums.net/general-cycling-discussion/1171621-porsche.html
-
Happy Ford/Chevy Day!
NOBLNG replied to Snake45's topic in General Automotive Talk (Trucks and Cars)

-
Right on! I'm sure they afford to please a customer once in a while. I have punctured nearly full cans CAREFULLY after letting the can sit and settle completely. With a very sharp awl, pierce slowly (right near the top where there will be no paint) until the faintest bit of propellant seeps out. Then wait until all pressure is gone and repeat the process (in case the puncture sealed itself and there is still pressure inside). Once all pressure is gone you can poke a larger hole and drain the contents.
-
Fantastic!
-
-
Good sources for coil springs
NOBLNG replied to OldNYJim's topic in Model Building Questions and Answers
I bought a bulk package Cheap at Princess Auto! A lot of them are useless, but there are also a lot of good ones.
-
Food Dehydrators & Paint Dryers
NOBLNG replied to JayVee's topic in Model Building Questions and Answers
I have read on here that 105F is OK and will not damage styrene, so I set it at either 95 to warm the paint or 105 to dry it. I have never checked it for accuracy, but have not melted anything yet. -
Thanks! Some beautiful details shots there. I have only seen one car with the concealed spare tire. Only one that has the windshield wipers mounted on the cowl, and they are a parallel arrangement, not opposed like this model has? This model's are not even on the cowl, they are on the lower side of the windshield frame!
-
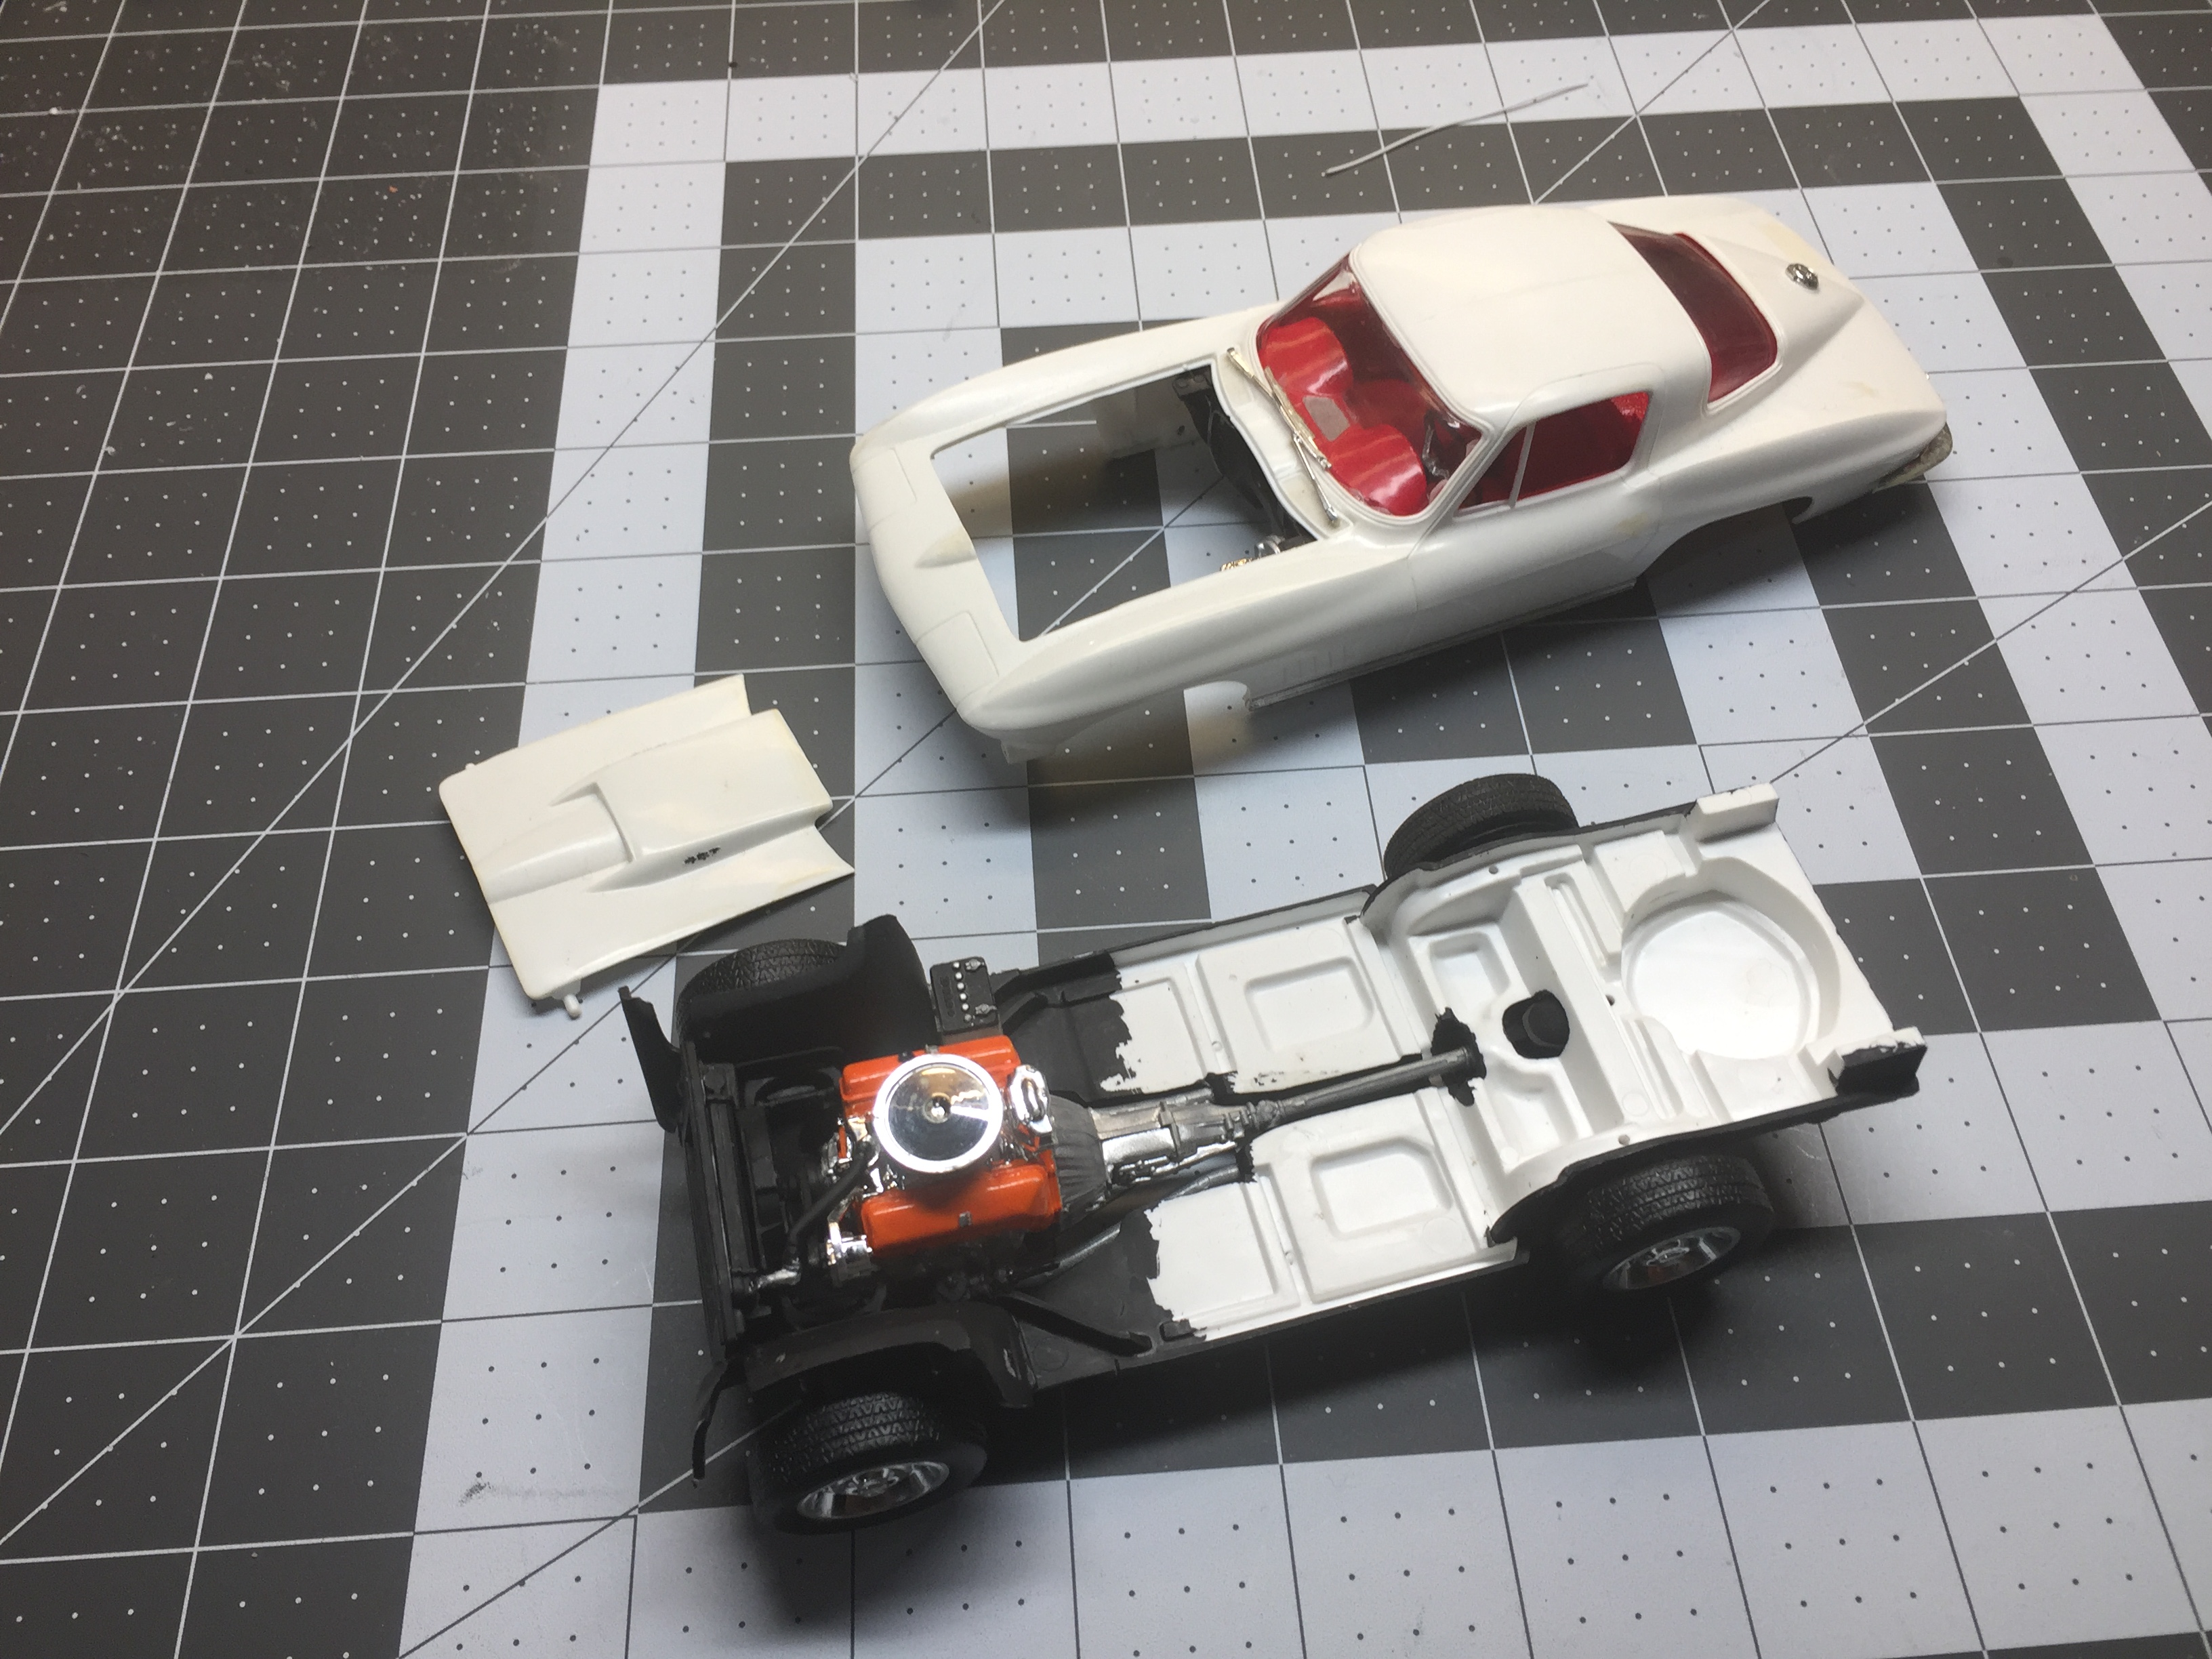
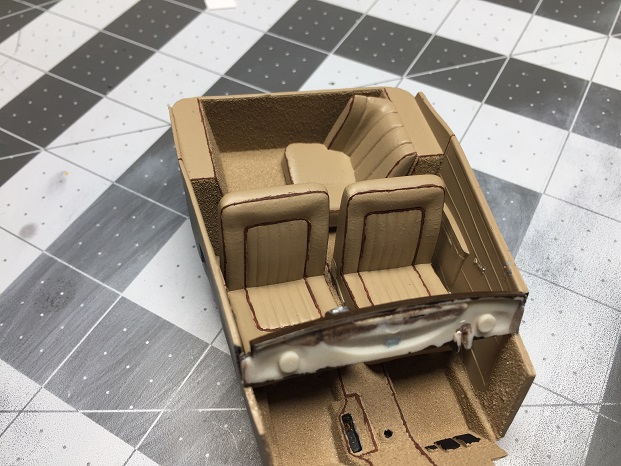
I finished the interior. I wish I had fixed that blemish on the back of the driver's seat. It didn't look that bad to the naked eye and there was a bit of "fabric texture" on the seat back that I didn't want to lose. Oh well!
-
Oh, OK. No wonder I was confused. I have sprayed the Aztek paint, and it goes on very nice...but I have not used the transparent. You could brush or spray some onto any clear plastic to get an idea of what it looks like?
-
Do you mean the Testors Aztec in the square bottles? Do you have a link or a picture of the stuff?
-
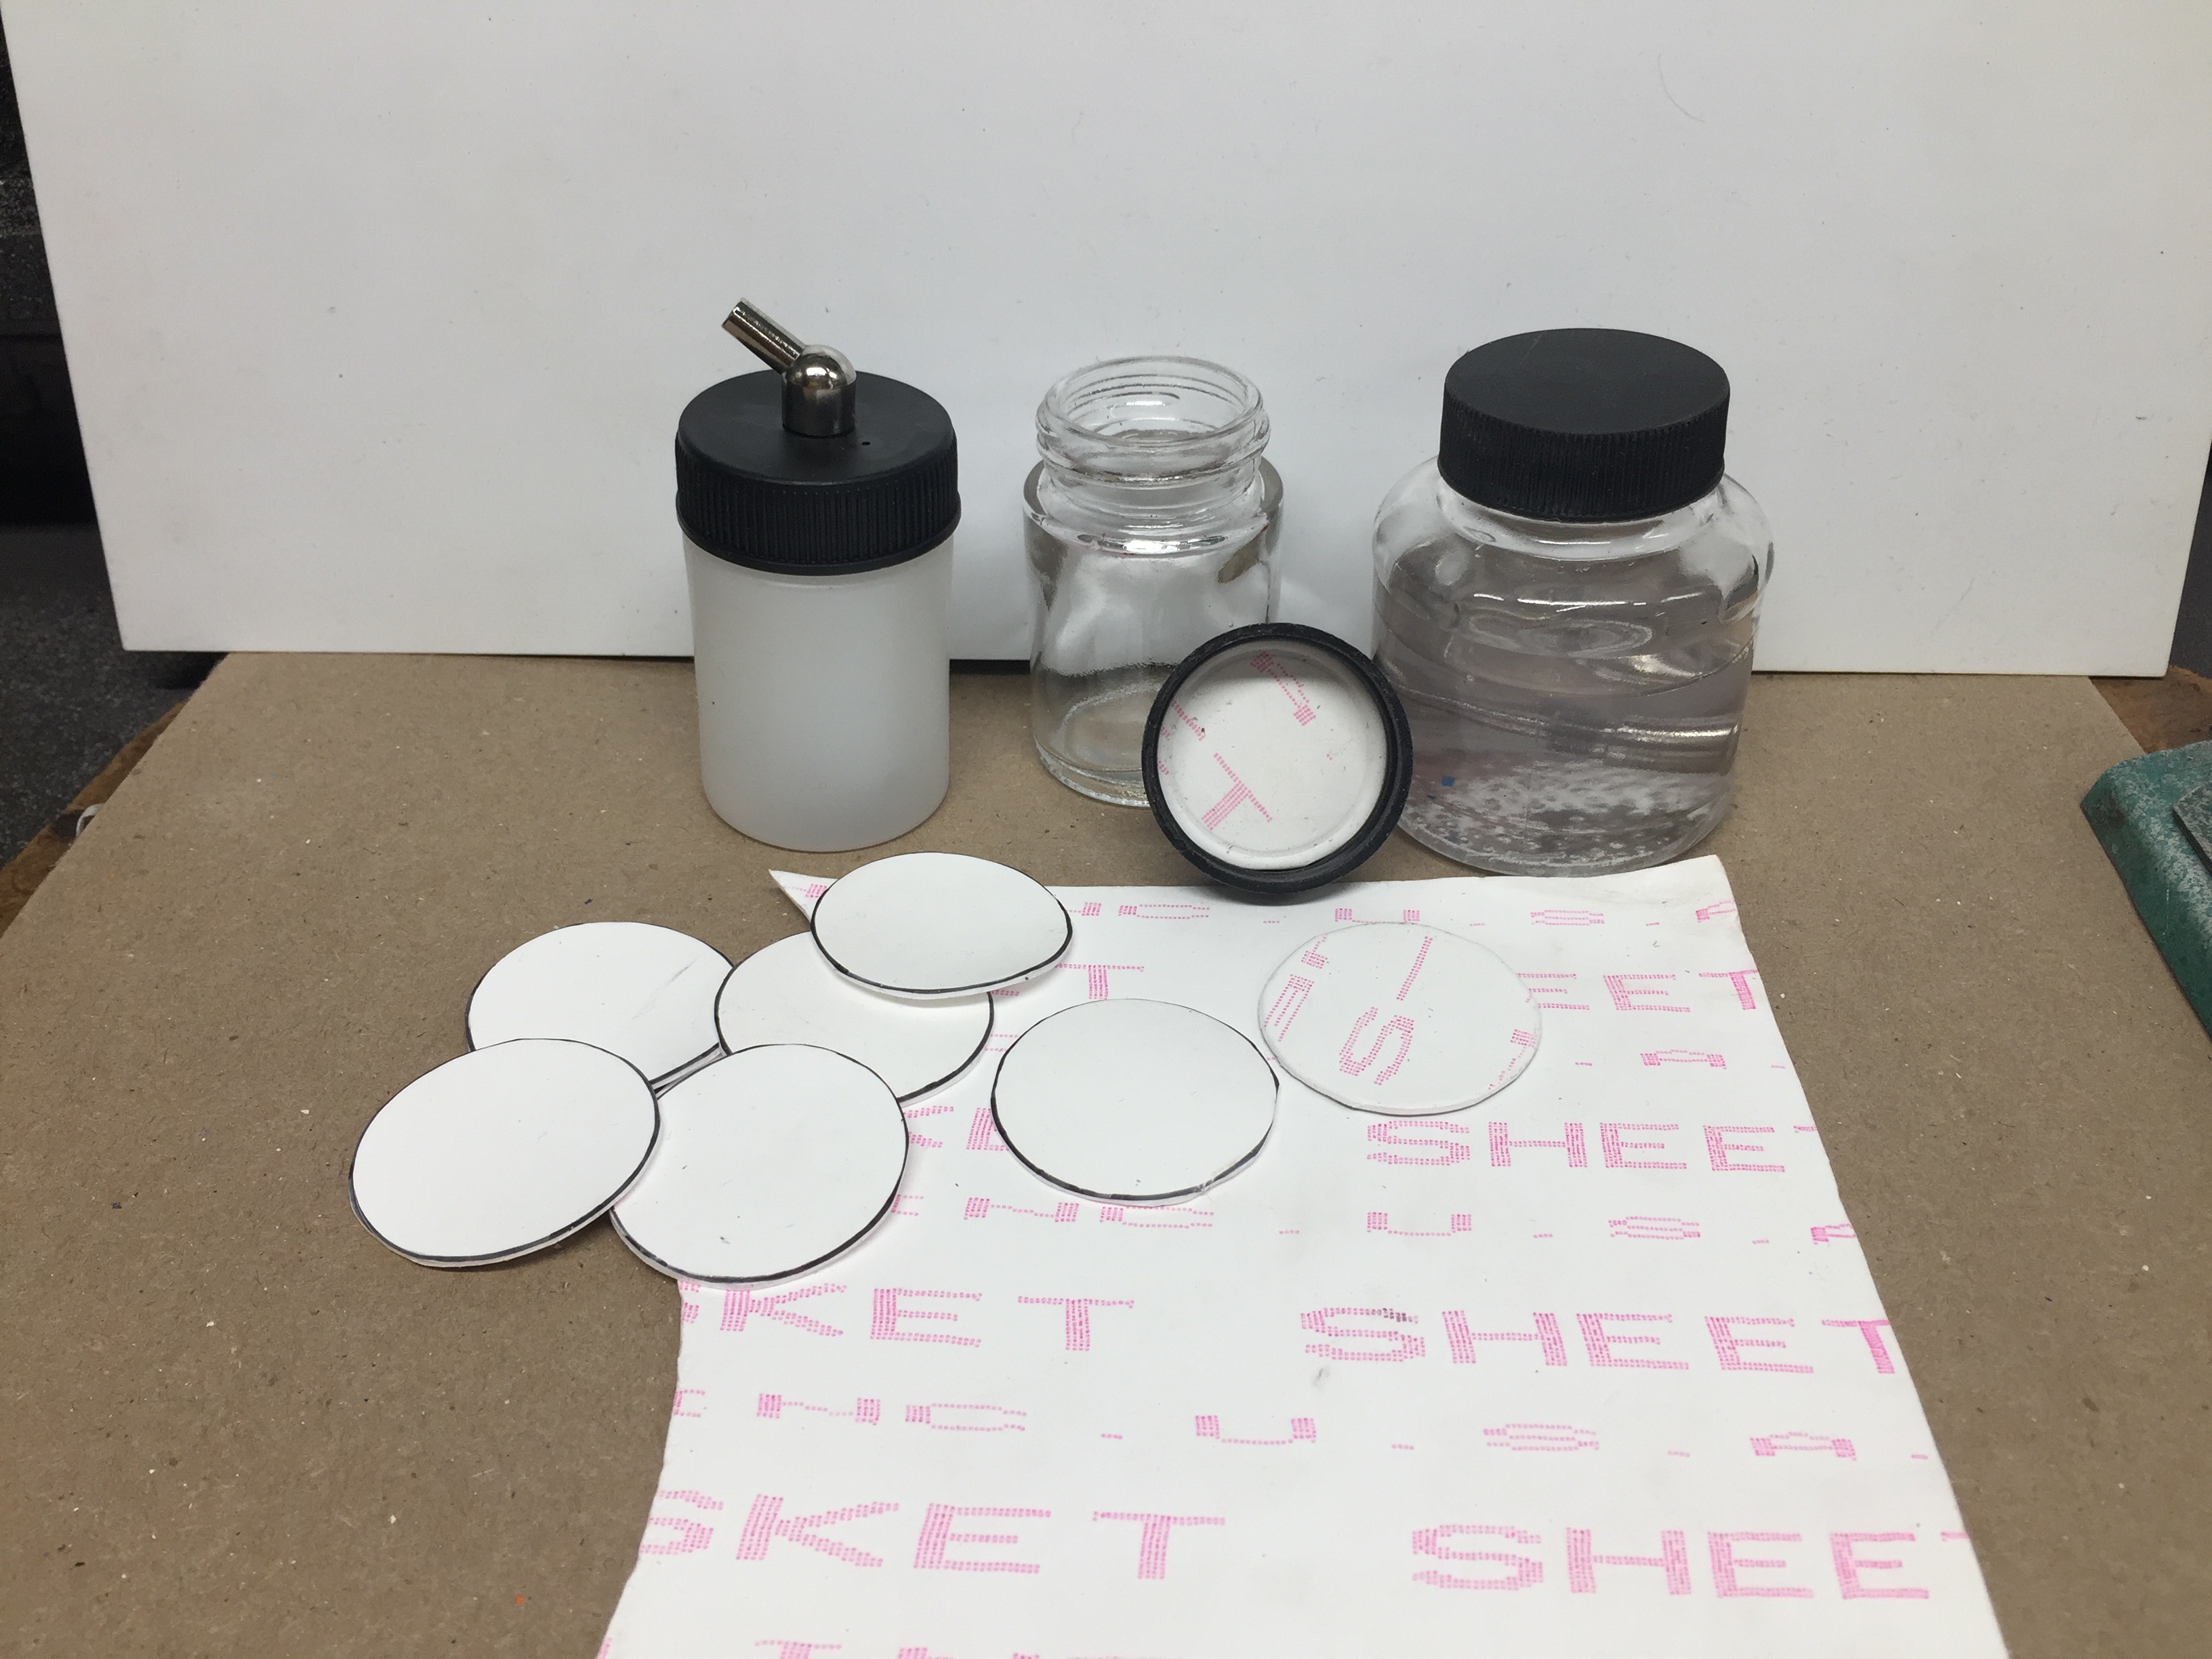
Rather than start a new thread, I figured I would add to this relevant one. My Paasche airbrush came with two cheap plastic paint bottles, only one of which had the fitting to attach to the airbrush. I can buy these two sizes of glass bottles at Michaels that fit the Paasche lid, but they come with foam gaskets in the lids that disintegrate with any volatile fluid. I went to a local gasket supplier and got some 1/16" PTFE (Teflon) offcuts for next to free! Replacing the cheapo lid gaskets with this stuff means I can store just about anything in them. It is quite soft and gives a very good seal. I also made a gasket for a 1/2 pint relish jar to store laquer thinner in, it is big enough that I can drop these smaller glass bottles inside to soak and clean them if necessary.
-
1937 Cord 812 - The Classic Monogram Kit After Some Improvements
NOBLNG replied to Plastheniker's topic in Model Cars
Yes, Thanks for posting this Jürgen. You did a beautiful job and I appreciate the tips! I recently bought this kit at a flea market and It just moved up in the priority list. -
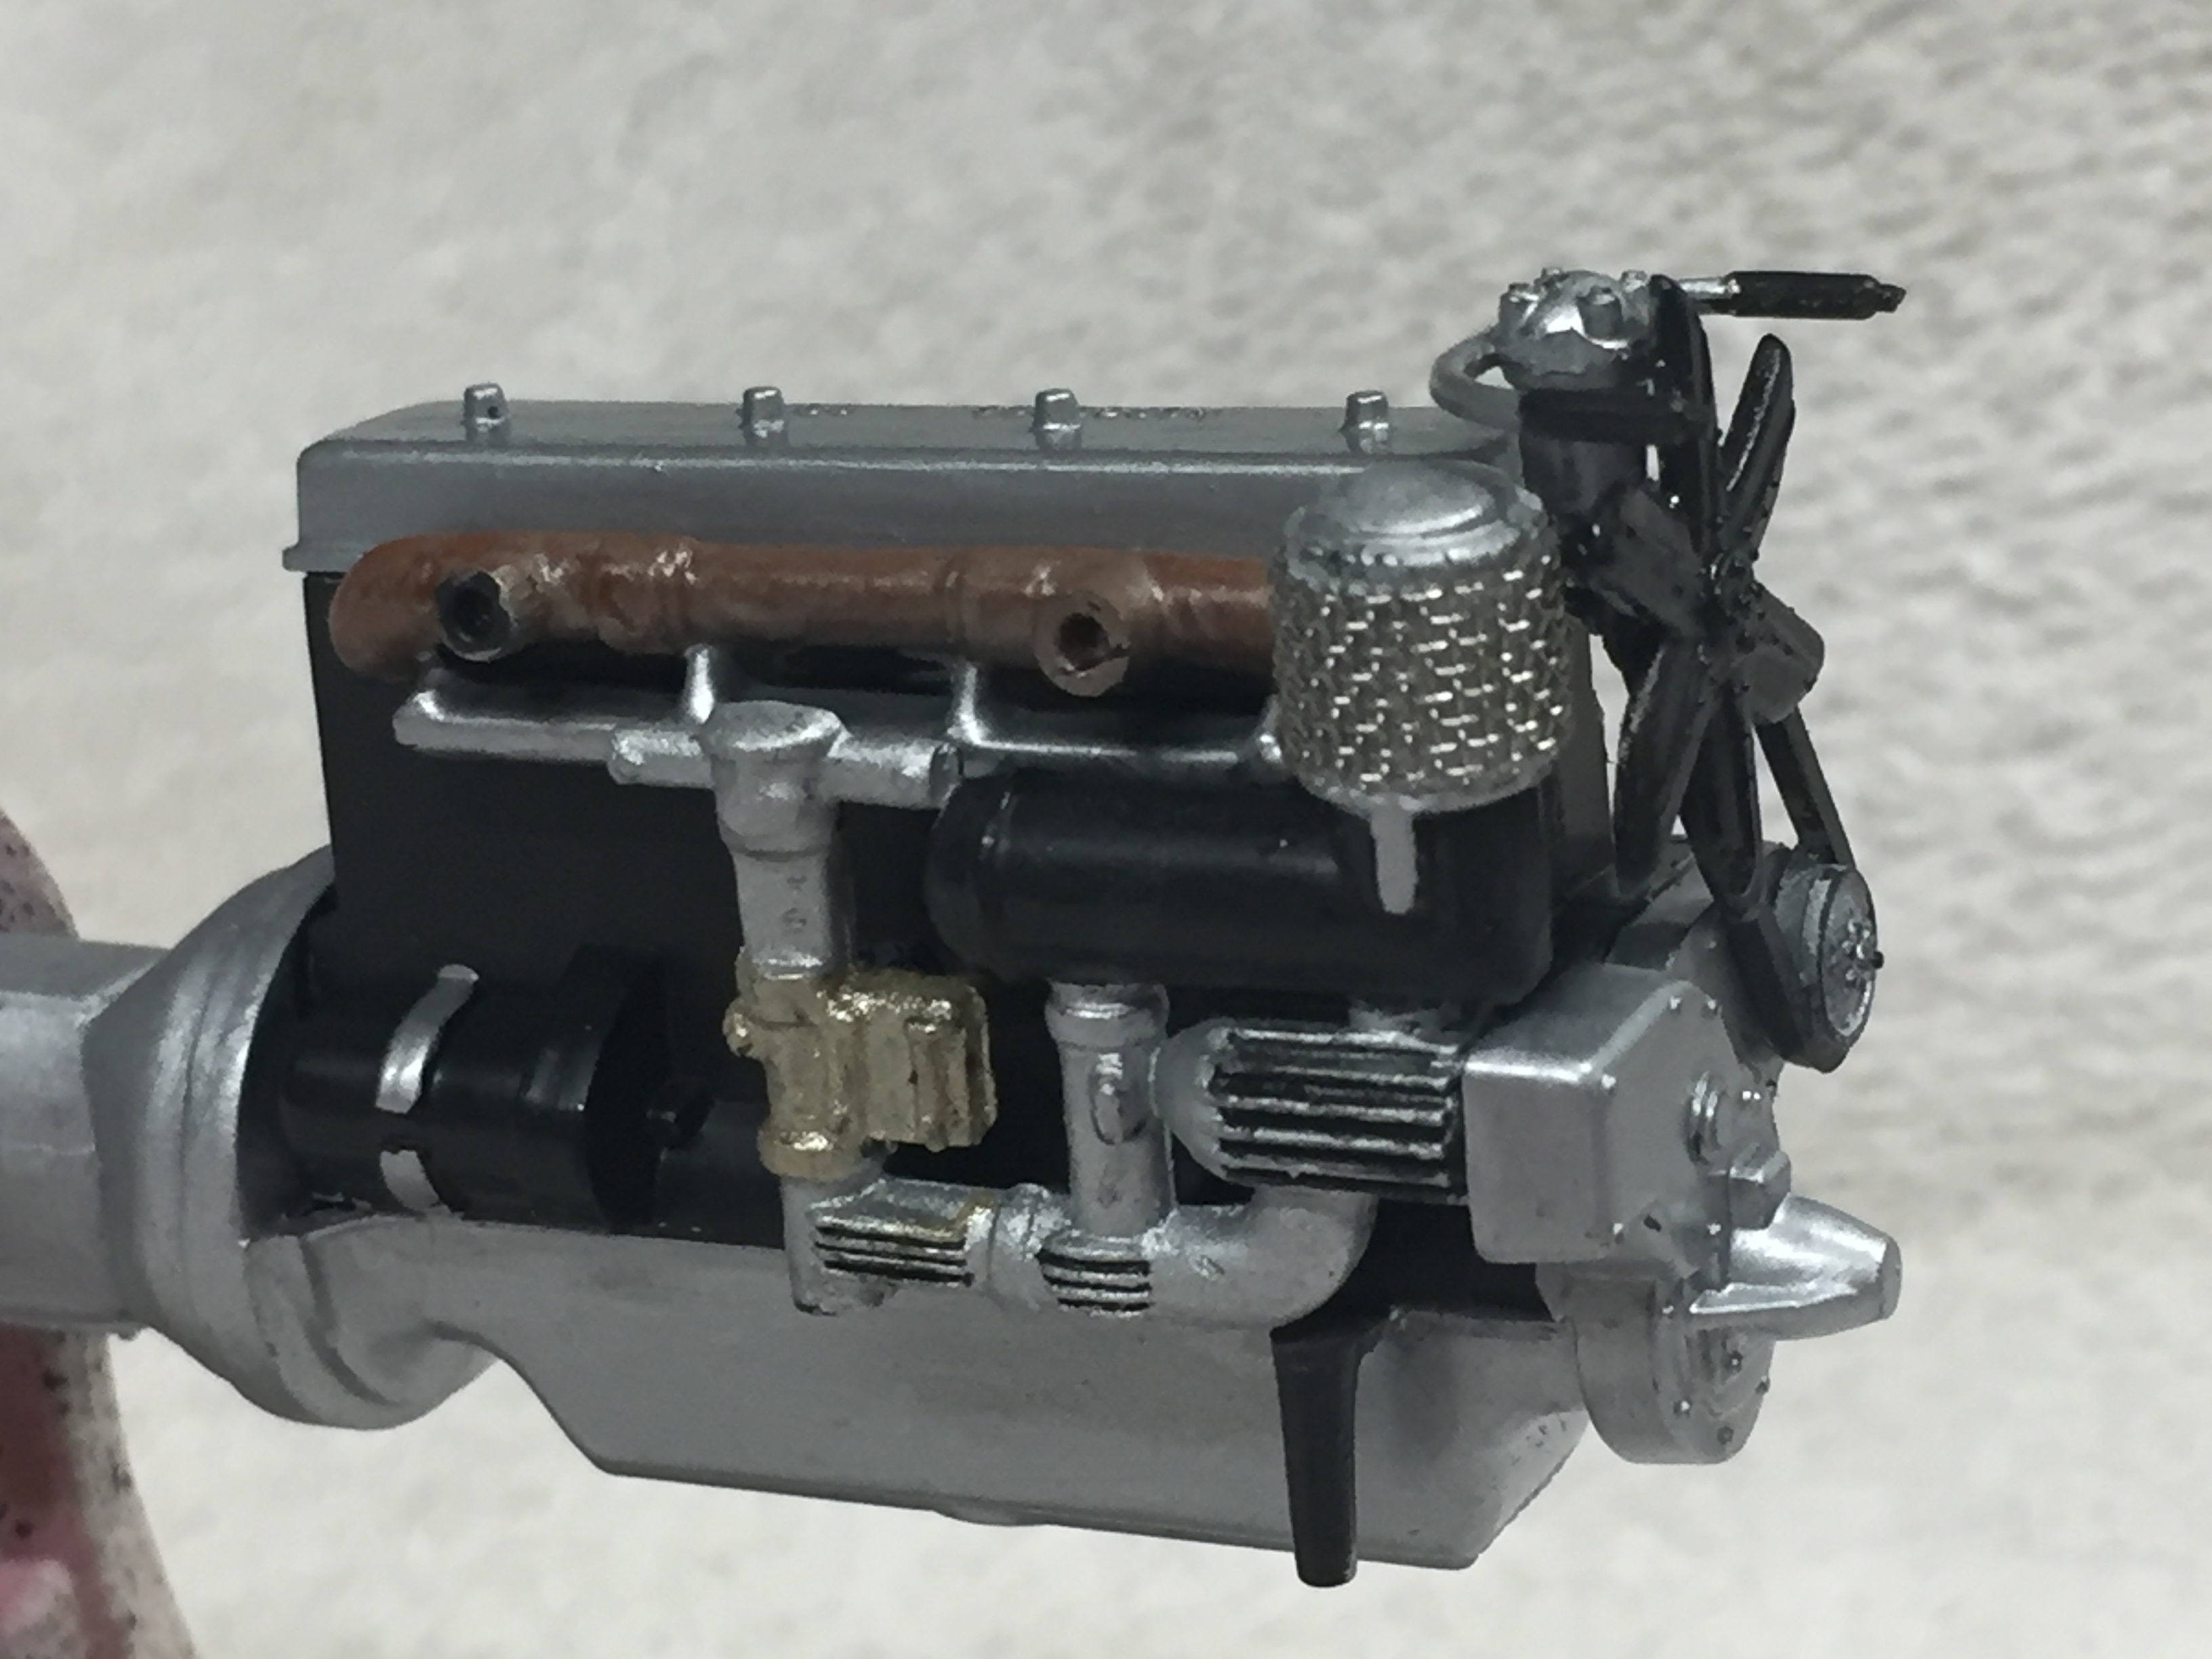
Thanks for the confidence everyone. I have some fine s/s mesh that I am considering putting in place of the louvers (same stuff as on the air cleaner) Although not factory correct, I think it will look nicer than the fake louvers.
-
Scratchbuilding Slapper Bars
NOBLNG replied to Straightliner59's topic in Tips, Tricks, and Tutorials
Nice, neat simple fab job! -
Looks darn fine to me!
-
1960 Pontiac Laurentian & Scratch Built Travel Trailer
NOBLNG replied to DR JAY's topic in Model Cars
Wow. Fantastic detailing on this! I love that camper. -
1/25 literally means one divided by twenty five. So take your full size measurement desired and divide it by 25 (or 24 or 16) to get the scale size needed. Likewise, if you have piece of wire, multiply it's actual diameter by 25(or what ever scale you are using) to get what it would represent in full size.
-
Looks like that paint went on real nice !!
-
Very nice. I recently built one of these too. I think that color will look great once all the rest of the chrome is on it.
-
I agree, really nice job on that interior!
-
Thanks for the link to your build. I hope mine turn out half as nice! This pic I found online is sort of my inspiration.
-
Thanks, I'll need it!


.jpg.af8b18a3b817e479b6abb55e41610e77.jpg)