Bainford
-
Posts
5,195 -
Joined
-
Last visited
Content Type
Profiles
Forums
Events
Gallery
Everything posted by Bainford
-
Looks good in red with white. Nice work.
-
Very cool funny car. Your efforts have paid off handsomely. Nice clean work. Despite the issues with the decals, they look great. Very well done.
-
 Welcome to the forum, Gary. Nice looking trucks.
 -
Very cool project, and awesome supercharged v-12 concept. Love it. I enjoy the hot rod wips, though I haven't built a hot rod in decades. I loved to build them when I was young, but decades of going through muscle cars and then vintage sports cars, in scale and in 1:1, I have lost my personal hot rod edge. I am amazed at the knowledge of hot rod subtleties and engineering displayed by forum members. I have a few hot rod projects in my project book and would like to get a couple built, but I find myself lagging behind in intimate knowledge of the genre. I particularly enjoy threads such as this one, which is a fountain on information on hot rod building, and the parts available to do so. I appreciate your taking the time to photograph and explain things well. Excellent thread, and wicked build. Cheers.
-
Very cool! It certainly invokes the 1:1 well. Nice weathering, and I love a whole raft of carburetors. Really digging this one.
-
Who doesn't love a mock-up? Let's see yours!
Bainford replied to Belairconvertable's topic in WIP: Model Cars
Digging that Plymouth. Looking good. -
No Test Laps yet....
Bainford replied to satterwhite78's topic in Other Racing: Road Racing, Salt Flat Racers
Cool collection of short trackers. All ready for some Saturday night brawling. These were some of my favourite kits when I was a kid. Really digging yours. Nice work. -
Bobby Unser 1974 IROC Camaro
Bainford replied to MarkJ's topic in Other Racing: Road Racing, Salt Flat Racers
It turned out great, Mark. I'm glad you stuck with it. Cool subject and cool build. The photography looks great, too. Very well done. -
Looking good. I quite like the colour.
-
A week n purple pond, now what?
Bainford replied to OldTrucker's topic in Model Building Questions and Answers
My last resort, when nothing else works, is a soak in brake fluid. Tough stuff may take a few days, but it usually comes off. I've not tried the alcohol that Brian mentioned, but it would much cleaner than brake fluid, and has a good record for removing lacquer, which is what the undercoat usually is. If using alcohol, use 91% or higher. -
Need a honest opinion from a collector
Bainford replied to Dpate's topic in Model Building Questions and Answers
Not fully ripped off, just gently ripped off to that degree we all quietly consider acceptable when we irrationally want some hobby related item we see. We don't judge. -
Hhmmm, interesting. Is the intended purpose of these things for paint sampling, or were they originally marketed for something else? EDIT: Never mind, I just went to amazon and checked them out. Never knew these existed.
-
Making gauge bezels and trim rings from aluminum tube
Bainford replied to Bainford's topic in Tips, Tricks, and Tutorials
Cheers guys. I appreciate the feedback. -
59 Chevrolet El-Camino
Bainford replied to Cool Hand's topic in Model Trucks: Pickups, Vans, SUVs, Light Commercial
That's one sweet El Camino. Very clean. Nice work! -
‘78 Dodge D100
Bainford replied to Smoke Wagon's topic in Model Trucks: Pickups, Vans, SUVs, Light Commercial
Good looking beater. That's one hard working Dodge. Nice work on the body damage. Well done. -
Beautiful Merc. Nice foil work.
-
Very nice, Steve. That's one smooth looking Cougar. I'm seriously digging the colour. Nice work.
-
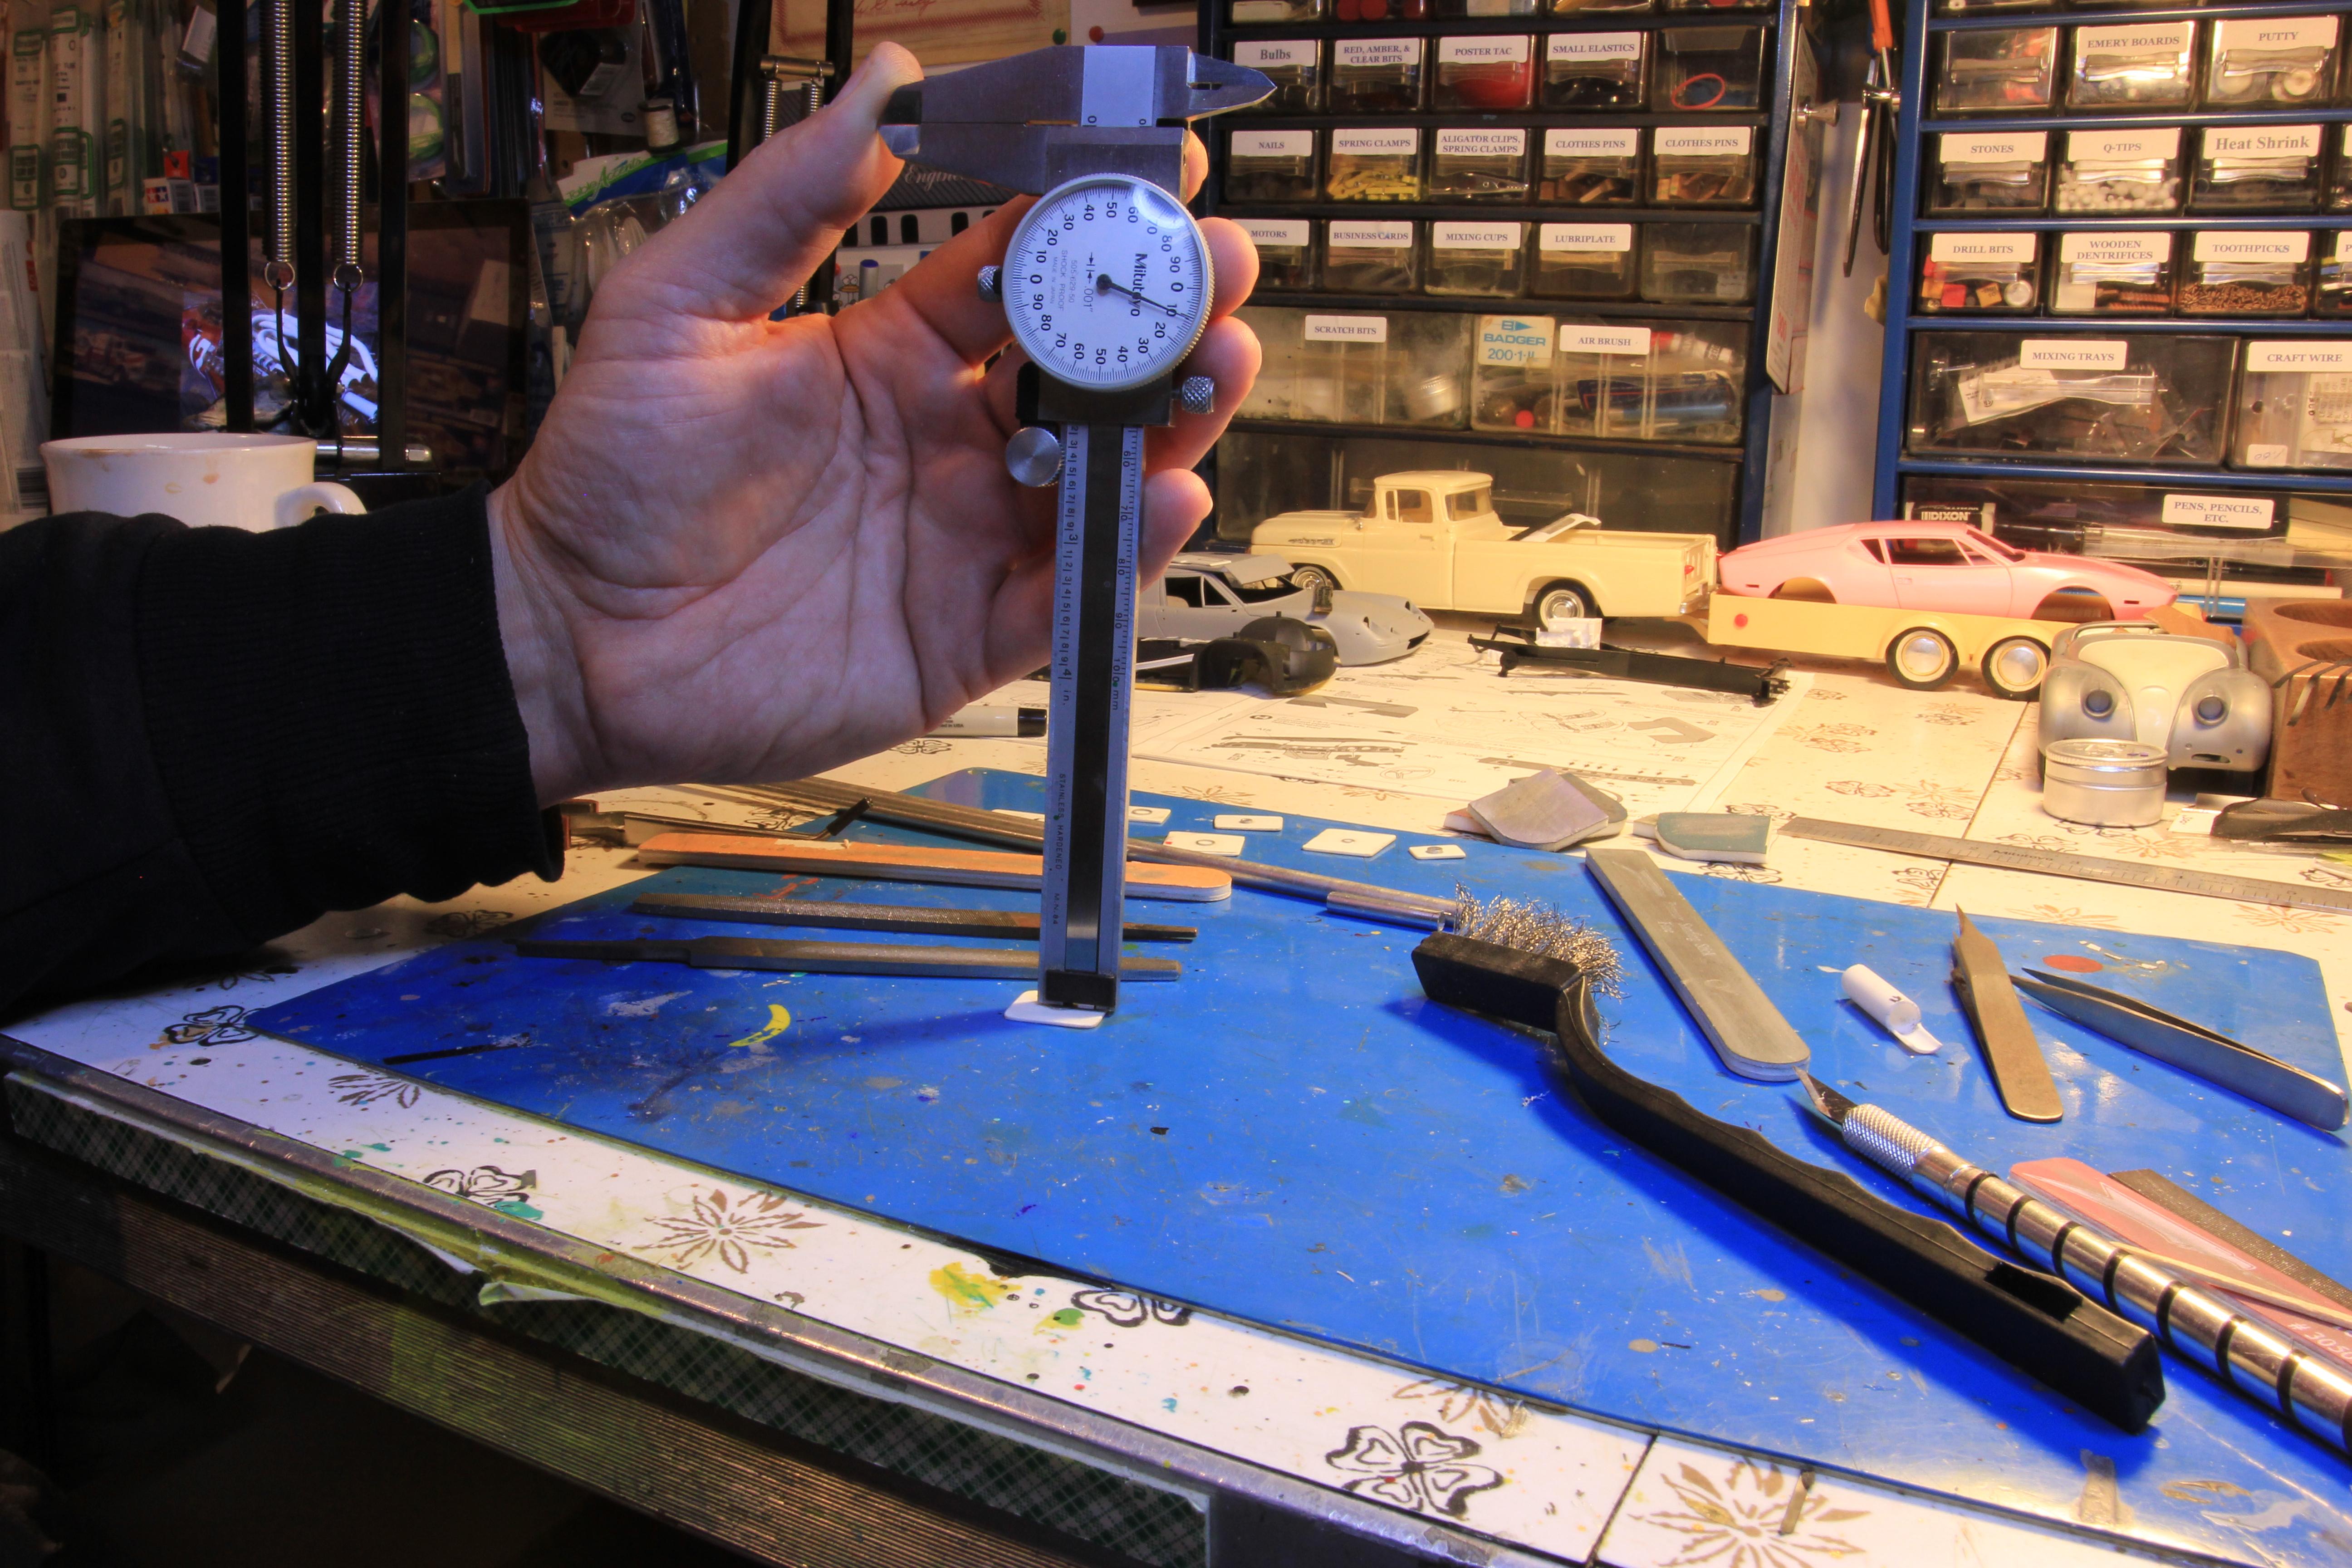
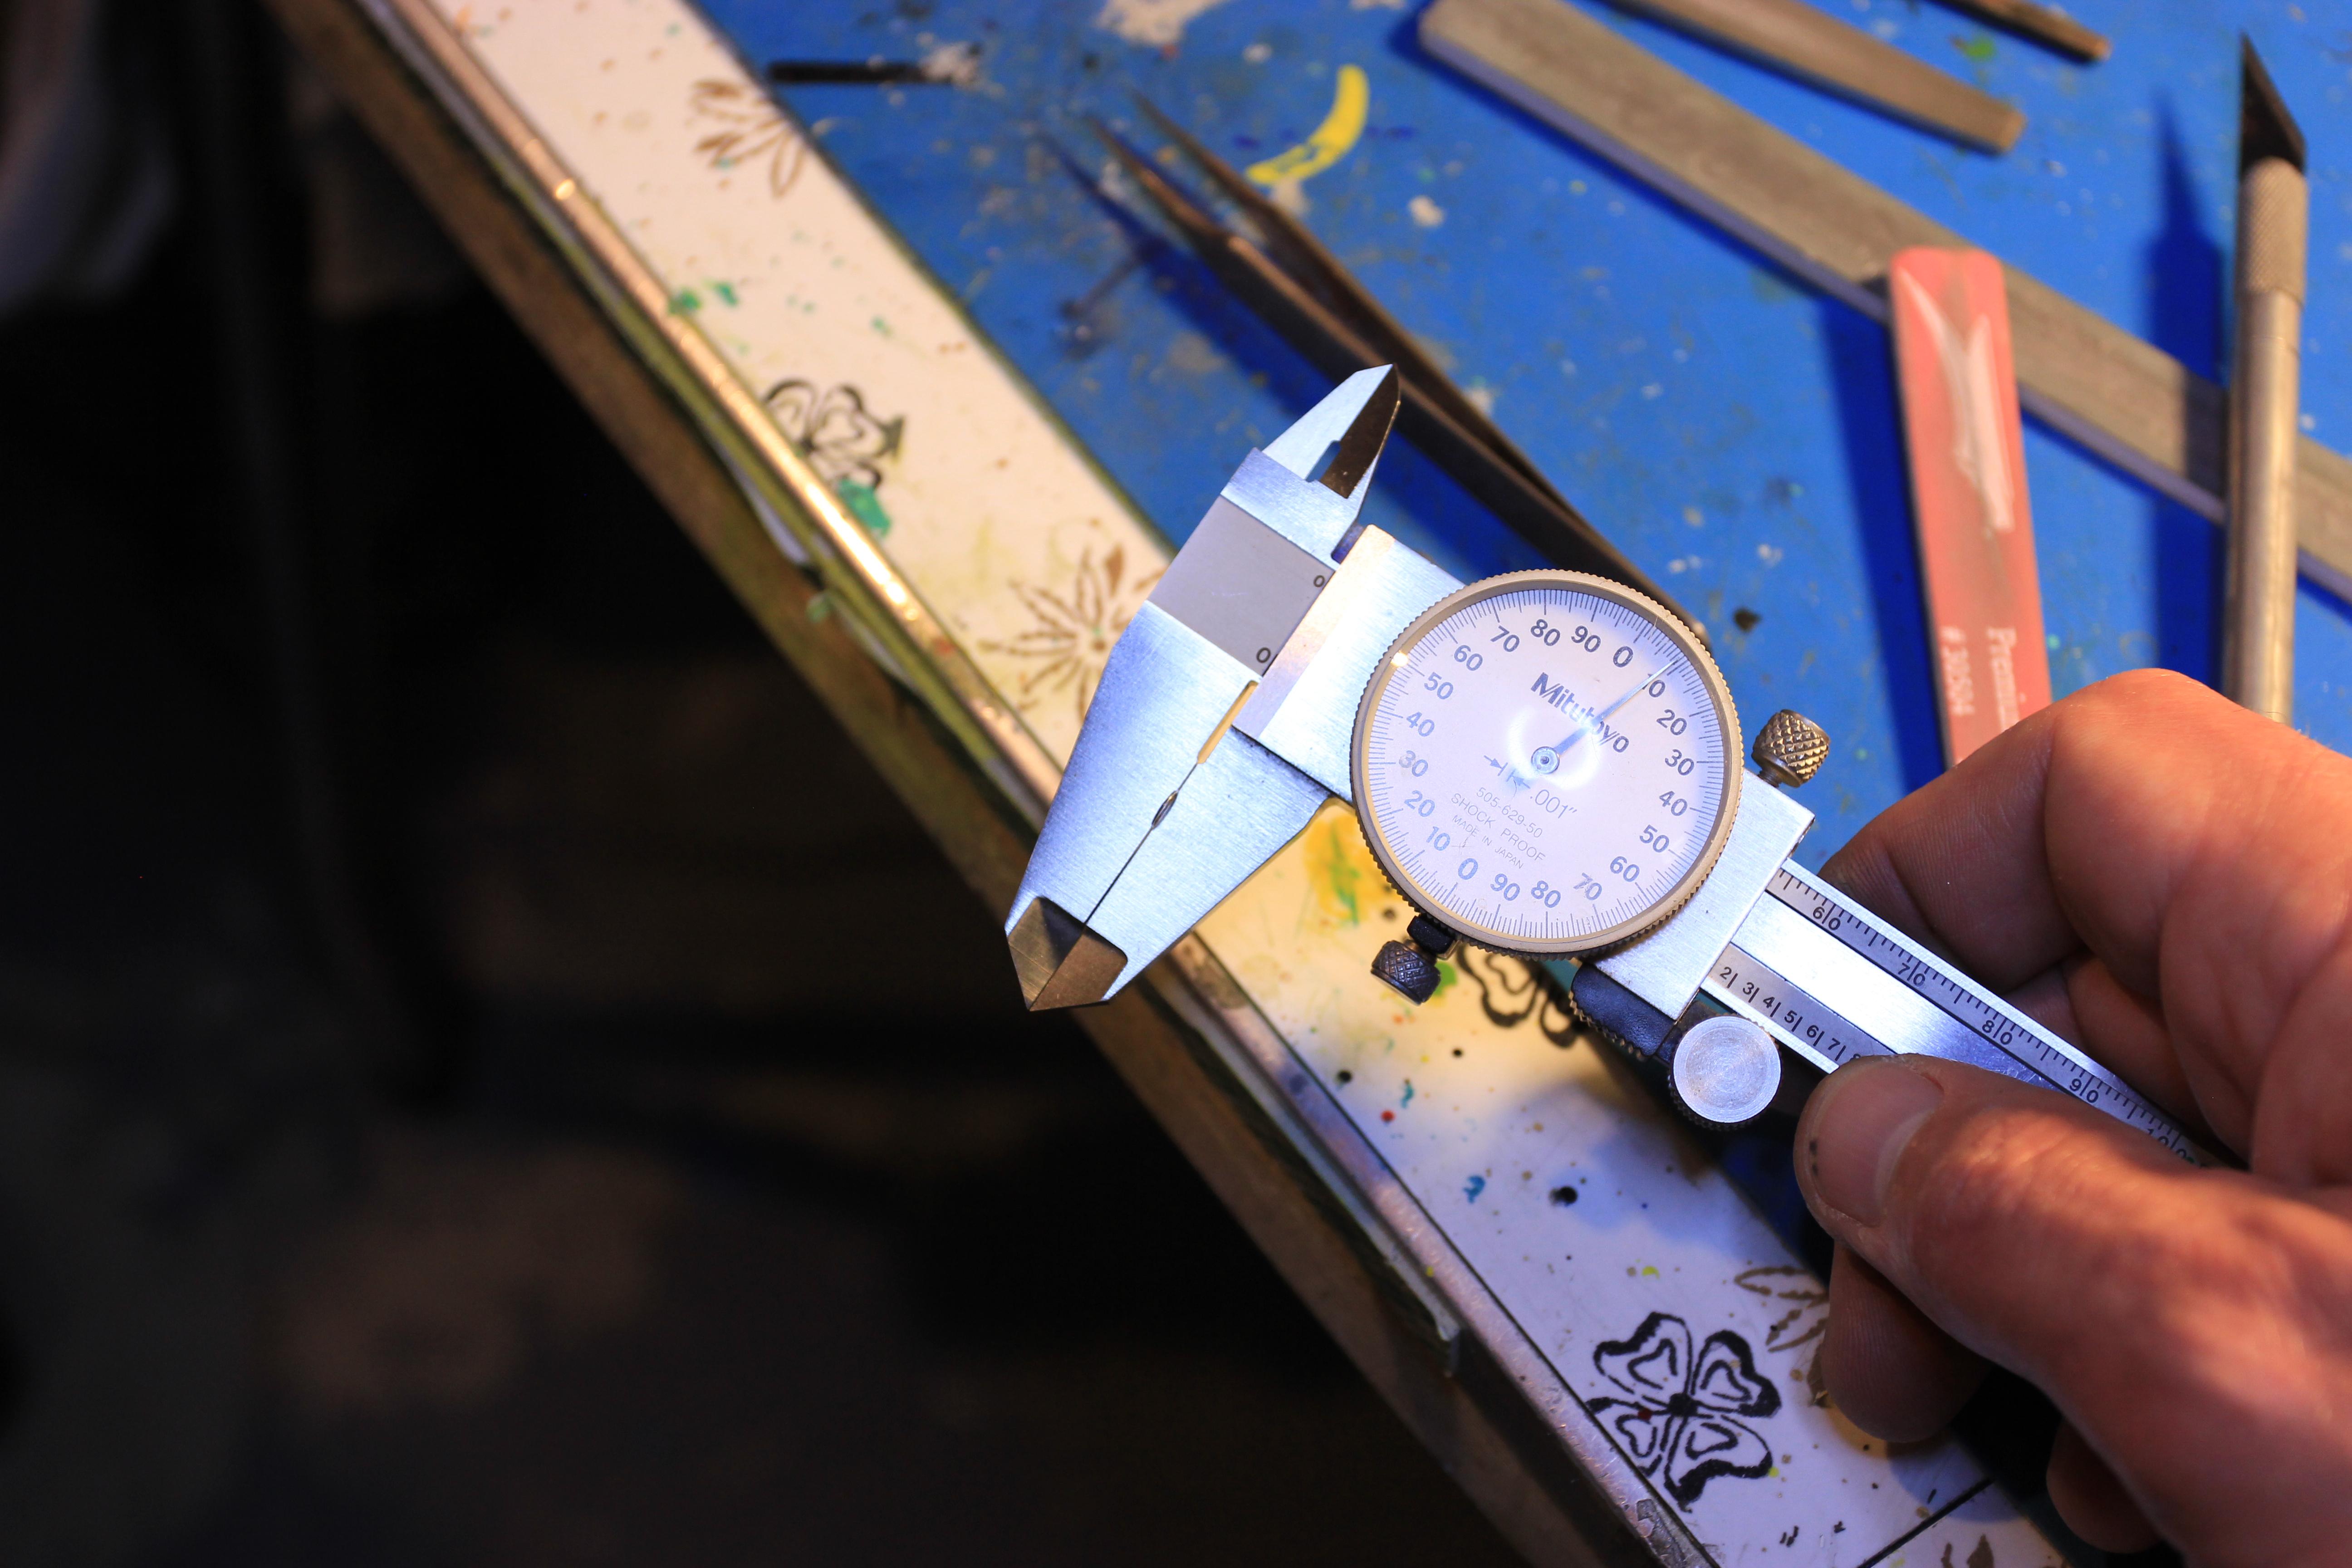
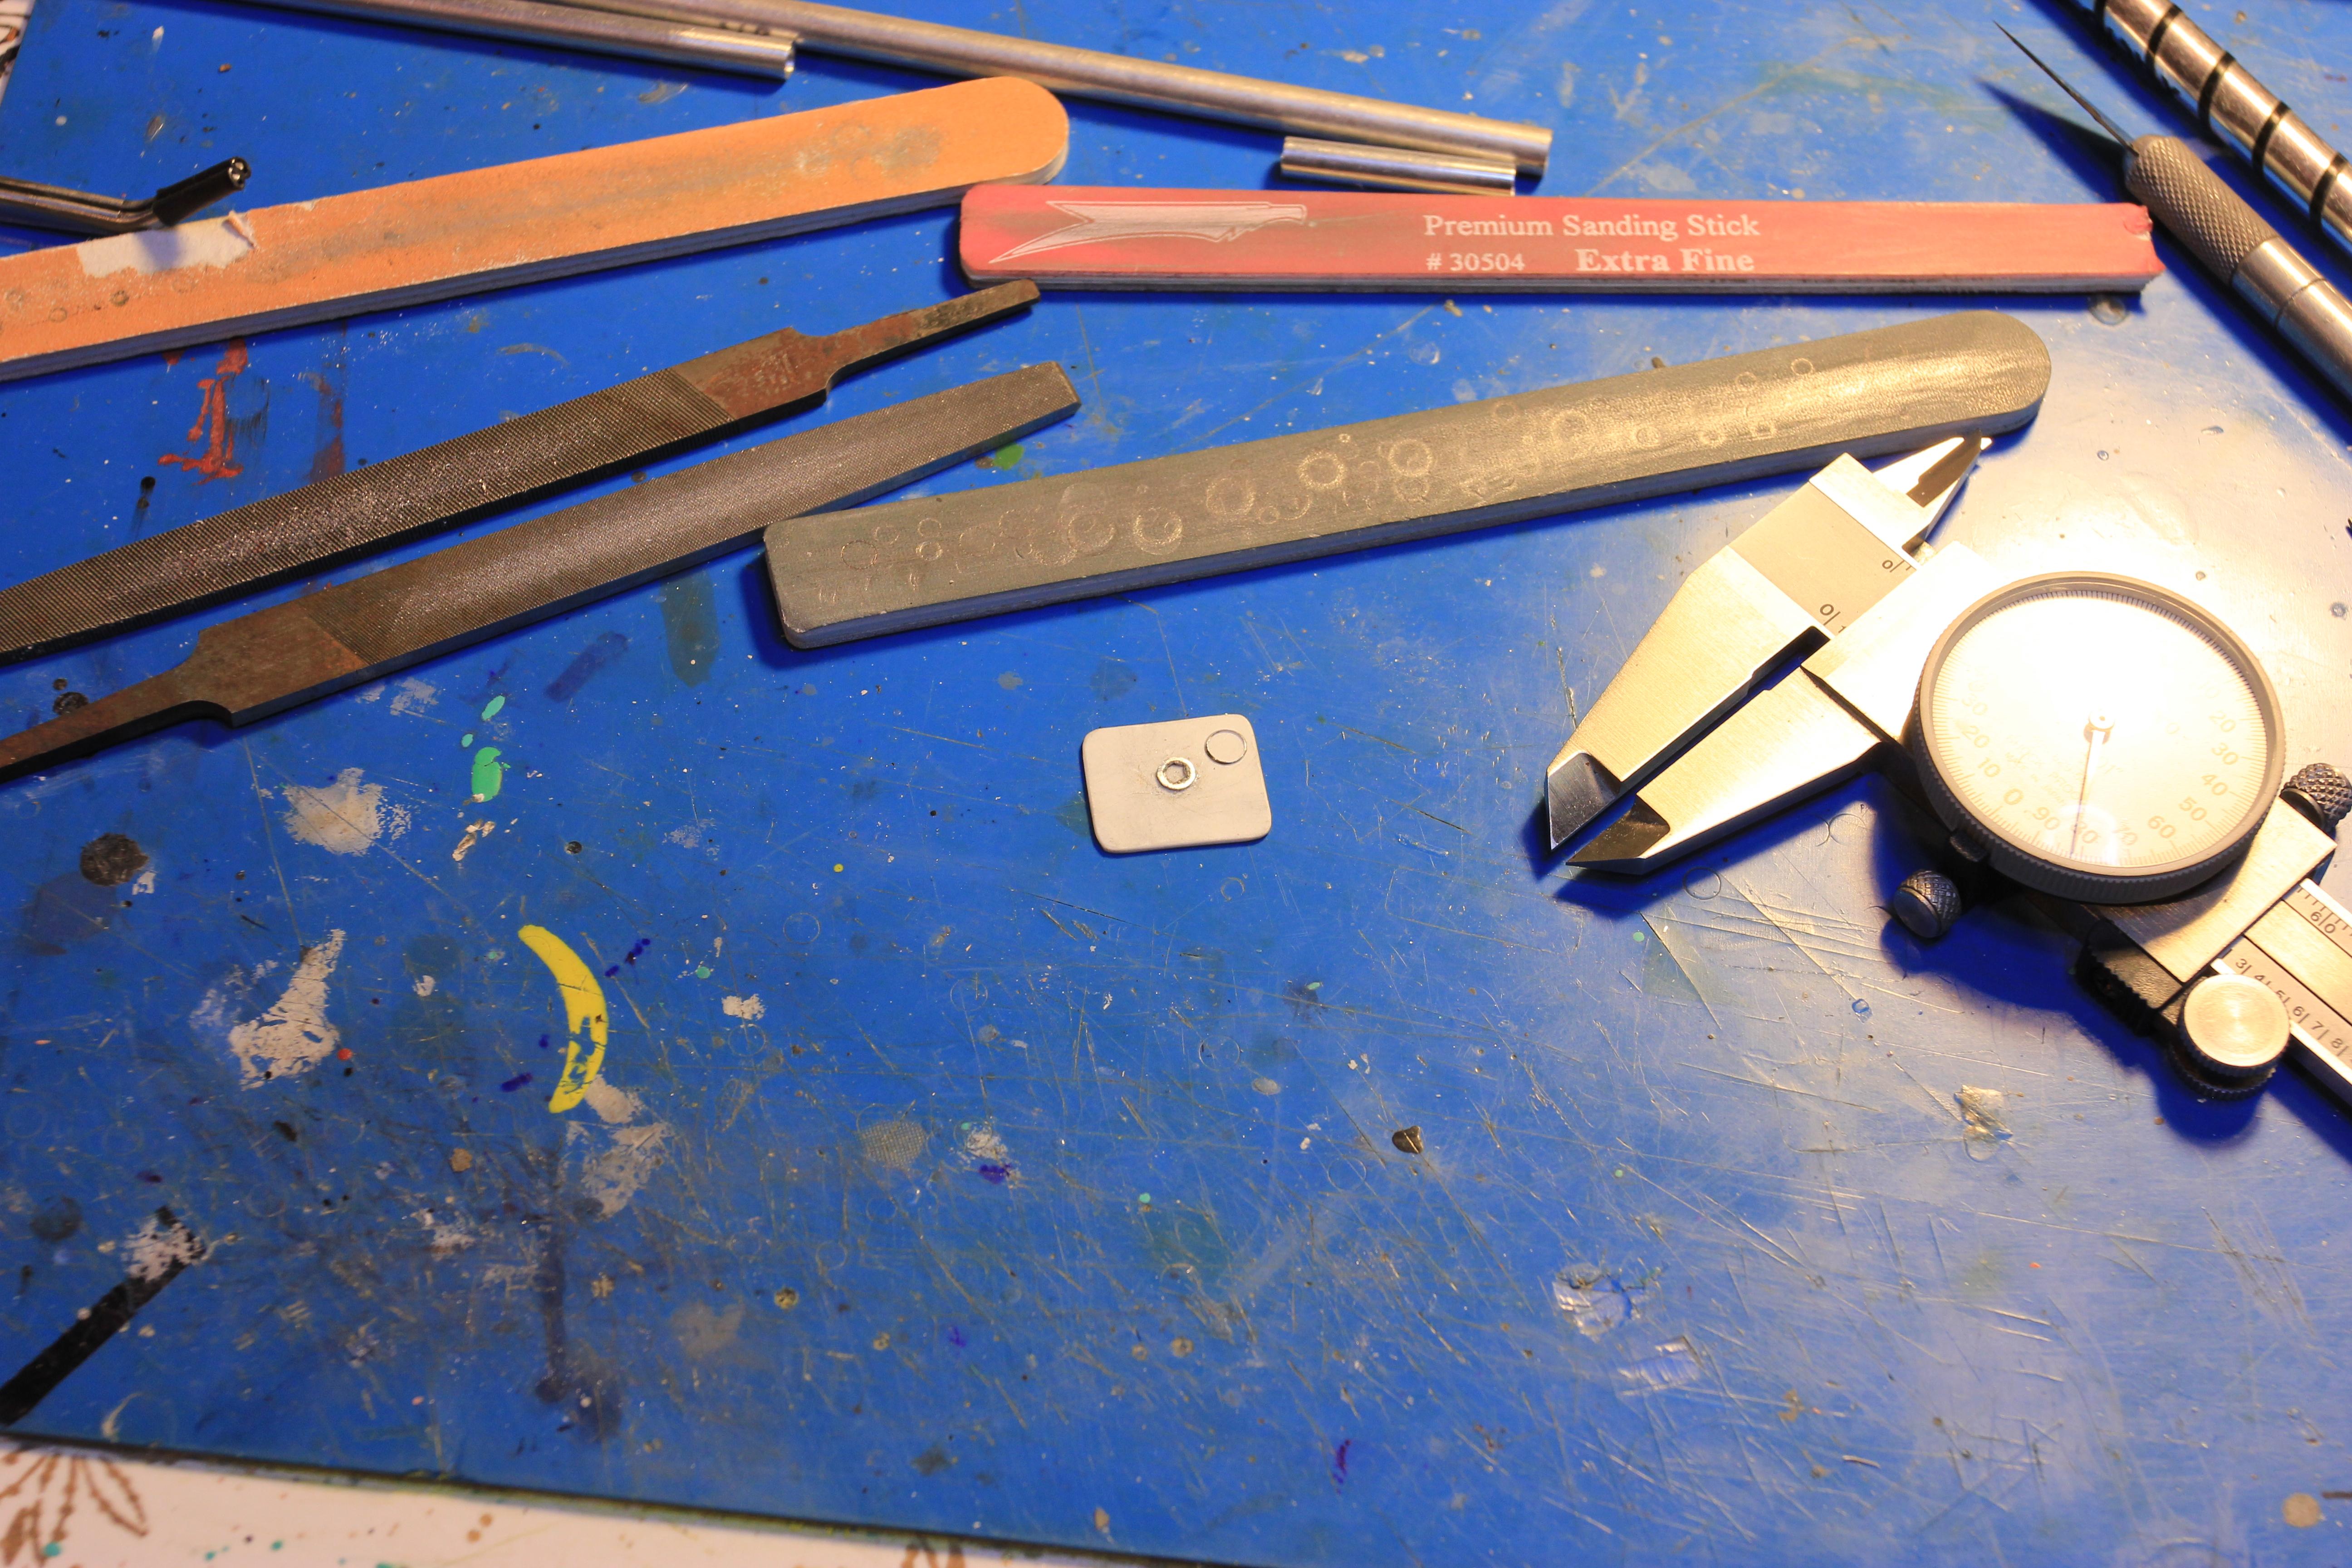
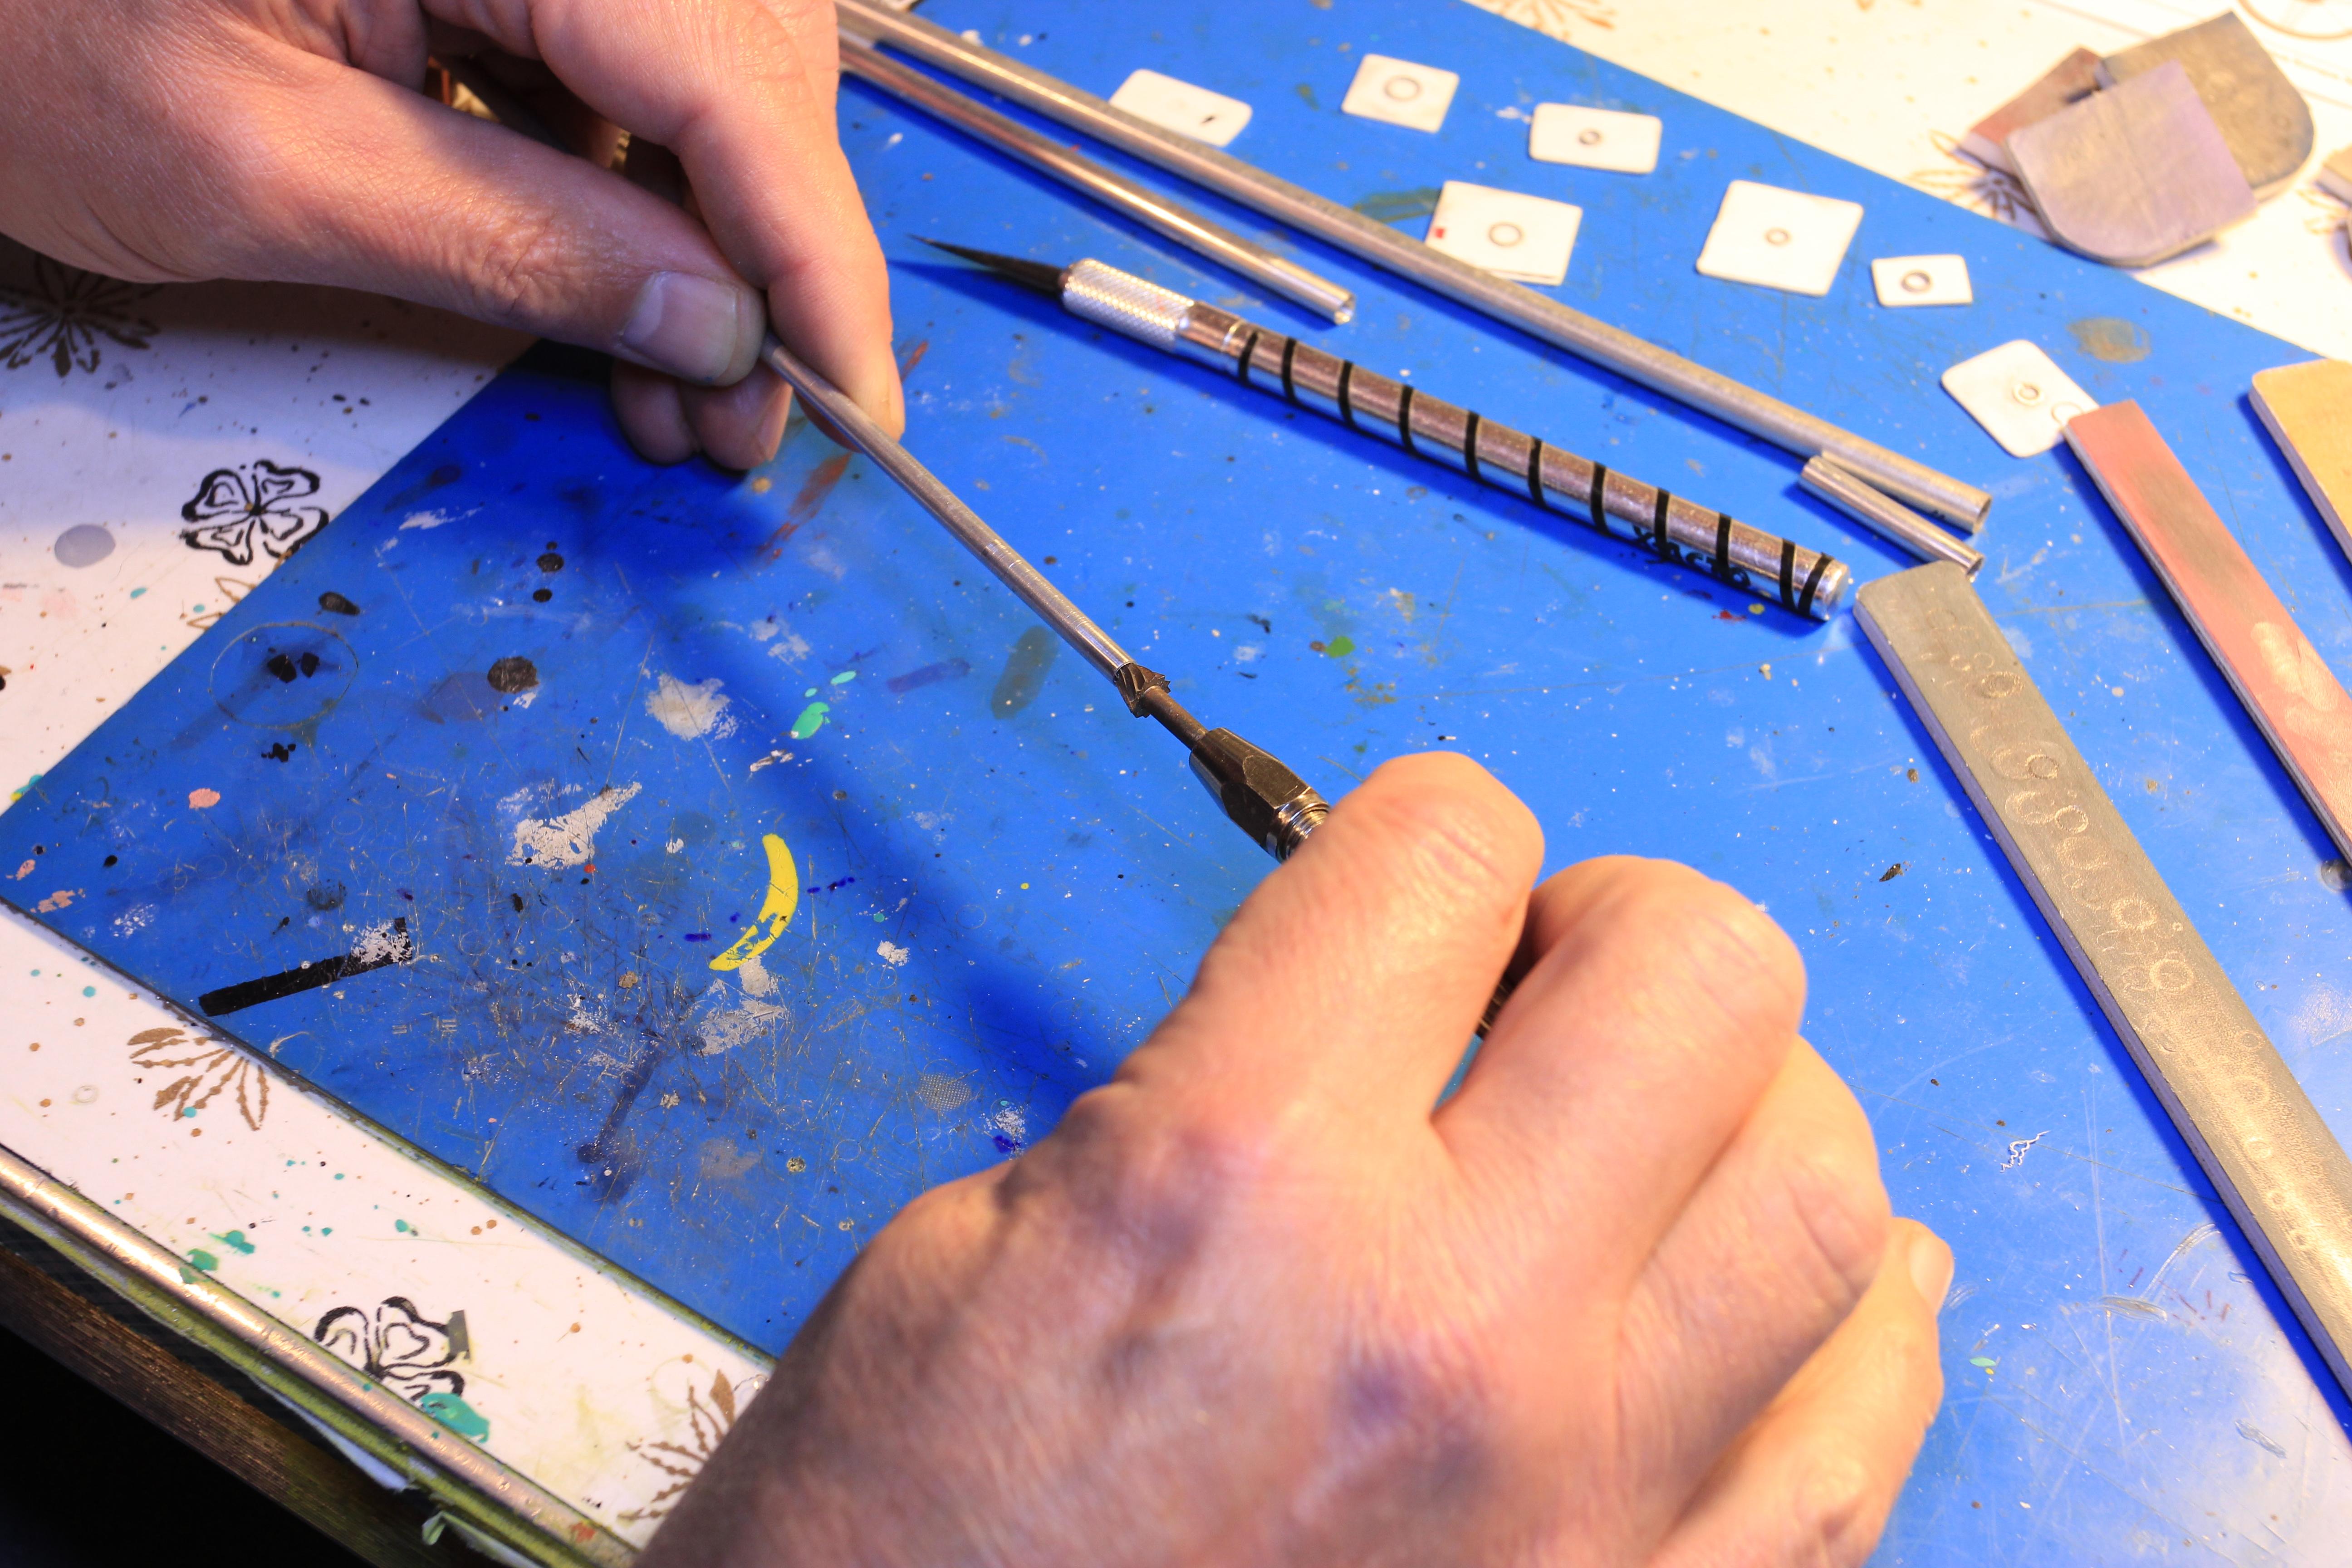
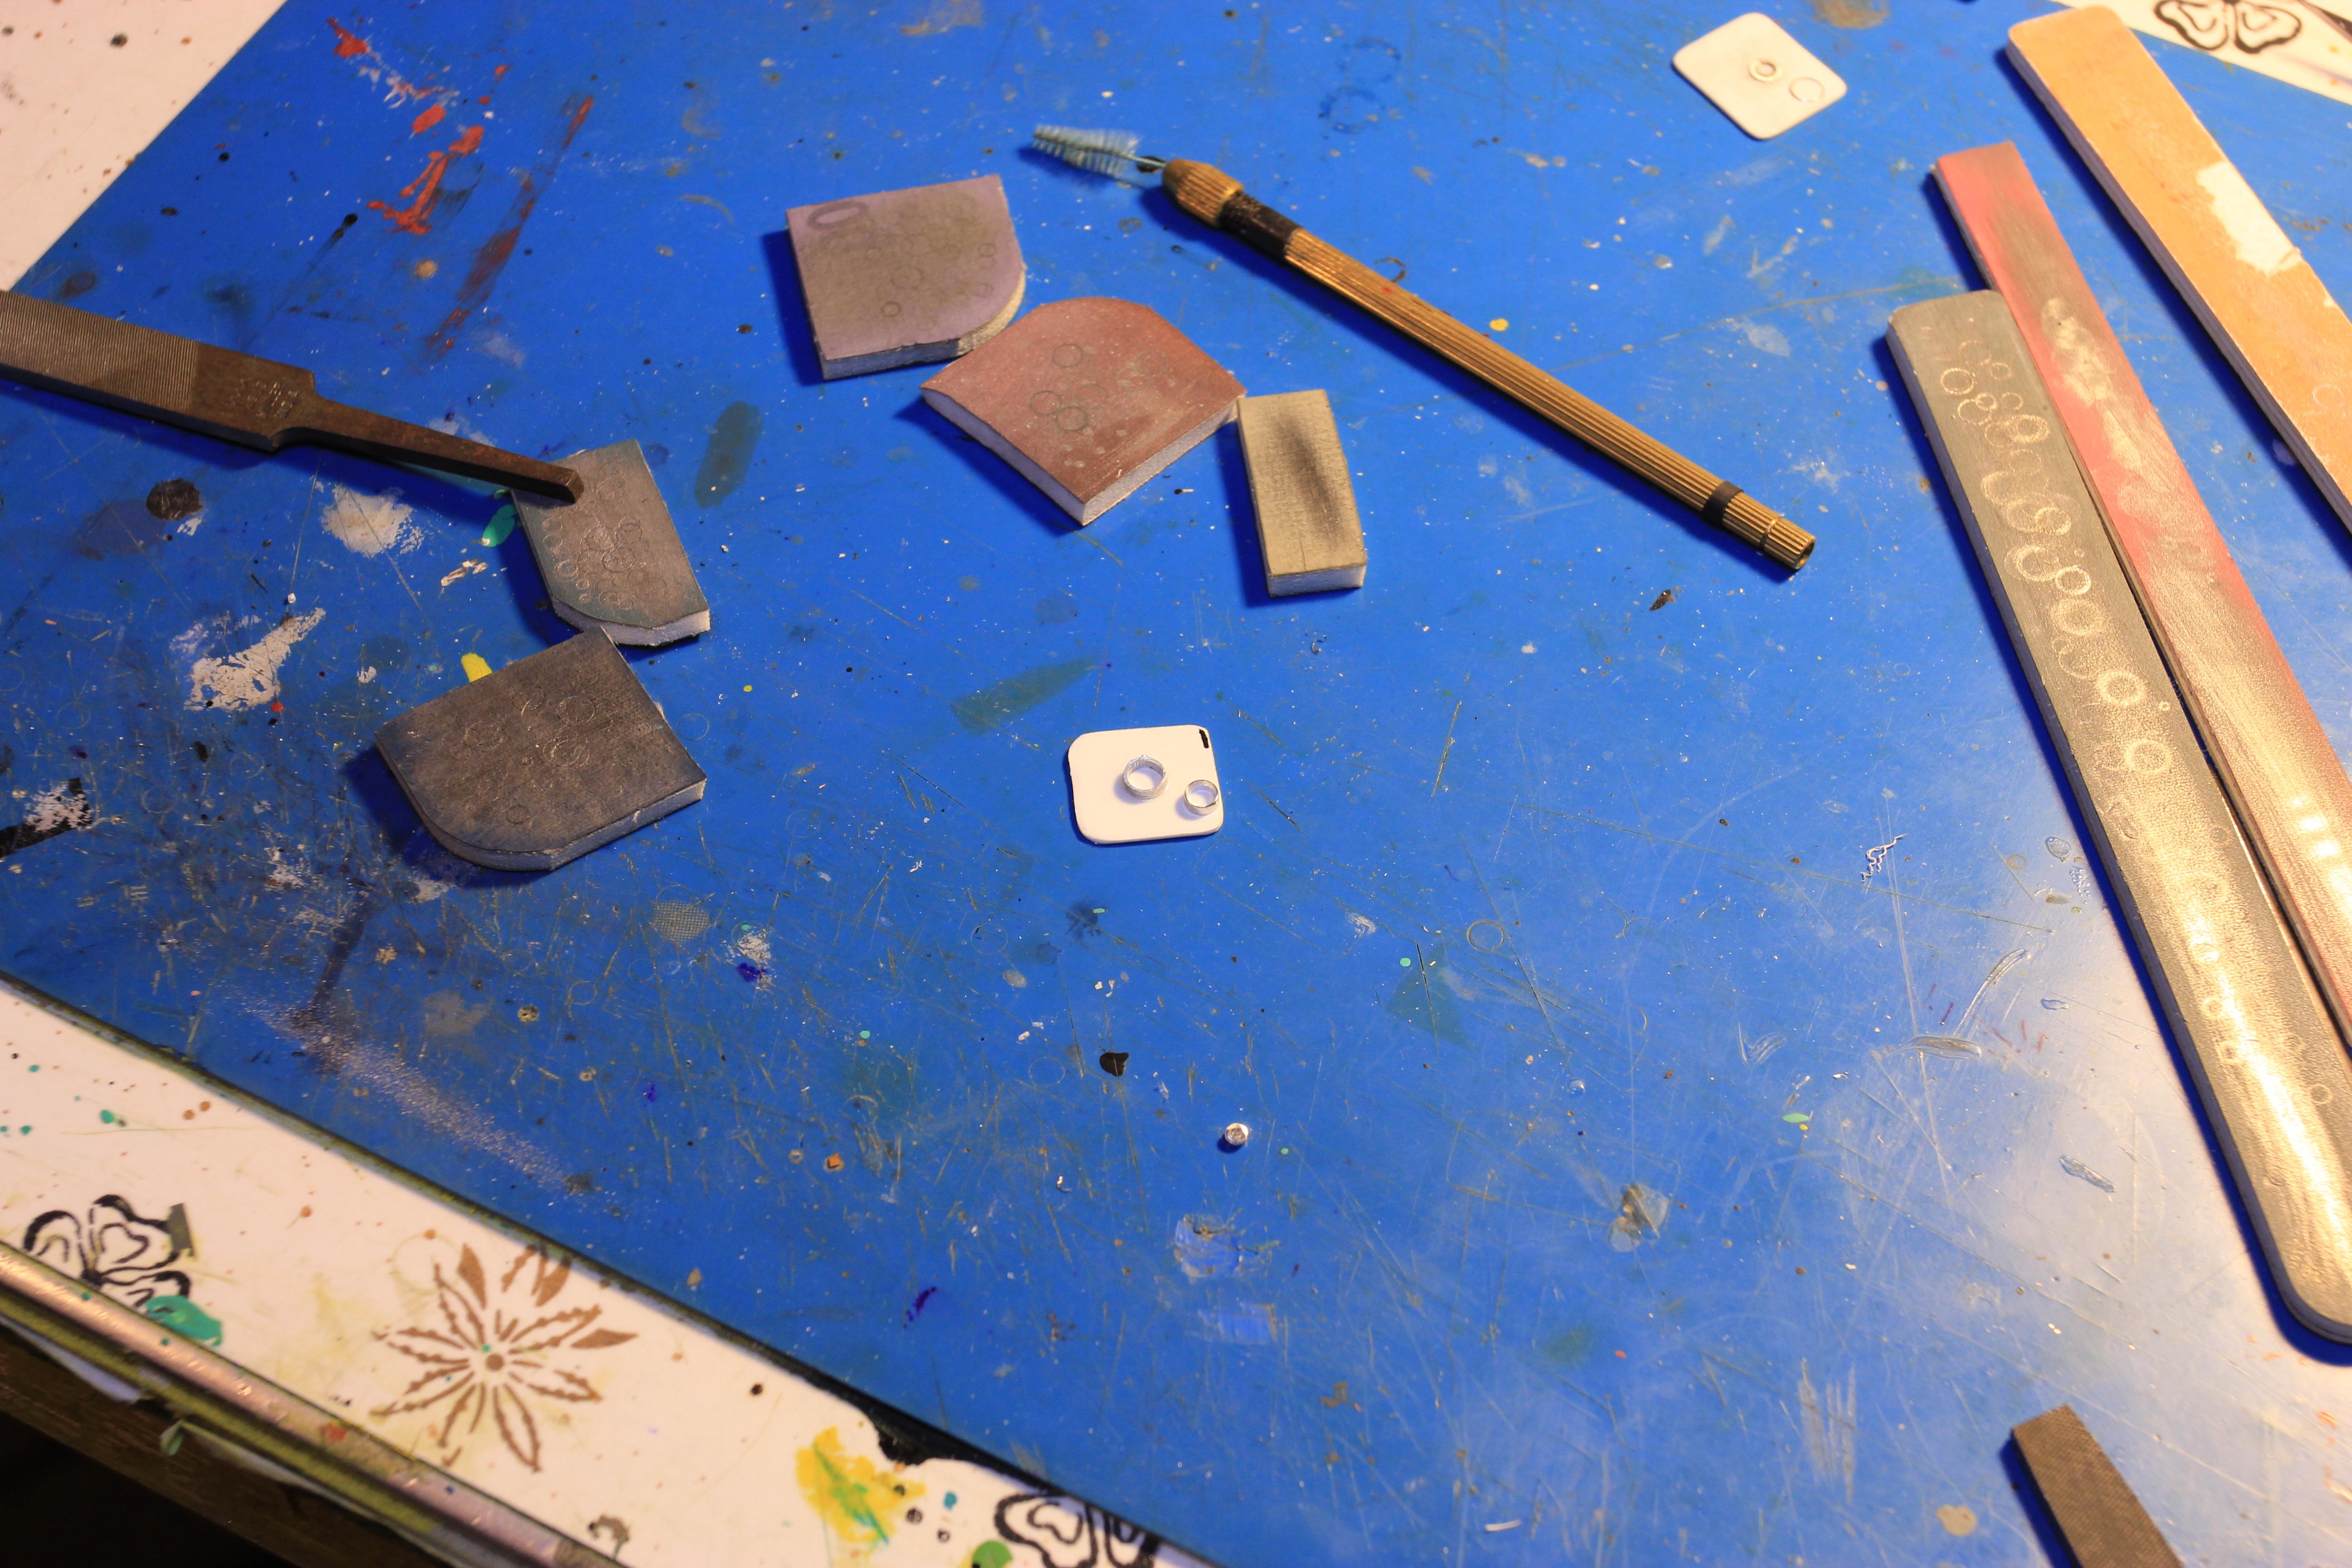
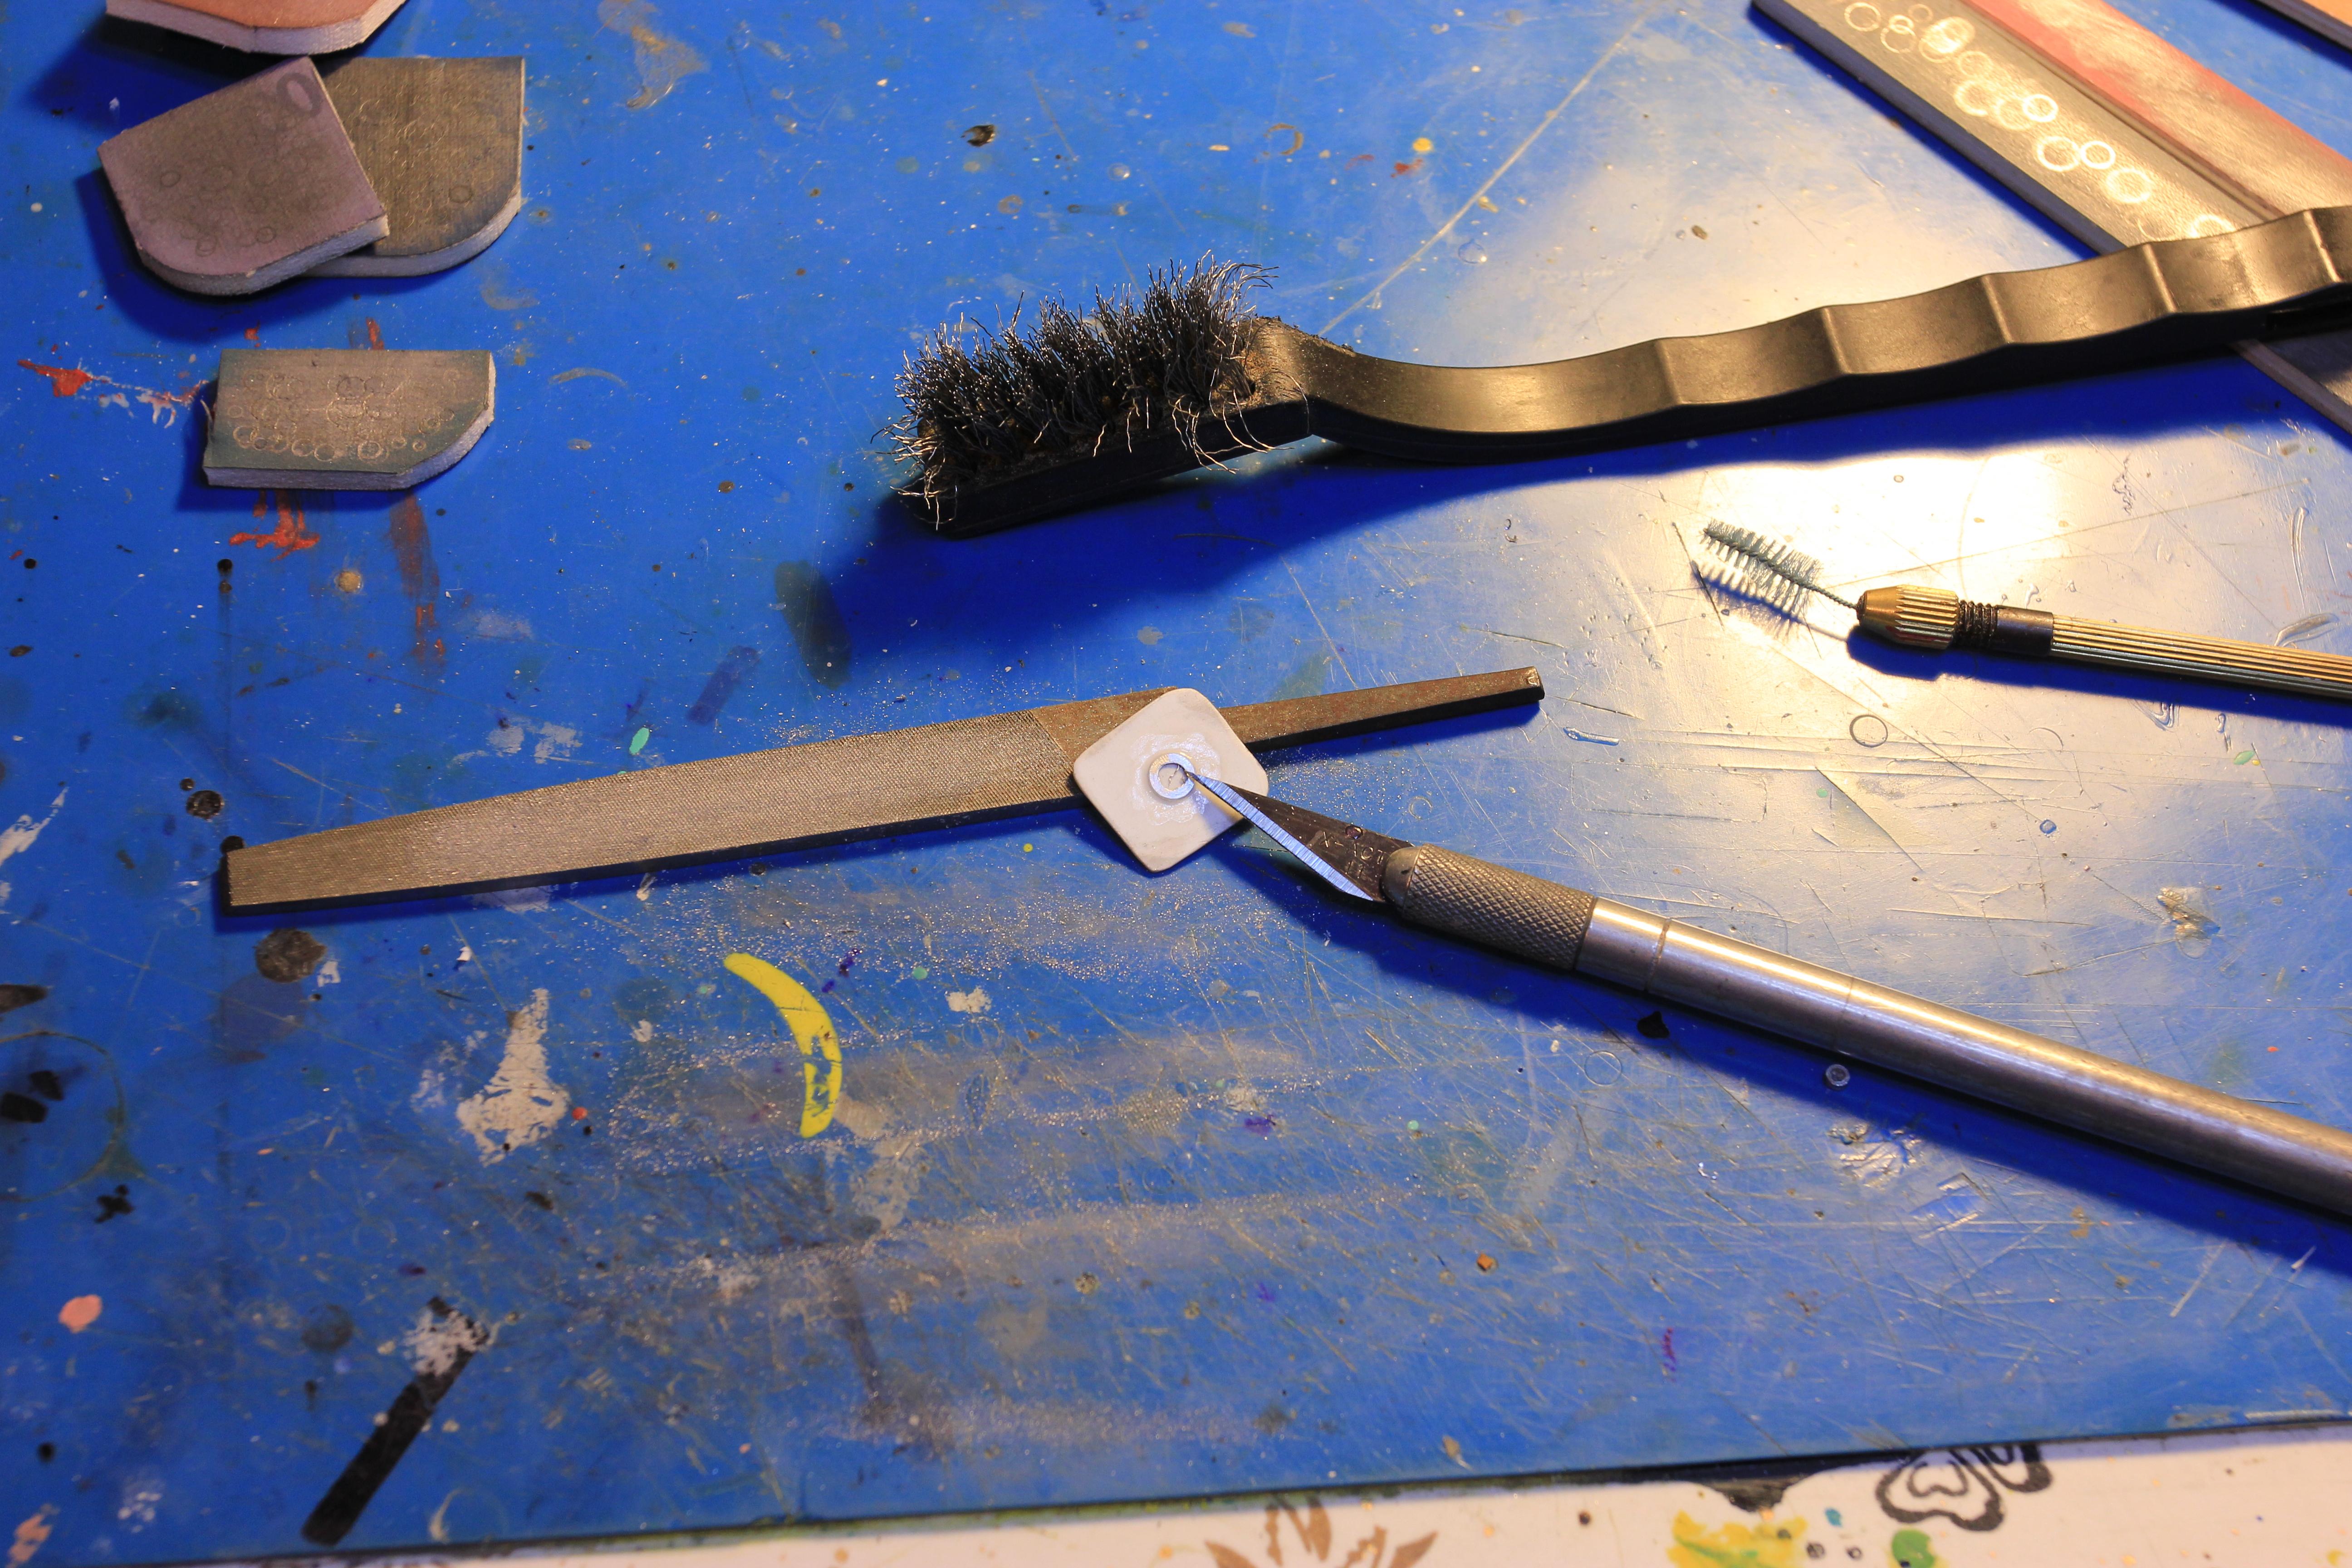
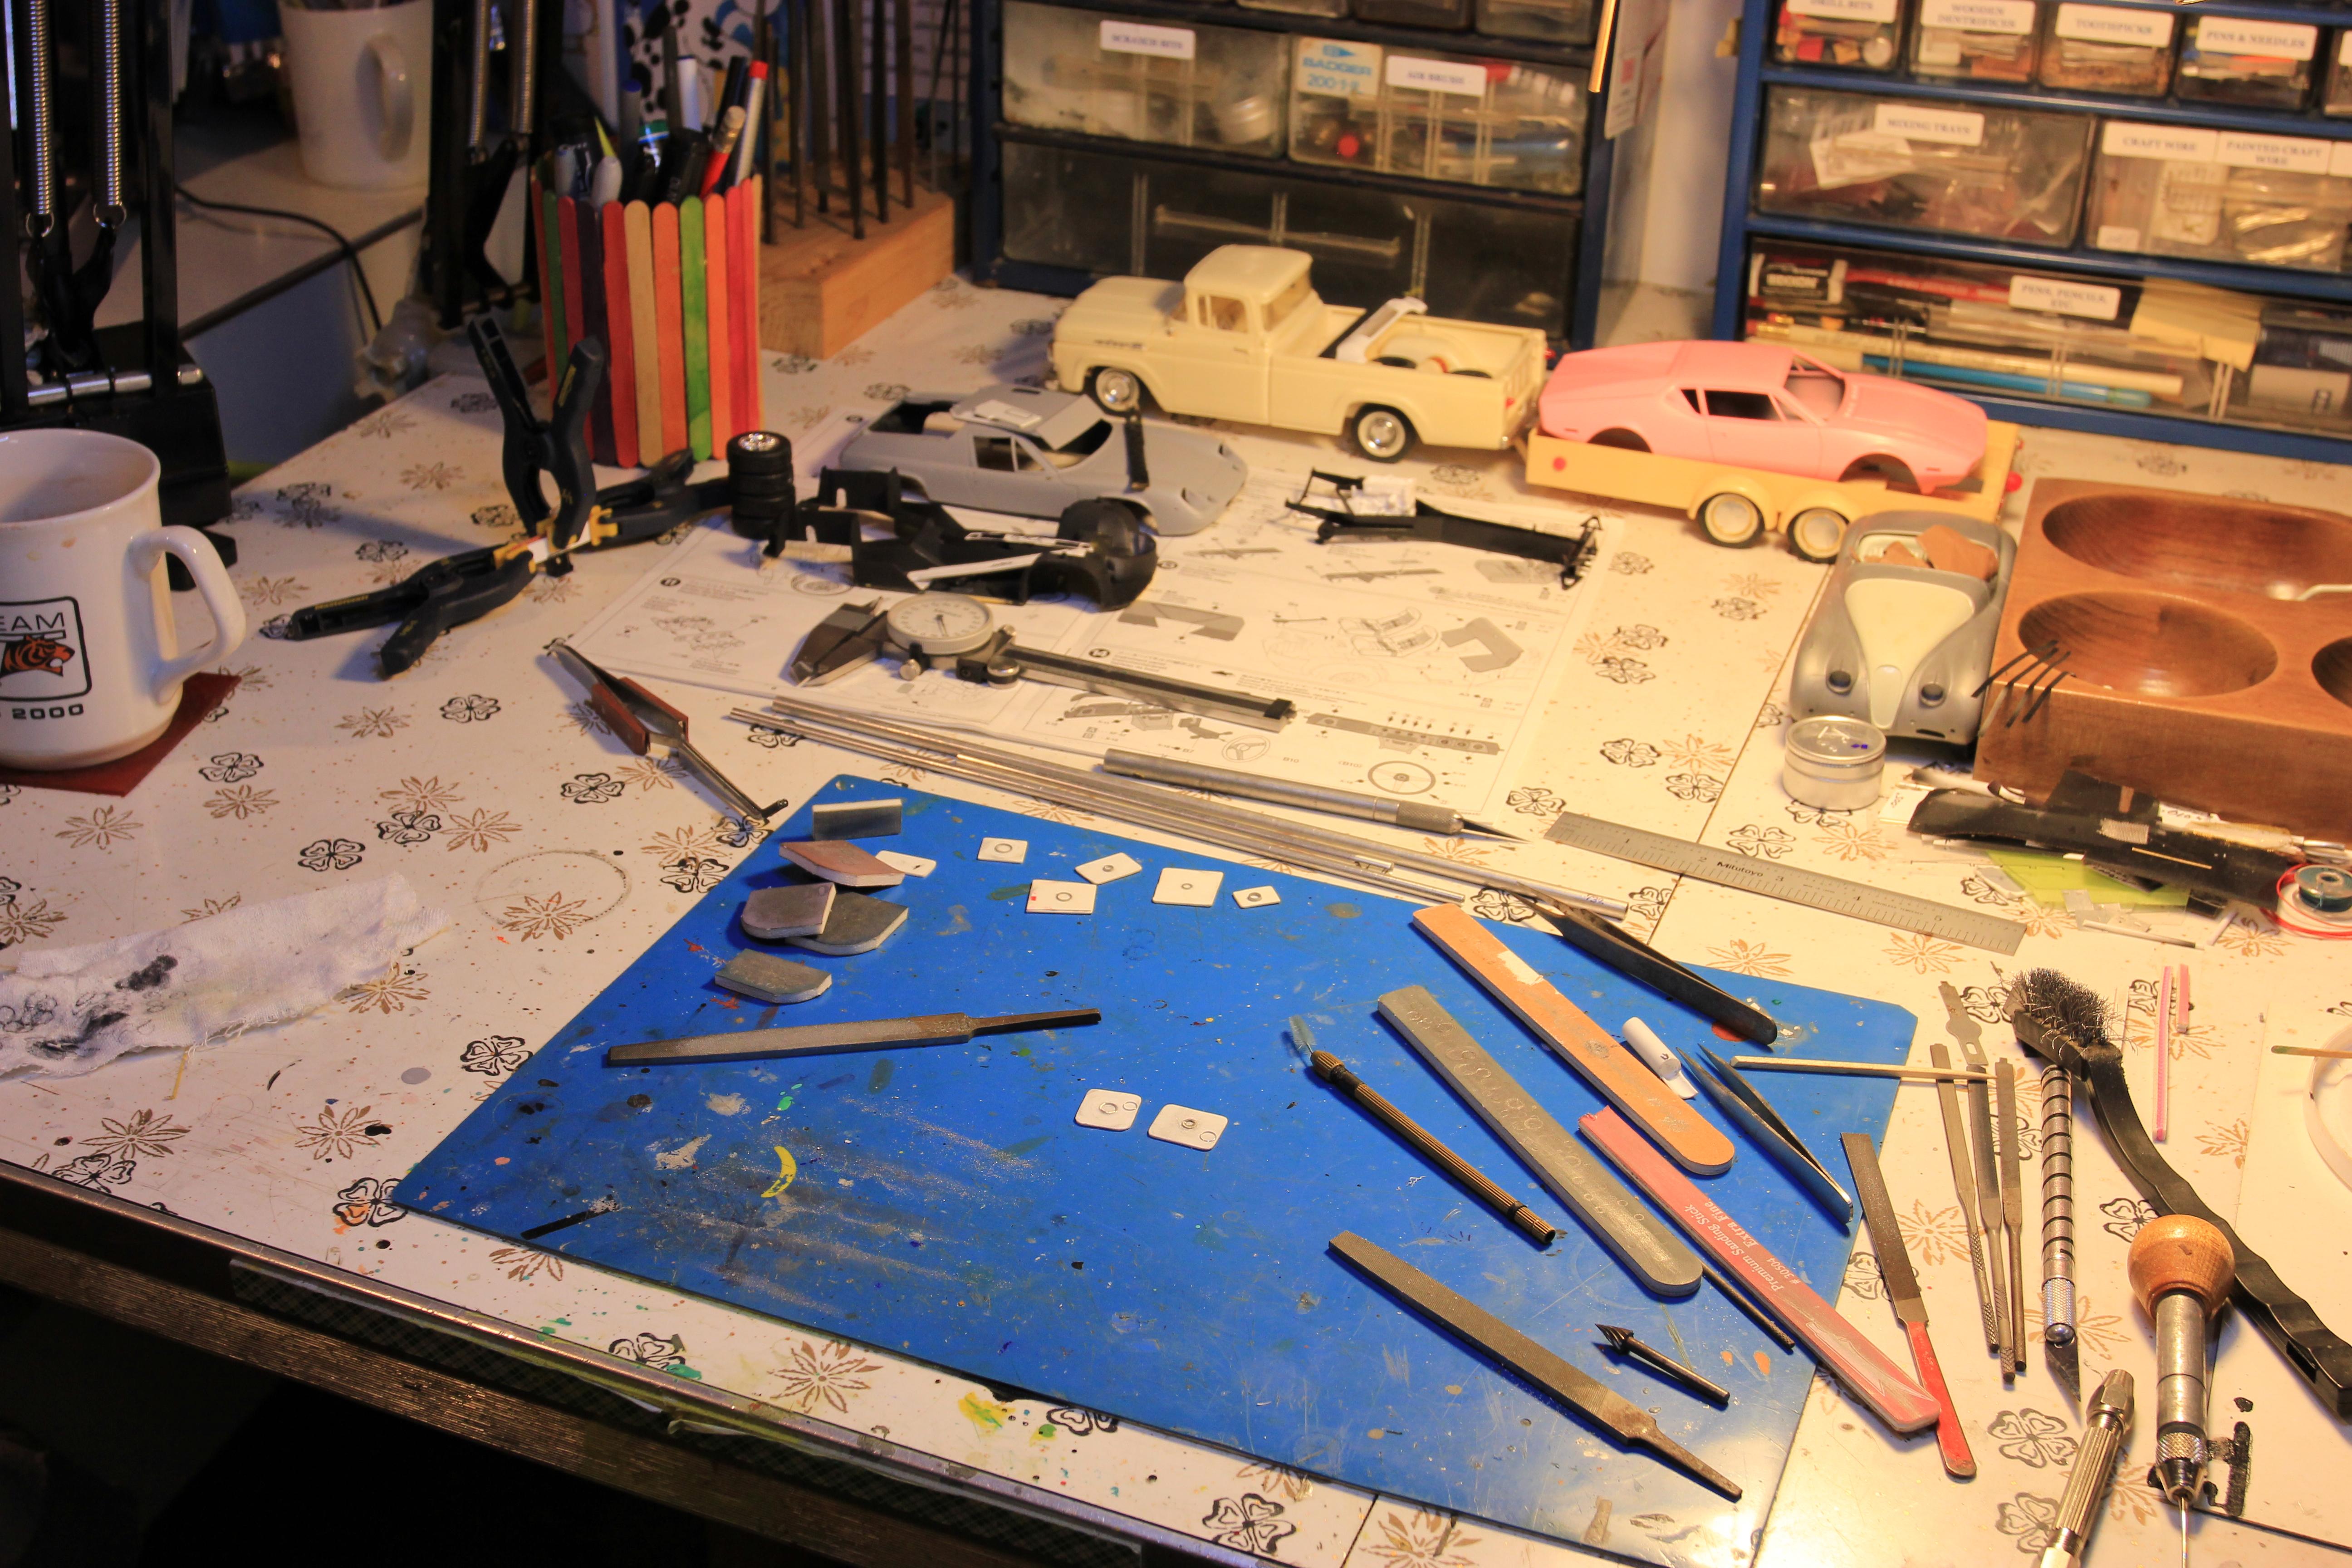
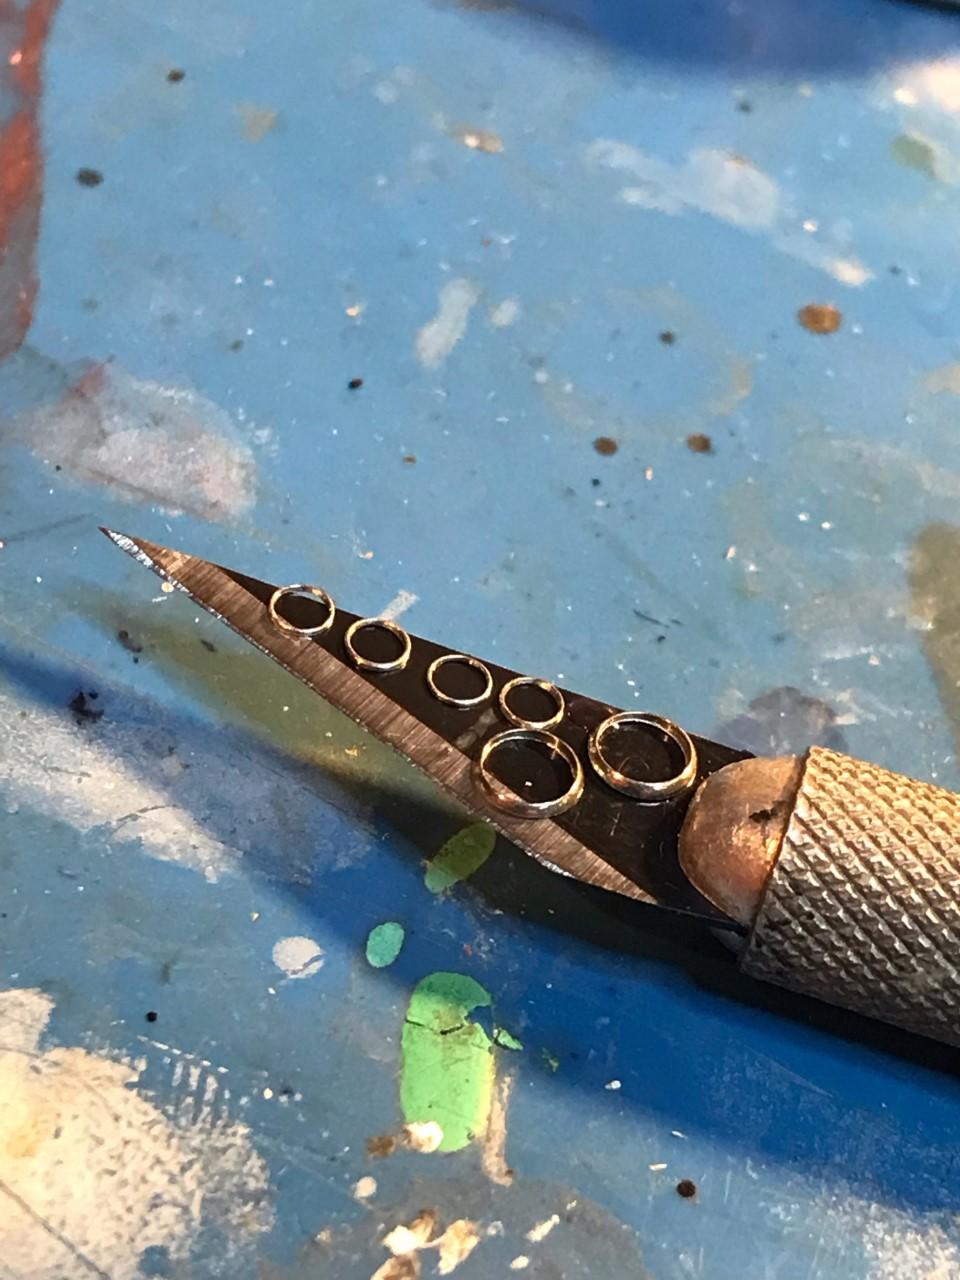
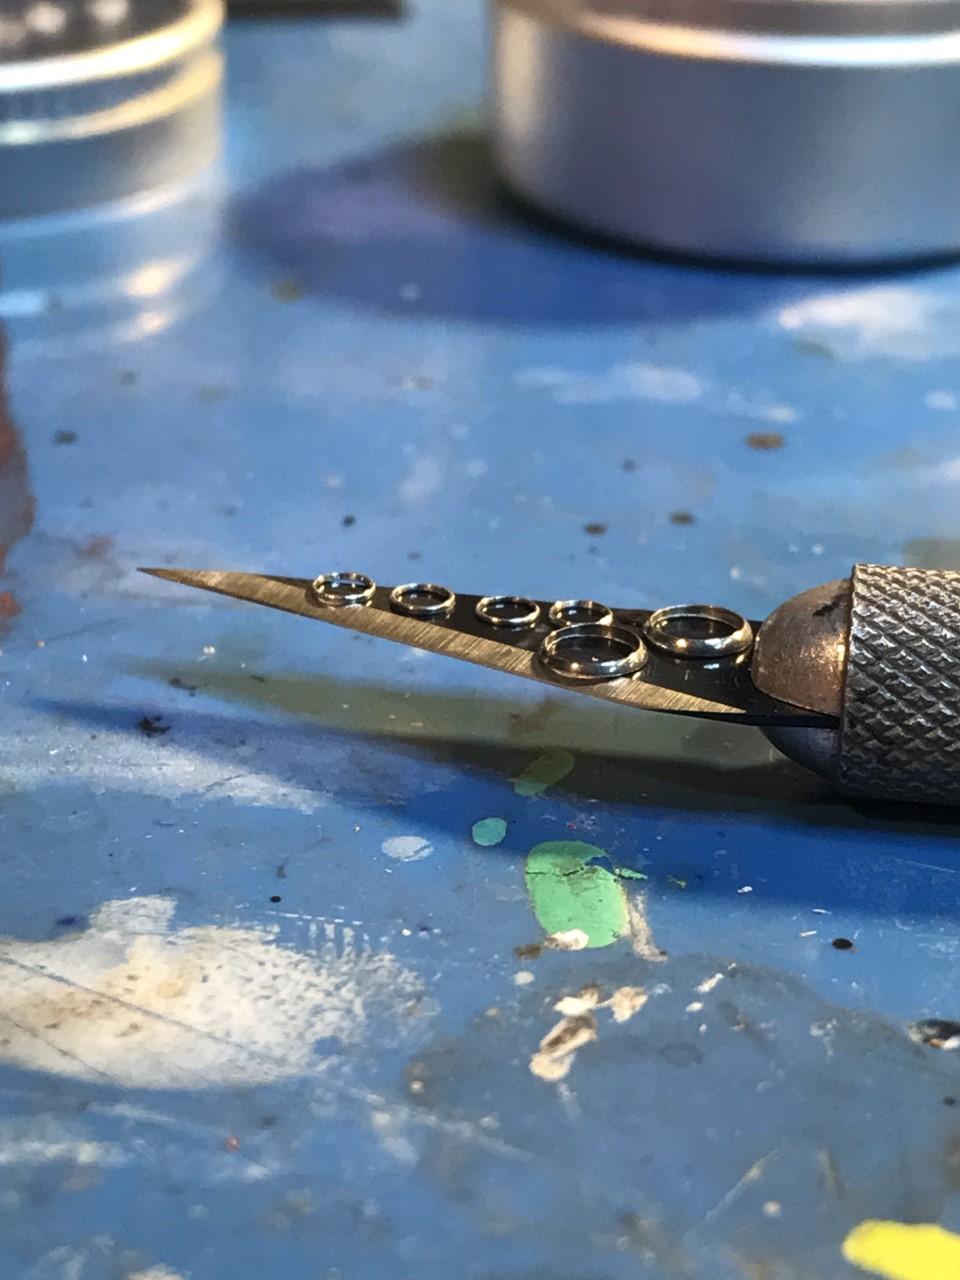
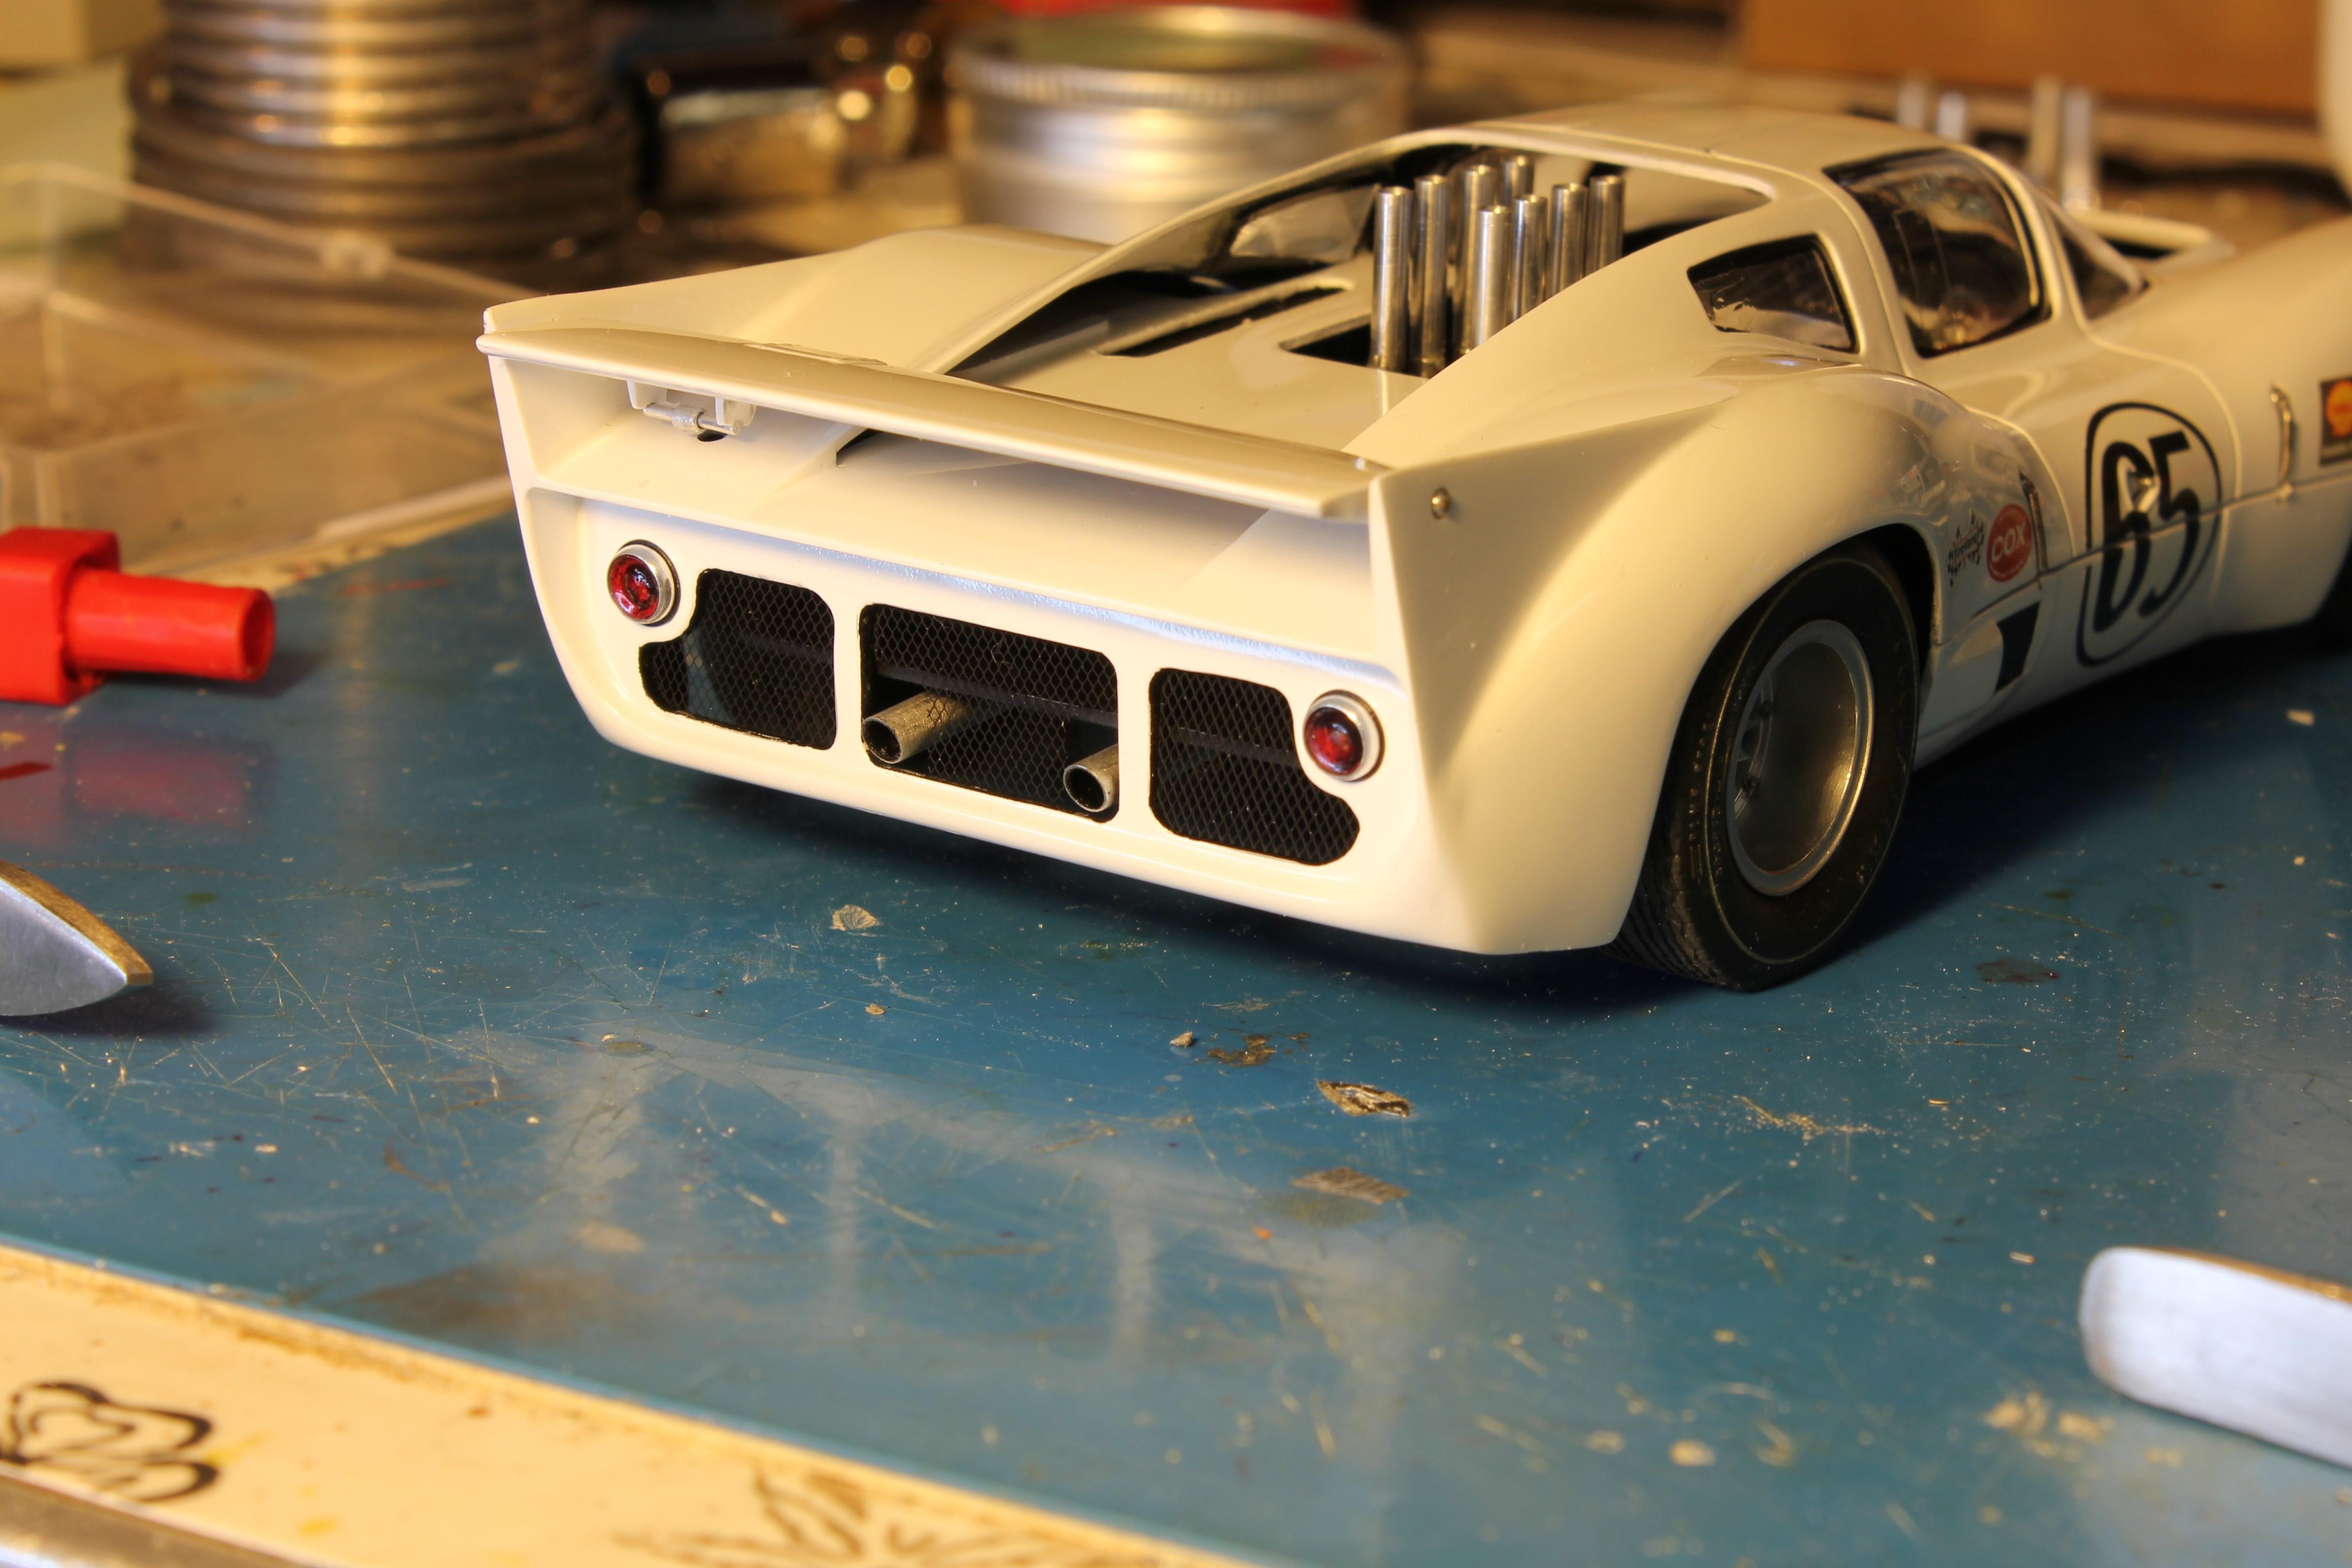
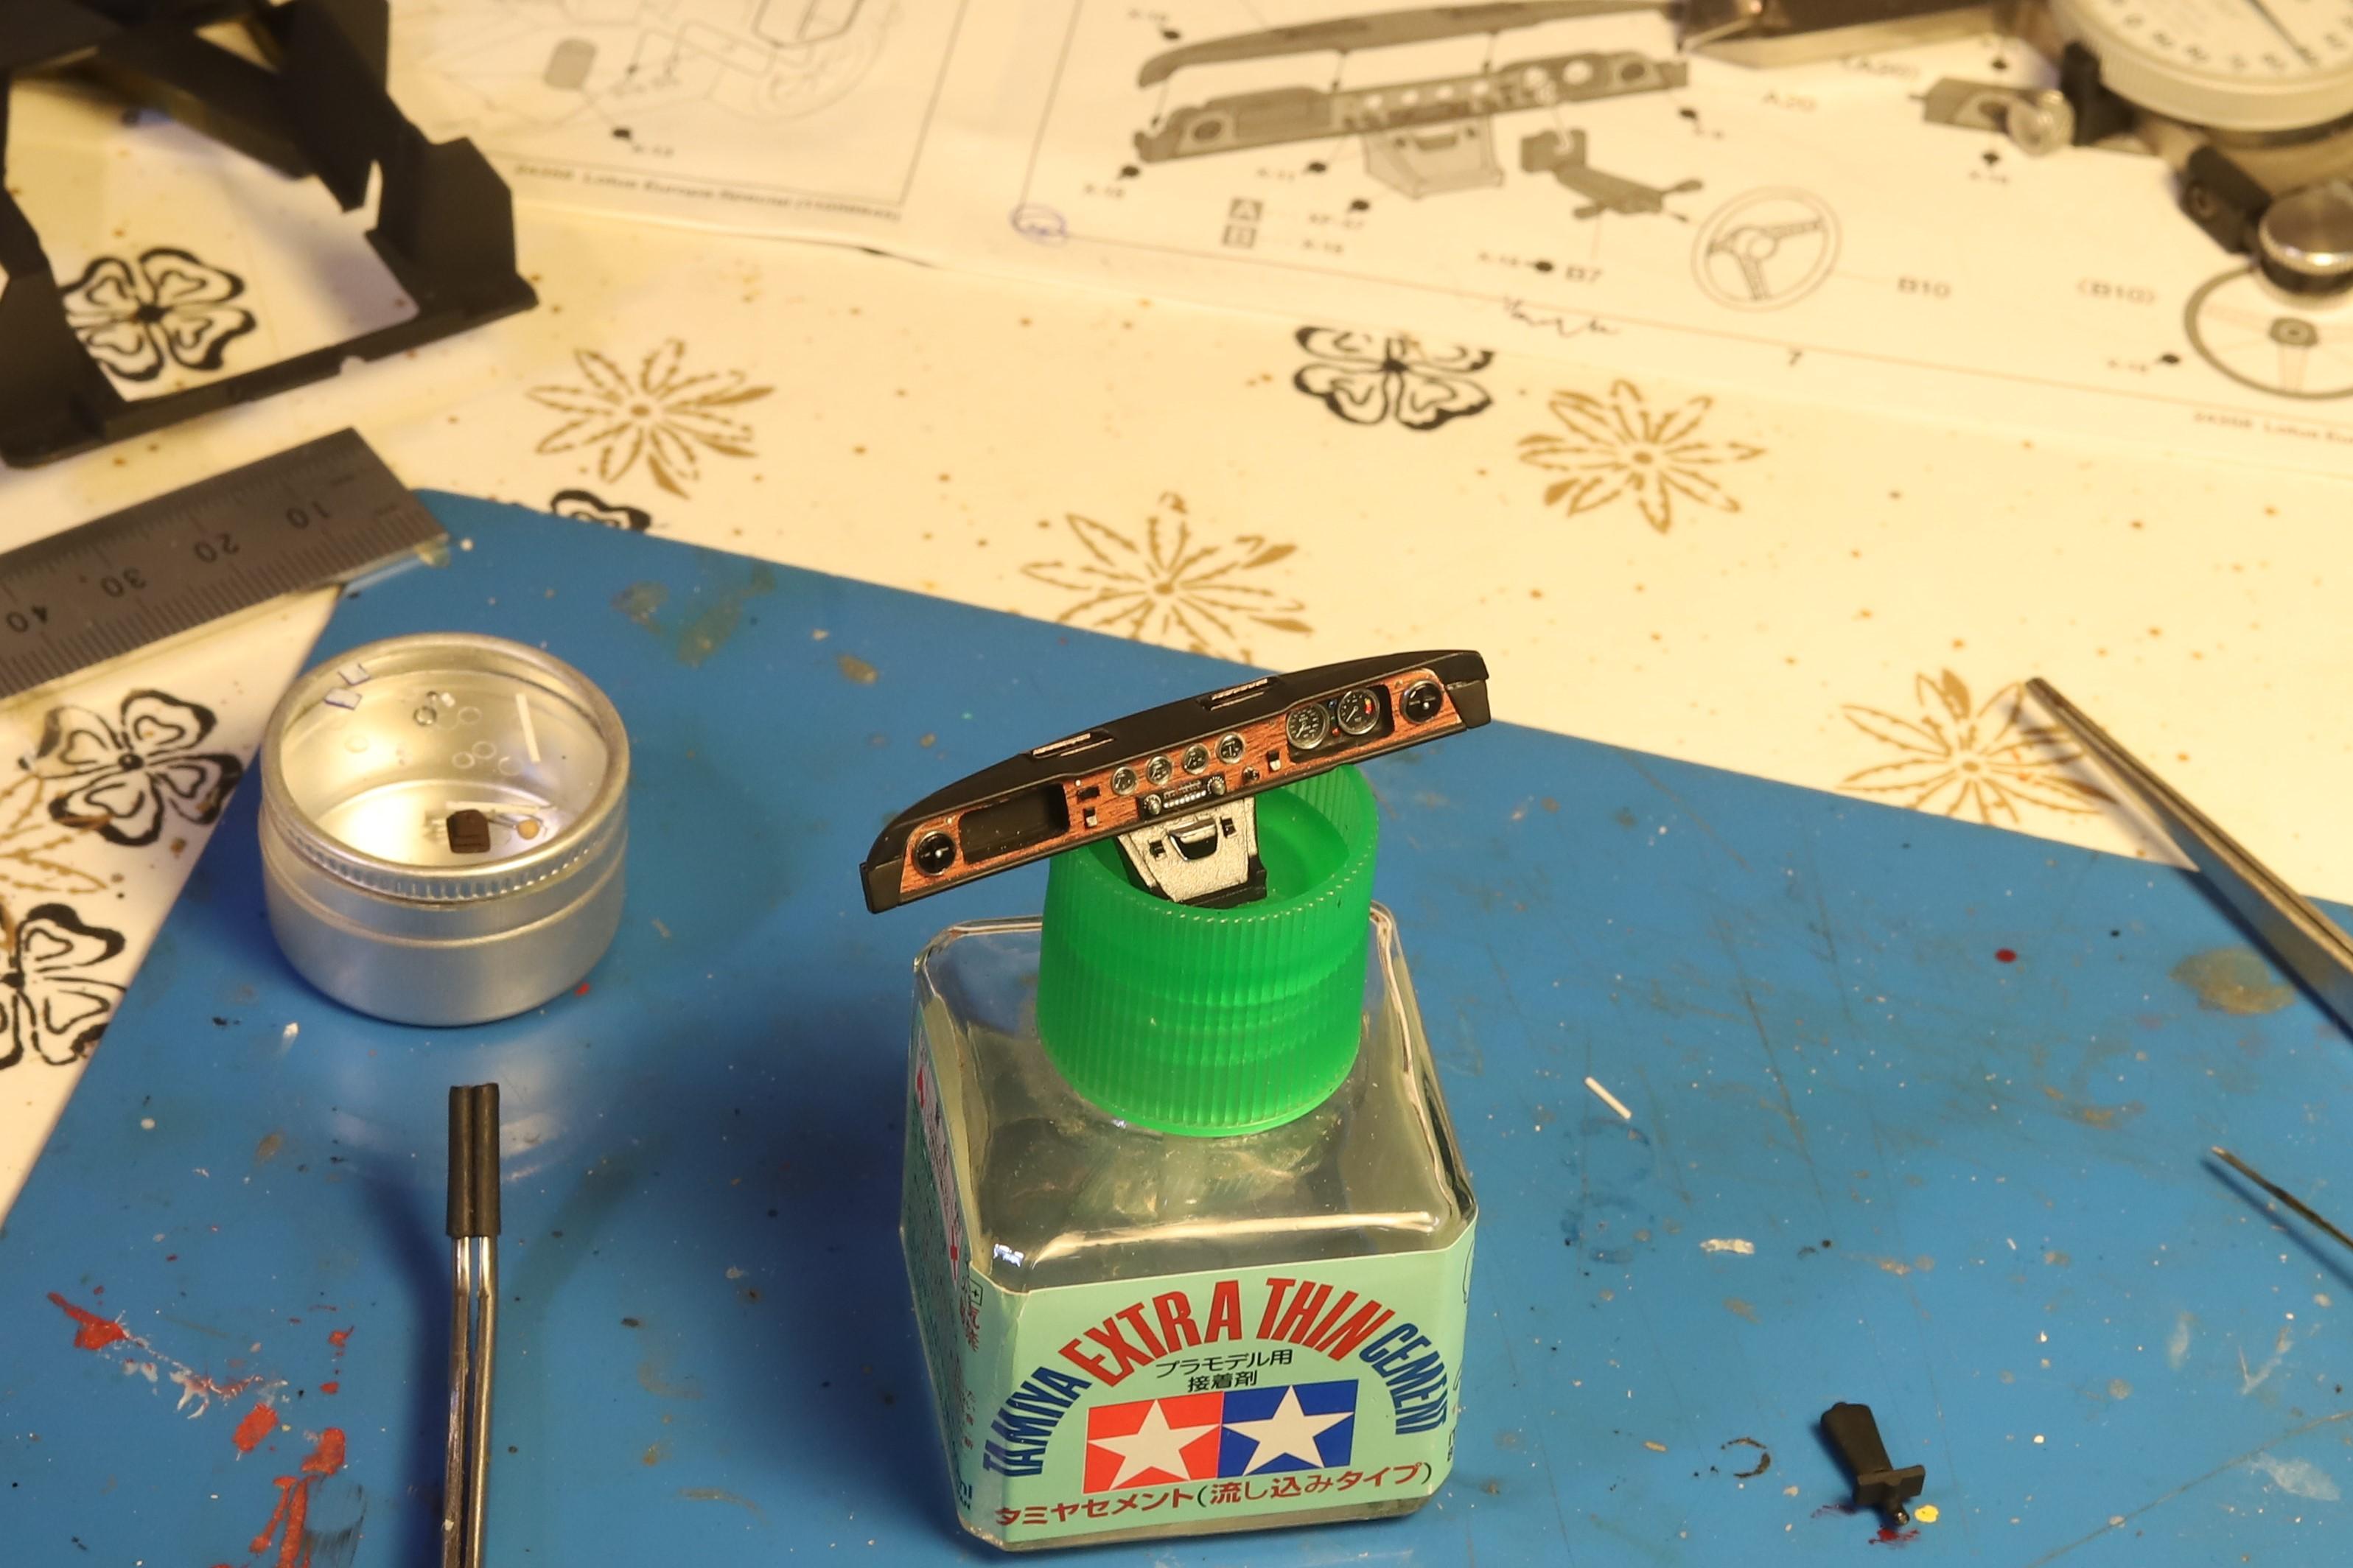
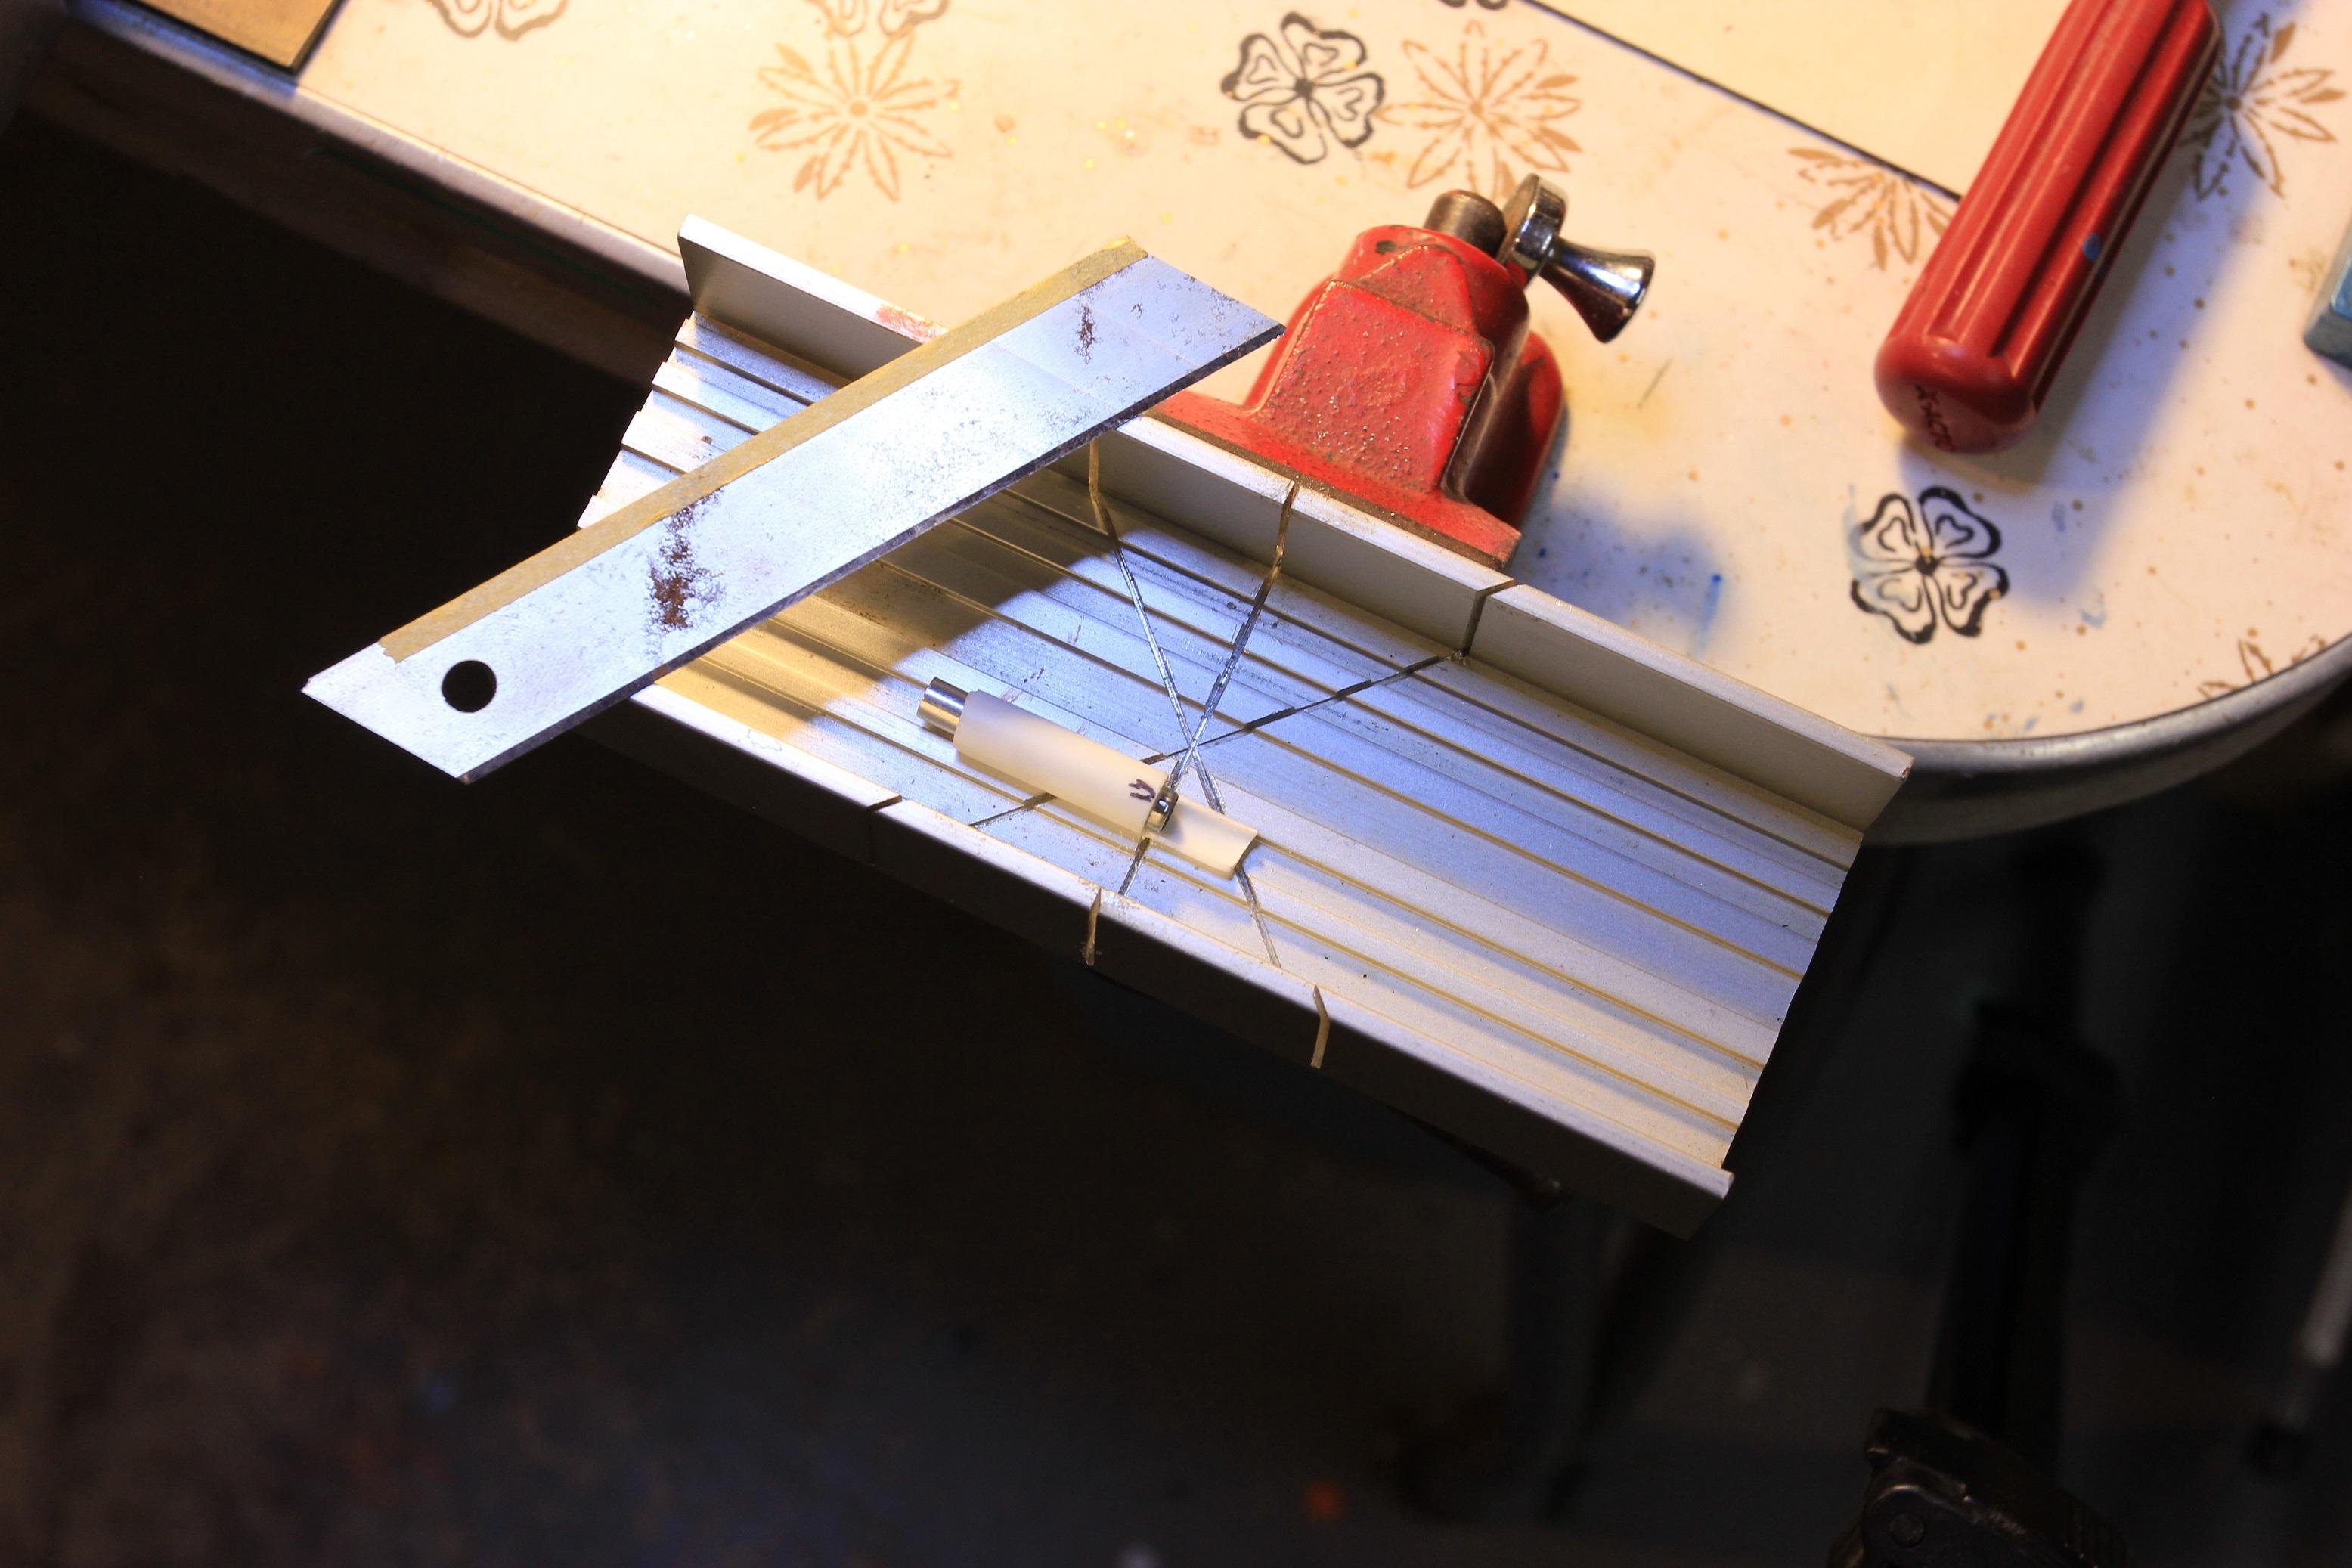
A discussion on the forum a couple months ago on making gauge bezels gave me the notion to share my method for making bezels and other trim rings from aluminum tube. This method isn't for everyone. It's a bit of work, and there are easier and faster methods for making a decent trim ring. But for those needing a thin trim ring to add a bit of realism to gauges, headlights, horn buttons, round tail lights, etc, the extra effort may be worth it. You get the hang of it once you make a few, and you can get faster and produce fewer rejects. There isn't really much new, here, the method of holding the ring during filing being the only clever bit. This is what we're after. These rings were made for the dash of my Europa build, the small ones for the small gauges and the larger ones for the eye-ball vents at either end of the dash. To start, we need nesting sizes of aluminum tube. One size for the ring, and either one size larger or one size smaller for the holder, depending on how the ring will be profiled. Select the size of tube needed for the ring. Ensure the end is square. Here's my tip for squaring the fresh cut end of a piece of tube. Place the end of the tube against a sanding stick, and slip a one-size-smaller tube of longer length (or a one-size-larger tube of shorter length) in the piece you are working, and hold it perpendicular to the sanding board while turning the piece being squared. In most cases the ring being replicated will not be flat across the end. It will generally taper or be beveled, either to the outside surface or the inside surface of the tube (ring). It is worth keeping in mind that as the tube is tapered or beveled, its wall thickness is reduced, by about 1/2 for a very thin ring. This means that a tube that is profiled around the outside surface of the tube will result in a ring with an Outside Diameter less than that of the original tube. Likewise, a tube profiled around the inside surface will result in a ring with an Inside Diameter larger than the original tube. For scratchbuilders looking for every thou of room they can get, this small degree of dimensional control can be very useful. This first ring will be a 3/16" (4.75 mm) tube, profiled around the outside. Here the tube is shaped with files and sanding sticks. Often times I will chuck the tube in the drill press, much quicker, but this one was done by hand. Then the tube is sanded smooth and polished using and extra fine sanding stick and Micro Mesh pads 4000 - 12000, and top that off with a rub with Tamiya polishing compound Fine and Finish. Again, this is much faster when done on the drill press, but these were done by hand. NO need to get carried away, only the end of the tube needs polishing. I keep a set of Micro Mesh pads and sanding sticks just for metal work, as both brass and aluminum make a mess of black oxidation. The end of the tube needs to be sliced off. A slice about .040' - .060' (1 - 1.5 mm) works well, though as you will see, the first one can be a little longer. This is a little rig I made for slicing tube in short lengths. I like the method of rolling the tube with an Xacto blade, but due to the length of the blade, only small diameter tube can be cut, and I frequently go off-square with the blade, ruining the tube end. With this rig I can cut larger tube relatively cleanly, and my record of keeping the blade square to the cut while rolling is slightly better. It makes use of a medium Olfa blade, an Xacto mitre box, and a length of plastic tube in which the aluminum tube can roll. Because the tube is profiled on the outside, the holding fixture will use a piece of tube that fits inside of the ring. Square up the end of the smaller tube, and cut a thin slice similar in length to the previous one. Doesn't matter if its a bit longer or shorter. Glue the squared end to a piece of sheet plastic as shown with some CA. I use .030" sheet plastic, sized such that it is slightly wider than the file you intend to use to file down the ring thickness. Debur the ragged end of the holder tube, then slip the ring over it, polished end down. Flip the holder/ring over onto your favorite file, and slowly and carefully drag the ring along the file. Keep your index finger centered over the ring, keep the downward controlled pressure even across the ring. Work slowly until you get the feel of how the material is coming off. Try to keep the holder square when filing. Turn the holder 90 or 180 degrees every few strokes to help keep everything even and square. Stop frequently and check your work. Clean the file frequently to keep the cut clean and smooth. Once it's down to size, this is what it looks like. It measures in at a pleasing .011" (0.25 mm), but as can be seen, I got a little off-square coming on the end. Depending on its application, this one could be a reject. If you are able to, this is the best time to dress any swarf around the outside edge, but due to its thinness, it may be difficult. Carefully pry it off the holder, taking care not to bend it. The ring will be quite delicate.., and the larger diameter the ring, the more fragile it is. Fortunately larger diameter rings are often also thicker. The ring is carefully dressed of its swarf with an extra fine sanding stick while held with rubber tipped tweezers (not pictured) or carefully held with regular tweezers. The swarf around the inside is trimmed carefully with a sharp Xacto knife. Magnification helps (essential?). It usually cleans up more easily then I think it's going to. Final measurement is .010" (0.25 mm). The holder can be reused for another couple rings, though it helps to keep the starting slice of tube as thin as possible, and requires diligence in keeping the index finger downward-pressure centered squarely over the ring during filing. The next ring will be from 5/32" (4.0 mm) tube, profiled on the inside. I use a cone shaped rotary file chucked into a pin vise to bevel the inside of the tube. Twirling an exacto blade in there works well, too. If the resulting beveled surface is not sufficiently smooth, wrap a small piece of 1000 or 1500 grit sandpaper around the rotary file and give the tube a few rubs. Polish the end as before, and cut off a thin slice. Make a holder as before, but this time the holder tube will be one size larger than the ring, rather then one size smaller. Trim the swarf from the ID of the ring before removing it from the holder. Measures at .011" (0.25 mm) thick. That is about 1/4" (6 mm) in scale. Not too bad for most scale applications. I have made them as thin as .006" (0.15 mm), but they get super flimsy and maddeningly difficult to work with. .010" - .012" looks great for 1/24 scale gauges, and in some cases so does .015", and when they are that thick they are much more easy to handle. Other applications may be .020" (0.5 mm) or thicker, which by comparison to these thin rings, are much easier to work with. Here are a few applications for these rings; Gauge bezels on this MGB. Gauge bezels and tail light trim on the Chaparral. The bezels around the eye-ball vents on this Lotus Europa dash. The gauges themselves are not trimmed with rings, but are made as individual assemblies from aluminum tube, inserted into holes in the dash. Questions, comments, criticisms?

-
Andretti Ford GT 66 Lemans
Bainford replied to Rich Chernosky's topic in Other Racing: Road Racing, Salt Flat Racers
Beautiful GT-40! Looks so sinister in that gorgeous black paint. Very nice indeed. -
TAMIYA PORSCHE 911 GT1
Bainford replied to HSCHMIDT's topic in Other Racing: Road Racing, Salt Flat Racers
Nice work. I get a headache just thinking about decaling that car. Good looking model. -
Nice style on this one. The paint is beautiful.
-
Jeep CJ-2A
Bainford replied to NOBLNG's topic in Model Trucks: Pickups, Vans, SUVs, Light Commercial
Very nice old school Jeep. Great work on this. Your improvements and detailing really brings this build to life. I love it! -
Great looking Duster, both model and 1:1. Nice work on the doors and deck lid and all around great detailing. Very well done!
-
Luke, you sure do work clean. Nice work all around, and that engine looks fabulous.
-
Those old decals seemed to have fared quite well. They look good.


.JPG.099955381e4d7b42afb623b2a4436100.JPG)
.JPG.7e9b1a1b83d8dc1d00bebabcc7dc983f.JPG)
.JPG.a4645e40e8b4884091a0483204dbaaf5.JPG)
.JPG.af25d8cac2376156fc66ebc0fdfc730d.JPG)
60.jpg.93f2efe29609fa7bcbf37c08c6f804f1.jpg)
60.jpg.81830aa308c9517fff7cd22b776231d9.jpg)
.JPG.dc063109acc8a6af458acbb2f74bea99.JPG)
80.jpg.0d9b0497c3354295c2fd8f2d05e59196.jpg)