David G.
-
Posts
11,326 -
Joined
-
Last visited
Content Type
Profiles
Forums
Events
Gallery
Everything posted by David G.
-
Nice foil work! David G.
-

D8 Bulldozer
David G. replied to Mopar - D's topic in WIP: Model Trucks: Big Rigs and Heavy Equipment
The fan guard looks great! I' always impressed by what PE parts can do for the appearance of a build. David G. -
It looks like you worked out a good stance on it. David G.
-
Tidy mod work on this one. It must be nice getting to put some color down too. David G.
-
Project Terminator
David G. replied to Saltie Olds's topic in WIP: Model Trucks: Big Rigs and Heavy Equipment
This should be cool. David G. -
W900 Hauler / Dodge 4x4: Part #1
David G. replied to Saltie Olds's topic in WIP: Model Trucks: Big Rigs and Heavy Equipment
Nice work on that! David G. -
AMT '70s Short Body R.E. Dragster (05/22/2022)
David G. replied to Straightliner59's topic in WIP: Drag Racing Models
Looks like it has you on pins & needles, so to speak. David G. -
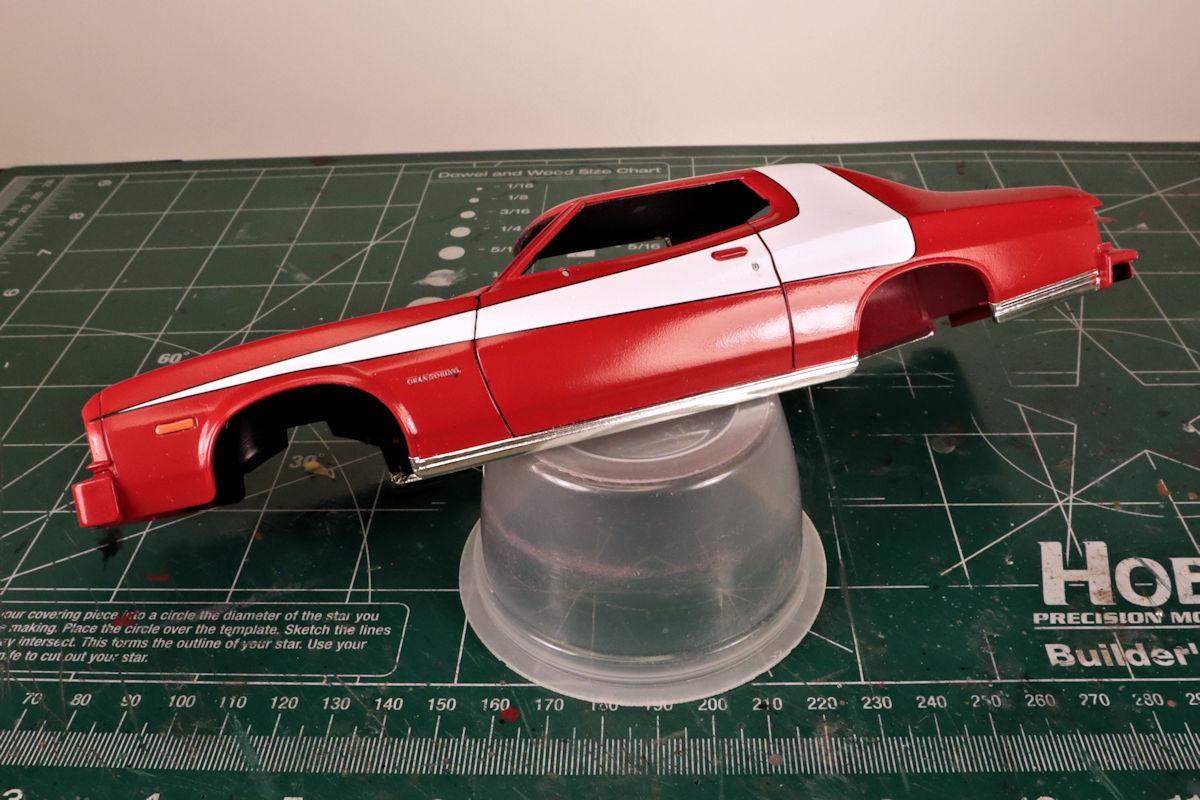
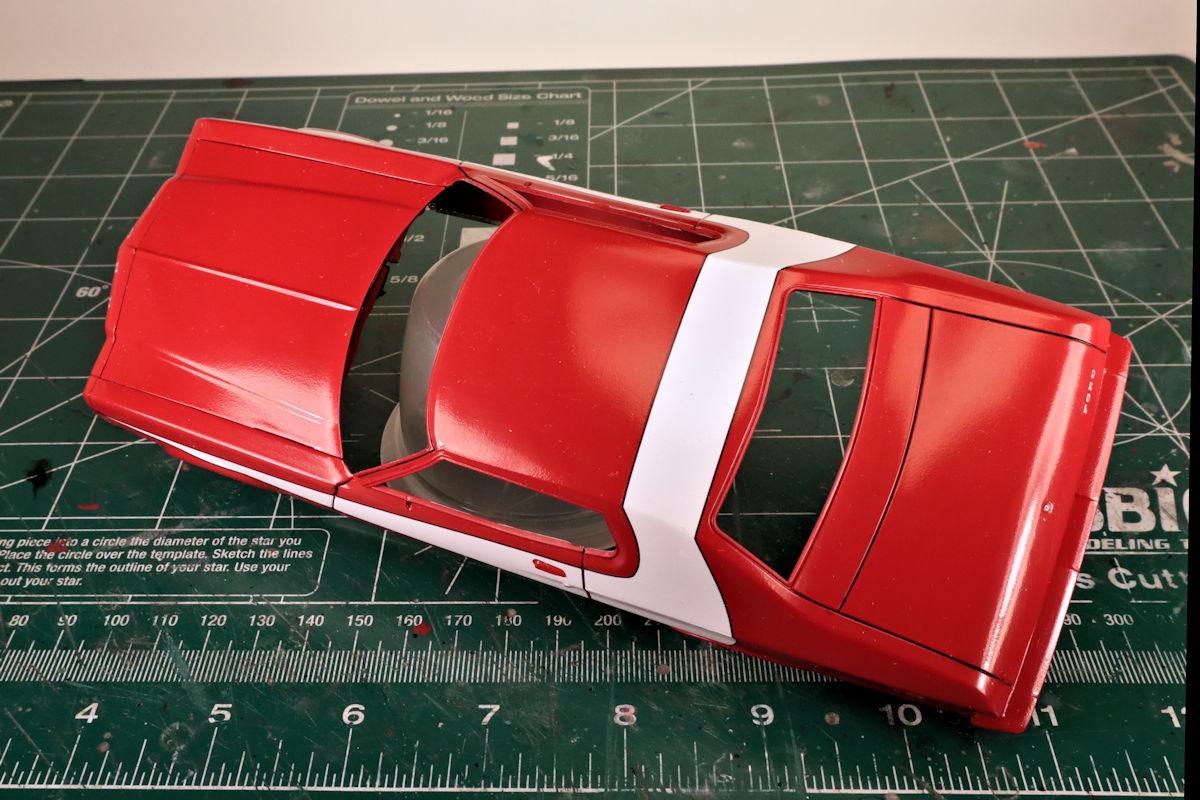
Hello Everybody! Day Eleven of Seven: After allowing the clear coat to cure for a few days I polished it out. There's still a bit of orange peel going on but I lack the courage to push it further and risk burning through the clear coat. We've all had that "just a little more becoming too much" experience. I can live with this. I even started throwing some foil at it and managed to get the rocker panels covered. I think I've worked out a method for applying this recent less-than-optimal version of Bare Metal Foil. I use a thinned PVA solution applied to the area with a small cotton bud right before laying the foil down. The PVA allows enough workability and any overage cleans up easily. And so far, it seems to stick well enough. I sank about 2 hours into this session for the polishing and foil work. Thanks for taking the time to look and as always, please feel free to post a comment. David G.

-
It looks like the gaps might be close once the paint is applied. David G.
-
1961 Mercedes Benz 190SL - Revell with a few modifications
David G. replied to 89AKurt's topic in WIP: Model Cars
Wow! This one is really dragging you down the rabbit hole, isn't it? At least you seem to be keeping up with it well enough. It's like I say: "Model builders, we're problem solvers who create our own problems to solve!" David G. -
Love the color shifting paint. David G.
- 766 replies
-
- 1
-

-
- stalled builds
- quick builds
- (and 2 more)
-
That bed works. I think the fenders really helped tie it all together. David G.
-
truck, boat, and trailer
David G. replied to Paul Payne's topic in WIP: Model Trucks: Pickups, Vans, SUVs, Light Commercial
Clever work splicing the engines together. It has a kind of Steampunk vibe to it. David G. -
1969 Ranchero GT
David G. replied to TooOld's topic in WIP: Model Trucks: Pickups, Vans, SUVs, Light Commercial
Impressive work on the bed, it looks like it came out of the box that way. David G. -
Amazing work on that wiring! With all those wires sticking out everywhere, it almost looks like an actual 1:1 engine swap! David G.
-
Much better. David G.
-
1/12th Porsche 934 Vaillant
David G. replied to majel's topic in WIP: Other Racing: Road Racing, Land Speed Racers
Crazy details on this one! Spectacularly good work pulling it all together, everything looks perfect. It's been a lot of fun to watch the process, thanks for taking the time to document it for us. David G. -
Good call on the brass rod. The brake drums look great too. David G.
-
The chassis and interior look great! David G.
-
W900 Hauler / Dodge 4x4: Part #1
David G. replied to Saltie Olds's topic in WIP: Model Trucks: Big Rigs and Heavy Equipment
Excellent progress on this one! That thing has a huge wheelbase! "Highway Use Only" as the saying goes. David G. -
W900 Hauler / Dodge 4x4: Part #1
David G. replied to Saltie Olds's topic in WIP: Model Trucks: Big Rigs and Heavy Equipment
Aren't they GPS antennas? David G. -
Resin Corvair Station Wagon
David G. replied to Joe Lange's topic in Car Aftermarket / Resin / 3D Printed
Very cool, I'll have to keep an eye out for this one. David G. -
Definite improvement. David G.
-
D8 Bulldozer
David G. replied to Mopar - D's topic in WIP: Model Trucks: Big Rigs and Heavy Equipment
Those tracks are well worth the money spent on them. David G. -
Great stance and attitude, nice color too. David G.