David G.
-
Posts
11,326 -
Joined
-
Last visited
Content Type
Profiles
Forums
Events
Gallery
Everything posted by David G.
-
Excellent work so far, everything looks great! David G.
-
Nice work on that! Davin G.
-

Monogram 1926 Mack
David G. replied to Straightliner59's topic in WIP: Model Trucks: Big Rigs and Heavy Equipment
This just continues to get better with each update. You have so much great work going here that it's difficult to find something specific to comment on. The overall effect is amazing. David G. -
Hey Dann, welcome back! I'm always amazed by the way you seem to pull these concepts right out of thin air. Amazing design work and spectacular execution. David G.
-
That came out pretty good David G.
-
Looks great so far! David G.
-
Tamiya AMG GT3
David G. replied to lghtngyello03's topic in Other Racing: Road Racing, Salt Flat Racers
Beautiful paint and decals, great detail work, everything looks just about perfect! David G. -
Gotta love those 70's graphics! Nicely done. David G.
-
Nice work on that! David G.
-
Great work on the cage! David G.
-
Ford GT40, Meng, 1/12
David G. replied to Matt Bacon's topic in WIP: Other Racing: Road Racing, Land Speed Racers
Excellent work on this so far. Great information provided, thanks for taking the time to share it. David G. -
Nicely Done! David G.
-
Thank you Carl! David G.
-
Nice! David G.
-
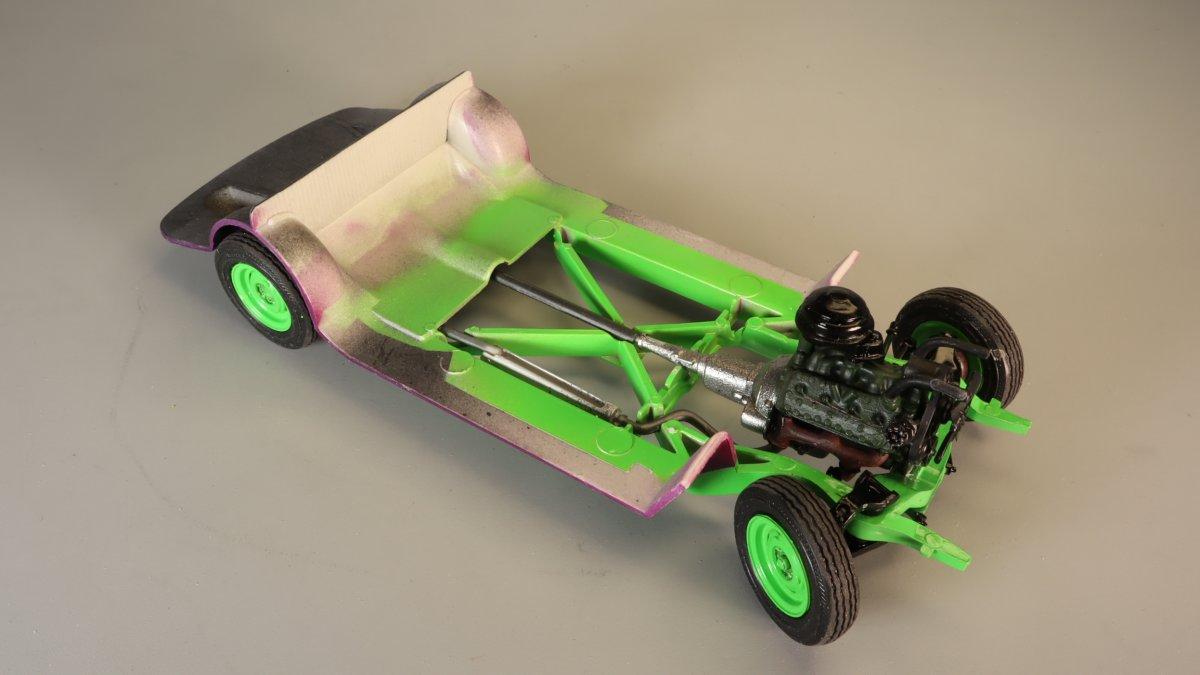
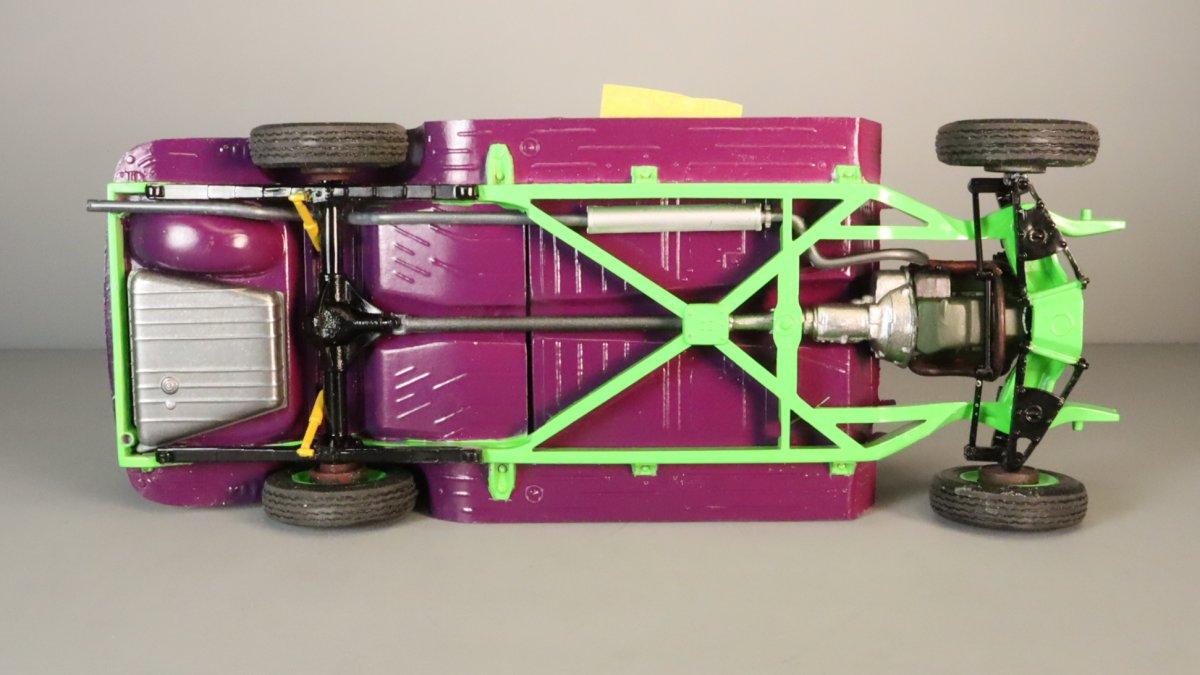
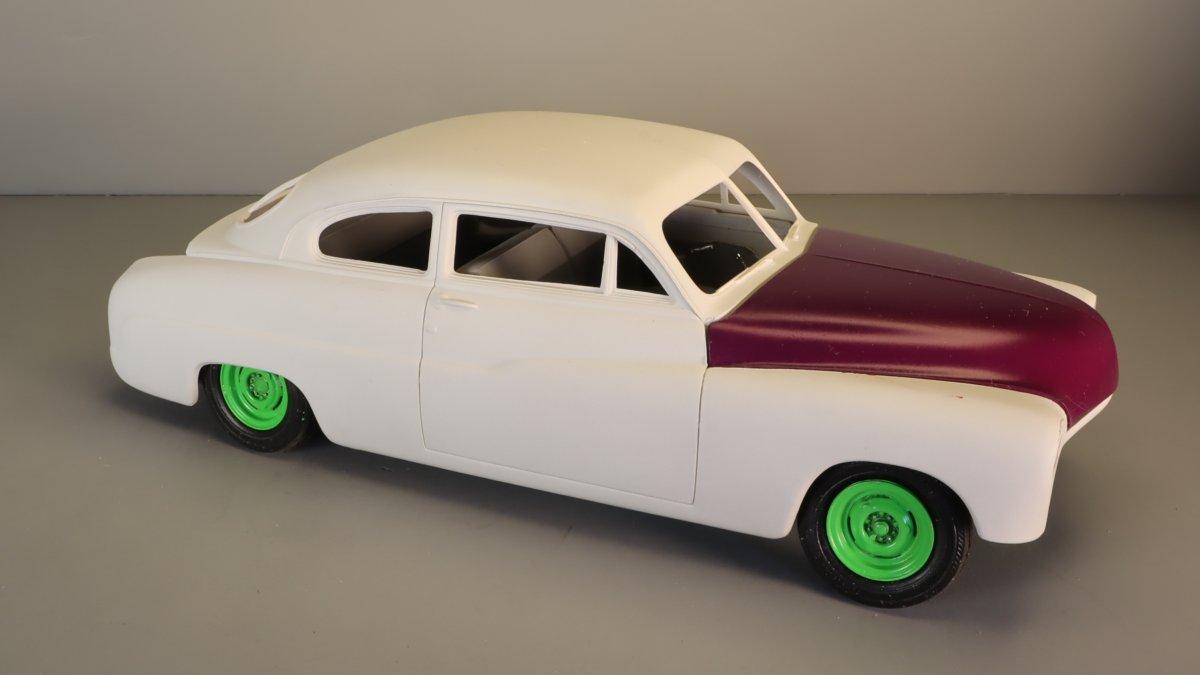
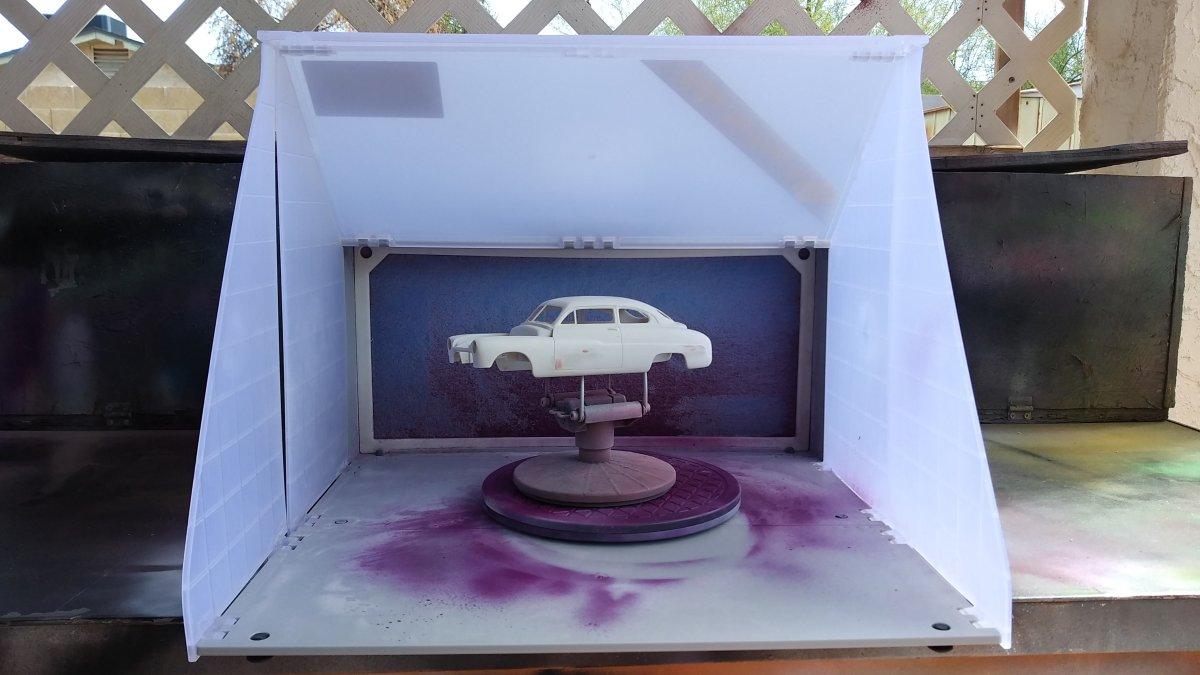
Ok progress is good and steady on this one. I should have it done fairly soon. Here is the assembled chassis... complete with posable wheels! For the under-shot I taped the nearly completed interior to the chassis to show its the floor pan. If you build this one with the optional lowered rear axle (and you should just because it's cool) be aware that the fin on the top of the differential will need to be trimmed down. Otherwise it will contact the front of the axle well and not allow the axle to be positioned properly. Test fitting the interior and the body to the chassis. No issues! Now, on to the paint shop! I bought the spray booth a few weeks ago from Micro Mark. It's nice to have a chance to try it out. Best Regards! David G.

-
Nicely Done! David G.
-
Nice choice, it reminds me of the color of the Ford in Karate Kid. David G.
-
Looks great! Excellent detail work. David G.
-
Cool idea, nicely done. David G.
-
Looks good. David G.
-
That's the idea, thanks Dave.
-
Excellent work so far! Crazy-wide tires on the rear. David G.
-
57 bug with working suspension & teardrop trailer
David G. replied to stitchdup's topic in WIP: Model Cars
Good progress on this. David G. -
If something unfortunate must happen, then that's an acceptable option. Better that than (heaven forbid) a split windshield. Thank you. David G.
-
Nicely Done! Love all the added detail, congrats on the win too. David G.