David G.
-
Posts
11,326 -
Joined
-
Last visited
Content Type
Profiles
Forums
Events
Gallery
Everything posted by David G.
-
Thanks for the link Bill. I did go check it out, you built a real sweet rig there. Thanks for the photo Keith, nice work on the tools and equipment. When I bought mine I had no idea of how the size would work out as completed. Had I known, I probably would have bought two. As it it though, mine's not bad it's just not suitable for large American cars. Thanks again for the feedback. David G.
-
 Beautiful detail work! Looks like it's fresh off the line and ready to haul. David G.
 -
Looks Great! Spectacular paintwork! David G.
-
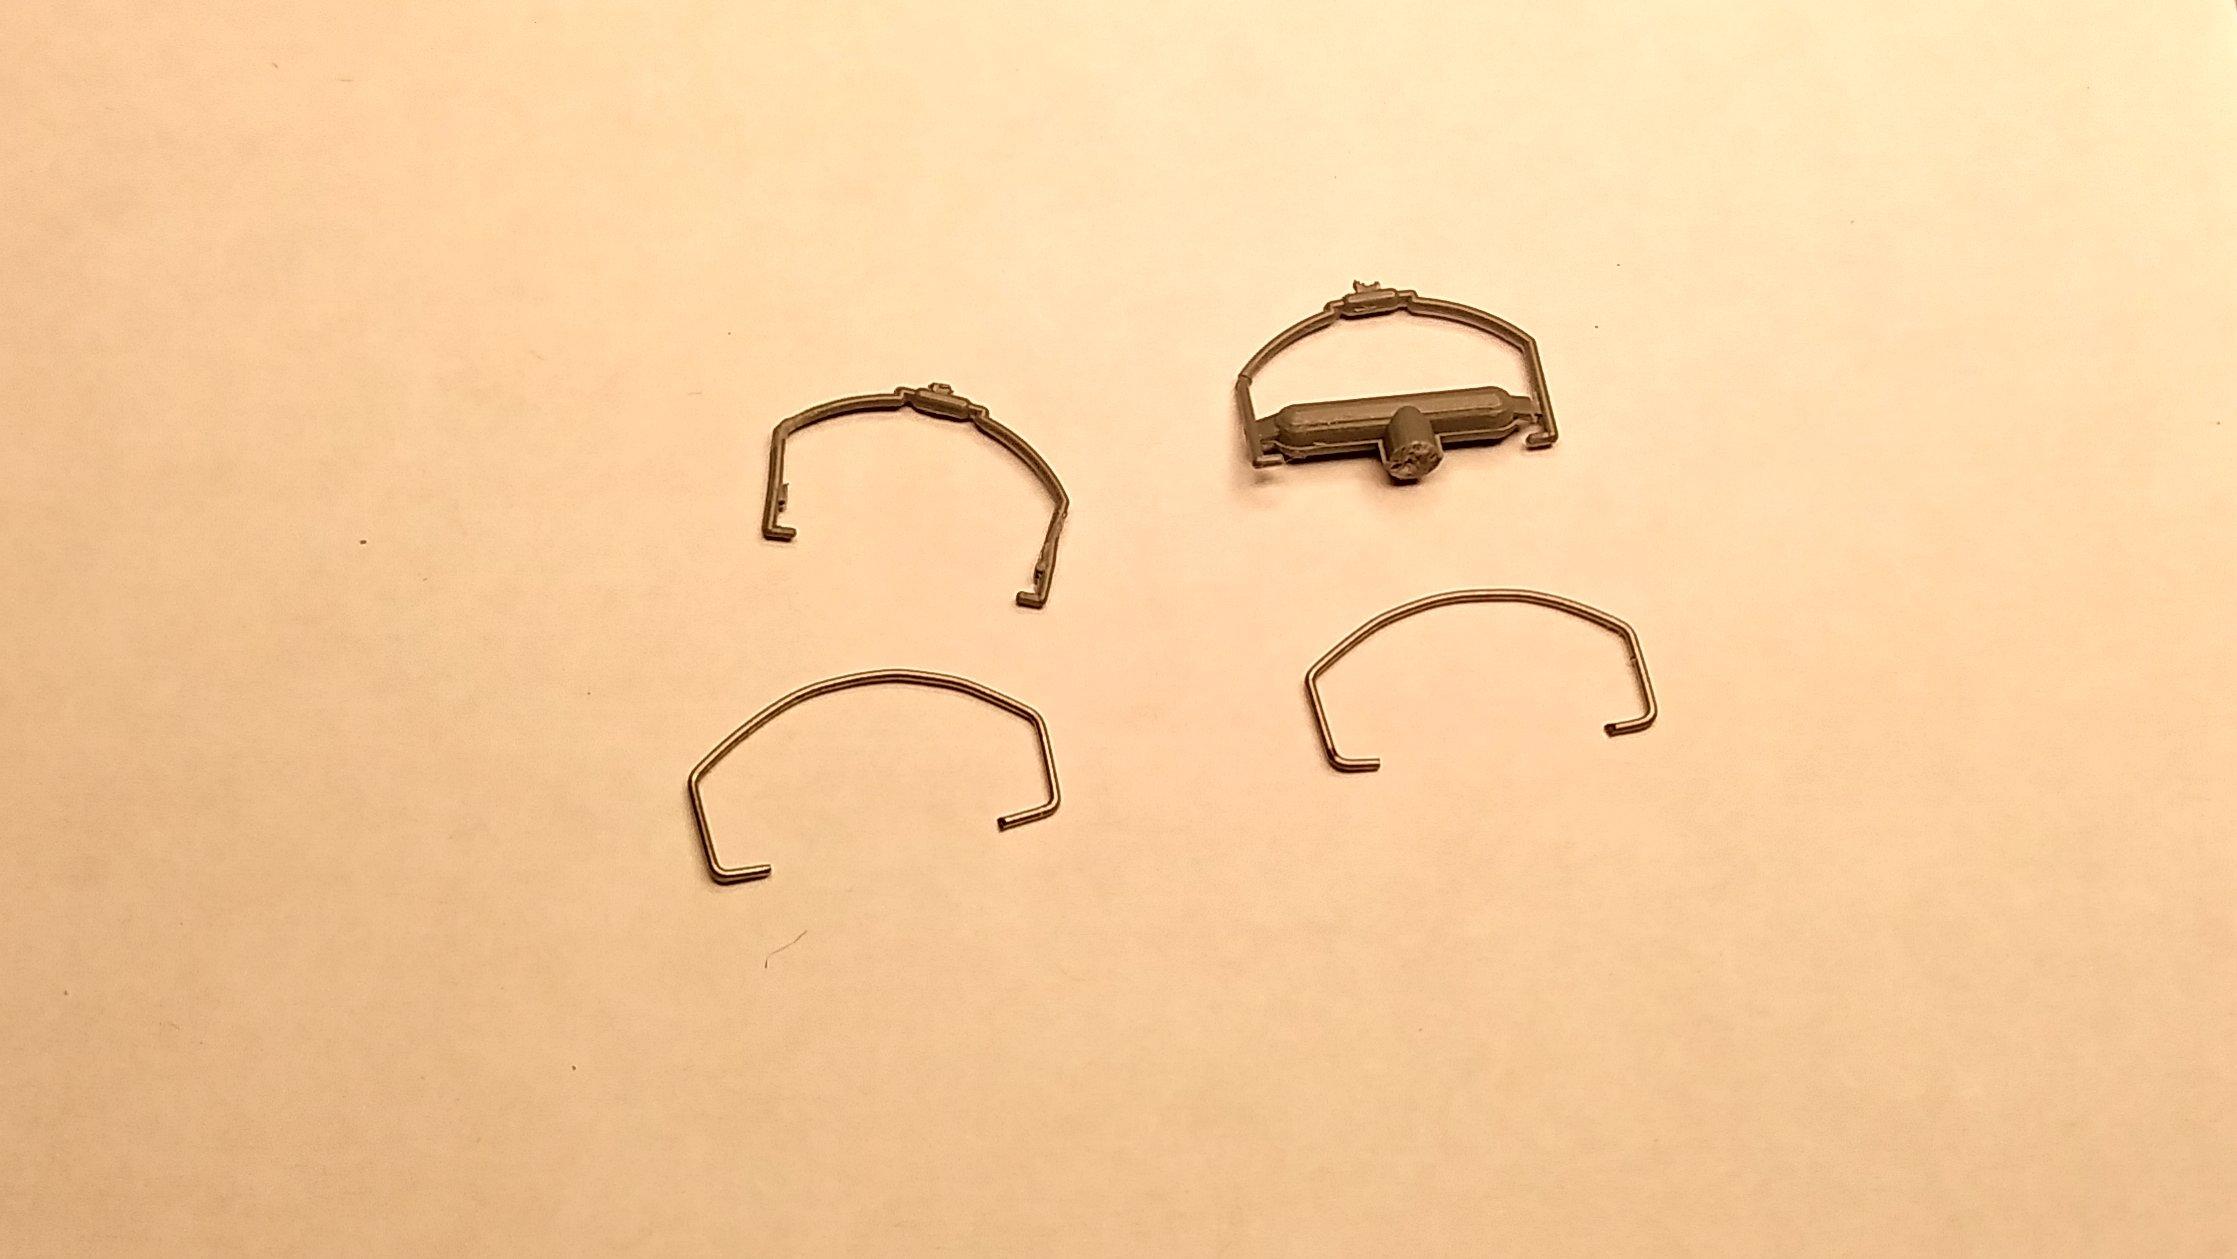
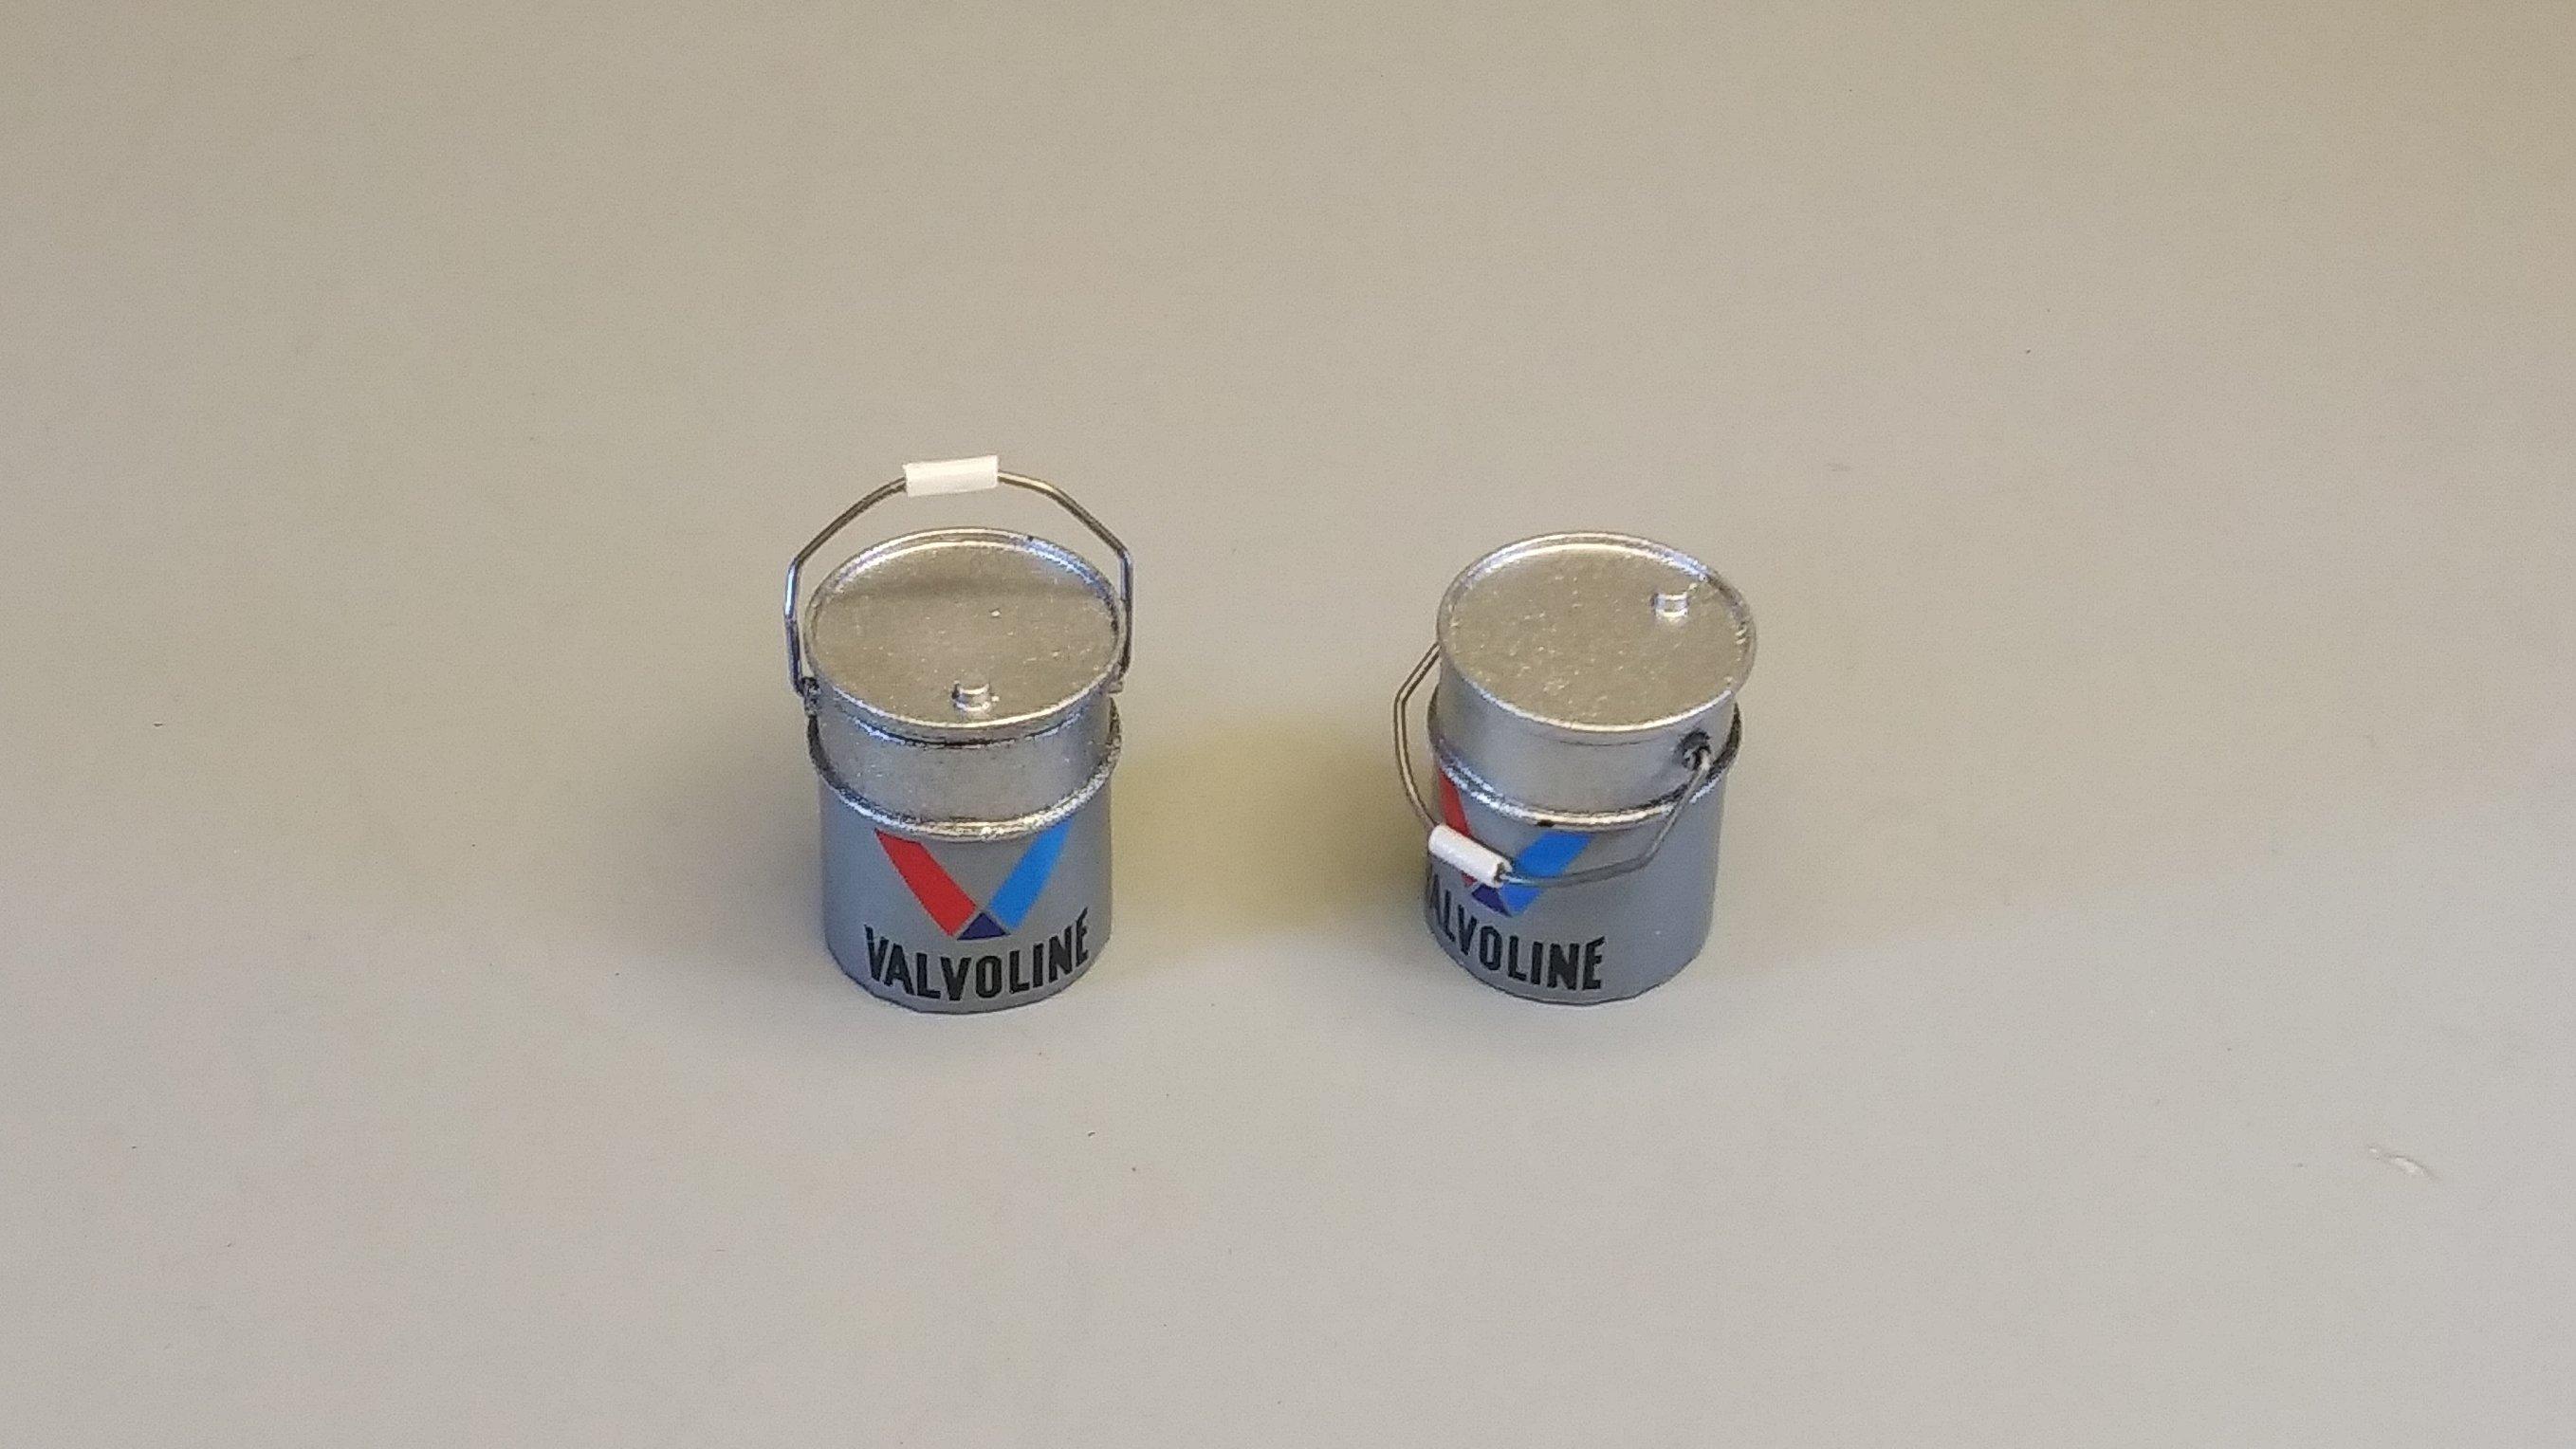
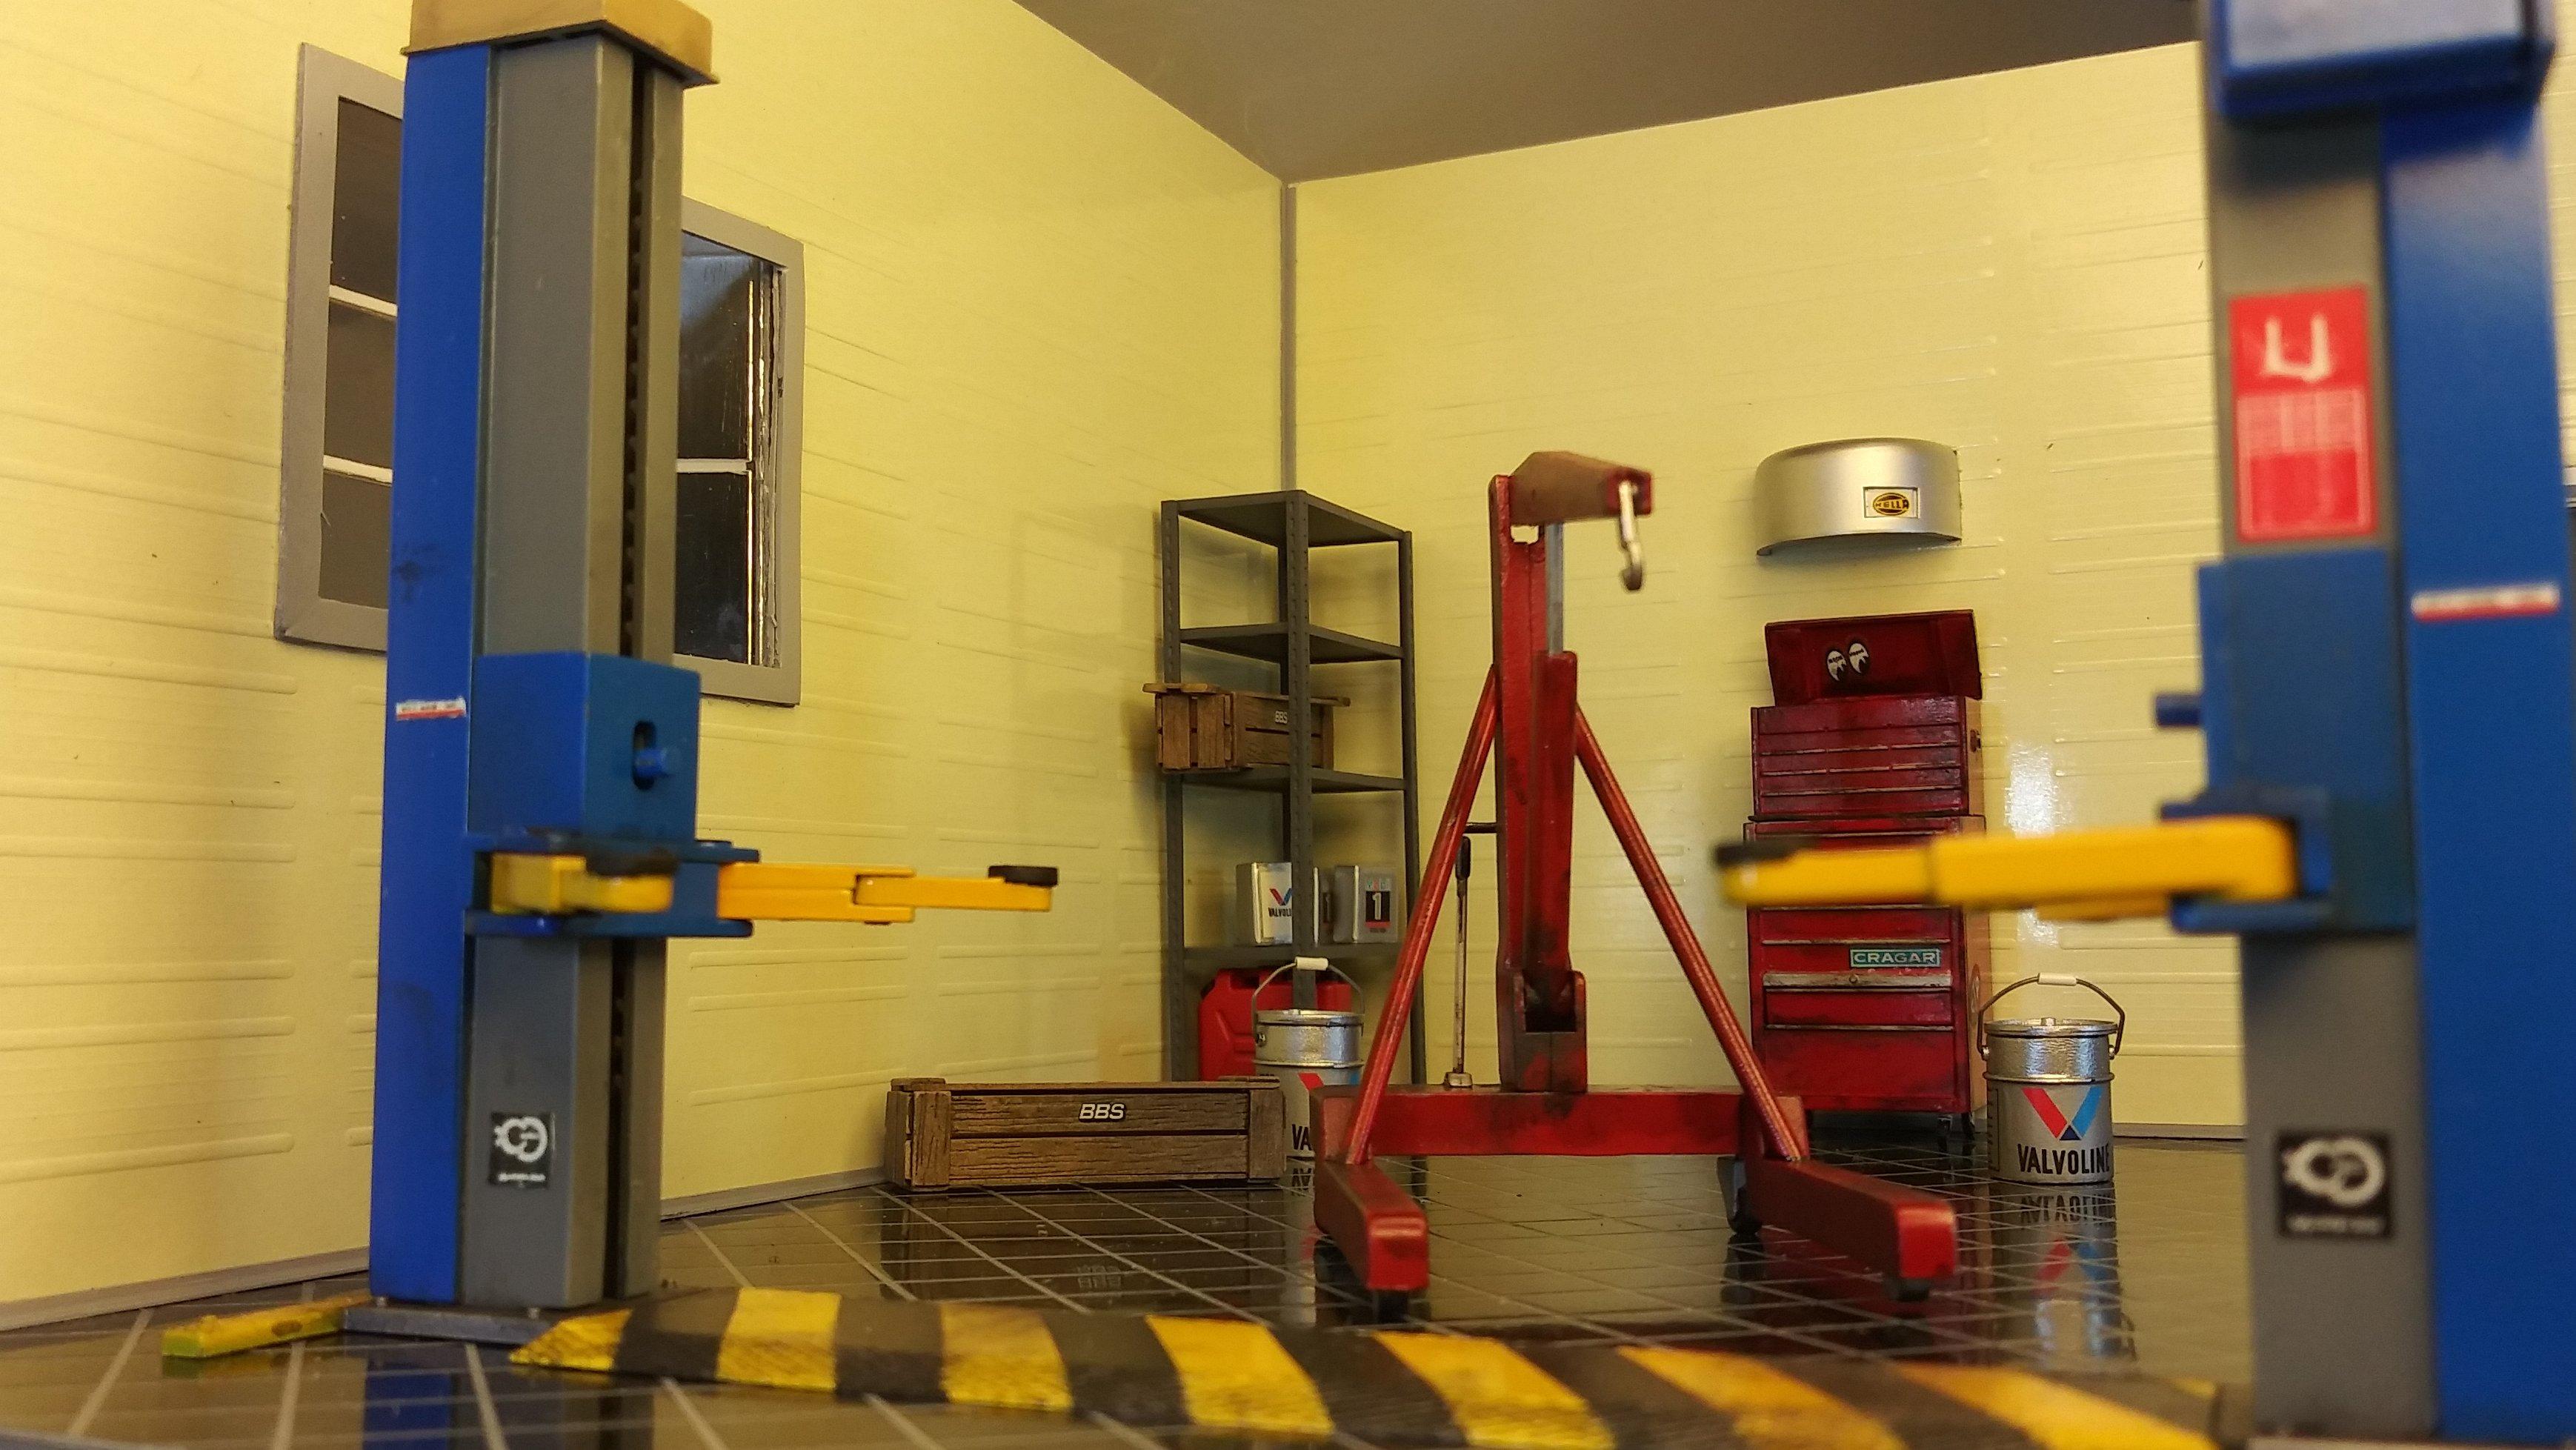
That reminds me, it's time for an update! Just a little one, but here it is. The next little step I chose to take in this journey of a thousand steps is the oil pails. As I began to remove the handles from their sprues I realized that they were too thin. Way too thin. Though they looked great, I was unable to remove the handles without damaging them. I decided that the only way to go was to make my own out of music wire. With the biggest challenge of this little part of the project behind me, the rest of it went together rather quickly. The handles are bits of wire insulation. Here is a shot of the newest members of the garage settling into their new home. As always, thanks for taking the time to look and please feel free to comment. David G.

-
Thanks for your comment Bill, and your thoughtfulness. I like to build a wide variety of model types and styles. As I like to say, "Shiny and Dull, I build 'em all!" I'll be sure to keep an eye out for posts of your work, I would enjoy seeing what you've done. David G.
-
Love the color! I'll be keeping an eve on this one. David G.
-
Kubelwagen
David G. replied to unclescott58's topic in All The Rest: Motorcycles, Aviation, Military, Sci-Fi, Figures
Nicely Done! David G. -
Fiat 131 Abarth
David G. replied to afx's topic in WIP: Other Racing: Road Racing, Land Speed Racers
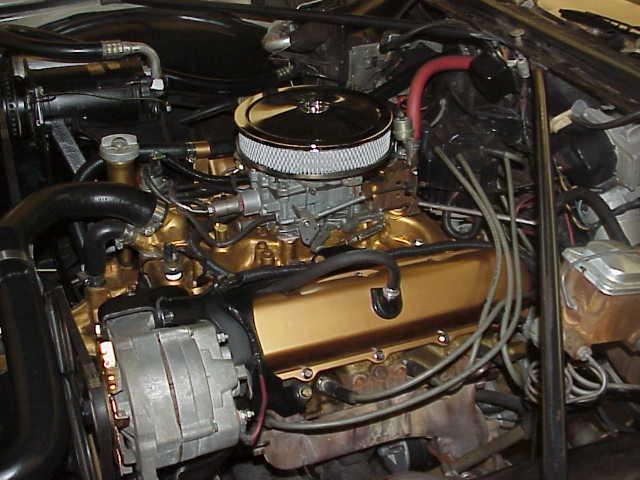
Oh, it wasn't meant as a slam JC. I was just surprised. I'm used to the big old V-8's from the 70's. The larger of which would probably weigh almost half as much as that whole Rally car. Like this one from my 71 Olds. Engine and transmission together just under 900 lbs. Any way, I love the work you're doing on this Fiat. Thanks again for taking the time to share it with us. David G.
-
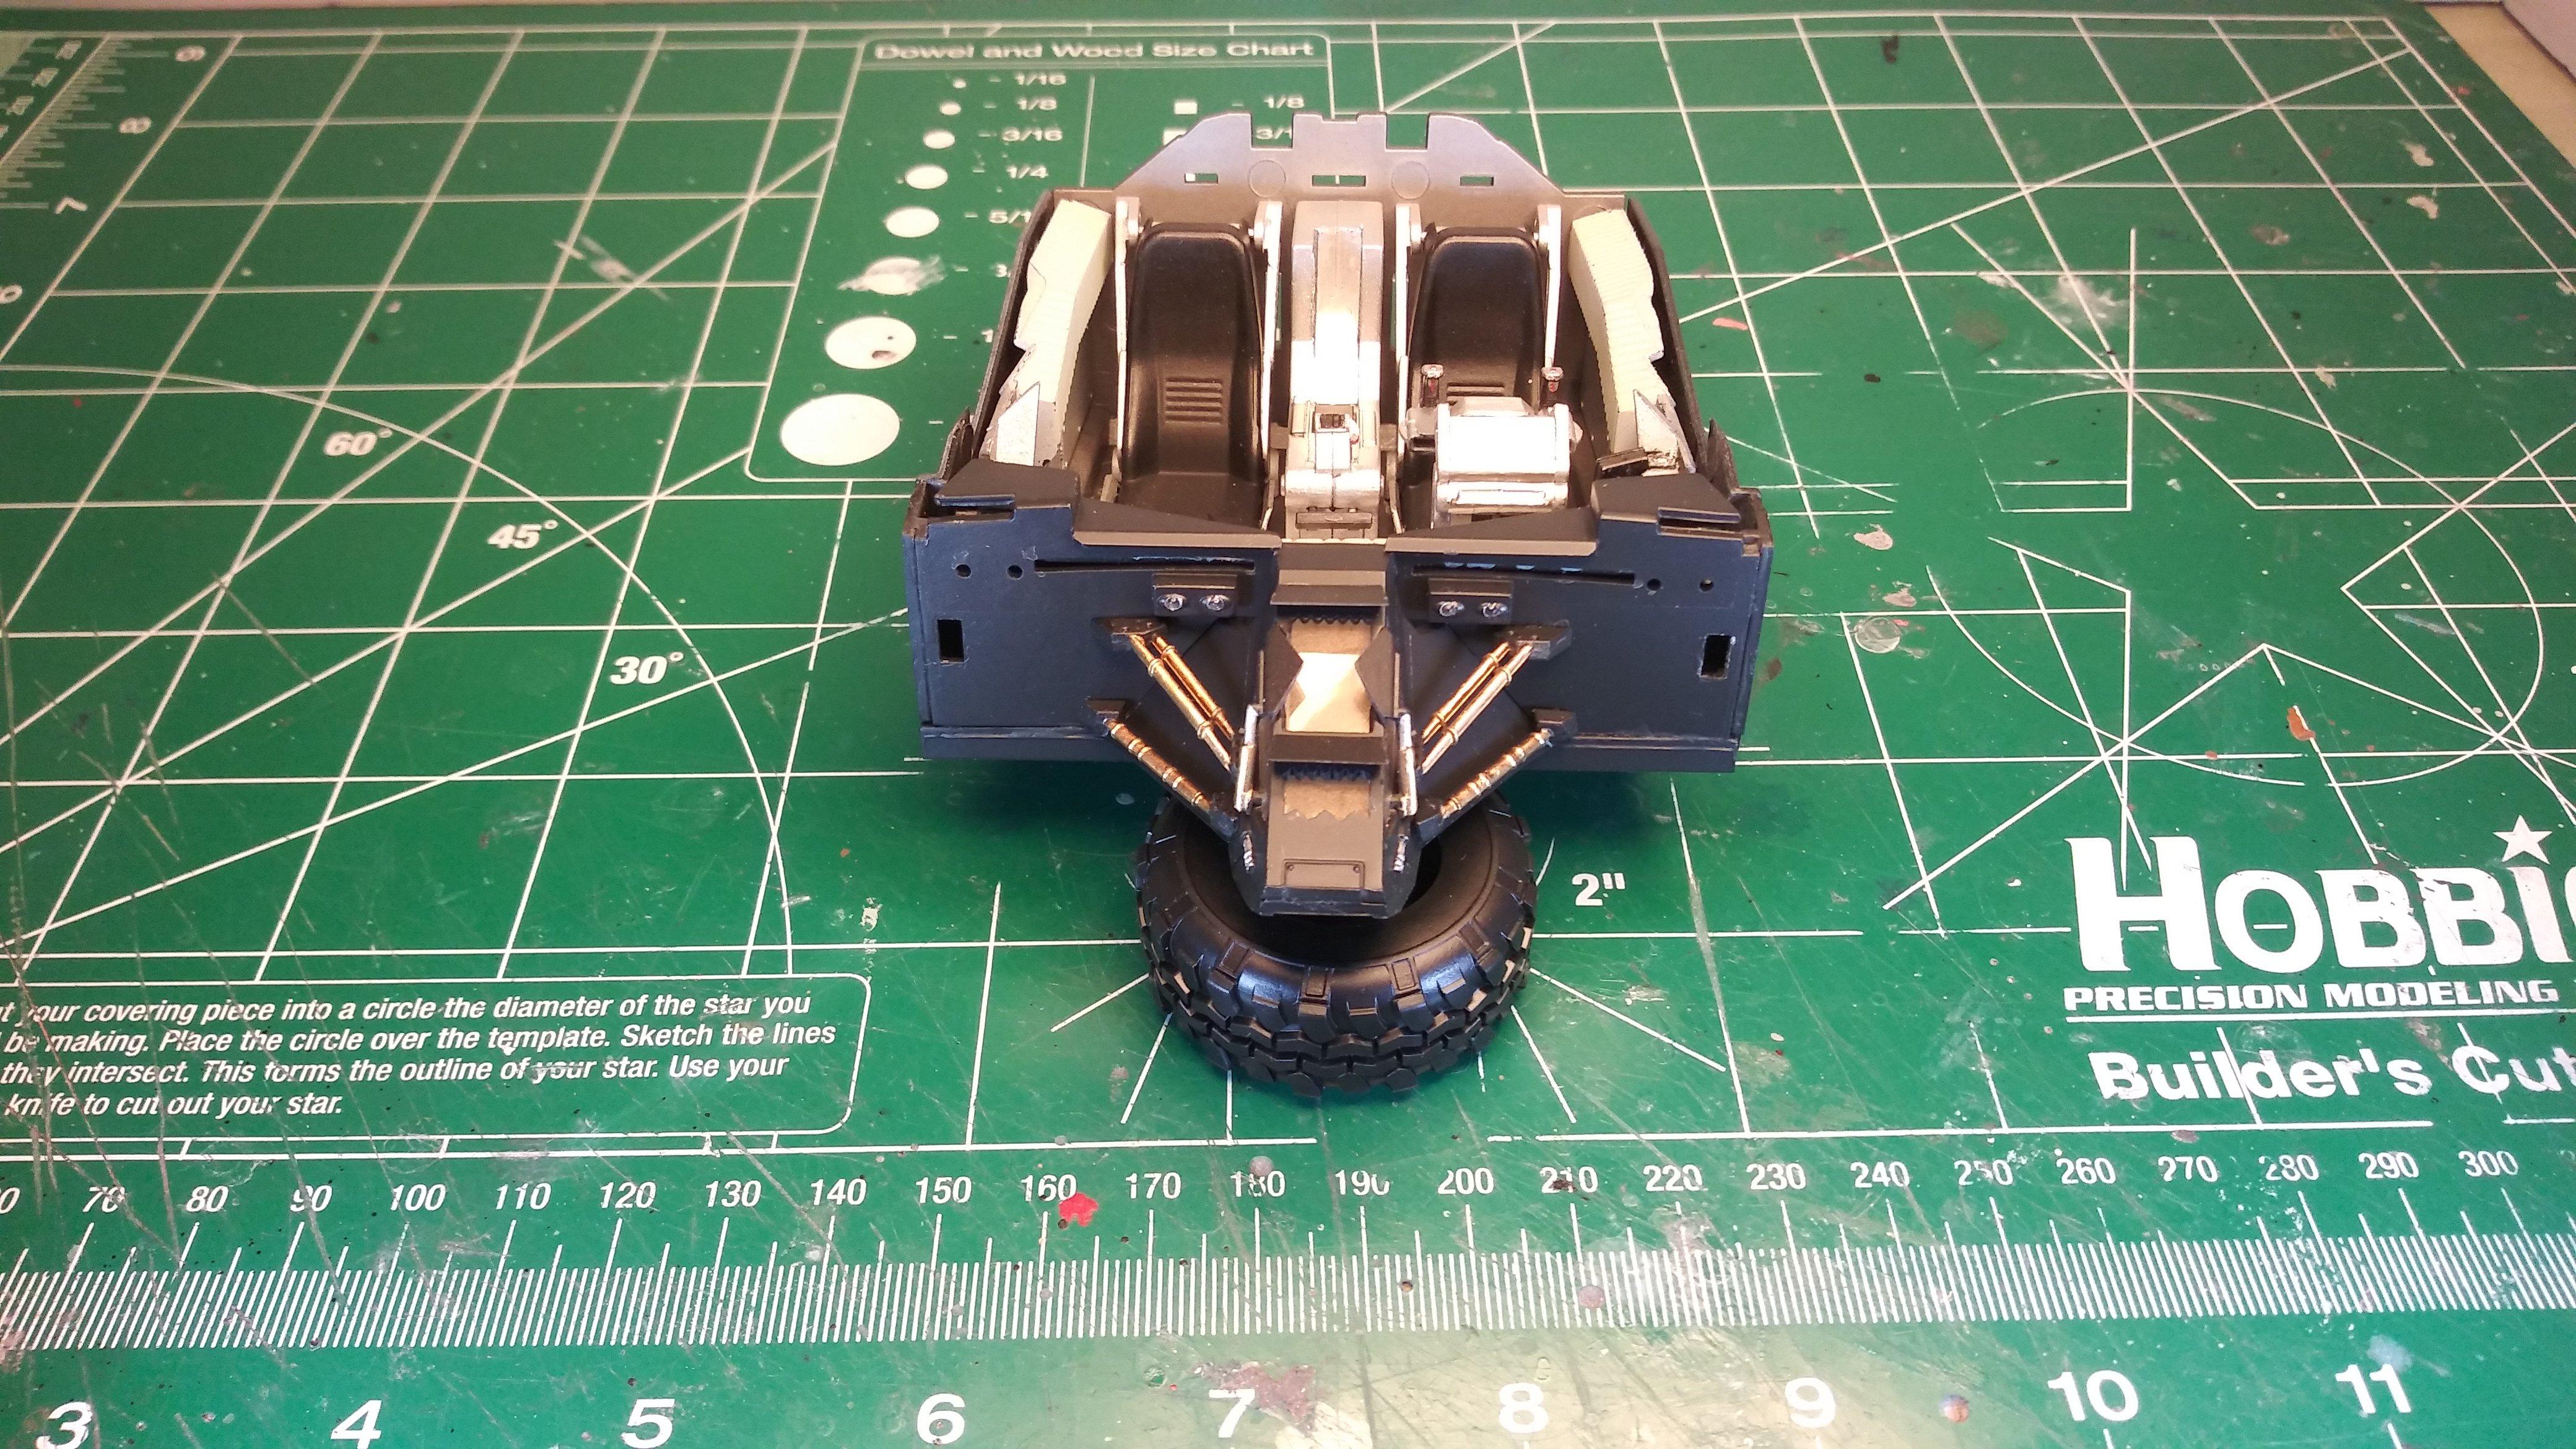
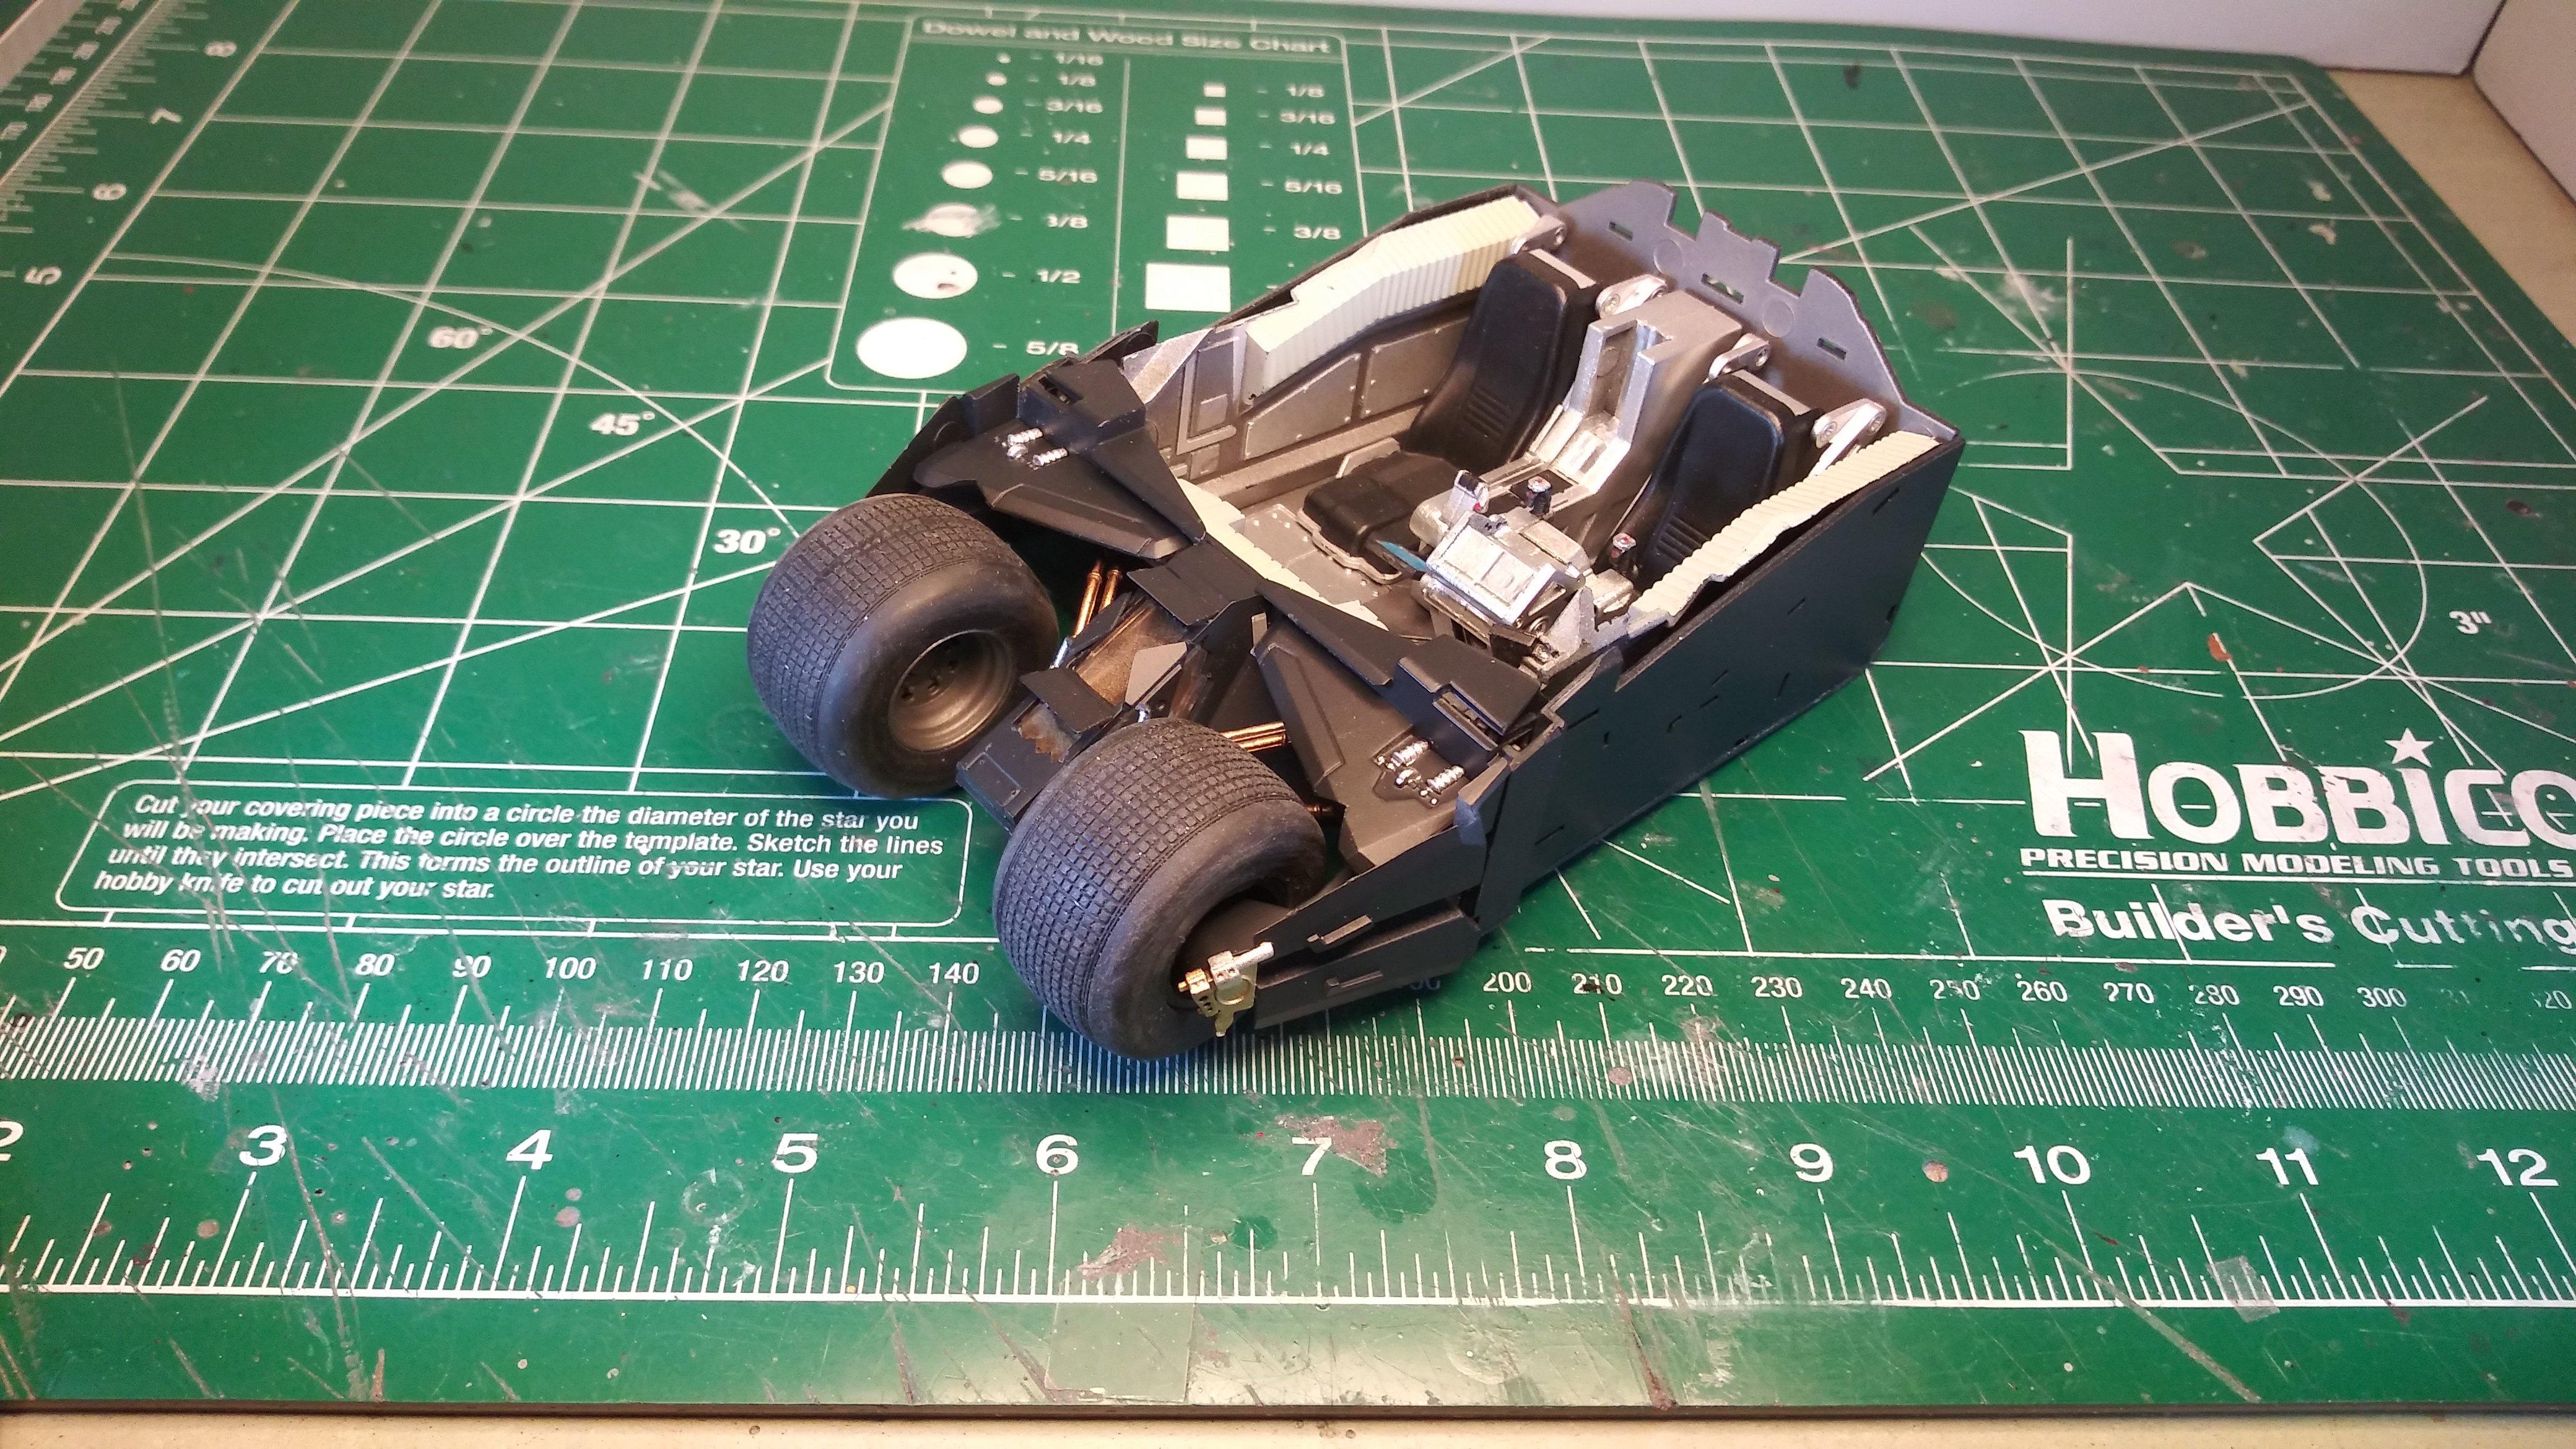
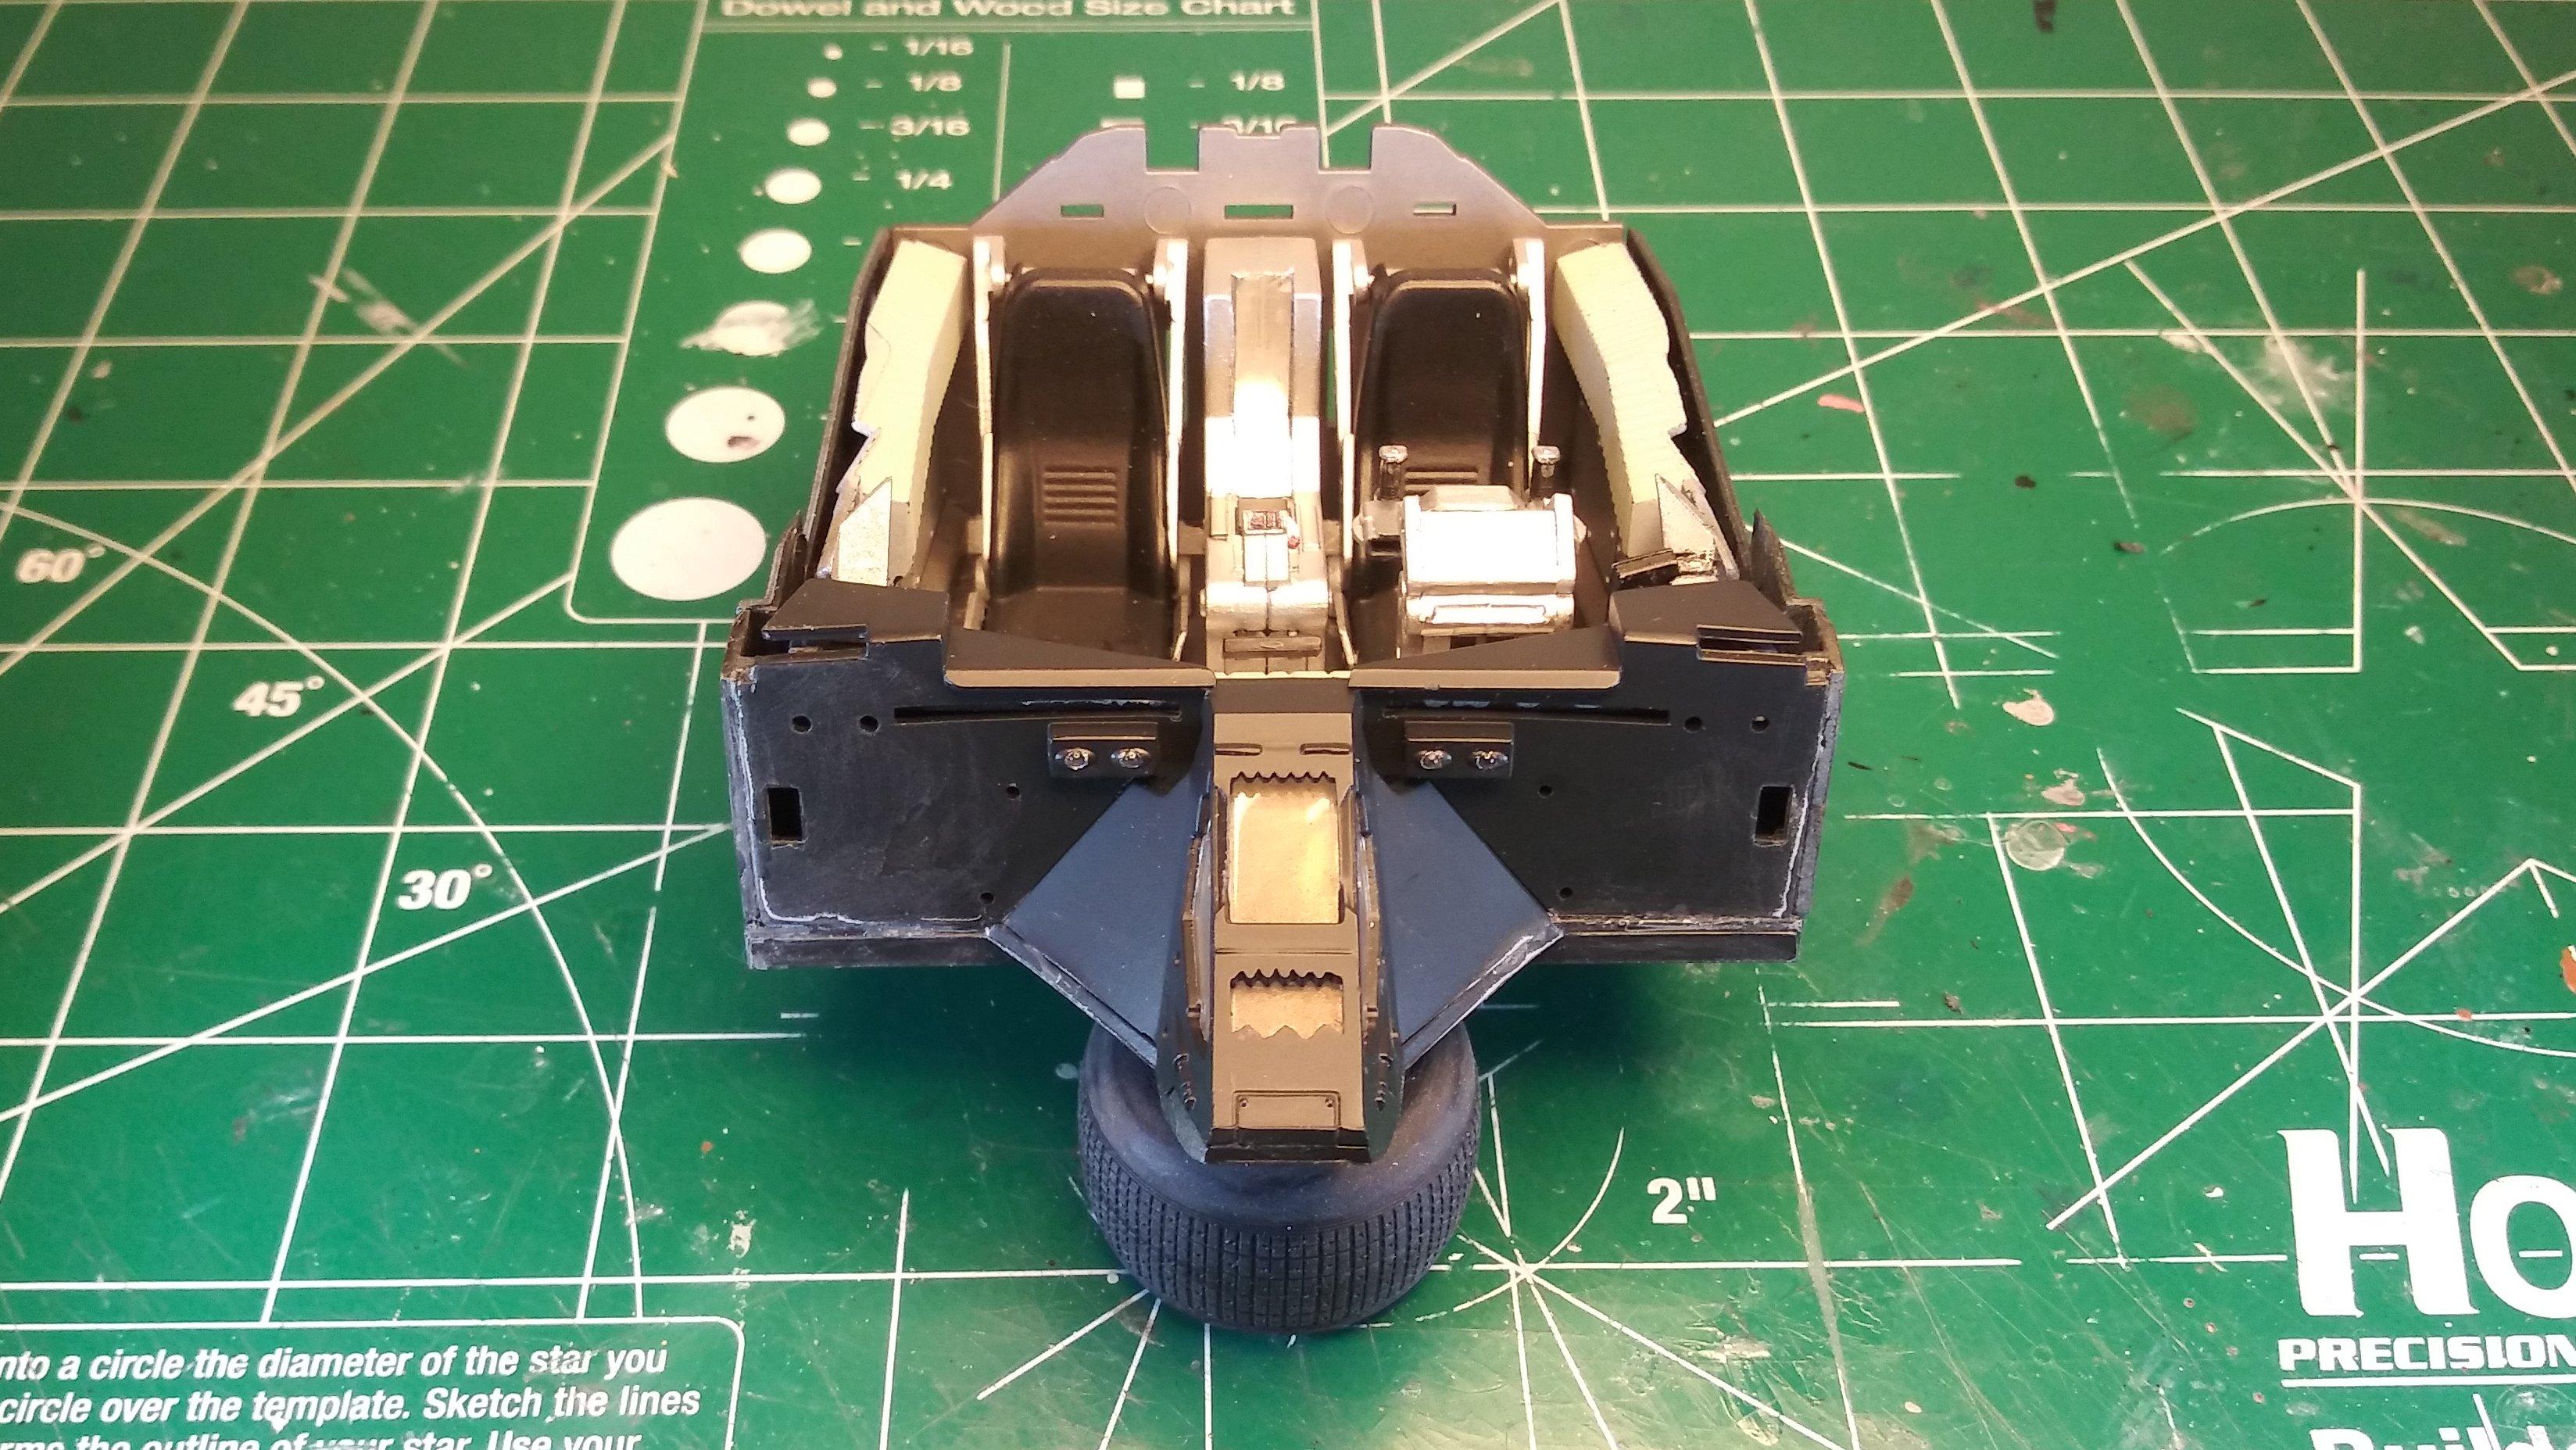
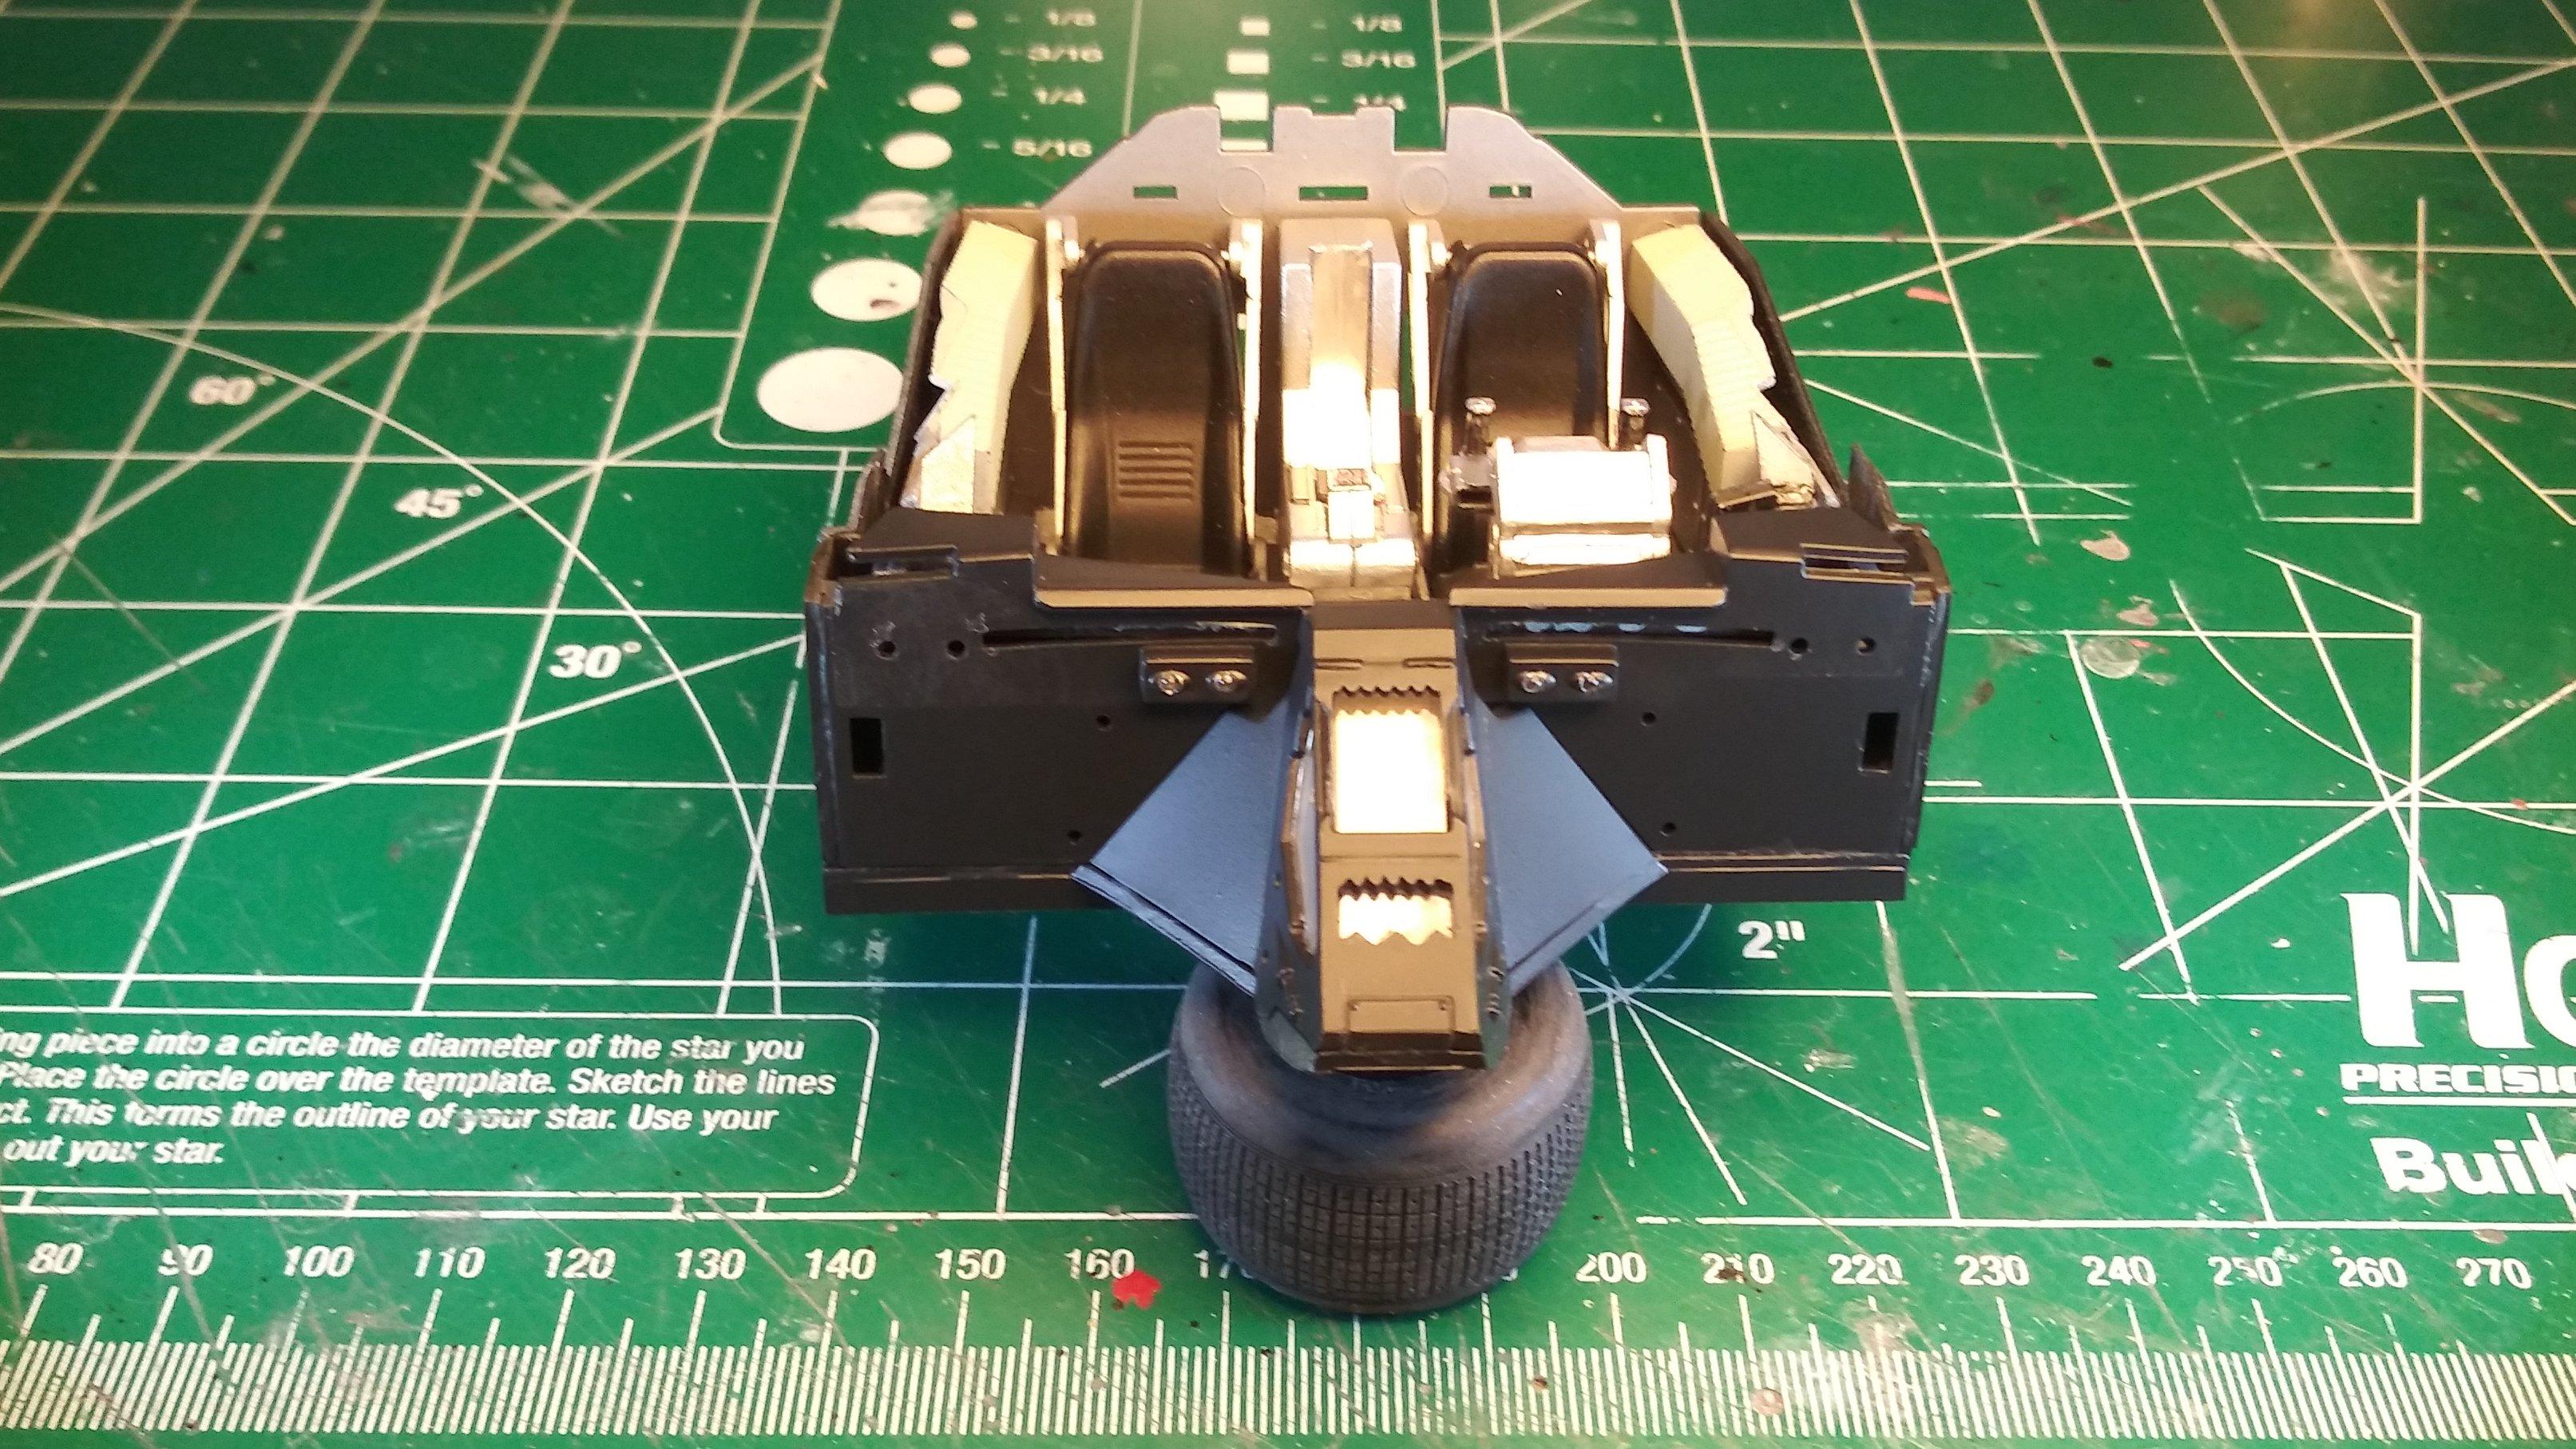
When I started building this kit, my desire (aside from adding another Batmobile to my collection) was to be able to complete a build within a reasonable amount of time. So far, this kit has provided me with a good balance of challenge and accomplishment. It's a rather simple kit but the unique design and structure add a bit of interest to the building of it. Struts and braces added to the front. Front suspension and wheels. There's not a lot of clearance for the wheels. But I guess that Batman knows what he's doing. As always, thanks for taking the time to look and please feel free to comment. David G.
-
Thank you for your comment Simon. Based on the research I did there is not a lot of detail that would be visible in that area. Most of the vehicle is fairly well shrouded with airfoils and spoilers which actually seems appropriate for a Batmobile. The mechanical detail and busy-ness that can be seen is fairly well represented and I'm mostly satisfied with that. Mostly. Thanks again, David G.
-
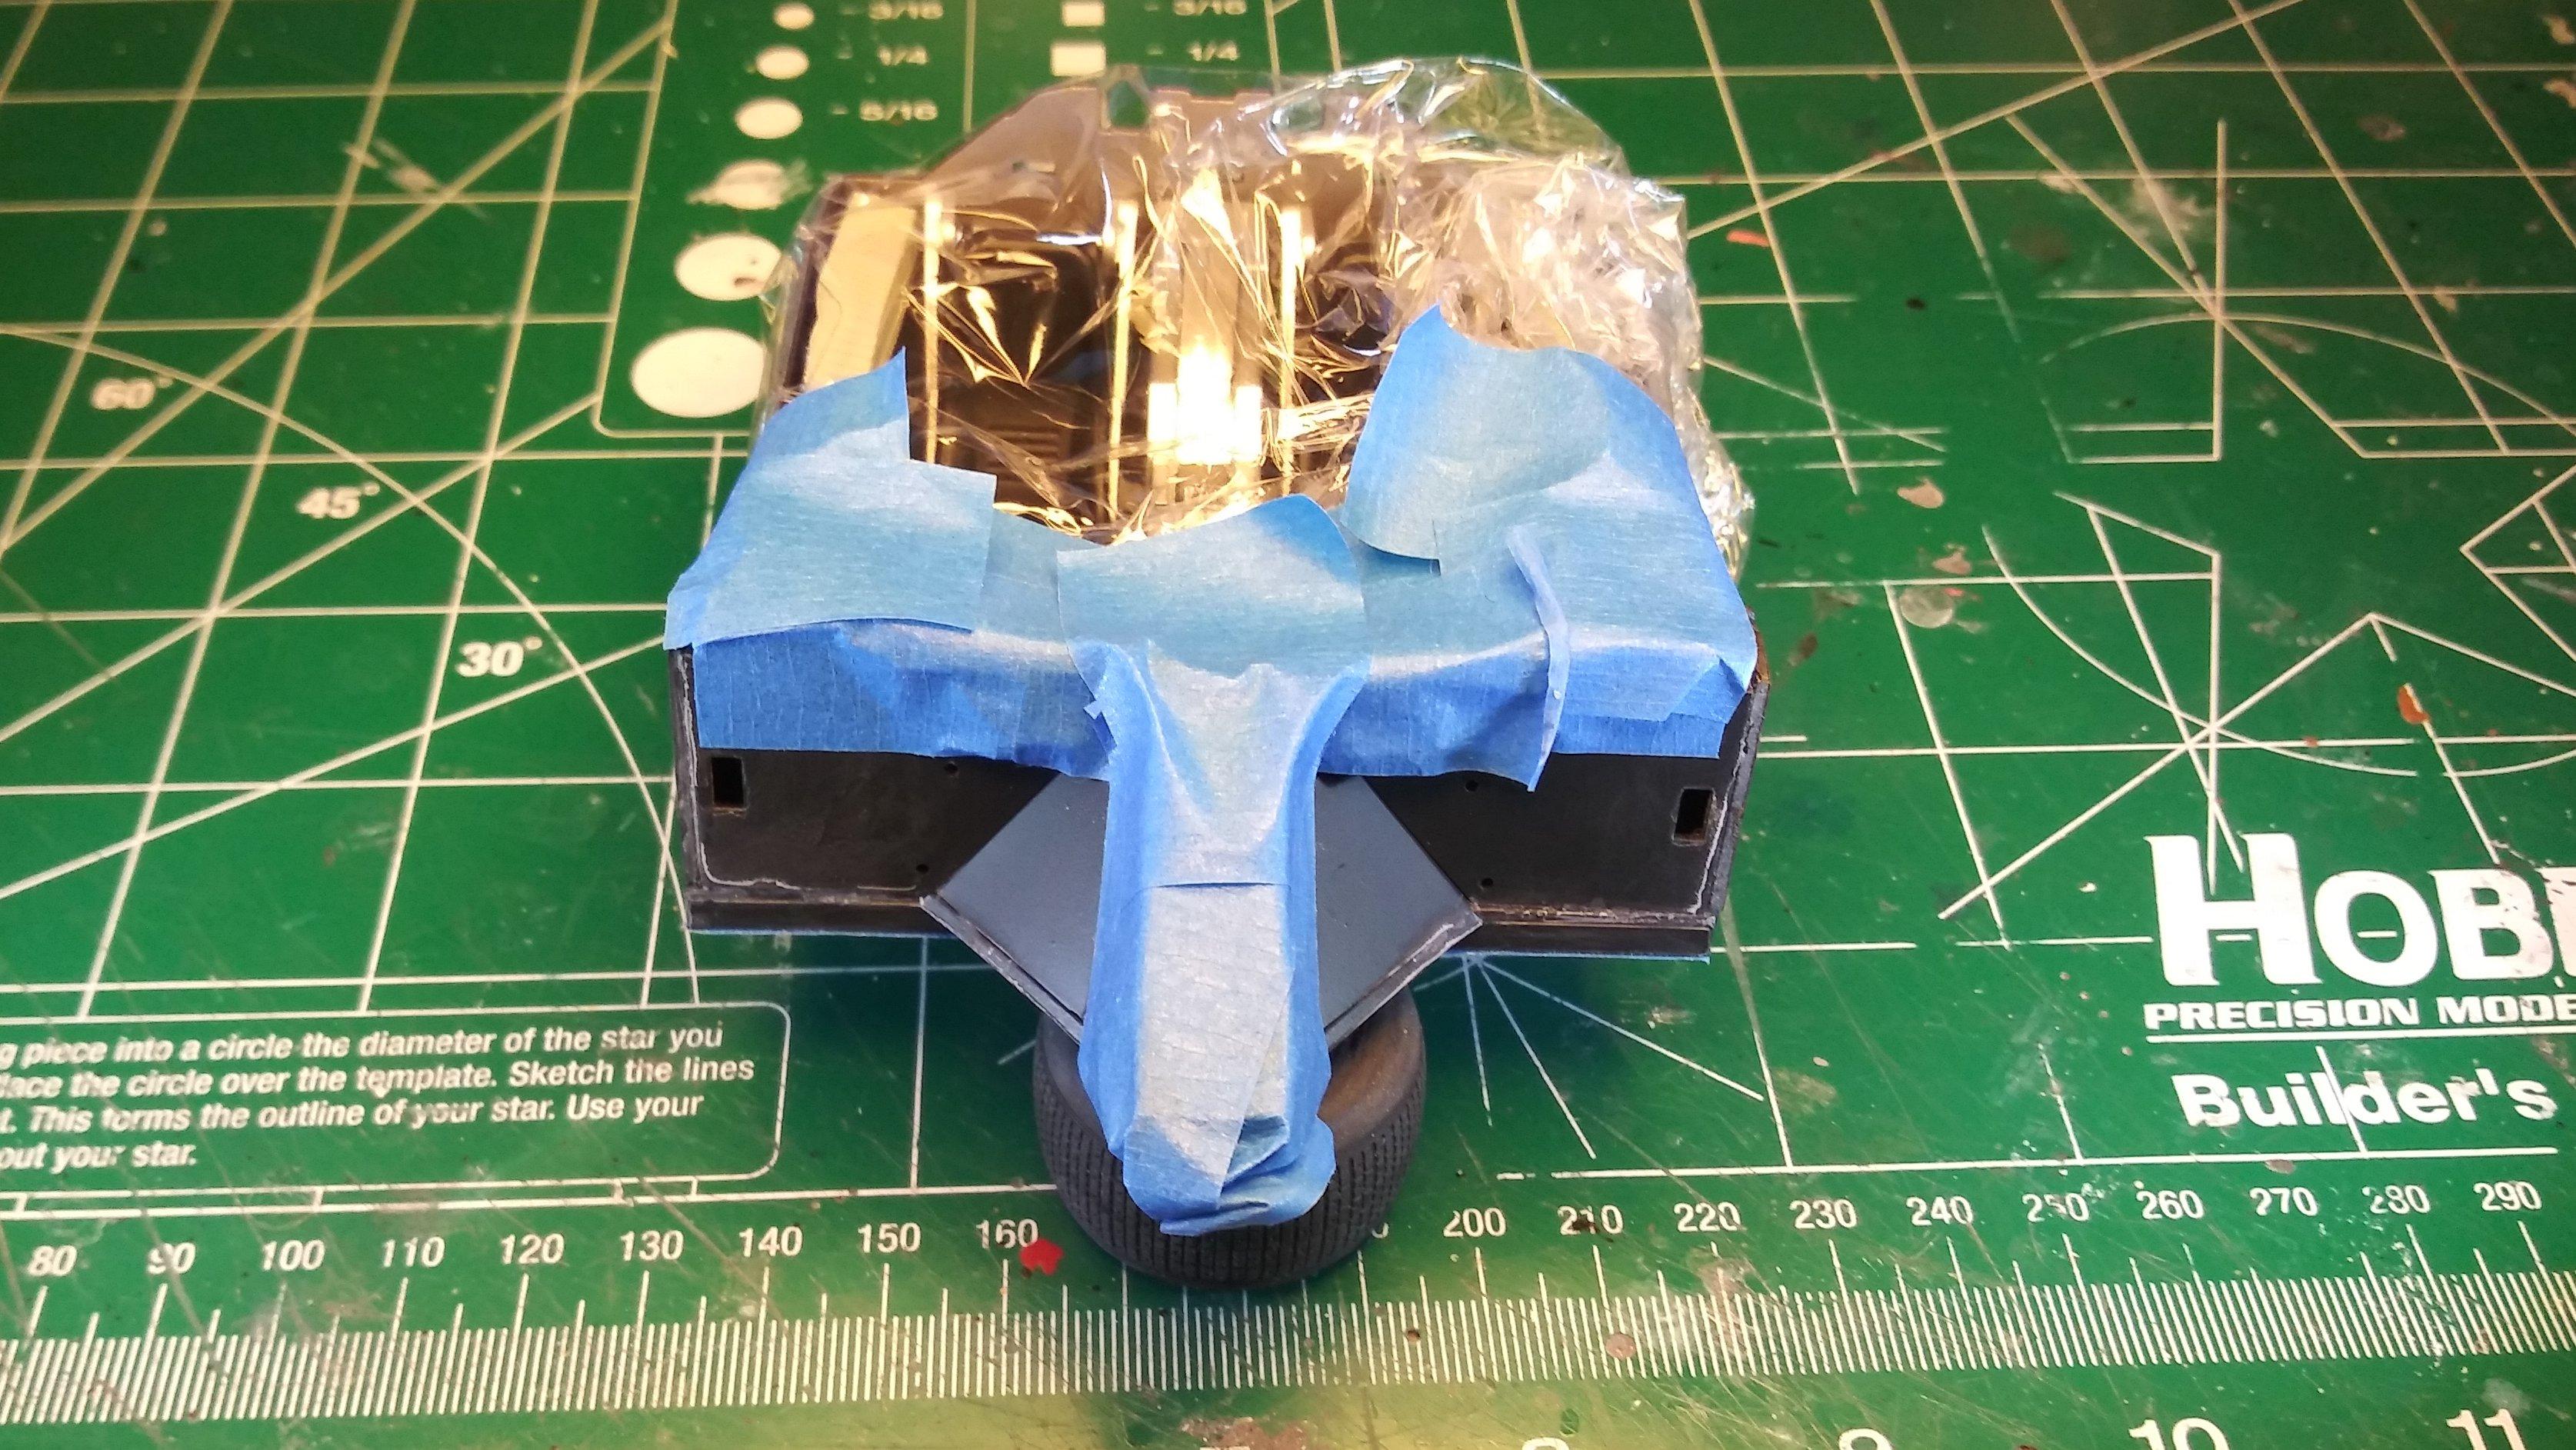
Wow! There is so much detail in so many different tones and colors that it'll almost be a shame to paint it all one shade of gray or white... whichever is the proper color. David G.
-
Fiat 131 Abarth
David G. replied to afx's topic in WIP: Other Racing: Road Racing, Land Speed Racers
Wow! Two points regarding the engine issue: 1. How tiny the correct-sized engine is. 2. The size difference between the two. But yeah, if you're going to do something, you might as well do it right. Your engine looks great so far. David G. -
Great work on the body and paint! The mods are well done too! David G.
-
Looks like it should be a fun build! David G.
-
It's time for another update. In mounting the front section of the hull, (the pointy bit in the center) I discovered some alignment issues and had to break the front panel loose on the starboard.. right... uh, passenger side. I did a bit of a messy job reattaching it and had to sand out the areas where I slopped the glue. A little bit of creative masking for the repaint. As good as new... almost. The places where the masking marks show are not likely to be very visible when the kit is completely assembled. Still, I may be able to blend them a bit with a little polishing. We'll see which way it goes. If I ever build another one of these I think I'll assemble the outer walls to the chassis plate first then fit the interior panels in afterward. As always, thanks for taking the time to look and please always feel free to comment. David G.
-
Beautiful Work! David G.
-
Nicely Done! That looks like a good shade of blue for the time period. David G.
-
I know that the Germans basically invented the minivan with the VW Microbus, and based on the photo of the 1938 Mercedes-Benz G-4 Radio Car, it looks like they also made the first SUV. ? I love the alphabet soup name you came up with for it, I always loved those German Sentence-words. This is totally mind-blowing! What a fun looking project. I can't wait to see more. David G.
-
Nice work! I can see your skills improving with each of your builds. Like it says in my signature line: "Each kit I build is really only practice for the next one." David G.
-
XR-6 (glue bomb restoration) Update 1/18/17
David G. replied to RancheroSteve's topic in WIP: Model Cars
Wow! There sure is a bit of history behind this project. I shouldn't talk, I had one build that took me about a decade to complete. I sure am glad I found it though, it was great seeing the progression of your work. I'll be sure to look for it in the Under Glass section. David G. -
Great looking rig! David G.
-
Nice work on the foil! When I built my '41 I had a bit of trouble covering that thin side molding. David G.
-
Your build is beyond cool! David G.
-
Jumpin' in with both feet, as always! David G.
-
Nice recovery! Your primer base looks great. David G.