89AKurt
-
Posts
8,426 -
Joined
-
Last visited
Content Type
Profiles
Forums
Events
Gallery
Everything posted by 89AKurt
-
Cool! Funny that since I committed to building a '69 Chevy pickup, been seeing more projects this year. ? Great choice for the truck, that based on historic photos? Appreciate your dedication to wiring, that's something you have to twist my arm to do, but really adds to a model. Good to see you getting back into the hobby!
-
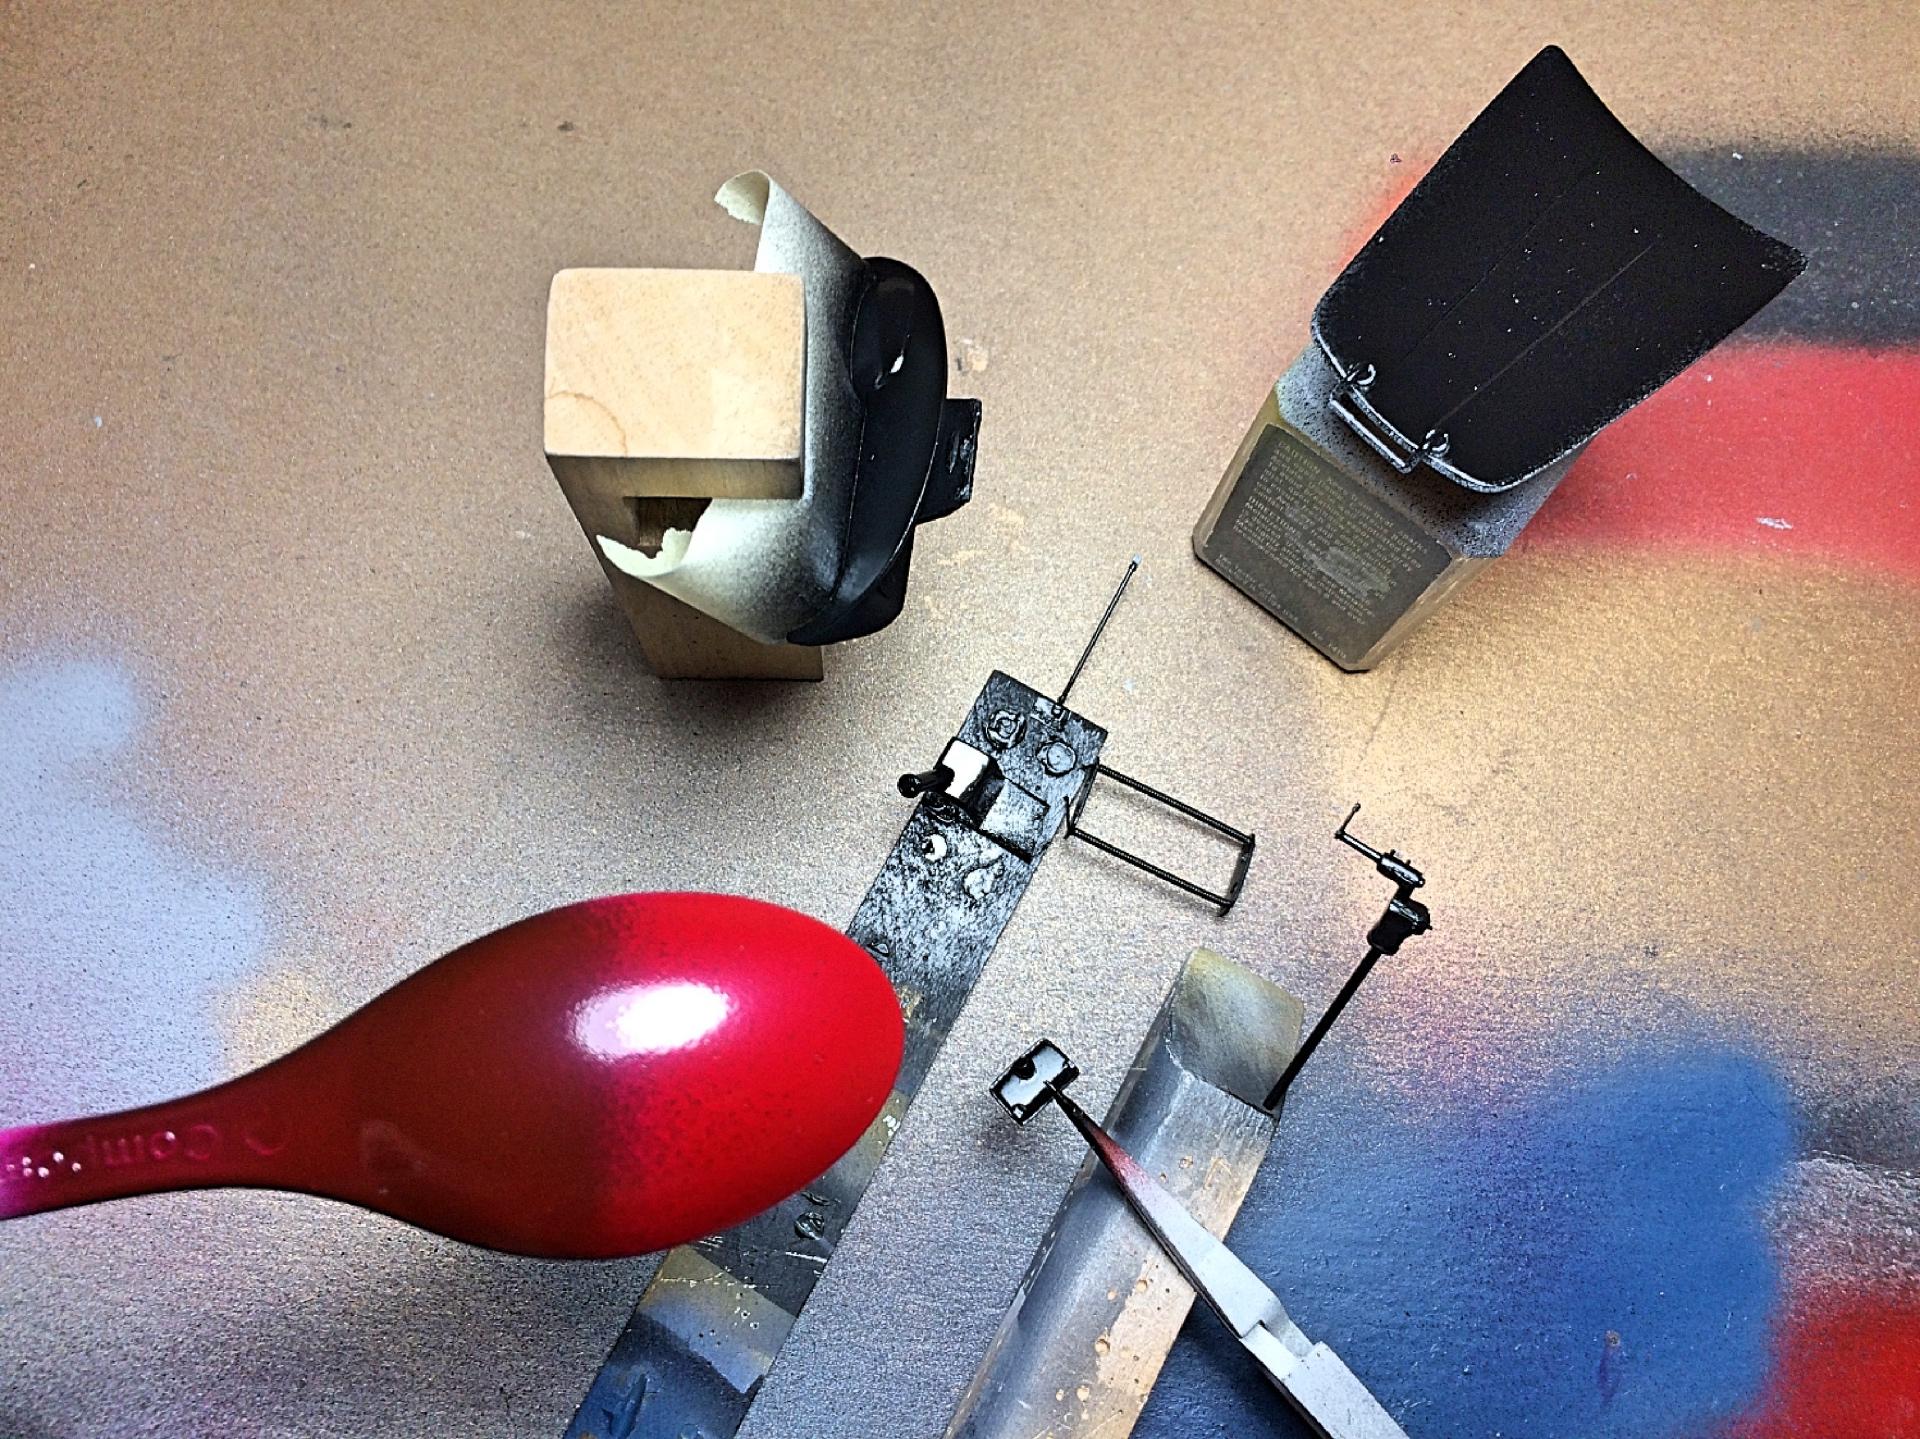
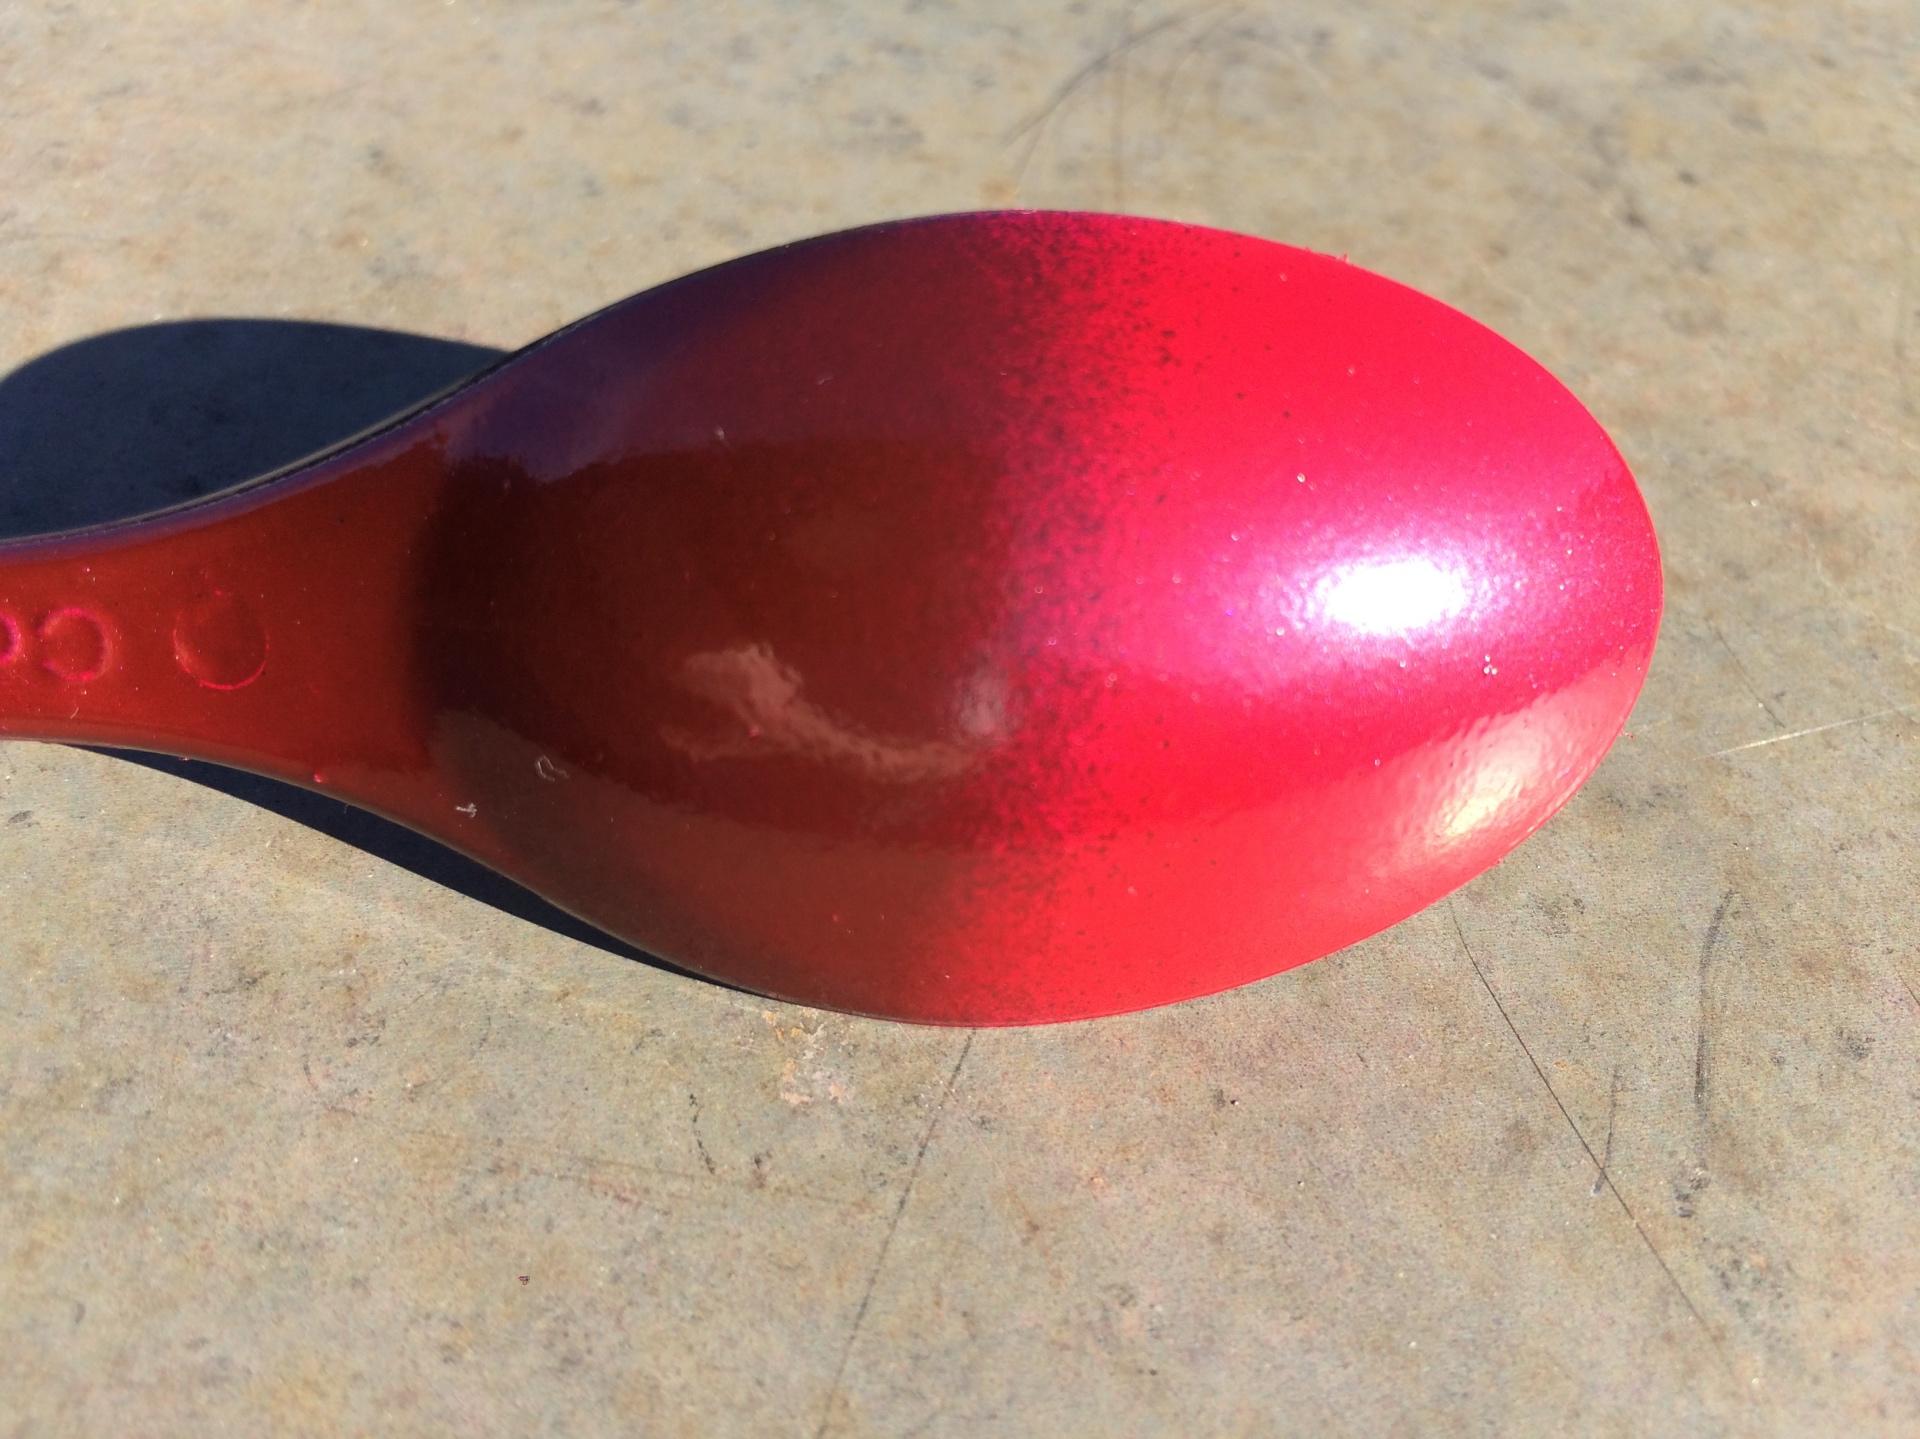
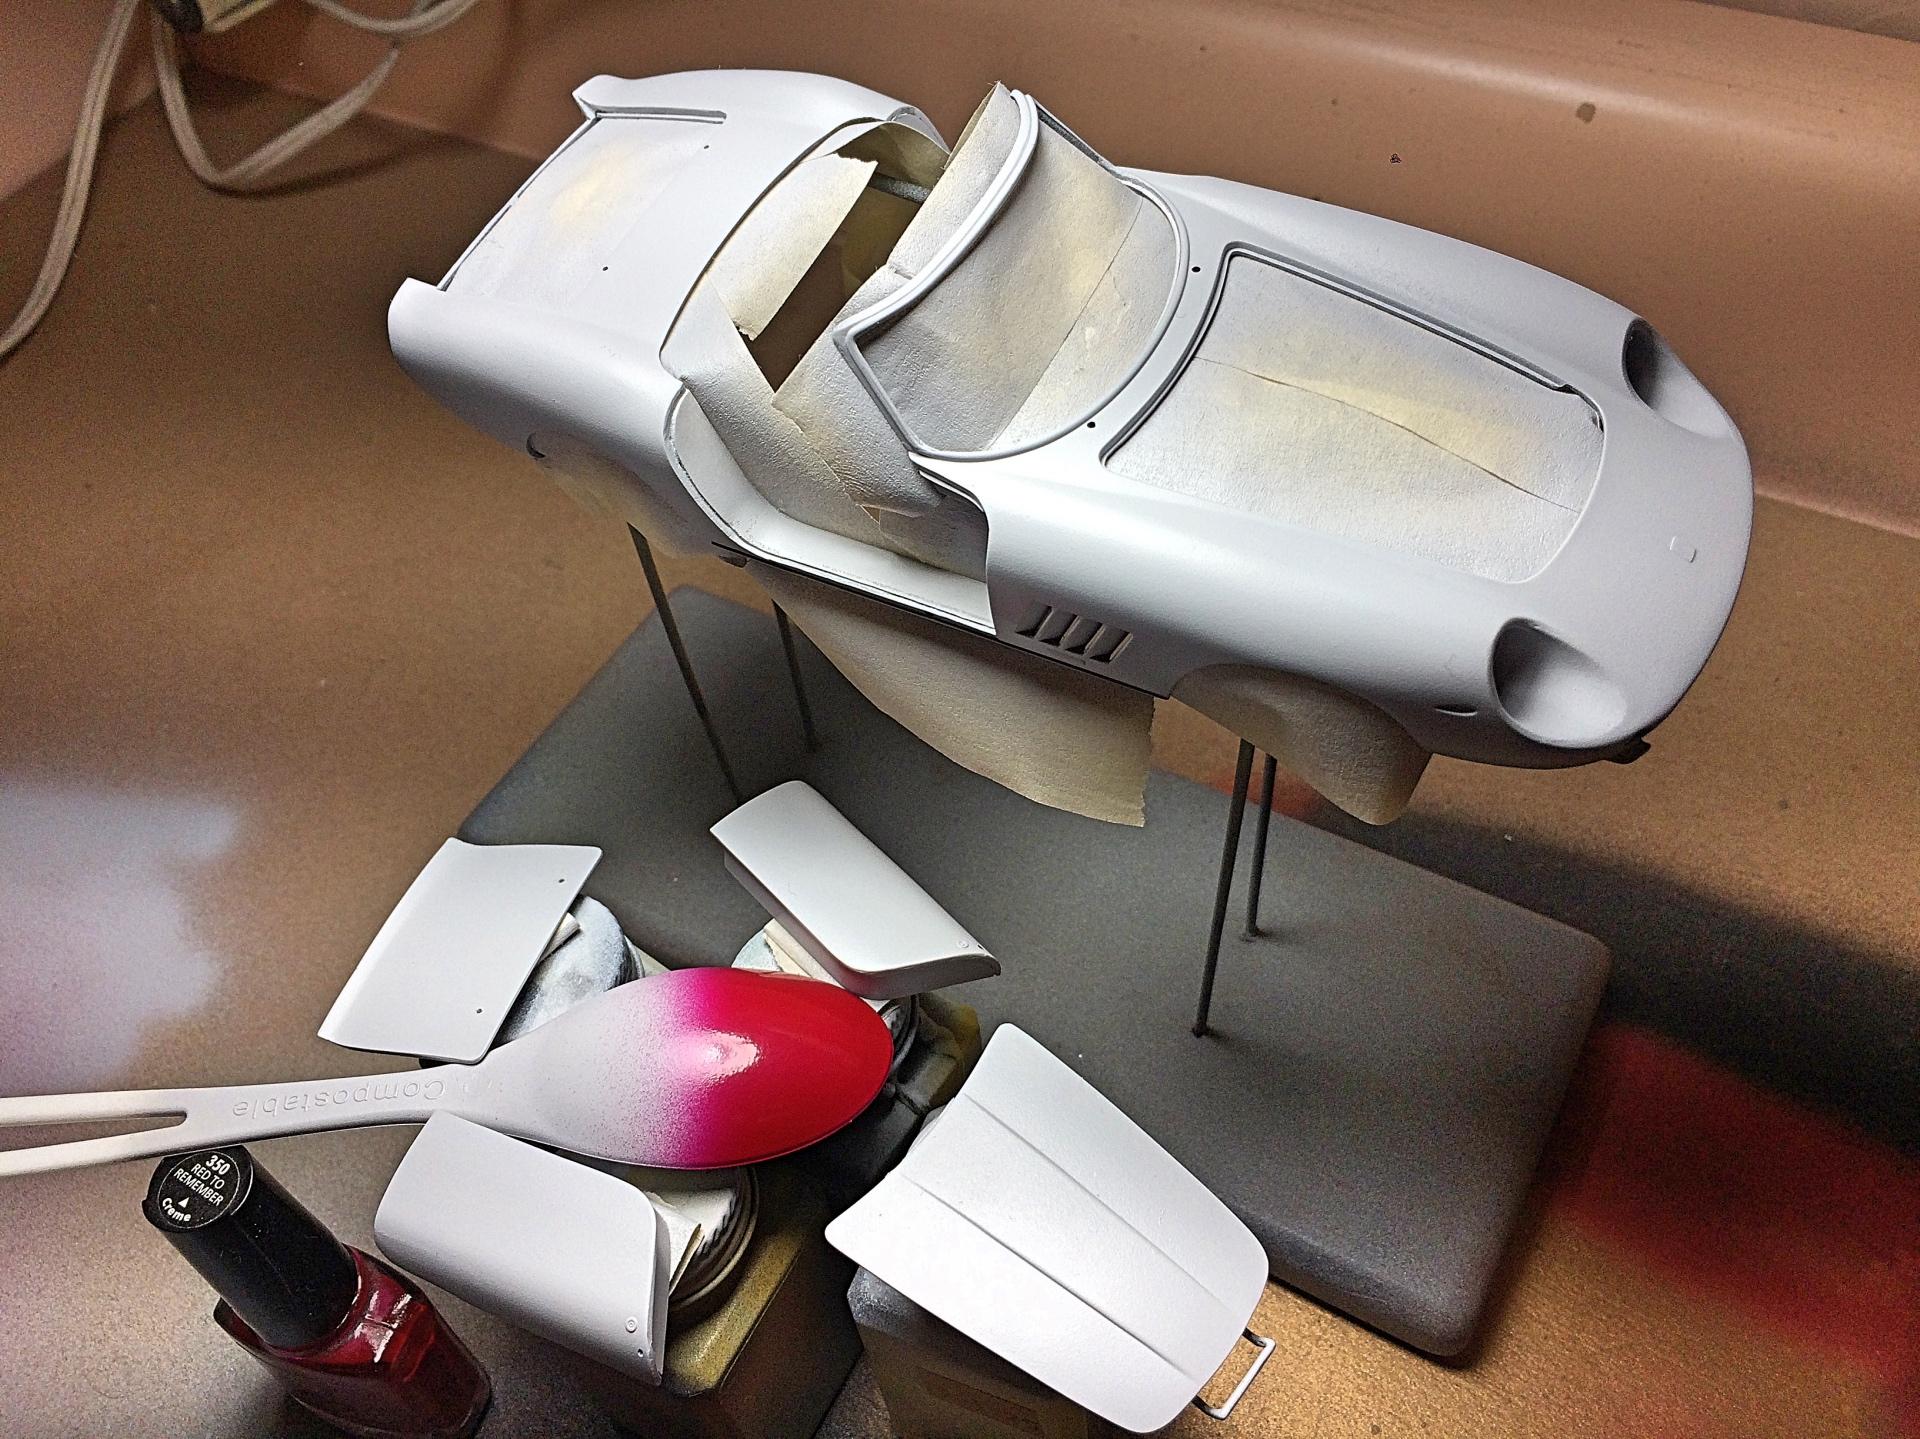
Appreciate the comments everyone! ? Made a major part from scratch, the steering box. It's so buried, the reference pictures are no help, used a parts catalog picture, which is far from manufacture drawings, so will be first to admit it's not accurate. All I wanted is eye candy, to represent a part of the car that's sort of important. Started by finding a correct looking size brass tube, gluing on a big piece of styrene, then using the Dremel to rough out, then carve with the #11. Dug through the car and military parts boxes, found some shapes that looked appropriate, but ended up using only two. The rest is chunks of scrap styrene, and photo-etch rings and nuts. No wonder they didn't include, super tight fit! Added a brass cross link to the otherwise detailed suspension steering rods. Then painted semi-gloss black. Did another test shot of the nail 'polish', over black. Makes a **HUGE** difference what the base color is. Now I'm having second thoughts. In the sun:

-
I'm sure most of these kits got broken windshield frames! So far my wire trick has held up. Hey! Sorry I missed this page, this morning. Oh heck yea, would love this distributors. I still haven't started the plug wiring, but it's next, at least the loom with wires attached.
-
Tuning into this build!
-
You have texture that is a challenge to match. Why not just make electric windows, put a Decora switch plate there? ?
-
Thank you so much! That's one way to put it, I have another that can't be written in this forum without seeing blah=blah=blah. ? Was lying awake last night, going over the next steps. Also did the night before, that's why I was able to blow out so many things. I have a part in the scrap box that has been calling to me.... The prospect of drilling 24 tiny holes, and making the wiring loom for plug wires, is a bit daunting. Then I can paint semi-gloss black. I see the forum will be down later today, good excuse to keep at it. Oh yea, raise the seats, got that tip somewhere this morning. ?
-
Great, that's something I've noticed before on my builds, but never made my Pet Peeve list. ? Should do that on my NART, but have a hole without carpet, but just a millimeter should be good. I was thinking of screwing them on too, since that's how I mounted to a bottle for doing the piping. You going to shave off the window cranks from the door panels? First time I've seen this build, looking real good, love the engine and wheels. I liked the first year of this generation, but then the Dark Ages descended upon Detroit with safety regulations, and the battering ram bumpers just killed esthetics.
-
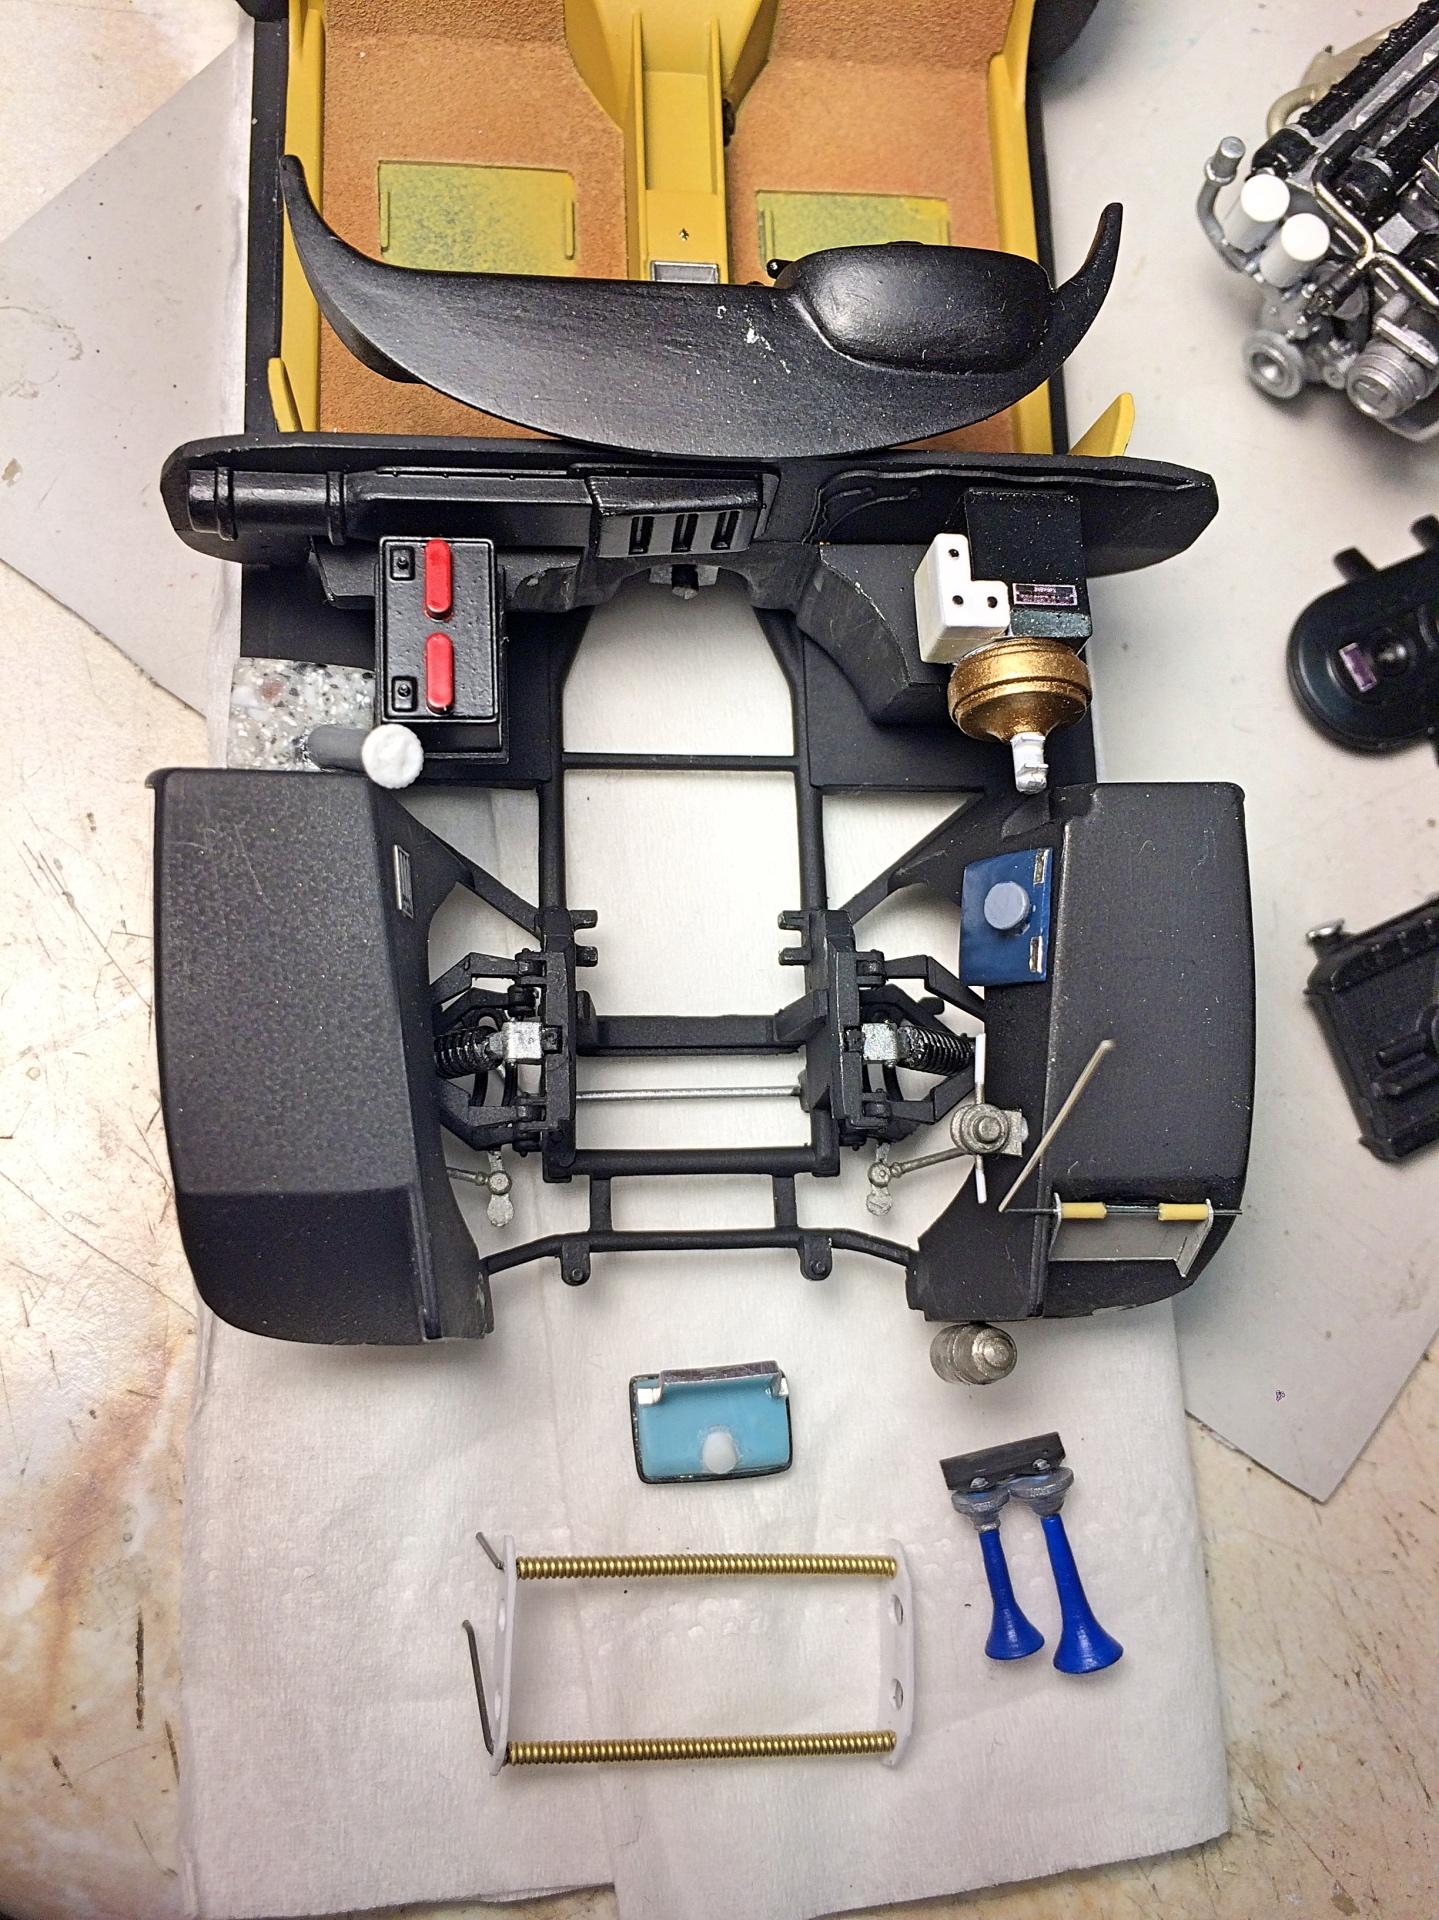
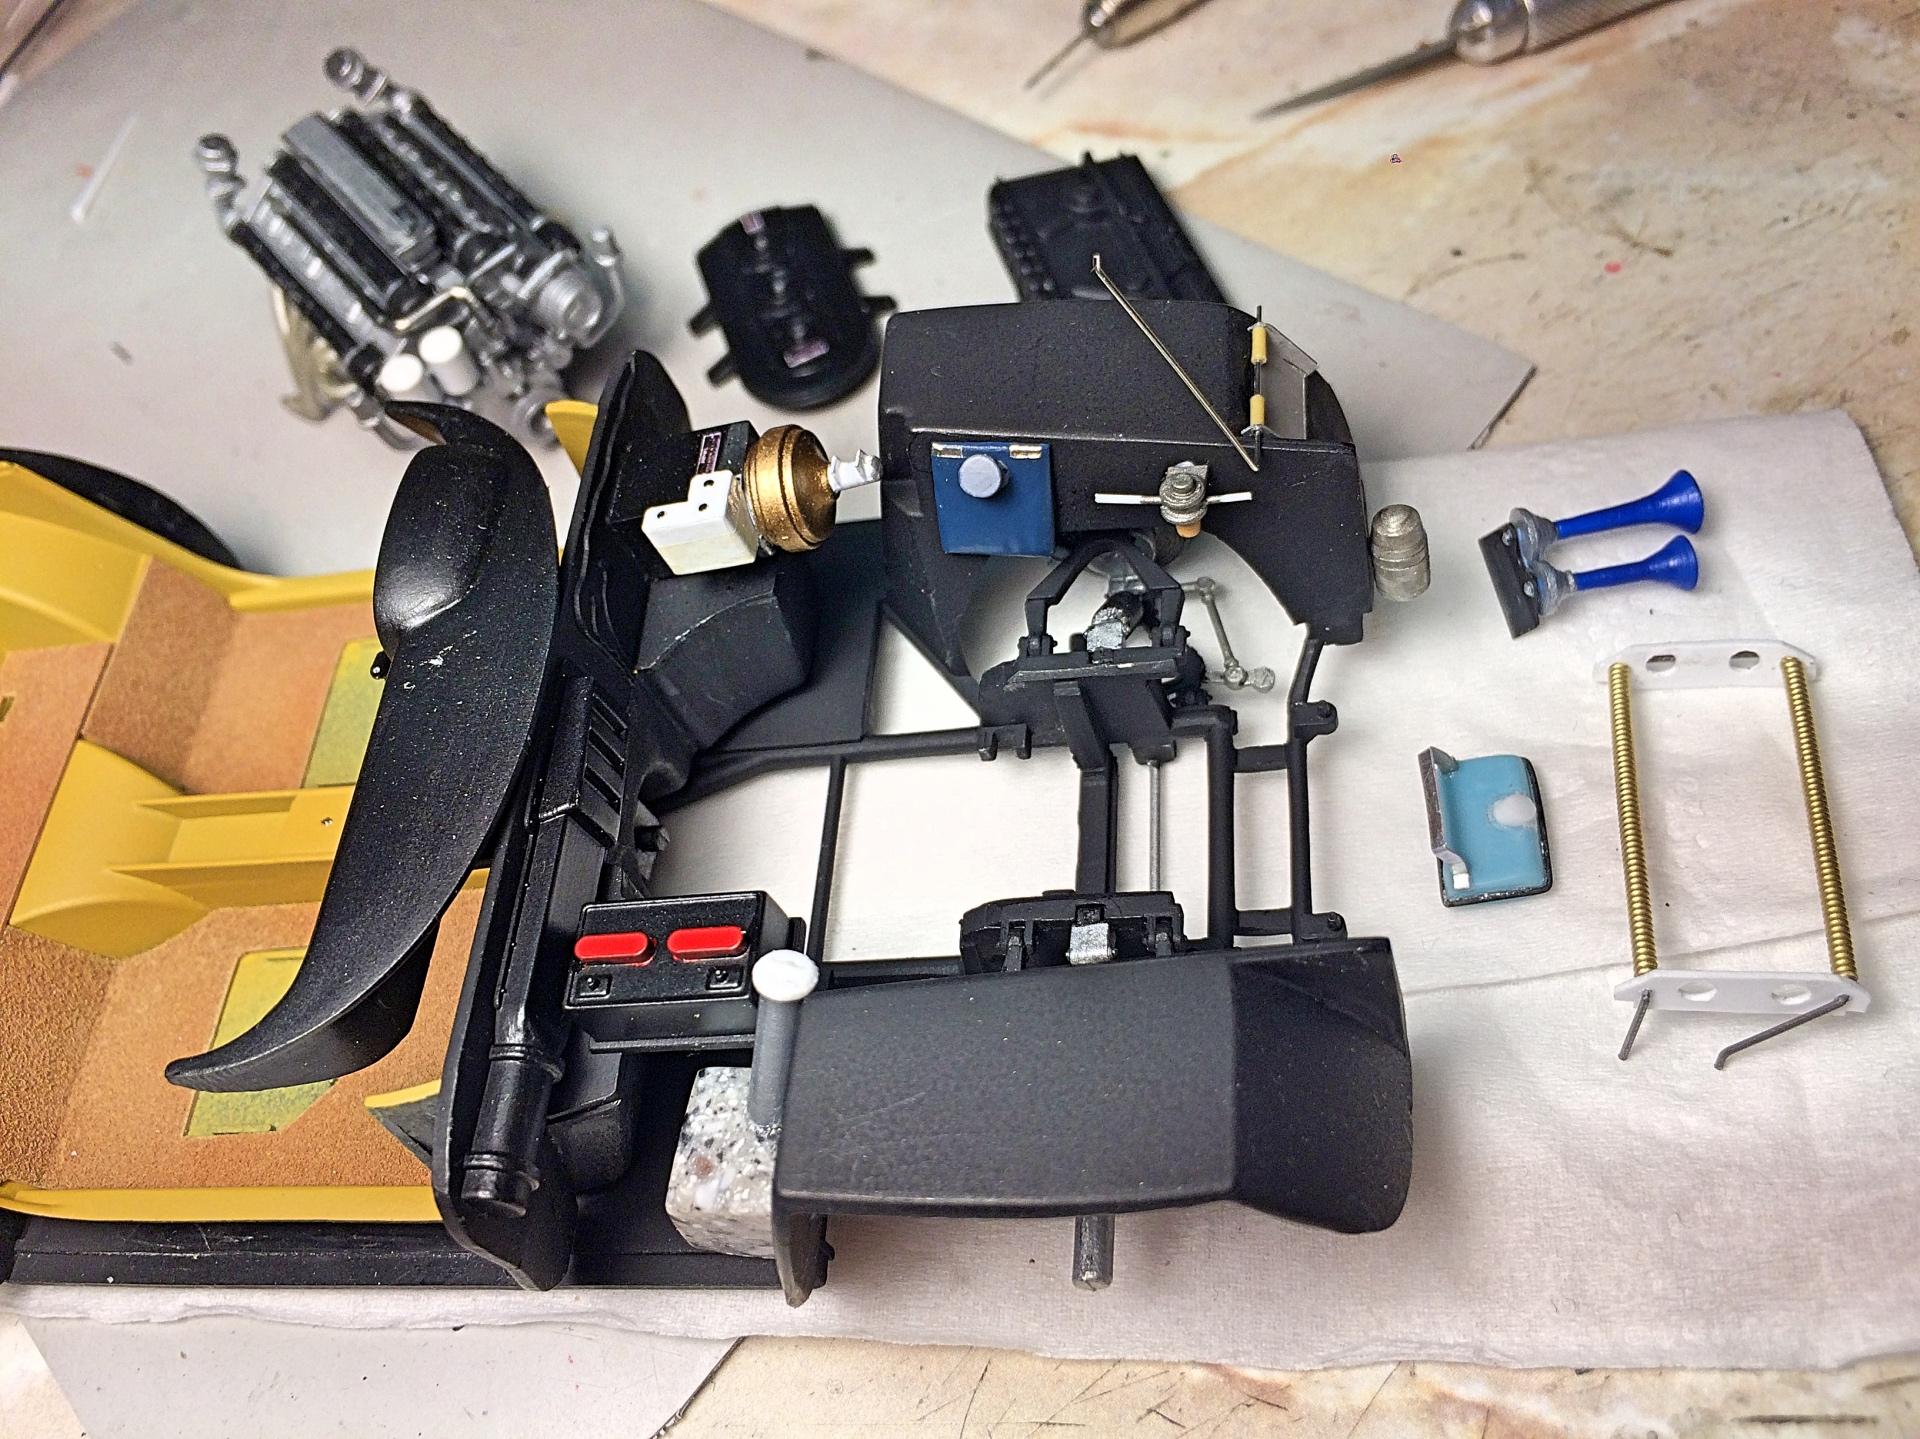
Thanks! I use the cordless drill for the lathe, it has a fast/slow switch and I run on high, and it's variable speed too. The Dremel is used instead of a file or whatever, trick is to run in the opposite direction from the spin of the cordless (which is reversible) or at a 90 degree axis. Maybe I should do a video, but I'm having technical issues downloading my last one. You got it! Finished a productive day with making the windshield washer bag, and the hood prop rod. Airbrushed the blue horns, then custom mixed in black and white with the blue for the bag. I turned the filler cap and tube for the bag. Painted some of the other parts too. The prop rod is held in an aluminum plate that is drilled then folded, and used wire insulation (wire removed of course) for retainer, and it's adjustable for now. I might make the retainer for the hood hinge, it's a massive plastic part that appears to not hold the hood just right anyway. Still debating about the steering part. I'm also not looking forward to plug wires.
-
all the cones
-
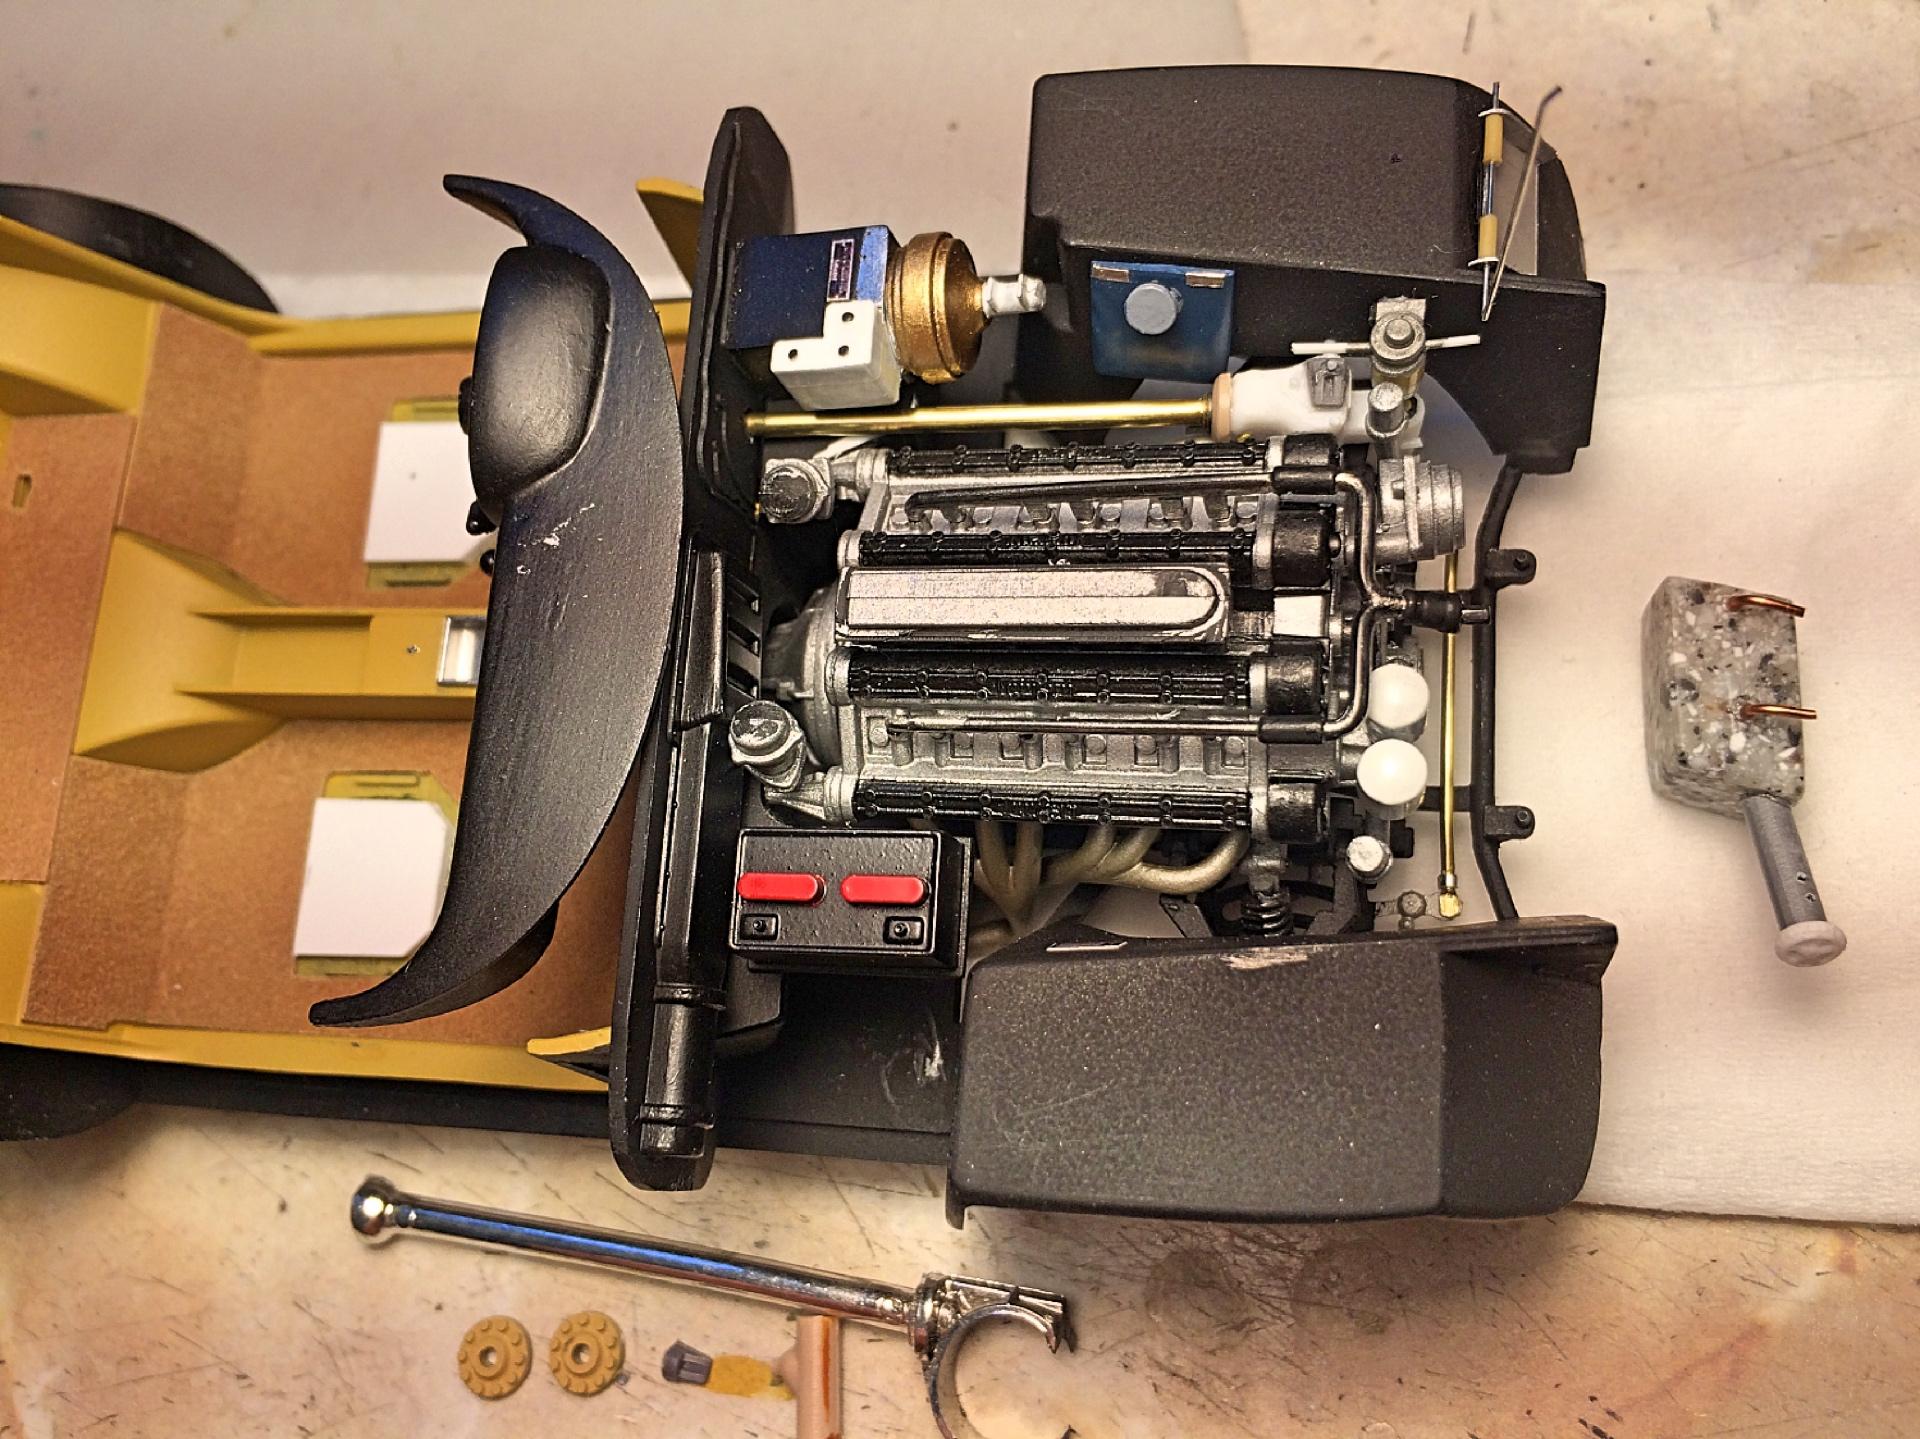
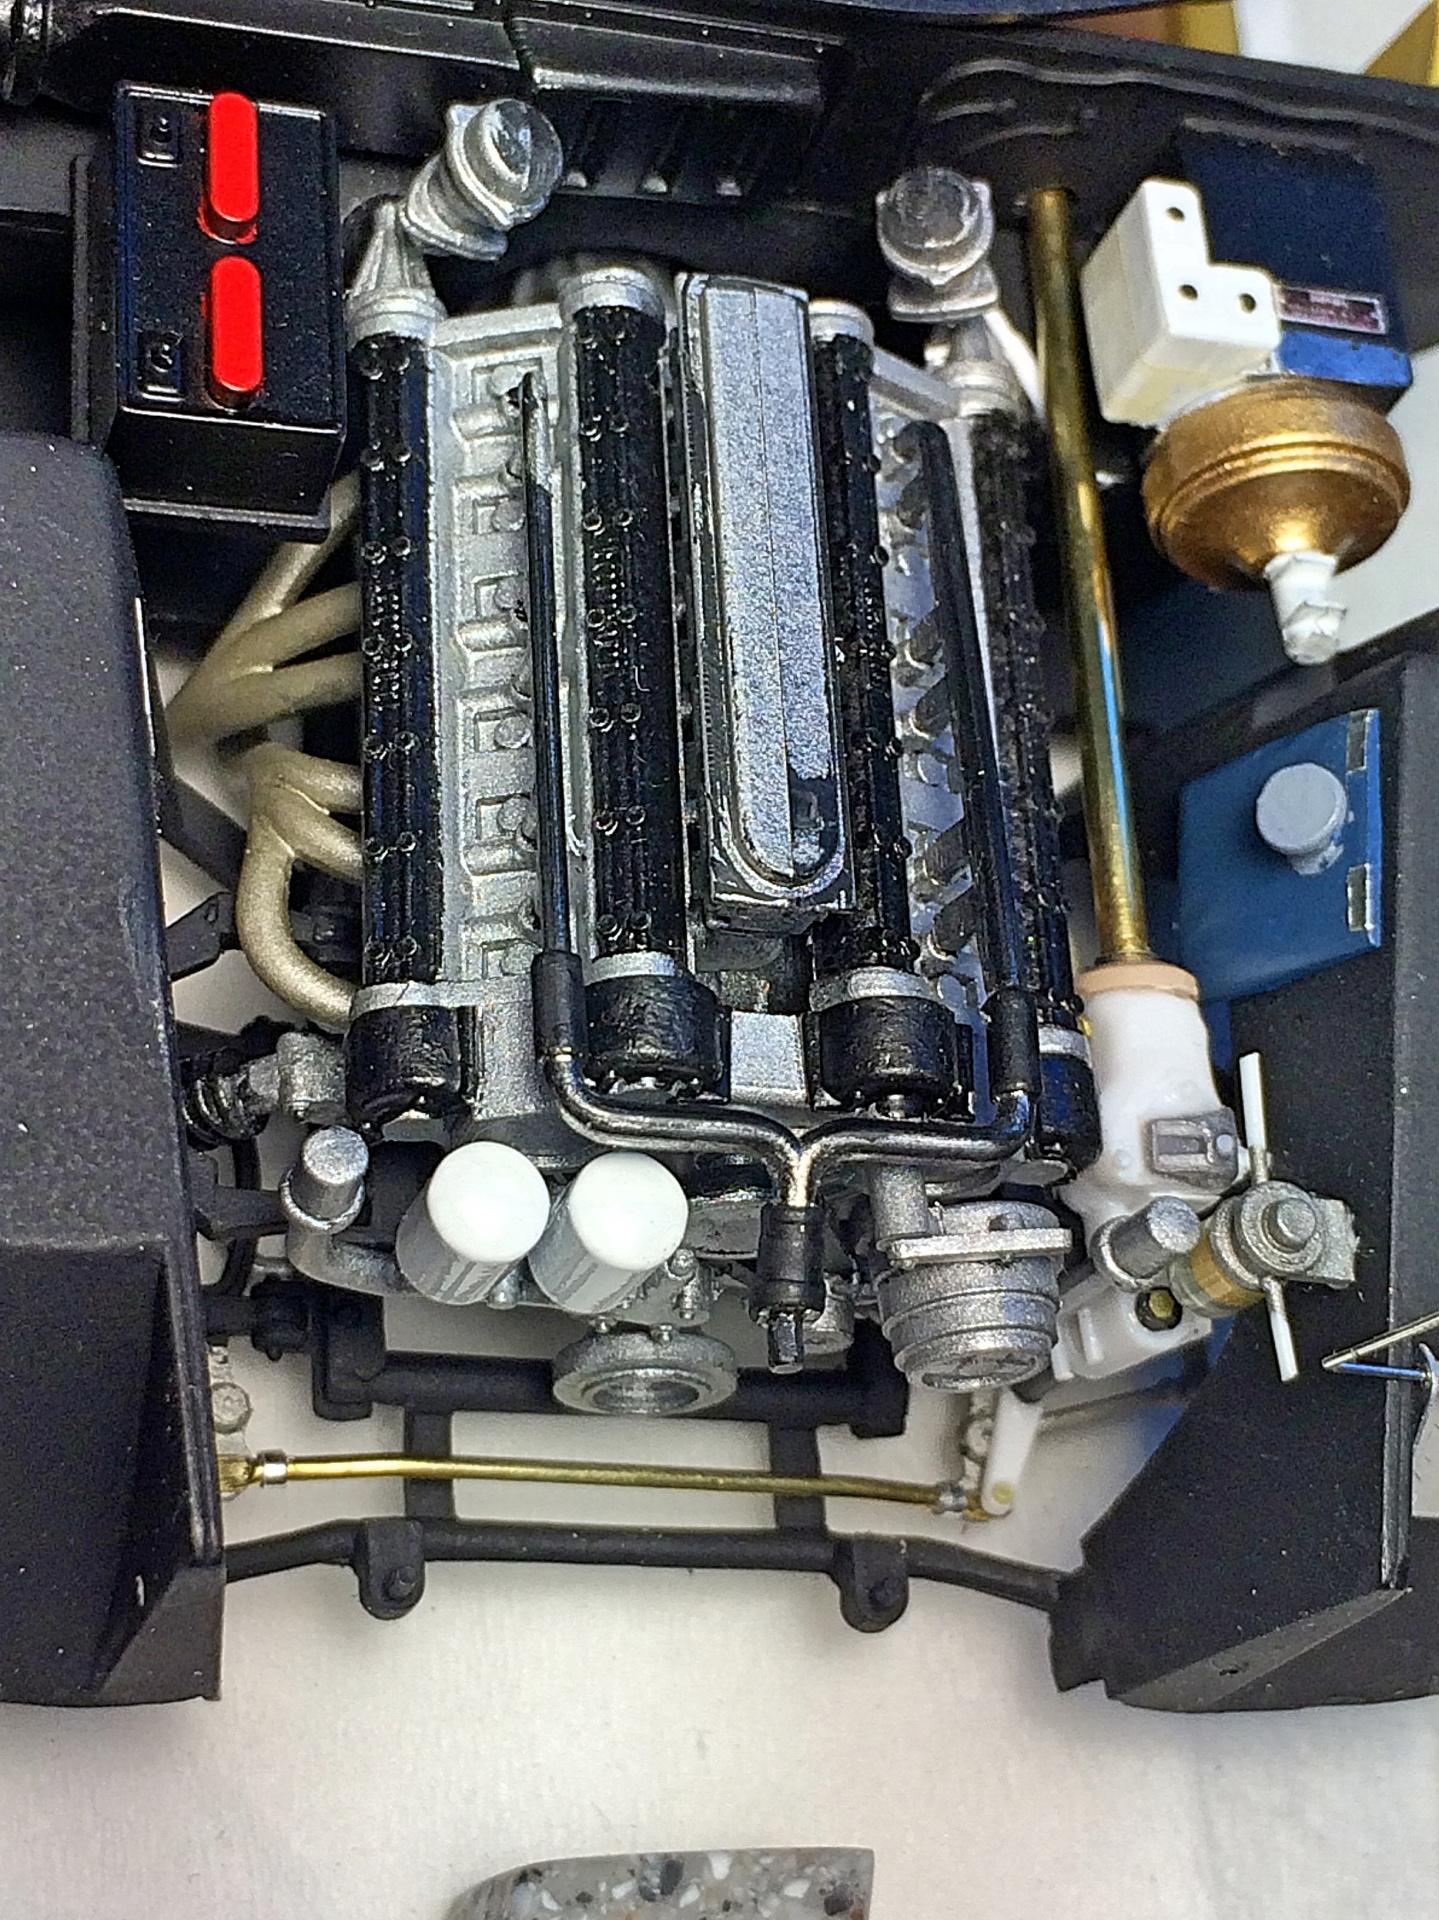
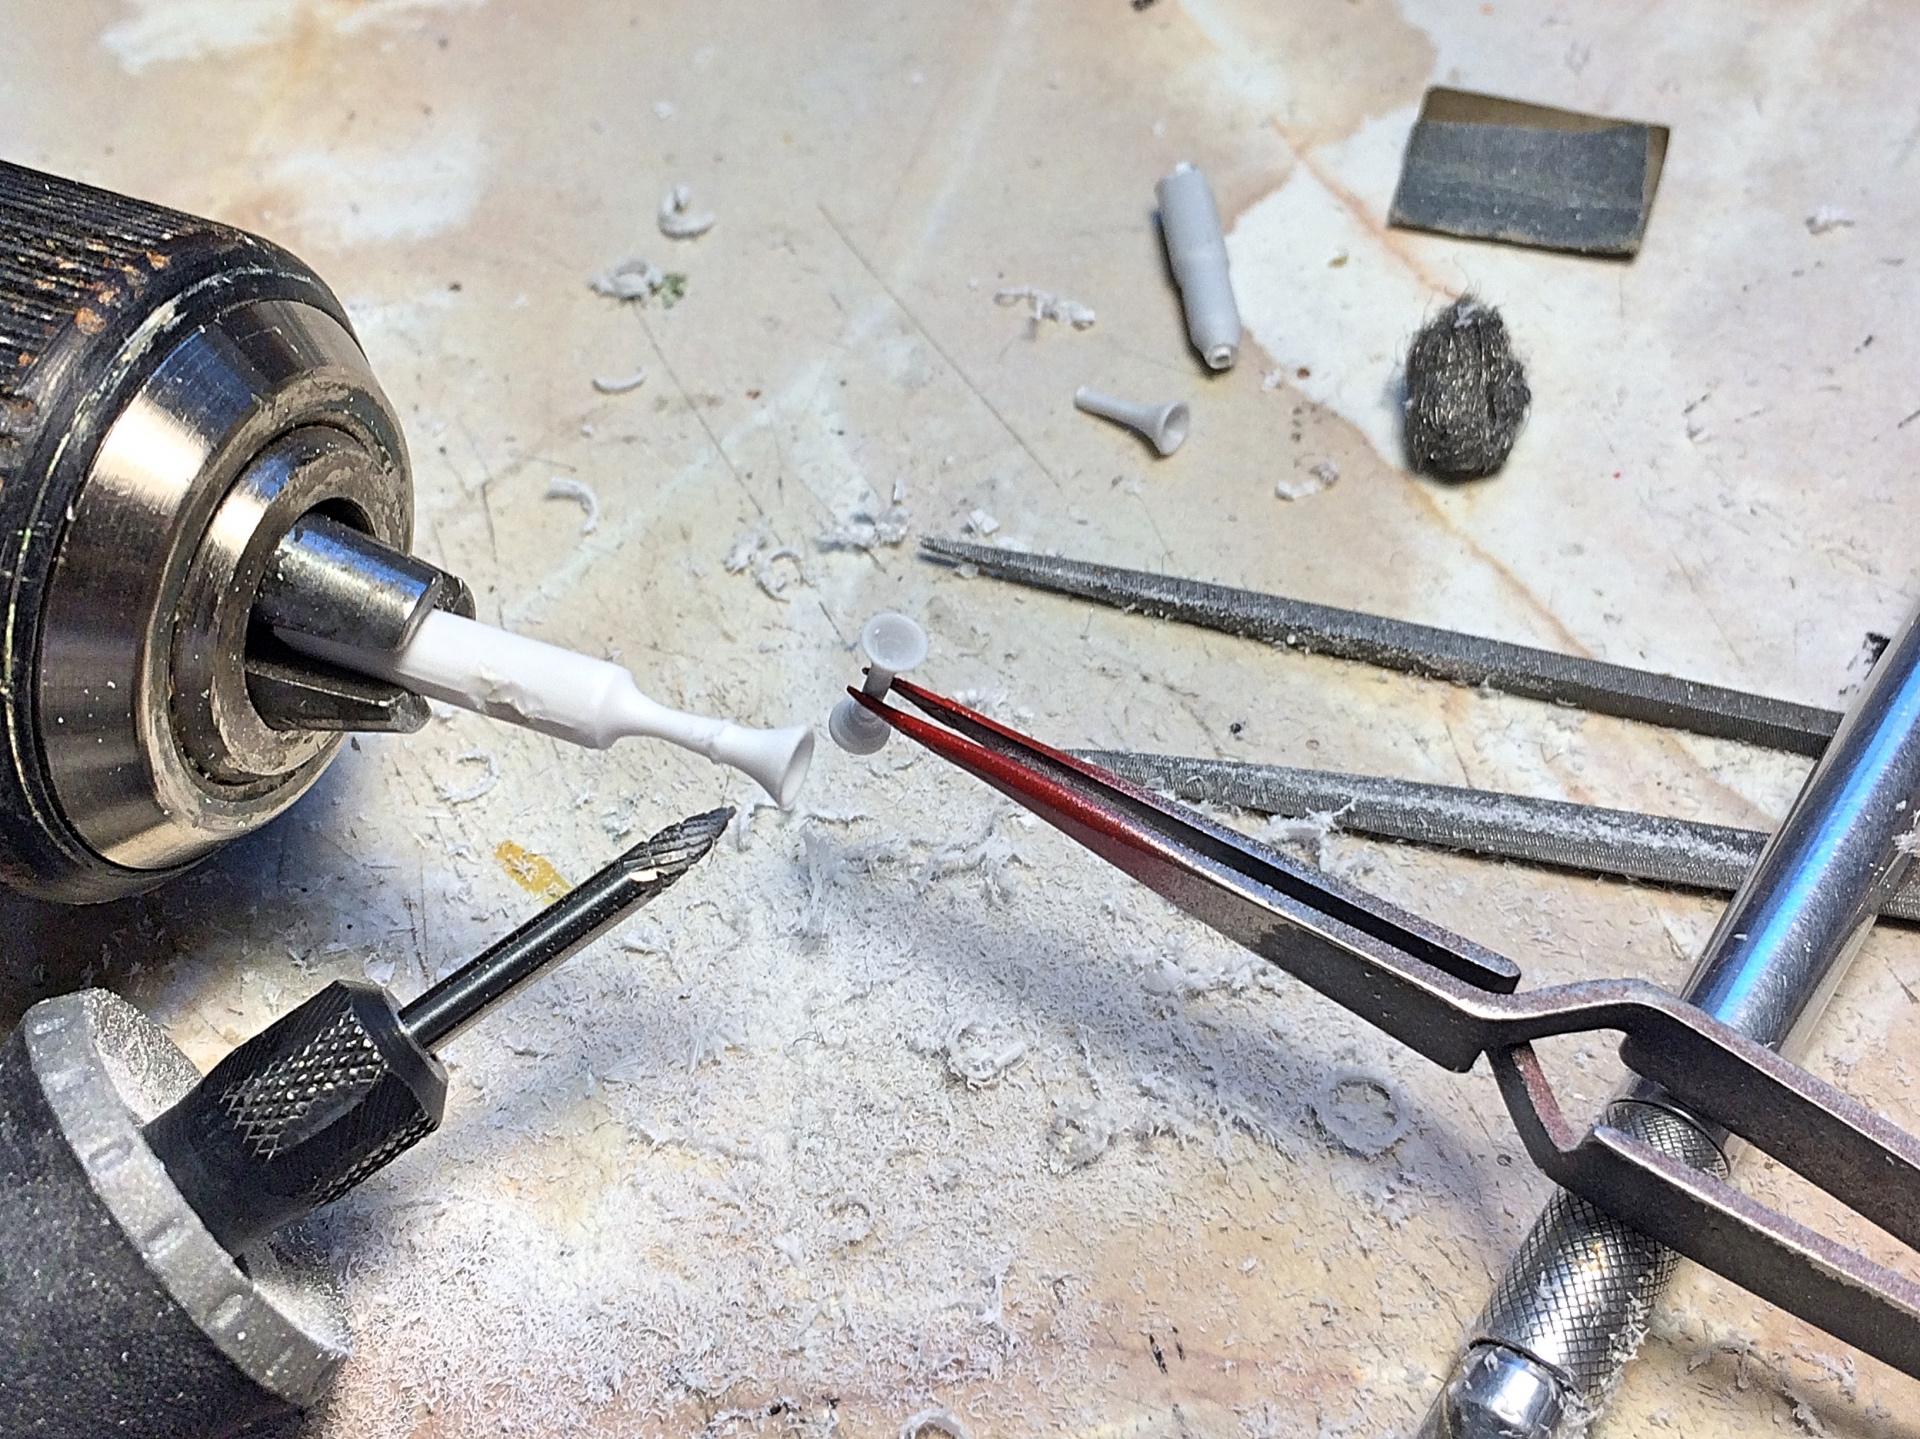
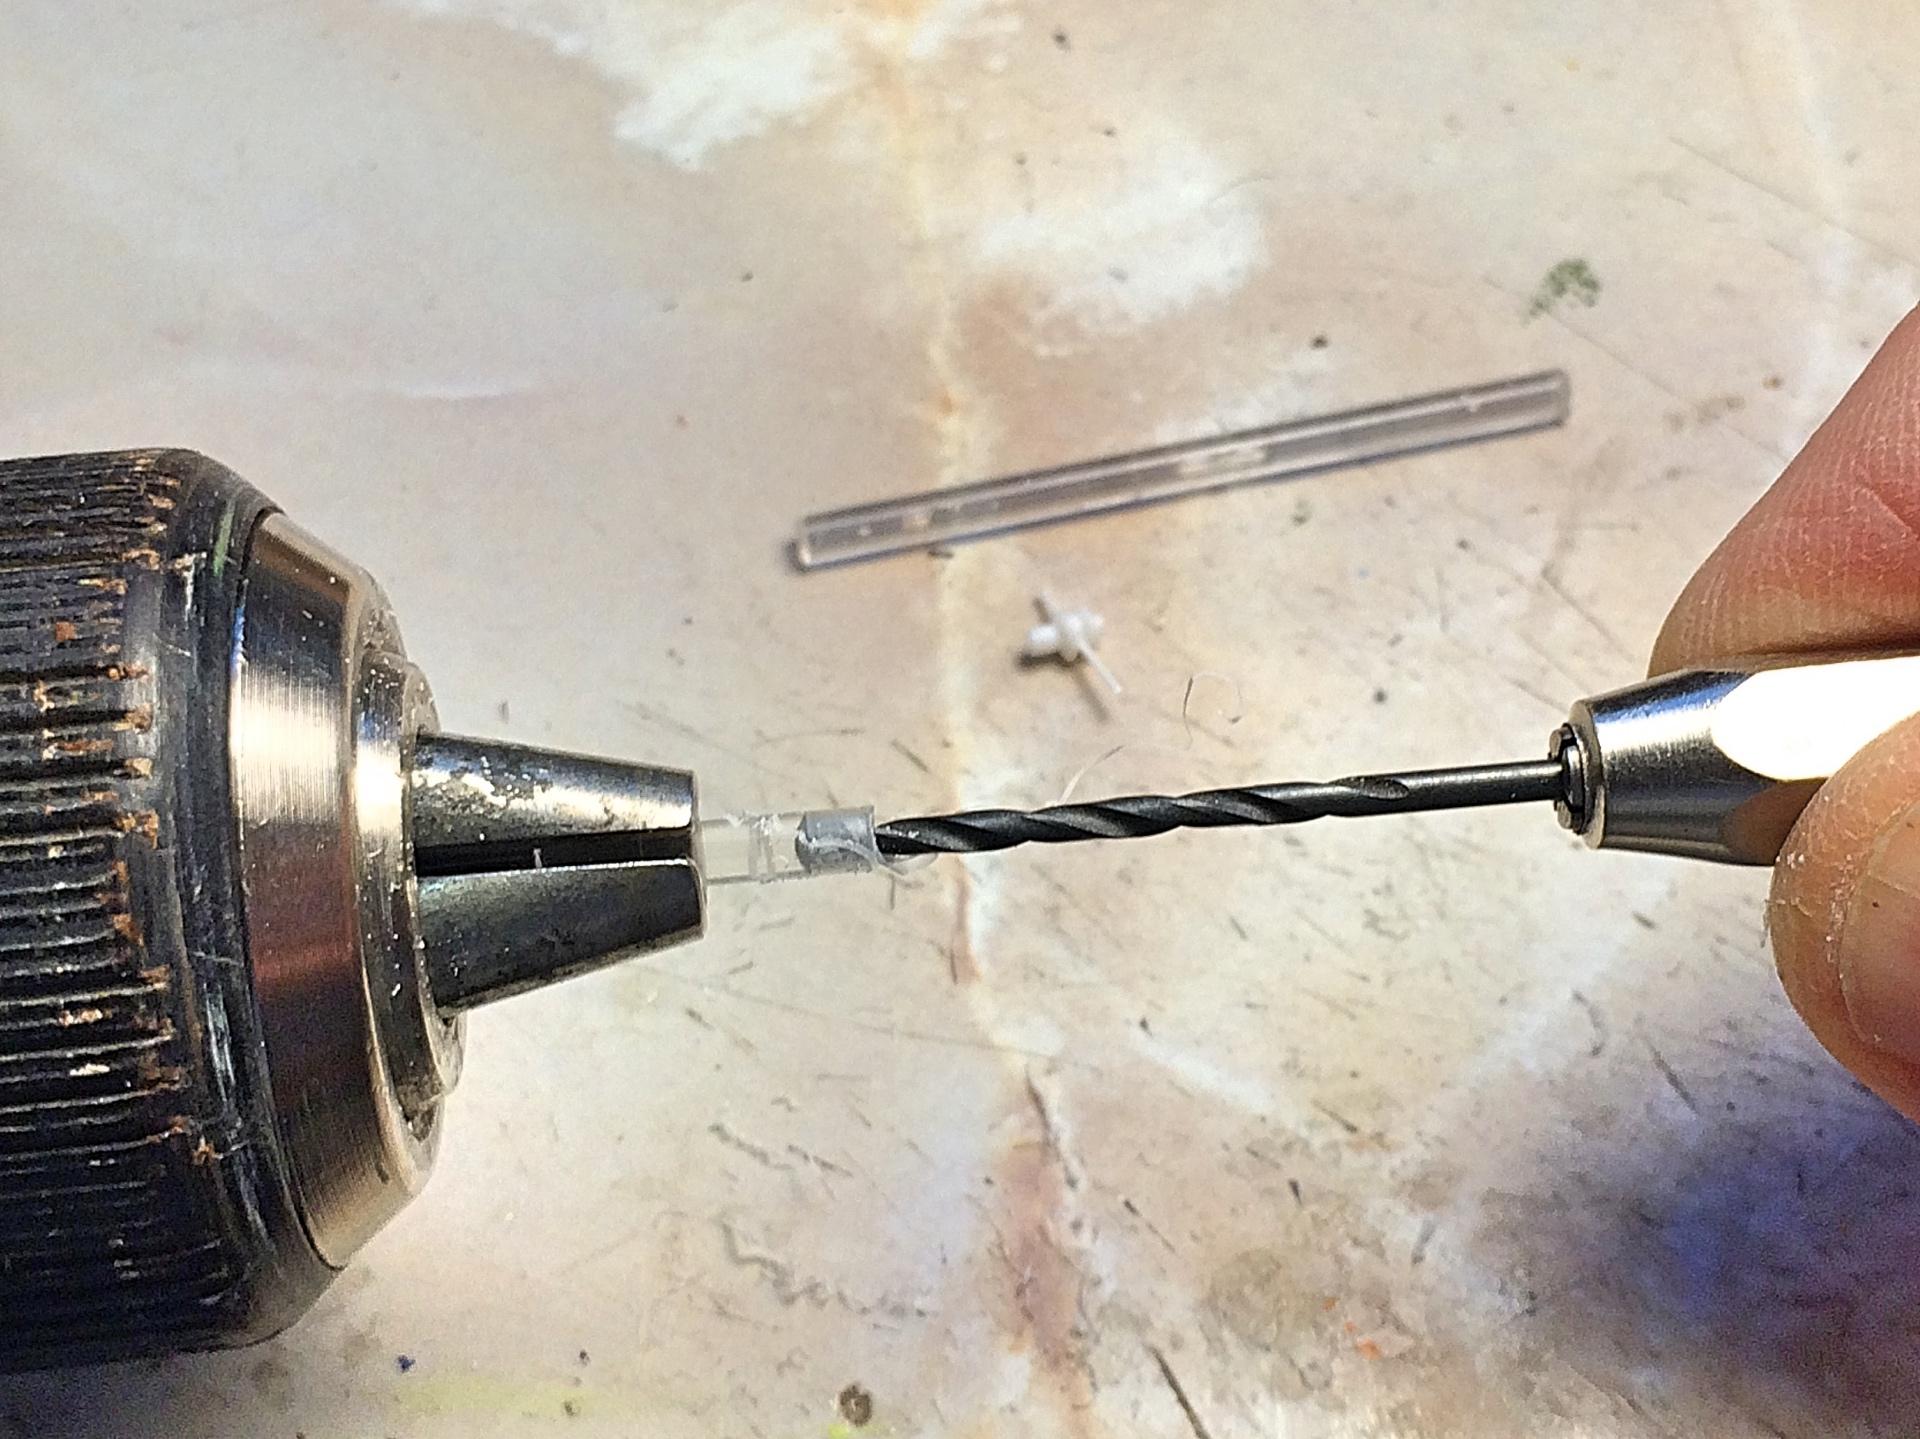
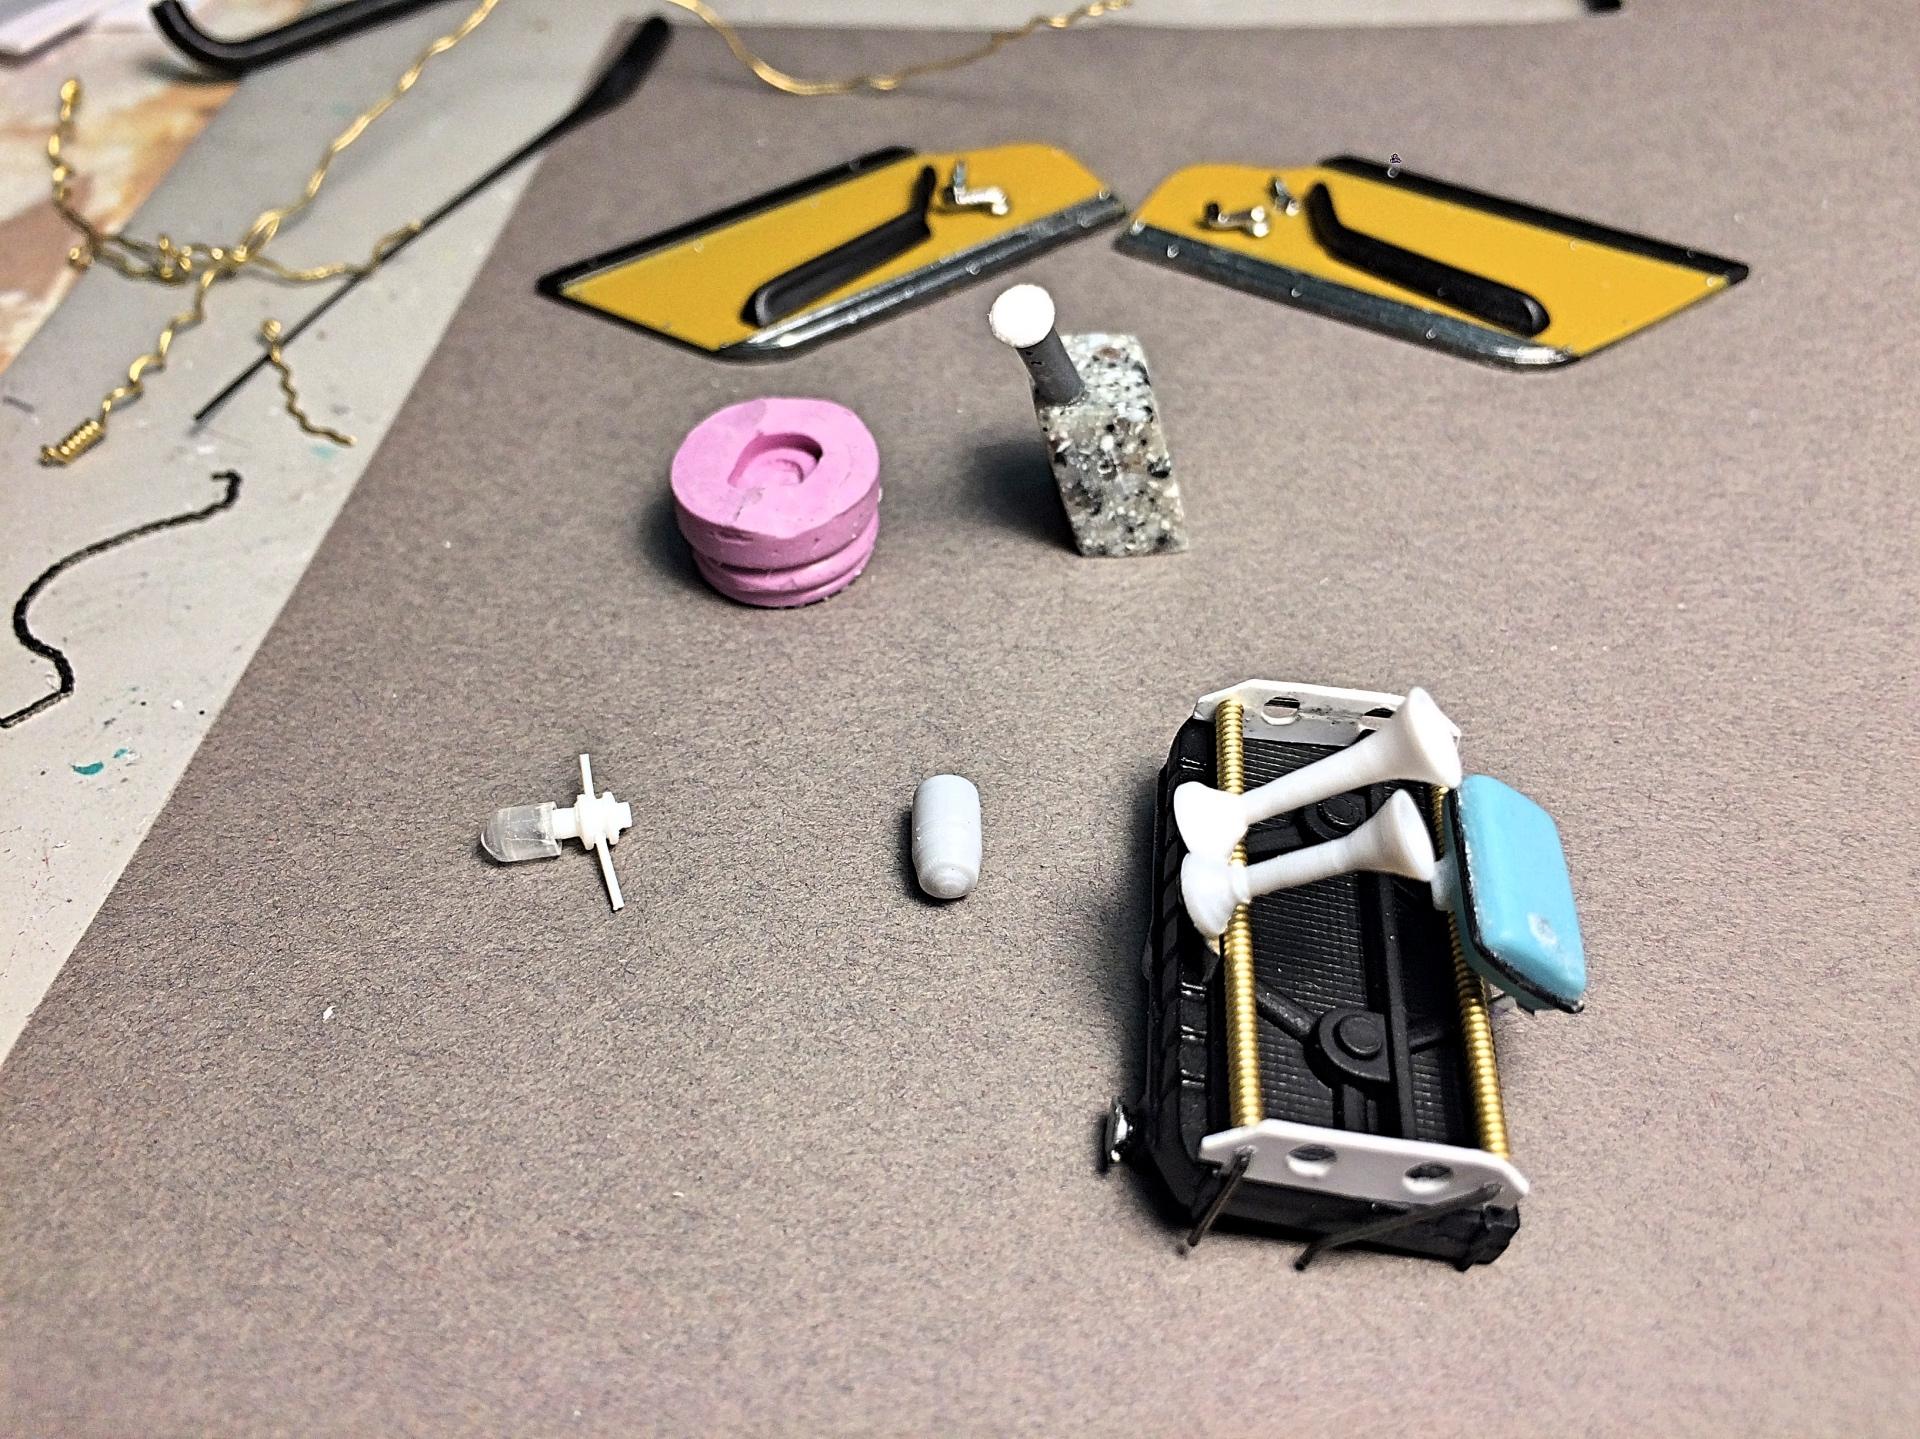
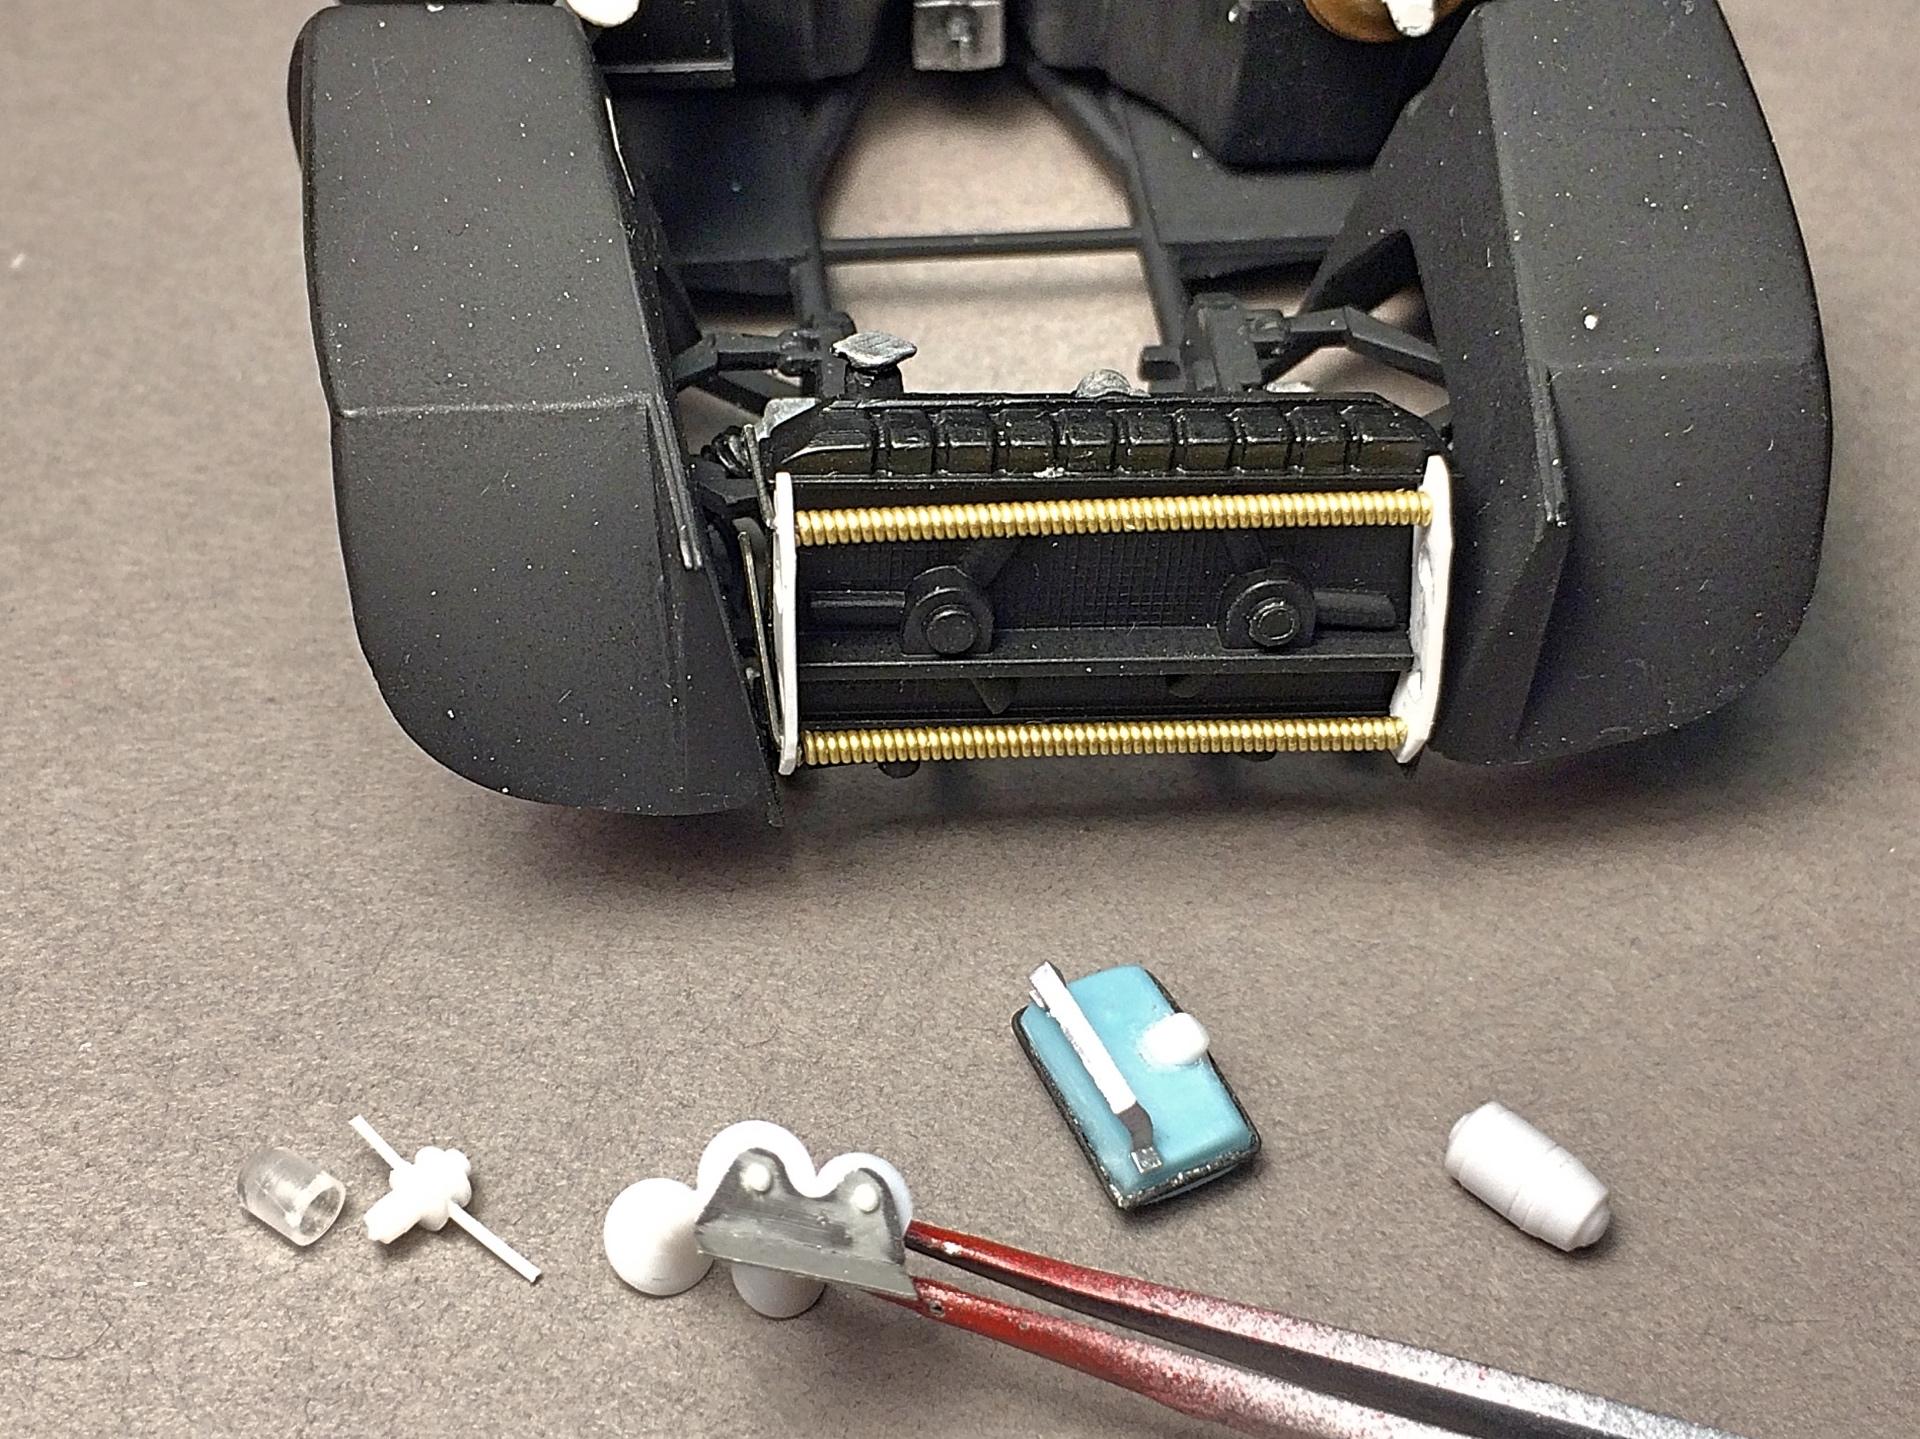
Appreciate you checking in! Started the day making a video, which I should post in the Tips section. One problem, my laptop is so full, need to find room to download. ? Decided to make the air horns totally on the Cheapskate lathe, which is a cordless drill with the big sprue in the chuck, and the Dremel with my favorite bit. Started by using the #11 blade to hollow out the end. The trick is to not work fast, because the plastic will get warm and bend, ruining the piece. When the shape is roughed out, used a file or sandpaper, finished with steel wool. Final cut is with the knife to remove from the sprue. There are two sizes of horns, that's not a mistake. Fuel pump is the basic shape in the reference pictures, turned the same way but also using the knife. Before cutting off, drilled the hole for the stretched sprue. The glass bowl is clear sprue, found an air bubble and cut there, then used a drill bit without twisting, let the cordless drill spin. Worked slowly to not melt it! Turned the outside, down about half way, then I sanded and polished, before cutting off. Put this onto another sprue, then sanded the tip, and spun in my cotton shirt to polish. The oil reservoir is a chunk of Corian. Used a rubber mold to reproduce the gas cap, took 3 tries. Also turned the air horn compressor. Made the coolant overflow tank from some big sprue, the seam is the same trick as the seat piping. The oil cooler is guitar string, cut and stripped off the brass outer wire where it isn't needed. The horns are mounted on aluminum plate, had drilled and glued in stretched sprue into the horns, holes in the plate, barely glued in the horns, then used the lighter to melt the ends.
-
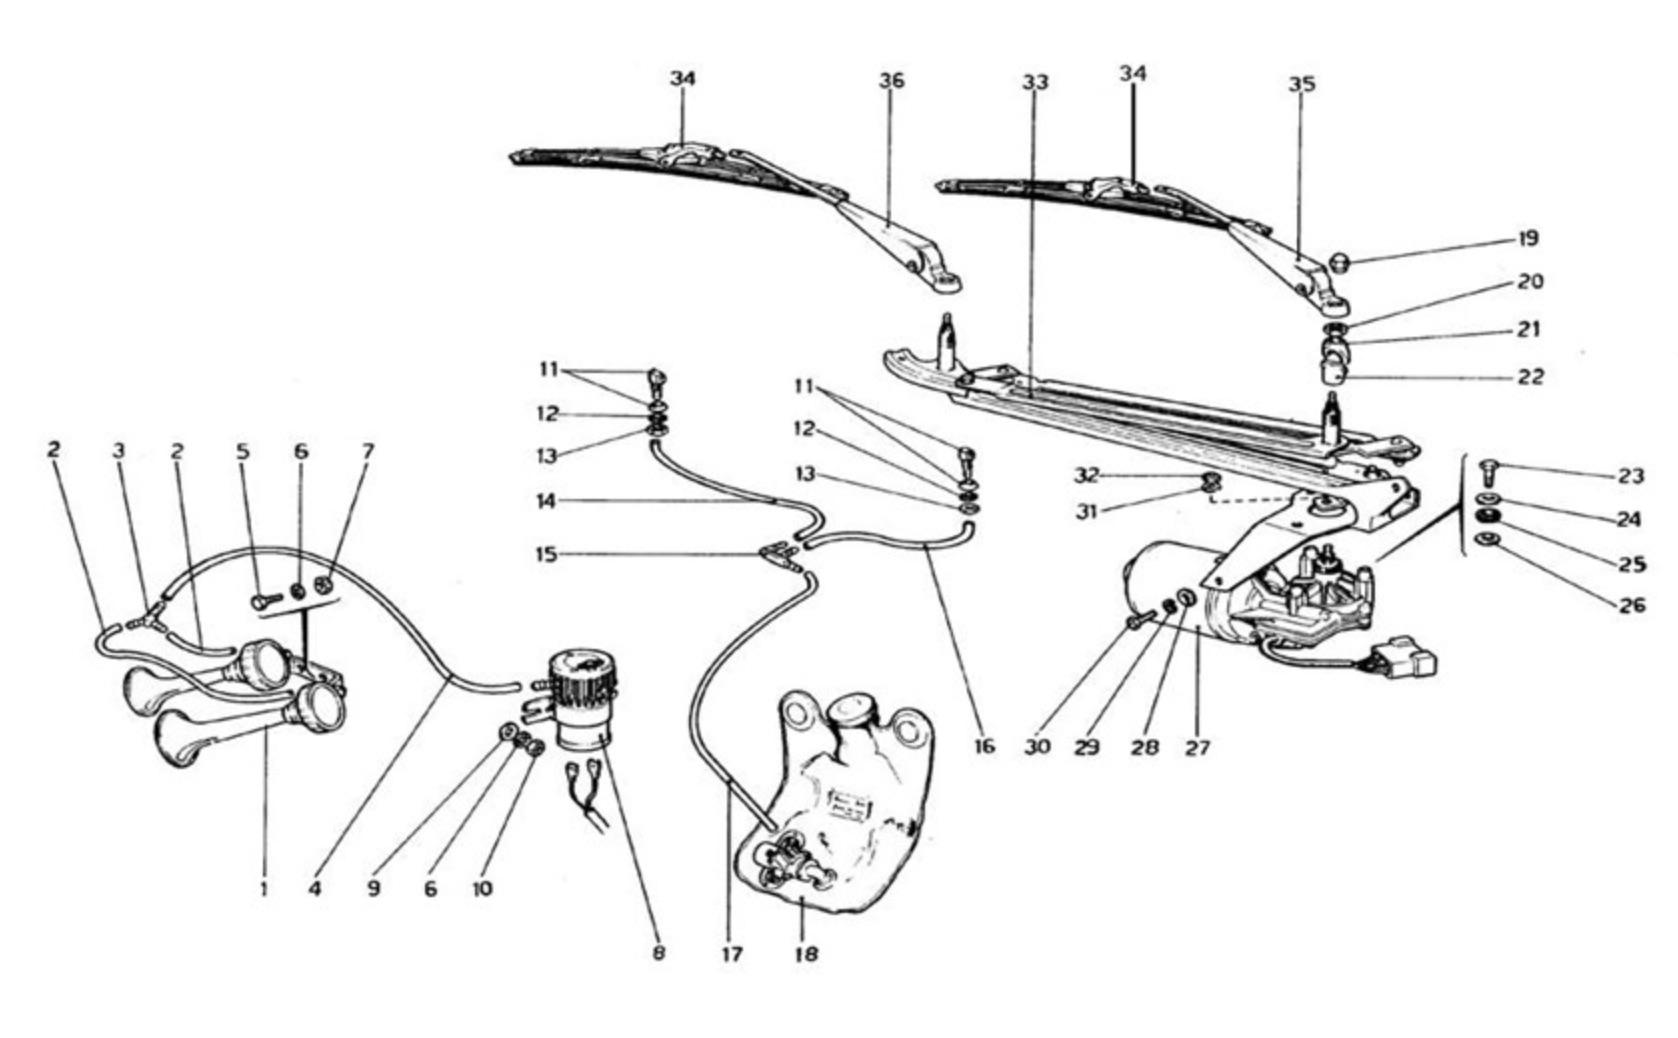
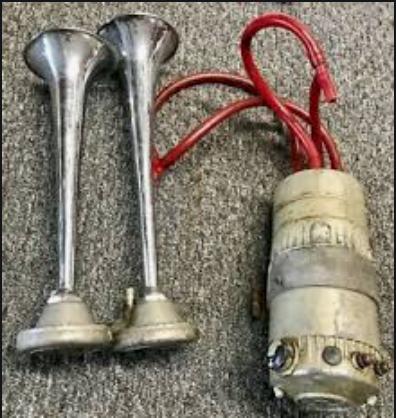
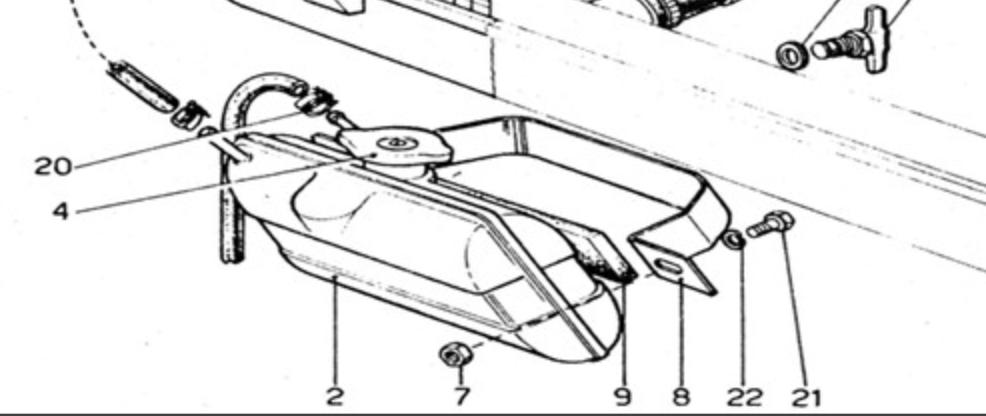
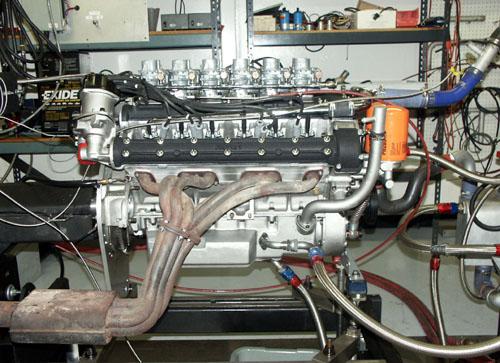
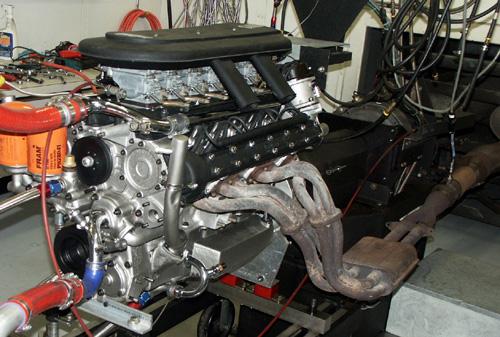
Yea, so many factors when looking at colors. When I spray black, will shoot the color over that to see what happens. Thank you! Much appreciated. ? Oh good, glad you are enjoying it! Thank you too. ? I will be posting another video later. For now, I'm researching to scratch-build: • Lower coolant hose. • Oil cooler, guitar string will be the material, which will be plumbed to the ... • Oil tank. Need to make a copy of the gas cap. More hoses lead to the draft tubes. • Fuel pump. Yellow wire will be used for the lines. • Coolant overflow tank. • Steering shaft, and something resembling the box, impossible to find a decent picture. • Air horns. Going to make forms, then vacuum-form the trumpets. • Windshield washer bag, includes adding the squirters. • Hood prop rod. This should be enough eye candy (wait until you see what eye candy will be with this car ?) Horns: Overflow tank: Where do oil lines connect to the engine? I've noticed the majority of oil filters are Fram, I think because the orange looks cool! ? These engine pictures are of hopped up builds, not concours restorations, note distributors, how plug wires are run, valve cover bolts are steel not black. It gets to a point of saying screw it, I'm doing what *I* want.
-
Coffee Cruise, obvious
-
of ill repute I see Jeff is taunting Nick with my punishment call, LOL
-
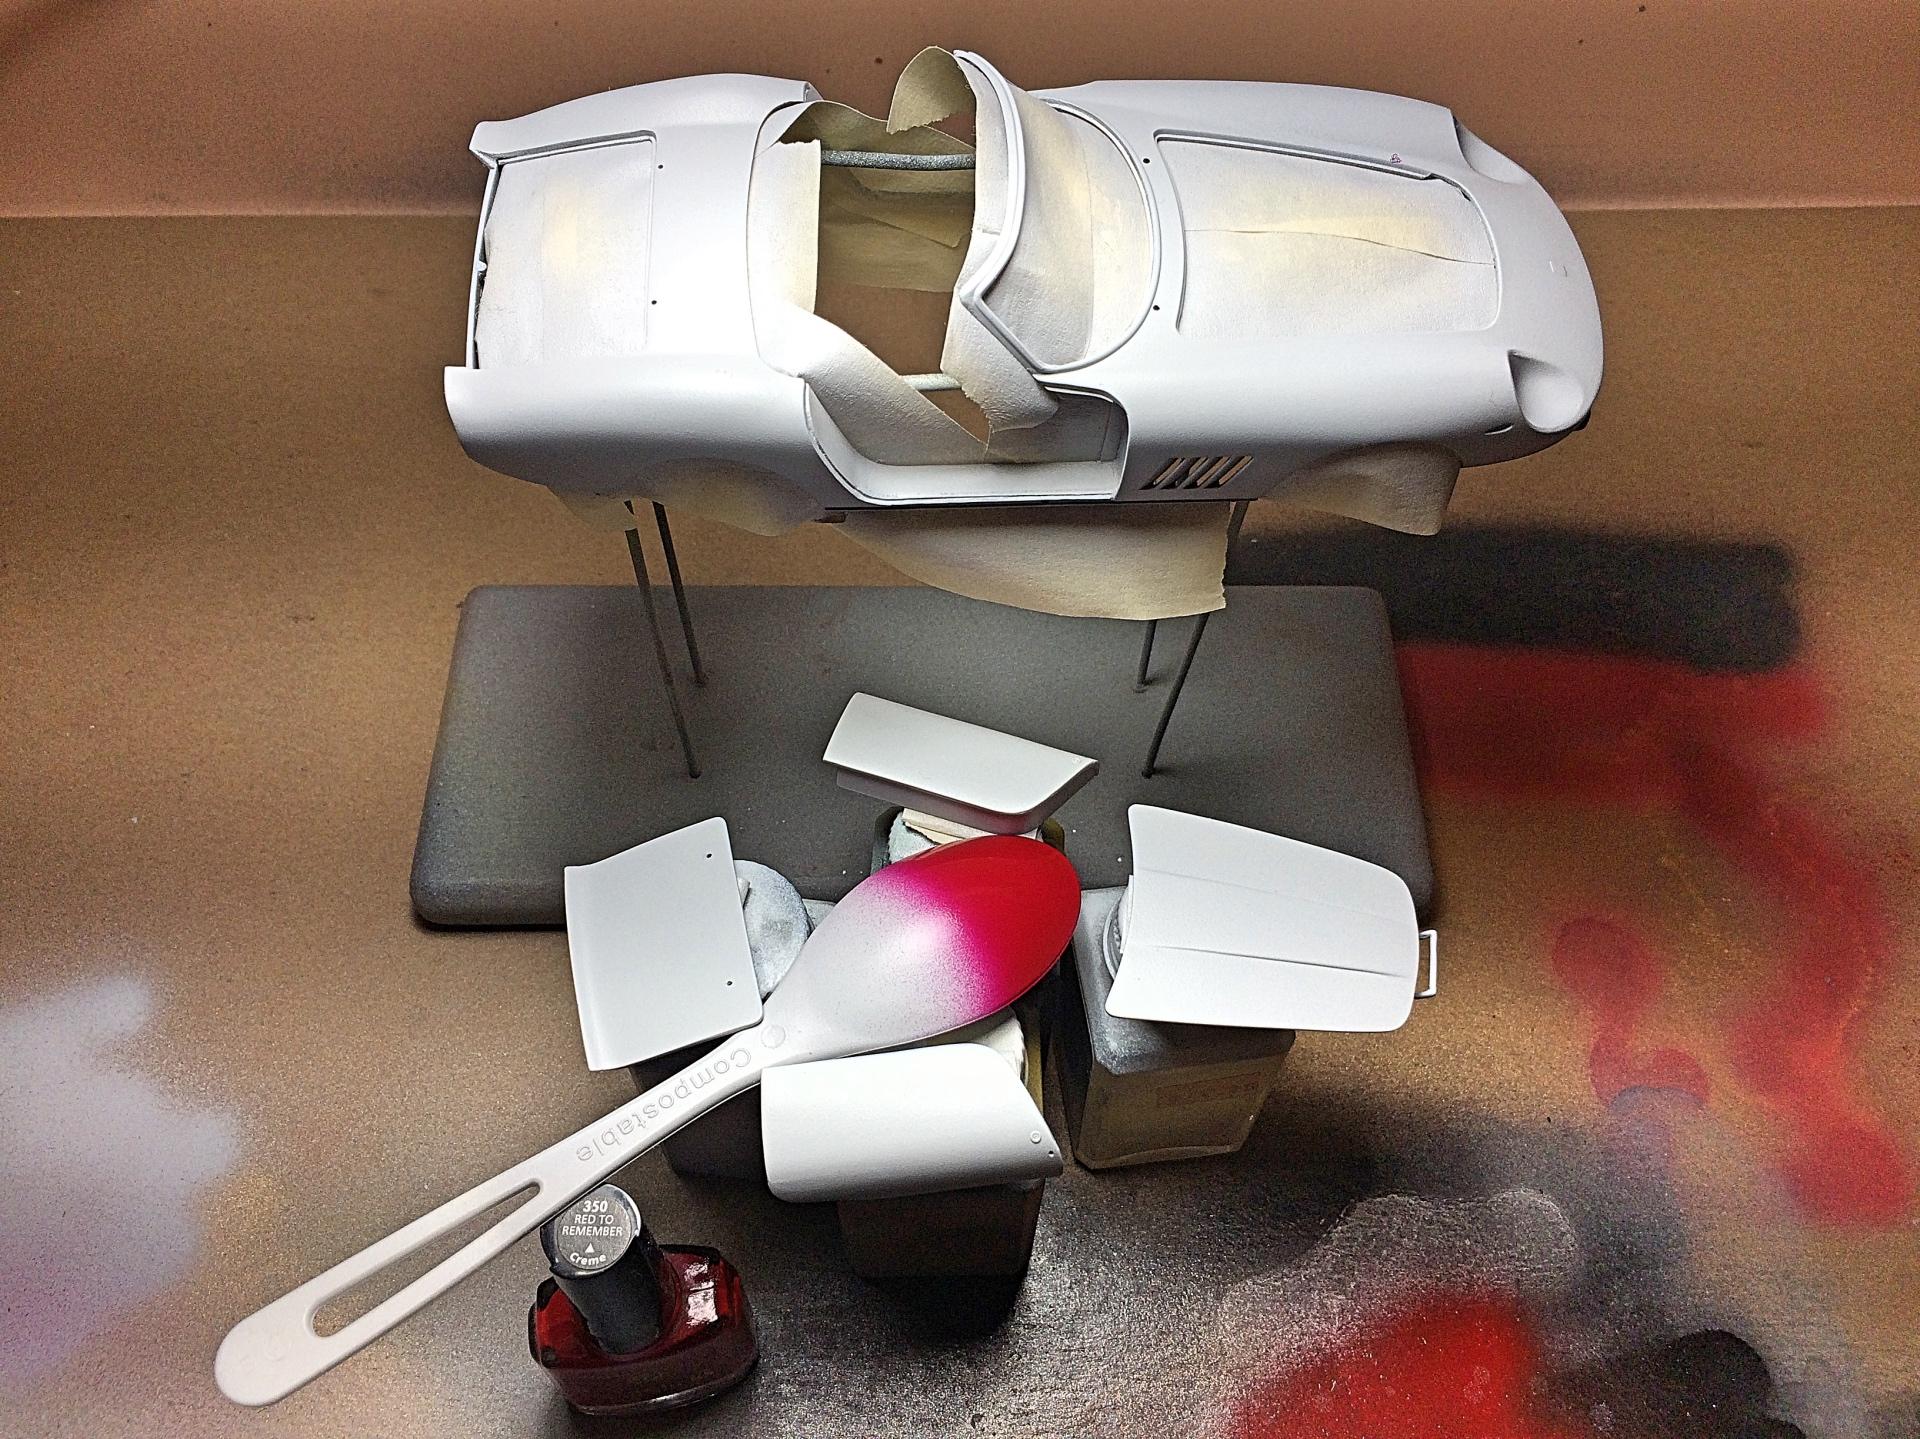
What is with the second hammer, looks like an anvil? I know the round head is for the knock-offs. The jack, a metallic like a thermos bottle? And is there a rod to operate it, like my Honda has? Have not got to the covers yet, other than vacuum-form, planning on Bare Metal foil trim. I used aluminum tape on the California, a bit crude looking close. Yea, you know where I'm going with the transaxle. ? Finally got paint on the body! ? Actually, it's Tamiya's primer, first car I've used it on. This better be good stuff! Did a test of the nail 'polish' color, seems a bit bright, might try over black next. I'm planning to wet-sand the heck out of this, could see some spots that need attention.
-
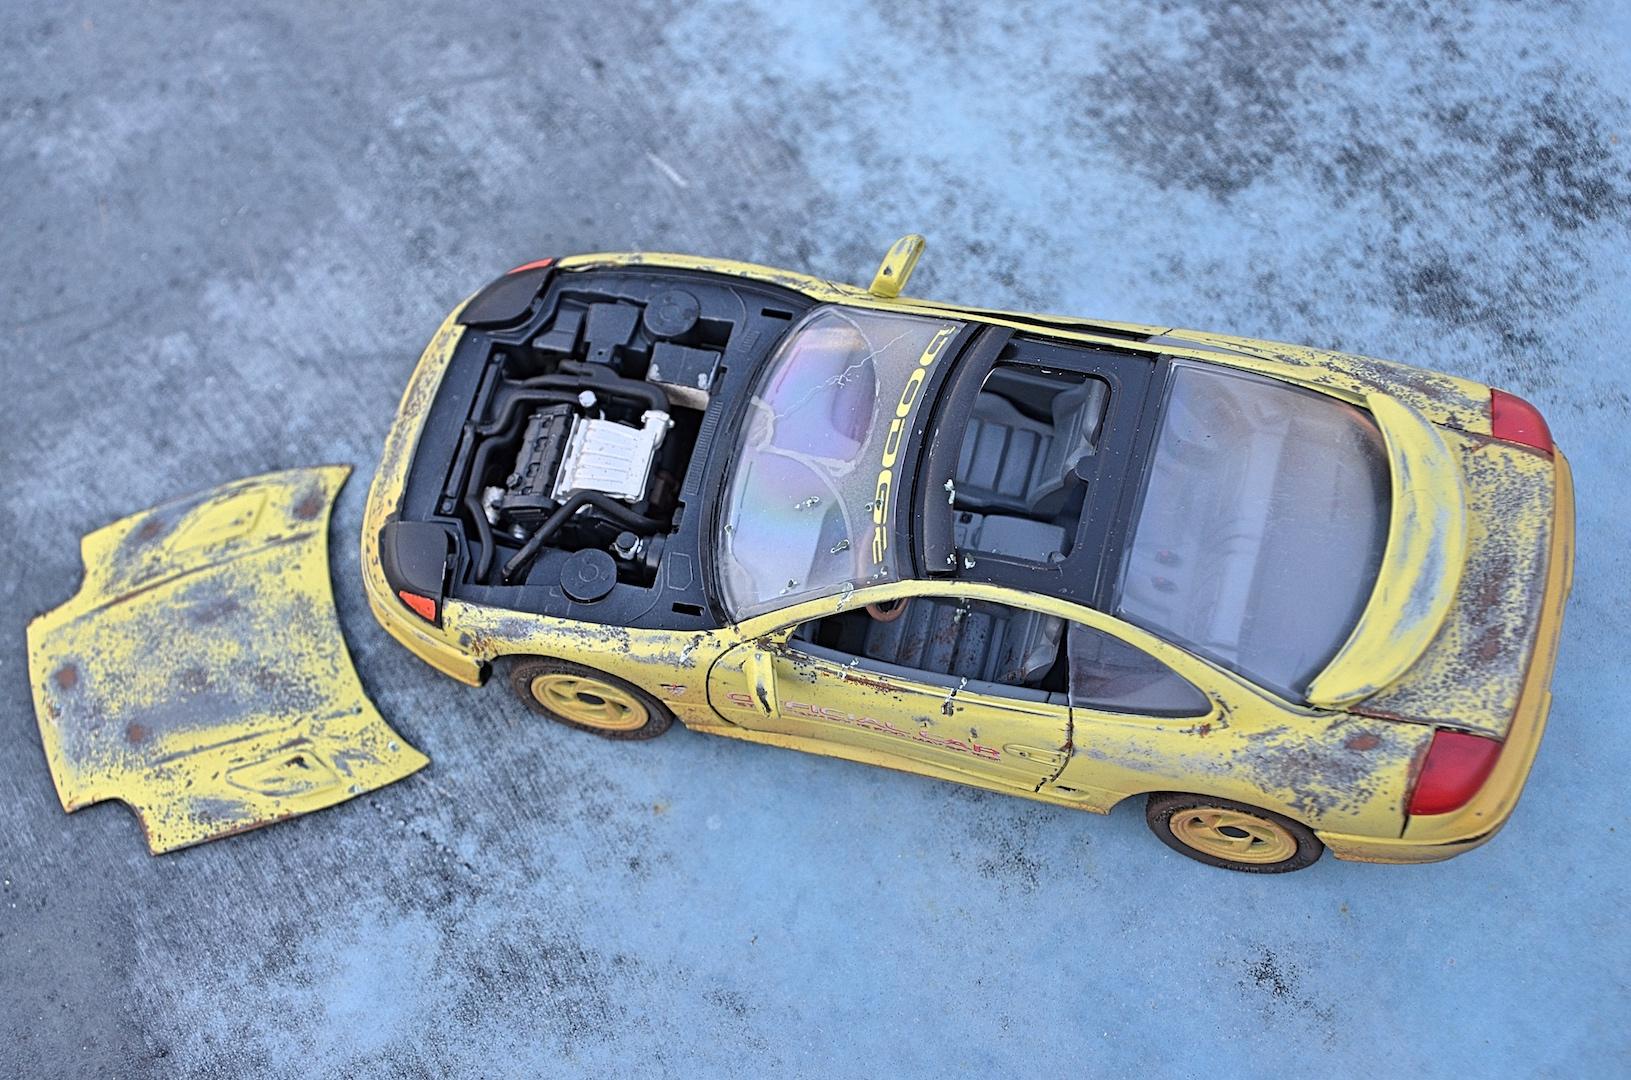
Oh man, don't tempt me! ? I'll be glad to get the Celica with Lexus V8 done. ? And thank you.
-
Cool, thanks!
-
Poison Pinto, a completely different model, but still, I built a Pinto! ? This was early 1970s. I knew a guy at school, went for a ride, sat in back, the seat had no cushion.
-
Always loved Rush. I got a couple of their new releases, cassette tapes, which should date me. I've done Red Barchetta and Trees at karaoke, trashes my throat. ? RIP
-
No such animal photo-etch of that badge! The pictures I've seen of the 275GTB has spare under the floor. There is a variety of manuals, I used what is straight on photos, and what is pretty colors. It's eye candy. I've also noticed the tool package varies too, even the color of hammer handles. Thank you. This forum is something, spoiling us. I feel like I'm going overboard posting every brush stroke, every dab of glue, every thought. Thank you!
-
with short fuses
-
Thanks for the comment. Check is in the mail. ? I know right? Always *after* painting it seems like. Downloaded a video onto YouTube, of the door hinge.
-
Time to razz my bud, how is this coming along? ?
-
You did a much better job than I did. ? Nice work on the paint. Yes, one turbo hose was a pain, the one around the back. Good question about the engine, first question is are they the same scale (I forgot what the AMT is).
-
Sorry, only wanted to post this video, since I just thought of posting on UToob. ? Learning curve....
-
tsk tsk, already avoiding punishment. ?♂️ using Roundup ammo