89AKurt
-
Posts
8,426 -
Joined
-
Last visited
Content Type
Profiles
Forums
Events
Gallery
Everything posted by 89AKurt
-
Tell me what you think of the chassis. ? ? Those guys are such push-overs. ? I do have at least 3 new ones now, Ferrari is inching to completion. Always look forward to your show.
-
happen when convenient
-
I built the 240Z, as a beater. Your projects look great! We all need comic relief, never underestimate what will be popular.
-
Duh, now I feel like a lucky dummy, the Hasegawa Kubelwagen Type 82 "Claire Frost" kit has tree K, two no less, with weapons greyed out on the instructions. I will make resin copies so I can make as many sporting rifles as I want. I'm fortunate to still have his custom rifle in this picture.

-
Great spirit of modeling going on there! I've done Deal's Wheels last century, your projects really do the subjects justice.
-
Thumbs up. I will probably be covered, stay tuned.
-
Oh yea, thanks for the tip, I got the Hasegawa 1/24 Kubelwagen, will take a look. Thanks for the encouragement.
-
No worries, keeps my thread bumped up. ? That's what this forum is all about.
-
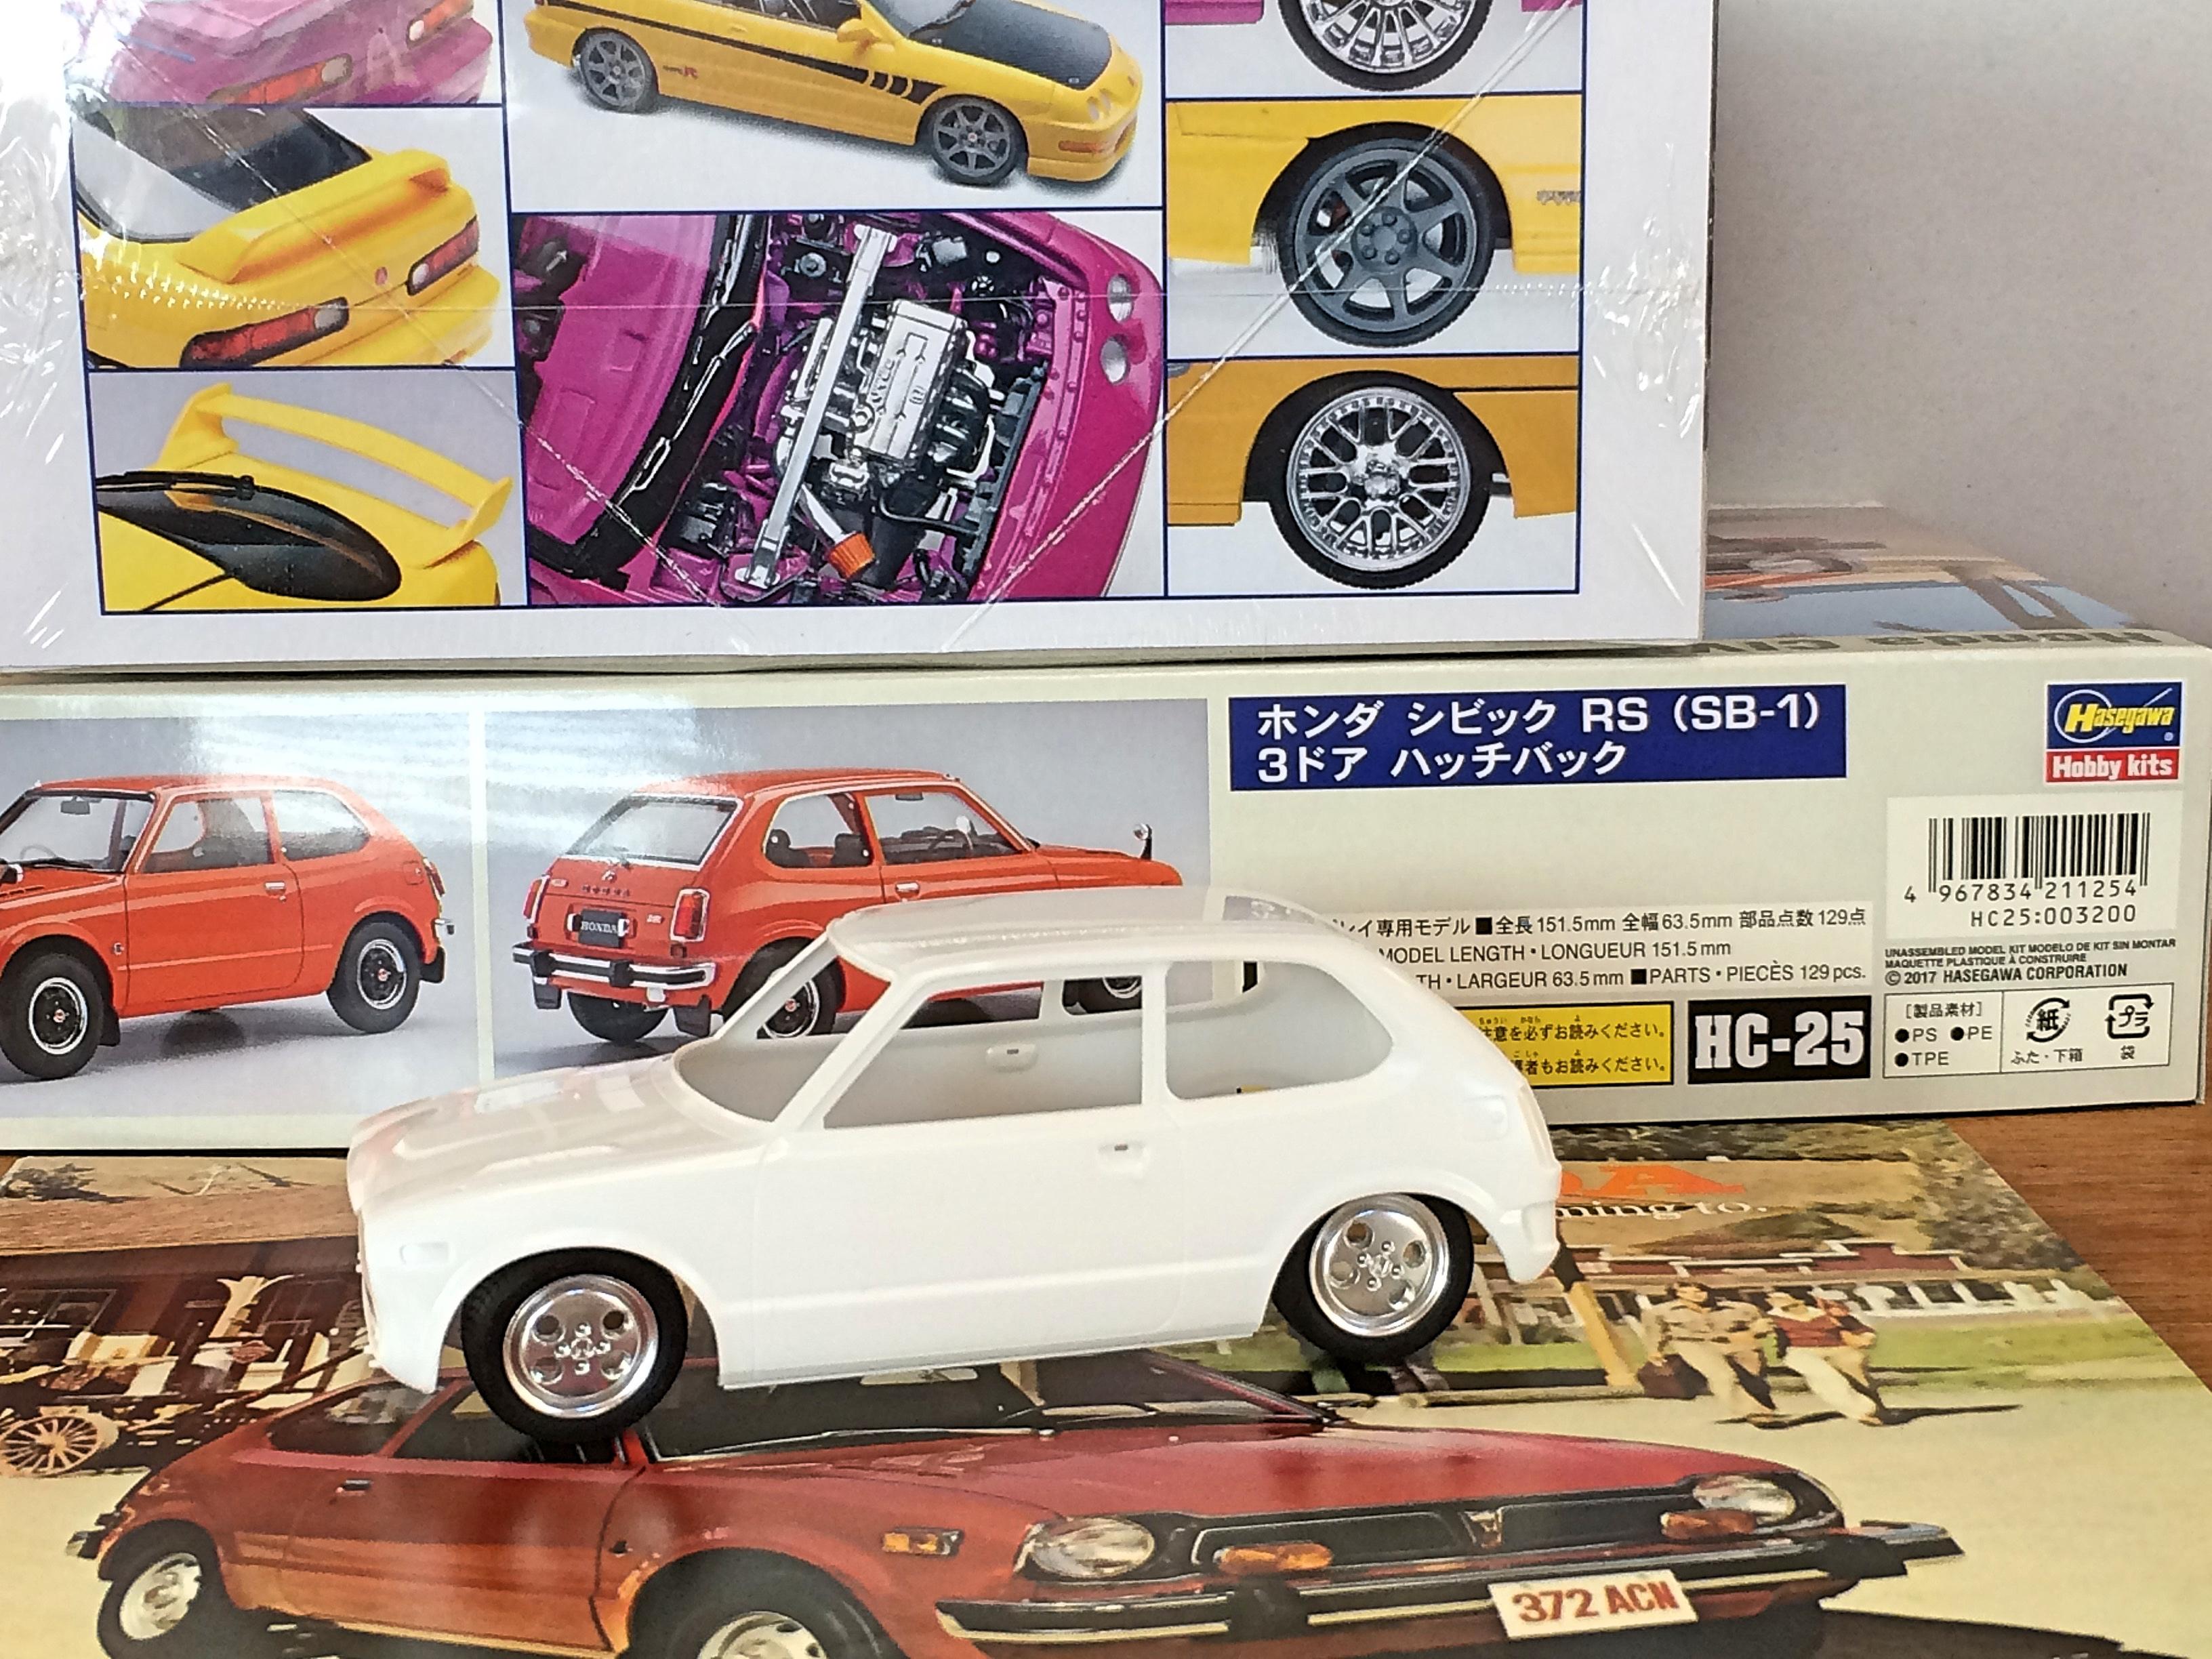
Thanks. I owned an '87 Civic Si, bought off the showroom floor. I wanted more storage space, otherwise the CRX was a close second choice. I'll look through my parts stash, think I have what you want.
-
Sorry you learned the hard way, only use Kleenex! Even other brands are not quite as good.
-
Those susceptible to cabin fever need not apply! This hobby is ideal for that lifestyle, but sure have to plan way ahead for supplies, not "I ran out of flat black, store is a couple miles away, bummer I don't have a 40% off coupon". Hope you have that color, the exhaust tips need it. ? Your first project came out good!
-
I built the Tamiya CRX some time ago, used the wheels from the Tamiya Civic, so have these wheels. I have other wheels to use too. Are these what you want? (got that Integra before, keeping sealed now) The CRX with Civic wheels. The Civic has Revell wheels, and the engine, which is my plan for the new project. This was a WIP that sat for years on the dark shelf of doom.
-
for dynamite sticks
-
I saw that before, love the patina, tool box, etc. Happy New Year!
-
That's 'Merica right there! ?? The Kaiser is cool, that a promo? Dig the Sedona background too.
-
Civic fan here.... built a few, this one is the same generation: You are wise to start off easy. I just started using the Tamiya primer, will see how it works out, but I've done several coats of primer and sanding to get it right. Those door panels are pathetic! For one project I covered with carbon fiber decal, and made wire door pulls, to give a racer look. Think I have some seats I could give you.
-
All very well done projects. I favor the Porsche 904 too, must be the number. ?
-
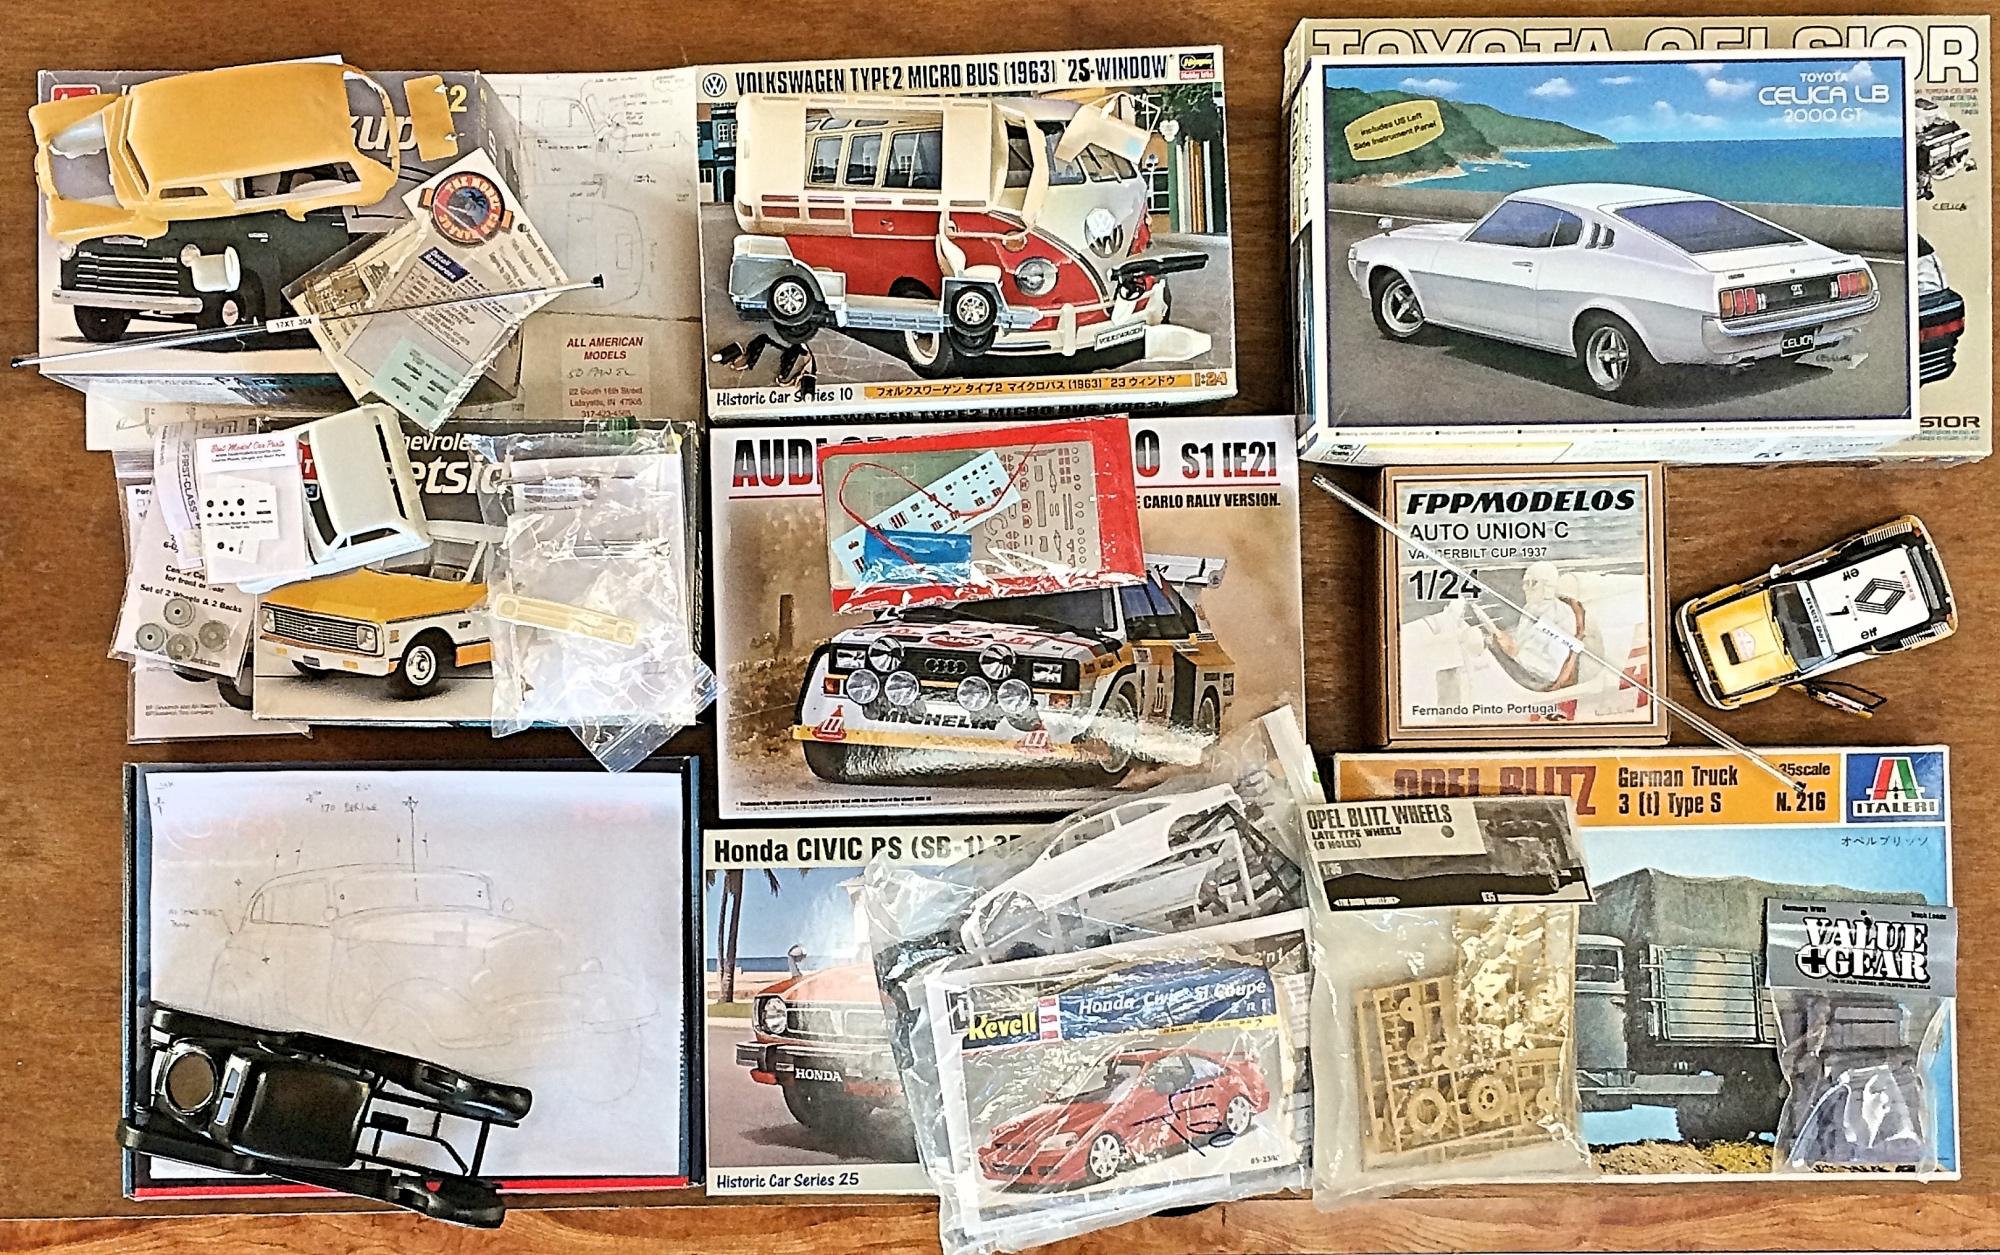
At the risk of: The best-laid plans of mice and men often go awry. (To A Mouse by Robert Burns) Resolution #1: Stop wasting so much time on Fakebook.? That's the only chance I have of living up to the next resolution. ? Hoping to continue the roll I've been on since joining this forum. We all have projects in mind, we get to them when the mood hits, and that can change daily. I struggled to pick only nine, leaving out the current NART project, that will be next if it kills me. Have my last finished project filling space to remind myself. Not in chronological order, but will start with WIP. 1948 Chevrolet Canopy Express was started April 1995. Got involved in the Bring Back Your Dead group build, but staled out after making substantial progress. Recently got the perfect tubing for the rolled bed edge. Just need to resolve the floor, gas tank, color paint for the patina look. VW 25 window Bus was started January 2003. The major kit bash work is done, the meshing of the Porsche 911 engine/suspension, dash, seats, wheels, lights, mirrors. Need to repair and redo the A-pillars before commencing. Cast a new VW emblem, so can remove from body so paint can look good in that area. Making the wire detail in the windows and back seat will be fun. Also want to do fiber-optic lighting. Debating how to do the cloth top, want an open and closed option made from Kleenex. Toyota Celica sleeper, have it planned out on the instructions, for stitching the Lexus (US name) V8 and chassis under the body with minimal modifications. Refuse to do the Rocketbunny look, but a razor wing might be cool. '69 Chevrolet pickup. Maybe I'll do a '68, which I currently own, but the '69 which was my previous truck will be a little easier. Have numerous parts, such as grills, badges, wheel/tires, gauges. Will resist doing a proper chassis/suspension, have a few more kits that could get the treatment. Beemax: Audi Quattro is something I've always wanted to build. Also have the Profil S1, which will become Bobby Unser's Pikes Peak car. Waiting for detail parts such as the engine, gravel tire/wheels, windows. Auto Union C Since I got the perfect tubing to do the 16 exhaust tips, that's calling me. Mercedes G4 sedan. No, they didn't produce one, a radio car yes, but not what could be considered the ultimate SUV during WW2. Roof came from my 170V Roadster project, needs sectioning to grow bigger. Would like to find a 1/24 scale Mauser rifle, know of smaller scale Shapeways versions. Honda Civic 1st generation, with newer engine transplant. Car is 1/24, engine 1/25, does it matter, do I care? I have the CVCC kit too, that will be a replica of my first car. Opel Blitz cargo truck. Only because there are resin cargo parts available now, makes it easy to fill the back. Found the aftermarket tire/wheels, to replace the evil tires that melt plastic. I have many other military kits that might push this aside. I'll be happy if half get built, but 8 got done 2019, so why not dream? HAPPY NEW YEAR!
-

Fully detailed Airfix James Bond Aston Martin DB-5
89AKurt replied to Dann Tier's topic in WIP: Model Cars
Saw the preview for the next Bond movie, they have this car with updates, such as gatling machine guns in the headlights. ? -
Only when connected
-
You do really nice paint jobs! Love the Arado, I'm into WW2 German armor and aircraft (Left 46 especially), looks good. Aftermarket tail decal?
-
The Cadillac is pretty cool. Keep restoring subjects that are uncommon!
-
I dig the colors for 1 and 3. They all look great! Happy New Year.
-
Think we all have such projects. I'm glad you bumped this thread. I've owned a '69 and currently a '68 pickup, have gathered a few kits and parts, really should pursue putting one together. Doesn't look like it will ever be re-issued.
-
I like the '50 Ford pickup, only because I've built it 3 times. ? I also had a similar experience, building two. I also totally understand about getting projects done, think that's a sign of ...... I better not. ? Keep up the good work!