Bainford
-
Posts
5,189 -
Joined
-
Last visited
Content Type
Profiles
Forums
Events
Gallery
Everything posted by Bainford
-
Nice, tidy Highboy. Great period look. Nicely done.
-
Cool look. I like it.
-
This is another option for scribing tape
-
Classic! Very nicely done.
-
Nice replica. Well done.
-
Nice work on the Firebird. That came out great. The big Pontiac mill looks cool, too.
-

64 Dodge D100 Pickup Pro Street
Bainford replied to AmericanMuscleFan's topic in WIP: Drag Racing Models
Francis, that chassis is simply stunning. The work is exceptionally clean. I’m loving this. -
Copying and Printing License Plates
Bainford replied to NOBLNG's topic in Model Building Questions and Answers
Thanks for the Plate Shack link. I had this years ago and lost it. The Jim Moini site is interesting, too. -
Copying and Printing License Plates
Bainford replied to NOBLNG's topic in Model Building Questions and Answers
The Acme Plate Maker is another site ACME License Maker . They do Canadian provinces too, though the font is not perfect for some places. -
Glad to see this one back on the bench. I always liked this kit, having built a couple back in the day. The original issue of the MPC fox Mustang. Yours is looking good.
-
Cool project! I really dig the 1:1. Your efforts to replicate it look spot on. Nice work.
-
Cool stuff, Dan. I like the aggressive, period style.
-
Gorgeous Caddy. The dual cowl feature was an interesting design. Your colour choices really make this old classic pop. Nice work all around. I've been thinking about tackling a couple old Monogram and JoHan classics. They always look so good built up.
-
Nice looking B GT. I see the C1 kit builds up nicely.
-
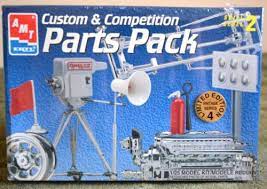
Big Al (Allison) Thunderbird kit
Bainford replied to papajohn97's topic in Model Building Questions and Answers
If shopping for an Allison, keep an eye out on ebay for these AMT Competition Part Pack kits.
-
More American Graffiti Milner's Dragster new decals
Bainford replied to magicmustang's topic in Drag Racing
Very cool. I loved this kit when in my teens. I still have my original build of the kit, now in need of significant repairs. I may look into those decals for the restoration effort. -
Nice work. The 68 Shelby looks great as a drag car. The green tones are cool, too.
-
Nice Skyline. The larger wheels fill it out nicely. I like the outdoor pics in the wet. It adds a nice aspect to the photos.
-
Cool project, Mike. Looking forward to seeing you tackle this one.
-
Cool! I like the 60s Galaxies too. Love the chrome steelies.
-
It’s a matter of personal preference, it can go on either way. I find it looks better when applied after clear coat. Good luck. I hope it goes well. It can be frustrating until you get the hang of it. Some guys really dislike foiling, but it’s one of my favourite parts of the build. The model comes to life once the foil is on.
-
My first thought, also. The texture seems a bit coarse for general painting/weathering, but might just be the cat's meow for a vinyl top.
-
Revell Ford GT
Bainford replied to jasoncamaro's topic in Other Racing: Road Racing, Salt Flat Racers
Looks great. Those decals must have kept you busy for a while. -
Cool project. This will be interesting to watch.
-
The lady seems impressed. I must agree with her. Nice looking Pontiac. Green save.