charlie8575
-
Posts
9,102 -
Joined
-
Last visited
Content Type
Profiles
Forums
Events
Gallery
Everything posted by charlie8575
-
Conversion primarily for Police enthusiasts
charlie8575 replied to Repstock's topic in WIP: Model Cars
I'm game. Any feel for how much you'll be looking for for one of these? I see a Capri Cream 250/PG Grampy car coming from this. Charlie Larkin -
I keep a tube of Testors around for certain applications, like big seams or parts that require fiddling with while assembling, so it certainly has its uses. I usually use Model Master with the metal tip. However, as the price of that has gone into orbit, I tried the octagonal bottle Tamiya, and might pour a little of that in a syringe bottle for places where the brush isn't a useful. It seems to be a good substitute for the Model Master. I'm curious to try Revell's Contacta. Charlie Larkin
-
Testor's is No More
charlie8575 replied to DoctorLarry's topic in Model Building Questions and Answers
Comparatively, that is actually pretty cheap. Model Master: about $4-5, depending, for 1/2 ounce. 5/8 ounce of MCW enamel: $6.50 (but it's VERY, VERY nice paint, and well worth it). 1 ounce of lacquer from MCW: $7.50+shipping. 2 ounces from ScaleFinishes: $9.99-10.49, depending on whether it's single or two-stage. 2 ounce touch-up bottle from a paint jobber in single-stage enamel: $8-12. Charlie Larkin -
Dupli-Color or Plasti-Kote sealer primer has worked flawlessly for me. It's good enough, that it's now my preferred primer, at least for a starter. I'll coat it with red or white if I need to. Charlie Larkin
-
I also like to warm the can, especially when it's cold out. You get more paint out of the can, and better flow. Heat a 1-quart saucepan to a simmer, pull from the burner, and let it the can sit in the pan for 3-5 minutes, until it's warm top to bottom, but not too hot to hold. Agitate the can while heading to your model. Wrap it in a couple of paper towels to keep it warm and absorb any water. NEVER, EVER use turpentine with plastic, unless you want a rubbery blob. Charlie Larkin
-
Testor's is No More
charlie8575 replied to DoctorLarry's topic in General Automotive Talk (Trucks and Cars)
Someone who actually knows what they're doing needs to buy Testors and fix it. And geez, have they gotten expensive over the last eightteen months. Has anyone seen the new Tamiya bottled lacquers yet? That's what I've been waiting for. Charlie Larkin -
Canyonlands junk cars - diorama idea
charlie8575 replied to 89AKurt's topic in General Automotive Talk (Trucks and Cars)
I never knew that was there...Canton/Milton? Charlie Larkin -
The interior is exquisite. If Round 2 decides to do the '68 again, they should see you for the interior master. Hopefully if done, the body errors would be corrected, too. Either way, outstanding so far. Charlie Larkin
-
Conversion primarily for Police enthusiasts
charlie8575 replied to Repstock's topic in WIP: Model Cars
Very interested. Will you be correcting the front seat, too? Charlie Larkin -
1907 Rolls Royce Silver Ghost, 1/24 Finecast metal kit
charlie8575 replied to Matt Bacon's topic in WIP: Model Cars
Stunning. Charlie Larkin -
It seems the other site is going under some re-building. Here's a brochure shot. The blue will get you a general idea. It's pretty close to the factory Dresden Blue. http://www.oldcarbrochures.com/static/NA/Ford/1957_Ford/1957_Ford_Full_Line_Brochure/1957 Ford Brochure-05.html Chips here: https://www.autocolorlibrary.com/pages/1957-Ford.html Charlie Larkin
-
http://57fordsforever.com/ A complete dealer album with upholstery samples can be found here. There's a medium blue vinyl you could have ordered on the Del Rio. I think I remember seeing a Humbrol paint that's pretty close to it. Another way to go would be to follow the lead of a build I saw on Facebook. If you can get Testors in the 1/4 ounce square bottles, two parts Flat Sea Blue to one part Flat Sky Blue. I believe Humbrol does have a cross-reference, but that'll get you a nice medium blue color. Might need a touch of white to get it closer to right. Charlie Larkin
-
Ambitious, to say the least. Looking forward to the finished product. Charlie Larkin
-
No sign of them at any of the hobby shops in Massachusetts I've been to lately. Haven't really discussed their arrival, either. Charlie Larkin
-
tamiya pearl white paint ts-45
charlie8575 replied to youpey's topic in Model Building Questions and Answers
I like the 3000 grit sanding foam from Tamiya. It may still remove some paint on the high spots, but it really knocks down a lot of imperfections. I used it on some of their TS-14 gloss black spray last night, and will apply one more coat today while it's not too cold out (although I'll probably heat the can first to spare myself any surprises). The coarser foam is good for sanding primer. I do find using soapy water helps reduce excessive paint removal. Charlie Larkin -
So I finally went through my kit, which I've had for some time, and just realized I never opened the bags. My body has a lot of that light scratching everyone else has noted. Definitely not one of the better polishing jobs I've seen from any of the manufacturers. I also hadn't noticed the lack of trim and emblems, Model Car Garage to the rescue it looks. My moulding has one tiny bit of flash on the passenger-side front fender at the grille location. Won't take more than a minute or two to clean up. There's one parting line at the edge of the trunk-lid on the back. that'll require a light sanding. All in all, the clean-up won't be too bad. With some of the other comments I'm reading, I wonder if they did permanently alter the 2-door? It would be unfortunate if they did. I have a set of stock wheel covers from Missing Link, one of Dale's front seats (good casting, will need the tunnel cleared out, though). For the stock builders, what have you found is the best way to achieve the correct ride height? Charlie Larkin
-
This one quote in the photo tells me everything. The no clear headlights is a little odd, I agree, but hey, flat aluminum paint, followed by Testors Clear Parts Cement fixes that. Definitely getting one. It'll be nice to have a small-block Olds, and appears to have a Super-Turbine 300. Charlie Larkin

-
1/25 AMT 1964 Olds Cutlass F85 Convertible
charlie8575 replied to Casey's topic in Car Kit News & Reviews
I'm really looking forward to this. I wonder if the coupe will be coming, too? I can play with parts, and make an F-85 wagon. That'll be cool. Charlie Larkin -
Put me down for a Mack. I might buy a '56 Buick or Cadillac. I've been toying with getting some of the AMT 1/32, and I could make a nice little diorama with those, and some of my other 1/32 cars. Charlie Larkin
-
AMT's '59 El Camino
charlie8575 replied to samdiego's topic in Model Trucks: Pickups, Vans, SUVs, Light Commercial
I like the pearl white with the flames, and the Cragar S/Ss with narrow-band whites. Charlie Larkin -
2002 Chevrolet S-10 Pick Up
charlie8575 replied to Tom99's topic in Model Trucks: Pickups, Vans, SUVs, Light Commercial
Nice work on this. Charlie Larkin -
1977 International Scout SSll
charlie8575 replied to bogger44's topic in Model Trucks: Pickups, Vans, SUVs, Light Commercial
Very nice build. It also answers my questions if this was different from the other Scout. Charlie Larkin -
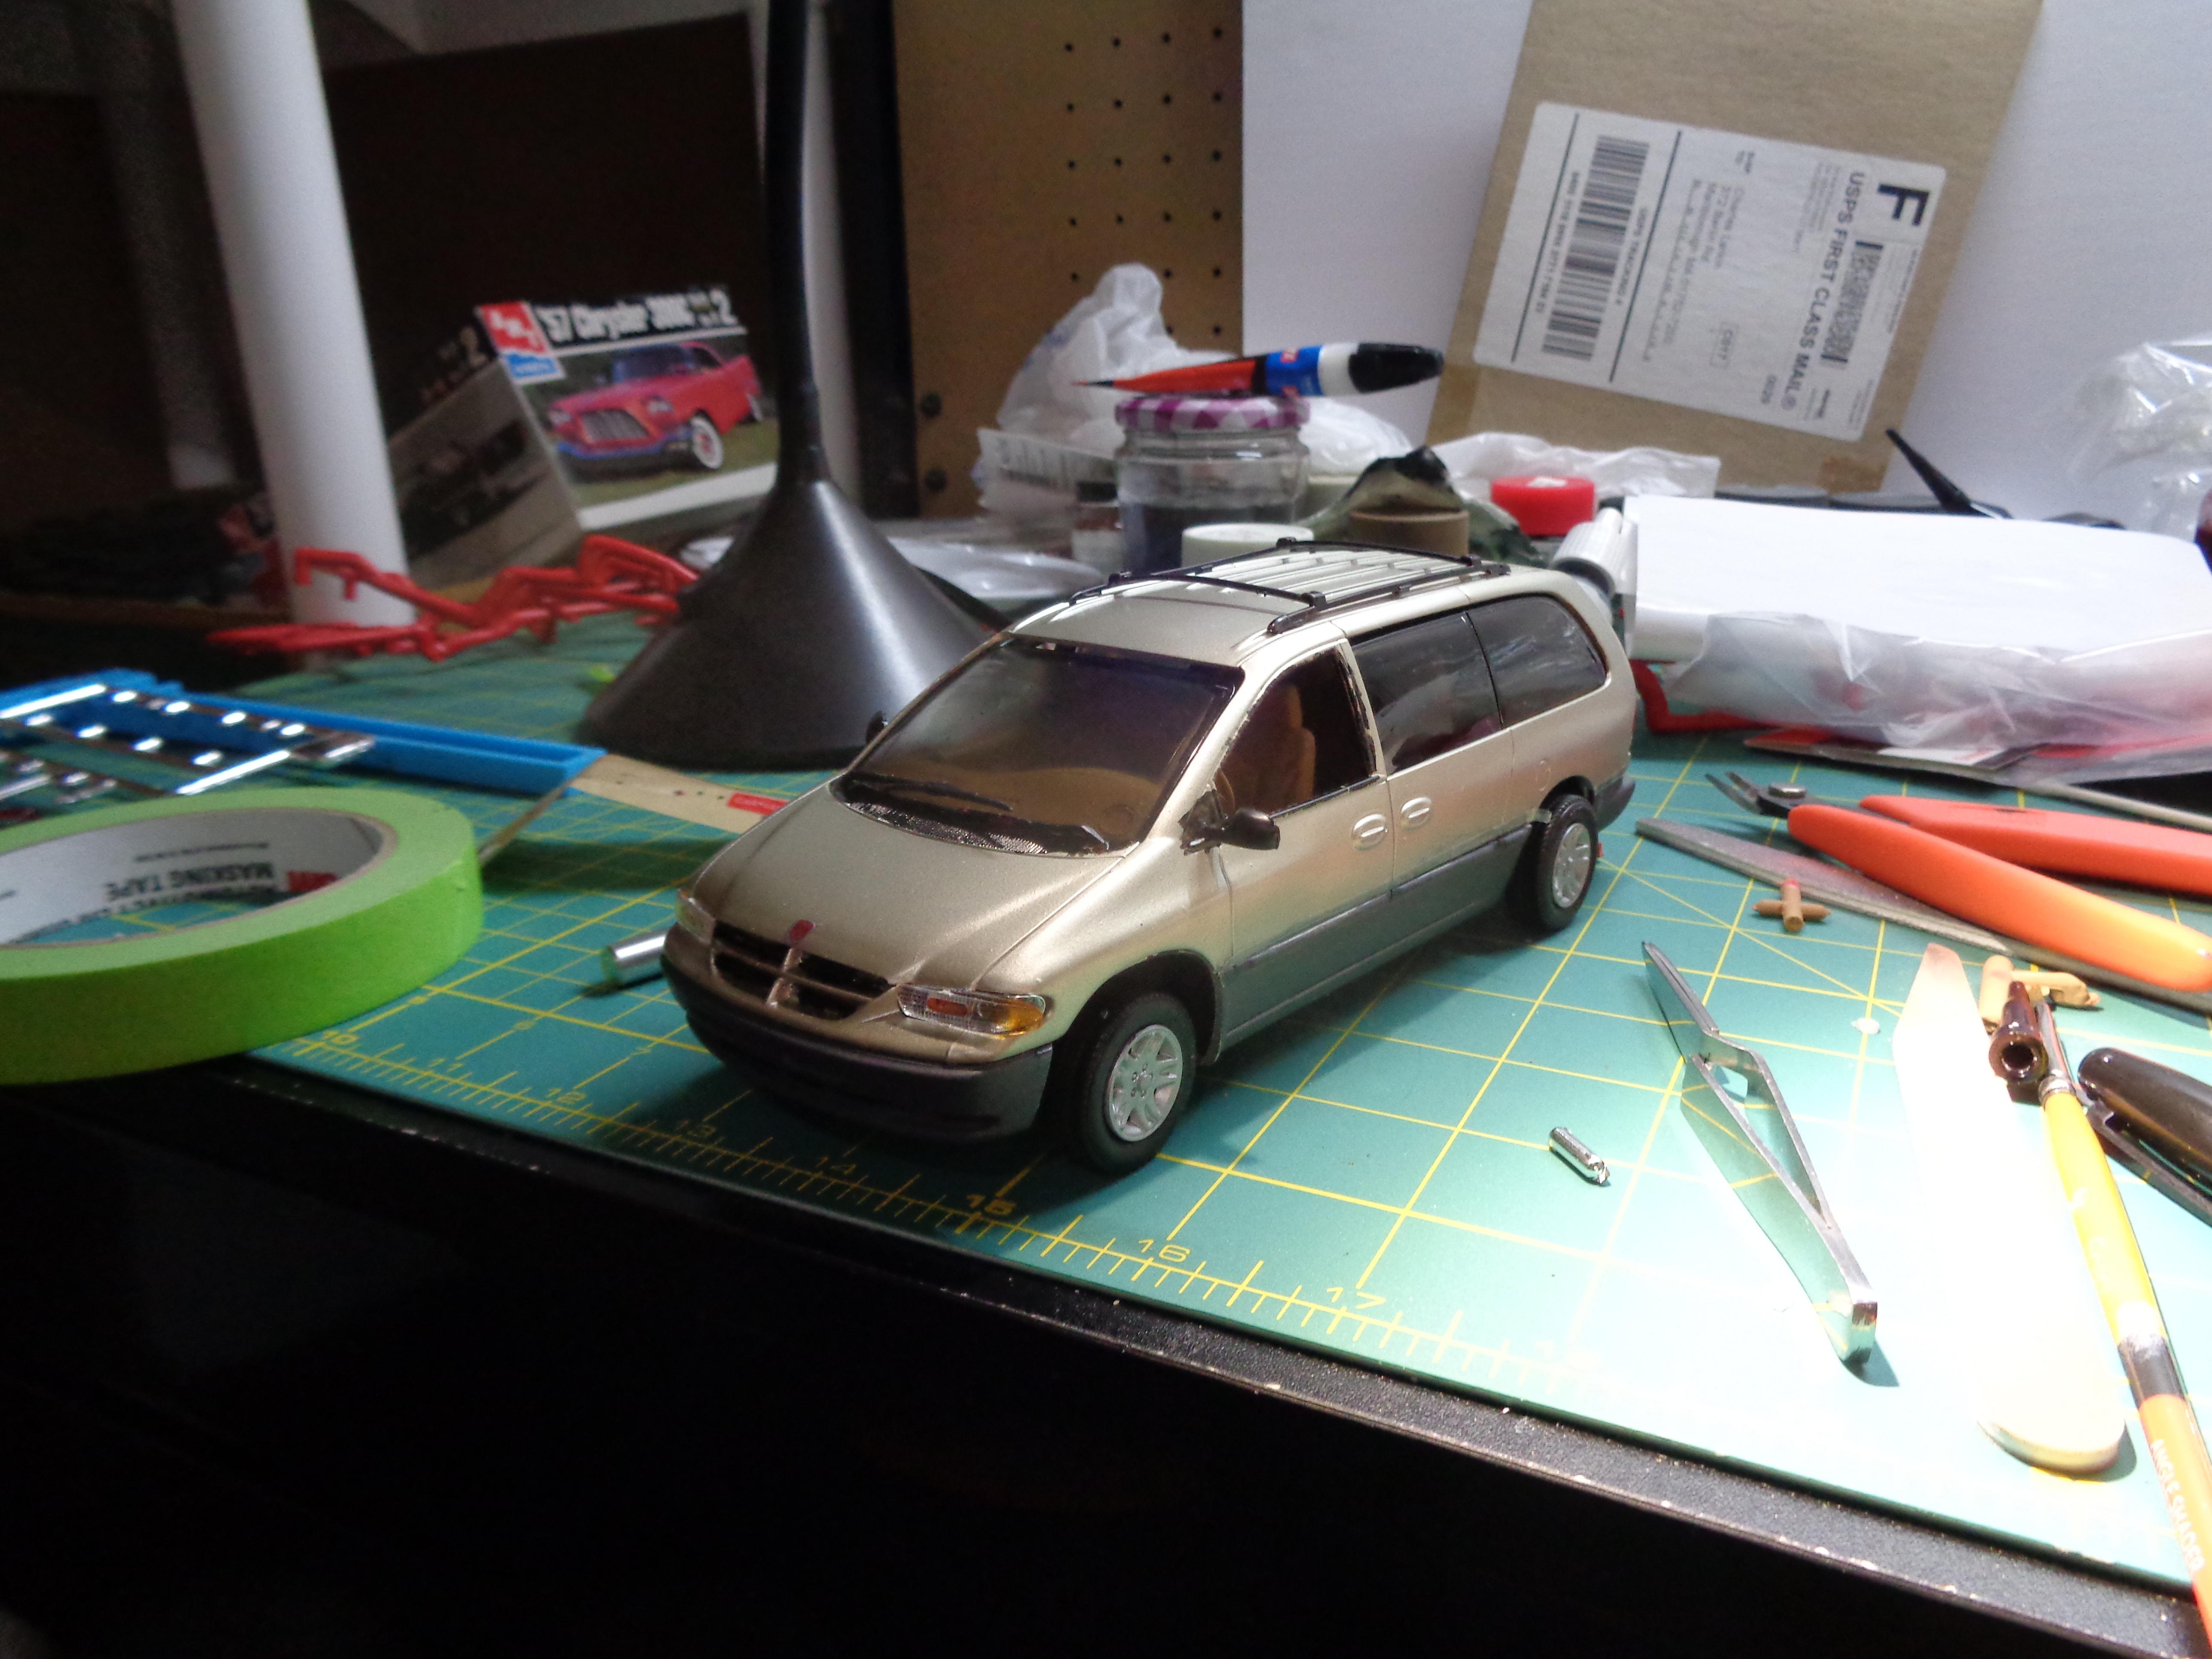
1996 Dodge Grand Caravan LE
charlie8575 replied to charlie8575's topic in Model Trucks: Pickups, Vans, SUVs, Light Commercial
If my other van ever turns up, I'll be using this as a learning experience. I also want to do it in either Island Teal or the Medium Blue. I left the pins on the headlights on because I found it helped me. The passenger-side taillight, though, was weird. It was almost like something was mis-sized and it simply would not stay put. Charlie Larkin -
1996 Dodge Grand Caravan LE
charlie8575 replied to charlie8575's topic in Model Trucks: Pickups, Vans, SUVs, Light Commercial
Curbside snap-kit with excellent engraving, which made detail painting a snap. I used almost all lacquers and acrylics, with Model Master Panzer Gray for the accent panels on the bottom (and a little Vallejo acrylic of the same color for a touch-up paint. Charlie Larkin -
This is the 24-Hour Build. Ended up being about 31 hours, but no biggie. Paint is Tamiya Champagne Gold over Humbrol Desert Tan. It details nicely with some painting. The Michelin XW4 tires are some of the nicest tires I've ever seen on a model car. Overall, a nice kit. The wipers and taillights were a bit too fiddly for my liking, though. Enjoy. Charlie Larkin