David G.
-
Posts
11,326 -
Joined
-
Last visited
Content Type
Profiles
Forums
Events
Gallery
Everything posted by David G.
-
The newer wheels make a big difference in the overall appearance. David G.
-
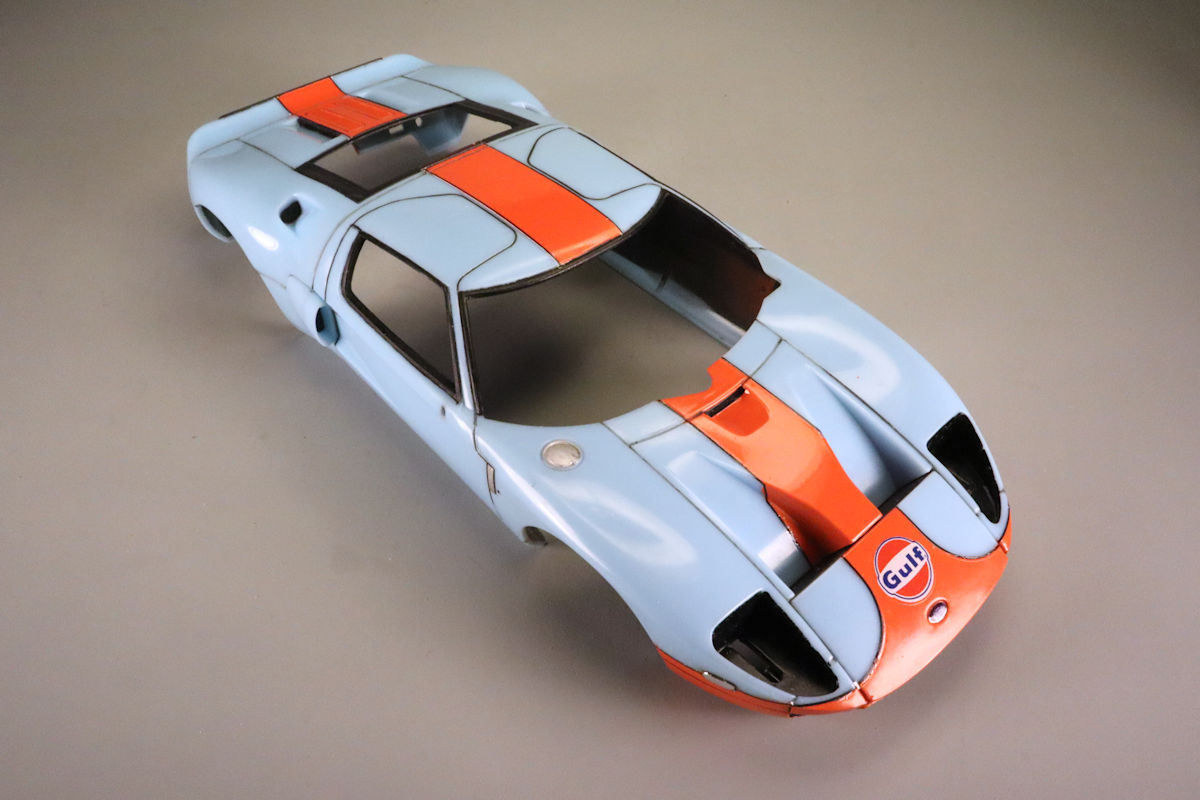
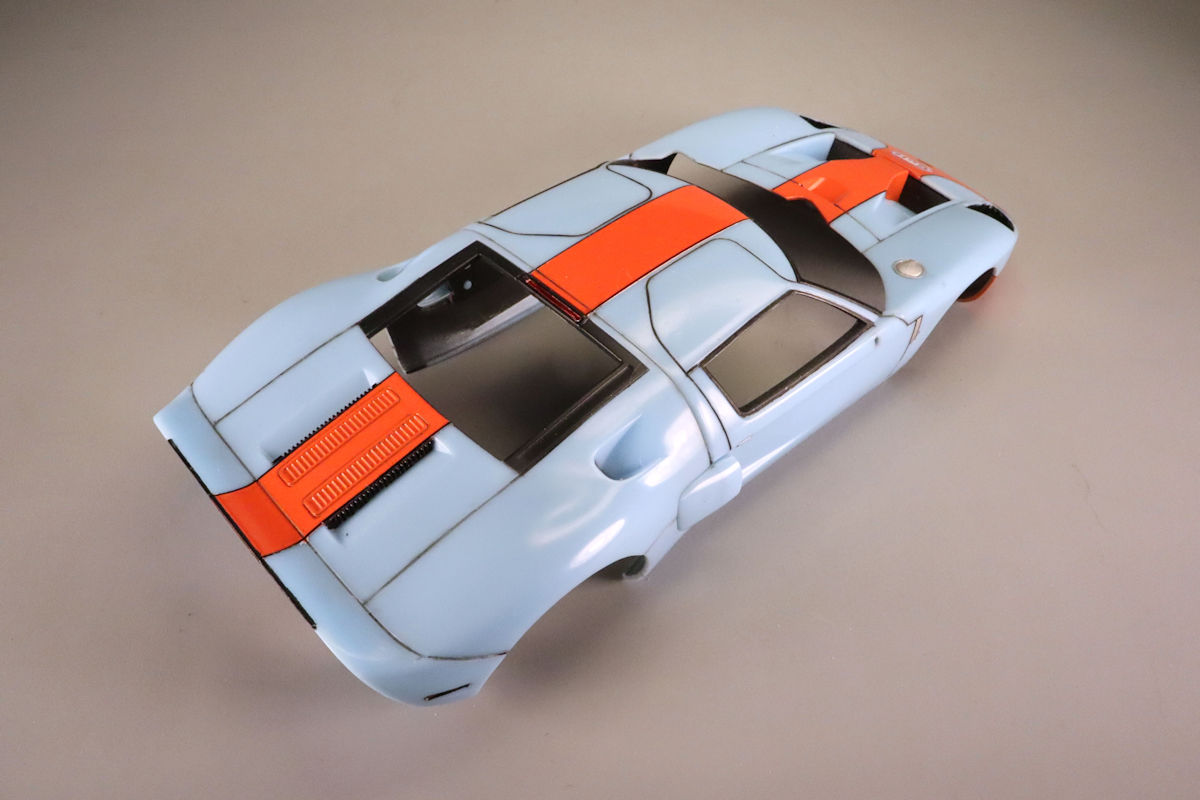
Hey Everybody! Finally, I've started putting some decals down. I figured that I'd start with most challenging bit and place the outlines on the racing stripe first. These decals seem to be extremely shiny. I'm considering a clear coat after placing all the decals. That should work over the bare polished plastic, right? There are flaws, but If you can't see them, I'm not pointing them out to you. Any way, that's all for now. As always, thanks for taking the time to look and please feel free to leave a comment. David G.

-
Clean and simple, nothing but business. Looks great. BTW, the paint scheme made me think of John Deere. David G.
-

Fujimi 1/24th Ferrari 330P4
David G. replied to Justin Porter's topic in WIP: Other Racing: Road Racing, Land Speed Racers
Looks like you're off to a great start! David G. -
WOW! That is just gorgeous! Great color combo, excellent foil work, nice solid build excellent work all around. David G.
-
Mission Impossible - American Graffiti cop car from a wreck
David G. replied to Alan Barton's topic in WIP: Model Cars
That's a bummer about the roof, but at least it's a fairly easy fix. And you discovered it before the body was painted. David G. -
Peterbilt 359
David G. replied to Protouringjoe's topic in Model Trucks: Big Rigs and Heavy Equipment
Sweet build, nice detail work! David G. -
Possibly the only Supernatural, "Supernatural" Impala
David G. replied to Beans's topic in WIP: Model Cars
I like all the little detail bits you're making. This should be a fun build. David G. -
Those are a couple of fantastic RC vehicles. Looks like a lot of fun there. What scale is the Clodbuster? I have a couple of old Traxxas Nitro Rustlers that I should rehab and fire up. David G.
-
Nicely Done! David G.
-
What a great idea! I can't wait to see how it works out. Over the years I've learned a number of different techniques just so I could make a particular part for a build project. At this point I might consider teaching myself how to photo etch. David G.
-
Looks like it's coming along quite nicely. David G.
-
I've heard of that decal film but I've never used it. I imagine it's like a thin varnish, is that right? I have both Micro Sol and Micro Set, I'll have to see if I can find some Liquid Decal Film at my LHS next time I'm there. David G.
-
Interesting body mods, I'm curious to see how they work out. David G.
-
Mission Impossible - American Graffiti cop car from a wreck
David G. replied to Alan Barton's topic in WIP: Model Cars
An impressive amount of work so far! David G. -
What a beautiful body design! It looks like a very fun and challenging kit. I would feel a bit intimidated by those decals and all that PE though. But you're a man who seems to love the art of the detail, so to speak. In any case, I'm a little envious. That's quite a kit for the money. David G.
-
Looks like it'll be one sweet custom rod when you get it done. David G.
-
That should look great on your shelf. David G.
-
Nice chassis detailing, paint looks great too. David G.
-
DeLorean Time Machine: WIP (Photos Restored)
David G. replied to David G.'s topic in WIP: Model Cars
I have the set on Blu-Ray, I'll have to watch #3 again when I get the chance. David G. -
Dark side PT Cruiser
David G. replied to Redisetta's topic in General Automotive Talk (Trucks and Cars)
Having all those things items glued to a car would certainly discourage tailgating. Not my style but I appreciate the effort and results. David G. -
Beautiful detailing and paintwork. The paint may not be that glossy but it's smooth and even which is biggest part of a great paintjob. Welcome back to the hobby. David G.
-
Color choice, chassis details, interior work, you have a lot of great stuff going on there. David G.
-
Nice progress on this, your foil work looks great! David G.
-
A clean solid looking build! Great paintwork and engine detail. David G.