David G.
-
Posts
11,326 -
Joined
-
Last visited
Content Type
Profiles
Forums
Events
Gallery
Everything posted by David G.
-
I like your most recent photos. The car looks like it should be part of a garage diorama in which it is undergoing a complete frame-off restoration. David G.
-
I'm late to the show on this one, but I'm glad to have found it. I always enjoy following your work, I find it entertaining and informative and I'm glad you take the time to share it with us. David G.
-
Clever idea taping the body panels down, rather like budget magnetic gluing jig. I'm very curious to see how this builds up. David G.
-

Foiling a 1961 Lincoln "Up-top" convertible.
David G. replied to carbuilder1950's topic in WIP: Model Cars
Your foil work looks great! Nice color combination too. David G. -
Sweet paintwork! David G.
-
This is shaping up to be a rather good build and that doesn't surprise one bit. It reminds me of something I might have driven in high school. Chrome wheels, a custom shifter and a six-banger under the hood. David G.
-
It's all coming along quite nicely. David G.
-
The color looks great, it'll look even better when it's all trimmed out. David G.
-
Nice work on the boot! David G.
-
Sweet build, nicely detailed interior. David G.
-
Fujimi 1/24th Ferrari 330P4
David G. replied to Justin Porter's topic in WIP: Other Racing: Road Racing, Land Speed Racers
Fantastic work on the interior and chassis! David G. -
Richard Petty race car hauler
David G. replied to Mopar - D's topic in WIP: Model Trucks: Big Rigs and Heavy Equipment
Fantastic work on the whole set! Everything looks just as it should. David G. -
Love the engine bay detail! David G.
-
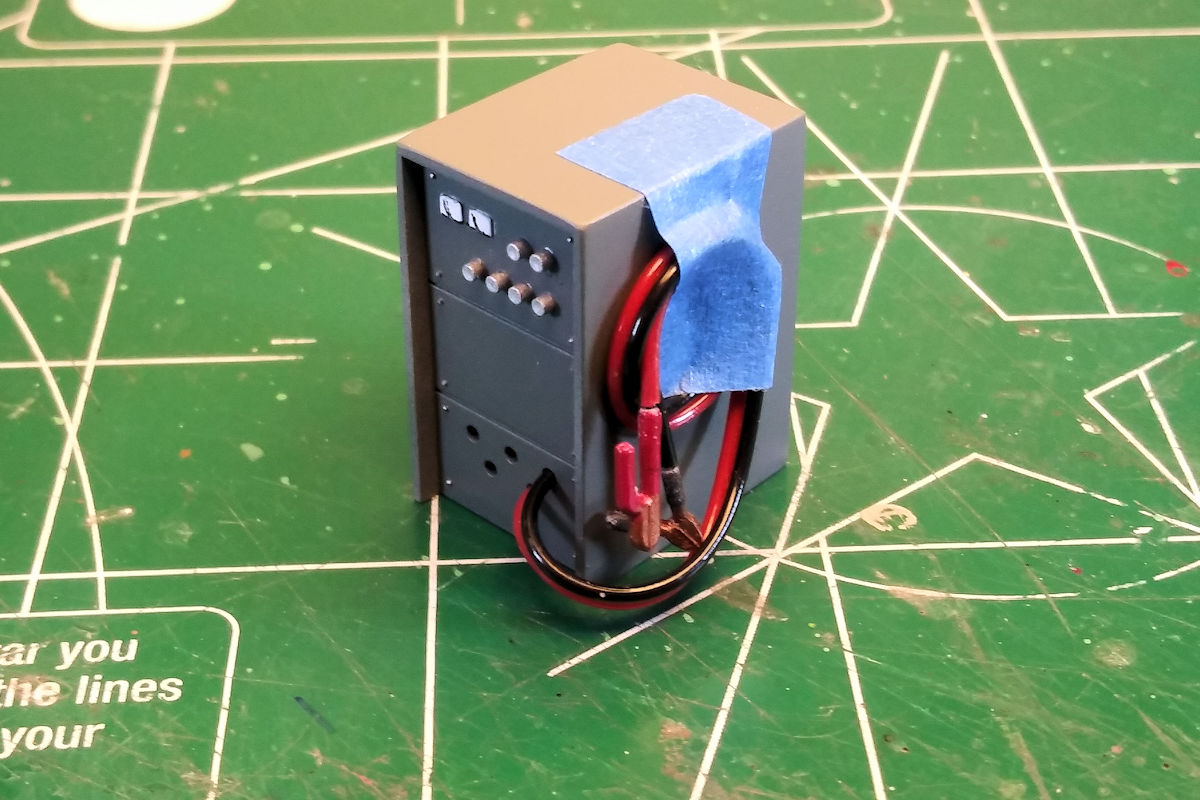
Hello everyone! While I'm waiting for the decals to set on my Ford GT I decided to get a little more work done on my Fujimi Garage. This time it's the arc welder. I've already filed and sanded the sink marks on the cabinet and painted it. I've also done the detail painting on the panel. Basic stuff, so I didn't get any photos. The clamps are supposed to fit into the provided vinyl tubing via little nubs that that are cast on their ends. Given that almost every time I've relied on connections like this in this kit, they've failed, I've decided to make my own attachments. I've drilled out the handles on the clamps and glued in some wire. I chose not to use the vinyl tubing provided by the kit and stripped the copper out of a paired wire. secured the remaining insulation into the panel with the same wire that I'm using for the clamps. After cutting the wire connectors on the clamps down to about 3 mm in length I inserted the clamps into the other ends of the wire insulation. The fit was snug enough that I didn't need any adhesive to hold them in place. I also did a bit of thermocycling to get the welding "cables" to hold a more realistic coil. My ultimate plan is to make a hook so they can be hung on the side of the cabinet. I'm going to let them rest like this for a while so they can contemplate their future. That's all for now. Thanks for taking the time to look and please feel free to comment. David G.

-
Gotta hand it to ya Gareth, you are bringing out the best it has to give. I like the dashboard and chassis detail. The slant six is great. David G.
-
Paint, fit, finish and detail, everything is spot-on. Absolutely beautiful! David G.
-
Though I'm late to the show, I'm all caught up now and thoroughly amazed. You've done a ton of modifications and detail work, all of it done exceedingly well. It's been quite an adventure so far, thanks for taking the time to share it with us. David G.
-
That looks like it may work. David G.
-
Looks like it has a good stance. David G.
-
Stretched SSR
David G. replied to Modlbldr's topic in WIP: Model Trucks: Pickups, Vans, SUVs, Light Commercial
I didn't realize that there was such a rake to the roofline, stretching the roof seems to accentuate it. Looks like it's going to have an interesting roof line, more like a custom chop. David G. -
Lots of great detail work going on here. It's nice to see this one back on the bench. May your progress be swift and sure. David G.
-
Looks pretty good so far. David G.
-
Ford Model T van .
David G. replied to Silver Foxx's topic in Model Trucks: Pickups, Vans, SUVs, Light Commercial
Great looking build! Well worth the effort you put into it. David G. -
Good progress on this. The chrome looks reflective enough but appears a little... grainy? Almost as if it were metal flake paint. David G.
-
Master level styrene craftmanship! David G.