Steve H
-
Posts
2,535 -
Joined
-
Last visited
Content Type
Profiles
Forums
Events
Gallery
Everything posted by Steve H
-

Revell Foose FD100 HOK Tangelo
Steve H replied to jjsipes's topic in Model Trucks: Pickups, Vans, SUVs, Light Commercial
Hi Jason, very nice build. The body colour is outstanding, excellent job on the “wood” bed, looks convincing. Cheers, Steve -
1963 Chevy Nova Wagon Street Rod FINISHED 3/20/22
Steve H replied to Dennis Lacy's topic in WIP: Model Cars
Dennis !!! I saw this lurking on your bench in your ‘57 Chev build and was hoping you would WIP it. This really speaks to me, the stance and wheel choice are perfect. I bought one of these with almost an identical vision to what you are doing. I will be watching (and learning) closely sir. Looks great so far. I might try and squeeze a big block in mine…. -
Hi Joe, I missed this one first time around. Absolutely beautiful build sir. As one of the others said, I’m neither a Charger, nor a GL expert, but that is a stunning build. Love it!
-
Oh ya… that’s tasty. Really like that, well done. The black hood is a nice choice, it makes it look a bit tougher. Cheers, Steve
-
dscV17 RESULTS ANNOUNCED - Congratulations to All the Winners
Steve H replied to Danno's topic in Contests and Shows
An excellent show again. Thank you very much to all who helped put it on. I agree with Jim, it would be great if we could somehow continue the virtual contest. Although, I very much look forward to making the trip down there to take in the show in person sometime soon. It’s on my bucket list! I want to put faces to the names of all involved, and I really want an invite to the post show BBQ!! Cheers, Steve -
Wow Bob, amazing stuff happening here. I will keep following.
-
Beautiful work as always Steve. Love the steering column… well, it’s all looking fabulous.
-
Looking awesome Dennis. Sounds like you have the right attitude for the foil work, and an adult beverage might help… Love the colour choice, perfect. Cheers, Steve
-
A Couple Of Questions About Embossing Powder
Steve H replied to Plowboy's topic in Model Building Questions and Answers
I look forward to to seeing what formula works for you. I have a feeling I will learn something…. It might be worthwhile reaching out to Steven G, his interiors are top notch. -
A Couple Of Questions About Embossing Powder
Steve H replied to Plowboy's topic in Model Building Questions and Answers
Hi Roger, I have used embossing powder with reasonable results on a handful of projects. My 2 cents… Embossing powder makes for great looking “carpet”. I use white glue thinned with about 30% water as adhesive, which works fairly well, although I’m sure there might be better methods. Painting after the powder is applied tends to take away somewhat from the “carpet” like texture of the powder in my opinion. As I mentioned in my ‘65 Wagon build, I have painted the powder first, then applied it, definitely not perfect, but it worked reasonably well. With your talents, a bit of experimentation will no doubt yield amazing results. I look forward to you sharing your technique once you’ve given it a go. Photo of results. This was a goldish/grey powder that received a mist of the tan interior colour to get it closer to the desired shade. Cheers, Steve
-
Beautiful build Gareth! I like the change of direction you took with it. I definitely need to buy one of these wagons…
-
Hi Claude, no apologies necessary sir. I have also had a busy spring and very little time at the desk or on the forum. Thank you for checking in. I always appreciate your opinion sir, as mentioned above, I’m going with black base, however, I have a future project in mind that would likely get the silver base as both look great. Vedoro green is an awesome colour. I am using the second set of wheels in gold, there will be a light coat of smoke on them too to tone the gold a bit. Cheers, Steve
-
Hello Roger! Thanks for the kind words sir. For the console I used wood grain decals from “Uschi” that might be spelled incorrectly but if you google im sure you’ll find them. They have lots of cool decals for wood and leather, excellent quality. Yes I used embossing powder. I have a few different brands on hand with “Hampton” being the best. I’m still learning how to use it well. For this application I had a goldish colour that was close but I wanted to paint it to be closer. My limited experience has been that if you paint it after it loses its texture. So…. I laid the powder out in a thin layer in a shallow box and misted it with paint. Not a great technique as the paint tends to clump, it’s actually kind of comical how bad it looked. But after sifting it around, it turned out not bad. I think powder is the best looking flocking, highly recommend it. I’m sure you’ve seen Steven Guthmiller’s interiors, amazing to say the least. Cheers, Steve
-
Thank you Mike! Time for me to come clean on the paint… For my eye, my preference is the green over black, and that is what I’m using. It creates a great “shadow” effect when not in direct light, then brightens right up in direct light. That of course doesn’t show up well in photos. Having said that, I love all the feedback and ideas that have been shared.
-
Thank you Josh, I’ve been trying to improve my interiors.
-
Hi Mike, thanks for taking the time to check in and show me some possibilities. That photo shop stuff is awesome. I’m going to stay with what I have (for several reasons) but I truly appreciate the input. Sorry for the VERY late reply, I’ve been busy with other stuff and haven’t been on the board much. Cheers, Steve
-
What a beauty David. As the others have said the paint and foil work is outstanding. The stance is perfect! I have fairly recently developed a “thing” for wagons, the old ones are just cool. Question for you, did you use the “paint over foil” technique for the Plymouth lettering on the hood? It looks great. Cheers,Steve
-
I couldn’t agree more. That thing is tasty!
-
I’ve got one… Modelhaus phantom ‘61 “Merchero”
-
*1960 Chevy Fleetside Pickup*
Steve H replied to Zippi's topic in WIP: Model Trucks: Pickups, Vans, SUVs, Light Commercial
Hi Bob, this is coming along nicely. Everyone has an opinion on foil and the formula” that works for them. Personally, I like to clear coat my bodies after I have foiled. The foil is then “sealed” by the clear. In my opinion, this aids to keep the foil protected, and helps prevent foil from lifting. I also know there are many that swear by doing the foil last, people do what works best for them. I’m curious what you use to burnish your foil down. I highly recommend the pointed Tamiya “Qtips”, there are three sizes, and they are perfect for burnishing foil into the crevasses, and aid in working out any wrinkles. Just my two cents. Cheers, Steve -
Hi David, you are absolutely right. The issue wasn’t so much a paint issue, as it was a rushing issue. I tend to rush my test spoons… I have since confirmed that the paints are compatible. Thanks for the input, much appreciated!
-
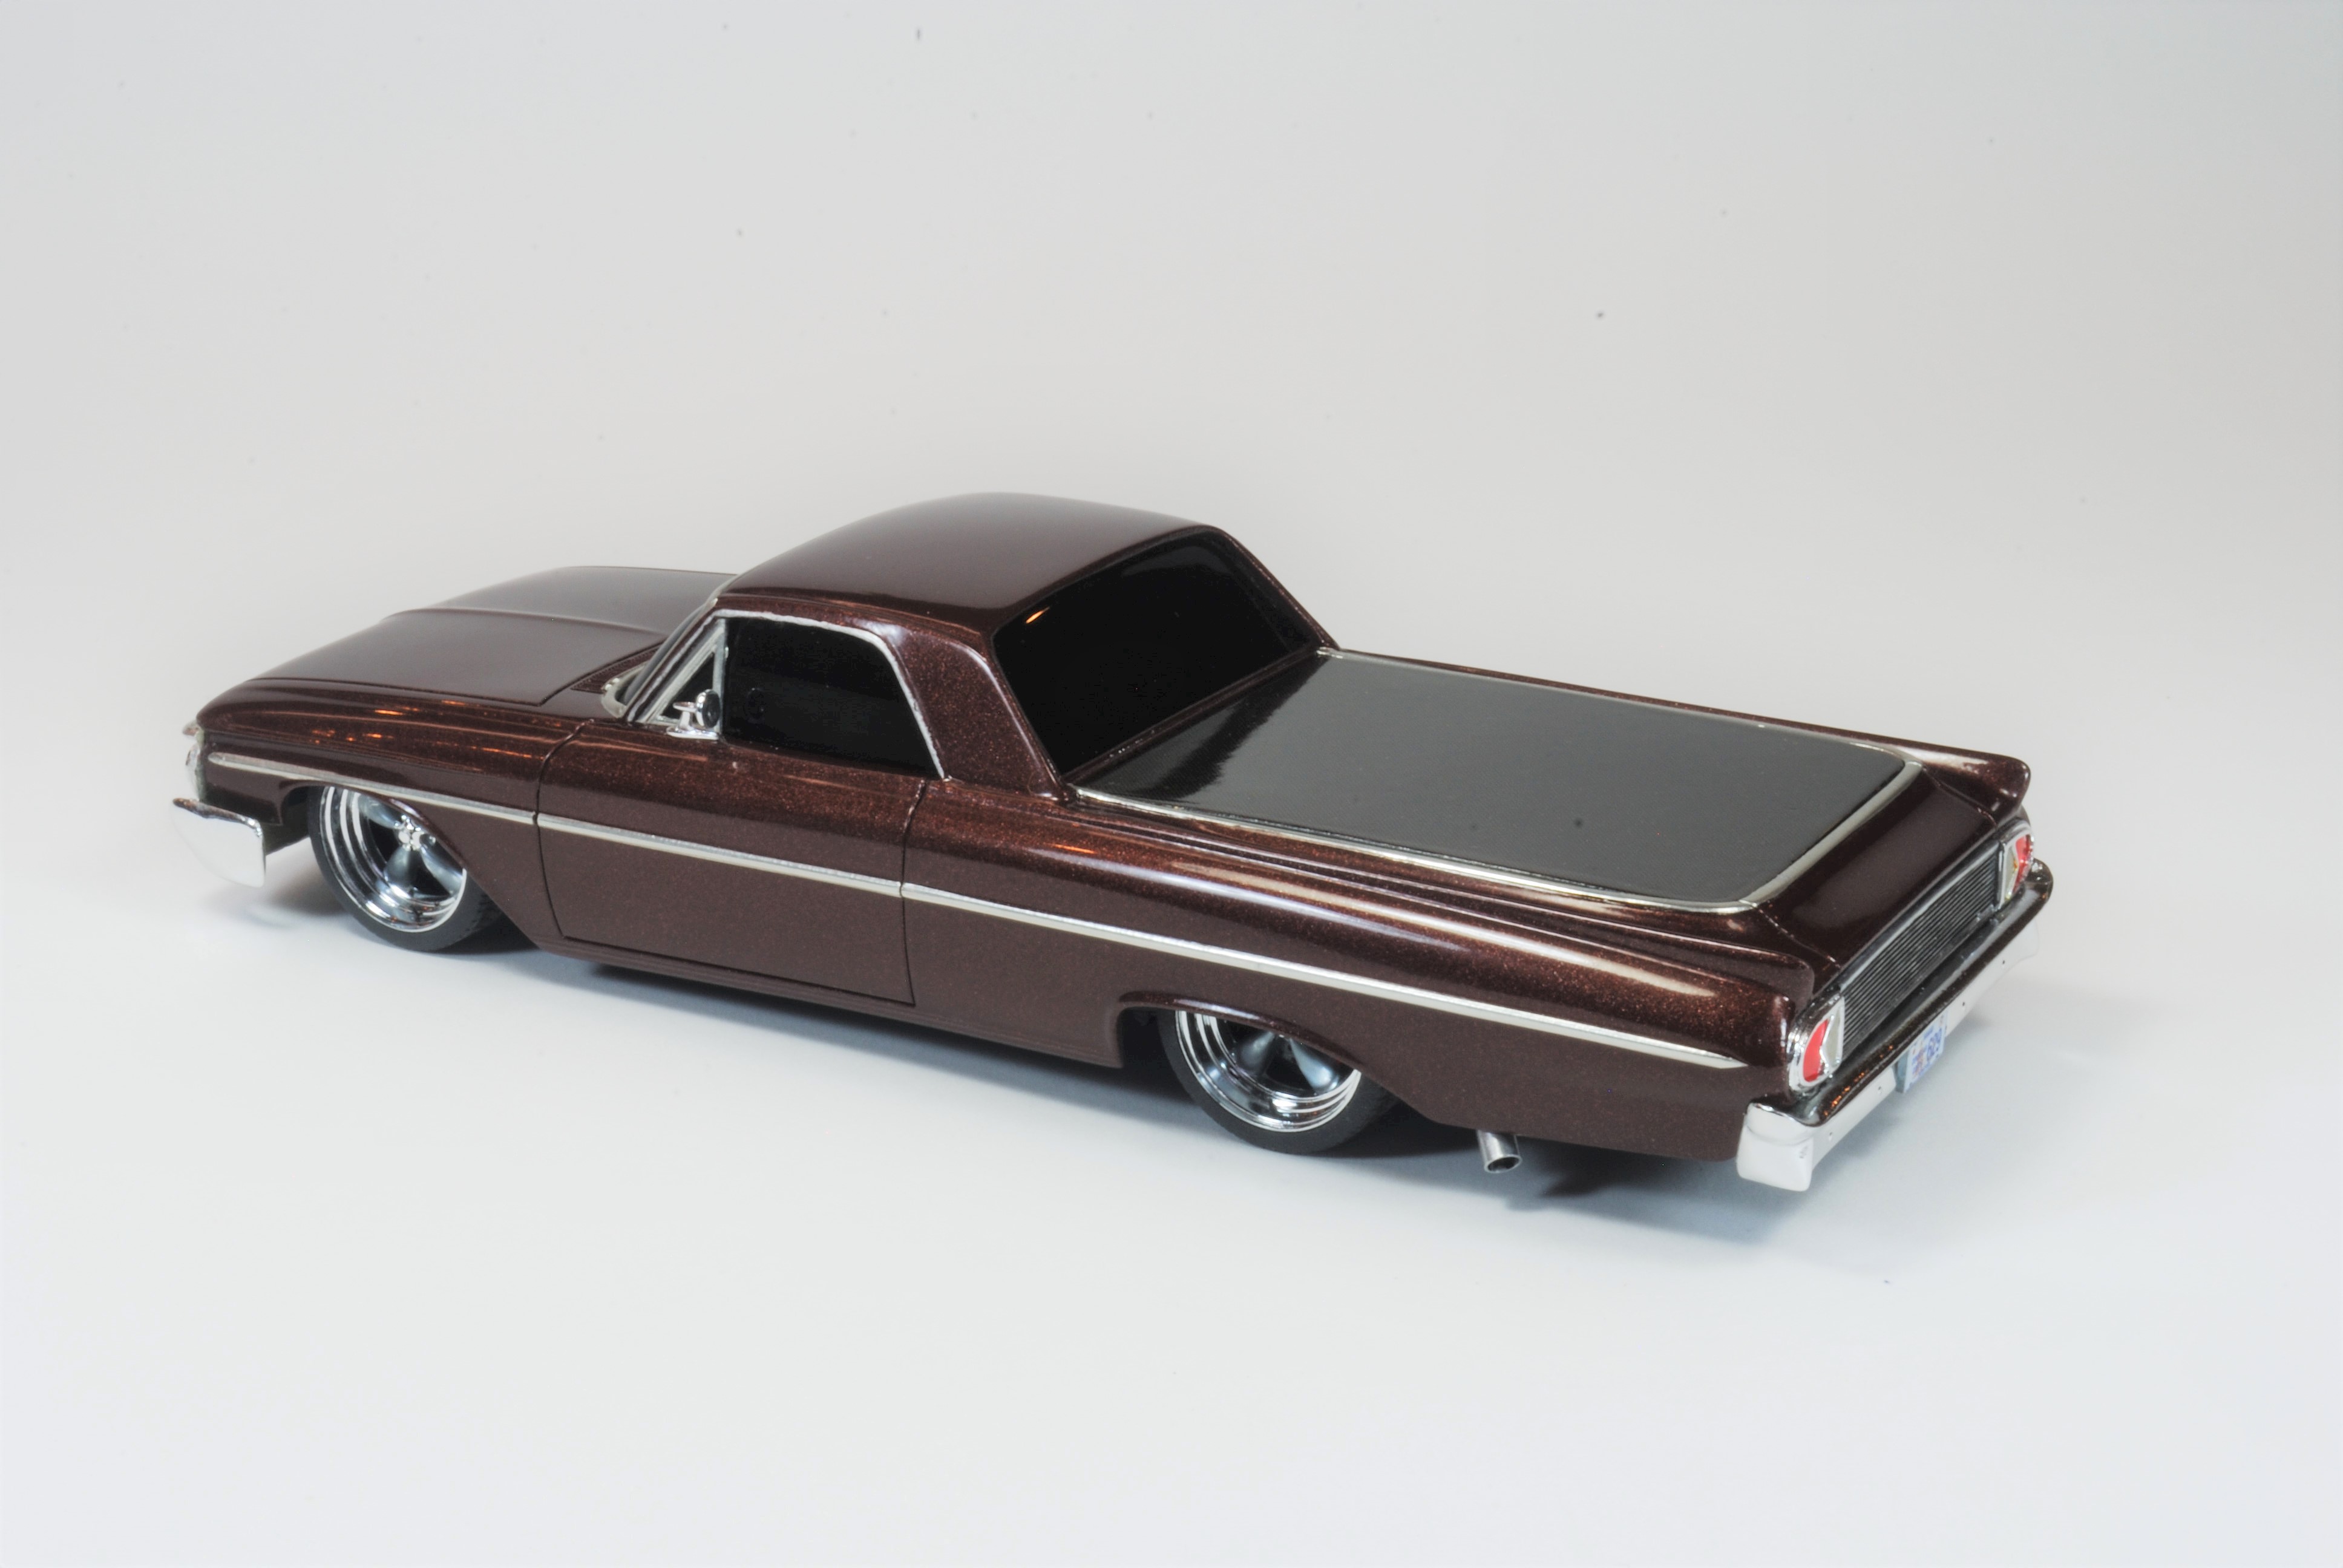
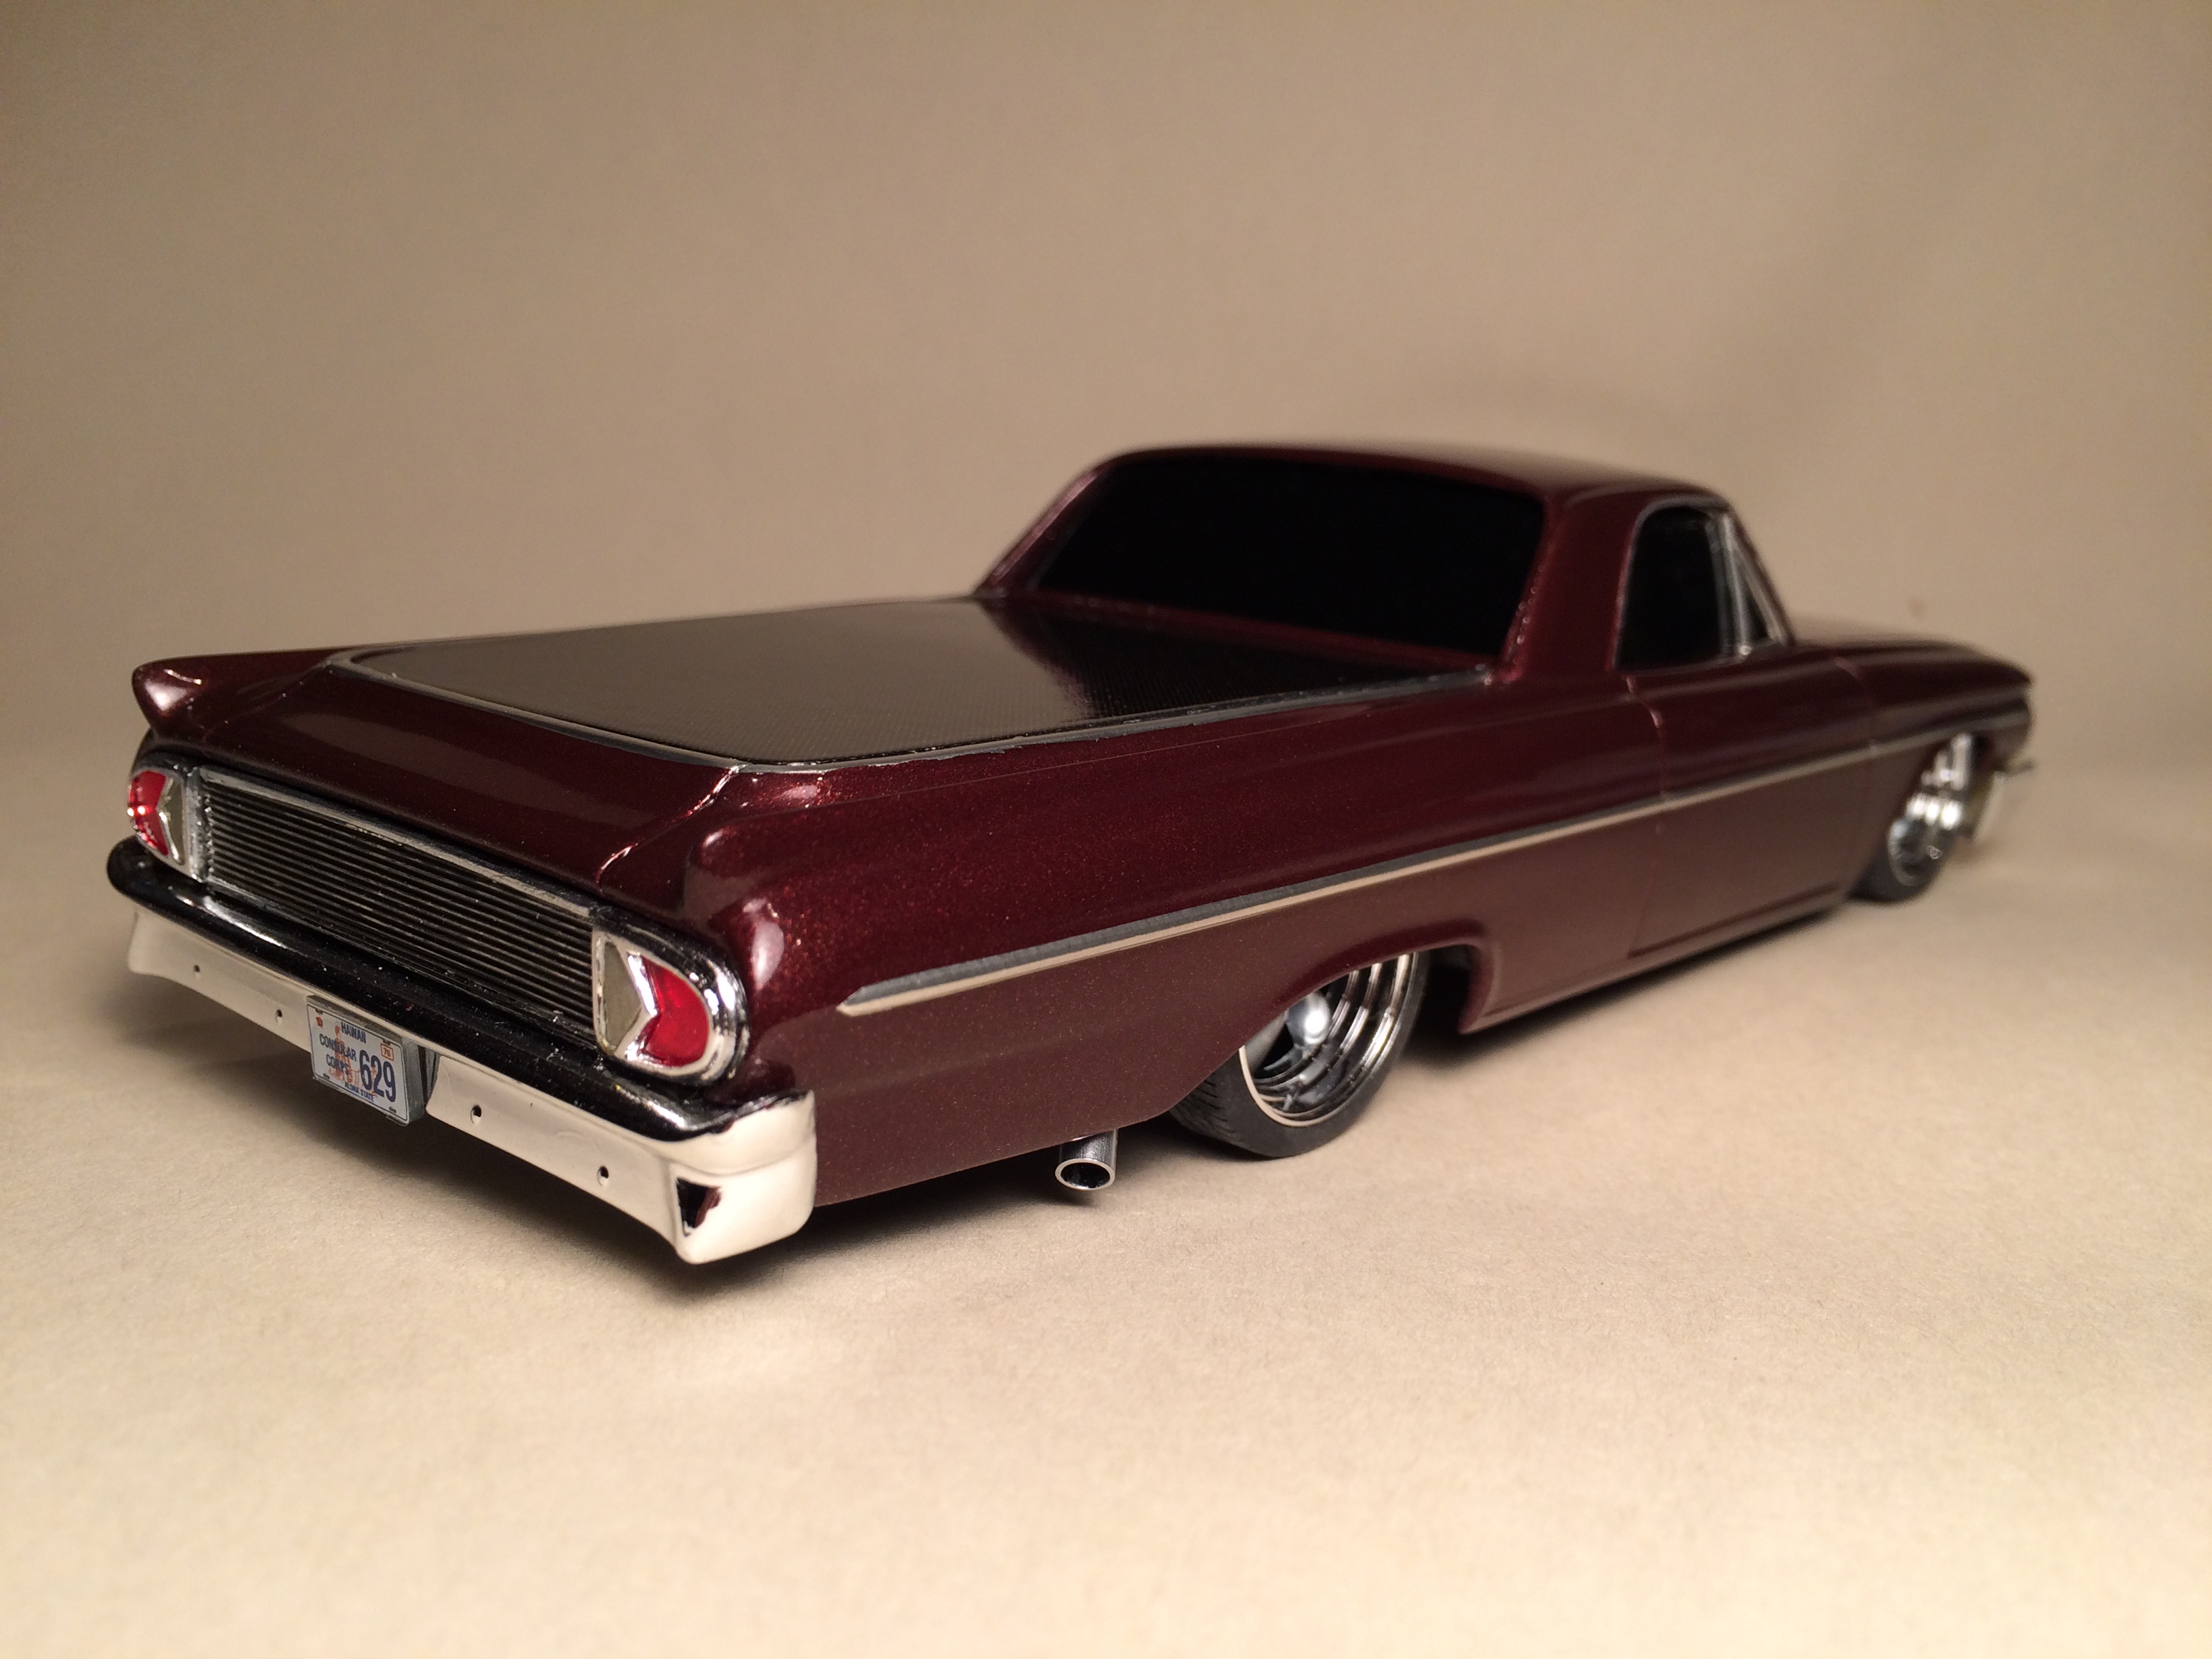
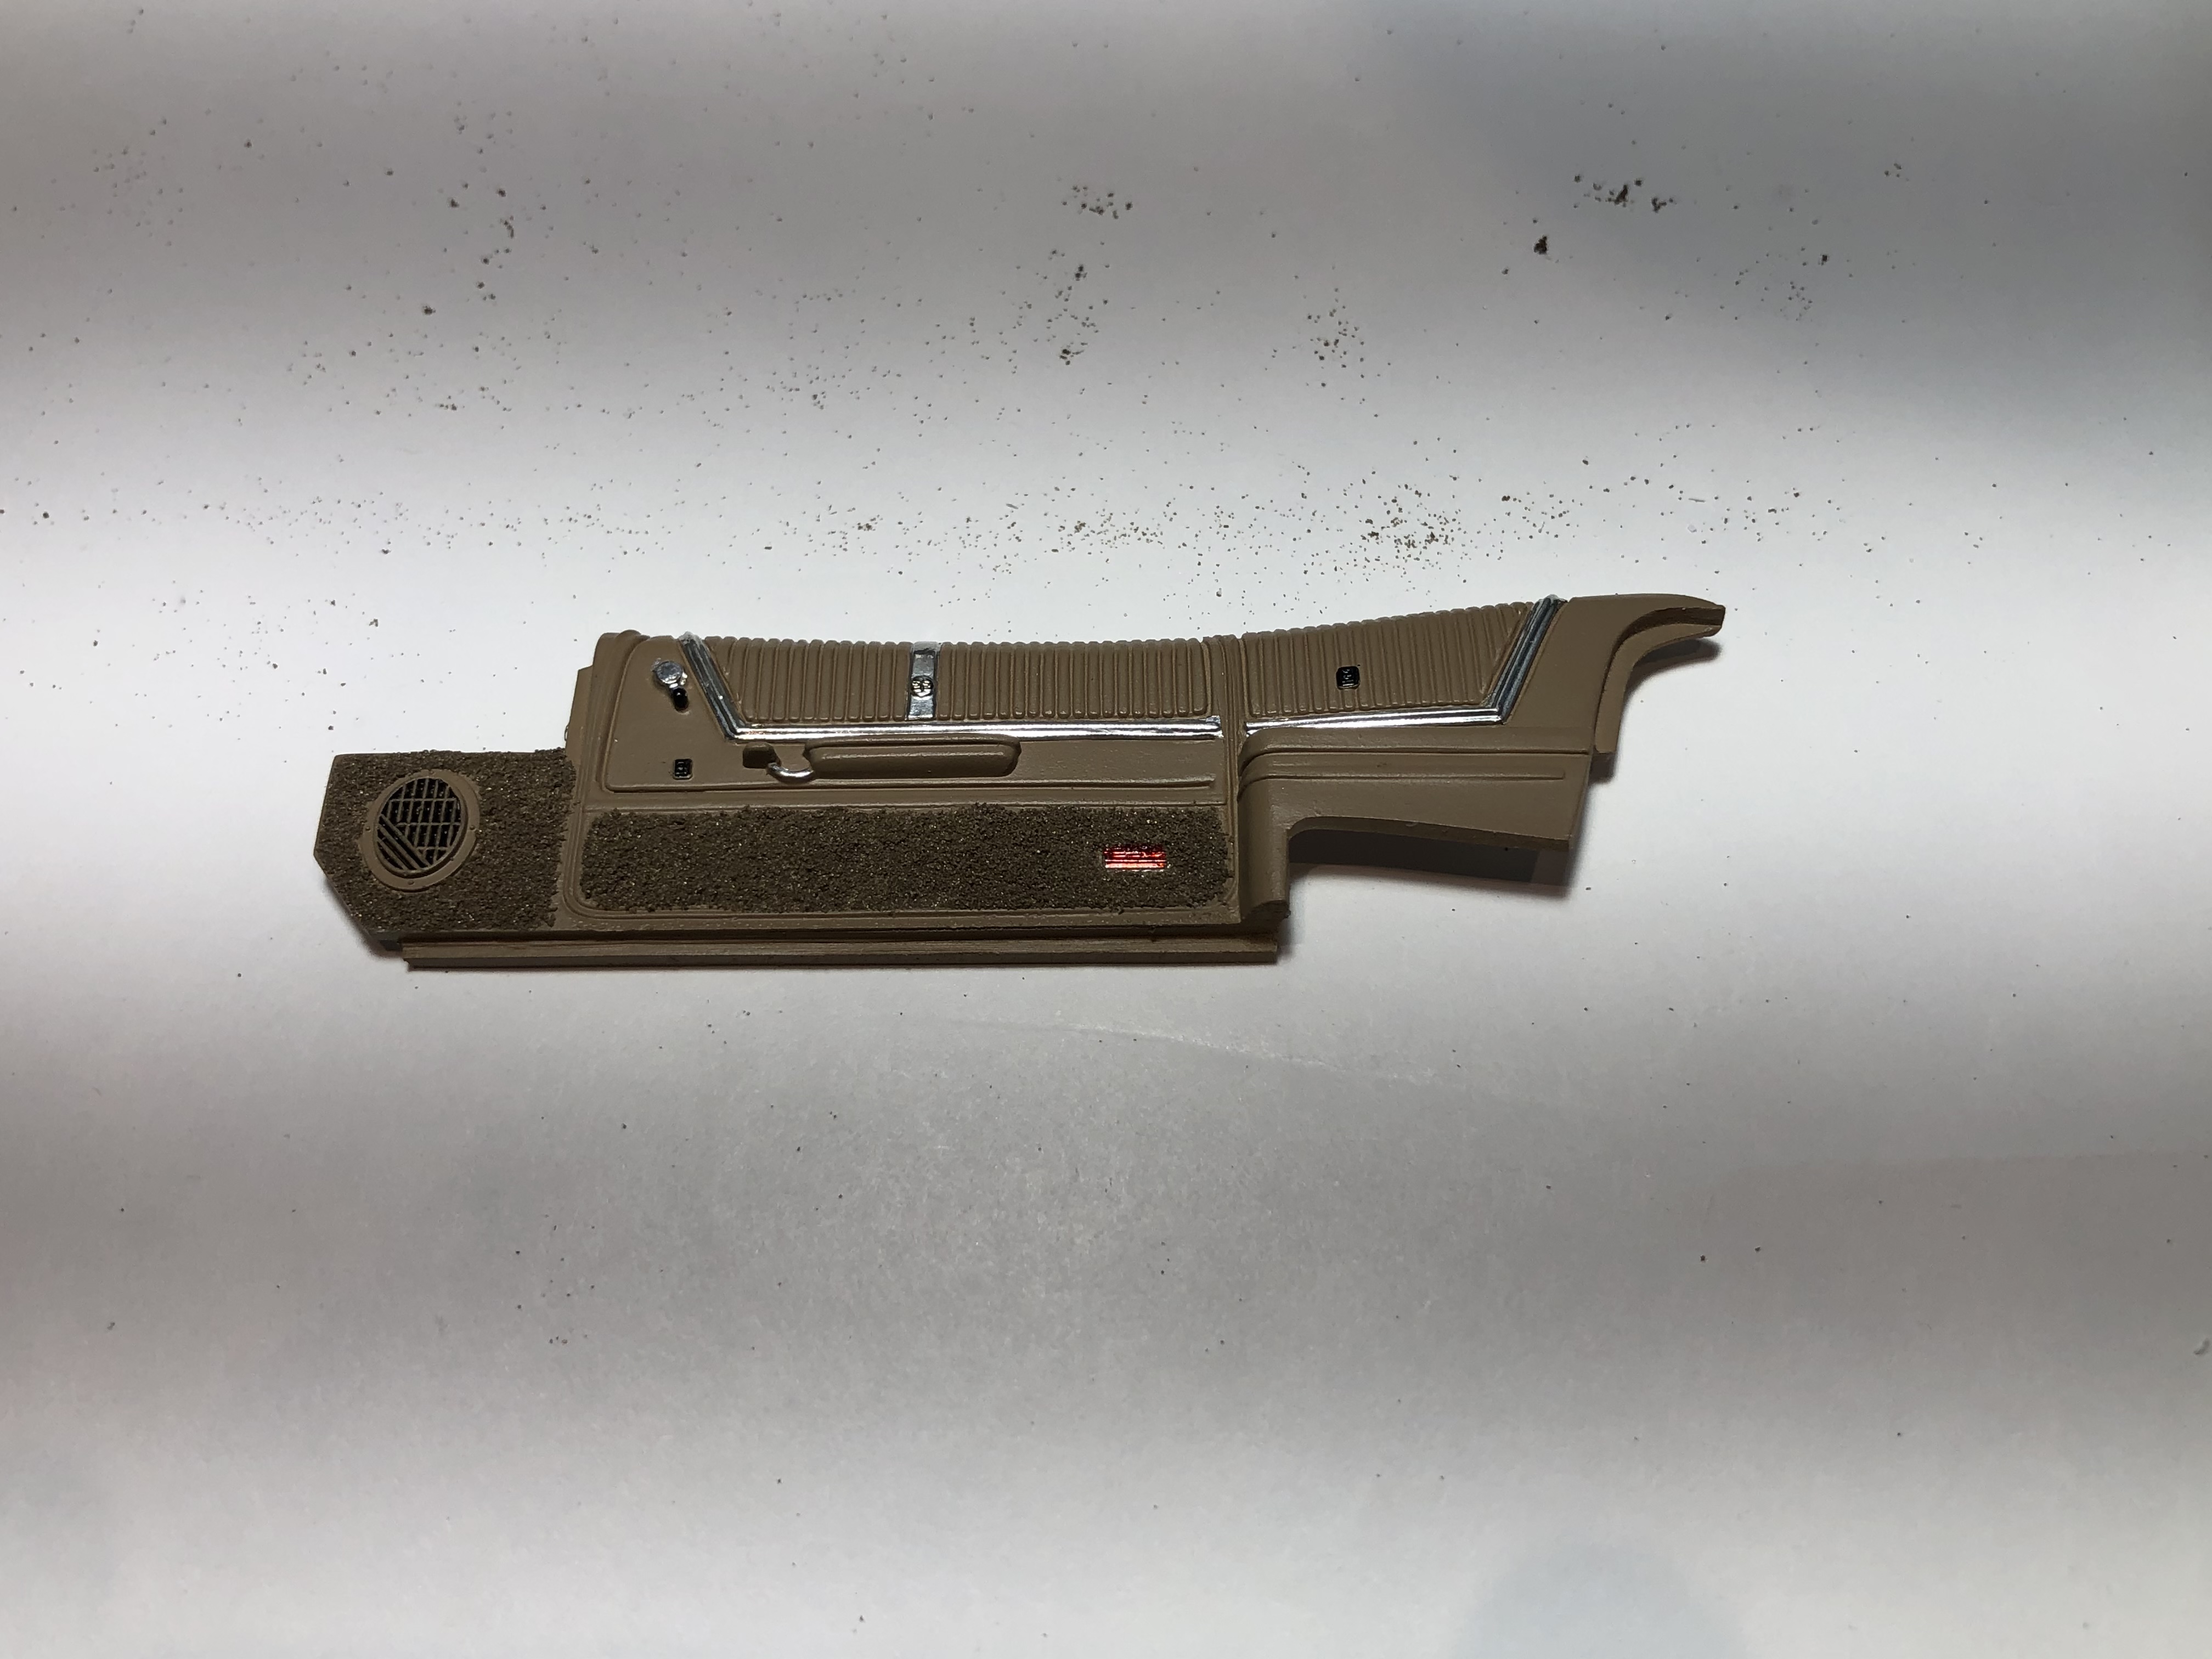
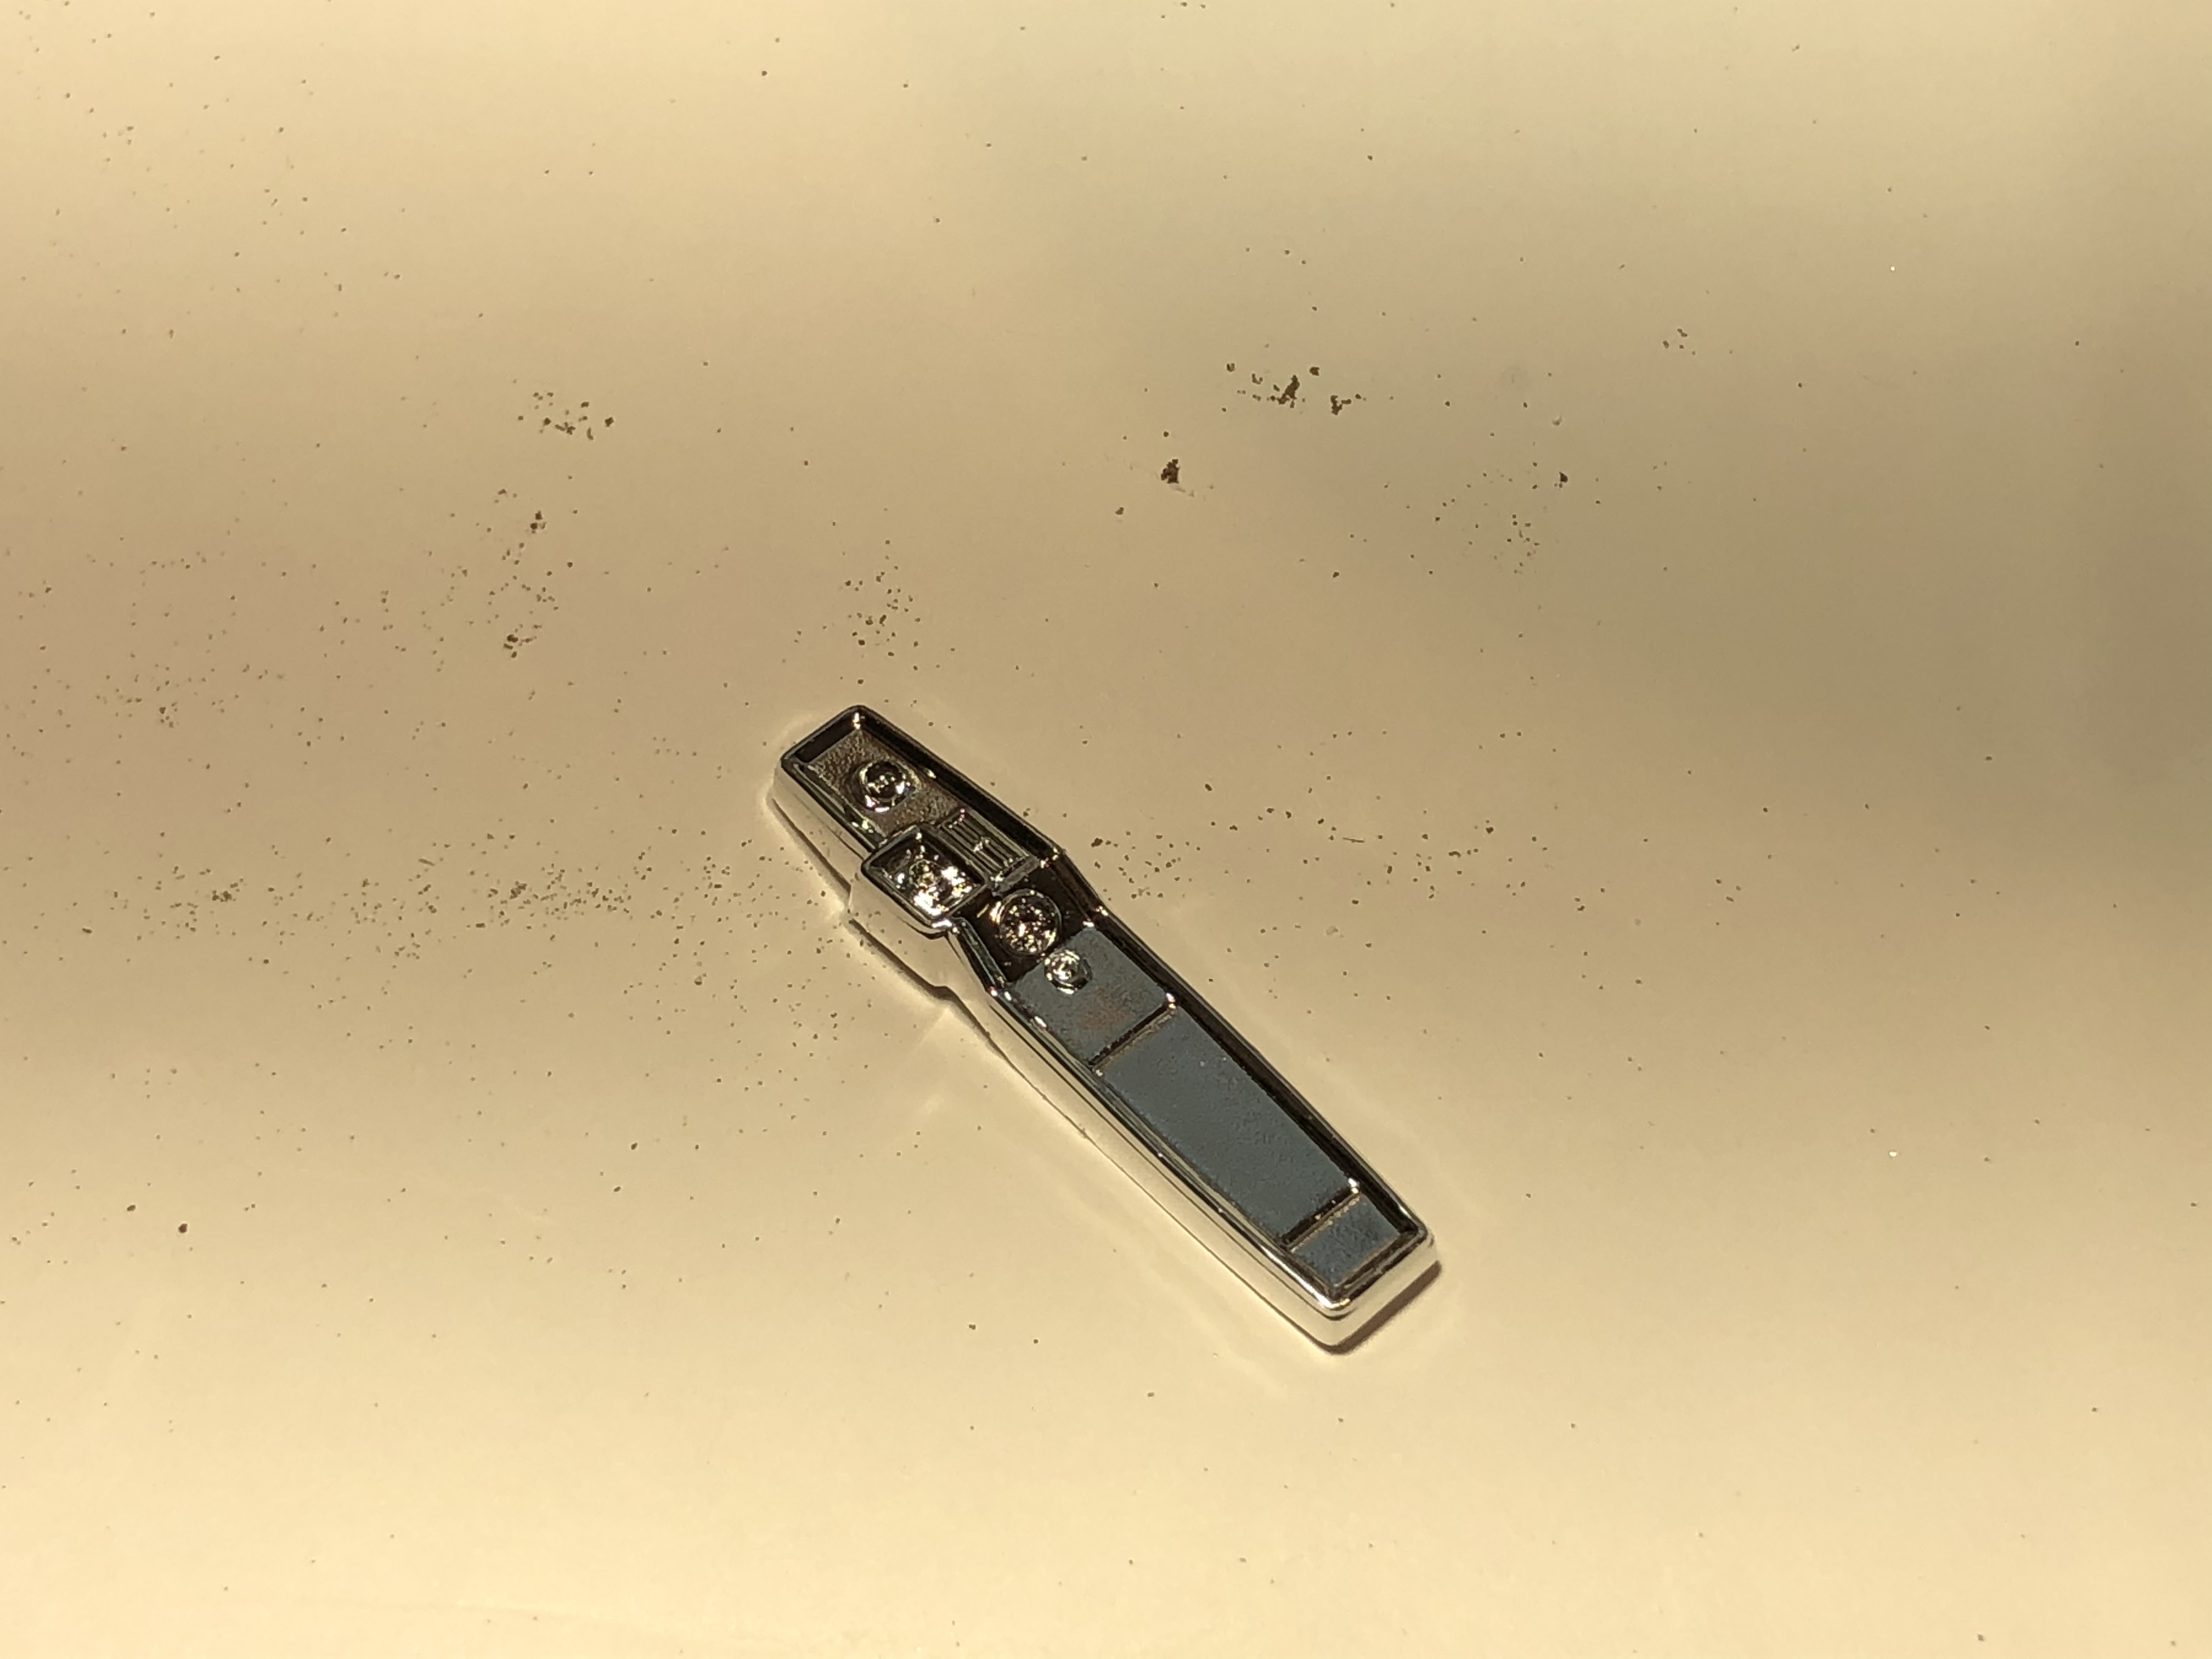
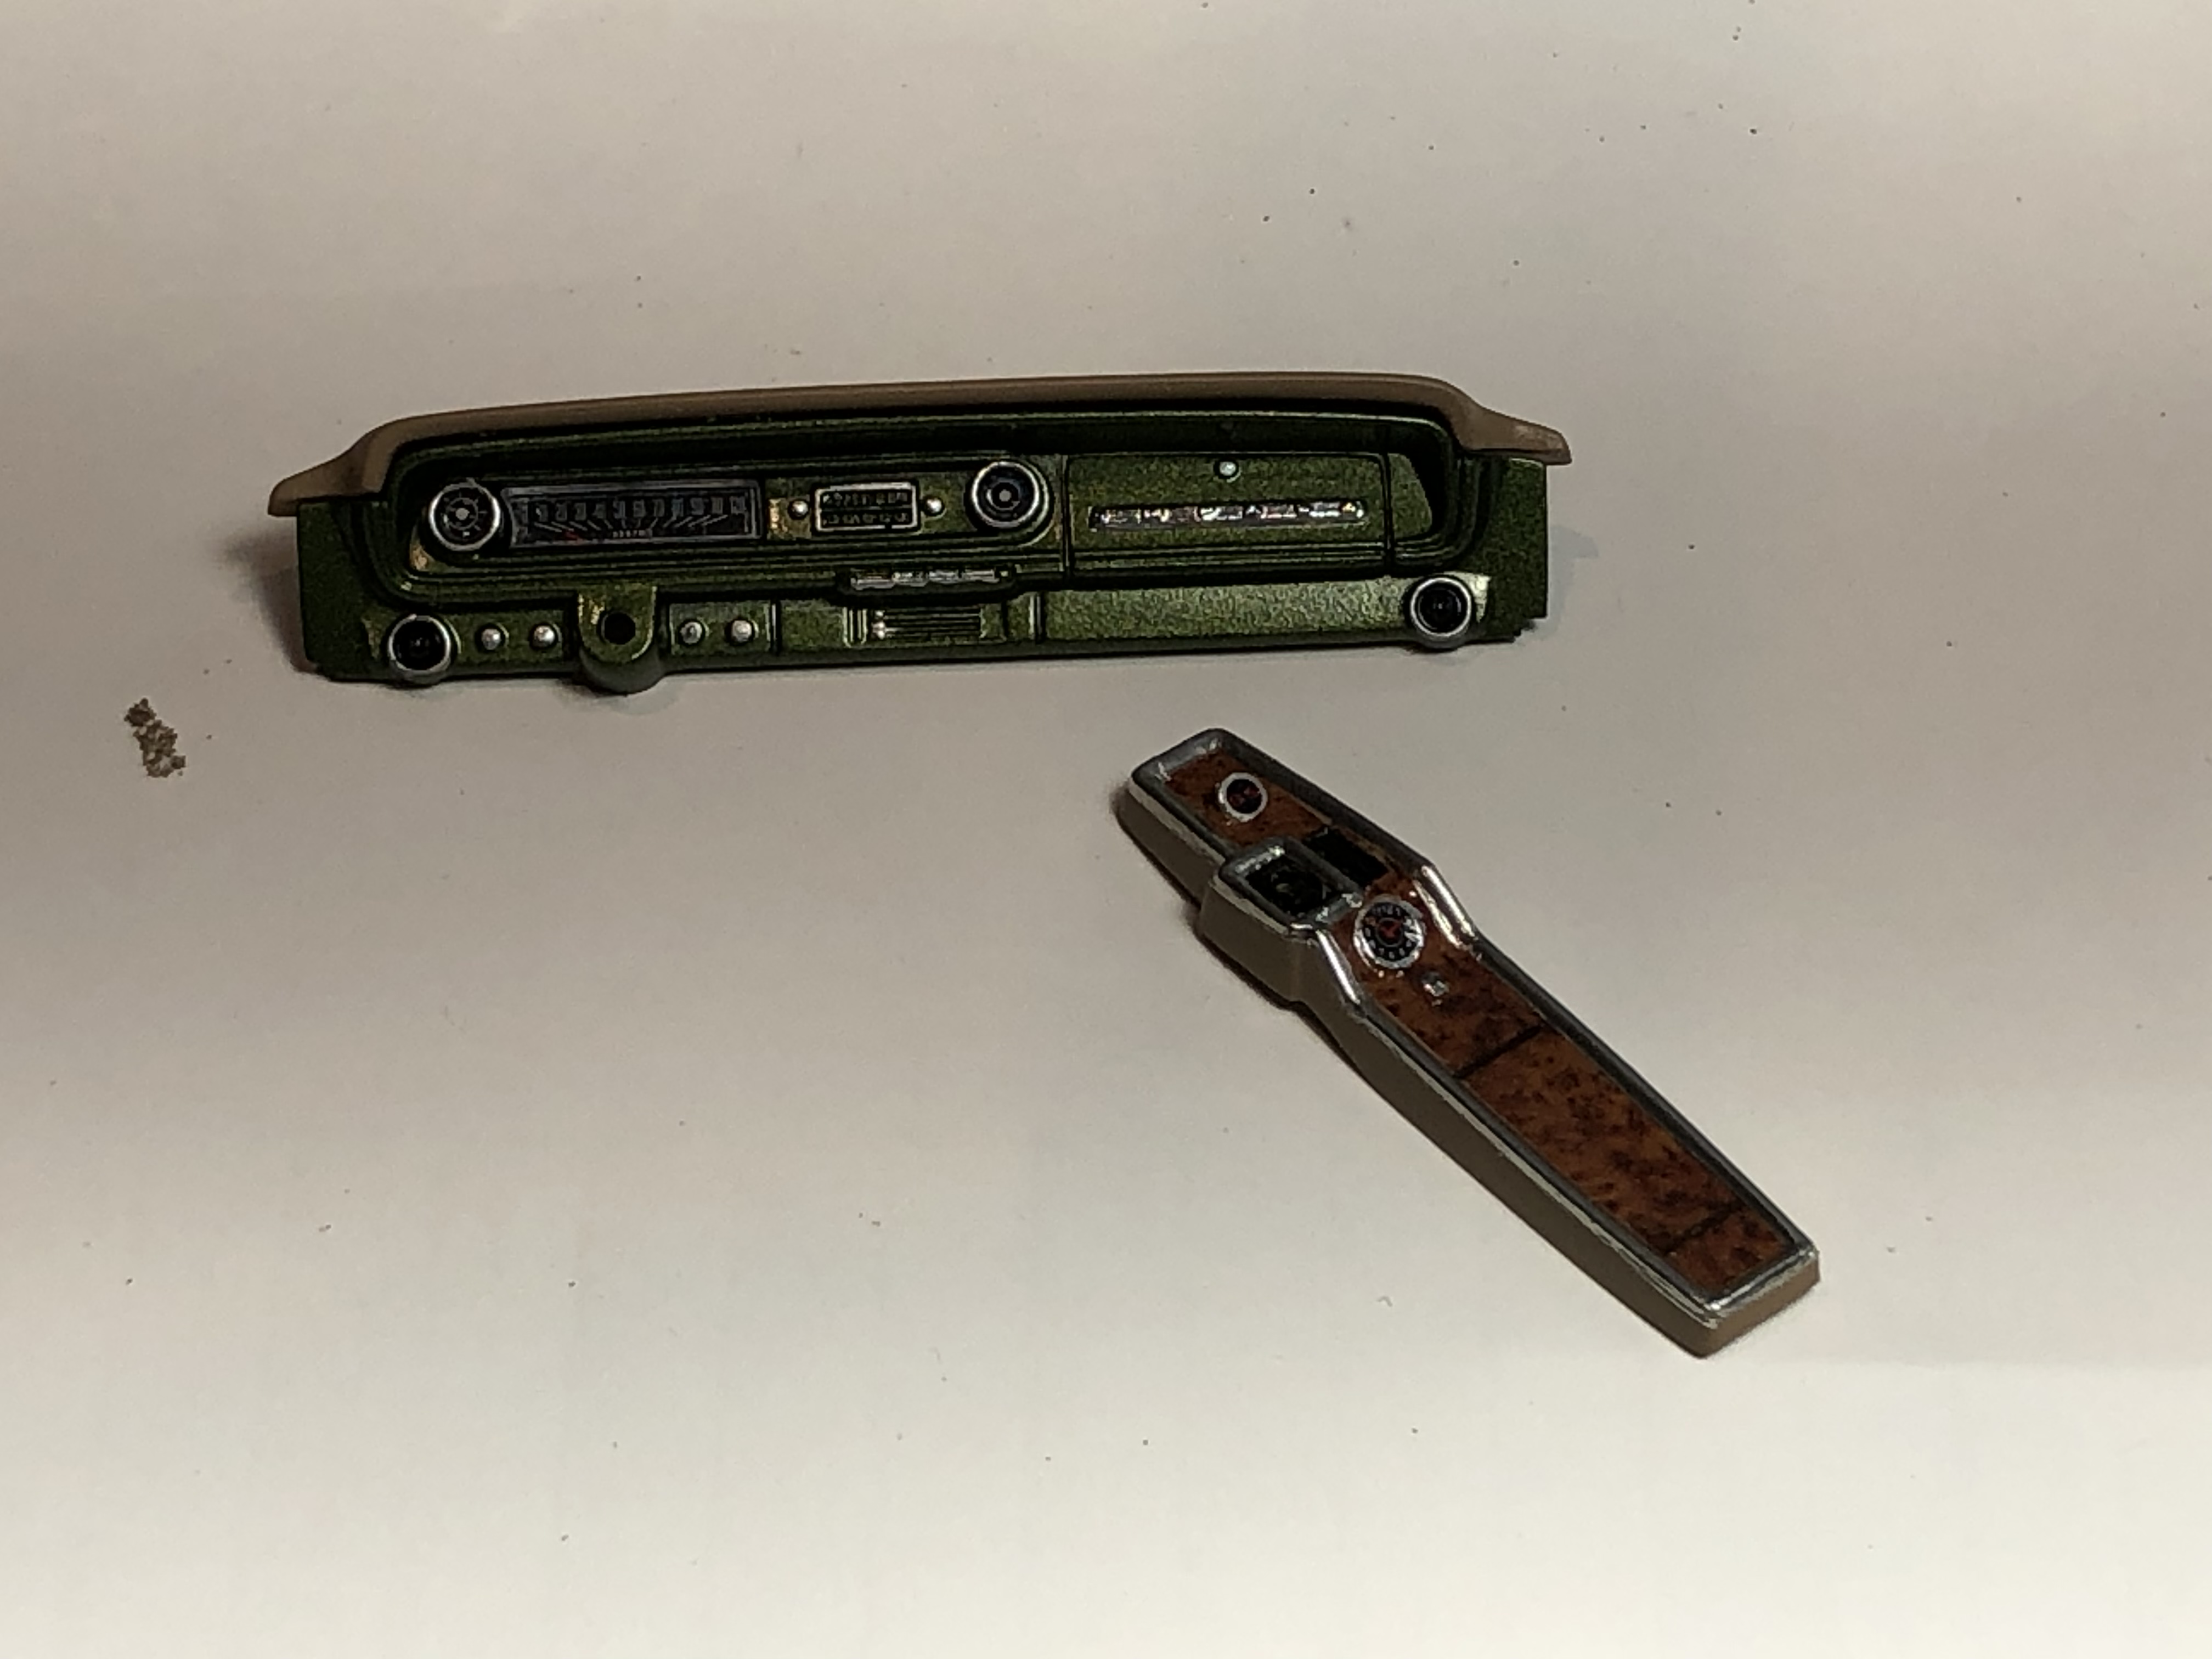
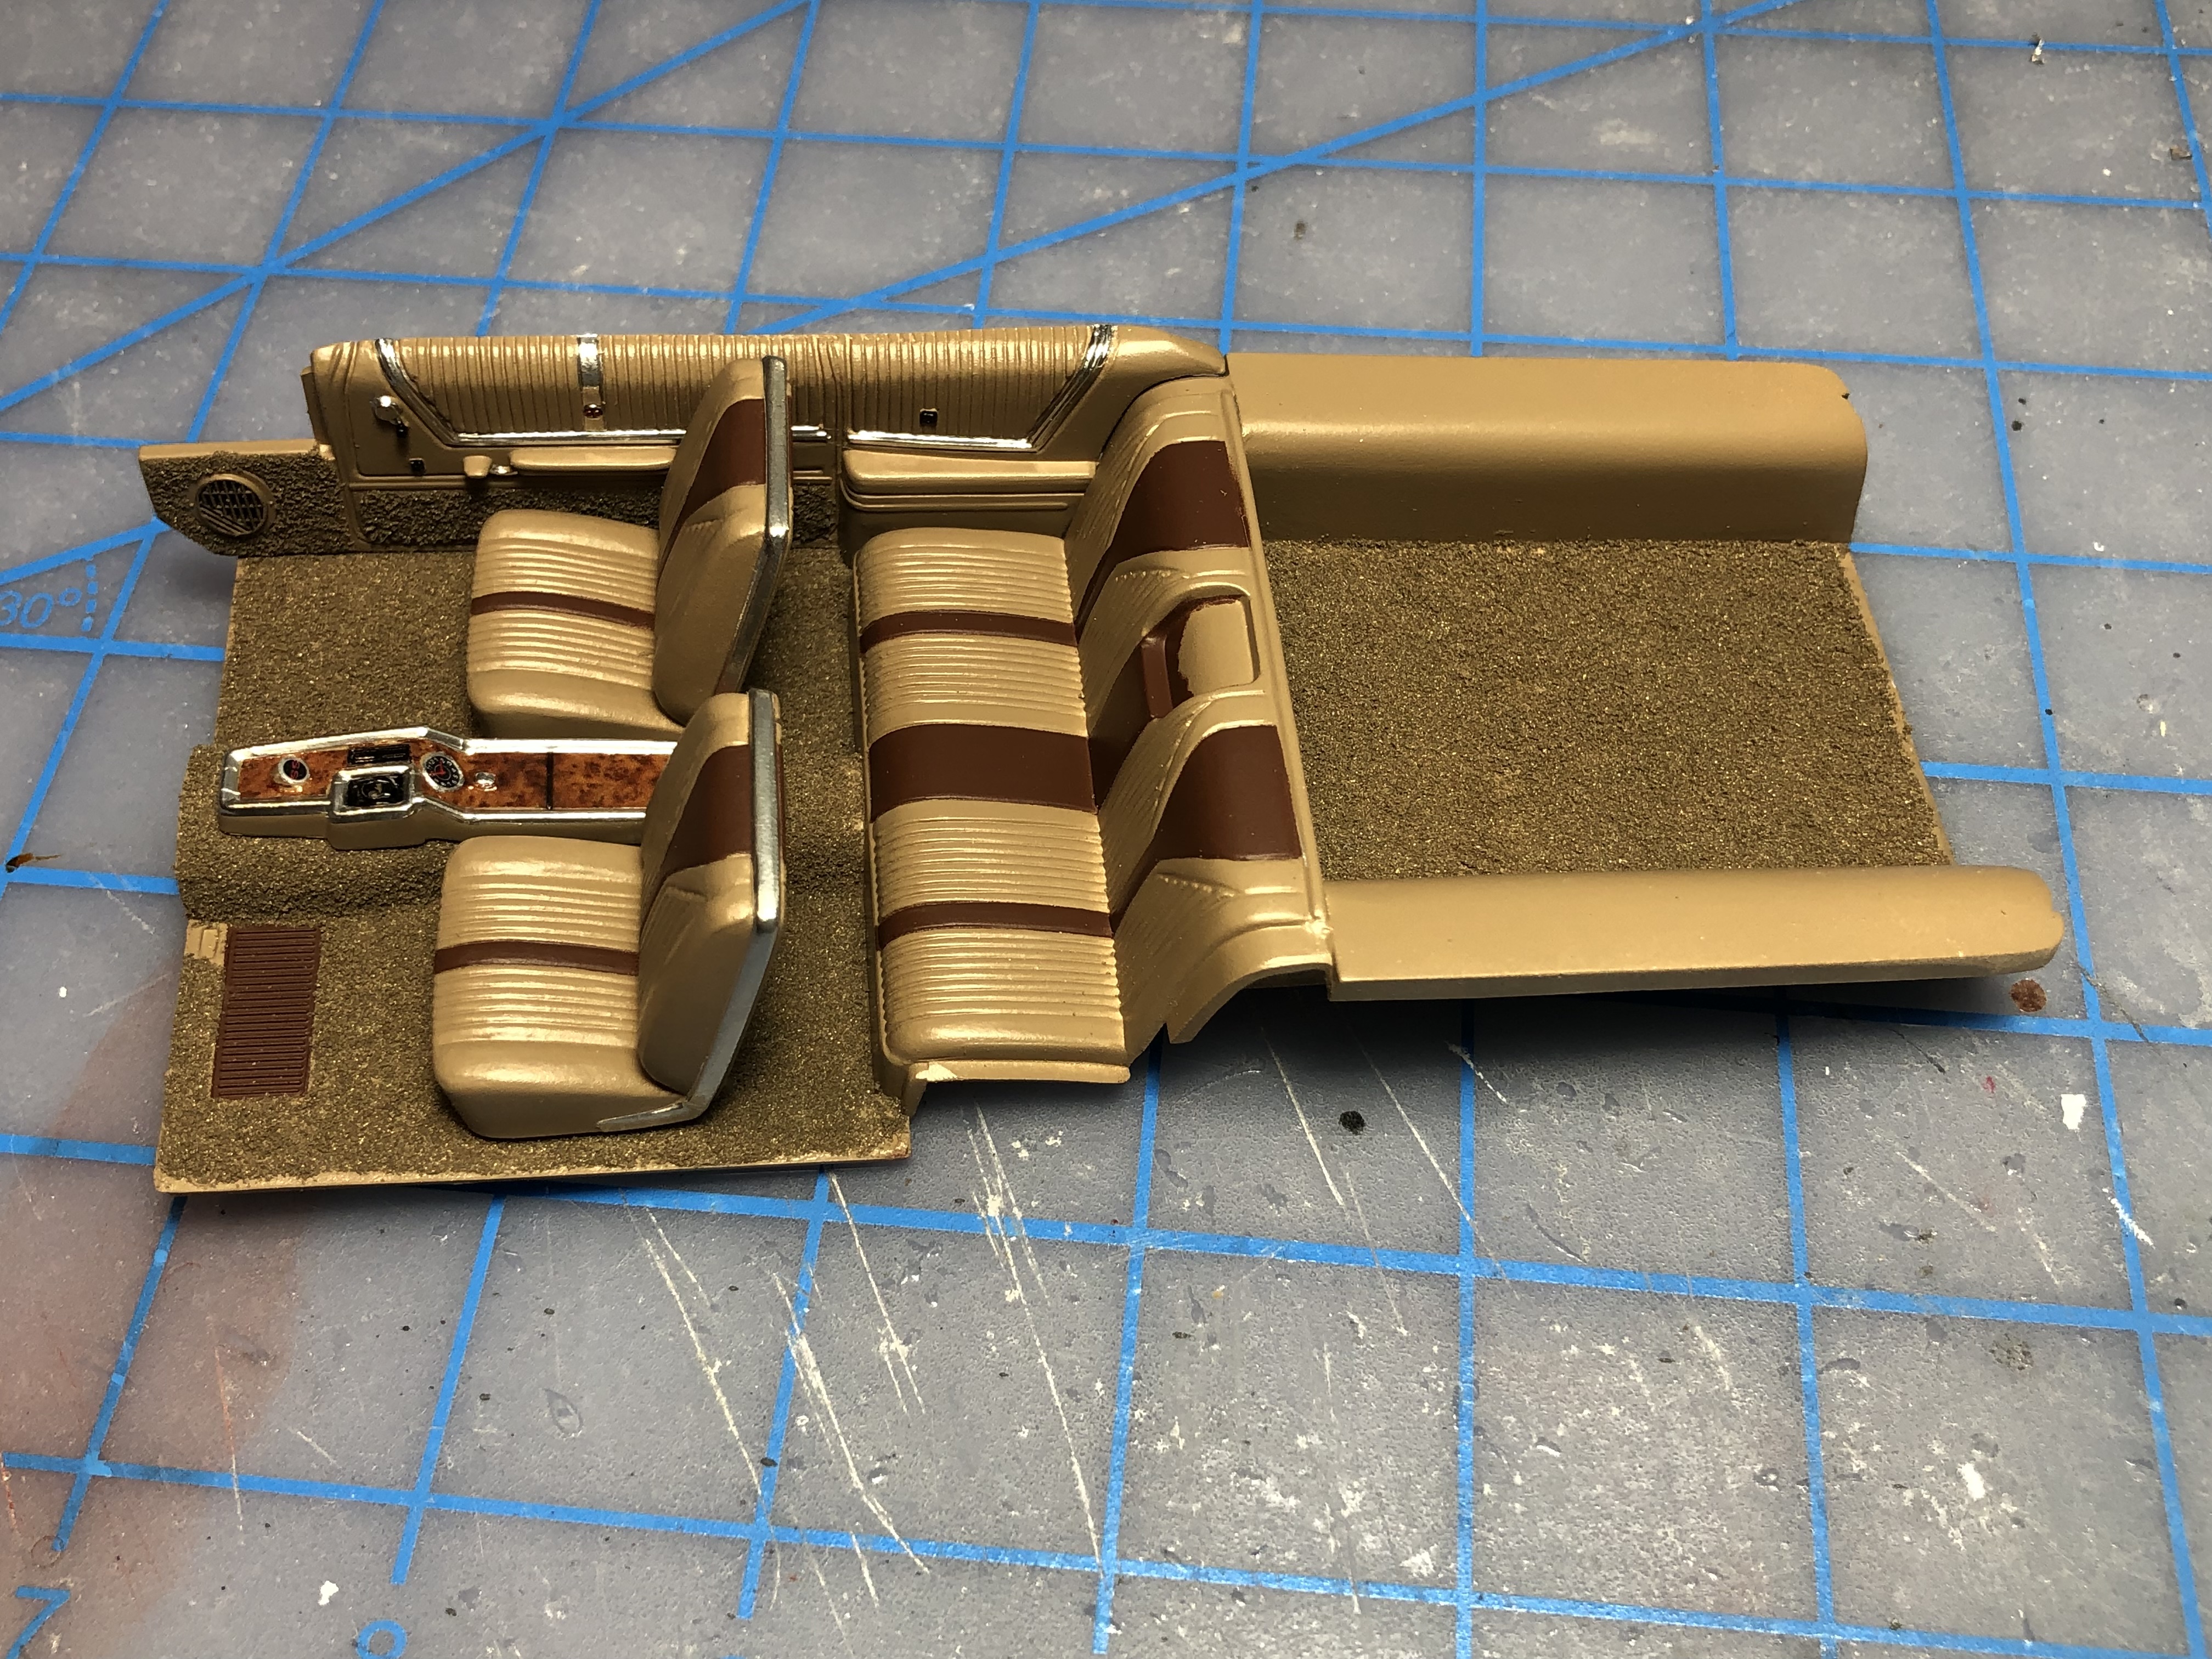
Hi guys, time for a long overdue update. I’ve had next to no time at the bench in a while for various reasons. Managed a few days with some quality desk time. Decided to get some work done on the interior. The kit console comes as a chrome piece… I stripped it, (easy off oven cleaner) then painted it to match interior. Added Birdseye maple decals, detail paint, and BMF. most of the interior is now painted, still a few bits to paint and some detailing, but it’s close. A quick mock up of interior… Also got a bit done on the engine. I plan on trying to spend some more time on the engine in the coming week. Chassis parts have been cleaned up, hoping to get them in primer soon. Hard to tell in the photo, I’m not a great photographer, but the plenum and valve covers are Vedoro green. Hoping to keep some momentum here…. As always, thanks for looking, all comments welcome. Cheers, Steve
-
A lot of BMF on that one! I can’t help but hear Austin Powers saying “one miiillllion dollars” with that bill reflecting in your paint job.
-
Hi Roger, beautiful ‘65 by any standards. The fact that it’s 20 years old, and as Claude said, still looks current today, is a testament to your talents. I was toying with the idea of body colour bumpers on my wagon, this gives me a good visual of what that would look like. Hmmmmmm…. Cheers, Steve
-
Beautiful paint and detailing Andy. I love the horizontal fins on the ‘59’s, your colour combo is perfect.