David G.
-
Posts
11,326 -
Joined
-
Last visited
Content Type
Profiles
Forums
Events
Gallery
Everything posted by David G.
-
Beautiful paintwork! Looks great. David G.
-
Beautiful work as always Bill! Above and beyond, above and beyond. David G.
-

*1960 Ford Ranchero*
David G. replied to Zippi's topic in WIP: Model Trucks: Pickups, Vans, SUVs, Light Commercial
Good call on the wheels and rear cab trim Bob. That color you mixed should look great. David G. -
They all look so good that it's hard to pick a favorite but I'm leaning toward the T-Bird. David G.
-
Nice color, overall good looking build. Well Done. David G.
-
Nicely Done! David G.
-
Everything looks good so far, you have a great start on this. I built this kit years ago and had a lot of fun with it. It's a great kit and there's a lot that can be done wit it. David G.
-
Your paint mix is spectacular and well suited to the body style. Assembly and detail are excellent. It could easily pass for a 1:1. A beautiful build of a beautiful car. David G.
-
Looks like you're off to a good start. David G.
-
Thanks Ray, let's hope so. David G.
-
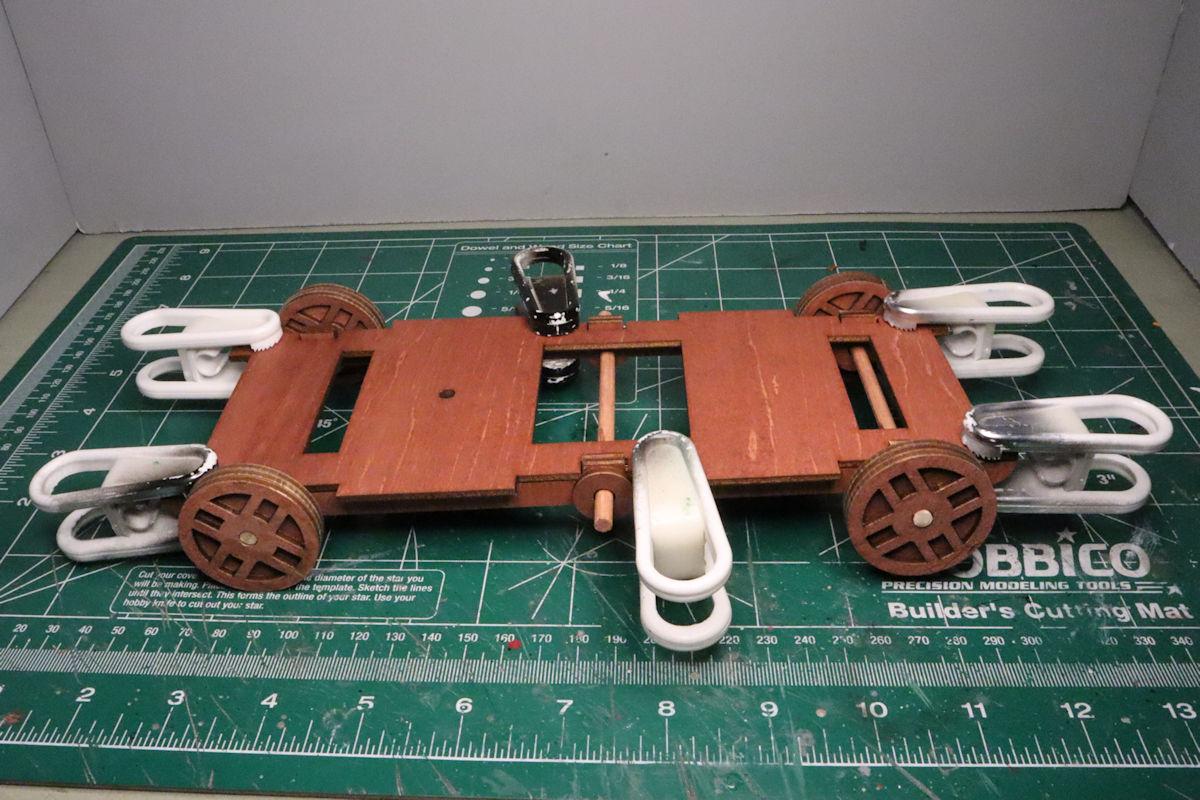
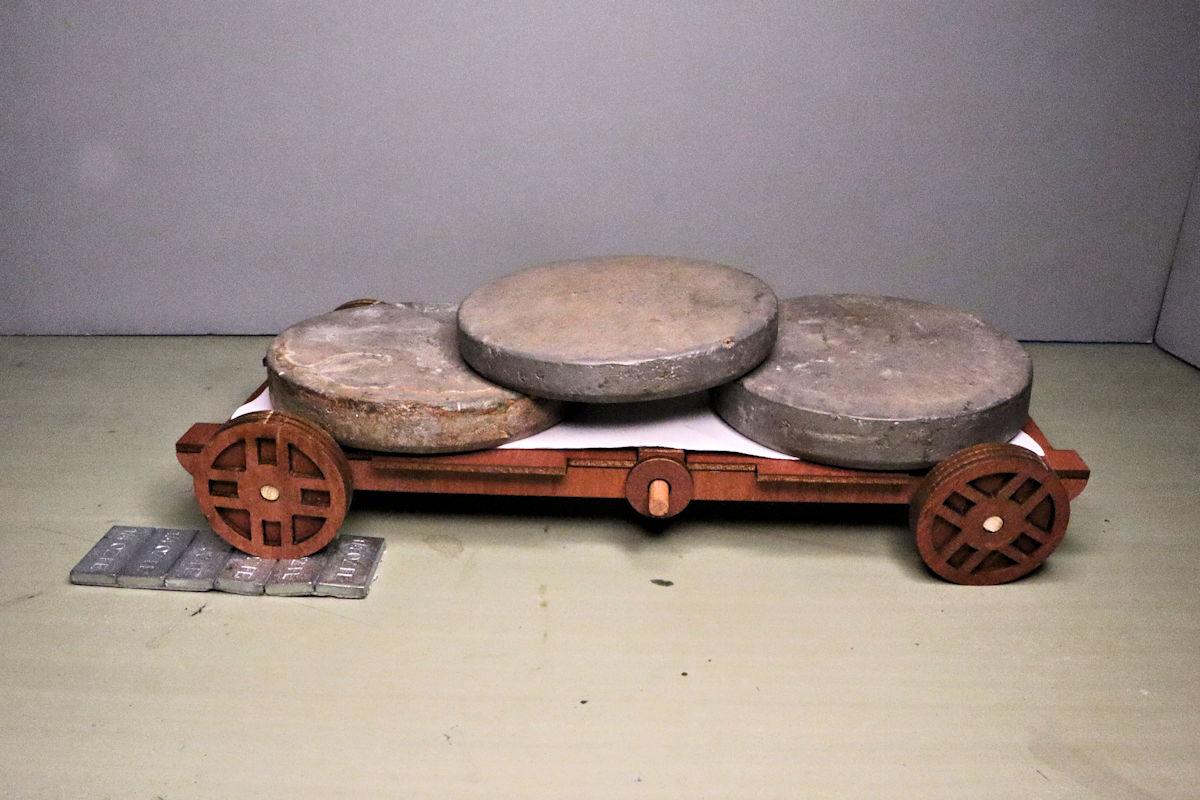
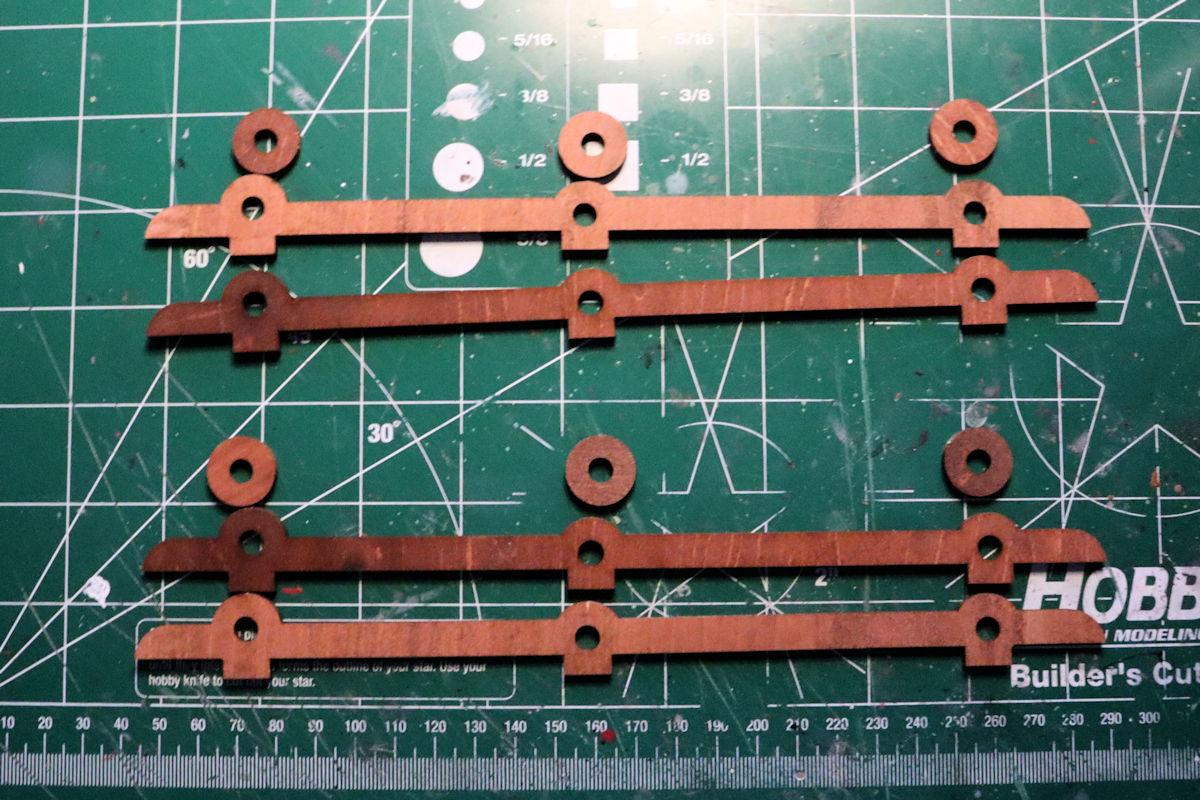
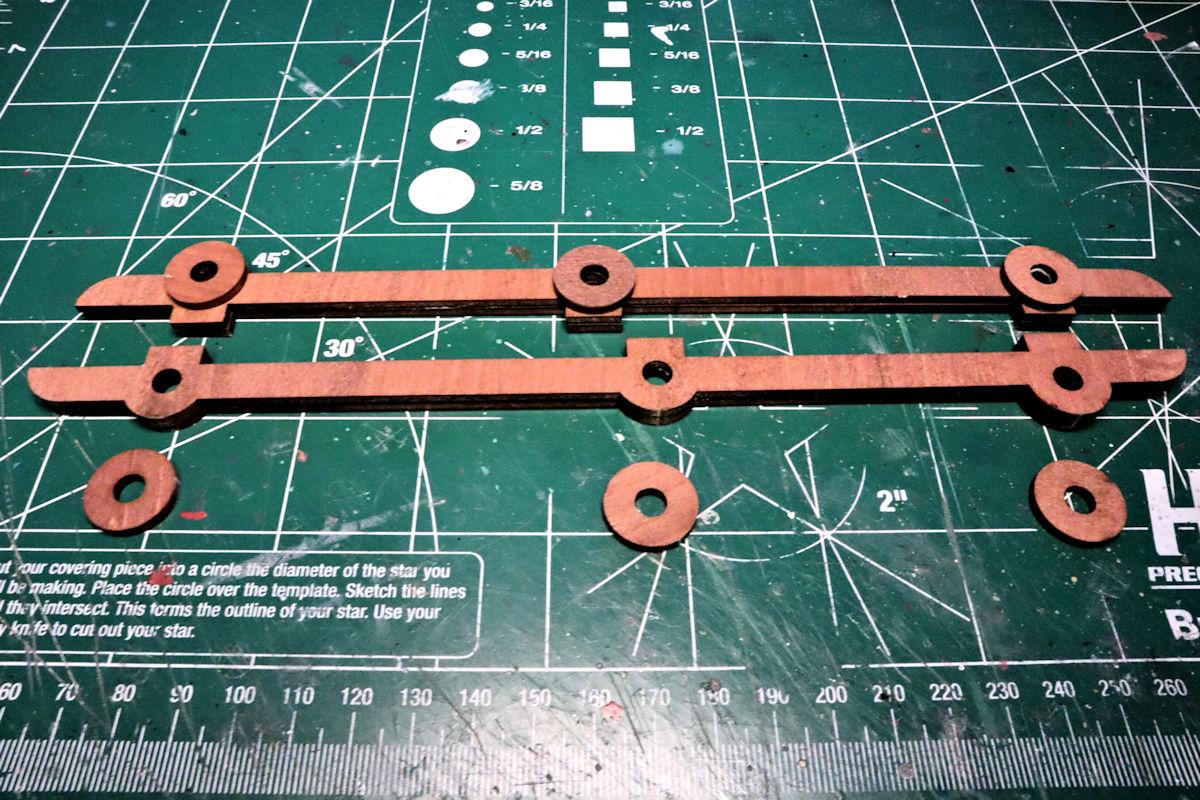
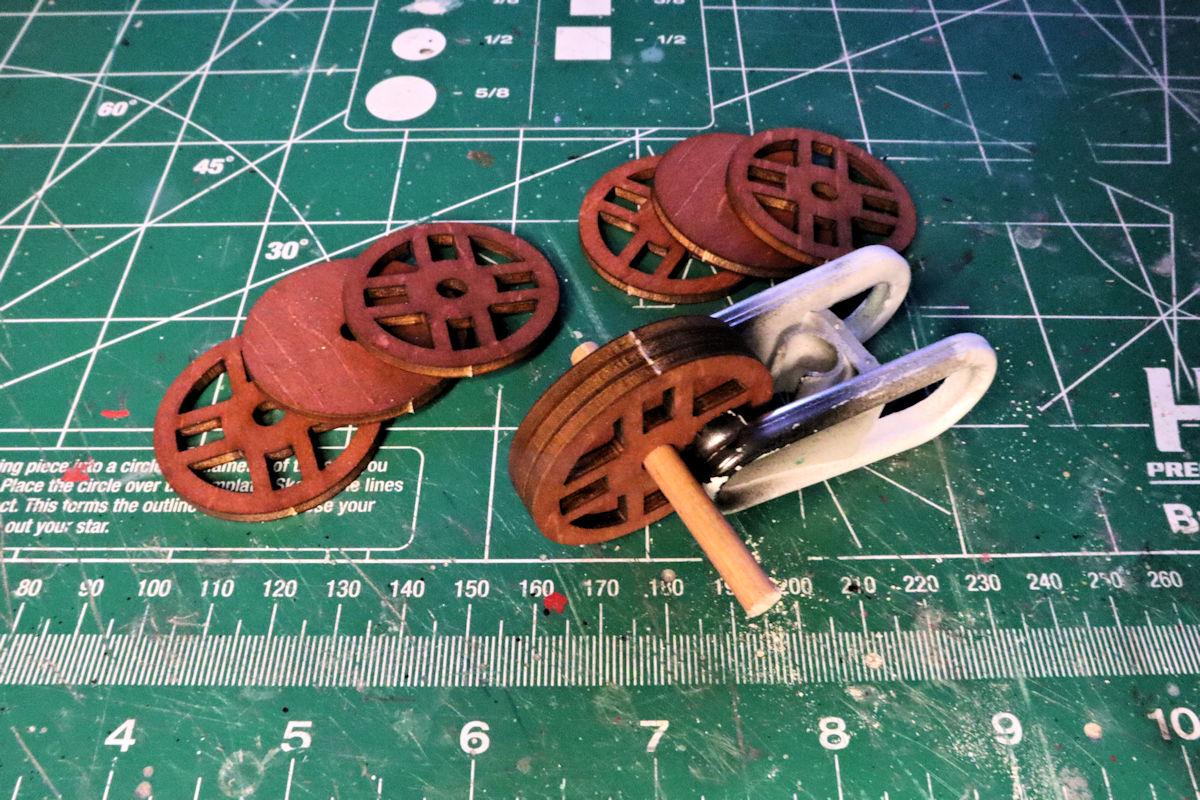
Hello Everybody! The first assembly step is building the side rails. The directions don't call for gluing these but even when mated to the platform pieces, there is no positive connection that holds them together. There is no adhesive included in the kit so I'll be using Zap Canopy Glue Formula 560. Any of the thicker PVA based adhesives should work as well. If you should decide to glue these together, be mindful when gluing the axle grommets to the rails. The rails definitely have a left side and right side. Or inside and outside depending on how you want to regard them. I almost got caught on this one! I also glued the lower deck and the rails together and set them to cure. After about half an hour, I decided to check on the assembly and found that it had developed a twist of about 1/8 of an inch. I didn't get a photo of the twist because my mind went into panic mode and immediately locked on fixing the problem. I sprayed the chassis... deck?... hull?.. superstructure?... with a light misting of water, shimmed up the contacting wheels, applied some weight and waited overnight. That took care of it. Here's one quick bonus tip: To symmetrically align the spokes on the sides of the wheels during assembly, align the attachment points that held them to the frame. As always, thanks for taking the time to look and please feel free to comment. David G.

-
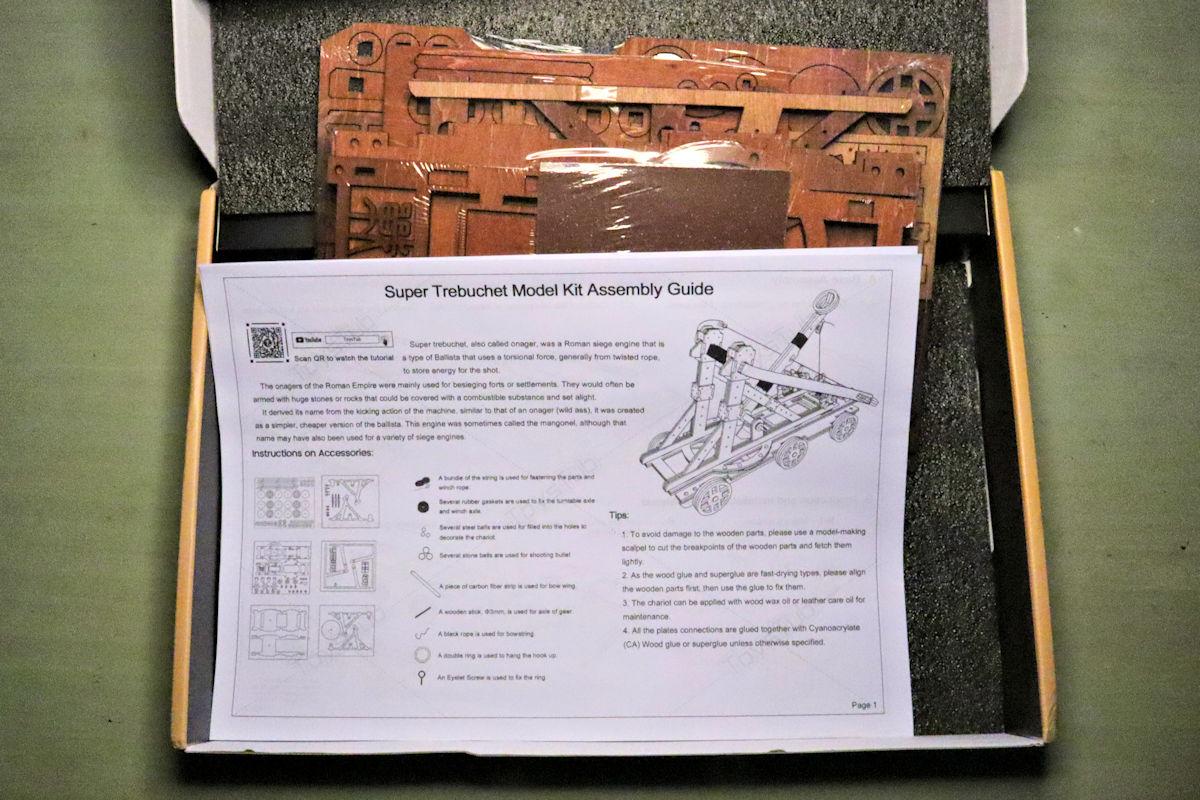
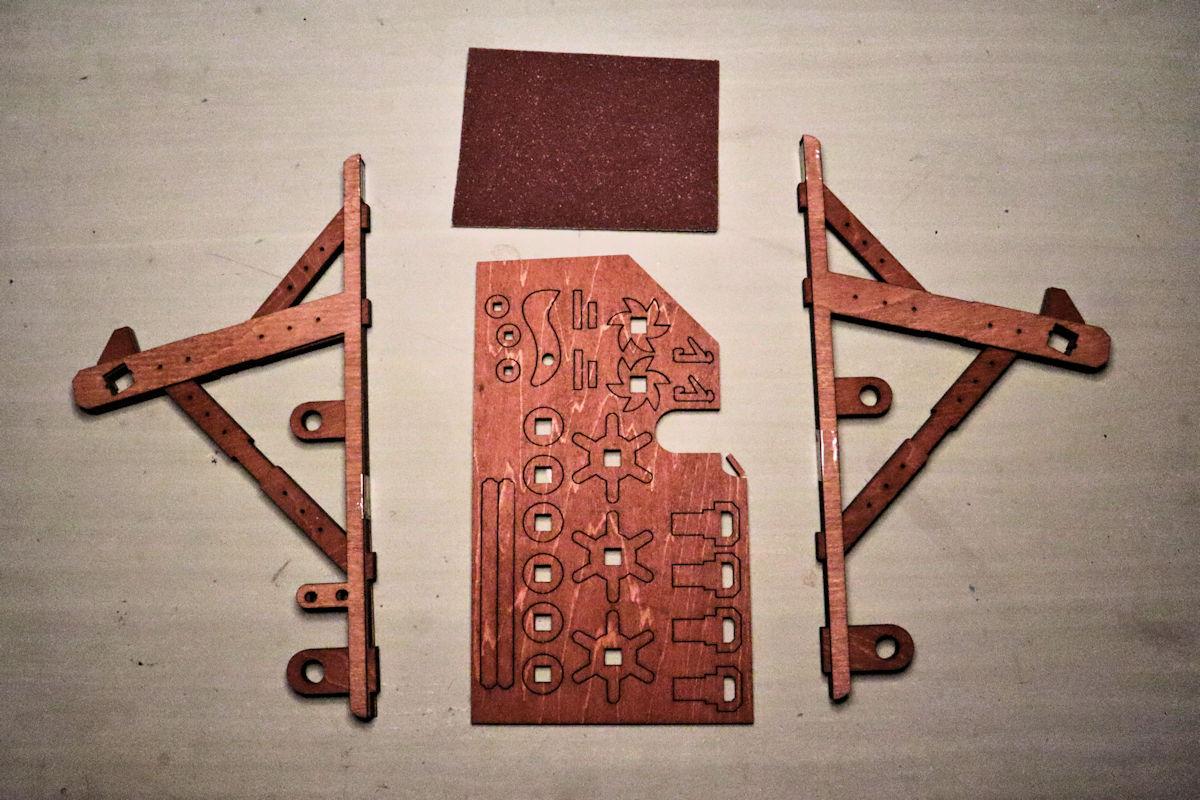
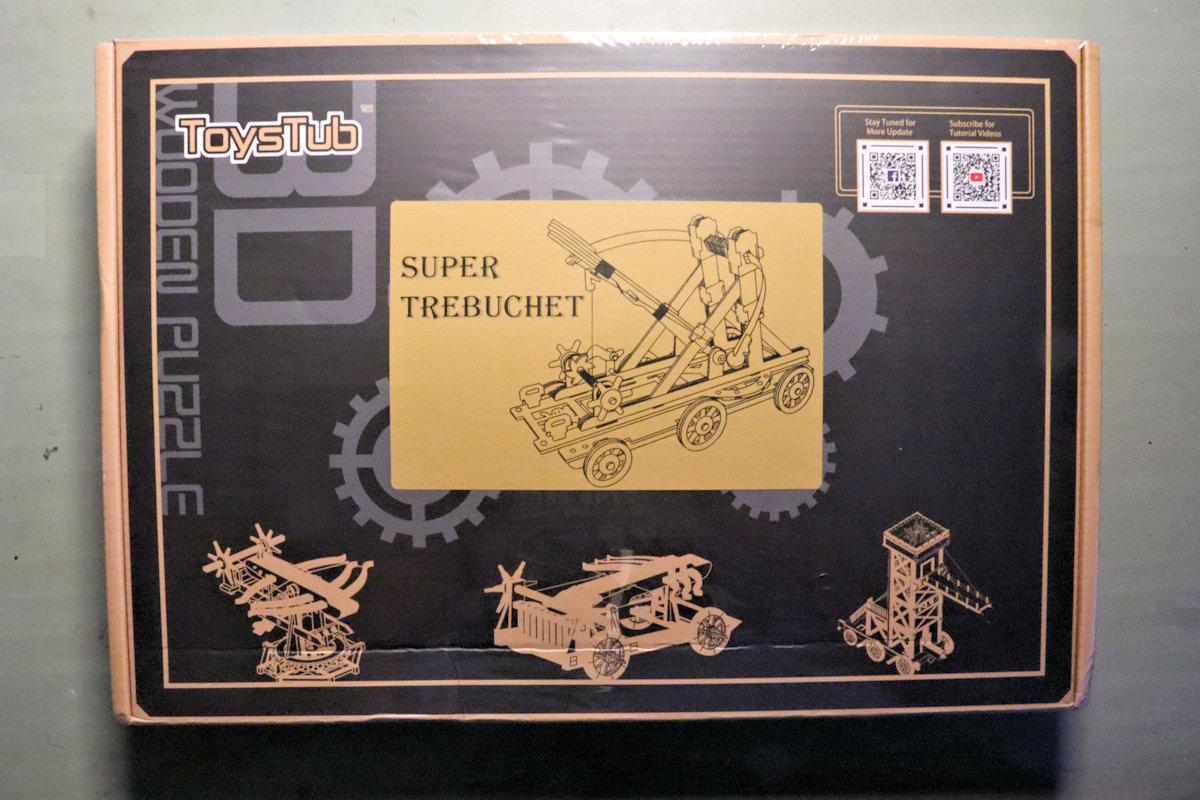
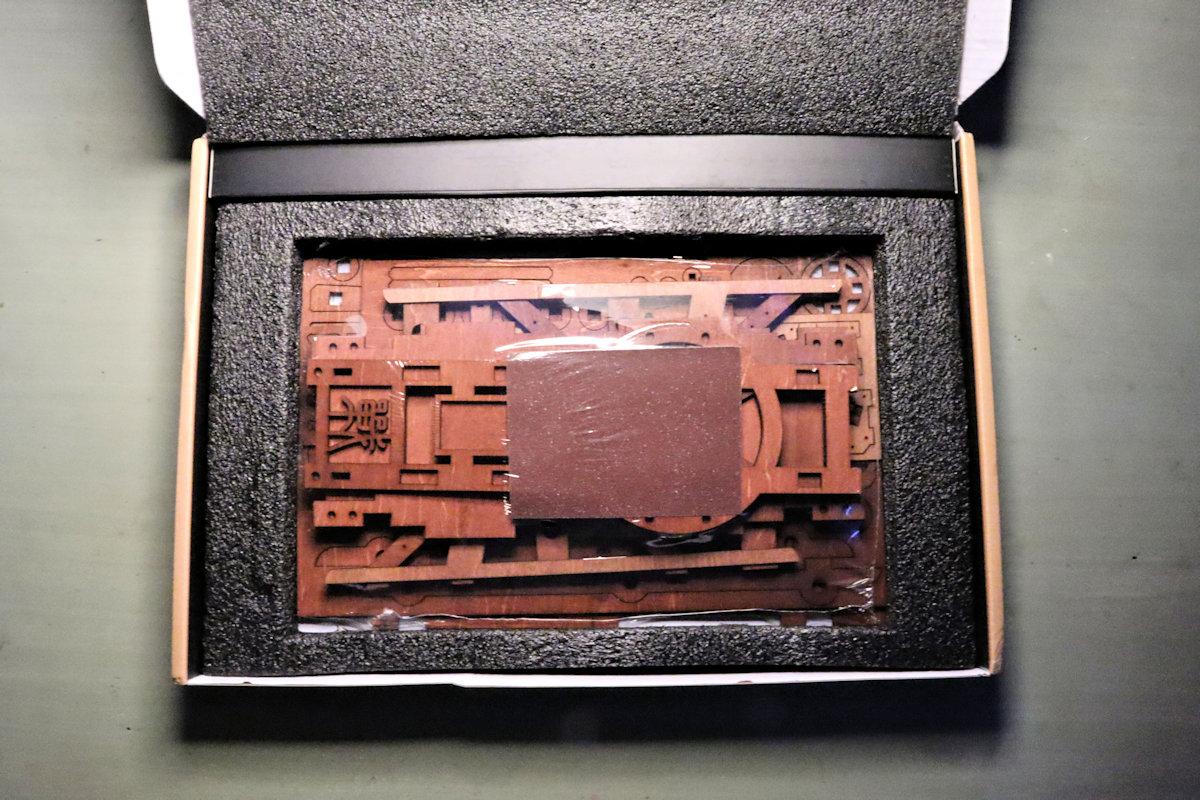
Hello Everybody! Though I tend to focus mainly on cars, my building interests are wide and varied. If I see something that appeals to me, I'll probably build it. Ancient siege engines definitely fit that bill. I found this model through an ad on FaceBook. I did a little research on the company and its products and found satisfactory results for both so I ordered their Super Trebuchet. I meant to order the Weighted Trebuchet and I just wasn't paying attention and goofed up my order. I realized my error as soon as I clicked the "submit" button (of course) and immediately sent a request to cancel my order through both their online dialog interface and standard email. That was a Friday and I received a response on the following Monday. Unfortunately, the order had already shipped. And though they couldn't cancel my order, they apologetically told me that I could return it for full credit. They also provided me with a code for a 10% discount on my next order for my inconvenience. Obviously I decided to keep it. I placed the order on November 19th and received it on December 3rd, two weeks delivery time is pretty good. I'm sharing this little story because I feel that it is something I would want to know if I were to consider placing an order. The Unboxing: Quality packaging! The box is nicely printed on all sides with images, descriptions and diagrams. I'd be proud to give this to someone as a gift. No problems here! Appropriately packaged to prevent any shipping damage, obvious great care taken. Color me impressed! And of course, instructions. Complete with parts list and a brief history of the engine. All panels are cleanly laser cut and so far, the parts seem to be easy to remove without causing damage. I'm not sure of the species of wood but it smells good and seems to be of high quality with nice grain. Several of the more complex looking pieces are bundled together in what I presume is sequence of assembly. I'm sure this also facilitates packing for shipping too. They even included a piece of sandpaper for deburring the parts. I'd have to say that overall, I'm extremely impressed with the company and its product. We'll see how the assembly goes but at this point, I have no regrets. Here is a link to the company's product page: ToysTub Super Trebuchet. As always, thanks for taking the time to look. Questions and comments are always welcome. Until next time, David G.
-
Nice rescue, everything looks great! I'd go Alclad for chrome for the grille and bumpers. It would be a good contrast against the flat black. I know what you mean about NE Ohio Winters, I grew up in the Youngstown area. The sun seems to take bankers hours this time of year, it's only out from 9AM to 4 PM. David G.
-
Beautiful color combination! Your detail work on the badges and trim is excellent as always. This really seems to be a strong point of yours. David G.
-
Thanks Joe, it's kind of you to say that. Thank you Chaz. David G.
-
*1934 Slammer Modified*
David G. replied to Zippi's topic in WIP: Stock Cars (NASCAR, Super Stock, Late Model, etc.)
WOW! Awesome details. I love the headers other bits you knocked together, they really add a lot to the visual appeal. The chassis looks excellent. David G. -
Revell Bronco,Trailer & Buggy
David G. replied to PatW's topic in Model Trucks: Pickups, Vans, SUVs, Light Commercial
Hi Patrick. Generally, changing the photo size would be done with photo editing software, like PhotoShop. There are free apps available for computers and smartphones that are pretty easy to use. Additionally many phones and computers may already have programs or apps for doing this preloaded. It's difficult for me to be more specific than that without knowing what you're working with. That, and I'm not really a techie either. I guess doing a search on the internet would be a good place to start. Something like "How do I enlarge photos on iPhone?" or whatever may apply in your situation. I hope you find this helpful. BTW, the additional photos look great! And please let me know if I can be of any further assistance. Regards, David G. -
Thank you Jeff, I'm glad you like them. Thanks Scott, I appreciate your comment. I did a lot of work on the roof rack and associated details over the weekend so I hope to have some more photos to post soon. Thanks Again, David G.
-
Great looking paintjob, solid build, nice detailing, that's one Killer Bee Ken! David G.
-
You have some nice mild custom work going on. Looks like you're off to a great start! David G.
-
Excellent detail work on the trim and scripts. The color looks great as does your paintwork. Nicely Done! I do enjoy seeing these old JoHan Mopars being built. I wish there was a way to bring them back into production. David G.
-
Revell Bronco,Trailer & Buggy
David G. replied to PatW's topic in Model Trucks: Pickups, Vans, SUVs, Light Commercial
What a wonderfully wild color scheme! It definitely has a Seventies vibe to it. The photos are a little on the small side but from what I can see they look great. Especially the muddy tires. David G. -
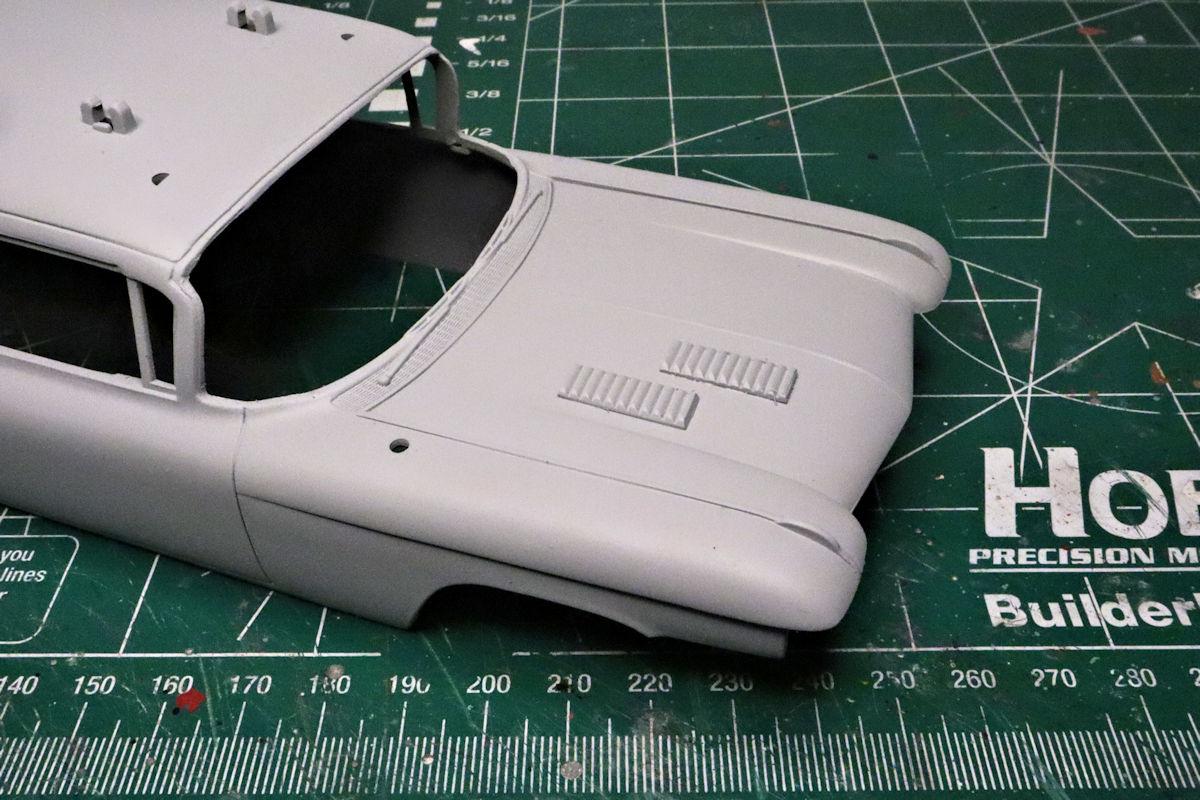
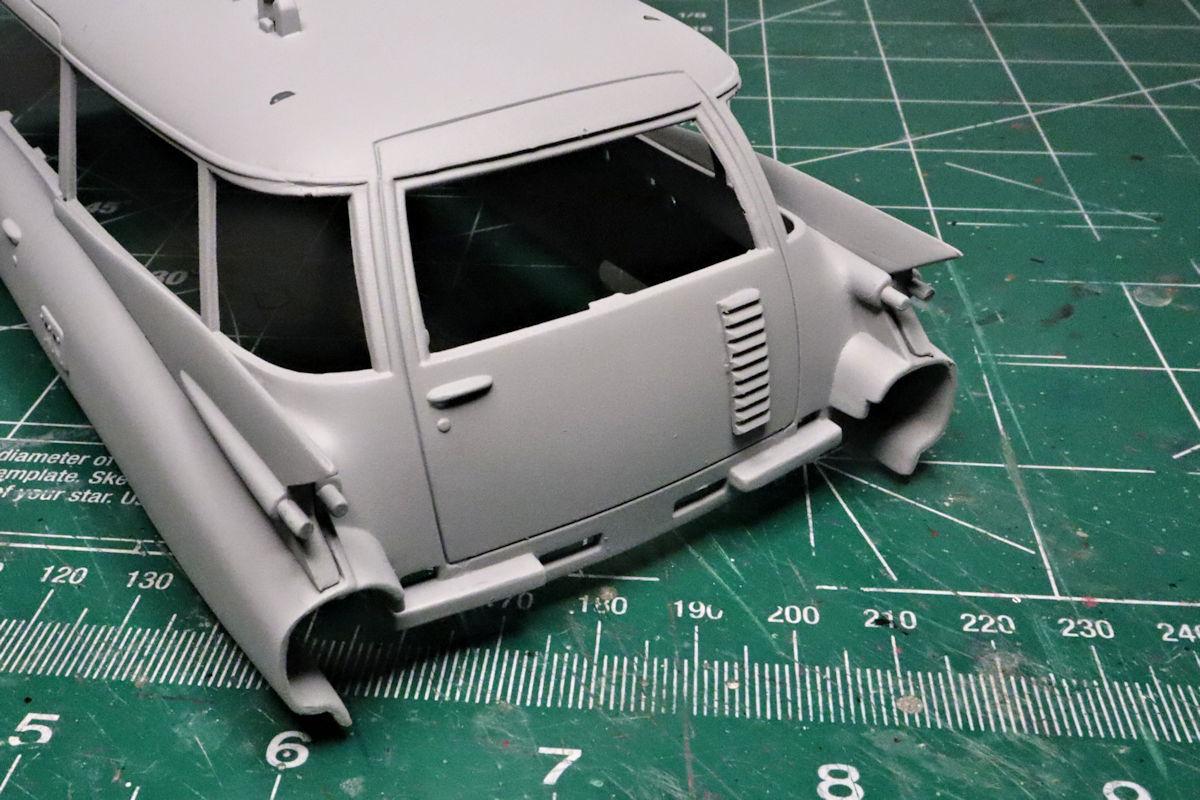
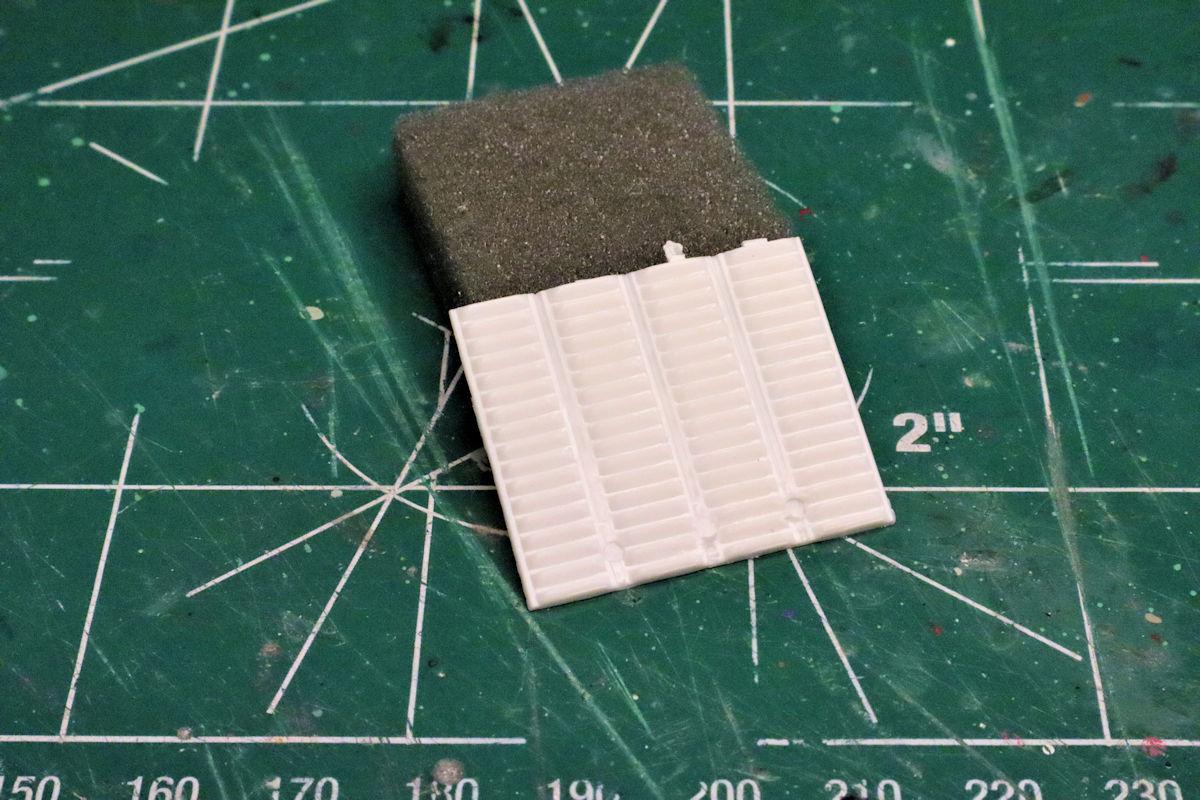
Hello Everybody! Though I still need to make the gurneys on which the proton packs will be mounted, I'm going to go back to some of the more basic tasks so I can have a break from the scratch building for a while. I pulled these louver plates from a model that I recently finished, AMT's 1959 Chrysler Imperial. I do like kits that include extra custom parts and that Imperial kit certainly had its share. Sanding the area to prep it for mounting the louvers revealed what seemed to be marks in the plastic where the louvers should be positioned. This was also true of the one on the rear door. That makes me wonder if there are allowances in the mold for the louvers to be cast into the body. All trimmed and mounted, here are the hood louvers. They do look a little clunky but not too bad. At one point I had considered cutting them into the body but I decided not to. I think once they're cleaned up and painted, they'll look fine. I do plan to file more of a slope on the first louver in each set to blend them into the body a little more. That should help. As always, thanks for taking the time to look and please feel free to comment. David G.
-
Supervan build
David G. replied to Dale Gribble's topic in WIP: Model Trucks: Pickups, Vans, SUVs, Light Commercial
I missed this one on the first go 'round, I'm glad to have found it. It's fun to see these old oddball customs built up. Excellent work on the flocking and paint, everything looks great. Thanks for taking the time to share it with us. David G. -
Ironically, one of the ads that occasionally pops up for me on this site is for an adblocker. I don't remember which one it advertised but I thought that that ironically was funny. David G.